

Page 1
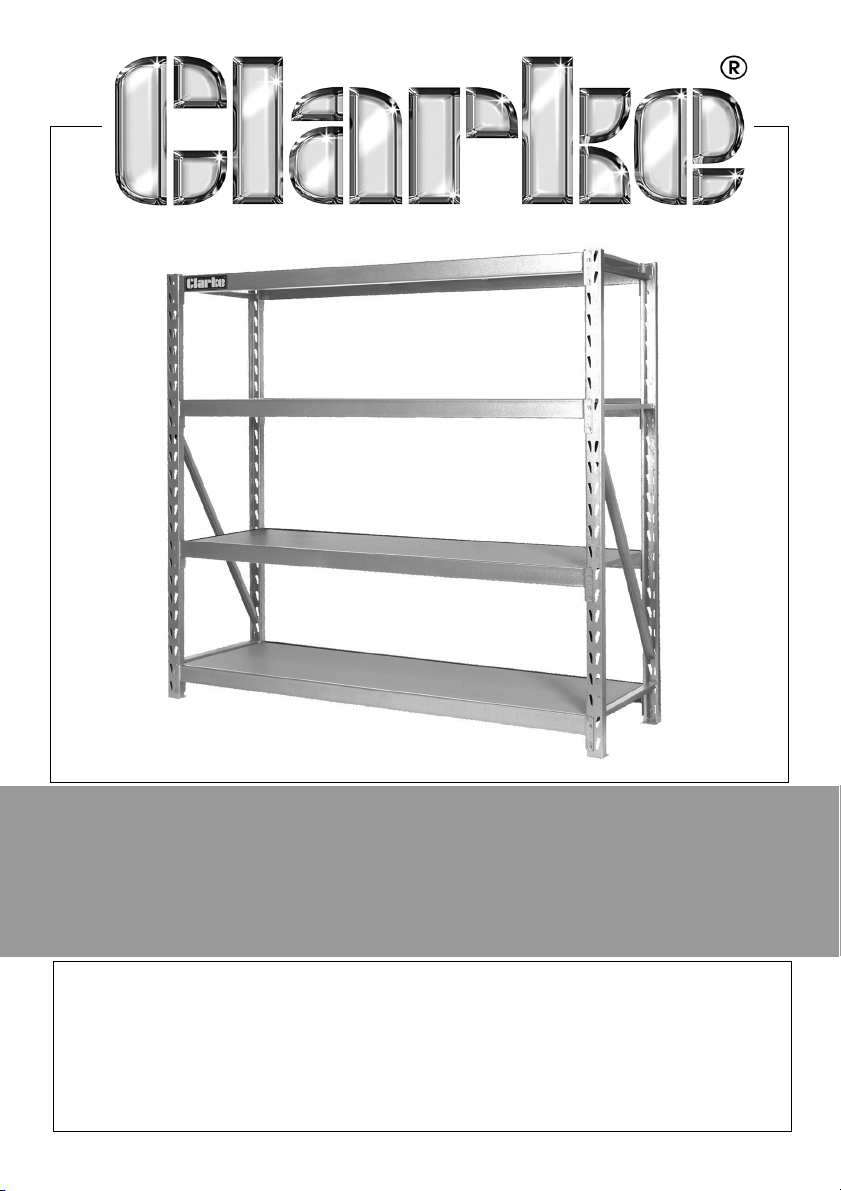
INDUSTRIAL SHELVING
MODEL NO: CS4700 & CS4700BO
PART NO: 6600502 & 6600610
ASSEMBLY INSTRUCTIONS
ORIGINAL INSTRUCTIONS GC0219 - rev 4
Page 2
INTRODUCTION
Thank you for purchasing this CLARKE Shelving Unit.
Before attempting to use this product, please read this manual thoroughly and
follow the instructions carefully. In doing so you will ensure the safety of yourself
and that of others around you, and you can look forward to your purchase
giving you long and satisfactory service. Keep these instructions for future
reference.
Please keep these instructions in a safe place for future reference.
GUARANTEE
This product is guaranteed against faulty manufacture for a period of 12
months from the date of purchase. Please keep your receipt which will be
required as proof of purchase.
This guarantee is invalid if the product is found to have been abused or
tampered with in any way, or not used for the purpose for which it was
intended.
Faulty goods should be returned to their place of purchase, no product can
be returned to us without prior permission.
This guarantee does not effect your statutory rights.
ENVIRONMENTAL PROTECTION
Do not dispose of this product with general household waste. All tools,
accessories and packaging should be sorted, taken to a recycling centre and
disposed of appropriately.
2
Parts & Service: 020 8988 7400 / E-mail: [email protected] or [email protected]
Page 3
SPECIFICATIONS
All CS4700 models
Dimensions (W x D x H) 1940 x 610 x 1830 mm
Product weight 95 kg
Load per shelf 800 kg (evenly distributed)
Please note that the details and specifications contained herein, are correct
at the time of going to print. However, CLARKE International reserve the right
to change specifications at any time without prior notice.
LIST OF COMPONENTS
When unpacking, check for damage and/or shortages etc. Any found should
be reported to your CLARKE dealer where the product was originally
purchased.
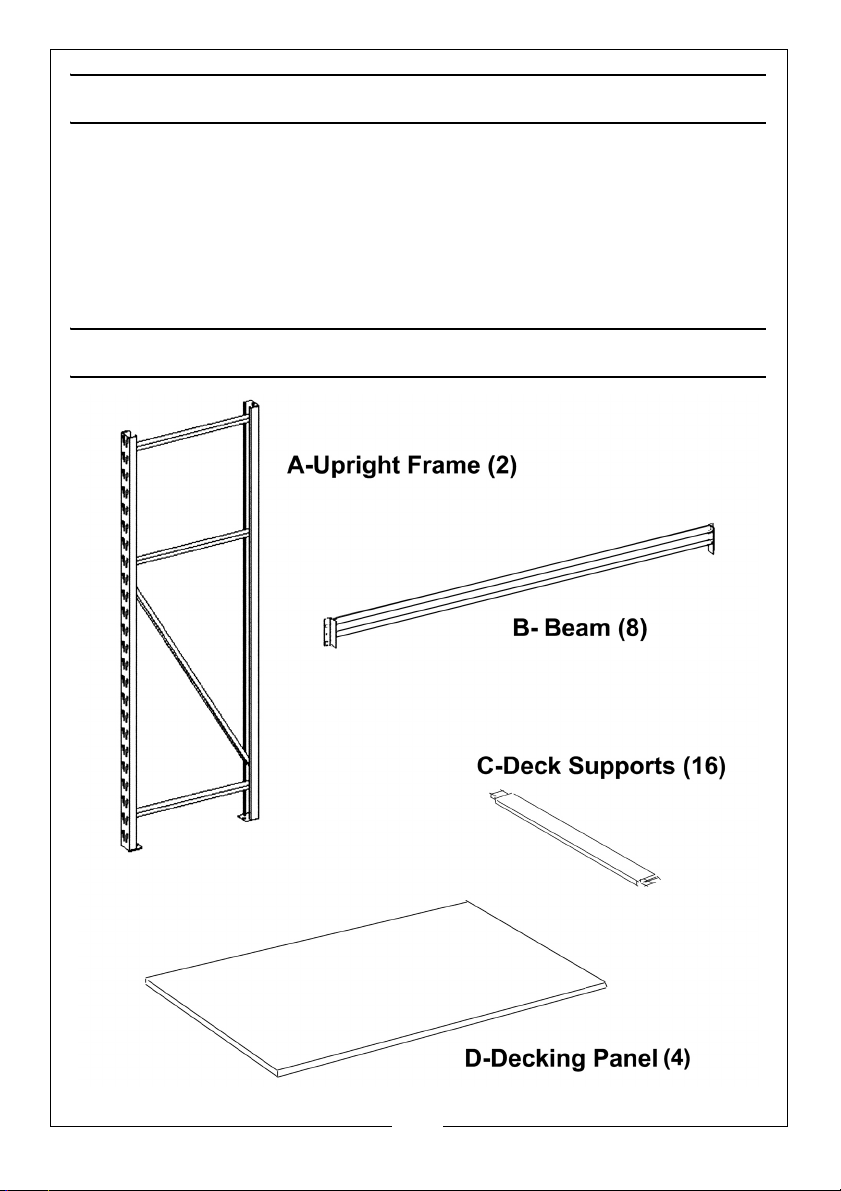
This shelving unit should include the following:
2 x Upright Frames
8 x Beams
16 x Deck Supports
4 x Deck Panels
1 x Instruction Manual (this document)
TOOLS REQUIRED
Rubber mallet or hammer.
Protective cloth/wood block.
3
Parts & Service: 020 8988 7400 / E-mail: [email protected] or [email protected]
Page 4
GENERAL SAFETY RULES
1. Always maintain the shelving in good condition for greater safety.
2. Never exceed the maximum load for this product.
3. Never use this product if damaged.
4. Always load small, stable items on the top shelves, heavier and bulky items
should be stored on the lower shelves.
COMPONENT PARTS
4
Parts & Service: 020 8988 7400 / E-mail: [email protected] or [email protected]
Page 5
ASSEMBLY TIPS
1. Assemble the unit on a strong, level surface. Avoid assembly on soft
surfaces.
2. Use a cloth or softwood block to protect the surface finish of the product
when using a hammer. Hit the flat surface of each cross-beam to prevent
damage to the beam.
3. Always ensure that the tabs sit at the bottom of the tapered slots.
4. It is recommended that the assembly should be done by two persons.
5. This product is not recommended for outdoor use.
ASSEMBLY INSTRUCTIONS
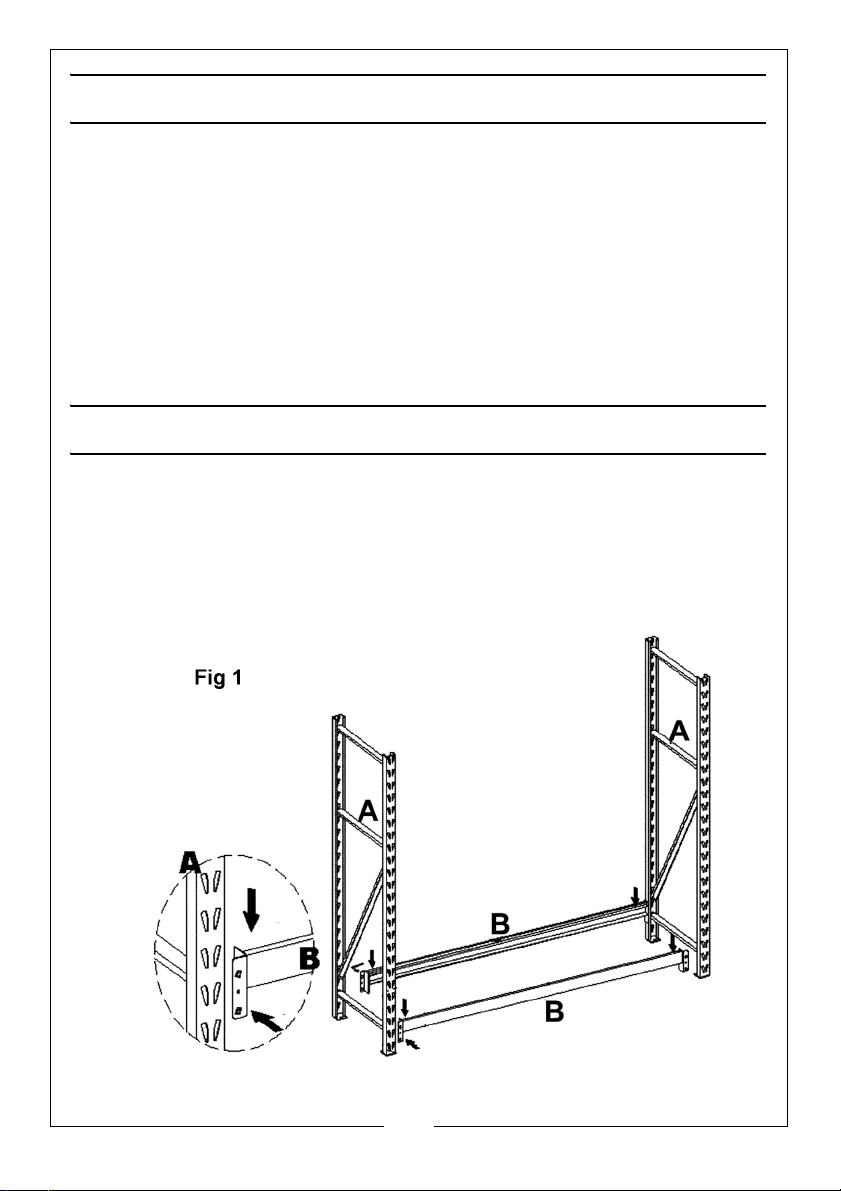
1. Take a beam (B) and attach to one of the upright frames by inserting the
two clips on the bracket into the keyholes of the frame column. Present
them from the outside.
2. Drive the tabs right to the bottom of the slots by tapping the beam near
the joint with a rubber mallet to lock the pieces together as shown in Fig 1.
5
Parts & Service: 020 8988 7400 / E-mail: [email protected] or [email protected]
Page 6
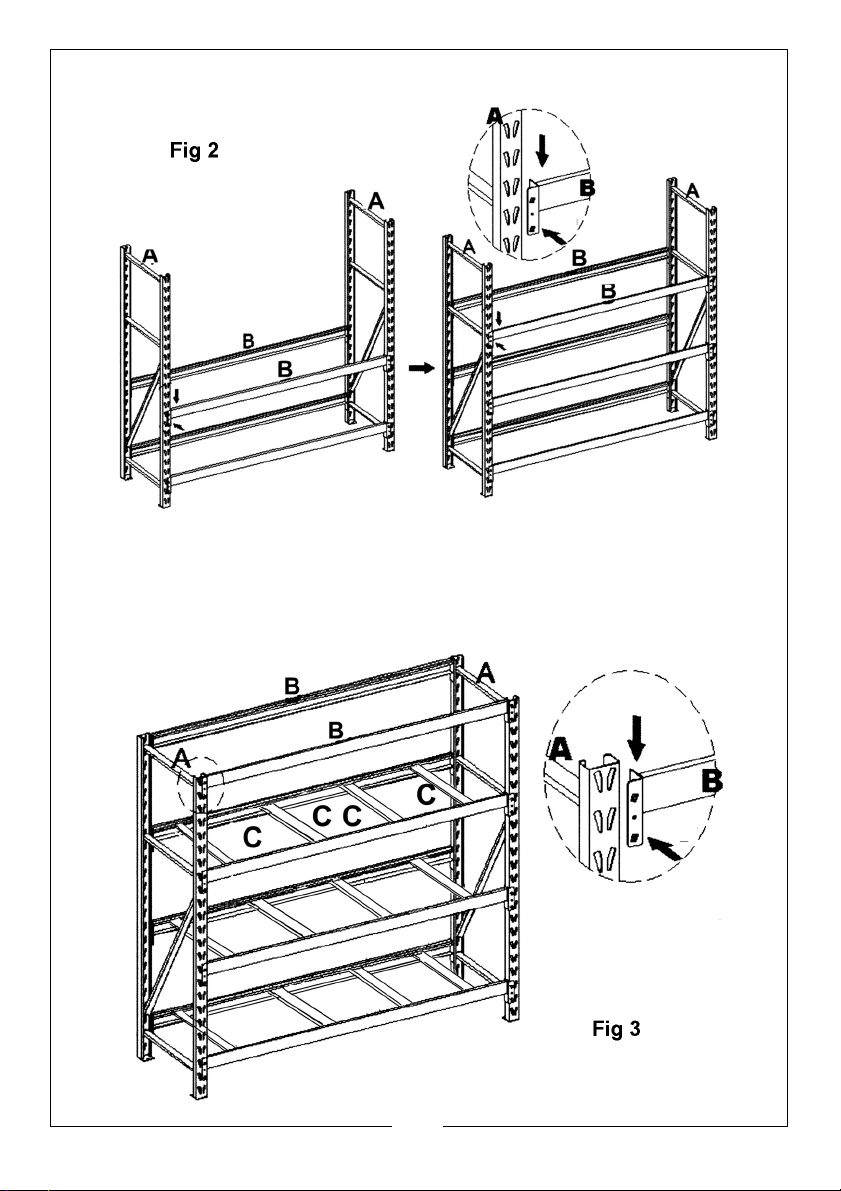
3. Repeat this step with the second upright frame (A) at the other end of the
beam, making sure that the clips are at the same level.
4. Repeat with the other beam (B), making sure that the beams are level.
NOTE: Take care not to strike so hard as to damage the beams.
6
Parts & Service: 020 8988 7400 / E-mail: [email protected] or [email protected]
Page 7
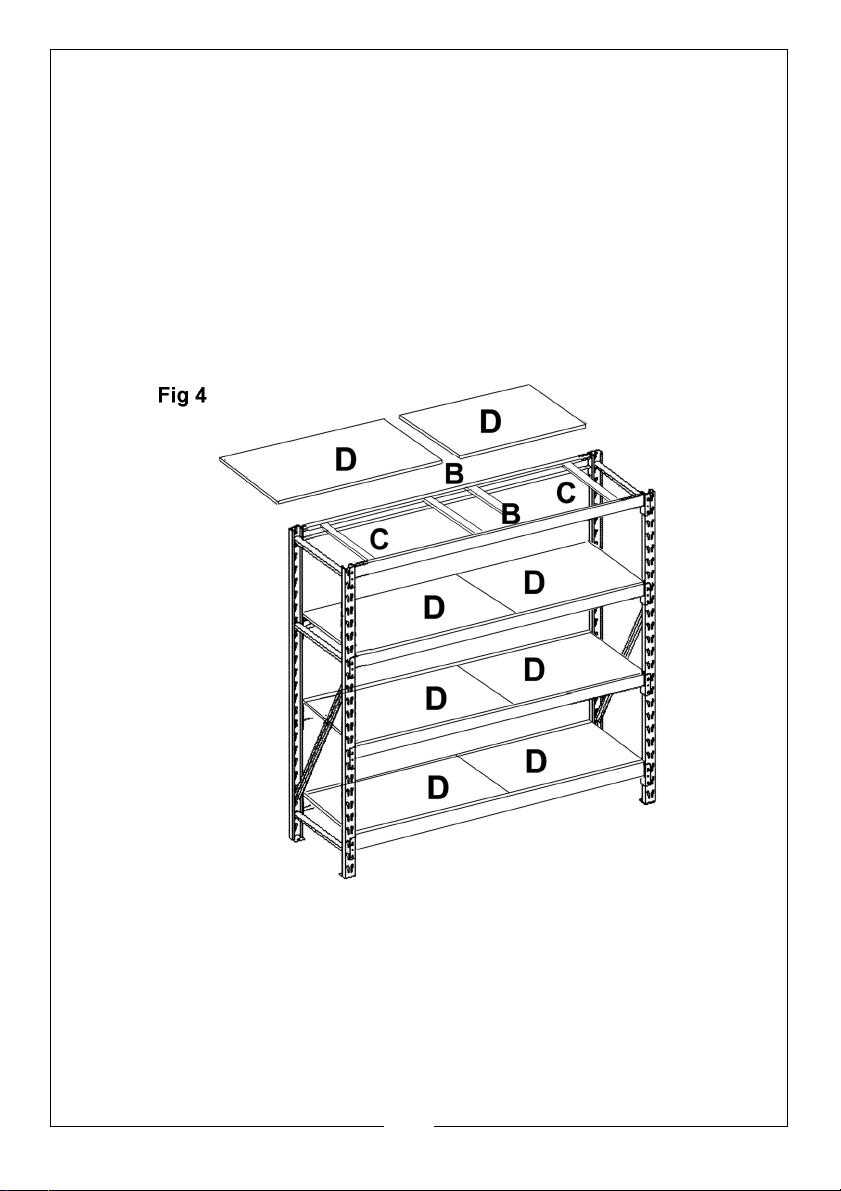
5. Repeat steps 2 to 4 to attach the next set of beams (B) at the same level to
form the second and third shelf frames as shown in fig 2.
NOTE: The units are adjustable in 3” increments.
6. Ensure the last two beams (B) are set into the top two keyholes of the
upright frames as shown in Fig 3.
7. Position the deck supports (C) to span between the beams (B), engaging
the support end in the socket provided in the beam. Four supports per shelf
are required at the positions shown.
8. Place the deck panels (D) onto the deck supports, resting on the top
flange of the beams. Make sure the deck panels sit properly between the
beamsand lay flush as shown in Fig 4.
9. Periodically inspect the unit to ensure the beams are seated correctly and
are firmly connected to the columns. Take care not to overload the
shelves.
7
Parts & Service: 020 8988 7400 / E-mail: [email protected] or [email protected]
Page 8

 Loading...