

Page 1
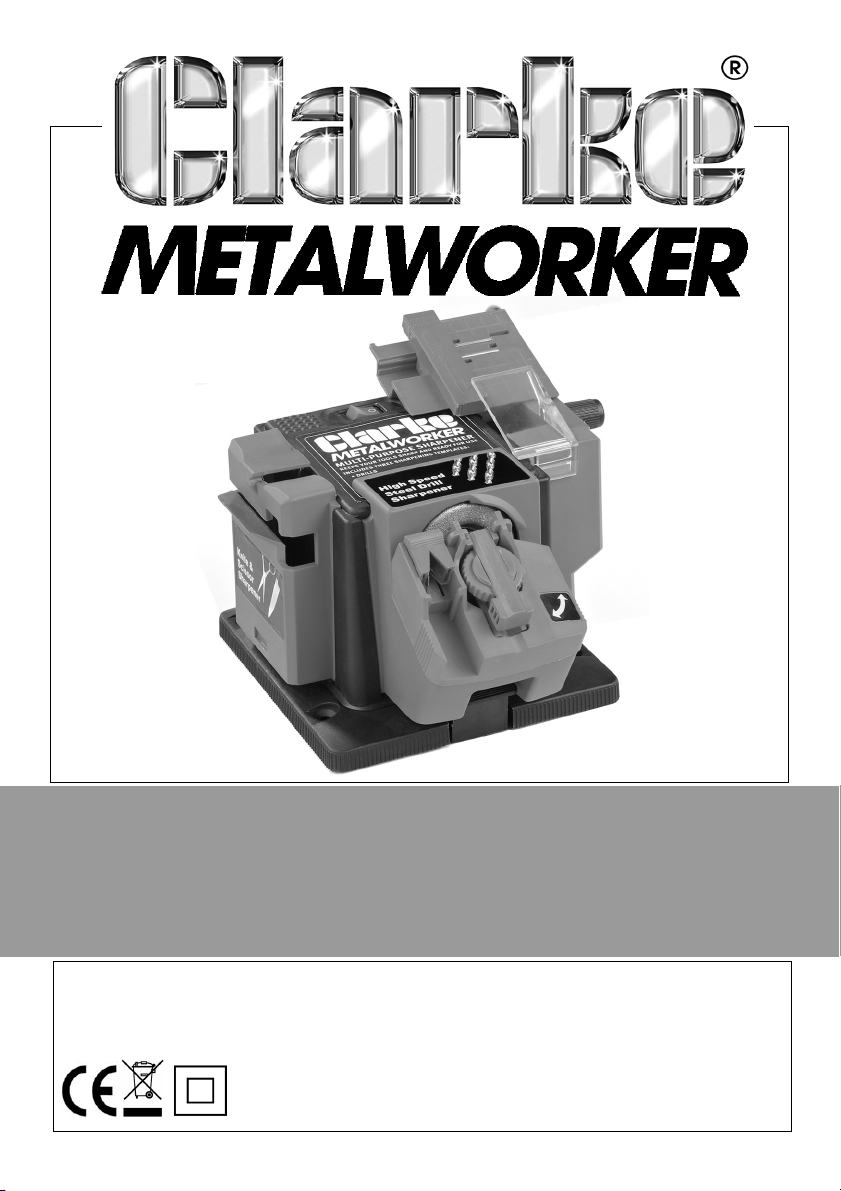
MULTI PURPOSE SHARPENER
MODEL NO: CMPS1
PART NO: 6480235
OPERATION & MAINTENANCE
INSTRUCTIONS
GC0513
Page 2
INTRODUCTION
Thank you for purchasing this CLARKE Multi-purpose Sharpener.
Before attempting to use this product, please read this manual thoroughly and
follow the instructions carefully. In doing so you will ensure the safety of yourself
and that of others around you, and you can look forward to your purchase
giving you long and satisfactory service.
IMPORTANT
Please read all of the safety and operating instructions carefully before using this
product. Please pay particular attention to all sections of these instructions that display
warning symbols and notices.
WARNING! This symbol is used throughout the user guide
whenever there is a risk of personal injury. Ensure that these
warnings are read and understood at all times.
GUARANTEE
This product is guaranteed against faulty manufacture for a period of 12
months from the date of purchase. Please keep your receipt which will be
required as proof of purchase.
This guarantee is invalid if the product is found to have been abused or
tampered with in any way, or not used for the purpose for which it was
intended.
Faulty goods should be returned to their place of purchase, no product can
be returned to us without prior permission.
This guarantee does not effect your statutory rights.
2
Parts & Service: 020 8988 7400 / E-mail: [email protected] or [email protected]
Page 3

GENERAL SAFETY RULES
WARNING: WHEN USING ELECTRIC TOOLS, MACHINES, OR EQUIPMENT,
BASIC SAFETY PRECAUTIONS SHOULD ALWAYS BE FOLLOWED TO REDUCE
THE RISK OF FIRE, ELECTRIC SHOCK, AND PERSONAL INJURY.
1. KEEP WORK AREA CLEAN. Cluttered areas invite injuries. Keep work area well lit.
2. NEVER use power tools in damp, wet, or poorly lit locations. Don't expose to rain. Do
not use electrically powered tools in the presence of flammable gases or liquids.
3. KEEP CHILDREN AWAY. Children must never be allowed in the work area. Do not let
them handle machines, tools, or extension cable.
4. STORE IDLE EQUIPMENT. When not in use, tools must be locked up in a dry location to
inhibit rust. Always lock up tools and keep out of reach of children.
5. DO NOT FORCE THE TOOL. It will do the job better and more safely at the rate for
which it was intended.
6. DRESS PROPERLY. Do not wear loose clothing or jewellery which could be caught in
moving parts.
7. USE EYE AND HAND PROTECTION. Always wear approved impact safety goggles.
8. DO NOT ABUSE THE POWER CABLE. Do not yank it to disconnect it from the socket. Do
not carry tools by the cable.
9. DISCONNECT POWER. Unplug when not in use, before servicing, and when changing
accessories.
10. AVOID UNINTENTIONAL STARTING. Be sure the switch is in the OFF position when not in
use and before plugging in.
11. STAY ALERT. Watch what you are doing, use common sense. Do not operate any tool
when you are tired.
12. CHECK DAMAGED PARTS. Before using any tool, any part that appears damaged
should be carefully checked to determine that it will operate properly and perform
its intended function. Do not use the tool if the switch does not turn on and off
properly.
13. GUARD AGAINST ELECTRIC SHOCK. Prevent body contact with grounded surfaces
such as pipes, radiators.
14. REPLACEMENT PARTS AND ACCESSORIES. When servicing, use only identical
replacement parts. Use of any other parts will void the warranty. Only use
accessories intended for use with this tool.
15. DO NOT OPERATE TOOL IF UNDER THE INFLUENCE OF ALCOHOL OR DRUGS. If there is
any doubt, do not operate the tool.
16. KEEP AWAY FROM LIQUIDS. Tool is designed for dry sharpening operations only.
17. HEAT PRODUCED WHEN SHARPENING. The sharpening head and any bits or tools
being sharpened will become hot. Be careful when handling; allow drill bits & tools
to cool before storing.
3
Parts & Service: 020 8988 7400 / E-mail: [email protected] or [email protected]
Page 4
ELECTRICAL CONNECTIONS
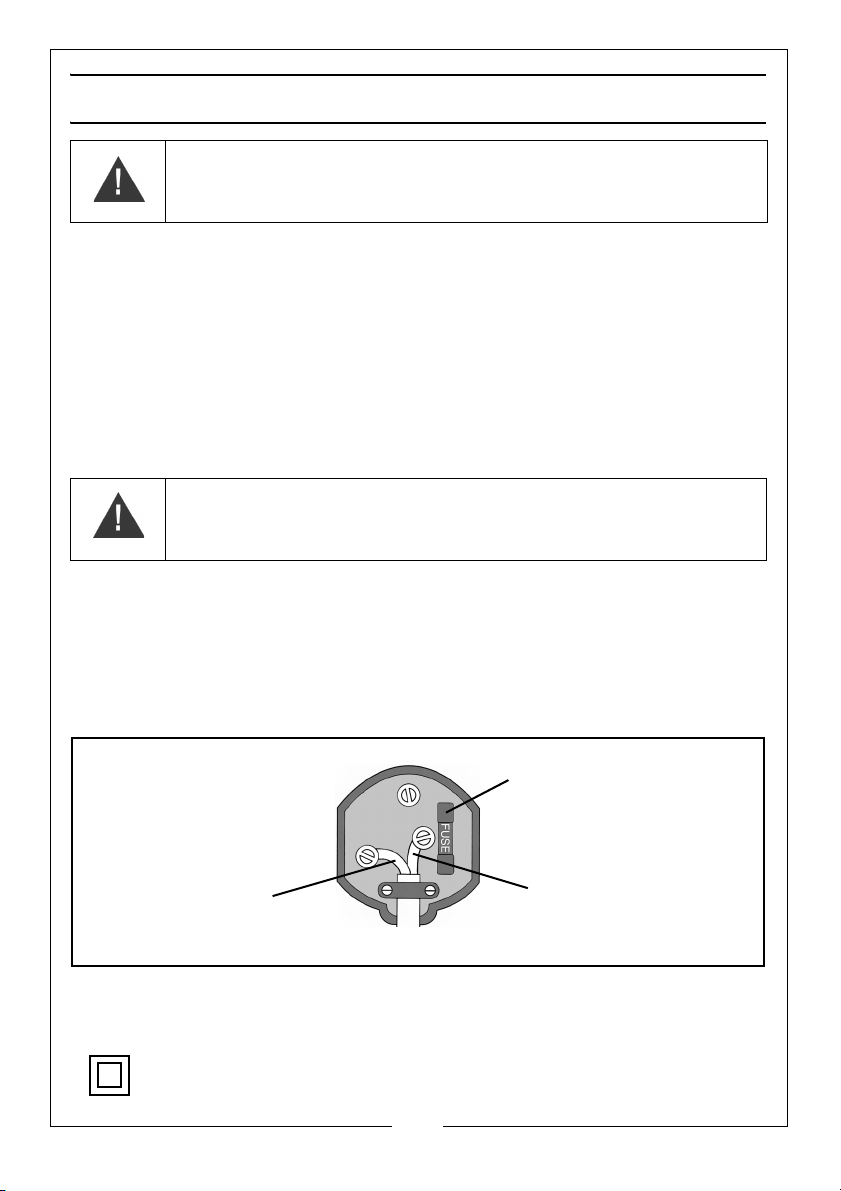
Plug must be BS1363/A approved.
Always fit a 5 Amp fuse.
Ensure that the outer sheath of the cable is firmly held by the clamp
Neutral
(Blue)
Live
(Brown)
WARNING! Read these electrical safety instructions thoroughly
before connecting the product to the mains supply.
Before switching the product on, make sure that the voltage of your electricity supply is
the same as that indicated on the rating plate. This product is designed to operate on
230VAC 50Hz. Connecting it to any other power source may cause damage.
This product may be fitted with a non-rewireable plug. If it is necessary to change the
fuse in the plug, the fuse cover must be refitted. If the fuse cover becomes lost or
damaged, the plug must not be used until a suitable replacement is obtained.
If the plug has to be changed because it is not suitable for your socket, or due to
damage, it should be cut off and a replacement fitted, following the wiring instructions
shown below. The old plug must be disposed of safely, as insertion into a mains socket
could cause an electrical hazard.
WARNING! The wires in the power cable of this product are
coloured in accordance with the following code:
Blue = Neutral Brown = Live
If the colours of the wires in the power cable of this product do not correspond with the
markings on the terminals of your plug, proceed as follows.
• The wire which is coloured Blue must be connected to the terminal which is
marked N or coloured Black.
• The wire which is coloured Brown must be connected to the terminal which is
marked L or coloured Red.
We strongly recommend that this machine is connected to the mains supply via a
Residual Current Device (RCD)
If in any doubt, consult a qualified electrician. DO NOT attempt any repairs yourself.
Parts & Service: 020 8988 7400 / E-mail: [email protected] or [email protected]
This symbol indicates that this is a Class II product, and does not require an earth
connection.
4
Page 5
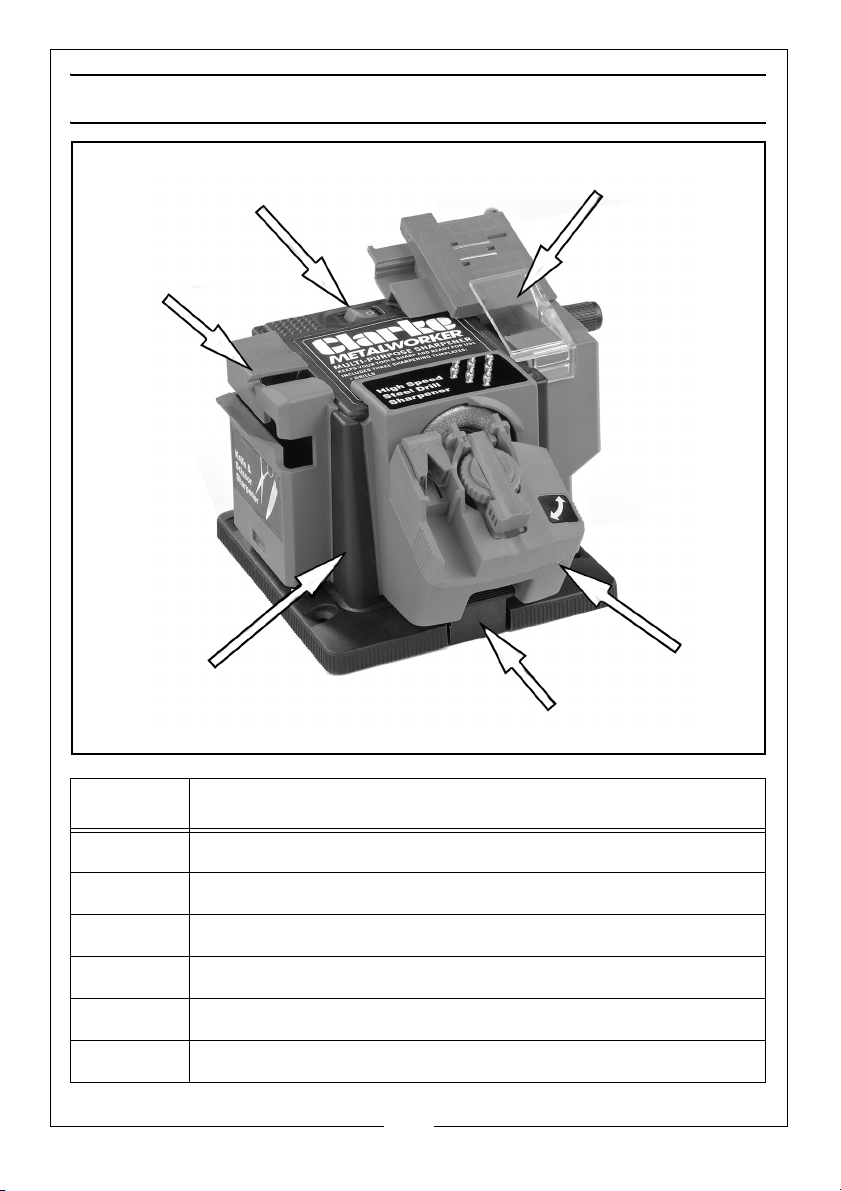
PRODUCT OVERVIEW
1
3
2
4
5
6
NO DESCRIPTION
1 Chisel & Plane Sharpener Attachment
2 Knife & Scissor Sharpener Attachment
3 High Speed Steel Drill Sharpener Attachment
4 Power Unit
5 ON/OFF Switch
6 Retaining Catch/Interlock Switch
Parts & Service: 020 8988 7400 / E-mail: [email protected] or [email protected]
5
Page 6
SETTING UP THE SHARPENER
This sharpener should only be used on a stable, horizontal surface. It is
intended to be screwed down onto a workbench using the mounting holes in
the base. Use 4 x 1” No 8 counter-sunk screws (not supplied) for this purpose.
The sharpener is fitted with an interlock which prevents the motor from starting
unless one of the sharpening attachments is clipped into its operating position
on the power unit.
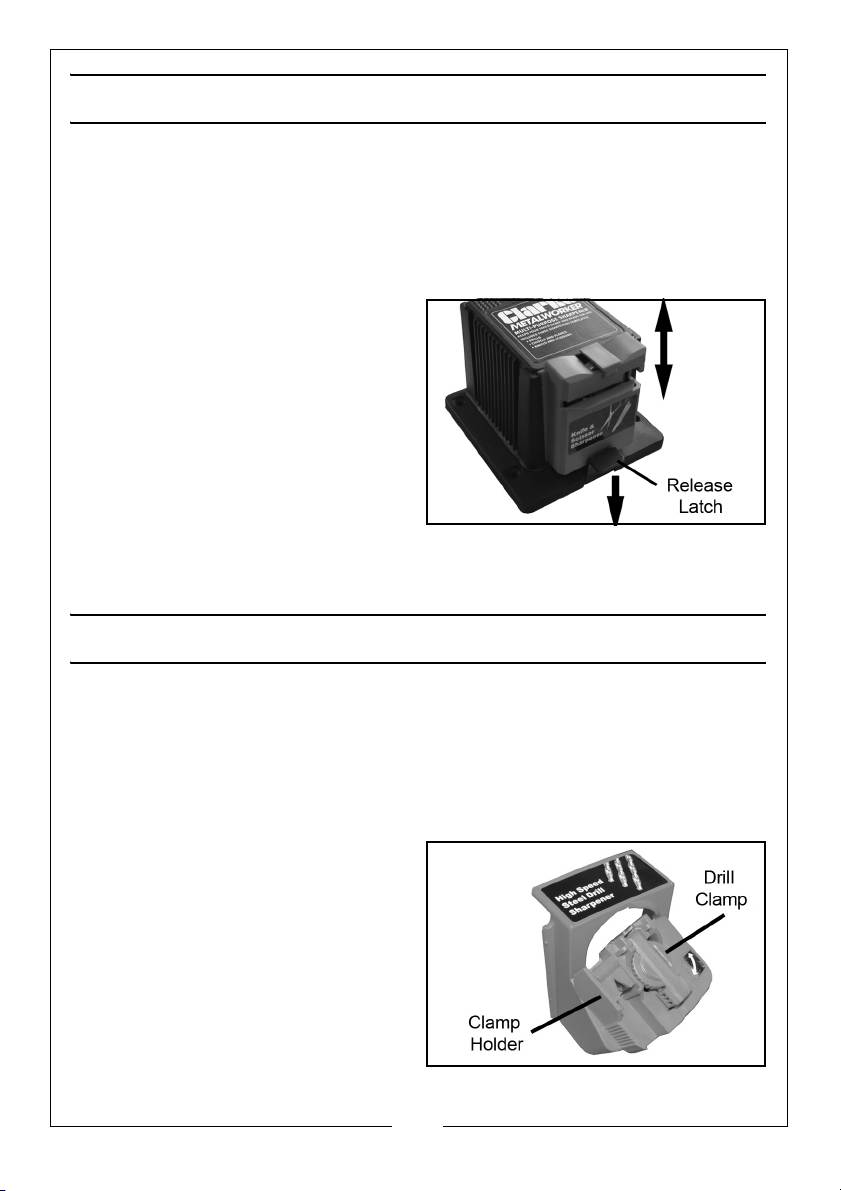
To attach each sharpening
attachment, slide it fully down the
slots on the front of the power unit
until it latches into place.
To release any sharpening
attachment, unclip it by pressing the
release catch down. Always wait for
the grinding wheel to stop before
removing the attachment. Store all
the attachments on the power unit
when not in use.
Plug the sharpener into a suitable mains power outlet.
HIGH-SPEED DRILL SHARPENER
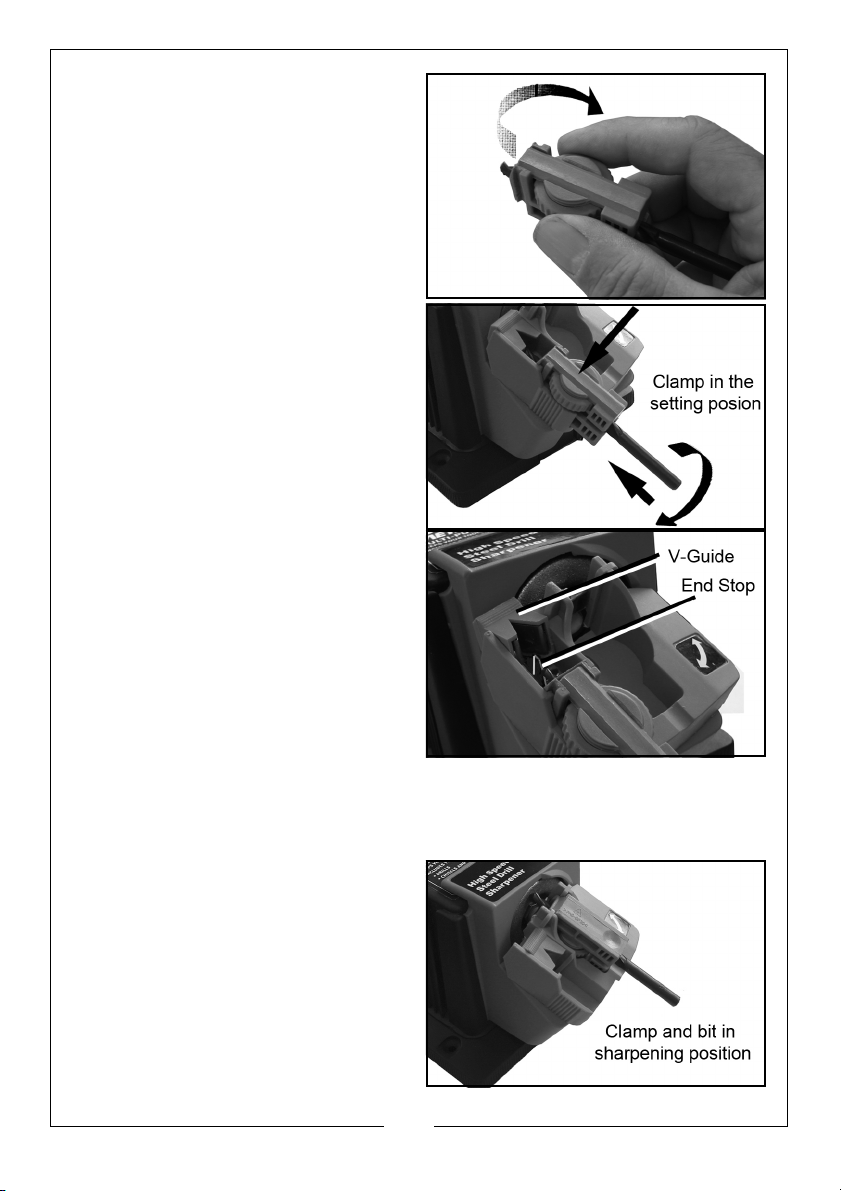
Using this attachment, you can sharpen any high speed drill bits from 7/64”
(3.1mm) to 3/8”(10mm). The sharpener holds the drill bit at the correct
sharpening angle.
Do not use with masonry or hammer drill bits.
SHARPENING PROCEDURE
1. Slide the drill sharpening
attachment onto the front of the
power unit and clip into place.
6
Parts & Service: 020 8988 7400 / E-mail: [email protected] or [email protected]
Page 7
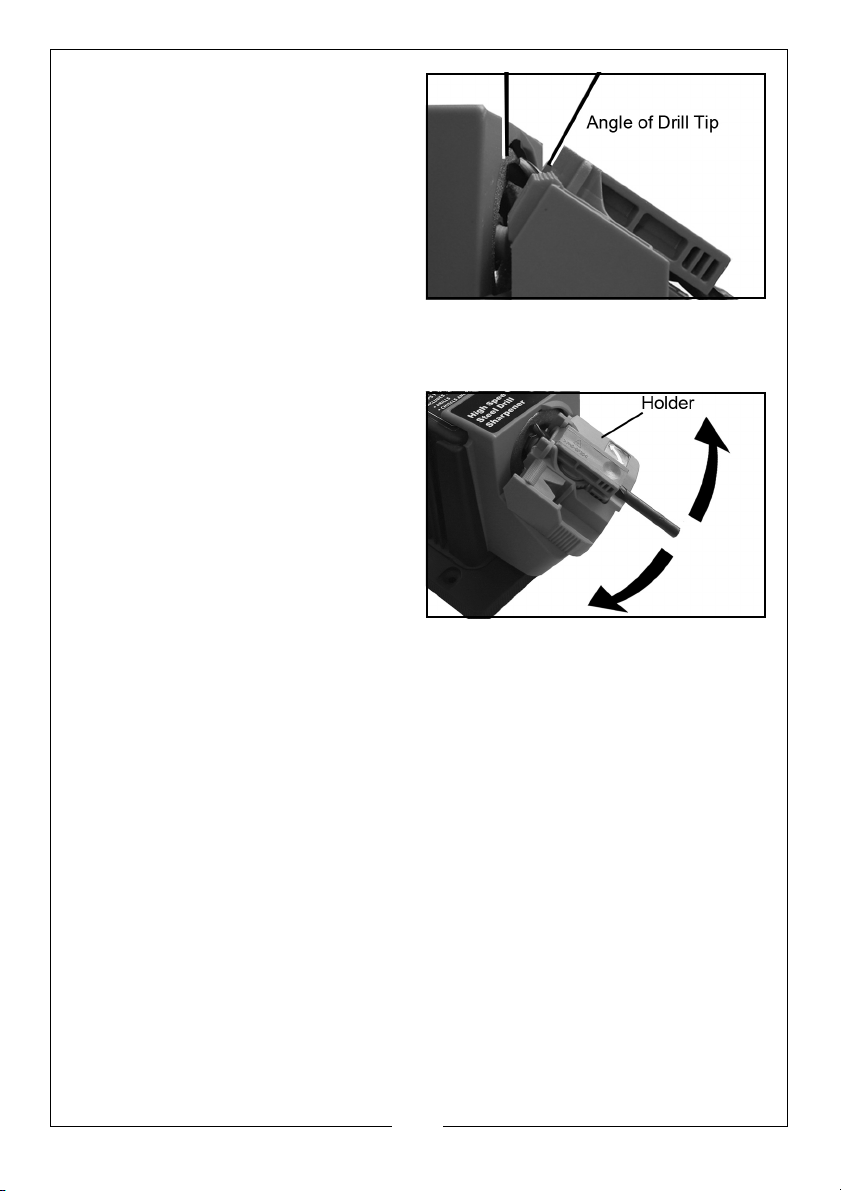
2. Remove the drill clamp from the
clamp holder and insert a drill bit
such that the bit tip is either flush
with the end face of the holder or
protrudes a small amount. Grip
the bit lightly with the drill clamp
so that the driil can still move.
3. Slide the drill clamp into the
grooves in the holder and slide
the V-guide towards the drill
clamp as far as it will travel.
4. Slide the drill bit towards the Vguide and rotate it until it seats
snugly within the V profile and
such that the ground edges are
vertically above each other.
5. Without rotating the bit, push the
bit forward within the clamp until
the bit tip touches the metal end
stop.
• The V-guide will slide
backwards as the drill bit is
advanced.
• This will set the drill bit with its
cutting edges vertically above
each other, so that the bit can
be sharpened equally on both its edges.
6. With the bit in this position, tighten the clamp and remove it, complete with
the drill bit.
7. Transfer the clamp from the
setting position to the sharpening
position.
7
Parts & Service: 020 8988 7400 / E-mail: [email protected] or [email protected]
Page 8
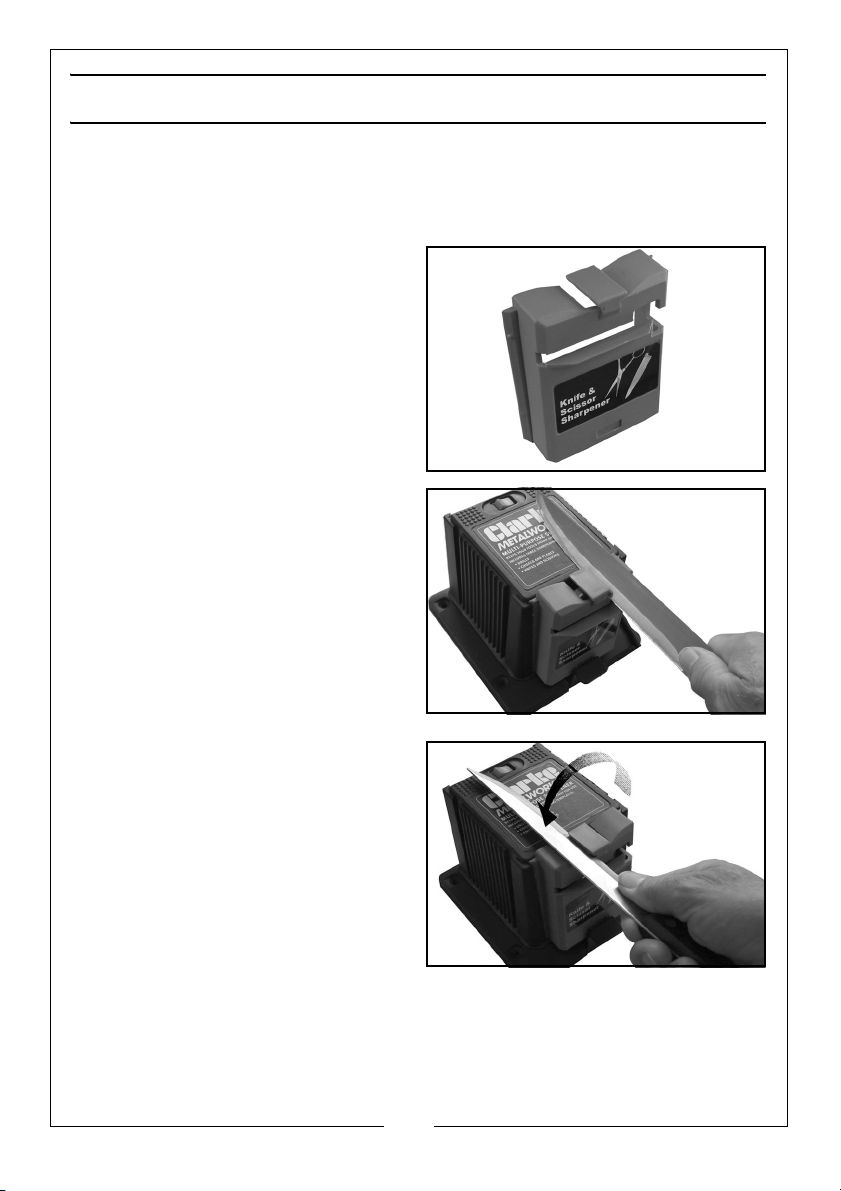
8. The drill bit should exactly touch
the grinding wheel and will be
held at the correct angle.
9. Turn the unit on and start
sharpening.
• Exert a slight downward
pressure onto the bit and pivot.
• The bit should be constantly
moved during sharpening by
swinging the bit holder back
and forth as indicated by the arrows.
• Examine bit according to the sharpening hints below.
10. Turn the clamp over and sharpen
the other edge in the same way.
11. Try to ensure that both sides of the
drill bit are sharpened, using the
same amount of time and
pressure.
• Check that both sides are the
same shape and that the tip is
exactly in the centre of the drill.
• Check that the trailing edge of
each cutting surface is lower than the leading edge.
• Check that both sides are equal.
12. Repeat the above steps as necessary.
13. Switch the power unit off and ensure the grinding wheel has stopped
before removing the sharpener attachment from the power unit.
SHARPENING HINTS
• If the tip of the bit starts to turn blue, it is overheating. Reduce the
amount of pressure and sharpening time. Allow the bit to cool
between sharpening cycles.
• If one edge is longer than the other, sharpen the short edge of the
drill bit a little more.
• If you are sharpening a broken (rather than blunt) bit and the time
required to restore the shape is too long, rough the bit into shape first
using a bench grinder.
8
Parts & Service: 020 8988 7400 / E-mail: [email protected] or [email protected]
Page 9
KNIFE AND SCISSOR SHARPENER
Using this attachment, you can sharpen any straight or curved blade but not
serrated blades.
SHARPENING KNIVES
1. Slide the knife and scissor
attachment onto the power unit.
2. Switch on the power unit.
3. Hold the knife by its handle, insert
the blade into the guide slot.
4. As soon as the blade touches the
grinding wheel, draw it across the
wheel with a light, steady pressure
towards the tip end before
removing. Do not press hard.
5. Insert the second side of the
blade into the other top guide slot
and repeat as above.
6. Repeat sharpening each side in
turn until a clean sharp edge is
attained.
7. Switch the power unit off and
ensure the grinding wheel has
stopped before removing the
sharpener attachment from the
base unit.
9
Parts & Service: 020 8988 7400 / E-mail: [email protected] or [email protected]
Page 10
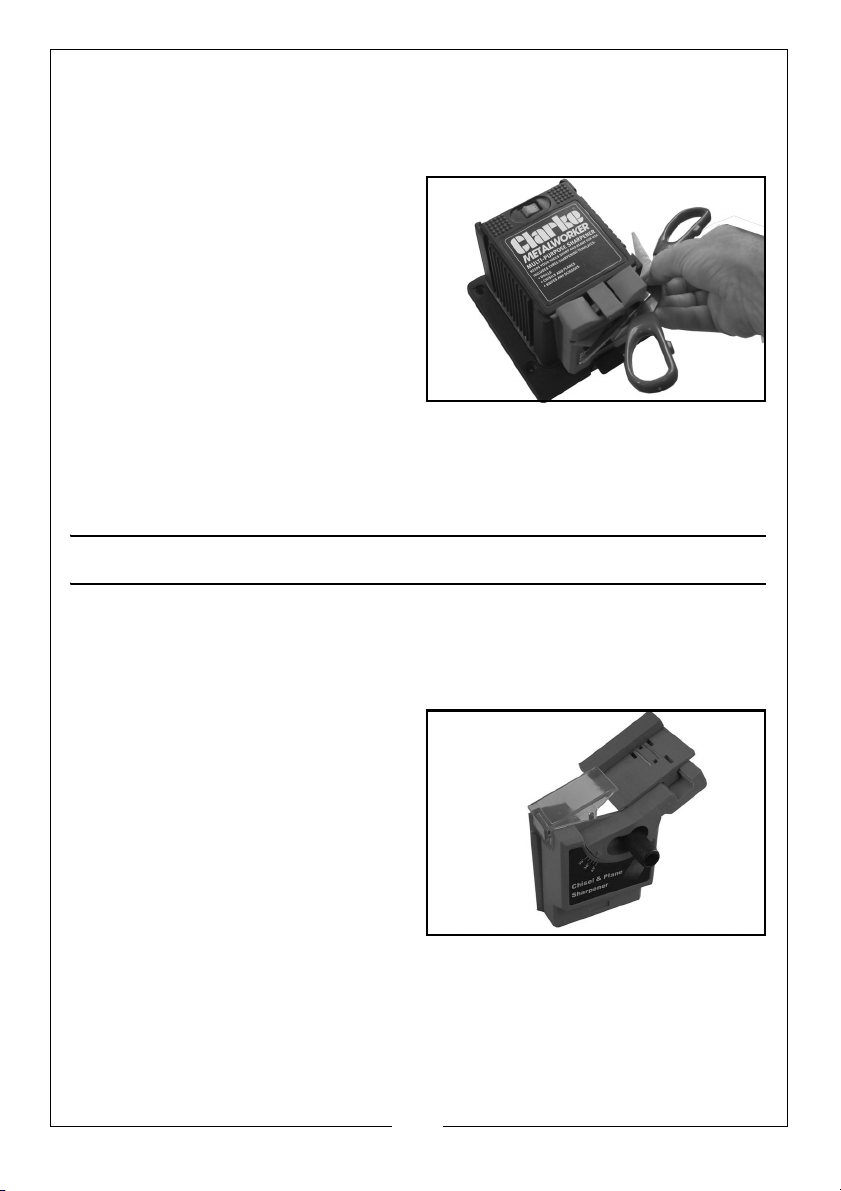
SHARPENING SCISSORS
1. Slide the knife and scissor attachment onto the power unit
2. Switch on the power unit.
3. Open the scissors fully and slide
the first blade through the front
guide slot with the other blade to
the right hand side.
4. Draw the blade across the
grinding wheel from pivot to tip
using only a light pressure.
5. Remove and turn the scissor over
to sharpen the second blade.
6. Repeat if necessary untill clean,
sharp edges are achieved.
7. Switch the power unit off and ensure the grinding wheel has stopped
before removing the sharpener attachment from the power unit.
CHISEL AND PLANE SHARPENER
Using this module you can sharpen chisels and plane blades up to 2” (50mm)
wide at a grinding angle from 20-40
o
.
SHARPENING BLADES
1. Slide the chisel and plane blade
attachment onto the power unit.
2. Place the blade against the back
lip of the support plate. The
magnet helps hold the blade in
position.
10
Parts & Service: 020 8988 7400 / E-mail: [email protected] or [email protected]
Page 11
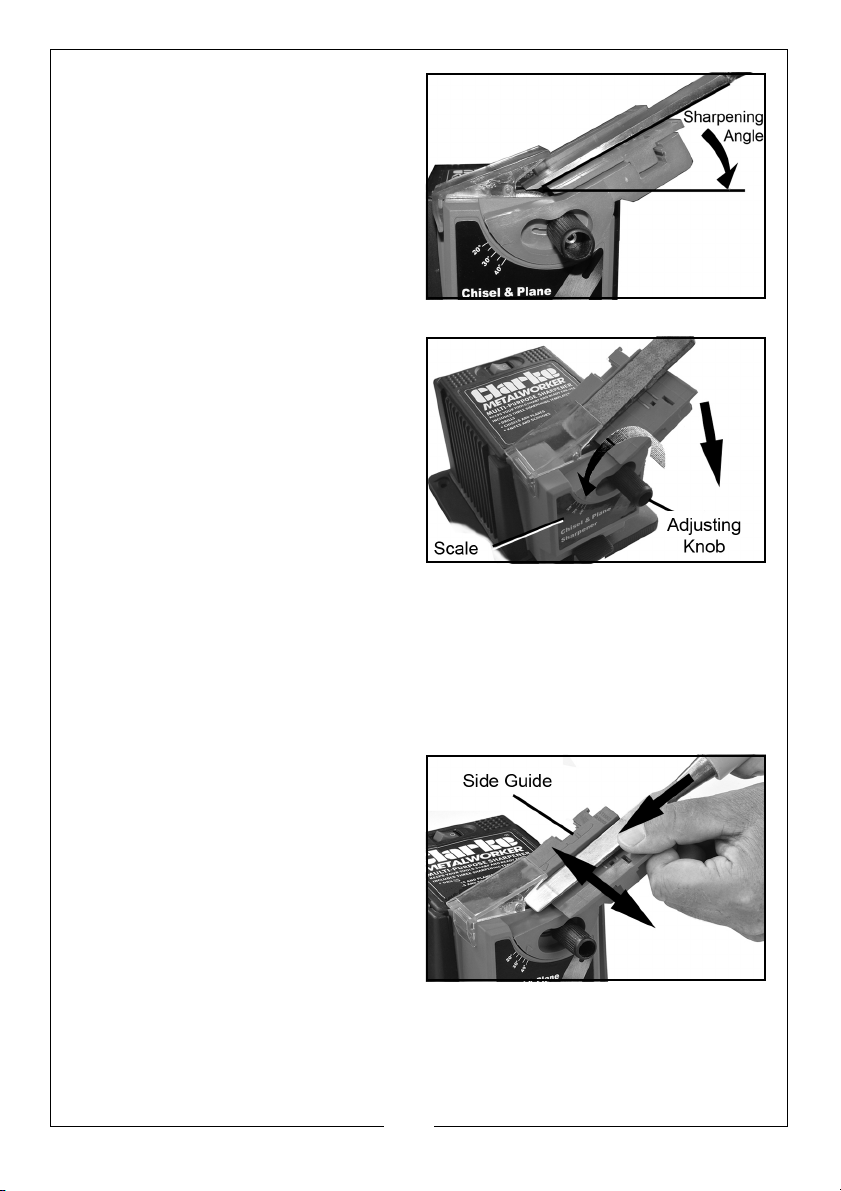
3. Take care that the sharpening
angle matches the existing
bevelled angle of the blade tip.
This avoids removing too much
metal unnecessarily and keeps
the plane blade at its optimum
cutting angle.
4. Adjust it to suit and set the angle
securely using the adjusting knob.
Note the angle on the scale
before tightening.
5. Switch the power unit on.
6. Slide the blade and plate with
light, steady pressure, back and
forth across the grinding wheel in
a continouous motion.
• Do not hold the blade
stationary as this will cause irregular sharpening.
7. Gradually ease the blade down the plate while sharpening. Press very
gently, repeating each step.
8. Lift the blade away and check that the bevelled edge and tip are evenly
sharp across the blade width. If not, adjust the grinding angle and try
again.
9. Use the extra side guide to act as
a spacer when sharpening narrow
chisels.
10. Switch the power unit off and
ensure the grinding wheel has
stopped before removing the
sharpener attachment from the
base unit.
• It is recommended that after
grinding, the chisel or plane
blade tip is honed using an oiled stone.
11
Parts & Service: 020 8988 7400 / E-mail: [email protected] or [email protected]
Page 12
MAINTENANCE
CLEANING
1. Keep the surface of your sharpener free of grit, dirt, and grease. Use soapy
water or non-toxic solvents. Do not use petroleum based solvents.
2. If the motor does not operate, it needs to be serviced or replaced by a
qualified technician.
SPECIFICATION
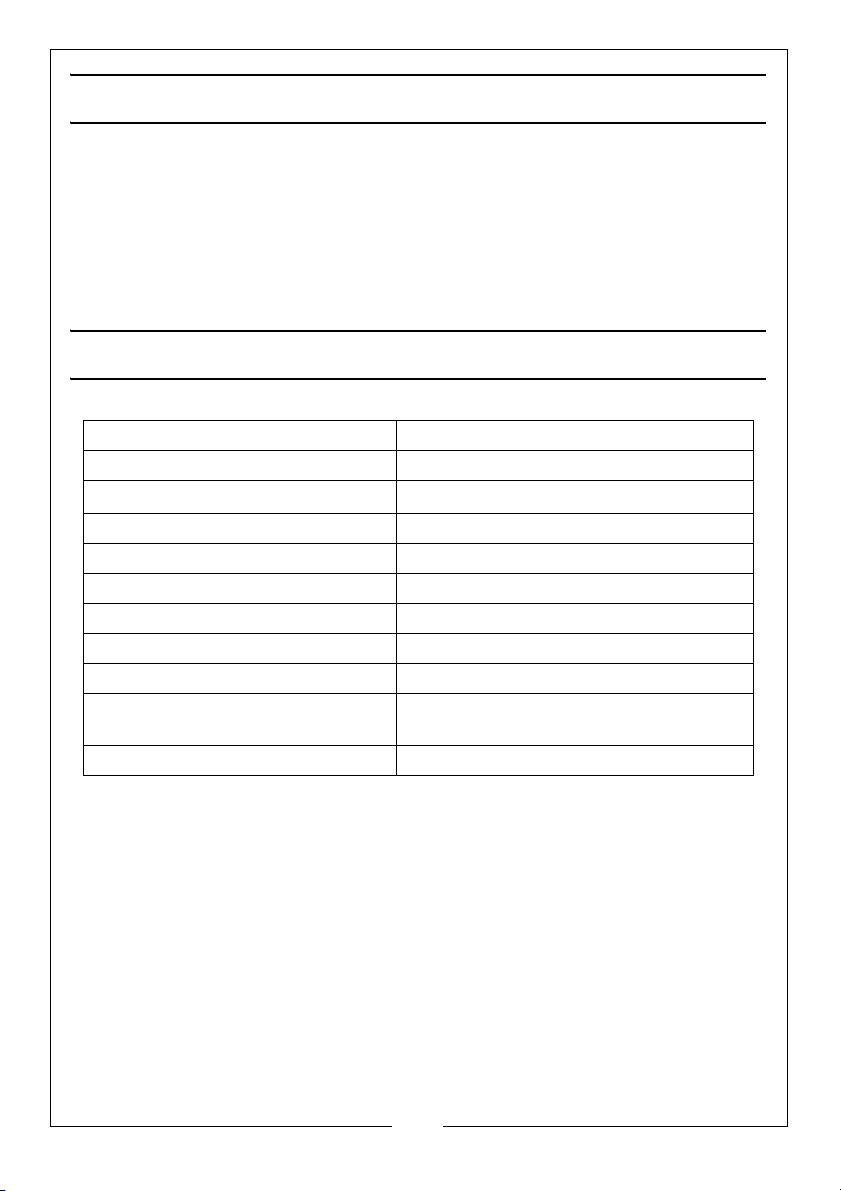
Model Number CMPS1
Voltage 230 V @ 50 Hz
Operating Temperature
Drill Bit Sizes And Type 3.0 mm to 10 mm HSS
Maximum Chisel Blade Width 51 mm
Duty Cycle S3 15% (90 sec on, 510 secs off)
No Load Speed 6700 rpm
Sound Pressure Level (L
Guaranteed Sound Power (L
pA dB) 74 dB(A)
wA dB) 87 dB(A)
Dimensions (L x W x H) 192 x 143 x 116 mm plus removable
Weight 1.65 Kg
o
C - + 40oC
-15
sharpening attachments
12
Parts & Service: 020 8988 7400 / E-mail: [email protected] or [email protected]
Page 13
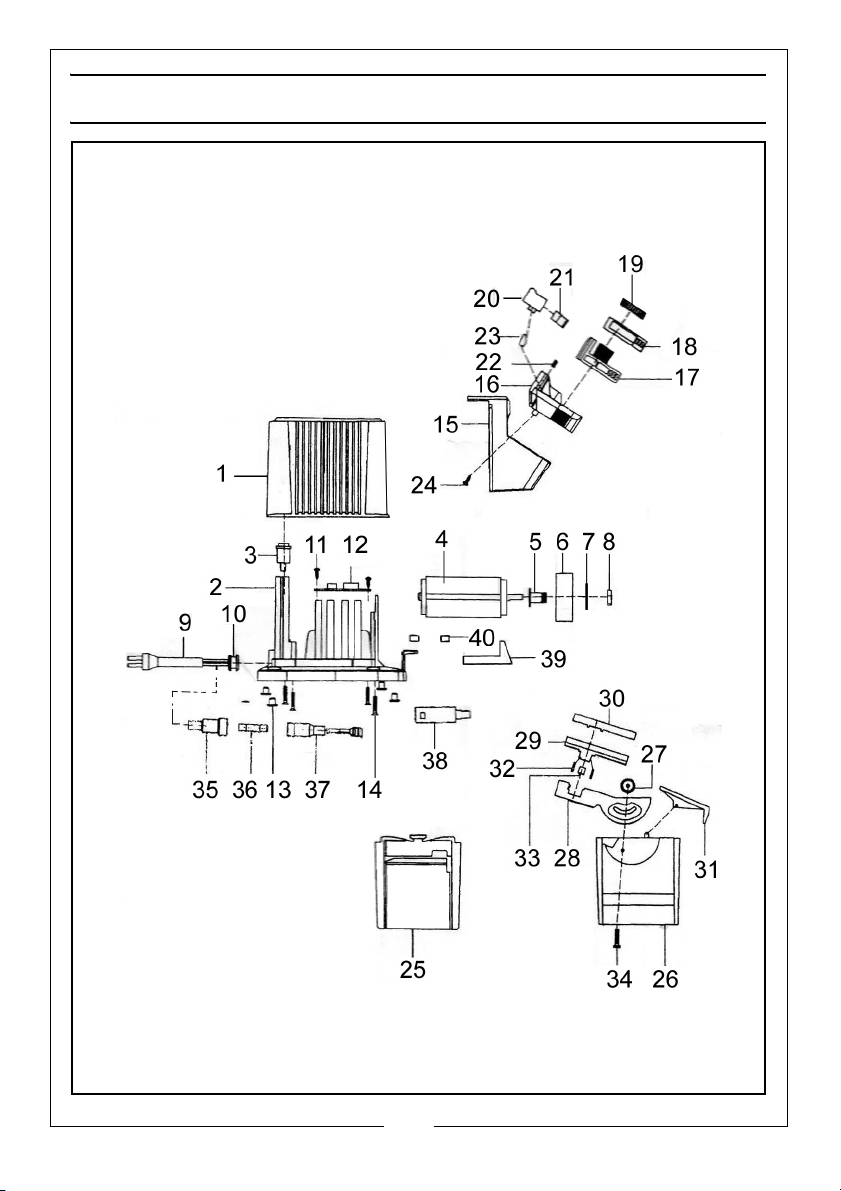
PARTS LIST DIAGRAM
13
Parts & Service: 020 8988 7400 / E-mail: [email protected] or [email protected]
Page 14
PARTS DIAGRAM
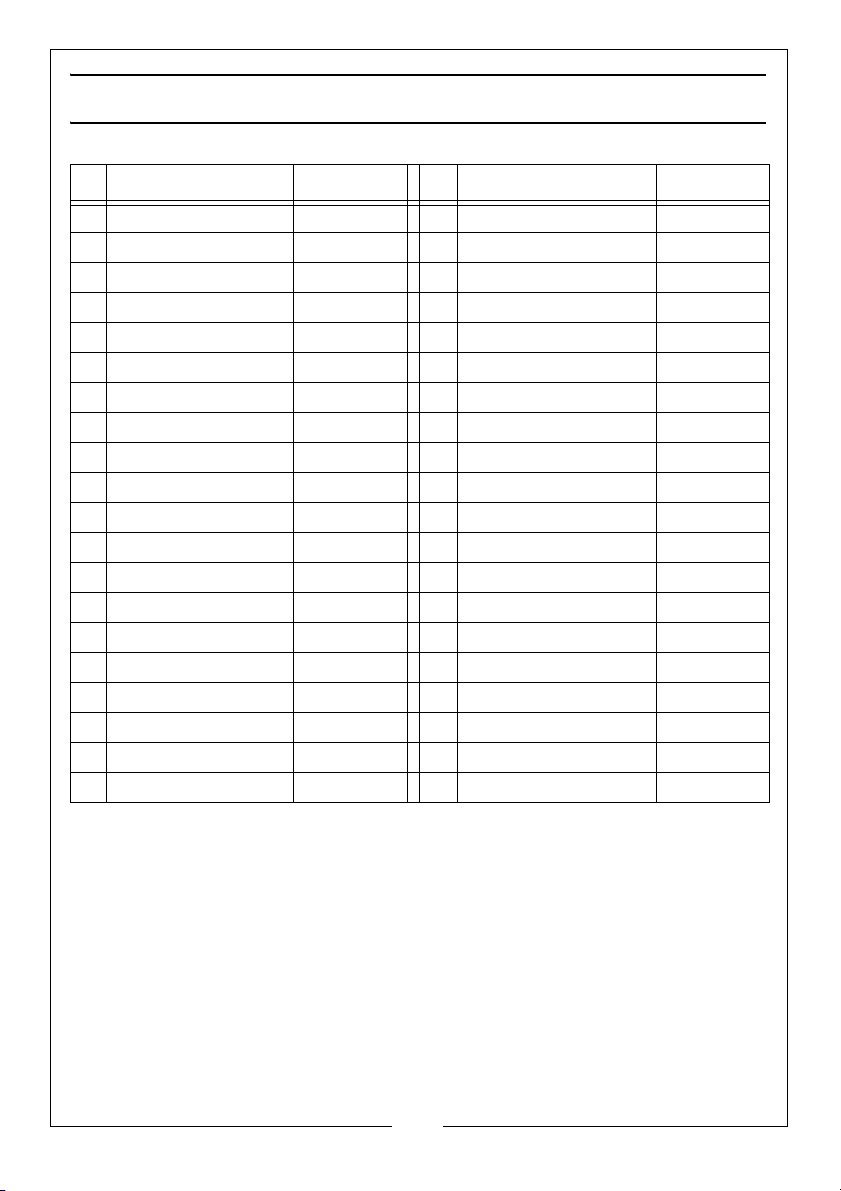
ID DESCRIPTION PART NO ID DESCRIPTION PART NO
1 Motor Housing HTCMPS101 21 End Stop HTCMPS121
2 Base HTCMPS102 22 Steel Strip HTCMPS122
3 Rocker Switch HTCMPS103 23 Steel Blade HTCMPS123
4 Motor HTCMPS104 24 Pivot Screw HTCMPS124
5 Wheel Boss HTCMPS105 25 Knife/Scissors Module HTCMPS125
6 Grinding Wheel HTCMPS106 26 Plane/blade Module HTCMPS126
7 Washer HTCMPS107 27 Locking Knob HTCMPS127
8 Nut HTCMPS108 28 Adjustable Plate HTCMPS128
9 Power Cable HTCMPS109 29 Sliding Blade Holder HTCMPS129
10 Cable Gland HTCMPS110 30 Chisel Side Guide HTCMPS130
11 Screw HTCMPS111 31 Transparent Guard HTCMPS131
12 Circuit Board HTCMPS112 32 Steel Edge HTCMPS132
13 Rubber Foot HTCMPS113 33 Magnet HTCMPS133
14 Screw HTCMPS114 34 Screw HTCMPS134
15 Drill Module Frame HTCMPS115 35 Fuse Holder HTCMPS135
16 Swivelling Frame HTCMPS116 36 Fuse HTCMPS136
17 Drill Upper Clamp HTCMPS117 37 Fuse Holder HTCMPS137
18 Drill Lower Clamp HTCMPS118 38 Interlock Switch HTCMPS138
19 Drill Clamp Knob HTCMPS119 39 Interlock Switch Arm HTCMPS139
20 Drill V- Guide HTCMPS120 40 Cable Clamp HTCMPS140
14
Parts & Service: 020 8988 7400 / E-mail: [email protected] or [email protected]
Page 15
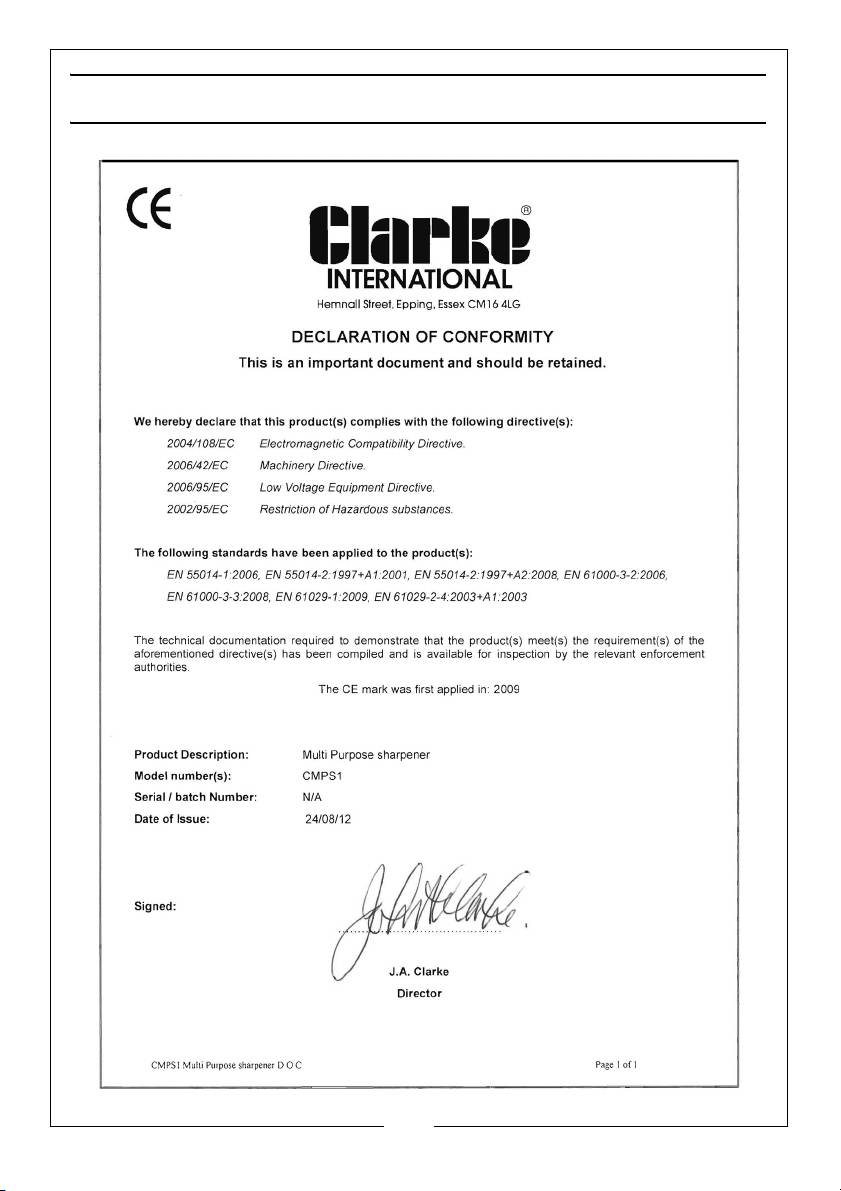
DECLARATION OF CONFORMITY
15
Parts & Service: 020 8988 7400 / E-mail: [email protected] or [email protected]
Page 16

 Loading...