

Page 1
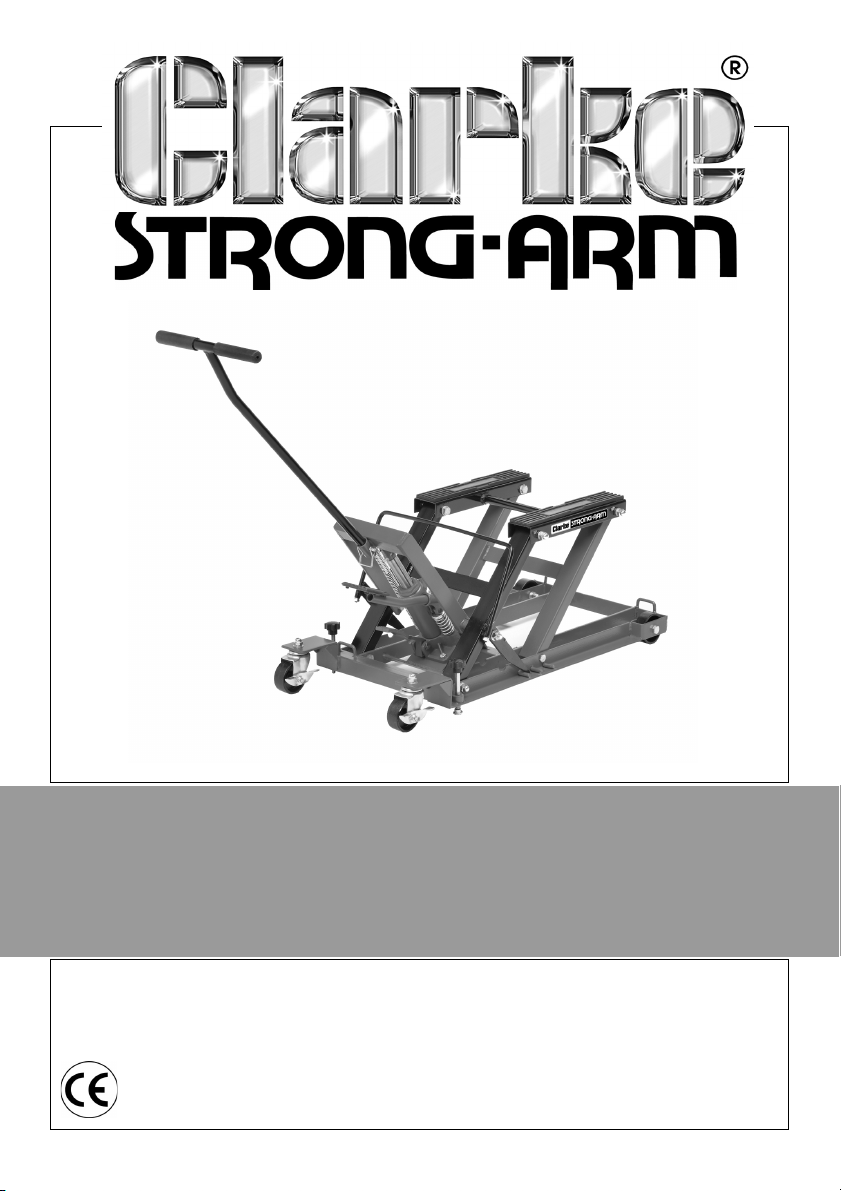
HYDRAULIC MOTORCYCLE LIFT
MODEL NO: CML4
PART NO: 7610191
OPERATION & MAINTENANCE
INSTRUCTIONS
LS0611
Page 2
INTRODUCTION
Thank you for purchasing this CLARKE hydraulic motorcycle lift.
Before attempting to operate this product, it is essential that you read this
manual thoroughly and carefully follow all instructions given. In doing so you
can look forward to the product giving you long and satisfactory service.
GUARANTEE
This CLARKE product is guaranteed against faulty manufacture for a period of
12 months from the date of purchase. Please keep your receipt as proof of
purchase.
This guarantee is invalid if the product is found to have been abused or
tampered with in any way, or not used for the purpose for which it was
intended.
Faulty goods should be returned to their place of purchase, no product can
be returned to us without prior permission.
This guarantee does not effect your statutory rights.
SPECIFICATIONS
Model Number
Maximum Load 400 kg
Minimum Table Height 130 mm
Maximum Table Height 430 mm
Weight 34.6 kg
2
Parts & Service: 020 8988 7400 / E-mail: [email protected] or [email protected]
CML4
Page 3
SAFETY PRECAUTIONS
1. NEVER exceed the safe working load of 400 kg, and only use the
motorcycle lift for its intended purpose.
2. NEVER use the lift if it has been subjected to an abnormal load or shock. It
should be removed from service immediately and fully inspected by
qualified personnel, and passed as serviceable, before being used again.
3. NEVER rely upon the hydraulic ram to support the saddle when loaded.
Always use the locking bar to hold the saddle in one of the positions
provided.
4. ALWAYS use the lift on a solid, flat, level surface.
5. ALWAYS screw down the stabilisers before putting the saddle under load.
NOTE: The castors are not designed to take the weight of the motorcycle,
but are used merely to move the lift quickly and easily around the
workshop. On no account must you raise a loaded platform
unless the stabilisers are screwed down, and NEVER use the lift to
transport a load.
6. ALWAYS use appropriate safety equipment, such as protective footwear,
when using this lift.
7. ALWAYS inspect the lift before use to ensure it is in good condition, and
replace any damaged or worn parts.
8. ALWAYS use spare parts supplied by Clarke International. Using non-
standard parts could be extremely dangerous.
9. ENSURE the operator is trained in both operational and safety aspects.
10. NEVER leave this lift unattended whilst there is a load on it.
11. NEVER allow children or bystanders anywhere near this lift whilst it is in use.
UNPACKING
Check to ensure that no damage has occurred during transit. Any damage
should be reported to your Clarke dealer immediately.
The following should be included:
1 x Main Carriage / Lifting Frame Assembly 1 x T-Handle
1 x Hydraulic Ram Assembly 1 x Height Lock Release Bar
1 x Foot Pedal Tie Down Straps
3
Parts & Service: 020 8988 7400 / E-mail: [email protected] or [email protected]
Page 4
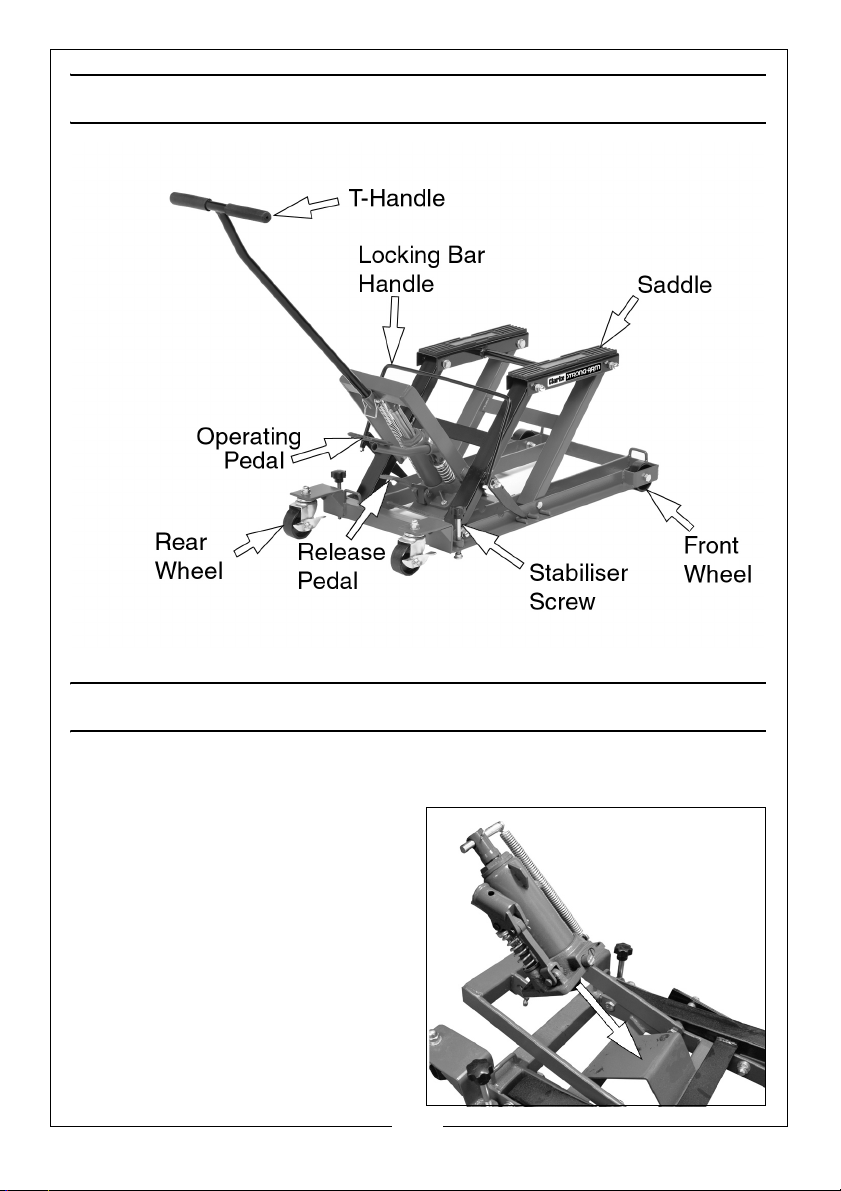
OVERVIEW
ASSEMBLY
THE RAM ASSEMBLY
1. Secure the ram assembly to its
baseplate using the two M8x25
bolts and M8 Spring washers
supplied.
2. Tighten the bolts securely.
4
Parts & Service: 020 8988 7400 / E-mail: [email protected] or [email protected]
Page 5
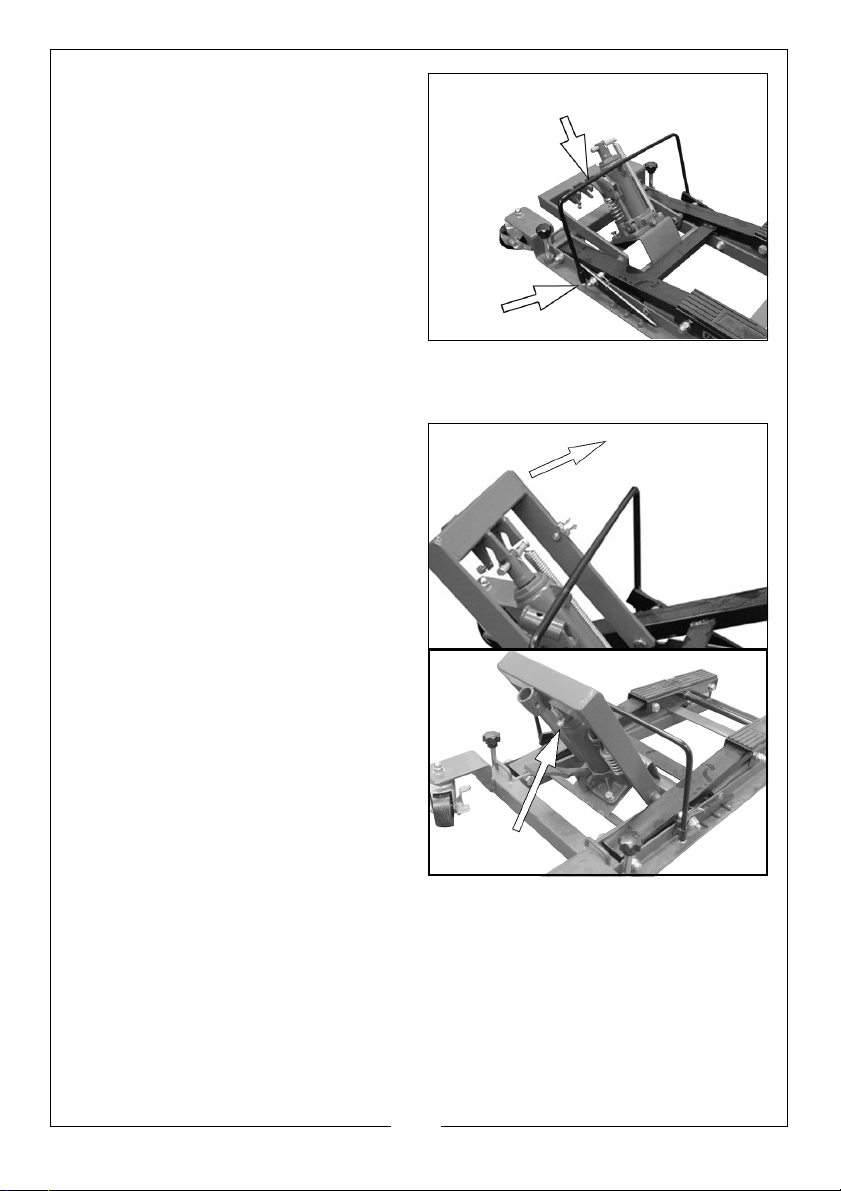
THE LOCKING BAR
1. Locate the locking bar handle in
to the socket at each side of the
lift.
2. Place a M8 spring washer on to
the threads and screw on the M8
nut securely.
• Ensure the locking bar is free to
rotate under its own weight.
• The locking bar should hinge so
that the ends engage against
one of the ridges on the base.
THE RAM TO THE FRAME
1. Lift the saddle manually and hook
the ram frame over the ram as
shown.
2. Secure in place using the locking
screw.
5
Parts & Service: 020 8988 7400 / E-mail: [email protected] or [email protected]
Page 6
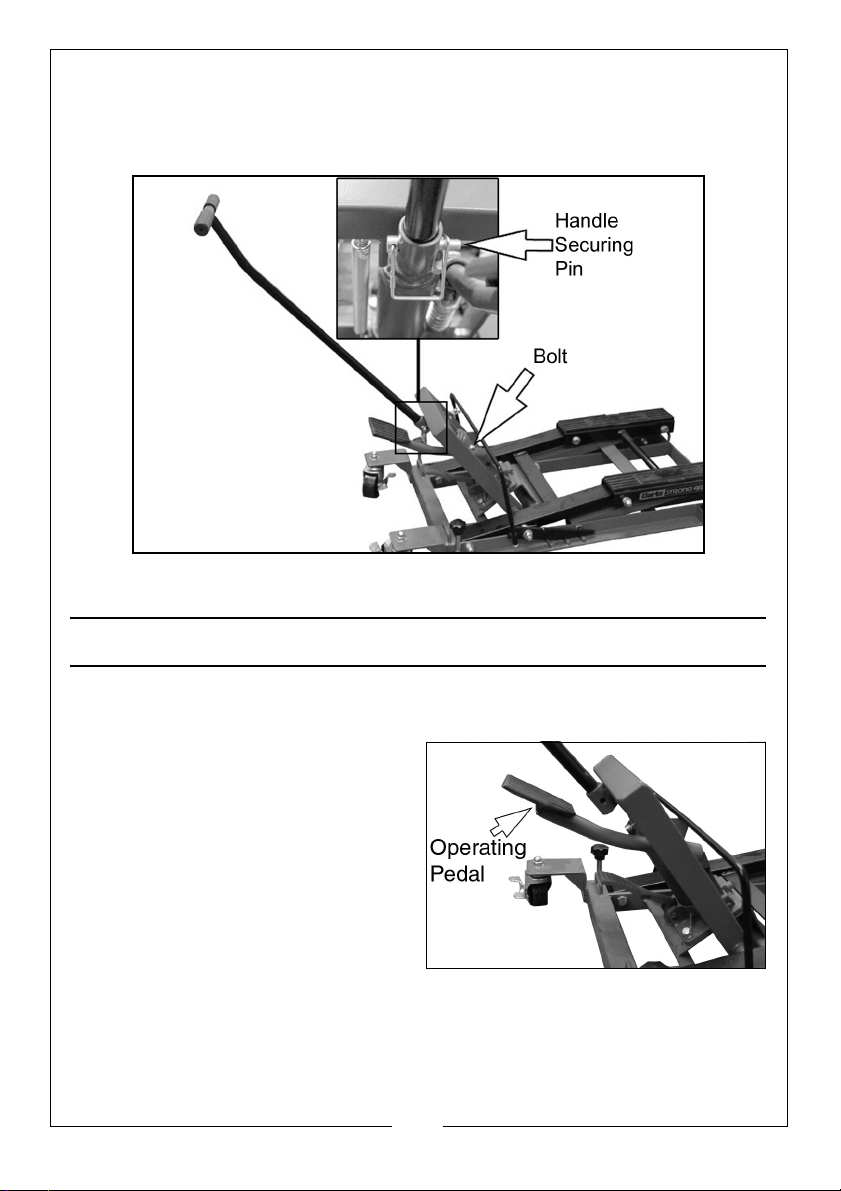
THE HANDLE AND OPERATING PEDAL
The handle is secured to the frame using the pin provided.
The operating pedal should be slid into place and secured using the M8x12
bolt supplied.
OPERATION
RAISING THE LOAD
1. Position the saddle between the
wheels of the motorcycle, as near
to the centre of gravity as
possible.
2. Pump the operating pedal until
the saddle makes light contact
with the motorcycle frame, then
assess where packing may be
required to ensure the motorcycle
is well supported and stable.
6
Parts & Service: 020 8988 7400 / E-mail: [email protected] or [email protected]
Page 7
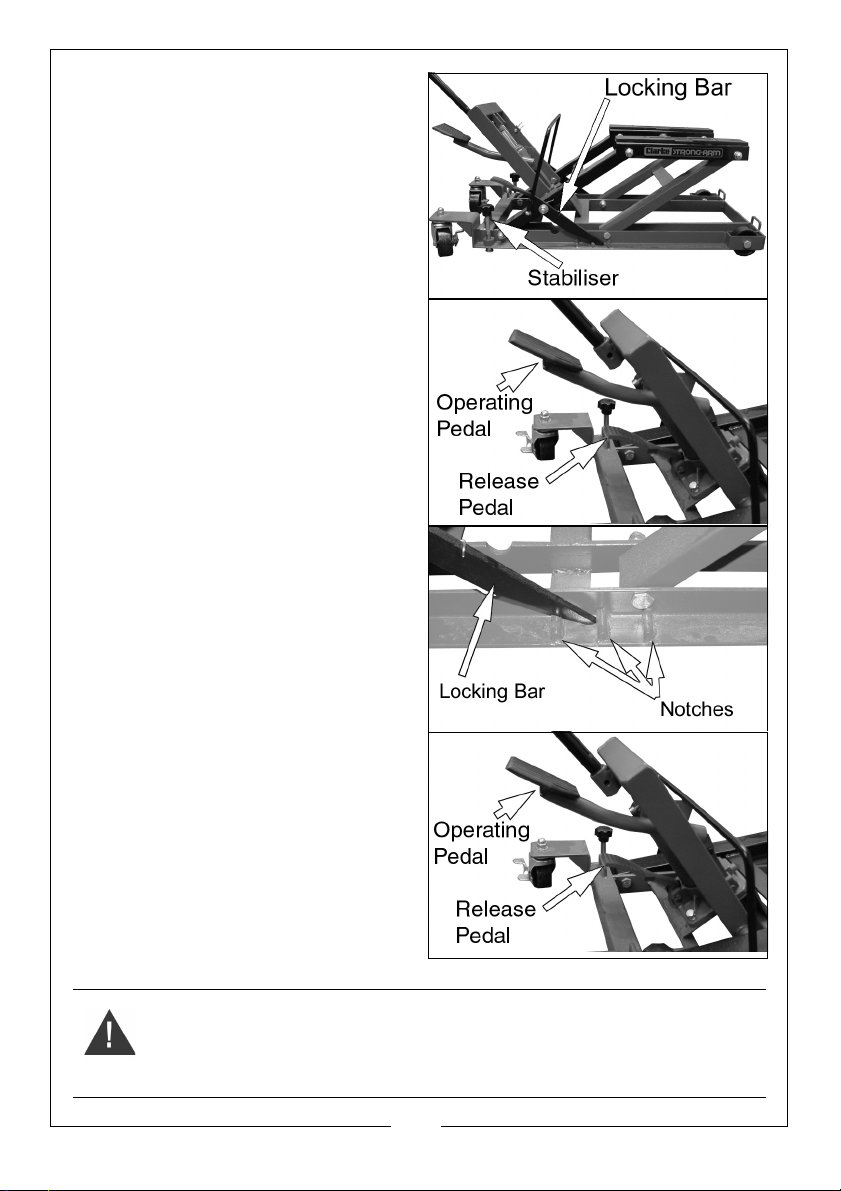
3. When the motorcycle is
satisfactorily supported, screw
down the two stabilisers,
• This removes any load from the
castors,
4. Raise the load by pumping the
operating pedal.
5. Once you have reached the
desired height, ensure the locking
bar is engaged with the notches
on the base,
6. Press the release pedal gently,
allowing the saddle to lower until
the load is taken by the locking
bar.
7. Secure the load using tie down
straps (supplied) before you
begin work.
WARNING: UNDER NO CIRCUMSTANCES MUST YOU RELY UPON THE RAM
TO SUPPORT THE LOAD.
WARNING: ENSURE THE MOTORCYCLE IS FULLY STABILISED BEFORE
COMMENCING WORK.
7
Parts & Service: 020 8988 7400 / E-mail: [email protected] or [email protected]
Page 8
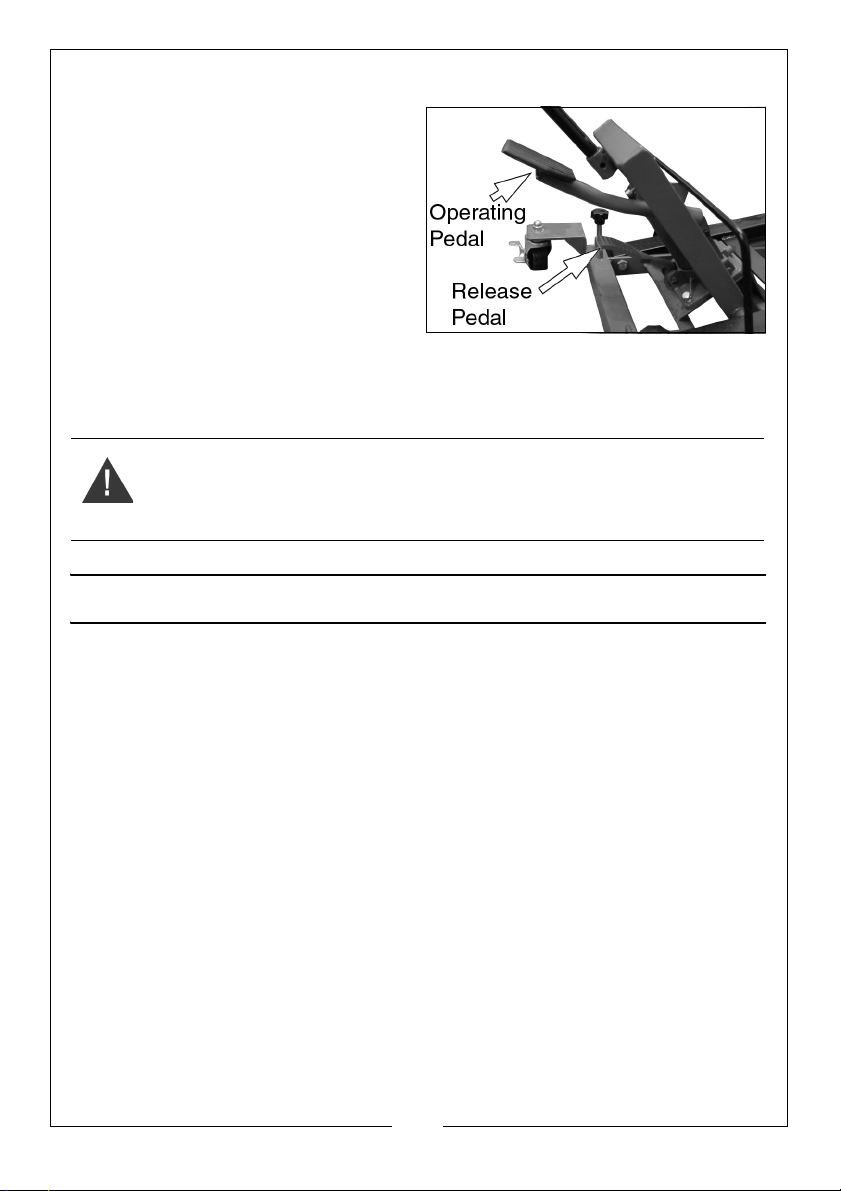
LOWERING THE LOAD
1. Pump the operating pedal to
raise the load slightly and release
the locking bar.
2. Push the locking bar against the
ram and into the locking bar
retaining clip
3. Press down on the release pedal
and allow the load to descend.
4. Remove the locking bar from the
locking bar retaining clip before
using the lift again.
WARNING: TAKE GREAT CARE WHEN LOWERING. YOU ONLY NEED TO
PRESS THE RELEASE PEDAL VERY LIGHTLY. TOO HEAVY A TOUCH WILL
RESULT IN THE LOAD DESCENDING TOO RAPIDLY WHICH COULD BE
HAZARDOUS
MAINTENANCE
BEFORE EACH USE
Visually inspect the lift for distortion of parts, cracked welds, damaged wheels
or castors, oil leakage from the ram, or any other sign of damage. Should any
of these be found, do not use the lift, and have it inspected and repaired by a
qualified technician before putting back into use. If necessary, consult your
Clarke dealer.
If the Warning label becomes illegible, have it replaced. Contact your Clarke
dealer.
8
Parts & Service: 020 8988 7400 / E-mail: [email protected] or [email protected]
Page 9
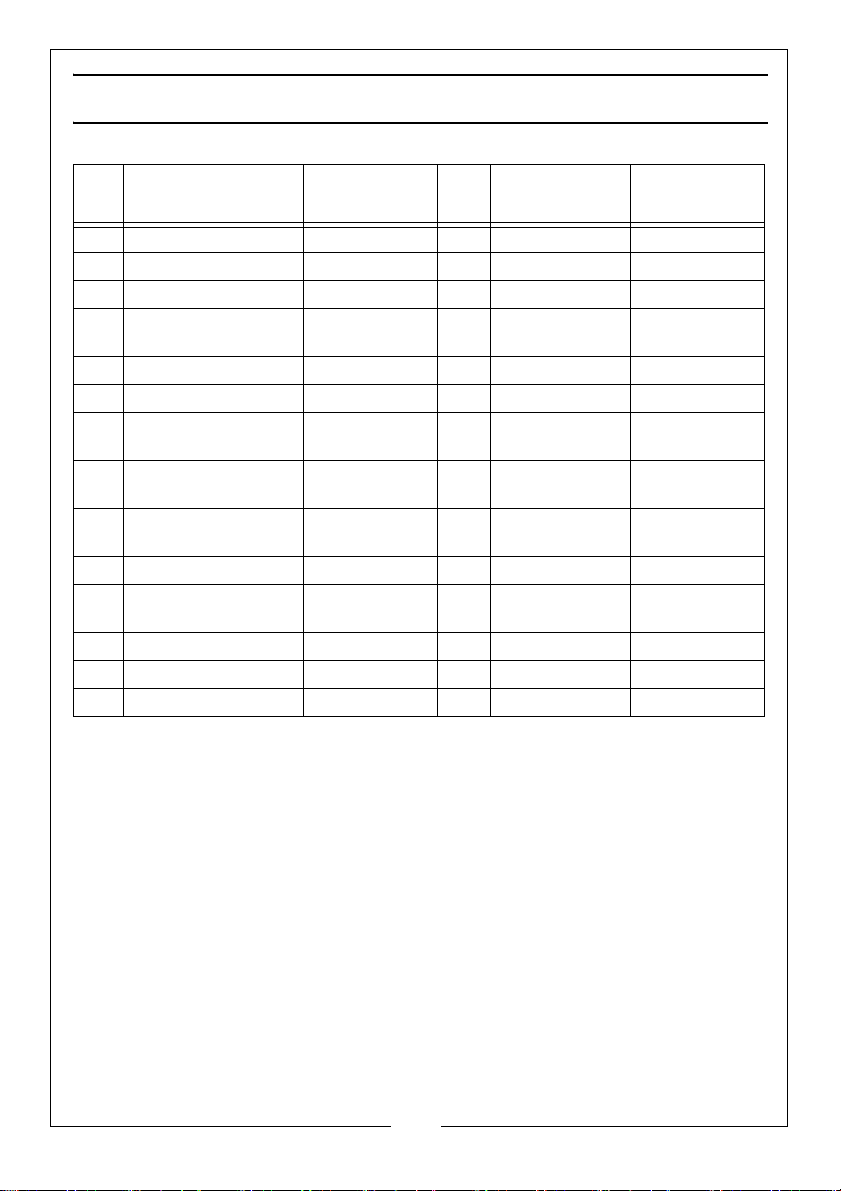
PARTS LIST
ITEM
NO
1 FRONT WHEEL TATACML401 15 SCREW TATACML415
2 B A S E A S S E M B LY TATACM L 4 0 2 16 SP R I N G TATACML416
3 SADDLE TATACML403 17 FLAT WASHER TATACML417
4LEFT LIFTING ARM
5 NUT M8 TATACML405 19 RELEASE PEDAL TATACML419
6 SPRING WASHER M8 TATACML406 20 BOLT M8 x 25 TATACML420
7LOCKING BAR
8LOCKING BAR
9 HANDLE SECURING
10 RAM FRAME TATACML410 24 REAR WHEEL SET TATACML424
11 T-HANDLE TATACML411 25 TORSIONAL
12 BOLT M8 x 12 TATACML412 26 LOCK NUT M12 TATACML426
13 NUT M12 TATACML413 27 LOCKING BAR TATACML427
14 STABILISER SCREW TATACML414 28 O I L F I L L E R P L UG TATACML428
DESCRIPTION PART NUMBER
TATACML404 18 RIGHT LIFTING
ASSEMBLY
TATACM L 4 0 7 21 RA M U N I T TATAC M L 4 2 1
HANDLE
TATACML408 22 HINGE PIN TATACML422
RETAINING CLIP
TATACML409 23 OPERATING
PIN
ITEM
NO
ARM ASSEMBLY
PEDAL
SPRING
DESCRIPTION PART NUMBER
TATAC ML 418
TATAC ML 423
TATAC ML 425
9
Parts & Service: 020 8988 7400 / E-mail: [email protected] or [email protected]
Page 10
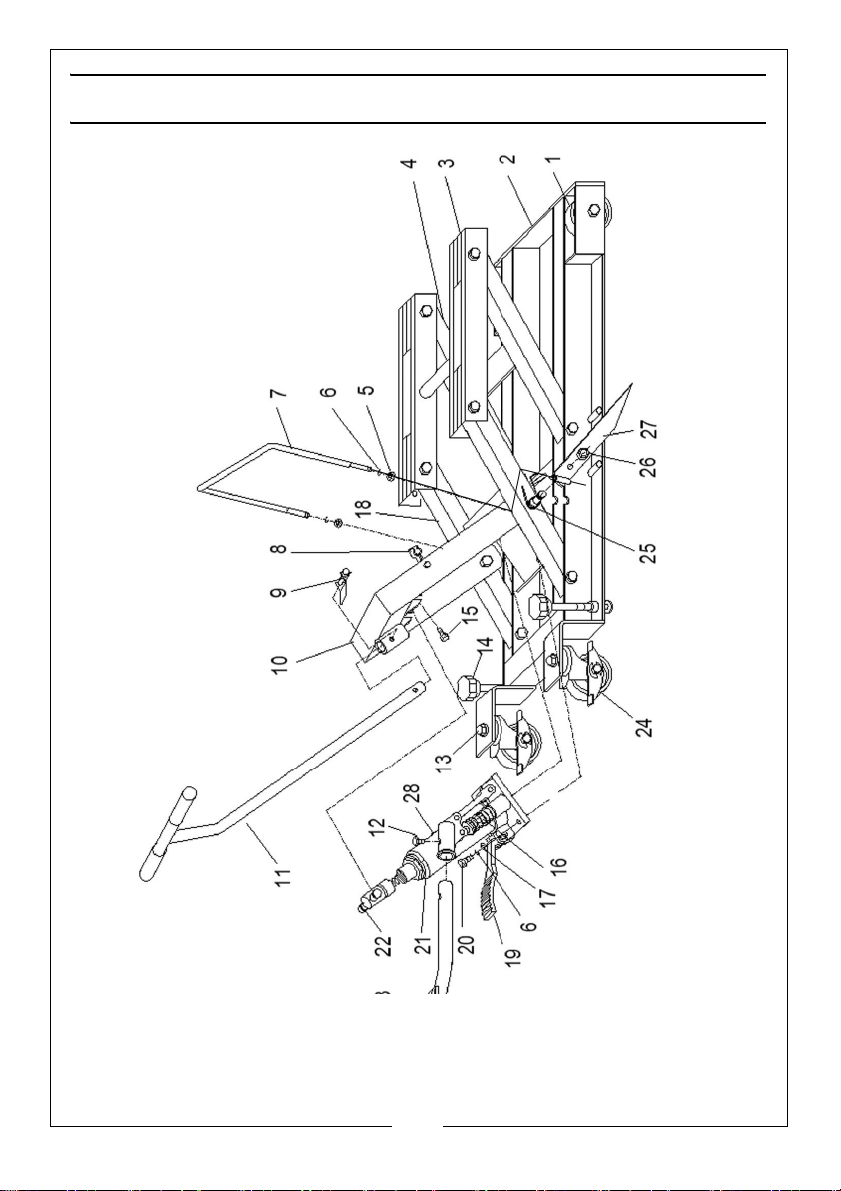
Page 11
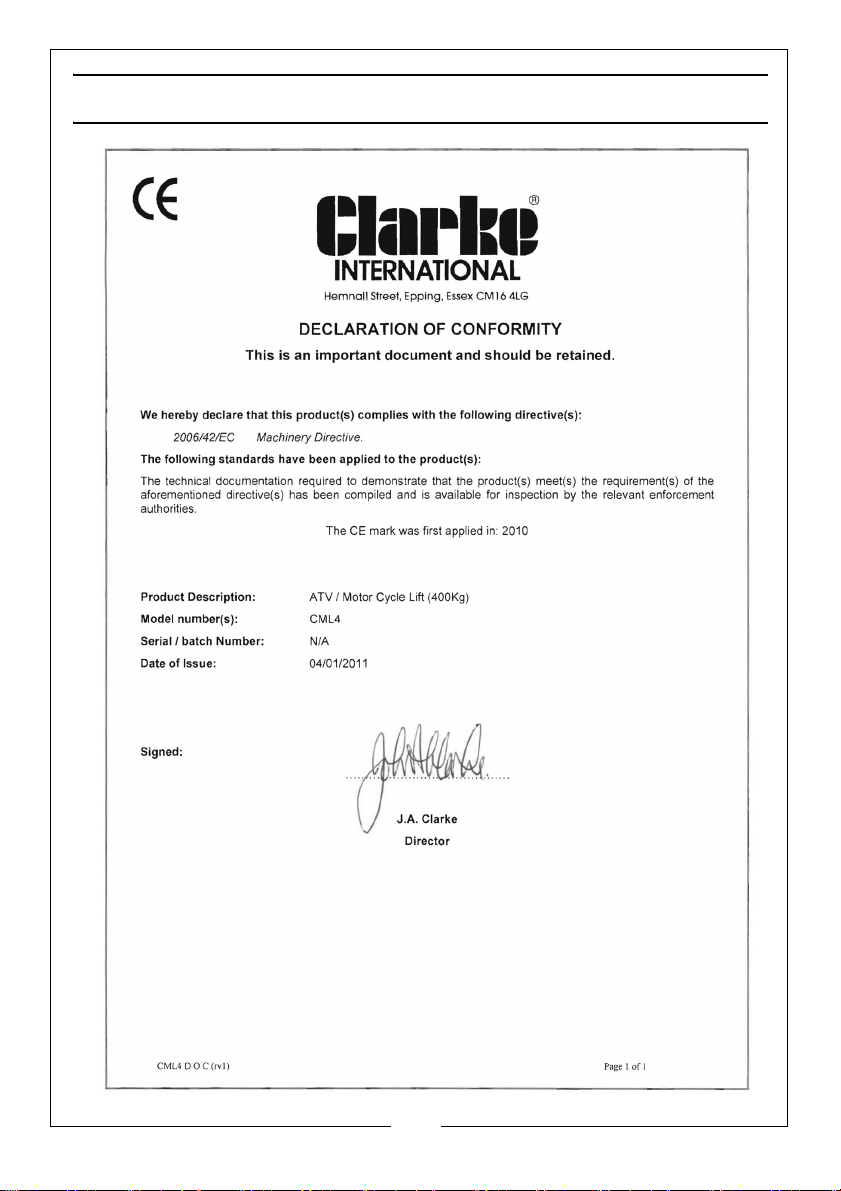
DECLARATION OF CONFORMITY
11
Parts & Service: 020 8988 7400 / E-mail: [email protected] or [email protected]
Page 12
 Loading...