

Page 1
PROFESSIONAL MORTAR GUN SET
Model No: CHT733
Part No: 1801733
USER INSTRUCTIONS
GC10/12
Page 2
INTRODUCTION
Thank you for purchasing this CLARKE product.
Please read and follow the instructions carefully. In doing so you will ensure
the safety of yourself and others around you, and you can look forward to
the product giving you long & satisfactory service.
Please keep these instructions in a safe place for future reference
GUARANTEE
This product is guaranteed against faulty manufacture for a period of 12
months from the date of purchase. Please keep your receipt which will be
required as proof of purchase.
This guarantee is invalid if the product is found to have been abused or
tampered with in any way, or not used for its intended purpose. Faulty goods
should be returned to their place of purchase. No product can be returned
to us without prior permission.
This guarantee does not effect your statutory rights.
2
Parts & Service: 020 8988 7400/E-mail:[email protected] or [email protected]
Page 3
CONTENTS
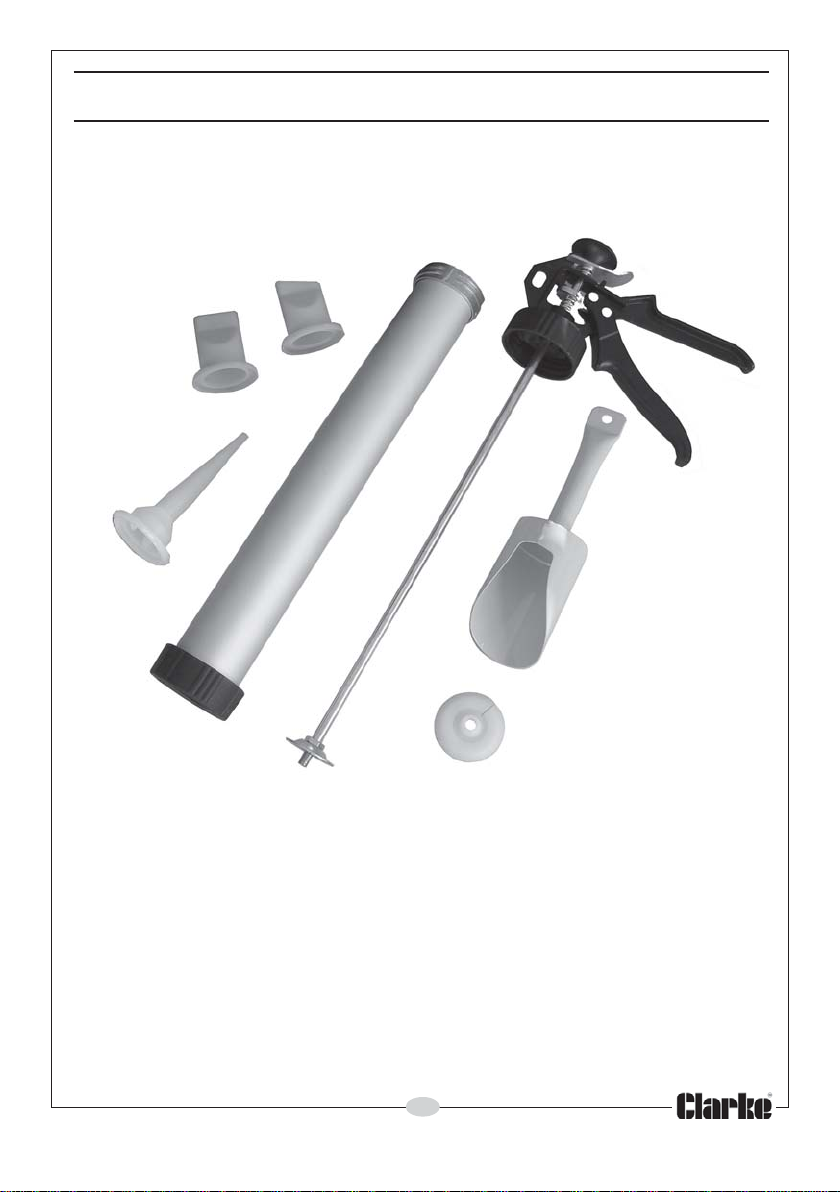
Straight Nozzle
Grouting Nozzle
Trigger & Ratchet
Mechanism with plunger
Angled Nozzle
Filling Scoop
Spare Plunger End
Aluminium Body
with retaining ring
The CHT733 Brick Mortar Gun can be used as a mortar or tile grouting gun
and can be used for jobs such as re-pointing walls, filling gaps in patio slabs
and grouting floor and wall tiles.
When using the gun for re-pointing and filling gaps in patio slabs etc, it is
important that the correct mix of soft building sand is used.
Ensure the mix is lump-free and is of a smooth, creamy texture. The use of a
plasticiser is recommended.
Do not use sharp sands or gravels.
3
Parts & Service: 020 8988 7400/E-mail:[email protected] or [email protected]
Page 4
ASSEMBLY
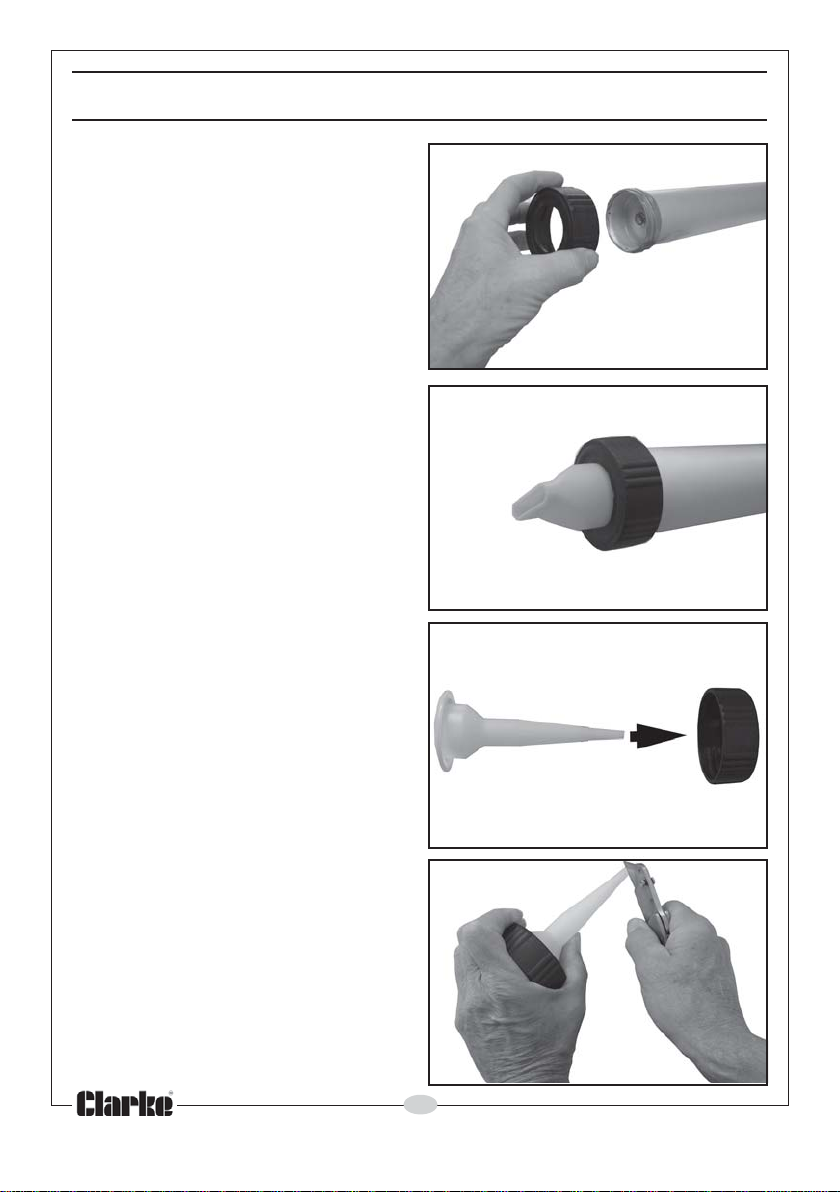
For working with mortar mixes, fit a
nozzle as follows:
1. Unscrew the end retaining ring
from the body of the gun as
shown in Fig 1.
2. Insert either a straight or angled
nozzle into the opening of the
ring.
3. Screw the ring back into the body
of the gun as in Fig 2.
When working with ready-mixed
grouts, ready mixed tile adhesives or
ready-mixed fillers use the tapered
grouting nozzle as follows:
1. Unscrew the end retaining ring
from the body of the gun.
2. Insert grouting nozzle (Fig 3) and
cut off the end to suit the size of
gap you intend to fill. (Fig 4)
3. Screw the retaining ring back
onto the body of the gun.
Fig 1
Fig 2
Fig 3
Fig 4
4
Parts & Service: 020 8988 7400/E-mail:[email protected] or [email protected]
Page 5
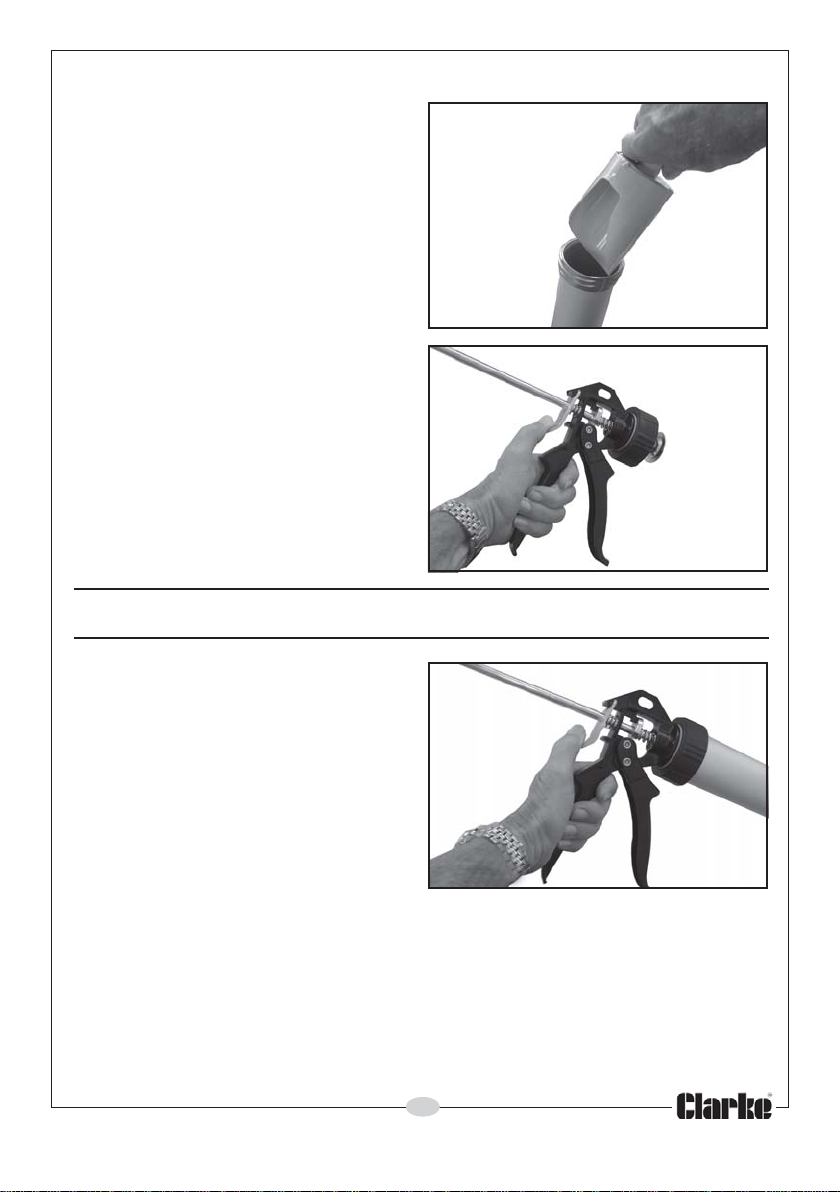
Fill the gun with mix as follows:
1. Unscrew the trigger end of the
gun from the body and withdraw
the trigger assembly and plunger.
2. With the scoop provided, fill the
body with the correct mix of
mortar to within 3 cm of the top
as shown in Fig 5.
3. With the plunger fully retracted as
shown in Fig 6, attach the trigger
back onto the gun body by
screwing the ring clockwise until
finger tight.
Your mortar gun is now ready for use.
OPERATION
Fig 5
Fig 6
1. To use, simply squeeze the trigger
with a steady pressure. To stop the
flow at any time, push the trigger
plate forward with your thumb, as
shown in Fig 7 and withdraw the
plunger slightly.
• If mortar does not flow, it could
be that the mixture is too dry,
lumpy, or that something other
than soft sand has been used, or
Fig 7
that the mixture has started to set.
• If this happens, you will need to start again, ensuring the mix is correct and
that the interior of the body and nozzle are clean and free from any dry
mix or other obstruction.
5
Parts & Service: 020 8988 7400/E-mail:[email protected] or [email protected]
Page 6
2. For working with patio slabs or floor tiles, use the angled nozzle and hold
the mortar gun at 45º to the work as you apply the mix.
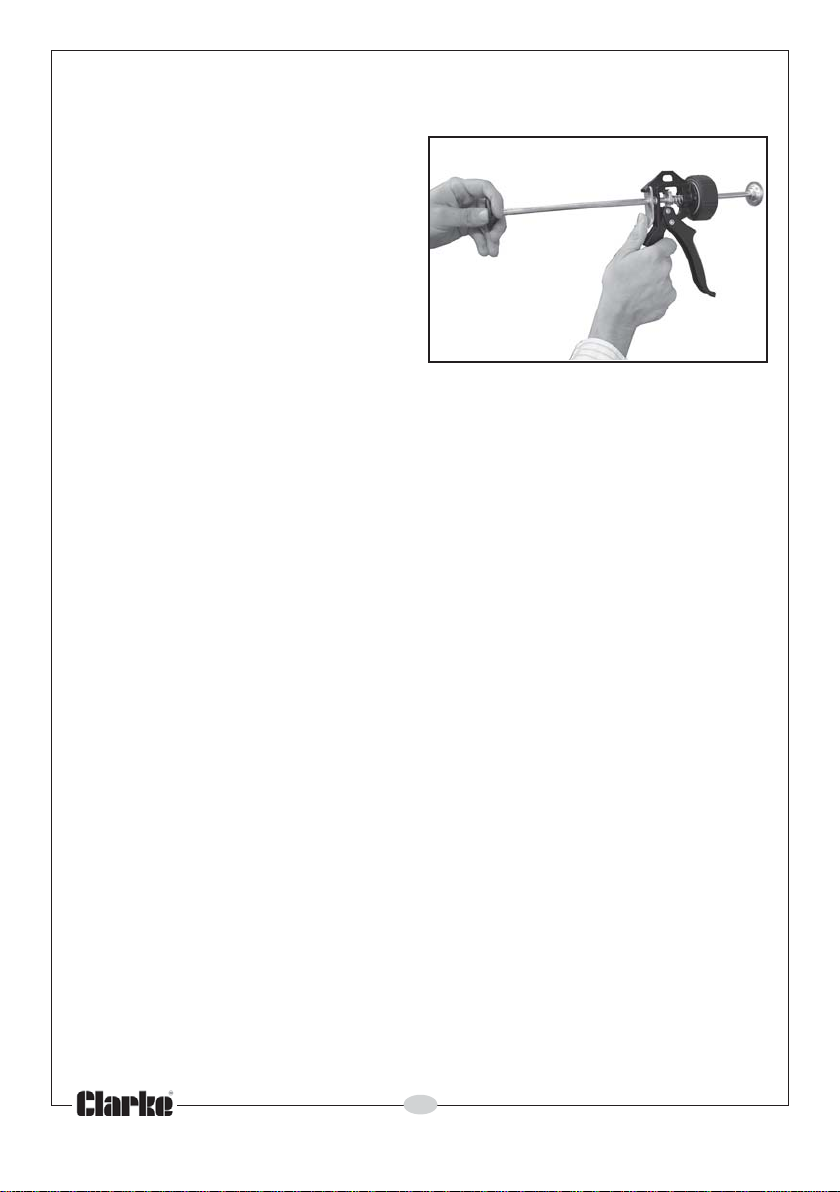
• To withdraw the plunger, push the
trigger plate forward and pull the
Fig 8
rod backwards until it is fully
retracted as shown in Fig 8.
• If using powdered grouts and
powdered fillers, ensure you mix
to the manufacturers instructions
and ensure the mix is free from
lumps and is a smooth, creamy
texture.
• Do not allow the mix to be too
wet as this will flow uncontrollably from the nozzle. Likewise, making the
mix too thick will block the nozzle.
6
Parts & Service: 020 8988 7400/E-mail:[email protected] or [email protected]
Page 7
MAINTENANCE
1. After use, wash all parts immediately in clean water, ensuring all the mix is
removed from inside the nozzle and gun body.
• A spare plunger end, which may occasionally need replacement, is
included with your mortar gun. To replace it proceed as follows.
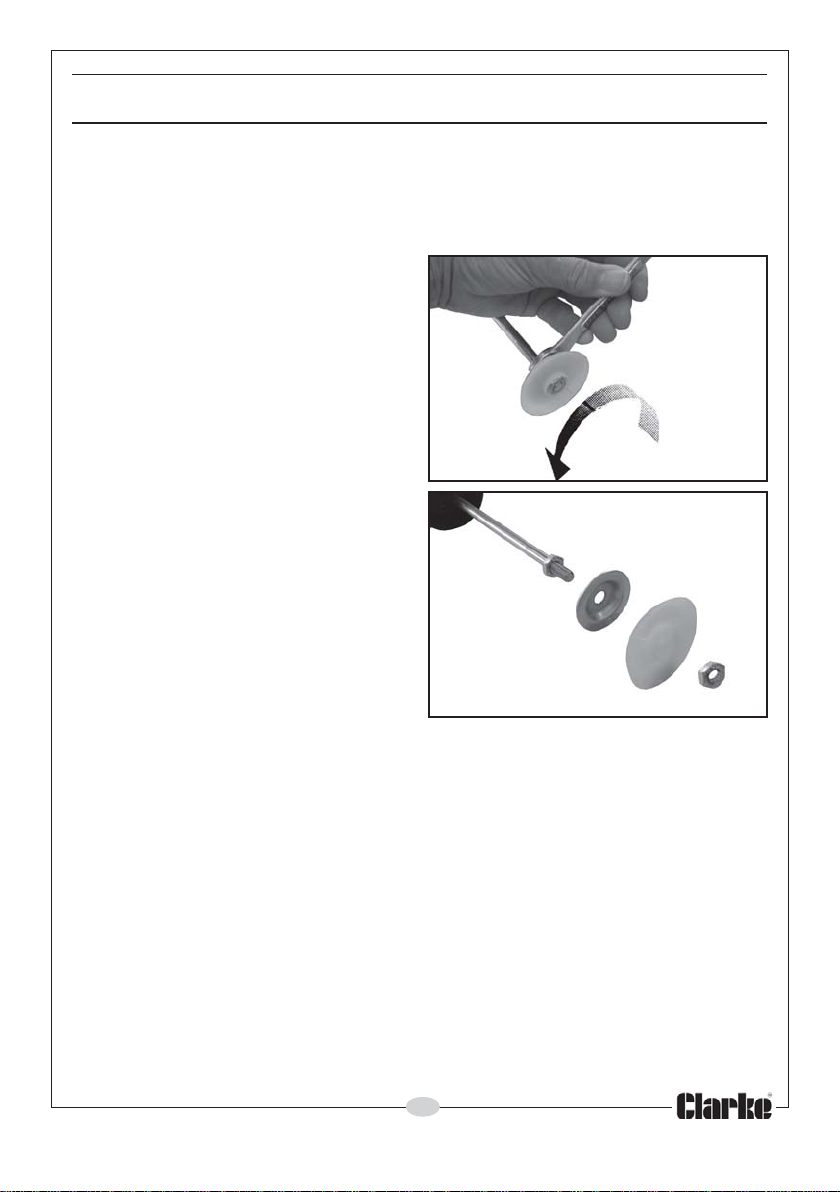
2. Hold the retaining nut below the
plunger end with a suitable 14mm
spanner as shown in Fig 9.
3. Turn the cup containing the nylon
plunger end anti-clockwise.
4. Remove the metal cup and nylon
plunger end with nut from the
plunger as shown in Fig 10.
5. Refit the nut into the hexagonal
opening in the replacement
plunger end.
6. Screw the plunger end, with nut
and metal cup, back onto the
plunger.
Fig 9
Fig 10
• A spares kit ref CHT734, containing additional nozzles, a scoop and
replacement plunger end is available from your Clarke dealer,
Part No: 1801734.
7
Parts & Service: 020 8988 7400/E-mail:[email protected] or [email protected]
Page 8
 Loading...