

Page 1
Model Number: CHT693
Part Number: 1801693
8pc Compression Tester Kit
SAFETY
WARNING: THE WARNINGS, CAUTIONS AND INSTRUCTIONS DISCUSSED IN THIS MANUAL CANNOT
COVER ALL POSSIBLE CONDITIONS AND SITUATIONS THAT MAY OCCUR. IT MUST BE UNDERSTOOD THAT
COMMON SENSE AND CAUTION ARE FACTORS WHICH MUST BE APPLIED BY THE OPERATOR.
1. DO NOT use tester if damaged.
2. Maintain the tester in good and clean condition for
best and safest performance.
3. If required, ensure vehicle to be worked on is
adequately supported with axle stands, ramps and
chocks.
4. Wear approved eye protection. A full range of
personal safety equipment is available from your
CLARKE dealer.
5. Wear suitable clothing to avoid snagging. Do not
wear jewellery and tie back long hair.
6. Account for all tools and equipment being used
and do not leave them in, on or near the engine.
7. When not in use, place in protective case and store in a safe, dry, childproof area.
IMPORTANT: Always refer to the vehicle manufacturers service instructions or a proprietary manual, to
establish the current procedure and data. These instructions are provided as a guide only.
PREPARATION
1. Run the engine until normal operating temperature is reached.
2. Stop engine and disconnect all spark plug wires, numbering them according to the cylinder to which
they were connected.
3. Loosen spark plugs one turn but do not remove them
• This will dislodge any dirt that has accumulated in the spark plug wells.
4. Use an air hose to blow dirt and debris from the spark plug wells.
5. Remove the spark plugs and place them on a clean, flat surface in the cylinder order in which they
were removed.
6. Remove the air filter and set the throttle to the wide open position, taking care not to damage the
linkage or throttle components.
WARNING: THE IGNITION SYSTEM MUST BE DISABLED. FAILURE TO DISABLE COULD RESULT IN DAMAGE
TO THE IGNITION SYSTEM OR ECU.
7. Disconnect the ignition system, following the manufacturer’s recommendations in the vehicle
servicing manual.
• It is also good practice to unplug the fuel injectors or disable the fuel pump, especially on cars
fitted with a catalytic convertor. This prevents unburnt fuel getting into the exhaust system during
the test.
Parts & Service: 020 8988 7400 / E-mail: [email protected] or [email protected]
Page 2
COMPRESSION TEST
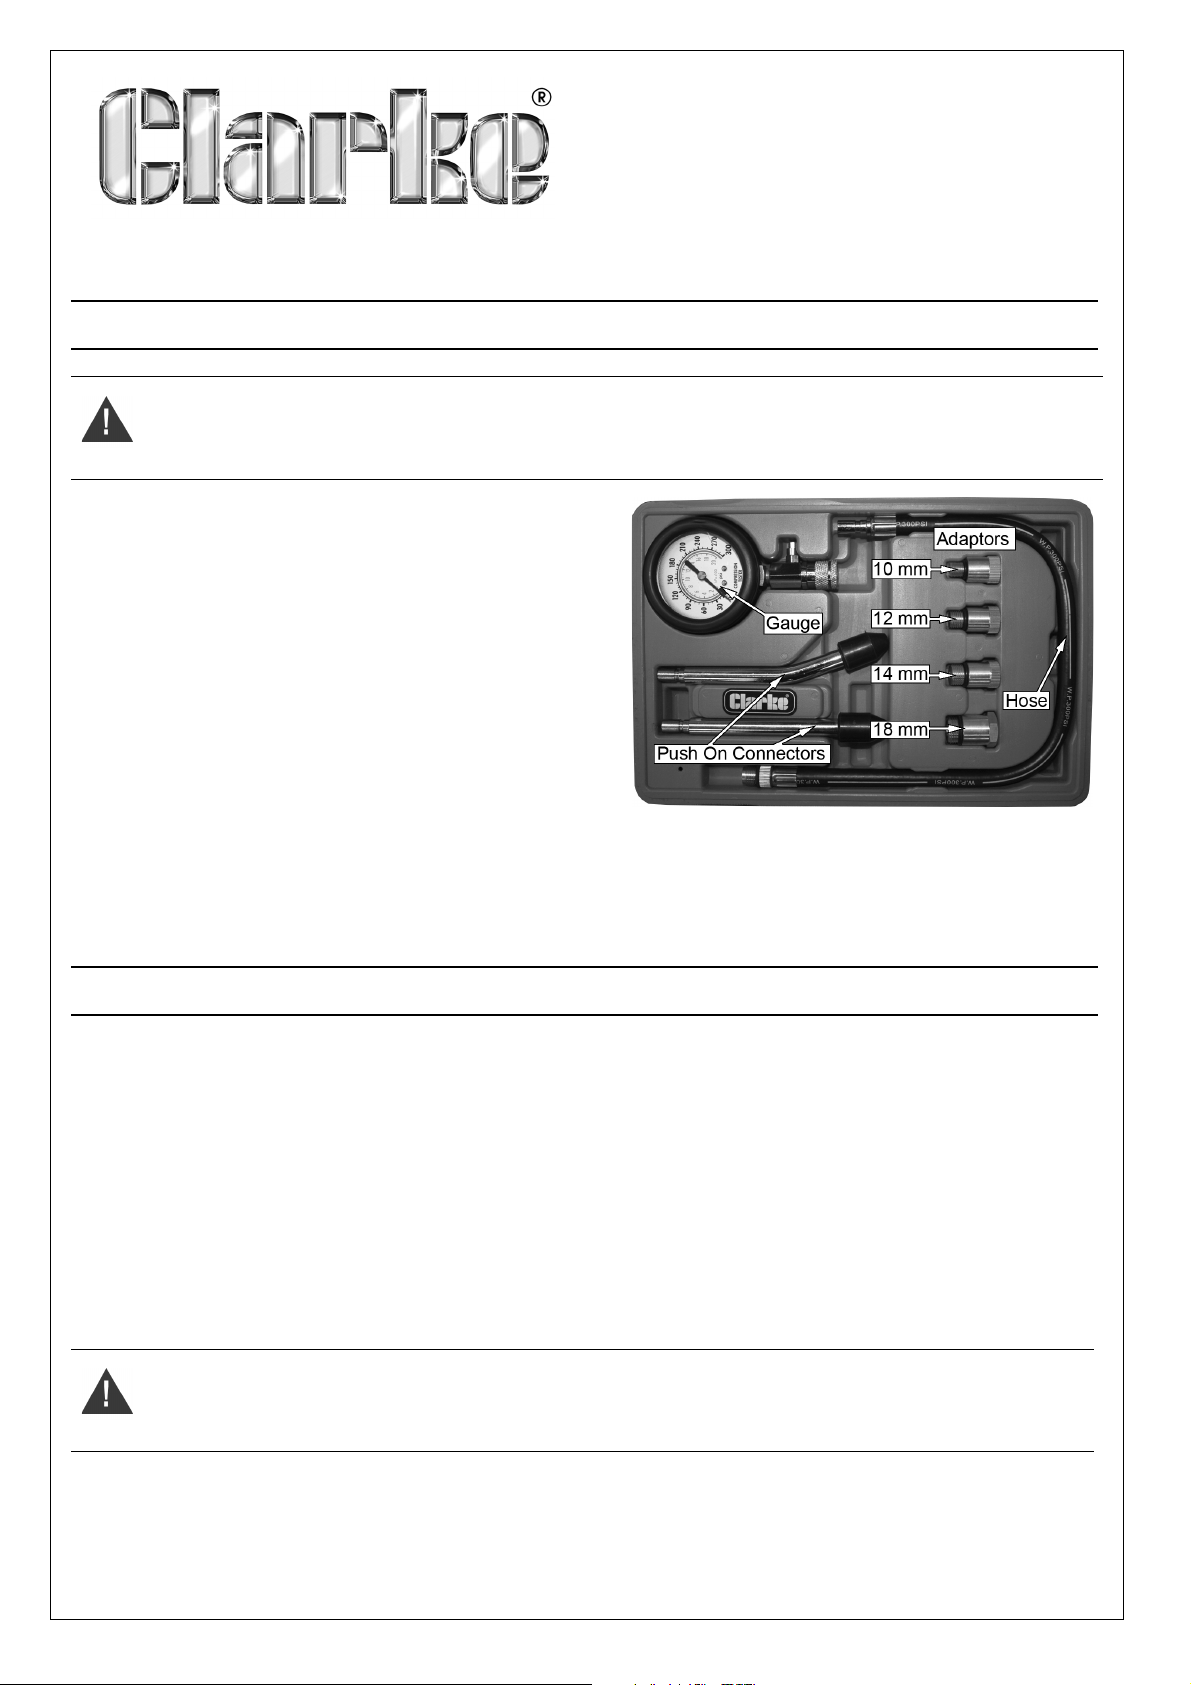
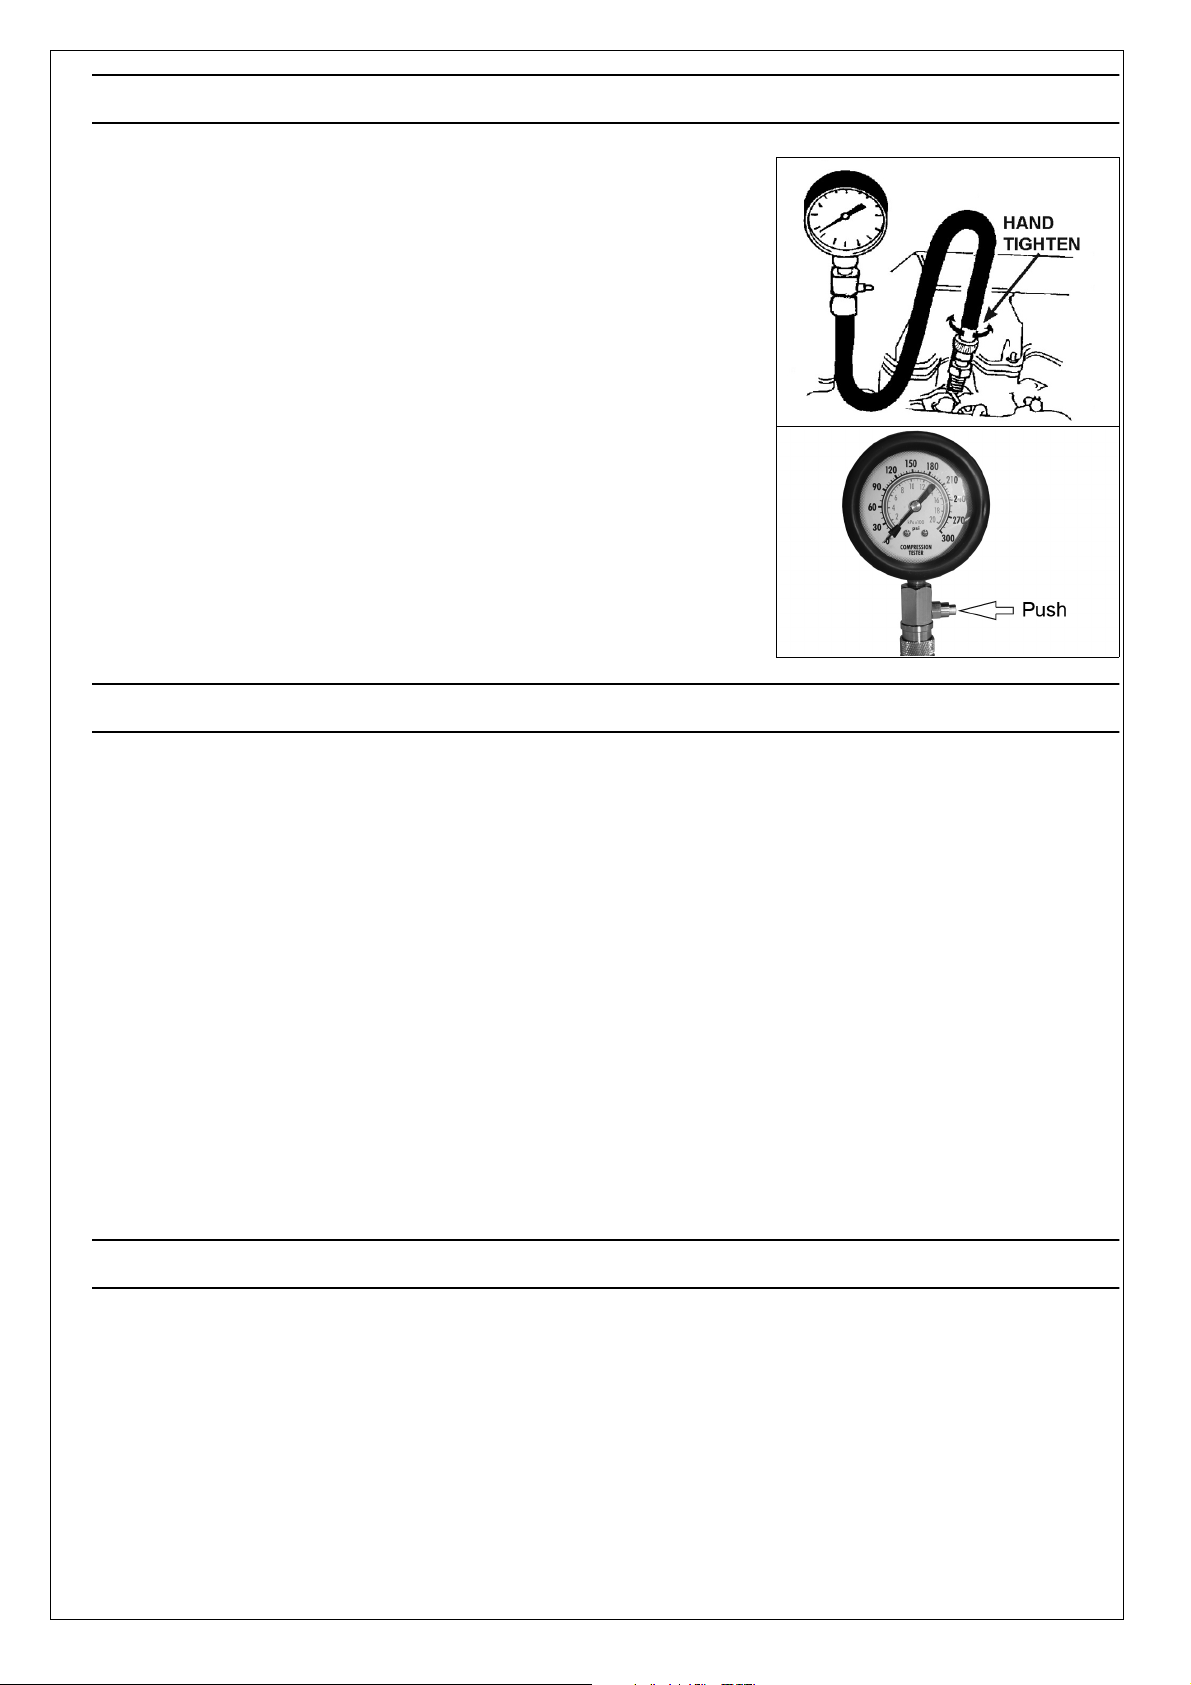
1. Select the spark plug adaptor required for the vehicle. Screw the
adaptor to the hose. Screw the spark plug adaptor and hose
assembly into a spark plug well. Hand tighten only. DO NOT use a
wrench.
2. Connect the snap coupling on the gauge to the hose. Ensure the
coupling is fully engaged.
3. Crank the engine for at least five compression strokes, or until the
pressure reading on the gauge stops rising.
4. Record the compression reading, then push the pressure release
valve to relieve the pressure.
5. Repeat the test and record the reading. Relieve the pressure and
remove the hose and adaptor from the spark plug well.
6. Repeat for the remainder of the cylinders.
7. You may also connect one of the Push On Connectors straight to
the gauge coupling to aid quick installation. Select either the
straight or angled stem for easiest access.
GAUGE READINGS
1. On a normal cylinder, the gauge needle should travel up the scale on each compression stroke until it
reaches peak value.
• All cylinders should indicate a pressure that is within the vehicle manufacturer’s specifications,
and the reading should not vary by more than 10% from cylinder to cylinder.
2. If the gauge needle does not travel up the scale or if it remains at the same value for several strokes
and then starts to climb, the problem could be a valve sticking.
3. If the compression reading is considerably higher than the vehicle manufacturer’s specification, the
problem may be carbon build-up in the cylinder. It may also indicate that either the piston, or the
cylinder head, has been modified.
4. If a reading on two adjacent cylinders is 20psi (or more) lower than the other cylinders, the problem
may be a cracked cylinder head or defective head gasket. Under these conditions, both coolant and
oil may be found in both cylinders.
5. If the readings are low, or vary widely between cylinders, pour a teaspoon of SAE 30 oil into each
cylinder and retest them. If the readings increase considerably, the problem may be poorly seated, or
worn piston rings. If the readings remain about the same, the valves and/or associated components
may be the problem. A burned or damaged piston may also cause the same results.
AFTER TESTING
1. Clean, re-gap and reinstall the spark plugs in the same order in which they were removed, or install
new spark plugs.
2. Reconnect each spark plug lead to the plug it was connected to prior to removal.
3. Return the throttle to the closed position.
IMPORTANT: After test, failure to return the throttle plates to the closed position before starting the
engine can cause serious damage to the engine.
4. Reconnect the ignition system.
Parts & Service: 020 8988 7400 / E-mail: [email protected] or [email protected]
 Loading...