

Page 1
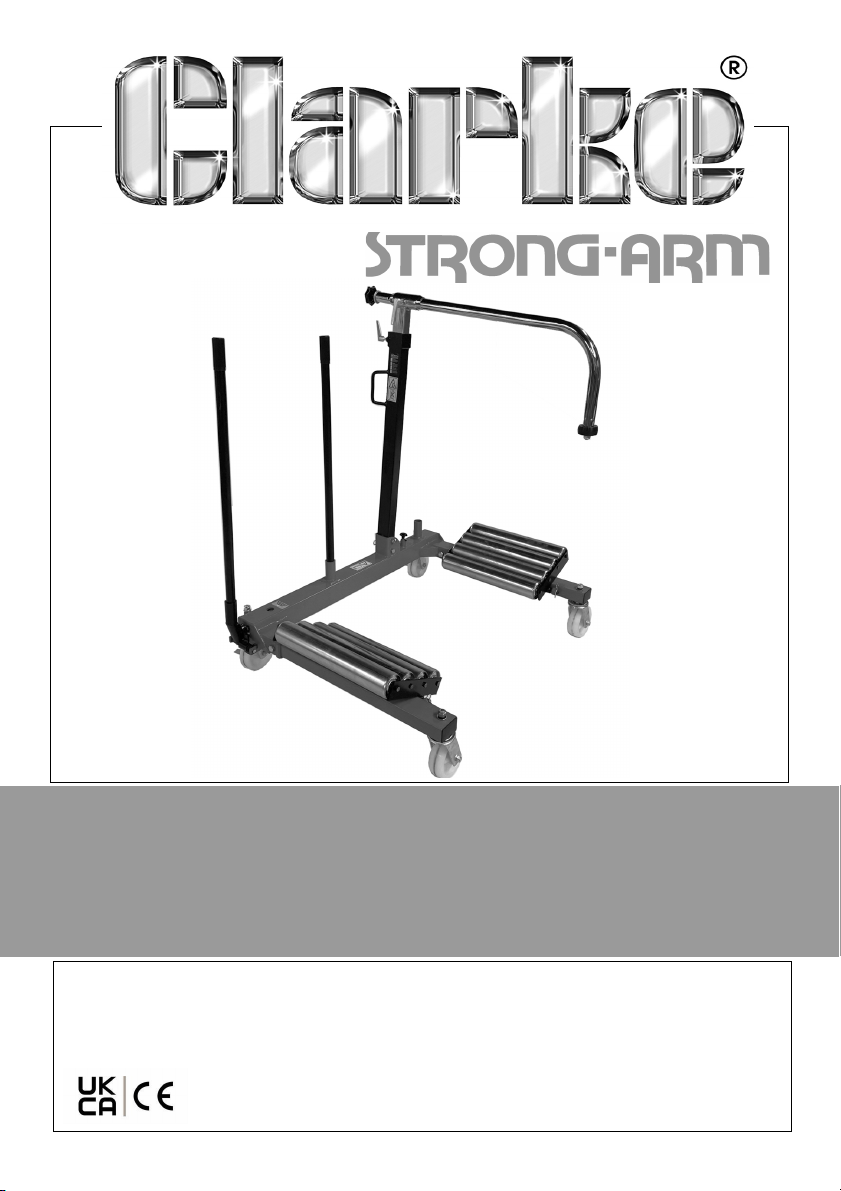
WHEEL DOLLY
MODEL NO: CHDDWD
PART NO: 7620100
OPERATION AND MAINTENANCE
INSTRUCTIONS
ORIGINAL INSTRUCTIONS GC-02/23
Page 2
INTRODUCTION
Thank you for purchasing this CLARKE product.
The CHDDWD Wheel Dolly is designed for effortless, fast and safe removal,
handling and fitting of agricultural, industrial and commercial wheels.
The lifting action is achieved using a two stage hydraulic pump mounted
inside the frame.
The wheel to be handled is lifted on two tables of rollers. one mounted on
each support beam. The hydraulic pump draws the beams together under
the wheel so that the wheel is lifted by the rollers and a safety lock then
applied. The wheel is balanced securely using the wheel support and
retaining arm before manoeuvring.
Please keep these instructions in a safe place for future reference.
PRODUCT FEATURES
• 2~speed hydraulic ram for quick and accurate adjustment
• Support handle to assist wIth manoeuvrability
• Adjustable retaining arm
• 4 heavy duty castor wheels to enable ease of movement once the
wheel is on the roller tables
• 2 roller tables each with rollers to enable rotation of the wheel for
alignment to the vehicle mounting studs
Before attempting to use this product, please read this manual thoroughly and
follow the instructions carefully. In doing so you will ensure the safety of yourself
and that of others around you and you can look forward to your purchase
giving you long and satisfactory service.
GUARANTEE
This product is guaranteed against faulty manufacture for a period of 12
months from the date of purchase. Please keep your receipt which will be
required as proof of purchase.
This guarantee is invalid if the product is found to have been abused or
tampered with in any way, or not used for the purpose for which it was
intended.
Faulty goods should be returned to their place of purchase, no product can
be returned to us without prior permission. This guarantee does not effect your
statutory rights.
2
Parts & Service: 020 8988 7400 / E-mail: [email protected] or [email protected]
Page 3
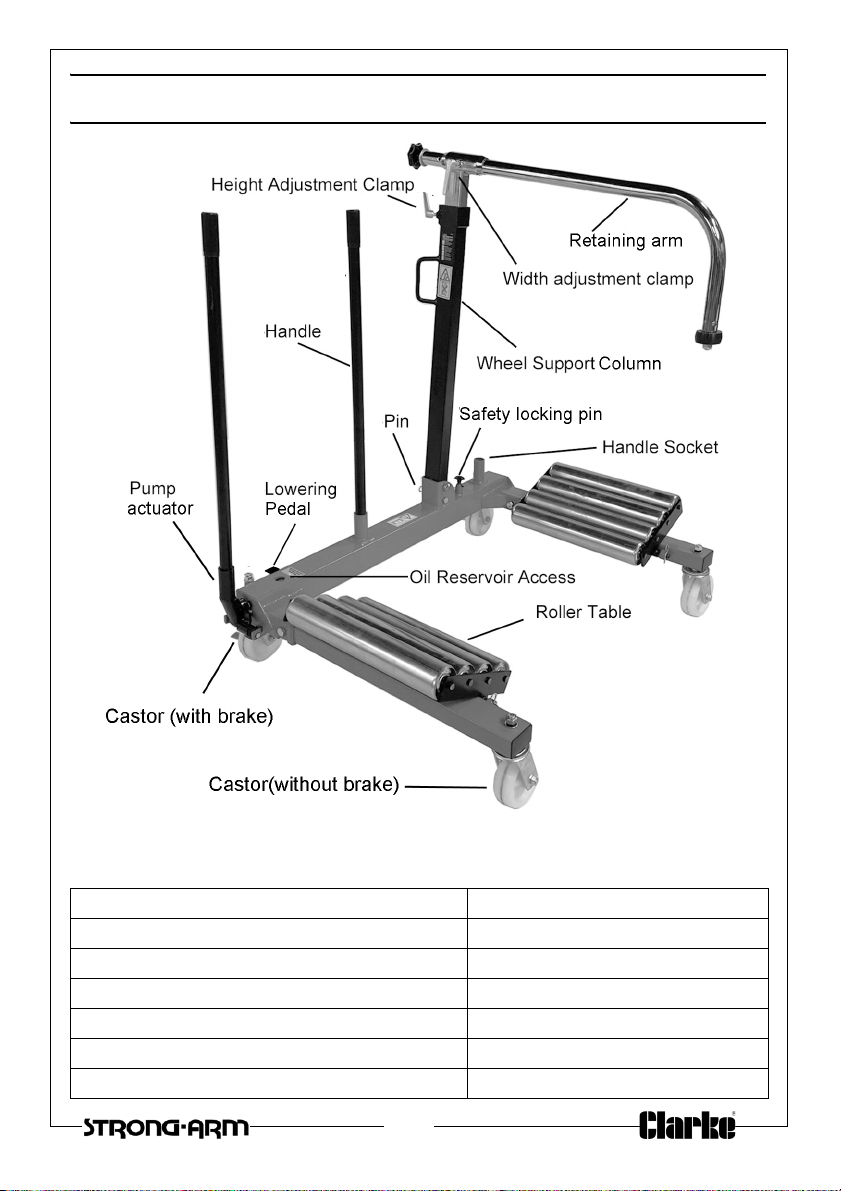
OVERVIEW
SPECIFICATIONS
Dimensions (L x W x H) Minimum Extension 1340 x 1160 x 940 mm
Dimensions (L x W x H) Maximum Extension 2080 x 1650 x 940 mm
Weight 118 kg
Maximum load capacity 1200 kg
Maximum tyre width 810 mm
Maximum wheel diameter 2000
Minimum wheel diameter 1000
Parts & Service: 020 8988 7400 / E-mail: [email protected] or [email protected]
3
Page 4
SAFETY PRECAUTIONS
GENERAL
1. ALWAYS read and ensure you fully understand the following precautions
and the hazards associated with this product. DO NOT allow anyone who
has not read these instructions to use this product.
2. Only use this product for its intended purpose.
3. NEVER carry out any modifications to this product. If experiencing difficulty
of any kind consult your local dealer.
4. ALWAYS use appropriate safety equipment such as protective footwear.
5. The operator must be in good health with good sight and hearing and the
physical ability to carry out all operations required.
6. The operator must understand how the product works, be responsible
when operating it and be aware of potential dangers.
WORK AREA
1. DO NOT use this product on inclined surfaces. It must only be used on level
ground. The dolly may move away as soon as it lifts the tyre from the
ground surface or the vehicle.
2. Only use the dolly on solid ground, preferably concrete. NEVER use it on
soft/unmade ground as the castors may sink in.
3. Make sure that non-essential persons keep a safe distance whilst the dolly is
in use.
4. ALWAYS use the dolly in a well lit work area.
5. Keep the work area clean and tidy and free from unrelated items.
6. Any possible spills of oil etc. most be immediately taken care of to avoid risk
of a slippery floor surface.
USE OF THE DOLLY
1. DO NOT overload the dolly beyond the maximum rated load.
2. DO NOT start the vehicle engine with the dolly in use.
3. NEVER use the dolly for wheels of greater diameter. width or weight than
those stated in the technical specification.
4. DO NOT attempt to push the dolly over obstacles when holding a wheel/
tyre. It should only be used on level and reasonably smooth surfaces.
5. ALWAYS engage the castor wheel brakes if the unit is left unattended.
4
Parts & Service: 020 8988 7400 / E-mail: [email protected] or [email protected]
Page 5
6. NEVER work underneath a vehicle supported only by this product. If
working under a vehicle, always use axle stands designed for the purpose.
7. The wheel support and retaining arm are only to be used to balance the
wheel, NOT to carry a load.
8. It is of great importance that the unit is secured by the locking pin on the
nearest hole before manoeuvrIng the unit. If this lock is not used, the dolly
could come apart while carrying the load and the wheel could fall out.
9. ALWAYS stand and operate the unit from behind the wheel support.
10. Take care that the load is evenly distributed.
11. DO NOT ride on the dolly or use it for transporting persons.
12. NEVER position hands/feet/parts of you body in or under the dolly.
13. Take care not to trap fingers in moving parts.
14. ALWAYS engage the castor brakes when the dolly is stationary.
SERVICING & REPAIRS
1. Check this product for damage before use and DO NOT use if damaged.
Any damage should be properly repaired or the defective part replaced. If
in doubt, DO NOT use.
2. ALWAYS use spare parts supplied by Clarke International. Using nonstandard parts could be extremely dangerous.
3. Ensure that this product is properly maintained at all times and that no
corrosion or other damage is allowed to weaken any part of it.
4. NEVER use this product if it has been subjected to excess load or shock. If
so, it should be removed from service immediately and fully inspected by
qualified personnel and passed as serviceable before being used again.
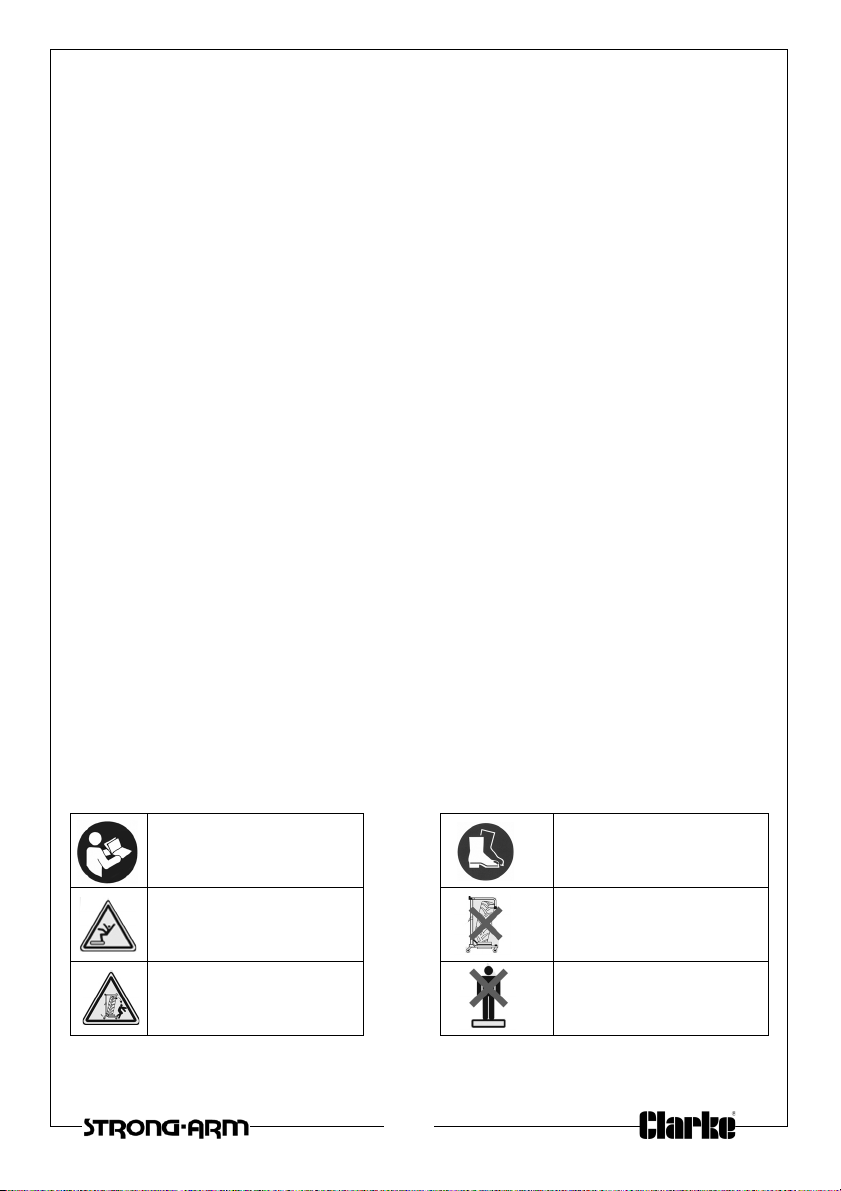
WARNING SYMBOLS APPEARING ON THE PRODUCT
Read instruction
manual before use
Do not stand or ride on
the dolly
Always operate the
dolly from the correct
side
5
Parts & Service: 020 8988 7400 / E-mail: [email protected] or [email protected]
Wear safety shoes for
foot protection
Always use the
retaining arm
Do not stand or ride on
the dolly
Page 6
ASSEMBLY
Unpack the components and remove packing materials. Before proceeding,
please check contents against the overview and parts list & diagram on
pages 12/13 and advise your dealer immediately if any parts are missing.
NOTE: Refer to the components diagram on pages 12/13 for parts
identity.
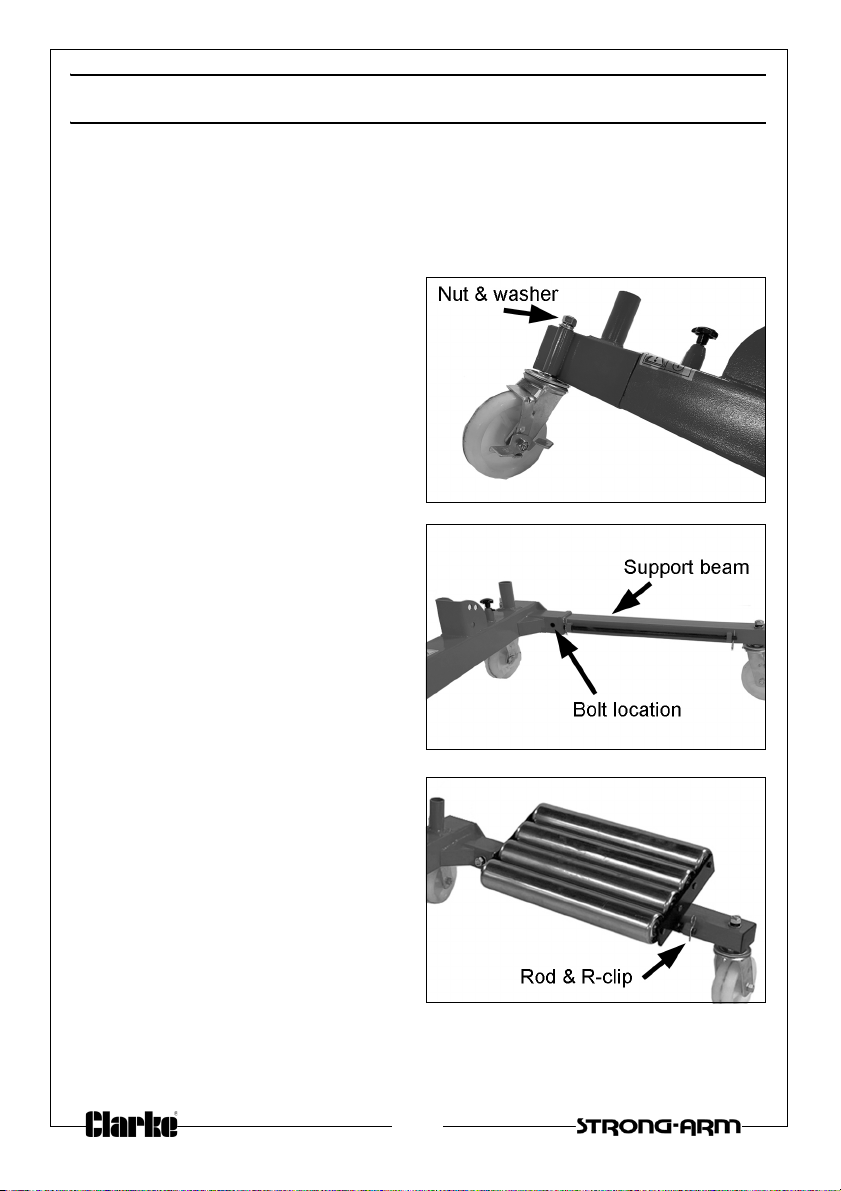
1. Attach the castor wheels with
brakes (21) to the outer frame (10)
and inner frame (9) using the flat
washers (6), spring washers (35)
and nuts (5).
2. Repeat with the other castors
without brakes (27), fitting them to
the left support beam (37) and
right support beam (2).
3. Bolt the left support beam (37) to
the corner assembly (7) using the
bolt (33), flat washer (6), spring
washer (35), nut (5).
4. Add the inner frame (9) to the
corner section (7).
5. Similarly, use the bolt (33), flat
washers (6). spring washer (35).
nut (5) to fIx the right support
beam (2) to the outer frame (10).
6. Use the mounting rod (25) and Rclips (31),to fix the Roller Tables
(23),to the left and right support
beams (2) and (37).
6
Parts & Service: 020 8988 7400 / E-mail: [email protected] or [email protected]
Page 7
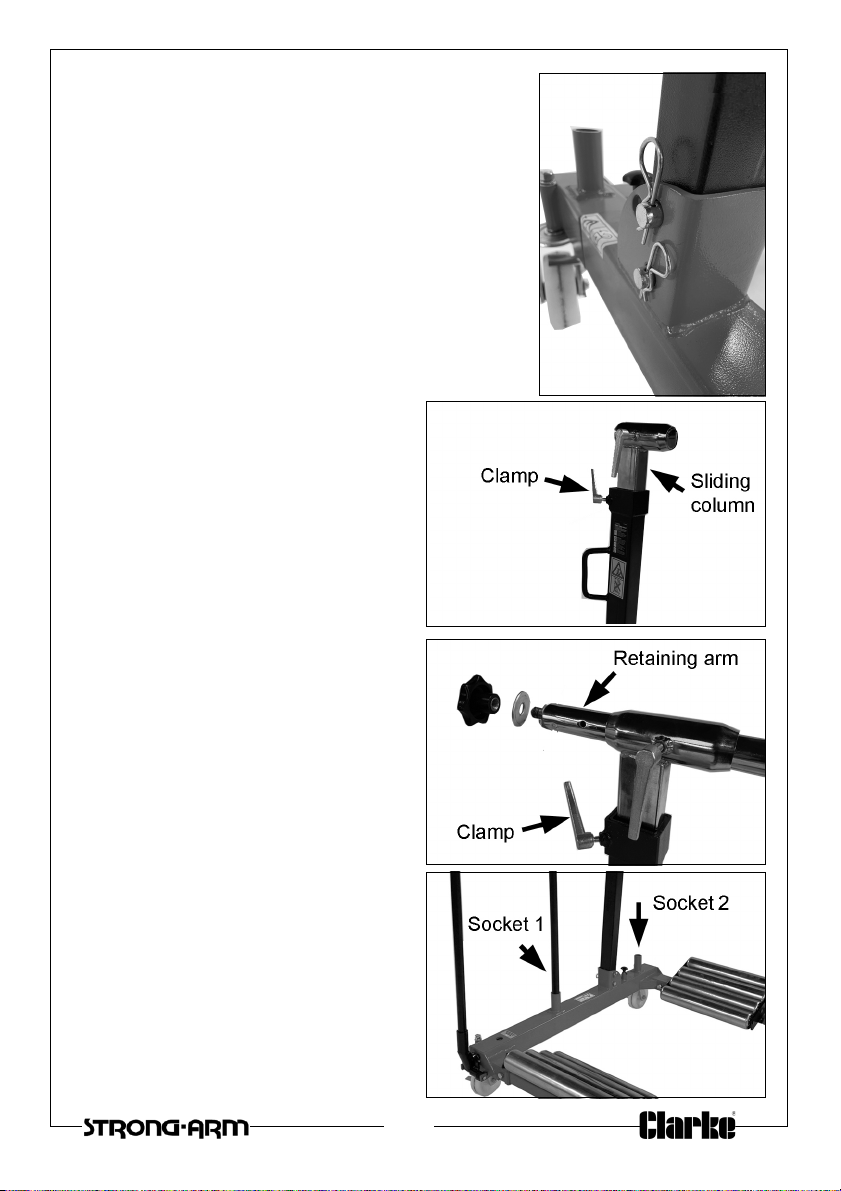
7. Use the pin (30), R-clip (31) to fix the lower
column (19) to the outer frame (10).
• 2 x pins & R-clips are used as shown.
8. Fit the sliding column (22) into the
lower column (19) and then
secure in your chosen position
with the height adjustment clamp
(18).
9. Fit the retaining arm (24) to the
sliding column (22) and secure
with the adjustment clamp (18).
10. Add the screw knob (29) and
large washer (32)
11. Fit the operating handles into their
sockets.
7
Parts & Service: 020 8988 7400 / E-mail: [email protected] or [email protected]
Page 8
OPERATION
WARNING: MAKE SURE THAT THE SAFETY PRECAUTIONS ARE STRICTLY
FOLLOWED. NO RESPONSIBILITY CAN BE ACCEPTED FOR INCORRECT USE
OF THE DOLLY.
Before use, visually inspect the dolly for distortion of parts, cracked welds,
damaged castors, oil leaks, or any other sign of damage. Should any of these
be apparent, have the dolly inspected and repaired by a qualified technician
before putting back into use.
During transit or storage, it is possible that an air pocket may have developed
within the hydraulic ram and the ram action may therefore appear to be
‘spongy’. In this case the ram may require purging by depressing the foot
pedal and pumping the handle.
LOADING THE DOLLY
1. Position the vehicle on a suitable horizontal floor, applying the brake. Jack
up the axle of the wheel to be changed with a suitable trolley jack so that
it is clear of the floor. Support the vehicle with axle stands at positions
advised in the vehicle handbook.
2. Expand the beams apart enough to position around the tyre.
3. Ensure the dolly is parallel to the sidewall of the tyre. Leave clearance
between the tyre wall and the column to allow rotating movement of the
tyre.
4. Adjust the wheel support column so that the retaining arm can be
positioned over the wheel.
5. Push the dolly under the wheel so that the roller tables are positioned either
side of the wheel and that the wheel rests against the wheel support
column.
6. Check that the lowering pedal is in its uppermost position then fit the
handle into the pump actuator and pump the arms together until the
wheel and roller tables cannot glide apart.
7. Pump the operating handle, depressing with smooth, even strokes until
both roller sets are in contact with the tyre tread.
8. Lower the retaining arm behind the wheel and adjust until the wheel is
vertical and can be moved approx 5cm sideways. This will allow the wheel
to be rotated when relocating on the wheel studs. Lock the retaining arm
in position by tightening the adjustment clamps.
8
Parts & Service: 020 8988 7400 / E-mail: [email protected] or [email protected]
Page 9
NOTE: The angle of the wheel supports can be adjusted by the removal
of locking pin to accommodate different wheel configurations.
WARNING! WHEEL SUPPORT COLUMN AND RETAINING ARM ARE ONLY USED TO
BALANCE THE WHEEL, NOT TO CARRY A LOAD!
9. Lift the wheel by pumping the actuator. When the wheel is positioned on
the dolly the arms must be secured in the lifting position with the width
locking pin.
IMPORTANT: Ensure that locking pin is secured through [he nearest locating
hole on the inner frame member. This prevents unintentional lowering of the
wheel white it is being handled.
10. With the wheel nuts removed, the wheel can now be safely carried away
from the vehicle on the dolly.
11. Put the handle into either socket for storage and use as a handle to move
the dolly around.
12. Always use the brakes on each of the front swivelling castors to prevent the
dolly moving unintentionally.
UNLOADING THE DOLLY
When the wheel Is located on the wheel studs of the vehicle and secured with
the wheel nuts or the wheel has been moved to a place for storage, it can be
released from the dolly.
1. Loosen the support and retaining arms by releasing the adjustment
clamps.
2. Lift and release the safety locking pin.
3. Press down on the lowering release pedal.
4. The beams should move apart under the weight of the wheel and the dolly
may be removed when the rollers are no longer bearing any weight.
5. Adjust the retaining arm so that it does not catch on the top of the wheel
before manoeuvring the dolly clear of the wheel.
Parts & Service: 020 8988 7400 / E-mail: [email protected] or [email protected]
9
Page 10
CARE AND MAINTENANCE
GENERAL
If the dolly has been stored for long periods, check for oil leaks before use and
top up via the oil refill plug on the oil reservoir if necessary.
• Oil can be topped up using Clarke Hydraulic Oil, part no: 3050830 for
1 litre, part no. 3050835 for 5 litres).
REFILLING THE HYDRAULIC OIL
If topping up the hydraulic oil reservoir, drive the dolly arms apart until they are
at theIr widest possible position. Remove the refill plug and top up the oil.
• Refilling is best carried out using a measuring jug with a flexible spout
or an oil can.
• The oil used should be equivalent to hydraulic oil quality ISO VG I5.
• When refilling the oil reservoir, the unit must be pumped fully apart
before the refill plug is removed otherwise there Is a risk of excess
pressure in the reservoir which can cause oil to squirt out when the
refill screw is loosened.
STORAGE
Store in a dry, child-proof place with the ram fully retracted.
ENVIRONMENTAL PROTECTION
One of the most damaging sources of environmental pollution is oil products.
NEVER throw away used hydraulic oil with domestic refuse or flush it down a
sink or drain. Collect any hydraulic oil in a leak proof container and take it to
your local waste disposal site.
If disposing of this product or any damaged components, do not dispose of
with general waste. This product contains valuable raw materials and should
be taken to your local civic amenity site for recycling of metal products.
10
Parts & Service: 020 8988 7400 / E-mail: [email protected] or [email protected]
Page 11
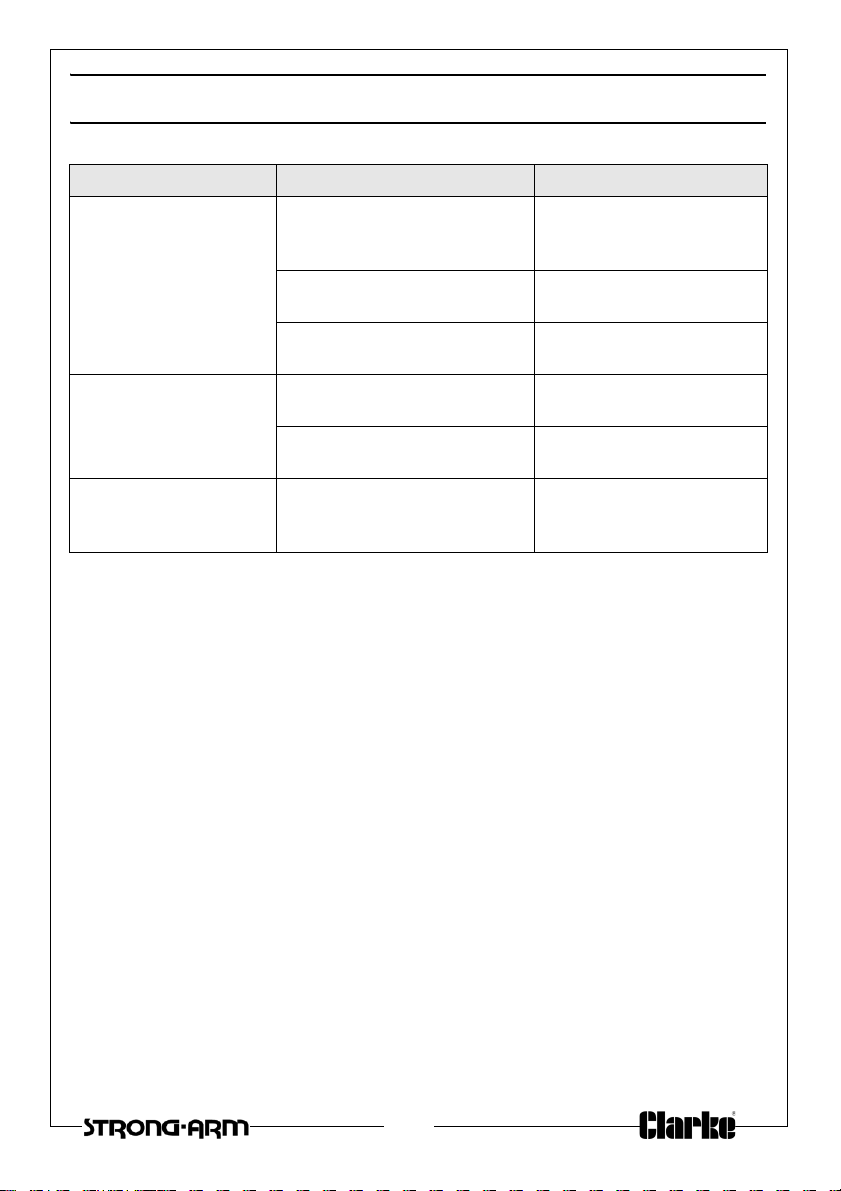
TROUBLESHOOTING
Problem Reason Solution
Dolly will not raise
wheel off the ground.
Dolly will not hold load
and beams move
slowly apart.
Dolly does not lower
naturally when valve is
opened.
Low oil level Check for leakage and
top up if required via the
oil level plug.
Air in cylinder Pump pedal to purge air
from ram.
O-ring worn. Return to your dealer for
overhaul.
Release valve not tightly
closed.
Release valve not seating. Return to your Clarke
Release valve stuck open Return to your Clarke
Speak to the Clarke
Service Department
dealer for overhaul.
dealer for overhaul.
Parts & Service: 020 8988 7400 / E-mail: [email protected] or [email protected]
11
Page 12
Page 13
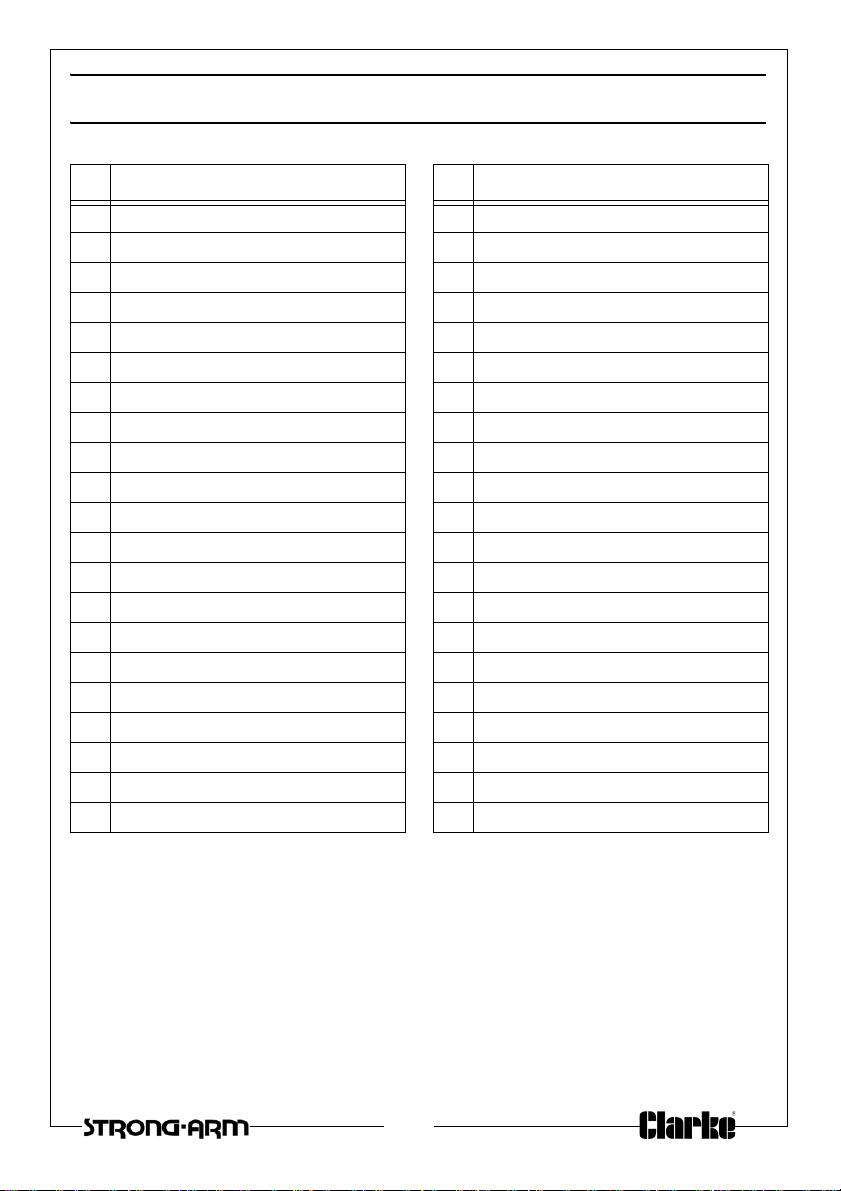
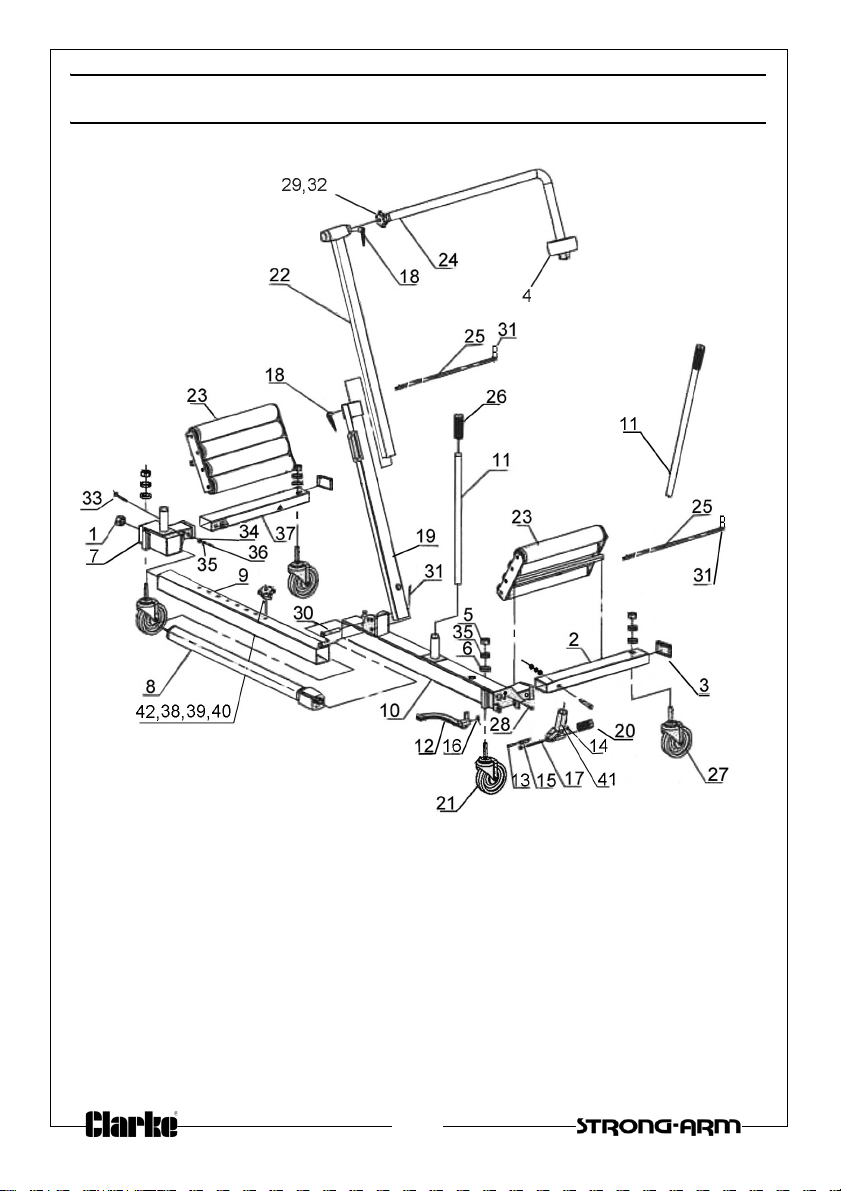
COMPONENT PARTS
NO DESCRIPTION NO DESCRIPTION
1 Nut 22 Sliding column
2 Right support beam 23 Roller table assembly
3 Rectangular end plug 24 Retaining arm
4 Support arm roller 25 Roller table mounting rod
5Nut M16 26Hand grip
6 Flat washer 16 27 Castor wheel assy without brake
7 Frame corner section 28 Hex socket screw
8 Hydraulic ram assembly 29 Hand tensioning knob
9 Inner frame 30 Pin
10 Outer frame 31 R-Clip
11 Operating handle 32 Washer
12 Release pedal 33 Bolt M16 x110
13 Hex c/s screw M8x55 34 Flat washer 16
14 Locknut M8 35 Spring washer 16
15 Bush 36 Nut M16
16 Circlip 14 37 Left support beam
17 Hinge spindle 38 Knob
18 Adjustment clamp 39 Spring
19 Lower Column 40 Roll pin
20 Torsion spring 41 Actuating yoke
21 Castor wheel assy with brake 42 Safety locking pin
Parts & Service: 020 8988 7400 / E-mail: [email protected] or [email protected]
13
Page 14
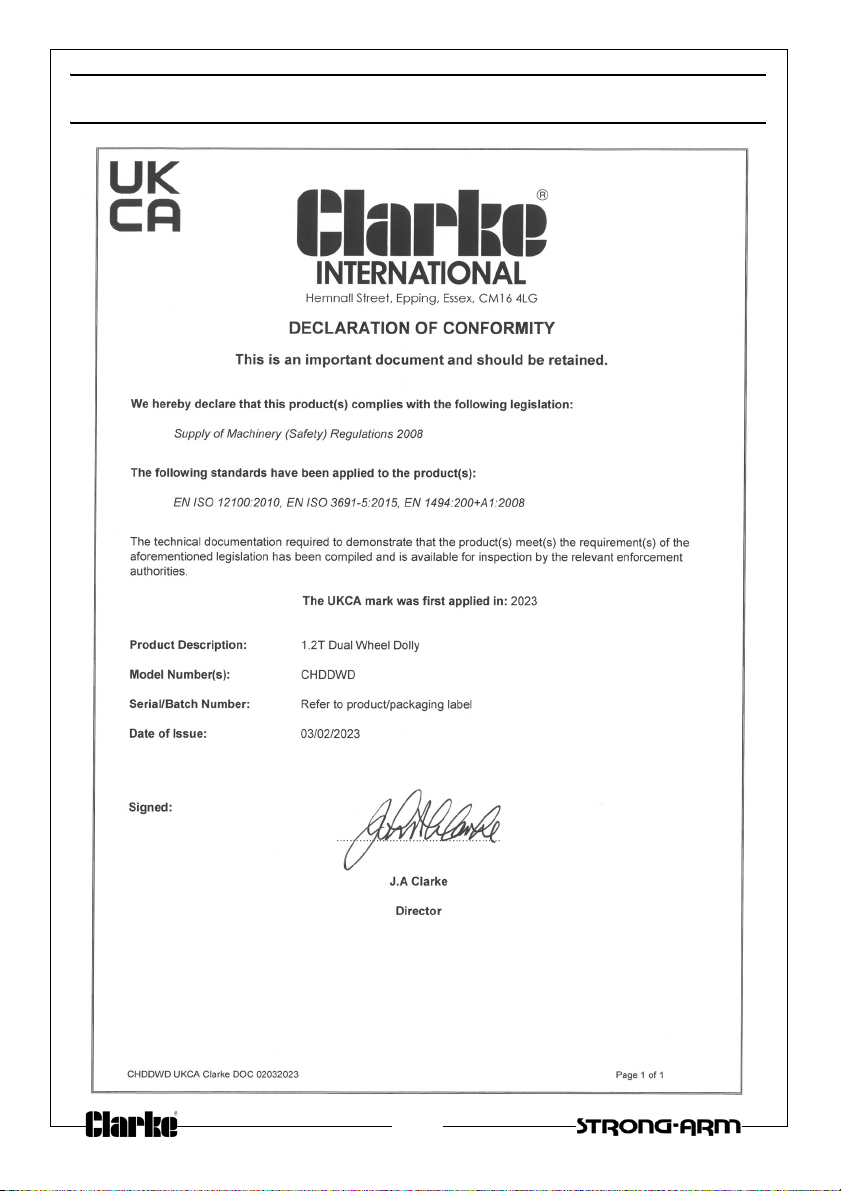
DECLARATION OF CONFORMITY-UK
14
Parts & Service: 020 8988 7400 / E-mail: [email protected] or [email protected]
Page 15
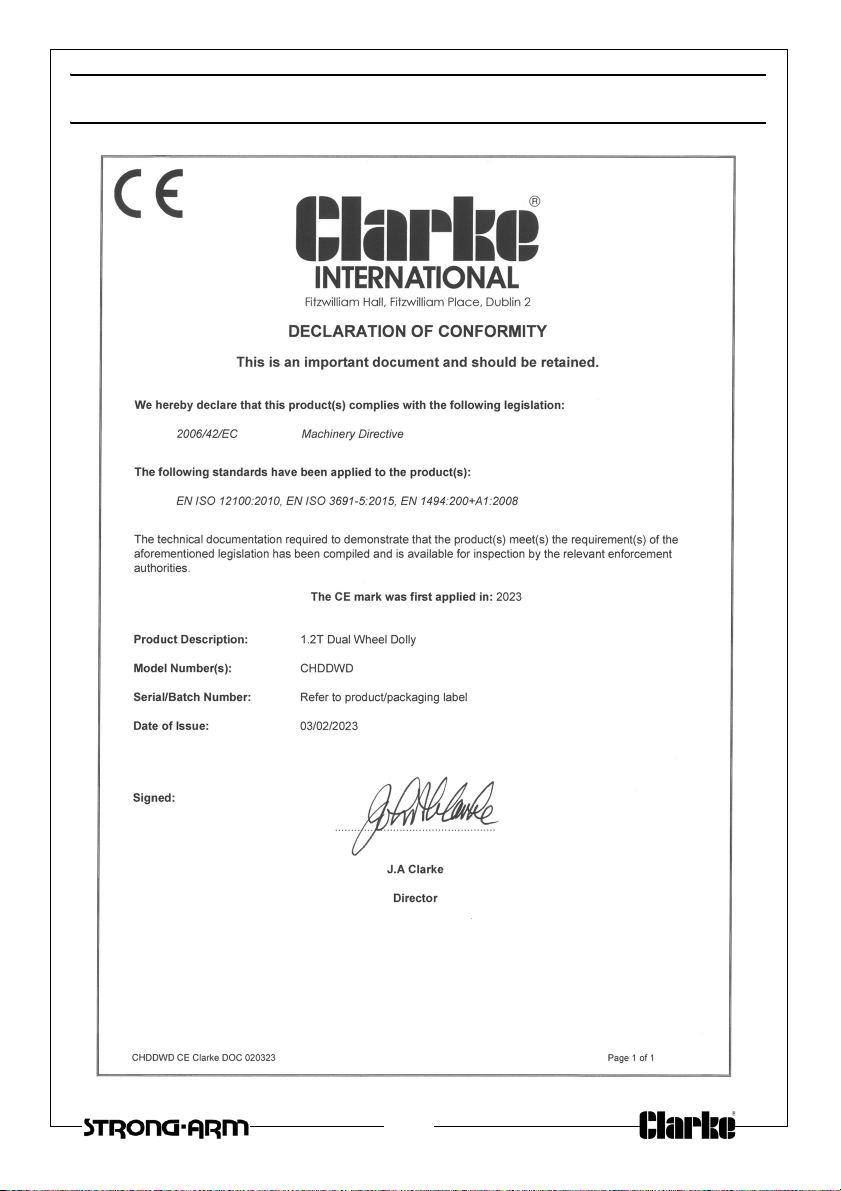
DECLARATION OF CONFORMITY - CE
Parts & Service: 020 8988 7400 / E-mail: [email protected] or [email protected]
15
Page 16

 Loading...