

Page 1

TRACTOR JACK
MODEL NO: CFT5
PART NO: 7624005
OPERATION & MAINTENANCE
INSTRUCTIONS
GC0915
Page 2
INTRODUCTION
Thank you for purchasing this CLARKE Tractor Jack.
Before attempting to operate the product, it is essential that you read this
manual thoroughly and carefully follow all instructions given. In doing so you
will ensure the safety of yourself and that of others around you, and you can
also look forward to the press giving you long and satisfactory service.
GUARANTEE
This CLARKE product is guaranteed against faulty manufacture for a period of
12 months from the date of purchase. Please keep your receipt as proof of
purchase.
This guarantee is invalid if the product is found to have been abused or
tampered with in any way, or not used for the purpose for which it was
intended.
Faulty goods should be returned to their place of purchase, no product can
be returned to us without prior permission.
This guarantee does not effect your statutory rights.
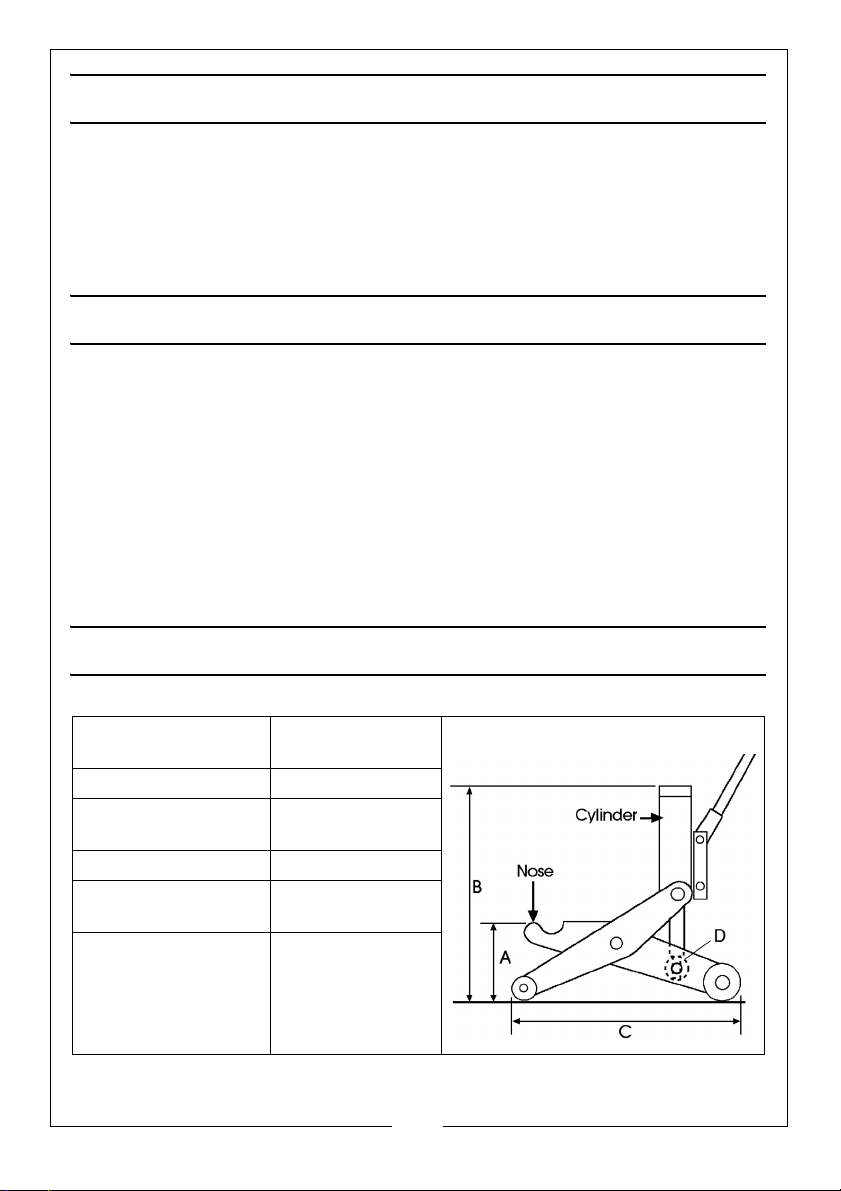
TECHNICAL SPECIFICATIONS
Working Height A Min 63 mm
Max 450 mm
Maximum Load A 4000 kg
Working Height B Min 407 mm
Max 720 mm
Maximum Load B 5000 kg
Overall Length (C
Max)
Weight 41 kg (18.5 lbs)
Parts & Service: 020 8988 7400 / E-mail: [email protected] or [email protected]
676 mm
FIG 1
2
Page 3

SAFETY PRECAUTIONS
1. Do not exceed the rated capacity of the jack.
2. Do not allow personnel to operate the jack unless they have read these
safety precautions.
3. Ensure that the jack is in good working order. Have any damaged parts
repaired or replaced immediately. Use genuine Clarke parts only. The use
of unauthorised parts may be dangerous and will invalidate the
guarantee.
4. Do not operate the jack if damaged.
5. Use the jack in a suitable, well lit work area.
6. Keep the work area clean and tidy and free from unrelated items.
7. Use the jack on level and solid ground, preferably concrete. Avoid soft/
unmade ground as the jack may sink in.
8. Ensure the vehicle is securely and rigidly supported.
9. Ensure all non-essential persons keep a safe distance whilst the jack is in
use.
10. Ensure there are no personnel or obstructions under the vehicle before
lowering.
11. Do not stand or work under the load until it secured by suitable means.
12. Ensure when lifting, that the jack and all parts of the load can be clearly
seen.
13. Never climb on, or attempt to ride on the jack.
14. Take care not to trap fingers in the moving parts of the jack.
15. Lower the load as much as possible before moving the jack. Do not
transport loads in an elevated position.
16. Ensure that you can see the saddle and jacking point throughout the
jacking operation in case there is any relative movement.
17. Never tamper with the product or modify it in any way, as this could prove
to be dangerous and will invalidate the guarantee. Only use the product
for the purpose for which it is intended.
18. Use appropriate safety equipment, such as protective footwear, when
using this jack.
19. When replacing parts, use only those supplied by Clarke International.
3
Parts & Service: 020 8988 7400 / E-mail: [email protected] or [email protected]
Page 4

20. Ensure that the jack is properly maintained and lubricated at all times, and
that no corrosion is allowed to weaken it.
21. If the jack has been subjected to an abnormal load or shock, it should be
removed from service immediately and fully inspected by qualified
personnel, and passed as serviceable, before being used again.
22. When not in use, store the jack, fully lowered, in a safe, dry, childproof area.
IMPORTANT: ALWAYS ensure that the centre of gravity of the load, is centred
about the head section, before taking the full weight.
LIFTING OPERATIONS AND LIFTING EQUIPMENT REGULATIONS 1998
This jack, depending on use, may fall within the scope of LOLER. It is the
owner’s responsibility to determine whether or not it does and, if so, to comply
with any applicable requirements in LOLER, for having the jack thoroughly
examined.
ENVIRONMENTAL PROTECTION
1. Take care to ensure that if hydraulic oil is spilt that it is cleaned away using
sand, or treated with absorbent granules designed for the purpose.
2. Always make every effort to contain any spillage and prevent ingress into
the local water course.
UNPACKING & ASSEMBLY
Unpack the components on a clean flat area of hard standing, and ensure
that all parts are present according to the packing list, as follows:
Visually inspect all components to ensure that no damage was suffered in
transit. Any deficiencies should be reported to your CLARKE dealer
immediately.
IMPORTANT: Due to the weight of the components, we recommend that you
get assistance during assembly.
ASSEMBLY
As supplied, the ram is extended from the cylinder body with the end of the
ram loose., i.e. not connected to the framework. The correct method of
assembly is as follows:
1. Lay the jack on its side, then pull the legs together, in a scissor action, to
allow access to the fixing point for the ram end. The cylinder will pivot on its
4
Parts & Service: 020 8988 7400 / E-mail: [email protected] or [email protected]
Page 5
mounting, sufficient to allow the ram to be located at ‘D’, Fig. 1. The
securing bolt may then be tightened.
2. Stand the jack upright and fit the handle as follows:
3. Unscrew the bolt, on the side of the jack handle housing, sufficient for the
grooved end of the handle to be inserted fully, and for the drive, in the end
of the handle, to engage with the tapered square end of the valve
operating connecting rod.
4. Retighten the bolt fully to secure the handle.
5. Attach the handle extension and secure with the bolt provided.
TO RAISE A LOAD
WARNING: BEFORE LIFTING, ENSURE THE SAFETY PRECAUTIONS ARE
STRICTLY FOLLOWED. NO RESPONSIBILITY CAN BE ACCEPTED FOR
INCORRECT USE OF THE JACK
1. Ensure the load is chocked and stable, and on firm level ground, before
manoeuvring the jack so that the groove in the nose or the top of the
cylinder, whichever is to be used, is directly beneath the lifting point.
2. Turn the handle fully clockwise, then pump the handle to raise the jack, so
that contact is made with the lifting point.
3. Make one final check to ensure that there are no obstacles to the lift, and
that all personnel are well clear before continuing to pump the handle and
lift the load.
4. NEVER allow any individual to get beneath the load until it is firmly chocked
or supported on axle stands or similar supports.
TO LOWER THE LOAD
1. With the axle stands/supports removed, check to ensure that there are no
personnel in the immediate vicinity before VERY SLOWLY turning the lifting
handle anticlockwise and allowing the jack to lower the load.
WARNING: PLEASE NOTE THAT THE SCISSOR ACTION OF THE JACK WILL
CAUSE THE JACK TO MOVE SLIGHTLY AS IT IS RAISED AND LOWERED. IT IS
MOST IMPORTANT THAT THIS MOVEMENT IS NOT RESTRICTED IN ANY WAY.
ENSURE THE GROUND IN THE IMMEDIATE VICINITY OF THE JACK IS FREE
FROM DEBRIS.
5
Parts & Service: 020 8988 7400 / E-mail: [email protected] or [email protected]
Page 6

MAINTENANCE
1. Always visually inspect the jack before use, to ensure that all parts are
correctly located and secure.
2. Check for cracks, deformation or other signs of damage or worn parts and
check the castors for damage. Do not use the jack unless it is perfectly
serviceable.
3. Remove any rust or corrosion and repaint for protection.
4. Ensure that decals and warning notices are in place and legible.
5. Do not leave the jack in the open, exposed to the weather.
6. Inspect for distortion of the column and locking pins, and security of all nuts
and bolts.
7. Keep all parts of the jack well lubricated to prevent any possibility of
corrosion.
8. Store in a dry place where it cannot be attacked by the elements.
PARTS LIST
The following user serviceable parts are available from your Clarke dealer or
Clarke International Spares department.
1. Handle
2. Handle Extension
3. Front Wheel
4. Rear Wheel
For overhaul of the hydraulic sub-assembly, contact your Clarke dealer.
6
Parts & Service: 020 8988 7400 / E-mail: [email protected] or [email protected]
Page 7
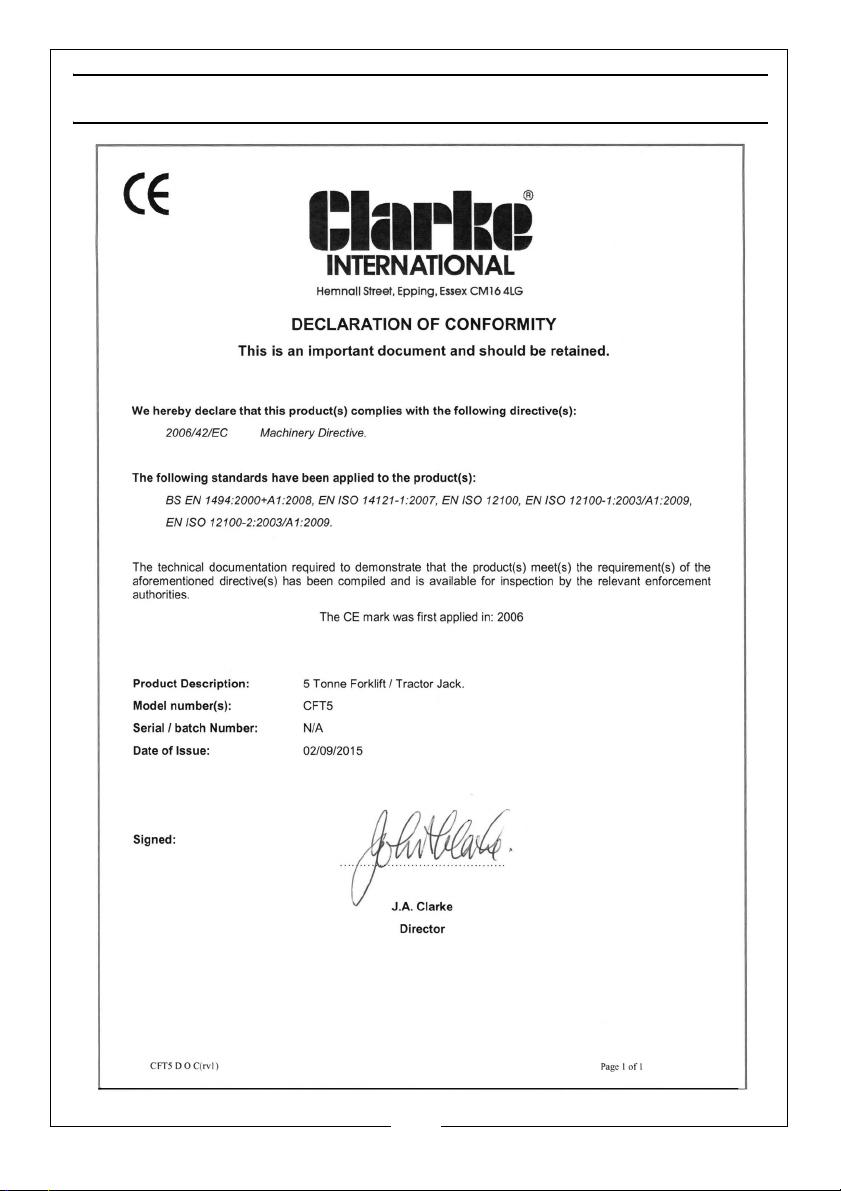
DECLARATION OF CONFORMITY
7
Parts & Service: 020 8988 7400 / E-mail: [email protected] or [email protected]
Page 8

 Loading...