

Page 1
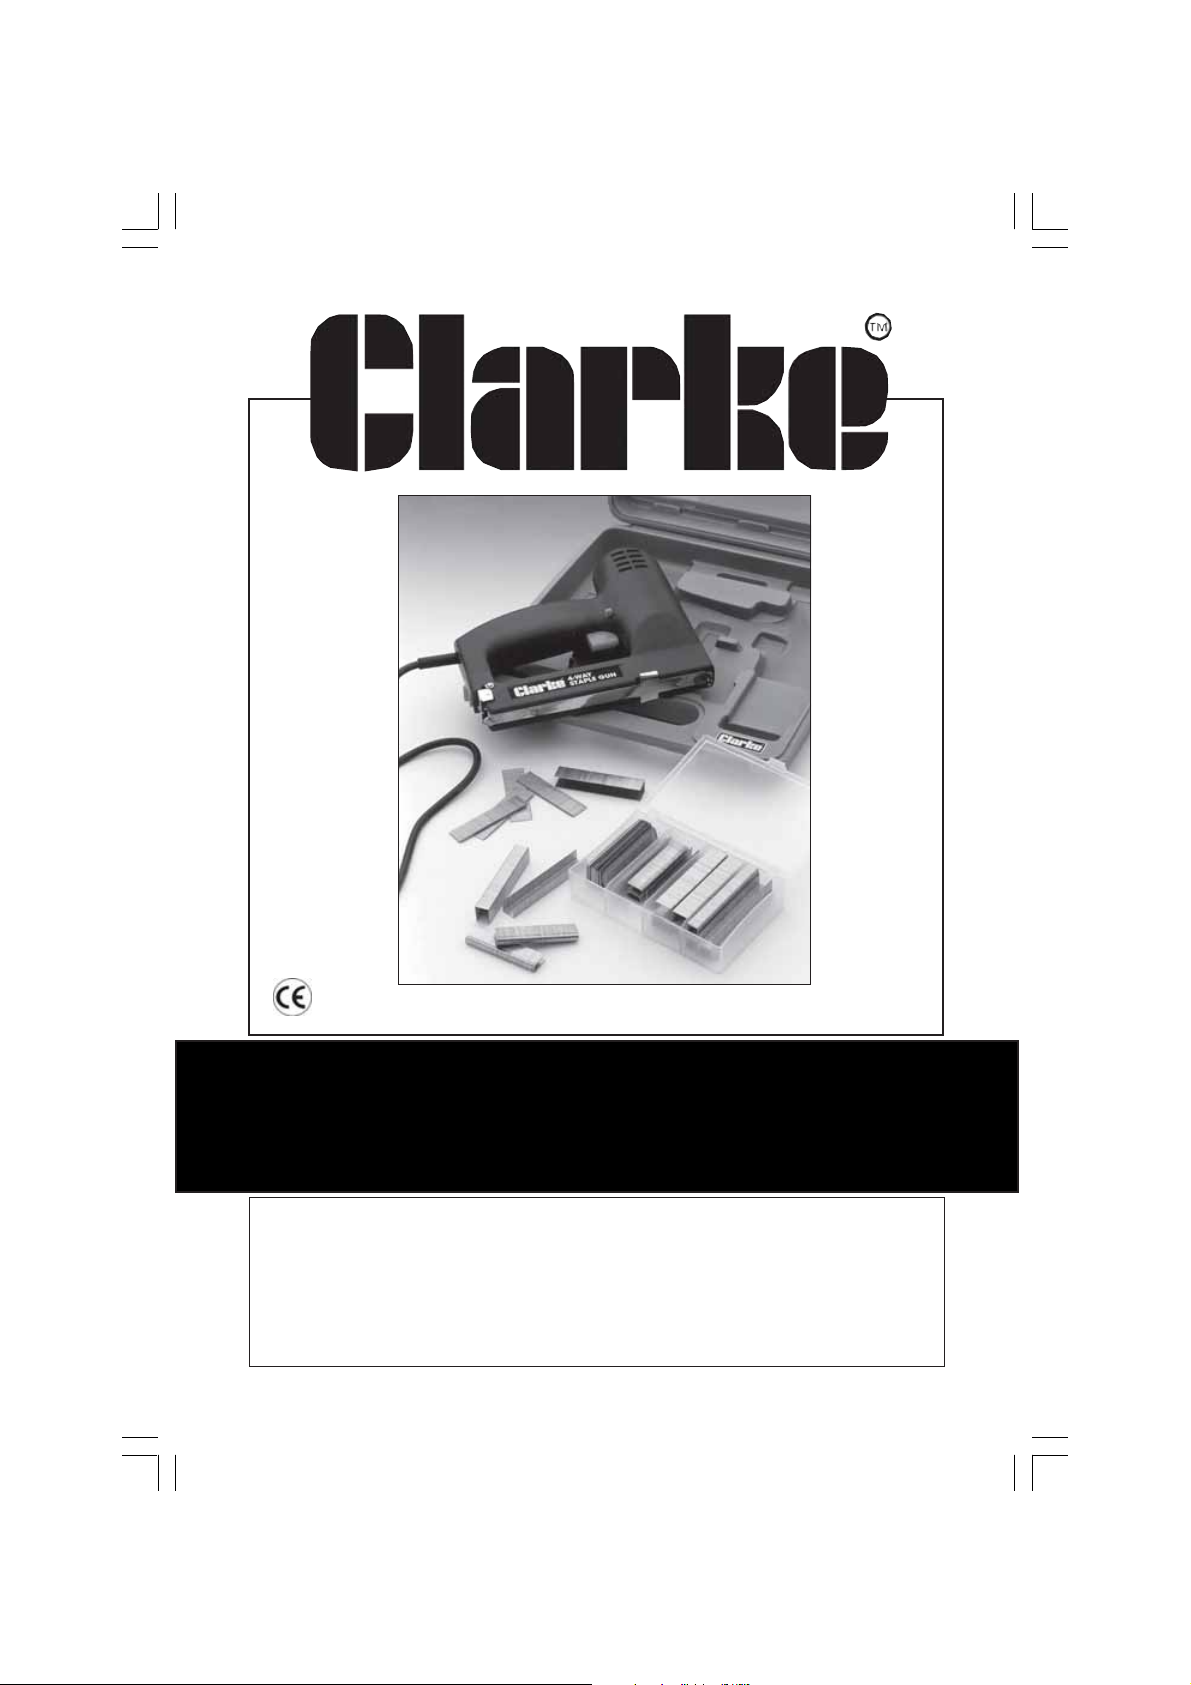
Electric Staple Gun
Electric Staple Gun
Model CESG4
Part Number 3110290
Operating & Maintenance
Instructions
1200
Page 2

Specifications
Model No ................................................................. CESG4
Part No .....................................................................
Power Input .............................................................. 230V, 50Hz, 1Ph
Watts......................................................................... 750
Fuse Rating ............................................................... 13Amps
Machine capability ................................................. 20 Shots Per Min
Staple Capacity ............... Square ......................... 10,12,14 mm
Round .......................... 14 mm
Nail Capacity ‘T’ Nail ......................... 10,12,14,16 mm
Pin Nail ......................... 16 mm
Weight ...................................................................... 1kg (2kg Boxed)
3110290
Restrictions of Use
This Staple Gun is suitable for use on materials such as:
• Softwood, Hardwood • MDF, Plywood • Hardboard • Fibreboard
• Corkboard • Flexible Plastics • Leather, Fabrics • PVC, Polythene sheet
• Foam Rubber
This Staple Gun is NOT suitable for use materials such as:
• Hard Laminates • Brittle Plastics • Metals (other than light foils)
Parts and Service Contacts
For Spare Parts and Servicing, please contact your local dealer, or
Clarke International on one of the following Numbers:
Parts and Service Tel: 020 89887400
Parts and Service Fax: 020 85583622
or email as follows:
Parts: [email protected]
Service: [email protected]
-2 -
Page 3

Thank you for purchasing this Clarke Electric Staple Gun which is designed to fasten
materials using standard Staples, ‘T’ Head Nails or Pin Nails.
The unit is intended for DIY use, on materials such as wood, hardboard, Fibre Board,
MDF etc.
Before attempting to use your staple gun please read this instruction manual
thoroughly and follow all directions carefully. This is for your own safety and that of
others around you, and to help you achieve long and trouble free use.
Guarantee
This product is guaranteed against faults in manufacture for 12 months from
purchase date. Keep your receipt as proof of purchase. This guarantee is invalid if
the product has been abused or tampered with in any way, or not used for the
purpose for which it is intended. The reason for return must be clearly stated. This
guarantee does not affect your statutory rights.
For Your Own Safety
WARNING! Read these safety instructions in conjunction with the operating
instructions, before using the equipment.
• Always wear suitable eye protection, manufactured to the latest European
Safety Standards, when firing the Staple Gun. Eyeglasses are NOT Safety glasses
• Always Disconnect the unit from the power supply when loading staples or `
nails into the gun.
• Always Keep your hands and fingers clear of the staple channel when using.
• Always Wear protective hair covering to contain long hair.
• Always avoid wearing clothing that could get caught by the fasteners,
( i.e loose sleeves or jewellery).
• Never leave the unit connected to the power supply whilst unattended. Turn
power OFF while not in use.
• Never attempt to repair or modify the Staple Gun. If the Staple Gun becomes
faulty contact your local dealer or Clarke Service (see Parts and Servicing).
• Use in a suitable well lit area on a suitable sturdy work surface avoiding areas
that are excessively damp and away from hazardous materials.
• Do not attempt to staple at the edge of a workpiece, the edge could fail,
causing a nail or staple to fly, the consequences of which could be extremely
serious.
• Never point the stapler at anyone.
• Always hold the stapler at right angles to the workpiece...Never at an angle.
Keep Children well away. All visitors should be kept a safe distance from
the work area, especially whilst operating unit.
- 3 -
Page 4

Electrical Connections
Connect the mains lead to a standard 230V (50Hz) electrical supply through an
approved 13 Amp BS1363 plug, or a suitably fused isolator switch.
WARNING: This appliance is DOUBLE INSULATED
IMPORTANT:
following code:
As the colours of the flexible cord of this appliance may not correspond with the
coloured markings identifying terminals in your plug proceed as follows:
• Connect BROWN coloured cord to plug terminal marked with a letter L or
coloured RED
• Connect BLUE coloured cord to plug terminal marked with a letter N or coloured
BLACK
IMPORTANT:
electric cable (i.e. non- re-wireable) please note:
1. The plug must be thrown away if it is cut from the electric cable. There is a
danger of electric shock if it is subsequently inserted into a socket outlet.
2. Never use the plug without the fuse cover fitted.
3. Should you wish to replace a detachable fuse carrier, ensure that the correct
replacement is used (as indicated by marking or colour code).
4. Replacement fuse covers can be obtained from your local dealer or most
electrical stockists.
5. The fuse in the plug must be replaced with one of the same rating (13 amps)
and this replacement must be ASTA approved to BS1362.
The wires in the mains lead are coloured in accordance with the
Blue - Neutral
Brown - Live
If this appliance is fitted with a plug which is moulded on to the
IMPORTANT: If in any doubt, do not attempt any electrical repair yourself. Consult
a qualified technician.
- 4 -
Page 5
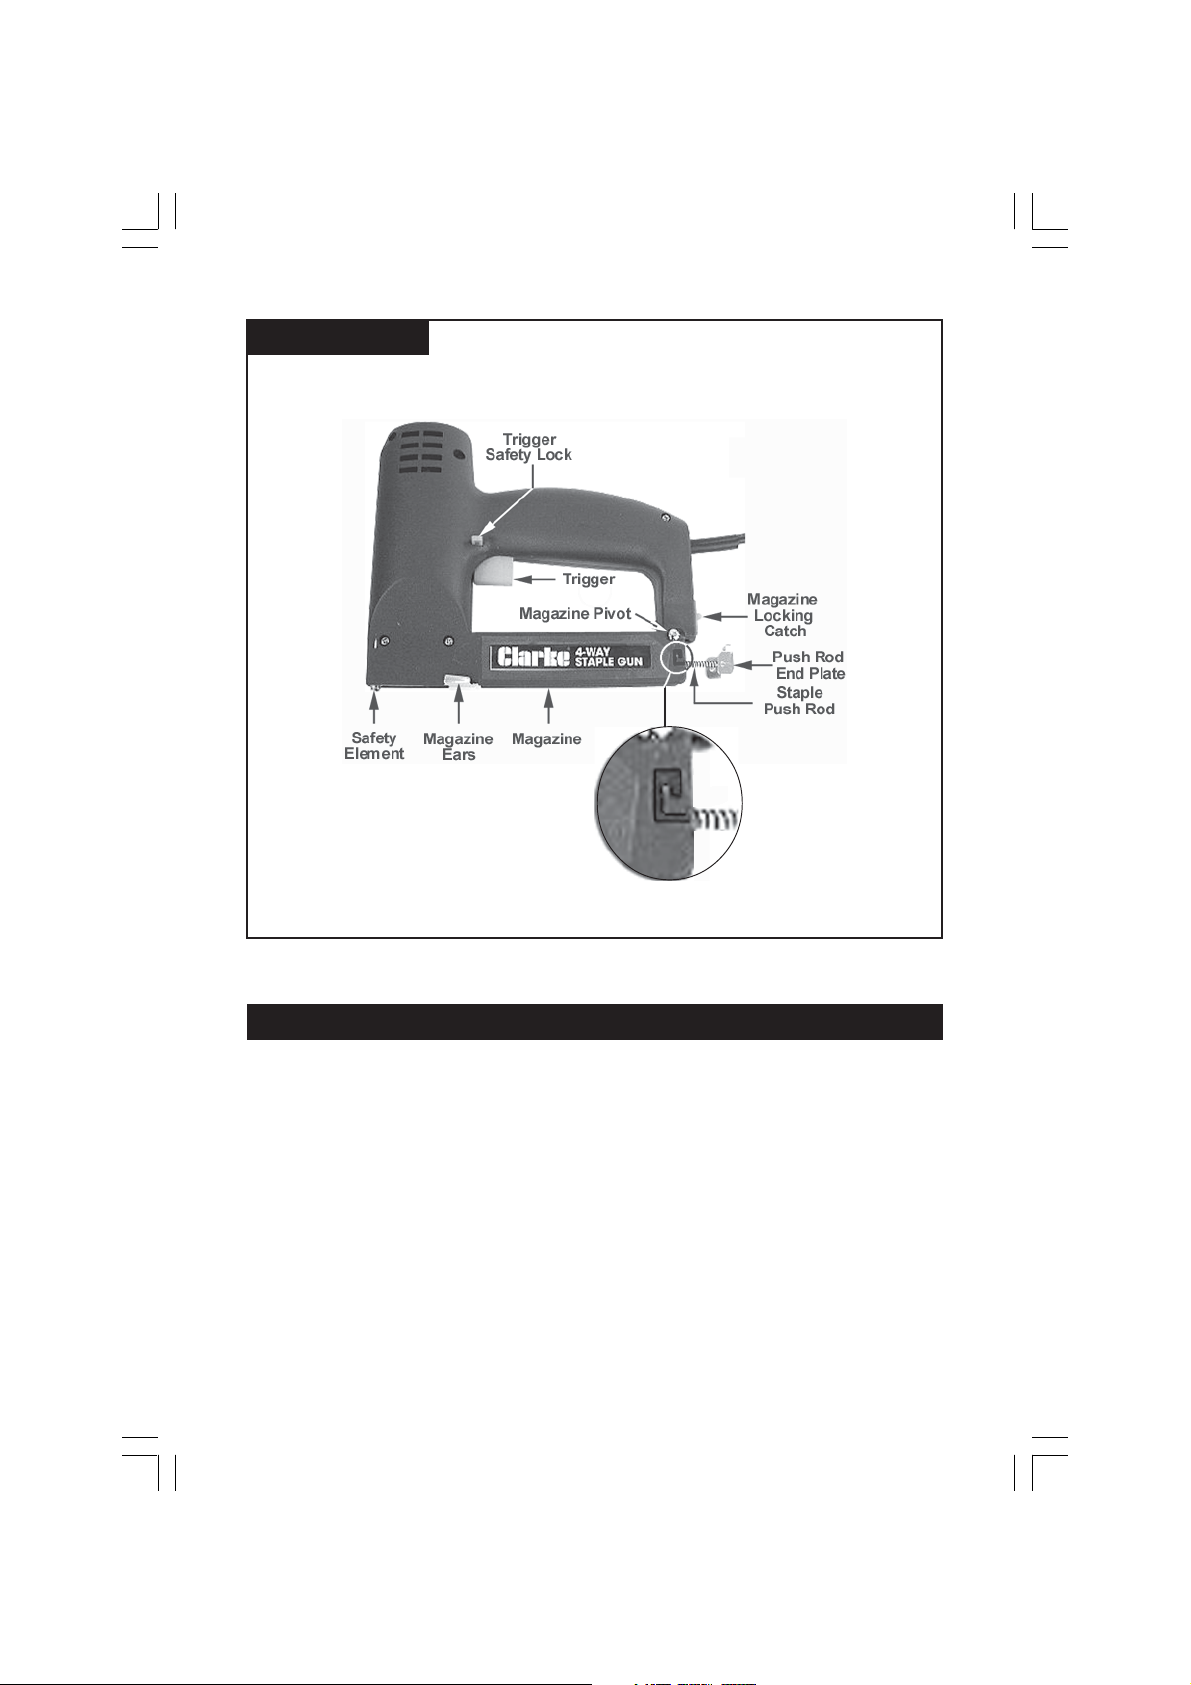
Figure (1)
Push Rod
Locking Slot
Operation
The staple gun has two safety features to ensure that the staples are not fired in
error or when the stapler is not in contact with the workpiece. The safety element
must be depressed and the trigger safety lock must be pushed to the left to allow
the trigger to operate. The following sequence is to be followed to ensure safe
operation.
1. Load the staples or nails into the staple chamber (see Loading the Staple Gun).
2. Connect to the power supply.
3. Place gun, parallel to the workpiece, at the desired point of contact, with a
slight downwards pressure so that the Safety Element is pushed upwards.
4. Push the Trigger Safety Lock to the Left.
5. Pull the Trigger to fire staple.
- 5 -
Page 6
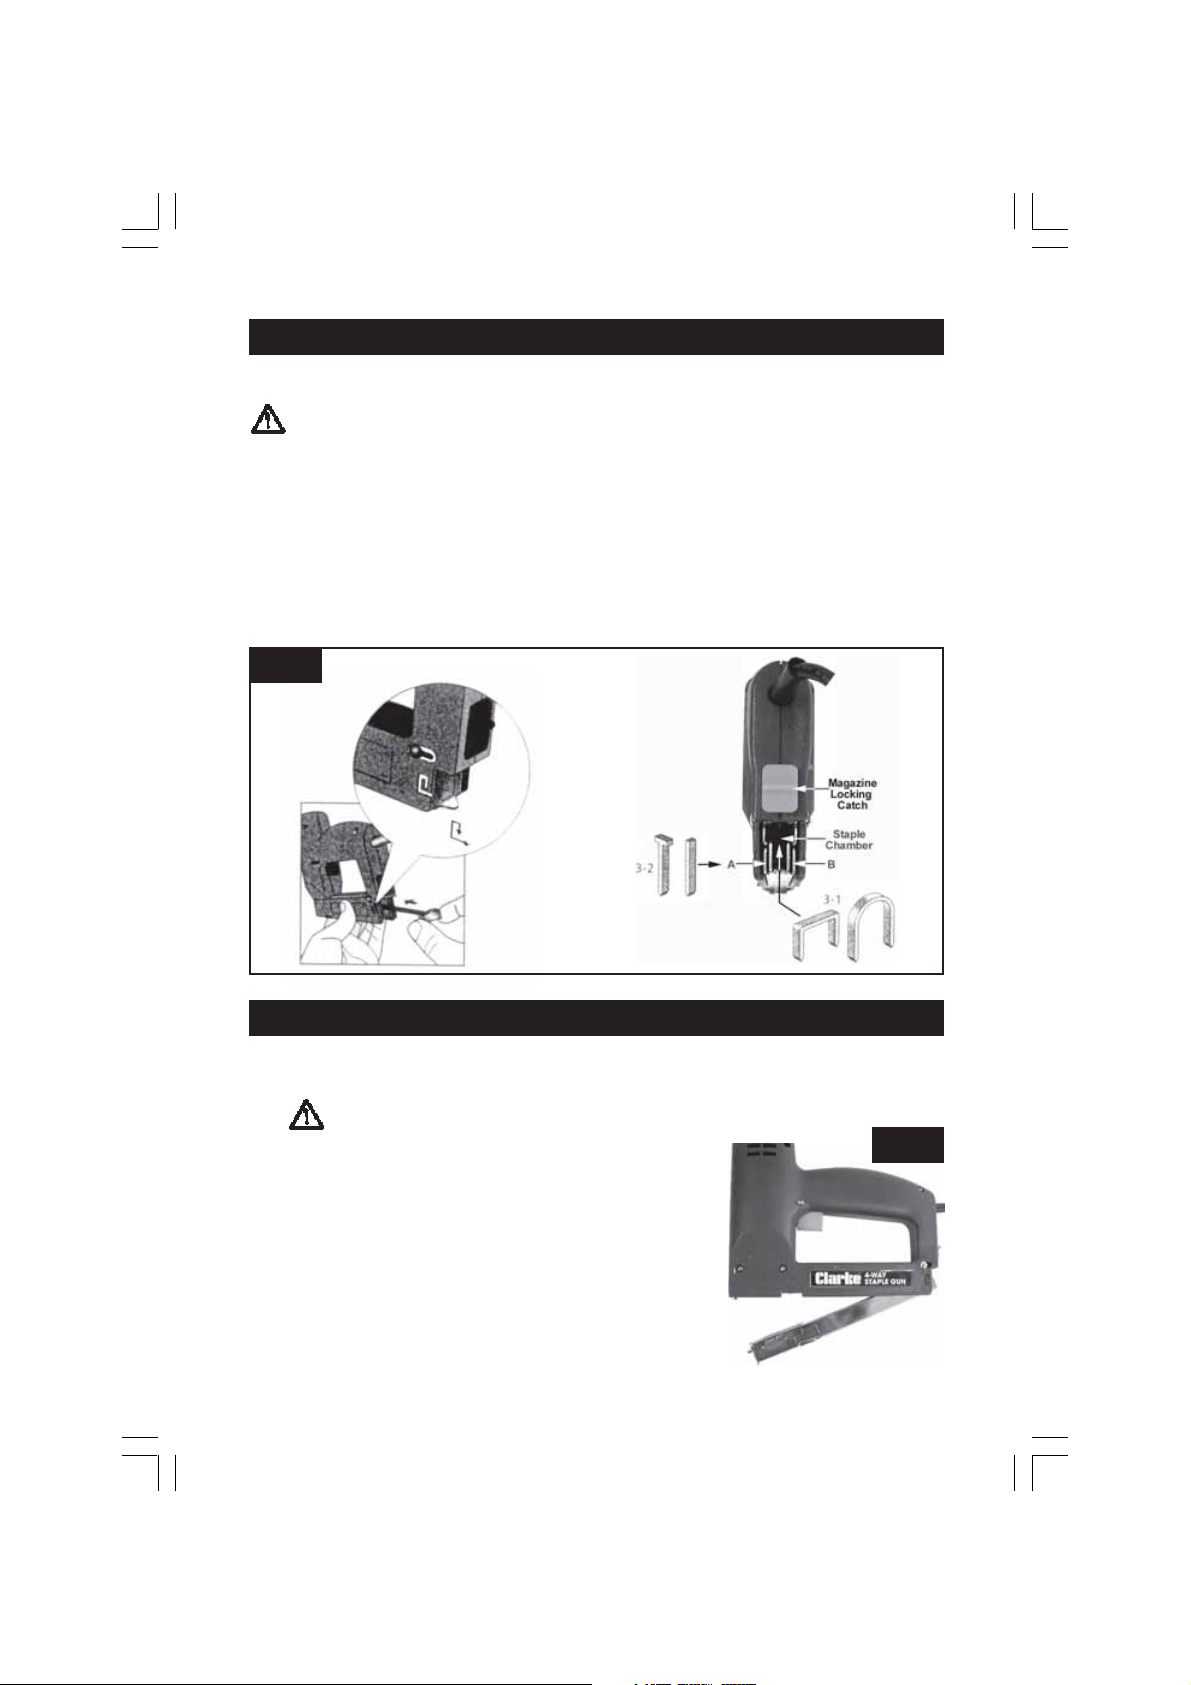
Loading the Staple Gun
The staple gun may be loaded with staples or nails as follows:
WARNING! Ensure that the power supply is off before attempting to load
the gun. This will ensure that the gun will not fire unintentionally.
1. First remove the Push Rod Assembly by pushing the end plate upwards, inwards
then downwards, (see fig 2(a)), allowing the push rod assembly to be withdrawn.
2. Insert the fasteners to be used into the staple chamber, (see fig 2(b)).
(note: nails may be loaded into the slot, either side of the magazine (A) or (B).
3. Replace the push rod assembly into the staple chamber and lock into place
by pushing the end plate inwards, upwards, then pull towards the rear and
finally press down, i.e. follow the locking slot, shown in figs.1 and 2(a).
Fig. 2
(a) (b)
Removing Jammed Fasteners
If fasteners become jammed, DO NOT pull the trigger until the jam has been cleared,
as this could cause serious damage. To clear then jam, proceed as follows:
1.
2. Remove the Staple Push Rod Assembly, as
3. Remove all fasteners from the chamber.
4. Push the Magazine Locking Catch (see Figs.1 and
5. Grasp the ‘Ears ‘ of the magazine and pull back-
WARNING! Ensure the stapler is disconnected from the power supply
and the trigger lock is ON...i.e. pushed to the right.
Fig. 3
detailed in ‘Loading the Staple Gun’ above.
(2b)) UPWARDS firmly.
wards slightly. This will allow the magazine to be
pulled downwards, using the ‘ears’, noting that
it is hinged at the rear (see Fig. 3).
- 6 -
Page 7
6. Clear the jam using a pair of pliers.
7. Replace magazine, ensuring the locking catch is pushed firmly down so that
it clicks into place.
8. Reload with fasteners and replace the push rod assembly.
Maintenance
There are no user serviceable parts on the Staple Gun. If there is a problem please
contact your local dealer or Clarke Service (see inside front cover), However a
replacement Push Rod Assembly is available (see Spare Parts and Accessories)
WARNING! Do not open the casing. There are no user serviceable parts
and therefore the Guarantee will be void if the casing has been opened
or the gun tampered with.
The Staple gun does not require any specific maintenance but it is suggested that
the chamber and magazine are kept free from any dirt or debris. This can be done
using a dry cloth or brush. Do not use solvent or alcohol based cleaner as it could
damage the casing.
WARNING! Ensure that the power supply is off before cleaning the Gun.
This will ensure that the gun will no fire unintentionally.
Spare Parts and Accessories
The following Spare Parts and accessories are available from your local dealer or
from Clarke Spare Parts Department (see inside front cover for contact Info.).
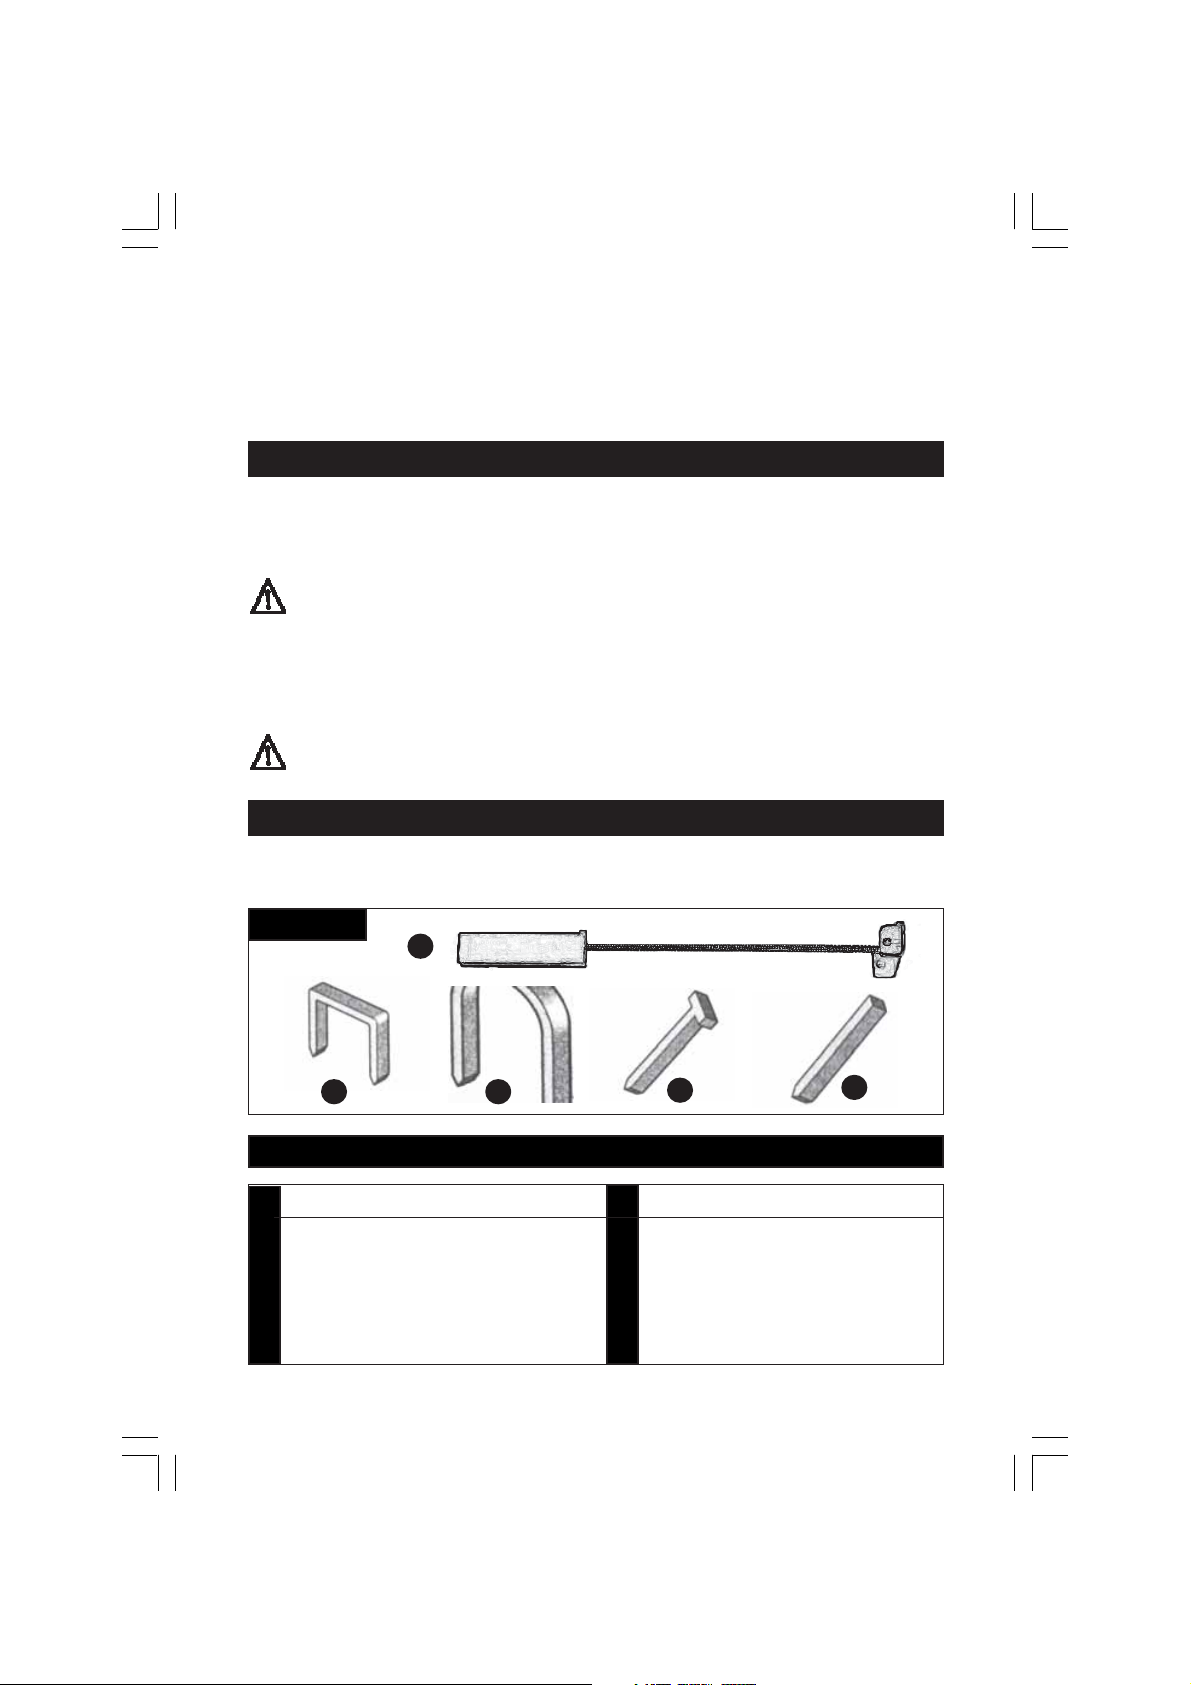
Fig.7
1
2 3
4
5
Spare Parts List
No. Description Part No. No. Description Part No.
1 Staple Push Rod Assy ZHESG401
2a 10 mm Square Staple 1800215
2b 12 mm Square Staple 1800216
2c 14 mm Square Staple 1800217
3 16 mm Round Staple 1800224
4a 8 mm T Nail 800218
4b 10 mm T Nail 1800219
4c 12 mm T Nail 1800220
4d 14 mm T Nail 1800221
4e 16 mm T Nail 1800222
5 16 mm Pin Nail 1800224
- 7 -
 Loading...