

Page 1
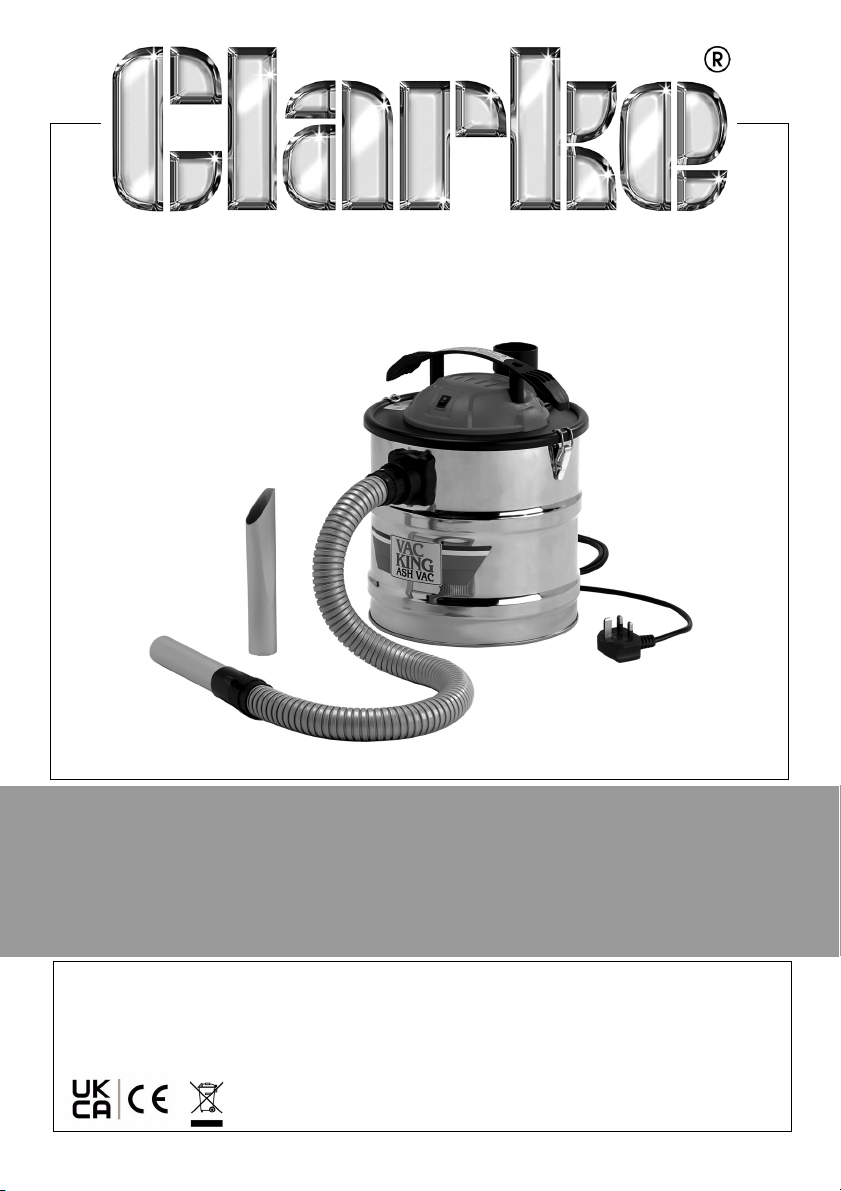
ELECTRIC ASHCAN
MODEL NO: ASHVAC1200
PART NO: 6471133
OPERATING & MAINTENANCE
INSTRUCTIONS
ORIGINAL INSTRUCTIONS GC0721 - ISS 6
Page 2
INTRODUCTION
Thank you for purchasing this CLARKE product which is designed for fast, easy
removal of cold ash from stoves and fireplaces.
Before attempting to use this product, please read this manual thoroughly and
follow the instructions carefully. In doing so you will ensure the safety of yourself
and that of others around you, and you can look forward to your purchase
giving you long and satisfactory service.
GUARANTEE
This product is guaranteed against faulty manufacture for a period of 12
months from the date of purchase. Please keep your receipt which will be
required as proof of purchase.
This guarantee is invalid if the product is found to have been abused or
tampered with in any way, or not used for the purpose for which it was
intended.
Faulty goods should be returned to their place of purchase, no product can
be returned to us without prior permission.
This guarantee does not effect your statutory rights.
ENVIRONMENTAL RECYCLING POLICY
Through purchase of this product, the customer is taking on the
obligation to deal with the WEEE in accordance with the WEEE
regulations in relation to the treatment, recycling & recovery and
environmentally sound disposal of the WEEE.
In effect, this means that this product must not be disposed of with general
household waste. It must be disposed of according to the laws governing
Waste Electrical and Electronic Equipment (WEEE) at a recognised disposal
facility.
PARTS & SERVICE
This product has been designed to give long and trouble free service. If,
however, having followed the instructions in this booklet carefully, you
encounter problems, refer to your local Clarke dealer.
2
Parts & Service: 020 8988 7400 / E-mail: [email protected] or [email protected]
Page 3
SPECIFICATIONS
Model Number ASHVAC1200
Dimensions (L x W x H) 315 x 322 x 378 mm
Weight 4.7 kg (empty)
Drum Capacity 18 Litres (12L working)
Operating Temperature
Max Vacuum 20 kPa
Duty Cycle S1 (continuous)
Fuse Rating 13A
Power Supply 230V @50Hz 1ph
Motor power rating 1200W
IP Rating IPX-0
Sound Pressure Level 80 dB LpA
Sound Power Level 84 dB LwA
Please note that the details and specifications contained herein are correct
at the time of going to print. However CLARKE International reserve the right to
change specifications at any time without prior notice.
-10 to +40
o
C
GENERAL SAFETY PRECAUTIONS
Prior to use, all users should become familiar with these instructions.
WORK AREA
1. Avoid operating in the presence of flammable liquids or gases. The motor
may produce sparks during operation. Do not use in enclosed areas where
flammable, explosive or toxic vapours are given off.
PERSONAL SAFETY
1. Always stay alert, watch what you are doing and use common sense when
operating this product. Do not use the ashcan while you are tired or under
3
Parts & Service: 020 8988 7400 / E-mail: [email protected] or [email protected]
Page 4
the influence of medication, drugs or alcohol. Lack of attention can result
in personal injury.
2. Never over-reach. Keep your proper footing and balance at all times to
enable better control of the ashcan in unexpected situations.
3. This product must not be used by children.
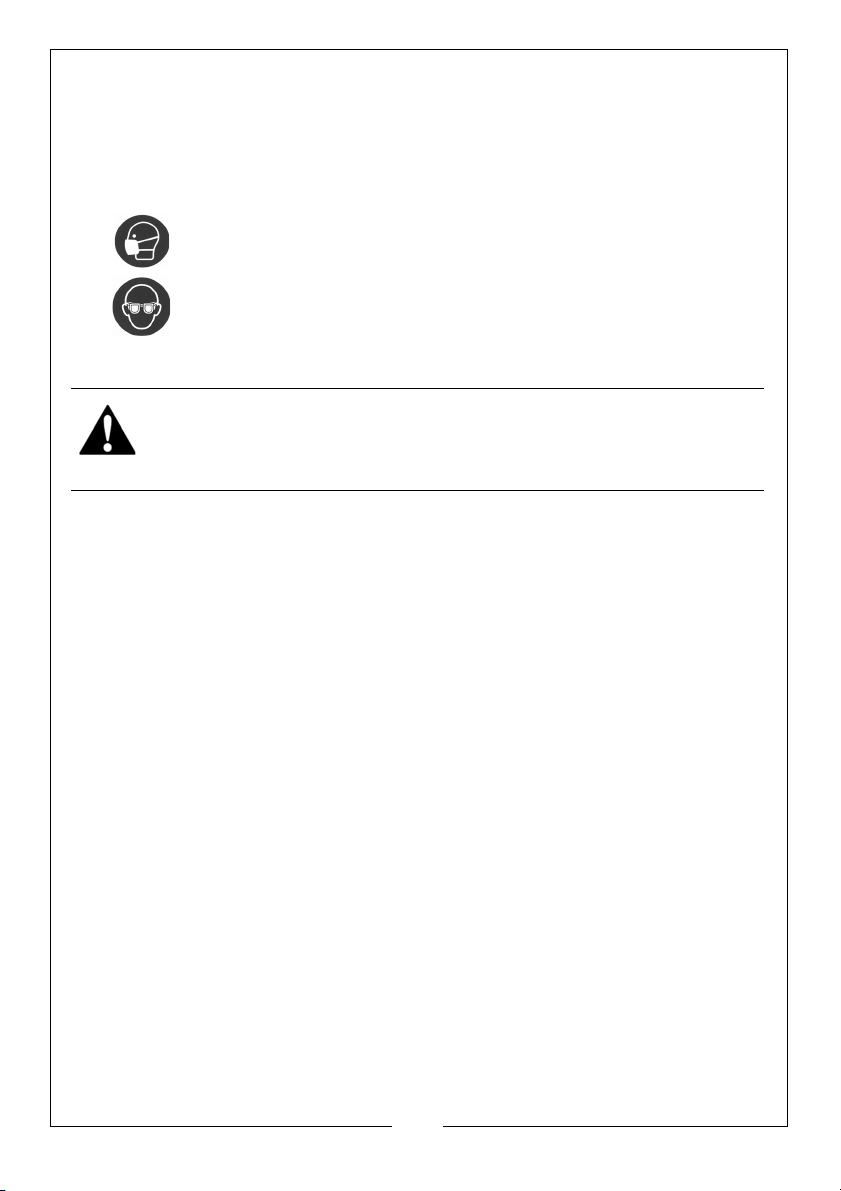
Wear a dust mask when disturbing fine dust particles.
Wear eye protection when blowing fine dust particles.
GENERAL PRODUCT USE AND CARE
WARNING: DO NOT USE THIS ASH CAN TO COLLECT HOT ASHES, COALS
OR WOOD EMBERS. ALWAYS ALLOW THE RESIDUE FROM STOVES AND
FIREPLACES TO COOL FULLY BEFORE COLLECTING WITH THIS ASH CAN.
1. Always maintain this product with care and keep it clean for best/safest
performance.
2. Never use this product if any part is damaged. Have it inspected and
repaired by your Clarke dealer. Do not use if the power cable, plug, or the
machine itself, is in poor condition.
3. Never abuse the power cable. Never pull on the cable when removing the
plug from the socket or lift the ashcan by the power cable. Take care not
to close doors on the cable or allow it to become snagged under furniture/
objects with sharp edges. Keep away from heat or oil.
4. Only use extension leads that are of an appropriate power rating and
suitable for the work environment. Extension leads must have an earth
connection. Inspect the extension lead regularly and replace if damaged.
5. Always take care when a long hose is required in the work area as it
presents a trip hazard. Tidy the hose away when the job is finished.
6. Never pick up flammable or readily combustible material or use in the
presence of explosive liquids or vapours.
7. Never pick up burning cigarettes or other smoking substances.
8. Never abuse this product by standing on it.
9. Always carry this product using the handle.
10. Only use the suction hose provided. A normal plastic vacuum cleaner hose
is not suitable and may be damaged.
4
Parts & Service: 020 8988 7400 / E-mail: [email protected] or [email protected]
Page 5
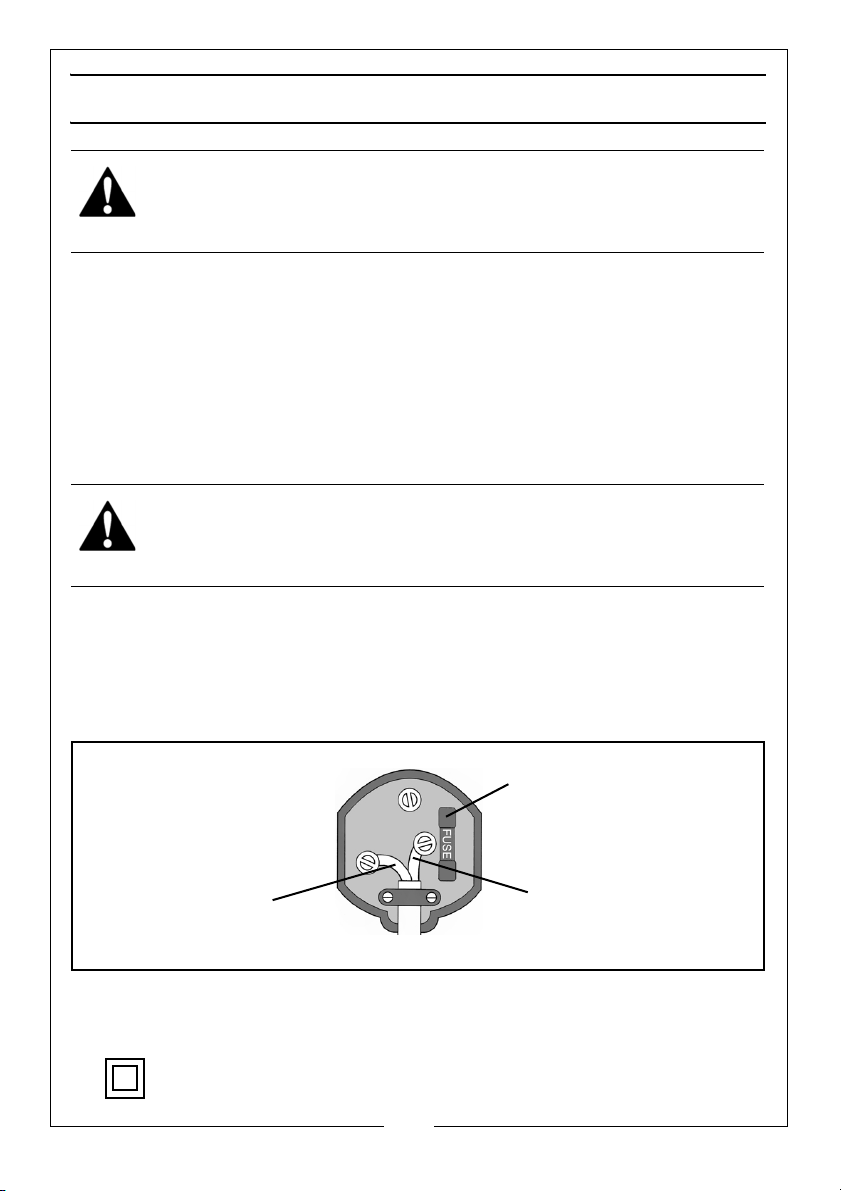
ELECTRICAL CONNECTIONS
Plug must be BS1363/A approved.
Always fit a 13 Amp fuse.
Ensure that the outer sheath of the cable is firmly held by the clamp
Neutral
(Blue)
Live
(Brown)
WARNING: READ THESE ELECTRICAL SAFETY INSTRUCTIONS THOROUGHLY
BEFORE CONNECTING THE PRODUCT TO THE MAINS SUPPLY.
Before switching the product on, make sure that the voltage of your electricity supply is
the same as that indicated on the rating plate. This product is designed to operate on
230VAC 50Hz. Connecting it to any other power source may cause damage.
This product may be fitted with a non-rewireable plug. If it is necessary to change the
fuse in the plug, the fuse cover must be refitted. If the fuse cover becomes lost or
damaged, the plug must not be used until a suitable replacement is obtained.
If the plug has to be changed because it is not suitable for your socket, or due to
damage, it should be cut off and a replacement fitted, following the wiring instructions
shown below. The old plug must be disposed of safely, as insertion into a mains socket
could cause an electrical hazard.
WARNING: THE WIRES IN THE POWER CABLE OF THIS PRODUCT ARE
COLOURED IN ACCORDANCE WITH THE FOLLOWING CODE:
BLUE = NEUTRAL BROWN = LIVE
If the colours of the wires in the power cable of this product do not correspond with the
markings on the terminals of your plug, proceed as follows.
•T
he wire which is coloured Blue must be connected to the terminal
which is marked N or coloured black.
• The wire which is coloured Brown must be connected to the terminal
which is marked
L. or coloured red
We strongly recommend that this machine is connected to the mains supply via a
Residual Current Device (RCD)
If in any doubt, consult a qualified electrician. DO NOT attempt any repairs yourself.
This symbol indicates that this is a Class II product, and does not
require an earth connection.
Parts & Service: 020 8988 7400 / E-mail: [email protected] or [email protected]
5
Page 6
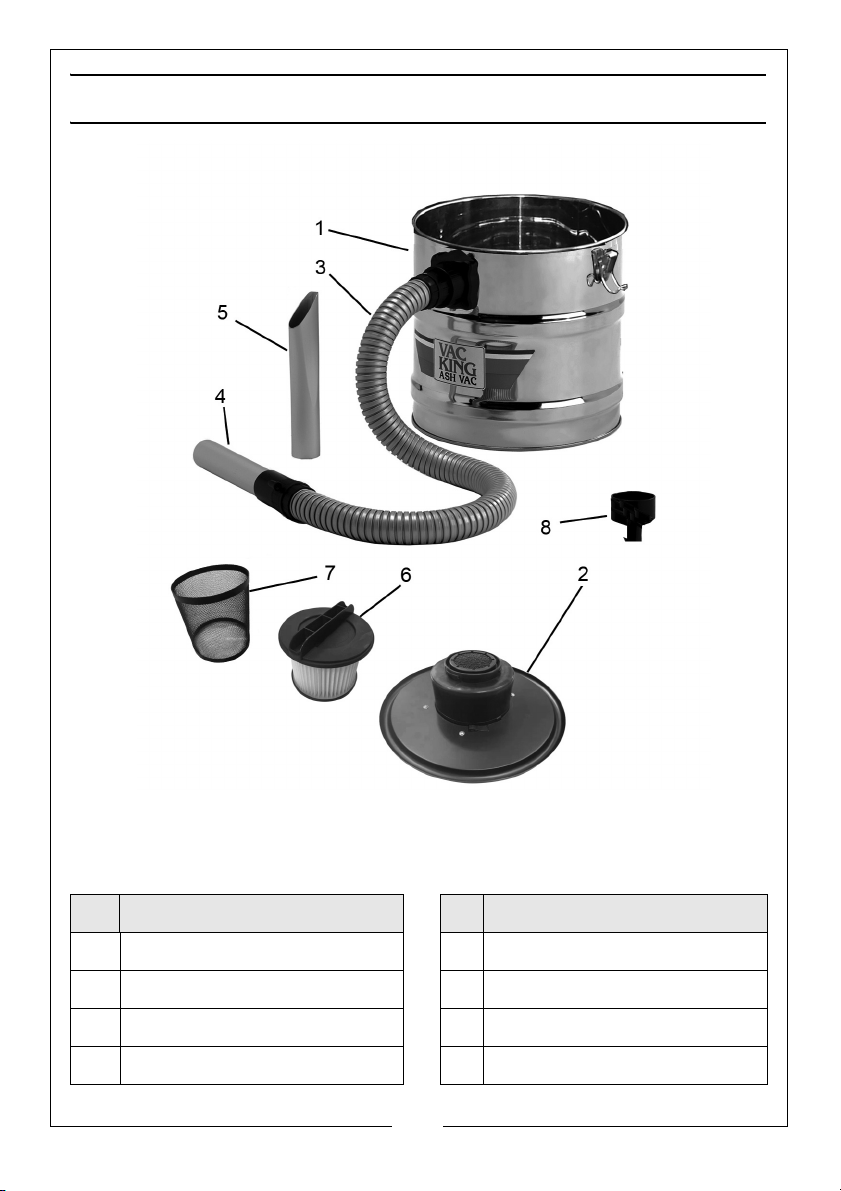
COMPONENTS
When unpacking please check contents and advise your dealer immediately if
any parts are missing. The essential components are as follows.
NO DESCRIPTION NO DESCRIPTION
1Tank
2 Motor/Lid Assembly
3 Suction Hose Assembly
4Suction Tube
Parts & Service: 020 8988 7400 / E-mail: [email protected] or [email protected]
5 Suction Tube with Crevice end
6 Cartridge Filter
7 Filter Canister
8 Air Outlet Adaptor
6
Page 7
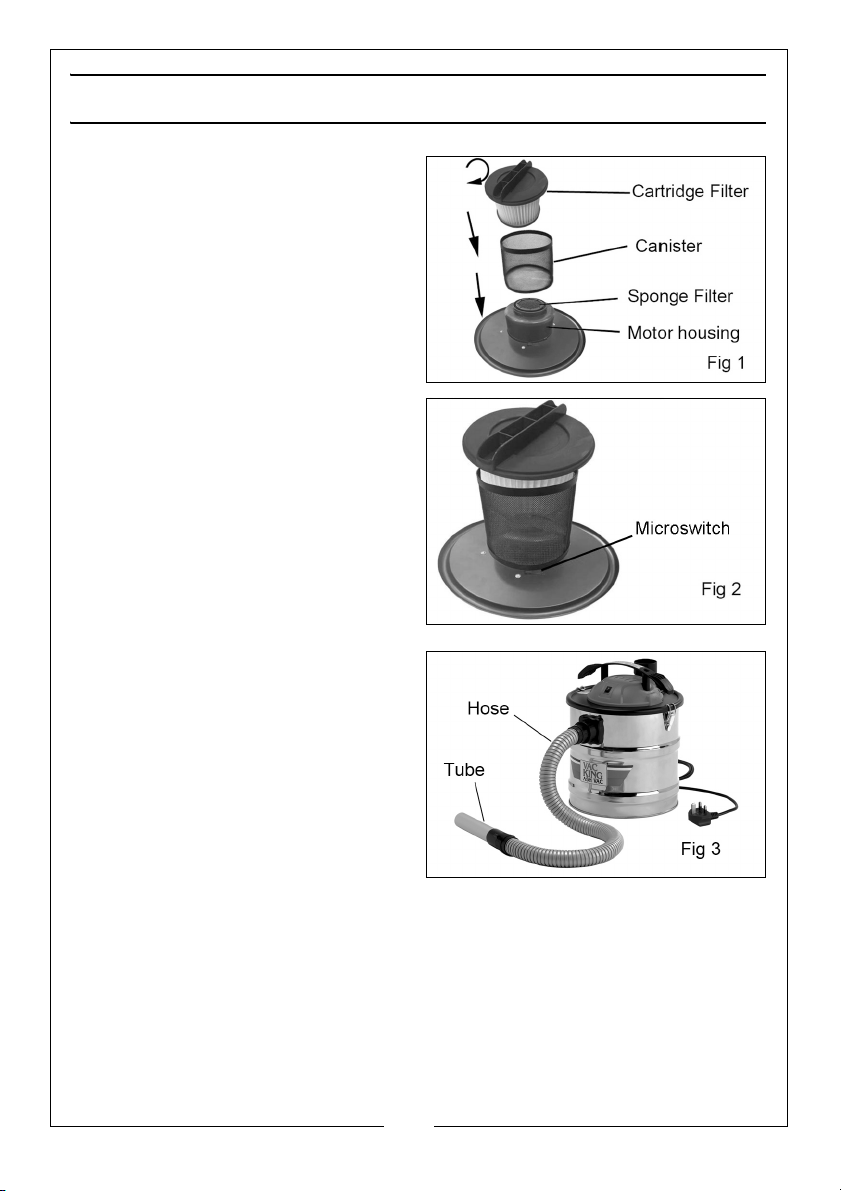
PREPARATION FOR USE
1. With the ashcan removed from the
packaging, undo the securing
clips securing the lid assembly and
remove the components from
within the tank. Check for
shortages and that no damage
was suffered in transit.
2. Check that the sponge filter is
correctly in position at the end of
the motor housing.
3. Place the canister over the motor
housing.
4. Place the cartridge filter inside the
canister and twist on the cartridge
filter cap to secure the canister
and cartridge filter.
• The motor will not run without
the canister correctly in position
as a microswitch needs to be
engaged.
5. Fit the tank cover to the tank,
securing in place with the clips.
6. Insert the suction tube into one
end of the suction hose as shown
in fig 3.
7. Insert the other end of the suction
hose into the inlet connection of
the tank.
NOTE: The two ends of the suction
hose are different. The end
with the collar and swivel fits into the tank.
8. Before plugging into the power supply, the ashcan should be positioned on
a firm, level surface. Do not cover the ashcan and always position it with
good all-round air ventilation. The ashcan must always remain upright.
7
Parts & Service: 020 8988 7400 / E-mail: [email protected] or [email protected]
Page 8
OPERATING INSTRUCTIONS
CAUTION: MAKE SURE THAT FIREPLACES AND STOVES ARE COLD BEFORE
YOU ATTEMPT TO VACUUM THEM CLEAN. WAIT UNTIL THE ASH HAS
COOLED DOWN COMPLETELY BEFORE YOU BEGIN TO COLLECT IT.
CAUTION: EXCESSIVE TEMPERATURES CAN LEAD TO DAMAGE TO THE
SUCTION HOSE AND THE ASH CAN AND CAUSE A RISK OF FIRE.
1. Take care not to collect material which appears to have cooled down on
the outside but which may still be hot on the inside. Hot ash particles may
ignite again in the air flow.
• Ash with a temperature exceeding 40°C may damage the ashcan.
2. Switch on the ashcan and use the suction tube to collect the ash.
3. When moving the ashcan:
• Always use the handle.
• Do not lift it by (or place a strain on) the hose or power cable.
• Always switch it off and disconnect it from the mains power supply.
4. Do not attempt to quickly extinguish fires in fireplaces or stoves with water
in order to achieve cool ash. The construction material in the fireplace or
stove may not withstand any sudden change in temperature and suffer
permanent damage.
5. Regularly check the tube and ashcan for excess temperature during use. If
you notice a significant temperature rise, switch off immediately. Let the
ashcan cool down before emptying the collected material.
6. Always empty the ashcan after use and clean it when required. Never use
solvents for cleaning any components.
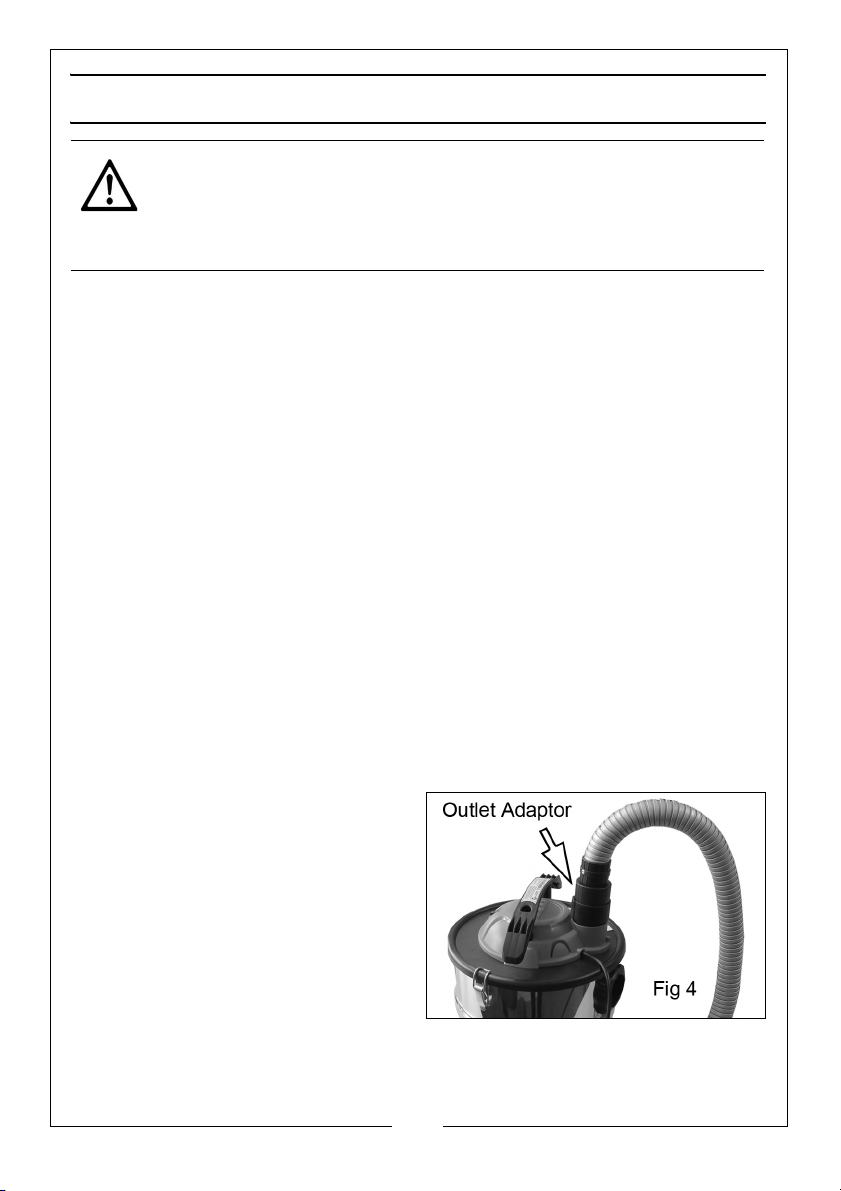
7. If required, the ashcan may be
used to blow a jet of exhaust air to
clear obstructions within the pipe.
Make sure the ashcan is emptied
before blowing.
8. The user should empty the ashcan
at regular intervals to prevent it
from overheating.
9. Fit the outlet adaptor as shown in
Fig 4 and connect the suction
hose to it. Twist the outlet adaptor clockwise to lock it in position.
10. If, after a few seconds the hose is still blocked, turn the unit off and clear
any blockages manually.
8
Parts & Service: 020 8988 7400 / E-mail: [email protected] or [email protected]
Page 9

MAINTENANCE
1. Inspect the cartridge filter regularly and clean it when necessary. Remove
the lid assembly and twist the canister off to access the filter.
2. Dislodge as much imbedded debris as possible before washing the filter
with tap water before drying it completely.
3. Reposition the filter and its canister, ensuring this is in place by engaging
the three retaining tabs into the fixings on the lid assembly and twisting the
canister clockwise. Important: cleaning should not use chemicals or
compressed air.
4. Always ensure that the sponge filter covering the motor fan is in good
condition and not blocked. Lift it away and wash it in water if required and
allow it to dry completely before use.
5. Ensure the hose is kept in good condition. A damaged hose will seriously
effect the efficiency of the ashcan and should be replaced.
6. Contact your CLARKE dealer for replacements.
CARE & STORAGE
1. When not in use, turn off using the switch on top of the ashcan, then
unplug from the power supply.
2. When finished work, ensure the electric cable is stowed away by winding it
around the handle and that it is not left as a hazard for others to trip over.
3. Do not change filters or carry out any cleaning without first disconnecting
the ashcan from the power supply.
4. Keep the external surfaces clean. Avoid impact damage & do not allow
this product to come into contact with abrasive or corrosive materials.
5. Do not use solvents, thinners or alcohol to clean the ashcan, as these
chemicals will damage the finish. With the ashcan unplugged from the
power supply, use a dry cloth to wipe over the casing.
6. When not in use this product should be stored in a secure, dry place, out of
the reach of children. DO NOT leave it exposed to the elements and avoid
direct sunlight, direct heat, rain/moisture etc.
7. Only use parts and accessories recommended in this manual. Never use
unauthorised accessories or attachments which may result in personal
injury or damage to the product.
8. Do not attempt to repair or modify this product or attempt any electrical
repair yourself. Consult a qualified electrician or the Clarke Service
Department on 020 8988 7400.
9
Parts & Service: 020 8988 7400 / E-mail: [email protected] or [email protected]
Page 10
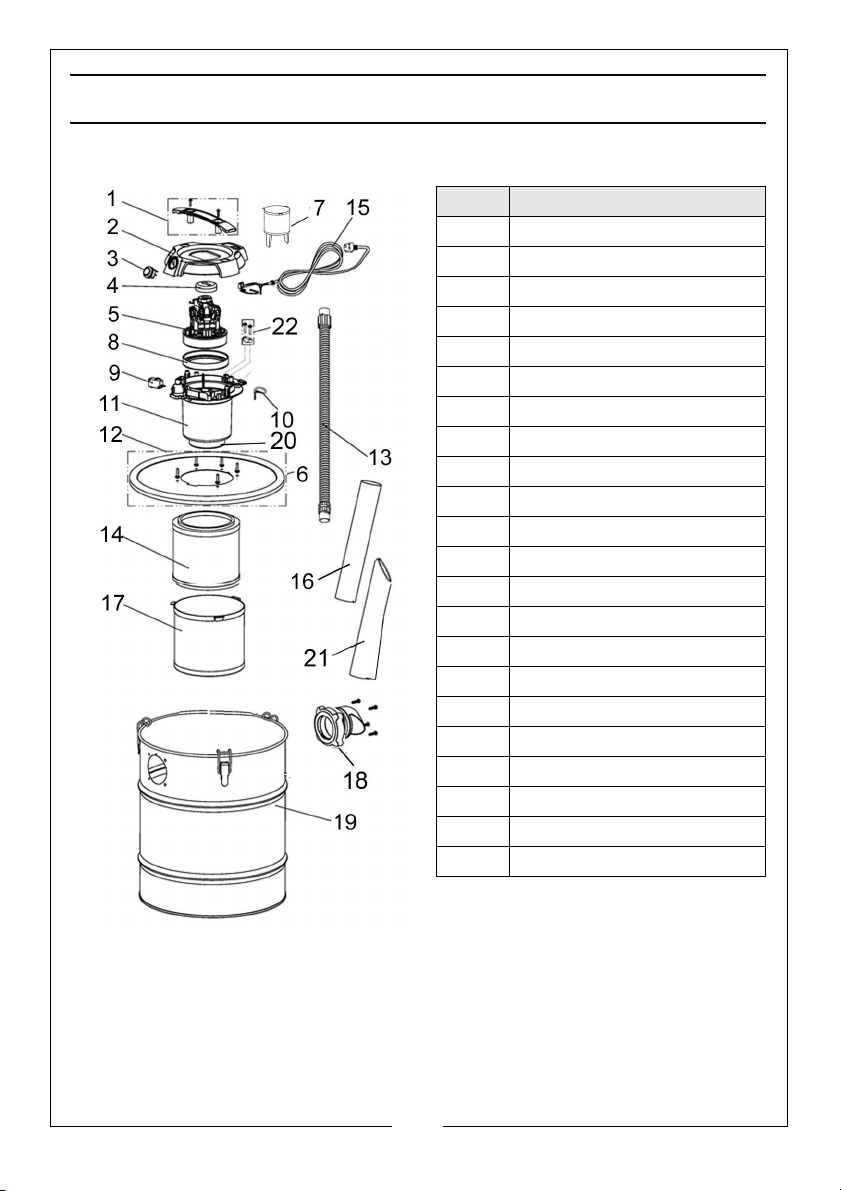
PART S DIA GRA M
Ref No Description
1 Carrying Handle
2Top Cover Moulding
3 On/Off Switch
4 Sealing Cap
5 Motor
6 Lid Sealing Ring
7 Air Outlet Adaptor
8 Rubber Seal
9 Filter Proximity Microswitch
10 Inner Wiring
11 Motor Housing
12 Top Cover Assembly
13 Suction Hose
14 Cartridge Filter
15 Power Cable & Plug
16 Straight Suction Tube
17 Filter Canister
18 Connecting Elbow
19 Ash Tank
20 Sponge Filter
21 Crevice Suction Tube
22 Cable Clamp
10
Parts & Service: 020 8988 7400 / E-mail: [email protected] or [email protected]
Page 11
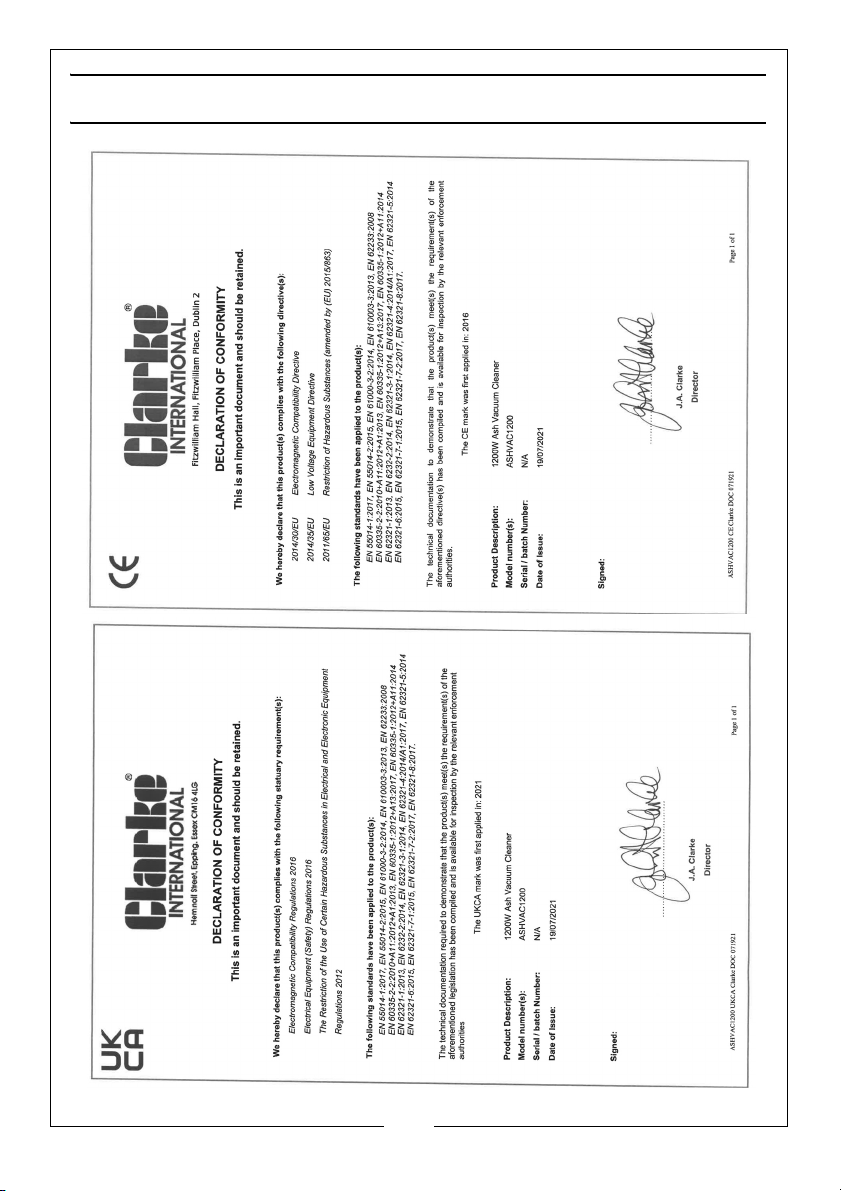
DECLARATION OF CONFORMITY
11
Parts & Service: 020 8988 7400 / E-mail: [email protected] or [email protected]
Page 12

 Loading...