

Page 1
DIGITAL CALIPER
MODEL NO: CM145
PART NO: 4500360
OPERATION & MAINTENANCE
INSTRUCTIONS
ORIGINAL INSTRUCTIONS
LS0720 - ISS 2
Page 2

INTRODUCTION
Thank you for purchasing this CLARKE Digital Caliper.
Please read this instruction leaflet thoroughly and
follow the instructions carefully, to ensure that the
instrument will give you long and satisfactory service.
Please keep these instructions in a safe place for
future reference.
GUARANTEE
This CLARKE product is guaranteed against faulty
manufacture for a period of 12 months from the date
of purchase. Please keep your receipt as proof of
purchase.
This guarantee is invalid if the product is found to
have been abused or tampered with in any way, or
not used for the purpose for which is was intended.
Faulty goods should be returned to their place of
purchase, no product can be returned to us without
prior permission.
This guarantee does not effect your statutory rights.
SAFETY PRECAUTIONS
• Keep the body of the caliper clean at all
times, do not use alcohol or other corrosive
chemicals as they could damage the internal
electronics.
• Prevent accidental damage to the caliper
by storing in its case when not in use.
• DO NOT immerse the caliper in liquid or allow
liquid to enter the slide.
Parts & Service: 020 8988 7400
2
Page 3
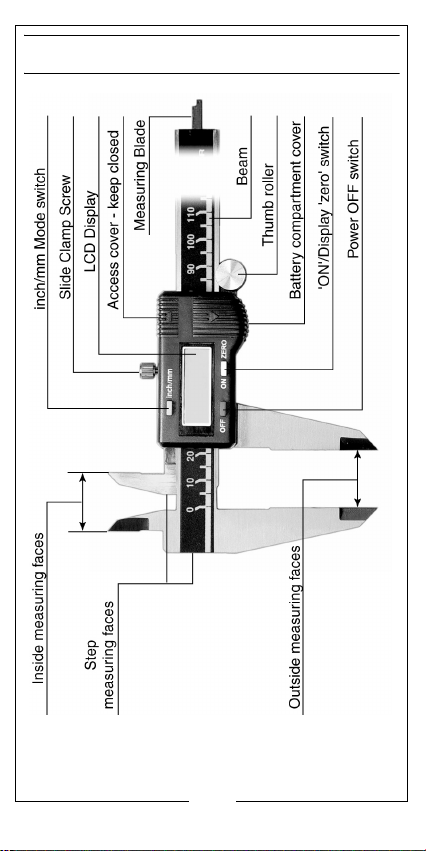
GENERAL VIEW
Parts & Service: 020 8988 7400
3
Page 4
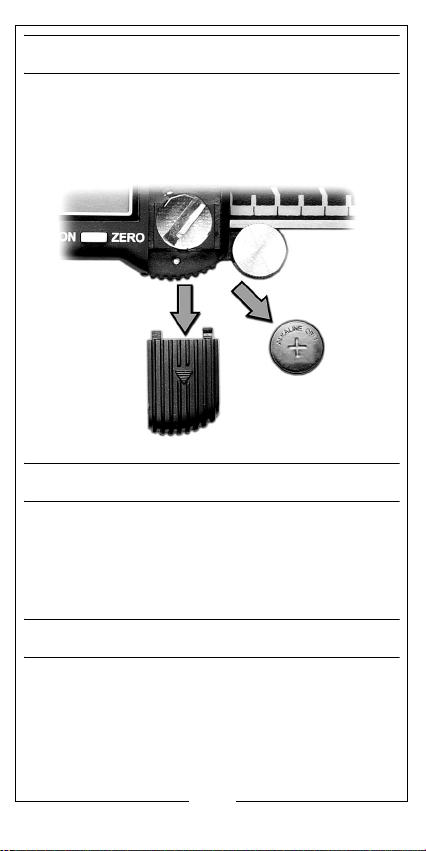
BATTERY REPLACEMENT
When the display constantly flashes the battery
requires replacement.
Slide off the battery compartment cover and insert a
new battery with the positive (+) side facing up.
SETUP AND OPERATION
• Loosen the slide clamp screw.
• Press the ON button to switch the calipers on,
select the required measuring unit by pressing
the inch/mm mode switch.
ZERO YOUR CALIPERS
It’s critical to zero your calipers before taking any
measurements. If you skip this step, your subsequent
measurements may not be accurate.
1. Close the calipers fully.
2. Press the ON/Zero button to set it to zero. The display reads 0.000”
Parts & Service: 020 8988 7400
4
Page 5
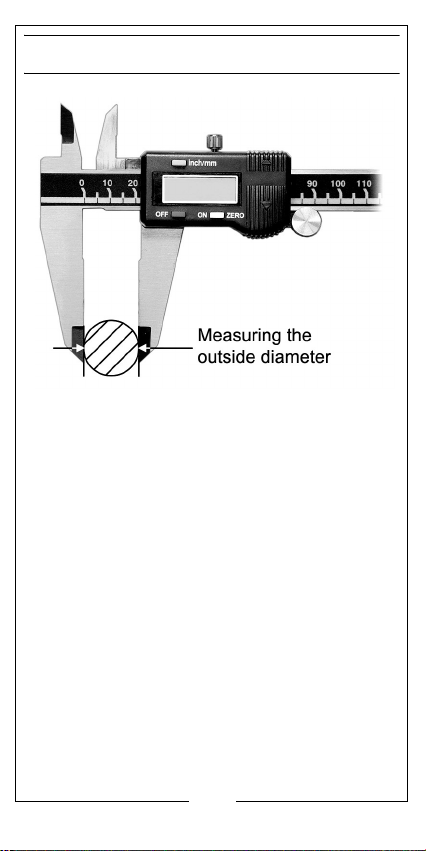
MEASURING OUTSIDE DIMENSIONS
You can also use the outside jaws to measure the
thickness of an object.
Make sure the object is perpendicular to the jaws so
the measurement is accurate.
Parts & Service: 020 8988 7400
5
Page 6
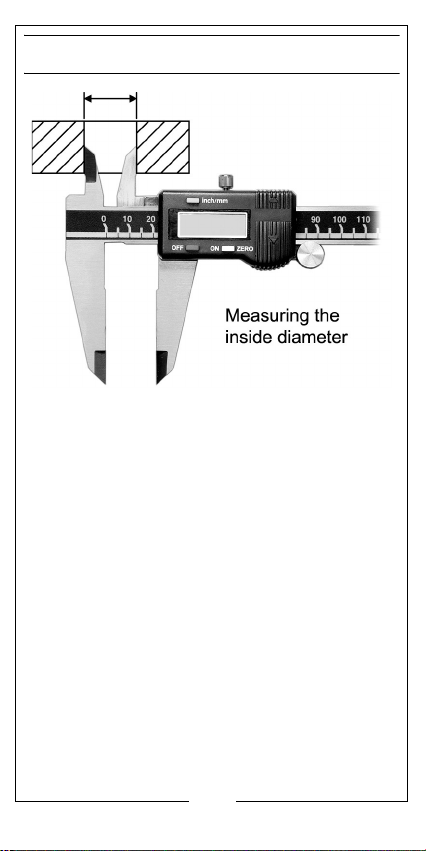
MEASURING INSIDE DIMENSIONS
Use the inside jaws to measure the inside dimensions
of an object.
Make sure the object is perpendicular to the jaws so
the measurement is accurate.
Parts & Service: 020 8988 7400
6
Page 7
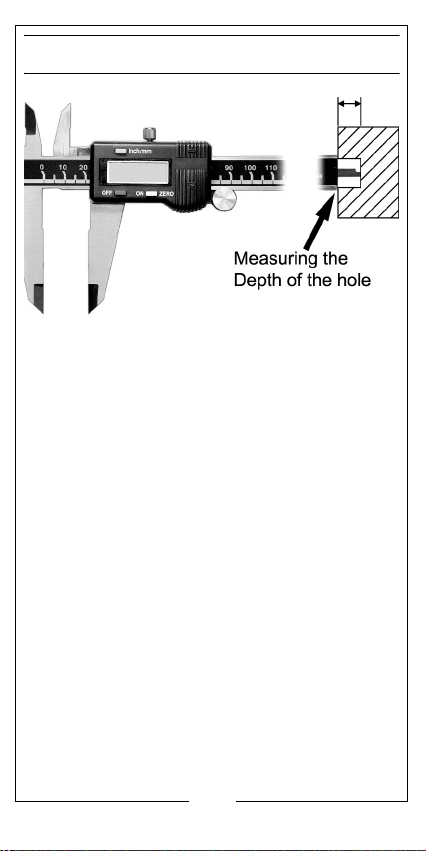
MEASURING DEPTH
Use the depth gauge to measure the depth from
one surface to the next.
Make sure the calipers are perpendicular to the
surface being measured so the measurement is
accurate.
Parts & Service: 020 8988 7400
7
Page 8
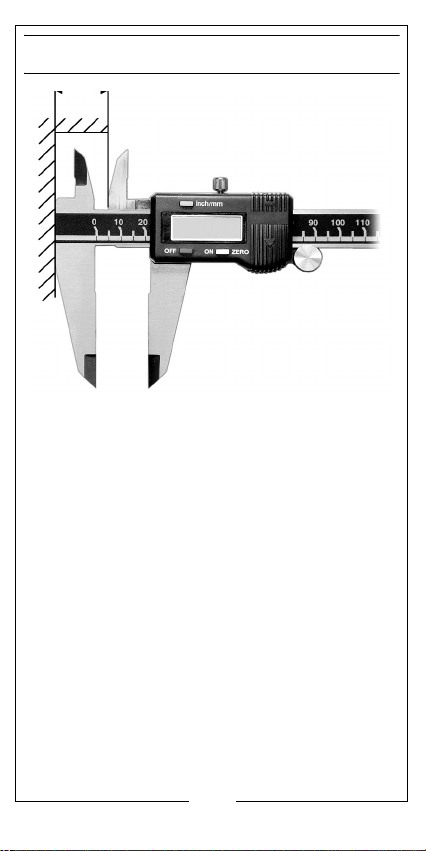
TAKING A STEP MEASUREMENT
Use the step gauge to measure the distance
between one edge and the next edge above it
Parts & Service: 020 8988 7400
8
Page 9

TAKING A COMPARATIVE MEASUREMENT
EXAMPLE: You need to find the difference between
the diameter of a hole and the diameter of the
cylinder that fits into the hole.
1. Close the calipers.
2. Press the ON/Zero button to zero your calipers.
3. Take an outside measurement of the cylinder.
4. Carefully remove the cylinder without disturbing the caliper.
5. Press the ON/Zero button to zero your calipers.
6. Take a inside measurement of the hole.
7. The value shown is the difference.
SELECTING METRIC/IMPERIAL
Press the MM/INCH button to switch between metric
and imperial measurement values.
Parts & Service: 020 8988 7400
9
Page 10
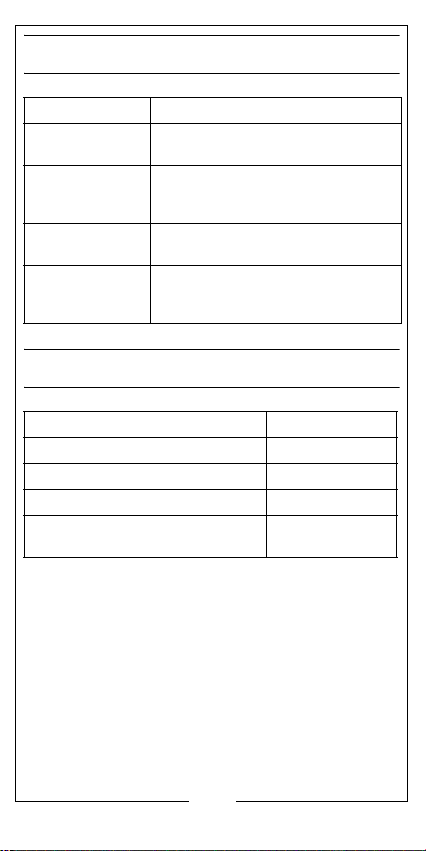
TROUBLESHOOTING
FAULT CAUSE/SOLUTION
Display flashes
constantly.
Display fails to
change when
slider is moved.
Display fails to
function.
Measuring
becomes less
accurate.
Low battery - Replace battery.
Electronic fault - Remove battery
& re-insert after 30 seconds.
Battery flat or in poor contact - Reinsert or replace battery.
Dirty sensor - Clean caliper
thoroughly with compressed air.
SPECIFICATIONS
Measuring Range 0 mm - 150 mm
Measuring Scale 0.01 mm / 0.005”
Accuracy (0 mm -150 mm) 0.03 mm
Operating Temperature Range -10°C to 40°C
Battery Type & Voltage Alkaline Cell
(LR44) 1.55 Volt
Parts & Service: 020 8988 7400
10
Page 11
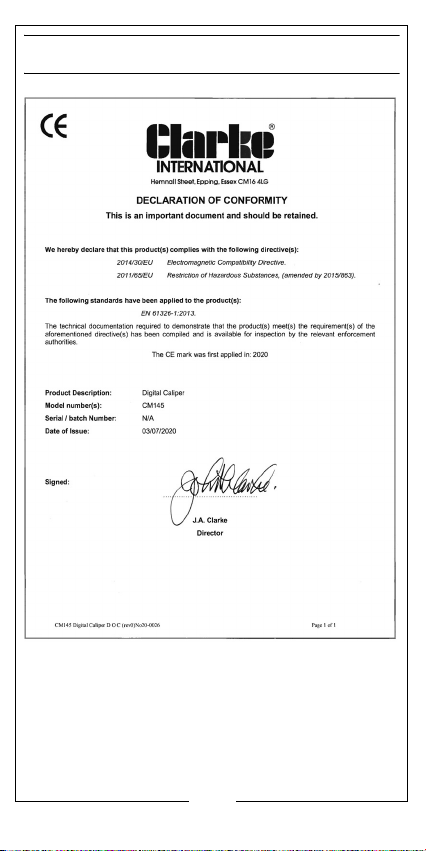
DECLARATION OF CONFORMITY
Parts & Service: 020 8988 7400
11
Page 12

 Loading...