

Page 1

ARES 547 - 557 - 567 - 577
ARES 617 - 657 - 697
Use and
Maintenance
Page 2
Thank you for choosing a CLAAS tractor.
In this guide you will find the instructions for use and
maintenance that you must know to get the best service from
your tractor.
This document is not to be considered as contractual. CLAAS
has a policy of continuous technical improvement to all their
products, and therefore reserve the right to change without
notice and at any time the details contained in this booklet.
If you are still unsure about any points, the technicians of the
CLAAS network will be pleased to give you any additional
information you may require.
The description of the different models contained in this
manual was established from technical characteristics known
at the time of writing the document. The manual contains all
existing equipment (standard or optional) for these models,
and their presence in the tractor depends on the version and
options chosen and on the country of sale.
Important: See chapter "M". Servicing operations during
the guarantee period are mandatory; failure to carry then
out will nullify the contractual guarantee.
Failure to observe the instructions for use and maintenance
as described in this manual definitively excludes any
possibility of recourse to the CLAAS guarantee system.
CONTENTS
For your safety
Before using the tractor for the first time, read the user's
manual and observe the general safety instructions!
WARNING TRIANGLE
In this user's manual, this sign indicates all the
paragraphs concerning safety aspects. Pass on these safety
instructions to all other users.
The instruction and warning plates affixed to the tractor give
important information about possible risks of use. Respect for
these instructions is a guarantee of your safety!
Appropriate use
This tractor has been designed to be used exclusively for
normal agricultural work (appropriate use).
Any use other than that defined above will be considered as
inappropriate and will release the manufacturer from any
liability in the event of damage or injury; the user alone will
bear the risks resulting from such misuse.
Appropriate use also supposes the observance of the
operating, maintenance and repair regulations laid down by
the manufacturer.
The tractor must be used, maintained and repaired only by
persons with a thorough knowledge of the vehicle and aware
of the possible risks.
Specific accident prevention instructions must be observed
as well as general rules concerning technical safety, health
and safety regulations and the highway code.
The manufacturer declines all responsibility for any damage
resulting from any modification made to the tractor without
their approval.
Ares 507-607 – 04.2006 – GB
Page 3

Model Type
ARES 547
ARES 557
ARES 567
ARES 577
ARES 617
ARES 657
ARES 697
5342
5352
5362
5372
8252
8262
8272
Ares 507-607 – 04.2006 – GB
Page 4
CHAPTER SYMBOLS
T
REF CHAPTERS SYMBOLS
IDENTIFICATION - APPROVAL
A
SAFETY
HOMOLOGATION ACCORDÉE AU
YPE/VERSION R ANNÉE
PAR LE MINISTÈRE DE L’AGRICULTURE
SOUS LE NUMÉRO
B
C
D
E
F
G
H
CAB
ELECTRICAL SYSTEM
ENGINE
TRANSMISSION
FRONT AXLE
HYDRAULICS - REAR LIFT AND HITCH
FRONT POWER TAKE-OFF - FRONT LIFT AND FRONT TOW
LINKAGE
I
J
K
L
M
ON BOARD COMPUTER
WHEELS AND TYRES
DIMENSIONS, WEIGHTS, CAPACITIES AND BALLAST
MAINTENANCE
OPERATIONS THAT ARE MANDATORY UNDER THE GUARANTEE
Ares 507-607 – 04.2006 – GB
kg
mm
l
Page 5

Notes
Ares 507-607 – 04.2006 – GB
Page 6

CONTENTS
A - IDENTIFICATION - CERTIFICATION - SAFETY
IDENTIFICATION ..................................................................................................................................................A.2
CERTIFICATION ...................................................................................................................................................A.2
SAFETY .................................................................................................................................................................A.3
SAFETY STICKERS WITH WARNING PICTOGRAMS .....................................................................................A.13
B-CAB
INSTRUMENTS AND CONTROLS (DRIVING POSITION) ..................................................................................B.2
INSTRUMENTS AND CONTROLS (PANEL) .......................................................................................................B.3
WARNING LIGHTS ...............................................................................................................................................B.4
ALARMS................................................................................................................................................................ B.5
INSTRUMENTS .....................................................................................................................................................B.9
CONTROLS AND ACCESSORIES IN THE CAB ROOF.................................................................................... B.12
OTHER CONTROLS AND ACCESSORIES ......................................................................................................B.13
DRIVER'S SEAT.................................................................................................................................................. B.17
SUSPENSION ADJUSTMENT............................................................................................................................B.19
HEATING – VENTILATION – MANUAL AIR CONDITIONING ..........................................................................B.22
HEATING/VENTILATION/AUTOMATIC CLIMATE CONTROL .........................................................................B.23
ADJUSTMENT AND DESCRIPTION OF THE DISPLAY ...................................................................................B.24
C - ELECTRICAL SYSTEM
BULBS...................................................................................................................................................................C.2
TOWING SOCKET ................................................................................................................................................C.2
LIGHTING - INDICATORS ....................................................................................................................................C.3
BATTERY MASTER SWITCH............................................................................................................................... C.5
IGNITION SWITCH WITH KEY .............................................................................................................................C.5
FUSES AND RELAYS...........................................................................................................................................C.6
D-ENGINE
CHARACTERISTICS.............................................................................................................................................D.2
OPERATIONS BEFORE START ..........................................................................................................................D.3
STARTING THE ENGINE......................................................................................................................................D.4
ENGINE STARTING HELP WHEN COLD ............................................................................................................ D.5
STOPPING THE ENGINE......................................................................................................................................D.5
OPERATION.......................................................................................................................................................... D.6
BLEEDING AIR FROM THE INJECTION SYSTEM .............................................................................................D.8
E - TRANSMISSION
CHARACTERISTICS............................................................................................................................................. E.2
REAR AXLE .......................................................................................................................................................... E.3
DISPLAY.............................................................................................................................................................. E.11
SWITCHING ON AND SELF-TEST..................................................................................................................... E.12
GEARBOX ........................................................................................................................................................... E.15
REAR AXLE ........................................................................................................................................................ E.26
Ares 507-607 – 04.2006 – GB
Page 7

STATIONARY WORKING ...................................................................................................................................E.32
TOWING...............................................................................................................................................................E.33
F - FRONT AXLE
CHARACTERISTICS .............................................................................................................................................F.2
FRONT AXLE ENGAGEMENT..............................................................................................................................F.3
DIFFERENTIAL LOCKING....................................................................................................................................F.4
PROACTIV FRONT AXLE SUSPENSION ............................................................................................................ F.4
G - HYDRAULICS - REAR LIFT AND HITCH
CHARACTERISTICS ............................................................................................................................................ G.2
REAR LINKAGE TCE 15-25 (ELECTRONIC TRACTO CONTROL)................................................................... G.4
REAR LIFT TCE 15T (ELECTRONIC TRACTO CONTROL)............................................................................. G.11
AUXILIARY SPOOL VALVES............................................................................................................................ G.16
ELECTROPILOT................................................................................................................................................. G.19
REAR HITCH ADJUSTMENT INSTRUCTIONS................................................................................................. G.22
AUTOMATIC HITCHES ...................................................................................................................................... G.24
H - FRONT POWER TAKEOFF, LINKAGE AND FRONT COUPLING
CHARACTERISTICS .............................................................................................................................................H.2
USING THE FRONT POWER TAKEOFF..............................................................................................................H.5
I - ON BOARD COMPUTER
ON-BOARD COMPUTER (INFOTRAC) ................................................................................................................. I.2
OPERATION ........................................................................................................................................................... I.4
INFOTRAC CALIBRATION PROCEDURE "OPERATING SPEED"..................................................................... I.9
J - WHEELS AND TYRES
GENERAL .............................................................................................................................................................. J.2
TYRE PRESSURES............................................................................................................................................... J.2
FRONT AND REAR AXLE CHARACTERISTICS ................................................................................................. J.4
TRACK TABLES.................................................................................................................................................... J.6
SETTING THE TRACK ........................................................................................................................................ J.20
ADJUSTING THE TRACK WITH SMOOTH SHAFT REAR AXLE (ARES 697) ................................................ J.21
FRONT AXLE STEERING LOCK STOPS........................................................................................................... J.21
DUAL WHEELS ................................................................................................................................................... J.22
USING DEEP-WORKING IMPLEMENTS............................................................................................................ J.23
K - DIMENSIONS, WEIGHTS, CAPACITIES AND BALLAST
DIMENSIONS AND WEIGHTS ..............................................................................................................................K.2
CAPACITIES..........................................................................................................................................................K.3
BALLASTS ............................................................................................................................................................K.4
L - MAINTENANCE
GENERAL .............................................................................................................................................................. L.2
M - OPERATIONS THAT ARE MANDATORY UNDER THE GUARANTEE
OPERATIONS MANDATORY UNDER THE TERMS OF THE CONTRACTUAL GUARANTEE........................ M.2
Ares 507-607 – 04.2006 – GB
Page 8
HOMOLOGATION ACCORDÉE AU
T
YPE/VERSION R ANNÉE
PAR LE MINISTÈRE DE L’AGRICULTURE
SOUS LE NUMÉRO
A -
IDENTIFICATION - CERTIFICATION
- SAFETY
Ares 507-607 – 04.2006 – GB
A.1
Page 9

HOMOLOGATION ACCORDÉE AU
T
YPE/VERSION R ANNÉE
PAR LE MINISTÈRE DE L’AGRICULTURE
SOUS LE NUMÉRO
IDENTIFICATION
A - Tractor type.
B - Tractor identification number.
C - CEE number (German certification no. for 50 km/h
version tractors).
D - Maximum allowable gross weight depending on tyre fit
(in kg).
E - Front axle weight.
F - Rear axle weight.
G - Maximum unbraked trailer weight (in kg).
H - Maximum trailer weight - mechanical brake (in kg).
I - Maximum trailer weight - inertia brake (in kg).
J - Maximum trailer weight - servo brake (in kg).
K - EMC (electromagnetic compatibility) acceptance.
L - EMC (electromagnetic compatibility) acceptance N°.
M - Smoke absorption coefficient.
N - CEE structure acceptance.
O - CEE structure acceptance N°.
In any correspondence, always state:
CLAAS KGaA mbH
Type
o
N
CEE
o
N
identification
Masse totale admissible (kg)
(suivant pneumatiques)
Essieu AV
Essieu AR
Masse remorquable admissible
(kg)
sans frein
frein mécanique
frein à inertie
freins assistés
Fabriqué par RENAULT Agriculture
A
A
C
B
D
E
F
G
H
I
J
B
S
e2
023003
1,28
e2
072
K
L
M
N
0
841msn24
Tractor identification number
This number is stamped on plate (A) which is riveted behind
the cab. It is also stamped on the right side of the front
chassis.
CEE structure acceptance N°
This number is stamped on plate (B) riveted to the right of
plate (A).
Engine type and serial number (plate
(C)
)
CERTIFICATION
• Certification of ARES tractors range 507-607 (40 km/h
version) according to European directives 74/150/CEE
(amended 2001/3/CE).
• Certification of the tractors ARES 657, 697 (50 km/h
version) according to the German highway code (Stvzo).
• Certification of ARES structures range 507-607 according
to European directives 79/622/CEE
(amended 1999/40/CE).
• CEE tractor certification no. for ARES 547, 557, 567, 577
(40 km/h version): e2*2001/3*0021.
• CEE tractor certification no. for ARES 617, 657, 697
(40 km/h version): e2*2001/3*0022.
841msn25
C
101msn01
• German tractor certification no. for ARES 657, 697
(50 km/h version): L787.
• Certification N° of safety structures of ARES tractors
range 507-607:
• 547ATX, 557ATX, 567ATX, 577ATX N° e2 S 101.
• 547ATZ, 557ATZ, 567ATZ, 577ATZ N° e2 S 102.
• 617ATX, 657ATX, 697ATX N° e2 S 103.
A.2
Ares 507-607 – 04.2006 – GB
Page 10
SAFETY
FOREWORD
CLAAS Tractors are designed and built to give you optimum
service over many years. They are designed to provide the
most comfortable and safe working conditions.
However, accidents can easily happen in agricultural work. It
is important to know the dangers and how to avoid them.
We respectively draw your attention to certain aspects
that merit constant attention (non exhaustive list).
PRECAUTIONS BEFORE STARTING
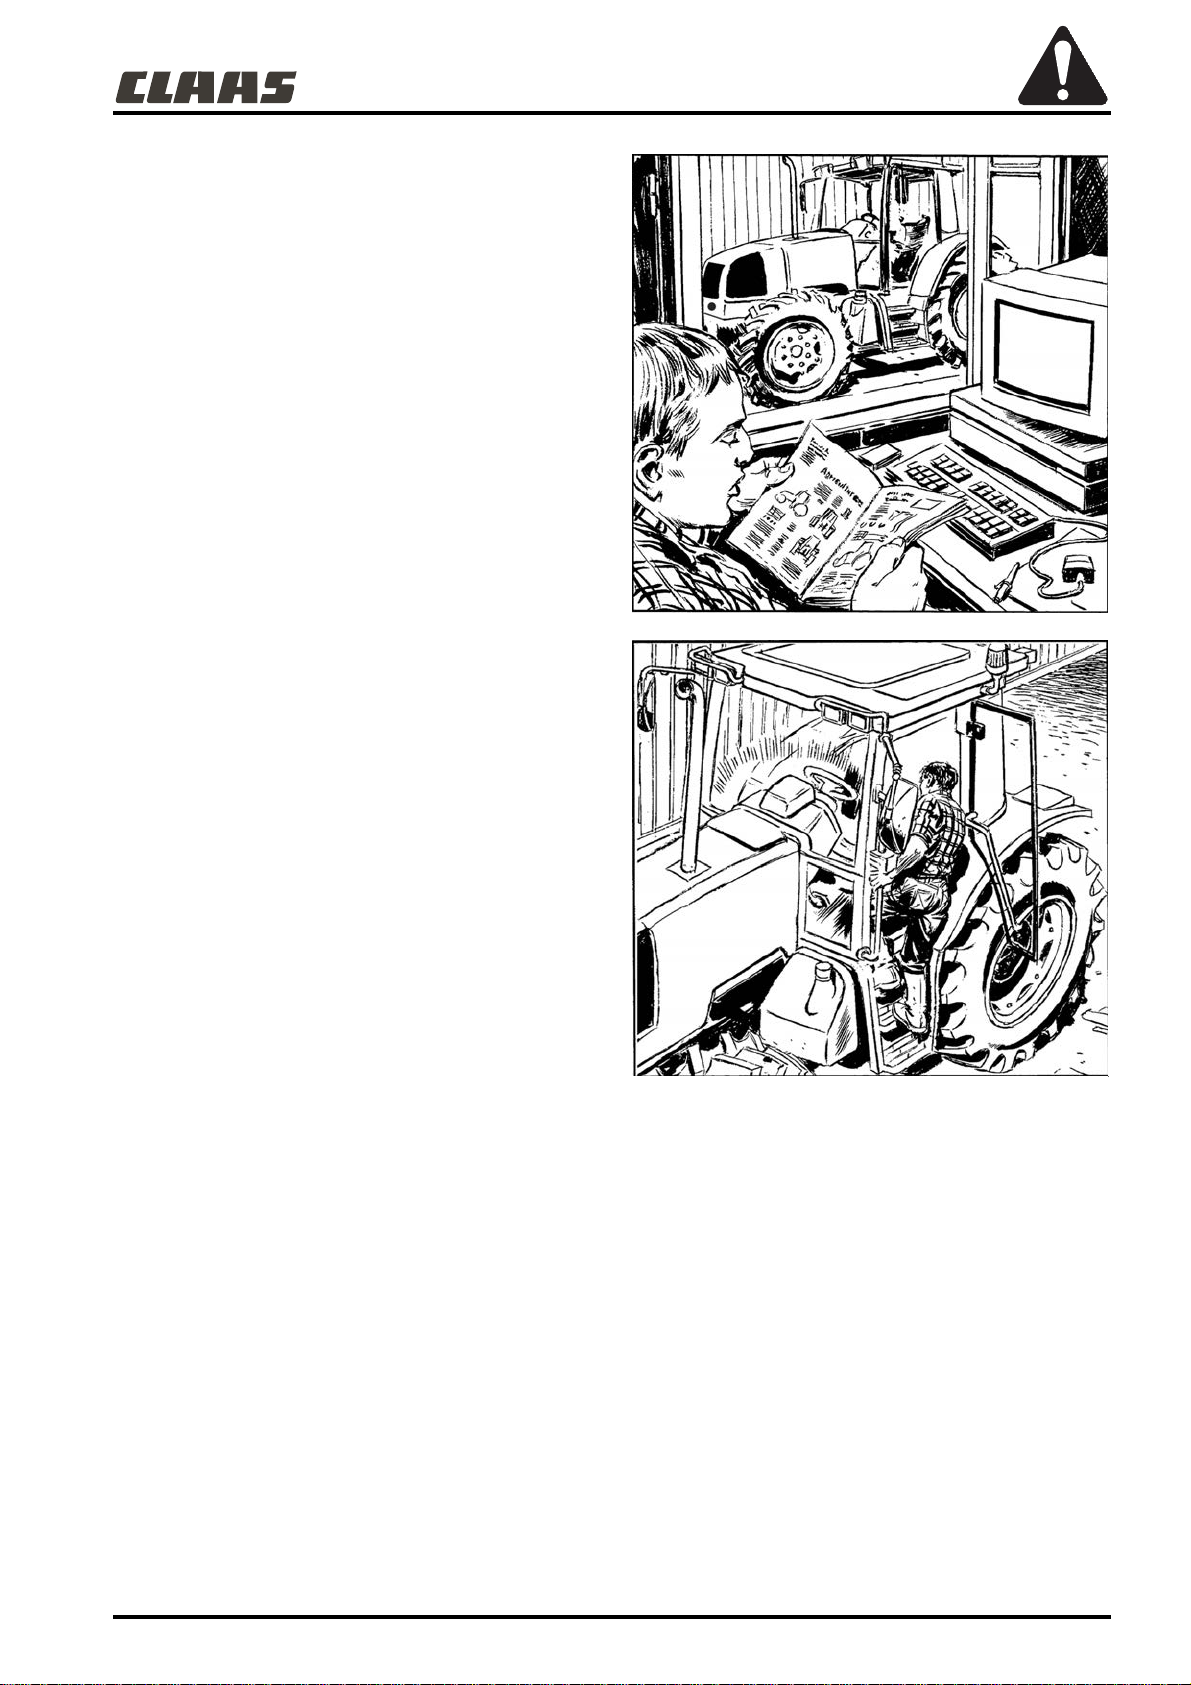
Caution is the best guarantee against any risk of
accident.
The driver must be fully familiar with the tractor and must
understand all the controls, their position and their purpose.
This manual must be read carefully.
If the tractor is used by anybody other than the owner, he
must be given all explanations required to allow him to work
safely.
The driving position must be clean (instrument panel, steering
wheel, floor and pedals).
001hsn03
Footsteps must be clean (no mud) to avoid slipping when
climbing or descending.
Use the steps and handles provided when getting into or out
of the tractor.
Before starting the engine, make sure that all controls are in
the neutral position, particularly the power take-off lever.
Only run the engine in well ventilated areas.
Make sure there is nobody nearby before starting the
tractor.
Fully release the handbrake before starting.
Do not start work if the tractor is not working properly.
001hsn04
Ares 507-607 – 04.2006 – GB
A.3
Page 11

CONDITION OF THE TRACTOR
Maintaining the tractor in the best possible condition, by
carrying out all routine maintenance (oil changes, level
checks, overhauls, adjustments and thorough cleaning) will
allow it to be used in the safest and most profitable way.
Check the following items first:
High temperature components:
particles such as straw, grass, wood chips etc., do not
accumulate in high temperature areas. Clear debris from
around the engine and the exhaust system. For tools
attached to the front or the side of the tractor, inspect and
clean the areas around the attachments for the various
supports.
Brakes:
-
Check that the brakes work properly. Check the
operation of the hand brake and foot brake.
Steering:
-
-
Transmission:
Check the operation of the hydrostatic steering.
Check the transmission fluid level
(especially if external services are used).
Hydraulic system:
-
Check the condition of the system
(unions, pipes, hoses), particularly the hoses to the
steering actuators.
Electrical system:
-
Check the condition of the electrical
system (batteries, wiring, headlights, indicator lights,
hazard lights, rotating beacons, windscreen wipers, etc.).
Lighting - indicators:
-
All lighting and indicating
equipment must not only be in working order, but must be
fully visible; clean them. Carry a spare set of bulbs.
Replace any defective element.
Only fit genuine CLAAS parts. The CLAAS network is at your
disposal for any parts or products required to keep your
tractor in perfect working order.
Check that airborne
001hsn05
A.4
001hsn06
001hsn07
Ares 507-607 – 04.2006 – GB
Page 12

ADJUSTMENT OR MAINTENANCE REPAIRS
Only carry out operations well within your capabilities. A
number of simple adjustments are described in the manual
(clutch and brake free travel, etc.). Never attempt to work on
your tractor unless you have perfectly understood the
procedure and have all the basic equipment required.
Special equipment is required to remove or install major
components (the cab, engine, transmission, front axle);
this equipment represents the only guarantee of safe
working conditions and successful repair.
The CLAAS network is at your disposal for all this work. It has
the approved special tooling, the skills required and genuine
CLAAS parts. If you have any doubts at all, call in your
CLAAS agent.
001hsn08
Ares 507-607 – 04.2006 – GB
A.5
Page 13

AXLE STANDS
If the tractor is to be placed on axle stands, always work
on a flat, horizontal, hard surface.
Check the axle stands are suitable for the load. For this
operation, check the tractor's front and rear weights in
chapter "K".
4-wheel-drive tractor:
If the rear axle is on stands, do not start the engine.
Risk of the tractor moving if the brakes are activated (foot
brake or hand brake)
If the engine has to be started, the front axle must also be
supported on axle stands.
HYDRAULIC SYSTEMS
Transmission oil: Transmision oil is used as hydraulic fluid for
the linkage and external services.
Oil escaping from a pipe under pressure can have
sufficient force to penetrate the skin.
Should an injury be caused by oil under pressure, see a
doctor immediately. Serious infection can occur if the
wound is not treated immediately.
Consequently, always use a piece of wood or cardboard
to find a leak on a pipe under pressure: never use your
hand!
As a general rule: Make sure the unions are tight and the
pipes in good condition before putting the system under
pressure.
Never loosen a union when the circuit is under pressure.
For any repairs to the hydraulic system, stop the engine and
lower the implement to the ground.
Let the oil cool down before working on the system, to prevent
any risk of getting burnt when the oil flows.
Maintenance - greasing: Always stop the engine.
001hsn09
A.6
Ares 507-607 – 04.2006 – GB
Page 14

ELECTRICAL SYSTEM
Knowledge and skill are required to work on the electrical
system. If the need arises (installation of miscellaneous
accessories, radio etc.) contact your approved CLAAS repair
agent.
In addition:
• Always disconnect the battery negative terminal before
working on the electrical system.
• Never weld on the tractor or on a towed implement.
• Never "patch-up" electric circuits.
Never replace a blown fuse with a larger calibre fuse;
•
you could cause a fire.
•
Never carry out work on components such as the
alternator or the fan motor when the engine is running.
•
If you need to handle the battery, ensure that acid
does not contact the skin; protect your eyes from
splashes.
FUEL
RE-FUELLING
Before filling the tank, always carefully clean around the fuel
cap to remove any pieces of straw, twigs, etc. which could
help start and then propagate a fire.
In addition:
Never fill the tanks when the engine is running or near
•
a naked flame.
•
Do not smoke when filling with fuel.
001hsn10
COOLANT
Do not work on the cooling system when the engine is
(risk of burns)
hot
.
001hsn11
Ares 507-607 – 04.2006 – GB
A.7
Page 15

ROAD USE - USE FOR TRANSPORT
Always comply with THE LEGISLATION on the use of
agricultural tractors on the road. Never exceed the maximum
transportation speed of the machine.
If in doubt, consult the police or insurance companies.
Whenever possible, avoid using busy roads.
When transporting equipment on a public road, use the
warning device required by the highway code.
All indicators must be clean and in working order.
The working lights must not be lit.
Brake pedals must be coupled together.
Do not use the differential lock on the road or in bends.
Certification aspects of the wearing of seat belts are laid
down in the construction and use regulations. Comply
with the law in your country.
If carrying an additional passenger, the tractor must be
fited with a passenger seat.
Do not carry passengers except on the seat provided for the
purpose.
Reduce speed on rough roads or tracks.
Towing: If the trailer has an independent brake system,
connect the brake pipe to the brake valve coupling and not to
the auxiliary spool valve.
If it is necessary to stop on the road in a position that causes
a traffic hazard (insufficient visibility), it is mandatory to switch
the hazard warning lights on.
When transporting mounted equipment, set the linkage to the
raised position. If the tool has transport wheels, use them.
Slow down before changing direction.
When travelling downhill, always remain in gear: never
declutch. The gear selected should be the same as would be
used to climb an equivalent gradient.
001hsn12
001hsn13
A.8
Ares 507-607 – 04.2006 – GB
Page 16

OPERATION
GENERAL RULE
As a general rule, always use equipment in good condition,
suitable for the size of the tractor and the type of work.
WHEEL TRACK
Always use the maximum track compatible with the work in
hand, to reduce the risks of overturning.
ATTACHING IMPLEMENTS
To hitch or unhitch an implement, place the gear lever in
neutral and apply the hand brake. Use a low gear for all
tractor manoeuvres.
Sufficient front-end ballast must be used if the implement
is heavy, to prevent the tractor rearing-up.
Drawbar: This is not intended as a trailer towing hitch and is
not designed to carry vertical loads.
Use the safety equipment provided to hitch implements
(towing jaw, towing stub, retaining pins, etc.).
During hitching operations or when using the external
lifting control, the operator must remain outside the hitch
frame.
001hsn14
The eye bolt on the front ballast weights must only be
used for towing the tractor in conjunction with a towbar
and over firm ground. Under no circumstances is it to be
used for towing a tool or a bogged down tractor.
DRIVING
Do not enter or leave the tractor when it is in motion.
Avoid risk of overturning:
Do not turn sharply when working on slopes. Maximum slope
allowed while working: See chapter K.
During a break in work, even if only brief, stop the engine and
apply the handbrake. If the ground slopes, engage a gear.
Lower the implement to the ground.
Ares 507-607 – 04.2006 – GB
A.9
Page 17

STATIONARY WORK
If the tractor has to work in a fixed position (use of static
implements), chock the tractor wheels, apply the hand
brake and keep a constant watch on it.
USE OF TOOLS DRIVEN BY THE PTO
Do not wear loose fitting clothing that might get caught
in moving parts.
The engine must be stopped before coupling or
uncoupling the attachment's universal joint shaft.
All guards must be fitted when working.
When repairing, adjusting or lubricating an attachment in
the field, always set the PTO lever to neutral and stop the
engine.
When the PTO is not in use, set the lever to neutral (shaft
stationary) and fit the protection cover.
001hsn15
A.10
Ares 507-607 – 04.2006 – GB
Page 18

TOXIC PRODUCTS
A tractor uses a number of fluids: Diesel, Diester,
transmission oil, brakes and linkage fluid, engine oil, liquid for
tyre ballast etc. In the event of an accidental leak of one of
these liquids causing pollution to foodstuffs (for human or
animal consumption), such as vegetables, silage, hay, pellets
etc., destroy the contaminated products, because it is
dangerous to ingest them.
Certain products used to treat crops are particularly
dangerous.
Always read the instructions for the use of these products
carefully and follow them scrupulously.
In certain cases, the user must protect himself against
any contact with the product.
The cab air filter is only a dust filter. It gives no protection
against treatment product gases or mist.
The cab air filters are designed to remove dust from the
air but not chemical vapours. Even when shut, the cab
does not protect its occupants from poisonous
pesticides, that are injurious to health and may be fatal..
Protection equipment that is appropriate or recommended for
the relevant pesticide must be used and worn during filter
use, inspection, cleaning or replacement..
If the tractor is to be used for the application of agricultural
chemicals, the following must be done:
- Fit a checmical air filter for the presticides (consult an
authorised CLAAS agent). After each application, replace
the chemical filter with a normal filter.
- Observe the precautions laid down by the manufacturer of
the agricultural chemical.
- Keep the the cab clean by removing protective equipment
and eliminating any traces of contaminated soil or other
matter from shoes or boots before entering the cab.
001hsn16
IMPORTANT
- Do not blow through the filters.
- Check that the filters are not damaged. Confirm that the
seals are in good condition. Replace the filters if holed
or damaged.
- When disposing of used filters, comply with the
regulations relating to the disposal of pesticide
containers.
Ares 507-607 – 04.2006 – GB
A.11
Page 19

AIR CONDITIONING
The air conditioning system contains a gas which can be
dangerous under certain conditions.
RECOMMENDATIONS:
Never work on the air conditioning.
If a leak occurs, prevent any concentration of the gas (in
a closed building, in the cab, etc.). Avoid any contact
between the gas and hot articles. Do not smoke.
IMPORTANT
It is recommended to keep a fire extinguisher and a first-aid
kit ready to hand.
SAFETY CABS
Our safety cabs have successfully undergone the official
E.E.C. and O.E.C.D. tests. As a result of these tests they
have been officially approved. They fully satisfy these tests.
Consequently, CLAAS disclaims responsibility for any
accident (impact or overturning) which applies loads
greater than those required by the tests to the structure.
001hsn16
Any safety structure which has been damaged (distorted)
in an accident must be replaced, not repaired.
If you want to add equipment or functions not provided
as standard or available as after-sales options, always
contact your CLAAS agent. It is important to obtain his
advice since it is forbidden to drill, weld or cut any of the
safety structure components since this would change
the cab characteristics and it would then no longer have
official approval.
ENVIRONMENTAL SAFETY
Precautions must be taken with waste in order to protect the
environment. Some liquids or parts such as oil, fuel, cooling
and brake fluids, filters and batteries pollute the surroundings.
Recover these liquids in sealed packaging so as to dispose of
them in compliance with the local requirements applicable
and the regulations in force in the country.
001hsn17
A.12
Ares 507-607 – 04.2006 – GB
Page 20

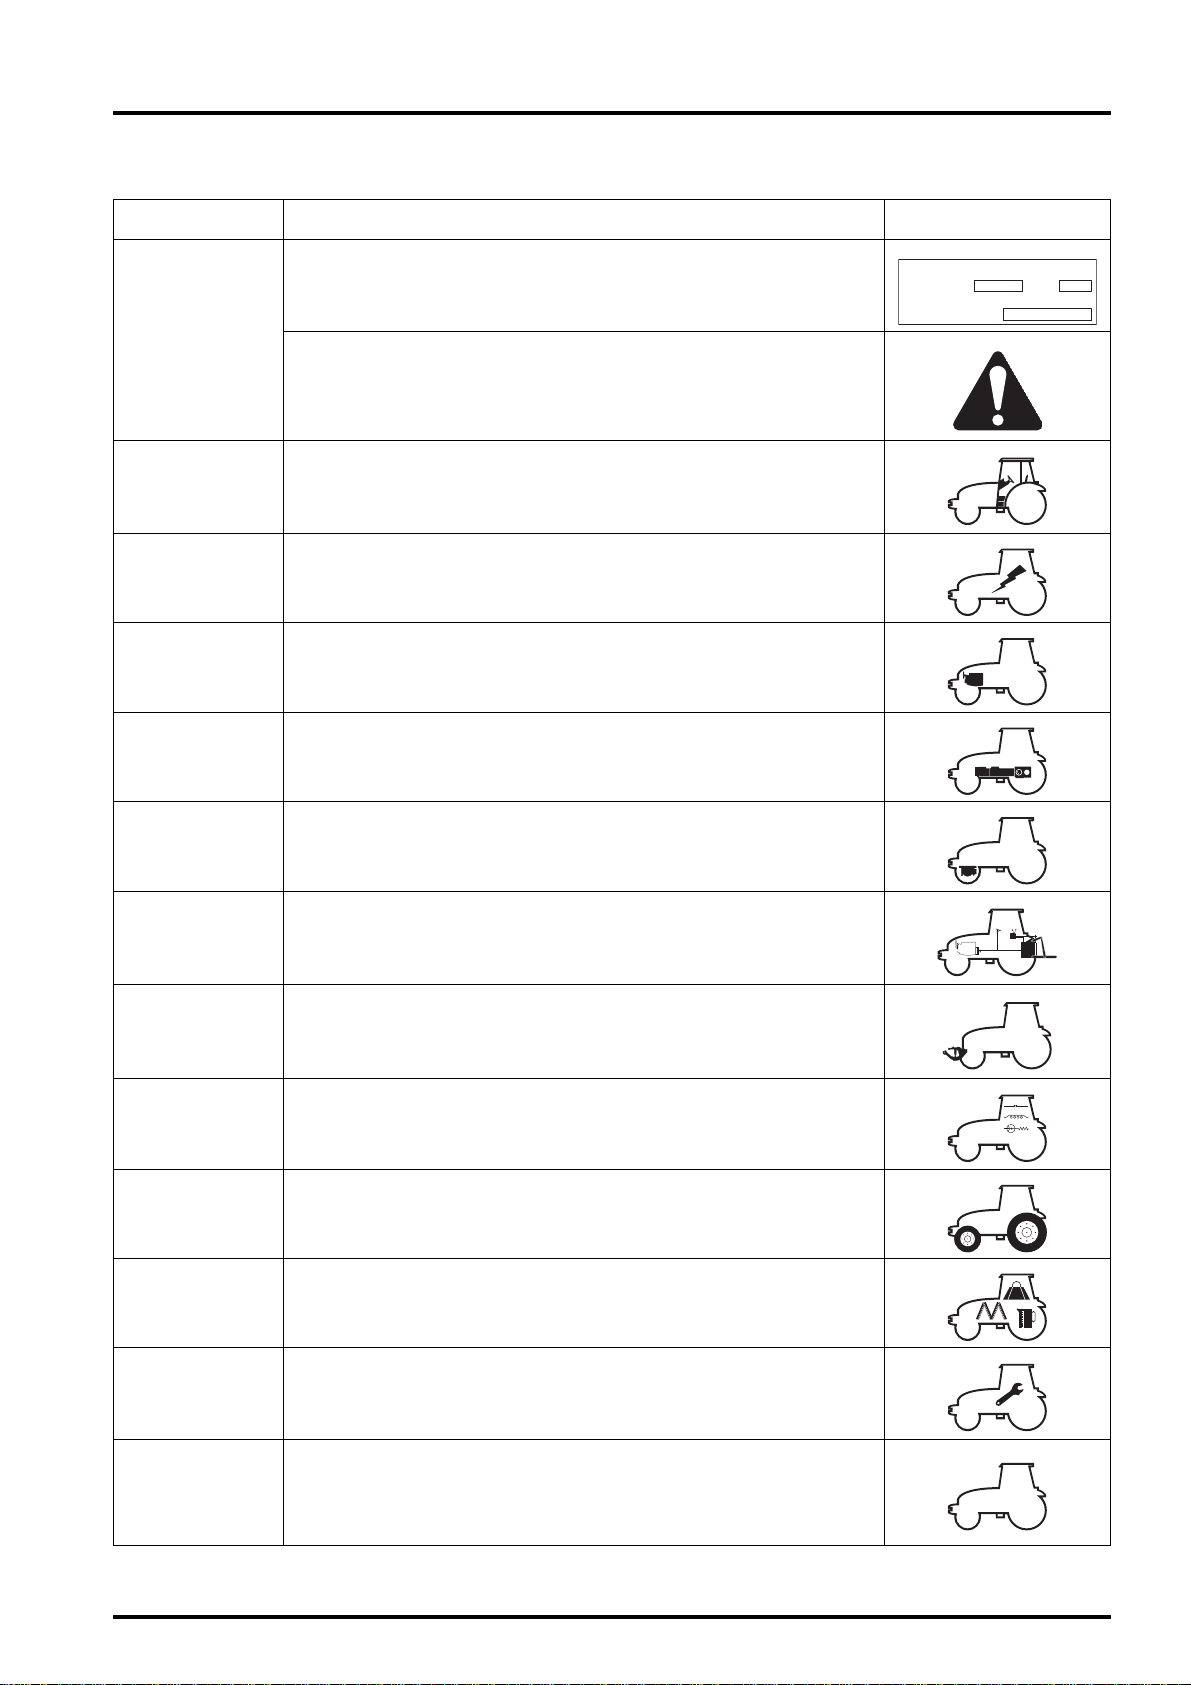
SAFETY STICKERS WITH WARNING PICTOGRAMS
Warnings Pictogram Location
Follow the safety instructions when
leaving the driver's seat (refer to the
user's manual for placing the gear box in
neutral).
781msn05 781msn21
Before using or working on the machine
read the safety rules in the user's
manual.
ou
tliser
ant d'u
eur lire
nt av
utilisation
tisseme
ir sur le charg
Aver
nt le livret d'
d'interven
tliser ou
attentiveme
ant d'u
eur lire
nt av
utilisation
le charg
tisseme
Aver
e livret d'
'intervenir sur
Avertis
d
entivement l
tliser ou
d'intervenir sur le c
sement avant d'utiliser ou
att
re
attentivement
eur li
nt avant d'u
tisseme
Aver
d'intervenir sur le charg
attentiv
hargeur lire
le livret d'utilisation.
e livret d'utilisation
nt l
eme
Do not exert a traction greater than
3 metric tons on the front hitch hook.
WARNING:
- Read the user's manual carefully
before using the tractor.
- Take account of the instructions and
safety rules, and always use the
tractor with great care
WARNING
Carefully read
operator's manual
before using tractor.
Observe instructions
and safety rules and
always operate the
tractor safety.
781msn16 781msn23
781msn08 781msn24
Ares 507-607 – 04.2006 – GB
781msn09 781msn25
A.13
Page 21

Warnings Pictogram Location
WARNING:
This tractor must not travel at a speed
greater than 30 km/h on public roads.
WARNING:
It is forbidden to transport a child under
13 years of age on farm machinery.
WARNING:
- This tractor's air conditioning is
charged with freon R 134 A, which is
a toxic gas when exposed to the open
air.
- Do not discharge the system without
the appropriate equipment.
WARNING
This tractor MUST
NOT be driven at
speeds in excess of
30km/Hr on the
public highway.
WARNING
It is prohibited for
children under 13
years of age to ride on
agricultural machines.
781msn10 781msn25
WARNING
The air conditioning
system on this tractor
is charged with R134A
FREON which forms a
poisonous gas when in
contact with a naked
flame.
DO NOT VENT
THE SYSTEM
WITHOUT THE
CORRECT
EQUIPEMENT
WARNING:
The power take-off must not be used at
1 000 rpm unless the implement is
designed to run at this speed (see the
user's manual).
WARNING:
To prevent accidents, disconnect
hydraulic hoses (of the grab hook) from
the tractor distributors immediately after
locking on the implement.
WARNING
1000 REV/MIN P.T.O.
MUST NOT BE USED UNLESS
IMPLEMENT IS DESIGNED
TO BE AT THIS SPEED
(SEE OPERATOR HANDBOOK)
WARNING
TO PREVENT ACCIDENTS,
DISCONNECT HYDRAULIC RELEASE
HOSE PIPE (ON PICKUP HITCH)
FROM TRACTOR’S HYRAULIC
SYSTEM, IMMEDIATELY AFTER
LATCHING THE IMPLEMENT.
781msn11 781msn26
781msn12 781msn27
A.14
781msn13 781msn28
Ares 507-607 – 04.2006 – GB
Page 22

Warnings Pictogram Location
WARNING:
Keep clear of the working zone of the
linkage and the power take-off when
using external controls.
Do not place the starter terminals in
contact with a tool that conducts
electricity (danger of sparks).
WARNING
KEEP CLEAR OF LINKAGE
WHEN OPERATING EXTERNAL CONTROL
781msn14 781msn29
Do not discard a worn battery but take it
to a recycling collection point.
To prevent any damage to the eyes,
never look at the surface of the radar
sensor when it is activated.
781msn17 781msn31
Pb
781msn18 781msn31
Ares 507-607 – 04.2006 – GB
781msn06 781msn22
A.15
Page 23

Warnings Pictogram Location
Never place a foot on the protector, to
avoid risks of breakage and getting
caught up in the power take-off.
Do not clean the air conditioner unit
using a high pressure washer.
781msn20 781msn33
Never work on the accumulator when it is
under pressure.
781msn19 781msn32
781msn34 781msn35
A.16
Ares 507-607 – 04.2006 – GB
Page 24

B -
CAB
Ares 507-607 – 04.2006 – GB
B.1
Page 25

INSTRUMENTS AND CONTROLS (DRIVING POSITION)
4
5
6
8
7
9
23
2
3
10
11
22
1
21
20
12
13
14
15
19
18
17
16
761msn00
1 - Hand brake lever.
2 - Clutch pedal.
3 - Brake pedals.
4 - Accelerator pedal.
5 - Manual accelerator lever.
6 - Clutch switch.
7 - Manouevring ratio switch.
8 - "+/–" ratio switch.
9 - Auxiliary distributor 1.
10 - Auxiliary distributor 2.
11 - Auxiliary distributor 3.
12 - Control box for electro-hydraulic linkage.
13 - Front power take-off engagement switch.
14 - Hexactiv switch.
15 - Transport/working mode selector.
16 - "+/–" ratio switch. Manouevring ratio switch.
17 - Rear power take-off engagement button.
18 - Electric socket for connecting implements (12V/25 A).
19 - Power take-off lever speed select lever 540-1 000 rpm
20 - Economy power take-off speed select lever.
21 - Crawler range selection lever.
22 - Switch bank:
- Front axle engagement.
- Engagement of rear axle differential lock (front and
rear axles only on Ares 697).
- Suspended front axle.
B.2
Ares 507-607 – 04.2006 – GB
Page 26

INSTRUMENTS AND CONTROLS (PANEL)
11
10
3
2
1
2
4
5
6
7
1 - Reverser lever under torque.
2 - Hot/cold air vents.
3 - Instrument cluster.
4 - Rotating beacon control switch.
5 - Hazard flasher switch.
6 - Steering wheel adjuster.
7 - Multifunction control:
- Front screen wiper.
- Front screen washer.
- Digital display (instrument panel).
9
8
761msn04
8 - Main switch (key operated).
9 - Drinks cooler compartment.
10 - Multifunction control:
- Direction indicators.
-Lights.
- Horn.
11 - Fresh air/air conditioning control.
Ares 507-607 – 04.2006 – GB
B.3
Page 27

WARNING LIGHTS
1 - STOP warning light (emergency stop).
2 - Oil pressure warning light.
3 - Hydraulic circuit and rear axle lubrication low pressure
warning light.
4 - Blocked dry type air filter warning light
5 - Blocked hydraulic circuit filter elements warning light.
6 - Service due warning light.
7 - Fuel level warning light.
8 - Transmission diagnostic warning light.
9 - Preheat warning light.
10 - Transmission oil temperature warning light.
11 - Engine coolant temperature warning light.
601hsn20
12 - Pneumatic or CUNA trailer brake pressure warning light
(depending on equipment fit).
13 - Brake fluid level warning light (40 km/h version).
Brake system pressure warning light (50 km/h version).
14 - Main beam warning light.
15 - Rear power take-off warning light.
16 - Front power take-off warning light.
17 - Tractor direction indicators warning light.
18 - 1st trailer direction indicators warning light.
19 - 2nd trailer direction indicators warning light.
20 - Hand brake warning light.
21 - Battery charge warning light.
B.4
Ares 507-607 – 04.2006 – GB
Page 28

ALARMS
RED "PRIMARY ALARM" LIGHTS
BRAKE SYSTEM PRESSURE WARNING
LIGHT (13) (50 KM/H VERSION)
This light comes on when the operating pressure is
incorrect. Refer to your approved CLAAS repair agent.
STOP WARNING LIGHT (1)
The flashing of the "STOP" (1) warning light with
(2), (3), (10), (11), (13), (20) and (21) plus the
buzzer indicates a serious defect. It is IMPERATIVE that you
stop IMMEDIATELY, in respect for conditions of use and
traffic.
ENGINE OIL PRESSURE WARNING LIGHT (2)
If the oil pressure warning light comes on stop
immediately and check the engine oil level. If the
level is too low, below the minimum marker, top up with oil. If
the warning light stays on and the oil level is normal, consult
your approved CLAAS agent.
HYDRAULIC FLUID PRESSURE INDICATOR (3)
If the light comes on during use, it means that there
is insufficient control pressure or rear axle
lubrication. Refer to your approved CLAAS repair agent.
TRANSMISSION OIL TEMPERATURE
WARNING LIGHT (10)
This warning light comes on when the
transmission (hydraulic) oil temperature is too high. Check
the cleanliness of the oil cooler at the front of the tractor and
clean if necessary. Start up again if the indicator comes on
again (cooler clean), "Stop the engine immediately" . Contact
your approved CLAAS repairer.
ENGINE COOLANT TEMPERATURE WARNING
LIGHT (11)
If the engine coolant temperature warning light
comes on, STOP THE ENGINE IMMEDIATELY. This means
that there is over-heating, in this case, check the following
points:
1 - Radiator and radiator grilles: Clean if there is any
clogging (dust, plant material, etc).
2 - Water pump belt: Check that the belt is not loose or
snapped.
3 - Coolant level in the radiator.
To carry out these operations, refer to chapter "L".
If it still overheats, contact your approved CLAAS agent.
Note: This light may come on after the engine is started
until the accumulator reaches its operating pressure
(1 minute maximum).
HAND BRAKE WARNING LIGHT (20)
When this warning light is on it shows that the hand
brake is in use . If the reverser lever is engaged in
forward or reverse with the hand brake on, an alarm sounds.
BATTERY CHARGE WARNING LIGHT (21)
–+
If the charging light comes on, check the condition
and tension of the alternator belt. If these are
normal, the alternator or regulator may be defective. Have
these units checked by your CLAAS approved repairer.
20
21 1 2 3
13 12 11 10
601hsn63
TRAILER BRAKE PRESSURE WARNING
LIGHT (12)
This warning light comes on when the trailer brake
pressure is too low, for pneumatic or CUNA trailer braking
(depending on equipment fit).
BRAKE FLUID LEVEL WARNING LIGHT (13)
(40 KM/H VERSION)
When the brake fluid level is too low,the warning
light comes on. "Stop immediately" and consult your
approved CLAAS agent.
Ares 507-607 – 04.2006 – GB
B.5
Page 29

ORANGE "CAUTION" LIGHTS
BLOCKED DRY-TYPE AIR FILTER ELEMENT
WARNING LIGHT (4)
When this warning light comes on, clean the main filter
element or replace the filter elements if they are coming to the
end of their service life. To carry out these operations, refer to
chapter "L".
HYDRAULIC CIRCUIT CLOGGING INDICATOR (5)
If the clogging indicator (5) comes on during work, this
means that the hydraulic circuit filter is clogged: There
may be clogging of the air intake strainer or the high pressure
hydraulic filters. Replacement of filter elements: See chapter "L".
Important: Starting the tractor in cold weather with the
transmission oil temperature too low (high viscosity) can
cause this light to come on. The light should go out after
several minutes' use; if this does not happen, follow the
above instructions.
SERVICE DUE WARNING LIGHT (6)
When this warning light comes on, it is telling you that
the tractor maintenance (every 500 hours) is due.
When the service has been done, turn the light off (see "Turning
off procedure" in this chapter).
601hsn22
N.B.: * During the guarantee period this light will come on
after the first 100 and 500 hours of use and then every 500
hours thereafter.
PROCEDURE FOR TURNING THE SERVICE DUE WARNING
LIST OFF
Select on display panel (2) the "total hour meter" mode. Press for
4 seconds on lever (3), and the maintenance warning light (6)
goes out automatically.
FUEL LEVEL WARNING LIGHT (7)
This light comes on when the quantity of fuel in the
tank is less than 40 litres.
PREHEAT WARNING LIGHT (9)
The automatic pre-heating warning light comes on
each time you switch on and goes out when
pre-heating is complete. This light depends on the ambient
temperature.
601hsn27
3
601msn19
B.6
Ares 507-607 – 04.2006 – GB
Page 30

BATTERY STATE WARNING LIGHT (8)
This light comes on when the battery voltage is below 10,5. Low
voltage causes some malfunctions. Have the battery and the
electrical circuit checked by your approved CLAAS dealer. The
"Auto 5" units check correct operation of the transmission. The
state of the diagnostic indicator (8) can indicate 3 cases of
anomalies:
1.
Diagnostic indicator flashes slowly
When the defect appears, the tractor reacts jerkily during
operations. In spite of this, work can continue. This defect can
make it impossible to change direction.
2.
Diagnostic indicator flashes rapidly + alarm
In this situation, do not place the reverser lever (F) in neutral (II),
or declutch to change gear with the lever (F) or switch (H) located
on the gear lever (A) because you risk completely immobilising
the tractor. If you have to stop, only use the clutch pedal (G).
You can only travel in one direction, the one
engaged when the defect appeared. If you have
to move the tractor, take all necessary
precautions, remembering that no reversal of direction
will be possible.
3.
Diagnostic indicator on permanently + alarm
In this situation, the tractor is immobilized and the neutral
indicator is steady on. This status corresponds to the safety
shutdown of the transmission by the "Auto 5" units.
Note: If one of the defects described above occurs during
tractor operation, consult your CLAAS approved repair
agant.
8
601hsn23
I
IV
II
F
III
601msn12
H
A
Ares 507-607 – 04.2006 – GB
326msn03
G
326msn01
B.7
Page 31

 Loading...