

Page 1
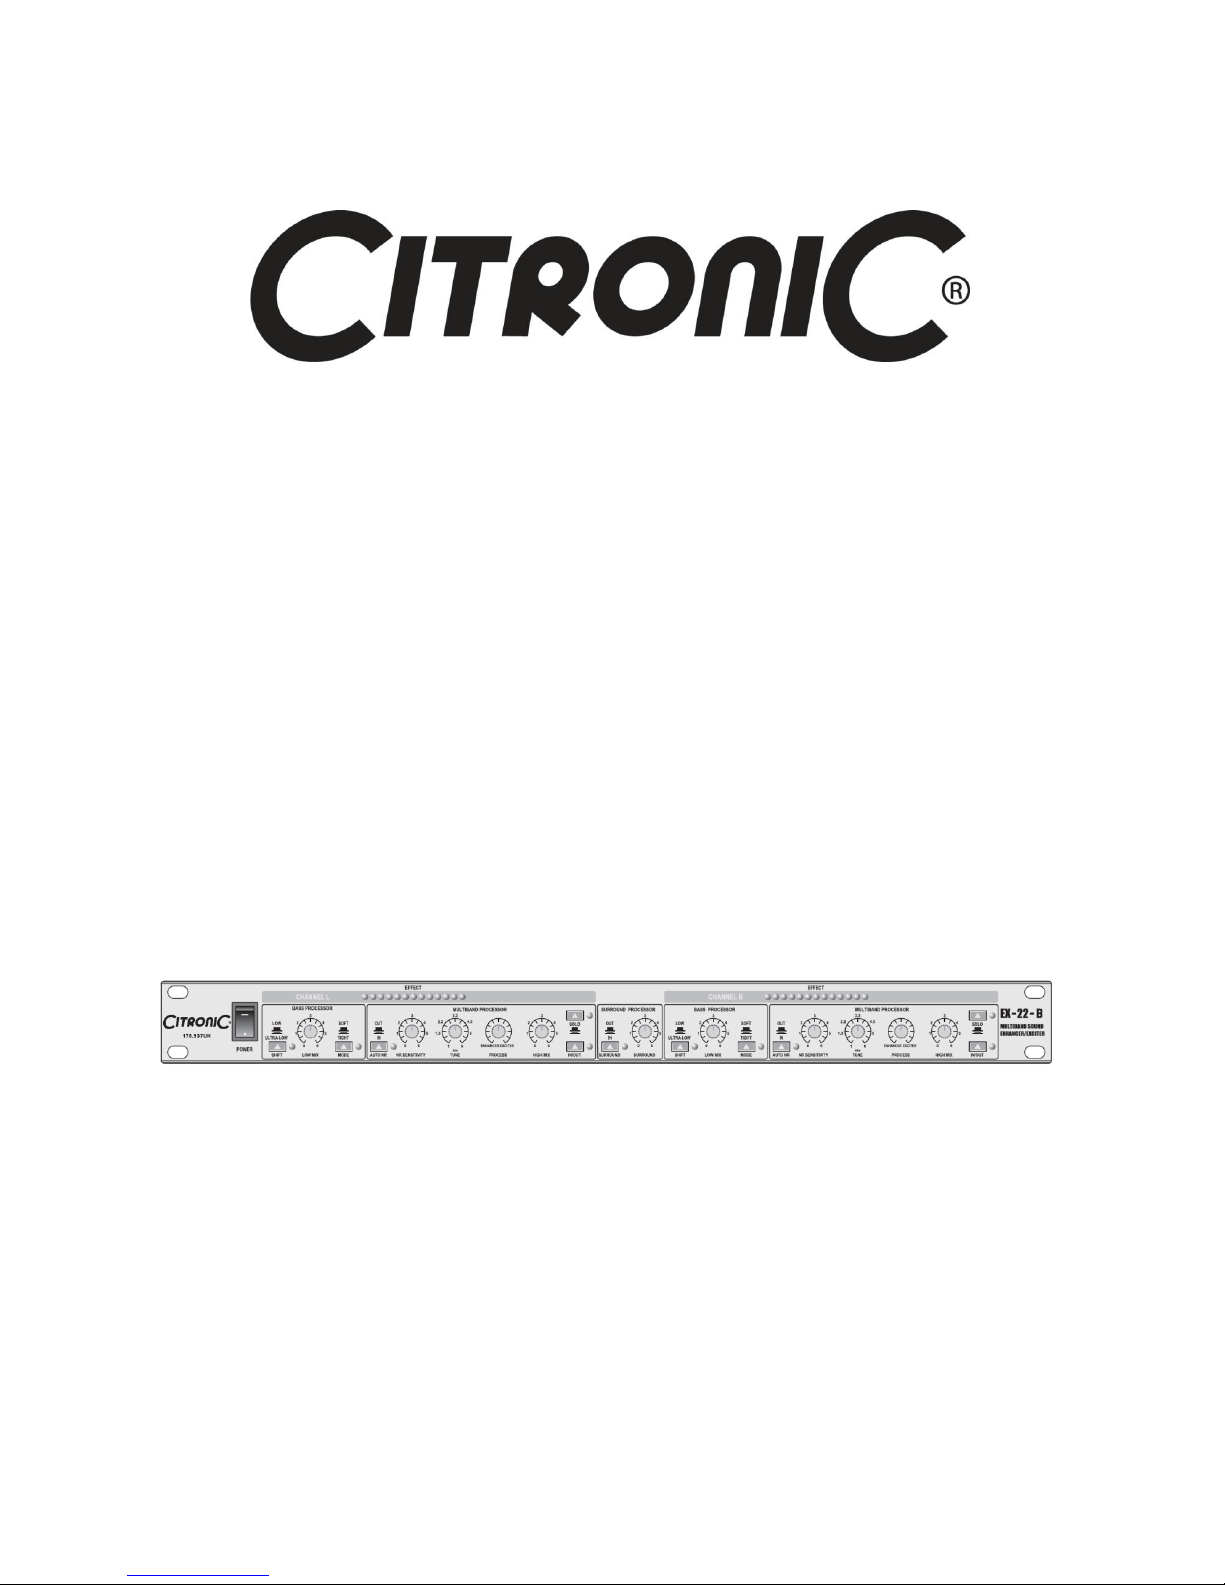
EX-22-B
170.937UK
Page 2
Introduction
Thank you for purchasing the Citronic EX-22-B enhancer/exciter. The aim of our audio processing range is to offer
cost-effective, high performance sound sculpting tools for live sound reinforcement and installation applications.
Citronic enhancer/exciter units are set out in a familiar format with a comprehensive range of controls for troublefree use.
The EX-22-B comprises a dual multi-band enhancer/exciter with an integral surround processor for correcting and
rebuilding frequency components of the audio signal.
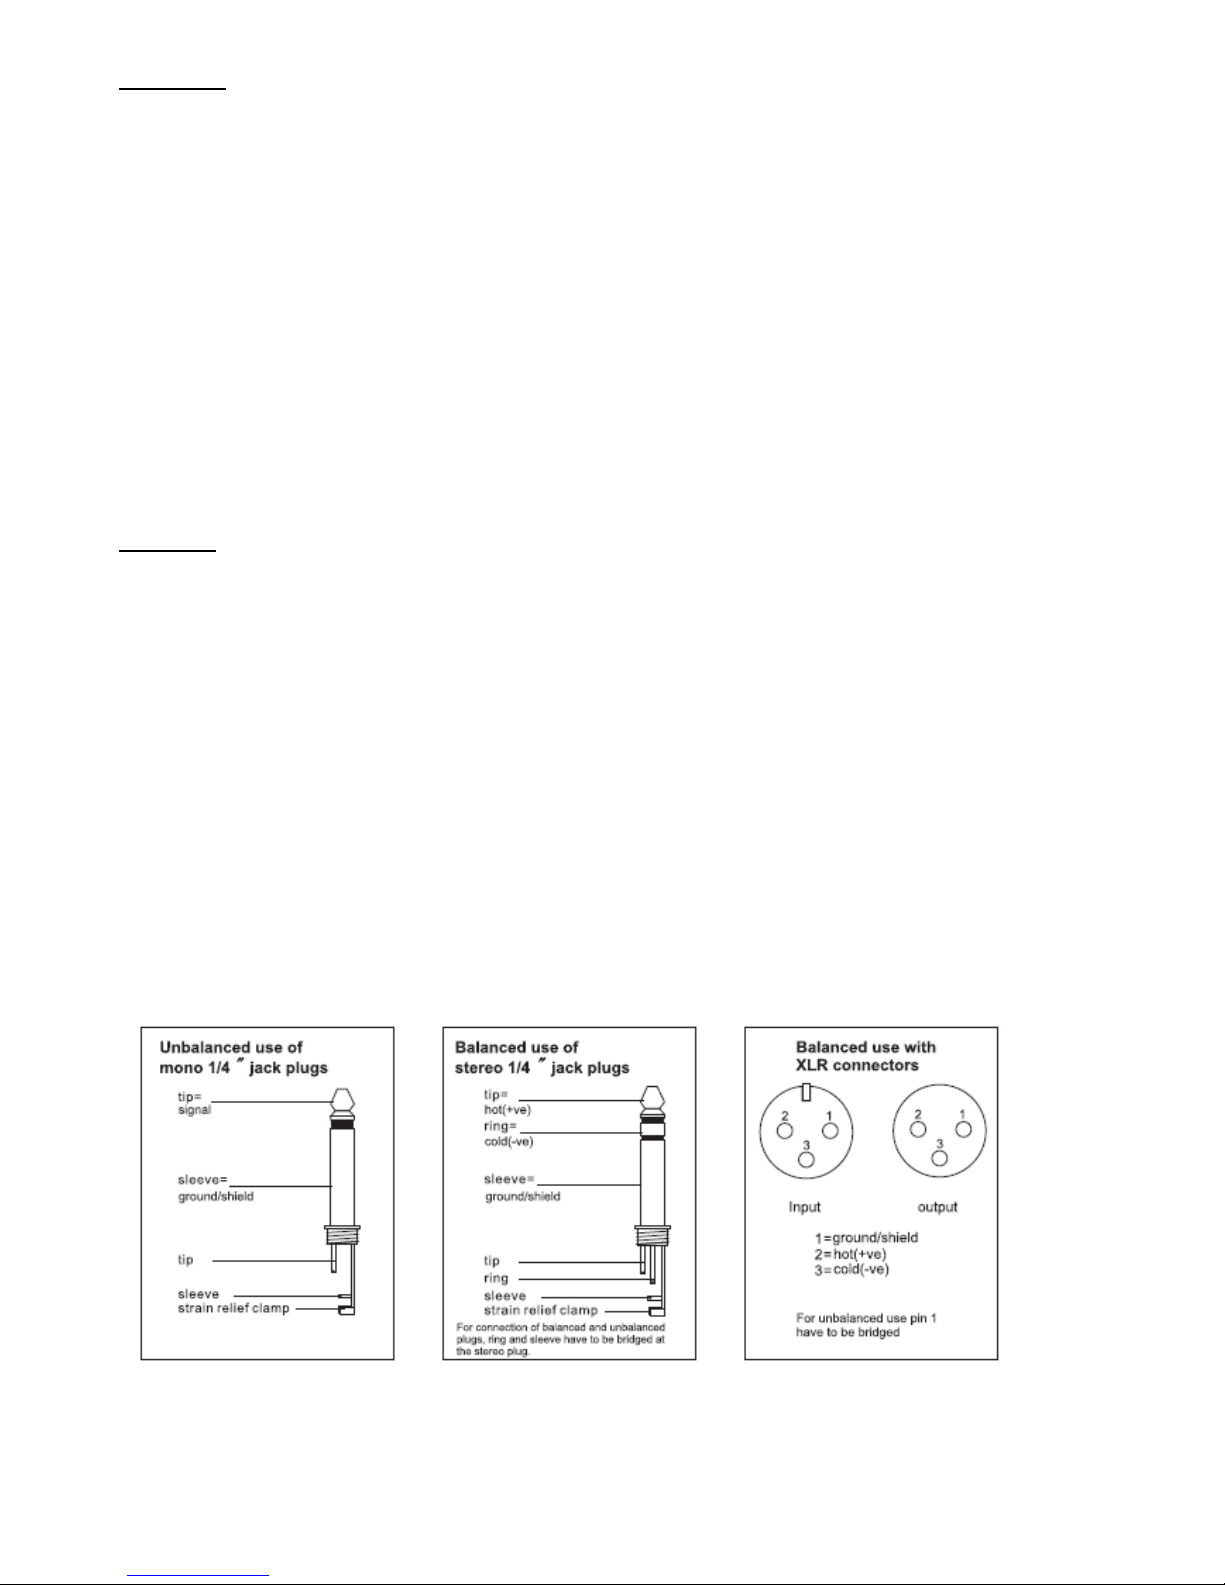
Connection to the EX-22-B is via balanced or unbalanced 6.3mm jack or XLR connectors allowing flexible linking
options.
This unit has been built to Citronic’s exacting standards using high grade circuit boards and components housed in a
heavy duty steel chassis casing to give long term, reliable service.
Installation
Set the EX-22-B into a 1U space in a rack, ensuring enough depth to contain the unit and any connectors attached
to it. Secure the front panel with rack screws and nuts to hold in place and stop the unit slipping. Plug the included
power cable into the rear panel IEC connector and connect to the mains. Be sure to switch the EX-22-B on before
switching on the power amplifiers to avoid loud thumping sounds through the speakers and switch the amplifiers
off before switching off the EX-22-B. The unit draws relatively little current and it is recommended to be left
powered whilst in the audio chain as switching can cause loud thumping sounds through the speakers.
This enhancer/exciter will not require special venting requirements as there is little heat generated compared to
amps etc. However, performance of this product may be impaired by exposure to continuous high temperatures
generated by adjacent equipment. Also, this unit is very well shielded against electromagnetic interference but high
levels in close proximity should be avoided. Nevertheless, spacing in between high power amplifiers is
recommended if possible.
Connection to each channel is served by either jack or XLR for both inputs and outputs. Use either jack or XLR but
never both for any input or output. For unbalanced and balanced connections, follow the diagrams below.
Page 3

Applications
In general, an enhancer is a program-dependent dynamic EQ which follows the input signal and profiles a filter
array to suit, boosting certain chosen frequencies to accentuate them, giving the impression of an overall brighter,
more present sound. An exciter works in complement to the enhancer by analysing the input and re-synthesizing
frequencies determined to be missing or lacking. This additive method is more effective but less natural than the
enhancer process and a blend of both processes gives the ideal compromise, which is possible across all settings of
the EX-22-B’s PROCESS control.
The EX-22-B uses cutting edge SMT circuitry to analyse and re-constitute the phase alignment and pulse symmetry
of the signal across multiple frequency bands. This unit can be used either as a stereo unit or as 2 independent
channels. Each channel can be treated as 3 separate processors as follows.
1. The Bass processor section enables the user to choose the character of the bass response – either “soft “ or
“tight” - and inject extra low end into the mix.
2. The Multiband processor deals with mid and high frequencies with the ability to tune in the frequency band
to be processed, varying between enhancer or exciter process and blending the process into the mix with
the HIGH MIX control. Since background noise can also be enhanced, an integral auto noise reduction
circuit is employed to help keep this effect to a minimum.
3. The Surround processor utilises the phase correction circuitry to split phases across the stereo field, giving
the impression of a wider stereo image. Turning this control clockwise produces an impressive pseudospatial sound.
Some applications for the EX-22-B are…
Breathing new life into an otherwise dull and bland mix
Accentuating a lead instrument or vocal to lift it in the mix without increasing gain
Overall tone enhancer for a live PA, compensating for dull-sounding rooms or focussing the bass in a
boomy environment (be sure to allow for the extra demands made upon power amps and speakers when
using an enhancer in this way)
Increasing the stereo spread of a narrow-panned mix
Operation
Bass Processor
1. SHIFT – determines the bass voicing - LOW or ULTRA LOW
2. LOW MIX – Adjusts the amount of bass accentuated into the mix
3. MODE – Adjusts the bass focus – SOFT or TIGHT
Page 4

Multiband Processor
4. AUTO NR – Switches the auto noise reduction circuit IN/OUT
5. NR SENSITIVITY – Adjusts the amount of auto noise reduction used
6. TUNE – Varies the centre frequency of the band to be processed
7. PROCESS – Adjusts the balance of the enhancer and exciter processes used
8. HIGH MIX – Adjusts the amount of processing applied to the signal
9. IN/OUT – Switches the process in or out for comparison
10. SOLO – Switches the unit to deliver only the process output without the original signal component for use
in parallel effect loops and compression side chains for frequency dependent limiting
Surround Processor
11. SURROUND IN/OUT – Switches the surround processor in or out
12. SURROUND Control – Varies the perceived stereo width of the surround effect
Page 5

Maintenance and Servicing
There are no user serviceable parts inside this unit. General case cleaning may be recommended using a dry or
slightly damp cloth and connectors should be checked periodically for good electrical contact. Any attempt to open
and modify or repair the circuitry of this unit will void the warranty. Refer all repair and servicing to qualified
personnel and all warranty issues must be handled by the retailer where the unit was purchased.
Technical Specification
Model
EX-22-B
Format
Dual or Stereo Enhancer/Exciter
Bandwidth
20Hz – 20kHz +0/-0.5dB
SNR
>95dB, 22Hz – 22kHz
THD
<0.008% @ +4dBu, 1kHz, gain 1
<0.04% @ +20dBu, 1kHz, gain 1
Crosstalk
<-100dB, 22Hz – 22kHz
Frequency Response
0.35Hz – 200kHz +0/-3dB
Input
XLR or 6.3mm jack, RF filtered, servo balanced
Input Impedance
50kΩ balanced, 25kΩ unbalanced
Maximum Input Level
+21dBu balanced and unbalanced, unity gain
Output
XLR or 6.3mm jack, RF filtered, servo balanced/auto level corrected
Output Impedance
102Ω balanced, 51Ω unbalanced
Maximum Output Level
+21dBu balanced and unbalanced
Indicators
13 LED Effect meters & individual function switch LEDs
Power
AC 230V 50Hz, 18W
Dimensions
483 x 150 x 44mm
Weight
2.3kg nett (2.8kg shipping)
© Citronic 2009
 Loading...