

Page 1
Cisco Smart+Connected Remote 250 Reference
Guide
This document includes the following information about the Cisco Smart+Connected Remote 250:
• Introduction, page 2
• Install and Maintain the Disposable the Batteries, page 3
• Install and Use the Optional Recharging Kit, page 4
• Configure the Remote Control, page 11
• Program Remote Paging, page 13
• Resetting the Device to Factory Settings, page 14
• Specifications, page 14
• Regulatory/Safety Information, page 16
• Related Documentation, page 16
• Warranty, page 17
• Service and Support, page 17
Americas Headquarters:
Cisco Systems, Inc., 170 West Tasman Drive, San Jose, CA 95134-1706 USA
Page 2
Introduction
Introduction
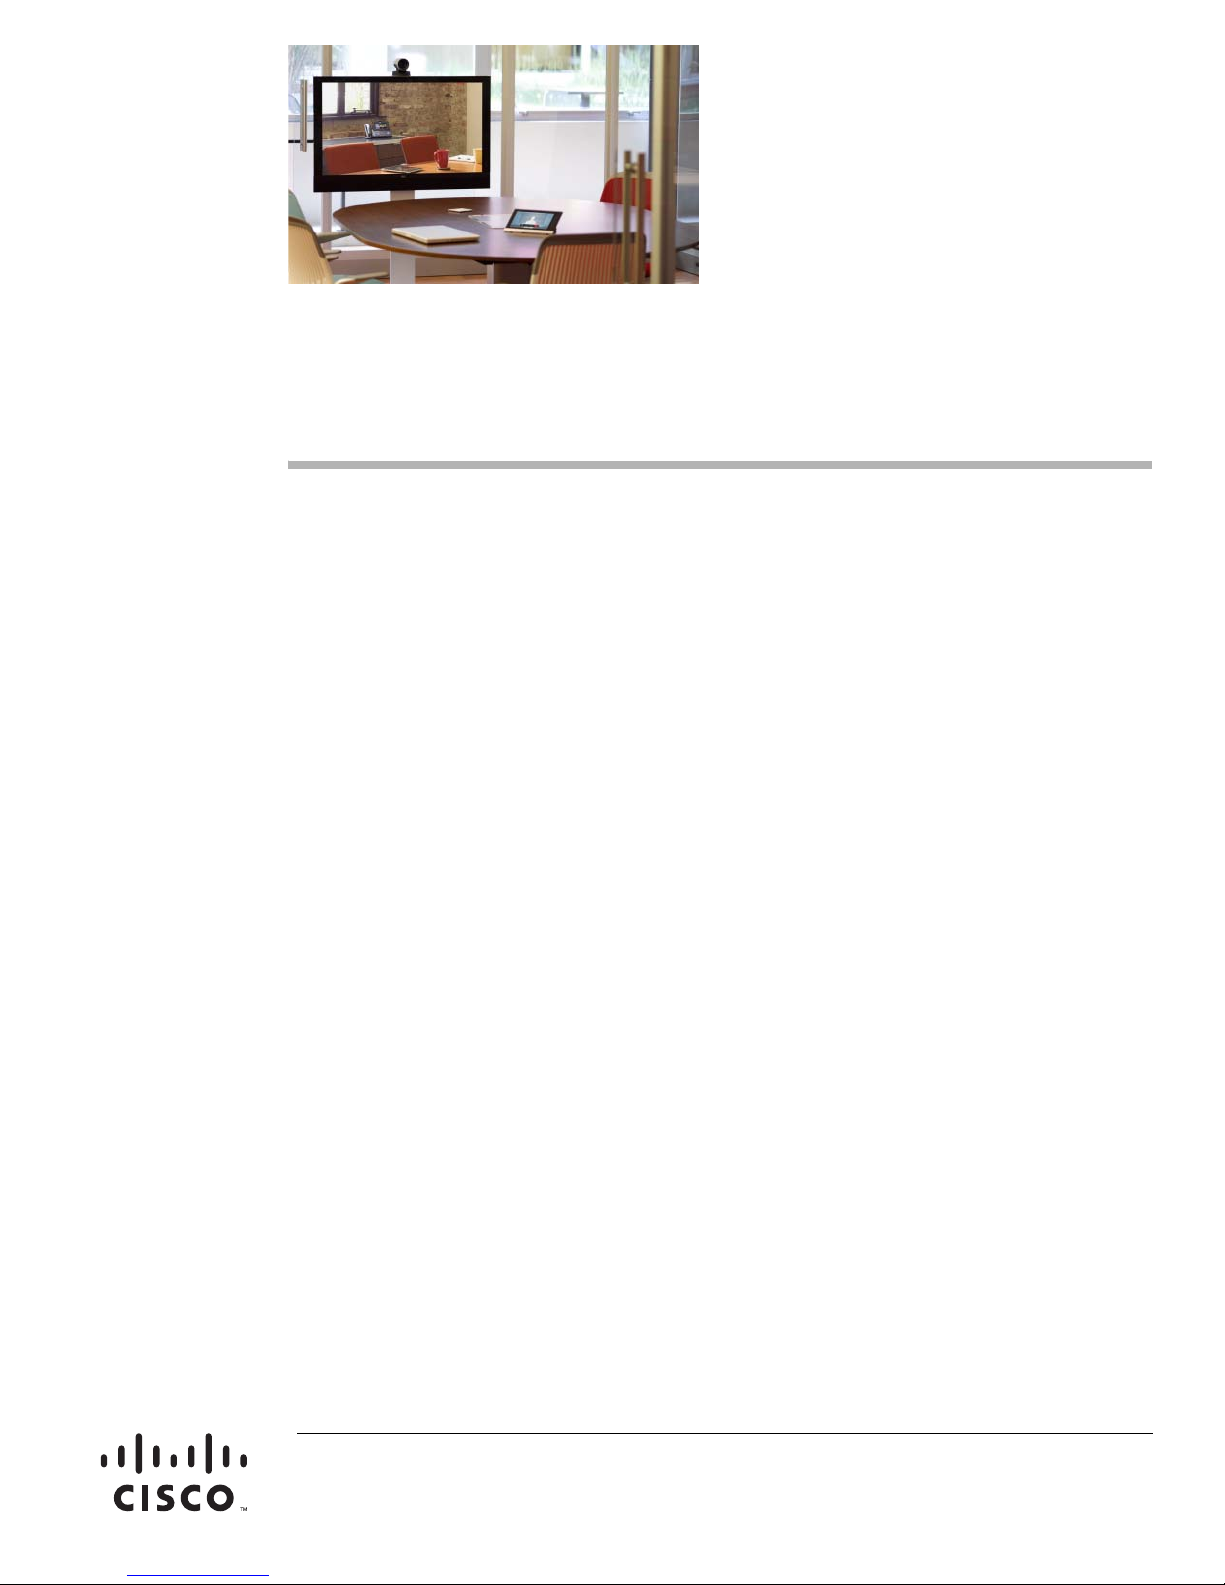
The Cisco Smart+Connected Remote 250 (SCH-REMOTE-250) allows residents to control automation
features and manage their personal audio and video equipment from anywhere in the residence. The
Cisco Remote 250 is used with an on-screen navigator (such as a television) and includes an LED display
for complete residential control using only the remote.
The Cisco Remote 250 provides wireless connectivity of any intelligent device from anywhere in the
residence. Line of sight is not required the—remote does not have to be pointed at the TV or Cisco
Controller.
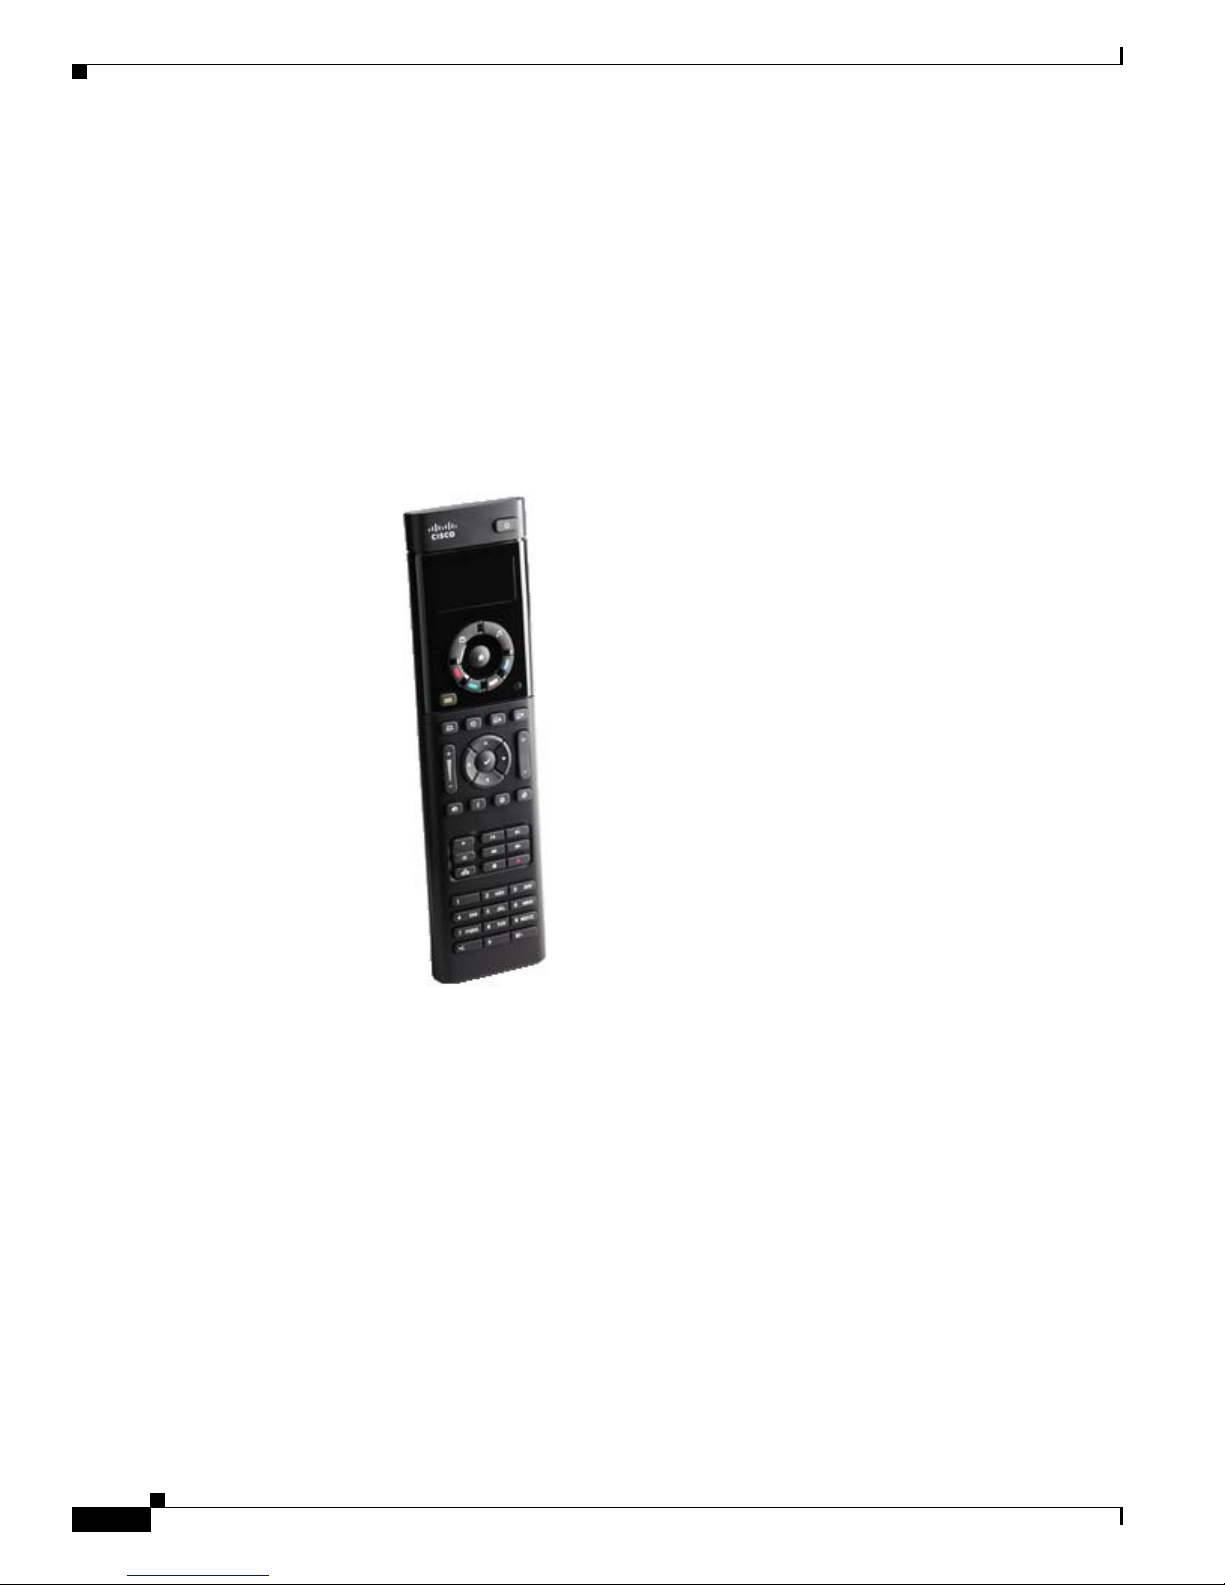
Figure 1 Cisco Remote 250
The Cisco Remote 250 offers:
• Bi-directional communication — Two-way communication with the Cisco Controller to provide
status information as well as control of any connected device.
• Ease of use — High-visibility screen and backlit keys for easy use in any lighting conditions.
Complete control in a small package that fits perfectly in your hand.
• Anything control — Control an entire residential automation system with this compact remote. No
additional remote controls are needed in the residence.
• Quick access control — Residents can press a single button to turn on their audio-video gear and
play their favorite movies or music.
• Ready to use worldwide with international icons on buttons providing a simplified and intuitive user
experience for all remote control activities.
• Recommended for use with the Cisco Controller 250 and Cisco Controller 800.
Cisco Smart+Connected Remote 250 Reference Guide
2
OL-27366-02
Page 3
Install and Maintain the Disposable the Batteries
Install and Maintain the Disposable the Batteries
Install the Batteries
Install the four (4) AA batteries (included) into the back of the Cisco Remote 250. Insert them according
to the diagram provided in the battery compartment (with the + and - terminals aligned correctly).
Battery Use and Care Tips
• Keep the battery contacts and compartment clean.
• Remove the batteries from the product if it is not going to be used for several months.
• Extreme temperatures reduce battery performance. Avoid putting the Cisco Remote 250 in very
warm places.
Battery Replacement and Safety Rules
Caution To prevent a battery short, leakage or rupture:
• Use typical AAA Alkaline batteries only.
• Do not mix battery types, such as Alkaline and rechargeable NiMH batteries.
• Do not attempt to recharge a battery unless the battery is specifically marked “rechargeable.”
• Never dispose of batteries in a fire.
ATTENTION! Pour empe^cher court-circuiter, fuite ou rupture de batterie:
• Utilisez les accumulateurs alcalins typiques d’AAA seulement.
• Ne me´langez pas les types de batterie, tels que les batteries alkalines et rechargeables de NiMH.
• N’essayez pas de recharger une batterie a` moins que la batterie soit spe´cifiquement marque´ «
rechargeable ».
• Ne vous de´barassez jamais des batteries dans un feu.
• Ne vous débarassez jamais des batteries dans un feu.
VORSICHT! Das Batteriekurzschluß, -durchsickern oder -abbruch verhindern:
• Benutzen Sie AAA alkalische Batterien nur im Schalter.
• Mischen Sie nicht Batteriearten, wie alkalische und nachladbare NiMH Batterien.
• Versuchen Sie nicht, eine Batterie neuzuladen, es sei denn die Batterie ist spezifisch gekennzeichnetes
„nachladbares.“
• Entledigen Sie nie sich Batterien in einem Feuer.
OL-27366-02
Cisco Smart+Connected Remote 250 Reference Guide
3
Page 4
Install and Use the Optional Recharging Kit
Install and Use the Optional Recharging Kit
An optional Cisco Remote Charging Station with a rechargeable battery is available to ensure a fully
charged battery at all times. If the battery level drops, simply place the remote in the station until the
remote is fully charged and ready to use again. These items are purchased seperatly.
See the following for more information:
• Ordering Information, page 5
• What’s in the Box?, page 5
• Installing the Remote Charging Kit, page 5
• Recharging Station Lights, page 10
• Set Up Your Existing Remote for the Recharging Station, page 10
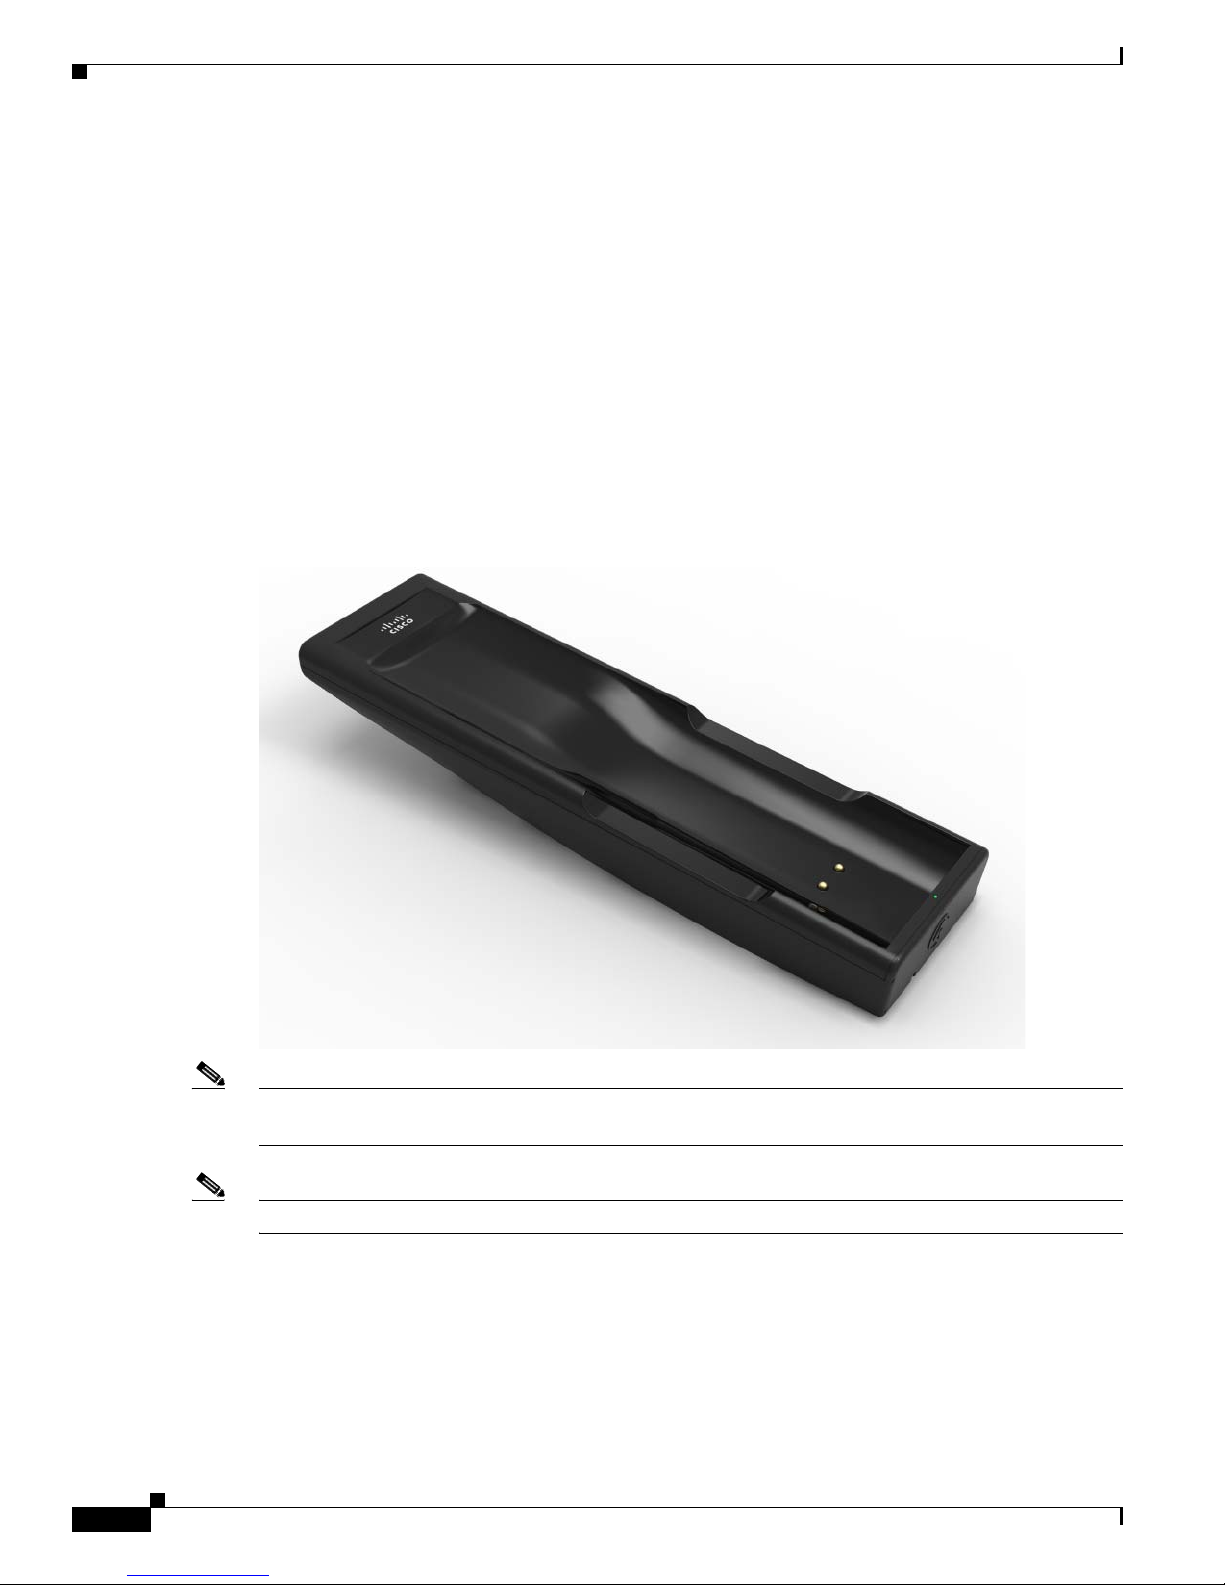
Figure 2 Cisco Smart+Connected Remote Charging Station
Note A lithium polymer rechargeable battery is used in this product. See the “Specifications” section on
page 14 for more information.
Note We recommend that you keep the remote on the recharging station when not in use.
Cisco Smart+Connected Remote 250 Reference Guide
4
OL-27366-02
Page 5
Ordering Information
Ta b l e 1 Cisco Smart+Connected Remote 150 Recharging Kit
Product Name Part Number
Cisco Smart+Connected Remote 250 Recharging Kit
Note The Recharging Kit includes a charging station, rechargeable
battery and new back cover plate for the remote.
Cisco Smart+Connected Remote 250 Rechargeable Battery and Cover
only
What’s in the Box?
The recharging station is sold and shipped in a seperate box (it is not included in the Cisco Remote box).
Make sure the following items are in the box:
• Recharging Station Cradle
Install and Use the Optional Recharging Kit
SCH-REMOTE-250-CHK
SCH-REMOTE-250-BPK
• Power Supply
• Rechargeable Battery (Lithium Polymer)
• Battery Cover
• Warranty Card
Installing the Remote Charging Kit
Note IMPORTANT! The remote must be used in a project running release 2.5.0 or later to properly indicate
the battery level; otherwise, a “Low Battery Warning” alert will appear (if an alert is configured) or in
the Cisco Remote 250 window.
OL-27366-02
Cisco Smart+Connected Remote 250 Reference Guide
5
Page 6
Install and Use the Optional Recharging Kit
Procedure
Step 1 Remove the old batteries from your new or existing remote.
a. Turn the remote upside down. On the bottom of the remote, pull the battery cover toward you with
your thumb and lift it off of the remote (
Figure 3 Remove the Battery Cover
Figure 3).
b. With your fingertip, pull out the old batteries (Figure 4).
Figure 4 Remove the Old Batteries
Cisco Smart+Connected Remote 250 Reference Guide
6
OL-27366-02
Page 7

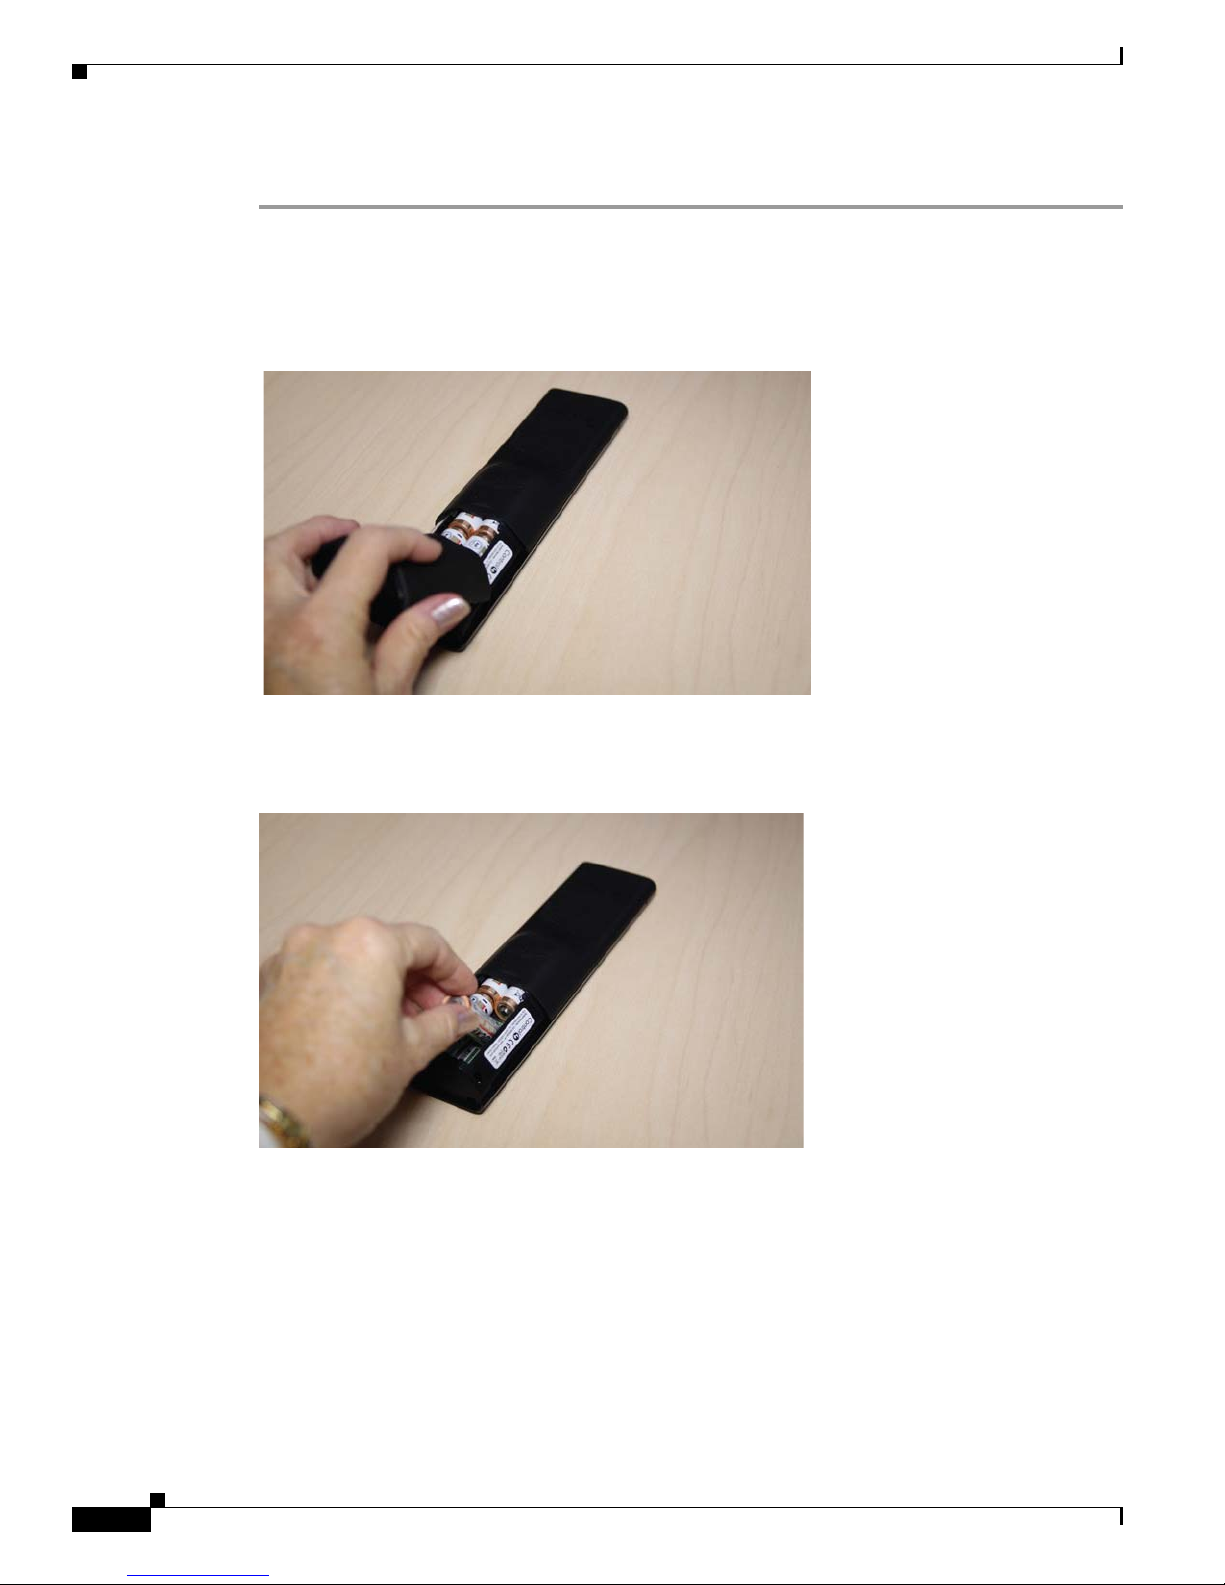
Step 2 Insert the rechargeable battery into your new or existing remote.
a. On the bottom of the remote (with the cover off and the old batteries taken out), insert the
rechargeable battery by sliding the small end into the slot first (Figure 3). Note the orientation of +
and - symbols for proper battery insertion (
Figure 5 Rechargable Battery
Figure 5).
Install and Use the Optional Recharging Kit
b. Seat the battery securely into the slot and push down (Figure 6).
Figure 6 Battery Installed
Step 3 Place the new cover on your existing remote.
If you’ve purchased a new remote with your recharging station, follow Step 2; otherwise, follow both
steps.
Note If you are using an existing remote with the new battery cover, it will appear that the paint color
and texturing may be different. With normal usage, the new battery cover color and texture will
blend to match the remote control. You should expect this to occur over a period of 1-2 months.
a. Insert the remote’s new battery cover into the remote. Notice the two metal plates on the cover; that’s
how you can differentiate the old cover from the new one (
OL-27366-02
Figure 7).
Cisco Smart+Connected Remote 250 Reference Guide
7
Page 8

Install and Use the Optional Recharging Kit
Figure 7 Replace the Cover
b. Slide the battery cover into the slot and then push down until the cover is horizontal. Slide the cover
into the slot until it snaps into place.
Step 4 Attach the power supply to your recharging station
This section applies to recharging stations for existing or new remotes.
a. Insert the small end of the USB cable into the back of the recharging station (inside the indentation)
and thread the power cord through the indentation in the station (
Note You can thread the cord straight out or wind it around to the opposite end of the recharging
Figure 8).
station.
Figure 8 Insert Power Cordthe Cover
b. Attach the USB cable to the power supply.
–
Remove the plastic shield from the power supply.
–
Attach the correct power plug adapter to the power supply by sliding it into the power supply’s
slot until it clicks into place.
–
(Optional) To remove the power plug adapter, press the Push button and slide the plug out.
Cisco Smart+Connected Remote 250 Reference Guide
8
OL-27366-02
Page 9

c. Insert the power plug into a power outlet to begin recharging.
d. For convenience, place the recharging station close to where you use your remote.
Step 5 Set the charging indicator on your recharging station
This section applies to recharging stations for existing or new remotes.
a. Turn the recharging station over.
b. Notice the Charging Indicator button labeled ‘High, Off, and Low’ (Figure 9).
Figure 9 Charging Indicator Button
Install and Use the Optional Recharging Kit
OL-27366-02
c. Move the button to the desired light level.
–
High—Sets to the highest light level.
–
Off—Sets the light to off.
–
Low—Sets the light to low.
d. Turn the recharging station over to its upright position.
Step 6 Place the Remote on Your Recharging Station
This section applies to recharging stations for existing or new remotes.
a. If you purchased a recharging station without a remote, ensure that you’ve replaced your old
batteries with the new rechargeable batteries and new cover.
b. While holding the remote in a horizontal position, place it onto the charging station.
c. Ensure that it is properly seated. The two metal plates on the back of the remote must touch the metal
pins in the recharging station (
Figure 10). Depending on your light setting an indicator light may
come on at the bottom of the recharging station. ().
Cisco Smart+Connected Remote 250 Reference Guide
9
Page 10

Install and Use the Optional Recharging Kit
Figure 10 Ensure Proper Installation
Recharging Station Lights
This section applies to recharging stations for existing or new remotes.
Depending on the Charging Indicator brightness you select, the indicator light will be High or Low
brightness or Black/Off. When your recharging station is on, you may see the following lights.
• Red—The remote is recharging, and is not fully charged yet.
• Green—The remote is fully charged.
• Black—The light is off. Either the Charging Indicator is turned off, or the remote is not seated
properly in the recharging station.
Set Up Your Existing Remote for the Recharging Station
You must update your remote to recognize the new rechargeable battery.
(Optional) You can check Enable Recharge Station in Composer Pro (SR-150 or SR-250 remote
Properties page) to acknowledge the battery. This view also shows you the percent battery level.
Cisco Remote 250 (Online)
If you have a Cisco Remote 250 that is online, follow these steps:
1. On the remote, press List.
2. Press Info.
3. Press Config.
4. Select Recharge Station.
5. Press Yes.
Cisco Smart+Connected Remote 250 Reference Guide
10
OL-27366-02
Page 11

Cisco Remote 250 (Offline)
If you have a Cisco Remote 250 that is offline, follow these steps:
1. On the remote, press List.
2. Press Config.
3. Select Recharge Station.
Press Yes.
Configure the Remote Control
Step 1 Start Control4 Composer Pro and connect to a Director.
Step 2 In the System Design view, (selected by default), select the room where the Cisco Remote will reside.
Step 3 In the My Drivers tab, locate the SR-250 under the User Interface section.
Step 4 Double-click SR-250 to add the device to the project tree.
Step 5 Identify the Cisco Remote 250:
Configure the Remote Control
a. In the Connections view, click the Network tab.
b. Select System Remote Control SR-250 in the center pane.
c. Click Identify (or right-click and choose Identify).
d. When prompted to do so, press the center button four (4) times to have the device identify to the
system.
e. When the MAC address appears in the window, click Close.
Step 6 View or change the Cisco Remote properties as needed in Composer Pro. In the System Design view’s
project tree, select the System Remote Control SR-250 object to display the device’s properties.
The properties include:
• Display Brightness—Set the light level (brightness) of the screen backlight. Choose a percentage
from 0 (Off) to 100 (full brightness).
• Keypad Brightness—Set the light level (brightness) of the keypad backlight. Choose a percentage
from 0 (Off) to 100 (full brightness).
• Sleep Mode—Set how long the Cisco Remote stays awake after no activity. The default setting is
15 seconds, but can be extended up to 60 seconds or can be reduced down to 0 to conserve battery
life. Select wake on movement to wake the remote when picked up.
• Battery Level—Displays the current strength of the batteries.
• Channel—Displays the ZigBee channel set for the SR-250, which should match the ZigBee channel
for the Cisco Controller.
• Gateway—Displays the MAC address of the ZigBee Server (usually your Cisco Controller unless
you specify differently).
• Network:
–
MAC—Displays the Cisco Remote MAC address.
–
Firmware Version—Displays the current firmware version.
OL-27366-02
Cisco Smart+Connected Remote 250 Reference Guide
11
Page 12

Configure the Remote Control
• Watch/Listen Button Behavior—Select to start the most recently-used device.
Program the Programmable Buttons
On the Cisco Remote 250, you can program six (6) soft buttons (Red, Green, Yellow, Blue, *, and #) to
perform programmed activities. These buttons can be programmed to execute any of the A/V device’s
macros or IR codes. Program these options using the A/V device Properties page.
Step 1 Start Composer Pro and connect to a Director.
Step 2 Ensure the System Design view is selected.
Step 3 Ensure that you have the following devices in your project:
• Cisco Controller
• System Remote Control SR-250
• An A/V device to be controlled
Step 4 Select the Connections view.
Step 5 On the Network tab, ensure the Controller and the System Remote Control are both network identified
(have a network address).
Step 6 Program the programmable buttons (Red, Green, Yellow, Blue, *, or #) either based on the selected A/V
device or the selected room.
Figure 1-11 Programmable Buttons
Cisco Smart+Connected Remote 250 Reference Guide
12
OL-27366-02
Page 13

Based on A/V Device
• Select the System Design view.
• Select an A/V device to display the device’s Properties page.
• On the device’s Properties page, choose Code or Macro for the button you want to program, and
Note Help text describes custom programming to end-users under the House option in any of the Navigators.
For example:
Step 1 In System Design view, select Disc Changer.
Step 2 Under Red button, choose Code.
Step 3 From the drop-down list, choose Subtitle.
Step 4 Choose the Set button to create a Subtitle button.
Program Remote Paging
then choose a code or macro from the drop-down list, edit the Help text as needed, and then choose
Set.
Based on Room
• Select the Programming view.
• Select a room in the Device Events pane.
• Select the Commands radio button in the [Room] Events pane.
• Use the drop-down menu to select a command or button (such as “Blue Button”).
• Build the script using items from the Actions pane to program the actions desired in the selected
room when you select the command or button.
Program Remote Paging
You can configure the Beep paging feature of the Cisco Remote 250 through programming. This feature
can be used to page a lost Cisco Remote. A keypad or custom button can be programmed to cause the
Cisco Remote to beep when pressed. This lets the user find the lost Cisco Remote.
To program the paging feature for this Cisco Remote:
Step 1 Start Composer Pro and connect to a Director.
Step 2 Select the Programming view.
Step 3 Select the Event that you want to use to start the page. For example, to select a keypad button press, first
select the keypad under the Device Event section (on the left), and then select the button under Events.
Step 4 In the Actions list (on the right), select System Remote Control SR-250.
Step 5 In the Commands list, choose an action for the System Remote Control, and then double-click the green
arrow to add the action to the Script pane.
OL-27366-02
Cisco Smart+Connected Remote 250 Reference Guide
13
Page 14

Resetting the Device to Factory Settings
Figure 1-12 Paging
• Beep until button press—The Cisco Remote beeps until you press one of its buttons.
• Beep for X seconds (<254)—The Cisco Remote beeps until X seconds have elapsed, or you press
one of its buttons.
• Stop Beep—The Cisco Remote stops beeping.
Resetting the Device to Factory Settings
To reset all settings to the factory defaults and leave the ZigBee network:
Press Room Off, #,*,1,3,4,1,3.
Specifications
Ta b l e 2 Cisco Remote 250 Specifications
Basic Specifications Description
Buttons
Total Buttons 47
Quick Access Control Buttons 2
Context Sensitive Programmable Buttons 4
Transport Control Buttons 8
Remote Display
LED Display Backlit OLED
Cisco Smart+Connected Remote 250 Reference Guide
14
OL-27366-02
Page 15

Table 2 Cisco Remote 250 Specifications (continued)
On-screen Display
TV Display On-Screen
Enclosure
High-Impact Molded Plastic Yes
Textured Finish Yes
Communications
ZigBee (802.15.4) Yes
Environmental
Normal operating temperature 32°F to 104°F
(0°C to 40°C)
Storage temperature –4°F to 149°F
(–20°C to 65°C)
Power Requirements
Batteries 4 AA
Dimensions
L x W x D 8.3 in. x 2.1 in. x 1.1 in.
Specifications
(190 mm x 55 mm x 27 mm)
Weight (Including Batteries) 8.8 oz. (250 g)
Optional Recharging Station
Recharging Cradle
( L x W x D)
Battery type (included with purchase of the
9 in. x 2.5 in. x 2.0 in.
(229 mm x 64 mm x 51 mm)
Lithium Polymer
recharging station)
Recharging Station Lights • Red: Remote is recharging and is not fully
charged
• Green: Remote is fully charged
• Black: Light is off, either the charging indicator
is turned off or the remote is not seated properly
in the recharging station
Power supply DC Supply 5V@1A
Mini-USB Type Connector Input
Power 5VDC @ 1A Maximum
Humidity 5% - 90% Non-condensing
Storage 0°F to 100°F
(-17.8°C to 37.7°C)
Operating temp 40°F to 90°F
(4.4°C to 32.2°C)
OL-27366-02
Cisco Smart+Connected Remote 250 Reference Guide
15
Page 16

Regulatory/Safety Information
Regulatory/Safety Information
To review regulatory information, go to www.cisco.com/go/smartconnectedresidential/docs.
Related Documentation
For more information about the Cisco Smart+Connected Residential products, see the following
documents and websites:
Subject / Document Title Location
General
Product Information and Home Page www.cisco.com/go/smartconnectedresidential
Data Sheets http://www.cisco.com/en/US/products/ps1244
5/products_feature_guides_list.html
Cisco 1-Year Limited Hardware Warranty Terms www.cisco.com/go/smartconnectedresidential
warranty
Regulatory Compliance and Safety Information for Cisco Smart+Connected
Residential Products
Cisco Support www.cisco.com/cisco/web/support/
ReleaseNotes
Release Notes for the Cisco Smart+Connected Residential Solution www.cisco.com/go/smartconnectedresidential/
Installation and Configuration
Cisco Smart+Connected Residential Installation and Configuration Guide www.cisco.com/go/smartconnectedresidential/
Cisco RMS Installation and Administration
Cisco Smart+Connected Remote Management Console Administration
Guide
www.cisco.com/go/smartconnectedresidential/
docs
docs
docs
www.cisco.com/go/smartconnectedresidential/
docs
Cisco Smart+Connected Remote Management Server Installation Guide
Hardware Reference Guides
Cisco Smart+Connected Controller 200 Reference Guide
Cisco Smart+Connected Controller 250 Reference Guide
Cisco Smart+Connected Controller 800 Reference Guide
Cisco Smart+Connected 7” In-wall Display Reference Guide
Cisco Smart+Connected Portable Tablet Reference Guide
Cisco Smart+Connected I/O Extender Reference Guide
Cisco Smart+Connected Universal Remote 150 Reference Guide
Cisco Smart+Connected Universal Remote 250 Reference Guide
Cisco Smart+Connected Video Door Station Reference Guide
Accounts and Licensing
Cisco Smart+Connected Remote 250 Reference Guide
16
www.cisco.com/go/smartconnectedresidential/
docs
OL-27366-02
Page 17

Warranty
Cisco Smart+Connected Residential Licensing and Registration Guide See your Cisco representative or partner for
more information.
Other
Smart Device Compatibility and other information:
Cisco Smart+Connected Smart Device License for Real Estate Developers
Composer Pro User Guide http://www.control4.com/documentation/Com
Note For information about third-party hardware and software, see the manufacturer’s product documentation
and/or website.
http://www.cisco.com/en/US/docs/building/sm
art_connected/residential/data_sheets/scr_ds_0
9_smartdevice.pdf
poser_Pro_User_Guide/index.htm
Warranty
A Cisco 1-year warranty applies. Go to the following URL for more information:
www.cisco.com/go/smartconnectedresidentialwarranty
Service and Support
Cisco offers a wide range of support programs to accelerate customer success. These innovative
programs are delivered through a unique combination of people, processes, tools, and partners, resulting
in high levels of customer satisfaction. For more information, contact your Cisco sales representative or
go to
www.cisco.com/cisco/web/support/index.html
OL-27366-02
Cisco Smart+Connected Remote 250 Reference Guide
17
Page 18

Service and Support
This document is to be used in conjunction with the documents listed in the “Related Documentation” section.
Cisco and the Cisco logo are trademarks or registered trademarks of Cisco and/or its affiliates in the U.S. and other countries. To view a list of
Cisco
trademarks, go to this URL: www.cisco.com/go/trademarks. Third-party trademarks mentioned are the property of their respective owners. The
use of the word partner does not imply a partnership relationship between Cisco and any other company. (1110R)
Any Internet Protocol (IP) addresses and phone numbers used in this document are not intended to be actual addresses and phone numbers. Any
examples, command display output, network topology diagrams, and other figures included in the document are shown for illustrative purposes only.
Any use of actual IP addresses or phone numbers in illustrative content is unintentional and coincidental.
© 2012-2013 Cisco Systems, Inc. All rights reserved.
Cisco Smart+Connected Remote 250 Reference Guide
18
OL-27366-02
 Loading...