

Page 1
ADMINISTRATION
GUIDE
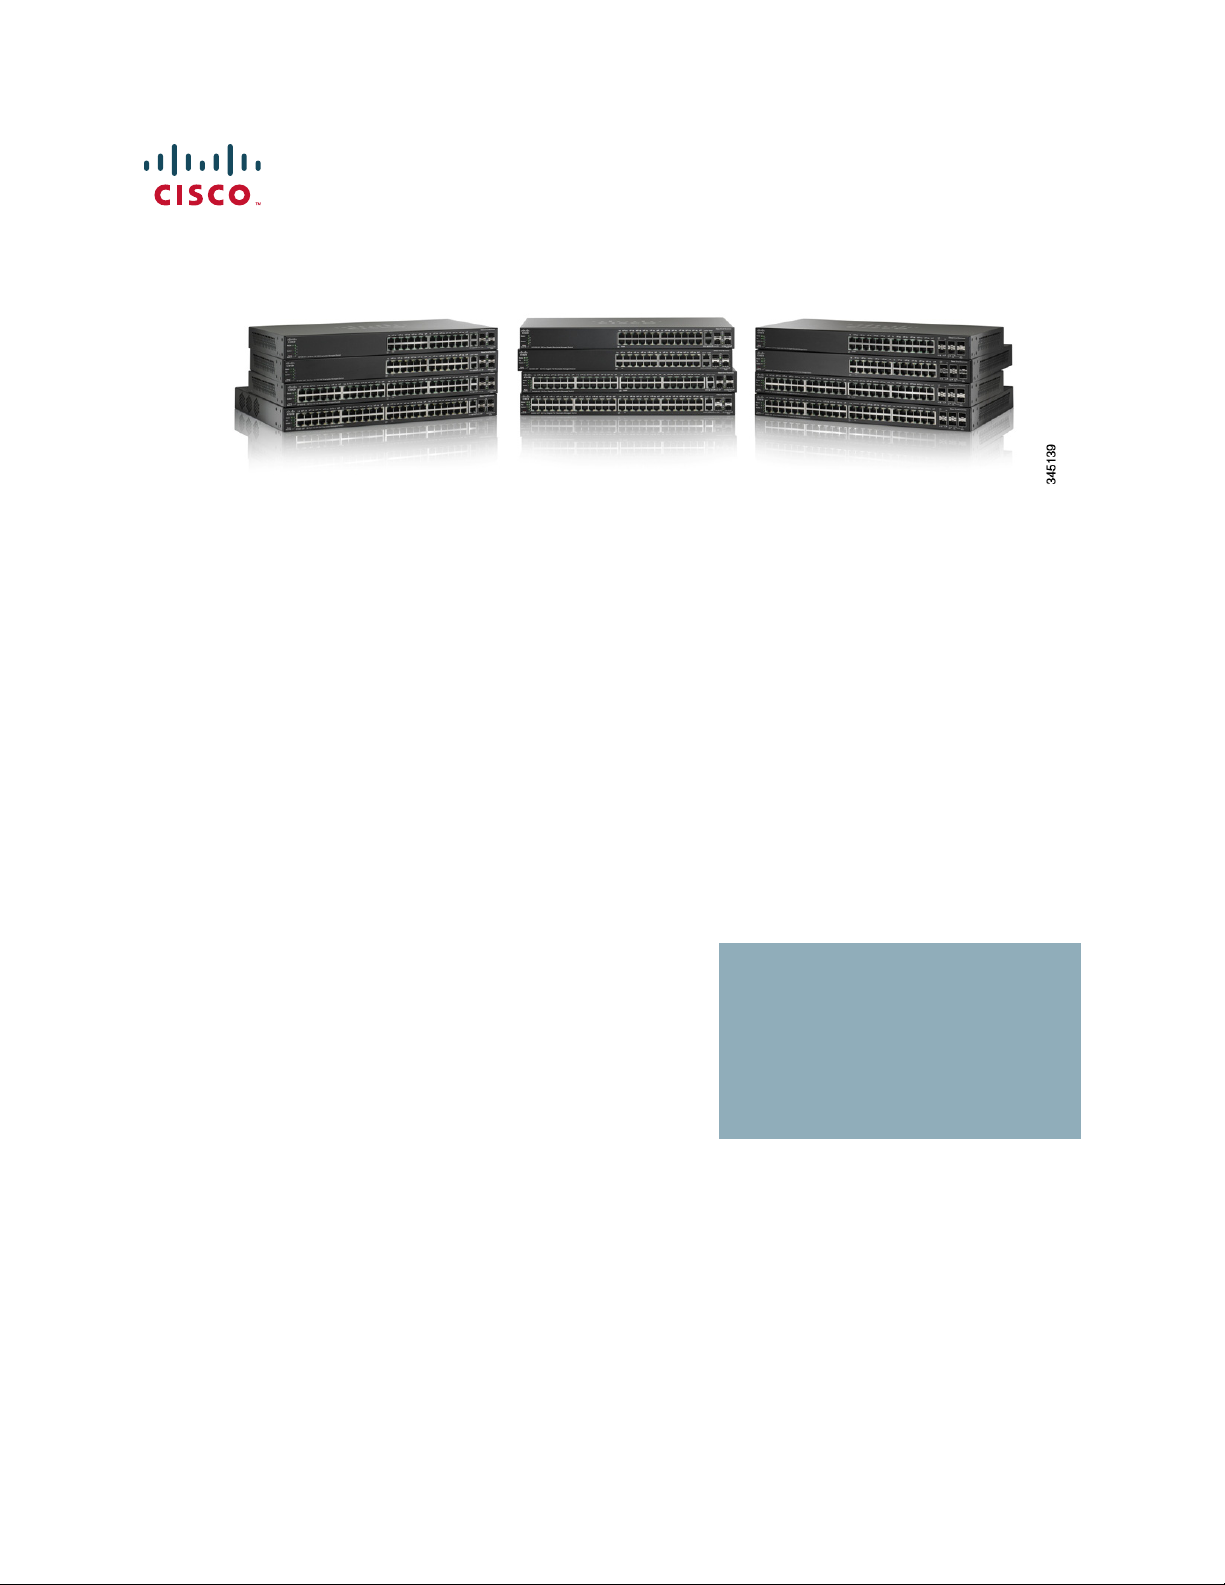
Cisco 500 Series Stackable Managed Switch
Administration Guide
Page 2

2
Cisco and the Cisco logo are trademarks or registered trademarks of Cisco and/or its affiliates in the U.S. and other countries. To view a list of Cisco
trademarks, go to this URL: www.cisco.com/go/trademarks. Third-party trademarks mentioned are the property of their respective owners. The use
of the word partner does not imply a partnership relationship between Cisco and any other company. (1110R)
Cisco 500 Series Stackable Managed Switch Administration Guide 2
Page 3

Contents
Chapter 1: Getting Started 10
Starting the Web-based Configuration Utility 10
Quick Start Device Configuration 14
Interface Naming Conventions 15
Differences Between 500 Devices<500> 15
Window Navigation 17
Chapter 2: Status and Statistics 22
System Summary 22
Ethernet Interfaces 22
Etherlike Statistics 24
GVRP Statistics 25
802.1X EAP Statistics 26
ACL Statistics 27
TCAM Utilization 28
Health 29
RMON 29
View Log 37
Chapter 3: Administration: System Log 38
Setting System Log Settings 38
Setting Remote Logging Settings 40
Viewing Memory Logs 42
Chapter 4: Administration: File Management 44
System Files 44
Upgrade/Backup Firmware/Language 47
Active Image 51
Download/Backup Configuration/Log 52
Configuration Files Properties 58
Cisco 500 Series Stackable Managed Switch Administration Guide 1
Page 4

Contents
Copy/Save Configuration 59
Auto Configuration/Image Update via DHCP 60
70
Chapter 5: Administration: Stack Management 71
Overview 71
Types of Units in Stack 73
Stack Topology 74
Unit ID Assignment 76
Master Selection Process 78
Stack Changes 78
Unit Failure in Stack 80
Software Auto Synchronization in Stack 82
Stack Unit Mode 82
Stack Ports 86
Default Configuration 94
Interactions With Other Features 94
System Modes 94
Chapter 6: Administration 100
Device Models 101
System Settings 103
Console Settings (Autobaud Rate Support) 106
Management Interface 107
System Mode and Stack Management 107
User Accounts 107
Defining Idle Session Timeout 107
Time Settings 108
System Log 108
File Management 108
Cisco 500 Series Stackable Managed Switch Administration Guide 2
Page 5

Contents
Rebooting the Device 108
Routing Resources 110
Health 114
Diagnostics 116
Discovery - Bonjour 116
Discovery - LLDP 117
Discovery - CDP 117
Ping 117
Traceroute 119
Chapter 7: Administration: Time Settings 122
System Time Options 123
SNTP Modes 124
Configuring System Time 125
Chapter 8: Administration: Diagnostics 136
Copper Ports Tests 136
Displaying Optical Module Status 138
Configuring Port and VLAN Mirroring 140
Viewing CPU Utilization and Secure Core Technology 141
Chapter 9: Administration: Discovery 144
Bonjour 144
LLDP and CDP 146
Configuring LLDP 147
Configuring CDP 168
CDP Statistics 176
Chapter 10: Port Management 178
Configuring Ports 178
Cisco 500 Series Stackable Managed Switch Administration Guide 3
Page 6

Contents
Loopback Detection 184
Link Aggregation 186
UDLD 194
PoE 194
Configuring Green Ethernet 194
Chapter 11: Port Management: Unidirectional Link Detection 202
UDLD Overview 202
UDLD Operation 203
Usage Guidelines 205
Dependencies On Other Features 206
Default Settings and Configuration 206
Before You Start 207
Common UDLD Tasks 207
Configuring UDLD 208
Chapter 12: Smartport 212
Overview 213
What is a Smartport 214
Smartport Types 214
Smartport Macros 216
Macro Failure and the Reset Operation 218
How the Smartport Feature Works 218
Auto Smartport 219
Error Handling 223
Default Configuration 223
Relationships with Other Features and Backwards Compatibility 224
Common Smartport Tasks 224
Configuring Smartport Using The Web-based Interface 226
Built-in Smartport Macros 231
Cisco 500 Series Stackable Managed Switch Administration Guide 4
Page 7

Contents
Chapter 13: Port Management: PoE 244
PoE on the Device 244
PoE Properties 247
PoE Settings 248
Chapter 14: VLAN Management 252
Overview 252
Regular VLANs 261
Private VLAN Settings 269
GVRP Settings 270
VLAN Groups 271
Voice VLAN 276
Access Port Multicast TV VLAN 289
Customer Port Multicast TV VLAN 292
Chapter 15: Spanning Tree 296
STP Flavors 296
STP Status and Global Settings 297
Spanning Tree Interface Settings 299
Rapid Spanning Tree Settings 301
Multiple Spanning Tree 304
MSTP Properties 304
VLANs to a MSTP Instance 305
MSTP Instance Settings 306
MSTP Interface Settings 307
Chapter 16: Managing MAC Address Tables 310
Static MAC Addresses 311
Dynamic MAC Addresses 312
Reserved MAC Addresses 313
Cisco 500 Series Stackable Managed Switch Administration Guide 5
Page 8

Contents
Chapter 17: Multicast 314
Multicast Forwarding 314
Multicast Properties 320
MAC Group Address 320
IP Multicast Group Addresses 322
IPv4 Multicast Configuration 324
IPv6 Multicast Configuration 330
IGMP/MLD Snooping IP Multicast Group 336
Multicast Router Ports 337
Forward All 338
Unregistered Multicast 338
Chapter 18: IP Configuration 340
Overview 340
IPv4 Management and Interfaces 344
DHCP Server 366
IPv6 Management and Interfaces 375
Domain Name 398
Chapter 19: IP Configuration: RIPv2 403
Overview 403
How Rip Operates on the Device 404
Configuring RIP 409
Chapter 20: IP Configuration: VRRP 417
Overview 417
Configurable Elements of VRRP 421
Configuring VRRP 424
Chapter 21: Security 428
Cisco 500 Series Stackable Managed Switch Administration Guide 6
Page 9

Contents
Defining Users 429
Configuring TACACS+ 432
Configuring RADIUS 437
Key Management 442
Management Access Method 445
Management Access Authentication 450
Secure Sensitive Data Management 452
SSL Server 452
SSH Server 454
SSH Client 455
Configuring TCP/UDP Services 455
Defining Storm Control 456
Configuring Port Security 457
802.1X 460
Denial of Service Prevention 460
DHCP Snooping 470
IP Source Guard 470
ARP Inspection 474
First Hop Security 480
Chapter 22: Security: 802.1X Authentication 481
Overview of 802.1X 481
Authenticator Overview 484
Common Tasks 494
802.1X Configuration Through the GUI 495
Defining Time Ranges 507
Authentication Method and Port Mode Support 508
Chapter 23: Security: IPv6 First Hop Security 511
IPv6 First Hop Security Overview 512
Cisco 500 Series Stackable Managed Switch Administration Guide 7
Page 10

Contents
Router Advertisement Guard 516
Neighbor Discovery Inspection 516
DHCPv6 Guard 517
Neighbor Binding Integrity 518
IPv6 Source Guard 521
Attack Protection 522
Policies, Global Parameters and System Defaults 523
Common Tasks 525
Default Settings and Configuration 527
Before You Start 527
Configuring IPv6 First Hop Security through Web GUI 528
Chapter 24: Security: SSH Client 546
Secure Copy (SCP) and SSH 546
Protection Methods 547
SSH Server Authentication 549
SSH Client Authentication 550
Before You Begin 551
Common Tasks 551
SSH Client Configuration Through the GUI 552
Chapter 25: Security: SSH Server 557
Overview 557
Common Tasks 558
SSH Server Configuration Pages 559
Chapter 26: Security: Secure Sensitive Data Management 562
Introduction 562
SSD Rules 563
SSD Properties 568
Cisco 500 Series Stackable Managed Switch Administration Guide 8
Page 11

Contents
Configuration Files 571
SSD Management Channels 576
Menu CLI and Password Recovery 576
Configuring SSD 577
Chapter 27: Access Control 580
Access Control Lists 580
MAC-based ACLs 584
IPv4-based ACLs 586
IPv6-Based ACLs 591
ACL Binding 594
Chapter 28: Quality of Service 598
QoS Features and Components 599
Configuring QoS - General 602
QoS Basic Mode 615
QoS Advanced Mode 617
Managing QoS Statistics 628
Chapter 29: SNMP 632
SNMP Versions and Workflow 632
Model OIDs 635
SNMP Engine ID 636
Configuring SNMP Views 638
Creating SNMP Groups 639
Managing SNMP Users 641
Defining SNMP Communities 643
Defining Trap Settings 645
Notification Recipients 646
SNMP Notification Filters 650
Cisco 500 Series Stackable Managed Switch Administration Guide 9
Page 12

Getting Started
Date Updated By Comment
This section provides an introduction to the web-based configuration utility, and
covers the following topics:
1
No changes for Nikola 1.4
• Starting the Web-based Configuration Utility
• Quick Start Device Configuration
• Interface Naming Conventions
• Differences Between 500 Devices<500>
• Window Navigation
Starting the Web-based Configuration Utility
This section describes how to navigate the web-based switch configuration utility.
If you are using a pop-up blocker, make sure it is disabled.
Browser Restrictions
If you are using IPv6 interfaces on your management station, use the IPv6 global
address and not the IPv6 link local address to access the device from your
browser.
Cisco 500 Series Stackable Managed Switch Administration Guide 10
Page 13

1
Getting Started
Starting the Web-based Configuration Utility
Launching the Configuration Utility
To open the web-based configuration utility:
STEP 1 Open a Web browser.
STEP 2 Enter the IP address of the device you are configuring in the address bar on the
browser, and then press Enter.
NOTE When the device is using the factory default IP address of 192.168.1.254, its power
LED flashes continuously. When the device is using a DHCP-assigned IP address or
an administrator-configured static IP address, the power LED is on solid.
Logging In
The default username is cisco and the default password is cisco. The first time
that you log in with the default username and password, you are required to enter
a new password.
NOTE If you have not previously selected a language for the GUI, the language of the Login
page is determined by the language(s) requested by your browser and the
languages configured on your device. If your browser requests Chinese, for
example, and Chinese has been loaded into your device, the Login page is
automatically displayed in Chinese. If Chinese has not been loaded into your
device, the Login page appears in English.
The languages loaded into the device have a language and country code (en-US,
en-GB and so on). For the Login page to be automatically displayed in a particular
language, based on the browser request, both the language and country code of
the browser request must match those of the language loaded on the device. If the
browser request contains only the language code without a country code (for
example: fr). The first embedded language with a matching language code is
taken (without matching the country code, for example: fr_CA).
To log in to the device configuration utility:
STEP 1 Enter the username/password. The password can contain up to 64 ASCII
characters. Password-complexity rules are described in Setting Password
Complexity Rules.
STEP 2 If you are not using English, select the desired language from the Language drop-
down menu. To add a new language to the device or update a current one, see
Upgrade/Backup Firmware/Language.
11 Cisco 500 Series Stackable Managed Switch Administration Guide
Page 14

Getting Started
Starting the Web-based Configuration Utility
STEP 3 If this is the first time that you logged on with the default user ID (cisco) and the
default password (cisco) or your password has expired, the Change Password
Page appears. See Password Expiration for additional information.
STEP 4 Choose whether to select Disable Password Complexity Enforcement or not.
For more information on password complexity, see the Setting Password
Complexity Rules section.
STEP 5 Enter the new password and click Apply.
When the login attempt is successful, the Getting Started page appears.
If you entered an incorrect username or password, an error message appears and
the Login page remains displayed on the window. If you are having problems
logging in, please see the Launching the Configuration Utility section in the
Administration Guide for additional information.
Select Don't show this page on startup to prevent the Getting Started page from
being displayed each time that you log on to the system. If you select this option,
the System Summary page is opened instead of the Getting Started page.
1
HTTP/HTTPS
You can either open an HTTP session (not secured) by clicking Log In, or you can
open an HTTPS (secured) session, by clicking Secure Browsing (HTTPS). You are
asked to approve the logon with a default RSA key, and an HTTPS session is
opened.
NOTE There is no need to input the username/password prior to clicking the Secure
Browsing (HTTPS) button.
For information on how to configure HTTPS, see SSL Server.
Password Expiration
The New Password page is displayed in the following cases:
• The first time that you access the device with the default username cisco
and password cisco. This page forces you to replace the factory default
password.
• When the password expires, this page forces you to select a new
password.
Cisco 500 Series Stackable Managed Switch Administration Guide 12
Page 15

1
Getting Started
Starting the Web-based Configuration Utility
Logging Out
By default, the application logs out after ten minutes of inactivity. You can change
this default value as described in the Defining Idle Session Timeout section.
!
CAUTION Unless the Running Configuration is copied to the Startup Configuration, rebooting
the device removes all changes made since the last time the file was saved. Save
the Running Configuration to the Startup Configuration before logging off to
preserve any changes you made during this session.
A flashing red X icon to the left of the Save application link indicates that Running
Configuration changes have not yet been saved to the Startup Configuration file.
The flashing can be disabled by clicking on the Disable Save Icon Blinking button
on the Copy/Save Configuration page
When the device auto-discovers a device, such as an IP phone (see What is a
Smartport), and it configures the port appropriately for the device. These
configuration commands are written to the Running Configuration file. This causes
the Save icon to begin blinking when the you log on, even though you did not make
any configuration changes.
When you click Save, the Copy/Save Configuration page appears. Save the
Running Configuration file by copying it to the Startup Configuration file. After this
save, the red X icon and the Save application link are no longer displayed.
To l o g o u t , c li ck Logout in the top right corner of any page. The system logs out of
the device.
When a timeout occurs or you intentionally log out of the system, a message is
displayed and the Login page appears, with a message indicating the logged-out
state. After you log in, the application returns to the initial page.
The initial page displayed depends on the “Do not show this page on startup”
option in the Getting Started page. If you did not select this option, the initial page
is the Getting Started page. If you did select this option, the initial page is the
System Summary page.
13 Cisco 500 Series Stackable Managed Switch Administration Guide
Page 16

Getting Started
Quick Start Device Configuration
Quick Start Device Configuration
To simplify device configuration through quick navigation, the Getting Started
page provides links to the most commonly used pages.
Category Link Name (on the Page) Linked Page
1
<300500>Initial
Setup
Device Status System Summary System Summary page
Quick Access Change Device Password User Accounts page
Change System Mode and
Stack Management
Change Management
Applications and Services
Change Device IP Address IPv4 Interface page
Create VLAN Create VLAN page
Configure Port Settings Port Setting page
Port Statistics Interface page
RMON Statistics Statistics page
View Log RAM Memory page
Upgrade Device Software Upgrade/Backup Firmware/
System Mode and Stack
Management page
TCP/UDP Services page
Language page
Backup Device Configuration Download/Backup
Configuration/Log page
<300-500>
There are two hot links on the Getting Started page that take you to Cisco web
pages for more information. Clicking on the Support link takes you to the device
product support page, and clicking on the Forums link takes you to the Support
Community page.
Cisco 500 Series Stackable Managed Switch Administration Guide 14
Create MAC Based ACL MAC Based ACL page
Create IP Based ACL IPv4 Based ACL page
Configure QoS QoS Properties page
Configure Port Mirroring Port and VLAN Mirroring page
Page 17

1
Interface Naming Conventions
Within the GUI, interfaces are denoted by concatenating the following elements:
• Type of interface: The following types of interfaces are found on the various
types of devices:
- Fast Ethernet (10/100 bits)—These are displayed as FE.
- Gigabit Ethernet ports (10/100/1000 bits)—These are displayed as
GE.
- <500>Ten Gigabit Ethernet ports (10000 bits)—These are displayed
as XG.
- LAG (Port Channel)—These are displayed as LAG.
Getting Started
Interface Naming Conventions
- VLAN—These are displayed as VLAN.
- Tunnel —These are displayed as Tunnel.
• <500>Unit Number—Number of the unit in the stack. In standalone mode
this is always 1.
• <500>Slot Number—The slot number is either 1 or 2.
• Interface Number: Port, LAG, tunnel or VLAN ID
Differences Between 500 Devices<500>
This guide is relevant for both Sx500, SG500X,SG500XG and ESW2-550X
devices. Notes are provided when a feature is relevant for one but not all of these
devices.
The following summarizes the differences between these devices:
• The RIP and VRRP features are only supported on SG500X, SG500XG, and
ESW2-550X devices, running in standalone mode and in advanced hybrid
stack of SG500X and Sx500 devices - see Administration: Stack
Management for more details).
• TCAM size, see TCAM Utilization
• Stack ports are different on these devices. See Default Stack and
Network Ports.
15 Cisco 500 Series Stackable Managed Switch Administration Guide
Page 18

Getting Started
Differences Between 500 Devices<500>
• Port speed availability per cable types are different on these devices. See
Cables Types.
• Enabling IPv4 routing is done differently in the devices, as follows:
- SG500XSG500XG/ESW2-550X—IPv4 routing must be enabled in the
- Sx500—When the device is switched from Layer 2 to Layer 3 system
1
IPv4 Interface page.
mode, IPv4 routing is automatically enabled.
Cisco 500 Series Stackable Managed Switch Administration Guide 16
Page 19

1
Window Navigation
This section describes the features of the web-based switch configuration utility.
Application Header
The Application Header appears on every page. It provides the following
application links:
Getting Started
Window Navigation
Application Link
Name
Username Displays the name of the user logged on to the device. The
Description
A flashing red X icon displayed to the left of the Save
application link indicates that Running Configuration
changes have been made that have not yet been saved to
the Startup Configuration file. The flashing of the red X can
be disabled on the Copy/Save Configuration page.
Click Save to display the Copy/Save Configuration page.
Save the Running Configuration file by copying it to the
Startup Configuration file type on the device. After this
save, the red X icon and the Save application link are no
longer displayed. When the device is rebooted, it copies
the Startup Configuration file type to the Running
Configuration and sets the device parameters according
to the data in the Running Configuration.
default username is cisco. (The default password is cisco).
17 Cisco 500 Series Stackable Managed Switch Administration Guide
Page 20

Getting Started
Window Navigation
1
Application Link
Name
Language Menu This menu provides the following options:
Description
• Select a language: Select one of the languages that
appear in the menu. This language will be the webbased configuration utility language.
• Download Language: Add a new language to the
device.
• Delete Language: Deletes the second language on
the device. The first language (English) cannot be
deleted.
• Debug: Used for translation purposes. If you select
this option, all web-based configuration utility labels
disappear and in their place are the IDs of the
strings that correspond to the IDs in the language
file.
NOTE To upgrade a language file, use the Upgrade/
Backup Firmware/Language page.
Logout Click to log out of the web-based switch configuration
utility.
About Click to display the device name and device version
number.
Help Click to display the online help.
The SYSLOG Alert Status icon appears when a SYSLOG
message, above the critical severity level, is logged. Click
the icon to open the RAM Memory page. After you access
this page, the SYSLOG Alert Status icon is no longer
displayed. To display the page when there is not an active
SYSLOG message, Click Status and Statistics > View
Log > RAM Memory.
Cisco 500 Series Stackable Managed Switch Administration Guide 18
Page 21

1
Getting Started
Window Navigation
Management Buttons
The following table describes the commonly-used buttons that appear on various
pages in the system.
Button Name Description
Use the pull-down menu to configure the number of
entries per page.
Indicates a mandatory field.
Add Click to display the related Add page and add an entry to a
table. Enter the information and click Apply to save it to the
Running Configuration. Click Close to return to the main
page. Click Save to display the Copy/Save Configuration
page and save the Running Configuration to the Startup
Configuration file type on the device.
Apply Click to apply changes to the Running Configuration on the
device. If the device is rebooted, the Running
Configuration is lost, unless it is saved to the Startup
Configuration file type or another file type. Click Save to
display the Copy/Save Configuration page and save the
Running Configuration to the Startup Configuration file
type on the device.
Cancel Click to reset changes made on the page.
Clear All
Interfaces
Counters
Clear Interface
Counters
Clear Logs Clears log files.
Clear Table Clears table entries.
Close Returns to main page. If any changes were not applied to
Click to clear the statistic counters for all interfaces.
Click to clear the statistic counters for the selected
interface.
the Running Configuration, a message appears.
19 Cisco 500 Series Stackable Managed Switch Administration Guide
Page 22

Getting Started
Window Navigation
1
Button Name Description
Copy Settings A table typically contains one or more entries containing
configuration settings. Instead of modifying each entry
individually, it is possible to modify one entry and then
copy the selected entry to multiple entries, as described
below:
1. Select the entry to be copied. Click Copy Settings to
display the popup.
2. Enter the destination entry numbers in the to field.
3. Click Apply to save the changes and click Close to
return to the main page.
Delete After selecting an entry in the table, click Delete to
remove.
Details Click to display the details associated with the entry
selected.
Edit Select the entry and click Edit. The Edit page appears,
and the entry can be modified.
1. C li ck Apply to save the changes to the Running
Configuration.
2. Click Close to return to the main page.
Go Enter the query filtering criteria and click Go. The results
are displayed on the page.
Refresh Clich Refresh to refresh the counter values.
Te st Click Te s t to perform the related tests.
Cisco 500 Series Stackable Managed Switch Administration Guide 20
Page 23

1
Getting Started
Window Navigation
21 Cisco 500 Series Stackable Managed Switch Administration Guide
Page 24

Status and Statistics
This section describes how to view device statistics.
It covers the following topics:
• System Summary
• Ethernet Interfaces
• Etherlike Statistics
2
• GVRP Statistics
• 802.1X EAP Statistics
• ACL Statistics
• TCAM Utilization
• Health
• RMON
• View Log
System Summary
See System Settings.
Ethernet Interfaces
The Interface page displays traffic statistics per port. The refresh rate of the
information can be selected.
This page is useful for analyzing the amount of traffic that is both sent and
received and its dispersion (Unicast, Multicast, and Broadcast).
Cisco 500 Series Stackable Managed Switch Administration Guide 22
Page 25

2
Status and Statistics
Ethernet Interfaces
To display Ethernet statistics and/or set the refresh rate:
STEP 1 Click Status and Statistics > Interface.
STEP 2 Enter the parameters.
• Interface—Select the type of interface and specific interface for which
Ethernet statistics are to be displayed.
• Refresh Rate—Select the time period that passes before the interface
Ethernet statistics are refreshed.
The Receive Statistics area displays information about incoming packets.
• Tot al B y te s (O ct ets )—Octets received, including bad packets and FCS
octets, but excluding framing bits.
• Unicast Packets—Good Unicast packets received.
• Multicast Packets—Good Multicast packets received.
• Broadcast Packets—Good Broadcast packets received.
• Packets with Errors—Packets with errors received.
The Transmit Statistics area displays information about outgoing packets.
• Tot al B y te s (O ct ets )—Octets transmitted, including bad packets and FCS
octets, but excluding framing bits.
• Unicast Packets—Good Unicast packets transmitted.
• Multicast Packets—Good Multicast packets transmitted.
• Broadcast Packets—Good Broadcast packets transmitted.
To clear or view statistics counters:
• Click Clear Interface Counters to clear counters for the interface displayed.
• Click View All Interfaces Statistics to see all ports on a single page.
23 Cisco 500 Series Stackable Managed Switch Administration Guide
Page 26

Status and Statistics
Etherlike Statistics
Etherlike Statistics
The Etherlike page displays statistics per port according to the Etherlike MIB
standard definition. The refresh rate of the information can be selected. This page
provides more detailed information regarding errors in the physical layer (Layer 1)
that might disrupt traffic.
To view Etherlike Statistics and/or set the refresh rate:
STEP 1 Click Status and Statistics > Etherlike.
STEP 2 Enter the parameters.
• Interface—Select the type of interface and specific interface for which
2
Ethernet statistics are to be displayed.
• Refresh Rate—Select the amount of time that passes before the Etherlike
statistics are refreshed.
The fields are displayed for the selected interface.
• Frame Check Sequence (FCS) Errors—Received frames that failed the
CRC (cyclic redundancy checks).
• Single Collision Frames—Frames that were involved in a single collision,
but were successfully transmitted.
• Late Collisions—Collisions that have been detected after the first 512 bits
of data.
• Excessive Collisions—Transmissions rejected due to excessive collisions.
• Oversize Packets—Packets greater than 2000 octets received.
• Internal MAC Receive Errors—Frames rejected because of receiver errors.
• Pause Frames Received—Received flow control pause frames.
• Pause Frames Transmitted—Flow control pause frames transmitted from
the selected interface.
To clear statistics counters:
• Click Clear Interface Counters to clear the selected interfaces counters.
• Click View All Interfaces Statistics to see all ports on a single page.
Cisco 500 Series Stackable Managed Switch Administration Guide 24
Page 27

2
GVRP Statistics
The GVRP page displays information regarding GARP VLAN Registration Protocol
(GVRP) frames that were sent or received from a port. GVRP is a standards-based
Layer 2 network protocol, for automatic configuration of VLAN information on
switches. It is defined in the 802.1ak amendment to 802.1Q-2005.
GVRP statistics for a port are only displayed if GVRP is enabled globally and on
the port. See the GVRP page.
To view GVRP statistics and/or set the refresh rate:
STEP 1 Click Status and Statistics > GVRP.
STEP 2 Enter the parameters.
Status and Statistics
GVRP Statistics
• Interface—Select the specific interface for which GVRP statistics are to be
displayed.
• Refresh Rate—Select the time period that passes before the GVRP
statistics page is refreshed.
The Attribute Counter block displays the counters for various types of packets per
interface.
• Join Empty—GVRP Join Empty packets received/transmitted.
• Empty—GVRP empty packets received/transmitted.
• Leave Empty—GVRP Leave Empty packets received/transmitted.
• Join In—GVRP Join In packets received/transmitted.
• Leave In—GVRP Leave In packets received/transmitted.
• Leave All—GVRP Leave All packets received/transmitted.
The GVRP Error Statistics section displays the GVRP error counters.
• Invalid Protocol ID—Invalid protocol ID errors.
• Invalid Attribute Type—Invalid attribute ID errors.
• Invalid Attribute Value—Invalid attribute value errors.
• Invalid Attribute Length—Invalid attribute length errors.
• Invalid Event—Invalid events.
25 Cisco 500 Series Stackable Managed Switch Administration Guide
Page 28

Status and Statistics
802.1X EAP Statistics
To clear statistics counters:
• Click Clear Interface Counters to clear the selected counters.
• Click View All Interfaces Statistics to see all ports on a single page.
802.1X EAP Statistics
The 802.1x EAP page displays detailed information regarding the EAP (Extensible
Authentication Protocol) frames that were sent or received. To configure the
802.1X feature, see the 802.1X Properties page.
To view the EAP Statistics and/or set the refresh rate:
2
STEP 1 Click Status and Statistics > 802.1x EAP.
STEP 2 Select the Interface that is polled for statistics.
STEP 3 Select the Refresh Rate (time period) that passes before the EAP statistics are
refreshed.
The values are displayed for the selected interface.
• EAPOL Frames Received—Valid EAPOL frames received on the port.
• EAPOL Frames Transmitted—Valid EAPOL frames transmitted by the port.
• EAPOL Start Frames Received—EAPOL Start frames received on the port.
• EAPOL Logoff Frames Received—EAPOL Logoff frames received on the
port.
• EAP Response/ID Frames Received—EAP Resp/ID frames received on the
port.
• EAP Response Frames Received—EAP Response frames received by the
port (other than Resp/ID frames).
• EAP Request/ID Frames Transmitted—EAP Req/ID frames transmitted by
the port.
• EAP Request Frames Transmitted—EAP Request frames transmitted by
the port.
Cisco 500 Series Stackable Managed Switch Administration Guide 26
Page 29

2
Status and Statistics
ACL Statistics
• Invalid EAPOL Frames Received—Unrecognized EAPOL frames received
on this port.
• EAP Length Error Frames Received—EAPOL frames with an invalid Packet
Body Length received on this port.
• Last EAPOL Frame Version—Protocol version number attached to the most
recently received EAPOL frame.
• Last EAPOL Frame Source—Source MAC address attached to the most
recently received EAPOL frame.
To clear statistics counters:
• Click Clear Interface Counters to clear the selected interfaces counters.
• Click Refresh to refresh the selected interfaces counters.
• Click View All Interfaces Statistics to clear the counters of all interfaces.
ACL Statistics
STEP 1 Click Status and Statistics > ACL.
STEP 2 Select the Refresh Rate (time period in seconds) that passes before the page is
When the ACL logging feature is enabled, an informational SYSLOG message is
generated for packets that match ACL rules.
To view the interfaces on which packets were forward or rejected based on ACLs:
refreshed. A new group of interfaces is created for each time period.
The interfaces on which packets were forwarded or rejected based on ACL rules
are displayed.
To manage statistics counters:
• Click Refresh to reset the counters.
• Click Clear Counters to clear the counters of all interfaces.
27 Cisco 500 Series Stackable Managed Switch Administration Guide
Page 30

Status and Statistics
TCAM Utilization
TCAM Utilization
The device architecture uses a Ternary Content Addressable Memory (TCAM) to
support packet actions in wire speed.
TCAM holds the rules produced by applications, such as ACLs (Access Control
Lists), Quality of Service (QoS), IP Routing and user-created rules.
Some applications allocate rules upon their initiation. Additionally, processes that
initialize during system boot use some of their rules during the startup process.
To view TCAM utilization, click Status and Statistics > TCAM Utilization.
The following fields are displayed for SG500X/SG500XG devices and for Sx500
devices in Layer 3 system mode and when the device is part of a stack (per unit):
2
• Unit No—Unit in stack for which TCAM utilization appears. This is not
displayed when the device is in standalone mode.
• Maximum TCAM Entries for Routing and Multicast Routing—Maximum
TCAM entries available for routing and Multicast Routing.
• IPv4 Routing
- In Use—Number of TCAM entries used for IPv4 routing.
- Maximum—Number of available TCAM entries that can be used for IPv4
routing.
• IPv4 Multicast Routing
- In Use—Number of TCAM entries used for IPv4 Multicast routing.
- Maximum—Number of available TCAM entries that can be used for IPv4
Multicast routing.
• IPv6 Routing
- In Use—Number of TCAM entries used for IPv6 Multicast routing.
- Maximum—Number of available TCAM entries that can be used for IPv6
Multicast routing.
• IPv6 Multicast Routing—Number of TCAM entries used for IPv6 routing.
- In Use—Number of TCAM entries used for IPv6 routing.
- Maximum—Number of available TCAM entries that can be used for IPv6
routing.
Cisco 500 Series Stackable Managed Switch Administration Guide 28
Page 31

2
Health
Status and Statistics
Health
• Maximum TCAM Entries for Non-IP Rules—Maximum TCAM entries
available for non-IP rules.
• Non-IP Rules
- In Use—Number of TCAM entries used for non-IP rules.
- Maximum—Number of available TCAM entries that can be used for non-
IP rules.
To view how the allocation among various processes can be changed (for the 500
series), see the Router Resources section.
RMON
See Health.
RMON (Remote Networking Monitoring) enables an SNMP agent in the device to
proactively monitor traffic statistics over a given period and send traps to an
SNMP manager. The local SNMP agent compares actual, real-time counters
against predefined thresholds and generates alarms, without the need for polling
by a central SNMP management platform. This is an effective mechanism for
proactive management, provided that you have set the correct thresholds relative
to your network’s base line.
RMON decreases the traffic between the manager and the device since the
SNMP manager does not have to poll the device frequently for information, and
enables the manager to get timely status reports, since the device reports events
as they occur.
With this feature, you can perform the following actions:
• View the current statistics (from the time that the counter values were
cleared). You can also collect the values of these counters over a period of
time, and then view the table of collected data, where each collected set is
a single line of the History tab.
• Define interesting changes in counter values, such as “reached a certain
number of late collisions” (defines the alarm), and then specify what action
to perform when this event occurs (log, trap, or log and trap).
29 Cisco 500 Series Stackable Managed Switch Administration Guide
Page 32

Status and Statistics
RMON
2
RMON Statistics
The Statistics page displays detailed information regarding packet sizes and
information regarding physical layer errors. The information is displayed according
to the RMON standard. An oversized packet is defined as an Ethernet frame with
the following criteria:
• Packet length is greater than MRU byte size.
• Collision event has not been detected.
• Late collision event has not been detected.
• Received (Rx) error event has not been detected.
• Packet has a valid CRC.
To view RMON statistics and/or set the refresh rate:
STEP 1 Click Status and Statistics > RMON > Statistics.
STEP 2 Select the Interface for which Ethernet statistics are to be displayed.
STEP 3 Select the Refresh Rate, which is the time period that passes before the interface
statistics are refreshed.
The following statistics are displayed for the selected interface.
• Bytes Received—Octets received, including bad packets and FCS octets,
but excluding framing bits.
• Drop Events—Packets dropped.
• Packets Received—Good packets received, including Multicast and
Broadcast packets.
• Broadcast Packets Received—Good Broadcast packets received. This
number does not include Multicast packets.
• Multicast Packets Received—Good Multicast packets received.
• CRC & Align Errors—CRC and Align errors that have occurred.
• Undersize Packets—Undersized packets (less than 64 octets) received.
• Oversize Packets—Oversized packets (over 2000 octets) received.
• Fragments—Fragments (packets with less than 64 octets, excluding
framing bits, but including FCS octets) received.
Cisco 500 Series Stackable Managed Switch Administration Guide 30
Page 33

2
Status and Statistics
RMON
• Jabbers—Received packets that were longer than 1632 octets. This
number excludes frame bits, but includes FCS octets that had either a bad
FCS (Frame Check Sequence) with an integral number of octets (FCS Error)
or a bad FCS with a non-integral octet (Alignment Error) number. A Jabber
packet is defined as an Ethernet frame that satisfies the following criteria:
- Packet data length is greater than MRU.
- Packet has an invalid CRC.
- Received (Rx) Error Event has not been detected.
• Collisions—Collisions received. If Jumbo frames are enabled, the threshold
of Jabber frames is raised to the maximum size of Jumbo frames.
• Frames of 64 Bytes—Frames, containing 64 bytes that were received.
• Frames of 65 to 127 Bytes—Frames, containing 65-127 bytes that were
received.
• Frames of 128 to 255 Bytes—Frames, containing 128-255 bytes that were
received.
• Frames of 256 to 511 Bytes—Frames, containing 256-511 bytes that were
received.
• Frames of 512 to 1023 Bytes—Frames, containing 512-1023 bytes that
were received.
• Frames of 1024 Bytes or More—Frames, containing 1024-2000 bytes, and
Jumbo Frames, that were received.
To clear statistics counters:
• Click Clear Interface Counters to clear the selected interfaces counters.
• Click View All Interfaces Statistics to see all ports on a single page.
RMON History
The RMON feature enables monitoring statistics per interface.
The History Control Table page
samples to store and the port from which to gather the data.
defines the sampling frequency, amount of
After the data is sampled and stored, it appears in the History Table page that can
be viewed by clicking History Table.
31 Cisco 500 Series Stackable Managed Switch Administration Guide
Page 34

Status and Statistics
RMON
STEP 1 Click Status and Statistics > RMON > History. The fields displayed on this page
STEP 2 Click Add.
STEP 3 Enter the parameters.
2
To enter RMON control information:
are defined in the Add RMON History page, below. The only field is that is on this
page and not defined in the Add page is:
• Current Number of Samples—RMON is allowed by the standard to not
grant all requested samples, but rather to limit the number of samples per
request. Therefore, this field represents the sample number actually granted
to the request that is equal or less than the requested value.
• New History Entry—Displays the number of the new History table entry.
• Source Interface—Select the type of interface from which the history
samples are to be taken.
• Max No. of Samples to Keep—Enter the number of samples to store.
• Sampling Interval—Enter the time in seconds that samples are collected
from the ports. The field range is 1-3600.
• Owner—Enter the RMON station or user that requested the RMON
information.
STEP 4 Click Apply. The entry is added to the History Control Table page
Configuration file is updated.
STEP 5 Click History Table (described below) to view the actual statistics.
RMON History Table
The History Table page displays interface-specific statistical network samplings.
The samples were configured in the History Control table described above.
To view RMON history statistics:
STEP 1 Click Status and Statistics > RMON > History.
,
and the Running
STEP 2 Click History Table.
Cisco 500 Series Stackable Managed Switch Administration Guide 32
Page 35

2
Status and Statistics
RMON
STEP 3 From the History Entry No. drop down menu, optionally select the entry number
of the sample to display.
The fields are displayed for the selected sample.
• Owner—History table entry owner.
• Sample No.—Statistics were taken from this sample.
• Drop Events—Dropped packets due to lack of network resources during the
sampling interval. This may not represent the exact number of dropped
packets, but rather the number of times dropped packets were detected.
• Bytes Received—Octets received including bad packets and FCS octets,
but excluding framing bits.
• Packets Received—Packets received, including bad packets, Multicast,
and Broadcast packets.
• Broadcast Packets—Good Broadcast packets excluding Multicast packets.
• Multicast Packets—Good Multicast packets received.
• CRC Align Errors—CRC and Align errors that have occurred.
• Undersize Packets—Undersized packets (less than 64 octets) received.
• Oversize Packets—Oversized packets (over 2000 octets) received.
• Fragments—Fragments (packets with less than 64 octets) received,
excluding framing bits, but including FCS octets.
• Jabbers—Total number of received packets that were longer than 2000
octets. This number excludes frame bits, but includes FCS octets that had
either a bad FCS (Frame Check Sequence) with an integral number of octets
(FCS Error) or a bad FCS with a non-integral octet (Alignment Error) number.
• Collisions—Collisions received.
• Utilization—Percentage of current interface traffic compared to maximum
traffic that the interface can handle.
33 Cisco 500 Series Stackable Managed Switch Administration Guide
Page 36

Status and Statistics
RMON
STEP 1 Click Status and Statistics > RMON > Events.
2
RMON Events Control
You can control the occurrences that trigger an alarm and the type of notification
that occurs. This is performed as follows:
• Events Page—Configures what happens when an alarm is triggered. This
can be any combination of logs and traps.
• Alarms Page—Configures the occurrences that trigger an alarm.
To define RMON events:
This page displays previously defined events.
The fields on this page are defined by the Add RIMON Events dialog box except
for the Time field.
• Time—Displays the time of the event. (This is a read-only table in the parent
window and cannot be defined).
STEP 2 Click Add.
STEP 3 Enter the parameters.
• Event Entry—Displays the event entry index number for the new entry.
• Community—Enter the SNMP community string to be included when traps
are sent (optional). Note that the community must be defined using the
Defining SNMPv1,2 Notification Recipients or Defining SNMPv3
Notification Recipients pages for the trap to reach the Network
Management Station.
• Description—Enter a name for the event. This name is used in the Add
RMON Alarm page to attach an alarm to an event.
• Notification Type—Select the type of action that results from this event.
Values are:
- None—No action occurs when the alarm goes off.
- Log (Event Log Table)—Add a log entry to the Event Log table when the
alarm is triggered.
- Trap (SNMP Manager and SYSLOG Server)—Send a trap to the remote
log server when the alarm goes off.
Cisco 500 Series Stackable Managed Switch Administration Guide 34
Page 37

2
Status and Statistics
RMON
- Log and Trap—Add a log entry to the Event Log table and send a trap to
the remote log server when the alarm goes off.
• Owner—Enter the device or user that defined the event.
STEP 4 Click Apply. The RMON event is saved to the Running Configuration file.
STEP 5 Click Event Log Table to display the log of alarms that have occurred and that have
been logged (see description below).
RMON Events Logs
The Event Log Table page displays the log of events (actions) that occurred. Two
types of events can be logged: Log or Log and Trap. The action in the event is
performed when the event is bound to an alarm (see the Alarms page) and the
conditions of the alarm have occurred.
STEP 1 Click Status and Statistics > RMON > Events.
STEP 2 Click Event Log Table.
This page displays the following fields:
• Event Entry No.—Event’s log entry number.
• Log No.—Log number (within the event).
• Log Time—Time that the log entry was entered.
• Description—Description of event that triggered the alarm.
RMON Alarms
RMON alarms provide a mechanism for setting thresholds and sampling intervals
to generate exception events on counters or any other SNMP object counter
maintained by the agent. Both the rising and falling thresholds must be configured
in the alarm. After a rising threshold is crossed, no rising events are generated until
the companion falling threshold is crossed. After a falling alarm is issued, the next
alarm is issued when a rising threshold is crossed.
One or more alarms are bound to an event, which indicates the action to be taken
when the alarm occurs.
35 Cisco 500 Series Stackable Managed Switch Administration Guide
Page 38

Status and Statistics
RMON
STEP 1 Click Status and Statistics > RMON > Alarms. All previously-defined alarms are
STEP 2 Click Add.
STEP 3 Enter the parameters.
2
Alarm counters can be monitored by either absolute values or changes (delta) in
the counter values.
To enter RMON alarms:
displayed. The fields are described in the Add RMON Alarm page below. In
addition to those fields, the following field appears:
• Counter Value—Displays the value of the statistic during the last sampling
period.
• Alarm Entry No.—Displays the alarm entry number.
• Interface—Select the type of interface for which RMON statistics are
displayed.
• Counter Name—Select the MIB variable that indicates the type of
occurrence measured.
• Counter Value—Number of occurrences.
• Sample Type—Select the sampling method to generate an alarm. The
options are:
- Absolute—If the threshold is crossed, an alarm is generated.
- Delta—Subtracts the last sampled value from the current value. The
difference in the values is compared to the threshold. If the threshold was
crossed, an alarm is generated.
• Rising Threshold—Enter the value that triggers the rising threshold alarm.
• Rising Event—Select an event to be performed when a rising event is
triggered. Events are created in the Events page.
• Falling Threshold—Enter the value that triggers the falling threshold alarm.
• Falling Event—Select an event to be performed when a falling event is
triggered.
• Startup Alarm—Select the first event from which to start generation of
alarms. Rising is defined by crossing the threshold from a low-value
threshold to a higher-value threshold.
Cisco 500 Series Stackable Managed Switch Administration Guide 36
Page 39

2
View Log
Status and Statistics
View Log
- Rising Alarm—A rising value triggers the rising threshold alarm.
- Falling Alarm—A falling value triggers the falling threshold alarm.
- Rising and Falling—Both rising and falling values trigger the alarm.
• Interval—Enter the alarm interval time in seconds.
• Owner—Enter the name of the user or network management system that
receives the alarm.
STEP 4 Click Apply. The RMON alarm is saved to the Running Configuration file.
See Viewing Memory Logs.
37 Cisco 500 Series Stackable Managed Switch Administration Guide
Page 40

Administration: System Log
This section describes the system logging, which enables the device to generate
multiple independent logs. Each log is a set of messages describing system
events.
The device generates the following local logs:
• Log sent to the console interface.
3
• Log written into a cyclical list of logged events in the RAM and erased when
the device reboots.
• Log written to a cyclical log-file saved to the Flash memory and persists
across reboots.
In addition, you can send messages to remote SYSLOG servers in the form of
SNMP traps and SYSLOG messages.
This section covers the following sections:
• Setting System Log Settings
• Setting Remote Logging Settings
• Viewing Memory Logs
Setting System Log Settings
You can select the events to be logged by severity level. Each log message has a
severity level marked with the first letter of the severity level concatenated with a
dash (-) on each side (except for Emergency that is indicated by the letter F). For
example, the log message "%INIT-I-InitCompleted: … " has a severity level of I,
meaning Informational.
Cisco 500 Series Stackable Managed Switch Administration Guide 38
Page 41

3
Administration: System Log
Setting System Log Settings
The event severity levels are listed from the highest severity to the lowest severity,
as follows:
• Emergency—System is not usable.
• Alert—Action is needed.
• Critical—System is in a critical condition.
• Error—System is in error condition.
• Warning—System warning has occurred.
• Notice—System is functioning properly, but a system notice has occurred.
• Informational—Device information.
• Debug—Detailed information about an event.
You can select different severity levels for RAM and Flash logs. These logs are
displayed in the RAM Memory page and Flash Memory page, respectively.
Selecting a severity level to be stored in a log causes all of the higher severity
events to be automatically stored in the log. Lower severity events are not stored
in the log.
For example, if Warning is selected, all severity levels that are Warning and higher
are stored in the log (Emergency, Alert, Critical, Error, and Warning). No events with
severity level below Warning are stored (Notice, Informational, and Debug).
To set global log parameters:
STEP 1 Click Administration > System Log > Log Settings.
STEP 2 Enter the parameters.
• Logging—Select to enable message logging.
• Syslog Aggregator—Select to enable the aggregation of SYSLOG
messages and traps. If enabled, identical and contiguous SYSLOG
messages and traps are aggregated over the specified Max. Aggregation
Time and sent in a single message. The aggregated messages are sent in
the order of their arrival. Each message states the number of times it was
aggregated.
• Max. Aggregation Time—Enter the interval of time that SYSLOG messages
are aggregated.
39 Cisco 500 Series Stackable Managed Switch Administration Guide
Page 42

Administration: System Log
Setting Remote Logging Settings
3
• Originator Identifier—Enables adding an origin identifier to SYSLOG
messages. The options are:
- None—Do not include the origin identifier in SYSLOG messages.
- Hostname—Include the system host name in SYSLOG messages.
- IPv4 Address—Include the IPv4 address of the sending interface in
SYSLOG messages.
- IPv6 Address—Include the IPv6 address of the sending interface in
SYSLOG messages.
- User Defined—Enter a description to be included in SYSLOG messages.
• RAM Memory Logging—Select the severity levels of the messages to be
logged to the RAM.
• Flash Memory Logging—Select the severity levels of the messages to be
logged to the Flash memory.
STEP 3 Click Apply. The Running Configuration file is updated.
Setting Remote Logging Settings
The Remote Log Servers page enables defining remote SYSLOG servers to which
log messages are sent. For each server, you can configure the severity of the
messages that it receives.
To d e f i n e S YS LO G s er v e r s :
STEP 1 Click Administration > System Log > Remote Log Servers.
STEP 2 Enter the following fields:
• IPv4 Source Interface—Select the source interface whose IPv4 address
will be used as the source IPv4 address of SYSLOG messages sent to
SYSLOG servers.
• IPv6 Source Interface—Select the source interface whose IPv6 address
will be used as the source IPv6 address of SYSLOG messages sent to
SYSLOG servers.
Cisco 500 Series Stackable Managed Switch Administration Guide 40
Page 43

3
Administration: System Log
Setting Remote Logging Settings
NOTE If the Auto option is selected, the system takes the source IP address
from the IP address defined on the outgoing interface.
Information is described for each previously-configured log server. The fields are
described below in the Add page.
STEP 3 Click Add.
STEP 4 Enter the parameters.
• Server Definition—Select whether to identify the remote log server by IP
address or name.
• IP Version—Select the supported IP format.
• IPv6 Address Type—Select the IPv6 address type (if IPv6 is used). The
options are:
- Link Local—The IPv6 address uniquely identifies hosts on a single
network link. A link local address has a prefix of FE80, is not routable, and
can be used for communication only on the local network. Only one link
local address is supported. If a link local address exists on the interface,
this entry replaces the address in the configuration.
- Global—The IPv6 address is a global Unicast IPV6 type that is visible and
reachable from other networks.
• Link Local Interface—Select the link local interface (if IPv6 Address Type
Link Local is selected) from the list.
• Log Server IP Address/Name—Enter the IP address or domain name of the
log server.
• UDP Port—Enter the UDP port to which the log messages are sent.
• Facility—Select a facility value from which system logs are sent to the
remote server. Only one facility value can be assigned to a server. If a second
facility code is assigned, the first facility value is overridden.
• Description—Enter a server description.
• Minimum Severity—Select the minimum level of system log messages to
be sent to the server.
STEP 5 Click Apply. The Add Remote Log Server page
added, and the Running Configuration file is updated.
closes, the SYSLOG server is
41 Cisco 500 Series Stackable Managed Switch Administration Guide
Page 44

Administration: System Log
Viewing Memory Logs
Viewing Memory Logs
The device can write to the following logs:
• Log in RAM (cleared during reboot).
• Log in Flash memory (cleared only upon user command).
You can configure the messages that are written to each log by severity, and a
message can go to more than one log, including logs that reside on external
SYSLOG servers.
RAM Memory
The RAM Memory page displays all messages that were saved in the RAM
(cache) in chronological order. Entries are stored in the RAM log according to the
configuration in the Log Settings page.
3
To view log entries, click Status and Statistics > View Log > RAM Memory.
The top of the page has a button that allows you to Disable Alert Icon Blinking.
Click. This button toggles between disable and enable.
The Current Logging Threshold specifies the levels of logging that are
generated. This can be changed by clicking Edit by the field’s name.
This page contains the following fields for every log file:
• Log Index—Log entry number.
• Log Time—Time when message was generated.
• Severity—Event severity.
• Description—Message text describing the event.
To clear the log messages, click Clear Logs. The messages are cleared.
Flash Memory
The Flash Memory page displays the messages that were stored in the Flash
memory, in chronological order. The minimum severity for logging is configured in
the Log Settings page. Flash logs remain when the device is rebooted. You can
clear the logs manually.
To view the Flash logs, click Status and Statistics > View Log > Flash Memory.
Cisco 500 Series Stackable Managed Switch Administration Guide 42
Page 45

3
Administration: System Log
Viewing Memory Logs
The Current Logging Threshold specifies the levels of logging that are
generated. This can be changed by clicking Edit by the field’s name.
This page contains the following fields for each log file:
• Log Index—Log entry number.
• Log Time—Time when message was generated.
• Severity—Event severity.
• Description—Message text describing the event.
To clear the messages, click Clear Logs. The messages are cleared.
43 Cisco 500 Series Stackable Managed Switch Administration Guide
Page 46

Administration: File Management
This section describes how system files are managed.
The following topics are covered:
• System Files
• Upgrade/Backup Firmware/Language
• Active Image
4
System Files
• Download/Backup Configuration/Log
• Configuration Files Properties
• Copy/Save Configuration
• Auto Configuration/Image Update via DHCP
System files are files that contain configuration information, firmware images or
boot code.
Various actions can be performed with these files, such as: selecting the firmware
file from which the device boots, copying various types of configuration files
internally on the device, or copying files to or from an external device, such as an
external server.
The possible methods of file transfer are:
• Internal copy
• HTTP/HTTPS that uses the facilities that the browser provides
• TFTF/SCP client, requiring a TFTP/SCP server
Cisco 500 Series Stackable Managed Switch Administration Guide 44
Page 47

4
Administration: File Management
System Files
Configuration files on the device are defined by their type, and contain the
settings and parameter values for the device.
When a configuration is referenced on the device, it is referenced by its
configuration file type (such as Startup Configuration or Running Configuration),
as opposed to a file name that can be modified by the user.
Content can be copied from one configuration file type to another, but the names
of the file types cannot be changed by the user.
Other files on the device include firmware, boot code, and log files, and are
referred to as operational files.
The configuration files are text files and can be edited in a text editor, such as
Notepad after they are copied to an external device, such as a PC.
Files and File Types
The following types of configuration and operational files are found on the device:
• Running Configuration—Contains the parameters currently being used by
the device to operate. This is the only file type that is modified when you
change parameter values on the device.
If the device is rebooted, the Running Configuration is lost. The Startup
Configuration, stored in Flash, overwrites the Running Configuration, stored
in RAM.
To preserve any changes you made to the device, you must save the
Running Configuration to the Startup Configuration, or another file type.
• Startup Configuration—The parameter values that were saved by copying
another configuration (usually the Running Configuration) to the Startup
Configuration.
The Startup Configuration is retained in Flash and is preserved when the
device is rebooted. At this time, the Startup Configuration is copied to RAM
and identified as the Running Configuration.
• Mirror Configuration—A copy of the Startup Configuration, created by the
device when the following conditions exist:
- The device has been operating continuously for 24 hours.
- No configuration changes have been made to the Running Configuration
in the previous 24 hours.
- The Startup Configuration is identical to the Running Configuration.
45 Cisco 500 Series Stackable Managed Switch Administration Guide
Page 48

Administration: File Management
System Files
Only the system can copy the Startup Configuration to the Mirror
Configuration. However, you can copy from the Mirror Configuration to other
file types or to another device.
The option of automatically copying the Running Configuration to the mirror
configuration can be disabled in the Configuration Files Properties page.
• Backup Configuration—A manual copy of a configuration file used for
protection against system shutdown or for the maintenance of a specific
operating state. You can copy the Mirror Configuration, Startup
Configuration, or Running Configuration to a Backup Configuration file. The
Backup Configuration exists in Flash and is preserved if the device is
rebooted.
• Firmware—The program that controls the operations and functionality of
the device. More commonly referred to as the image.
4
• Boot Code—Controls the basic system startup and launches the firmware
image.
• Language File—The dictionary that enables the web-based configuration
utility windows to be displayed in the selected language.
• Flash Log—SYSLOG messages stored in Flash memory.
File Actions
The following actions can be performed to manage firmware and configuration
files:
• Upgrade the firmware or boot code, or replace a second language, as
described in Upgrade/Backup Firmware/Language section.
• View the firmware image currently in use or select the image to be used in
the next reboot as described in the Active Image section.
• Save configuration files on the device to a location on another device as
described in the Download/Backup Configuration/Log section.
• Clear the Startup Configuration or Backup Configuration file types as
described in the Configuration Files Properties section.
• Copy one configuration file type to another configuration file type as
described in the Copy/Save Configuration section.
• Enable automatically uploading a configuration file from a DHCP server to
the device, as described in the section.
Cisco 500 Series Stackable Managed Switch Administration Guide 46
Page 49

4
This section covers the following topics:
• Upgrade/Backup Firmware/Language
• Active Image
• Download/Backup Configuration/Log
• Configuration Files Properties
• Copy/Save Configuration
• Auto Configuration/Image Update via DHCP
Upgrade/Backup Firmware/Language
Administration: File Management
Upgrade/Backup Firmware/Language
The Upgrade/Backup Firmware/Language process can be used to:
• Upgrade or backup the firmware image.
• Upgrade or backup the boot code.
• Import or upgrade a second language file.
The following methods for transferring files are supported:
• HTTP/HTTPS that uses the facilities provided by the browser
• TFTP that requires a TFTP server
• Secure Copy Protocol (SCP) that requires an SCP server
If a new language file was loaded onto the device, the new language can be
selected from the drop-down menu. (It is not necessary to reboot the device). This
language file is automatically copied to all devices in the stack.
All software images on the stack must be identical to ensure the proper operation
of the stack. If a device is added to a stack and its software image is not identical
to the master's software image, the master automatically loads the correct image
to the new device.
The following ways can be used to update images across the stack:
• Image can be updated prior to connecting a unit to the stack. This is the
recommended method.
• Upgrade device or stack. If the stack is updated, the slave units are
automatically updated. This is done as follows:
47 Cisco 500 Series Stackable Managed Switch Administration Guide
Page 50

Administration: File Management
Upgrade/Backup Firmware/Language
- Copy image from TFTP/SCP server to master, using the Upgrade/
- Change the active image, using the Active Image page.
- Reboot, using the Reboot page.
There are two firmware images stored on the device. One of the images is
identified as the active image and other image is identified as the inactive image.
When you upgrade the firmware, the new image always replaces the image
identified as the inactive image.
Even after uploading new firmware on the device, the device continues to boot by
using the active image (the old version) until you change the status of the new
image to be the active image by using the procedure in the Active Image section.
Then boot the device.
4
Backup Firmware/Language page.
NOTE If the device is running in stacking mode, the new firmware is pushed to all of the
stack units. If there is a new device joining the stack with a different firmware
version, the master unit syncs the firmware version automatically with this newly
joined unit. This occurs transparently, without any manual intervention.
Upgrade/Backing Firmware or Language File
To upgrade or backup a software image or language file:
STEP 1 Click Administration > File Management > Upgrade/Backup Firmware/
Language.
STEP 2 Click the Transfer Method. Proceed as follows:
• If you selected TFTP, go to STEP 3.
• If you selected via HTTP/HTTPS, go to STEP 4.
• If you selected via SCP, go to STEP 5.
STEP 3 If you selected via TFTP, enter the parameters as described in this step.
Otherwise, skip to STEP 4.
Select one of the following Save Action::
• Upgrade—Specifies that the file type on the device is to be replaced with a
new version of that file type located on a TFTP server.
Cisco 500 Series Stackable Managed Switch Administration Guide 48
Page 51

4
Administration: File Management
Upgrade/Backup Firmware/Language
• Backup—Specifies that a copy of the file type is to be saved to a file on
another device.
Enter the following fields:
• File Type—Select the destination file type. Only valid file types are shown.
(File types are described in the Files and File Types section).
• TFTP Server Definition—Select whether to specify the TFTP server By IP
address or By name.
• IP Version—Select whether an IPv4 or an IPv6 address is used.
• IPv6 Address Type—Select the IPv6 address type (if IPv6 is used). The
options are:
- Link Local—The IPv6 address uniquely identifies hosts on a single
network link. A link local address has a prefix of FE80, is not routable, and
can be used for communication only on the local network. Only one link
local address is supported. If a link local address exists on the interface,
this entry replaces the address in the configuration.
- Global—The IPv6 address is a global Unicast IPV6 type that is visible and
reachable from other networks.
• Link Local Interface—Select the link local interface (if IPv6 is used) from the
list.
• TFTP Server IP Address/Name—Enter the IP address or the name of the
TFTP server.
• (For Upgrade) Source File Name—Enter the name of the source file.
• (For Backup) Destination File Name—Enter the name of the backup file.
STEP 4 If you selected via HTTP/HTTPS, you can only select the Save Action: Upgrade.
Enter the parameters as described in this step.
• File Type—Select one of the following file types:
- Firmware Image—Select this to upgrade the firmware image.
- Language File—Select this to upgrade the language file.
• File Name—Click Browse to select a file or enter the path and source file
name to be used in the transfer.
STEP 5 If you selected via SCP (Over SSH), see SSH Client Authentication for
instructions. Then, enter the following fields: (only unique fields are described, for
non-unique fields, see the descriptions above)
49 Cisco 500 Series Stackable Managed Switch Administration Guide
Page 52

Administration: File Management
Upgrade/Backup Firmware/Language
• Remote SSH Server Authentication—To enable SSH server authentication
(which is disabled by default), click Edit. This takes you to the SSH Server
Authentication page to configure the SSH server, and return to this page.
Use the SSH Server Authentication page to select an SSH user
authentication method (password or public/private key), set a username and
password on the device (if the password method is selected), and generate
an RSA or DSA key if required.
SSH Client Authentication—Client authentication can be done in one of the
following ways:
• Use SSH Client System Credentials—Sets permanent SSH user
credentials. Click System Credentials to go to the SSH User Authentication
page where the user/password can be set once for all future use.
• Use SSH Client One-Time Credentials—Enter the following:
4
- Username—Enter a username for this copy action.
- Password—Enter a password for this copy.
NOTE The username and password for one-time credential will not saved in
configuration file.
Select one of the following Save Action(s):
• Upgrade—Specifies that the file type on the device is to be replaced with a
new version of that file type located on a TFTP server.
• Backup—Specifies that a copy of the file type is to be saved to a file on
another device.
Enter the following fields:
• File Type—Select the destination file type. Only valid file types are shown.
(The file types are described in the Files and File Types section).
• SCP Server Definition—Select whether to specify the SCP server by IP
address or by domain name.
• IP Version—Select whether an IPv4 or an IPv6 address is used.
• IPv6 Address Type—Select the IPv6 address type (if used). The options
are:
Cisco 500 Series Stackable Managed Switch Administration Guide 50
Page 53

4
Administration: File Management
Active Image
- Link Local—The IPv6 address uniquely identifies hosts on a single
network link. A link local address has a prefix of FE80, is not routable, and
can be used for communication only on the local network. Only one link
local address is supported. If a link local address exists on the interface,
this entry replaces the address in the configuration.
- Global—The IPv6 address is a global Unicast IPv6 type that is visible and
reachable from other networks.
• Link Local Interface—Select the link local interface from the list.
• SCP Server IP Address/Name—Enter the IP address or domain name of
the SCP server.
• (For Upgrade) Source File Name—Enter the name of the source file.
• (For Backup) Destination File Name—Enter the name of the backup file.
STEP 6 Click Apply. If the files, passwords and server addresses are correct, one of the
Active Image
following may happen:
• If SSH server authentication is enabled (in the SSH Server Authentication
page), and the SCP server is trusted, the operation succeeds. If the SCP
server is not trusted, the operation fails and an error is displayed.
• If SSH server authentication is not enabled, the operation succeeds for any
SCP server.
There are two firmware images stored on the device. One of the images is
identified as the active image and other image is identified as the inactive image.
The device boots from the image you set as the active image. You can change the
image identified as the inactive image to the active image. (You can reboot the
device by using the process described in the Management Interface section).
To select the active image:
STEP 1 Click Administration > File Management > Active Image.
The page displays the following:
• Active Image—Displays the image file that is currently active on the device.
51 Cisco 500 Series Stackable Managed Switch Administration Guide
Page 54

Administration: File Management
Download/Backup Configuration/Log
• Active Image Version Number—Displays the firmware version of the active
image.
• Active Image After Reboot—Displays the image that is active after reboot.
• Active Image Version Number After Reboot—Displays the firmware
version of the active image as it be after reboot.
STEP 2 Select the image from the Active Image After Reboot menu to identify the
firmware image that is used as the active image after the device is rebooted. The
Active Image Version Number After Reboot displays the firmware version of the
active image that is used after the device is rebooted.
STEP 3 Click Apply. The active image selection is updated.
4
Download/Backup Configuration/Log
The Download/Backup Configuration/Log page enables:
• Backing up configuration files or logs from the device to an external device.
• Restoring configuration files from an external device to the device.
NOTE If the device is working in stacking mode, the configuration files are taken from the
master unit.
When restoring a configuration file to the Running Configuration, the imported file
adds any configuration commands that did not exist in the old file and overwrites
any parameter values in the existing configuration commands.
When restoring a configuration file to the Startup Configuration or a backup
configuration file, the new file replaces the previous file.
When restoring to Startup Configuration, the device must be rebooted for the
restored Startup Configuration to be used as the Running Configuration. You can
reboot the device by using the process described in the Management Interface
section.
Configuration File Backwards Compatibility
When restoring configuration files from an external device to the device, the
following compatibility issues might arise:
Cisco 500 Series Stackable Managed Switch Administration Guide 52
Page 55

4
Administration: File Management
Download/Backup Configuration/Log
• Change Queues Mode from 4 to 8—Queue-related configurations must be
examined and adjusted to meet QoS objectives with the new Queues
mode. See the CLI Reference Guide for a listing of these QoS commands.
• Change Queues Mode from 8 to 4—Queue-related configuration
commands that conflict with the new Queues mode are rejected, meaning
that the download of the configuration file fails. Use the System Mode and
Stack Management page to change the Queues mode.
• Change the System Mode—If the System mode is contained in a
configuration file that is downloaded to the device, and the file's System
mode matches the current System mode, this information is ignored.
Otherwise, if the System mode is changed, the following cases are
possible:
- If the configuration file is downloaded onto the device (using the
Download/Backup Configuration/Log page), the operation is aborted,
and a message is displayed indicating that the System mode must be
changed in the System Mode and Stack Management page.
- If the configuration file is downloaded during an automatic configuration
process, the Startup Configuration file is deleted and the device reboots
automatically in the new System mode. The device is configured with an
empty configuration file.
See Configuration After Reboot for a description of what happens when the
stacking modes are changed.
Downloading or Backing-up a Configuration or Log File
To backup or restore the system configuration file:
STEP 1 Click Administration > File Management > Download/Backup Configuration/
Log.
STEP 2 Select the Transfer Method.
STEP 3 If you selected via TFTP, enter the parameters. Otherwise, skip to STEP 4.
53 Cisco 500 Series Stackable Managed Switch Administration Guide
Page 56

Administration: File Management
Download/Backup Configuration/Log
Select either Download or Backup as the Save Action.
Download—Specifies that the file on another device replaces a file type on the
device. Enter the following fields:
a. TFTP Server Definition—Select whether to specify the TFTP server by IP
address or by domain name.
b. IP Version—Select whether an IPv4 or an IPv6 address is used.
NOTE If the server is selected by name in the Server Definition, there is no
need to select the IP Version related options.
c. IPv6 Address Type—Select the IPv6 address type (if used). The options are:
- Link Local—The IPv6 address uniquely identifies hosts on a single
4
network link. A link local address has a prefix of FE80, is not routable, and
can be used for communication only on the local network. Only one link
local address is supported. If a link local address exists on the interface,
this entry replaces the address in the configuration.
- Global—The IPv6 address is a global Unicast IPV6 type that is visible and
reachable from other networks.
d. Link Local Interface—Select the link local interface from the list.
e. TFTP Server IP Address/Name—Enter the IP address or name of the TFTP
server.
f. Source File Name—Enter the source file name. File names cannot contain
slashes (\ or /), cannot start with a period (.), and must include between 1 and
160 characters. (Valid characters: A-Z, a-z, 0-9, “.”, “-”, “_”).
g. Destination File Type—Enter the destination configuration file type. Only valid
file types are displayed. (The file types are described in the Files and File
Types section).
Backup—Specifies that a file type is to be copied to a file on another device. Enter
the following fields:
a. TFTP Server Definition—Select whether to specify the TFTP server by IP
address or by domain name.
b. IP Version—Select whether an IPv4 or an IPv6 address is used.
c. IPv6 Address Type—Select the IPv6 address type (if used). The options are:
Cisco 500 Series Stackable Managed Switch Administration Guide 54
Page 57

4
Administration: File Management
Download/Backup Configuration/Log
• Link Local—The IPv6 address uniquely identifies hosts on a single network
link. A link local address has a prefix of FE80, is not routable, and can be used
for communication only on the local network. Only one link local address is
supported. If a link local address exists on the interface, this entry replaces
the address in the configuration.
• Global—The IPv6 address is a global Unicast IPV6 type that is visible and
reachable from other networks.
d. Link Local Interface—Select the link local interface from the list.
e. TFTP Server IP Address/Name—Enter the IP address or name of the TFTP
server.
f. Source File Type—Enter the source configuration file type. Only valid file
types are displayed. (The file types are described in the Files and File Types
section).
g. Sensitive Data—Select how sensitive data should be included in the backup
file. The following options are available:
- Exclude—Do not include sensitive data in the backup.
- Encrypted—Include sensitive data in the backup in its encrypted form.
- Plaintext—Include sensitive data in the backup in its plaintext form.
NOTE The available sensitive data options are determined by the current
user SSD rules. For details, refer to Secure Sensitive Data Management >
SSD Rules page.
h. Destination File Name—Enter the destination file name. File names cannot
contain slashes (\ or /), the leading letter of the file name must not be a period
(.), and the file name must be between 1 and 160 characters. (Valid characters:
A-Z, a-z, 0-9, “.”, “-”, “_”).
i. Click Apply. The file is upgraded or backed up.
55 Cisco 500 Series Stackable Managed Switch Administration Guide
Page 58

Administration: File Management
Download/Backup Configuration/Log
STEP 4 If you selected via HTTP/HTTPS, enter the parameters as described in this step.
Select the Save Action.
If Save Action is Download (replacing the file on the device with a new version
from another device), do the following. Otherwise, go to the next procedure in this
step.
a. Source File Name—Click Browse to select a file or enter the path and source
file name to be used in the transfer.
b. Destination File Type—Select the configuration file type. Only valid file types
are displayed. (The file types are described in the Files and File Types
section).
c. Click Apply. The file is transferred from the other device to the device.
If Save Action is Backup (copying a file to another device), do the following:
4
a. Source File Type—Select the configuration file type. Only valid file types are
displayed. (The file types are described in the Files and File Types section).
b. Sensitive Data—Select how sensitive data should be included in the backup
file. The following options are available:
- Exclude—Do not include sensitive data in the backup.
- Encrypted—Include sensitive data in the backup in its encrypted form.
- Plaintext—Include sensitive data in the backup in its plaintext form.
NOTE The available sensitive data options are determined by the current
user SSD rules. For details, refer to Secure Sensitive Data Management >
SSD Rules page.
c. Click Apply. The file is upgraded or backed up.
STEP 5 If you selected via SCP (Over SSH), see SSH Client Configuration Through the
GUI for instructions. Then enter the following fields:
• Remote SSH Server Authentication—To enable SSH server authentication
(it is disabled by default), click Edit, which takes you to the SSH Server
Authentication page to configure this, and return to this page. Use the SSH
Server Authentication page to select an SSH user authentication method
(password or public/private key), set a username and password on the
device, if the password method is selected, and generate an RSA or DSA
key if required.
Cisco 500 Series Stackable Managed Switch Administration Guide 56
Page 59

4
Administration: File Management
Download/Backup Configuration/Log
SSH Client Authentication—Client authentication can be done in one of the
following ways:
• Use SSH Client System Credentials—Sets permanent SSH user
credentials. Click System Credentials to go to the SSH User Authentication
page where the user/password can be set once for all future use.
• Use SSH Client One-Time Credentials—Enter the following:
- Username—Enter a username for this copy action.
- Password—Enter a password for this copy.
• Save Action—Select whether to backup or restore the system configuration
file.
• SCP Server Definition—Select whether to specify the SCP server by IP
address or by domain name.
• IP Version—Select whether an IPv4 or an IPv6 address is used.
• IPv6 Address Type—Select the IPv6 address type (if used). The options
are:
- Link Local—The IPv6 address uniquely identifies hosts on a single
network link. A link local address has a prefix of FE80, is not routable, and
can be used for communication only on the local network. Only one link
local address is supported. If a link local address exists on the interface,
this entry replaces the address in the configuration.
- Global—The IPv6 address is a global Unicast IPV6 type that is visible and
reachable from other networks.
• Link Local Interface—Select the link local interface from the list.
• SCP Server IP Address/Name—Enter the IP address or name of the SCP
server.
If Save Action is Download (replacing the file on the device with a new version
from another device), enter the following fields.
• Source File Name—Enter the name of the source file.
• Destination File Type—Select the configuration file type. Only valid file
types are displayed. (The file types are described in the Files and File
Types section).
57 Cisco 500 Series Stackable Managed Switch Administration Guide
Page 60

Administration: File Management
Configuration Files Properties
If Save Action is Backup (copying a file to another device), enter the following
fields (in addition to those fields listed above):
• Source File Type—Select the configuration file type. Only valid file types
are displayed. (The file types are described in the Files and File Types
section).
• Sensitive Data—Select how sensitive data should be included in the
backup file. The following options are available:
- Exclude—Do not include sensitive data in the backup.
- Encrypted—Include sensitive data in the backup in its encrypted form.
- Plaintext—Include sensitive data in the backup in its plaintext form.
NOTE The available sensitive data options are determined by the current
user SSD rules. For details, refer to Secure Sensitive Data Management >
SSD Rules page.
4
• Destination File Name—Name of file being copied to.
STEP 6 Click Apply. The file is upgraded or backed up.
Configuration Files Properties
The Configuration Files Properties page displays when various system
configuration files were created. It also enables deleting the Startup Configuration
and Backup Configuration files. You cannot delete the other configuration file
types.
NOTE If the device is working in stack mode, the configuration files are taken from the
master unit.
To set whether mirror configuration files will be created, clear configuration files
and see when configuration files were created:
STEP 1 Click Administration > File Management > Configuration Files Properties.
This page displays the following fields:
• Configuration File Name—Type of system file.
• Creation Time—Date and time that file was modified.
Cisco 500 Series Stackable Managed Switch Administration Guide 58
Page 61

4
STEP 2 If required, disable Auto Mirror Configuration. This disables the automatic
creation of mirror configuration files. When disabling this feature, the mirror
configuration file, if it exists, is deleted. See System Files for a description of
mirror files and why you might not want to automatically create mirror
configuration files.
STEP 3 If required, select either the Startup Configuration, Backup Configuration or both
and click Clear Files to delete these files.
Copy/Save Configuration
When you click Apply on any window, changes that you made to the device
configuration settings are stored only in the Running Configuration. To preserve
the parameters in the Running Configuration, the Running Configuration must be
copied to another configuration type or saved on another device.
Administration: File Management
Copy/Save Configuration
!
CAUTION Unless the Running Configuration is copied to the Startup Configuration or another
configuration file, all changes made since the last time the file was copied are lost
when the device is rebooted.
The following combinations of copying internal file types are allowed:
• From the Running Configuration to the Startup Configuration or Backup
Configuration.
• From the Startup Configuration to the Running Configuration, Startup
Configuration or Backup Configuration.
• From the Backup Configuration to the Running Configuration, Startup
Configuration or Backup Configuration.
• From the Mirror Configuration to the Running Configuration, Startup
Configuration or Backup Configuration.
To copy one type of configuration file to another type of configuration file:
STEP 1 Click Administration > File Management > Copy/Save Configuration.
STEP 2 Select the Source File Name to be copied. Only valid file types are displayed
(described in the Files and File Types section).
STEP 3 Select the Destination File Name to be overwritten by the source file.
59 Cisco 500 Series Stackable Managed Switch Administration Guide
Page 62

Administration: File Management
Auto Configuration/Image Update via DHCP
STEP 4 Select the Sensitive Data option if you are backing up a configuration file, select
one of the following formats for the backup file.
- Exclude—Sensitive data is not included in the backup file.
- Encrypted—Sensitive data is included in the backup file in encrypted
form.
- Plaintext—Sensitive data is included in the backup file in plain text.
NOTE The available sensitive data options are determined by the current
user SSD rules. For details, refer to Secure Sensitive Data Management >
SSD Rules page.
STEP 5 The Save Icon Blinking field indicates whether an icon blinks when there is
unsaved data. To disable/enable this feature, click Disable/Enable Save Icon
Blinking.
4
STEP 6 Click Apply. The file is copied.
Auto Configuration/Image Update via DHCP
The Auto Configuration/Image Update feature provides a convenient method to
automatically configure Cisco 200, 300 and 500 switches in a network and
upgrade their firmware. This process enables the administrator to remotely ensure
that the configuration and firmware of these devices in the network are up-to-date.
This feature is comprised of the following parts:
• Auto Image Update—Automatic downloading a firmware image from a
remote TFTP/SCP server. At the end of the Auto Configuration/Image
Update process, the device reboots itself to the firmware image.
• Auto Configuration—Automatic downloading a configuration file from a
remote TFTP/SCP server. At the end of the Auto Configuration/Image
process, the device reboots itself to the configuration file.
NOTE If both Auto Image Update and Auto Configuration are requested, Auto Image
Update is performed first, then after reboot, Auto Configuration is performed and
then a final reboot is performed.
Cisco 500 Series Stackable Managed Switch Administration Guide 60
Page 63

4
Administration: File Management
Auto Configuration/Image Update via DHCP
To use this feature, configure a DHCP server in the network with the locations and
names of the configuration file and firmware image of your devices. The devices in
the network are configured as DHCP clients by default. When the devices are
assigned their IP addresses by the DHCP server, they also receive information
about the configuration file and firmware image. If the configuration file and/or
firmware image are different from the ones currently used on the device, the
device reboots itself after downloading the file and/or image. This section
describes these processes.
In addition to the ability to keep the devices in the network updated with the latest
configuration files and firmware image, Auto-Update/Configuration enables quick
installation of new devices on the network, since an out-of-the-box device is
configured to retrieve its configuration file and software image from the network
without any manual intervention by the system administrator. The first time that it
applies for its IP address from the DHCP server, the device downloads and
reboots itself with the configuration file and/or image specified by the DHCP
server.
The Auto Configuration process supports downloading a configuration file that
includes sensitive information, such as RADIUS server keys and SSH/SSL keys, by
using the Secured Copy Protocol (SCP) and the Secure Sensitive Data (SSD)
feature (See SSH Client Authentication and Security: Secure Sensitive Data
Management).
Download Protocols (TFTP or SCP)
Configuration files and firmware images can be downloaded from either a TFTP or
an SCP server.
The user configures the protocol to be used, as follows:
• Auto By File Extension—(Default) If this option is selected, a user-defined
file extension indicates that files with this extension are downloaded using
SCP (over SSH), while files with other extensions are downloaded using
TFTP. For example, if the file extension specified is.xyz, files with the .xyz
extension are downloaded using SCP, and files with the other extensions
are downloaded using TFTP. The default extension is .scp.
• TFTP Only—The download is done through TFTP, regardless of the file
extension of the configuration file name.
• SCP Only—The download is done through SCP (over SSH), regardless of
the file extension of the configuration file name.
61 Cisco 500 Series Stackable Managed Switch Administration Guide
Page 64

Administration: File Management
Auto Configuration/Image Update via DHCP
SSH Client Authentication
SCP is SSH based. By default, remote SSH server authentication is disabled, so
that the device accepts any remote SSH server out of the box. You can enable
remote SSH server authentication so that only servers found in the trusted server
list can be used.
SSH client authentication parameters are required to access the SSH server by
the client (which is the device). The default SSH client authentication parameters
are:
• SSH authentication method: by username/password
• SSH username: anonymous
• SSH password: anonymous
NOTE The SSH client authentication parameters can also be used when downloading a
file manually (meaning, a download that is not performed through the DHCP Auto
Configuration/Image Update feature).
4
Auto Configuration/Image Update Process
DHCP Auto Configuration uses the configuration server name/address and
configuration file name/path, if any, in the DHCP messages received. In addition,
DHCP Image Update uses the indirect file name of the firmware, if any, in the
messages. This information is specified as DHCP options in the Offer message
coming from the DHCPv4 servers and in the Information Reply messages coming
from DHCPv6 servers.
If this information is not found in the DHCP server messages, backup information
that has been configured in the DHCP Auto Configuration/Image Update page is
used.
When the Auto Configuration/Image Update process is triggered (see Auto
Configuration/Image Update Trigger), the sequence of events described below
occurs.
Auto Image Update Starts:
• The switch uses the indirect file name from option 125 (DHCPv4) and option
60 (DHCPv6) if any, from the DHCP message received.
• If the DHCP server did not send the indirect file name of the firmware image
file, the Backup Indirect Image File Name (from the DHCP Auto
Configuration/Image Update page) is used.
Cisco 500 Series Stackable Managed Switch Administration Guide 62
Page 65

4
Administration: File Management
Auto Configuration/Image Update via DHCP
• The switch downloads the Indirect Image File and extracts from it the name
of the TFTP/SCP server's image file.
• The switch compares the version of the TFTP server's image file with the
version of the switch active image.
• If the two versions are different, the new version is loaded into the non-
active image, a reboot is performed and the non-active image becomes the
active image.
• When using the SCP protocol, a SYSLOG message is generated informing
that reboot is about to start.
• When using the SCP protocol, a SYSLOG message is generated
acknowledging that the Auto Update process is completed.
• When using the TFTP protocol, SYSLOG messages are generated by the
copy process.
Auto Configuration Starts:
• The device uses the TFTP/SCP server name/address and configuration file
name/path (DHCPv4 options: 66,150, and 67, DHCPv6 options: 59 and 60), if
any, from the DHCP message received.
• If the information is not sent by the DHCP server, the Backup Server IP
Address/Name and the Backup Configuration File Name (from the DHCP
Auto Configuration/Image Update page) is used.
• The new configuration file is used if its name is different than the name of
the configuration file previously used on the device or if the device has
never been configured.
• The device is rebooted with the new configuration file, at the end of the
Auto Configuration/Image Update Process.
• SYSLOG messages are generated by the copy process.
Missing Options
• If the DHCP server did not send the TFTP/SCP server address in a DHCP
option and the backup TFTP/SCP server address parameter has not been
configured, then:
- SCP—The Auto Configuration process is halted.
- TFTP—The device sends TFTP Request messages to a limited
Broadcast address (for IPv4) or ALL NODES address (for IPv6) on its IP
63 Cisco 500 Series Stackable Managed Switch Administration Guide
Page 66

Administration: File Management
Auto Configuration/Image Update via DHCP
interfaces and continues the process of Auto Configuration/Image
Update with the first answering TFTP server.
Download Protocol Selection
• The copy protocol (SCP/TFTP) is selected, as described in Download
Protocols (TFTP or SCP).
SCP
• When downloading using SCP, the device accepts any specified SCP/SSH
server (without authentication) if either of the following is true:
- The SSH server authentication process is disabled. By default the SSH
server authentication is disabled in order to allow downloading
configuration file for devices with factory default configuration (for
example out-of-box devices).
4
- The SSH Server is configured in the SSH Trusted Servers list.
If the SSH server authentication process is enabled, and the SSH server is
not found in the SSH Trusted Servers list, the Auto Configuration process is
halted.
• If the information is available, the SCP server is accessed to download the
configuration file or image from it.
Auto Configuration/Image Update Trigger
Auto Configuration/Image Update via DHCPv4 is triggered when the following
conditions are fulfilled:
• The IP address of the device is dynamically assigned/renewed at reboot, or
explicitly renewed by administrative action, or automatically renewed due
to an expiring lease. Explicit renewal can be activated in the IPv4 Interface
page.
• If Auto Image Update is enabled, the Auto Image Update process is
triggered when an indirect image file name is received from a DHCP server
or a backup indirect image file name has been configured. Indirect means
that this is not the image itself, but rather a file that holds the path name to
the image.
• If Auto Configuration is enabled, the Auto Configuration process is triggered
when the configuration file name is received from a DHCP server or a
backup configuration file name has been configured.
Cisco 500 Series Stackable Managed Switch Administration Guide 64
Page 67

4
Administration: File Management
Auto Configuration/Image Update via DHCP
Auto Configuration/Image Update via DHCPv6 is triggered when the following
conditions are fulfilled:
• When a DHCPv6 server sends information to the device. This occurs in the
following cases:
- When an IPv6-enabled interface is defined as a DHCPv6 stateless
configuration client.
- When DHCPv6 messages are received from the server (for example,
when you press the Restart button on IPv6 Interfaces page,
- When DHCPv6 information is refreshed by the device.
- After rebooting the device when stateless DHCPv6 client is enabled.
• When the DHCPv6 server packets contain the configuration filename
option.
• The Auto Image Update process is triggered when an indirect image file
name is provided by the DHCP server or a backup indirect image file name
has been configured. Indirect means that this is not the image itself, but
rather a file that holds the path name to the image.
Auto Configuration Image Update in a Stack
The current master of a stack is responsible for the Auto Configuration/Image
Update of the whole stack. For auto configuration, the new configuration file is
downloaded to the master unit. For auto image update, the new image is saved to
the non-active image of the master unit. After the stack is rebooted, the new image
is copied to the units of the stack.
Ensuring Correct Performance
To ensure that the Auto Configuration/Image Update feature works correctly, note
the following:
• A configuration file that is placed on the TFTP/SCP server must match the
form and format requirements of the supported configuration file. The form
and format of the file are checked, but the validity of the configuration
parameters is not checked prior to loading it to the Startup Configuration.
• In IPv4, to ensure that a device downloads the configuration and images file
as intended during the Auto Configuration/Image Update process, it is
recommended that the device is always assigned the same IP address.
65 Cisco 500 Series Stackable Managed Switch Administration Guide
Page 68

Administration: File Management
Auto Configuration/Image Update via DHCP
This ensures that the device is always assigned with the same IP address,
and obtains the same information used in Auto Configuration/Image Update.
DHCP Auto Configuration/Image Update
The following GUI pages are used to configure the device:
• Administration > File Management > DHCP Auto Configuration/Image
Update—To configure the device as a DHCP client.
• Administration > Management Interface > IPv4 Interface (In L2) or IP
Configuration > IPv4 Management and Interfaces > IPv4 Interfaces (in L3)—
To renew the IP address through DHCP when the device is in Layer 2
system mode.
Default Settings and Configuration
4
The following defaults exist on the system:
• Auto Configuration is enabled.
• Auto Image Update is enabled.
• The device is enabled as a DHCP client.
• Remote SSH server authentication is disabled.
Before You Start the Auto Configuration/Image Update Process
To use this feature, the device must either be configured as a DHCPv4 or DHCPv6
client. The type of DHCP client defined on the device is in correlation with the type
of interfaces defined on the device.
Auto Configuration Preparations on the Server
To prepare the DHCP and TFTP/SCP servers, do the following:
TFTP/SCP Server
• Place a configuration file in the working directory. This file can be created
by copying a configuration file from a device. When the device is booted,
this becomes the Running Configuration file.
Cisco 500 Series Stackable Managed Switch Administration Guide 66
Page 69

4
Administration: File Management
Auto Configuration/Image Update via DHCP
DHCP Server
Configure the DHCP server with the following options:
• DHCPv4:
- 66 (single server address) or 150 (list of server addresses)
- 67 (name of configuration file)
• DHCPv6
- Option 59 (server address)
- Options 60 (name of configuration file plus indirect image file name,
separated by a comma)
Auto Image Update Preparations
To prepare the DHCP and TFTP/SCP servers do the following:
TFTP/SCP Server
1. Create a sub directory in the main directory. Place a software image file in it.
2. Create an indirect file that contains a path and the name of the firmware version
(for example indirect-cisco.txt that contains cisco\cisco-version.ros).
3. Copy this indirect file to the TFTP/SCP server’s main directory
DHCP Server
Configure the DHCP server with the following options
• DHCPv4—Option 125 (indirect file name)
• DHCPv6—Options 60 (name of configuration file plus indirect image file
name, separated by a comma)
DHCP Client Work Flow
STEP 1 Configure Auto Configuration and/or Auto Image Update parameters in the
Administration > File Management > DHCP Auto Configuration/Image Update
page.
STEP 2 Set the IP Address Type to Dynamic in the Defining an IPv4 Interface in Layer 2
System Mode or Defining IPv4 Interface in Layer 3 System Mode pages, and/
or define the device as a stateless DHCPv6 client in the IPv6 Interface page.
67 Cisco 500 Series Stackable Managed Switch Administration Guide
Page 70

Administration: File Management
Auto Configuration/Image Update via DHCP
Web Configuration
To configure Auto Configuration and/or Auto Update:
STEP 1 Click Administration > File Management > DHCP Auto Configuration/Image
Update.
STEP 2 Enter the values.
• Auto Configuration Via DHCP—Select this field to enable DHCP Auto
Configuration. This feature is enabled by default, but can be disabled here.
• Download Protocol—Select one of the following options:
4
Auto By File Extension
-
the TFTP or SCP protocol depending on the extension of the
configuration file. If this option is selected, the extension of the
configuration file does not necessarily have to be given. If it is not given,
the default extension is used (as indicated below).
-
File Extension for SCP
indicate a file extension here. Any file with this extension is downloaded
using SCP. If no extension is entered, the default file extension .scp is
used.
-
TFTP Only
for auto configuration.
SCP Only
-
auto configuration.
• Image Auto Update Via DHCP—Select this field to enable update of the
firmware image from the DHCP server. This feature is enabled by default, but
can be disabled here.
• Download Protocol—Select one of the following options:
—Select to indicate that only the TFTP protocol is to be used
—Select to indicate that only the SCP protocol is to be used for
—Select to indicate that Auto Configuration uses
—If Auto By File Extension is selected, you can
Auto By File Extension
-
TFTP or SCP protocol depending on the extension of the image file. If this
option is selected, the extension of the image file does not necessarily
have to be given. If it is not given, the default extension is used (as
indicated below).
-
File Extension for SCP
indicate a file extension here. Any file with this extension is downloaded
using SCP. If no extension is entered, the default file extension .scp is
used.
Cisco 500 Series Stackable Managed Switch Administration Guide 68
—Select to indicate that auto update uses the
—If Auto By File Extension is selected, you can
Page 71

4
-
TFTP Only
for auto update.
Administration: File Management
Auto Configuration/Image Update via DHCP
—Select to indicate that only the TFTP protocol is to be used
SCP Only
-
auto update.
• SSH Settings for SCP—When using SCP for downloading the configuration
files, select one of the following options:
• Remote SSH Server Authentication—Click on the Enable/Disable link to
navigate to the SSH Server Authentication page. There you can enable
authentication of the SSH server to be used for the download and enter the
trusted SSH server if required.
• SSH Client Authentication—Click on the System Credentials link to enter
user credentials in the SSH User Authentication page.
• Backup Server Definition—Select whether the backup server will be
configured By IP address or By name.
• IP Version—Select whether an IPv4 or an IPv6 address is used.
• IPv6 Address Type—Select the IPv6 address type (if IPv6 is used). The
options are:
- Link Local—The IPv6 address uniquely identifies hosts on a single
network link. A link local address has a prefix of FE80, is not routable, and
can be used for communication only on the local network. Only one link
local address is supported. If a link local address exists on the interface,
this entry replaces the address in the configuration.
—Select to indicate that only the SCP protocol is to be used for
- Global—The IPv6 address is a global Unicast IPV6 type that is visible and
reachable from other networks.
• Link Local Interface—Select the link local interface (if IPv6 is used) from the
list.
STEP 3 Enter the following optional information that is used if the DHCP server did not
provide the required information.
• Backup Server IP Address/Name—Enter either the backup server IP
address or name.
• Backup Configuration File Name—Enter the backup configuration file
name.
• Backup Indirect Image File Name—Enter the indirect image file name to
be used. This is
69 Cisco 500 Series Stackable Managed Switch Administration Guide
a file that holds the path to the image. An example of an
Page 72

Administration: File Management
indirect image file name is: indirect-cisco.scp. This file contains the path and
name of the firmware image.
The following fields are displayed:
• Last Auto Configuration/Image Server IP Address—Address of the last
backup server.
• Last Auto Configuration File Name—Name of the last configuration file
name.
STEP 4 Click Apply. The parameters are copied to the Running Configuration file.
4
Cisco 500 Series Stackable Managed Switch Administration Guide 70
Page 73

Administration: Stack Management
This section describes how stacks are managed. It covers the following topics:
• Overview
• Types of Units in Stack
• Stack Topology
• Unit ID Assignment
5
Overview
• Master Selection Process
• Stack Changes
• Unit Failure in Stack
• Software Auto Synchronization in Stack
• Stack Unit Mode
• Stack Ports
• Default Configuration
• Interactions With Other Features
• System Modes
Devices can either function on their own (Standalone mode), or they can be
connected into a stack of up to eight devices in various stacking modes (see
Stack Unit Mode).
Cisco 500 Series Stackable Managed Switch Administration Guide 71
Page 74

Administration: Stack Management
Overview
The devices (units) in a stack are connected through stack ports. These devices
are then collectively managed as a single logical device. In some cases, stack
ports can become members in Link Aggregation Groups (LAGs) increasing the
bandwidth of the stack port. See Stack Port Link Aggregation.
The stack is based on a model of a single master/backup and multiple slaves.
An example of eight devices connected into a stack is shown in the following:
Stack Architecture (Chain Topology)
5
A stack provides the following benefits:
• Network capacity can be expanded or contracted dynamically. By adding a
unit, the administrator can dynamically increase the number of ports in the
stack while maintaining a single point of management. Similarly, units can
be removed to decrease network capacity.
• The stacked system supports redundancy in the following ways:
- The backup unit becomes the master of the stack if the original master
fails.
- The stack system supports two types of topologies: chain (see “Stack
Architecture (Chain Topology)”and ring (see “Stack in Ring
To po lo g y” ). In ring topology, if one of the stack ports fails, the stack
continues to function in chain topology (see Stack Topology).
- A process known as Fast Stack Link Failover is supported on the ports in
a ring stack to reduce the duration of data packet loss when one of the
stack ports link fails. Until the stack recovers to the new chain topology,
the stack port that is currently down, loops-back the packets that were
supposed to be sent through it, so that the packets arrive at their
Cisco 500 Series Stackable Managed Switch Administration Guide 72
Page 75

5
destination using the remaining stacking links. During Fast Stack Link
failover, the master/backup units remain active and functioning.
NOTE The Fast Stack Link Failover feature is only active for one or two
unit stacks. See Stack Port Link Aggregation.
Types of Units in Stack
A stack consists of a maximum of eight units. A unit in a stack is one of the
following types:
• Master—The master unit’s ID must be either 1 or 2. The stack is managed
through the master unit that manages itself, the backup unit and the slave
units.
Administration: Stack Management
Types of Units in Stack
• Backup—If the master unit fails, the backup unit assumes the master role
(switchover). The backup unit’s ID must be either 1 or 2.
• Slave—These units are managed by the master unit.
In order for a group of units to function as a stack, there must be a master-enabled
unit. When the master-enabled unit fails, the stack continues to function as long as
there is a backup unit (the active unit that assumes the master role).
If the backup unit fails, in addition to the master, and the only functioning units are
the slave units, these also stop functioning after one minute. This means for
example, that if after 1 minute, you plug in a cable to one of the slave units that was
running without a master, the link will not come up.
Backward Compatibility of Number of Units in Stack
Previous versions of the device supported a maximum of four units as opposed to
the current version that supports eight units. Upgrading from earlier software
releases can be done without changing the configuration files.
When a firmware version, which does not support the hybrid stack modes is
loaded to the stack and the stack is rebooted, the stack reverts to Native Stack
mode. When a device in Hybrid stack mode is loaded with a firmware version that
does not support Hybrid stack mode, its system mode reverts to the default
system mode (SG500X/EWS2-550X: L3 and L2, Sx500: L2).
If a stack’s unit IDs were manually-configured, those units whose ID is greater than
4 are switched to auto numbering.
73 Cisco 500 Series Stackable Managed Switch Administration Guide
Page 76

Administration: Stack Management
Stack Topology
Unit LEDs
The device has 4 LEDs marked as 1, 2, 3, 4 that are used to display the unit ID of
each unit (e.g. on Unit ID 1, LED 1 is ON and the other LEDs are OFF). To support unit
IDs greater than 4, the LED display is changed in accordance to the below
definition:
• Units 1-4: LEDs 1-4 are lit, respectively.
• Unit 5: LED 1 and 4 are lit.
• Unit 6: LED 2 and 4 are lit.
• Unit 7: LED 3 and 4 are lit.
• Unit 8: LED 1, 3, and 4 are lit.
5
Stack Topology
Types of Stack Topology
The units in a stack can be connected in one of the following types of topologies:
• Chain To p o l o g y —Each unit is connected to the neighboring unit, but there is
no cable connection between the first and last unit. See “Stack
Architecture (Chain Topology)” shows a chain topology.
• Ring Topology—Each unit is connected to the neighboring unit. The last unit
is connected to the first unit. The following shows a ring topology of an
eight-unit stack:
Cisco 500 Series Stackable Managed Switch Administration Guide 74
Page 77

5
Administration: Stack Management
Stack Topology
Stack in Ring Topology
A ring topology is more reliable than a chain topology. The failure of one link in a
ring does not affect the function of the stack, whereas the failure of one link in a
chain connection might cause the stack to be split.
Topology Discovery
A stack is established by a process called topology discovery. This process is
triggered by a change in the up/down status of a stack port.
The following are examples of events that trigger this process:
• Changing the stack topology from a ring to a chain
• Merging two stacks into a single stack
• Splitting the stack
• Inserting other slave units to the stack, for instance because the units were
previously disconnected from the stack due to a failure. This can happen in
a chain topology if a unit in the middle of the stack fails.
During topology discovery, each unit in a stack exchanges packets, which contain
topology information.
After the topology discovery process is completed, each unit contains the stack
mapping information of all units in the stack.
75 Cisco 500 Series Stackable Managed Switch Administration Guide
Page 78

Administration: Stack Management
Unit ID Assignment
Unit ID Assignment
After topology discovery is completed, each unit in a stack is assigned a unique
unit ID.
The unit ID is set in the System Mode and Stack Management page in one of the
following ways:
• Automatically (Auto)—The Unit ID is assigned by the topology discovery
process. This is the default setting.
• Manually—The unit ID is manually set to an integer from 1-8. .
Duplicate Unit IDs
If you assign the same unit ID to two separate units, only one of them can join the
stack with that unit ID.
5
If auto numbering has been selected, the duplicate unit is assigned a new unit
number. If auto numbering was not selected, the duplicate unit is shut down.
The following shows a case where two units were manually assigned the same
unit ID. Unit 1 does not join the stack and is shut down. It did not win the master
selection process between the master-enabled units (1 or 2).
Duplicate Unit Shut Down
Cisco 500 Series Stackable Managed Switch Administration Guide 76
Page 79

5
Administration: Stack Management
Unit ID Assignment
The following shows a case where one of the duplicate units (auto-numbered) is
renumbered.
Duplicate Unit Renumbered
The following shows a case where one of the duplicate units is renumbered. The
one with the lower MAC retains its unit ID (see Master Selection Process for a
description of this process).
Duplication Between Two Units With Auto Number Unit ID
NOTE If a new stack has more than the maximum number of units (8), all extra units are shut
down.
77 Cisco 500 Series Stackable Managed Switch Administration Guide
Page 80

Administration: Stack Management
Master Selection Process
Master Selection Process
The master unit is selected from the master-enabled units (1 or 2). The factors in
selecting the master unit are taken into account in the following priority:
• Force Master—If Force Master is activated on a unit, it is selected.
• System Up Time—The master-enabled units exchange up-time, which is
measured in segments of 10 minutes. The unit with the higher number of
segments is selected. If both units have the same number of time segments,
and the unit ID of one of the units was set manually while the other unit’s unit
ID was set automatically, the unit with the manually-defined unit ID is
selected; otherwise the unit with the lowest unit ID is selected. If both units
IDs are the same, the unit with the lowest MAC address is chosen. Note:
The up time of the backup unit is retained when it is selected as master in
the switch failover process.
5
NOTE For a stack to operate, it must have a master unit. A master unit is defined as the
Stack Changes
• Unit ID—If both units have the same number of time segments, the unit with
the lowest unit ID is selected.
• MAC Address—If both units IDs are the same, the unit with the lowest MAC
address is chosen.
active unit that assumes the master role. The stack must contain a unit 1 and/or unit
2 after the master selection process. Otherwise, the stack and all its units are
partially shut down, not as a complete power-off, but with traffic-passing
capabilities halted.
This section describes various events that can cause a change to the stack. A
stack topology changes when one of the following occurs:
• One or more units are connecting and/or disconnecting to and from the
stack.
• Any of its stack ports has a link up or down.
• The stack changes between ring and chain formation.
When units are added or removed to and from a stack, it triggers topology
changes, master election process, and/or unit ID assignment.
Cisco 500 Series Stackable Managed Switch Administration Guide 78
Page 81

5
Administration: Stack Management
Stack Changes
Connecting a New Unit
When a unit is inserted into the stack, a stack topology change is triggered. The
unit ID is assigned (in case of auto numbering), and the unit is configured by the
master.
One of the following cases can occur when connecting a new unit to an existing
stack:
• No duplicate unit IDs exist.
- Units with user-defined IDs retain their unit ID.
- Units with automatically-assigned IDs retain their unit ID.
- Factory default units receive unit IDs automatically, beginning from the
lowest available ID.
• One or more duplicate unit IDs exist. Auto numbering resolves conflicts and
assigns unit IDs. In case of manual numbering, only one unit retains its unit ID
and the other(s) are shutdown.
• The number of units in the stack exceeds the maximum number of units
allowed. The new units that joined the stack are shut down, and a SYSLOG
message is generated and appears on the master unit.
The following shows an example of auto numbering when a master-enabled unit
joins the stack. There are two units with unit ID = 1. The master selection process
selects the best unit to be the master unit. The best unit is the unit with the higher
uptime in segments of 10 minutes. The other unit is made the backup.
Auto-numbered Master-enabled Unit
79 Cisco 500 Series Stackable Managed Switch Administration Guide
Page 82

Administration: Stack Management
Unit Failure in Stack
The following shows an example of auto numbering when a new unit joins the
stack. The existing units retain their ID. The new unit receives the lowest available
ID.
Auto Number Unit
5
The following shows what happens when a user-assigned, master-enabled unit
with Unit ID 1 joins a stack that already has a master unit with user-assigned unit ID
1. The newer Unit 1 does not join the stack and is shutdown.
User-assigned Master-enabled Unit
Unit Failure in Stack
Failure of Master Unit
If the Master fails, the backup unit takes over the master role and continues to
operate the stack normally.
Cisco 500 Series Stackable Managed Switch Administration Guide 80
Page 83

5
Administration: Stack Management
Unit Failure in Stack
For the backup to be able to take the place of the master, both units maintain a
warm standby at all times. In warm standby, the master and its backup units are
synchronized with the static configuration (contained in both the Startup and
Running configuration files). Backup configuration files are not synchronized. The
backup configuration file remains on the previous master.
Dynamic process-state information, such as the STP state table, dynamicallylearned MAC addresses, dynamically-learned Smartport types, MAC Multicast
tables, LACP, and GVRP are not synchronized.
When a master is being configured, it synchronizes the backup immediately.
Synchronization is performed as soon as a command is executed. This is
transparent.
If a unit is inserted into a running stack, and is selected as a backup unit, the master
synchronizes it so that it has an up-to date configuration, and then generates a
SYNC COMPLETE SYSLOG message. This is a unique SYSLOG message that
appears only when backup is converging with the master unit, and looks like this:
%DSYNCH-I-SYNCH_SUCCEEDED: Synchronization with unit 2 is finished
successfully.
Master/Backup Switchover
When a master fails or when you configure a force master on the backup unit, a
switchover occurs.
The backup unit becomes the master, and all of its processes and protocol stacks
are initialized to take responsibility for the entire stack. As a result, there is
temporarily no traffic forwarding in this unit, but slave units remain active.
NOTE When STP is used and the ports are in link up, the STP port’s state is temporarily
Blocking, and it cannot forward traffic or learn MAC addresses. This is to prevent
spanning tree loops between active units.
Slave Unit Handling
While the backup becomes the master, the active slave units remain active and
continue to forward packets based on the configuration from the original master.
This minimizes data traffic interruption in units.
After the backup unit has completed the transition to the master state, it initializes
the slave units one at a time by performing the following operations:
• Clear and reset the configuration of the slave unit to default (to prevent an
incorrect configuration from the new master unit). As a result, there is no
traffic forwarding on the slave unit.
81 Cisco 500 Series Stackable Managed Switch Administration Guide
Page 84

Administration: Stack Management
Software Auto Synchronization in Stack
• Apply related user configurations to the slave unit.
• Exchange dynamic information such as port STP state, dynamic MAC
addresses, and link up/down status between the master and the slave unit.
Packet forwarding on the slave unit resumes after the state of its ports are
set to forwarding by the master according to STP.
NOTE Packet flooding to unknown unicast MAC addresses occurs until the
MAC addresses are learned or relearned.
Reconnecting the Original Master Unit After Failover
After failover, if the original master is connected again, the master selection
process is performed. If the original master (unit 1) is reselected to be the master,
the current master (unit 2, which was the original backup unit) is rebooted and
becomes the backup once again.
5
NOTE During master/backup failover, the up time of the backup unit is retained.
Software Auto Synchronization in Stack
All the units in the stack must run the same software version (firmware and
bootcode). Each unit in a stack automatically downloads firmware and bootcode
from the master unit if the firmware and/or boot code that the unit and the master
are running is different. The unit automatically reboots itself to run the new version.
Stack Unit Mode
The stack unit mode of a device indicates whether it is configured to be part of a
stack or to operate on its own.
Devices can operate in one of the following stack unit modes:
• Standalone—A device in Standalone stack unit mode is not connected to
any other device and does not have a designated stack port.
• Native Stacking—A device in Native Stacking mode can be connected to
other devices of the same type through its stack ports to form a stack. All
units in a native stack must be of the same type (either all Sx500s, all
SG500Xs/ESW2-550Xs or all SG500XGs).
Cisco 500 Series Stackable Managed Switch Administration Guide 82
Page 85

5
Administration: Stack Management
Stack Unit Mode
• Basic Hybrid—A device in Basic Hybrid mode can be connected to
Sx500and SG500X/ESW2-550X devices to form a stack. The only limitation
(and the reason that this mode is called Basic Hybrid as opposed to
Advanced Hybrid) is that there is no support for VRRP or RIP. In this mode,
the GUI displays the pages of Sx500, even if the stack master is a SG500X/
ESW2-550X, since the feature set is that of the Sx500.
In this mode, any type of device can take the master/backup roles. Only the
5G stacking ports can be used as stack ports.
• Advanced Hybrid—A device in Advanced Hybrid mode can be connected
to Sx500 and SG500X/ESW2-550X devices to form a stack. In this mode,
VRRP and/or RIP are supported, but auto numbering of units is not
supported, because only the SG500Xor ESW2-550X devices can function
as master/backup.
Sx500 devices can only be slaves, therefore up to 6 Sx500 units can be
stacked together with two SG500X/ESW2-550Xs devices.
• Advanced Hybrid XG—A device in Advanced Hybrid XG mode can be
connected to SG500X/ESW2-550X and SG500XG devices to form a stack.
All units can be master or slave units.
Stack Configuration Options
The following describes some typical stack configurations:
Possible Stack Configuration Possible RIP/
VRRP
Support
Stack consists of all SG500Xs in
Native Stacking mode.
Stack consists of all ESW2-550Xs
in Native Stacking mode.
Stack consists of all Sx500s in
Native Stacking mode.
Enabled/
Disabled
Enabled/
Disabled
Not
supported.
Stack Ports Speed
1G/10G or 1G/5G
1G/10G or 1G/5G
1G/5G (default) or 1G
Copper/SFP (Combo)
83 Cisco 500 Series Stackable Managed Switch Administration Guide
Page 86

Administration: Stack Management
Stack Unit Mode
5
Possible Stack Configuration Possible RIP/
VRRP
Support
Stack consists of mixed device
types in Basic Hybrid mode.
• Master: Either SG500X,
ESW2-550X or Sx500s
• Backup: Either type of
device
• Slaves: Either type of device
Stack consists of mixed device
types in Advanced Hybrid mode.
• Master: SG500X
• Backup: SG500X
• Slaves: Either type of device
Stack consists of mixed device
types in Advanced Hybrid XG
mode.
Not
supported.
Enabled/
Disabled
Enabled/
Disabled
Stack Ports Speed
1G/5G
1G/5G
1 G or 10G
• Master: SG500X/ESW2-
550X or SG500XG
• Backup: SG500X/ESW2-
550X or SG500XG
• Slaves: Either type of device
Consistency of Stack Unit Modes in the Stack
All units in the stack must have the same stack unit mode.
When the stack is initialized, it runs a topology discovery algorithm that collects
information on the units of the stack.
After a unit is selected to become the master, it can reject its neighbor’s request to
join the stack if it has an inconsistent stack unit mode. When a unit is rejected
because of its stack unit mode, it is logically shutdown (the ports cannot send/
receive traffic) and all its LEDs (system, FAN, unit IDs, network ports and stack
ports LEDs) are turned on. The information regarding the stack unit mode is
displayed as a SYSLOG error in the master unit.
Cisco 500 Series Stackable Managed Switch Administration Guide 84
Page 87

5
Administration: Stack Management
Stack Unit Mode
Note that the only way for the unit to recover from this mode is by unplugging its
electricity and plugging it back in.
Changing the Stack Unit Mode
Change the stack unit mode of a device to remove it from a stack (by changing its
stack unit mode to Standalone), or when configuring it to become part of a stack
(by changing its stack unit mode to Native Stacking, Basic Hybrid Stacking or
Advanced Hybrid Stacking).
The following sections describe the system mode and configuration of the
devices after reboot when the stack unit mode is changed.
System Mode (500 Devices) After Reboot
When the stack mode of a device is changed, the system mode of the device may
be changed after reboot:
• Sx500 devices—The system mode (Layer 2 or Layer 3) of the backup and
slave Sx500 units is taken from the master-enabled unit. If the system mode
is not specifically set before reboot, it is Layer 2 after reboot (this is the
default). If you want the device to be in Layer 3 mode after reboot, this must
be specifically set before reboot.
• SG500X/ESW2-550X devices—When the device is in Standalone or
Native Stacking mode, its system mode is always Layer 2 and 3. When the
device is in Basic or Advanced Hybrid mode, it behaves as described
above for Sx500 devices. When the device is in Basic or Advanced Hybrid
mode, it behaves as described above for Sx500 devices..
• SG500XG devices—Always Layer 2 and Layer 3.
Configuration After Reboot
When you change the stack mode of a device and reboot the device, the Startup
Configuration file is usually removed because it may contain configuration
information that is not applicable to the new mode.
It is retained after bootup in the following cases:
• SG500X/ESW2-550X devices:
- Standalone to Native Stacking—Retained only when the unit is forced
to become the master with unit ID = 1
85 Cisco 500 Series Stackable Managed Switch Administration Guide
Page 88

Administration: Stack Management
Stack Ports
- Basic Hybrid to Advanced Hybrid—Retained only when the unit is
forced to become the master with unit ID = 1
- Basic Hybrid to Advanced Hybrid XG—Retained only when the unit is
forced to become the master with unit ID = 1
• SG500XG:
- Standalone to Native Stacking—Retained only when the unit is forced
to become the master unit with unit ID = 1
- Native to Advanced Hybrid XG—Retained only when the unit is forced
to become the master unit with unit ID = 1
• Sx500 devices:
- Standalone to Native Stacking—Retained only when the unit is forced
to become the master unit with unit ID = 1
5
Stack Ports
- Standalone to Basic Hybrid—Retained only when the unit is forced to
become the master with unit ID = 1
- Native Stacking to Basic Hybrid—Retained only when the unit is
forced to become the master with unit ID = 1
Ports in a stack must be reserved to be one of the following port types:
• Network Ports—Also known as uplink ports. These are ports that are
connected to the network.
• Stack Ports—Ports that connect two units in a stack. Stack ports are used
to transfer data and protocol packets among the units.
You must indicate to the system (reserve) which ports you plan to use as stack
ports (in the System Mode and Stack Management page). All ports that are not
reserved to be stack ports, are considered to be network ports.
Stack Port Link Aggregation
When two neighboring units are connected, the ports connecting them are
automatically assigned to a stack LAG. This feature enables increasing the stack
bandwidth of the stack port beyond that of a single port.
Cisco 500 Series Stackable Managed Switch Administration Guide 86
Page 89

5
Administration: Stack Management
Stack Ports
There can be up to two stack LAGs per unit.
The stack LAG can be composed of between two and eight stack ports
depending on the unit type.
Stack Port States
Stack ports can be in one of the following states:
• Down—Port operational status is down or stack port operational status is
up, but traffic cannot pass on the port.
• Active—Stack port was added to a stack LAG whose stack port
operational status is up and traffic can pass on the port and it is a member
of a stack LAG.
• Standby—Stack port operational status is up and bidirectional traffic can
pass on the port, but the port cannot be added to a stack LAG, and the port
does not transmit traffic. Possible reasons for a port being in standby are:
- Stack ports with different speeds are used to connect a single neighbor.
- One unit is connected to more than two neighboring units.
Backward Compatibility
For an explanation of the performance of a stack consisting of devices that
support stack port LAGs and devices that do not support this feature, see
Backwards Compatibility.
Physical Constraints for Stack LAGs
The following factors constrain the use of stack LAGs:
• A stack LAG must contain stack ports as described in Ta bl e 1 through
Ta bl e 4 .
• A stack LAG must contain ports of the same speed.
• When attempting to connect a unit to a stack whose topology is not a ring/
chain (for example, trying to connect a unit to more than two neighboring
units - star topology), only two stack LAGs can be active, the remainder of
the stack ports are set to standby mode (inactive).
Recommended Stack Connections
The following tables describe the optimal way to connect units in a stack
according to the type of units in the stack.
87 Cisco 500 Series Stackable Managed Switch Administration Guide
Page 90

Administration: Stack Management
Stack Ports
When link failure occurs on a port in a stack LAG, the traffic on the stack is
redistributed between the remaining stack ports in the stack LAG. This can cause
the stack connections to change from a recommended configuration to a nonrecommended configuration.
Ta bl e 1 Sx500 Stack with Sx500 or SG500X/ESW2-550X
5
Number of
Active Stack
Ports
1 S1 or S2 or S3 or S4
2 The following cases are possible:
Ta bl e 2 SG500X and ESW2550X Stacks with Sx500, SG500X/ESW2-550X or SG500XG
Number of
Active Stack
Ports
1 S1 or S2 or XG1 or XG2
2 Case 1: S1 to one neighbor and S2 to another neighbor
Recommended Connections for Stack Ports on the Sx500
Case 1: S1 to one neighbor and S2 to another neighbor
Case 2: S3 to one neighbor and S4 to another neighbor
Case 3: S1 and S2 to same neighbor
Case 4: S3 and S4 to same neighbor
Recommended Connections for Stack Ports on the SG500X
Case 2: XG1 to one neighbor and XG2 to another neighbor
Case 3: S1 and S2 to same neighbor
Case 4: XG1 and XG2 to same neighbor
4 S1+S2 to same neighbor and XG1+XG2 to another neighbor
Cisco 500 Series Stackable Managed Switch Administration Guide 88
Page 91

5
Administration: Stack Management
Stack Ports
Ta bl e 3 SG500XG Stack with SG500X/ESW2-550X
Number of
Active Stack
Ports
1Any port
2 One port to one neighbor and another port to another neighbor
4 2 ports to one neighbor and another 2 ports to another
Ta bl e 4 Sx500XG Stack with Sx500XG
Number of
Active Stack
Ports
1Any port
2 1 port to one neighbor and the other port to another neighbor
4 2 ports to one neighbor and the other 2 ports to another
Recommended Connections for Stack Ports on the
SG500XG
2 ports to same neighbor
neighbor
Recommended Connections for Stack Ports on the
Sx500XG
2 ports to same neighbor
neighbor
4 ports to same neighbor
8 4 ports to one neighbor and the other 4 ports to another
neighbor
Default Stack and Network Ports
The following are the default stack and network ports:
• Sx500 Devices—When an Sx500 device operates in Native Stacking
mode, S1-S2-1G operate as regular network ports, and S3-S4-5G operate
as stack ports by default.
• SG500X/ESW2-550X Devices—S1-S2-10G are stack ports by default.
You can manually reconfigure S1-S2-10G and S1-S2-5G as network ports or
stack ports.
• SG500XG Devices—Any ports can be stack or network. By default the
device is standalone.
89 Cisco 500 Series Stackable Managed Switch Administration Guide
Page 92

Administration: Stack Management
Stack Ports
When you convert a device from one of the Stacking modes to Standalone mode,
the stack ports automatically become network ports.
Port Speeds
The speed of stack ports can be set manually or set to auto selection. The
following describes the available types of stack ports and their speeds on the
various types of devices:
5
Device Type Port Pair Possible Speeds in
Stack
Sx500 S1-S2 1G No
Sx500 S3-S4 5G/1G Yes
SG500X/
ESW2-550X
SG500X/
ESW2-550X
SG500XG Any pair of ports
S1-S 2-XG 10 G/1G Yes
S1-S 2- 5G 5G/1G Ye s
1G or 10G Yes
from XG1 - XG16
Auto Speed
Selection
Available
Auto Selection of Port Speed
You can set the stacking cable type to be discovered automatically when the
cable is connected to the port (auto-discovery is the default setting). The system
automatically identifies the stack cable type and selects the highest speed
supported by the cable and the port.
A SYSLOG message (informational level) requesting that the user configures the
port speed manually is displayed when the cable type is not recognized.
Connecting Units
Two units can only be connected in a stack if the ports on both ends of the link are
of the same speed. This is done by configuring the stack ports speed to:
• Auto Speed mode
• Same speed on each side of the connection
Cisco 500 Series Stackable Managed Switch Administration Guide 90
Page 93

5
Cables Types
Each type of stack port can be used with specific cable types.
When the stack mode is set to Native Stacking, you can use either a fiber or
copper cable as a stacking cable. If both cables (Fiber and Copper) are
connected, fiber is the preferred media. Dual connection can be used for
redundancy. When a media change occurs, for example you disconnect the fiber
stacking cable and the copper stacking cable becomes active, the system initiates
a topology change event.
The following describes the possible combinations of cables types and ports.
Stack Ports Network Ports
Connector Type S1-S2-5G
for
SG500X/
ESW2550X and
S3-S4 for
Sx500
Cisco SFPH10GB -CU1M –
Passive Copper
Cable
Cisco SFPH10GB -CU3M –
Passive Copper
Cable
5G 1G 10G1G1G10G
5G 1G 10G1G1G10G
S1, S2 in
Sx500
S1,S2 - XG
in SG500X/
ESW2550X
Administration: Stack Management
Stack Ports
S1,S2 - 5G
for
SG500X
and S3, S4
for Sx500
S1,S2 in
Sx500
S1,S2 - XG
in SG500X
Cisco SFPH10GB -CU5M –
Passive Copper
Cable
Cisco SFP-10G-SRNot
Cisco SFP-10GLRM
Cisco SFP-10G-LRNot
1G SFP Module
MGBSX1
91 Cisco 500 Series Stackable Managed Switch Administration Guide
5G 1G 10G1G1G10G
Not
supported
Not
supported
supported
1G 1G 1G 1G 1G 1G
supported
Not
supported
Not
supported
10G Not
supported
10G Not
supported
10G Not
supported
Not
supported
Not
supported
Not
supported
10G
10G
10G
Page 94

Administration: Stack Management
Stack Ports
Stack Ports Network Ports
Connector Type S1-S2-5G
for
SG500X/
ESW2550X and
S3-S4 for
Sx500
1G SFP Module
MGBT1
1G SFP Module
MGBLX1
1G 1G 1G 1G 1G 1G
1G 1G 1G 1G 1G 1G
S1, S2 in
Sx500
S1,S2 - XG
in SG500X/
ESW2550X
S1,S2 - 5G
for
SG500X
and S3, S4
for Sx500
S1,S2 in
Sx500
5
S1,S2 - XG
in SG500X
1G SFP Module
MGBBX1
100Mbs SFP
Module MFELX1
100Mbs SFP
Module MFEFX1
100Mbs SFP
Module MFEBX1
Other SFPs 1G According
Connector Type All ports
1G 1G 1G 1G 1G 1G
Not
supported
Not
supported
Not
supported
Not
supported
Not
supported
Not
supported
to:
Forced user
speed
EEPROM
speed
1G speed
Stack Ports or Network Ports
Not
supported
Not
supported
Not
supported
According
to:
Forced user
speed
EEPROM
speed
1G speed
Not
supported
Not
supported
Not
supported
1G According
100Mbs Not
supported
100Mbs Not
supported
100Mbs Not
supported
According
to:
Forced
user speed
EEPROM
speed
1G speed
to:
Forced
user speed
EEPROM
speed
10G speed
Cisco SFP-H10GB-CU1M – Passive Copper Cable 1G - 10G
Cisco SFP-H10GB-CU3M – Passive Copper Cable 1G - 10G
Cisco SFP-H10GB-CU5M – Passive Copper Cable 1G - 10G
Cisco SFP-10G-SR 10G
Cisco SFP-10G-LRM 10G
Cisco SFP-10G-LR 10G
1G SFP Module MGBSX1 1G
Cisco 500 Series Stackable Managed Switch Administration Guide 92
Page 95

Administration: Stack Management
5
Stack Ports or Network Ports
Connector Type All ports
1G SFP Module MGBT1 1G
1G SFP Module MGBLX1 1G
1G SFP Module MGBBX1 1G
100Mbs SFP Module MFELX1 Not supported
100Mbs SFP Module MFEFX1 Not supported
100Mbs SFP Module MFEBX1 Not supported
Other SFPs 1G
Stack Ports
93 Cisco 500 Series Stackable Managed Switch Administration Guide
Page 96

Administration: Stack Management
Default Configuration
Default Configuration
The following are the device defaults in the various stacking modes:
5
Device
Type
Sx500 Native Stack S3-S4 5G Stack Layer 2
SG500X/
ESW2550X
SG500XG Native Stack User can choose
Stack Mode Default Stack
Ports
Basic Hybrid S3-S4 5G Stack Layer 2
Advanced Hybrid S3-S4 5G Stack Layer 2
Native Stack S1-S 2 1 0G Sta ck Layer 2+Layer 3
Basic Hybrid S1-S2 5 G S ta ck Layer 2
Advanced Hybrid S1-S2 5 G Stack Layer 2
Advanced Hybrid XG S1-S2 5G St ack Layer 2
any pair
Advanced Hybrid XG User can choose
any pair
Default System
Mode
Layer 2+Layer 3
Layer 2+Layer 3
Interactions With Other Features
RIP and VRRP are not supported in Basic Hybrid stack mode.
System Modes
Use the System Mode and Stack Management page to perform the following:
• Change the stack mode of a device to Standalone.
Cisco 500 Series Stackable Managed Switch Administration Guide 94
Page 97

5
Administration: Stack Management
System Modes
• Change the stack mode of a device to one of the stacking modes, change
the unit ID, stack ports, and the speed of the stack ports of all the devices in
a stack.
• Change the system mode (Layer 2/3) of a standalone device or of the stack.
• Change the queues mode from 4 to 8 supported queues or vice versa.
Information about these modes is stored in the configuration file, as follows:
• Configuration File Header—Contains the system mode and the queues
mode (even if these are the default values).
• Configuration File Body—Contains configuration commands.
Backwards Compatibility
The following modes have been expanded in the current software version of the
device. Care must be taken when using these features in previous software
versions:
• Stack Port LAG—If a unit whose software supports stack ports in LAGs is
connected to a unit whose software does not support stack ports in LAGs,
the stack port connecting the units is not made a member of the stack LAG.
The units are connected through the stack ports, and the stack master
copies its software to the other unit. The software copied depends on the
unit which becomes the master.
• Queues Mode—This mode can be changed from 4 QoS queues to 8 QoS
queues. There is no issue when upgrading from previous software versions
that did not support 8 queues, since the 4-queue mode is the default
queues mode in the current software version. However, when changing the
queues mode to 8 queues, the configuration must be examined and
adjusted to meet the desired QoS objectives with the new queues mode.
Changing the queues mode takes effect after rebooting the system. Queuerelated configuration that conflicts with the new queues mode is rejected.
• Stacking Mode—The Stacking mode has been expanded to include hybrid
stacking modes. There is no problem in upgrading from previous software
versions, since the device will boot with the existing stacking mode (Native
Stacking mode). If you want to downgrade software from a device that was
configured in a hybrid stacking mode to a software version that does not
support hybrid stacking, configure the device to Native Stacking mode first.
95 Cisco 500 Series Stackable Managed Switch Administration Guide
Page 98

Administration: Stack Management
System Modes
System Mode and Stack Management
To configure the stack:
STEP 1 Click Administration > System Mode and Stack Management.
The operational status of a standalone device or a stack is displayed in the
Operational Status block:
• Stack Mode—Displays one of the following values for the device:
- Standalone—Device is not part of a stack.
- Native Stacking—Device is part of a stack in which all of the units are of
the same types.
- Basic Hybrid Stacking—Device is part of a stack that can consist of both
SG500X and Sx500 devices with the Sx500 feature set.
5
- Advanced Hybrid Stacking—Device is part of a stack that can consist of
both SG500X and Sx500 devices with the SG500X feature set.
- Advanced Hybrid Stacking XG—Device is part of a stack that can
consist of both SG500X/ESW2-550X and SG500XG devices with the
SG500X feature set.
• Stack Topology—Displays whether the topology of the stack is chain or
ring.
• System Mode—Displays whether the stack/standalone devices are
operating in Layer 2, Layer 3 or Layer 2 and Layer 3 system mode.
• Stack Master—Displays the unit ID of the master unit of the stack.
• Master Election Status—Displays how the stack master unit was selected.
See Master Selection Process.
STEP 2 Enter the following Administrative Status fields:
• Stack Master—Select the master unit of the stack. The following options are
available:
- Auto Select—System selects the master. See Master Selection
Process.
- Unit 1—Select unit 1 as the master unit after reboot.
- Unit 2—Select unit 2 as the master unit after reboot.
Cisco 500 Series Stackable Managed Switch Administration Guide 96
Page 99

5
Administration: Stack Management
System Modes
• System Mode—Select either Layer 2 or Layer 3 mode.
NOTE Available only on devices where system mode can be selected.
• Queues Mode—Select whether to configure 4 or 8 QoS queues on the
device. See Configuring QoS Queues.
NOTE If the device is an Sx500 and if the stack unit mode is changed from Native Stacking
to Standalone, the device will be in Layer 2 system mode after reboot, unless you
change the System Mode field to Layer 3 at this time.
Stack Topology View
This view displays how the devices in the stack are connected to each other.
When you click on the arrows connecting the devices, a tooltip displays the unit
number, the type of stack ports connected the units and the numbers of the
connected units. See an example of this below:
97 Cisco 500 Series Stackable Managed Switch Administration Guide
Page 100

Administration: Stack Management
Stack Port
Network Port
Becomes stack ports after Apply&Reboot
Cannot become stack
port
System Modes
Unit View and Stack Port Configuration
To select stack ports for a device:
a. Click a device in the Stack Topology View. The ports on this device are
displayed in this view.
b. When you click on a port, a tooltip displays the port number, unit that it is
connected to, the port speed and its connection status. See an example of this
in the following:
5
c. Click on the (black) network ports that you want to select as stacking ports
(gray ports). These are ports that are currently network ports. When you click
Apply and Reboot, these ports become stack ports after the reboot.
d. To confirgure stack parameters for devices in the stack, click the device in the
Stack Topology View, and enter the following fields for the device and stacking
ports:
• Unit ID After Reset—Select a unit ID or select Auto to have the unit ID be
assigned by the system.
• Unit 1 Stack Mode—Select a stack mode.
• Unit 1 Stack Connection Speed—Select the speed for the stack ports.
Select Auto for the system to select the speed.
STEP 3 Click Apply and Reboot. The parameters are copied to the Running Configuration
file and the stack is rebooted.
Cisco 500 Series Stackable Managed Switch Administration Guide 98
 Loading...