

Page 1
Installation Guide
Home Phone - VoIP
Page 2
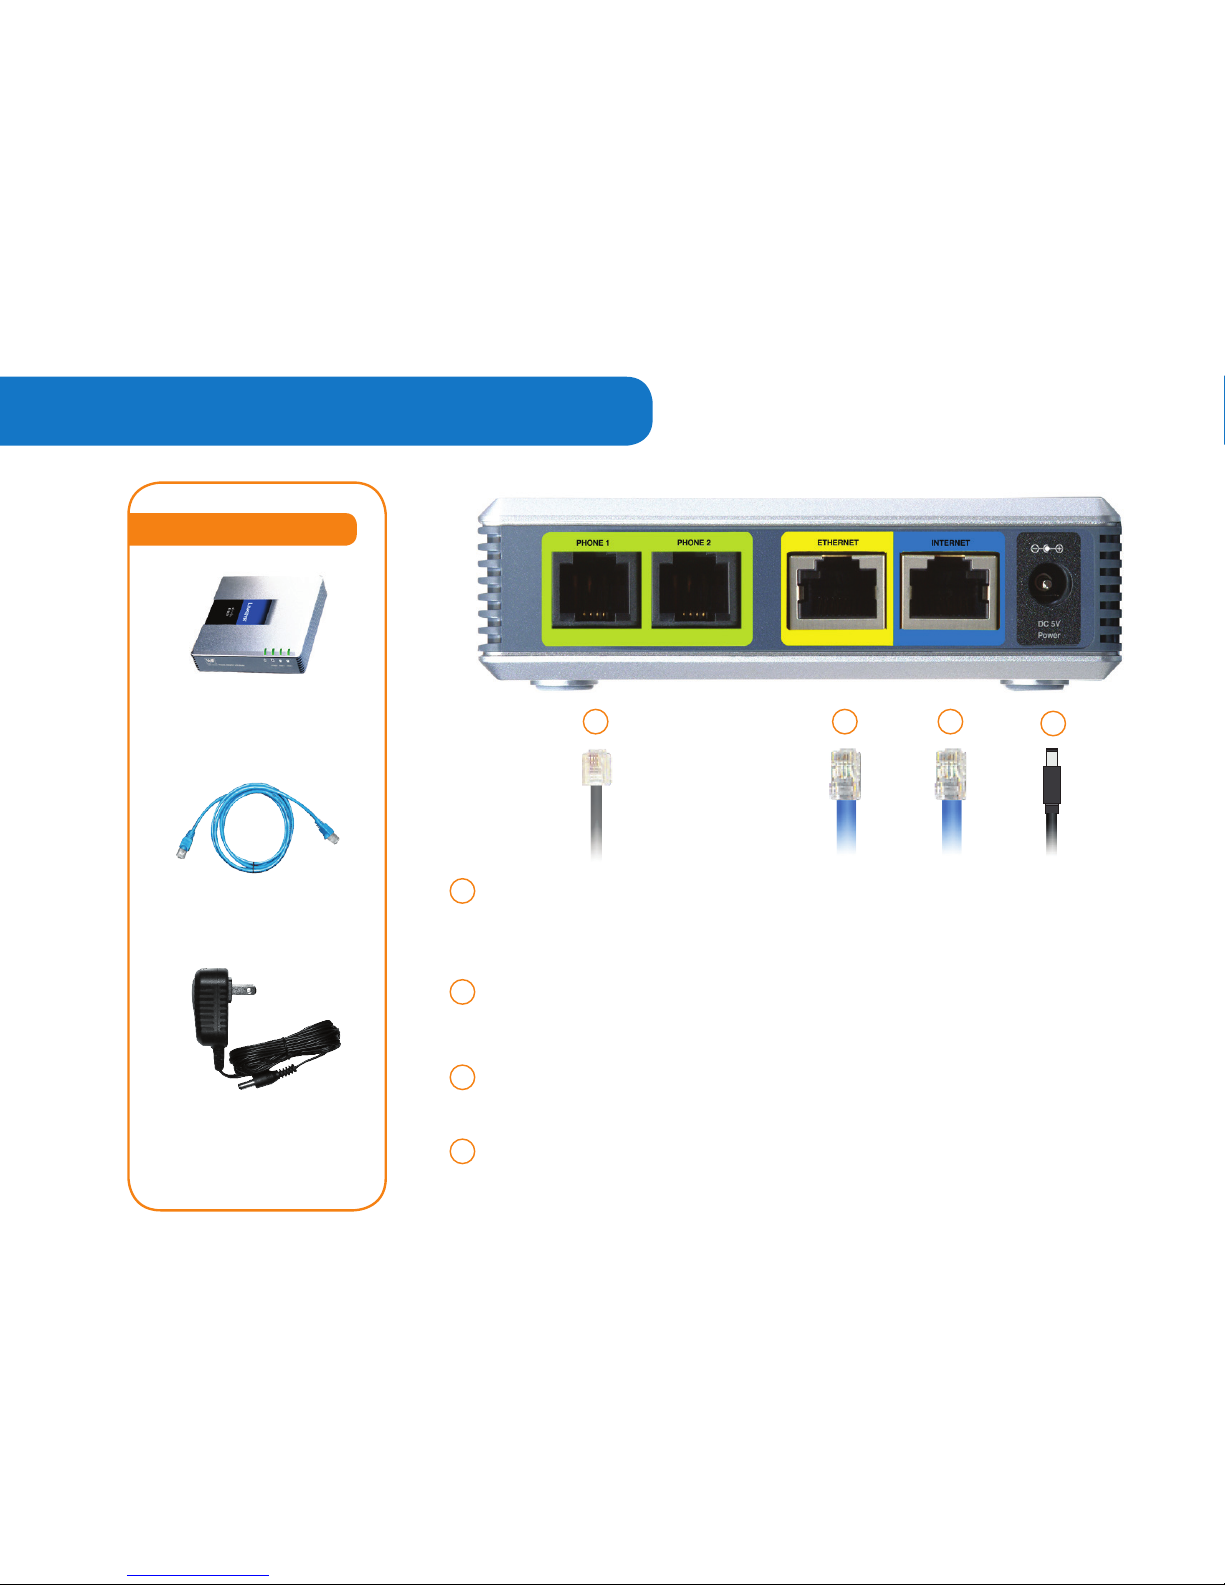
Package Contents
Phone 1 Used to connect to your telephone handset, using your
existing telephone cord. A telephone number will be assigned to
this port.
Ethernet Used to connect to your Computer using an Ethernet
Cable (if you are not using a wireless router).
Internet Used to connect to your Internet Modem using the
Ethernet Cable provided in your package.
DC 5V Used to connect to a power source (like a wall outlet or
power bar), using the Power Adapter provided in your package.
1
2
3
4
Package Contents
ETHERNET CABLE
Cisco SPA2102-R1
VoIP Adapter
Power Adapter
1 2 3
4
Page 3

Step by step videos
Watch our step by step
videos at
www.comwave.net/videos
Page 4

Installation
Continue to
1
step
Power Bar
Internet
Modem
VoIP Adapter
Existing
cable or
phone line
Router
(optional)
Computer
8
step
2
step
6
step
WAIT!!
2 min.
Telephone
3
step
4
step
5
step
WAIT!!
2 min.
Page 5

Can’t make calls?
1
2
3
4
Disconnect the power from
both the Internet Modem
and VoIP Adapter and wait 1
minute.
Retry and .
Start your computer
Still unable to make a call?
Contact us at 1-866-350-5656.
If you do not hear dial tone or are
unable to make or receive calls,
try the following steps to resolve
the issue quickly.
5
step
6
step
To begin installation, turn o your computer and
disconnect the power adapter to your High Speed
Internet Modem.
Connect an Ethernet cable from the Internet Modem
to the Internet port of the VoIP Adapter.
Connect a second Ethernet cable from the Ethernet
port of the VoIP Adapter to your computer.
Connect your telephone handset to the PHONE 1
port of the VoIP Adapter.
Connect the Internet Modem to a power outlet.
Note: wait 2 minutes before continuing to the next
step.
Connect the VoIP Adapter to the power outlet and
wait 2 minutes.
Note: Do not disconnect as you could cause damage
to the Adapter.
Your phone should now work.
1
step
2
step
3
step
4
step
5
step
6
step
7
step
Page 6

VoiceMail
Comwave’s VoiceMail stores 20 messages and allows you to listen to your messages by phone or email.
To access VoiceMail
from your email
The voice messages can be
automatically forwarded to your
email account. Set up this feature by
logging in to My Account at
1 Save
2 Delete
3 Play
4 Previous
5 Date/Time
6 Next
1 Record
2 Listen
3 Use default greeting
To access VoiceMail
when away from home or oce
To access VoiceMail
from home or oce
1
Play
Messages
2
Change
Busy Greeting
3
Change
No Answer Greeting
4
Change
Passcode
5
Personalize
Name
From your Comwave
Phone press *98
1
Voice Messaging Menu
Dial your Comwave Phone Number.
Press * during the greeting
Enter your passcode
Refer to your welcome letter
Enter your passcode
Refer to your welcome letter
www.comwave.net
Page 7

Popular Features
*72
*73
*78
*79
*70
*67
Call Forwarding
Call Forwarding OFF
Do Not Disturb
Do Not Disturb OFF
Call Waiting OFF
Automatically reactivates on next call
Caller-ID Block
9-1-1
Take a moment to review the 9-1-1 terms at www.comwave.net/911.
Be sure that your 9-1-1 address is up to date. Log into My Account at www.comwave.net to verify or update
your 9-1-1 address.
IMPORTANT: Every time you change your billing address or travel with your Comwave VoIP Adapter you will
need to update your 9-1-1 address.
For information on additional features and help using all our features, visit our website.
www.comwave.net
Page 8

Have more questions?
Let us help 1-866-350-5656
SPA2102-R1
 Loading...