

Chord Hugo Instruction Manual
Hugo
Instruction Manual
Portable Headphone amplifier with Advanced DAC
Thank you for purchasing the Chord Hugo. In order to get the most from your
product please, take a few moments to read these instructions.
Hugo is an advanced portable headphone amplifier. It features a state of the art FPGA
DAC design with our latest WTA filter algorithm. Hugo supports PCM formats up to 384KHz
including DXD. It will also natively play DSD64 and DSD128 in DoP format. Powered by
rechargeable batteries for many hours of playback, Hugo is totally portable and will
work wirelessly via Bluetooth or can be connected via micro USB to give a direct
digital audio signal as found on many portable devices. Hugo can also be used as a
standalone DAC with RCA phono outputs to connect into a HiFi system. Coaxial and
optical digital inputs will connect to a variety or source components. There is an
advanced volume control which can be bypassed for line level operation. Hugo is a
truly versatile audio component to enhance your listening experience.
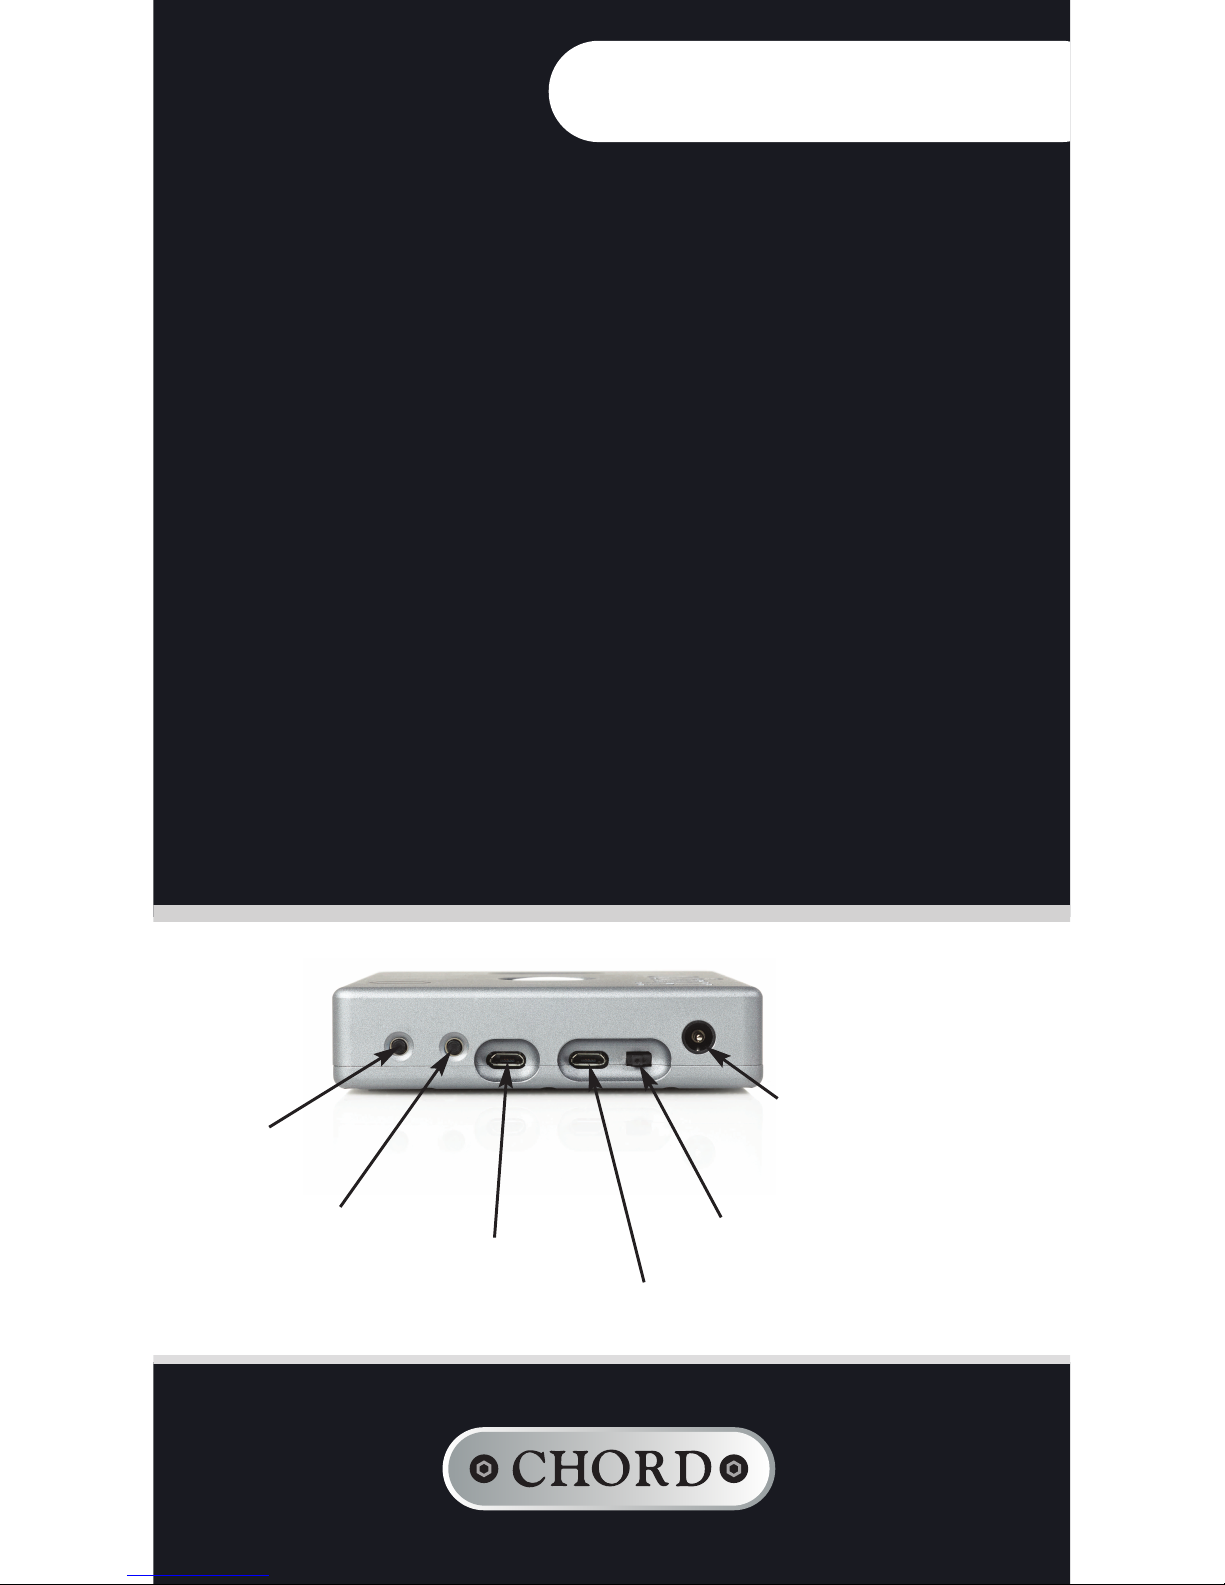
Get to know Hugo
Hugo features several different inputs and output connections. Please choose the one
that suits your source component.
Power switch
(on to the right)
HD USB input
44 – 384KHz capable
SD USB input
low power
44/48Khz only
Crossfeed switch
Different modes add
spatial effects
Input Source Switch
12V DC power input.
Connect to the wall adapter
provided to charge or leave
connected for continuous
operation.
Chord Electronics Limited
Coax digital audio input
Left and Right phono output.
Can be volume controlled or at 2V line level.
(connect to amplifier or preamplifier)
1 x 6.35mm ( inch) jack
2 x 3.5mm headphone jacks
Optical TOSLink digital input
Volume Control – Rotate to change volume.
Colour changes to indicate volume level
Crossfeed Mode
Off – No crossfeed
Red – Minimum
Green – Medium
Blue – Maximum
Input Source
Red – Coax
Green – Optical
Blue – Bluetooth
Yellow – SD USB
White – HD USB
Battery Life
Blue – Fully Charged
Green – 90%
Yellow – 50%
Red – 30%
Flashing Red - Recharge
Operation
Turn on the power switch to the right. Hugo will cycle through the sequence of colours
and then be ready for operation. Select the input you wish to use and plug in the input
cables and headphones, as appropriate. Adjust the volume to a comfortable listening
level. The volume control will glow a range of colours from dark red for minimum volume
all the way to white for maximum volume.
Driver Installation
If you are using the high definition (HD) USB input with a Microsoft WindowsTMVista,
7 or 8 PC then you will need to install the driver software on the supplied CD or via
our website. Before plugging in Hugo, double click the driver file to open it and then
click the setup file to start the installation process. Follow the on screen prompts to
complete the installation. ASIO drivers are also included. Apple
TM
or AndroidTMplatforms
are driverless and do not require any driver to operate.
Bluetooth Input
Hugo can play music via a Bluetooth enabled device. Hugo supports standard
A2DP Bluetooth audio or the higher quality APTX Bluetooth Audio codec. Select the
Bluetooth input indicated by a blue source light and then follow the instructions on your
device to pair with Hugo. The pairing code is 0000, if required.
1
/
4
 Loading...