

Chicago Electric MIG 180 Installation Manual
Chicago Electric MIG 180
81295B Gun Install
Step 1
First you will need to remove all the side panels on your machine. This is
necessary to access everything for this install.
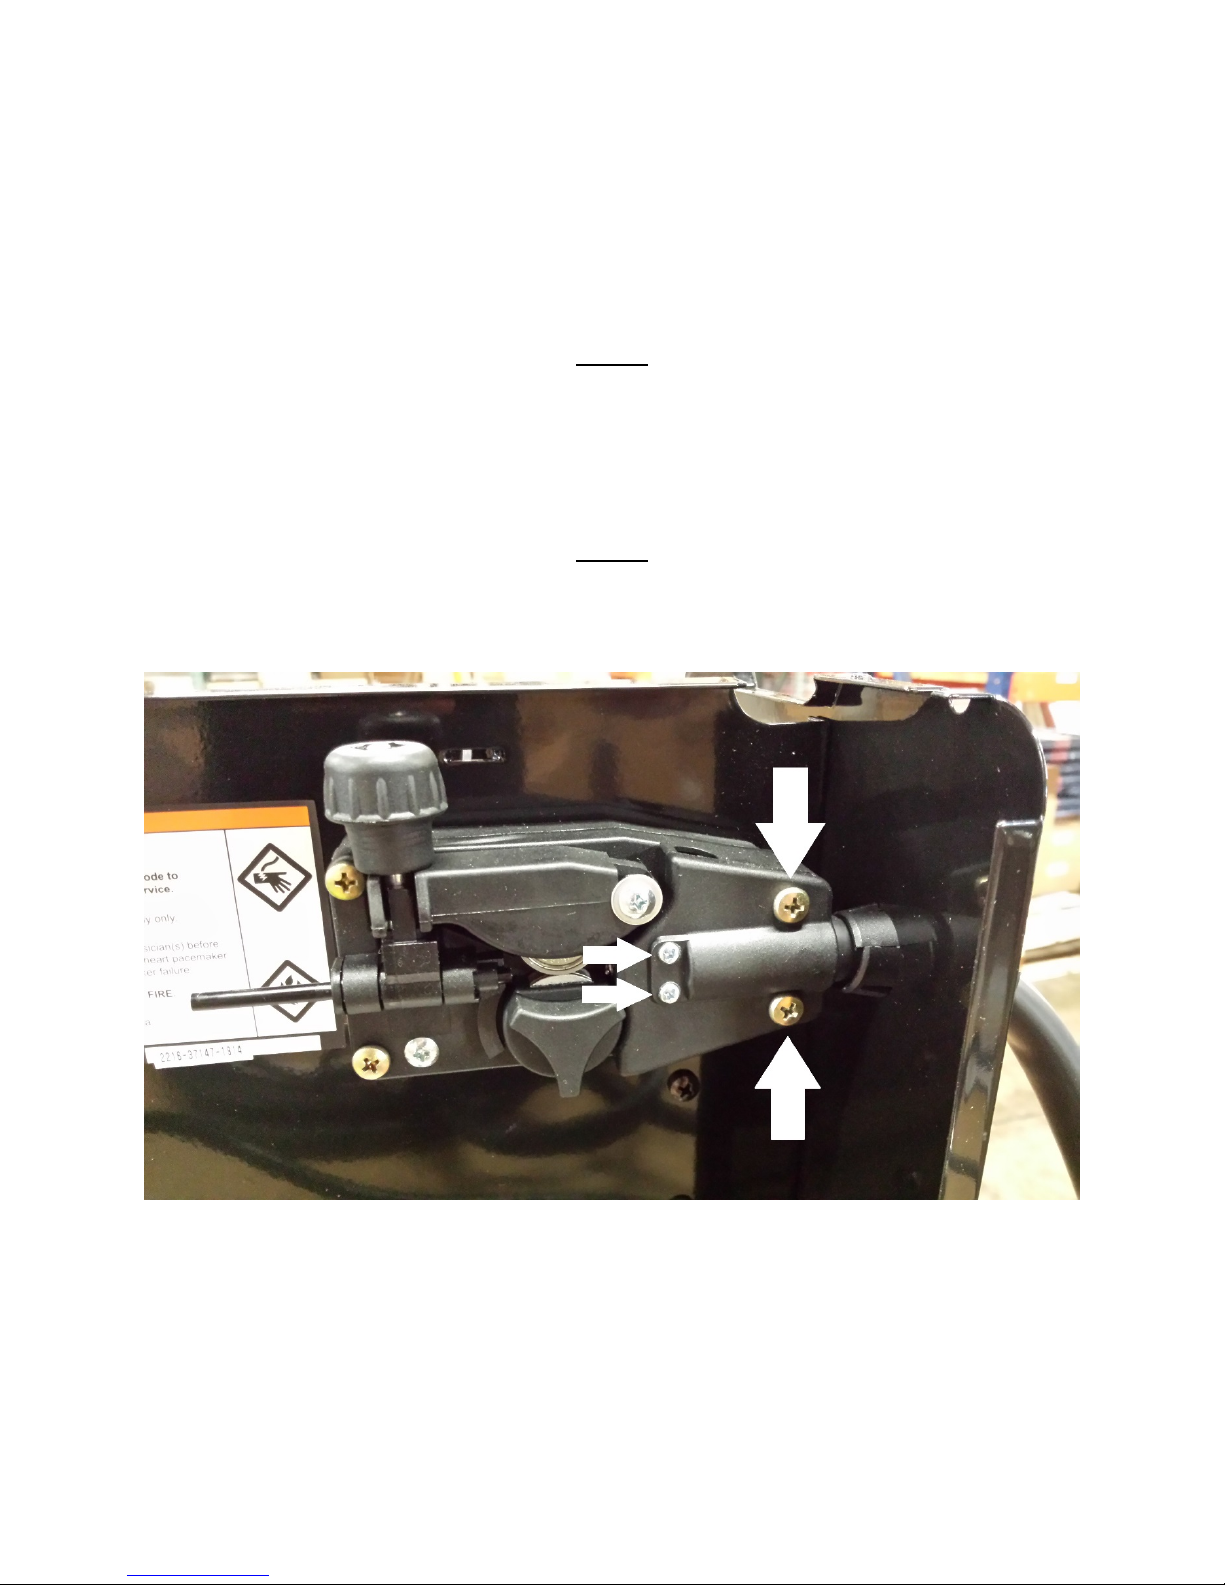
Step 2
On the side with your wire feeder, you will need to remove the four screws that
hold your gun to the wire feeder.
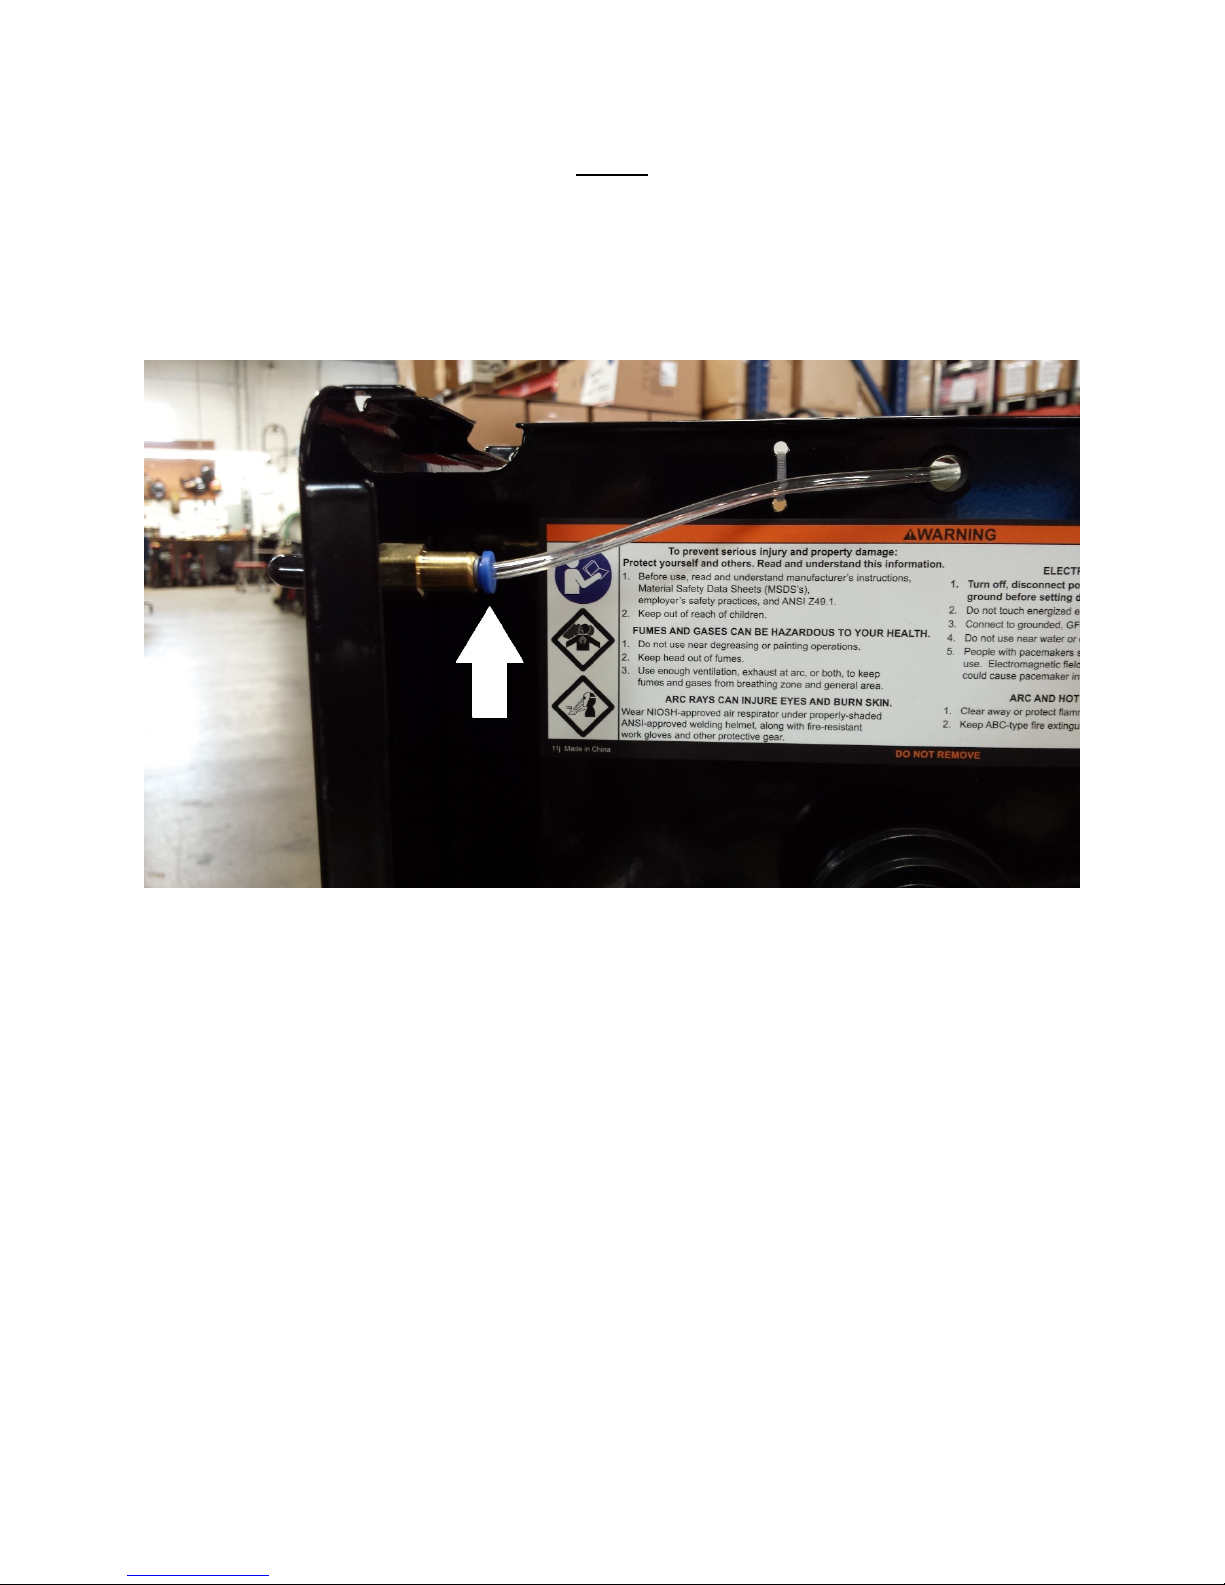
Step 3
On the same side of the machine you will need to disconnect the gas hose from
the push-lock fitting. To do so you will push the plastic collar of the fitting toward
the back of the machine and gently pull the hose out toward the front of the
machine.
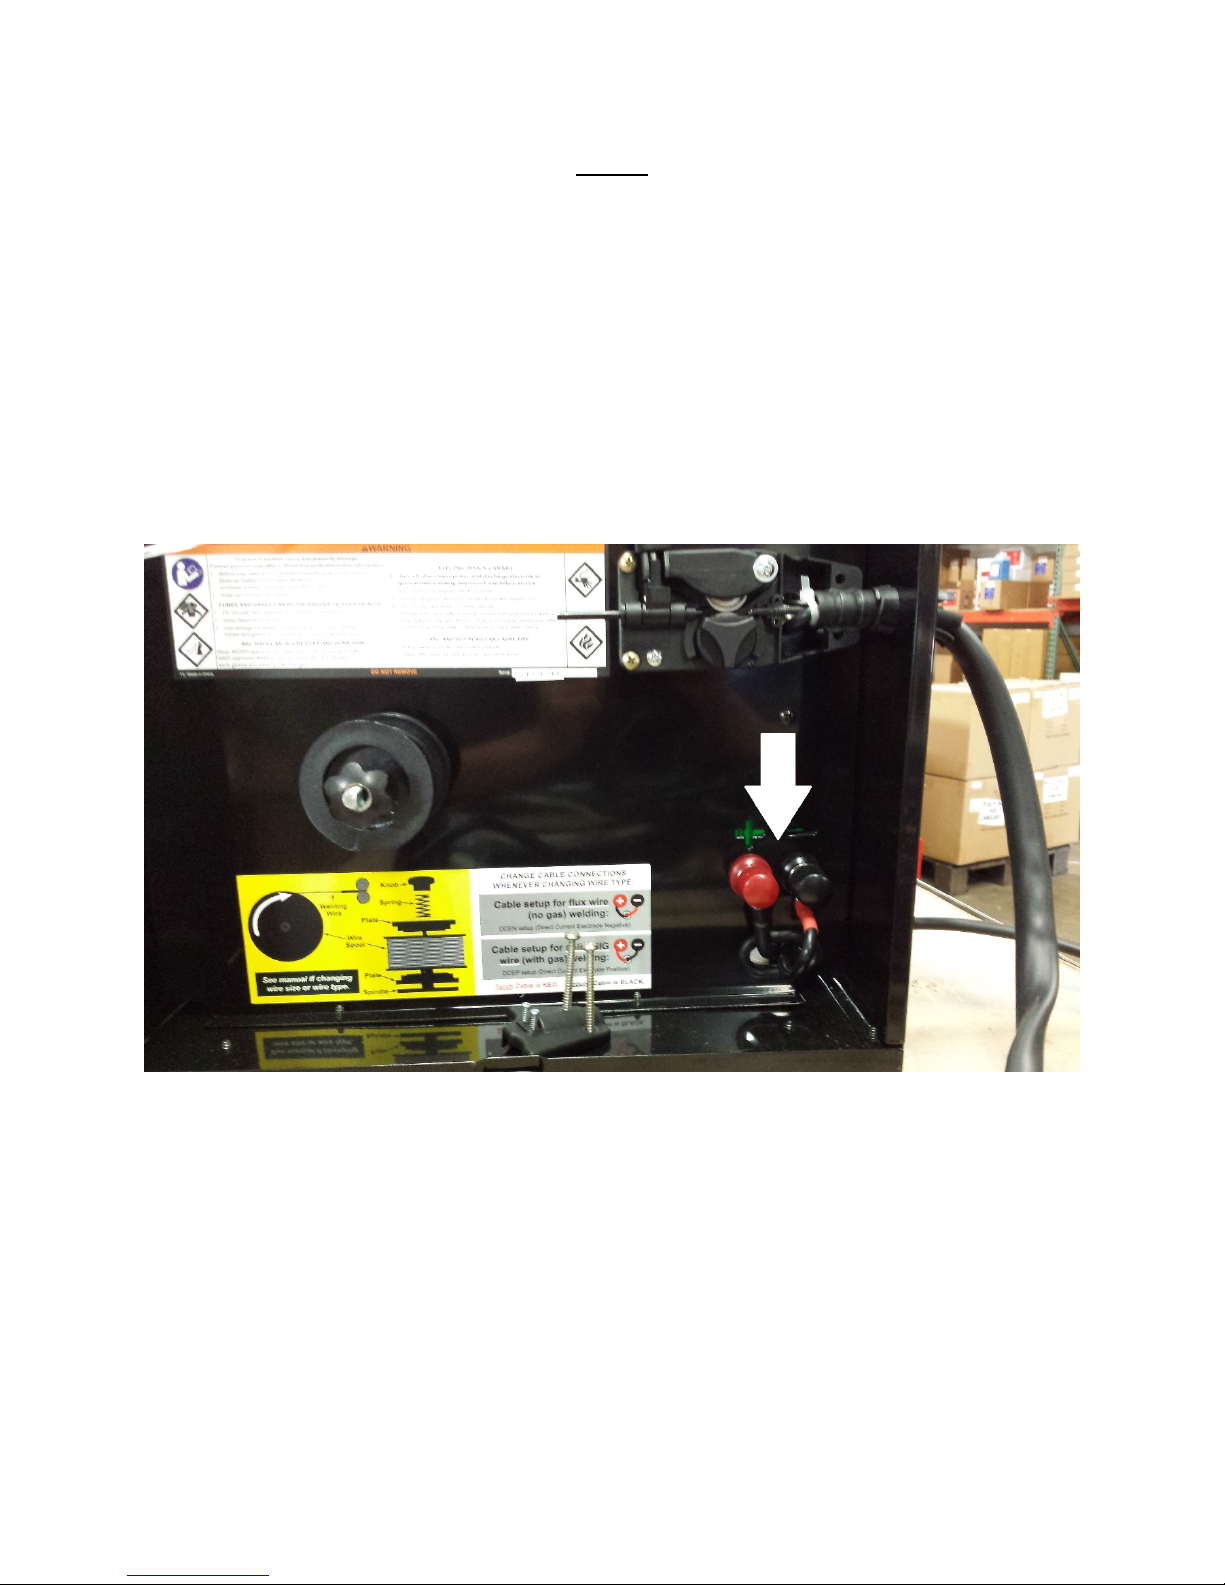
Step 4
You will then disconnect your guns power cable located below your wire feed
mechanism. This cable is held in by one of two knobs, depending on if you have
switched your polarity from the factory set reverse polarity. You will remove the
knob that holds the cable with the red sheathing. On our machine this would be
the cable on the right (negative side) as our machine has not been changed from
the original factory setup. If you are running solid core wire you may have
switched this cable to the positive side. Remove the correct knob and remove the
cable from the post (this will be necessary to pull the cable out through the inside
of the cabinet).

Step 5
Now you will go to the other side of the machine (referred to as the “inside” for
the remainder of this walk-through). On the inside you will need to locate where
your guns trigger wires, power cable, and gas hose come through from the wire
feed side. This hole will be just on the other side of the wire feed mechanism that
you just removed the 4 screws from.
Once you have located this hole you will see 3 things, the gas hose (clear vinyl
hose), power cable (this will be the bigger of the wires and it will be round), and
the trigger wires (slightly thinner than the power cable and also it will have a
flatter shape compared to the power cable).
 Loading...