

Page 1

Chery S18D Service Manual
(Body Accessories & Dimensions)
After Sales Service Department of Chery Automobile
Co.,Ltd.
Page 2

Chery S18D Service Manual
Contents
Chapter I Engine Hood & Luggage Boot ................................................................................................ 1
I. Removal and Installation of Engine Hood ........................................................................................................ 1
1. Preparations .............................................................................................................................................. 1
2. Precautions ................................................................................................................................................ 1
3. Removal and Installation of Engine Hood Accessories ........................................................................... 1
4. Removal & Adjustment of Engine Hood Assembly ................................................................................. 1
5. Removal of Engine Hood Lock ................................................................................................................ 2
6. Removal & Adjustment of Hood Cable ................................................................................................... 2
II. Removal and Installation of Trunk lid ............................................................................................................. 3
1. Preparations .............................................................................................................................................. 3
2. Removal of Trunk lid Trim Board ............................................................................................................ 3
3. Removal and Installation of Luggage boot Lock ..................................................................................... 3
4. Removal of Luggage Boot Lock Cylinder ............................................................................................... 4
5. Removal of Rear Wiper Nozzle ................................................................................................................ 5
6. Removal of Rear Wiper Motor ................................................................................................................. 6
Chapter II Removal of Interior Trim Parts .............................................................................................. 8
I. Removal and Installation of Seat Belts ............................................................................................................. 8
1. Preparations .............................................................................................................................................. 8
2. Precautions ................................................................................................................................................ 8
3. Removal and Installation of the Seat belt of Front Seats ......................................................................... 8
4. Removal and Installation of the Seat belt of Rear Seats ....................................................................... 10
II. Removal and Installation of Seats .................................................................................................................. 11
1. Preparations ............................................................................................................................................. 11
2. Removal of Front Seats .......................................................................................................................... 12
3. Removal of Rear Seats ........................................................................................................................... 12
4. Installation Procedure ............................................................................................................................. 13
III. Removal and Installation of Central Console .............................................................................................. 13
1. Preparations ............................................................................................................................................ 13
2. Removal Procedure ................................................................................................................................. 13
3. Installation Procedure ............................................................................................................................. 14
IV. Removal and Installation of Carpet .............................................................................................................. 14
1. Preparations ............................................................................................................................................ 14
2. Removal Procedure ................................................................................................................................. 14
3. Installation Procedure ............................................................................................................................. 16
Chapter III Removal & Maintenance of Vehicle Doors ........................................................................ 17
I. Removal, Installation & Maintenance of Front Doors .................................................................................... 17
1. Preparations ............................................................................................................................................ 17
2. Precautions .............................................................................................................................................. 17
3. Removal Procedure ................................................................................................................................. 17
4. Installation Procedure ............................................................................................................................. 21
II. Removal & Installation of Rear Doors .......................................................................................................... 21
1. Preparations ............................................................................................................................................ 21
2. Precautions .............................................................................................................................................. 21
3. Removal Procedure ................................................................................................................................. 22
4. Installation Procedure ............................................................................................................................. 25
Chapter IV Removal, Installation & Maintenance of Front/Rear Bumper ......................................... 26
2
Page 3

Chery S18D Service Manual
I. Removal, Installation & Maintenance of Front Bumper ................................................................................ 26
1. Preparations ............................................................................................................................................ 26
2. Precautions .............................................................................................................................................. 26
3. Removal Procedure ................................................................................................................................. 26
4. Installation Procedure ............................................................................................................................. 27
II. Removal, Installation & Maintenance of Rear Bumper ................................................................................ 27
1. Preparations ............................................................................................................................................ 27
2. Precautions .............................................................................................................................................. 27
3. Removal Procedure ................................................................................................................................. 27
4. Installation Procedure ............................................................................................................................. 28
Chapter V Removal and Installation of Outside Lamps ..................................................................... 29
I. Preparations .................................................................................................................................................... 29
II. Precautions ..................................................................................................................................................... 29
III. Removal Procedure of Headlamp ................................................................................................................. 29
IV. Removal of Front Fog Lamp ......................................................................................................................... 30
V. Removal of Rear Fog Lamp ........................................................................................................................... 31
VI Removal of Tail Lamp ................................................................................................................................... 32
. Removal of License Lamp Ⅶ .......................................................................................................................... 32
. Installation & Adjustment of HeadlampⅧ ..................................................................................................... 33
. Installation of Tail LampⅨ ............................................................................................................................... 34
Chapter VI Removal and Installation of Vehicle Ceiling ..................................................................... 35
I. Preparations ..................................................................................................................................................... 35
II. Precautions ..................................................................................................................................................... 35
III. Removal and Installation of Sun Visor ........................................................................................................ 35
IV. Removal and Installation of Ceiling Armrest ............................................................................................... 35
V. Removal and Installation of Front Ceiling Lamp .......................................................................................... 36
VI. Removal and Installation of A-pillar Panel .................................................................................................. 36
VII. Removal and Installation of B-pillar Panel ................................................................................................ 37
VIII. Removal and Installation of C-pillar Panel ............................................................................................... 37
IX. Removal and Installation of Vehicle Ceiling ................................................................................................ 38
Chapter VII Removal and Installation of Instrument Panel & Instrument Panel Crossbeam ......... 40
I. Removal of Instrument Panel .......................................................................................................................... 40
1. Removal Procedure ................................................................................................................................. 40
2. Installation Procedure ............................................................................................................................. 45
3. Methods for Clearing Instrument Maintenance Indicator ...................................................................... 45
II. Removal of Instrument Panel Cross Beam .................................................................................................... 45
1. Removal Procedure ................................................................................................................................. 45
2. Installation Procedure ............................................................................................................................. 47
Chapter VIII Air Conditioning System ................................................................................................. 48
I. System Constitution ........................................................................................................................................ 48
II. Removal of Evaporator Assembly ................................................................................................................. 48
3
Page 4
Chery S18D Service Manual
1. Preparations ............................................................................................................................................ 48
2. Removal and Installation Procedures .................................................................................................... 48
3. Installation of Evaporator Assembly ...................................................................................................... 50
III. Removal and Installation of Evaporator Interior ......................................................................................... 50
1. Preparation of Tools ................................................................................................................................ 50
2. Removal and Installation of Blower ....................................................................................................... 50
3. Removal and Installation of Blower Speed Regulation Module ............................................................ 51
4. Removal and Installation of Heater Exchanger ...................................................................................... 51
5. Removal and Installation of Mode Air Door Related Mechanism ......................................................... 52
6. Removal and Installation of Blend Air Door Related Mechanism ....................................................... 53
7. Removal and Installation of Int./Ext.Air Door Motor & Related Mechanism ..................................... 54
8. Removal and Installation of Evaporator ................................................................................................. 54
CHAPTER IX Body Dimension .............................................................................................................. 56
I. Basic Instructions on BIW Maintenance ......................................................................................................... 56
1. Vehicle Door Structure ........................................................................................................................... 57
2. Door Panel Maintenance Process ........................................................................................................... 57
3. Main Contents of Door Panel Maintenance ........................................................................................... 58
4. Basic Methods for Door Panel Maintenance .......................................................................................... 59
II. Body Assembly Dimension ............................................................................................................................ 63
1. Left Front Axonometric Drawing ........................................................................................................... 63
2. Left Rear Axonometric Drawing ............................................................................................................ 64
III. Engine Compartment Dimension ................................................................................................................ 65
4
Page 5
Chery S18D Service Manual
Chapter I Engine Hood & Luggage Boot
I. Removal and Installation of Engine Hood
1. Preparations
Tools: slotted screwdriver, cross screwdriver, socket wrench, and etc.
2. Precautions
2.1. During removal and installation, be particularly careful to apply proper force and no abrupt or
violent operation is allowed.
2.2. During removal and installation of the interior trimming, be particularly careful to avoid surface
scratch.
3. Removal and Installation of Engine Hood Accessories
3.1. Removal Procedure
3.1.1. Pull off the washer fluid hose.
3.1.2. Press down the water nozzle clip under
the engine hood, and then push it up
while removing the noozle outward.
3.2. Installation Procedure
The installation procedures are reverse to those for removal. If the nozzle shall be replaced, please
adjust the nozzle water injection to suitable height and width.
4. Removal & Adjustment of Engine Hood Assembly
4.1. Screw off the four adjusting bolts of the
engine hood, and then the engine hood can
be taken down. And the positing of the engine
hood can be adjusted in left-right & front-rear
directions by loosening the four adjusting
bolts.
Installation torque: 25±2N.m
4.2. Installation of Engine hood Assembly:
The installation procedures are reverse to those for removal.
1
Page 6
Chery S18D Service Manual
5. Removal of Engine Hood Lock
5.1. Removal Procedure
5.1.1. Remove three bolts on engine hood lock
body with 10# socket wrench to remove
the engine hood lock.
Installation torque: 7±1N.m
5.1.2. Remove the engine hood lock cable
return spring from the engine hood lock
assembly and remove the cable.
5.2. Installation Procedure
The installation procedures are reverse to those
for removal.
6. Removal & Adjustment of Hood Cable
6.1. Removal & Adjustment Procedures
6.1.1. Remove the plastic nut behind the pull
cover in driver’s cab.
6.1.2. Pull out of the engine hood cable handle
and remove the engine hood cable from
the slot of pull rod.
6.2. Installation Procedure
The installation procedures are reverse to those for removal.
2
Page 7
Chery S18D Service Manual
II. Removal and Installation of Trunk lid
1. Preparations
Tools: plastic screwdriver, socket wrench, cross ratchet wrench and etc.
Material: plastic clip
2. Removal of Trunk lid Trim Board
2.1. Pry up the trim board clearance with a plastic
screwdriver, then remove the clips in
sequence and remove the trunk lid interior
trim board.
2.2.Remove the fixing bolts of license plate lamp
trim board with 10# socket wrench; remove
the license plate lamp trim board.
2.3. Installaiton of trunk lid trim board
Replace the damaged clips and align the clip with
the installation hole; tap them for installation.
Remark: the trim board tapping force shall be
suitable; clean the surface of interior trim board
after installation..
3. Removal and Installation of Luggage boot Lock
3.1. Removal Procedure
3
Page 8

Chery S18D Service Manual
3.1.1. Remove the pull rod from the upper lock
body.
3.1.2. Disconnect the connector on upper lock
body.
3.1.3. Remove the screws on the upper lock
with cross ratchet wrench.
Installation torque: 12±1N.m
3.1.4. Remove the luggage boot lock.
3.2. Installation Procedure
The installation procedures are reverse to those
for removal.
Installation precautions: check if the lock cylinder
has deformation, if the riveted joint is in position, if
the luggage boot lock body sleeve is in good
condition, if the lock tongue can open and shut
freely.
4. Removal of Luggage Boot Lock Cylinder
4.1. Removal Procedure
4
Page 9
Chery S18D Service Manual
4.1.1. Screw off the two fixing bolts of lock
cylinder with 10# socket wrench.
Installation torque: 7±1N.m
4.1.2. Push the lock cylinder out and remove it.
Note: the lock cylinder washer shall not be
throwed away.
4.2. Installation Procedure
The installation procedures are reverse to those
for removal.
Note: the clearance between the lock cylinder and
door sheet metal.
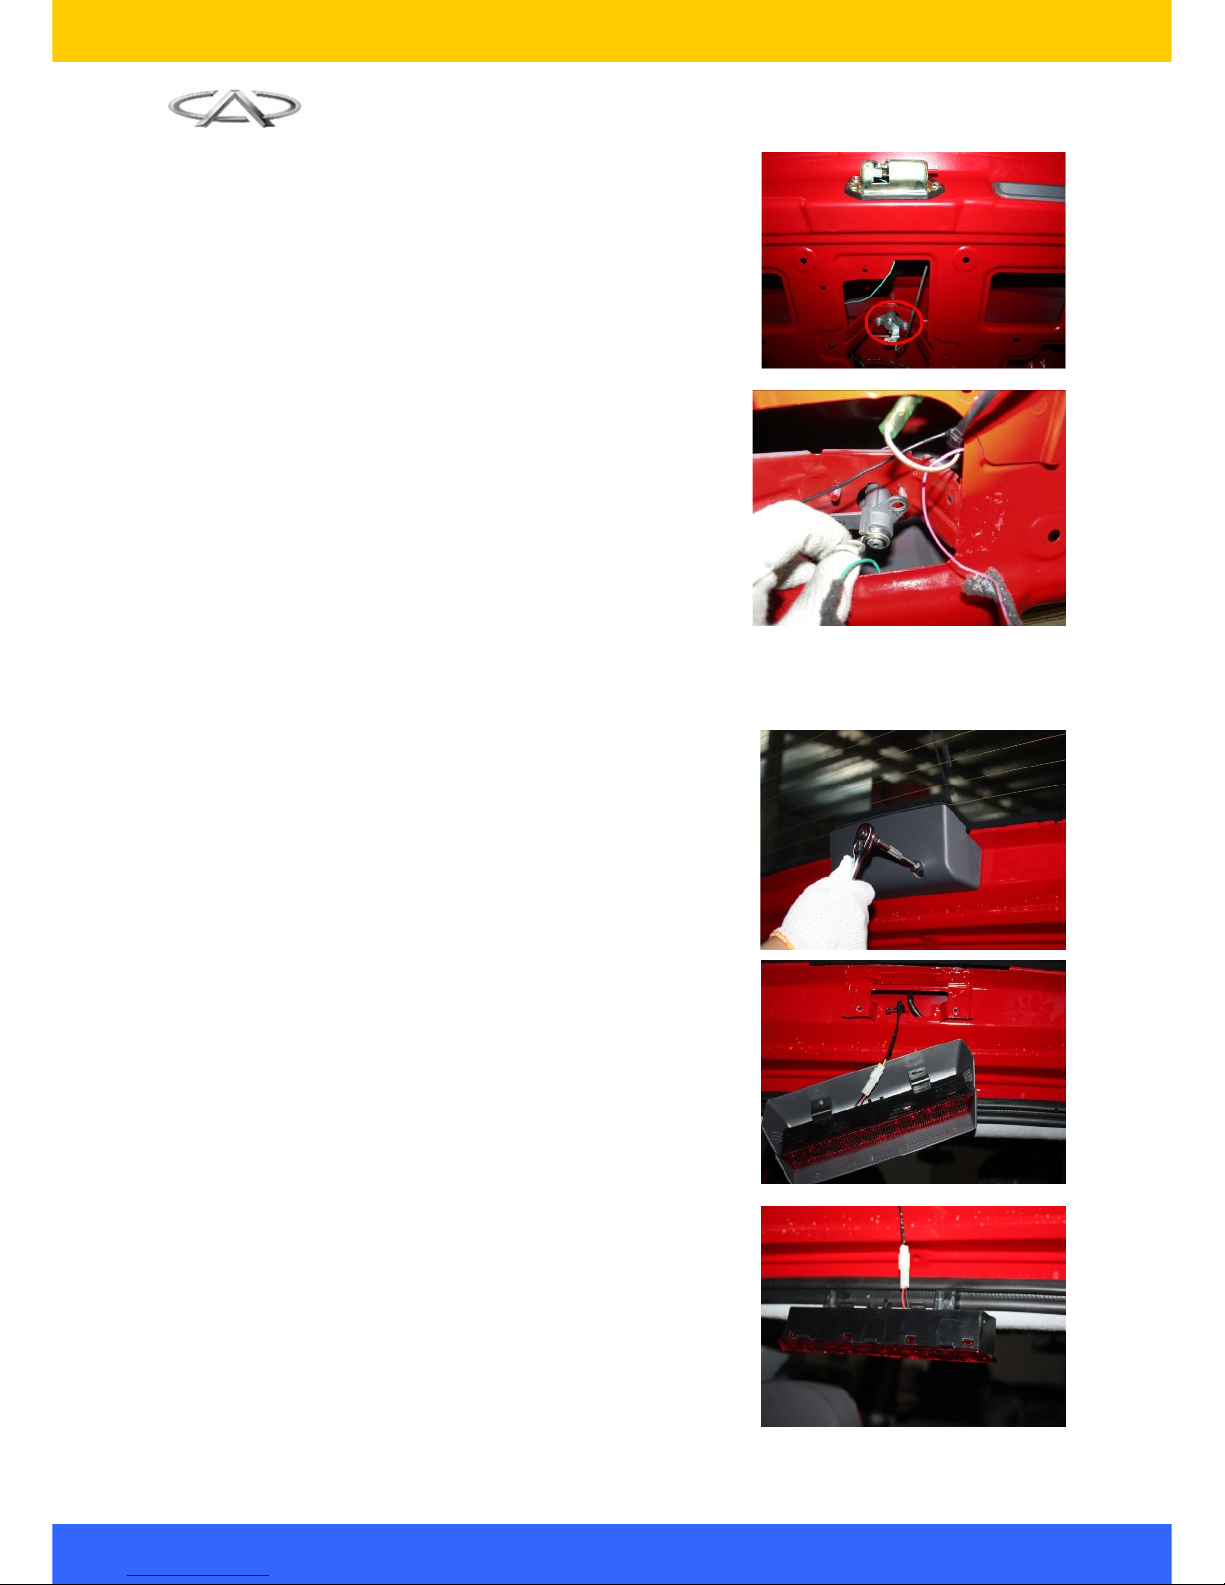
5. Removal of Rear Wiper Nozzle
5.1. Removal Procedure
5.1.1. Remove the fixing bolt of high mount
brake lamp cover with a 10# socket
wrench.
5.1.2. Remove the cover and disconnect the
connector; remove the high mount brake
lamp.
5
Page 10
Chery S18D Service Manual
5.1.3. Pull off the rear water nozzle hose to
remove the rear water nozzle.
5.2. Installation Procedure
The installation procedures are reverse to those
for removal.
Note: water injection opening should be opposite
to wiper motor steering shaft.
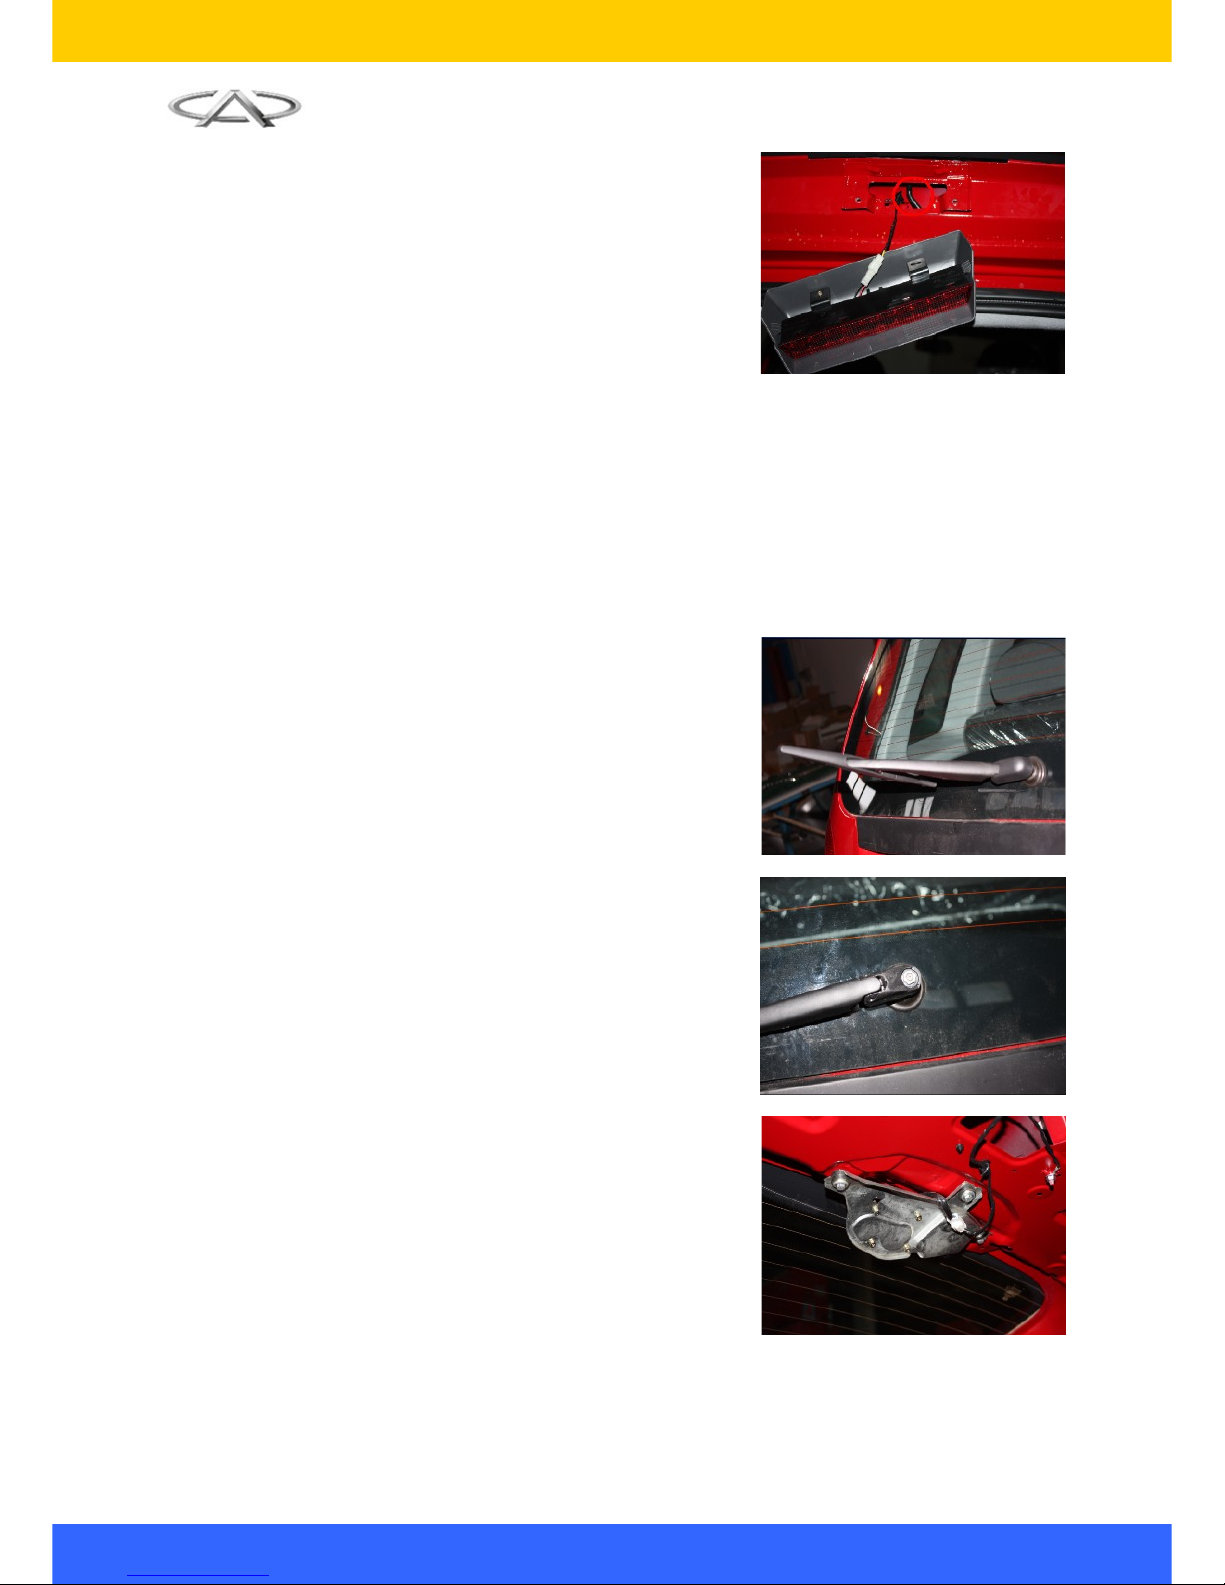
6. Removal of Rear Wiper Motor
6.1. Removal Procedure
6.1.1. Remove the rear wiper blade and arm
seat cover.
6.1.2. Use a 10# socket wrench to loosen the
nut above the motor, and remove the rear
wiper blade.
Installation torque: 7±1N.m
6.1.3. Pull the wiper motor connector, remove
three fixing bolts of the rear wiper motor
with 10# socket wrench; remove the motor
assembly.
Installation torque: 12±1N.m
6
Page 11
Chery S18D Service Manual
6.2. Installation Procedure
The installation procedures are reverse to those
for removal.
Notice to install the wiper seat sealing ring in place
to avoid water leakage of rear windshield.
7
Page 12
Chery S18D Service Manual
Chapter II Removal of Interior Trim Parts
I. Removal and Installation of Seat Belts
1. Preparations
Tools: plastic screwdriver, wrench, socket wrench and etc.
Parts: disposable clip, expansion bolt.
2. Precautions
Keep the seat belts clean and free of oil, and check them for any damage.
3. Removal and Installation of the Seat belt of Front Seats
3.1. Remove the front and rear door weather strip.
3.2. Pry out the front doorsill pressure plate with
plastic screwdriver.
3.3. Remove the fixing bolts of rear doorsill with
cross screwdriver and remove the rear
doorsill pressure plate.
3.4. Remove the seat belt lower fixing bolt with
17# socket wrench.
Torque: 50±10N.m
8
Page 13
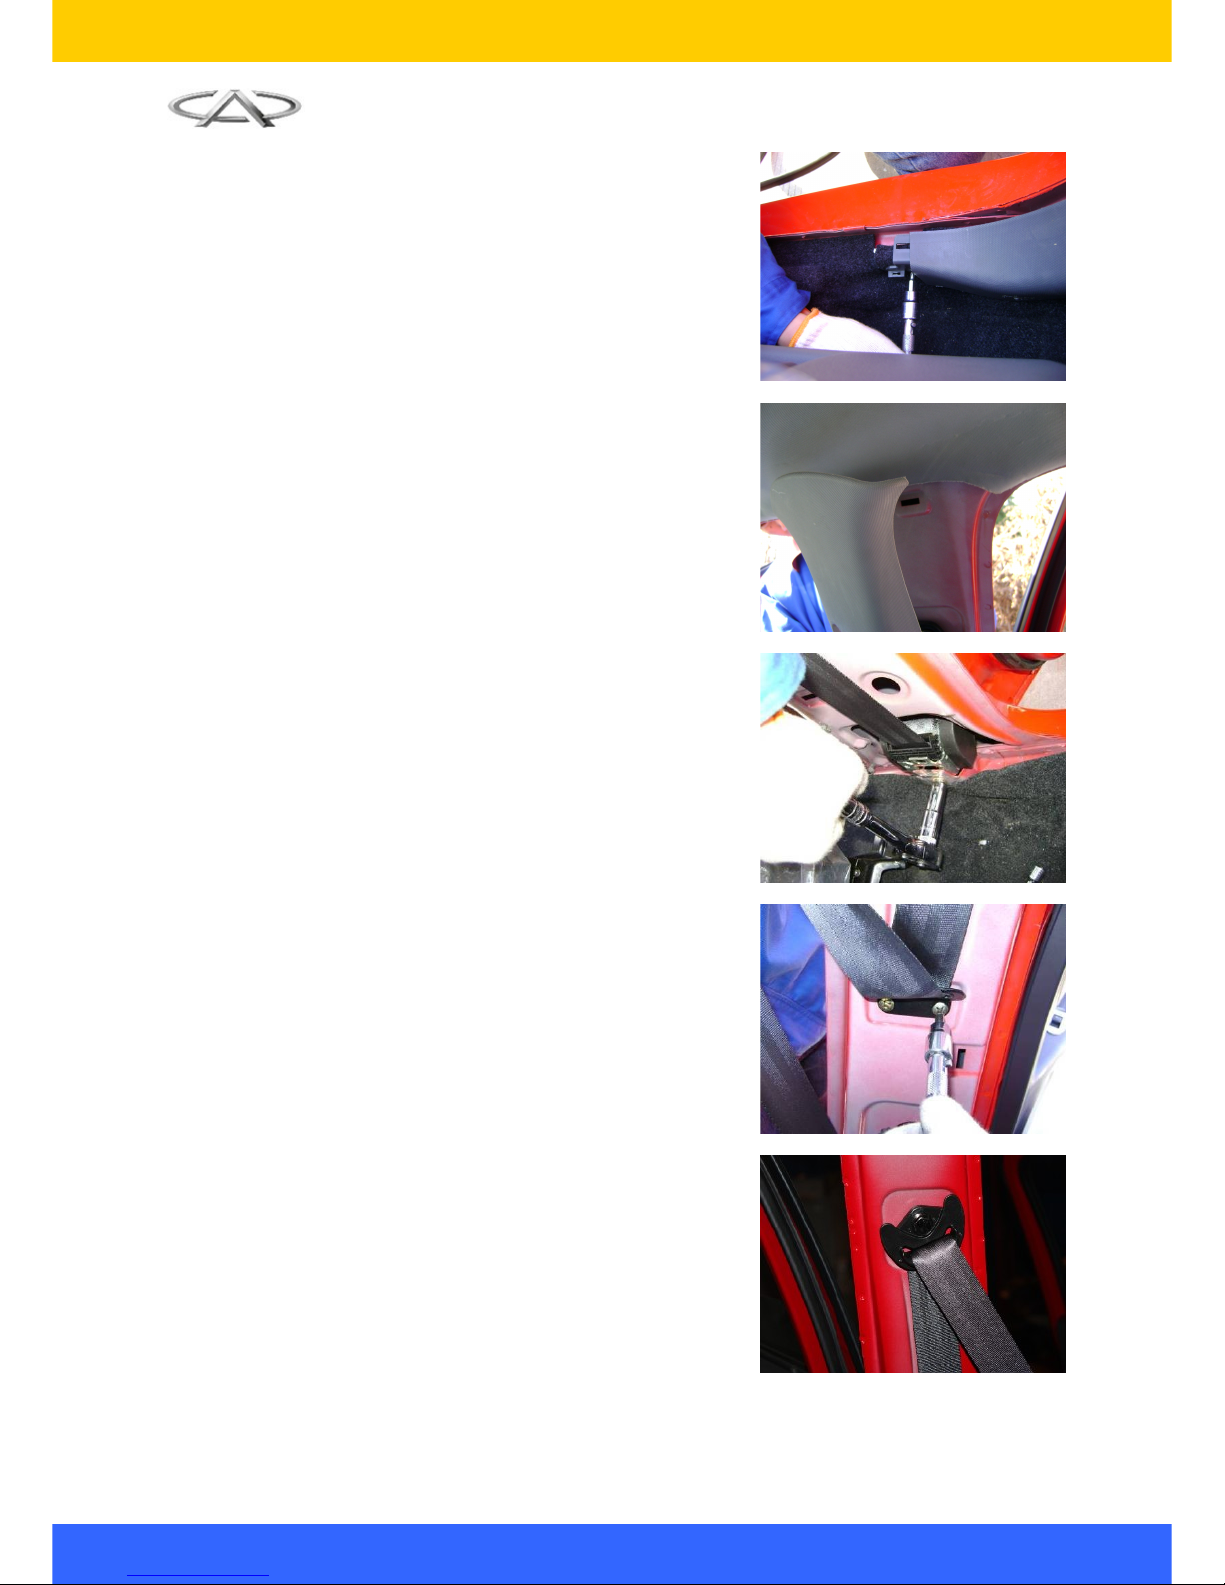
Chery S18D Service Manual
3.5. Remove the two fixing screws of pillar B lower
panel with cross screwdriver (each one for
front and rear), remove the pillar B lower
panel.
3.6. Remove the pillar B upper panel.
3.7. Remove the seat belt retractor assembly with
17# socket wrench.
Torque: 50±10N.m
3.8. Remove the seat belt guide plate with cross
screwdriver.
3.9. Remove the seat belt upper fixing point bolt
with 17# socket wrench.
Torque: 50±10N.m
3.10. Installation Procedure
The installation procedures are reverse to those for removal.
9
Page 14
Chery S18D Service Manual
Note:
1. Keep the seat belt clean and away from oil, check if there is damage of seat belt, adding screw
thread sealant during the mounting of seat belt fixing bolt.
2. The pillar panel shall be fit firmly with the body without any looseness, and it shall also be fit well
with roof and weather strip.
3. The fit clearance between B pillar lower panel and front/rear doorsill pressure plate shall be even
and less than 1 mm.
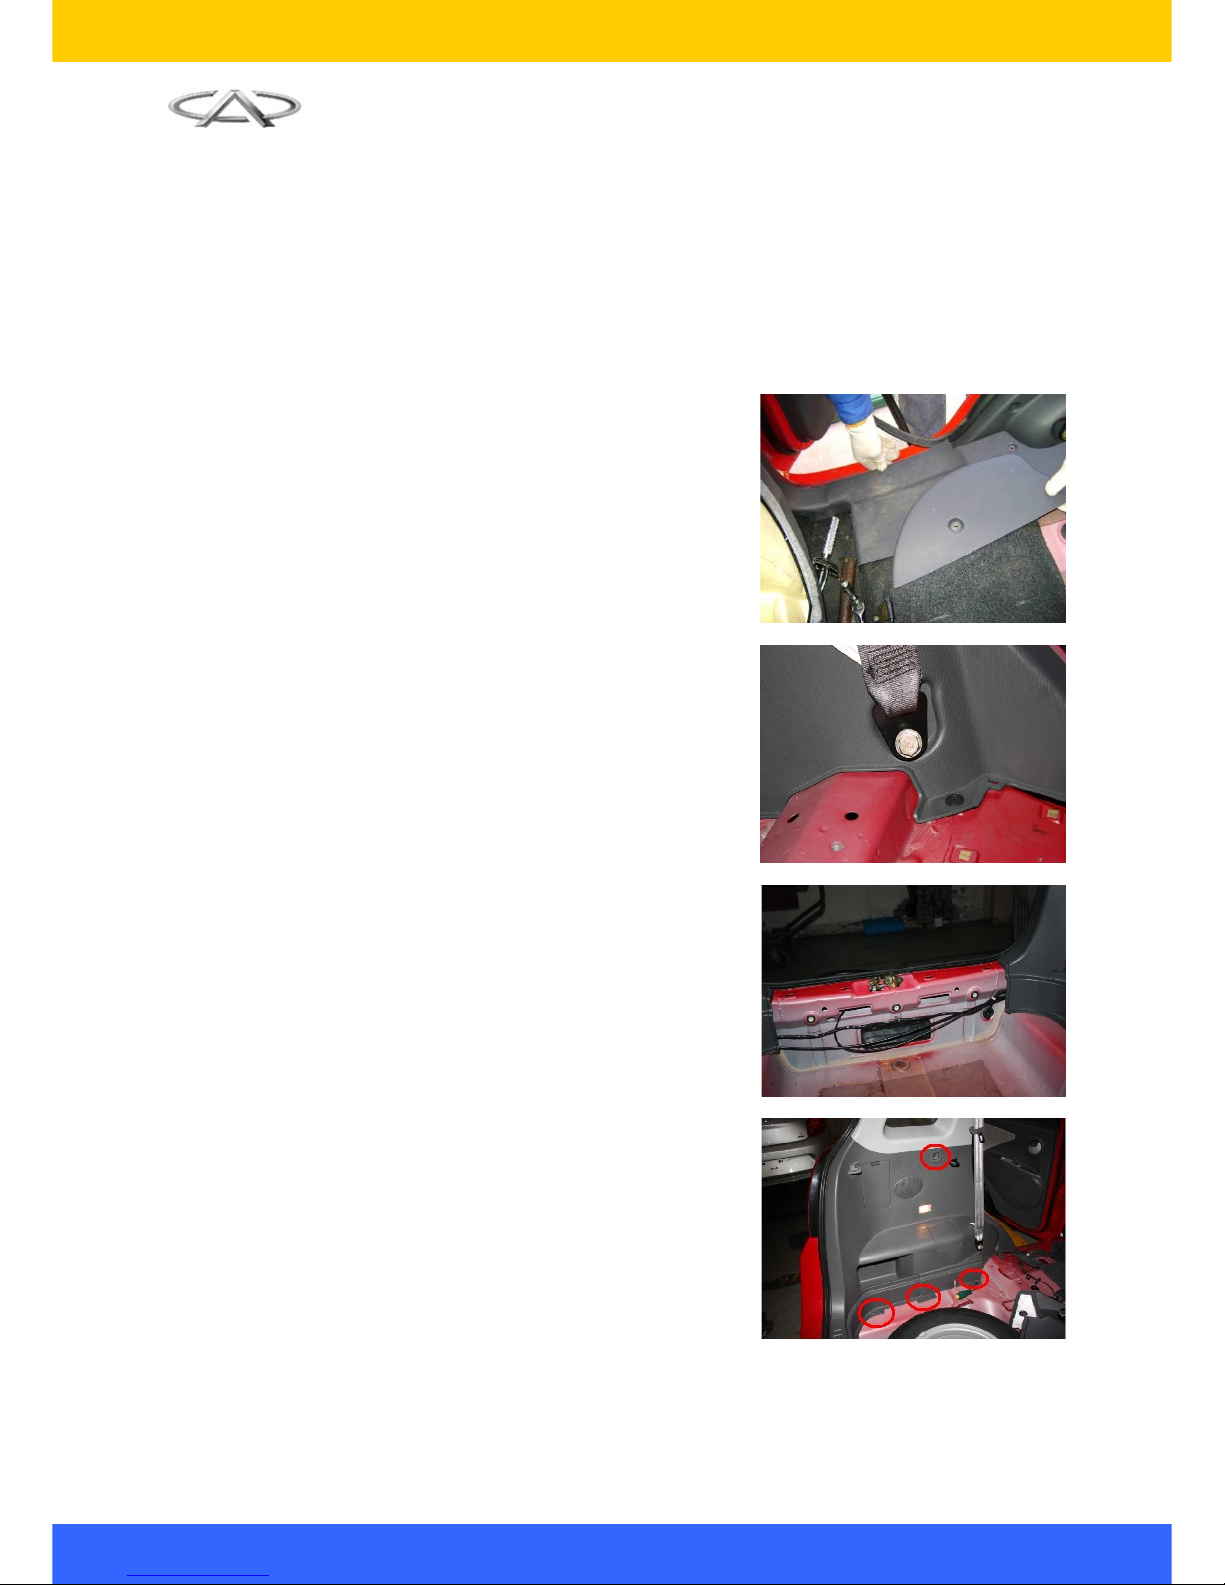
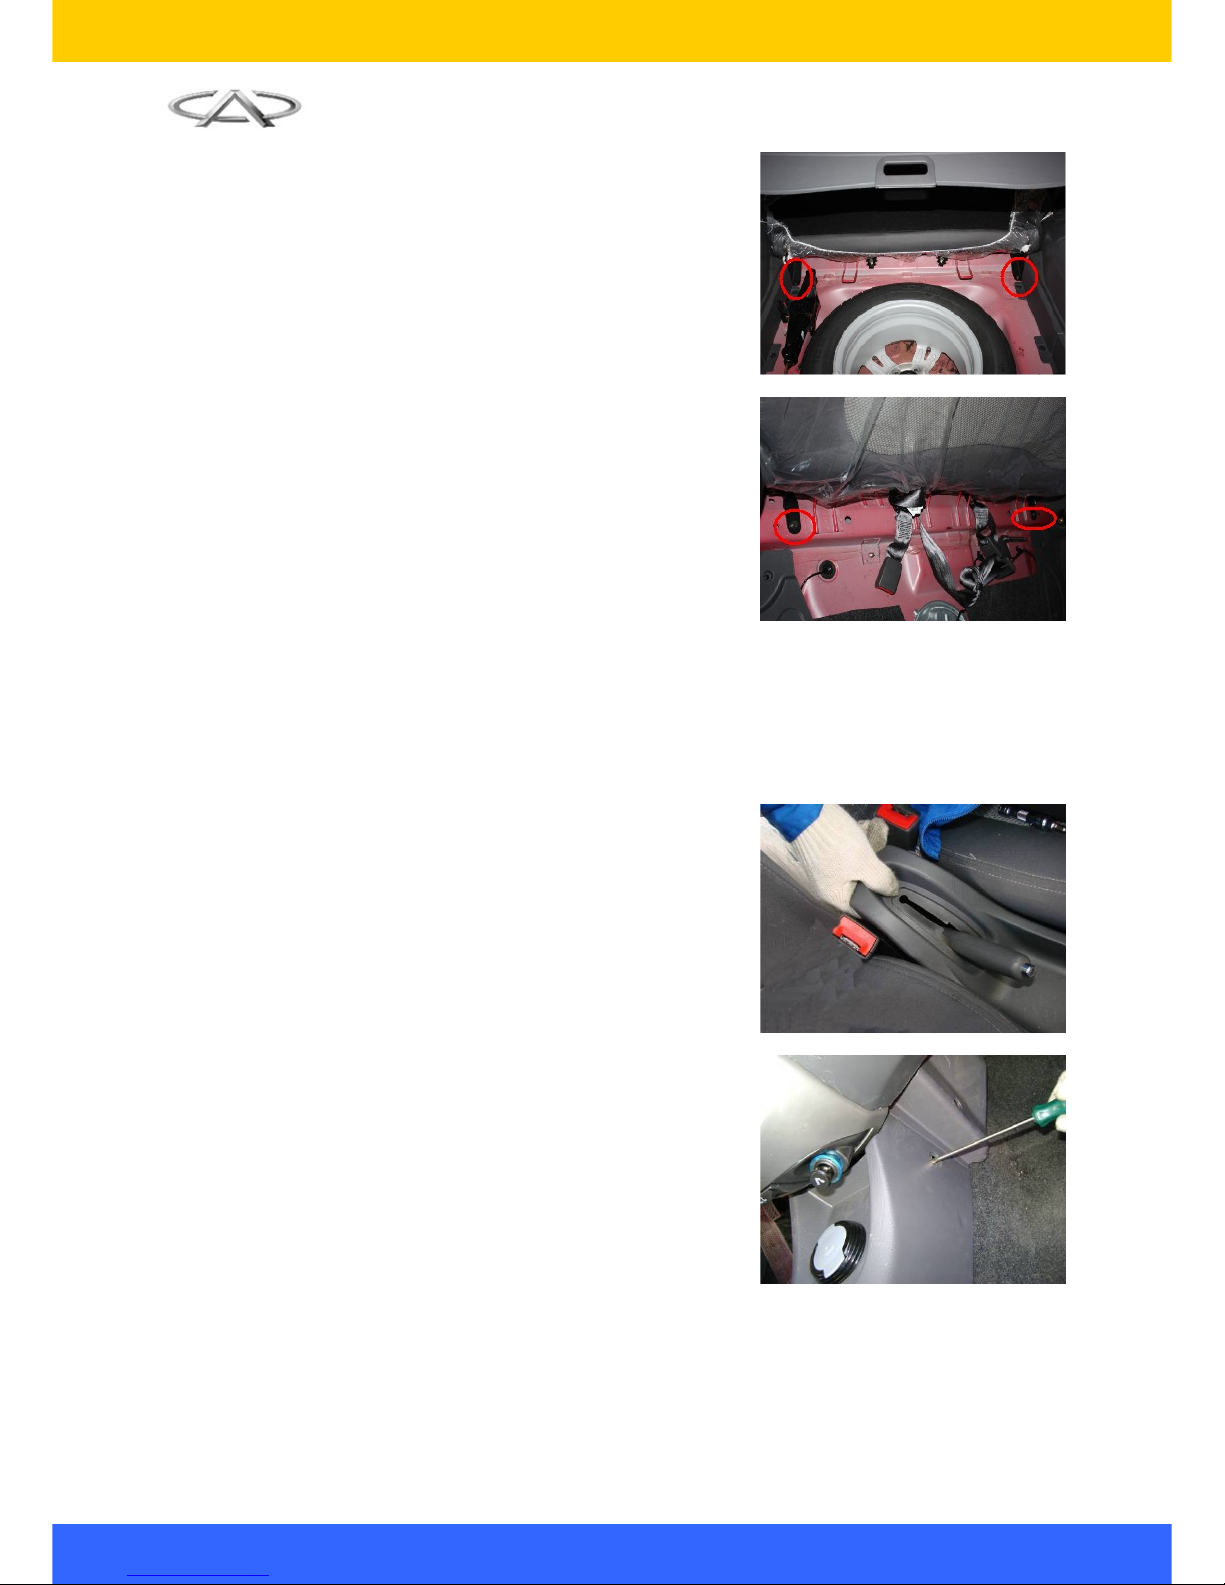
4. Removal and Installation of the Seat belt of Rear Seats
4.1. Remove the fixing screw of rear doorsill with
cross screwdriver, remove the rear doorsill
pressure plate. (refer to the removal and
installation of the seat belt of front door)
4.2. Remove the seat belt bolt with 17# socket
wrench.
Torque: 50±10N.m
4.3. Remove the back doorsill pressure plate with
cross screwdriver.
4.4. Remove the lower panel fixing bolt with cross
screwdriver and remove the lower panel.
10
Page 15
Chery S18D Service Manual
4.5. Pry out the pillar C upper panel with plastic
screwdriver.
4.7. Remove the rear seat belt upper and lower
fixing point and rear seat fixing clip with 17#
socket wrench.
Torque: 50±10N.m
4.8. Installation Procedure
The installation procedures are reverse to those for removal.
Note:
1. Keep the seat belt clean and away from oil, check if there is damage of seat belt, adding screw
thread sealant during the mounting of seat belt fixing bolt.
2. The pillar panel shall be fit firmly with the body without any looseness, and it shall also be fit well
with roof and weather strip.
3. The fit clearance between C pillar lower panel and rear doorsill pressure plate shall be even and
less than 1 mm.
II. Removal and Installation of Seats
1. Preparations
Tools: socket wrench
11
Page 16
Chery S18D Service Manual
2. Removal of Front Seats
2.1. Move the seat by pulling the movable handle
under the seat, after the fixing bolts come out,
use 13# socket wrench to remove the seat
bolts.
Torque: 25±3N.m
2.2. Pull out the seat connector and remove the
seat.
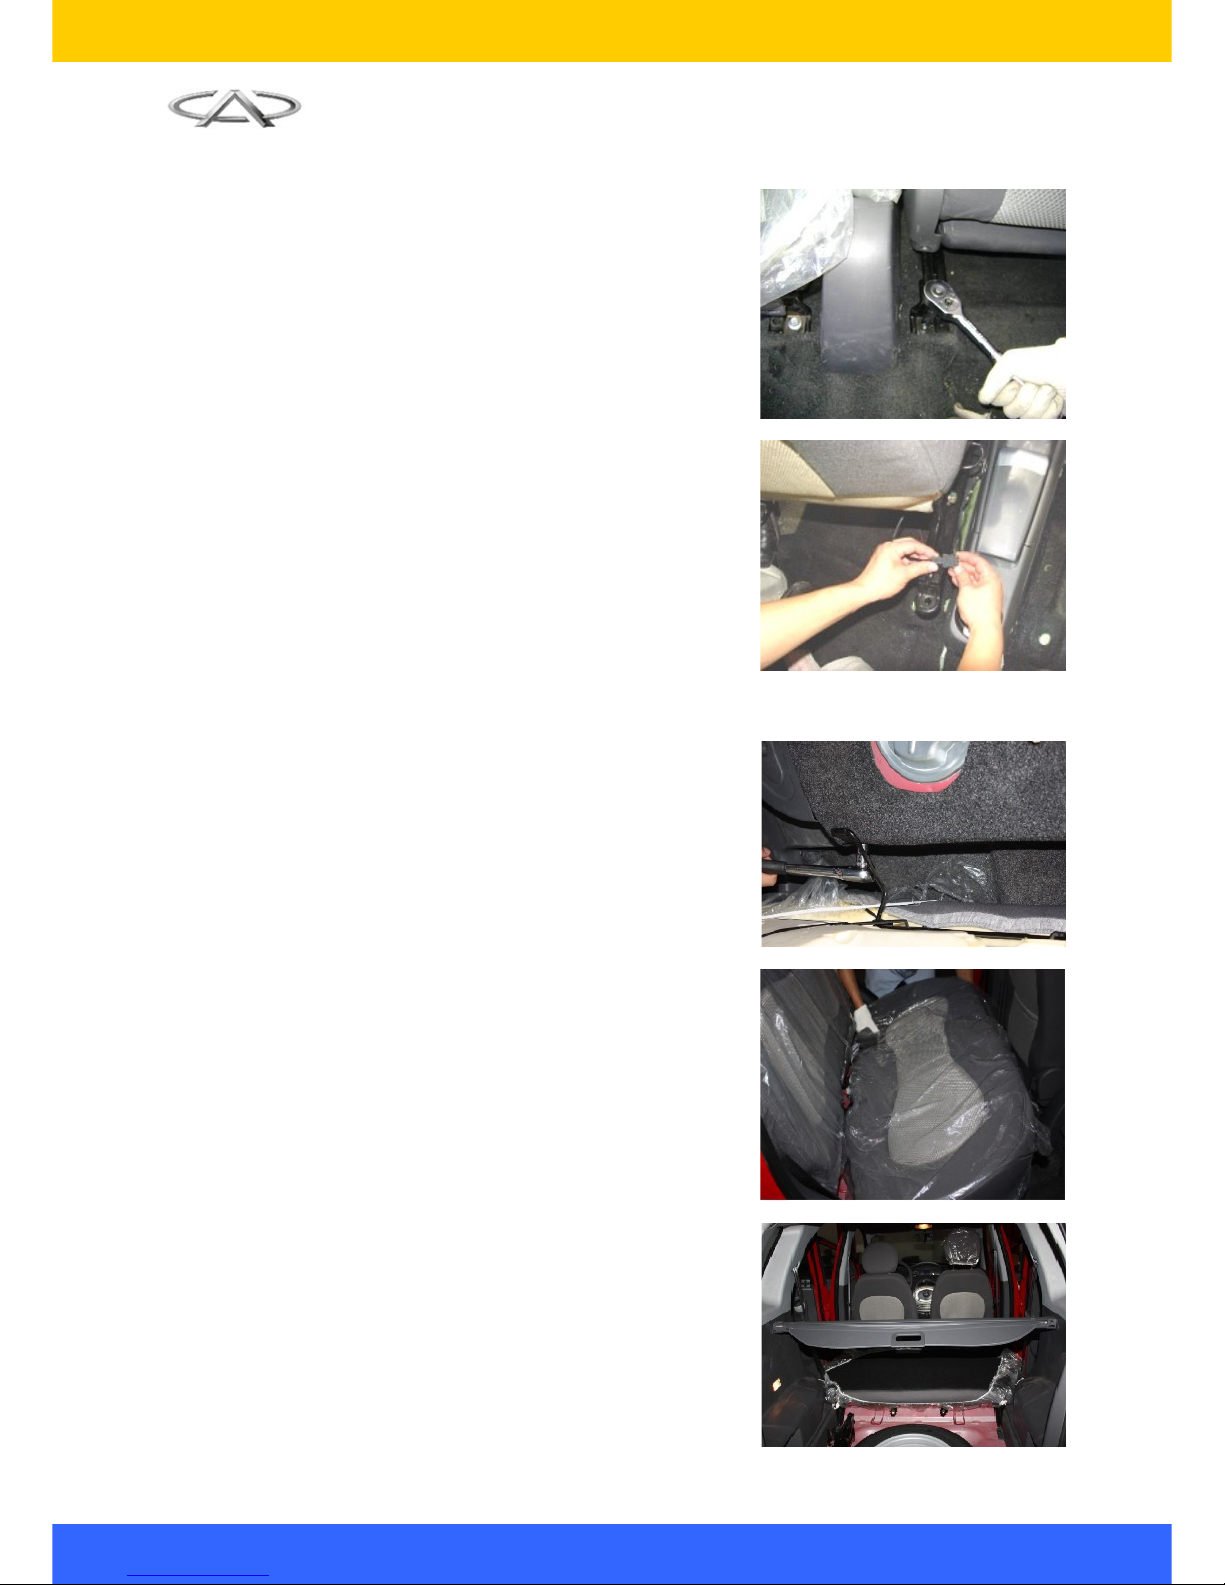
3. Removal of Rear Seats
3.1. Lift up the seat cushion and remove the fixing
bolts of the rear seat cushion with the 14#
socket wrench.
Torque: 25±3N.m
3.2. Remove the cushion after the removal of four
fixing bolts.
3.3. Open the luggage boot and take out the
luggage boot carpet.
12
Page 17
Chery S18D Service Manual
3.4. Remove the fixing bolts of the seat backrest
with 13# socket wrench to remove the rear
seat backrest (two bolts on each side).
Torque: 25±3N.m
4. Installation Procedure
The installation procedures are reverse to those
for removal.
Note: keep the cleanness of vehicle interior trim
parts during removal and installation; avoid the
trim parts surface scratch when moving the seat.
III. Removal and Installation of Central Console
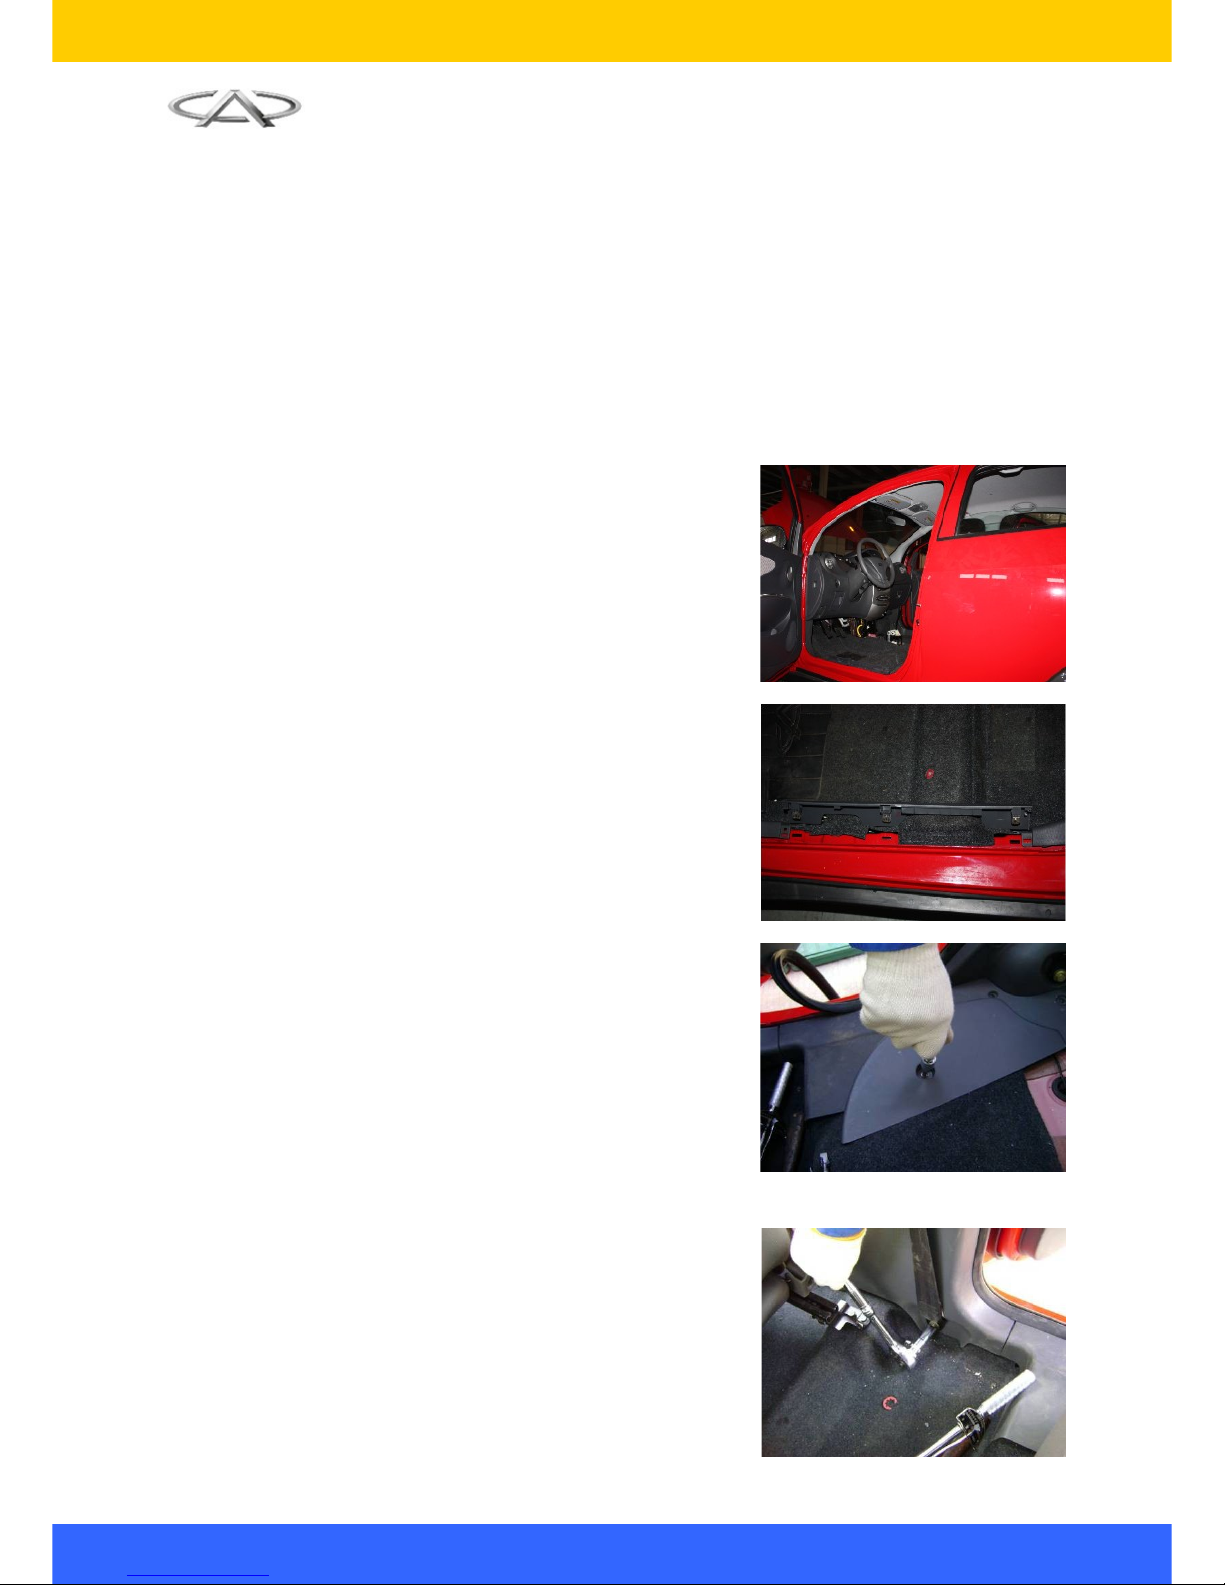
1. Preparations
Tools: cross screwdriver, plastic screwdriver and etc.
2. Removal Procedure
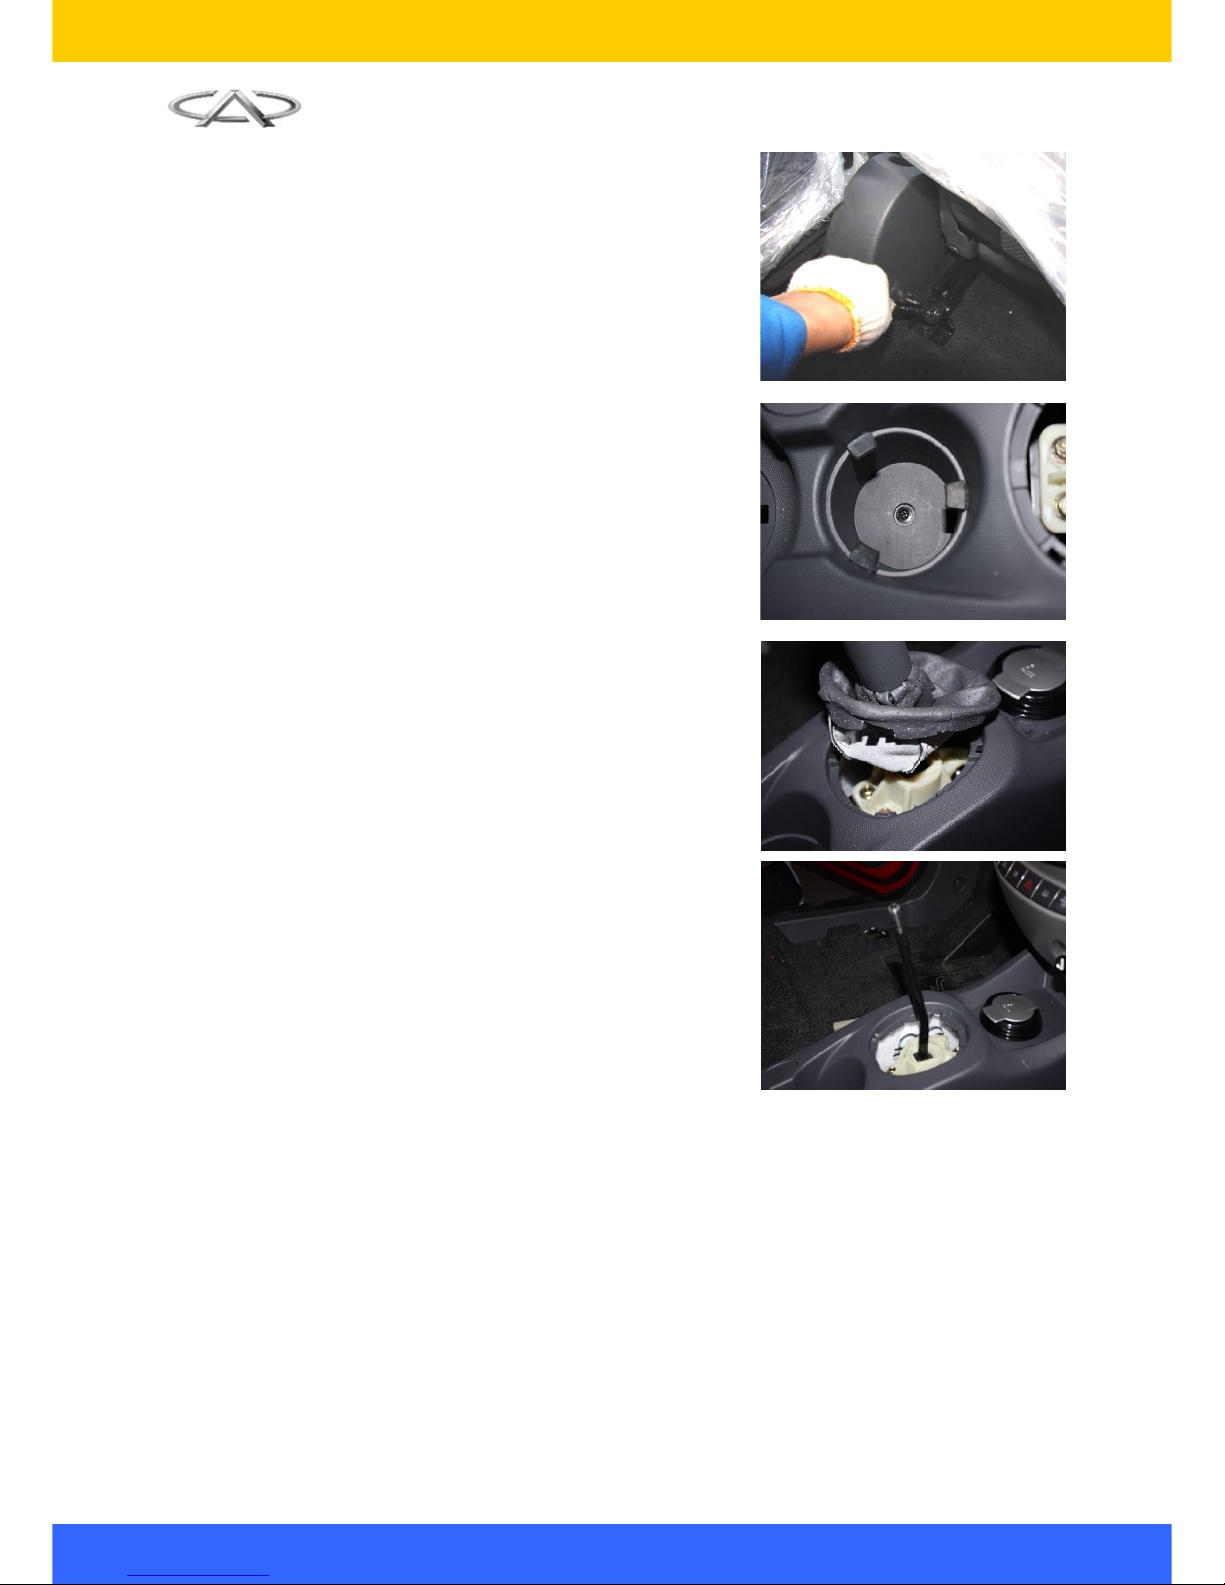
2.1. Use plastic screwdriver to pry open the panel
at the hand brake.
2.2. Use cross screwdriver to remove the front
fixing screws of the central console assembly.
13
Page 18
Chery S18D Service Manual
2.3. Use cross screwdriver to remove the rear
fixing screws of the central console assembly
and cup holder lower fixing screws.
2.4. Use plastic screwdriver to pry open the
gearshift handle cover and rotate the gearshift
handle in anti-clockwise direction to remove it.
2.5. Lift up the rear part of center console and pull
the rear part to remove the center console.
3. Installation Procedure
The installation procedures are reverse to those for removal.
IV. Removal and Installation of Carpet
1. Preparations
Tools: slotted screwdriver, cross screwdriver; socket wrench and etc.
2. Removal Procedure
2.1. Remove the seats. (Refer the removal of
seat)
14
Page 19

Chery S18D Service Manual
2.2. Remove the central console (Refer the
removal of central console)
2.3. Remove the seat belt, front and rear doorsill
panel and the upper/lower panel of pillar B.
(Refer the removal of seat belt)
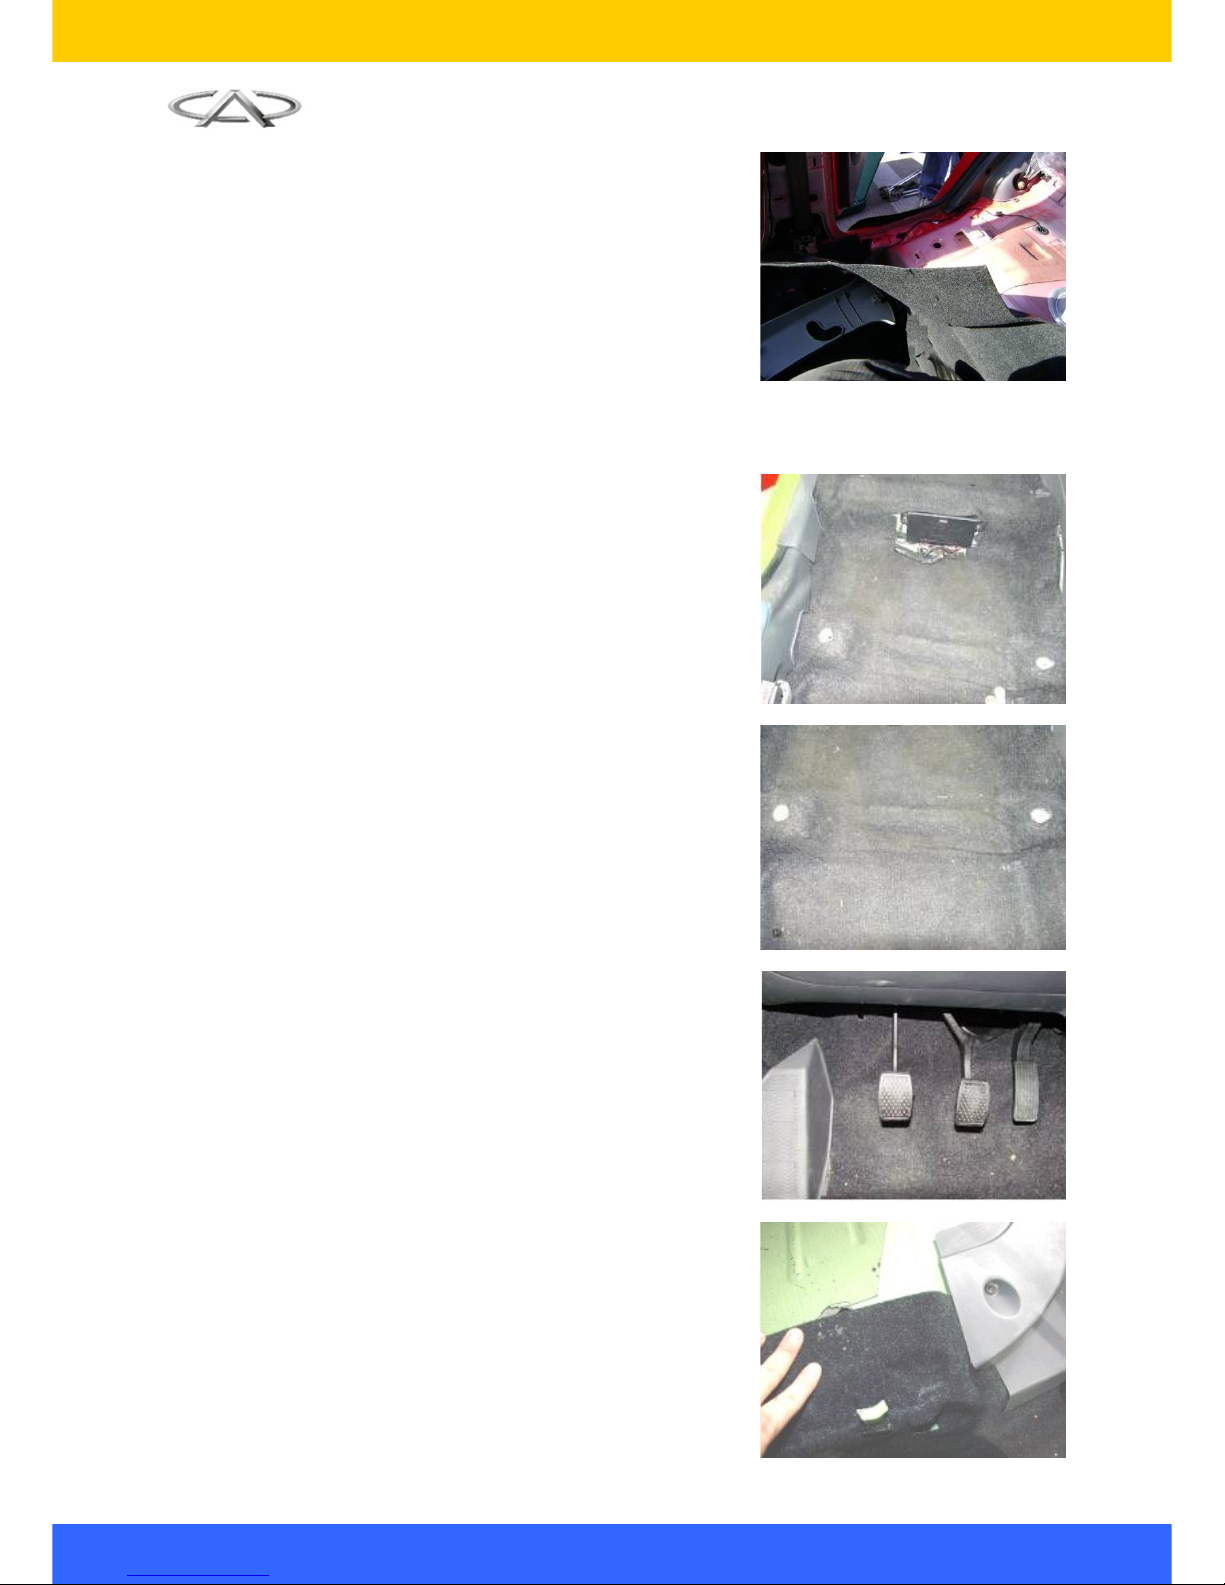
2.4. Pry out the footreast cover by slotted
screwdriver.
2.5. Remove the footrest with 10# socket wrench.
2.6. Remove the pillar A lower panel with cross
screwdriver.
2.7. Remove the seat cushion of rear seats (See
removal of seats)
Remove the rear doorsill pressure plate with cross
screwdriver.
15
Page 20
Chery S18D Service Manual
2.8. Remove the the carpet fixing clip and remove
the carpet.
3. Installation Procedure
Note: In installation, notice the carpet edges flatness and indoor related wiring harness direction.
3.1. Put the vehicle carpet inside the vehicle, and
take out the harness connected with the
seats, and then press the vehicle carpet
besides the middle passage tightly.
3.2. Let the seat holes exposed.
3.3. Spread the carpet under foot pedal and press
it tightly.
3.4. Spread the rear part of the carpet according
to the shape of the vehicle floor, expose the
mounting holes of the rear seats, and spread
and press the rear part of the carpet
according to the shape of the vehicle floor.
16
Page 21
Chery S18D Service Manual
Chapter III Removal & Maintenance of Vehicle Doors
I. Removal, Installation & Maintenance of Front Doors
1. Preparations
Tools: slotted screwdriver, cross screwdriver, plastic screwdriver, socket wrench, pliers and etc.
2. Precautions
2.1. Wear necessary appliance for labor protection to prevent from accidents.
2.2. Disconnect the battery to prevent damage for electrical equipments.
2.3. To prevent glass from being damaged, pay attention to take correct steps during removal and
installation.
3. Removal Procedure
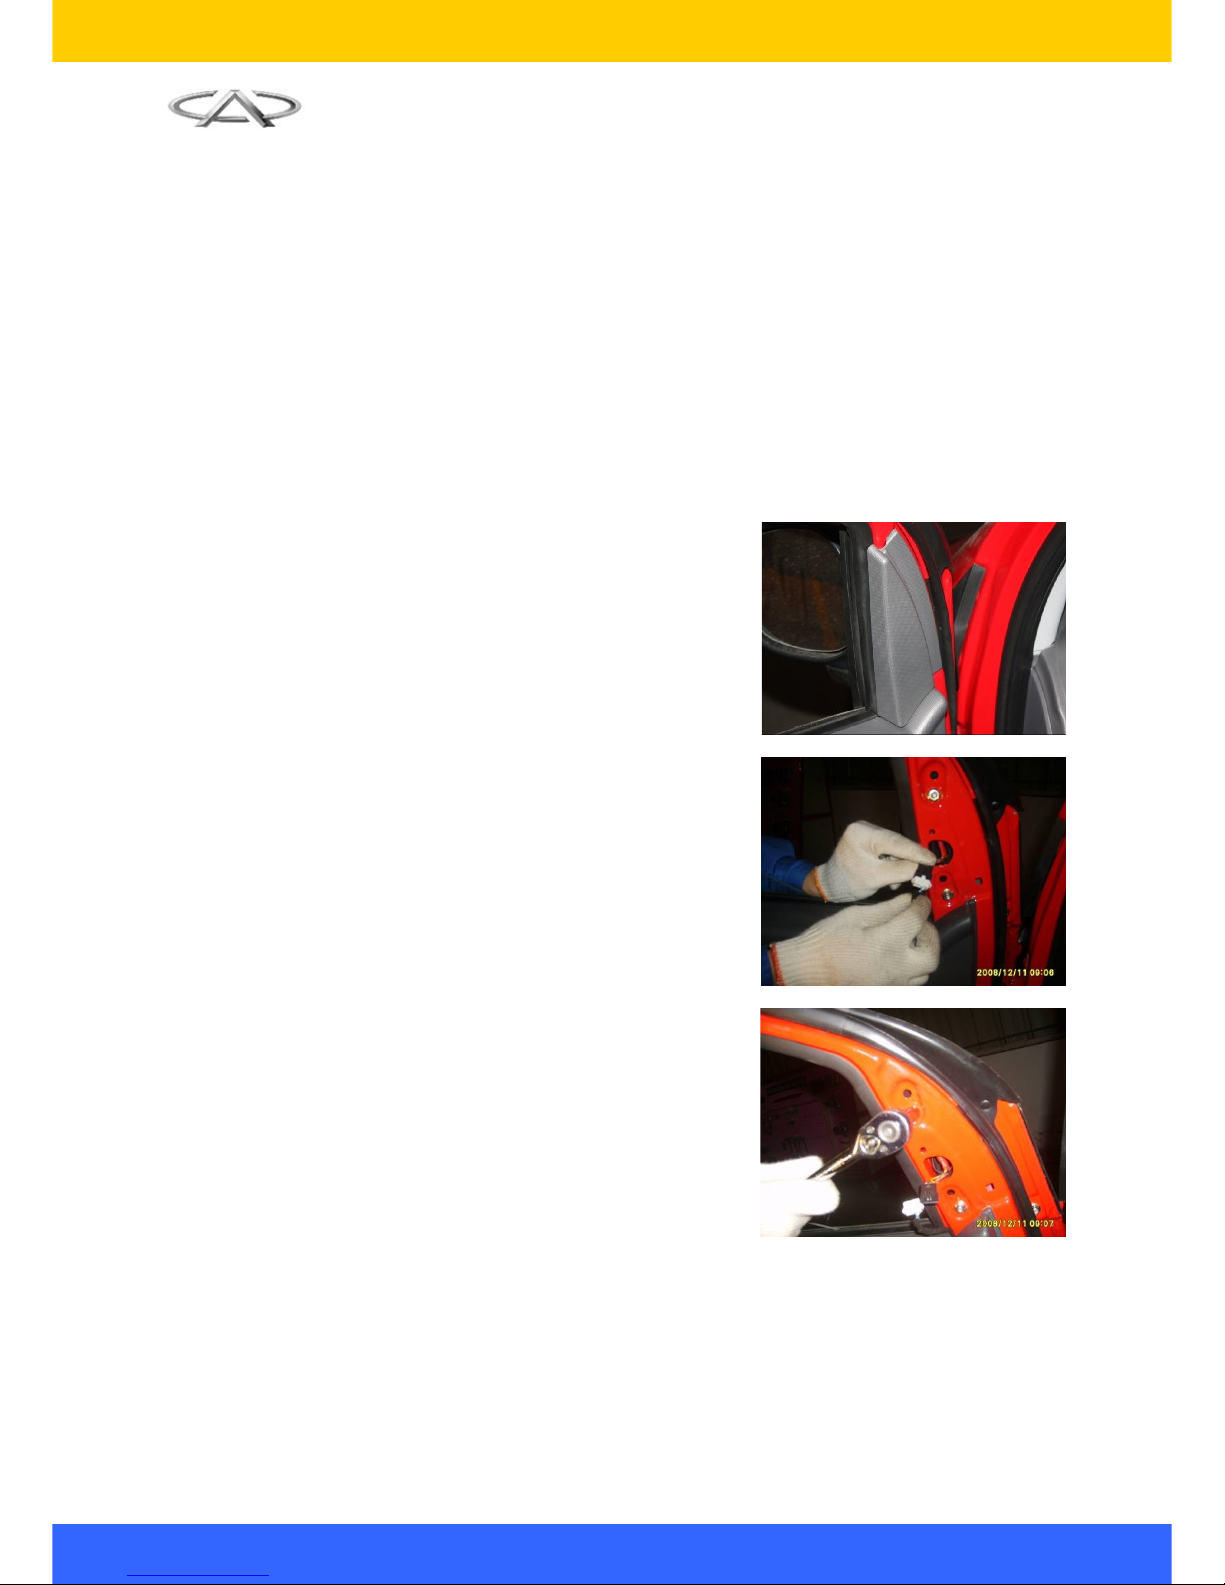
3.1. Pry out the door inner triangular block with
plastic screwdriver.
3.2. Disconnect the wiring harness of exterior rear
view mirror.
3.3. Remove the three fixing nut of exterior rear
view mirror with 10# socket wrench, remove
the exterior rear view mirror.
17
Page 22

Chery S18D Service Manual
3.4. Pry out the cover in the inner door handle slot
with slotted screwdriver.
3.5. Remove the five fixing screws of door inner
panel with cross screwdriver (two screws on
panel front surface and three screws on panel
side surface).
3.6. Pry out the protective cover of door inner
armrest groove with slotted screwdriver.
3.7. Remove the screw that fix the door inner
armrest with cross screwdriver.
18
Page 23

Chery S18D Service Manual
3.8. Pry up the door inner armrest assembly with
plastic screwdriver and take it out.
3.9. Pull out the exterior rear view mirror adjusting
switch (only driver side) and window regulator
control switch connector.
3.10. Pry out the door inner panel from edge
with the plastic screwdriver.
3.11. Pull off the door inner handle cable.
3.12. Remove the two screws of front door
armrest fixing bracket with cross
screwdriver.
19
Page 24

Chery S18D Service Manual
3.13. Remove the anti-water protective layer.
3.14. Connect the battery and connect the
window regulator switch connector, lower
the window glass at a proper position and
remove the two screws that fix the glass.
3.15. Take out the glass carefully.
3.16. Remove the five screws that fix the
window regulator with 10# socket
wrench.
3.17. Pull off the window regulator connector
and take out the window glass regulator
assembly.
20
Page 25

Chery S18D Service Manual
3.18. Remove the two fixing screws with 10#
socket wrench, remove the door outside
handle.
3.19. Remove the three screws fixing the lock
cylinder with cross screwdriver, remove
the lock cylinder.
3.20. Remove the two screws that fix the lock
cylinder with cross screwdriver, remove
the lock cylinder.
3.21. Use 13# socket wrench to remove the
four fixing screws of the hinge that fix the
vehicle door, remove the door.
Torque: 32±3 N.m
4. Installation Procedure
The installation procedures are reverse to those for removal.
Note: The removal procedures for the right-front door can refer to those for the left-front door.
II. Removal & Installation of Rear Doors
1. Preparations
Tools: slotted screwdriver, cross screwdriver, socket wrench and etc.
2. Precautions
2.1. Wear necessary appliance for labor protection to prevent from accidents.
2.2. Disconnect the battery to prevent damage for electrical equipments.
21
Page 26

Chery S18D Service Manual
2.3. To prevent glass from being damaged, pay attention to take correct steps during removal and
installation.
3. Removal Procedure
3.1. Pry out the rear door inner triangular block
with plastic screwdriver.
3.2. Pry out the protective cover of door inner
armrest groove with slotted screwdriver,
expose the fixing screw.
3.3. Remove the fixing screw of the door inner
armrest with cross screwdriver.o
3.4. Pry out the window regulator switch with
slotted screwdriver, pull off the connector of
window regulator and remove it.
22
Page 27

Chery S18D Service Manual
3.5. Remove the fixing screws of door panel on its
front and side with cross screwdriver.
3.6. Pry out the door inner panel from edge with
the plastic screwdriver.
3.7. Pull off the door inner handle cable.
23
Page 28

Chery S18D Service Manual
3.8. Remove the door inner armrest bracket with
cross screwdriver.
3.9. Remove the anti-water protective layer.
3.10. Remove the door outside handle fixing
nuts with 10# socket wrench, remove the
door outside handle.
3.11. Connect the battery and lower the
window glass at a proper position (let the
glass fixing screws be exposed on the
two installation holes as shown in figure)
and remove the two screws that fix the
glass with cross screwdriver, remove the
glass carefully.
24
Page 29

Chery S18D Service Manual
3.12. Remove the five screws that fix the
window regulator with 10# socket
wrench, remove the window regulator.
3.13. Remove the fixing bolts of rear door and
hinge with 10# socket wrench, remove
the rear door assembly.
Torque: 32±3 N.m
4. Installation Procedure
The installation procedures are reverse to those
for removal.
Note: The removal procedures for the right-rear
door can refer to those for the left-rear door.
25
Page 30

Chery S18D Service Manual
Chapter IV Removal, Installation & Maintenance of Front/Rear
Bumper
I. Removal, Installation & Maintenance of Front Bumper
1. Preparations
Socket wrench, cross screwdriver, slotted screwdriver, plastic screwdriver.
Parts: expansion bolt.
2. Precautions
2.1. Wear necessary appliance for labor protection to prevent from accidents.
2.2. Try to avoid scratching the paint of the bumper during the removal operation.
3. Removal Procedure
3.1. Open the Engine hood.
3.2. Remove the fixing screws on upper of front
bumper with cross screwdriver.
3.3. Remove the bumper lower fixing screw with
cross screwdriver and 7# socket wrench.
3.4. Remove the fixing screw that connects the
front bumper and fender with 7# socket
wrench.
26
Page 31

Chery S18D Service Manual
3.5. Remove the left and right fog lamp wiring
harness connectors, remove the front bumper
(the front bumper is connected and fixed with
the fender by clip; do not break the clip during
removal of bumper).
3.6. Remove the two fixing bolts of upper air
intake grille with cross screwdriver to remove
the air intake grille.
3.7. Use plastic screwdriver to pry out the edges
of lower air intake grille to remove it.
Note: the air intake grille can be replace directly
without removing the lower bumper.
4. Installation Procedure
The installation procedures are reverse to those
for removal.
II. Removal, Installation & Maintenance of Rear Bumper
1. Preparations
Tools: cross screwdriver, slotted screwdriver, socket wrench and etc.
Parts: expansion bolt
2. Precautions
2.1. Wear necessary appliance for labor protection to prevent from accidents.
2.2. Try to avoid scratching the painted surface of the bumper when removing it.
3. Removal Procedure
3.1. Open the luggage boot lid and use a cross
screwdriver to loosen off the four fixing
screws on the rear bumper.
27
Page 32

Chery S18D Service Manual
3.2. Use a cross screwdriver to loosen off the
screws fixing the rear bumper bottom and the
vehicle body.
3.3. Use a 7# socket wrench to loosen the screws
connecting the fender and the bumper.
3.4. Apply the force vertical to fender surface to
outwards to separate the bumper and fender
clips and remove the bumper.
Note: notice the force applied to avoid the damage
of clips during removal.
3.5. Remove the connectors of reverser radar and
left & right rear fog lamp.
Note: notice to avoid the wiring harness being
pulled by bumper when removing the wiring
harness connector.
3.6. Remove the rear bumper rod.
(the rear bumper rod is fixed with wheelhouse by
clips, notice to avoid the damage of clips during
removal of rear bumper rod)
3.7. Push the reverse radar from inside of bumper
towards outside to remove the reverse radar.
Note: during the installtion of reverse radar, the
locating pin of reverse radar shall be aligned with
the bumper locating hole (as right figure).
4. Installation Procedure
The installation procedures are reverse to those for removal.
28
Page 33

Chery S18D Service Manual
Chapter V Removal and Installation of Outside Lamps
I. Preparations
Tools: socket wrench, cross screwdriver and etc.
II. Precautions
2.1. Wear necessary appliance for labor protection to prevent from accidents.
2.2. Try to avoid scratching the paint surface of the bumper when removing it.
2.3. Pay attention not to scratch the headlamp surface during removal or placing it.
III. Removal Procedure of Headlamp
3.1. Remove the headlamp wiring harness
connector.
3.2. Remove the three headlamp fixing screws on
the engine compartment cross beam and
fender with 10# socket wrench and remove
the headlamp.
3.3. Open the headlamp high beam holder shield
by hand.
3.4. Disconnect the connector of high and low
beam lamp holder.
29
Page 34

Chery S18D Service Manual
3.5. Press down the bulb fixing clip by hand and
turn the clip over to take out the high/low
beam bulb.
3.8 Pull off the front position lamp wirning harness
connector and remove the front position lamp
bulb.
3.9. Screw off the turn signal lamp holder by hand
and can replace the turn signal lamp bulb.
IV. Removal of Front Fog Lamp
4.1. Remove the front wheel mud guard.
30
Page 35

Chery S18D Service Manual
4.2. Remove the front fog lamp fixing boltr with
cross screwdriver to remove the front fog
lamp.
4.3. Press down the bulb fixing clip by hand and
turn the clip over to take out the high/low
beam bulb.
V. Removal of Rear Fog Lamp
5.1. Remove the rear bumper (see the removal
and installation of rear bumper for details)
5.2. Remove the rear fog lamp fixing bolts with
cross screwdriver and remove the fog lamp.
5.3. Rotate the rear fog lamp holder in anticlockwise direction to remove the rear fog
lamp bulb.
31
Page 36

Chery S18D Service Manual
VI Removal of Tail Lamp
6.1. Remove the baffle on luggage boot inner tail
lamp.
6.2.Remove the three nuts fixing tail lamp in
luggage boot compartment with 10$ socket
wrench.
6.3. Pull off the tail lamp wiring harness connector
and remove the tail lamp assembly.
6.4. Rotate the bulb seat anti-clockwise by hand to
remove the bulb.
Ⅶ. Removal of License Lamp
7.1. Use a cross screwdriver to remove the
license lamp fixing bolts.
32
Page 37

Chery S18D Service Manual
7.2. Pull off the harness connector and remove
the license lamp.
Ⅷ.Installation & Adjustment of Headlamp
8.1. Installation Procedures for the Headlamp
The installation procedures of headlamp are
reverse to those for removal.
8.2. Function of headlamp
8.2.1. Front view
As shown in right figure:
1 Low beam lamp
2 Turn lamp
3 High beam lamp and position lamp
8.2.2. Back view
1 High beam lamp up & down adjusting nut
2 High and low beam lamp and position lamp
rear cover
3 Turn lamp bulb holder
4 Low beam left & right adjusting nut
5 Low beam lamp rear cover
6 Low beam lamp up & down adjusting nut
8.3. Adjustment of Headlamp
8.3.1. Pay attention to law and regulations and verify the following items before adjustment:
1). The tire air pressure should comply with the related standard;
2). Vehicle is unloaded (except for spare tire and equipping tools, and include driver’s weight for
sedan);
3). The vehicle should be parked on level and smooth road or field;
4). The matched mirror surface of the headlamp should be fresh of dirt;
5). The power supply should work normally and the bulb should be properly installed.
8.3.2. Insert a hexagon wrench into corresponding adjusting hole to adjust the lamp.
33
Page 38

Chery S18D Service Manual
Ⅸ.Installation of Tail Lamp
9.1. Installation Procedure of tail lamp
The installation procedures of tail lamp are
reverse to those for removal.
9.2. Function of tail lamp
9.2.1. Front view
1). Brake lamp/ position lamp (one bulb has two
filaments)
2). Turn lamp
3). Reverse lamp
9.2.2. Rear view
As shown in right figure:
1). Reverse lamp holder
2). Turn lamp holder
3). Brake lamp/ position lamp holder
34
Page 39

Chery S18D Service Manual
Chapter VI Removal and Installation of Vehicle Ceiling
I. Preparations
Tools: socket wrench, cross screwdriver, slotted screwdriver and etc.
Parts: expansion bolt.
II. Precautions
1. During the removal and installation, make sure to apply proper force and violent operation is not
allowed.
2. During removal and installation of the inner trims, make sure to protect the tirms from being
scratched.
III. Removal and Installation of Sun Visor
1. Removal Procedure
1.1. Use a cross screwdriver to remove the
screws on sun visor in left of the driver’s cab
and remove the sun visor.
1.2. The removal procedures for the right sun
visor are reverse to those for removal of the
left one.
2. Installation Procedure
The installation procedures are reverse to those for removal.
IV. Removal and Installation of Ceiling Armrest
1. Removal Procedure
1.1. Open the ceiling armrest screw cover over the
co-driver’s seat by hand, and then use a
cross screwdriver to loosen off the left and
right fixing screws.
35
Page 40

Chery S18D Service Manual
1.2. Remove the ceiling armrest.
2. Installation Procedure
The installation procedures are reverse to those for removal.
V. Removal and Installation of Front Ceiling Lamp
1. Removal Procedure
1.1. Align a slotted screwdriver with the groove
along the ceiling lamp edge to pry it open.
Note: Do not scratch part surface.
1.2. Remove the three fixing screws of the front
ceiling lamp.
1.3. Disconnect the harness connector and
remove the front ceiling lamp assembly.
2. Installation Procedure
The installation procedures are reverse to those for removal.
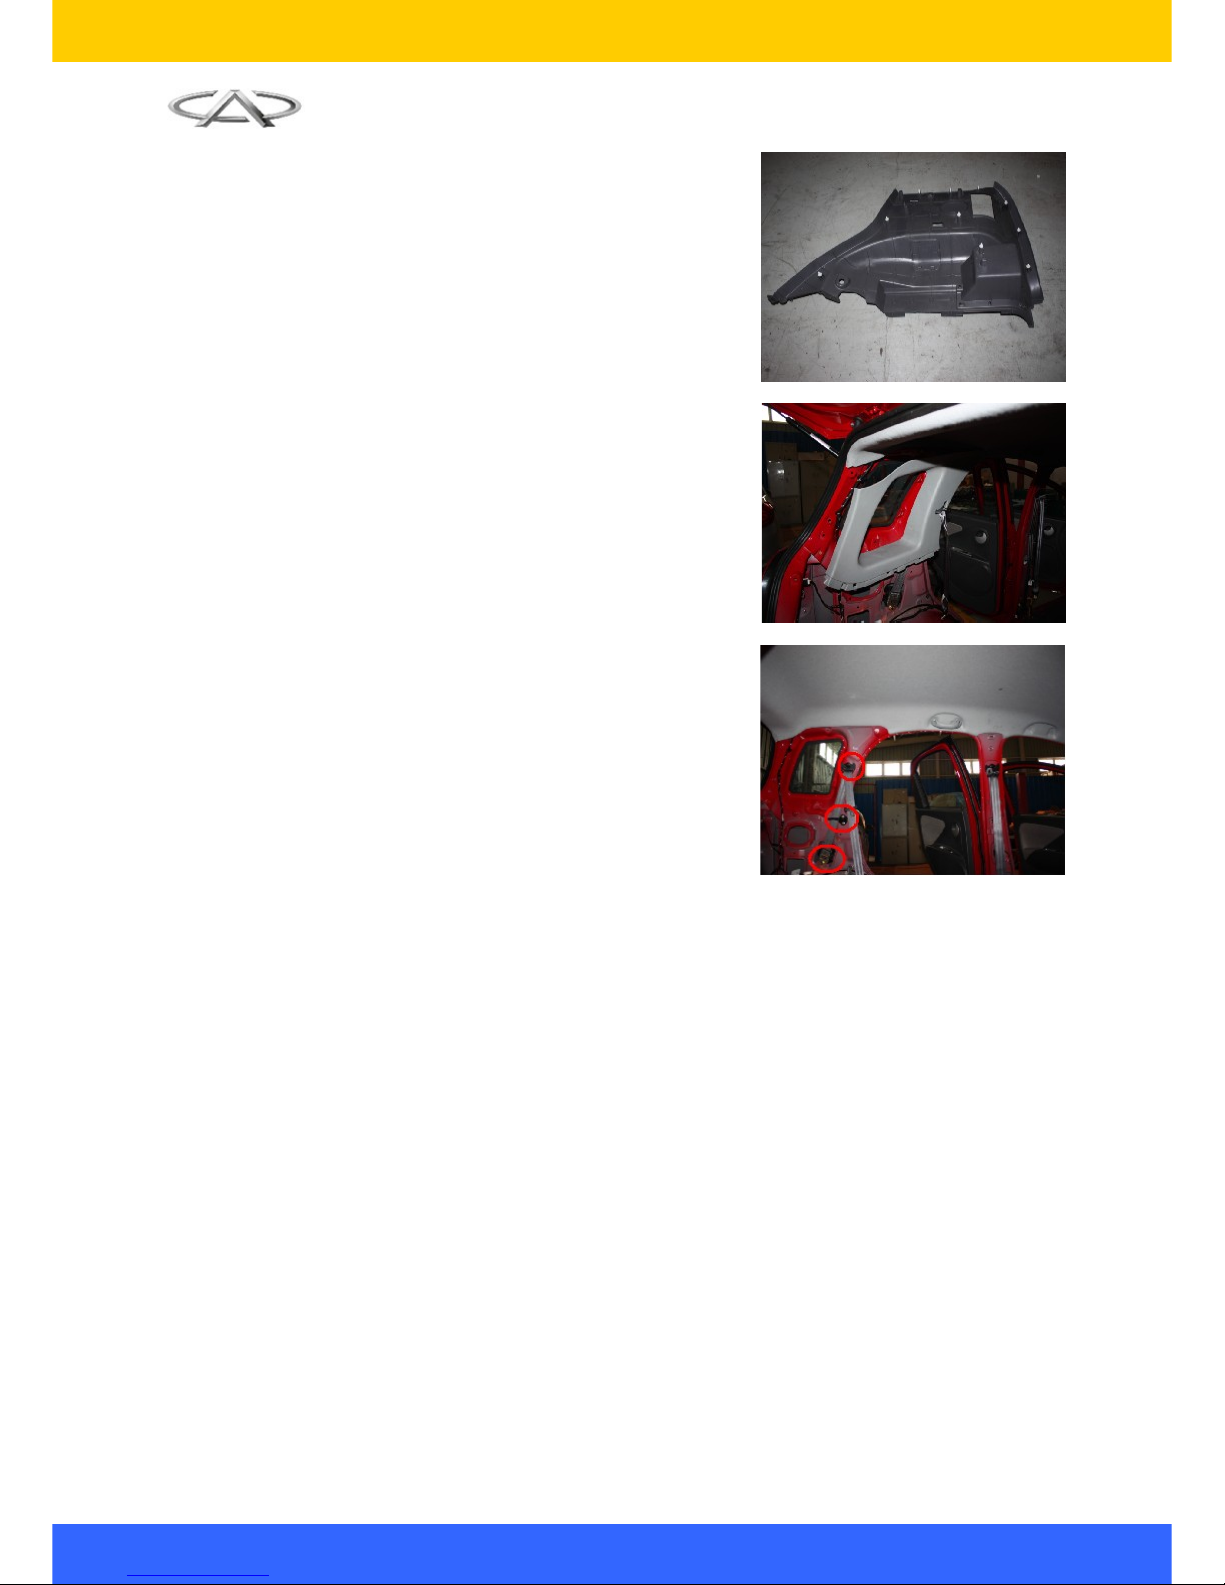
VI. Removal and Installation of A-pillar Panel
1. Removal Procedure
36
Page 41

Chery S18D Service Manual
1.1. Remove the weather strip of the right A-pillar
panel, and then pry out the left A-pillar panel
with slotted screwdriver.
1.2. The removal procedures of the left A-pillar
panel can refer to the removal procedures of
right A-pillar panel.
2. Installation Procedure
The installation procedures are reverse to those for removal.
VII. Removal and Installation of B-pillar Panel
1. Removal Procedure
1.1. Remove the B-pillar lower panel (See
Removal and Installation of Seat belt).
1.2. Use a plastic screwdriver to pry out the Bpillar upper panel.
2. Installation Procedure
The installation procedures are reverse to those for removal.
VIII. Removal and Installation of C-pillar Panel
1. Removal Procedure
37
Page 42

Chery S18D Service Manual
1.1. Use a socket wrench to remove the seat belt
bolts (See Removal and Installation of Rear
Seats & Seat belts).
Torque: 50±10N.m
2. Installation Procedure
The installation procedures are reverse to those for removal.
IX. Removal and Installation of Vehicle Ceiling
1. Removal Procedure
1.1. Remove the left/right sun visors and their
fixing seat. (See Removal and Installation of
Sun Visor)
1.2. Remove the front ceiling lamp. (Refer to
removal and installation of front ceiling lamp)
1.3. Remove all interior ceiling armrests. (See
removal and installation of ceiling armrest)
1.4. Remove the A/B/C-pillar panel. (See removal
and installation of A/B/C-Pillar Panel)
1.5. Use a slotted screwdriver to loosen off the
vehicle ceiling clips (3 in all).
1.6. Remove the four doors and back door
weather strips.
38
Page 43

Chery S18D Service Manual
1.7.Remove the vehicle ceiling.
2. Installation Procedure
The installation procedures are reverse to those
for removal.
39
Page 44

Chery S18D Service Manual
Chapter VII Removal and Installation of Instrument Panel &
Instrument Panel Crossbeam
I. Removal of Instrument Panel
Tools: socket wrench, cross screwdriver, slotted screwdriver and etc.
1. Removal Procedure
1.1. Remove the center console. (See the removal
and installation of center console).
1.2. Remove the three fixing screws of instrument
panel with cross screwdriver, remove the top
cover of instrument panel.
1.3. Loosen the five screws on lower cover of
instrument panel with cross screwdriver.
40
Page 45

Chery S18D Service Manual
1.4. Remove the lower cover of instrument panel
(avoid the break of the two clips in inner side)
1.5. Remove the two fixing screws connecting the
dashboard and instrument panel body with
cross screwdriver.
1.6. Pry out the dashboard body with slotted
screwdriver.
1.7. Pull off the harness connector on instrument
panel body and remove it.
1.8. Pry out the dashboard brightness adjusting
switch with slotted screwdriver.
41
Page 46

Chery S18D Service Manual
1.9. Screw off the fixing nut of engine hood handle
and remove the handle and cable. (See the
removal and installation procedures of engine
hood handle and cable)
1.10. Pry out the central control panel shield
with slotted screwdriver.
1.11. Pull off the A/C regulating switch harness
and central control panel switch harness.
Note: during installation, notice the color marked
by the harness shall be correspond to the color of
the connector on switch back, wrong installation is
not allowed.
1.12. Remove the fixing screw of radio
cassette player.
42
Page 47

Chery S18D Service Manual
1.13. Pull off the harness and antenna
connector of radio cassette player,
remove the radio cassette player.
1.14. Loosen the two bolts besides the name
car box with 10# socket wrench.
1.15. Pry out the speaker shield with slotted
screwdriver.
1.16. Remove the speaker body with slotted
screwdriver.
1.17. Remove the two screws on pillar-A lower
panel with cross screwdriver, remove the
pillar-A lower panel.
43
Page 48

Chery S18D Service Manual
1.18. Remove the fixing bolt of instrument
panel body and hinge inner side sheet
metal with 10# socket wrench.
1.19. Remove the panel on two sides of
instrument panel body.
1.20. Remove the fixing screws on two sides of
instrument panel body with cross
screwdriver.
1.21. Remove the fixing bolt between body
sheet metal and the instrument panel
body beside speaker with 10# socket
wrench.
1.22. Remove the instrument panel body.
44
Page 49

Chery S18D Service Manual
Note:
1. Disconnect the battery negative before
removing the electrical equipment.
2. Don’t wait until all the instrument panel bolts
are removed before you remove the ones on
the other side, or the instrument panel are
likely to get deformed.
2. Installation Procedure
The installation procedures are reverse to those for removal.
Note:
.① Double-wind channels should agree with the air-conditioner outlet connector and be installed
properly without any air leak, and the Instrument Panel air channel should not conflict with the
Instrument Panel crossbeam, the evaporator and other parts, or the Instrument Panel and its
accessories will not be installed properly.
.② The Instrument Panel should not interfere with the front windscreen or affects its installation and
the clearance shall be even.
.③ The clearances between the instrument panel and either sides of the vehicle body should be
consistent and meet the requirements for assembling the door weather strips.
3. Methods for Clearing Instrument Maintenance Indicator
Following is the clearing method:
.① Insert the key into the ignition switch and turn the key to the position “ACC”;
.② Press the adjusting button by hand and hold it, then turn the key to “ON” position;
.③ Press the adjusting knob and hold it for about 20 seconds before you release the knob, and then
the maintenance indicator will be cleared.
II. Removal of Instrument Panel Cross Beam
Tools: socket wrench, cross screwdriver, slotted screwdriver and etc.
Parts: harness strap
1. Removal Procedure
1.1. Remove the instrument panel assembly (see
the removal of instrument panel)
1.2. Remove the connector of interior wiring
harness and instrument panel wiring harness.
45
Page 50

Chery S18D Service Manual
1.3. Pull off the connector of ECU wiring harness
and instrument panel wiring harness.
1.4. Remove the connector of instrument panel
wiring harness and engine wiring harness.
1.5. Remove the connectors of A/C wiring harness
and ceiling wiring harness; remove all ground
points of instrument panel wiring harness.
1.6. Remove the fixing bolt of anti-theft controller
with 10# socket wrench, and then remove its
connector.
1.7. Remove the fixing bolt on two ends of
instrument panel crossbeam with 10# socket
wrench.
Torque: 25±2N.m
46
Page 51

Chery S18D Service Manual
1.8. Remove the two fixing nuts between the
instrument panel cross beam and steering
column with 13# socket wrench.
Torque: 23±2N.m
1.9. Remove the three fixing bolts connecting
instrument panel cross beam top cover and
vehicle body with 10# socket wrench.
Torque: 25±2N.m
1.10. Remove the four bolts on the lower fixing
points of middle support on instrument
panel cross beam with 10# socket
wrench.
Torque: 7±1N.m
1.11. Take out the instrument panel cross
beam (Pay attention to the ground point
connected with floor).
2. Installation Procedure
The installation procedures are reverse to those
for removal.
47
Page 52

Chery S18D Service Manual
Chapter VIII Air Conditioning System
I. System Constitution
Air adjustment and distributing system: HVAC air mixing and distributor part, inside/outside circulation
air inlet, air outlet, outside circulation air filter.
Control system: control panel assembly, micro motor, blower, speed regulating mode, high/low pressure
switch, A/C temperature sensor.
Heating system: heater water tank, hot water pipe, and engine cooling water system.
Cooling system: compressor, condenser, reservoir dryer, expansion valve, evaporator and pipe.
II. Removal of Evaporator Assembly
1. Preparations
Tools: cross screwdriver, clamp pliers, socket wrench and etc.
Auxiliary material: refrigerant, antifreeze, sponge rubber strip
2. Removal and Installation Procedures
2.1. Use coolant recycling machine to recycle the coolant.
Note:
(1) Don’t handle with the coolant in any closed place or near flame.
(2) Do not splash the refrigerant onto eyes and skin.
2.2. Remove the instrument panel assembly and the front crossbeam, and disconnect the related
electrical equipment connectors. (See Removal and Installation of Instrument Panel)
2.3. Loosen off the fixing nuts of the high/low
pressure pipe with 5# inner hexagon wrench
and pull out the high/low pressure pipe.
48
冷凝器
空调压缩机
蒸发箱总成
空调控制面板
干燥瓶
低压管路总成
高压管路总成
Condenser
A/C Compressor
Evaporator Ass’y
A/C Control Panel
Drying Bottle
Low pressure pipeline
assembly
High pressure pipeline
assembly
Page 53

Chery S18D Service Manual
2.4. Remove the two evaporator nuts fixed onto
sheet metal with 10# socket wrench.
2.5. Use clamp pliers to remove the inlet/outlet
water pipes of the evaporator and pull out the
pipes.
Note: Coolant will flow out from the water pipe,
pay attention to recycle the coolant.
2.6. Loosen off the 3 fixing nuts that fix the
evaporator assembly on the sheet metal with
10# socket wrench (See the following figures
for detailed positions).
49
Page 54

Chery S18D Service Manual
2.7. Take the evaporator assembly out of the
driver’s cab.
3. Installation of Evaporator Assembly
The installation procedures are reverse to those for removal.
III. Removal and Installation of Evaporator Interior
1. Preparation of Tools
Cross screwdriver, slotted screwdriver, inner spline wrench and etc.
2. Removal and Installation of Blower
2.1. Removal Procedure
2.1.1. Remove the blower motor and relay
module connector.
2.1.2. Push down the clip and rotate the blower
clockwise to remove it.
2.2. Installation Procedure
50
Page 55

Chery S18D Service Manual
The installation procedures are reverse to those
for removal.
3. Removal and Installation of Blower Speed Regulation Module
3.1. Removal Procedure
3.1.1. Pull out the speed regulation module
connector.
3.1.2. Use a cross screwdriver to remove the
fixing screws on speed regulation
module.
3.1.3. Pull out the speed regulation module.
3.2. Installation Procedure
The installation procedures are reverse to those
for removal.
4. Removal and Installation of Heater Exchanger
4.1. Removal Procedure
4.1.1. Disassemble the evaporator assembly. (See Removal of Evaporator Assembly)
4.1.2. Disassemble the air-conditioner harness. (See Removal of Instrument Panel Cross Beam)
51
Page 56

Chery S18D Service Manual
4.1.3. Remove the two screws on rear end of
hot water pipe with cross screwdriver.
4.1.4. Remove the two screws on front end of
hot water pipe with cross screwdriver.
4.1.5. Tear off the sponge around the water
inlet and outlet pipe and remove the
heater exchanger.
Note: the sponge seal around the housing is
disposable.
4.2. Installation Procedure
The installation procedures are reverse to those
for removal.
After the installation, the system should be
evacuated, proper pressure should be maintained
and anti-freeze agent should be filled to check for
any leakage. Check if the radiator is blocked and
compressed air can be used to clean it.
5. Removal and Installation of Mode Air Door Related Mechanism
5.1. Removal Procedure
5.1.1. Pull out the control motor connector.
52
Page 57

Chery S18D Service Manual
5.1.2. Remove the two fixing screws on control
motor with inner spline wrench and
remove the control motor.
5.2. Installation Procedure
The installation procedures are reverse to those
for removal.
6. Removal and Installation of Blend Air Door Related Mechanism
6.1. Removal Procedure
6.1.1. Pull out the blend air door motor
connector.
6.1.2. Remove the blend door control plate with
inner spline wrench.
53
Page 58

Chery S18D Service Manual
6.1.3. Align with the slot opening on one end of
control arm and remove the control arm.
6.2. Installation Procedure
The installation procedures are reverse to those
for removal.
7. Removal and Installation of Int./Ext.Air Door Motor & Related Mechanism
7.1. Removal Procedure
7.1.1. Pull out the motor connector.
7.1.2. Remove the fixing screws of control
motor and remove the motor.
7.2. Installation Procedure
The installation procedures are reverse to those
for removal.
8. Removal and Installation of Evaporator
8.1. Removal Procedure
54
Page 59

Chery S18D Service Manual
8.1.1. Remove the air-conditioner harness (See
removal of air-conditioner harness)
8.1.2. Remove the five fixing screws on
evaporator housing.
8.1.3. Remove the evaporator top cover.
8.1.4. Remove the evaporator core.
8.2. Installation of evaporator assembly
The installation procedures are reverse to those
for removal.
After the installation, the system should be
evacuated, proper pressure should be maintained
and anti-freeze agent should be filled to check for
any leakage. Check if the radiator is blocked and
compressed air can be used to clean it.
55
Page 60

Chery S18D Service Manual
CHAPTER IX Body Dimension
I. Basic Instructions on BIW Maintenance
Vehicle body maintenance should be carried out by professionals according to the requirements of the
manufacturer, and only in this way will the promises of “rust free” and “paint defect free” be effective.
1. Only adopt the materials specified by the manufacturer;
2. When welding the outside metal of the vehicle body, make sure protective coating is applied to
the inner side;
3. When spot-welding, make sure zinc coating is used;
4. Before air-tight sealing the welded parts, apply a layer of filling coating to the inner side and
outer side;
5. Before protecting the chassis with paint, apply protective coating to protect the chassis from
rock bumping;
6. When the coating is sprayed, all opening parts at this position should be secured with
fasteners;
In some cases, the vehicle must be placed on a hoister platform, for removal of spare parts may affect
the distribution of various parts in the vehicle body.
Before spot-welding, make sure the battery connector is unplugged, and check if the ventilation is good
enough before welding.
In maintaining the vehicle body in a certain area, take care to protect other vehicles in this area.
Be particularly careful when spraying sand or welding near the oil tank or fuel system, and disassemble
them if the safety can not be assured.
When maintaining or spray-painting the vehicle body, take all possible measures of preventing
accidents.
When welding galvanized steel sheets, the spot-welding current should be raised by 30%, and the
electrodes should be pointed, and the clamping force of the electrodes should be increased; and when
doing gas shielded welding, the welding current should be further intensified.
Do not weld the air-conditioning parts or try to weld the parts on the vehicle whose temperature are
easily raised. When spray-painting the vehicle frame, the temperature either in the drying oven or the
pre-heating oven should not go beyond 80˚C.
Take the following measures during welding operation to prevent shaking the electronically welded
equipment:
Connect the grounding of the electronic welding equipment directly to the welded parts. And check to
make sure no other parts or insulative parts exists between the ground wiring connector and the spotwelded parts;
First disassemble the ECU, and prevent the electronic device or circuit from contacting the ground
wiring connector or welding wire.
Corrections:
The vehicle body and the chassis are manufactured off the production-line by low-temperature
tempering and cold die casting. Therefore, when the metal parts are damage in any accident, the same
processes must be used to restore them, and no heating is allowed. If they are damaged very seriously
and can not be restored, the damaged parts must be removed after the connecting surface is corrected.
The car bodies are made up of various members, pressing panels and other parts, of which the doors
are the most complexly processed parts of the vehicle body. They involve processes like part stamping
and welding, assembly of spare parts and assemblies, for which the dimensional fits and technical
requirements are quite strict, so the car doors are difficult to maintain and the quality requirements are
fairly high, and only the service personnel understand the structure of the car doors thoroughly and are
56
Page 61

Chery S18D Service Manual
qualified for the maintaining operations.
1. Vehicle Door Structure
Generally speaking, the vehicle doors consist of outside plates, inside plates, window frames, glass
guide rails, hinges, locks and window accessories and so on. The inside door plates are equipped with
accessories including glass lifter, locks and so on. To secure the assembly, some parts of the inside
door plates need to be fortified. To increase safety level, the inner parts of the outside plates are usually
equipped with impact bars. The outside plates and inside plates are connected by flanging, adhesion,
seam welding and so on. Depending on different bearing capabilities, the outside plates should be light
and the inside plates should have higher rigidity and be able to stand stronger impact.
The BIW vehicle door assemblies have relatively fewer components, and usually consist of inside
plates, outside plates, glass guide rails, window frame reinforcing plates, lock mounting plates, hinges
reinforcing plates, impact bar assemblies and so on; The figure below is a typical structure drawing of a
vehicle door.
2. Door Panel Maintenance Process
Generally speaking, the basic maintenance methods for car doors and hoods are the same as those for
ordinary plate work, and the following procedures apply to both of them:
(1) Primary tests. The positions of the door panels as related to other assemblies of the vehicle body
as well as the dimensions of their tolerance clearances should be tested
57
Front glass guide rail
Rear view mirror
mounting plate
Upper door glass guide rail
Rear glass guide rail
Upper hinge mounting
plate
Weather strip guide rail
Outside plate window
frame stiffening plate
Inside plate window
frame stiffening plate
Door lock
mounting plate
Inside plate back
Rear impact bar
connecting plate
Impact bar
Front impact bar
connecting plate
Lower hinge mounting plate
Position limitator
mounting plate
Outside door
plate
Inside plate front
Page 62

Chery S18D Service Manual
(2) Clean the vehicle doors. Use fresh water or detergent to clean the dirt and greasy spots on the
door panels, and let them thoroughly dry for tests.
(3) Maintenance appraisal. Appraise the scope and degree of damage to the door panels by testing
and decide the maintenance methods.
(4) Clear the old paint. Before cleaning or maintenance, get rid of the old paint according to the actual
situation, especially when there exists obvious rust, cracks or dents; The paint can be got rid of in
manual, heating, mechanic or chemical method(s).
Painted surface Welding torch
Scraper
Fig . 3
(5) Tests after the removal, including the measurements of the geometric dimensions between various
plate work pieces, tests of specific damage spots of various plate work pieces, recognition of
damage types, analyses of damage causes and choices of maintenance schemes.
3. Main Contents of Door Panel Maintenance
Generally speaking, the causes of door panel damages are related to the following 4 aspects: structure
design defects, manufacturing defects, chemical erosion, and physical damage. And the most common
damage causes can be classified as the following types:
1. Abrasion: The surfaces of plate work pieces may contact each other and relative movements will
take place and cause surface friction, which will lead to abrasion. For example, the long time
friction between the hinge hole and the shaft of the vehicle door hinge will increase their tolerance
clearance and cause to vehicle doors to drop.
2. Erosion: This is generally due to the oxidation caused by the mud deposit and dirt; or the rust
caused by lack of anti-erosion processing after welding; or erosion caused by chemicals. This type
of damage usually occurs between the plate work pieces, in overlapped parts of spot-welded
pieces, and at other similar places.
3. Cracks or breaks: The metal plates may develop fatigue under repeated inner/outer stress where
the stress concentrates and the structure is the weakest, causing cracks and even breaks.
58
Page 63

Chery S18D Service Manual
4. Dents or wrinkles: Dents develop because the door panel is subjected to bumping or pressing,
leading to elastic or plastic deformations.
5. Bends or twists: They are mainly caused by too much load the door panel receives in use or the
plastic deformation due to bumps.
4. Basic Methods for Door Panel Maintenance
The basic maintenance methods for the above door panel damage types include dent reconditioning,
flame correction, welding, repairing and mending, wrinkle spreading and so on.
4.1. Reconditioning of Dents
For convex-concave damages in the outside door panels, if they are indirectly caused by structural
pieces or reinforcers, the structural pieces should be corrected first, and then the outside panel breaks
or dents are to be corrected. If the backs of the metal panels are accessible, hand hammers and
underlay irons or spoon-shaped irons, tommy bars, flat punches and so on can be used for primary
repairs. For enclosed metal panels or parts that are difficult to access from the backs, other tools can
be used for repairing, such as slide hammers and pointed hammers.
Here are some common ways of dent reconditioning:
(1) Repair the dents with underlay irons and hand hammers: the commonest practice is to beat the
damaged metal panels with underlay irons and hand hammers. Both sides of the metal panel to be
repaired must be accessible to the hand-held underlay iron and there are two ways of using the
underlay iron as the supporting piece for the hand hammer:
① Beat with a hammer from above the underlay rion. This approach is suitable for correcting
smaller and shallower dent or breaks.
When beating with a hammer from above the underlay rion, the hand-held underlay iron
should be placed against the back of the metal panels, and then beat the convex part. The
beating of hand hammer can make the metal panel contract and finally smooth the metal
panel.
59
Page 64

Chery S18D Service Manual
② Beat with a hand hammer from other parts than from directly above the underlay iron. The
underlay iron is placed against the lowest part of the dent, and then the higher parts near the
dent are beaten with a hand hammer.
Generally, when trying to repair the dent with a hand hammer and an underlay iron, the convex
side is beaten with the hand hammer and the concave side is pressed against the underlay
iron. First do brief correction by beating the damaged part with a wooden hammer, and then do
finer repairing with an iron hammer. For a larger area of dent, the underlay iron should be
placed against the place where the dent is shallower, and the hand hammer should beat the
higher parts. Besides, the wooden hammer and the iron one should be used alternatively
according to the actual situation.
(2) Repair the dent with a shaping spoon or tommy bar. Shaping spoons and tommy bars are
commonly used tools for door panel maintenance, and they are customized according the
characteristics of the vehicle body. They can reach the limited space between door panels to push
up the dent. This method is suitable for the narrow room between the door panels where it is
inaccessible for the underlay iron or the hammer, and the shaping spoon can act as a underlay iron
to distribute the impact of the hammer over a larger area.
(3) Restore the dent with a dent smoother. The dent smoother is applied to the inner side of the metal
panel and it is used for the dents that are hardly accessible to other tools and it is usually operated
in the following two ways:
Slide hammer
Handle
Flat gasket
Slide hammer
Handle
Fig. 8
Fig. 9
Puncturing: Drill a small hole in the dent with a hand power drill, and then insert a pull-rod with threaded
head or hook-shaped head into the hole. Slide the slide hammer on the metal pull-rod and impact the
handle repeatedly so as to pull up the dent gradually. Make more than one holes when necessary, and
fill the hole(s) by soldering and polish the spot(s) when the dent(s) is/are smoothed.
Electrode welding: Weld a peg or a flat gasket onto the dent with a special spot-welder, and then use a
dent smoother to pull at the peg or flat gasket till the dent is smoothed. More than one peg or flat
gaskets can be welded when necessary so that the whole dented area can be dragged out. Finally,
break the peg or flat gasket, and polish the welded scar with a sand mill. This method can avoid drilling
the metal panels and prevent potential erosion, so it is widely used.
4.2. Restoration of Stretched Parts
When the metal panel is impacted, the dented area would be stretched. At times even proper
operations can not restore it, the heating-contracting method is sometimes used to achieve the desired
60
Page 65

Chery S18D Service Manual
repairing effect.
(1) Heated position and flame intensity: The effect of flame correction depends on the heated position
and the flame intensity. Different heated spots bring about different effects, and the heated position
should be where the material is deformed the most and the metal panel is stretch the most, or the
furthest part outward that is bent and deformed. Different flame intensities also lead to different
correcting effects. The intenser the flame is, the faster the metal panel is heated and the more
concentrated the heat is, and then the stronger the contracting capability is. The low-carbon steel
panel, for example, should be heated till it gets cherry red (600 - 800℃ ℃).
(2) Heating ways normally adopted for flame correction in the vehicle body maintenance are:
① Spot heating: The heated area is a round spot of a certain diameter, which is usually 15 -
30mm. One or more spots can be heated according to the actual deformity situation. When
more than one spot is heated, the spots are arranged in a plum pattern. And this way is often
used for contracting the convex area in the middle of the panel.
② Triangle heating: The heated area resembles a triangle, and this way is often used for
correcting strip-shaped materials and deformed panel edges.
·
Expa ns ion
are a
Wavy edge
Heat ing po sit ion
Trian gle he at in
Fig. 11
Stretched
area
Spot heating
Fig. 1 0
(3) Cooling-contracting way: When the flame is taken away, proper cooling ways should be chosen
according to the stretched degrees of the metal panels. Different cooling ways bring about different
contracting effects.
① Natural cooling-contracting, or cooling in the air naturally, which is suitable for smaller areas of
deformities.
② Water cooling, or covering the heated area with wet cotton cloth to make it cool suddenly. The
contraction of metal plate cooled in this way is larger than that of the naturally cooled one, but
it may make the steel panel fragile.
③ Natural cooling and hammering, usually operated with a hand hammer and a underlay iron.
During the operation, beat around the heated area quickly to increase the compressing stress
and the contraction till that area is smoothed. The wooden hammer is preferred and do not use
too strong a force, or the metal panel may get re-stretched.
4.3. Restoration of Cutting & Patching
When any part of the metal door panel is eroded or damaged beyond repair, it should be removed and
replaced with a new piece by welding. The repairing methods include patching repair and cutting.
Procedures for cutting repair are as follows:
(1) Check the damaged part and determine the repairing area.
(2) Make a paper model according to the determined area.
(3) Draw lines on the metal plates and cut material according to the paper model, and leave proper
processing allowance.
61
Page 66

Chery S18D Service Manual
(4) Select proper processing and shaping methods so that the patch matches well with the part to be
removed.
(5) Apply the patch to the intended position and press it tightly, draw a line along the edge of the part
to be removed and cut it out, using methods like gas cutting or excising according to the actual
situation, and then align the patch with the excised area.
(6) Weld the seam by gas welding or carbon oxide protection welding. Spot-weld it at a pace of 30-
50mm to fix it and then weld it again in a certain order after beating it smooth. For seams requiring
welding of higher strength, double-sided welding is preferred.
(7) Smooth the welded seam by beating it with flat hammer, release the welding pressures, and then
shape it and polish the seam with a grinding machine.
4.4. Restoration of Wrinkled Parts
Depending on the damage extent of the plate work pieces, the wrinkles are divided into “live wrinkles”
and “dead wrinkles”. The “live wrinkles” are slight ones and can be directly removed by beating the
convex part with a hammer. The “dead wrinkles” refer to seriously damaged parts. Since the wrinkles
are folded and pressed against each other, so if you hammer the most convex part, the wrinkles would
get even more seriously and harder to release, hence the name “dead wrinkles”. The principle of
correcting the wrinkles is to spread “dead wrinkles” first so that they become “live wrinkles”, and then
“live wrinkles” are converted into convex-concave shape, and finally restore the damaged parts just as
you deal with convex-concave damages. The repairing procedures are as follows:
(1) First use support-draw method to apply a correcting force in the direction opposite to that of the
impact at the wrinkled part of the plate work, and then spread and ease the wrinkles.
(2) Remove the wrinkled plate work and lay it on a platform and then, beginning with the inner side of
the wrinkled area, pry up the wrinkles with a proper prying tool and heat the “dead wrinkles” one by
one with a welding torch at the same time. Finally all “dead wrinkles” are pried up and eased and
converted into” live wrinkle”.
(3) Beat and smooth the “live wrinkles” from the inner side outward. The hammered spots should be
near the most convex part of the “live wrinkles”. At the same time make sure the platform can
support every beaten spot. When the wrinkles in one side of the plate are almost smoothed, turn it
over to beat the other side till all wrinkles are completely spread out.
(4) Measure with a templet, and at the same time heat and beat the convex-concave part to restore it
to its original shape.
(5) When the vehicle body is assembled, test with a templet again and make finer correction to
achieve the final requirements.
(6) The seriously damaged wrinkles that can not be restored can be excised and repaired.
4.5. Welding of Four Doors and Two Covers
When welding the door panel, choose proper welding methods: gas welding (oxygen and acetylene
welding), CO2 shielded welding, manual arc welding, resistance spot welding, braze welding and so on.
Besides, in order not to reduce the original strength and durability of the vehicle body, try to adopt the
welding methods used in manufacturing the door panels, and the dimensions and types of all weld
joints should be similar to those used by the original manufacturer.
As for appearance and quality, no burnt-through spots, half points, cracks, a lot of burrs or other defects
should exist at the welded parts. The welded surface should be smooth and nice-looking, no obvious
twist or deformation is allowed, and the indentation depth should be less than 1/5 of the plate thickness.
Flat spade and iron hammer can be used to carry out non-destructive tests of the welded spots’
strength. Insert the flat spade between two welded spots to see if they are easy to separate, and then
beat the welded part with an iron hammer to restore it. No welding spatter is allowed at the welded
seam, and the overlapped seam should be nice-looking with no defects like air holes or cracks. Defects
like undercut, welding beading and burning through are also not allowed.
62
Page 67

Chery S18D Service Manual
II. Body Assembly Dimension
1. Left Front Axonometric Drawing
No. Clearance position
Clearance
value(mm)
Flatness value(mm)
1 Front windshield and ceiling 7±1 ——
2 Front windshield and pillar A 5±1 ——
3 Front door and ceiling 4±1 2±1
4 Front door and rear door (upper)
1
0.5
4
+
−
1
0
0
+
5 Rear door and ceiling 4±1 2±1
6 Rear side windshield and rear door
1
0.5
4
+
−
1
0
0
+
7 Rear side windshield and ceiling 4.5±1 ——
8 Rear door outside handle and rear door 2
-0.5
0
——
9 Rear side windshield and back door
4~5.5
——
10 Tail lamp and fender 2±0.5 ——
11 Rear bumper and fender (upper part) 0
+0.5
0
-0.7
-0.3
+0.7
12 Rear bumper and fender (lower part) 0
0
+0.5
0.7±0.5
13 Door outer trim panel and door clearance 0
0
+0.5
——
14 Rear door and side wall trim panel 5
-1
+1.5
——
15 Front door and rear door(lower part) 4
0
+1
1
0
0
+
16 Front door handle and door 2
+0.5
0
——
17 Front door and side wall trim panel 5
-1
+1.5
——
18 Front door and front fender 4±1 0
+1
0
63
Page 68

Chery S18D Service Manual
No. Clearance position
Clearance
value(mm)
Flatness value(mm)
19 Front bumper and front fender 0
0
+0.5
——
20 Headlamp and fender 3±1 -0.7
+0.5
-1.0
21 Front fog lamp and front bumper 2±0.5 ——
22 Engine hood and front bumper 3.5
+1
-0.5
——
Note: as for the flatness value, the former part is the comparatively higher part in the text description.
E.g. in No.9, the flatness value of the fender and front door is
1
0
4
+
mm.
It means fender is higher than front door. Difference is
1
0
4
+
mm(4~5mm).
2. Left Rear Axonometric Drawing
No. Clearance position
Clearance
value(mm)
Flatness value(mm)
1 Rear bumper and tail lamp 2±1 ——
2 Back door and tail lamp 5±0.5 -0.7
+0.5
-1.0
3 Rear fog lamp and rear bumper 2±0.5 ——
4 Back door and rear bumper (upper part) 6±1 ——
5 Rear windshield and back door (lower part) 3.5
+1.5
0
——
6 Back door and rear bumper (lower part) 6±1 ——
7 Rear windshield and back door (upper part) 3.5
+1.5
0
——
8 Ceiling and back door 7
+1.5
-0.5
1
+1
-0
Note: in flatness value, the former part is the comparatively higher part in the text description.
E.g. in No.3, the flatness value of side wall and rear bumper is 0.7±0.5mm.
It means the side wall is higher than rear bumper. Difference is 0.7±0.5mm(0.2~1.2mm).
64
Page 69

Chery S18D Service Manual
III. Engine Compartment Dimension
No. Name
Central Distance of Holes
(mm)
A/B Front bumper cross beam installation hole 820
C/D Headlamp installation hole 624
E/F Headlamp installation hole 1323.7
G/H Headlamp installation hole 1283.2
I/J Engine right mounting bracket hole 131.2
K/L Fender installation 1349.5
M/N Fender installation 1280
O/P Shock absorber hole 1026.4
65
 Loading...