

ChemoMetec NC-100 User Manual
NucleoView™
User's Guide
P/N 991-0006
Ver s i o n 2 . 3
Technology that counts


i
NucleoView
™
A part of the NucleoCounter®™ NC-100 and
NucleoCounter® YC-100 ™system
M a n u a l N o . 9 9 1 - 0 0 0 6 ( E n g li s h)
V e rs i o n 2 . 3
A u gu s t , 2 0 12
ChemoMetec A/S
Gydevang 43, DK-3450 Allerød
Telephone: +45 48 13 10 20, Fax: +45 48 13 10 21
Intern et: www.chemometec.com,
E-mail: Sales@chemometec.co m

ii
This page was intentionally left blank

iii
Customer support
If you h av e questions a bout in stalling or using your Nucle oViewTM sof tw ar e check this us er 's guid e fi rs t - you
will fin d answers t o most of you r qu estions here. I f you need fu rt he r assista nce, please con ta ct customer
suppor t at ChemoMet ec A /S .
Contacting support
Techni ca l information including product liter at ure, answer s to question s regarding the o pe ration of the
NucleoCo un te r™ no t covered in th is document and information on s oftware upg ra de is availab le through the
followin g:
For Em ai l support, se nd question s to NucleoCoun te r Technica l Support on th e ad dress
suppor t@ ch emometec. com
Check ou t th e FAQ secti on under su pp ort at www.ch em om etec .com
To speak w ith a Techn ic al Support Special is t, call ( +4 5) 4 8 13 10 20.
Please n ot e the NucleoC ou nter™ serial n um be r and have it a vailabl e wh en contacti ng ChemoMetec A/S for
suppor t. T he NucleoCoun te r™ serial number is found on a la bel a ff ix ed to the bot tom of the in st rument a nd in
the disp la y upon st ar t-up. T he v ersi on number o f the NucleoC ou nter firmware s ha ll also be no ted. Refer to the
User’s G ui de of you Nuc leoCounter inst rument in o rder to retri ev e that.
Sales and ordering information
For pr e- sales assis ta nc e with Nu cl eo Counter ™ or the Nu cleoView™ software, to place an ord er for a
NucleoCo un te r™ or c onsumable s, c al l (+45) 48 13 10 2 0, or mail to Sales@ch em om etec .com
Changes
The ma te rial in thi s document is for informat ion on ly and is s ubject to c ha ng e without n ot ic e. While
reason ab le e fforts ha ve b een made in t he preparat ion of this doc um ent to assure i ts a ccuracy, Ch em oMet ec
A/ S as su mes no liabil ity resulting fro m errors or o missions in this docum en t, o r from the us e of the
inform at ion contain ed h erein.
Chem oM etec A /S reserves t he righ t to make changes i n the produ ct d esign wit ho ut reservation and without
notifi ca tion to its u sers.
Copyright
Copyrigh t © ChemoMe te c A/S 200 1-2002. A ll r ig hts reser ve d. No part of this publi ca tion may be r ep ro du ced,
stored i n a retrieval s ystem, or t ra ns mitted in a ny form or by a ny means, ele ctronic, me ch an ical,
photocop yi ng, recor ding or other wi se , without t he prior wr it te n consent of Ch em oMet ec A/S, G ydevang 43,
DK-3 45 0 Allerød, Denmar k.
Trademarks
Chem oM etec , NucleoCount er, NucleoCasse tt e and Nucle oV ie w are re gistered trad em arks and trad em arks of
Chem oM etec A /S. LabVIEW ™ is a tr ademark of Na ti on al Instrume nt s Corporation. Windows, Ex cel and Word
are trad em arks of Micro so ft C orporatio n.
All ot he r trademarks ar e the pro pe rt y of their resp ec tive owners.

iv
This page was intentionally left blank

Intended use
v
Intended use
The Nu cleoView™ software is developed as a dedicat ed accessory to the NucleoCounter™
NC-100 and the NucleoCounter™ YC-100 instruments; it is intuitive and easy to use.
NucleoView™ offers the user several features when connected to the NucleoCo unter™.
With NucleoView™, correction for dilution o f the samples and calculation of viability
becomes easy. When documentation o f results is required, NucleoCounter™ results can be
printed or saved for later use using the Nu cleoView application. Nucleo Vie w™ offers
several additional features, which are described in detail in this manual.
Though the NucleoView software can be operated in a safe way the program is not CFR
Part 11 compliant.

Intended use
vi
This page was intentionally left blank

Table of cont ents
vii
Table of contents
1 INSTALLATION ............................................................................................................ 1
1.1 INST AL LATION OF THE NUCL EO VIEW PA CK AGE VER . 2.3 - WINDO WS 7 ................................. 2
1.2 REMOVA L OF THE NU CLEOVIEW SOFTWARE .................................................................... 5
1.2.1 Removal of NucleoViewTM - Windows 7 ......................................................... 6
2 GETTIN G STARTED WITH NUCLEOVIEWTM .................................................................... 9
2.1 LA UN CH NUCLEO VI EWTM .......................................................................................... 9
2.2 SELE CTION OF PROGRAM MODE ................................................................................... 9
2.2.1 Viewer (limited access rights) mode ............................................................ 10
2.2.2 Data collection (full access rights) mode ..................................................... 10
2.2.3 Change program mode ............................................................................... 10
2.2.4 Configure text editor .................................................................................. 11
2.3 QUIT NUCLEOVI EWTM ............................................................................................ 11
3 THE STRUCTURE OF NUCLEOVIEWTM .......................................................................... 13
3.1 ME AS UREMENT TAB ............................................................................................... 13
3.2 VIABIL IT Y TAB ....................................................................................................... 13
3.3 UTIL IT IES TAB ....................................................................................................... 13
3.4 ABOUT ............................................................................................................... 13
4 MEASUREMENT TAB ................................................................................................. 15
4.1 CONCENTR AT ION OF CELL S IN TH E NUCLEOCAS SETTETM ................................................... 16
4.2 CONCENTR AT ION OF CELL S IN SUSP ENSION AND MU LTIPLIC AT ION FACTOR ............................ 16
4.3 NON-VI AB LE SAMPLE .............................................................................................. 18
4.4 OP ER AT OR A ND COMMENT ...................................................................................... 18
4.5 BROWSE A ND TODAY .............................................................................................. 19
4.6 STORAG E OF DATA ................................................................................................. 20
4.7 CHAN GI NG D AT A IN CM-FILES .................................................................................. 20
4.8 COLLEC TE D IMAGE AND O BJECT I NTENSITY HISTOGRAM ................................................... 22
4.9 SAVE I MA GE ......................................................................................................... 23
5 VIABILITY TAB .......................................................................................................... 27
5.1 CHOOSE F ILES FOR TH E CALCULA TION AND SA VE RESULT .................................................. 27
5.2 VIABIL IT Y (%) A ND CONCEN TR ATION OF VIAB LE CELLS (C ELLS/ML) ..................................... 28
5.3 CONFIGURE TE XT ED IT OR ......................................................................................... 29
6 UTILITIES TAB ........................................................................................................... 31
6.1 REPO RT P ATH ....................................................................................................... 31
6.2 RESU LT LIST – PRI NT AND EX PO RT ............................................................................. 31
6.2.1 Location and name of exported files ........................................................... 33

Table of cont ents
viii
6.3 VIABIL IT Y REPORT – PRINT A ND EXPORT ...................................................................... 34
6.3.1 Location and name of exported files ........................................................... 35
6.4 IMPORT D AT A INTO EXCEL ....................................................................................... 36
6.4.1 Set decimal symbol ..................................................................................... 39
6.5 REPO RT H EADER.................................................................................................... 40
6.6 DEFA ULT SETTI NG S FOR NUC LE OVIEWTM ..................................................................... 41
6.7 CONFIGURE TE XT EDIT OR ......................................................................................... 42
6.7.1 Define font for WordPad ............................................................................. 44
6.7.2 Define font for Notepad .............................................................................. 46
7 TROUBLESHOOTING .................................................................................................. 49
7.1 QUAL IT Y OF THE SA MPLE ......................................................................................... 49
7.2 DATA NOT RECEIVED .............................................................................................. 49
7.2.1 Test Image transfer from the NucleoCounter. .............................................. 51
7.3 NU CL EOVIEW “F RE EZES” ......................................................................................... 52
8 TECHNI CAL SPE CIFICATIONS ...................................................................................... 55
8.1 NU CL EOVIEW™ S OFTWARE ...................................................................................... 55
9 APPENDIX 1: PRINTED RES ULT LIST ............................................................................ 57
10 APPENDIX 2: PRINTED VIABILITY REPORT ................................................................... 59
11 APPENDIX 3: DEFAULT SETTINGS FOR YEAST SAMPLES ............................................... 61
12 INDEX ...................................................................................................................... 63

1 Installation
1
NOTICE - IMPORTANT!
Before installation of NucleoView Package ver. 2.3, check if an older version
of NucleoView is installed on the computer.
Any other version of NucleoView is most likely to be located in the folder
C:\Nucleoview.
If present it must be uninstalled by executing the uninst.exe file placed in
the folder C:\Nucleoview.
1 Installation
When the NucleoCounter is connected to a computer running NucleoView it is possible to
register the estimated cell concentration and the collect ed imag e of the NucleoCassette
chamber. Connecting a NucleoCounter to a computer does not affect the operat ion of the
NucleoCounter in any way and the NucleoView software performs no additional image
analysis.
The installation1 procedures below describe the installation of the NucleoView software
and the USB driver on computers running Windows 7. It is possible to install NucleoView
and the USB driver on computers running other op erating systems than Windows 7. For a
list of supported op erating systems please refer to chapter 8 Technical sp ecifications .
The co mmunication between the NucleoCounter and NucleoView is based on the USB 1.1
protocol, thu s the computer must b e equipped with an USB 1.1 compatible port.
If no older version of Nucl eoView is installed on the computer follow the directions in
chapter 1.1 Installation of the NucleoView Package ver. 2.3 - Windows 7.
If an older version of NucleoView is installed on the computer, it has to be uninstalled
before NucleoView Package ver. 2.3 can be installed. Follo w the 3 steps below.
1. Uninstall the older version of NucleoView (see chapter 1.2.1 Removal of
NucleoViewTM - Windo ws 7)
2. Install NucleoView Package ver. 2.3 by follo wing the directions in chapter
1.1 In stallation of the NucleoView Package ver . 2.3 - Windows 7
The Nu cleoCounter will then be ready for use with the NucleoView software ver. 2.21.
1
This installation is called ” NucleoView Package ver. 2.3”, since it contains a new driver for
64-bit OS also. However the actual NucleoView program is still ver. 2.2.
1 Installation
2
1.1 Installation of the NucleoView Package ver. 2.3 - Windows 7
2
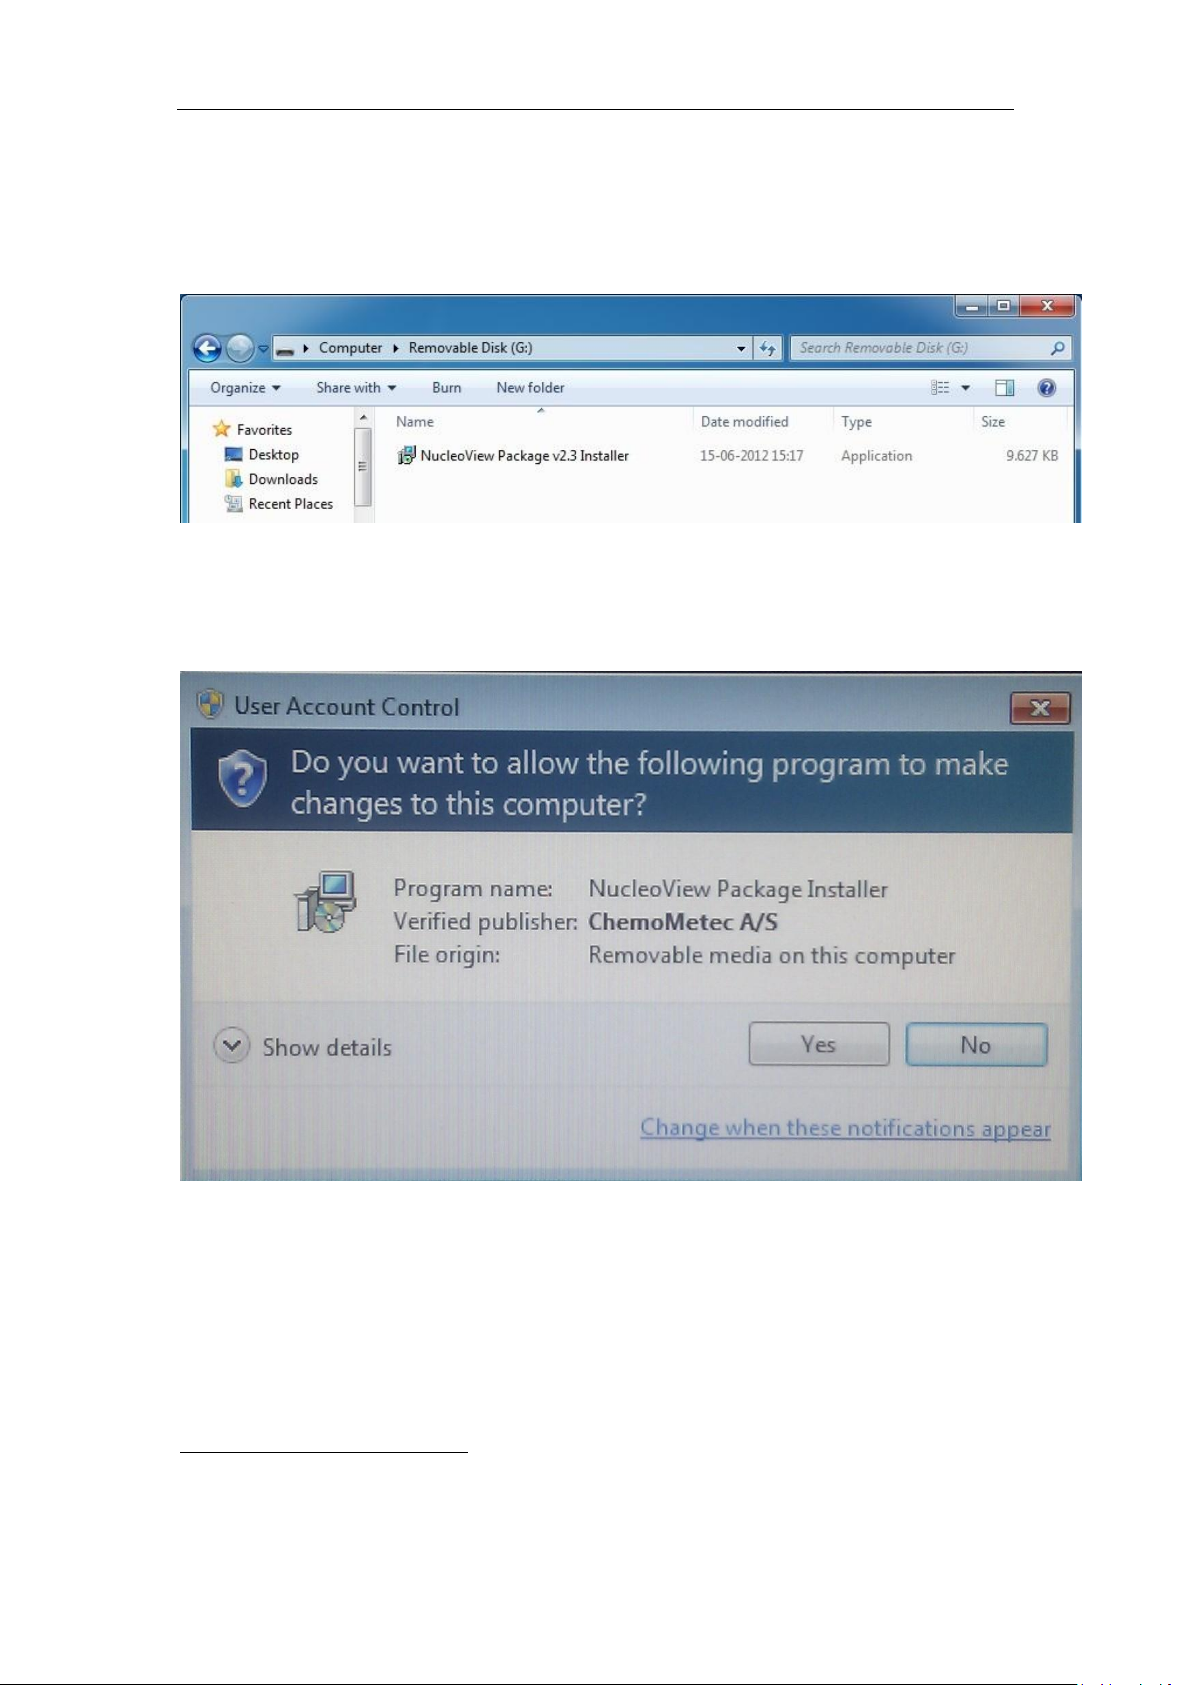
When the computer has been turned on and is finished with the start -up process, insert
the USB Flash disk supported with the NucleoCounter to the comput er. Let the computer
install the USB Flash disk and the open the DISK.
Figure 1 NucleoVie w Package v2 .3 Installer located on the USB Flash disk
Activate the application “NucleoView Package v2.3 Installer” and allow (hit Yes) the
Installer program to make changes to the computer (see Figure 2 User Account Control )
Figure 2 User Account Con trol
The Installer will welcome you and you can now continue the installation in a very
controlled manor.
2
This description applies to Windows 7 only.
1 Installation
3
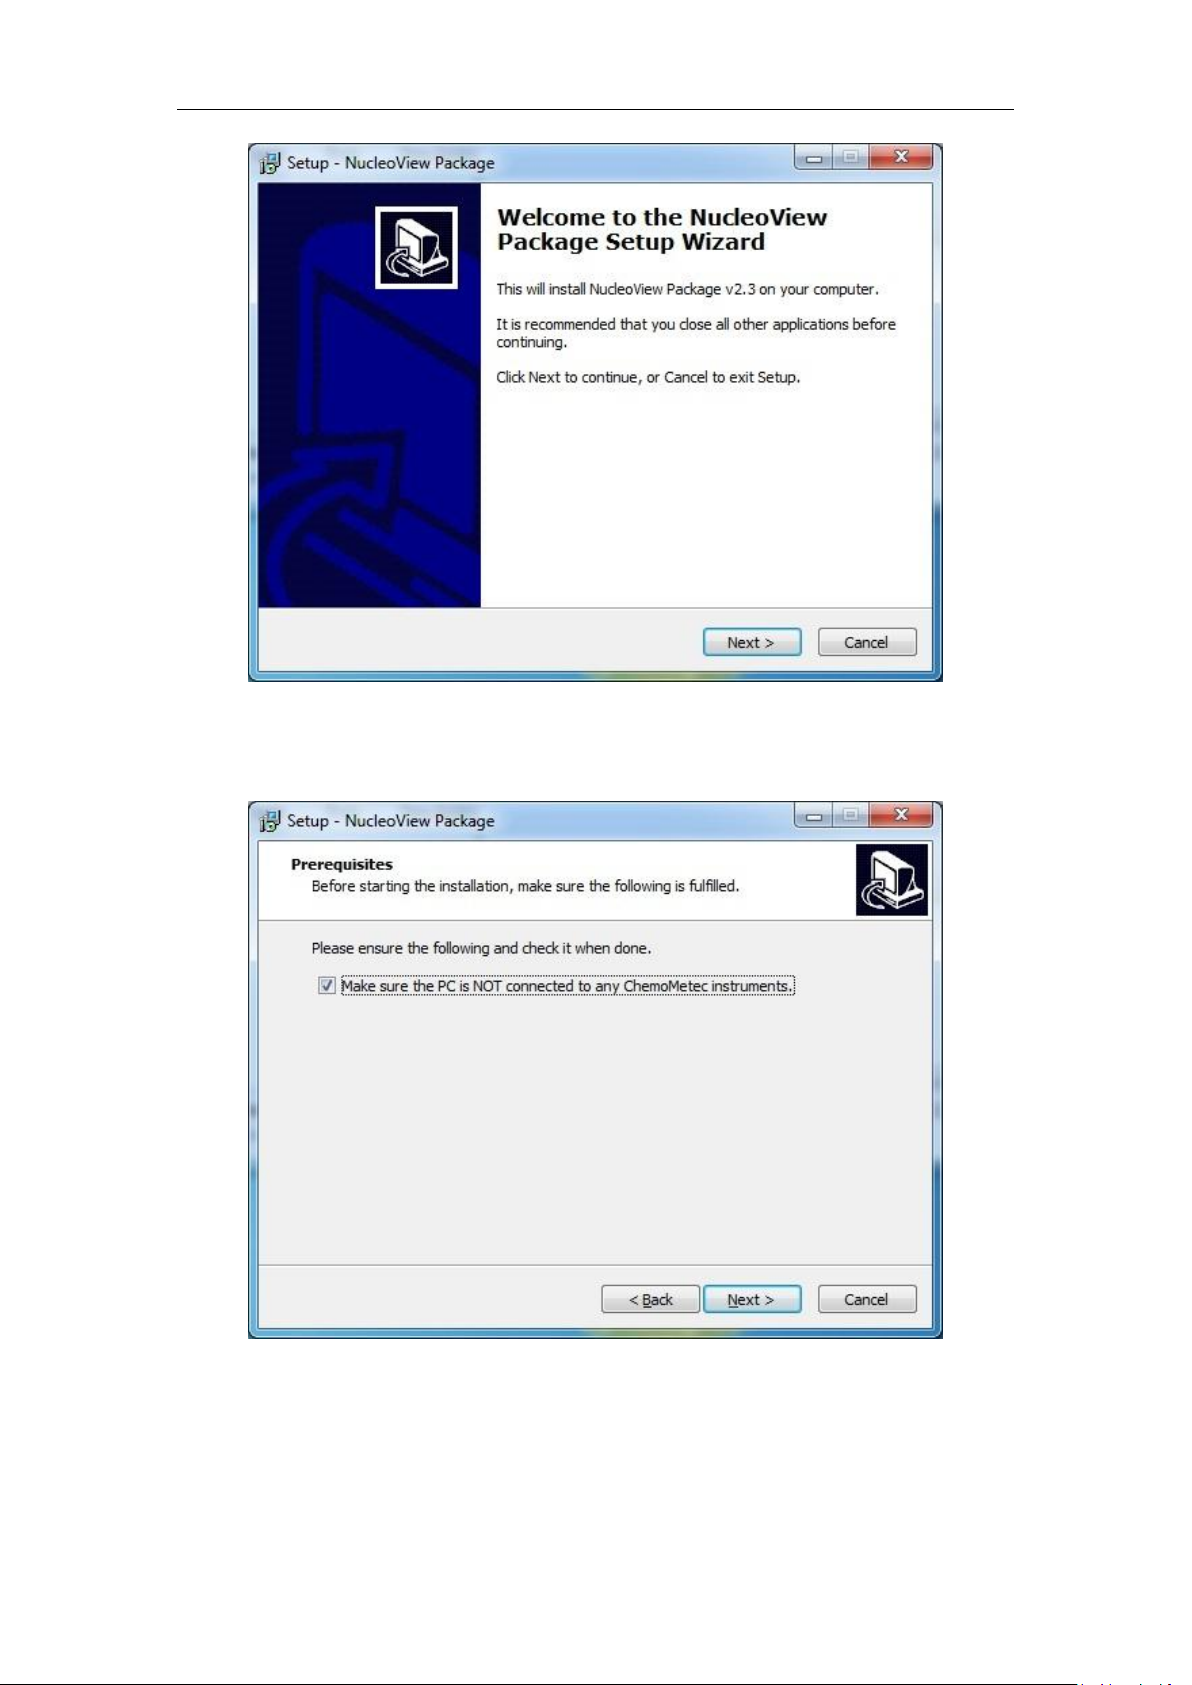
Hit “Next”
Figure 3 In staller Setup - Welcome
Figure 4 In staller Setup - Prerequisites
Check the check box in Figure 4 Installer Setup - Prerequisit es and hit “Next”.
1 Installation
4
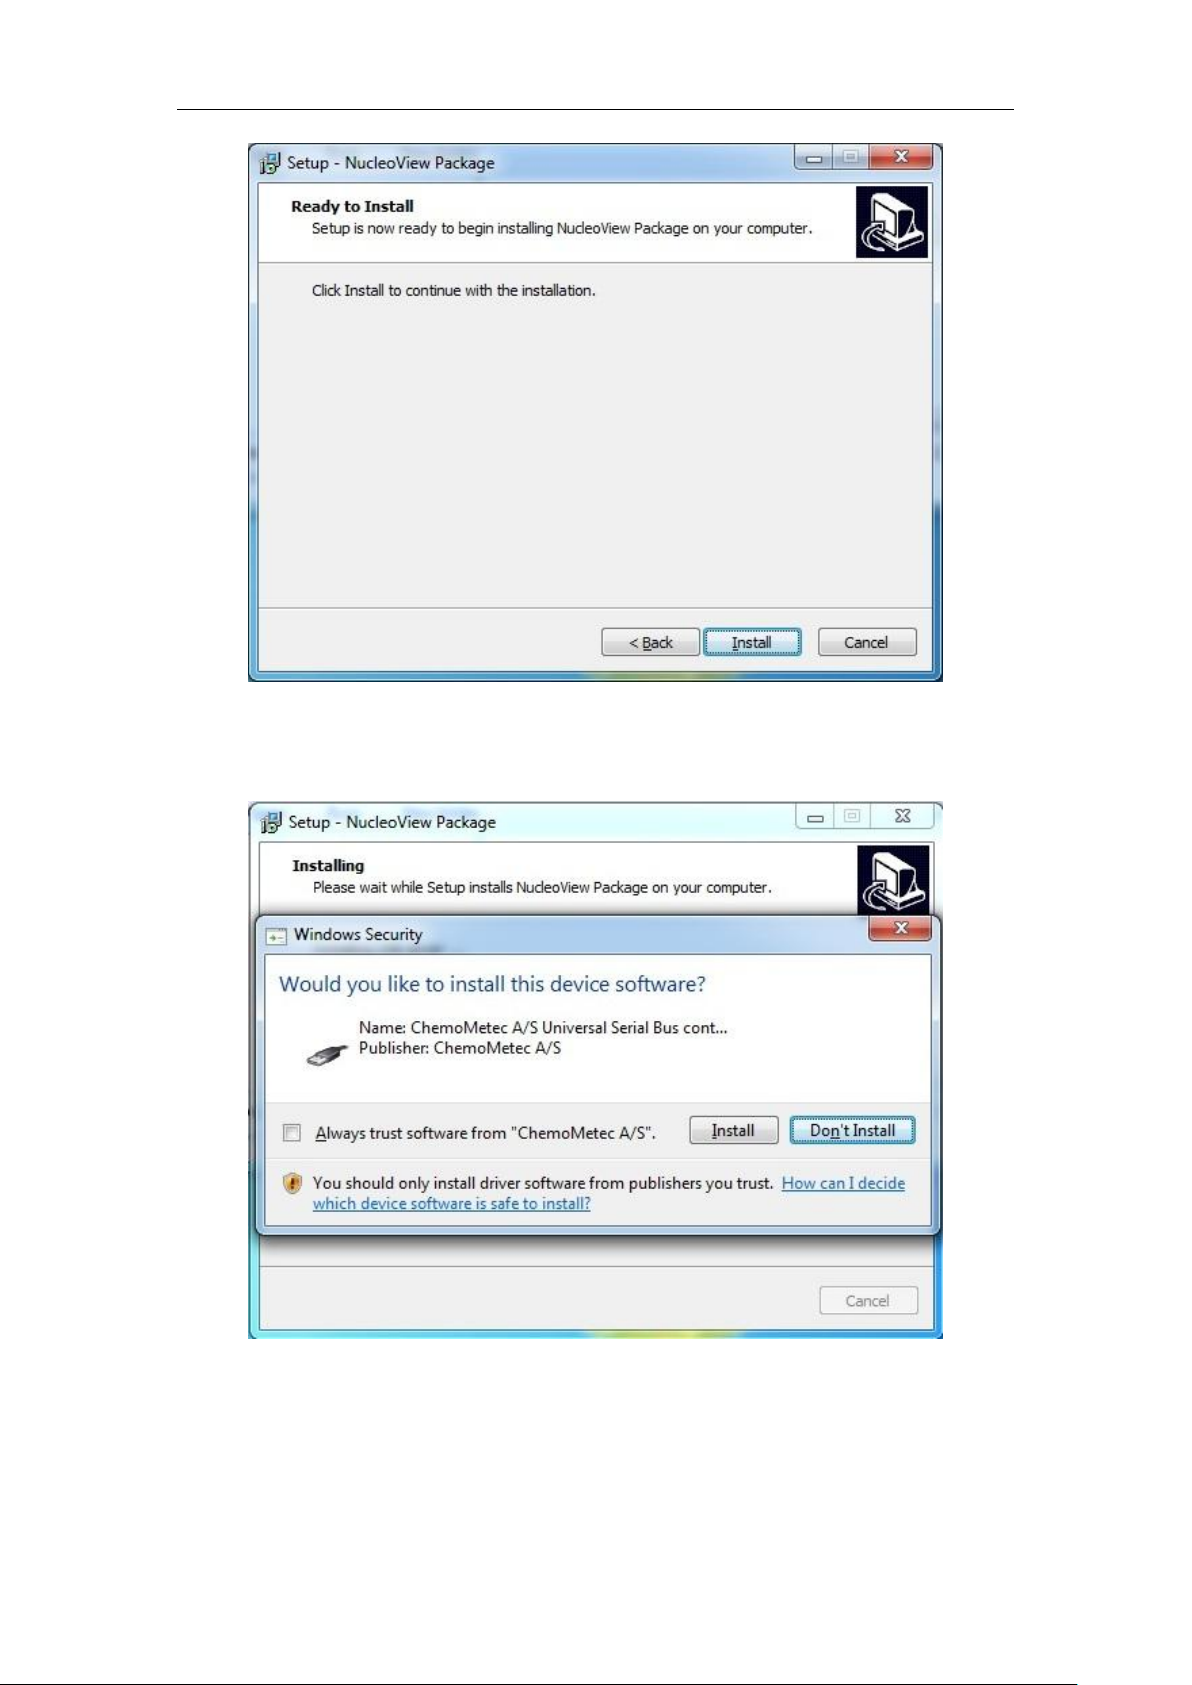
Hit “Install”.
Figure 5 In staller Setup – Ready to Install
Figure 6 In staller Setup – Installing and Windows Security
After the actual Installation is started you will be prompted to accept the installation of
the device software for the USB driver. Hit “Install”

1 Installation
5
In the background the installation continues and when this is over the following dialogue
appears. Then hit “Finish”.
Figure 7 In staller Setup – Com pleted
The first time a NucleoCounter is turned on while connect ed to the computer, the
comput er will identify the NucleoCounter as new hardwar e and install the drivers for it . So
the screen will show the following message.
1.2 Removal and upgrade of the NucleoView software
For removal3 of the NucleoView software follow the directions below. If you upgrade from
NucleoView 2. 0 or 2.1 these version must be removed first.
3
For r emoval of Nucl eoView 2.0 or 2.1 refer to the original manual.
1 Installation
6
1.2.1 Removal of NucleoView
TM
- Windows 74
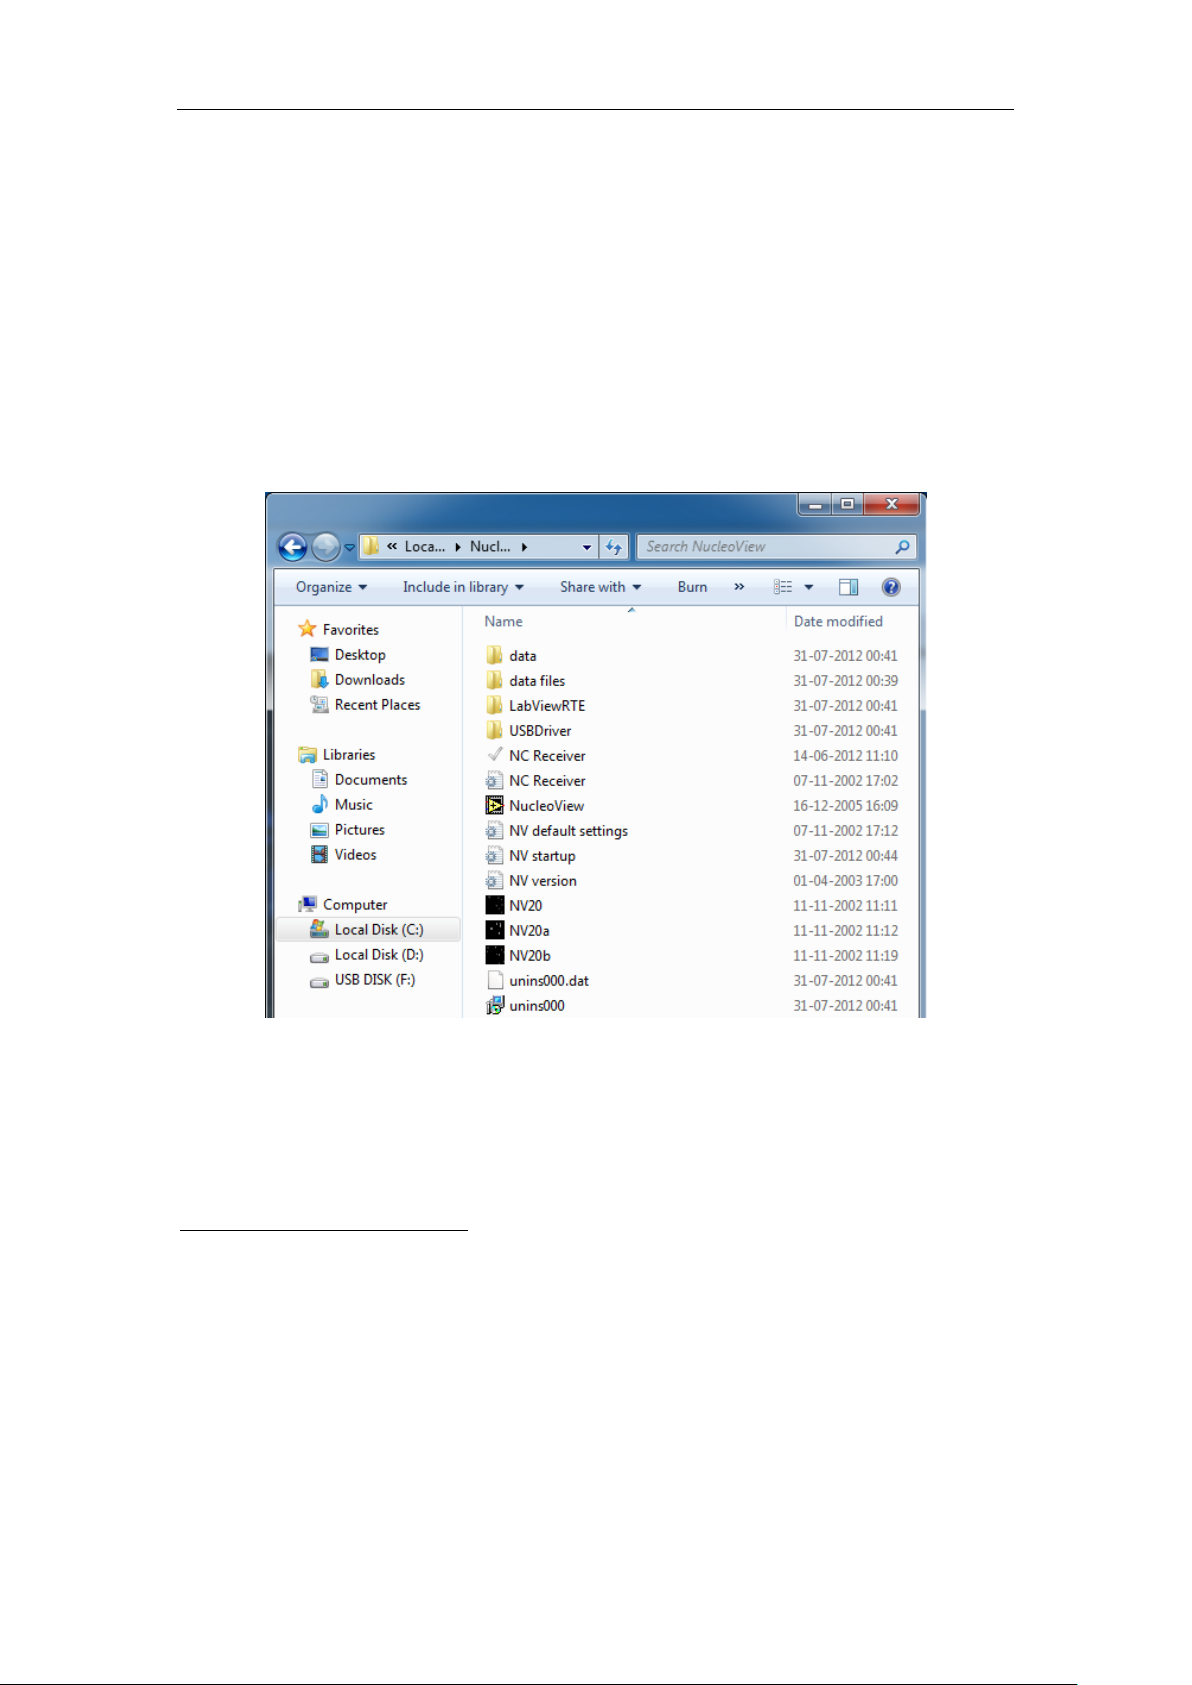
To remove the Nucleo View software5 open the NucleoView folder (see Figure 8 Contents of
the NucleoView folder (be fore uninst000.exe is ac tivated).). The folder should be located
in the root directory of the local hard disk (C: \Nucleo view) if the location was not changed
during the installation.
In the Nucleo View folder double-click on “uninst000.exe6” and confirm that the
NucleoView software is to be uninstalled. The NucleoView software will then be removed
from your computer. Any saved data will remain on the computer.
Figure 8 Contents of the NucleoView folder (be fore uninst000.exe is activated)7.
4
This description applies to Windows 7 only.
5
In order to remove the program correct, first quit the NC Receiver.exe program if it is
running.
6
“uninst000.exe” or “uninst000” depending on your folder settings in your OS.
7
If you at any time created your own Default settings you will also have a file called “NV
default settings.ini”.
1 Installation
7
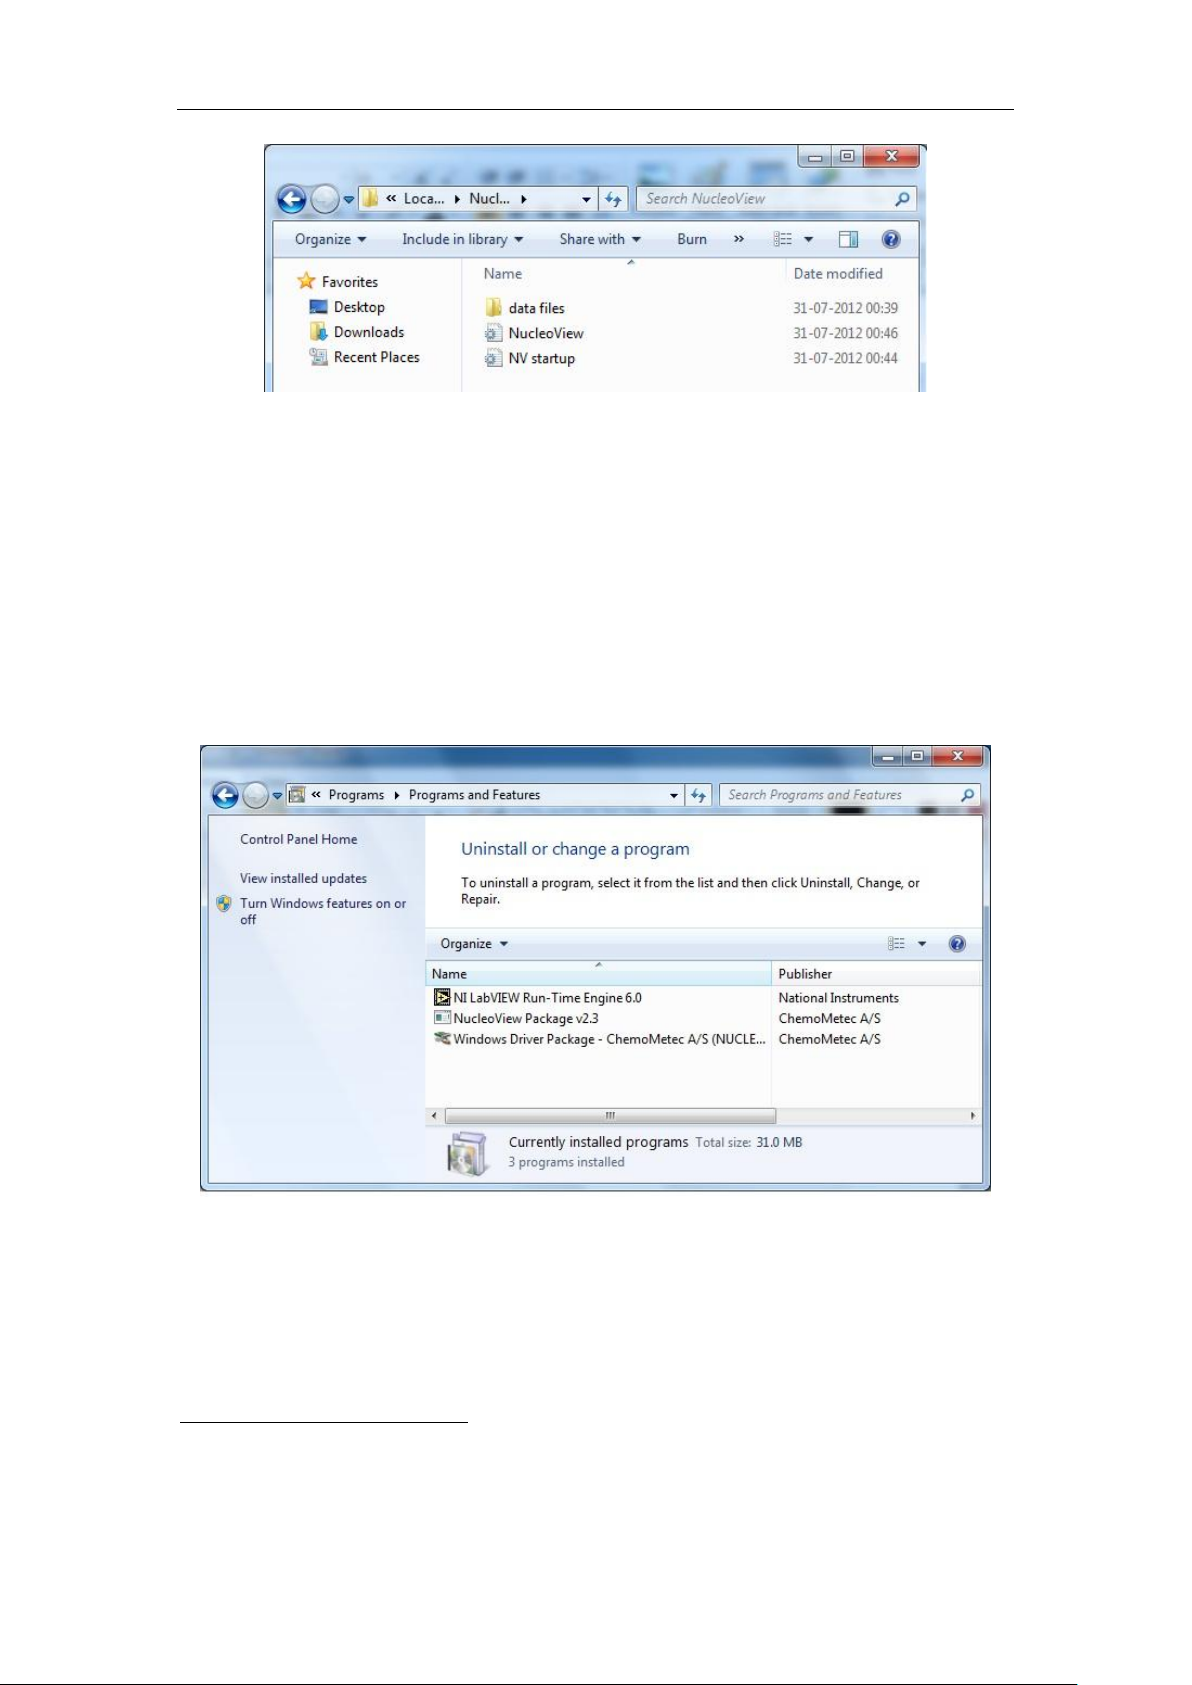
Figure 9 Contents of the NucleoView folder (after uni nst 000.exe is activated)8.
If the program has to be removed completely you can just delete the files and folders now.
Remember you will loose ALL data , i f you delete the contents of the “data files” folder
from Figure 9.
In case you are upgrading the NucleoView program, DO NOT delete any files or folders
after “uninst000.exe” was activated.
1.2.2 Removal of all installed components
4
In case all installed components must be removed the following procedure can be used.
Figure 10 Remove all components.
Via th e start button select programs – Control Panel – Programs and Features. From the
list you can locate the three components listed ab ove and by a right click on the mouse
you are able to uninstall the components individually .
8
If you at any time created your own Default settings you will also have a file called “NV
default settings.ini”.

1 Installation
8
This page was intentionally left blank
2 Getting started with NucleoViewTM
9
Data from NucleoCounter can only be transferred if the NC Receiver is active,
therefore it must not be closed.
2 Getting started with NucleoView
NucleoView allows the user to register the results of cell count s with the NucleoCounter
on a computer. This is useful when documentation of results and data is needed.
2.1 Launch NucleoView
NucleoView can be activated through the Windows “Start” menu. First select “NucleoView
2.2” from the “Programs” submenu, and then select “Nucleo View”.
When NucleoView is launched, both NucleoView and the NC Receiver appear on the task
bar. The NC Receiver is an application, which must be active when receiving data from the
NucleoCounter. NC Receiver is launched automatically when NucleoView is launched.
TM
TM
2.2 Selection of program mode
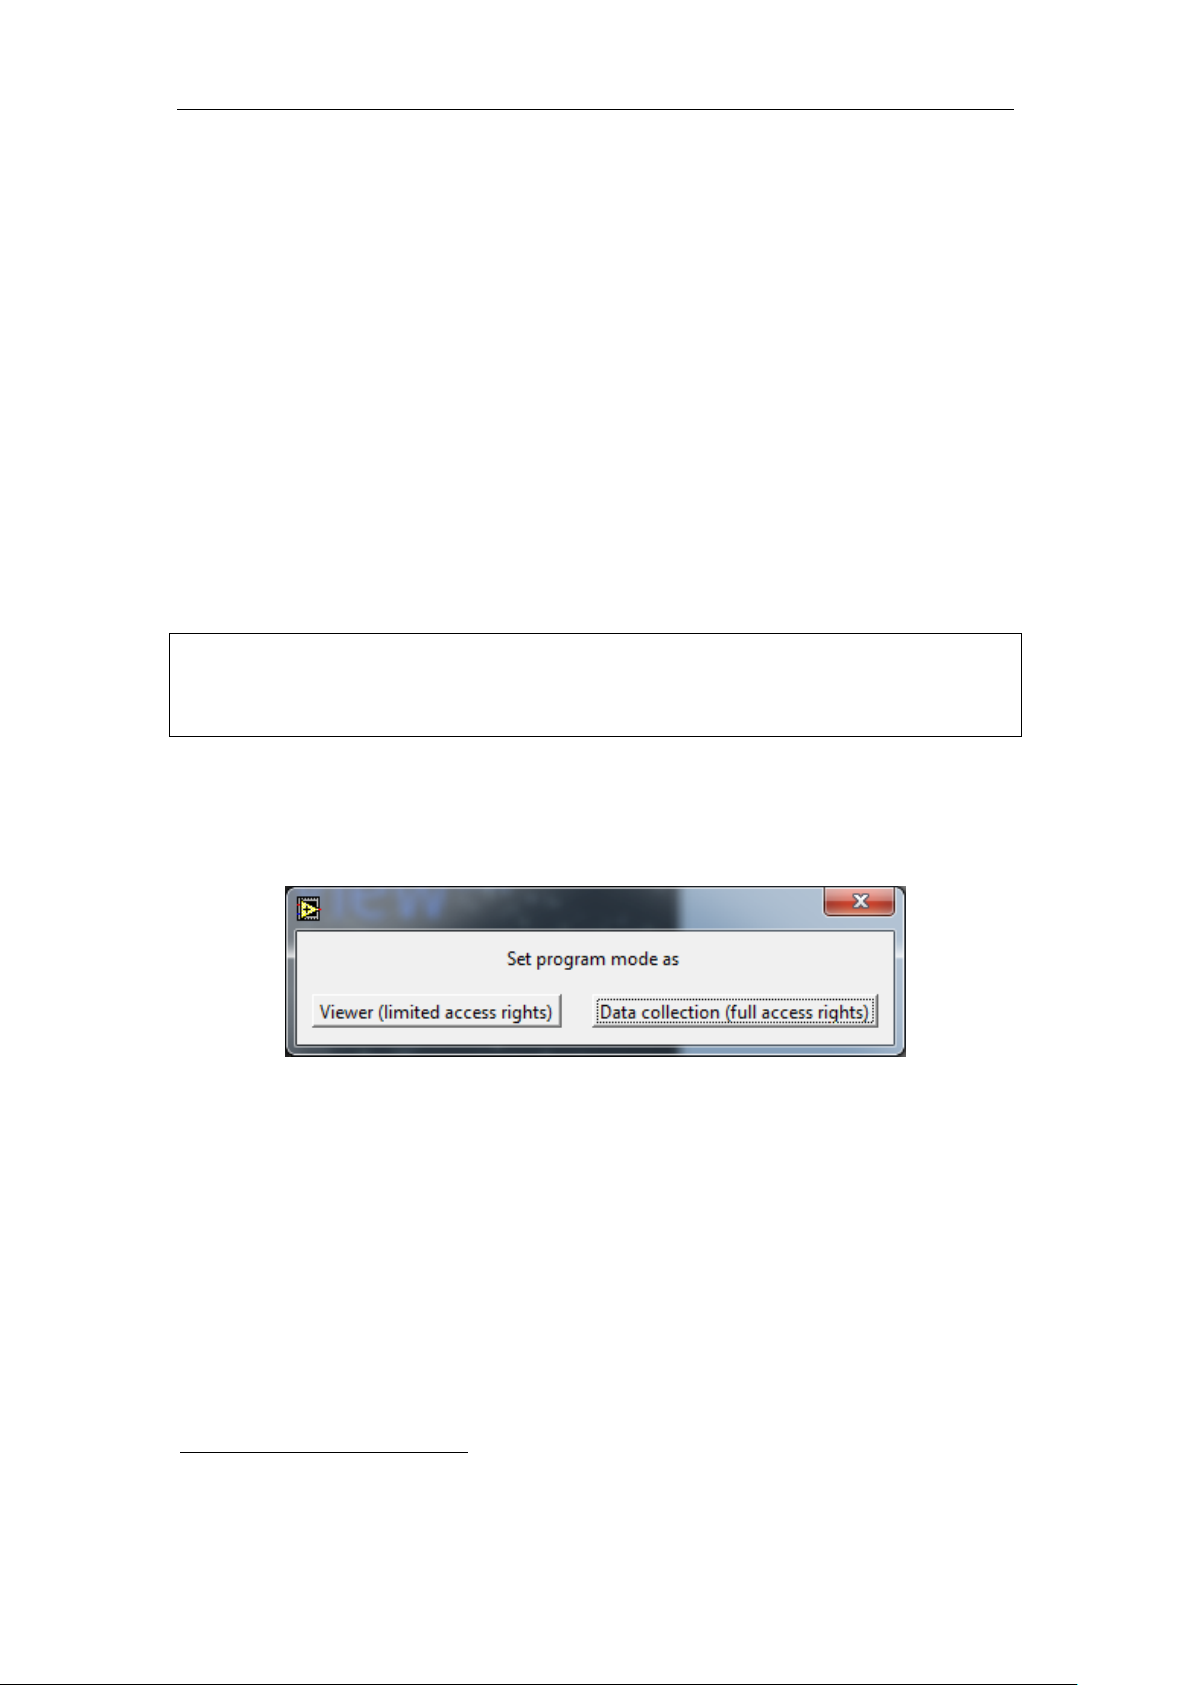
When NucleoView is launched for the first t ime, th e window shown in figure 11 appears.
Figure 11 This start -up window allows for selection of the appropriate program mode.
You shall now select “Data collection ” mode9 for your NucleoView installation in order to
get full access rights. Once this program mode has been selected (click it using t he mouse)
NucleoView is ready for use.
9
Data collection is th e normal mode when an instrument is connected.

2 Getting started with NucleoViewTM
10
2.2.1 Viewer (limited access righ ts) mode
The Vi ewer mode is recommended for installations retrieving and viewing data over a data
network – not for collectio n of data.
In this mode it is possible to retrieve and view all data from the CM files received from a
NucleoCounter. It is possible to change all settings in the program, but it will not be saved
to the files.
2.2.2 Data collection (full access rights) mode
The Data coll ection program mode is recommended for the comput er directly connected to
the NucleoCounter via the USB interface.
In this mode it is possible to m odify and save settings and infor mation in the CM file for
later use. This mode is required if data ha s to be saved with the CM file.
The information, which can be saved, is:
Multiplication factor (from the dilution of the sample)
Operator (16 characters)
Comments (45 characters)
Data concerning the dilution
Exact amounts of Lysis buffer
Exact amounts of Stabilizing buffer
Exact amounts of sample
External dilution factor
2.2.3 Change program mode
In case you want to change the program mode follo w the d irections below.
1. Close NucleoV iew using the “QUIT” button on the Measurement tab.
2. Locate the folder “c:\nucleovi ew”.
3. Locate and delete the file “NV startup.ini” in the folder “c:\nucleoview”.

2 Getting started with NucleoViewTM
11
DO NOT use this procedure to perform regular changes between Viewer and
Data collection mode, since it can affect the ability to change parameters in
your older files. Only use this procedure if you during initial startup
accidentally chose the wrong program mode.
4. Launch NucleoView again, and you will have the possibility of making the choice of
modes again.
2.2.4 Configure text editor
First time the Viability- or Utilities tab is entered NucleoView will prompt to have a text
editor configured. In the Viability tab click “OK” and continue the calculati ons (see chapter
5.3 Configure text editor ) or proceed to the Utilities tab to configure a text editor (see
chapter 6.7 Configure text editor).
2.3 Quit NucleoView
To quit NucleoView click the “QUIT” button in the Measurement tab.
TM

2 Getting started with NucleoViewTM
12
This page was intentionally left blank
3 The structure of NucleoViewTM
13
3 The structure of NucleoView
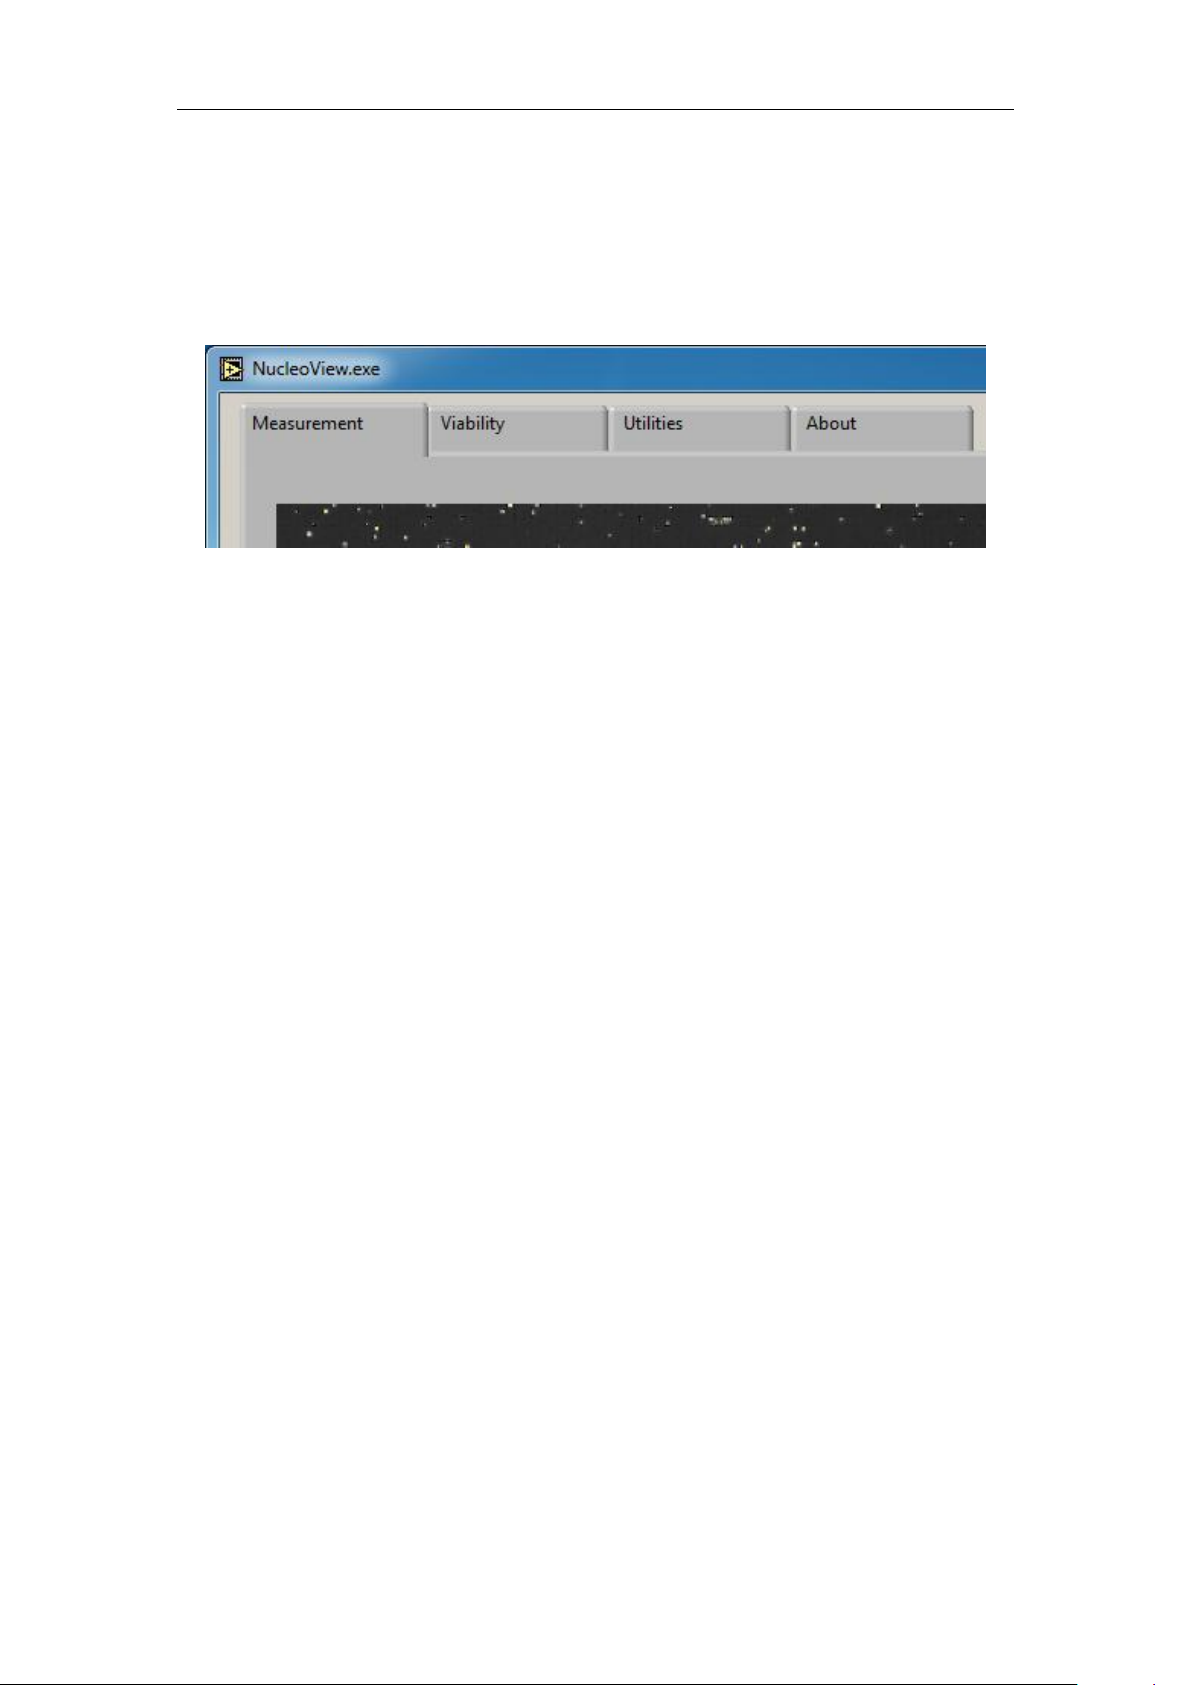
NucleoView is operated through a number of tabs. The different tabs are selected by
clicking on the corresponding tab. The tabs are shown in figure 12.
Figure 12 The four tabs of NucleoView.
The default startup screen is the Measurement tab. For detailed descr iptions of the
different tab s see the following chapters. An overview of the four different tabs is given
below.
TM
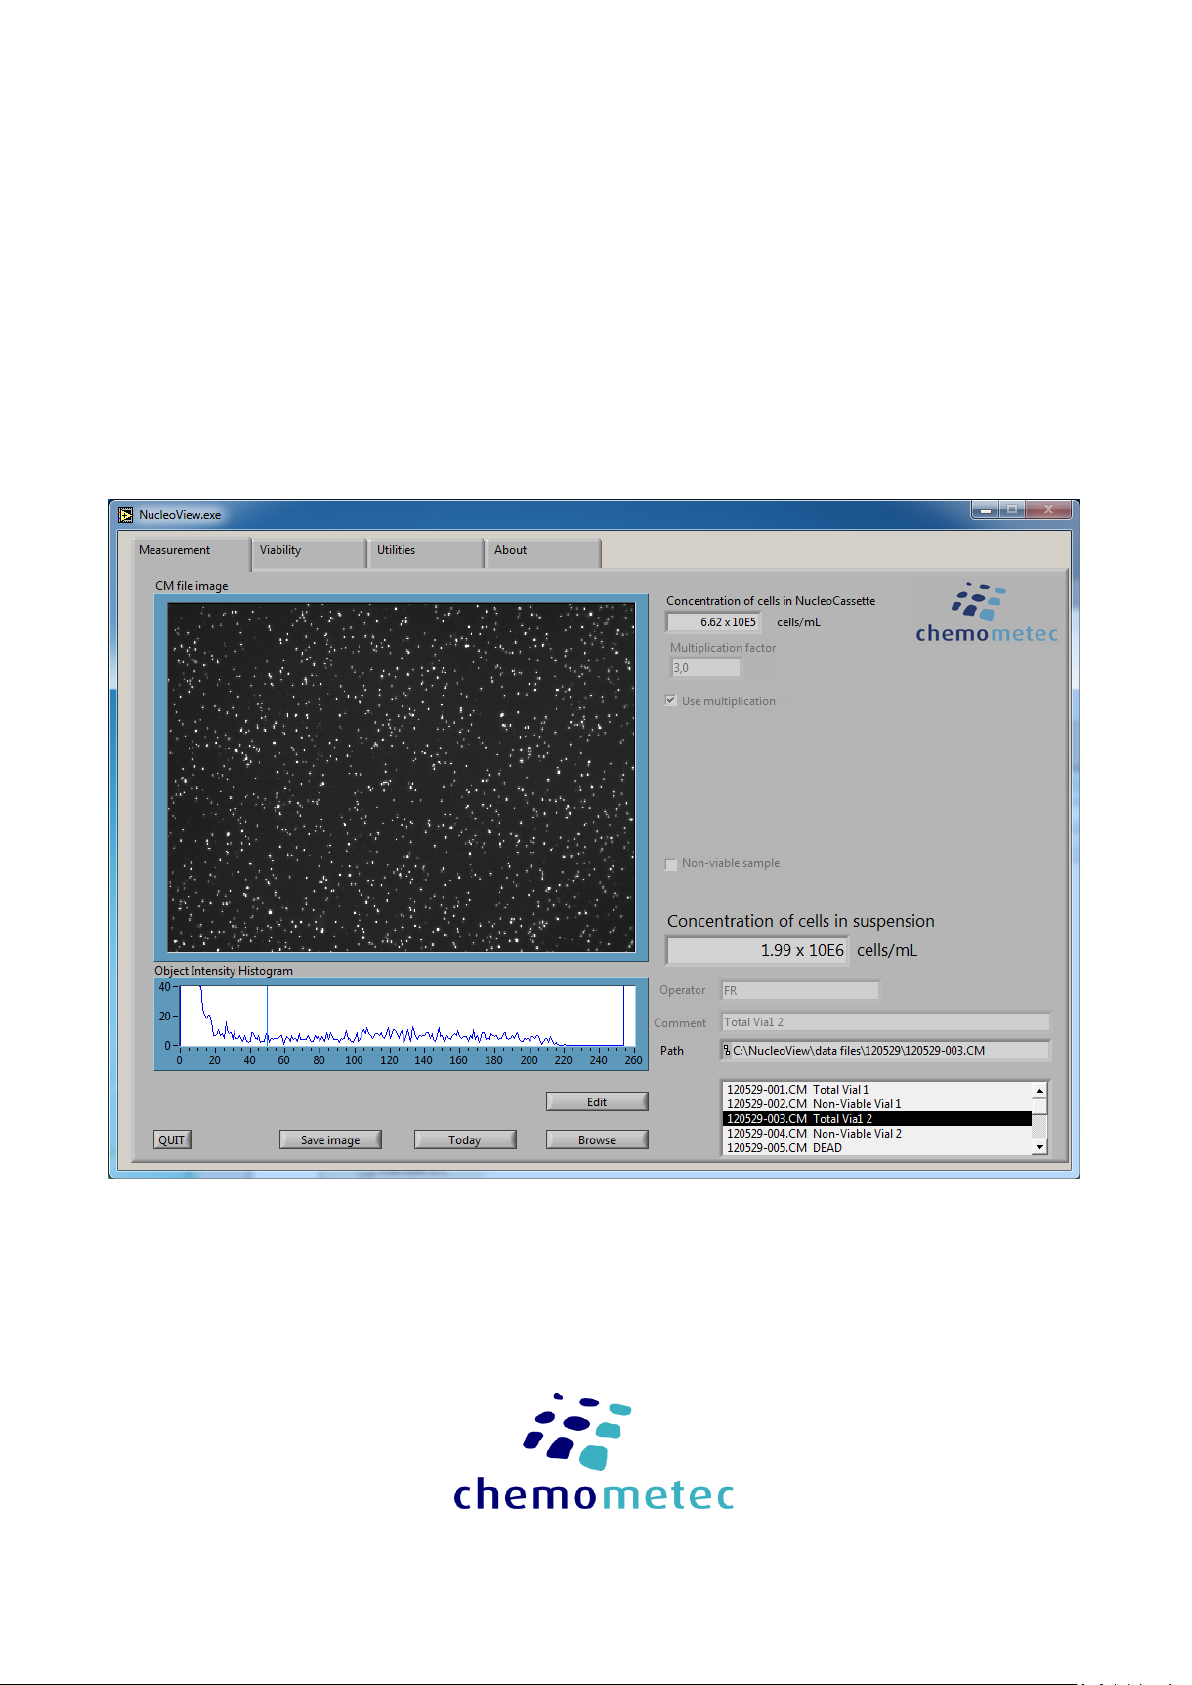
3.1 Measurement tab
This i s where data from the CM file received from the NucleoCounter is presented. The
presented data is: Concentration of cells in the NucleoCa ssette, Multiplication factor,
Concentration of cells in the suspension, Operator, Comment. Parameters s uch as the
multiplication factor, operator and comment can be changed and saved to the CM file
(provided the Data collection program mode is chosen). Pl ease refer to chapter 4 for a
detailed description of each feature.
3.2 Viability tab
On the Viability tab it is po ssible to calculate the viability on basis o f two files or
measur ements. Choose the files and NucleoView ca lculates the viability (%) and the
concentration of viable cells in the original cell suspension. The result of the calculation
can then be saved for printing or exporting purposes.
3.3 Utilities tab
Here it is possible to print and export data from a chosen session or from the saved
viability calculations. The header of the prints and exports includes various in formation
and may be customized through the Utilities tab. Furthermore it is possible to change the
default settings for the measurements (multiplication factor etc.).
3.4 About
This tab displays version information of the NucleoView.
 Loading...