

Page 1
2 YEAR WARRANTY (RESTRICTIONS APPLY)
Hoto Instruments warrants its products to the original purchaser to be free from defects
in workmanship and material under normal use and proper maintenance for two years
(one year for attachments, adapters, batteries, and cables) from original purchase. This
warranty shall not be effective if the product has been subject to overload, shock load, misuse, negligence, accident or repairs attempted by others than Hoto Instruments.
During the warranty period, we will, at our option, either repair or replace defective
products. Please call our customer service department for a return authorization number
and return the defective product to us with freight prepaid.
The foregoing warranty constitutes the SOLE AND EXCLUSIVE WARRANTY, and we
hereby disclaim all other warranties, express, statutory or implied, applicable to the products,
including but not limited to all implied warranties of merchantability and fitness. In no
event shall Hoto Instruments be liable for any incidental or consequential damages.
Model ESL-20
LED Stroboscope
Specifications subject to change without notice
03/08
INSTRUCTION MANUAL
Page 2
Model ESL-20 LED Stroboscope
Introduction
Model ESL-20 is an enhanced LED array, battery operated, stroboscope
designed to measure and observe rotating, reciprocating and linear
motion in a large variety of production, quality control and academic
applications.
●
Enhanced LED array with 96 lights
●
0 to 120,000 flashes per minute with floating decimal display
●
LEDs never need replacements
●
Extended battery life – 10 hours continuous use at 6,000 rpm/fpm
●
Rate Multiplier(x2)/Divider(÷2) for fast synchronization and true
rpm confirmation
●
19 non-volatile data memory, last reading recall
●
External Trigger
●
Digital Phase Shift by 1° increments
●
Rugged Aluminum Housing
Important
Do not look directly at the emitted light.
Instrument is fragile – handle with care.
Do not operate instrument in a humid or dusty environment.
To clean, wipe surface with a damp, soapy cloth. Avoid harsh chemicals.
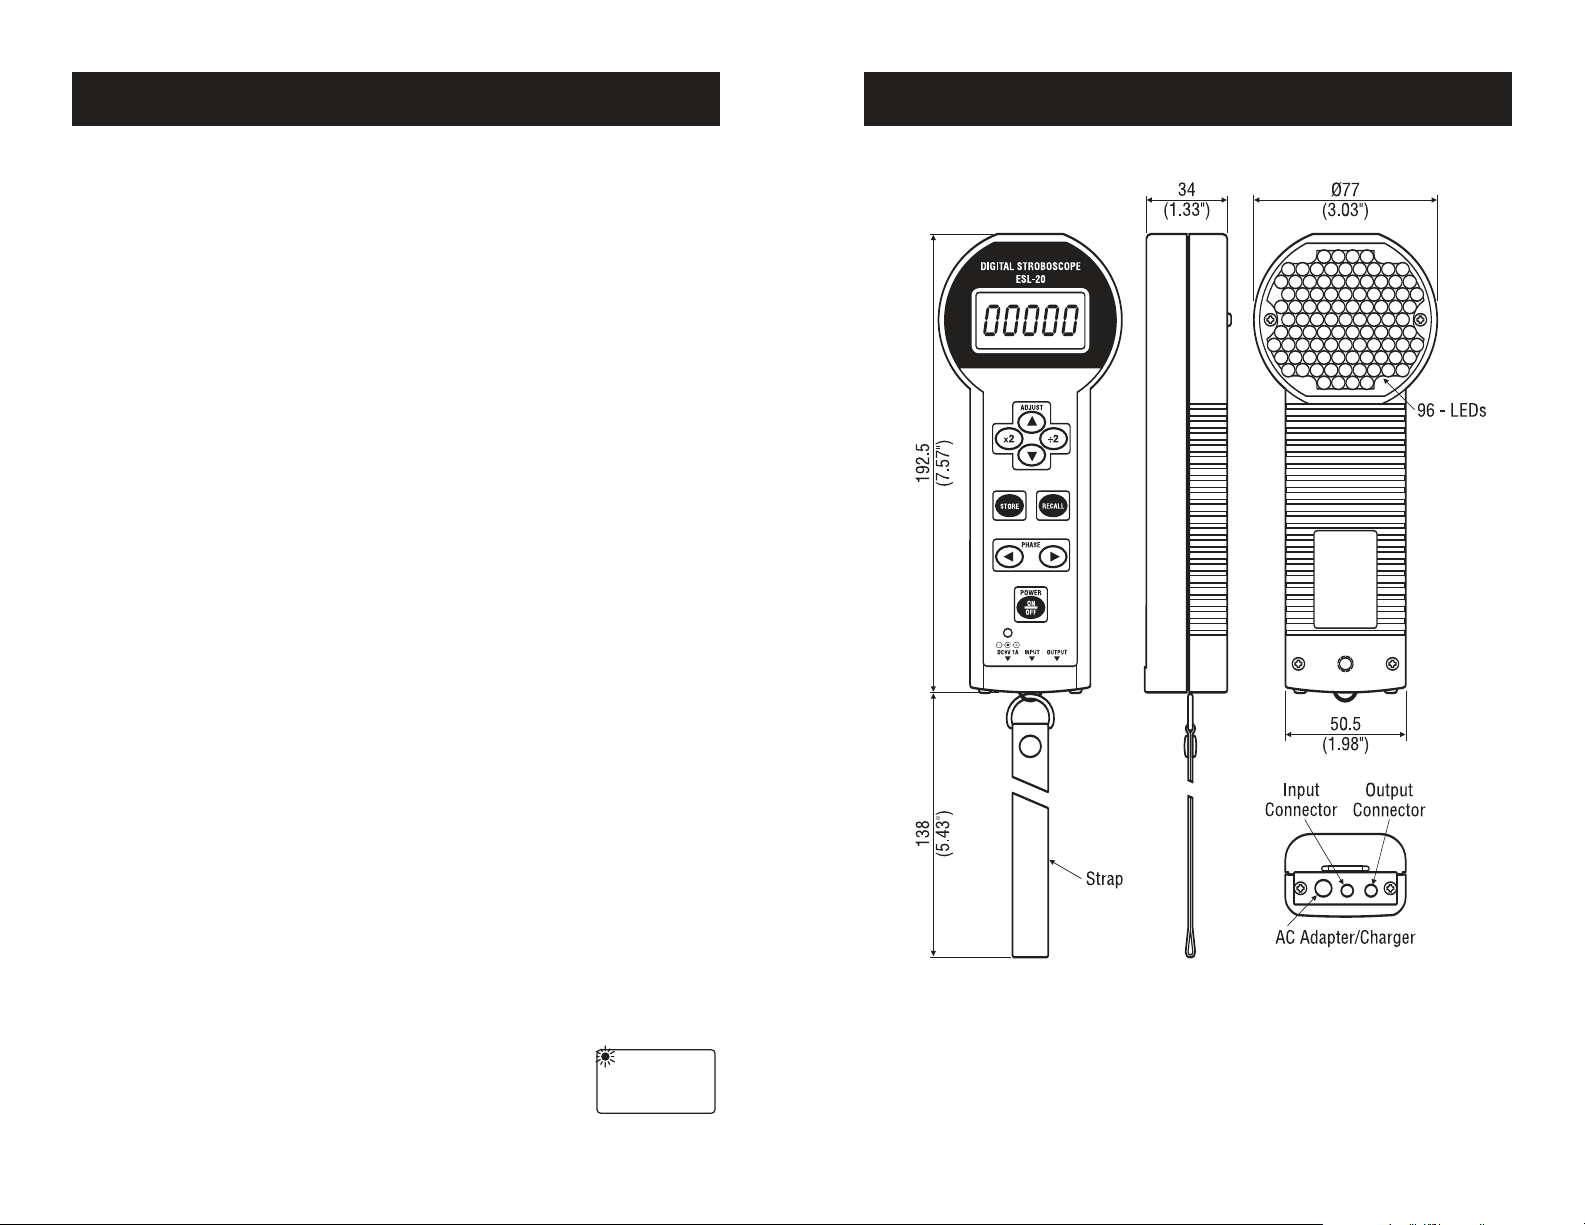
Dimensions
Operation
1. When you receive your ESL-20 it may not be fully charged. Connect
the unit to the AC adapter/charger; a full charge takes about 6 hours.
Automatic shutoff prevents overcharging. The AC adapter/charger
may be used to operate the strobe but the battery is not charged
during operation.
2. The ESL-20 can be handheld or tripod mounted. When mounting
the unit, the tripod screw (1/4-20UNC) should not exceed 8mm.
3. Visually note a unique feature or physically mark the object to be
measured with reflective tape or a chalk mark.
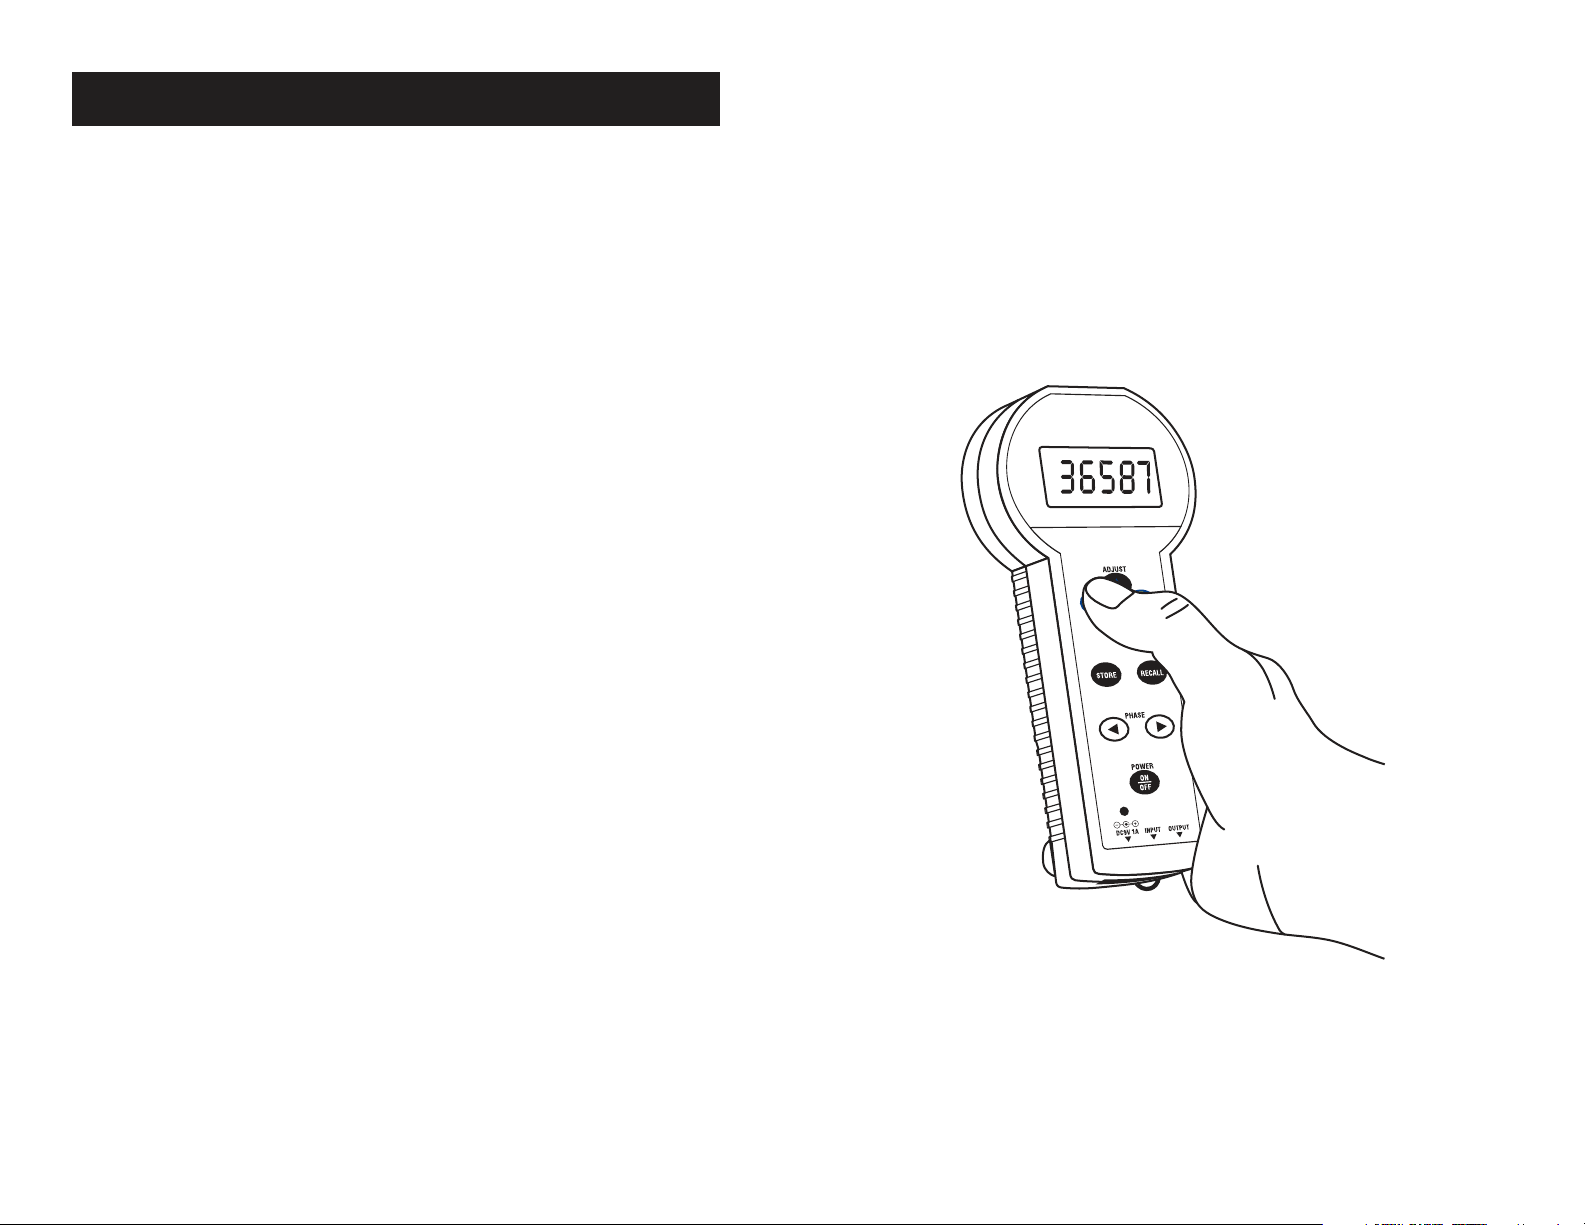
4. Press the
on the display and the strobe will flash at 3,000 fpm
(factory default) or the previous power down value.
POWER switch, the power icon will flash
Specifications subject to change without notice.
page 7page 2
Page 3

2X SPEED
4X SPEED
TRUE RPM
1/2 SPEED
1/4 SPEED
Recharging the Battery
BATT
IMPORTANT!
exclusively and plug into the correct AC output; others will
cause damage.
When the Battery icon flashes on the display, turn off the unit and
connect to the AC adapter/charger. The indicator light near the On/Off
button will flash and turn solid as the unit is charged. The indicator will
go off when the strobe is fully charged.
Use the provided AC adapter/charger
Specifications
Range Resolution
6.0 – 9999.9 fpm/rpm ±0.1 fpm/rpm
10000 – 120000 fpm/rpm ±1 fpm/rpm Display flashes over 100000 rpm
> 120000 fpm/rpm “E” on Display (Strobe cut-off)
Accuracy ±0.007%, ±1LSD
Power NiMH rechargeable battery
Display 12mm, 5 digit LCD
Light Source LED Array
Phase Shift 0 – 359° in 1° increments
Flash Rate Coarse Adjust Press x2 or ÷2
Flash Rate Fine Adjust Press v or
Synchronous Output NPN Open collector 30V, 10mA max., 100 µs pulse width
Synchronous Input Low level: 0~0.8VDC, High level: 2.5~30VDC,
or use with NPN open collector output,
50µs minimum pulse width, negative edge trigger
Tripod Thread ¼ - 20 UNC
Operating Temperature 0 – 45°C
Storage Temperature -10 – 50°C
Weight 1.2 lb/540 g
Standard Accessories Carrying case, AC Adapter/Charger
v
(adjustable rate)
BATTERY ICON
BATTERY ICON
EXTERNAL
TRIGGER ICON
PHASE SHIFT
BY 1° PER CLICK
OR HOLD
BATTERY INDICATOR
UNITS
UNITS
MEMORY LOCATIONS 1-19POWER ICON
BOTTOM VIEW
INPUT
OUTPUT
AC ADAPTER/CHARGER
4. Aim the ESL-20 at object. To approximate true
rpm, rapidly increase the flash rate by pressing
x2 until multiple images of the feature or mark
appear almost frozen.
v
Use or v to adjust the flash rate until the images
of the feature or mark appear frozen.
By holding or v switch, the flash rate changes
v
more rapidly the longer the switch is held down,
then resets 1.5 seconds after it is released.
Advanced users: After you release the or
v
v switch,
the rate of change is indicated by a flashing digit.
The place of the flashing digit advances from second
to third as the switch is held longer. While a digit is
flashing, press the phase shift switches < or > to
move the place of the flashing digit higher or lower.
Then press or
v
v switch to change the flash rate by
that amount.
5. Confirm true rpm by pressing ÷2 until a single image appears. Then
press ÷2 again. If a single image appears again, press x2 for true rpm.
If true rpm cannot be confirmed repeat steps four and five.
page 3page 6
Page 4

Memory Store & Recall
–––––
Memory Functions
Press STORE to save up to 19 flash rates. When STORE is pressed the
memory location number in the upper right corner of the display and the
value flashes to confirm storage. Data is saved to the next available memory
location until 19 values are stored and no more data can be saved.
Press
RECALL to cycle through stored measurements. The memory
location numbers appear in the upper right corner of the display.
Referencing Memory to Physical Locations
To reference your tests to specific memory locations, first activate the
required number of locations by storing data (any value) in them. Then
press
RECALL until the memory location number appears, adjust the
flash rate and press STORE to overwrite the current value.
Using this method, numbered machinery or processes may be referenced
to corresponding memory location numbers and recalled for quick
retests so only fine adjustments to the flash rate are necessary.
Clear Memory
With power on, simultaneously press STORE and
RECALL for a minimum of four seconds. The display will
show a row of dashes and all memory locations will be
erased. To erase an individual memory press
RECALL to
select a specific memory location, adjust the flash rate, then press STORE.
Power Management
After your stroboscope is set to a constant flash rate, the
instrument will automatically power off after two minutes.
Press any key except POWER to extend the operating time
another two minutes.
To disable power management, turn off the unit, then press
and hold
STORE while pressing POWER. The Power
icon flashes during normal operation and remains steady
when power management is off.
External Triggering Input
Insert a 3.5mm phone plug into the base of the
strobe. See diagram and specifications for details.
POWER
MANAGEMENT ON
POWER
MANAGEMENT OFF
When the strobe receives an input signal, the External
Trigger icon flashes at the bottom left of the display. The
strobe’s flash rate corresponds to the frequency of the
input signal. The display will indicate this rate in flashes
EXTERNAL TRIGGER ICON
per minute. To disable External Trigger Mode, turn off the
strobe and remove the input plug.
To synchronize two ESL-20 stroboscopes, connect one ESL-20 output
port to the other strobe's input port (this one will be the slave).
Digital Phase Shift
The input signal’s cycle is 360°. Alternatively, the delayed angle of the
input cycle can be viewed and displayed by adjusting the > and < keys.
The range of this adjustment (phase shift) is 0 to 359°. Three seconds
after the phase angle is set the display will return to flashes per minute,
while maintaining the phase shift setting. When the instrument is
switched off, the phase shift setting is reset to zero.
page 5page 4
 Loading...