

Page 1

116
OI407G-2000
01.0 Introduction . . . . . . . . . . . . . . . . . . . . . . . . . . . . . . . . . . . . . . . . . . . . . . . 02
1.1 Applications
02.0 Safety Precautions . . . . . . . . . . . . . . . . . . . . . . . . . . . . . . . . . . . . . . . . . 03
03.0 Contents of Complete Outfit . . . . . . . . . . . . . . . . . . . . . . . . . . . . . . . . . 04
04.0 Overview of CDT-2000HD . . . . . . . . . . . . . . . . . . . . . . . . . . . . . . . . . . 05
4.1 LCD Display
4.2 Front Panel Key Functions
05.0 Installing Batteries . . . . . . . . . . . . . . . . . . . . . . . . . . . . . . . . . . . . . . . . . 06
06.0 Measuring RPM . . . . . . . . . . . . . . . . . . . . . . . . . . . . . . . . . . . . . . . . . . . 07
6.1 Contact Operation
6.2 Non-Contact Operation
07.0 Measuring Surface Speed or Length . . . . . . . . . . . . . . . . . . . . . . . . . . 09
08.0 Using Optional Surface Speed Wheels . . . . . . . . . . . . . . . . . . . . . . . . . 10
09.0 Memory System . . . . . . . . . . . . . . . . . . . . . . . . . . . . . . . . . . . . . . . . . . . 11
10.0 Specifications . . . . . . . . . . . . . . . . . . . . . . . . . . . . . . . . . . . . . . . . . . . . . 12
11.0 Spare Parts & Optional Accessories . . . . . . . . . . . . . . . . . . . . . . . . . . . 13
12.0 Removing the Protective Rubber Shell . . . . . . . . . . . . . . . . . . . . . . . . . 14
13.0 Warranty . . . . . . . . . . . . . . . . . . . . . . . . . . . . . . . . . . . . . . . . . . . . . . . . . 15
Table of Contents
NOTES
Page 2

2 15
1.0 INTRODUCTION
The CDT-2000HD Digital Tachometer combines the best features of
contact and non-contact tachometers for measuring rotational speed,
surface speed and length.
When used in the non-contact operating mode, a small piece of
reflective tape is applied to the rotating element (wheel, shaft, etc.).
The CDT-2000HD uses a visible LED light source to accurately
measure the RPM from up to 24” (60 cm) away from the “target”.
In the contact operating mode, the speed is sensed using one of the contact
adapters supplied with the instrument.
In applications where surface speed or linear speeds are to be measured,
the universal wheel is used for direct readout of feet/min, meters/min,
inches/min, meters/sec and feet/sec, as selected by the user.
The CDT-2000HD can also be used to measure the accumulated total of
continuously running material such as paper, wire/yarn being wound on a
spool, or for checking the calibration of on-line counters and totalizer devices.
It will display totals in feet, meters or inches.
1.1 Applications
Contact RPM — Used to measure the speed of
rotating motors, shafts, pulleys, gears, etc.
Non-Contact RPM — Used when contact
measurement is not possible due to access space
restrictions, safety concerns, etc.
Linear Speed and Length — Used to
measure the linear speed or length of
moving surfaces, such as conveyor belts,
printed materials, webs of fabric or
paper, etc.
13.0 Warranty
ELECTROMATIC Equipment Co., Inc. (ELECTROMATIC) warrants to the
original purchaser that this product is of merchantable quality and confirms
in kind and quality with the descriptions and specifications thereof. Product
failure or malfunction arising out of any defect in workmanship or material
in the product existing at the time of delivery thereof which manifests itself
within five years from the sale of such product, shall be remedied by repair
or replacement of such product, at ELECTROMATIC’s option, except where
unauthorized repair, disassembly, tampering, abuse or misapplication has
taken place, as determined by ELECTROMATIC. All returns for warranty
or non-warranty repairs and/or replacement must be authorized by
ELECTROMATIC, in advance, with all repacking and shipping expenses
to the address below to be borne by the purchaser.
THE FOREGOING WARRANTY IS IN LIEU OF ALL OTHER
WARRANTIES, EXPRESSED OR IMPLIED, INCLUDING BUT NOT
LIMITED TO, THE WARRANTY OF MERCHANTABILITY AND
FITNESS FOR ANY PARTICULAR PURPOSE OR APPLICATION.
ELECTROMATIC SHALL NOT BE RESPONSIBLE NOR LIABLE FOR
ANY CONSEQUENTIAL DAMAGE, OF ANY KIND OR NATURE,
RESULTING FROM THE USE OF SUPPLIED EQUIPMENT, WHETHER
SUCH DAMAGE OCCURS OR IS DISCOVERED BEFORE, UPON OR
AFTER REPLACEMENT OR REPAIR, AND WHETHER OR NOT SUCH
DAMAGE IS CAUSED BY MANUFACTURER’S OR SUPPLIER’S
NEGLIGENCE WITHIN FIVE YEARS FROM INVOICE DATE.
Some State jurisdictions or States do not allow the exclusion or limitation of
incidental or consequential damages, so the above limitation may not apply
to you. The duration of any implied warranty, including, without limitation,
fitness for any particular purpose and merchantability with respect to this
product, is limited to the duration of the foregoing warranty. Some states
do not allow limitations on how long an implied warranty lasts but, not
withstanding, this warranty, in the absence of such limitations, shall extend
for five years from the date of invoice.
ELECTROMATIC Equipment Co., Inc.
600 Oakland Ave. Cedarhurst, NY 11516—USA
Tel: 1-800-645-4330/ Tel: 516-295-4300/ Fax: 516-295-4399
Every precaution has been taken in the preparation of this manual. Electromatic Equipment Co., Inc., assumes
no responsibility for errors or omissions. Neither is any liability assumed for damages resulting from the use of
information contained herein. Any brand or product names mentioned herein are used for identification purposes only, and are trademarks or registered trademarks of their respective holders.
Page 3
3
2.0 Safety Precautions
All operators should wear safety goggles when using this or any other
tachometer. Failure to do so could result in serious injury!
1. Check condition of housing, slide-on Contact Adapter and
split mounting hubs of push-in Contact Cone, Surface Speed
Wheel and any other accessories. Replace those that are worn,
loose-fitting or cracked. The Contact Adapter shaft should
rotate freely.
2. When operating in the contact mode, be sure Contact Adapter
fits snugly into the housing grooves.
3. When using the Surface Speed Wheel accessory, make sure it
its the tachometer shaft snugly. In operation, keep the wheel
perpendicular and parallel to the moving surface to prevent it
from running off the tachometer shaft.
4. Do not use the standard surface speed wheel for speeds in
excess of 1000 feet per minute. For higher speeds, specify the
optional Heavy-Duty Surface Speed Wheel (DT12) with
set-screw mounting.
5. Store the instrument in its carrying case when it is not in use
14
12.0 Removing Protective Rubber Shell
The gauge is supplied with a durable rubber shell that provides an added
measure of physical and environmental protection in harsh applications.
To remove the shell, follow the procedure outlined below:
1. Using your thumbs, slide the rubber shell
up and off of one corner of the gauge.
Repeat for the other corner
2. Pull the shell down until it is completely
off the corners of the gauge, the pull the
gauge forward and out of the shell.
3. Replace the shell by sliding the gauge
bottom first into the large center opening,
then, one at a time, slip the corners of the
shell back over the gauge.
Page 4

11.0 SPARE PARTS & OPTIONAL ACCESSORIES
Standard Spare Parts
CDT-ADAP Slide-In Contact Adapter
DTCA Cone Tip Adapter
DT6 6" (152mm) Circumference Surface Speed Wheel
DT-TAPE 10 Strips of Reflective Tape - 1/2" x 4" (12 x 100mm)
Optional Accessories
DTFA Funnel Tip Adapter
DTSX Shaft Extension
CDT-WHEEL 0.1 meter Circumference Surface Speed Wheel
DT12 12" Circumference Surface Speed Wheel
4
3.0 CONTENTS OF COMPLETE OUTFIT
The CDT-2000 is supplied with the following accessories in a foam-fitted,
carrying case:
1. Meter with molded rubber shell
2. Slide-on Contact Adapter
3. 6" Circumference Surface Speed Wheel
4. Cone Tip Measuring Adapter
5. Reflective Tape (10 strips)
6. Two AA Batteries (not shown)
7. NIST Calibration Certificate (not shown)
8. Instruction Manual (not shown)
1
3
2
4
5
13
Page 5

5
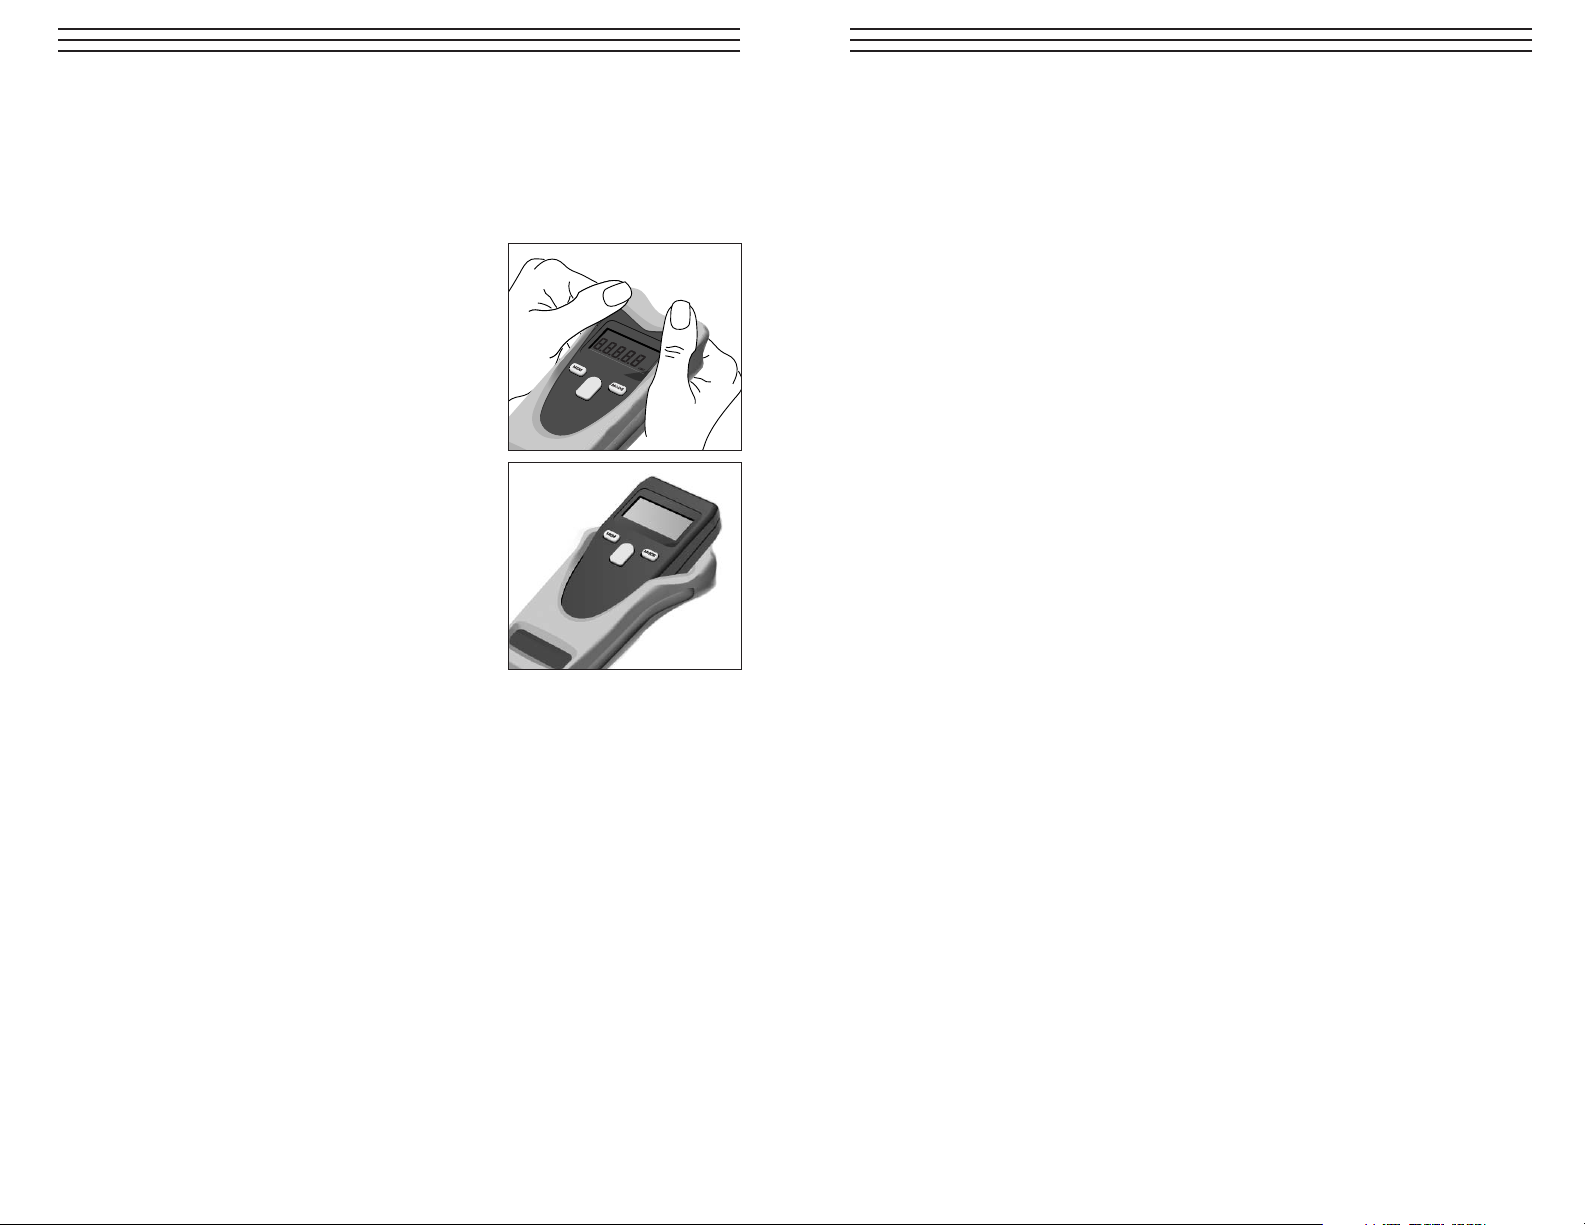
4.0 OVERVIEW OF CDT-2000HD
4.1 LCD Display
1. Units of Measure Indicators—Indicates which unit of measure is
being shown on the display.
2. On-Target Indicator — Flashes to indicate that the unit is lined up
correctly for an accurate non-contact measurement.
3. Memory Indicators — Indicates which type of measurement
stored in memory (last, max., min., avg) is being displayed.
4. Low Battery Indicator — Indicates that batteries need replacement.
4.2 Front Panel Key Functions
5. MEM: Access the memory. Each time the key is pressed
the values stored in memory will be recalled to the display.
6. MODE: Each time the MODE key is pressed, the units of measure
will change.
7. MEASURE: The MEASURE Key performs the following
functions:
• Turns on the power
• Starts and stops the measuring period
• Exits from the memory mode
• Selects the displayed wheel type when using one of the optional
surface speed wheels.
1
2
5
6
7
4
3
12
Resolution .01 from 0 –100
.1 from 100 – 1,000
1 from 1000 – 99,999
Accuracy ± 0.02% of reading or ±1 digit
Display 5-Digit LCD, 10mm high
Decimal Point Automatic
Memory System Maximum, minimum, average and last reading (retained in
memory for the life of batteries)
Measurement System
Non-Contact
Visible LED light beam
Contact
Contact adapter
Engineering units
RPM
RPM
Surface Speed
Feet/min, inches/min and meters/min
Length
Feet, inches, meters
Sensing Distance Up to 24 inches (60 cm)
Display Update Time 0.5 seconds or one measuring period
Auto Power Off After 30 seconds of non-use (minimum, maximum
average, and last reading retained in memory)
Battery Life 40 hours continuous use (approx.) with alkaline batteries
Battery Type 2 AA (1.5 V) or rechargeable
Weight 6 ounces (170 grams)
Housing Material ABS Plastic
Operating Temperature 32 to 122° F (0 to 50° C)
Storage Temperature – 4 to 158° F (–20 to 70° C)
Accessories Included Contact adapter, cone tip, 6" circumference universal
surface speed wheel, reflective tape, NIST-traceable
calibration certificate, operating instructions and foamfitted, hard-plastic carrying case
10.0 SPECIFICATIONS
Optical 1 – 99,999 rpm
Mechanical 1 – 99,999 rpm
Measuring Ranges – rpm
0 – 99,999 m, / 0 – 99,999 ft / 0 – 99,999 in
Measuring Ranges – length
Other Specifications
Wheel Size 6" 12" 0.1 m
m/min 0.10–1524 0.40–609.6 0.10–1999
ft/min 0.40–5000 0.40–2000 0.40–6550
in/min 4.0–60.00 4.00–24.000 4.00–78.700
m/sec 0.10–25.40 0.10–10.16 0.10–33.30
ft/sec 0.10–83.33 0.10–33.33 0.10–109
Measuring Ranges – speed
Page 6

6 11
9.0 MEMORY SYSTEM
The CDT-2000HD is supplied with
a built-in memory system which
stores the last measurement, maximum
measurement, minimum measurement,
and the average measurement which
occurred during a measuring period.
A measuring period is the interval of time while the Measure key is
depressed. The stored values are retained in memory even when the power
turns off (auto power off). To recall the stored values after auto power off:
1. Press the Measure key to turn the power on
2. Press the MEM key to recall the desired value
The Memory key accesses the CDT-2000HD’s built-in
memory. Each time the MEM key is pressed the values
stored in memory will be recalled to the display in the sequence listed
below. The appropriate memory indicator will be shown together with
the recalled value on the display.
Note: When the batteries are removed, the values stored in memory
will be lost.
MEM
MEM
MAX
MIN
AV
rpm
8.8.8.8.8
MEM
MAX
MIN
AV
rpm
8.8.8.8.8
MEM
MAX
MIN
AV
rpm
8.8.8.8.8
MEM
MAX
MIN
AV
rpm
8.8.8.8.8
Last
Maximum
Minimum
Average
5.0 INSTALLING BATTERIES
1. Turn the gauge over and locate the battery
compartment. You do not have to remove
the rubber shell.
2. Open the battery compartment by pulling
down on the tab located at the top of the
battery cover and remove the cover.
Insert two AA batteries following the
orientation engraved on the inside of the
battery compartment.
3. Replace the battery cover by inserting the
two tabs located on the bottom edge of the
cover into the matching slots in the housing.
4. Push the cover closed until the tab at the
top of the battery cover “clicks” into a
locked position.
5. Replace the cut-out section of the protective
rubber shell.
click
Page 7

7
6.0 MEASURING RPM
6.1 Contact Operation - RPM
1. Install the Slide-on Contact Adapter.
Push on securely
2. Slide the Cone Tip adapter over the shaft of
the instrument. Be sure to align the pin on
the side of the shaft with the slot in the
adapter. Push on securely.
3. Select the Contact RPM mode by pressing
the MODE key until the rpm symbol appears
in the top left corner of the LCD display
4. Position the adapter carefully so that it contacts the center of
the rotating shaft. Apply enough pressure to eliminate any slip.
5. Press and hold the MEASURE key to take measurements.
6. Release the MEASURE key prior to removing the instrument from
the rotating element. The LAST reading will be retained on the
display.
M
O
D
E
M
E
M
m
a
x
m
in
m
e
m
rp
m
m
/m
in
ft/m
in
in
/m
in
RPM
10
8.0 USING OPTIONAL-SIZED SURFACE SPEED WHEELS
The following wheels can be used with the CDT-2000HD
8.1 Setting Wheel Size
1.Press MEM and MODE keys
simultaneously & release. The
currently selected wheel size will
show in the display
2. Change this setting to match the wheel
being used by pressing the MODE key.
Each time the MODE key is pressed,
the wheel type will change as follows:
6" ➔ 0.1 ➔ 12" and repeat
3. When the correct size is shown on the
display, press the MEASURE key to
select.
NOTE: Factory default setting for wheel
type is 6". If wheel type is changed, the
new setting is retained in memory. When
batteries are changed, wheel type setting
will revert to factory default.
1.9"
(49mm)
Standard
6" Wheel
1.2"
(32mm)
Optional
0.1 Meter Wheel
3.8"
(97mm)
Optional
12" Wheel
8.8.8.8.8
SLOT
PIN
Page 8

7.0 MEASURING SURFACE SPEED OR LENGTH
1. Install the Slide-on Contact Adapter.
2. Slide the Surface Speed Wheel over the shaft of the
instrument. Be sure to align the pin on the side of the
shaft with the slot in the adapter. Push on securely.
NOTE: If using optional surface speed wheel,
refer to Section 8.0 before continuing.
3. Select the desired units of measure
for surface speed or length by
pressing the MODE key until the
appropriate symbol appears on the
LCD Display.
The units of measure appear in
the following sequence:
RPM➔ m/min ➔ m/sec ➔ ft/min ➔ ft/sec ➔ in/min ➔ m ➔ ft ➔ in
4. Position the wheel carefully so that it is
perpendicular to the moving surface. Apply
enough pressure to eliminate any slip.
5. Press and hold the MEASURE key to take
measurements.
6. Release the MEASURE key prior to removing the instrument from
the moving surface. The Last reading will be retained on the display.
8
6.2 Non-Contact Operation - RPM
1. Remove the Contact Adapter.
2. Attach a small piece of the supplied
reflective tape to the rotating element
(shaft, pulley, etc.).
3. Select the Non-Contact RPM mode by
pressing the MODE key until the rpm
symbol appears in the top left corner of
the LCD display
4. Aim the CDT-2000 at the target using
the red visible light beam for alignment
assistance.
5. Press and hold the MEASURE key to begin
taking measurements. The On-Target”
indicator will be displayed on the LCD
if the instrument is properly aimed at
the target (reflective tape).
6. Release the Measure key prior to removing
the instrument from the target. The last
reading will be retained on the LCD display.
Hints for Non-Contact Measurements
1. The non-reflective area should be larger than the reflective
area.
2. If the rotating element is highly reflective, cover it with black
tape or paint to improve the contrast between the reflective
tape and the surface of the rotating element.
M
O
D
E
M
EM
m
a
x
m
in
m
em
rp
m
m
/m
in
ft/m
in
in
/m
in
9
M
ODE
M
EM
m
a
x
m
in
m
e
m
rp
m
m
/m
in
ft/m
in
in
/m
in
8.8.8.8.8
Reflective Tape
8.8.8.8.8
SLOT
PIN
Page 9

CDT-2000HD
Digital Tachometer
Operating Instructions
ELECTROMATIC
E Q U I P M E N T C O., I N C.
600 Oakland Ave., Cedarhurst, NY 11516–U.S.A.
TEL: 516-295-4300
• FAX: 516-295-4399
CHECK•LINE
®
INSTRUMENTS
CHECK•LINE
®
BY ELECTROMATIC
 Loading...