

Page 1
■ MEGOHMMETRES
■ MEGOHMMETERS
■ MEGOHMMETER
■ MEGAOHMMETRI
■ MEGAÓHMETROS
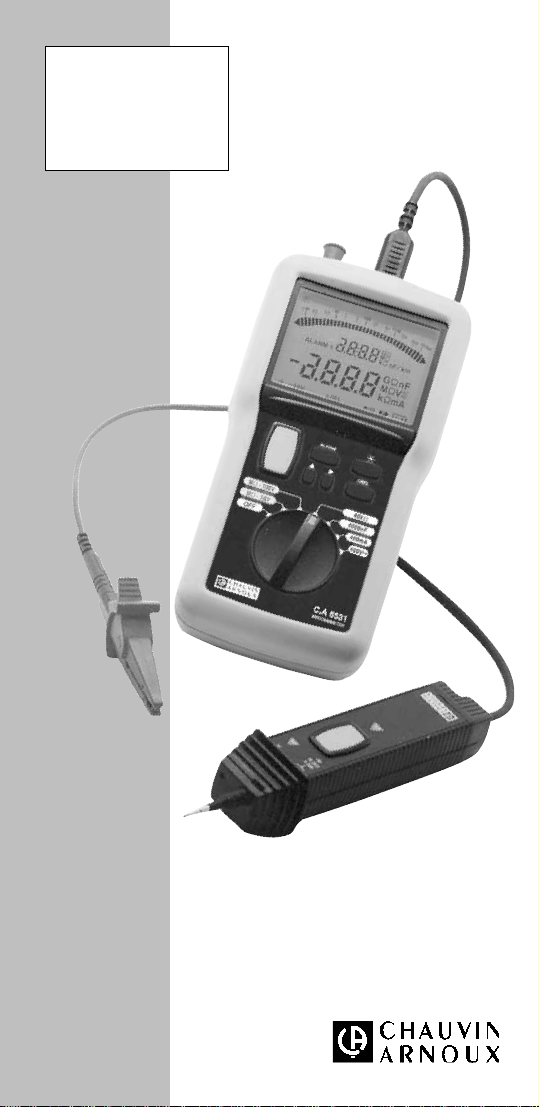
C.A 6531
C.A 6533
FRANÇAIS
ENGLISH
DEUTSCH
ITALIANO
ESPANOL
Notice de fonctionnement
User's manual
Bedienungsanleitung
Libretto d’Istruzioni
Manual de Instrucciones
1
Page 2
English
Meaning of the symbol
Warning ! Please refer to the User’s Manual before using
the instrument.
In this User’s Manual, the instructions preceded by the abov e
symbol, should they not be carried out as shown, can result
in a physical accident or dammage the instrument and the
installations.
Meaning of the symbol
This device is protected by a double insulation or by a
reinforced insulation. No linking is required from the protection
earth terminal to ensure the electrical security.
Meaning of the symbol
Warning ! Risk of electric shock.
The voltage of the parts marked with this symbol may be
dangerous. For safety reasons, this symbol will light up on
the LCD screen as soon as a voltage is generated.
Thank you for purchasing a C.A 6531 or C.A 6533 insulation
tester.
To get the best service from this instrument :
■ read this user’s manual carefully
■ respect the safety precautions detailed
PRECA UTIONS FOR USE
■ Comply with the conditions for use : temperature, humidity,
altitude, degree of pollution and place of use
■ This instrument can be used on category-III installations for
voltages not exceeding 600 V in relation to the earth. Category
III meets severe reliability and availability requirements,
corresponding to permanent use on fixed industrial
installations (see IEC 1010-1 + A2).
■ Use connection accessories that comply with the applicable
IEC safety standards, with a minimum voltage and voltage
surge category at least equal to those that you use for your
measurements.
■ Respect the value and type of the fuse to avoid damaging
the instrument and cancelling the warranty.
■ Set the switch to OFF when the instrument is not in use.
■ Do not perform any insulation or resistance measurements
when the presence of a voltage is indicated.
■ Check that none of the terminals is connected and that the
switch is set to OFF before opening the instrument.
23
Page 3
CONTENTS
1. PRESENTATION................................................26
1.1 General Presentation ................................................... 26
1.1.1 The Megohmmeter ..........................................26
1.1.2 Accessories .....................................................26
2. DESCRIPTION...................................................27
2.1 Housing......................................................................... 27
2.1.1 C.A 6531 ..........................................................27
2.1.2 C.A 6533 ..........................................................27
2.2 Display ..........................................................................27
2.2.1 Symbols ...........................................................27
2.2.2 Bargraph ..........................................................28
2.2.3 Digital display ...................................................28
2.3 Control keyboard ..........................................................28
2.3.1 Yellow key ........................................................28
2.3.2 ALARM key......................................................28
2.3.3 Key .............................................................28
2.3.4 Key .............................................................29
2.3.5 Key ............................................................29
2.3.6 DREL key ......................................................... 29
3. MEASUREMENT FUNCTIONS .........................29
3.1 Insulation ......................................................................29
3.1.1 AC / DC voltage measurement........................29
3.1.2 Insulation Measurement .................................. 30
3.2 Resistance ....................................................................30
3.3 Capacitance (C.A 6531) ...............................................31
3.4 AC / DC current (C.A 6531)..........................................31
3.5 AC voltage (C.A 6531)..................................................31
4. SPECIAL FUNCTIONS......................................31
4.1 Start/stop ......................................................................31
4.2 Automatic shutdown ..................................................... 32
4.2.1 Deactivation of the automatic
4.3 Autotests.......................................................................32
4.4 Buzzer...........................................................................32
4.5 Alarm thresholds .......................................................... 33
4.6 Relative measurements (DREL) ...................................34
4.7 Programming the capacitance
shutdown function............................................32
4.3.1 Power supply ...................................................32
4.3.2 Fuse (C.A 6531) ..............................................32
4.4.1 The different audible signals ...........................32
4.4.2 Deactivation of the buzzer...............................33
4.5.1 Programming of the alarm thresholds .............33
4.5.2 Activation/deactivation
of the alarm thresholds ....................................34
4.5.3 Tr iggering of the alarm.....................................34
per unit length (C.A 6531) ............................................34
24
Page 4

5. USE....................................................................35
5.1 AC / DC voltage and insulation measurement............. 35
5.2 Resistance measurement ............................................36
5.3 Capacitance measurement (C.A 6531)........................36
5.4 AC / DC current measurement (C.A 6531) .................. 36
5.5 AC voltage measurement (C.A 6531) ..........................36
6. SPECIFICATIONS .............................................37
6.1 Reference conditions ....................................................37
6.2 Characteristics per function ..........................................37
6.2.1 Voltage.............................................................37
6.2.2 Insulation .........................................................37
6.2.3 Resistance .......................................................38
6.2.4 Capacitance (C.A 6531) ..................................38
6.2.5 Distance (C.A 6531) ........................................38
6.2.6 AC / DC current (C.A 6531).............................38
6.2.7 AC voltage (C.A 6531).....................................39
6.3 Power supply ................................................................ 39
6.4. Climatic conditions .......................................................39
6.5. Variations in nominal field of use ................................. 40
6.6. Limits ............................................................................40
6.7. Constr uction specifications .......................................... 40
6.8. Compliance with inter national standards .....................40
6.8.1. Electromagnetic compatibility: EC compliance41
6.8.2. Mechanical protection ..................................... 41
7. MAINTENANCE.................................................41
7.1. Upkeep..........................................................................41
7.1.1. Replacing the batteries....................................41
7.1.2. Replacing the fuse (C.A 6531) ........................41
7.1.3. Cleaning ...........................................................42
7.1.4. Storage ............................................................42
7.1.5. Calibration........................................................42
7.2. Maintenance .................................................................42
8. WARRANTY ......................................................42
9. TO ORDER ........................................................43
10. ATTACHMENT ................................................ 107
10.1 Front views ................................................................ 107
10.1.1. C.A 6531 ...................................................... 107
10.1.2. C.A 6533 ...................................................... 108
10.2. Examples of applications .......................................... 109
10.2.1. Insulation measurements
on electrical installations .............................. 109
10.2.2. Measurement on electrical or telecom cable.... 110
10.2.3. Capacitance measurement
between wires (C.A 6531) ............................ 111
10.2.4 Insulation measurements on motors ............ 112
10.3 Accessories ............................................................... 113
10.3.1. Shoulder bag ................................................ 113
10.3.2. Use of the shoulder bag ............................... 113
10.3.3. Remote control probe ................................... 114
25
Page 5

1. PRESENTATION
1.1 General Presentation
1.1.1 The Megohmmeter
These portable instruments function with batteries or a vehicle
battery.
They can be used to check insulation and voltages and to
measure resistances.
The C.A 6531 can also be used for:
■ measurement of the capacitance of a telephone line
■ current measurement
■ measurement of the pure alternating component of a DC
voltage.
These megohmmeters help to ensure the safety of electrical
and telephone installations.
The acquisition, processing and display of the measurements
are managed by a microprocessor.
They offer a wide range of advantages such as:
■ automatic detection of the presence of a dangerous voltage
on the terminals in MW calibres (all insulation measurement
blocked if U > 25 V),
■ protection of the instrument against external voltage surges,
■ operator safety by means of automatic discharge of the high
voltage on the equipment tested,
■ display of the difference compared to a measurement value
in memory,
■ measurement of the length of a telephone line according to
its capacitance per km unit length (C.A 6531),
■ automatic shutdown of the instrument to save the batteries
and indication of the battery charge,
■ fuse testing by periodic checks during current measurement
(C.A 6531),
■ a large backlit LCD screen with a wide range of indicators
making it very easy for the user to read.
1.1.2 Accessories
■ Carrying bag
When placed in the carrying bag, the instrument can either be
carried on the shoulder to transport it or around the neck for
use. This leaves the users’ hands free to perform the
measurements. Since the instrument is perpendicular to the
chest, it is easy to read.
At the bottom of the shoulder bag, underneath the instrument,
there is a pocket for the leads, the touch prod, the crocodile
clamp and the remote control probe.
■■
■ Remote control probe
■■
This probe is plugged in to a special connector.
It can be used for all the measurements, including activation of
insulation testing, using the yellow button which works in e xactly
the same way as the button on the instrument.
(part of standard delivery, see § 10)
(option, see § 10)
26
Page 6
A pushbutton on the back of the probe allows you to light the
measuring point (approx. 500 lux). This function is very useful,
since insulation testing is performed on installations with the
power off!
2. DESCRIPTION
2.1 Housing
See the diagrams of the instruments in § 10 (appendix at the
end of this user’s manual)
2.1.1 C.A 6531
➀ 3 safety terminals, Ø 4 mm (marked “mA”, “ + “ and “ - “)
Next to the “ – “ terminal, there are two additional contacts
for connecting the remote control probe (3-point connector).
➁ 7-position switch:
OFF , MW - 50 V, MW - 100 V, 40 kW , 4000 nF, 400 mA, 400 V~
➂ Keys: Yellow (to activate insulation measurement), ALARM,
, , and DREL.
➃ Backlit liquid crystal display
➄ Battery compar tment + stand (not shown in the drawing)
2.1.2 C.A 6533
➀ 2 x 4 mm Ø safety terminals (labelled “ + ” and “ G “), a 3-
point jack for the guarded lead or the remote control probe
(labelled “ - “).
➁ 6-position switch:
OFF, MW - 50 V, MW - 100 V, MW - 250 V, MW - 500 V, 400 kW
➂ Keys: yellow (to activate insulation measurement), ALARM,
, , and DREL.
➃ Backlit liquid crystal display
➄ Battery compar tment + stand (not shown in the drawing)
2.2 Display
2.2.1 Symbols
ALARM Threshold active or threshold programming in progress
> Upper threshold
< Lower threshold
Dangerous voltage generated (only comes on if test
at 50 V)
See the user’s manual
> 25 V Voltage > 25 V present on the instrument’s terminals
DD
DREL Difference between actual measurement and
DD
measurement in memory (does not function for voltage
on the MW positions)
27
Page 7
Buzzer active
Constant operation (no automatic shutdown)
P
Batteries flat
2.2.2 Bargraph
Insulation > 1.1 GW
Insulation < 70 kW
2.2.3 Digital display
BAT Batteries low – must be changed
OL Range exceeded
- - - Insulation < 10 kW at 50 V, < 20 k W at 100 V,
< 50 kW at 250 V, < 100 kW at 500 V
2.3 Control keyboard
2.3.1 Yellow key
When this yellow key is pressed, a high v oltage is generated fo r
insulation testing. However, if a voltage greater than 25 V has
been detected, no insulation testing is allowed and the key
becomes inactive. The instrument remains in voltage
measurement mode.
2.3.2 ALARM key
The ALARM key can be used to activate/deactivate the alarm
thresholds during insulation and resistance measurements.
When associated with the and keys, it can be used to
program the values of these thresholds.
2.3.3 Key
This key can be used to program:
■ The alarm thresholds (with the ALARM key)
By pressing the key, you can make the following elements
flash, successively:
- the measurement unit digit (if there is one),
- the thousands digit,
- the hundreds digit,
- the tens digit,
- the units digit,
- the decimal separators,
- the type of threshold (upper or lower),
- and it then returns to the measurement units.
■ The capacitance per unit length in nF/km (with the key
on the CA 6531).
By pressing the key, you can make the following elements
flash, successively:
- the tens digit,
- the units digit,
- and it then returns to the tens digit.
28
Page 8

2.3.4 Key
When programming the alarm thresholds, the key can be used
to scroll through all the possible values of the flashing elements
and then loop back to the beginning:
■ MW or GW for insulation, kW or W for resistance, for the
measurement units,
■ 1,2, 3 or _ for the thousands digit,
■ 0, 1, 2, 3, 4, 5, 6, 7, 8 and 9 for the hundreds , tens and units,
■ “-.- - -” or “- -.- -” or “- - -.-” or “- - - -” f or the decimal separator,
■ > or < for the upper or lower threshold.
When programming the capacitance per unit length in nF/km,
the key can be used to change the values of the flashing
digits to 0, 1, 2, 3, 4, 5, 6, 7, 8 or 9.
2.3.5 Key
■■
■ C.A 6531 and C.A 6533
■■
When this key is pressed, the backlighting of the displa y comes
on. It will be turned off automatically one minute later . When it is
lit, you can turn the backlighting off by pressing this key again.
■■
■ C.A 6531
■■
When the switch is on 4000 nF, a long press on this key enables
you to program the unit length value (see 4.7).
DD
2.3.6
DREL key
DD
A long press on this key enables you to memorize a value.
The measurements that follow will be the positive or negative
deviation compared with the value memorized (does not function
for voltage on the MW positions).
3. MEASUREMENT FUNCTIONS
3.1 Insulation
The insulation measurements correspond to the MW positions
of the switch.
3.1.1 AC / DC voltage measurement
As soon as the switch is set to one of the MW positions, the
instrument measures the voltage between its + and - terminals.
The value of this voltage is display ed (0 to 600 V AC / DC max.).
If the voltage present is less than 25 V, the insulation can be
tested, but the lower the test voltage the greater the possibility
of error.
If the voltage is greater than 25 V,“ > 25 V “ is displayed.
Pressing the yellow key does not trigger insulation measurement,
but causes a series of buzzes (buzz, buzz, buzz, ...) and mak es
the symbol flash until the yellow key is released.
29
Page 9

These warnings only end if the voltage falls below 25 V
(disconnection of the leads or removal of the voltage) or if the
yellow key is released or , natur ally, if you turn off the instrument
by retur ning the switch to the OFF position.
The instrument indicates if the value measured is outside
its measurement range. Above 600 V, the digital display
indicates OL.
3.1.2 Insulation Measurement
If there is not a dangerous voltage (see § 3.1.1.), the user can
then measure the insulation by pressing the yellow key. The
high voltage is then generated between the terminals (marked
+ and -). The value of the measurement is shown on the
logarithmic scale of the bargraph and on the digital display, with
the corresponding MW or GW symbol. As soon as the yellow
key is released, the instrument returns to voltage measurement
mode.
If the voltage generated may be dangerous, the symbol
is displayed.
The instrument indicates if the value measured is outside
its measurement range. If the insulation resistance is greater
than 400 MW (C.A 6531), 2 or 20 GW (C.A 6533), the OL symbol
is displayed on the digital measurement display. When the
measurement is greater than 1.1 GW (even on the C.A 6531),
the symbol lights up on the right-hand side of the bargraph.
Similarly , the digital measurement displa y indicates “ - - - “ if the
insulation resistance is less than:
■■
■ C.A 6531
■■
10 kW at 50 V or 20 kW at 100 V
■■
■ C.A 6533
■■
10 kW at 50 V, or 20 kW at 100 V, or 50 kW at 250 V, or 100 kW at
500 V
When the measurement is less than 70 k
lights up on the left-hand side of the bargraph.
To measure high insulation values, you are advised to use the
“G“ guard terminal to remove the influence of superficial leak
currents and “hand capacitance” (see § 10.2.2).
WW
W, only the symbol
WW
3.2 Resistance
Resistance measurement corresponds to the 40 kW position of the
switch on the C.A 6531 and the 400 kW position on the C.A 6533.
The measurement is indicated on the digital measurement
display, accompanied by the W or kW symbol if necessar y.
The instrument indicates if the value measured is outside
its measurement range. If the resistance is greater than 40 kW
or 400 kW , depending on the instrument, the OL symbol is
displayed on the digital measurement display.
A programmed threshold may trigger an alarm (see § 4.5).
30
Page 10

3.3 Capacitance (C.A 6531)
Capacitance measurement corresponds to the 4000 nF position
of the switch.
The measurement is shown on the display accompanied by the
nF symbol.
The length of the telephone line measured is indicated in km on
the digital threshold display, according to the programmed
capacitance per unit length.
If the leads are set up in a short circuit, the instrument
indications OL on the digital measurement display and the
distance is - - - km.
If the capacitance measurement is greater than 4000 nF,
the OL symbol is displayed on the digital measurement display.
If the distance measurement is greater than 80 km, the OL
symbol is displayed on the digital measurement display.
If the leads are not connected, the digital measurement display
indicates 0.00 and
- - - -
km.
3.4 AC / DC current (C.A 6531)
Current measurement corresponds to the 400 mA position of
the switch.
The measurement is shown on the display accompanied by the
mA symbol. The fuse is checked periodically.
If the current measurement is greater than 400 mA AC / DC,
the OL symbol is displayed on the digital measurement display.
If the value of the current is negative, the instrument detects
that the fuse is not functional, only at the end of measurement.
It is advised therefore to swap over the leads so as to always
have a positive current measurement.
3.5 AC voltag e (C.A 6531)
AC voltage measurement corresponds to the V~ position of the s witch.
The measurement is shown on the display accompanied by the
V AC symbol. In this function, the DC component is not
measured.
If the voltage measurement is greater than 400 V A C, the OL
symbol is displayed on the digital measurement display.
4. SPECIAL FUNCTIONS
4.1 Start/stop
When you move the switch from the OFF position to one of the
active positions, the instrument is started up. All the display
segments light up at the same time for 1 second. Then all the
segments go out except (for 2 seconds) the , and
symbols which delimit the size of the bargraph. The bargraph
indicates the battery charge life and the digital measurement display
indicates the charge life available (0.00 to 1.00 = 0 to 100%).
The instrument can be shut down at any time by resetting the
switch to OFF.
.
31
Page 11

4.2 Automatic shutdown
After 5 minutes without any activity by the user on the instrument
(key press on the keyboard or on the yellow key on the remote
control probe or turn of the rotary switch), the instrument shuts
down automatically . It is then on standby. When this is the case,
to start up the instrument again, all you have to do is press one
of the keys, turn the switch or press the yello w key on the remote
control probe.
4.2.1 Deactivation of the automatic shutdown function
Press the button whilst switching on the device with the
rotating switch. The P displayed indicates that the de vice is in
continuous use mode.
To reactivate the automatic shutdown function, switch the
instrument off (turn the switch to OFF) and then switch it back
on again.
4.3 Autotests
4.3.1 Power supply
The power supply voltage is measured automatically once ev ery
second. The voltage range ensuring correct operation is betw een
7 V and 10 V. Depending on the result of the autotest, there are
four possible cases:
■ The voltage is correct:
The symbol is not displayed on the screen.
■ The remaining charge life is low (U < 7.1 V): the
symbol flashes.
■ Measurement accuracy is no longer guaranteed - change
the batteries (U £ 6,9 V): the symbol remains lit
continuously.
■ The voltage is close to interrupting operation of the clock (U
< 6.7 V): the digital display indicates BAT and then, after 5
seconds, the shutdown buzzer sounds and the automatic
shutdown function is activated. The instrument shuts down.
4.3.2 Fuse (C.A 6531)
The fuse is automatically tested when switching on the
instrument and at the end of each current measurement.
4.4 Buzzer
4.4.1 The different audible signals
When the symbol is displayed, the buzzer is active. It gives
out different audible signals, depending on the situation.
■ Short buzz (65 ms at 2 kHz) in the following cases:
- press on a key
- automatic shutdown
■ Continuous buzz (at 2 kHz) in the following cases:
- when the measurement is lower than the minimum
threshold,
- when the measurement is higher than the maximum
threshold.
32
Page 12

■ Short, higher buzz (65 ms at 4 kHz) when an inactive key is
pressed.
■ Series of short, high buzzes (4 kHz) if the voltage measured
is greater than 25 V and the user is pressing the yellow key.
4.4.2 Deactivation of the buzzer
Press the ALARM button when switching on the device with the
rotating switch.
The symbol is no longer displayed.
To reactivate the buzzer, switch the instrument off and then back
on again.
4.5 Alarm thresholds
Thresholds can only programmed for insulation and resistance
measurement.
The thresholds can be upper or lower thresholds. They can be
active or inactive and will be stored in the memory even after
the instrument has been switched off.
4.5.1 Programming of the alarm thresholds
You can select the threshold programming mode by a long press
on the ALARM key. The ALARM symbol is displayed and the
value of the threshold corresponding to the switch position is
indicated on the digital threshold display.
If no value was programmed previously, the displa y indicates
a default threshold:
■■
■ On the C.A 6531
■■
> 0.050 MW for the MW - 50 V position
> 0.100 MW for the MW - 100 V position
< 10.00 kW for the 40 kW position
■■
■ On the C.A 6533
■■
> 0.05 MW for the MW - 50 V position
> 0.10 MW for the MW - 100 V position
> 0.25 MW for the MW - 250 V position
> 0.50 MW for the MW - 500 V position
< 10.00 kW for the 400 kW position
At this moment, it is possible to program the threshold using the
(see § 2.3.3) and keys (see § 2.3.4).
During this programming, if y ou change the switch position,
you lose what you have just done.
You can quit the programming mode and record the threshold
by another long press on the ALARM key.
If the programmed threshold is too high, it is corrected when
it is stored in the memory: the maximum value is entered.
For example, a 2 GW insulation threshold will be stored in the
memory as 399.9 MW on the C.A 6531, while for resistance
measurement 700 kW will become 399.9 kW on the C.A 6533.
33
Page 13

If the threshold has been “wrongly” programmed, it is
corrected when it is stored in the memory: For example, 002
MW will become 2.00 MW .
4.5.2 Activation/deactivation of the alarm thresholds
The threshold corresponding to the switch position can be
activated by a short press on the ALARM key.
The ALARM symbol, the < or > symbol, the programmed value
of the threshold and the corresponding unit are then displayed
on the digital threshold display.
The threshold can be deactivated by a second short press on
the key . The ALARM symbol, the < or > symbol, the programmed
value of the threshold and the corresponding unit disappear.
DD
If the
DREL function is on and you activate a threshold, it will
DD
apply to the absolute value of the value displayed.
4.5.3 Triggering of the alarm
Examples in insulation measurement:
■■
■ If an upper threshold of 100 M
■■
indicates “ALARM > 100.0 M W ”.
If the measurement exceeds this value, a continuous beep
will be triggered and the whole digital threshold display will
flash.
■■
■ If a lower threshold of 100 M
■■
indicates “ALARM < 100.0 M W ”.
If the measurement falls below this value, a contin uous beep
will be triggered and the whole digital threshold display will
flash.
WW
W is active, the display
WW
WW
W is active, the display
WW
4.6 Relative measurements (
Pressing the DREL key enables you to store the v alue measured
in the memory.
The measurements that follow are differences compared with
the value in memory. These differences may be positive or
negative. The DREL symbol is displayed.
Another press clears the value from the memory and returns
the instrument to normal mode.
This key can be used at any time except in voltage mode
on the M
WW
W positions.
WW
DD
DREL)
DD
4.7 Programming the capacitance per unit length
(C.A 6531)
When the switch is set to nF, a long press on the key activates
the programming mode for the capacitance per unit length of
the line to be measured. The value in memory is displayed on
the digital threshold display along with the nF/km symbol.
If no value was programmed previously, the display indicates
50 nF/km by default. It is then possible to modify the value
present (see § 2.2.3).
34
Page 14

During programming, if you c hange the switch position, you
lose what you have just done.
You can quit the programming mode and record the value by
another long press on the key.
5. USE
To display the device software version and series number press
the yellow button whilst switching on via the rotating switch.
To start up the machine, set the rotary switch to the type of
measurement to be performed and then connect the instrument
to the installation to be tested. The unit is displayed and the
calibre is selected automatically for the best reading.
The instrument can be shut down manually by setting the switch
to OFF . Otherwise, the instrument will be shut down automatically
after 5 minutes without any sign of the presence of a user (see
§ 4.2).
5.1 AC / DC voltage and insulation measurement
(see § 10.2 Examples of applications)
■ Start up the instrument by setting the switch to the MW
position which will provide the required voltage.
■ Connect the lead from the “+” terminal to the cold point and
the lead of the “-” terminal or the remote control probe to the
hot point.
■ The instrument first measures the AC / DC voltage present
between its terminals (see § 3.1.1). If there is no voltage > 25 V :
■ Press the yellow key, keeping it pressed down until the
measurement is displayed. The yellow key on the remote
control probe acts in exactly the same wa y as the yellow k e y
on the instrument (see § 3.1.2).
To measure high insulation values (> 1 G
advised to use the “ G “ guard terminal to remove the influence
of superficial leak currents and “hand capacitance” (see §
10.2.2). In this case, it is preferable to use crocodile clips or
wire grips rather than touch prods held in the hand.
■ Note the value displayed.
■ When measurement has ended, release the yellow key and
wait for the installation tested to discharge (voltage < 25 V)
before disconnecting the leads.
■ If the digital v alue fluctuates greatly for large v alues (> 500 MW)
this means it is a highly capacitive load. In this case read the
measurement from the bar graph.
Note: The user can control the backlighting as required by
pressing the key
A programmed alarm threshold may be activated with the
ALARM key (see § 4.5).
WW
W ), you are
WW
35
Page 15

5.2 Resistance measurement
■ Start up the instrument by setting the switch to 40 kW
(C.A 6531) or 400 kW (C.A 6533).
■ Connect the + and - leads to the measurement points.
■ Note the resistance value displayed (see § 3.2).
Note: The user can control the backlighting as required by
pressing the key.
A programmed alarm threshold may be activated with the
ALARM key (see § 4.5).
5.3 Capacitance measurement (C.A 6531)
■ Start up the instrument by setting the switch to 4000 nF.
■ Connect the + and - leads to the measurement points.
■ Note the capacitance value displayed (see § 3.3) and the
length of the line after programming its capacitance per unit
length.
Note: The user can control the backlighting as required by
pressing the key.
5.4 AC / DC current measurement (C.A 6531)
■ Start up the instrument by setting the switch to 400 mA.
■ Connect the leads from the mA and - terminals to the
measurement points. The fuse is checked at start-up and
after every measurement.
■ Note the current value displayed (see § 3.4).
Note: The user can control the backlighting as required by
pressing the key.
5.5 AC voltage measurement (C.A 6531)
■ Start up the instrument by setting the switch to V~.
■ Connect the + and - leads to the measurement points.
■ Note the voltage value displayed (see § 3.5).
Note: The user can control the backlighting as required by
pressing the key .
36
Page 16

6. SPECIFICATIONS
The instrument displays a measurement every 400 ms, which
corresponds to 2.5 measurements per second for the digital display .
The bargraph is refreshed every 100 ms.
The digital measurement is smoothed, while the bargraph always
indicates the instantaneous measurement.
6.1 Reference conditions
Influence quantities Reference conditions
Temperature 23 °C ± 3 K
Relative humidity 45 to 55 % RH
Supply voltage 8 V ± 0.2 V
Frequency of measured voltage DC or 45 to 65 Hz
Frequency of measured current DC or 45 to 65 Hz
Capacity in parallel on resistance nil
Electrical field nil
Magnetic field < 40 A/m
6.2 Characteristics per function
6.2.1 Voltage
Measurement range: 0 to 600 V AC/DC
Frequency: DC and 15... 400 Hz
Automatic calibres 0.0... 399.9 V AC/DC 400...599 V AC/DC
Resolution 0.1 V 1 V
Accuracy ± 3% R ±2 ct ± 3% R ±1 ct
Input impedance 4 MW (C.A 6531) - 300 kW (C.A 6533)
6.2.2 Insulation
Measurement range:
■■
■ C.A 6531:at 50 V 10 kW to 400 MW
■■
at 100 V 20 kW to 400 MW
■■
■ C.A 6533:at 50 V 10 kW to 2 GW
■■
at 100 V 20 kW to 2 GW
at 250 V 50 kW to 20 GW
at 500 V 100 kW to 20 G W
Analogue calibre 70 kW...1.1 GW
Resolution 8 segments per 10-unit interval
Accuracy 5 % R ± 1 segment
Models C.A 6531 and C.A 6533 C.A 6533
Digital 0.01 to 0.20 to 40.0 to 400 to 4.00 to
calibres 0.19 MW 39.99 MW 399.9 MW 3999 MW 20.00 GW
Resolution 10 kW 100 kW 1 MW 10 MW
Accuracy 3% R ± 5 ct 3% R ± 2 ct 5% R ±2ct
37
Page 17

Models C.A 6531 and C.A 6533 C.A 6533
Test
voltage
Voltage at
open circuit
Test
current
Short-circuit
current
50 V 100 V 250 V 500 V
< 75 V < 150 V < 300 V < 600 V
³ 1 mA ³ 1 mA ³ 1 mA ³ 1 mA
for for for for
R £ 50 kW R £ 100 kW R £ 250 kW R £ 500 kW
£ 3 mA
The residual voltage present on the terminals when the yellow
key is released is discharged through the instrument via the
measurement leads in 3 to 6 s/µF according to the measurement
for the C.A 6531 and in less than 2 s/µF for the C.A 6533.
6.2.3 Resistance
Measurement range :0 to 40 kW for the C.A 6531
0 to 400 kW for the C.A 6533
Models C.A 6531 and C.A 6533 C.A 6533
Auto 0.0..399.9 400..3999 4.00..39.99 40.0..399.9
calibres WWkW kW
Resolution 0.1 W 1 W 10 W 100 W
Accuracy ± 3% R ± 2 ct ± 3% R ± 1 ct
Measurement
current
Voltage at
open circuit
55 ou 550 µA according to the measurement
7 V £ U
open
£ 9 V
6.2.4 Capacitance (C.A 6531)
Measurement range: 0 to 4000 nF
Calibre 0.00..399.9 nF 400..3999 nF
Resolution 0.1 nF 1 nF
Accuracy ± 2% R ± 1 ct
Measurement 55 ou 550 µA
current according to the measurement
6.2.5 Distance (C.A 6531)
Measurement range: 0 to 80 km
Calibre 0.000...3.999 km 4.00...39.99 km 40.0...80.0 km
Resolution 1 m 10 m 100 m
Accuracy ± 2% R ± 2 ct ± 2% R ± 1 ct
6.2.6 AC / DC current (C.A 6531)
■ Measurement range: 0 to 399.9 mA AC / DC
■ Frequency: DC and 15...400 Hz
■ Resolution: 0.1 mA
■ Accuracy: ± 3% ± 2 ct
■ Internal impedance: 1 W
38
Page 18

6.2.7 AC voltage (C.A 6531)
■ Measurement range: 0 to 399.9 V AC
■ Frequency: 10 Hz to 1 MHz
■ Resolution: 0.1 V AC
■ Accuracy: ± 3% R ± 3 ct
■ Internal impedance: 4 MW
6.3 Power supply
The instruments are powered by 6 x 1.5 V alkaline batteries,
type LR6.
Measurement
(C.A 6531/6533) 57,600
Voltmeter
Ammeter (C.A 6531)
Resistance (C.A 6531/6533)
Capacitance meter (C .A 6531)
Isulation(C.A 6531/6533)
MW 50 V (R = 50 kW ) 90 mA 15,000 5-seconds measurements
MW 100 V (R = 100 kW) 120 mA 10,800 5-seconds measurements
Isulation (C.A 6533)
MW 50 V 140 mA 8,800 5-seconds measurements
MW 100 V 150 mA 8,000 5-seconds measurements
MW 250 V 130 mA 9,800 5-seconds measurements
MW 500 V 190 mA 5,600 5-seconds measurements
* Add approximately 45 mA when the backlighting is on.
Average Average
consumption* charge lif e
25 mA
5-seconds measurements
50 mA 28,000 5-seconds measurements
6.4. Climatic conditions
Storage without battery
90
80
70
60
50
40
30
20
10
0
-50
-40 -30 -20 -10 0 10 2030405060708090
Humidity in % of HR (non-condensing atmosphere)
Use
Temperaturein °C
39
Reference
Page 19

6.5. Variations in nominal field of use
Influence
quantities
Temperature -10 to + 55°C
Relative
humidity
Supply
voltage
Frequency DC and
(inV and in mA) 15..400 Hz 1% R ±1 ct 2% R ±2 ct
Capacity
en parallel
on the resistance
Operating Measurement
range
limits
(1% R ±1 ct)/10°C (2% R ±2 ct ) / 10 °C
20 to 80% HR 2% R ± 2 ct 3% R ± 2 ct
7 to 10 V (1% R ±1 ct)/V (2% R ±2 ct)/V
0 to 5 µF at
nominal current
variations
Typical Maximum
Negligible 1% R ±1 ct
6.6. Limits
The instrument is protected across all ranges against a constantly
applied voltage, between any two terminals, of 600 V AC/DC on
the C.A 6531, and 720 V AC/DC on the C.A 6533.
The C.A 6531 is protected for 10 s against an accidental
overvoltage of 720 V across all the ranges.
The current input on the C.A 6531 accepts 0.63 A, beyond which
it is protected by fuse.
6.7. Construction specifications
■ Overall dimensions of the unit (L x l x h): 211 x 108 x 60 mm
■ Dimensions of the display: 73 mm x 54.3 mm
■ Weight: approx. 835 g
■ Materials:
- Polycarbonate housing
- Crystal polycarbonate screen
- Elastomer external mouldings
- Silicon keyboard.
■ Stand:
Enables the instrument to be tilted at 30°. It clips onto the
bottom of the housing when not in use.
6.8. Compliance with international standards
■ Electrical safety: IEC 1010-1 + A2 (Nov. 95),
■ Dual insulation:
■ Pollution level: 2
■ Installation category: III
■ Rated voltage: 600 V
IEC 61557 (Feb. 97) and DIN EN 61557.
40
Page 20

6.8.1. Electromagnetic compatibility: EC compliance
■ Emission: NF EN 55 081 -1 (Ed. 92)
■ Immunity: NF EN 55 082 -1 (Ed. 95)
6.8.2. Mechanical protection
IP54 as per NF EN 60529 (Oct. 92)
IK04 as per NF EN 50102 (June 95)
7. MAINTENANCE
To display the device software version and series n umber press
the yellow button whilst switching on via the rotating switch.
For maintenance, use only specified spare parts. The
manufacturer will not be held responsible for any accident
occuring following a repair done other than by its After Sales
Service or approved repairers.
7.1. Upkeep
7.1.1. Replacing the batteries
Before performing any measurements, make sure that the
symbol does not appear on the display after the start-up
phase. If it does appear , you m ust change all the batteries, taking
all the necessary precautions when you open the instrument.
Check that none of the terminals is connected and that the
switch is set to OFF before opening the battery
compartment.
The hatch is located on the back of the unit. It can be opened
and closed using a coin or a large screwdriver (1/4-turn captive
screw). T o avoid errors, the symbol on the
power-supply board shows the direction in which the 2 x 3 LR6
1.5 V batteries should be mounted. Make sure that you put the
hatch back properly and close it after changing the batteries.
7.1.2. Replacing the fuse (C.A 6531)
If “FUS” appears on the digital measurement display during the
start-up phase or when measuring continuity, y ou must change
the fuse, taking all the necessary precautions when opening
the instrument.
Check that none of the terminals is connected and that the
switch is set to OFF before opening the battery compartment
on the back of the instrument.
It can be opened and closed using a coin or a large screwdriver
(1/4-turn captive screw). The fuse is placed on a fuse carrier
welded to the power-supply board.
To avoid any errors, the text “F-0.63 A” is written ne xt to the fuse
carrier. Make sure that you replace the faulty fuse with a new
fuse of the same rating and type and then replace and close the
hatch.
41
Page 21

Exact type of fuse: FF 0.63 A - 660 V - 6.3 x 32 mm - 30 kA
(printed on the battery compar tment label)
7.1.3. Cleaning
The instrument must be disconnected from any source of
electricity.
Use a soft cloth slightly moistened with soapy water. Rinse with
a wet cloth and dry quickly with a dry cloth or pulsated air. Do
not use alcohol, solvents or hydrocarbons.
7.1.4. Storage
If the instrument is not used for a long period (more than two
months), remove the batteries and store them separately.
7.1.5. Calibration
It is essential that all measuring instruments are regularly
calibrated.
We advise you to check this instrument at least once a year. For
checking and calibration of your instrument, please contact our
accredited laboratories (list on request) or the Chauvin Arnoux
subsidiary or Agent in your country.
7.2. Maintenance
Repairs under or out of guarantee: please return the product
to your distributor
8. WARRANTY
Our guarantee is applicable for 3 years (for C.A 6431 and
C.A 6433) after the date on which the equipment is made
available (extract from our Gener al Conditions of Sale, av ailable
on request).
42
Page 22

9. TO ORDER
C.A 6531...............................................................P01.1408.04
Delivered with a shoulder bag for transport and hands-free use
of the instrument and its accessories,
2 elbowed-straight safety leads (red +black), 1.5 m long
1 red crocodile clip, 1 black touch prod,
2 wire grips (red and black), 6 LR6 batteries
and this 5-language user’s manual.
C.A 6533...............................................................P01.1408.05
Delivered with a shoulder bag for transport and hands-free use
of the instrument and its accessories,
2 elbowed-straight safety leads (red +black), 1.5 m long
1 x 1.5 m long guarded safety lead, triple banana plug. (black)
1 red crocodile clip, 1 blue crocodile,
1 black touch prod,
2 wire grips (red and black), 6 LR6 batteries
and this 5-language user’s manual.
Accessories:
Remote control probe ........................................... P01.1019.35
Spare parts:
■ 2 elbowed-straight safety leads
(red + black) 1.5 m long .................................... P01.2950.88
■ 3 x 1.5 m long straight-straight safety leads
(red, blue, guarded black) ................................. P01.2951.71
■ 5 crocodile clips
(red, black, blue, white, green/yellow)............... P01.1018.49
■ 2 wire grips (red and black)............................... P01.1018.53
■ 1 shoulder bag
for transport and hands-free use ......................P01.2980.49
■ 1 set of 5 fuses 0,63 A ...................................... P01.2970.78
43
 Loading...