

Page 1
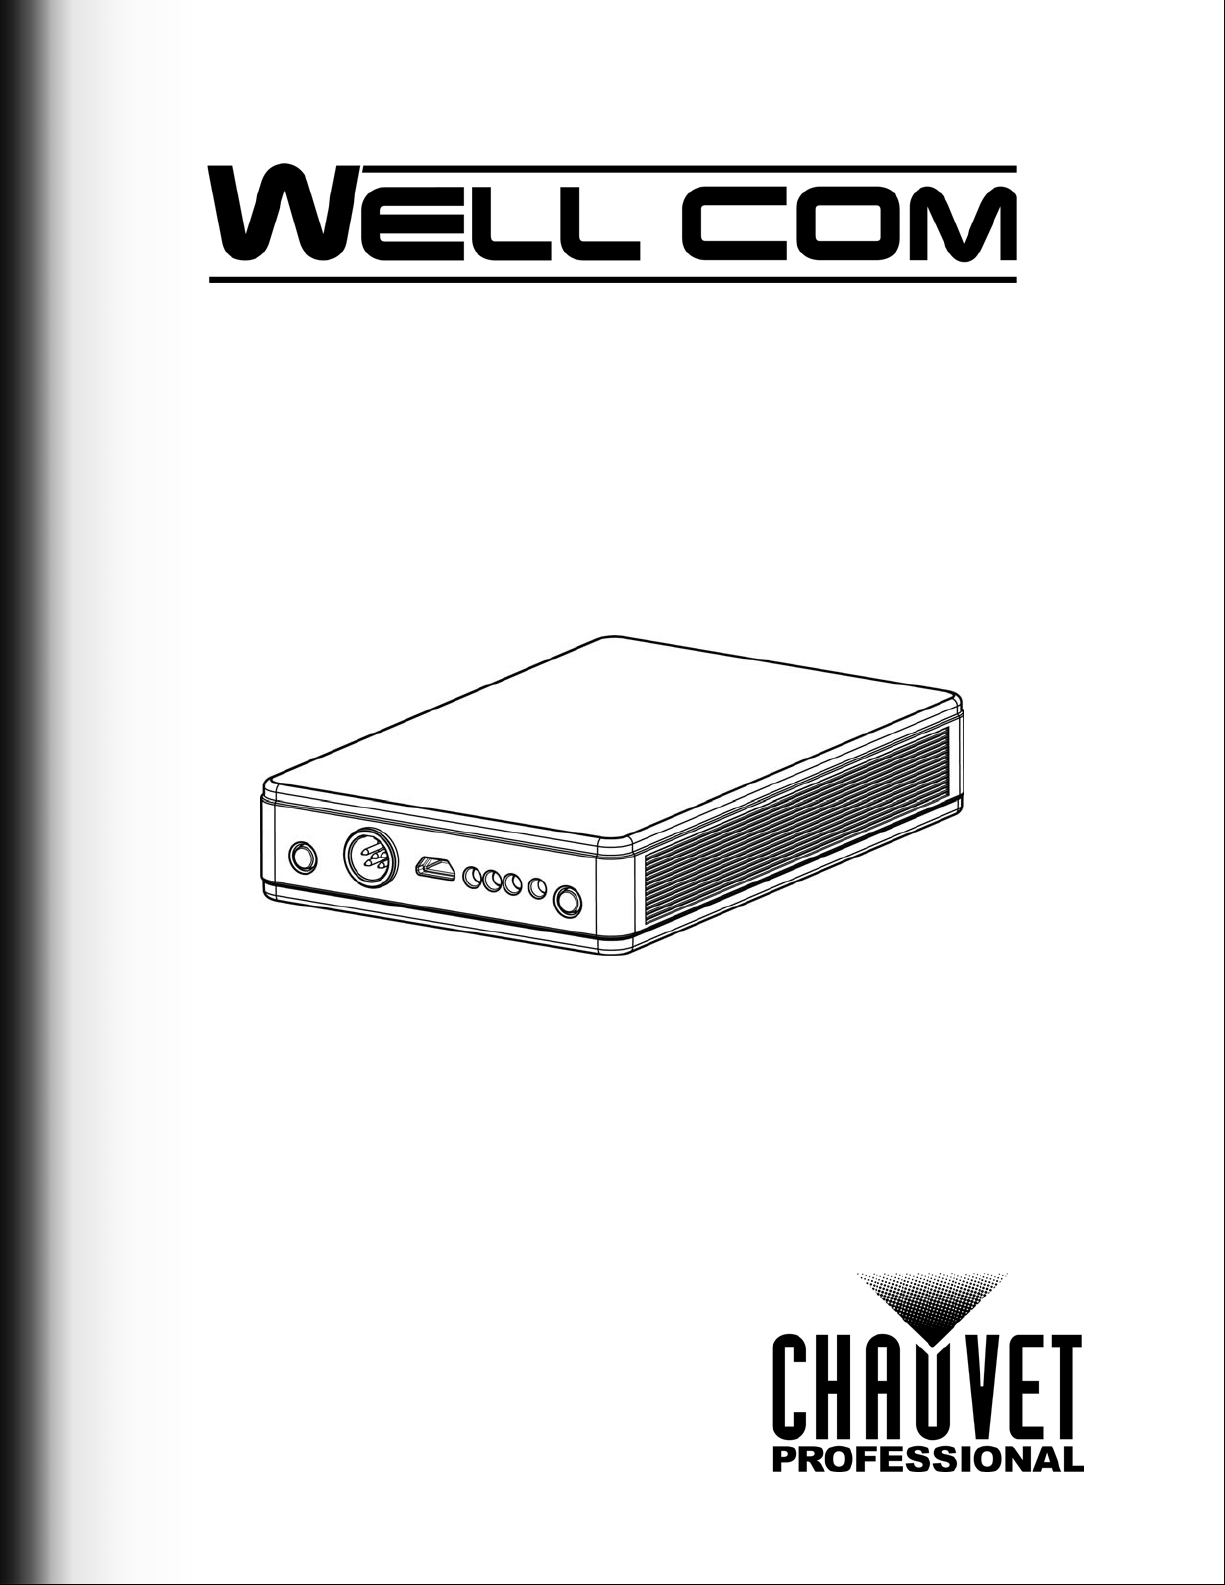
User Manual
Page 2

EDITION NOTES
The WELL COM User Manual includes a description, safety precautions, installation, programming,
operation and maintenance instructions for the WELL COM as of the release date of this edition.
Trademarks
CHAUVET, the Chauvet logo and WELL COM are r egistered trademarks or trademark
Sons, LLC (d/b/a Chauvet and Chauvet Lighting) in the United States and other countri es. Other compan y
and product names and logos referred to herein may be trademarks of thei r respective companies.
Copyright Notice
The works of authorship contained in this manual, including, but not limited to, all design, text and images
are owned by Chauvet.
© Copyright 2017 Chauvet & Sons, LLC. All rights reserved.
Electronically published by Chauvet in the United States of America.
Manual Use
Chauvet authorizes its customers to download and print this manual for professional information purposes
only. Chauvet expressly prohibits the usage, copy, storage, distribution, modification, or printing of this
manual or its content for any other purpose without written consent from Chauvet.
Document Printing
For best results, print this document in color, on letter size paper (8.5 x 11 in), double-sided. If using A4
paper (210 x 297 mm), configure the printer to scale the content accordingly.
Intended Audience
Any person installing, operating, and/or maintaining this product should comple tely read th rough the guide
that shipped with the product, as well as this manual, before installing, operating, or maintaining this
product.
s of Chauvet &
Disclaimer
Chauvet believes that the information contained in this manual is accurate in all respects. However,
Chauvet assumes no responsibility and specifically disclaims any and all liability to any party for any loss,
damage or disruption caused by any errors or omissions in this document, whether such errors or
omissions result from negligence, ac cident or any other cause. Chauvet reserves the right to revise the
content of this document without any obligation to notify any person or company of such revision, however,
Chauvet has no obligation to make, and does not commit to make, any such revisions. Download the latest
version from www.chauvetprofessional.com
.
Document Revision
This WELL COM User Manual is the 2nd edition of this document. Go to www.chauvetprofessional.com
for the latest version.
WELL COM User Manual Rev. 2
Page 3

TABLE OF CONTENTS
TABLE OF CONTENTS
1. Before You Begin....................................................................... 1
What Is Included ........................................................................................... 1
Claims........................................................................................................... 1
Manual Conventions ..................................................................................... 1
Symbols ........................................................................................................ 1
Safety Notes.................................................................................................. 2
Personal Safety.................................................................................................. 2
Mounting and Rigging........................................................................................ 2
Power and Wiring............................................................................................... 2
Operation ...................................................................................................... 2
2. Introduction ................................................................................ 3
Description.................................................................................................... 3
Features........................................................................................................ 3
Product Overview.......................................................................................... 3
Product Dimensions...................................................................................... 4
3. Setup ........................................................................................... 5
AC Power...................................................................................................... 5
Battery Charge Notes.................................................................................... 5
Downloading the App.................................................................................... 5
Connecting to the WELL COM Wi-Fi Network.............................................. 5
Settings......................................................................................................... 5
Wi-Fi Settings..................................................................................................... 6
Password Protection......................................................................................... 6
SSID .................................................................................................................. 6
WIFI Channel.................................................................................................... 6
IP Address and Subnet Mask............................................................................ 6
Device Settings.................................................................................................. 6
Input Mode........................................................................................................ 6
Connecting Products to WELL COM............................................................. 6
4. Operation .................................................................................... 7
Visual Modeling Mode................................................................................... 7
Designing or Editing a Step................................................................................ 7
DMX Address................................................................ .................................... 7
Count................................................................................................................. 7
Color.................................................................................................................. 8
Color Preset...................................................................................................... 8
Color Palette ..................................................................................................... 8
Color Mixer........................................................................................................ 8
Saving a Step..................................................................................................... 9
Edit Mode...................................................................................................... 10
Designing or Editing a Step................................................................................ 10
Scene Setting..................................................................................................... 11
Edit Mode Menu................................................................................................. 11
Delete All............................................................................................................ 11
Playback Pages ............................................................................................ 12
Delete a Scene................................................................................................... 12
Backup............................................................................................................... 13
5. Technical Information................................................................ 14
Product Maintenance.................................................................................... 14
WELL COM User Manual Rev. 2
i
Page 4

TABLE OF CONTENTS
6. Technical Specifications ........................................................... 15
Returns............................................................................................ 16
Contact Us ...................................................................................... 17
ii
WELL COM User Manual Rev. 2
Page 5
BEFORE YOU BEGIN
1. BEFORE YOU BEGIN
What Is Included
•WELL COM
• USB A Male to Micro USB B Male (3 ft)
• 5-pin DMX Adapter
Claims
Carefully unpack the product immediately and check the container to make sure all the parts are in the
package and are in good condition.
If the box or the contents (the product and included accessories) appear damaged from shipping, or show
signs of mishandling, notify the carrier immediately, not Chauvet. Failure to report damage to the carrier
immediately may invalidate your claim. In addition, keep the box and contents for inspection.
For other issues, such as missing components or parts, damage not related to shipping, or concealed
damage, file a claim with Chauvet within 7 days of delivery.
Manual Conventions
Convention Meaning
1–512 A range of values
50/60 A set of values of which only one can be chosen
<SET> A button on the product’s control panel
Settings A product function or a menu option
• External Power Supply
• Warranty Card
• Quick Reference Guide
Symbols
Symbol Meaning
The term “DMX” used throughout this manual refers to the USITT DMX512-A
digital data transmission protocol.
Electrical warning. Not following these instructions may cause electrical damage to
the product, accessories, or the user.
Critical installation, configuration, or operation information. Not following these
instructions may make the product not work, ca use damage to the product, or cause
harm to the operator.
Important installation or configuration information. The product may not function
correctly if this information is not used.
Useful information.
WELL COM User Manual Rev. 2
Page 1 of 17
Page 6

BEFORE YOU BEGIN
Safety Notes
Read all the following safety notes before working with this product. These notes contain important
information about the installation, usage, and maintenance of this product.
This product contains no user-serviceable parts. Any reference to servicing in
this User Manual will only apply to properly trained, certified technicians. Do not
open the housing or attempt any repairs.
All applicable local codes and regulations apply to proper installation of this
product.
Personal Safety
• Always disconnect this product from its power source before servicing.
• Always connect this product to a grounded circuit to avoid the risk of electrocution.
• Do not touch this product’s housing during opera tion because it may be very hot.
Mounting and Rigging
• This product is not intended for permanent installation.
• This product is for indoor use only! To prevent risk of fire or shock, do not expose this product to
rain or moisture. (IP20)
• CAUTION: When transferring product from extreme temperature environments, (e.g., cold truck to
warm humid ballroom) condensation may form on the internal electronics of the product. To avoid
causing a failure, allow product to fully acclimate to the surrounding envir onment before connecting
it to power.
• Mount this product in a location with adequate ventilation, at least 20 in (50 cm) from adjacent
surfaces.
• Make sure there are no flammable materials close to this product while it is operating.
• Never carry the product by the power cord or any moving part.
Power and Wiring
• Make sure the power cord is not crimped or damaged.
• Always make sure you are connecting this product to the proper voltage in accordance with the
specifications in this manual or on the product’s specification label.
• To eliminate unnecessary wear and improve its lifespan, during periods of non-use completely
disconnect the product from power via breaker or by unplugging it.
• Never connect this product to a dimmer pack or rheostat.
• Never disconnect this product by pulling or tugging on the power cable.
Operation
• Do not operate this product if there is damage on the housing or cables. Have the damaged parts
replaced by an authorized technician at once.
• The maximum ambient temperature is 1 13 °F (4 5 °C). Do not operate the product at higher temperatures.
• In the event of a serious operation problem, stop using this product immediately!
If your Chauvet product requires service, contact Chauvet Technical Support.
Page 2 of 17
WELL COM User Manual Rev. 2
Page 7
INTRODUCTION
1 2345678
2. INTRODUCTION
Description
The WELL COM is a battery powered interface that allows W-DMX control from a smartphone or tablet.
The default password for the WELL COM is 2323.
Features
• Compact, easy-to-use battery powered Wi-Fi™ receiver and wireless W-DMX™ transmitter in a
single unit
• 8 hours of usage on a full charge
• Compatible with Android™ and iOS® on both smartphones and tablets
• Output can be used in wireless W-DMX™ or wired DMX protocols
• Full universe of DMX available for programming larger events
• Built in color picker and color macros for use with RGB, RGBA, and RGBW wash fixtures
• Program up to 24 steps per scene with fade and hold times
• A total of 18 scenes available for playback
• Easy to navigate user interface
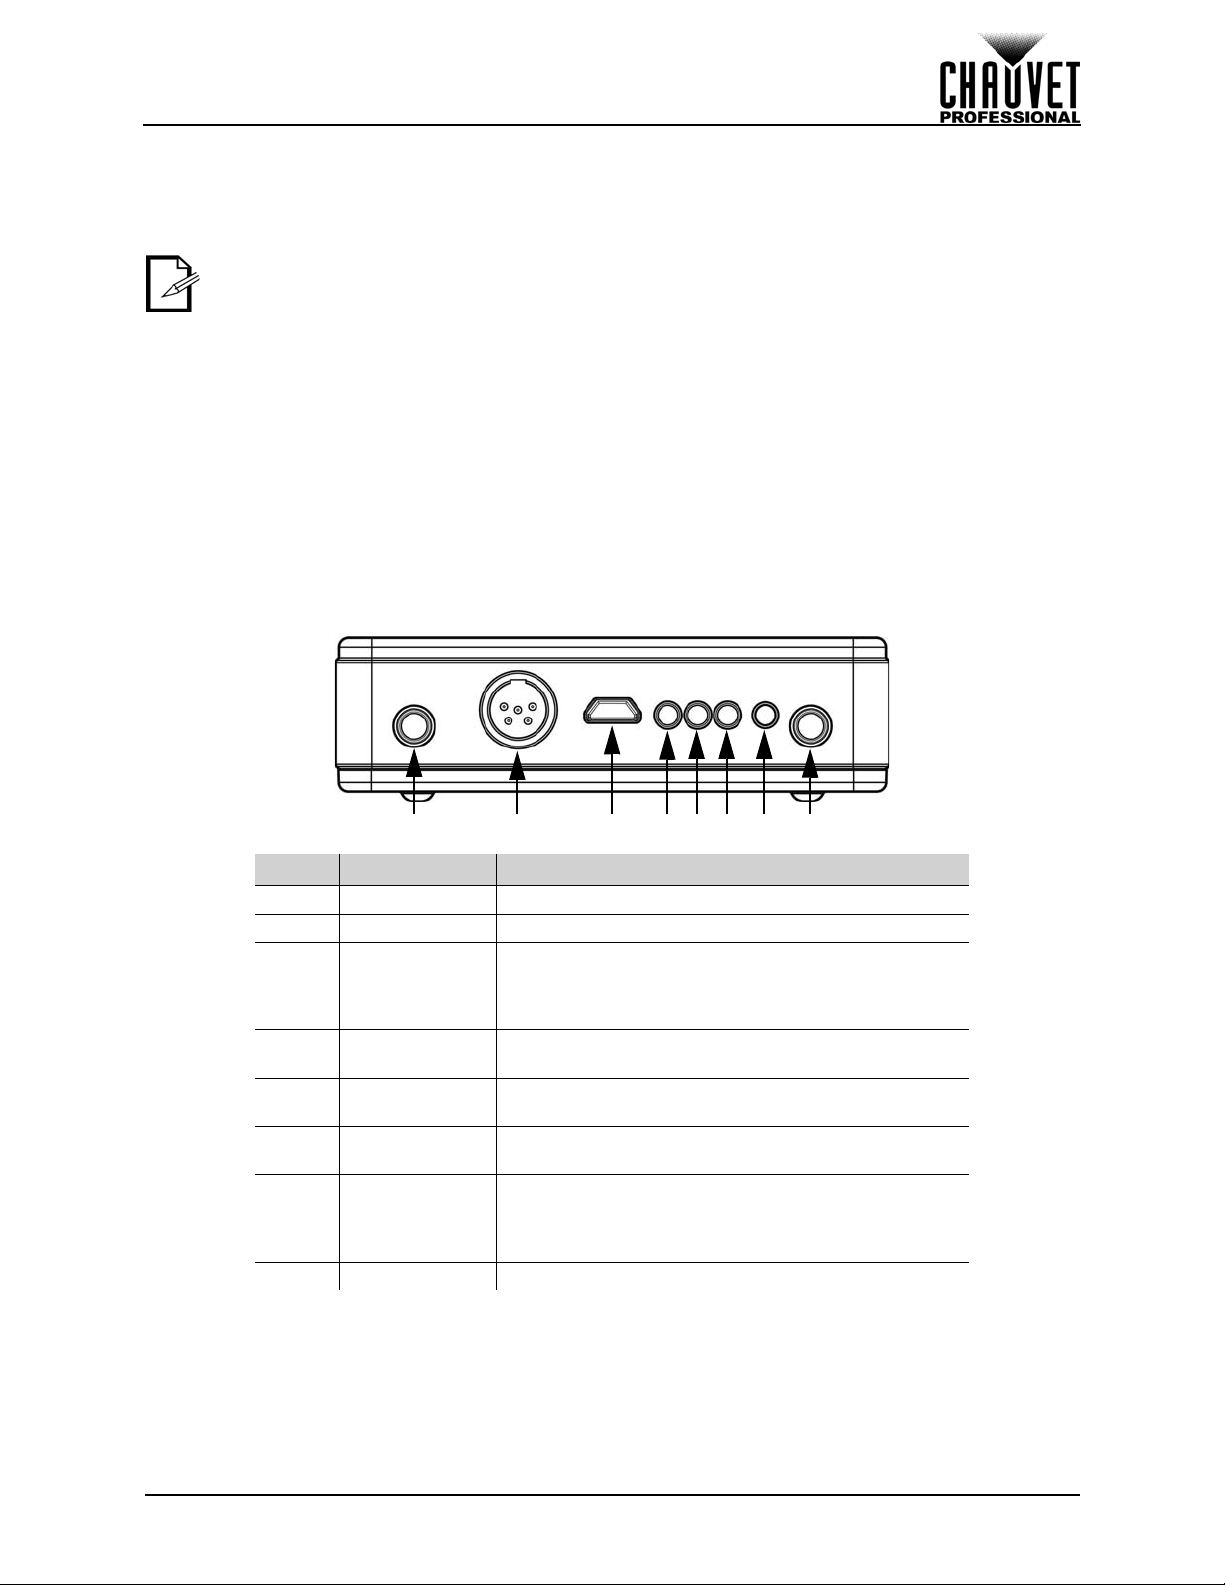
Product Overview
# Description Function
1<LINK>Press to reset wireless fixture pairing
2DMXDMX in port (adapter included)
Micro USB B port for charging the battery
3 Power Charger
4 Wi-fi Pairing
5 DMX Signal
6 Wi-fi Signal
7 Battery Life
8<PWR>Press to power on/off the device
• External power supply included
• Battery Charge Time - 8 hours
• Battery Life - 8 hours
Blinks for 5 seconds after pressing <LINK>, and
then intermittently while connected to products
Blinking - No DMX signal detected
Solid - DMX signal detected
Blinking - No Wi-Fi signal detected
Solid - Wi-Fi signal detected
Green - Power is currently 50–100%
Orange - Power is currently 25–50%
Red - Power is currently less than 20%
Blinking - Battery is charging
WELL COM User Manual Rev. 2
Page 3 of 17
Page 8

Product Dimensions
5.13 in
130.4 mm
3.34 in
85 mm
0.98 in
25 mm
INTRODUCTION
Page 4 of 17
WELL COM User Manual Rev. 2
Page 9

SETUP
3. SETUP
AC Power
Each WELL COM has an auto-r anging external po wer supply th at works with an input vo ltage range of 100
to 240 VAC, 50/60 Hz. To determine the power requirements for each WELL COM external power supply,
refer to the label affixed to the product. You can also refer to the Technical Specifications chart in this
manual.
The listed current rating indicates the maximum current draw during normal operation. For more
information, download Sizing Circuit Breakers from the Chauvet website: www.chauvetprofessional.com
• Always connect the product to a protected circuit (circuit breaker or fuse). Make
sure the product has an appropriate electrical ground to avoid the risk of
electrocution or fire.
• To eliminate unnecessary wear and improve its life span, during periods of non-use
completely disconnect the product from power via breaker or by unplugging it.
Never connect the product to a rheostat (variab le resistor ) or dimmer circuit , even if
the rheostat or dimmer channel serves only as a 0 to 100% switch.
Battery Charge Notes
• Recharge the battery within three days from last use.
• Recharge the battery to full capacity before storing this product.
• For best results, charge the battery in a temperature between 32 °F (0 °C) and 95 °F (35 °C).
• When charging the battery, keep the product at no less than 1 m from any open flame or hot plate.
• Do not charge the battery for more than 24 hours.
• Perform a full discharge/recharge cycle every 3 months.
..
Downloading the App
The WELL COM app is available from the Google Play Store or the Apple App Store. The WELL COM
wireless transceiver is not required at the time of downloading or installing the app, but it is required to
control lights. For more information about downloading and installing apps onto your mobile device, see
the documentation that came with your mobile device.
Connecting to the WELL COM Wi-Fi Network
The WELL COM generates a Wi-F i signal, which a mobile device running the WELL COM app must
connect to in order to control any lights.
1. Hold <PWR> for 3 seconds to power on the WELL COM.
2. Turn on Wi-Fi on your mobile device.
3. Go to the Wi-Fi settings on your mobile device and connect to the WELL COM default Wi-Fi
(SSID) WIFI-WELL COM.
Settings
To view or change the settings of th e WELL COM, op en the app on a connected mobile device, and press the
Wi-Fi symbol on the bottom right of the home page. Press the icon on the bottom left to view this manual.
WELL COM User Manual Rev. 2
Page 5 of 17
Page 10

SETUP
Wi-Fi Settings
Password Protection
To change the password for a WELL COM product’s Wi-Fi network:
1. Enter the current password in the Current Password field. The default password is 2323.
2. Enter the desired password in the New Password and Repeat Password fields.
3. Press the Save icon in the upper right corner of the menu. The product will restart.
To set whether that password will also protect against unauthorized program changes:
1. Under Password Protection, select Enable (will prompt for password to save program changes)
or Disable (will not prompt for password to save program changes).
2. Press the Save icon in the upper right corner of the menu.
SSID
To change the SSID of the WELL COM Wi-Fi signal:
1. Enter the desired SSID in the SSID field.
2. If there is a password, enter it in the Current Password field.
3. Press the Save icon in the upper right corner of the menu.
WIFI Channel
To avoid interference with other Wi-Fi signals in the immediate area, there are 2 Wi-Fi channels to select
from. Select from either CH 2 or CH 11, then press the Save icon in the upper right corner of the menu.
IP Address and Subnet Mask
To set the IP Address or Subnet Mask:
1. Enter the desired IP Address or Subnet Mask in the IP Address or Subnet Mask field.
2. If there is a password, enter it in the Current Password field.
3. Press the Save icon in the upper right corner of the menu.
Device Settings
The Device Settings allow selection of Input and WDMX modes, and also display the current Battery
charge and Firmware Version.
Input Mode
To set the Input Mode, select from either WIFI (WELL COM receives control signal through Wi-Fi) or DMX
(WELL COM receives control signal through DMX cable), then press the Save icon in the upper right
corner of the menu.
Connecting Products to WELL COM
To connect products to receive WDMX from the WELL COM:
1. Set the products to receive WDMX signal on the same WIFI Channel
2. Set the products to their most basic DMX personality.
3. Set the DMX starting address of each product.
as the WELL COM.
Page 6 of 17
WELL COM User Manual Rev. 2
Page 11

OPERATION
Reset all
channels
Go to Save
Screen
4. OPERATION
The WELL COM can store up to 24 unique steps in each of 18 scenes available for playback. Each sce ne
can be assigned a Fade Time and Hold Time, and output on as many of the 512 channels available to the
WELL COM as desired.
Visual Modeling Mode
This mode programs the output by visual modeling. To prog ram the steps of a scene by DMX chan nel, see
Edit Mode
.
Designing or Editing a Step
To program the light output for a step through the Visual Modeling mode, first select whether the products
to be programmed are RGB, RGBW , or RGBA. From the home p age of the ap p, press RGB FIXTURE (for
products with red, green, and blue LEDs), RGBW FIXTURE (for products with red, green, blue, and white
LEDs), or RGBA FIXTURE (for products with red, green, blue, and amber LEDs).
DMX Address
The DMX ADDRESS setting determines which range of DMX channels are currently being edited. In RGB
mode, the WELL COM will control the currently selected channel and the next 2. In RGBW and RGBA
modes, the WELL COM will control the currently selected channel and the next 3.
Products with different DMX starting addresses must be programmed separately. First program the color
for one starting address, and then change the DMX ADDRESS setting to the starting address of the next
product or set of products. The WELL COM will continu e to send previously configu red channel information
until the settings for those channels are changed.
Products that need to be the same color at all times should be set to the same DMX starting
address. Products that need to be different colors should have different starting addresses,
spaced apart so they do not overlap.
For example, in RGB mode: Product 1 and 2 need to be the same color, so they are both set to
DMX Address 001. Product 3 needs to be different, so it is set to DMX Address 004, because
channels 002 and 003 are taken up by Products 1 and 2.
Count
The COUNT setting allows products with con secutive, non-overlapping DMX addresses to be pr ogrammed
to an identical color without switching the DMX starting address in the app. Set the starting address of the
first fixture, and the number of fixtures, and that number of DMX addresses will respond to the visual
modeler. Examples:
• In RGBW mode, set the DMX ADDRESS to 001 and the COUNT to 4, for the following DMX
addresses to respond identically: 001, 005, 009, and 013.
• In RGB mode, set the DMX ADDRESS to 029 and the COUNT to 7, for the following DMX
addresses to respond identically: 029, 032, 035, 038, 041, 044, and 047.
WELL COM User Manual Rev. 2
Page 7 of 17
Page 12

OPERATION
Custom Presets
Brightness Slider
Palette
Dial
Sliders
Color
There are 3 methods of designing the color output. A preview of the output will display on the bottom of the
screen with the DMX values for each color. Press the Refresh icon to set all DMX values to 0.
Color Preset
The Preset mode provides a selection of pre-designed colors from which to choose. On the top row there
are 7 customizable presets. To design a custom preset:
1. Press and hold the desired custom preset box until it flashes.
2. Design a color using the Palette or Mixer.
3. Return to the Preset screen.
4. Tap the desired custom preset box until it stops flashing.
5. Tap another custom preset box to program it, or press the back button to exit.
Color Palette
The Palette mode provides a 360° color spectrum and a brightness slider for sele cting and refining the
output.
Color Mixer
The Mixer mode provides sliders for each available color, as well as a number dial for selecting specific
DMX values.
Page 8 of 17
WELL COM User Manual Rev. 2
Page 13

OPERATION
Fade Time
Hold Time
Saved Steps
Scene Selector
Selected Step
Unsaved Steps
Saving a Step
After all the colors and values have been set, follow the instructions below to save it to a scene.
1. Press the Save icon to the right of the Refresh icon.
2. Select the scene in which to save the step from the right side of th e scr ee n .
3. Set the FADE TIME (the amount of time it will take for each step to fade from one step to the next)
for the scene, from 0:0 (0 minutes, 0 seconds) to 59:59 (59 minutes, 59 seconds).
4. Set the HOLD TIME (the amount of time each step will output before moving to the next) for the
scene, from 0:0 (0 minutes, 0 seconds) to 59:59 (59 minutes, 59 seconds).
5. Press and hold the desired step in the scene. The current output will save to that step. If a
previously saved step is pressed and held in this way, it will be overwritten with the current output.
6. To view any step in the scene without overwriting it, press the circle for that step WITHOUT
holding.
WELL COM User Manual Rev. 2
Page 9 of 17
Page 14

OPERATION
Portrait Mode
Selected Scene
Saved Scenes
Unsaved Scene
Delete All
Edit Button
Backup Options
Landscape
Mode
Menu
Button
Fade
Time
Hold
Time
Scene
Setting
Playback
Button
Step
Selector
Channel
Faders
To Steps
13–24
T o Channels
9–512
Edit Mode
In Edit mode, individual DMX channel values can be set, along with the Fade Time, Hold Time, the Name
of the scene, and the color it will glow on the screen when selected for playback. The scene can also be
played back in this mode. Screen rotation must be enabled on the mobile device to enter the Edit mode.
To enter Edit mode:
1. On the home page, press PLAYBACK PAGES.
2. Press Edit, on the top right of the screen.
3. Tap the scene to be edited.
A scene does not need to have already been programmed to be viewed in Edit mode.
4. Turn the mobile device until the view changes to landscape mode.
Designing or Editing a Step
To design the output and save it to a step in Edit mode:
1. Use the faders for each DMX channel to set the desired values.
2. Press and hold the desired step in the scene. The current output will save to that scene. If a
previously saved step is pressed and held in this way, it will be overwritten with the current output.
3. To view any step in the scene without overwriting it, press the circle for that step WITHOUT
holding.
Page 10 of 17
WELL COM User Manual Rev. 2
Page 15

OPERATION
Scene Setting
To set the name and glow color of the scene, press the box next to the Play icon in the top right corner of
the screen. Glow color indicates that the scene is playing back. Press OK to save the name and color, or
Cancel to cancel.
Edit Mode Menu
Press the menu icon in the upper left corner of the screen to get the following options:
• Save Scene (saves the scene)
• Release Fades (sets all faders to 0)
• Delete Step (deletes the selected step from the scene)
• Delete All Steps (deletes every step from the scene)
Delete All
In Edit mode, with the view on the mobile device in portrait mode, an option appears on the bottom left of
the screen to DELETE ALL. Press this to delete all scenes.
WELL COM User Manual Rev. 2
Page 11 of 17
Page 16

OPERATION
Playback Pages
From the Playback Pages, press the desired sce ne to pla y it back. Individual scenes can also be deleted,
and the Backup can also be accessed.
Delete a Scene
To delete a scene:
1. On the home page, press PLAYBACK PAGES.
2. Press and hold any scene. Red X’s will appear in the corner of all saved scenes.
3. Press the red X of the desired scene or scenes to be deleted.
4. Press the back button to finish.
Page 12 of 17
WELL COM User Manual Rev. 2
Page 17

OPERATION
Backup
The Backup option allows configurations to be saved and restored.
To back up the current WELL COM configuration:
1. On the home page, press PLAYBACK PAGES.
2. Press Backup on the bottom right of the screen.
3. Press Backup Now.
To restore a previous backup to the WELL COM:
1. On the home page, press PLAYBACK PAGES.
2. Press Backup on the bottom right of the screen.
3. Select the desired Backup.
4. Press Restore. The selected Backup can also be deleted by pressing Delete.
WELL COM User Manual Rev. 2
Page 13 of 17
Page 18

TECHNICAL INFORMATION
5. TECHNICAL INFORMATION
Product Maintenance
To maintain optimum performance and minimize wear, clean this product frequently. Usage and
environment are contributing factors in determining the cleaning frequency.
Clean this product at least twice a month. Dust build-up reduces light output performance and can cause
overheating. This can lead to reduced light source life and increased mechanical wear.
To clean the product:
1. Unplug the product from power.
2. Wait until the product is at room temperature.
3. Use a vacuum (or dry compressed air) and a soft brush to remove dust collected on the external
vents.
4. Clean all transparent surfaces with a mild soap solution, ammonia-free glass cleane r , or iso propyl
alcohol.
5. Apply the solution directly to a soft, lint free cotton cloth or a lens cleaning tissue.
6. Softly drag any dirt or grime to the outside of the transparent surface.
7. Gently polish the transparent surfaces un til the y ar e fre e of haz e an d lint .
Always dry the transparent surfaces carefully after cleaning them.
Page 14 of 17
WELL COM User Manual Rev. 2
Page 19

TECHNICAL SPECIFICATIONS
6. TECHNICAL SPECIFICATIONS
Dimensions and Weight
LENGTH WIDTH HEIGHT WEIGHT
5.13 in (130.4 mm) 3.34 in (85 mm) 0.98 in (25 mm) 0.6 lb (0.3 kg)
Note: Dimensions in inches rounded to the nearest decimal digit.
Power
EXTERNAL POWER SUPPLY TYPE RANGE VOLTAGE SELECTION
Switching (internal) 100 to 240 VAC, 47/63 Hz Auto-ranging
PARAMETER 120 V, 60 HZ 208 V, 60 HZ 230 V, 50 HZ
Consumption 7 W 6 W 6 W
Operating Current 0.125 A 0.078 A 0.075 A
POWER I/O U.S./WORLDWIDE UK/EUROPE
Power input connector Micro USB B Male Micro USB B Male
Power Cord plug USB A Male USB A Male
Thermal
MAXIMUM EXTERNAL TEMPERATURE COOLING SYSTEM
113 °F (45 °C) Convection
DMX
I/O CONNECTOR CHANNELS
5-pin XLR
Wireless DMX
512
Ordering
PRODUCT NAME ITEM NAME ITEM CODE UPC NUMBER
WELL COM WELL COM 03081272 781462216207
WELL COM User Manual Rev. 2
Page 15 of 17
Page 20

RETURNS
RETURNS
Send the product prepaid, in the original box, and with the original packing and accessories. Chauvet will
not issue call tags.
Call Chauvet and request a Return Merchandise Authorization (RMA) number before shipping the product.
Be prepared to provide the model number, serial number, and a brief description of the cause(s) for the
return.
To submit a service request online, go to www.chauvetprofessional.com/service-request
Clearly label the package with an RMA number. Chauvet will refuse any product returned without an RMA
number.
Write the RMA number on a properly affixed label. DO NOT write the RMA number
directly on the box.
Once you have the RMA number, provide the following information on a piece of paper and place it inside
the box:
• Your name
• Your address
• Your phone number
• RMA number
• A brief description of the problem
Be sure to pack the product properly. Any shipping damage resulting from inadequate packaging will be
your responsibility. FedEx packing or double-boxing are recommended.
Chauvet reserves the right to use its own discretion to repair or replace returned
product(s).
.
Page 16 of 17
WELL COM User Manual Rev. 2
Page 21

CONTACT US
CONTACT US
World Headquarters
EUROPE
MEXICO
Address: Av. de las Partidas 34 - 3B
Lerma, Edo. de México, CP 52000
General Information Technical Support
Address: 5200 NW 108th Ave. Voice: (844) 393-7575
Sunrise, FL 33351 Fax: (954) 756-8015
Voice: (954) 577-4455 Email: chauvetcs@chauvetlighting.com
Fax: (954) 929-5560
Toll Free: (800) 762-1084 www.chauvetlighting.com
Website
General Information Technical Support
Address: Stokstraat 18 Email: eutech@chauvetlighting.eu
9770 Kruishoutem
Belgium www.chauvetlighting.eu
Voice: +32 9 388 93 97
Website
General Information Technical Support
Address: Unit 1C Email: uktech@chauvetlighting.com
Brookhill Road Industrial Estate
Pinxton, Nottingham, UK
NG16 6NT www.chauvetlighting.co.uk
Voice: +44 (0) 1 773 511115
Fa x: +44 (0) 1773 511110
Website
General Information Technical Support
(Entrance by Calle 2)
Zona Industrial Lerma
Email: servicio@chauvet.com.mx
Website
Voice: +52 (728) 690-2010 www.chauvet.com.mx
Visit the applicable website above to verify our contact information and instructions to request support.
Outside the U.S., United Kingdom, Ireland, Mexico or Benelux, contact the dealer of record.
WELL COM User Manual Rev. 2
Page 17 of 17
 Loading...