

Page 1
Moving
Rehabilitation
Forward™
User Manual
Model 2766
Intelect® Advanced
Laser Module
DJO is an ISO 13485 Certified Company
Page 2

TABLE OF CONTENTS
Intelect® Advanced Laser Module
FOREWORD . . . . . . . . . . . . . . . . . . . . . . . . . . . . . . . . . . . . . . . . . . . . . . . . . .1
Product Description . . . . . . . . . . . . . . . . . . . . . . . . . . . . . 1
ABOUT LASER THERAPY . . . . . . . . . . . . . . . . . . . . . . . . . . . . . . . . . . . . . .3
Precautionary Instructions. . . . . . . . . . . . . . . . . . . . . . . . 3
Cautions. . . . . . . . . . . . . . . . . . . . . . . . . . . . . . . . . . . . . . . 3
Warnings . . . . . . . . . . . . . . . . . . . . . . . . . . . . . . . . . . . . . . 4
Dangers . . . . . . . . . . . . . . . . . . . . . . . . . . . . . . . . . . . . . . . 6
Overview of Laser Therapy . . . . . . . . . . . . . . . . . . . . . . . 7
Common Terms . . . . . . . . . . . . . . . . . . . . . . . . . . . . . . . . . 8
Indications. . . . . . . . . . . . . . . . . . . . . . . . . . . . . . . . . . . . 10
Contraindications . . . . . . . . . . . . . . . . . . . . . . . . . . . . . . 10
Additional Precautions. . . . . . . . . . . . . . . . . . . . . . . . . . .11
Preventing Overheating of the Applicators . . . . . . . . . 12
Preventing Adverse Effects . . . . . . . . . . . . . . . . . . . . . . 12
NOMENCLATURE . . . . . . . . . . . . . . . . . . . . . . . . . . . . . . . . . . . . . . . . . . . 13
SPECIFICATIONS . . . . . . . . . . . . . . . . . . . . . . . . . . . . . . . . . . . . . . . . . . . . 16
Module Specifications . . . . . . . . . . . . . . . . . . . . . . . . . . 16
Laser Technical Specifications . . . . . . . . . . . . . . . . . . . . 17
Description of Device Markings . . . . . . . . . . . . . . . . . . 17
Laser Applicator Technical Specifications . . . . . . . . . . . 18
Single Diode Applicators . . . . . . . . . . . . . . . . . . . . . 18
Cluster Diode Applicators. . . . . . . . . . . . . . . . . . . . . 19
Laser Protective Eyewear Technical Specifications . . . 21
SETUP. . . . . . . . . . . . . . . . . . . . . . . . . . . . . . . . . . . . . . . . . . . . . . . . . . . . . . 22
Attaching the Module to the Unit . . . . . . . . . . . . . . . . . 22
Removing the Module from the Unit . . . . . . . . . . . . . . 28
OPERATION . . . . . . . . . . . . . . . . . . . . . . . . . . . . . . . . . . . . . . . . . . . . . . . 29
Preparing the Patient's Skin for Therapy . . . . . . . . . . . 29
Starting, Stopping, & Interrupting Therapy . . . . . . . . . 30
Using the Acupuncture Point Locator. . . . . . . . . . . . . . 39
Using Clinical Indications . . . . . . . . . . . . . . . . . . . . . . . 43
Saving User Protocols . . . . . . . . . . . . . . . . . . . . . . . . . . 46
System Utilities. . . . . . . . . . . . . . . . . . . . . . . . . . . . . . . . 48
Changing the Laser PIN . . . . . . . . . . . . . . . . . . . . . . 48
Changing the Display . . . . . . . . . . . . . . . . . . . . . . . . 50
Displaying the Laser Rationale . . . . . . . . . . . . . . . . 50
Treatment Tips. . . . . . . . . . . . . . . . . . . . . . . . . . . . . . . . . 51
ACCESSORIES. . . . . . . . . . . . . . . . . . . . . . . . . . . . . . . . . . . . . . . . . . . . . . . 52
Standard Accessories. . . . . . . . . . . . . . . . . . . . . . . . . . . 52
Optional Accessories . . . . . . . . . . . . . . . . . . . . . . . . . . . 52
TROUBLESHOOTING . . . . . . . . . . . . . . . . . . . . . . . . . . . . . . . . . . . . . . . 53
Error Messages. . . . . . . . . . . . . . . . . . . . . . . . . . . . . . . . 53
MAINTENANCE . . . . . . . . . . . . . . . . . . . . . . . . . . . . . . . . . . . . . . . . . . . . 56
Maintaining the Intelect Advanced Laser Module. . . . 56
Cleaning. . . . . . . . . . . . . . . . . . . . . . . . . . . . . . . . . . . . . . 56
Service. . . . . . . . . . . . . . . . . . . . . . . . . . . . . . . . . . . . . . . 56
Warranty Repair/Out of Warranty Repair . . . . . . . . . . . 57
WARRANTY . . . . . . . . . . . . . . . . . . . . . . . . . . . . . . . . . . . . . . . . . . . . . . . . 58
i
Page 3

FOREWORD
This manual has been written for the operators of the Intelect Advanced Laser Module. It contains general
instructions for operation, precautionary instructions, and maintenance recommendations. For all other information
(i.e., stim, battery pack, remote, ultrasound, etc.) concerning your Intelect Advanced Therapy Systems, consult
the user manual shipped with those products. In order to obtain maximum life and efficiency from your Intelect
Advanced Laser Module, and to assist in the proper operation of the unit, read and understand this manual
thoroughly.
The specifications put forth in this manual were in effect at the time of publication. However, owing to DJO, LLC’s
policy of continuous improvement, changes to these specifications may be made at any time without obligation on
the part of DJO, LLC.
Before administering any treatment to a patient, you should become acquainted with the operating procedures,
as well as the indications, contraindications, warnings, and precautions. Consult other resources for additional
information regarding the application of therapeutic laser. Users of this device should refer to CAN/CSA-Z386-92:
Laser Safety in Health Care Facilities or ANSI Z-136.3, 1996: American National Standard for the Safe Use of Lasers
in the Health Care Environment.
Intelect® Advanced Laser Module
Product Description
The Intelect Advanced Laser Module, designed and manufactured by DJO offers a new dimension in clinical laser
therapy made possible by advanced software design and digital signal processing.
When you add a Laser Module to your existing Intelect Advanced main unit (which may already contain
electrotherapy, ultrasound, or both) the result is a unit with extraordinary versatility based on simplicity of
operation.
Effectiveness of this treatment is dependent upon correct use. If treatment times are exceeded, the therapy may not
result in positive clinical outcomes.
© 2011 DJO, LLC. All rights reserved. Any use of editorial, pictorial, or layout composition of this publication without express written consent from DJO, LLC is strictly prohibited. This publication
was written, illustrated, and prepared for distribution by DJO, LLC.
1
Page 4

FOREWORD
The following features are available on the Intelect Advanced Laser Module:
• Clinical Indications
An efficient approach for setting up a treatment using preset parameters.
• Real Time Feedback
This feature provides a continuously measured and monitored output system that adjusts the dosage
delivered to the patient.
• Electronic Signature™
Automatically calibrate the system to any Intelect Advanced Laser applicator.
• Ergonomic Applicators
A new ergonomic design that offers a 20 degree contour in the applicator hand grip. This ergonomic extra will
help deliver uniform laser therapy with greater clinician comfort.
• Clear LCD display
Guide the operator through the setup process providing continuous feedback about treatment settings. Gives
you optimal visibility during attended procedures.
• User Protocols
User protocols allow you to set, save, and change the parameters of each program (protocol) in order to tailor
it to meet your patients’ specific needs. Ten storage slots are available for user protocols.
• Laser Acupuncture
Combined with the laser applicator (single laser diode), the patient-handheld Acupuncture Point Locator allows
the user to locate optimum treatment sites on the patient’s body.
Intelect® Advanced Laser Module
2
Page 5
ABOUT LASER THERAPY
DANGER
WARNING
CAUTION
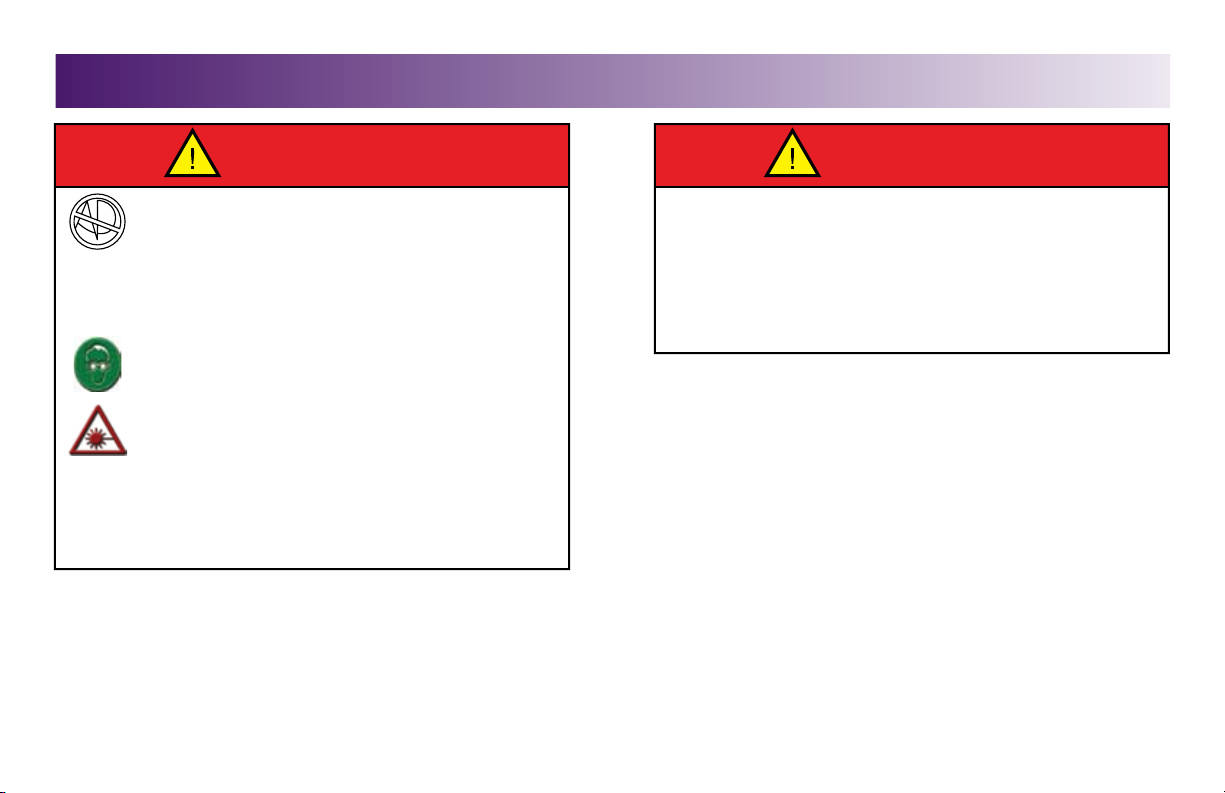
PRECAUTIONARY INSTRUCTIONS
The precautionary instructions found in this section and throughout
this manual are indicated by specific symbols. Understand these
symbols and their definitions before operating this equipment. The
definition of these symbols are as follows:
Text with a “CAUTION” indicator will explain possible Safety
infractions that could have the potential to cause minor to moderate
injury or damage to equipment.
Text with a “WARNING” indicator will explain possible Safety
infractions that will potentially cause serious injury and equipment
damage.
Text with a “DANGER” indicator will explain possible Safety
infractions that are imminently hazardous situations that would
result in death or serious injury.
NOTE: Throughout this manual “NOTE” may be found. These notes
are helpful information to aid in the particular area or function
being described.
Intelect® Advanced Laser Module
CAUTION
• Read, understand, and practice the precautionary and operating
instructions. Know the limitations and hazards associated with
using any laser device. Observe the precautionary and
operational decals placed on the unit.
• Do not operate this unit when connected to any unit other than
Chattanooga devices.
• Do not operate this unit in an environment where other devices
are being used that intentionally radiate electromagnetic energy
in an unshielded manner. Portable and mobile RF communications
equipment can affect Medical Electrical Equipment.
• The laser unit should be routinely checked before each use to
determine that all controls function normally; especially that the
dosage control properly adjusts the intensity of the laser output in
a stable manner. Also, determine that the treatment time control
actually terminates the laser output when the timer reaches zero.
• DO NOT use sharp objects such as a pencil point or ballpoint
pen to operate the buttons on the Operator Interface as damage
may result.
• Use of controls or adjustments or performance of procedures
other than those specified herein may result in hazardous
exposure to laser energy.
• Handle the applicator with care. Inappropriate handling of the
applicator may adversely affect its characteristics.
• Inspect treatment head cables and associated connectors
before each use.
• This unit should be operated in temperatures between 15 to
40°C (59 to 85°F), and transported and stored in temperatures
between -7 to 43°C (20 to 110°F), with relative humidity ranging
from 30% - 60%.
3
Page 6
WARNING
ABOUT LASER THERAPY
• Use of parts or materials other than Chattanooga's can
degrade minimum safety.
• DO NOT disassemble, modify, or remodel the unit or
accessories. This may cause unit damage, malfunction,
electrical shock, fire, or personal injury.
• Failure to use and maintain the Intelect Advanced Laser and
its accessories in accordance with the instructions outlined in
this manual will invalidate your warranty.
• DO NOT remove the cover. This may cause unit damage,
malfunction, electrical shock, fire, or personal injury. There
are no user-serviceable parts inside the unit. If a malfunction
occurs, discontinue use immediately and consult the dealer
for repair service.
• DO NOT permit any foreign materials or liquids to enter the
unit. Take care to prevent any foreign materials including, but
not limited to, inflammables, water, and metallic objects from
entering the unit. These may cause unit damage, malfunction,
electrical shock, fire, or personal injury.
• If you have difficulty operating the unit after carefully
reviewing this users manual, contact your DJO dealer for
assistance.
• This equipment generates, uses, and can radiate radio
frequency energy and, if not installed and used in accordance
with the instructions, may cause harmful interference to other
devices in the vicinity. However, there is no guarantee that
interference will not occur in a particular installation. Harmful
interference to other devices can be determined by turning
this equipment on and off, try to correct the interference
using one or more of the following: Reorient or relocate
Intelect® Advanced Laser Module
CAUTIONCAUTION
the receiving device, increase the separation between the
equipment, connect the equipment to an outlet on a different
circuit from that to which the other device(s) are connected
and/or consult the factory field service technician for help.
• Before each use, clean the plastic lens with NOVUS® Polish
System. Contact Novus at: www.novuspolish.com. Apply
with a clean cloth. Failure to clean the lens between patient
therapy sessions could cause beam fragmentation, which may
result in serious injury and equipment damage.
• Be sure to read all instructions for operation before treating a
patient.
• DO NOT drop the applicator or module on hard surfaces. Do
not cool an overheated applicator with ice water or ice packs.
Do not allow the applicator to reach maximum temperatures
repeatedly. Do not submerge the applicator or module in
water. All of these conditions will damage the applicator
and module. Damage resulting from these conditions is not
covered under the warranty.
• Use of controls or adjustments or performance of procedures
other than those specified herein may result in hazardous
exposure to laser energy.
• Make certain that the unit is electrically grounded by
connecting only to a grounded electrical service receptacle
conforming to the applicable national and local electrical codes.
4
Page 7
WARNING
ABOUT LASER THERAPY
• This device should be kept out of the reach of children.
• This device should be used only under the continued
supervision of a licensed practitioner.
• Care must be taken when operating this equipment around
other equipment. Potential electromagnetic or other
interference could occur to this or to the other equipment. Try
to minimize this interference by not using other equipment
(e.g., cell phones) in conjunction with it.
• Dispose of all products in accordance with local and national
regulations and codes.
• This equipment is not designed to prevent the ingress of
water or liquids. Ingress of water or liquids could cause
malfunction of internal components of the system and
therefore create a risk of injury to the patient.
• Use of controls or adjustments or performance of procedures
other than those specified herein may result in hazardous
conditions causing damage to the module and applicator.
• Use of other accessories other than those specified may result
in increased emissions and decreased immunity.
• If laser is not in use, power off unit or remove applicator.
• Laser equipment not in use should be protected against
unqualified use.
Intelect® Advanced Laser Module
5
Page 8
DANGER
DANGER
ABOUT LASER THERAPY
Intelect® Advanced Laser Module
• Equipment not suitable for use in the presence of a
flammable anesthetic mixture with air, oxygen, or
nitrous oxide.
• The solvents of adhesives and flammable solutions
used for cleaning and disinfecting should be
allowed to evaporate before the unit is used.
• DO NOT connect the unit to an electrical supply
without first verifying that the power supply is
the correct voltage. Incorrect voltage may cause
unit damage, malfunction, electrical shock, fire,
or personal injury. Your unit was constructed to
operate only on the electrical voltage specified on
the Voltage Rating and Serial Number Plate. Contact
your DJO dealer if the unit is not properly rated.
• Protective safety glasses should be worn by the
operator and patient to block infrared energy from
the eyes during treatment.
• DO NOT point the laser beam directly into human
or animal eyes. The lens of the eye does not detect
the invisible, coherent laser beams, potentially
resulting in permanent retinal damage.
• This unit is considered to be a Class IIIB laser product and
thus emits visible and invisible laser radiation (IR). Avoid direct
exposure to the laser beam. The symbol to the left is located
on the back of the applicator and indicates the active radiant
surface (the area on the applicator that emits infrared laser
energy) and the direction of the beam of light.
• When the unit is on, not all wavelengths are visible to the
naked eye. Therefore, when performing any operational or
functional check, always wear DJO laser protective eyewear.
6
Page 9

ABOUT LASER THERAPY
Intelect® Advanced Laser Module
OVERVIEW OF LASER THERAPY
In short, the light energy absorbed into the patient’s tissue triggers biological changes at a cellular level to provide
the temporary increase in local blood circulation; temporary relief of minor muscle and joint aches, pains, and
stiffness; relaxation of muscles and relief of muscle spasms; and temporary relief of minor pain and stiffness
associated with arthritis. The dose and frequency of treatment can be adjusted to produce the desired effect.
Low Level Laser Light differs from ordinary light in four ways. Briefly, it is much more intense, directional,
monochromatic and coherent. Most lasers consist of a column of active material with a partly reflecting mirror at
one end and a fully reflecting mirror at the other. The active material can be solid (ruby crystal), liquid or gas (HeNe,
CO
, etc.).
2
Low Level Laser Light has unique physical properties that no ordinary light has. This is the key to why laser light
is so effective compared to other kinds of light in healing. There are more than 100 double-blind positive studies
confirming the clinical effect of LLLT (Low Level Laser Therapy). More than 2500 research reports are published.
The book Laser Therapy - clinical practice and scientific background by Jan Tunér and Lars Hode is a good reference
guide for literary documentation.
There is no exact limit with respect to the penetration of the light. The light gets weaker the further from the surface
it penetrates. There is, however, a limit at which the light intensity is so low that no biological effect of the light
can be registered. This limit, where the effect ceases, is called the greatest active depth. In addition to the factors
mentioned above, this depth is also contingent on tissue type, pigmentation, and dirt on the skin. Fat tissue is more
transparent than muscle tissue.
Some laser applicators may cause a noticeable heat sensation, particularly in hairy areas and on sensitive tissues
such as lips.
7
Page 10

ABOUT LASER THERAPY
Intelect® Advanced Laser Module
OVERVIEW OF LASER THERAPY– COMMON TERMS
Common Terms
Applicator - The hand held assembly used to deliver laser energy. The applicator includes the laser head, transducer, and related
electronics.
Collimating - The shape of the laser beam. While neither focused nor dispersed, this laser beam resembles a column when
applied from the unit through the applicator.
Continuous Mode – The output of the laser is not interrupted during the treatment time. This mode imparts the most energy to
the tissues and is used when a maximal effect is desired. (See Duty Cycle).
Dosage – A measure of the intensity of the laser over the treatment area. The unit of measure is Joules or joules/cm
Energy – Measured in Joules, energy equals the treatment time multiplied by the power. More importantly, Energy Density
equals the power output multiplied by the treatment time, and divided by the spot size (cm
measurement of energy delivered.
Frequency – Pulsed frequencies are selectable from 2.5 to 20,000 Hz. The lower the frequency, the longer the wavelength, the
deeper the penetration of laser.
Galvanic Skin Response (GSR) – Located by the Acupuncture Point Locator and Laser Applicator (single diode), GSR are the areas
on the human body that indicate the most sensitivity and serve to be good points of treatment for laser therapy to simulate
acupuncture.
Laser Acupuncture – A function available on the Laser Module that allows the user to locate GSR’s (Galvanized Skin Responses)
on the patient’s body and treat those areas accordingly.
Laser Head – The clear lens face of the applicator that contacts the patient’s skin. It consists of laser diodes with or without LED’s
(depending on the applicator).
Power – Measured in Watts (W), power wattage is directly proportional to the treatment time and penetration of the laser energy.
High-powered diodes will reduce patients’ treatment time and give a higher amount of energy at a deeper depth. Power
output can be either continuous or pulsed.
8
2
). This gives a more specific
2
.
Page 11

ABOUT LASER THERAPY
Intelect® Advanced Laser Module
OVERVIEW OF LASER THERAPY– COMMON TERMS
Power Density - Ratio of power divided by treatment time.
Pulsed Mode – This is the ratio of the “On” time to “Total” time of the cycle, expressed as a percentage. The lower the
percentage, the lower temporal average intensity. 100% is continuous laser light. Pulsed Mode is 90% on and 10% off.
NOTE: Pulsed Mode is also equivalent to Duty Cycle.
Spot Size - Area of the LED, SLD, or laser beam when it leaves the face of the lens.
Treatment Area - Area of tissue affected by LED, SLD, or laser when wavelength, divergence angles, and depth of penetration are
factored. This is the area used to calculate dosage.
Treatment Time – Measured in seconds, it is the suggested time per laser point that therapy is given.
Wavelength – Measured in nanometers (nm), wavelength is the key component in obtaining effective therapy as different
wavelengths bring about different physiological effects. Superficial skin disorders have been found to be most effectively
treated at wavelengths 600-700 nm, while deeper muscular or ligament lesions and joint conditions are better treated at higher
wavelengths of 700-1000 nm.
9
Page 12

ABOUT LASER THERAPY
Intelect® Advanced Laser Module
Indications
The Intelect Advanced Laser Module is indicated
for the following:
• increasing local blood circulation.
• relieving minor muscle and joint aches, pains,
and stiffness.
• relaxing muscles.
• relieving muscle spasms.
• relieving minor pain and stiffness associated
with arthritis.
• promoting nerve regeneration, bone growth,
and ligament repair.
• healing wounds.
Contraindications
The Intelect Advanced Laser Module should NOT be used:
• where analgesia may mask progressive pathology, and
where the practitioner would normally avoid the use of any
other analgesia in order to retain the beneficial aspects of
pain.
• for direct aim into the eyes of humans or animals.
• over areas injected with steroids in the past 2-3 weeks.
• over areas that are suspicious or contain potentially
cancerous tissue.
• over areas of active hemorrhage.
• over a pregnant uterus.
• over the neck (thyroid or carotid sinus region) or chest
(vagus nerve or cardiac region of the thorax).
• directly over areas with open wounds, unless covered with a
clear protective barrier.
• treatment over sympathetic ganglia.
• for symptomatic local pain relief unless etiology is
established or unless a pain syndrome has been diagnosed.
• on patients suspected of carrying serious infectious disease
and or disease where it is advisable, for general medical
purposes, to suppress heat or fevers.
10
Page 13

ABOUT LASER THERAPY
• over or near bone growth centers until bone growth is
complete.
• over the thoracic area if the patient is using a cardiac
pacemaker.
• over or applied to the eye.
• on ischemic tissues in individuals with vascular
disease where the blood supply would be unable to
follow the increase in metabolic demand and tissue
necrosis might result.
Additional Precautions
Additional precaution should be used when the laser is
used on patients with the following conditions:
• Over an area of the spinal cord following a
laminectomy, i.e., when major covering tissues have
been removed.
• Over anesthetic areas.
• On patients with hemorrhagic diatheses.
Intelect® Advanced Laser Module
11
Page 14
DANGER
ABOUT LASER THERAPY
WARNING
Patients with an implanted neurostimulation device must not be treated
with or be in close proximity to any shortwave diathermy, microwave
diathermy, therapeutic laser diathermy or laser diathermy anywhere on
their body. Energy from diathermy (shortwave, microwave, ultrasound,
and laser) can be transferred through the implanted neurostimulation
system, can cause tissue damage and can result in severe injury or death.
Injury, damage, or death can occur during diathermy therapy even if the
implanted neurostimulation system is turned "off."
Preventing Overheating of the Applicators
To prevent the applicator from becoming overheated,
check to be sure proper contact is being made
throughout the treatment.
Preventing Adverse Effects
Perform the following procedures to avoid the negative
effects of laser therapy.
Patient Susceptibility
Intelect® Advanced Laser Module
Be sure to inspect the treatment area during and
following treatment, and discontinue if an adverse
reaction does occur.
Output Power
Higher output levels have a greater potential for
patient discomfort. Choose a lower setting to reduce
output or select a pulsed duty cycle to decrease patient
discomfort.
Head Max. Temp. Disclaimer
Head Max. Temp. is for the protection of the equipment,
not for the protection of the patient.
Factors that Affect Treatment
The following factors may affect laser treatment:
• Color of skin (light or dark)
• Age of lesion
• Depth of lesion
• Sensitivity of patient
• Medications that increase sensitivity to light.
Some patients are more sensitive to laser output (i.e., patients taking
medications that increase sensitivity to light) and may experience a
reaction similar to a heat rash.
12
Page 15

NOMENCLATURE
Intelect® Advanced Laser Module
MODULE APPLICATOR
Feet Indentions
Ribbon Cable
Connection
Patient Interrupt
Switch Connection
Door Interrupt
Switch Connection
Power Cord
Routing Area
Applicator
Connection
Acupuncture Point
Locator Connection
13
Lens
LED’s
Pause/Resume
Button
Laser
Diode
Laser
Head
LED Indicator
(Output Power)
Page 16

NOMENCLATURE
Feet Indentions
These indentions retain the rubber feet of the unit. This allows the module to align and rest directly
underneath the unit.
Ribbon Cable Connection
A ribbon cable connects the unit to the module at this location on the module in order to transfer data from
the laser module to the unit.
Patient Interrupt Switch Connection
As a safety measure and to minimize any apprehension, it is recommended that you always allow the
patient to hold the Patient Interrupt Switch during laser therapy. When the red button on the end of the
switch is pressed, a beeper sounds and the treatment is paused. Parameters can then be verified and
changed (if necessary) and therapy can be resumed.
Use of the Patient Interrupt Switch should always be explained to the patient before starting treatment.
Patients will feel safer knowing they can stop the treatment if necessary.
The Patient Interrupt Switch is very sensitive. Explain this to the patient when using it in order to prevent
unnecessary interruptions in treatment.
Laser Interlock (Door Interrupt Switch Connection)
This option allows you to set up a switch (similar to the patient interrupt switch) that interrupts treatment
when the door of the treatment room is opened during a therapy session.
Acupuncture Point Locator Connection
This port serves as the connection between the Acupuncture Point Locator and the module.
Intelect® Advanced Laser Module
14
Page 17

NOMENCLATURE
Applicator Connection
This port serves as the connection point between the module and the applicator.
Power Cord Routing Area
This hollow area on the back of the module allows you to feed the power cord from the unit through the
module and out to the electrical outlet.
Lens
This clear lens acts as a shield to protect the patient’s skin.
LED’s
The LED’s (Light Emitting Diodes) generate different wavelengths of light that allow the user to treat topical
or surface symptoms.
Laser Diode
This mechanism generates different wavelengths of light that allow the user to treat various, deeper
penetrating symptoms.
Laser Head
This aluminum housing located on the end of the applicator accommodates the lens, laser diodes, LED’s,
and their associated electronics.
Pause/Resume Button
Use this button to pause the treatment session. To restart therapy, press the PAUSE button.
LED Indicator (Output Power)
This orange light illuminates when laser energy is being distributed by the applicator.
Intelect® Advanced Laser Module
15
Page 18

SPECIFICATIONS
MODULE SPECIFICATIONS
DIMENSIONS
Length .................................................... 27.8 cm (10.95 in)
Height ..................................................... 21.2 cm (8.35 in)
Width ........................................................ 4.2 cm (1.65 in)
WEIGHT
Standard Weight ........................................1.3 kg (2.9 lbs)
Intelect® Advanced Laser Module
POWER
Input ................... 120 - 240 V - 1.0 A, 50/60 Hz 75 W Max
Fuses ..................... 1.0A Time Lag (not user serviceable)
Electrical Class .................................................... CLASS 1
Electrical Type ................................................... TYPE B
Output Type ................................... infrared Lamp (laser)
Laser Class .................................................................... 3B
Complies with EN/IEC 60601-1, 60601-1-2, 60601-2-22,
and 60825-1.
CAN/CSA C22.2 No. 601.1-M90 w/A2.
Each module is shipped with four screws, laser
protective eyewear, this manual, and an extended front
access panel.
For a complete list of standard and optional
accessories, see page 52.
16
Page 19
SPECIFICATIONS
Intelect® Advanced Laser Module
LASER TECHNICAL SPECIFICATIONS DESCRIPTION OF DEVICE MARKINGS
Duty Cycles
Pulsed ........................................................................... 90%
Continuous ................................................................. 10 0%
Pulse Frequencies ...................................... 2.5 Hz - 20000 Hz
................................................................... and continuous.
Wavelengths ......... 670-950 nm (dependent on applicator)
Output ................. 10-1440 mW (dependent on applicator)
Output accuracy ...................................... +/- 20% of nominal
Maximum Treatment Time ...................... 4 min for any laser,
...................................................................... 10 min for LED
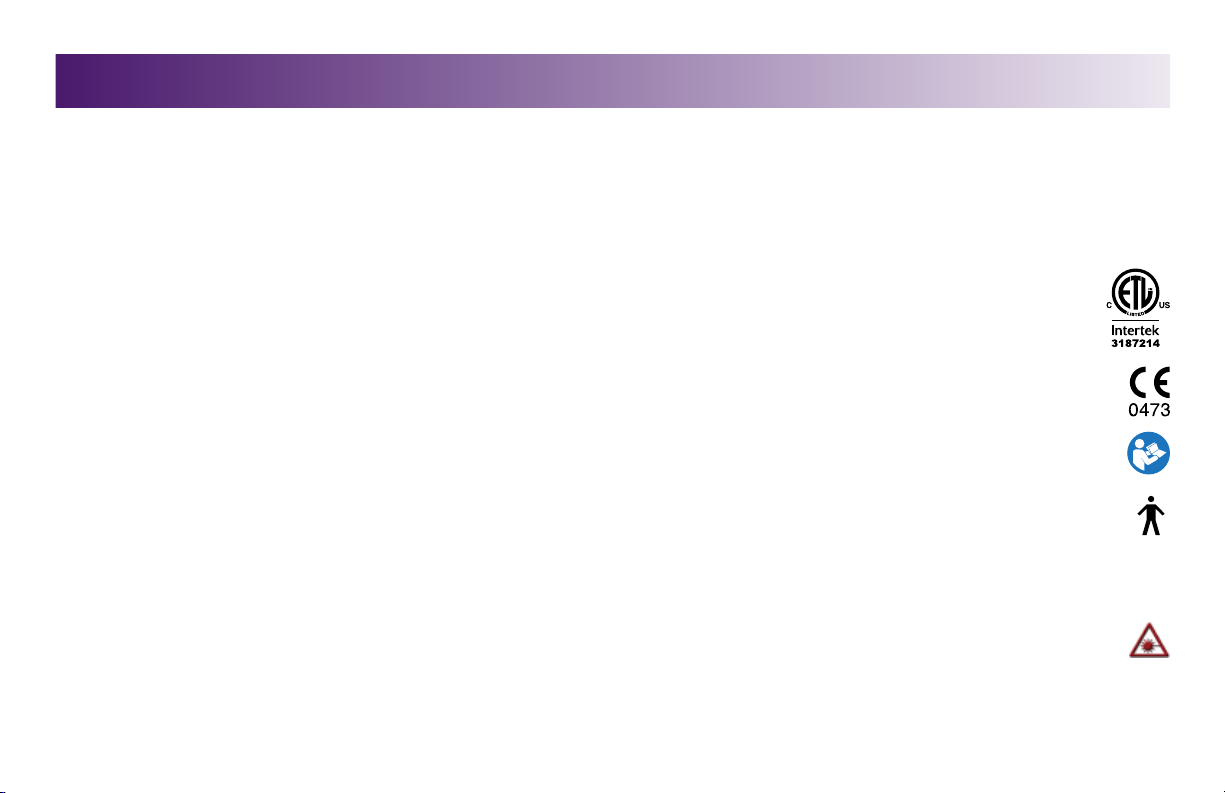
The markings on the unit are assurance of its conformity
to the highest applicable standards of medical
equipment safety and electromagnetic compatibility. One
or more of the following markings may appear on the
device:
Standards:
Classified by Intertek Testing Services NA Inc.
Complies with 21CFR 1040.10 & 1040.11
IEC/UL/EN 60601-1, 60601-1-2, and 60601-2-22
CAN/CSA C22.2 No. 601.1-M90 w/A2. ..........................
Refer to ACCOMPANYING DOCUMENTS ....................
Type B Equipment ...........................................................
This unit is considered to be a Class 3B laser product
and thus emits visible and invisible laser radiation (IR).
Avoid direct eye exposure to the laser light beam. The
symbol to the right is located on the back of the
applicator and indicates the active radiant surface (the
area on the applicator that emits infrared laser energy
and the direction of the beam of light). .............................................
17
Page 20

SPECIFICATIONS
Intelect® Advanced Laser Module
LASER APPLICATOR TECHNICAL SPECIFICATIONS
For all single diode and cluster laser and LED applicators, the expected increase in the measured quantities after manufacture
added to the values measured at the time of manufacture is ±20%.
The new software incorporates a cooling function that forces the user to cool the laser clusters prior to the next treatment.
The software will calculate the cooling time needed when treatment times exceed 3 minutes per application. For a 3 minute
treatment, it will force a 15 second cool down period before the next treatment can begin. For a 4 minute treatment, it will force a
2 minute cool down period before the next treatment can begin. The software extrapolates for times between 3 and 4 minutes.
A message will display on the screen informing the user that the probe is cooling down and the time period required. After
5 seconds, this message will disappear. If the user attempts to use the probe before the cool down period is completed, the
message will re-display to signify that the applicator is still in cool down mode. After the cool down period is complete, a
message displays that informs the user that the unit is ready for use.
Single Diode Applicators
Applicator Wavelength
(nm)
670 nm 10 mW LED 670 10 0.625 0.16 LED 0.386308 0.698132 N/A 0.16
850 nm 40 mW Laser 850 40 0.571 0.07 Laser 2.4887 0.097 0.54334 0.012
850 nm 100 mW Laser 850 100 1.43 0.07 Laser 6.2218 0.097 0.54334 0.012
850 nm 150 mW Laser 850 150 2.14 0.07 Laser 8.80 0.097 0.54334 0.012
850 nm 200 mW Laser 850 200 2.85 0.07 Laser 12.44 0.097 0.54334 0.0376
820 nm 300 mW Laser 820 300 0.606 0.495 Laser 15.24 0.097 0.54334 0.242
Output
Power
(mW)
Power
Density
(W/cm2)
Treatment
Area
(cm2)
18
Diode
Type
Nominal Ocular
Hazard Distance
(NOHD-in
meters)
Divergence
a1
(rad)
Divergence
a2
(rad)
Spot
Size
(cm2)
Page 21

SPECIFICATIONS
LASER APPLICATOR TECHNICAL SPECIFICATIONS continued
Cluster Diode Applicators
Intelect® Advanced Laser Module
Applicator
9 Diode Cluster Laser
290 mW
9 Diode Cluster Laser
540 mW
9 Diode Cluster Laser
1040 mW
13 Diode Cluster Laser
265 mW
13 Diode Cluster Laser
415 mW
13 Diode Cluster Laser
715 mW
Output
Power
(mW)
Power
Density
(W/
2
cm
Treatment
Area
(cm
)
Diode
2
Type
)
290 0.038 7.55 GaAlAs
and LED
540 0.072 7.55 GaAlAs
and LED
1040 0.138 7.55 GaAlAs
and LED
265 0.035 7.55 GaAlAs
and LED
415 0.055 7.55 GaAlAs
and LED
715 0.095 7.55 GaAlAs
and LED
Diode
Specifications
Four 670 nM (10 mW) LED
Five 850 nm (50 mW) Laser
Four 670 nm (10 mW) LED
Five 850 nm (100 mW) Laser
Four 670 nm (10 mW) LED
Five 850 nm (200 mW) Laser
Seven 670 nm (10 mW) LED
Three 850 nm (50 mW) Laser
Three 950 nm (15 mW) LED
Seven 670 nm (10 mW) LED
Three 850 nm (100 mW) Laser
Three 950 nm (15 mW) LED
Seven 670 nm (10 mW) LED
Three 850 nm (200 mW) Laser
Three 950 nm (15 mW) LED
19
Nominal Ocular
Hazard Distance
(NOHD-in
meters)
Divergence
a1
(rad)
Divergence
a2
(rad)
3.1109 0.097 0.54334 0.64
6.2218 0.097 0.54334 0.64
12.4438 0.097 0.54334 0.64
3.1109 0.097 0.54334 1. 1 2
6.2218 0.097 0.54334 1.1 2
12.4438 0.097 0.54334 1.12
Spot
Size
2
(cm
0.06
0.06
0.188
0.136
0.48
0.136
0.48
0.1128
0.48
)
Page 22

SPECIFICATIONS
LASER APPLICATOR TECHNICAL SPECIFICATIONS continued
Cluster Diode Applicators
Intelect® Advanced Laser Module
Applicator
19 Diode Cluster LED
325 mW
33 Diode Cluster LED
565 mW
33 Diode Cluster Laser
690 mW
33 Diode Cluster Laser
940 mW
33 Diode Cluster Laser
1440 mW
Output
Power
(mW)
Power
Density
(W/
2
cm
Treatment
Area
(cm
)
Diode
2
Type
)
325 0.043 7.55 LED
565 0.018 31.2 LED
690 0.022 31.2 GaAlAs
and LED
940 0.030 31.2 GaAlAs
and LED
1440 0.046 31.2 GaAlAs
and LED
Diode
Specifications
Six 670 nm (10 mW) LED
Seven 880 nm (25 mW) LED
Six 950 nm (15 mW) LED
Twelve 670 nm (10 mW) LED
Thirteen 880 nm (25 mW) LED
Eight 950 nm (15 mW) LED
Twelve 670 nm (10 mW) LED
Eight 880 nm (25 mW) LED
Eight 950 nm (15 mW) LED
Five 850 nm (50 mW) Laser
Twelve 670 nm (10 mW) LED
Eight 880 nm (25 mW) LED
Eight 950 nm (15 mW) LED
Five 850 nm (100 mW) Laser
Twelve 670 nm (10 mW) LED
Eight 880 nm (25 mW) LED
Eight 950 nm (15 mW) LED
Five 850 nm (200 mW) Laser
20
Nominal Ocular
Hazard Distance
(NOHD-in
meters)
Divergence
a1
(rad)
Divergence
a2
(rad)
0.386308 0.698132 N/A 7.55
0.386308 0.698132 N/A 31.2
3.1109 0.097 0.54334 1.92
6.2218 0.097 0.54334 1.92
12.4438 0.097 0.54334 1.92
Spot
Size
(cm
1.28
1.28
.06
1.28
1.28
.06
1.28
1.28
.06
2
)
Page 23

SPECIFICATIONS
LASER PROTECTIVE EYEWEAR TECHNICAL SPECIFICATIONS
OPTICAL DENSITY vs. WAVELENGTH
Optical Density
Wavelength
Useful Range
Optical Density 5+ ............................................190-400 nm
Optical Density 3+ ........................................... 625-830 nm
Optical Density 3+ ..........................................815-1050 nm
Intelect® Advanced Laser Module
Each Intelect Advanced Laser Module is shipped with Laser Protective Eyewear. The eyewear
is L3 rated and approved and EN207 compliant and approved for international sales.
21
Page 24

SETUP
ATTACHING THE MODULE TO THE UNIT
WARNING
Disconnect the unit from the power source (electrical
outlet or battery module) before attempting any
maintenance, removal, or replacement procedures
to prevent possible electrical shock and equipment
damage. However, if you are disconnecting another
module (e.g., battery), make certain you leave the
ribbon cable plugged into the main unit.
To attach the module to the unit, do the following:
1. Disconnect the unit from the power source.
2. Remove the rear access panel and disconnect the power cord from the main unit.
3. Place the main unit on a level surface.
4. Remove the front access panel and disconnect all cables and wires.
Intelect® Advanced Laser Module
22
Page 25

SETUP
ATTACHING THE MODULE TO THE UNIT continued
5. Using a #1 Phillips Screwdriver, remove the screw securing the plastic lanyard
to the front access panel.
6. Turn the unit upside down and lay it flat on your lap or a covered surface so
as not to scratch the plastic display lens.
Intelect® Advanced Laser Module
7. Remove the warning label covering the ribbon cable and unroll the ribbon
cable. If the warning label has previously been removed, continue with the
23
Page 26

CAUTION
SETUP
ATTACHING THE MODULE TO THE UNIT continued
next step. If you are disconnecting another module, make certain you leave
the ribbon cable plugged into the main unit.
NOTE: If the unit is equipped with an sEMG Module, leave it in place to
maintain sEMG functions for Channels 1 and 2. The sEMG Module will
not interfere with installation of a module.
8. Rest the unit on its back behind the module.
DO NOT TWIST THE RIBBON CABLE! Before proceeding
with the next step, make certain the ribbon cable is
not twisted. If the ribbon cable is twisted, the pins
will not properly align. If the power is turned on with
misalignment of pins or a twisted ribbon cable, the
controlling electronics in the module will be destroyed and
possible damage to the internal components could occur.
9. Align the holes on the male end of the ribbon cable to the pins on the module.
Be careful when fitting the cable to the pins. If any of
the pins are damaged or broken, the performance and
function of the module may be affected.
Intelect® Advanced Laser Module
CAUTION
24
Page 27

SETUP
ATTACHING THE MODULE TO THE UNIT continued
10. Using only your fingers, gently fit the female end of the ribbon cable to the
connector pins of the module.
11. Make sure the fit is snug.
12. Fit the rubber feet of the unit into the feet indentions on the module, and
allow the unit to rest flush on the module.
NOTE: Make certain the ribbon cable is positioned exactly as shown in the
picture on the left.
13. Turn the unit upside down and lay it flat on your lap or a covered surface so as
not to scratch the plastic display lens. Using a #1 Phillips Head screwdriver,
secure the module to the unit with the four screws (shipped with the module).
NOTE: Tighten the screws only enough to prevent the unit from shifting on
the unit. Do not over-tighten the screws.
14. Set the assembled unit upright on the work surface.
Intelect® Advanced Laser Module
25
Page 28

SETUP
ATTACHING THE MODULE TO THE UNIT continued
15. Using a #1 Phillips Head screwdriver, secure the new extended front access
panel to the lanyard.
NOTE: When securing the front access panel, make certain the lanyard does
not become kinked.
16. Feed the female end of the power cord through the power cord routing area
and plug it into the unit.
17. Replace the rear access panel.
Intelect® Advanced Laser Module
18. Plug the male end of the power cord into an approved electrical outlet.
26
Page 29

WARNING
SETUP
ATTACHING THE MODULE TO THE UNIT continued
19. Replace all cables and wires on the original unit.
20. If applicable, insert the patient interrupt switch, door interrupt switch,
microcurrent point locator, or laser applicator in the proper connection. For
more information about the symbols used for the connections, see pages 14-15.
21. Turn the unit on using the On/Off Switch.
The system will automatically recognize the added module and display a
configuration change message.
22. Read and carefully follow the instructions on the screen.
Verify that the module installed is the module displayed in
the message BEFORE pressing the START button. If it is not,
DO NOT press the START button. Turn the system Off and back On.
If the problem persists, call the dealer or DJO Technical Support
immediately. DO NOT USE THE SYSTEM until all necessary repairs
are made by a technician certified by DJO. If use is attempted before
repairs are made, the system may operate unpredictably and has
the potential of causing injury to the patient or damage to the
system’s internal components.
Intelect® Advanced Laser Module
27
Page 30

SETUP
Intelect® Advanced Laser Module
REMOVING THE MODULE
To remove a module from the main unit, do the following:
1. Disconnect the unit from the electrical outlet. Leave the ribbon cable plugged into the main unit.
2. Remove the rear access panel and disconnect the power cord from the main unit.
3. Remove the extended front access panel and disconnect all cables and wires.
4. Route the Power Cord through the Power cord routing area on the Module to the unit.
5. Replace the Rear Panel.
6. Using a #1 screwdriver, remove the four screws that are securing the module. Retain the screws for
future use.
7. Remove the module from the unit.
8. Using only your fingers, gently remove the female end of the ribbon cable from the connector pins of
the module.
9. Leave the ribbon cable connected to the unit.
28
Page 31

WARNING
OPERATION
Intelect® Advanced Laser Module
PREPARING THE PATIENT’S SKIN FOR LASER THERAPY
Before applying laser therapy to the patient, you must first prepare the patient’s skin. By properly preparing the
patient’s skin for laser therapy, you will allow more laser energy to reach the targeted areas and reduce the risk of
skin irritation.
To prepare the patient’s skin for laser therapy, do the following:
1. Thoroughly wash the skin on which you intend to place the
laser head with mild soap and water or alcohol wipe.
2. Dry the skin thoroughly.
CAUTION
If you are treating open wounds, make certain you wrap the
Laser Head with cellophane (cling wrap) before beginning
treatment. This will help to prevent the ingress of fluid from
the wound into the laser applicator, and reduces the risk of
cross infection at the site of the wound.
Before each use, clean the plastic lens with NOVUS® Polish
System. Contact Novus at: www.novuspolish.com. Make
certain to apply with a clean cloth. Failure to clean the
lens between patient therapy sessions could cause beam
fragmentation, which may reduce the effectiveness of the
treatment.
29
Page 32

OPERATION
Intelect® Advanced Laser Module
STARTING, STOPPING, AND INTERRUPTING THERAPY
The Operator Interface consists of buttons with a liquid crystal display (LCD). The operator is able to view parameter
options on the display and make selections by pressing the buttons on the Operator Interface. The LCD will provide
continuous information during the treatments concerning dosage and elapsed time. Parameters are adjusted using
Operator Interface buttons on the front of the unit. The output can be stopped by pressing the “PAUSE” or “STOP”
buttons located on the Operator Interface.
To administer laser therapy to a patient, make certain you have performed the necessary steps listed in “Preparing
the Patient’s Skin for Laser Therapy” on page 29. Then, continue with the following procedures:
1. On the Main window, press the button next to Laser Therapy.
The Laser PIN window displays.
30
Page 33

OPERATION
STARTING, STOPPING, AND INTERRUPTING THERAPY continued
2. 1 1 1 1 is the default PIN. Press the button next to the number 1 four times so
that * * * * displays briefly. Then, the Laser Therapy window displays.
If you begin to enter the wrong PIN, you can press the button next to Clear
PIN to try again.
For information on changing the PIN, see pages 48-50.
NOTE: If you lose or forget your PIN, contact DJO Service
Department at 1-800-592-7329 USA or 1-317-406-2209.
3. Press the button next to Laser Therapy.
The message “Reading Protocol Please Wait . . . ” displays. Then, the next
Laser Therapy window displays.
Intelect® Advanced Laser Module
31
Page 34

OPERATION
STARTING, STOPPING, AND INTERRUPTING THERAPY continued
4. Press the button next to Frequency.
The Frequency window displays.
Intelect® Advanced Laser Module
5. Press the button next to the
increments. Hold the button down to quickly display higher frequencies.
Press the button next to the icon to decrease the frequency in 1 Hz
increments. Hold the button down to quickly display lower frequencies.
32
icon to increase the frequency in 1 Hz
Page 35

OPERATION
STARTING, STOPPING, AND INTERRUPTING THERAPY continued
Press the button next to Toggle Preset Frequencies repeatedly to scroll
through commonly used frequencies.
Intelect® Advanced Laser Module
Press the button next to the
selected.
You are returned to the Laser Parameter window with the new Frequency
displayed.
33
icon to accept the frequency you
Page 36

OPERATION
STARTING, STOPPING, AND INTERRUPTING THERAPY continued
6. Press the button next to Treatment Time.
The Treatment Time window displays.
7. Press the button next to the icon to increase the number of seconds
for the treatment time. Hold the button down to quickly increase the treatment
time.
NOTE: The Treatment Time and the Calculated Dosage are directly correlated.
Whenever Treatment Time is changed, the Calculated Dosage is
automatically changed and reflected on the window.
Press the button next to the icon to decrease the number of seconds
Intelect® Advanced Laser Module
for the treatment time. Hold the button down to quickly increase the treatment
time.
34
Page 37

OPERATION
STARTING, STOPPING, AND INTERRUPTING THERAPY continued
Press the button next to the icon to accept the treatment time you
selected.
You are returned to the Laser Parameters window. Notice that if you changed
the Calculated Dosage, the Treatment Time automatically changed.
8. Press the button next to Calculated Dosage.
The Calculated Dosage window displays.
9. Press the button next to the icon to increase the dosage. Hold the
button down to quickly increase the Treatment Time.
NOTE: The Treatment Time and the Calculated Dosage are directly correlated.
Whenever Treatment Time is changed, the Calculated Dosage is
automatically changed and reflected on the window.
Press the button next to the icon to decrease the dosage. Hold the
button down to quickly increase the dosage.
Intelect® Advanced Laser Module
Press the button next to the icon to accept the dosage you selected.
35
Page 38

OPERATION
STARTING, STOPPING, AND INTERRUPTING THERAPY continued
You are returned to the Laser Parameters window. Notice that if you changed
the Calculated Dosage, the Treatment Time automatically changed.
10. If you are using a cluster diode applicator, press the button next to Select
Diodes repeatedly to select either Laser Only, LED Only, or Laser and LED.
This option allows you to use all or some of the diodes in the cluster diode
applicator.
If you are using a single diode applicator, this option is unavailable.
Intelect® Advanced Laser Module
36
Page 39

OPERATION
STARTING, STOPPING, AND INTERRUPTING THERAPY continued
11. Press the START button. A message displays to alert you to the fact that the
laser is armed. The unit will beep two times to count down the number of
seconds left until the applicator is ready. Press the Pause/Resume button to
begin the treatment.
After you press the Pause/Resume button, an orange light will illuminate on
the back of the laser applicator to indicate that laser output is being
distributed.
NOTE: When treatment time has expired, a tone will sound.
The therapy can be interrupted at any time by pressing the Pause/Resume
button on the back of the applicator, the STOP button (on the Operator
Interface), or the PAUSE button (on the Operator Interface).
When the STOP button is pressed, the applicator stops emitting laser energy,
and the Completed Treatment Review window displays. Press the button next
to Start New Treatment to begin a new therapy session (refer to step 2 on
page 31), or press Save to Patient Card to transmit the parameters of the
treatment to the patient card. For more information on the Save to Patient
Card option, see the unit’s user manual.
Intelect® Advanced Laser Module
37
Page 40

OPERATION
STARTING, STOPPING, AND INTERRUPTING THERAPY continued
When either the PAUSE button on the Operator Interface or the Pause button
on the back of the applicator are pressed, the following occurs:
• the timer pauses
• the unit beeps once
• “Paused” is displayed on the laser status indicator
• the laser applicator stops emitting laser energy
• the orange light goes out
To resume therapy, press the PAUSE button on the Operator Interface, the
Pause button on the back of the laser applicator, or the START button.
When the treatment timer reaches zero, the Treatment Review Laser window
displays.
12. To resume the same therapy session, press the Pause button on the back of
the laser applicator or the START button.
13. To finish the laser therapy, press the STOP button.
The Completed Treatment Review window displays.
14. Press the button next to Start New Treatment to begin a new therapy session
(refer to step 2 on page 31). Or, press Save to Patient Card to transmit the
parameters of the treatment to the patient card. For more information on the
Save to Patient Card option, see the unit’s user manual.
Intelect® Advanced Laser Module
38
Page 41

OPERATION
Intelect® Advanced Laser Module
USING THE ACUPUNCTURE POINT LOCATOR
The Acupuncture Point Locator allows the user to locate the optimum treatment areas (GSR’s) on the patient’s body,
then treat those areas.
NOTE: You must have a single diode applicator plugged into the laser module before attempting
acupuncture therapy. Otherwise, the necessary buttons will not display.
To administer acupuncture therapy, do the following:
1. On the main Laser Therapy window, press the button next to Acupuncture so
that the button displays Acupuncture.On.
2. Make any necessary parameter changes by pressing the button next to the
appropriate button. For more information on making parameter changes, see
the section entitled “Starting, Stopping, and Interrupting Therapy” on pages
30-38.
39
Page 42

OPERATION
USING THE ACUPUNCTURE POINT LOCATOR (continued)
3. Allow the patient to hold the Acupuncture Point Locator firmly in either hand.
4. Hold the applicator over an area in which you intend to locate an acupuncture
point.
5. Press the START button.
A message displays to alert you to the fact that the laser is armed. The unit
will beep two times to count down the number of seconds left until the
applicator is ready.
6. Slowly move the applicator around the treatment area.
Intelect® Advanced Laser Module
As you near the acupuncture point, the number of beeps increase to
indicate an acupuncture point.
40
Page 43

OPERATION
USING THE ACUPUNCTURE POINT LOCATOR (continued)
7. Press the button next to the icon to increase the sensitivity of the
applicator.
The highest sensitivity level is 9.
Intelect® Advanced Laser Module
8. Press the button next to the
applicator.
9. Once you have located the acupuncture point, hold the applicator steadily and
directly over it.
10. Press the Pause/Resume button on back of the applicator while continuing to
hold the applicator over the acupuncture point.
An orange light will illuminate on the back of the laser applicator to indicate
that laser energy is being output. The unit timer will begin to count down the
therapy time you selected.
11. If you want to find another acupuncture point before the therapy time runs out,
press the Pause button on back of the applicator.
The unit begins to beep slowly.
41
icon to decrease the sensitivity of the
Page 44

OPERATION
Intelect® Advanced Laser Module
USING THE ACUPUNCTURE POINT LOCATOR (continued)
12. When the timer reaches zero, repeat steps 6 through 11 until the therapy time
runs out, or you have treated all necessary acupuncture points.
NOTE: When treatment time has expired, a tone will sound.
The therapy can be interrupted at any time by pressing the Pause/Resume
button on the back of the applicator, the STOP button (on the Operator
Interface), or the PAUSE button (on the Operator Interface).
When the STOP button is pressed, the applicator stops emitting laser energy,
and the Completed Treatment Review window displays. Press the button next
to Start New Treatment to begin a new therapy session (refer to step 2 on
page 31), or press Save to Patient Card to transmit the parameters of the
treatment to the patient card. For more information on the Save to Patient
Card option, see the unit’s user manual.
42
Page 45

OPERATION
Intelect® Advanced Laser Module
USING CLINICAL INDICATIONS
The indications contained in this section are to be used only as guidelines. Each patient should be individually
assessed to determine the appropriateness of the parameter setting prior to use. To select an indication for a patient,
do the following:
1. On the Laser Therapy window, press the button next to Laser Indication.
The Laser Indications window displays.
2. On the Laser Indications window, press the button next to the appropriate clinical
indication.
NOTE: The clinical indications displayed will depend on the type of applicator
currently plugged in. For instructional purposes, the single diode, 100 mW,
850 nm applicator is used.
43
Page 46

OPERATION
USING CLINICAL INDICATIONS (continued)
3. If the applicator you are using has additional clinical indications associated
with it, press the button next to Next Page to display another list of
indications.
The next Laser Indications window displays.
4. If the indication you require has an available severity, select either Acute or
Chronic.
The next Laser Indications window displays.
Intelect® Advanced Laser Module
44
Page 47

OPERATION
USING CLINICAL INDICATIONS (continued)
5. The parameters of the indication are displayed on the window. If necessary,
make any parameter changes or adjustments.
The Laser Therapy window displays.
6. To begin therapy, continue with the instructions outlined in the section entitled
“Preparing the Patient’s Skin for Laser Therapy” on page 29.
7. To save these parameters as a new user protocol, continue with the next
section entitled “Saving User Protocols.”
Intelect® Advanced Laser Module
45
Page 48

OPERATION
SAVING USER PROTOCOLS
The Intelect Advanced Laser Module allows you to tailor a protocol according to the
requirements of a patient. To save a laser indication, do the following:
1. Complete steps 1 through 6 of the previous section entitled “Using Laser
Indications.”
2. On the Laser Therapy window, press the Clinical Indications button.
The Save Protocol window displays.
3. Use the buttons on the first two rows to enter a name for the indication,
Intelect® Advanced Laser Module
pressing the
button after each letter or number.
46
Page 49

OPERATION
Intelect® Advanced Laser Module
SAVING USER PROTOCOLS (continued)
4. When you have finished entering the name of the indication, press the button
next to .
The message “Saving Protocol Please Wait” displays. You are returned to the Laser
Therapy window with the parameters of the indication you just saved displayed, as
well as the name of the indication.
47
Page 50

OPERATION
SYSTEM UTILITIES
Changing the Laser PIN
To change the PIN, do the following:
1. On the Main window, press the button next to Laser Therapy.
The Laser PIN window displays.
2. 1 1 1 1 is the default PIN. Press the button next to the number 1 four times so
that * * * * displays briefly. If you begin to enter the wrong PIN, you can press the
button next to Clear PIN to try again.
The Laser Therapy window displays.
Intelect® Advanced Laser Module
48
Page 51

OPERATION
SYSTEM UTILITIES continued
3. Press the button next to Change Laser PIN.
The Change Laser PIN window displays.
4. Press the buttons next to the numbers to which you want to change the PIN.
Once you enter four numbers, a message displays to inform you of the new
PIN.
Intelect® Advanced Laser Module
49
Page 52

OPERATION
Intelect® Advanced Laser Module
SYSTEM UTILITIES (continued)
5. Press any button to continue.
You are returned to the Laser Therapy window.
Changing the Display
The laser module can display either Joules (J) or Joules per centimeters squared (J/cm2). To change the display,
simply press the button next to Display on the Laser Parameters window. The window will refresh and the new
designation will display.
Displaying the Laser Rationale
Pressing the button next to the icon displays an overview of laser therapy, a list of available
treatment options, and a synopsis of the available parameters.
50
Page 53

OPERATION
Intelect® Advanced Laser Module
TREATMENT TIPS
Contact
To obtain the most effective results, the applicator should be in contact with the patient’s skin.
Applicator Position
Due to the characteristics of laser light, the angle at which the light enters the patient’s skin is very important.
Therefore, the applicator lens should always be parallel to the treatment area.
Treating Joints
If you are applying laser therapy to a patient’s joint, it is more effective to apply the laser energy into the joint
by positioning the joint in an open position (e.g., knee in flexion). However, do not attempt this method if it is
uncomfortable to the patient.
Applicator Selection
If the injury you intend to treat is very small (pinpoint), you should only need to treat the area with a single diode
applicator. If the area surrounding the treatment area is sensitive, it is recommended that you apply therapy with a
single diode applicator first, then use the cluster applicator for the surrounding area.
Cold and Heat
If you intend to apply cold and heat in conjunction with laser therapy, use the following guidelines:
• Use cold before the laser therapy. This slows the flow of red blood cells and reduces the amount of energy
removed from the area.
• Use heat after the treatment. This speeds the flow of red blood cell and so that more energy can be removed
from the area.
51
Page 54

ACCESSORIES
Standard Accessories Optional Accessories
Ref. Description
27455 User Manual CD
27525 Laser Protective Eyewear
27842 Acupuncture Point Locator
27470 Patient Interrupt Switch [26 AWG, 68.89 in (174.143 cm), Shielded]
One of the following:
21284 • Power Supply Cord (Euro) [18 AWG, 80 in (203.2 cm), Shielded]
27325 • Power Supply Cord (US) [18 AWG, 80 in (203.2 cm), Shielded]
20971 • Power Supply Cord (Australian) [18 AWG, 80 in (203.2 cm), Shielded]
20972 • Power Supply Cord (Swiss) [18 AWG, 80 in (203.2 cm), Shielded]
20973 • Power Supply Cord (UK) [18 AWG, 80 in (203.2 cm), Shielded]
20974 • Power Supply Cord (Danish) [18 AWG, 80 in (203.2 cm), Shielded]
20975 • Power Supply Cord (Japanese) [18 AWG, 80 in (203.2 cm), Shielded]
20976 • Power Supply Cord (Indian) [18 AWG, 80 in (203.2 cm), Shielded]
20977 • Power Supply Cord (Israeli) [18 AWG, 80 in (203.2 cm), Shielded]
Ref. Description
27799 Single Diode 670 nm LED 10 mW Applicator [26 AWG, 68.89 in (174.143 cm), Shielded]
27805 Single Diode 820 nm Laser 300 mW Applicator [26 AWG, 68.89 in (174.143 cm), Shielded]
27803 Single Diode 850 nm Laser 40 mW Applicator [26 AWG, 68.89 in (174.143 cm), Shielded]
27840 Single Diode 850 nm Laser 100 mW Applicator [26 AWG, 68.89 in (174.143 cm), Shielded]
27804 Single Diode 850 nm Laser 150 mW Applicator [26 AWG, 68.89 in (174.143 cm), Shielded]
27841 Single Diode 850 nm Laser 200 mW Applicator [26 AWG, 68.89 in (174.143 cm), Shielded]
27810 9 Diode cluster 290 mW Laser Applicator [26 AWG, 68.89 in (174.143 cm), Shielded]
27811 9 Diode cluster 540 mW Laser Applicator [26 AWG, 68.89 in (174.143 cm), Shielded]
27812 9 Diode cluster 1040 mW Laser Applicator [26 AWG, 68.89 in (174.143 cm), Shielded]
27813 13 Diode cluster 265 mW Laser Applicator [26 AWG, 68.89 in (174.143 cm), Shielded]
27814 13 Diode cluster 415 mW Laser Applicator [26 AWG, 68.89 in (174.143 cm), Shielded]
27816 13 Diode cluster 715 mW Laser Applicator [26 AWG, 68.89 in (174.143 cm), Shielded]
27815 19 Diode cluster 325 mW LED Applicator [26 AWG, 68.89 in (174.143 cm), Shielded]
27802 33 Diode cluster 690 mW Laser Applicator [26 AWG, 68.89 in (174.143 cm), Shielded]
27807 33 Diode cluster 940 mW Laser Applicator [26 AWG, 68.89 in (174.143 cm), Shielded]
27808 33 Diode cluster 1440 mW Laser Applicator [26 AWG, 68.89 in (174.143 cm), Shielded]
27809 33 Diode cluster 565 mW LED Applicator [26 AWG, 68.89 in (174.143 cm), Shielded]
27478 Battery Pack
27904K Remote Interlock Adapter
27467 Carrying Bag
Intelect® Advanced Laser Module
52
Page 55

TROUBLESHOOTING
ERROR MESSAGES
Intelect® Advanced Laser Module
CODE
NUMBER
130 Warning
131 Warning
132 Warning
TYPE
MESSAGE
PROBABLE CAUSES POSSIBLE REMEDIES
Another treatment is running
while attempting to set up
and perform a Laser Therapy
treatment.
Treatment Room Door Lockout is
breached.
Attempted to start a laser
treatment but no laser applicator
is plugged in.
A. Allow existing treatment to complete before starting Laser Therapy.
B. If no other treatment is running, reset Therapy System by turning main
power switch Off and On.
A. Make certain Treatment Room Door is completely closed.
B. Make certain the Lockout cable is connected to the system.
C. Replace Lockout to System cable with a known good cable.
D. Contact department responsible for installation of the Treatment
Room Door Lockout mechanism for maintenance or repair.
E. Send Laser Module to Factory for Service.
A. Connect desired Laser Applicator to the system.
B. If Applicator is connected, reset Therapy System by turning main
power switch Off and On.
C. Connect a known good Laser Applicator.
D. Send Laser Module to Factory for Service.
53
Page 56

TROUBLESHOOTING
ERROR MESSAGES continued
Intelect® Advanced Laser Module
CODE
NUMBER
133 Warning Laser Applicator became
134 Warning Entered incorrect laser PIN. Enter correct Laser PIN number.
139 Warning
142 Warning
143 Warning
TYPE
MESSAGE
PROBABLE CAUSES POSSIBLE REMEDIES
unplugged while performing a
laser treatment
Laser Board Software upgrade
warning.
A Laser Protocol was selected
but no Laser Module is installed
on system.
A Laser Protocol was selected
but no Laser Applicator
connected to system.
A. Connect desired Laser Applicator to the system.
B. If Laser Applicator is connected, reset Therapy System by turning
main power switch Off and On.
C. Connect a known good Laser Applicator.
D. Send Laser Module to Factory for Service.
Contact DJO Service Department.
Install Laser Module to Therapy System. Refer to Laser User Manual
(pages 22-27) for installation Instructions
A. Connect proper Laser Applicator to the system.
B. If Laser Applicator is connected, reset Therapy System by turning
main power switch Off and On.
C. Connect a known good Laser Applicator.
D. Send Laser Module to Factory for Service.
54
Page 57

TROUBLESHOOTING
ERROR MESSAGES continued
Intelect® Advanced Laser Module
CODE
NUMBER
144 Warning Wrong Laser Applicator
214 Error General Laser PC Board Error. Send Laser Module to Factory for Service.
215 Error Laser Applicator out of
216 Error
217 Error
218 Error
TYPE
MESSAGE
PROBABLE CAUSES POSSIBLE REMEDIES
connected to system for the
protocol selected.
calibration due to laser output
being too high.
Laser Applicator out of
calibration due to laser output
being too low.
Laser Applicator out of
Calibration Due to LED output
being too high.
Laser Applicator out of Calibration
Due to LED output being too low.
A. Connect correct Laser Applicator to the system.
B. If Applicator is connected, reset Therapy System by turning main
power switch Off and On.
C. Connect a known good Laser Applicator.
D. Send Laser Module to Factory for Service.
Send Laser Applicator to Factory for Service.
Send Laser Applicator to Factory for Service.
Send Laser Applicator to Factory for Service.
Send Laser Applicator to Factory for Service.
55
Page 58

MAINTENANCE
WARNING
Maintaining the Intelect Advanced Laser Module
The following items should be checked at least monthly to ensure proper operation of this unit:
• Power cord and plug: Check to make sure the cord is not frayed, kinked, and does not have torn or cut
insulation.
• Applicator cable: Check to make sure the cable is flexible, free of kinks, not frayed, and the insulation is intact.
• Applicator lens: Check to see that there is no build-up of oil or foreign material on or behind the applicator
lens.
Before each use, clean the plastic lens with NOVUS®
Polish System. Contact Novus at: www.novuspolish.com.
Make certain to apply with a clean cloth. Failure to clean
the lens between patient therapy sessions could cause
beam fragmentation, which may reduce the effectiveness
of the treatment.
Cleaning
To clean the accessories, use only soap and water. Alcohol may be used to disinfect and sterilize the aluminum
surface, but avoid the plastic area.
The Intelect Advanced Laser Module’s case may be cleaned by wiping with a damp cloth or mild cleaning solution.
Avoid abrasive cleansers.
Intelect® Advanced Laser Module
56
Page 59

MAINTENANCE
Service
The Intelect Advanced Laser Applicator must be recalibrated annually. Chattanooga laser products must be returned
to the factory or an authorized servicing dealer for repairs or recalibration. Should the unit require service, warranty,
or repair, please contact the selling dealer or your local DJO customer service.
Laser requires annual calibration, from the date placed in service, by a Service Technician certified by DJO.
EU Directive on Waste Electrical and Electronic Equipment (WEEE), ensures
that product is appropriately disposed of or recycled at the end of its life.
Intelect® Advanced Laser Module
57
Page 60

WARRANTY
DJO, LLC ("Company") warrants that the Intelect® Advanced Laser Module ("Product") is free of defects in material and workmanship. This
warranty shall remain in effect for two years (24 months) from the date of original consumer purchase. If this Product fails to function during the
two years warranty period due to a defect in material or workmanship, Company or the selling dealer will repair or replace this Product without
charge within a period of thirty (30) days from the date on which the Product is returned to the Company or the dealer. All repairs to the Product
must be performed by a service center certified by the Company. Any modifications or repairs performed by unauthorized centers or groups will
void this warranty.
The warranty period for applicators is one year (12 months).
This Warranty Does Not Cover:
• ANY MALFUNCTION OR FAILURE IN THE PRODUCT CAUSED BY PRODUCT MISUSE, INCLUDING, BUT NOT LIMITED TO, DROPPING THE UNIT
OR APPLICATOR AND FAILURE TO PROVIDE REASONABLE AND NECESSARY MAINTENANCE OR ANY USE THAT IS INCONSISTENT WITH
THE PRODUCT USER MANUAL.
• Replacement parts or labor furnished by anyone other than the Company, the selling dealer or a certified Company service technician.
• Defects or damage caused by labor furnished by someone other than Company, the selling dealer or a certified Company service technician.
• DJO, LLC is not responsible for injury or damage resulting from modifications or service performed by non-authorized DJO, LLC service personnel.
COMPANY SHALL NOT BE LIABLE IN ANY EVENT FOR INCIDENTAL OR CONSEQUENTIAL DAMAGES.
Some states do not allow the exclusion or limitation of incidental or consequential damages, so the above limitation or exclusion may not apply
to you. To Obtain Service From Company or the selling dealer under this warranty:
1. A written claim must be made within the warranty period to the Company or the selling dealer.
2. The Product must be returned to the Company or the selling dealer by the owner.
This warranty gives you specific legal rights and you may also have other rights which vary from location to location.
The Company does not authorize any person or representative to create for it any other obligation or liability in connection with the sale of the
Product. Any representation or agreement not contained in the warranty shall be void and of no effect.
THE FOREGOING WARRANTY IS IN LIEU OF ALL OTHER WARRANTIES, EXPRESSED OR IMPLIED,
INCLUDING ANY WARRANTY OR MERCHANTABILITY OR FITNESS FOR A PARTICULAR PURPOSE.
Intelect® Advanced Laser Module
58
Page 61

DJO is an ISO 13485 Certied Company
DJO France SAS
Centre Europeen de Fret
3 rue de Bethar
64990 Mouguerre, France
T: + 33 (0) 5 59 52 86 90
F: + 33 (0) 5 59 52 86 91
djoglobal.eu/fr_FR
© 2011 DJO, LLC. All rights reserved.
27455_H Laser (English)
 Loading...