

Page 1

Operation Manual
Model: LED50D3000ISX
CH ANG HON G E UR O PE E L ECT RIC S .R. O
Argentinská 286/38, 170 00 Praha 7, Czech Republic
Tel: 0042 (0) 242408849
Fax: 0042 (0) 220951190
Service E-mail: info@changhongeurope.cz
Web site: www.changhongeurope.com
.
50
TV
EN
C
Z
(
SK
)
Page 2

E
ngli
sh
Contents
Warning…………………………………………………….…………………………1
Safety instructions………………………………………………………………….4
Main Unit Control………………………………………………………….............6
Getting Started………………………………………………………………………8
Connection and Setup……………………………………………………………...9
Remote Control……………………………………………………………….........10
Basic Operation……………………………………………………………....……12
Menu Operation…………………………………………………………………….15
Teletext………………………………………………………………………………50
Troubleshooting Guide…………………………………………………………...51
Page 3

Warning
1
WARNING:
TO REDUCE THE RISK OF ELECTRIC SHOCK DO NOT REMOVE
COVER (OR BACK). NO USER SERVICEABLE PARTS INSIDE. REFER
TO QUALIFIED SERVICE PERSONNEL.
The lightning flash with arrowhead symbol, within an equilateral triangle,
is intended to alert the user to the presence of uninsulated "dangerous
voltage" within the products enclosure that may be of sufficient
magnitude to constitute a risk of electric shock to persons.
The exclamation point within an equilateral triangle is intended to alert the
user to the presence of important operating and maintenance (servicing)
instructions in the literature accompanying the appliance.
REGULATORY INFORMATION
This equipment generates uses and can radiate radio frequency energy and, if not
installed and used in accordance with the instructions, may cause harmful
interference to radio communication. However, there is no guarantee that
interference will not occur in a particular installation. If this equipment does cause
harmful interference to radio or television reception, which can be determined by
turning the equipment off and on, the user is encouraged to try to correct the
interference by one or more of the following measures:
-Relocate the receiving antenna.
-Increase the separation between the equipment and receiver.
-Connect the equipment into an outlet on a circuit different from that to which the
receiver is connected.
-Consult the dealer or experienced radio/TV technician for help.
Any changes or modifications not expressly approved by the party responsible
for compliance could void the user's authority to operate the equipment.
CAUTION
DO not attempt to modify this product in any way without written authorization from
supplier. Unauthorized modification could void the user's authority to operate this
product.
It is not recommended to keep a certain still image displayed on the screen for a
long time as well as displaying extremely bright images on screen.
Figures and illustrations in this User Manual are provided for reference only
and may differ from actual product appearance. Product design and
specifications may be changed without notice.
CAUTION
RISK OF ELECTRIC SHOCK
DO NOT OPEN
E
nglish
Page 4

Warning
2
E
ngli
WARNING
To Reduce The Risk Of Fire Or Electric Shock, Do Not Expose This Apparatus To
sh
Rain Or Moisture.
The ventilation should not be impeded by covering the ventilation openings with
items, such as newspapers, table-cloths, curtains, etc.
The Apparatus shall not be exposed to dripping or splashing and that no objects
filled with liquids, such as vases, shall be placed on the apparatus.
Attention should be drawn to the environmental aspects of battery disposal. Don’t
throw used batteries in dustbin. Please contact your retailer in order to protect the
environment.
When you install your TV, maintain a distance of at least 4 inches between the TV
and other objects (walls, cabinet sides, etc.) to ensure proper ventilation. Failing to
maintain proper ventilation may result in a fire or a problem with the product caused
by an increase in its internal temperature.
No naked flame sources, such as lighted candles, should be placed on the
apparatus.
To prevent the spread of fire, keep candles or other open flames away from this
product at all times.
The device may be malfunction when under electrostatic discharge. It can be
manually resumed by power off and power on again.
CAUTION connecting the Power Cord
Most appliances recommend they be placed upon a dedicated circuit; that is, a
single outlet circuit which powers only that appliance and has no additional outlets
or branch circuits.
Do not overload wall outlets. Overloaded wall outlets, loose or damaged wall
outlets, extension cords, frayed power cords, or damaged or cracked wire
insulation are dangerous. Any of these conditions could result in electric shock or
fire. Periodically examine the cord of your appliance, and if its appearance
indicates damage or deterioration, unplug it, discontinue use of the appliance, and
have the cord replaced with an exact replacement part by an authorized servicer.
Protect the power cord from physical or mechanical abuse, such as being twisted,
kinked, pinched, closed in a door, or walked upon. Pay particular attention to plugs,
wall outlets, and the point where the cord exits the appliance.
The MAINS plug is used as the disconnect device, and the disconnect device shall
remain readily operable.
Operating Temperature: 5°C to 35°C Operating Humidity: ≤80%
Storage Temperature: -15°C to 45°C Storage Humidity: ≤90%
This equipment is a Class Ⅱ or double insulated electrical appliance. It has
been designed in such a way that it does not require a safety connection to
electrical earth.
Page 5
Warning
3
is a trademark of SRS Labs, Inc. TruSurround HD technology is
incorporated under license from SRS Labs, Inc.
E
nglish
This DivX Certified® device has passed rigorous testing to ensure it plays DivX®
video.
To play purchased DivX movies, first register your device at vod.divx.com. Find
your registration code in the DivX VOD section of MENU-support.
For HD Test Kit 1080p v1.1 and later:
DivX Certified
®
, DivX Certified® and associated logos are trademarks of DivX, LLC and are
DivX
used under license.
Covered by one or more of the following U.S. patents: 7,295,673; 7,460,668;
7,515,710; 7,519,274.
Manufactured under license from Dolby Laboratories.
Dolby and the double-D symbol are trademarks of Dolby Laboratories.
®
to play DivX® video up to HD 1080p, including premium content.
Page 6
Safety instructions
4
E
ngli
IMPORTANT SAFETY INSTRUCTIONS
1. Read these instructions.
sh
2. Keep these instructions.
3. Heed all warnings.
4. Follow all instructions.
7. Do not block any of the ventilation
openings. Install in accordance with
the manufacturer's instructions.
5. Do not use this apparatus near water.
6. Clean only with a dry cloth.
8. Do not install near any heat source
such as radiators, heat registers,
stoves, or other apparatus (including
amplifiers) that produce heat.
9. Do not defeat the safety purpose of
the polarized or grounding type plug.
A polarized plug has two blades with
one wider than other. A grounding
type plug has two blades and a third
grounding prong. The wide blade or
the third prong is provided for your
safety. When the provided plug does
not fit into your outlet, consult an
electrician for replacement of the
obsolete outlet.
Page 7
Safety instructions
5
10. Protect the power cord from being
walked on or pinched particularly at
plugs, convenience receptacles,
and the point where they exit from
the apparatus.
11. Only use the attachments/
accessories specified by the
manufacturer.
12. Use only with a cart, stand, tripod,
bracket, or table specified by the
manufacturer, or sold with the
apparatus. When a cart is used, use
caution when moving the cart/
apparatus combination to avoid
injury from tip-over.
13. Unplug this apparatus during
lightning storms or when unused for
long periods of time.
14. Refer all servicing to qualified
service personnel. Servicing is
required when the apparatus has
been damaged in any way, such as
power supply cord or plug is
damaged, liquid has been spilled or
objects have fallen into the
apparatus, the apparatus has been
exposed to rain or moisture, does
not operate normally, or has been
dropped.
E
nglish
ON DISPOSAL
-The fluorescent lamp used in this product contains a small amount of mercury.
-Do not dispose of this product with general household waste.
-Disposal of this product must be carried out in accordance to the regulations of
your local authority.
NOTE
-If the TV feels cold to the touch, there may be a small "flicker" when it is turned on.
This is normal; there is nothing wrong with TV.
-Some minute dot defects may be visible on the screen, appearing as tiny red,
green, or blue spots. However there have no adverse effects on the monitor's
performance.
-Avoid touching the screen or holding your finger(s) against it for long periods of
time. Doing so may produce some temporary distortion effect on the screen.
Page 8
Main Unit Control
6
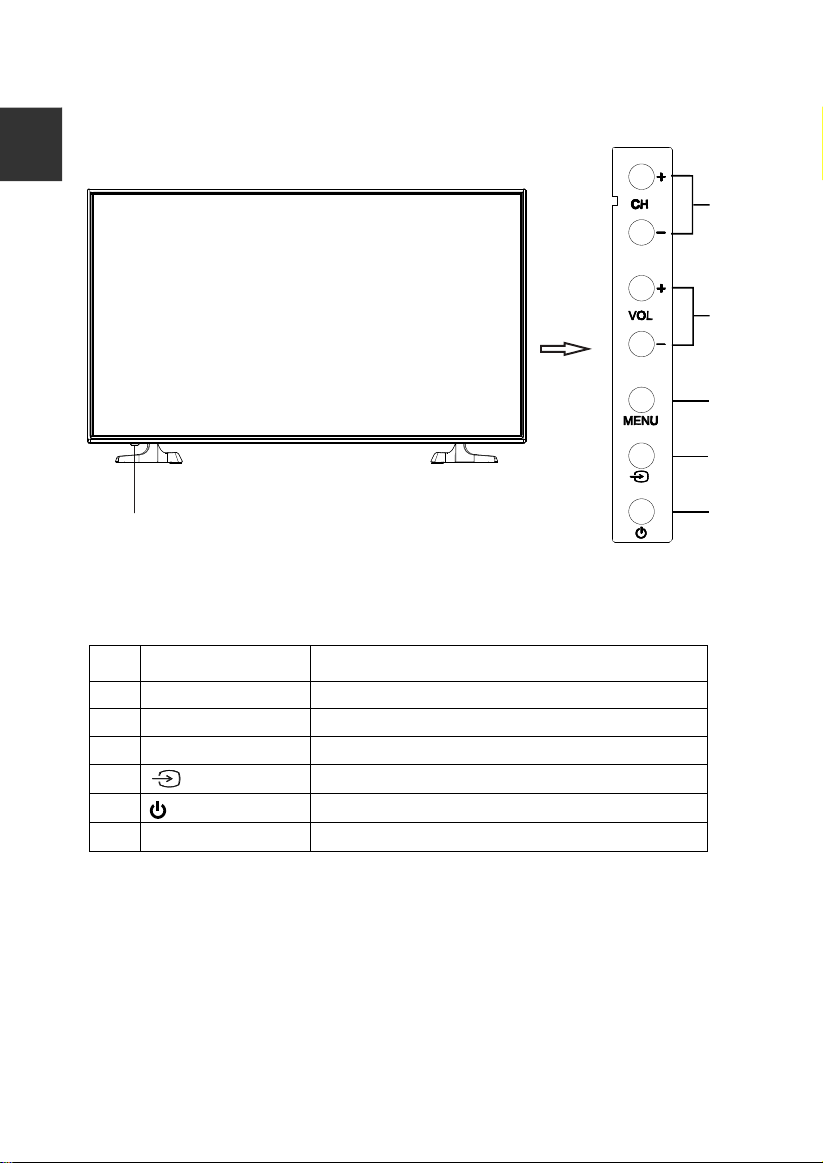
Front Panel
E
ngli
sh
1
2
3
4
6
Name Description
No.
1 CH+/CH- Changes the channels.
2 VOL+/VOL- Adjust the volume.
3 MENU Open the menu.
4
5
6
Power & Sensor
To switch among the signal source.
Turns the unit on and off.
Power Indicator and Infrared sensor.
5
Page 9

Main Unit Control
7
Rear & Sides Panel
E
nglish
15
17
16
8
CONVERT TO
7
8 9 10 11 12 13
No.
Name Description
7 LAN
Local area network (LAN) port. Connect a LAN cable
to this port to connect to the Network.
8
HDMI1/2
HDMI1(ARC) input;
HDMI2 and MHL share one port.
9 CONVERT TO SCART
SCART input/output.
10 AV AV audio/video signal input.
11 COMPONENT Component input.
PC/DVI AUDIO-PC
12 PC input.
ANT1/2
13
14
15
16
17
USB1/2
COMMON INTERFACE
DIGITAL AUDIO OUT
Antenna input.
Ear phone output.
Connector for USB Play.
Insert CI card.
Digital audio output.
15
14
Page 10
Getting Started
8
Using the Remote Control
E
ngli
When using the remote control, aim it at remote sensor on the television. If there is an
object between the remote control and the remote sensor on the unit, the unit may not
sh
operate.
• Point the remote control at the REMOTE SENSOR located on the television.
• When using this television in a very brightly lit area, the infrared REMOTE CONTROL
SENSOR may not work properly.
• The recommended effective distance for using the remote control is about 7 meters.
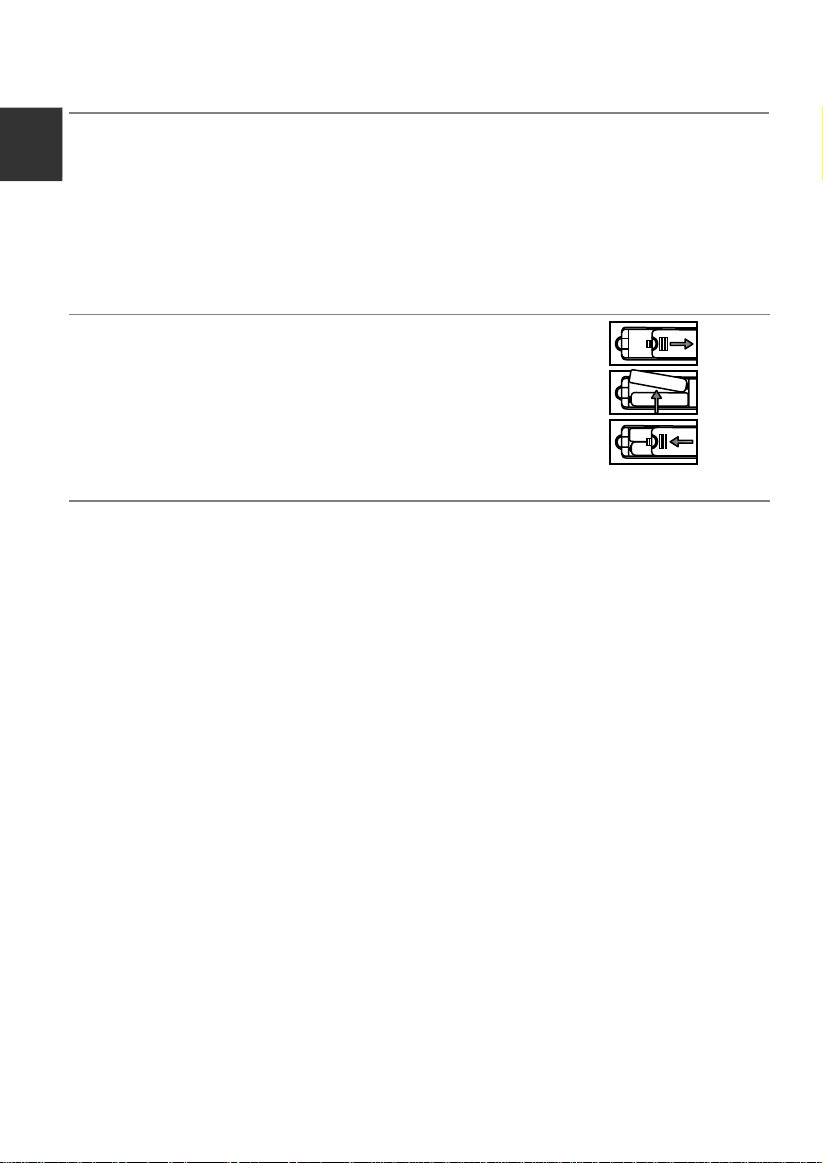
Installing Batteries in the Remote Control
1. Open the cover at the back of the remote control.
2. Install two AAA size batteries. Make sure to match
the “+” and “-” ends of the batteries with the
diagram inside the compartment.
3. Replace the cover.
Battery Replacement
You will need to install the batteries into the remote control to make it operate following
the instruction below.
When the batteries become weak, the operating distance of the remote control will be
greatly reduced and you will need to replace the batteries.
Notes on Using Batteries:
The use of the wrong type of batteries may cause chemical leakage and/or explosion.
Please note the following:
• Always ensure that the batteries are inserted with the + and - terminals in the correct
direction as shown in the battery compartment.
• Different types of batteries have different characteristics. Do not mix different types.
• Do not mix old and new batteries. Mixing old and new batteries will shorten battery life
and/or cause chemical leakage.
• Replace batteries as soon as they do not work.
• Chemicals which leak from batteries may cause skin irritation. If any chemical matter
seeps out of the batteries, wipe it up immediately with a dry cloth.
• The batteries may have a shorter life expectancy due to storage conditions. Remove
the batteries whenever you anticipate that the remote control will not be used for an
extended period.
• The batteries (battery pack or batteries installed) shall not be exposed to excessive
heat such as sunshine, fire or the like.
CAUTION:
• It may result in an explosion if batteries are replaced incorrectly.
• Only replace batteries with the same or equivalent type.
Page 11

Connection and Setup
9
Cable Installation
Before the installation and use, please read carefully the relevant content in “Warning
and Safety instructions”.
1. Take the TV from the wrapping package and put it in a drafty and flat place.
NOTE:
• When you plug or unplug the TV, computer or other equipment, you must make sure
that the power cable has been already shut down;
• When unplugging the power cable or signal cable, please hold the plug (the insulated
part); do not draw the body of the cable.
2. The RF output terminal can be connected with the RF input port of the TV.
3. The output AV terminal of DVD can be connected with the AV input port of the TV
through AV cable.
NOTE:
• COMPONENT (YPbPr)
one audio channel.
If COMPONENT (YPbPr) and AV works as mini terminal, and shared same audio,
•
please choose to use a one-to-three audio&video cable.
4. The output COMPONENT (YPbPr) terminal of DVD can be connected with the
COMPONENT (YPbPr) input port of the TV through AV cable.
5. Connect one end of the VGA cable with the VGA port on computer, connect the other
end of the VGA cable with the VGA port on the TV, and tighten the bolts clockwise on
the each end of VGA cable.
NOTE:
• While connecting the 15-pin VGA, please do not insert the plug overexerted, for fear
the pin might be broken.
6. Connect one end of the HDMI cable with HDMI output port, connect the other end of
the HDMI cable with the HDMI port on the TV.
NOTE:
• While connecting the HDMI, please aim at carefully, do not insert overexerted, for fear
the pin might be broken.
7. Sending the TV's audio signal to external audio equipment via the Digital Audio
Output port.
8. Check and make sure that all AV cables are connected with the corresponding ports
correctly.
9. Connect the power cable with 100-240V~ power supply.
NOTE:
• The range of power input for the TV is 100-240V~ 50/60Hz; do not connect the TV
power input port with the power cable out of the above range.
• Please hold the insulated part of the plug when you are unplugging the power cable,
do not touch directly the metallic part of the cable.
and AV cannot be used at same time for they share of
E
nglish
Page 12
Remote Control
10
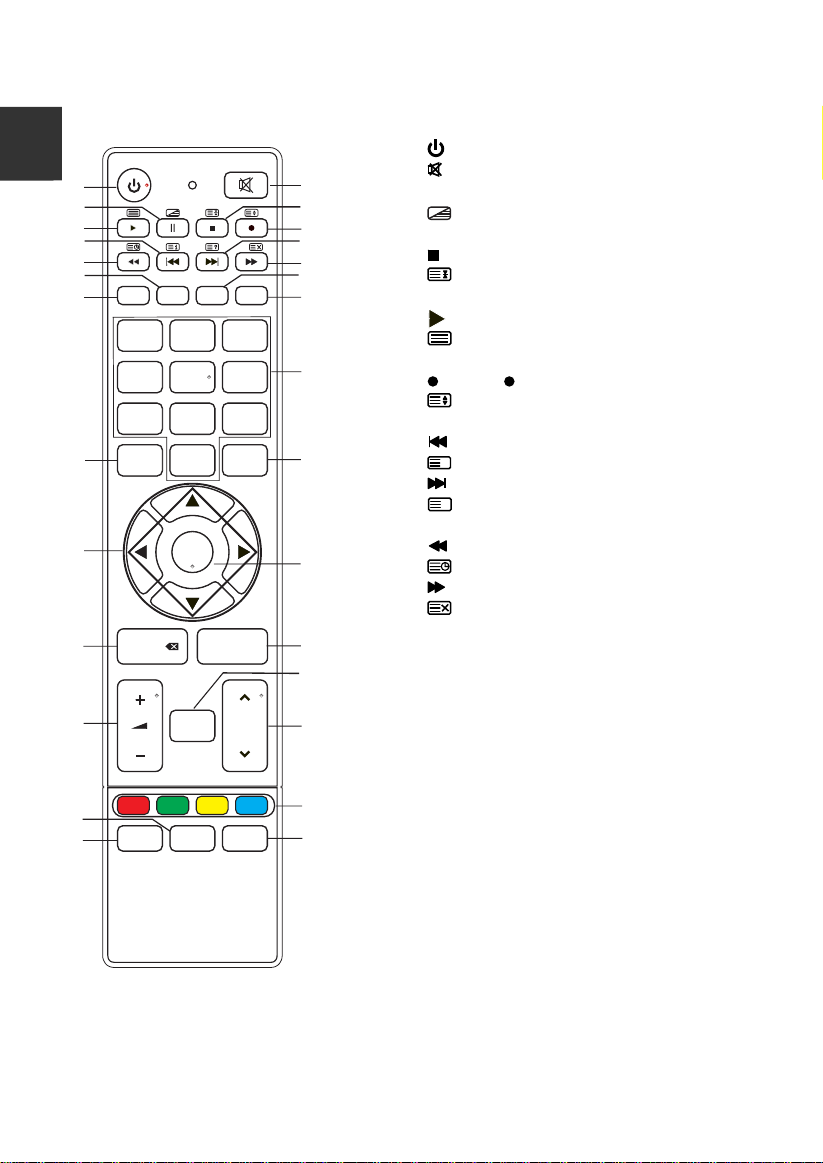
The buttons of the original remote control are as following:
E
ngli
sh
1
3
5
7
9
11
13
16
18
20
22
26
27
INFO EPG ANT
1 2
5
4
7 8 9
MENU
0
OK
BACK/
3D
SOURCE
APPS
LIST FAV
EXIT
HOME/
TOOLS
3
6
P
2
4
6
8
10
12
14
15
17
19
21
23
24
25
28
: Power, switch on or off TV set.
1.
: Press to mute or restore sound.
2.
3. II: Pause (in USB/PVR mode).
: Press to enter the MIX mode in
the teletext.
4.
: Stop (in USB/PVR mode).
: Hold the teletext page on display,
press again to release.
5. : Play (in USB/PVR mode).
: Enter the Teletext, and press this
button again to exit.
: Press button to start recording.
6.
: Change size of teletext screen in
display mode.
7.
: Previous (in USB mode).
i
: Go to the index page.
: Next (in USB mode).
8.
?
: Reveal the hidden information of
some teletext pages.
: Fast reverse (in USB mode).
9.
: Enter subtitle mode or subpage.
: Fast forward (in USB mode).
10.
: Cancel the teletext but not to exit
teletext, press again to exit.
11. EPG: Electronic Programme Guide,
use in the DTV mode.
12. ANT: Press to select an antenna
source.
13. INFO: Press to display the current
program information on the screen.
14. TOOLS: Press to display the Tools
menu.
15. NUMBER BUTTONS: Choose
channels or password importation.
Page 13
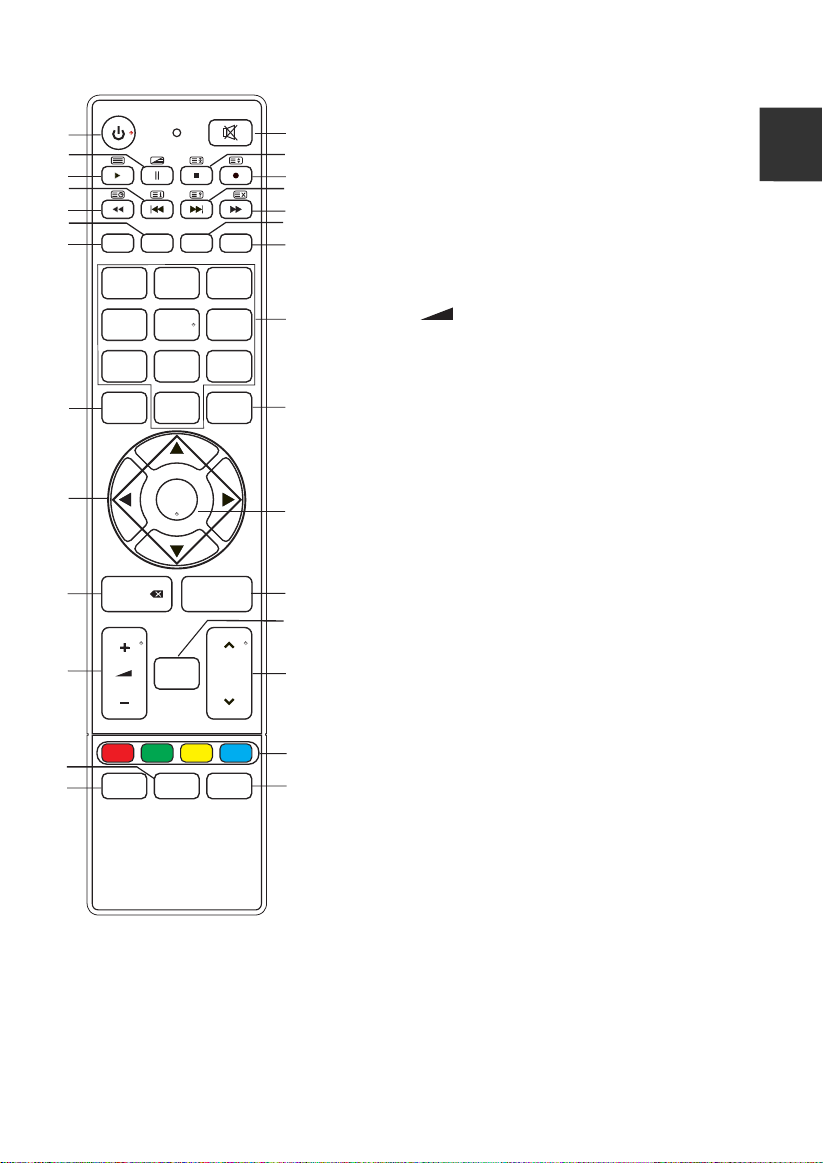
Remote Control
11
1
3
5
7
9
11
INFO EPG ANT
13
1 2
5
4
7 8 9
16
MENU
18
OK
EXIT
0
TOOLS
3
6
2
4
6
8
10
12
14
various optional adjustable settings.
17. EXIT: Return the last layer OSD menu or
exit OSD Menu.
18. ▲/▼/◄/►: To select the direction.
19. OK: Press to execute the selected item in
the menu screen.
20. BACK: Return to last viewed program.
16. MENU: Press to enter the menu screen for
E
nglish
21. HOME/SOURCE: Select signal source,
and link to various internet services.
15
22. + -: Press to adjust the volume level up
or down.
23. APPS: Press to enter APP Store function.
24. ∧P∨: Press to select channels in
17
ascending or descending order.
25. COLOR BUTTONS: Red/ green/ yellow/
blue key navigation link.
26. LIST: Press to call up the channel list.
Press again to exit it.
19
27. 3D: No function.
28. FAV: Switch on/off the favorite programs
list.
20
BACK/
22
26
27
3D
NOTE:
HOME/
SOURCE
APPS
LIST FAV
21
23
P
24
25
28
• All pictures in this manual are examples, only for reference, actual product may differ
from the pictures.
• The buttons not mentioned here are not used.
Page 14

Basic Operation
12
QUICK START GUIDE
E
ngli
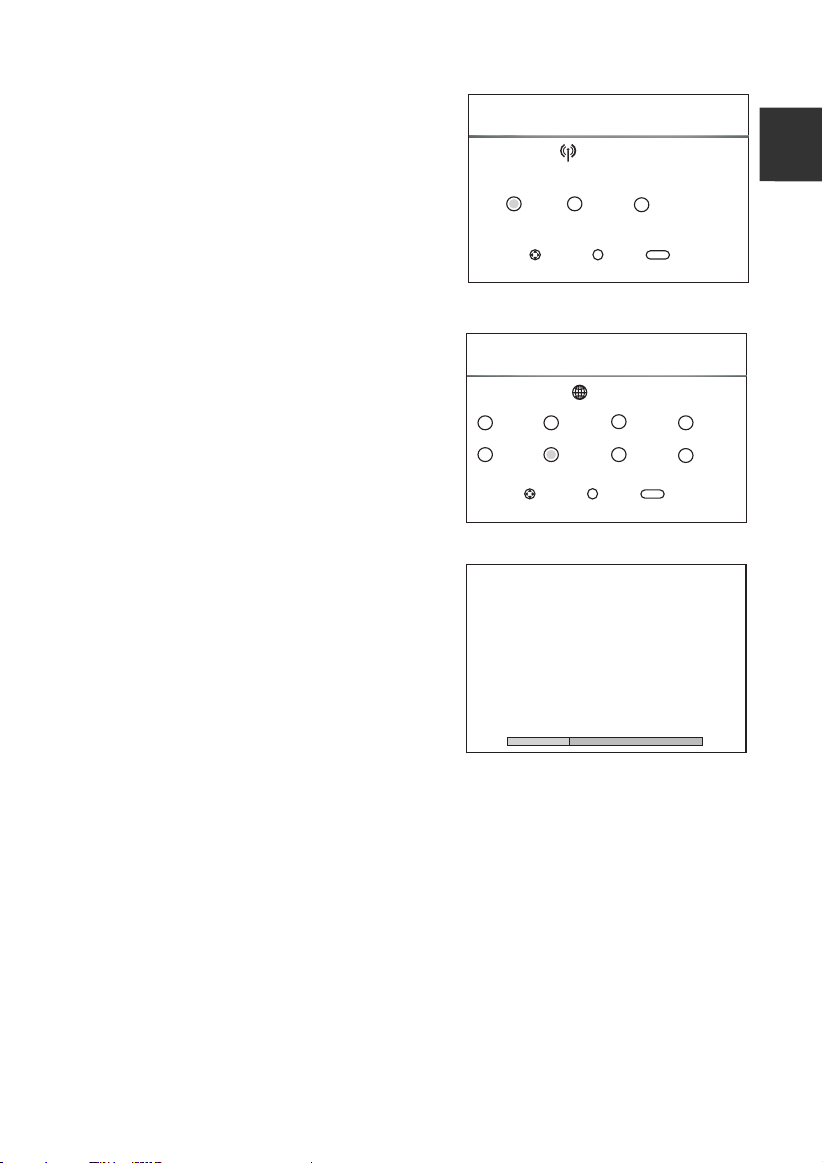
■ Initial Setup
1. The first time you power on the TV, the
sh
"Installation Guide" will be shown on the TV
screen. Please follow below procedures to do
first installation including channel searching.
Selecting a Language
2.
Press the ▲/▼/◄/► button to
Language, and then press the OK button.
select a
Installation Guide
Welcome to the installation guide!
Ple ase pre ss [OK] t o start t he guid e!
Installation Guide
Lan guage
Deu tsch
Čes ko
Ita liano
Slo venči na
Sele ct
Eng lish
OK
Ack
Back
BACK
Fra nçais
3. Scan the QR code
Please scan the QR code to download
application, and then press the OK button.
(Details please refer to page 15).
4. Selecting an Environment
Press the ▲/▼/◄/► button to
select an
Environment, and then press the OK button.
If you select the “Store”, it will be displayed the
“Yes/No” image.
Installation Guide
Ple ase sca n the QR co de to dow nload a pplic ation .
Ple ase kee p your de vice an d TV in the s ame net work.
For An droid a nd iOS
OK
Ack
Back
BACK
Installation Guide
Env ironm ent Sel ect
Hom e
Sele ct
OK
Ack
Sto re
Back
BACK
Page 15
13
Basic Operation
5. Selecting an Antenna
Press the ▲/▼/◄/► button to select an
Antenna, and then press the OK button.
6. Selecting a Country
Press the ▲/▼/◄/► button to
select a
Country, and then press the OK button.
7.
The TV starts Auto Tuning.
Installation Guide
Ant enna Typ e
Air
Cab le
OK
Sele ct
Ack
Sat ellit e
Back
BACK
Installation Guide
Cou ntry
Cro atia Cze ch
Sele ct
ATV
DTV
Rad io
Dat a
Ger many
Cha nnel Tun ing
:
:
:
:
Fra nce
10 %. .. UHF CH 2 6 DTV
Den mark
Gre ece
OK
Ack
BACK
Pro gramm e(s)
0
Pro gramm e(s)
0
Pro gramm e(s)
0
Pro gramm e(s)
0
Back
Fin land
Hun gary
E
nglish
NOTE:
• If the TV doesn't receive any channels, please check your aerial connection or the
country you selected, and then try an auto search again.
• If the TV just receives some of the channels, it means the aerial's reception isn't good
enough and an antenna service is recommended.
For this TV set works with Linux operating system, the TV may automatically restart or
•
the remote control does not respond when it is being used. If the remote control does
not respond, please turn off the power and restart the TV.
Page 16

Basic Operation
14
Turning on and off the TV
E
ngli
■ Turn on the TV
Connect the power cable, if TV has a power switch, turn it on firstly. Press the
sh
button on remote control can turn on TV from standby mode.
■ Turn off the TV
Press the
Do not leave your set in standby mode for long periods of time. It is best to unplug the
set from the mains and aerial.
When there is an accident power off, it is recommended to unplug the power cable
from the power socket.
■ No signal
There is No Signal menu on screen when there is no input signal. In DTV/ATV mode,
if there is no signal in 5 minutes, the TV will turn off automatically. In PC-RGB
mode, the TV set will automatically turn off in 1 minute if no input signals. When VGA
cable is connected, the TV turns on automatically.
Programme Selection
■ Using the CH+/CH- on the panel of TV or ∧P∨ on the remote control.
Press CH+/∧ to increase channel number.
Press CH-/ ∨ to decrease channel number.
■ Using 0- 9 Digital Buttons.
You can select the channel number by pressing 0 to 9. (In DTV, ATV mode)
■ Example
To select - channel (e.g. Channel 5): Press 5.
To select -- channel (e.g. Channel 20): Press 2 and 0 in a short time.
Volume Adjustment
■ Press the VOL+/VOL- on the panel of TV or +
volume.
■ If you want to switch the sound OFF, press the
■ You can release mute by pressing the
Changing the Input Source
1. You can select the input source by pressing the HOME/SOURCE button to open
Smart Home interface.
2. Press the ▲/▼ button to cycle through the input source, and press the OK button to
confirm your choice.
button on the remote control to enter standby mode.
- on the remote control to adjust the
.
or increase the volume.
Page 17

Menu Operation
15
iSmart TV function
■ Installation and connection
In order to allow you experience iSmart TV function, you can download application by
scan the QR code from the installation guide, which can be installed to your Android
or iOS mobile device, like smart phone or tablet.
Your TV and mobile phone must be connected in the same network, and the network
needs Internet access. Open the application installed on your handheld device after
the device access to the network; select the TV in the device list to connect.
■ Enter iSmart TV World
1. Control by Virtual buttons
You can use Virtual Buttons to control the TV in the application like remote, such as
menu, CH+/-, VOL+/-, etc. In order to achieve the function of arrow keys that right
and left, up and down, you just need to slide in the blank interface of the middle
screen. Let you control the TV without remote.
2. Watch TV any category
iSmart TV will help you to categorize the program after connecting the TV, and
syncing EPG information. You can choose what program you want to watch at the
moment, or book a program for watch later.
3. Quick Settings
In order to reach the best playback effect you want, you can adjust the quality of
pictures and sounds quickly through the shortcut menu, such as brightness, color
temperature, zoom model, sound mode, etc.
4. Media push
iSmart TV will find multimedia files on your mobile phone and help you to
categorize files. You can share these multimedia files to the TV easily by clicking
the file. You can experience excitement and pleasure from the big-screen!
Note:
(1) If there is a mobile version problem cause the application install fails, please
upgrade your phone version.
(2) The EPG information services are from a third party, we do not guarantee the
accuracy and timeliness.
(3) In case of functional changes in the application side, application side shall
prevail.
E
nglish
Page 18

Menu Operation
16
How to Navigate Menus
E
ngli
Please before using the TV follow the steps below to learn how to navigate the menu in
order to select and adjust different functions. The access step may differ depending on
sh
the selected menu.
1. Press the MENU button to display the main menu.
Picture
Network
2. Press the ▲/▼/◄/► button to cycle through the main menu. Press the OK button to
access the submenu.
3. Press the ▲/▼ button to select the desired sub item, and then press the OK button.
4. Press the ▲/▼/◄/► button to select the desired value. The adjustment in the OSD
may differ depending on the selected menu.
5. Press the MENU button to return to the previous menu.
6. Press the EXIT button to exit from the menu.
NOTE:
• When an item in MENU is displayed gray, it means that the item is not available or
can not be adjusted.
• Buttons on the TV have the same function as corresponding buttons on the remote
control. If your remote control is lost or couldn’t work, you may use the buttons on the
TV to select menus. This manual focuses on operation of the remote control.
• Some items in the menus may be hidden depending on modes or signal sources
used.
Sound
Time
Channel
Lock
Setting
Support
Page 19

Menu Operation
17
Configuring the Picture Menu
■ Picture Mode: You can select the type of picture which
best corresponds to your viewing requirements.
The manufacture's recommendation mode is Home.
■ User: Contrast, Brightness, Saturation, Sharpness and
Backlight can be adjusted.
■ Color Temperature: Select the color temperature of the
picture.
■ Aspect Ratio: You can select the picture size which best
corresponds to your viewing requirements.
■ Screen (In PC mode):
Auto Adjust: Adjust the image automatically.
Horizontal Pos.: Centre the image by moving it left or
right.
Vertical Pos.: Centre the image by moving it up or down.
Phase: Adjust when characters have low contrast or
when the image flickers.
Size: Adjust the screen size.
■ PC Mode (In PC mode): Switch PC Mode function
On or Off.
■ NR: Reduces screen noise without compromising video
quality.
■ Dynamic Contrast: Adjusts the contrast to the optimal
level according to the image's brightness.
■ OverScan (In DTV mode):
The picture reproduction rate is adjusted.
■ Picture Reset: Reset all picture settings to the factory defaults.
Picture
Pic ture Mo de
Use r
Col or Temp eratu re
Asp ect Rat io
NR
Dyn amic
Con trast
Ove rScan
Adj ust
OK
Hom e
< >
>
>
16: 9
< >
On
< >
On
>
<
Sta ndard
< >
Ack Back
BAC K
E
nglish
Configuring the Sound Menu
■ Audio Type: You can select an audio type to suit your
personal preferences. Treble and Bass can be adjusted
when the audio type is set to User.
■ Balance: You can adjust the sound balance of the
speakers to preferred levels.
■ AVL (Auto Volume Level): AVL automatically remains
on the same level of volume if you change programmes.
Because each broadcasting station has its own signal
conditions, volume adjustment may be needed every
time when the channel is changed. This feature allows
users to enjoy stable volume levels by making automatic
adjustments for each program.
■ SRS:
To switch the SRS function.
SRS TruSurround HD
TM
creates an immersive,
feature-rich surround sound experience from two
speakers, complete with rich bass, high frequency detail
and clear dialog.
Sound
Aud io Type
Bal ance
AVL
SRS
SPD IF Mode
AD Sw itch
AD Vol ume
Adj ust
OK
Ack Back
0
Off
Off
< >
PCM
< >
Off
30
BAC K
>
><
><
><
Page 20

Menu Operation
18
■ SPDIF Mode: You can select the SPDIF mode. SPDIF (Sony Philips Digital Interface)
E
ngli
provides digital audio output to speakers and various digital devices such as
A/V Receivers and Home Theaters which reduces interference and distortion.
sh
■ AD Switch (In DTV mode)
North America and Europe. This is an auxiliary audio function that provides an
additional audio track for visually challenged persons. This function handles the
Audio Stream for the AD (Audio Description), when it is sent along with the Main
audio from the broadcaster. Users can turn the Audio Description On or Off and
control the volume.
■ AD Volume:
When the AD Switch is set On, the AD Volume can be adjusted.
■ Audio Delay: Correct audio-video sync problems, when watching DTV and when
listening to digital audio output using an external device such as an audio receiver
(0ms~250ms).
■ Sound Reset: Reset all sound settings to the factory defaults.
Configuring the Channel Menu
■ Antenna Type: Selecting an antenna source.
◆When TV signals is Air.
■ Auto tuning
Select the OK button to enter Auto Tuning menu.
– Tune Type: Press the ◄/► button to select tune type.
– Country: Press the ◄/► button to select country.
– Scan Mode: Select Free, All, or Encrypted channels to
store.
– Service Type: Select the channel type to memories.
– Search: Press the OK/► button to start the auto
searching.
■ DTV Manual Tuning
Manual store for digital channels.
1. Press the ◄/► button to select channel.
2. Press the ▲/▼ button to select Search, and press
the OK button to start channel tuning. When a channel is
found, the searching process will stop, the channel will be saved
with current channel number. Press the EXIT button to exit.
*this is only available in some countries, mainly in
Channel
Ant enna Type
Sat ellit e Setti ngs
Aut o Tuning
DTV M anual Tu ning
ATV Manua l Tuning
Pro gramm e Edit
CI In forma tion
Adj ust
OK
Air
<
Ack B ack
>
>
>
>
>
>
BAC K
Page 21

Menu Operation
19
◆When TV signals is Cable.
■ Auto tuning
Select the OK button to start Auto Tuning.
– Tune Type: Press the ◄/► button to select tune type.
– Country: Press the ◄/► button to select country.
– Scan Mode: Select Free, All, or Encrypted channels to
store.
– Service Type: Select the channel type to memories.
– Scan Type: Scans for all active broadcast station
channels and stores them in the TV.
If you select Full, the Auto Tuning will search through
all frequencies to find available channels.
If you select Network, the Auto Tuning will search
through appointed frequencies to find available
channels.
– Frequency: Enter a user-defined frequency.
(When the Frequency is set Quick, the Symbol and
Modulation can be adjusted).
– Symbol: Displays available symbol rates.
(Symbol: Speed at which a device such as modem
sends symbols to a channel).
– Modulation: Displays available modulation values.
(Modulation: Loading of audio or video signals onto
carrier).
– Search: When you are satisfied with your setting,
press the OK/► button. The TV will begin memorizing
all of the available channels.
Channel
Ant enna Type
Sat ellit e Setti ngs
Aut o Tuning
DTV M anual Tu ning
ATV Manua l Tuning
Pro gramm e Edit
CI In forma tion
Adj ust
<
OK
Ack B ack
Auto Tuning
Tune Type
Cou ntry Ge rmany
Sca n Mode
Ser vice Type
DTV +Radi o
Cab le
>
>
>
>
>
>
BAC K
DTV
><
>
All
><
><
E
nglish
■ DTV Manual Tuning
Frequency, Symbol, Modulation, Scan Mode, and
Service Type are needed in order to add a programme
correctly in DVB cable mode. Please inquire of the cable
service provider about the correct values. When setting is
completed, select Search and press the OK button to
start channel tuning.
Sca n Type
Frequency
Sym bol
Adj ust
OK
Ful l
< >
Aut o
Aut o
Ack B ack
BAC K
Page 22

Menu Operation
20
E
◆ When TV signals is Satellite.
ngli
■ Satellite Settings
–Satellite/Transponder: Press the ▲/▼ button to
sh
select the Satellite/Transponder, then press the
OK button. Press the ▲/▼ button to select the
satellite/transponder from the list.
Delete: Press the red button to delete the current
satellite/transponder.
Edit: Press the green button to edit the current
satellite/transponder.
Add: Press the yellow button to add a new
satellite/transponder.
– LNB Power: Select the power supply type for the LBN.
– LNB Type: Select the LBN type.
Press the OK button access the submenu. Items can be
adjusted when the LNB Type is set to User Mode.
– 22kHz Tone: 22KHz SWITCH. Select the 22KHz
depending on the LNB type.
– Toneburst: You can choose one of two satellites.
Used to choose proper device.
– DiSEqC1.0: You can choose one of four satellites.
Used to choose proper device.
– DiSEqC1.1: You can choose one of sixteen satellites.
Used to choose proper device.
– Motor: Sets the positioned type between DiSEqC1.2
and USALS.
When motor is set to DiSEqC1.2 or USALS:
Set Limit: Press the green button to set Limits to the
scope of satellite Antenna rotation.
Move Continue: Rotates the antenna until the rotation
has been completed or Stopped manually.
Move Step: Rotates the antenna in accordance with the
step value. Enables the antenna make a fine
adjustment.
Set West Limit: Set the West limit value.
Set East Limit: Set the East limit value.
Goto Reference: Drive antenna to zero position.
Disable Limit: Delete Limit settings. Allows the antenna to rotate over the full arc.
Cancel east limit and west limit.
Set position: Press the red button to set position.
Move Auto: Rotates the antenna automatically.
Move Continue: Rotates the antenna until the rotation has been completed or
stopped manually.
Move Step: Rotates the antenna in accordance with the step value. Enables the
antenna make a finer adjustment.
Store Position: Store current position as the selected positioner limit.
Goto Position: Rotates the antenna to the stored satellite position.
Channel
Ant enna Type
Sat ellit e Setti ngs
Aut o Tuning
DTV M anual Tu ning
ATV Manua l Tuning
Pro gram Ed it
CI In forma tion
Adj ust
Satellite Settings
Sat ellit e
Transp onder 1 0729 V 22 000
LNB P ower
LNB Type
22k Hz Tone >
Toneb urst
DiS EqC1. 0
Qua lity
Stre ngth
Adj ust
Sat ellit e
<
OK
Ack B ack
ASTR A
13/ 18 V
Uni versa l
<
OK
Ack B ack
>
>
>
>
>
>
>
BAC K
>
>
><
>
Aut o
Non e
><
Non e
><
0%
0%
BAC K
Page 23

Menu Operation
21
Goto Reference: Drive antenna to zero position.
GotoX: Moves the antenna to the location specified by Set Location.
When Motor is set to USALS:
Set Location: Press the yellow button to set Location.
Location: Longitude Direction, Longitude Angle, Latitude Direction, Latitude Angle
can be adjusted When the Location is set to Manual.
Longitude Direction: Sets the Longitude direction for the location.
Longitude Angle: Sets the Longitude angle for the location.
Latitude Direction: Sets the Latitude direction for the location.
Latitude Angle: Sets the Latitude angle for the location.
– Go Search: When setting is completed, select Go Search and press the OK to
enter Auto Tuning menu.
– Reset: Satellite setup setting will be reset to the default values. After reset all, you
can reset the country while Auto Tuning.
• The satellite TV company may adjust the transponder during the operation period;
therefore, the program parameter may be partially changed. The users who use this
machine to receive the satellite programs should regularly refer to the related
detailed information in this website: http://www.lyngsat.com/, and please add the new
transponder parameter in the machine in time, otherwise, your program receiving
may be influenced.
■ Auto Tuning: Select the OK button to start Auto Tuning.
1. Select the county for channels.
2. Press the ▲/▼ button to select Search, press the ◄/► button to select Quick
Scan or Blind Scan, and then press the OK button to start channel tuning.
3. The TV will begin memorizing all of the available channels.
■ DTV Manual Tuning
Manual store for DVBS2 channels.
Press the ▲/▼ button to select the desired sub item.
Press the ◄/►button to select the desired value.
Press the ▲/▼ button to select Search, and press the
OK button to start channel tuning.
Press the EXIT button to exit.
DTV Manual Tuning
Sat ellit e
Fre quenc y
Sym bol
Pol ariza tion
Sca n Mode
Ser vice Type
Sea rch
Qua lity
Stre ngth
Adj ust
ASTR A
Vert ical
<
<
DTV +Radi o
OK
Ack B ack
>
0
><
0
><
>
All
>
><
0%
0%
BAC K
E
nglish
Page 24

Menu Operation
22
■ ATV Manual Tuning
E
ngli
Manual store for ATV channels.
Press the ▲/▼ button to select the desired sub item.
sh
Press the ◄/► button to select the desired value.
Press the ▲/▼ button to select Search, and press the ◄/► button to search the
signal upward or downward, the system will stop after one channel is searched.
Press the EXIT to exit.
Press the ▲/▼ button to select Save, and press the OK button to save it.
■ Programme Edit
1. Press the ▲/▼ button to select the items.
2. Delete: Press the red button to delete the channel.
Sort: Press the green button to sort the channel.
Move: Press the yellow button to move the channel.
Skip: Press the blue button to skip the channel.
Favorite: Press the FAV button to set the favorite channel.
■ CI Information (In DTV mode): This function enables you to watch some encrypted
services (pay services). Please insert CI card into the CI slot according to the arrow
on the CI card.
NOTE:
• The function can only be gotten when CI slot is available.
• This OSD is only for illustration and the menu options and screen format will vary
according to the Digital pay services provider.
• It is possible for you to change CI (Common Interface) menu screen and service by
consulting your dealer.
• Please do not insert or pull out the CI card when power on.
• Do not insert or pull out the CI card frequently so as to avoid any damages of the TV
and the CI card.
• During initialization of the CI card, please don't operate the TV.
■ Signal Information
Display the current Signal Information.
Page 25

Menu Operation
23
Configuring the Setting Menu
■ Language: Select your preferred On Screen Display
language.
■ Audio Languages: Select your preferred audio
language. (Available for digital channels if multiple audio
languages are broadcasted.)
■ Subtitle Languages: Select your preferred subtitle
language. (Available for digital channels if multiple
subtitle languages are broadcasted.)
■ Subtitle: Switch the Subtitle function On or Off.
■ Hearing Impaired: When the Subtitle is set On, the
Hearing Impaired can be adjusted. When hearing
Impaired is ON, the TV screen will give some information
to the people whose hearing are impaired. When Hearing
Impaired is Off, the information will be hidden.
■ Country: Display the current country.
■ HBBTV Enable: Switch the HBBTV Enable function On
or Off. (The first time this function may unavailable, the
second time can work.)
■ Environment Select: Select the Environment Select
Home or Store. Store mode is the optimal setting for store
environment.
■ Energy Saving: When the Environment Select is set
Home, the Energy Saving can be adjusted. Switch the
Energy Saving function On or Off.
■ Health Remind: Switch the Health Remind function On or
Off. While Health Remind is set to On, a prompt picture
will remind you to have a break at intervals of two hours.
■ HDMI_CEC:
Press the OK/► button to access the
submenu. The HDMI_CEC system can be used only with
devices that have the HDMI_CEC feature. You must
connect an HDMI_CEC device using an HDMI cable.
Some HDMI cables may not support HDMI_CEC
functions.
–Device List: Display devices that are connected to TV.
–HDMI_CEC: Switch the HDMI_CEC function On or Off.
–Auto Standby: Switch the Auto Standby function On or
Off.
–ARC: Switch the ARC function On or Off.
■ Power Indicator: Switch the Power Indicator function On or Off.
■ Power On Logo: Switch the Power On Logo function On or Off.
■ Default: Restore the system settings to the factory default. When the restore is
complete, the TV will enter standby mode.
Setting
Lan guage E nglis h
Aud io Lang uages
Sub title L angua ges
Sub title
Hea ring
Imp aired
Cou ntry
PVR F ile Sys tem
Adj ust
OK
Ack B ack
Off
Off
Ger many
BAC K
>
>
>
><
>
Setting
HBB TV Enab le
Env ironm ent
Sel ect
Ene rgy Sav ing
Hea lth Rem ind
HDM I_CE C On
Pow er Indi cator
Pow er On Log o
Adj ust
OK
On
Hom e
On
Off
On
On
< >
Ack B ack
BAC K
><
><
><
><
>
><
E
E
nglish
nglish
Page 26

Menu Operation
24
PVR Function Operation Instruction
E
ngli
How to use PVR function?
Preparing
sh
1. Plug USB flash drive or USB hard disk into USB slot on the left hand side of the TV
set.
NOTE:
• USB disk needs should have capacity at least 512MB.
• USB device must support USB 2.0 high-speed specification.
2. Press the HOME/SOURCE button to display the Smart Home menu. Press the
▲/▼ button to select DTV source, the PVR function can only be used in DTV mode.
3. Then press the MENU button on the remote to bring the main menu up, press the
▲/▼/◄/► button to highlight Setting menu, and then press the OK button.
4. Press ▲/▼ button to highlight PVR File System (In DTV mode), then press the
OK button to go into submenu.
Setting
– Select Disk: Select a disk used for PVR.
NOTE:
• Some models have two USB input and several disk
can be used when two USB devices are plugged in.
– Time Shift Size: You can select the memory size for
Time Shift function.
– Format Start: Format USB disk.
NOTE:
• Before formatting, please back up all important files.
• During the device formatting, do not disconnect the
device or turn off the power. If your USB device can't be
formatted or fail to be checked by the system, it means
the device isn't compatible with the TV or is damaged.
The larger USB device will take longer time to format
please be patient until the formatting finishes.
– Speed Check: Press the OK/► button to check the
speed of the storage device.
PVR File System
Sel ect Dis k
Time Shi ft Size
For mat Sta rt
Adj ust
OK
Ack B ack
>
512 M
><
>
BAC K
Page 27

Menu Operation
25
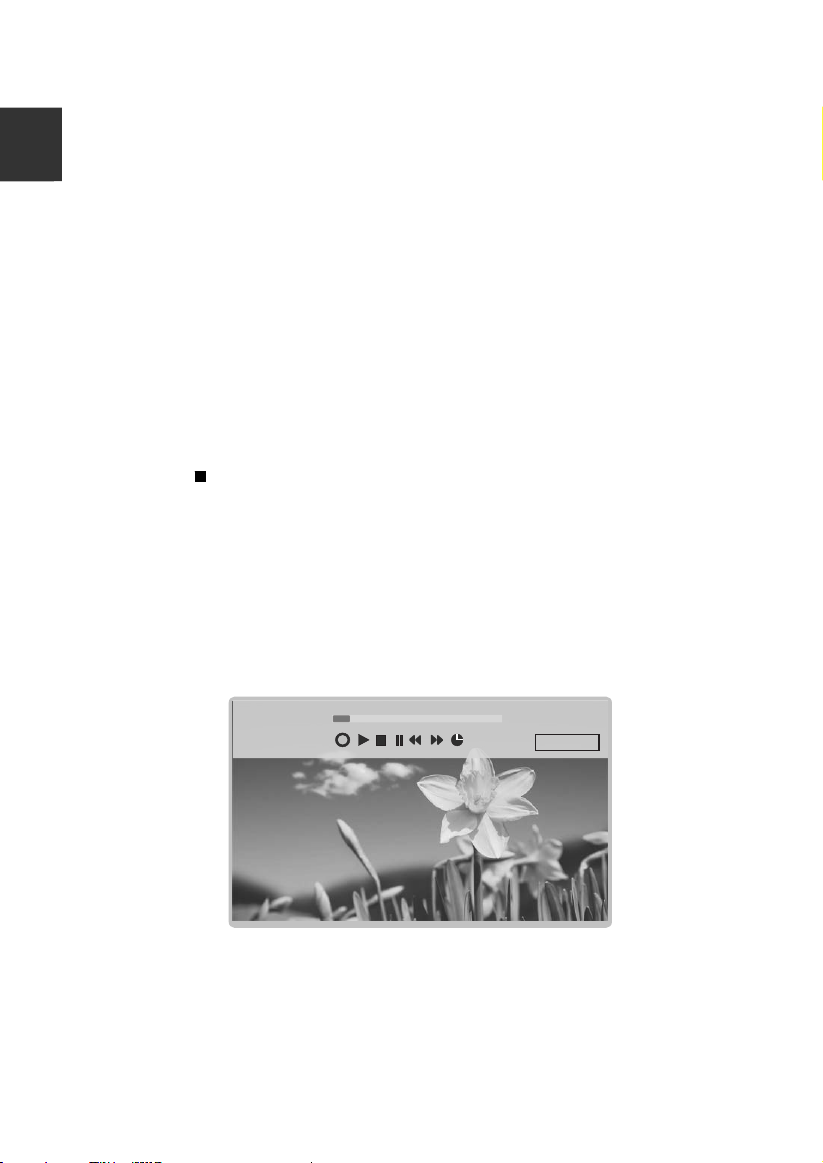
Recording
There are two types of recording: Instant Recording and Schedule Recording.
Instant Recording can record the current TV programmes, while Schedule Recording
can start at a specified time and record the TV programmes automatically on the day,
time and duration you choose.
– Instant Recording
1. Select the channel you want, then press
come up on the screen when TV start recording.
2. Press
button to display/hide the recording menu. Press the ◄/► button to
select play, stop, pause, fast reverse, fast forward and set start time.
3. It will keep recording until
(stop) button is pressed or the memory is full.
>
00:0 8
00:0 0
button to start recording. A menu will
CH 6 ITV 2
00:2 4
>
Disk S pace: 7 %
E
nglish
– Schedule Recording
The unit is able to do schedule recording when TV is turned on or in standby mode.
1. Press EPG button to bring up EPG menu.
2. Then press red button will active timer recording submenu. You can set up time
or channel in the menu.
3. Press the ▲/▼ button to highlight different setting and press the ◄/► button to
change setting. After you have finished adjusting settings to desired options, and
press the OK button to save the scheduled recording.
NOTE:
• You can set up several schedule programmes to record. To do this you will need
to press the yellow button in the EPG mode which will show you the entire list.
Different schedules should not overlap and there must be at least a 1 minute time
gap to set up between two schedules.
• When recording starts in standby mode, the front indicators will change color and
there will be no picture or sound from the unit. You can press
button to turn on
the screen.
Page 28
Menu Operation
26
Playing the Recorded Programmes
E
ngli
Option1:
After recording has finished, press the TOOLS button on the remote control, and
sh
then press the ▲/▼ button to select the Record list.
1. Press the ▲/▼ button to select the recorded file, and then press the OK button to
play the file.
2. Press the red button to delete the file you no longer require.
3. Press the yellow button to select the ascend or descend page.
4. Press the blue button to change the list by different types.
5. Press the EXIT button to quit the menu.
Option2:
Also you can play the recorded programmes in USB mode.
1. Press HOME/SOURCE button to enter the Smart Home interface.
2. Use the ◄/► button to select Movie, and then press OK.
3. Use the arrow buttons and OK button to enter the desired disk.
4. Use the arrow buttons and OK button to open the folder.
5. Press the MENU button to display the setting menu.
6. Press the
7. Press the EXIT button to return to the USB main menu screen.
Time Shift Function
This function allows the TV to automatically record live TV and make it available for
viewing at any time. With the Time shift turned on, you may rewind normal TV
viewing at any time without missing any of the live broadcasts.
Press the TOOLS button on the remote control, and then press the ▲/▼ button to
select Time Shift to activate Time Shift function.
point of view you want to record.
button to stop the playing file.
The TV stores the channel from the
00:0 8
CH 6 ITV 2
00:2 4
>
Disk S pace: 7 %
>
00:0 0
If an USB device dedicated to recording is disconnected, Time Shift files that were
saved will automatically be deleted.
Page 29

Menu Operation
27
HBBTV
You will be able to access services from entertainment providers, online providers and
CE manufactures through the HBBTV.
1. When the screen indicates (with the red button, etc.) that HBBTV is being accessed.
Press the red button to enter the HBBTV menu.
2. Operate the TV with the suggestive information.
NOTE:
• This service may be supported in other countries.
• Some broadcasting may not support the HBBTV.
•
An application on HBBTV may malfunction temporarily depending on the
circumstances of the broadcast station or application provider.
• An application is only available for use on HBBTV when the TV network is connected
to an external network. The application may malfunction depending on the network
conditions.
E
nglish
Page 30
Menu Operation
28
Network Function Operation Instruction
E
ngli
You can set up your TV so that it can access the Internet through your local area
network (LAN) using a wired or wireless connection.
sh
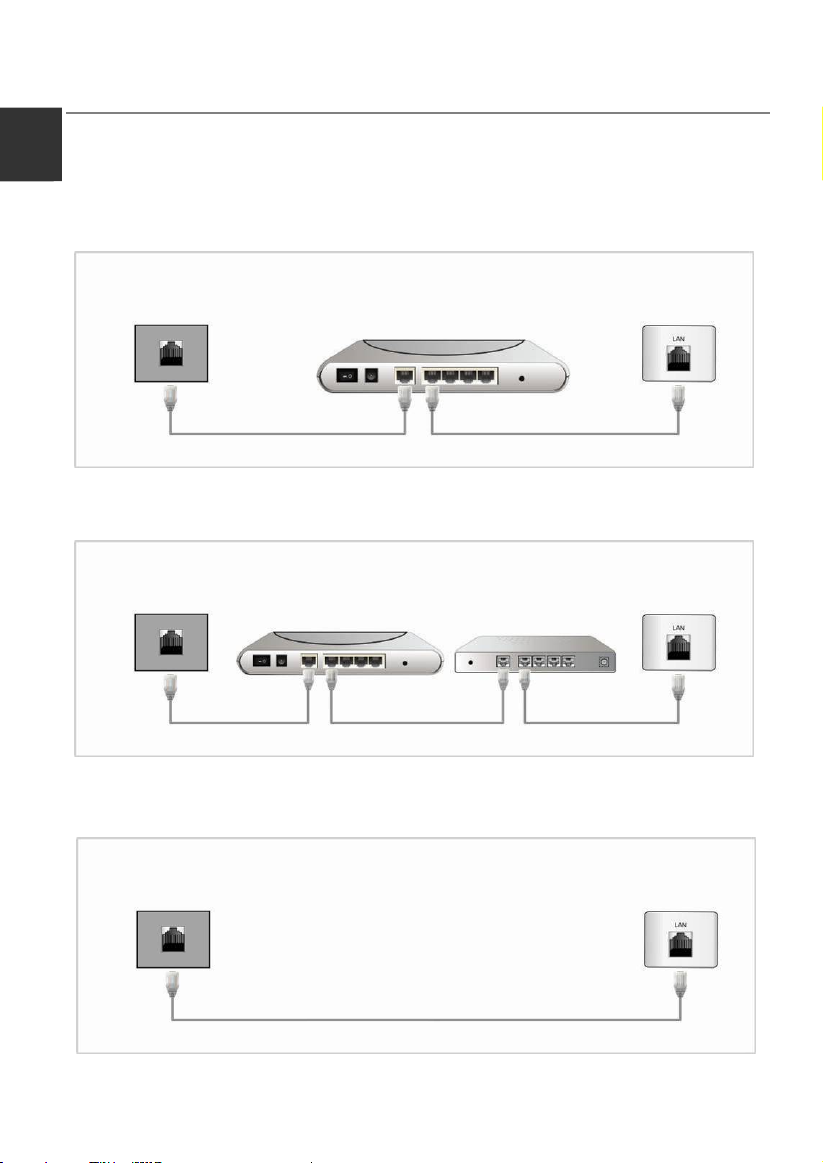
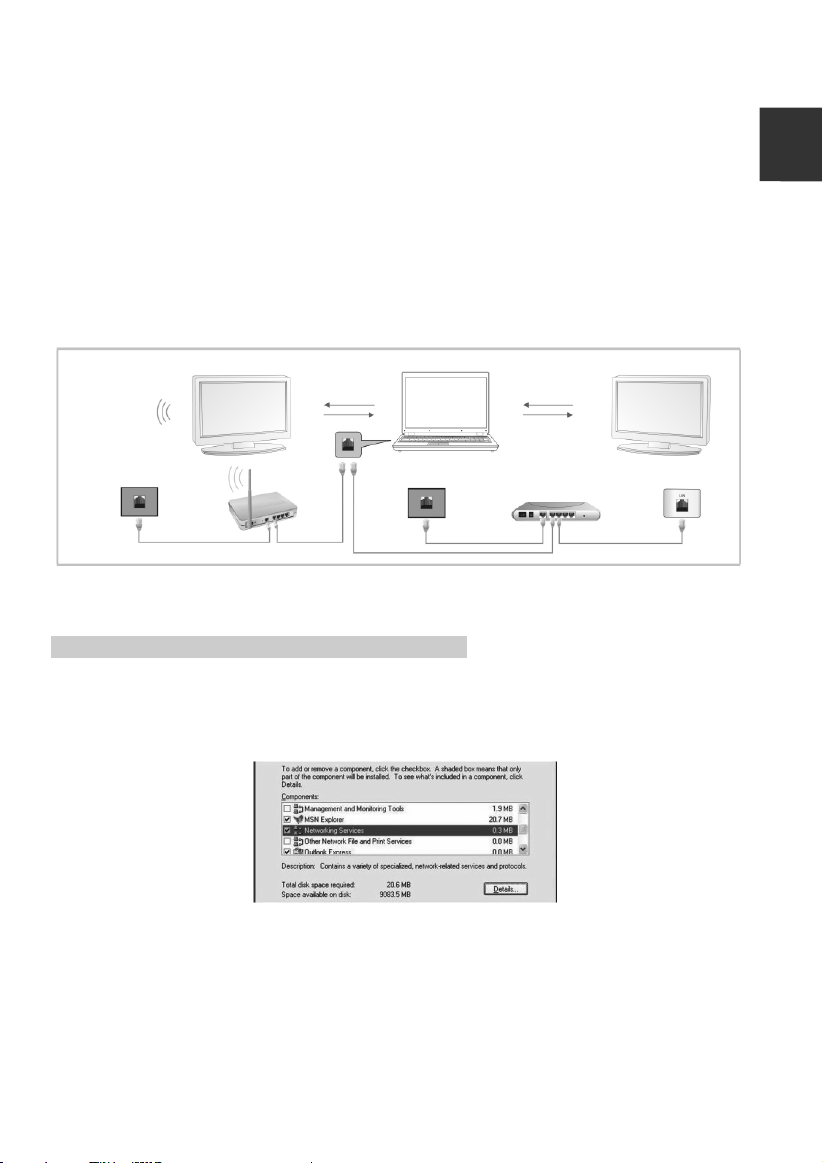
Connecting to a wired network
You can attach your TV to your LAN by connecting the LAN port on your TV to an
external modem using a LAN cable.
The Modem Port on the Wall
Modem Cable
External Modem
(ADSL/VDSL/Cable TV)
The LAN Port on the TV
LAN Cable
You can attach your TV to your LAN by connecting the LAN port on the back of your
TV to an IP Sharer which is connected to an external modem.
The Modem Port on the Wall
Modem Cable
You may be able to attach your TV to your LAN by connecting the LAN port on your
External Modem
(ADSL/VDSL/Cable TV)
LAN Cable LAN Cable
IP Sharer
(having DHCP server)
The LAN Port on the TV
TV directly to a network wall outlet using a LAN cable. Note that the wall outlet is
attached to a modem or router elsewhere in your house.
The LAN Port on the Wall
The LAN Port on the TV
LAN Cable
Page 31

Menu Operation
29
Wired Network Configuration
1. Connect your TV to your LAN as described in the
previous section.
2. Turn on your TV, press the MENU button on your
remote, use the ▲/▼/◄/► button to select Network,
and then press the OK button.
3. Press the ▲/▼ button to Select Network, and then
press the ◄/► button to select the Wired.
4. Press the ▲/▼ button to Select IP Config, and then
press the OK button.
– Mode: Select Mode to set the IP, Netmask,
Gateway and DNS values automatically, or set them
manually.
– IP: The TV’s IP address.
– Netmask: Value of the Netmask.
– Gateway: Address of the Gateway.
– DNS: Address of the DNS.
– MAC Addr: Display the mac address.
Wired Network Setup
– How to set up automatically (Wired)
Use the Automatic Network Setup when connecting
your TV to a network that supports DHCP.
1. Connect your TV to your LAN as described in the
previous section.
2. Turn on your TV, press the MENU button on your
remote, use the ▲/▼/◄/► button to select
Network, and then press the OK button.
. Press the ▲/▼ button to Select IP Config, and then
3
press the OK button.
4. Set Mode to
5. Auto acquires and enters the needed Internet
values automatically.
6. Select the Confirm and press the OK button to
connect the internet.
7. If the Network Function has not acquired the network
connection values, go to the directions for Manual.
Auto.
Network
Net work
IP Co nfig
Adj ust
OK
Ack B ack
IP Config
Mod e
IP
Net mask
Gat eway
DNS
MAC A ddr: 00: 0 0:00 :01 00: 00:
Con firm
Adj ust
OK
Ack B ack
Wir ed
BAC K
Auto
0. 0. 0.0.
0. 0. 0.0.
0. 0. 0.0.
0. 0. 0.0.
BAC K
><
>
><
E
nglish
Page 32

Menu Operation
30
– How to set up manually (Wired)
E
E
ngli
ngli
Use the Manual Network Setup when connecting your TV to a network that requires
a Static IP address.
sh
sh
1. Follow Steps 1 through 3 in the “How to set up automatically” procedure.
2. Set Mode to
3. Press the ▲/▼ button to highlight IP, and then press the OK button.
4. Press the ▲/▼ button to highlight the field you want to change, and then use the
number buttons to input the IP address. Press the MENU/▲/▼ button to return.
5. Press ▲/▼ to highlight Netmask, Gateway and DNS, and edit in the same way
as IP address.
6. When done, Select the Confirm and press the OK button to connect the
internet.
NOTE:
• IP, Netmask, Gateway and DNS address field numbers must be between 0 and
255.
• If you manually set the IP address, you must not use the same IP address for any
other device. The IP address you use should be a private address.
Tips for Network Connection:
• Use a standard LAN cable with this TV. Cat5 or better with a RJ45 connector.
• If you have a Dynamic Network, you should use an ADSL modem or router that
supports Dynamic Host Configuration Protocol (DHCP). Modems and routers that
support DHCP automatically provide the IP address, netmask, gateway and DNS
values your TV needs to access the Internet.
• Some networks require a Static IP address. If your network requires a Static IP
address, you must enter the IP address, netmask, gateway and DNS values
manually when you set up the network connection. If you do not know the correct
values to use, please contact your network administrator or internet service
provider.
• Many network connection problems during set up can often be fixed by re-setting
the router or modem. After connecting the player to the home network, quickly
power off and/or disconnect the power cable of the home network router or cable
modem. Then power on and/or connect the power cable again.
Manual.
Page 33
Menu Operation
31
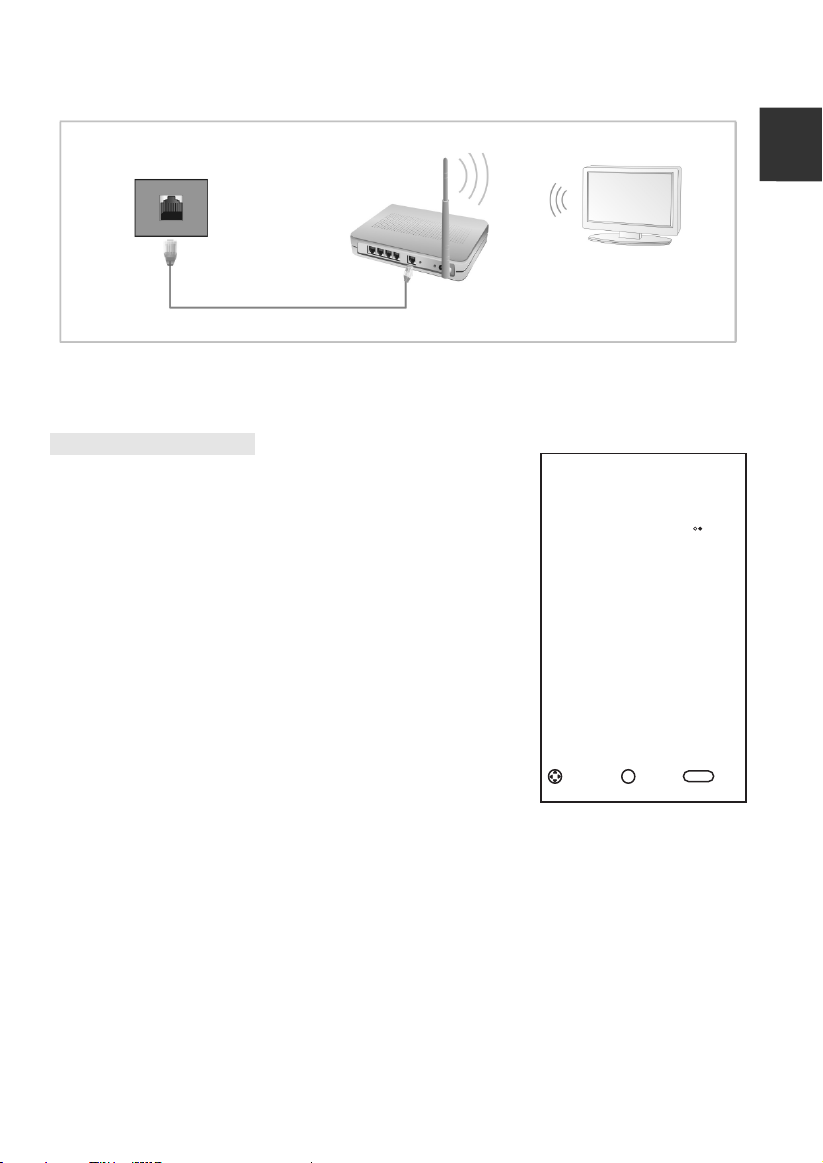
Connecting to a Wireless Network
E
nglish
The LAN Port on the Wall
Wireless IP sharer
LAN Cable
The TV with Built-in Wireless
• To use a wireless network, your TV must be connected to a wireless IP sharer. If
the wireless IP sharer supports DHCP, your TV can use a DHCP or static IP address
to connect to the wireless network.
Wireless Network Setup
To enter the Network settings into your TV, follow these
steps.
1. Turn on your TV, press the MENU button on your
remote, use the ▲/▼/◄/► button to select Network,
and then press the OK button.
Network
Net work
Wif i Confi g
Wif i
2. Press the ▲/▼ button to Select Network, and then
press the ◄/► button to select the Wifi.
3. Press the ▲/▼ button to Select Wifi Config, and
then press the OK button.
– Base Station: Select Base Station then press the
OK button. The Network function searches for
available wireless networks. When done, it displays
a list of the available networks.
In the list of networks, press the ▲/▼ button to
select a network, and then press the OK button.
Adj ust
OK
Ack B ack
BAC K
><
>
Page 34

Menu Operation
32
– Wifi Manual Search: Select Wifi Manual Search then press the OK button.
E
ngli
sh
SSID
Safe Mode
Password
None
> <
Connect
Cancel
SSID: Enter the correct SSID (Network Name).
Password: On the enter password screen, key in your network’s Password.
To enter the SSID or Password, follow these steps:
Press the OK button to display the keyboard at the
screen.
Use the ▲/▼/◄/► button to select numbers and
directions.
To enter a letter or number, and
press to continue to
cycle through numbers, lower case and upper case.
To delete the letter or number you entered, use the
▲/▼/◄/► button to select Del.
Use the ▲/▼/◄/► button to select Esc to closes
the keyboard.
NOTE:
• The password box supports up to 8 characters.
Safe Mode: Press the ◄/► button to select None, WEP, WPA and WPA2.
If Your TV Fails to Connect to the Internet:
• Your TV may not be able to connect to the Internet because your ISP has
permanently registered the MAC address (a unique identifying number) of your
PC or modem, which it then authenticates each time you connect to the Internet
as a way of preventing unauthorized access. As your TV has a different MAC
address, your ISP can not authenticate its MAC address, and your TV can not
connect.
• To resolve this problem, ask your ISP about the procedures required to connect
devices other than a PC (such as your TV) to the Internet.
• If your Internet service provider requires an ID or password to connect to the
Internet, your TV may not be able to connect to the Internet.
• The internet connection may fail because of a firewall problem. If this is the case,
contact your Internet service provider.
Page 35
Menu Operation
33
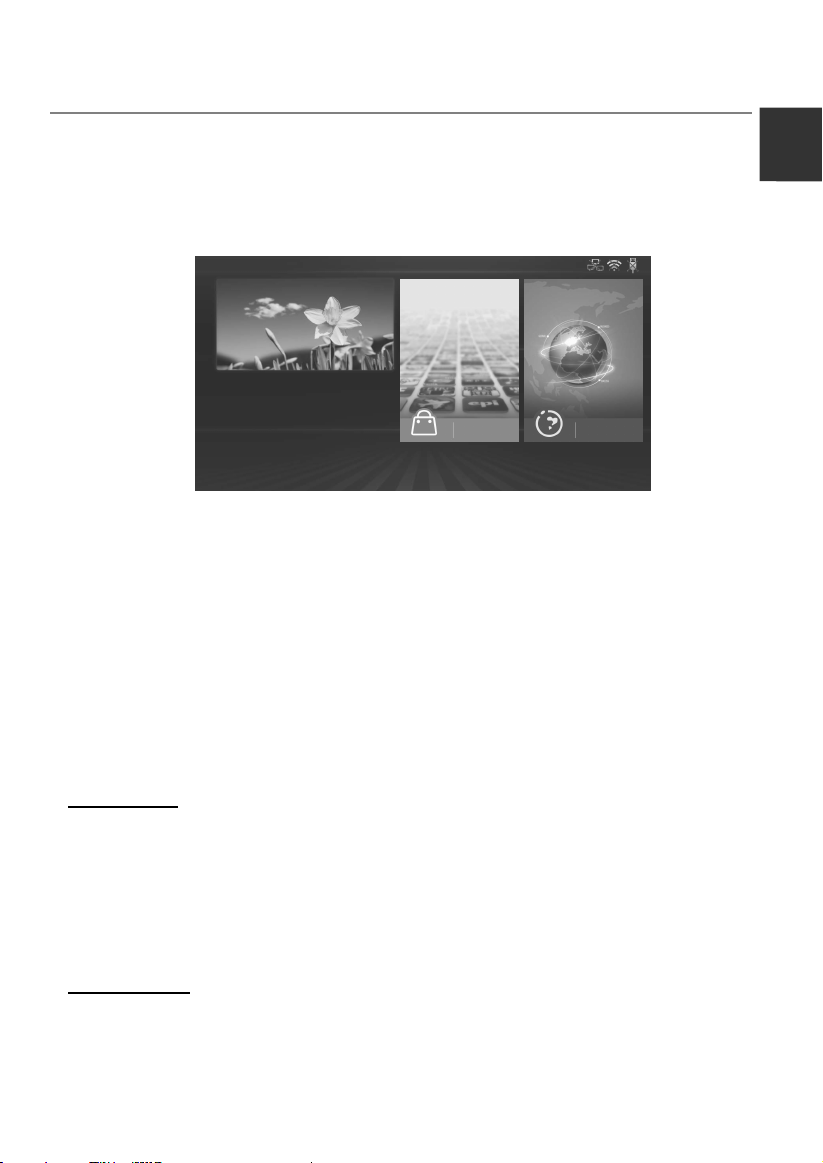
Smart Home
Smart Home brings useful and entertaining contents and services directly from the
web to your TV.
Press the HOME/SOURCE button on the remote control. The Smart Home display
will appear.
Press the arrow buttons to scroll to the contents you want and press the OK button.
Press the EXIT button to close the Smart Home display.
DTV
ATV
SCA RT
Component
PC
App S tore
Home interface layout mode:
On the left of the screen is the input source.
On the right of the screen are the App Store, Browser, Multiscreen, Movie, Music,
Photo and Free Share.
Press arrow buttons to cyclically select all options.
– App Store
Press the arrow buttons to select App Store and press OK. Press the APPS
button to return to the App Store main interface. Press EXIT button to exit.
App Store: In the App Store main interface, press the arrow buttons to select the
APP STORE, and press OK.
Select Country: If you select the country, it can display available applications.
APP STORE:
APP will be divided into seven categories: Service, Games,
Entertainment, News, Sport, Music and VOD. Press the arrow buttons to select a
different type of applications, and press the OK button to enter different application
list. Use the arrow buttons to select the application icon, press the OK button to
enter the selected.
Add to favourites:
1. You can press the arrow buttons to select APPs type.
2. Press the green button to add the selected application to FAVOURITES.
FAVOURITES:
Display your personal applications.
In FAVOURITES list, Press the arrow buttons to select an application, and then
press the OK button. The application service starts.
Press the red button to delete the selected application.
Bro wser
E
nglish
Page 36

Menu Operation
34
SEARCH:
E
E
ngli
ngli
Press the arrow buttons to select SEARCH, and then press the OK button.
Enter the search term using the remote control directly. Search content of inside
sh
sh
the application, or to search websites.
1. Highlight the desired character on the on-screen software keyboard.
2. Press the arrow buttons to select “START SEARCH”, and then press the OK
button.
HOME:
Press the arrow buttons to select HOME to return the App Store main interface.
– Browser
1. Press the arrow buttons to select Browser, and then press the OK button.
2. You can use the keyboard to enter the address. Select the browser input
window and press the OK button to display the keyboard at the screen. Select
characters to enter.
3. After sign in, press the arrow buttons to select the file you want to view, and
press OK.
4. Press the EXIT button to close the web browser.
Using the Control Panel with Web Browser
The Web Browser has a series of icons across the top of the screen. With these
icons, you can easily use the Web Browser.
A
B
C D
A. Enter the browser input window.
B. Open history.
C. Open the Bookmarks Manager.
D. Open the System Settings.
On the bottom display the four color buttons:
Red: Magnify the web page.
Green: Minify the web page.
Yellow: Refresh the web page.
Blue: Return the HOME page.
Page 37

Menu Operation
35
NOTE:
• Buttons on the TV are not available when using the Network function.
• The video may not play smoothly due to the Internet speed.
• The web browser on this device is a TV browser. It may work differently to PC
browsers.
• Not all web contents that can be accessed by computer may be viewed with this
TV.
• This TV may not be able to do some operations that computer can do.
• Depending on network environment and the use situation, content may be difficult
to view.
• This TV might take time to the start-up and the playback of contents.
• We do not assume at all the responsibility for contents that website offers.
• Unsupported fonts within the provider’s content will not display normally.
• Slow responses and/or interruptions may occur, depending on your network
conditions.
• The web browser supports HTML5 video playing.
– Multiscreen
Multiscreen allows users to echo screen display and audio from a phone or tablet
onto our TV in real-time.
1. Turn on the Multiscreen on TV: press the HOME/SOURCE button on the remote
control to enter Smart Home interface, and press the arrow buttons to select
Multiscreen, and then press OK.
E
nglish
NOTE: Our TV needs a specific WiFi dongle to support this function.
2. Enable the Screen Mirroring settings on the device which you want to connect to,
and searching devices.
NOTE: Sometimes it is called Wireless display, it depends on the manufacturers.
3. A list of devices that can be connected would be displayed on your device.
4. Select our TV named ChangHong-ChangHong to connect.
5. Seconds later, the Multiscreen would be connected successfully.
Page 38

Menu Operation
36
– Music/Photo/Movie
E
ngli
To Access/Quit USB mode
sh
1. Connect an USB device.
2. Press the HOME/SOURCE button to display the Smart Home menu. Press the
▲/▼/◄/► button to select the Music/Photo/Movie, and then press OK button.
3. Press the EXIT button to return to the Smart Home main menu.
NOTE:
• Special USB device may be not or well supported.
• USB max. Load: DC5V 500mA.
• In terms of loading capacity, it cannot support all models of mobile hard disk. It is
recommended to use low-power mobile hard disk of no more than 500mA current.
The formats supported
The USB function can support the USB device with USB memory.
It can play Music, Movie or Photo files.
Music Format Support: MP3, AAC.
Movie Format Support: AVI, VOB, DAT, MPEG -1 / MPEG-2 / MPEG-4, TS/TP.
Photo Format Support: JPEG, BMP, PNG.
NOTE:
• Special algorithm documents may not be or well be supported by the USB.
• The USB supports the format mentioned above, if the file format is not supported,
change it to the given format.
Screen Display
Fil e M usic Photo
Retu rn
<
01/ 01
1. Use the ◄/► button to select Music, Photo or Movie, and then press the OK button.
2. Use the arrow buttons to highlight the folder, and then press the OK button.
3. Use the arrow buttons to highlight the Music /Photo/Movie. Press OK button to play
the selected Music /Photo/Vide.
4. Press the BACK button to return to previous menu screen.
5. Press the EXIT button to return to the USB main menu.
Movie
>
Page 39

Menu Operation
37
Music Play Console
1. Play/pause: Press the OK button to switch between the play and pause status.
2. FR: Press the ◄ button to select Fast Backward.
3. FF: Press the ► button to select Fast Forward.
4. Previous: Press the ▲ button to select the previous file in the same directory.
5. Next: Press the ▼ button to select the next file in the same directory.
6. BACK: Press the BACK button to return to previous menu screen.
7. Settings: To enter the music play setting menu, or press the MENU to enter.
1). Repeat mode: User could select “One, None, or All.”
2). Sound: Press the OK button to enter the submenu.
a. Sound mode: You can select sound mode to suit your personal preferences.
b. Treble/Bass: Items can be adjusted when the sound mode is set to User.
c. Balance: You can adjust the sound balance of the speakers to preferred levels.
d. SRS:
Photo Play Console
1. Play/pause: To switch between the play and pause status.
2. Stop: To stop play.
3. Zoom in: To magnify the picture.
4. Zoom out: To minify the picture.
5. Previous: To play the previous file in the same directory.
6. Next: To play the next file in the same directory.
7. Rotate Left: To rotate left for 90 degrees.
8. Rotate Right: To rotate right for 90 degrees.
9. Info: Picture information.
10. Settings: To enter the photo play setting menu, or press the MENU to enter.
1). Repeat mode: User could select “One, None, or All.”
2). Energy Saving: To switch the Energy Saving function. It can be adjusted when
3). Speed: User could select “Slow, Normal, or Fast.”
4). Effect: User could select “Random, or Off.”
5). Picture mode: You can select the type of picture which best corresponds to your
6). Scaler: User could select “Fit, or Full Screen.”
7). BGM: To switch the Background music function.
To switch the SRS function.
the picture mode is set to home.
viewing requirements.
E
nglish
Page 40

Menu Operation
38
Movie Play Console
E
ngli
1. Play/pause: To switch between the play and pause status.
2. Stop: To stop play.
sh
3. FB: Fast Backward.
4. FF: Fast Forward.
5. Goto: Select the settings time to play movie.
6
. Previous: To play the previous file in the same directory.
7. Next: To play the next file in the same directory.
8. Info: Picture information.
9. Settings: To enter the movie play setting menu, or press the MENU to enter.
1). Repeat mode: User could select “One, None, or All.”
2). Subtitle: If movie files have one or more subtitles, user could select subtitle.
3). Audio Track: If video files have multiple audio tracks, user could change tracks.
4). Picture: Press the OK button to enter the submenu.
a. Picture mode: You can select the type of picture which best corresponds to
your viewing requirements.
b. User: Contrast, Brightness, Saturation, Sharpness and Backlight can be
adjusted.
c. Color Temperature: Select the color temperature of the picture.
d. Motion Compensation: Set the Motion Compensation Off, Low, Middle, and
High. Removes blurring and shudders from scenes with rapid movement.
e. Energy Saving: To switch the Energy Saving function. It can be adjusted
when the picture mode is set to home.
f. Scaler: User could select “Full Screen, Movie, Origin or Fit.”
g. NR: Reduces screen noise without compromising video quality.
h. Dynamic Contrast: Adjusts the contrast to the optimal level according to the
image's brightness.
i. OverScan: The picture reproduction rate is adjusted.
5). Sound: Press the OK button to enter the submenu.
a. Sound mode: You can select sound mode to suit your personal preferences.
b. Treble/Bass: Items can be adjusted when the sound mode is set to User.
c. Balance: You can adjust the sound balance of the speakers to preferred
levels.
d. SRS:
To switch the SRS function.
Page 41
Menu Operation
39
– Free Share
This TV can display and play many types of movie, photo and music files from your
Free Share server and has been certified by Free Share for movies, photos and
music. Free Share is a cross-industry organization of consumer electronics,
computing industry and mobile device companies. Digital Living provides consumers
with easy sharing of digital media through a wired or wireless network in the home.
The Free Share certification logo makes it easy to find products that comply with the Free
Share Interoperability Guidelines. This unit complies with Free Share Interoperability
Guidelines v1.5. When a PC running Free Share server software or other Free Share
compatible device is connected to this TV, some setting changes of software or other
devices may be required. Please refer to the operating instructions for the software or
device for more information.
The TV with Built-in Wireless
TV
PC or other Free Share media
TV
E
E
nglish
nglish
The LAN Port
on the TV
LAN Cable
Wireless IP
sharer
External Modem
(ADSL/VDSL/Cable TV)
Depending on the version of Windows, the actual screens on your PC may differ in
which case the same basic set-up information will almost always be applied.
Using Windows Media Player 11 for Windows XP
– How to enable the Universal Plug and Play (UPnP)
1. Click Start, click Run, type appwiz.cpl, and then click OK.
2. Click Add/Remove Windows Components.
3. In the Components window, click Networking Services, and then click
Details.
4. Click to select the UPnP User Interface check boxes in the Subcomponents of
Networking Services window, if it is not selected, and then click OK.
Page 42

Menu Operation
40
E
ngli
sh
– How to Add items to the Windows Media Player Library
1. Click the arrow below the Library tab, and then click Add to Library, as shown
in the following screen shot.
2. In the Add to Library dialog box, click one of the following options, as shown in
the following screen shot.
My personal folders. Use this option to search for the digital media files stored
in your personal Music, Pictures, and Videos folders, as well as any files stored
in the public Music, Pictures, and Videos folders that everyone who uses your
computer has access to.
Personal folders are typically located at C:\Documents and
Settings\username\My Documents; whereas, public folders are typically located
at C:\Documents and Settings\All Users\Documents.
Whenever a file is added or deleted from one of these folders, your library is
automatically updated through a process called folder monitoring.
My folders and those of others that I can access. Use this option to monitor
the digital media files stored in your personal Music, Pictures, and Videos
folders, the files stored in the public Music, Pictures, and Videos folders, as well
as the files stored in the personal Music, Pictures, and Videos folders that
belong to other users on your computer.
Note that you can only monitor the files stored in another user's personal folder if
that person has chosen to share the folder with you. For information about how
to share a folder with another person on your computer, see Windows Help and
Support.
Page 43

Menu Operation
41
3. (Optional) Click Advanced Options, and then do any of the following, as shown
in the following screen shot.
E
nglish
To monitor additional folders, click Add, and then specify the location of the folder.
To stop monitoring a folder that you previously added, click the folder that you
want to remove from the list, and then click Remove. To stop monitoring a folder
that has been automatically added, click the folder, and then click Ignore.
To specify whether the Player should add files previously deleted from the
library, select or clear the Add files previously deleted from library check
box.
To prevent files that are smaller than a certain size from being added to the
library, enter the file size limits in the Audio files and Video files boxes.
– Turn on media sharing
If media sharing is not already turned on, you need to turn it on.
1. Click the arrow below the Library tab, and then click Media Sharing.
2. In the Media Sharing dialog box, select the Share my media check box.
Page 44

Menu Operation
42
– Choose which devices to share your media with
E
ngli
After you turn on media sharing, you need to select the devices that should have
access to your Player library.
sh
1. In the list of devices below the Share my media to check box, select a device.
2. Do one of the following:
If you want to share your media with the computer or device you have selected,
click Allow.
If you don't want to share your media with the computer or device you have
selected, click Deny.
For information about how to customize what media you share with the device,
see "Change settings for sharing media" in Windows Media Player Help.
Note that you can also allow or deny devices by clicking the notification that
appears when the Player detects a new device on your network.
Using Windows Media Player 12 for Windows 7
– How to set Network Location
1. Click Start, click Control Panel.
2. Click Home network. In the Set Network Location window, click Home
network.
3. Click View or change HomeGroup settings.
4. Click Stream my pictures, music, and videos to all devices on my home
network, and then click Save changes.
Page 45

Menu Operation
43
E
nglish
5. Click Change advanced sharing settings.
6. Click Public.
7. Click Turn on network discovery, Turn on file and printer sharing and Turn
on sharing so anyone with network access can read and write files in the
Public folders.
8. Click Choose media streaming options…
Page 46

Menu Operation
44
9. Click Allow All.
E
ngli
sh
– How to Add items to the Windows Media Player Library
1. Click the Start button, click All Programs, and then click Windows Media
Player.
If the Player is currently open and you’re in Now Playing mode, click the Switch
to Library button
2. In the Player Library, click Organize.
in the upper-right corner of the Player.
3. Click Manage libraries, and then click one of the following options:
Music. Click this option to open the Music Library Locations dialog box.
Videos. Click this option to open the Videos Library Locations dialog box.
Pictures. Click this option to open the Pictures Library Locations dialog box.
Recorded TV. Click this option to open the Recorded TV Library Locations
dialog box.
4. Click Add.
5. Find the folder in the list, click Include folder, and then click OK.
– Windows Media Player settings
Requirement Windows Media Player:
Windows Media Player V11 or higher
Windows Media Player shares as following:
• Movie Format Support: MPEG -1 / MPEG-2 / MPEG-4, TS.
• Photo Format Support: JPEG, PNG.
• Music Format Support: MP3, AAC.
Network and firewall requirements
If you want to share the computer with other Media devices, you must open multiple
firewall ports. If you are using Windows Firewall, the required Transmission Control
Protocol (TCP) and User Datagram Protocol (UDP) ports will automatically open
when the media sharing is working. If you are using other software or hardware
firewall, you may need to manually open these ports.
Page 47

Menu Operation
45
Computer or other FREE SHARE media servers must be open firewall ports as
shown below:
Port Protocol Scope
1900 UDP limited to the local subnet
2869 TCP limited to the local subnet
10243 TCP limited to the local subnet
10280-10284 UDP limited to the local subnet
NOTE:
• If you cannot search the shared equipment, please check to see if the UPnP is
blocked by the firewall.
Playing back shared contents
1.
Start the server on your computer or other device that connected on your home
network.
2. Press the HOME/SOURCE button on the remote control.
3. Press the ▲/▼/◄/► button to select Free Share, and press OK.
4. Press Navigation buttons to select your computer or other device, and press OK.
5. Press Navigation buttons to select a folder you want, and then press the OK
button.
6. Press Navigation buttons to select files you want, and then press the OK button to
mark. Press
NOTE:
• The TV may not properly play the files produced with certain encoders.
• The TV may not smoothly play the video files with a resolution higher than the
supported resolution for each frame.
• The TV supports the H.264/AVC codec up to the profile level 4.1.
• If you play a video file through the USB connection that does not support the high
speed, the video player may not work properly.
• Video file names that contain special characters may not be playable.
• The playback of videos may be paused, stopped or buffering occurring often
depending on your broadband speed.
• To play the file on the media server, the TV and the media server must be
connected to the same access point. You are recommended to locate both TV and
PC in same subnet. The first 3 parts of the subnet address of the TV and the PC IP
addresses should be the same and only the last part (the host address) should be
changed. (e.g. IP Address: 123.456.789.**)
• Check your network settings when the Free Share option does not work
properly.
• When the network is unstable, the device may be slower or may need to load
during playback.
• There may be some restrictions by file features and the media server that restrict
playback.
• When selecting Full Screen in Free Share mode, the ratio of the outputted screen
may differ from the original.
button to play.
E
nglish
Page 48
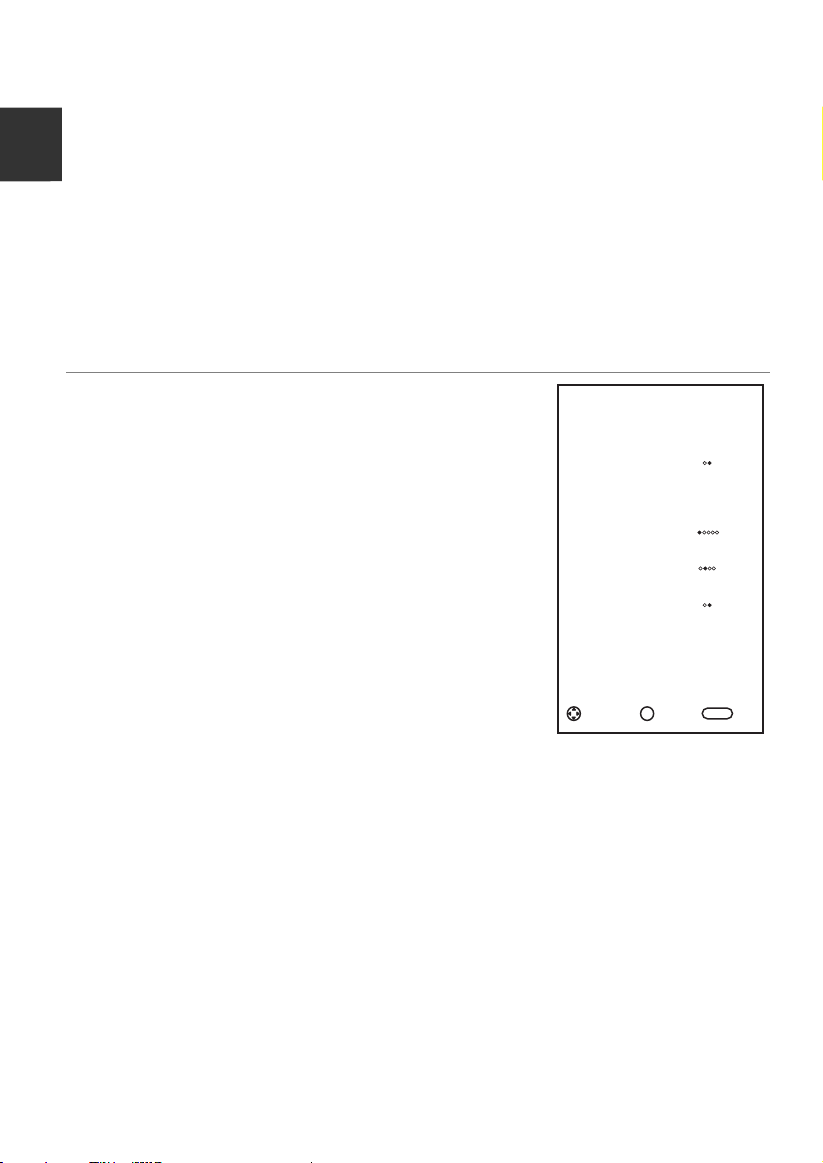
Menu Operation
46
E
• If there are too many folders and files in one folder, it may not operate properly.
ngli
• Movie thumbnail is only supported when Free Share server supports a Movie
thumbnail.
sh
• Files in a folder can be played only when they are of the same type.
• The subtitle file name and movie file name have to be the same and located in the
same folder.
• If subtitle files have been added after a directory has been indexed already, the
user has to remove and read the folder to the list of shares.
• The playback and operating quality may be affected by your home network condition.
• The files from removable media such as USB drive, DVD-drive etc. on your media
server may not share properly.
Configuring the Time Menu
■ Auto Sync.: Switch Auto Sync function On or Off.
■ Clock: You can display either the DTV Signal Stream
Time or set the System Time (When the Auto Sync
is set Off, the Clock can be adjusted).
■ Sleep Timer: Select the time to turn the TV to standby
mode automatically.
■ Auto Sleep: Select the Auto Sleep time you want.
The TV will enter into standby mode
there is no operation in set
time.
automatically when
■ No Signal Power Off: Switch No Signal Power Off
function On or Off.
■ Time Zone: Select your time zone (When the Auto Sync
is set On, the Time Zone can be adjusted).
Time
Aut o Sync.
Clo ck
01: 01
Sle ep Timer
Aut o Sleep
No Si gnal Pow er
Off
Time Zon e GMT+ 1
On
Off
4H
On
< >
><
><
><
>
Adj ust
OK
Ack B ack
BAC K
Page 49

Menu Operation
47
Configuring the Lock Menu
■ Lock System: The feature can prevent unauthorized
operating the TV set, unless entering 4-digit password.
When Lock System is on and the system is locked, we
must input the system password at Auto Tuning, DTV
Manual Tuning, ATV Manual Tuning, Programme Edit or
Default. Press the right number buttons for the password.
The default password is 0000.
NOTE: • After a password correction has been
confirmed, please remember it for entering into the
Parent Lock menu, all functions cannot be activated
Lock
Loc k Syste m
Set P asswo rd
Blo ck Pro gramm e
Par ent
Loc k
Off
until the correct password is entered. If you forget, the
super password of 1225 still is valid.
■ Set Password: You can set your private password.
Press the number buttons on the remote control to set
the new password. When the new password has been
input twice, the setting is finished successfully. The TV
will go back to previous menu.
Adj ust
OK
Ack B ack
BAC K
■ Block Programme (In ATV/DTV mode): Press the
green button LOCK to lock the available programme you want. Press the green
button again to unlock it. To watch a locked programme, press the OK button to enter
password input screen. Enter your 4 digit password number.
■ Parent Lock (In DTV mode): This feature can prevent children watching adult’s
TV programmes, according to the rating limit set. This function appears according
to information from broadcasting station. Therefore if the signal has incorrect
information, this function does not operate.
Configuring the Support Menu
■ DivX(R) VOD: Display the DivX(R) VOD register
information.
■ Installation Guide: This is an installation guide to help
you to setup the TV.
■ Software Version: Display current software version
information.
■ Upgrade: Select the upgrade you want: USB Upgrade,
or Network Upgrade.
■ Contact Changhong: Visit our website at
www.Changhong.com.
■ Service: Provide service information.
Support
Div X(R) V OD
Ins talla tion Gu ide
Sof tware Vers ion
Upg rade
Con tact Cha nghon g
Ser vice
><
>
>
>
>
>
>
>
E
nglish
Adj ust
OK
Ack B ack
BAC K
Page 50
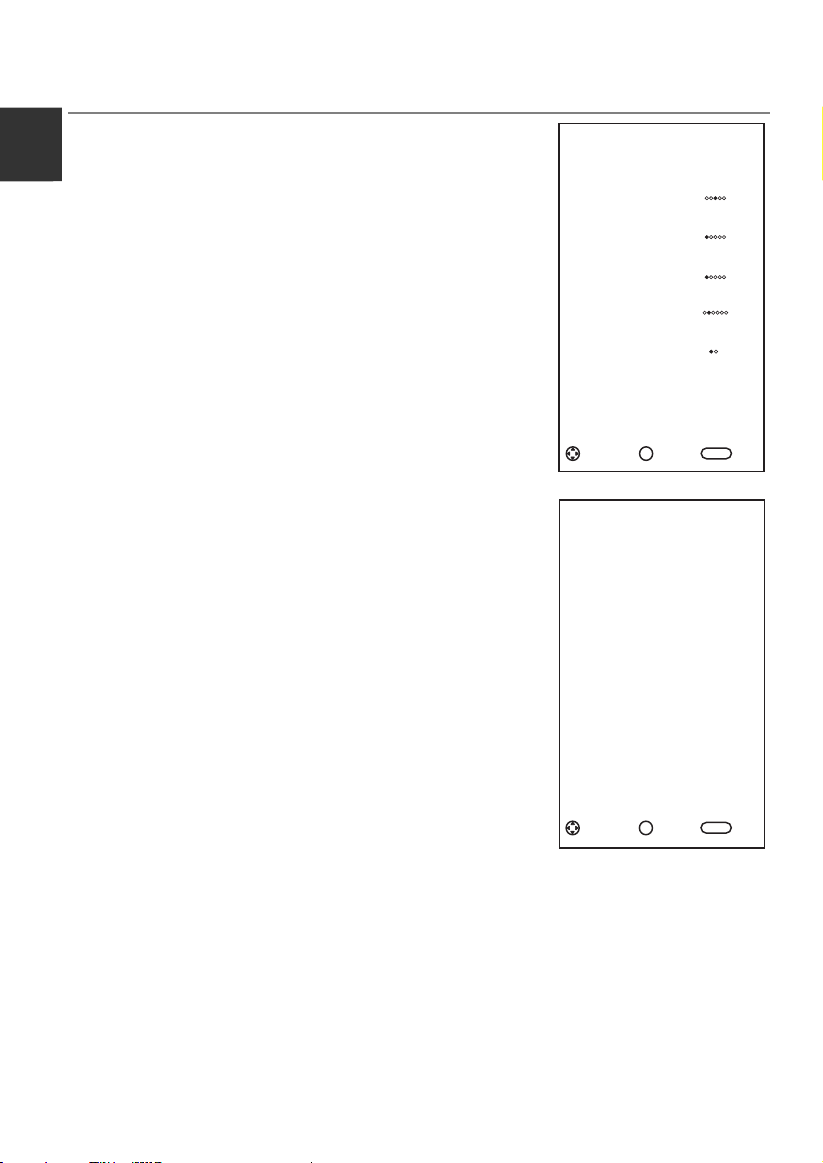
Menu Operation
48
Tools Menu (In DTV mode)
E
ngli
Press TOOLS button to display the Tools menu.
■ Picture Mode: You can select the type of picture which
sh
best corresponds to your viewing requirements.
■ Sound Mode: You can select an audio type to suit your
personal preferences..
■ Sleep Timer: Select the time to turn the TV to standby
mode automatically.
■ Aspect Ratio: You can select the picture size which
best corresponds to your viewing requirements.
■ Freeze: Switch freeze function On or Off.
■ Audio Languages: Select you’re preferred
audio language. (Available for digital channels if multiple
audio languages are broadcasted.)
MTS(In ATV mode): Select between NICAM DUAL I/
NICAM DUAL II/ NICAM DUAL I+II/MONO.
■ Subtitle Languages: Select your preferred subtitle
Language. (Available for digital channels if multiple
subtitle languages are broadcasted.)
■ DTV<--->Radio: Press to interchange Radio and DTV
programs when there is Radio program (In DTV mode).
■ Record List: Press to enter the Recorded list. (In PVR
mode).
■ Time Shift: When the TV plays the programme, press
Time Shift button to start time shift function.
Tools
Pic ture Mo de
Sou nd Mode
Sle ep Timer
Asp ect Rat io
Fre eze
Aud io Lang uages
Sub title L angua ges
Adj ust
OK
Hom e
><
Sta ndard
><
Off
><
16: 9
><
Off
< >
>
>
Ack B ack
BAC K
Tools
DTV <--> Ra dio
Rec ord Lis t
Time Shi ft
>
>
>
Adj ust
OK
Ack B ack
BAC K
Page 51

Menu Operation
49
Programme Guide (In DTV mode)
Press EPG button to display the Programme Guide menu. This function let you know
the detailed information of the channel, indicating the time of the program playing. From
the Programme Guide it is possible to check the program information for the next eight
days (If the information is available from the broadcaster). Press EXIT button to exit.
Schedule: Press the yellow button to display the Schedule list.
Info: Press green button to see the detailed information of the
current channel.
Record: Press red button to set the parameters for recording.
The unit is able to do schedule recording when TV is turning on
or in standby mode. You can set up several schedule recording.
Different schedules should not overlap. When recording starts
in standby mode, the front indicators will change color and there
will be no picture or sound from the unit.
Remind: If you find the desired program which will be shown in
the future. Press the blue button to book program.
Time/Channel: Press TOOLS button to select the top of items,
and press the ◄/► button to change the list by Time or
Channel.
Channel List
Press LIST button to display the Channel List.
Press the ▲/▼ to select the items. Press the OK button to enter
the channel.
Press the ◄/► button to page up or down the Channel list.
Press the green button to enter Programme Edit.
Press the TOOLS button to search the programmes.
Press LIST/EXIT button to exit.
Pro gramm e
Gui de
Dat eTime <Feb. 01 2010 2 3:25>
75 CI TV No Info rmati on
76 La 1 Vol ver Con
77 La 2 Acc ion Dir ecta
78 24 h La Noche E n...
79 Cl an Sm allvi lle
102 Tele text Ca rs No Inf ormat ion
728 H eart No Inf ormat ion
Sche dule
Reco rd Remi nd
Adju st
Channel List
1 RED +MARKE R
2 C/B
3 CRO SS HATCH
4 4v3 _MONO SCOPE
OK
Ack
Tim e
< >
2/3
Info
TOOLS
Guid e
1/1
DTV
DTV
DTV
DTV
E
nglish
Favorite List
Press FAV button to display the favorite list.
Press the ▲/▼ to select the items. Press the OK button to enter
the channel.
Press the ◄/► button to page up or down th
e Favorite list.
Press FAV/EXIT button to exit.
TOOLS
Sear chProg ramme E dit
Ack
Page
Sele ct
OK
Favorite List
1 RED +MARKE R
2 C/B
3 CRO SS HATCH
4 4v3 _MONO SCOPE
OK
Sele ct
Ack
1/1
DTV
DTV
DTV
DTV
Page
Page 52

Teletext
50
Using the teletext feature
E
ngli
■ Display teletext
1. Select a TV station with a teletext signal.
sh
2. Press the
3. Press the button to enter Mix mode, this function enables you to superimpose
the teletext page over the TV program.
4. Press the
■ Page selection
1. Enter the page number (three digits) using the number buttons. If you press a wrong
number during input, you must complete the three digit number and then reenter the
correct page number.
2. The ▲/▼ button can be used to select the preceding or following page.
■ Hold
You can press the
■ Index
Press the
■ Enlarging Text
When a page is displayed, you can double the size of the text to make it easier to
read.
1. Press the
2. Press the
3. Press the
■ Reveal mode
You can display concealed teletext information (e.g. Answer to puzzles or riddles etc.)
by pressing
display.
■ Subpage
Some teletext may contain several sub-pages which are automatically paged in a
certain cycle by the TV station.
1. You can enter into a certain sub page by pressing the
select the page number with number buttons. Enter the sub page number
(e.g. 0003) for the third sub page.
2. Press the button again to exit the sub page mode.
3. Press the
■ Color buttons (Red, Green, Yellow and blue)
Press these buttons to access directly to the corresponding color pages displayed at
the lower part of the teletext screen.
button to enter teletext mode.
button 2nd return or exit to the normal ATV/DTV mode.
button to hold a page, and press it again to release the page.
i
button to enter the main index page directly.
button to enlarge the top half of the page.
button again to enlarge the bottom half of the page.
button once more to return to the normal display.
?
button. Press ? button again to remove the information from the
button directly and
button to return to the normal TV mode.
Page 53

Troubleshooting Guide
51
Troubleshooting
Before contact the service technician, perform the following simple checks. If any
program still persists, unplug the TV and calling for serving.
PROBLEM POSSIBLE SOLUTION
- Check whether the main plug has been connected
to a wall let.
No sound and picture
Normal picture but no sound
The remote control does not
work
Power is suddenly turned off
Picture appears slowly after
switching on
No or poor color or poor
picture
Horizontal/vertical bars or
picture shaking
Poor reception on some
channels
Lines or streaks in pictures
No output from one of the
speakers
- Check whether you have pressed the POWER
button on the front of TV set.
- Check the picture contrast and brightness settings.
- Check the volume.
- Sound muted? Press the MUTE button.
- Try another channel, the problem may be with the
broadcast.
- Are the audio cables installed properly?
- Check to see if there any object between the
product and remote control Causing obstruction.
- Are batteries installed with correct polarity (+ to +,
- to -)?
- Correct remote operating mode set: TV, VCR etc.?
- Install new batteries.
- Is the sleep timer set?
- Check the power control settings. Power
interrupted.
- No broadcast on station tuned with auto activated.
- This is normal; the image is muted during the
product startup process. Please contact your
service center, if the picture has not appeared after
five minutes.
- Adjust the color in menu option.
- Keep a sufficient distance between the product and
the VCR.
- Try another channel, the problem may be with the
broadcast.
- Are the VIDEO cables installed properly?
- Activate the any function to restore the brightness of
the picture.
- Check for local interference such as an electrical
appliance or power tool.
- Station or cable product experiencing problems.
Tune to another station.
- Station signal is weak, reorient antenna to receive
weaker station.
- Check for sources of possible interference.
- Check the antenna (Change the direction of the
antenna).
- Adjust balance in menu option.
E
nglish
Page 54

Troubleshooting Guide
52
NOTE:
E
ngli
sh
Maintenance
Early malfunctions can be prevented. Careful and regular cleaning can extend the
amount of time you will have your new TV. Be sure to turn the power off and unplug the
power cord before you begin any cleaning.
Cleaning the screen
1. Here’s a great way to keep the dust off your screen for a while. Wet a soft cloth in a
mixture of lukewarm water and a little fabric softener or dish washing detergent. Wring
the cloth until it’s almost dry, and then used it to wipe the screen.
2. Make sure the excess water is off the screen, and then let it air-dry before you turn
on your TV.
Cleaning the cabinet
To remove dirt or dust, wipe the cabinet with a soft, dry, lint-free cloth. Please be sure
not to use a wet cloth.
Extended Absence
Disposal of old electrical appliances
There is a problem in VGA mode (Only VGA mode applied).
PROBLEM POSSIBLE SOLUTION
- Adjust resolution, horizontal frequency, or vertical
frequency.
The signal is out of range.
Vertical bar or stripe on
back ground & Horizontal
Noise & Incorrect position.
Screen color is unstable or
single color.
If you expect to leave your TV dormant for a long time (such as a vacation), it’s a
good idea to unplug the power cord to protect against possible damage from
lightning or power surges.
The European directive 2012/19/EU on Waste Electrical and Electronic
Equipment (WEEE), requires that old household electrical appliances must
not be disposed of in the normal unsorted municipal waste stream. Old
appliances must be collected separately in order to optimize the recovery
and recycling of the materials they contain, and reduce the impact on human
health and the environment.
The crossed out “wheeled bin” symbol on the product reminds you of your
obligation, that when you dispose of the appliance, it must be separately
collected.
Consumers should contact their local authority or retailer for information
concerning the correct disposal of their old appliance.
- Check it whether the signal cable is connected or
loose.
- Check the input source.
- Work the auto configures or adjusts clock, phase, or
H/V position.
- Check the signal cable.
- Reinstall the PC video card.
Page 55

Obsah
Upozornění…………………………………………………………………………...1
Bezpe čnostní pokyny…………………………………………………….............4 .
Hlavní ovládání zařízení……………………………………………………….......6
Začínáme…………………………………………………………........................…8
Připojení a nastavení……………………………………………………..........…..9
Dálkové ovládání……………………………………………………..……………10
Základní provoz………………………………………………………..…………..12
Nabídka pro provoz……………………………………………….......…………..15
Průvodce pro řešení problem ………………………………………................50
Řešení problem …………………………………………………..........…………51
ů
ů
Če
sk
y
Page 56
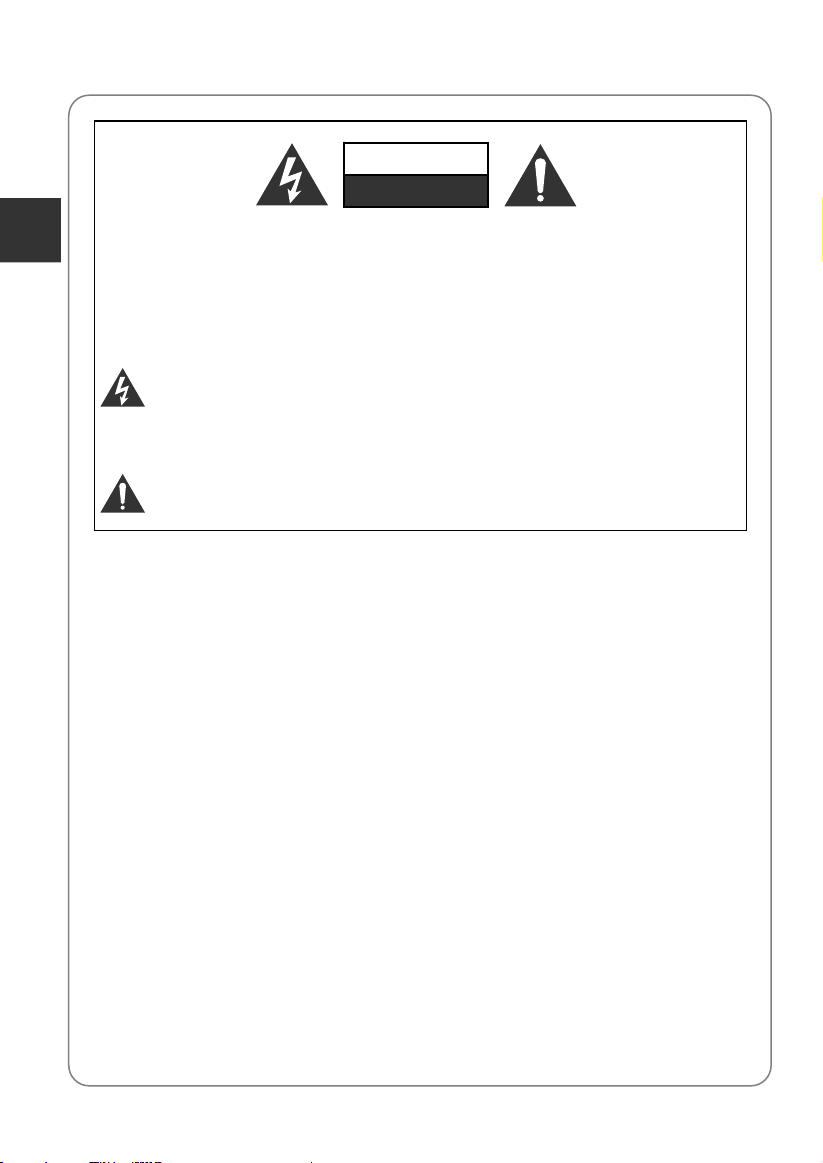
Upozornění
1
Če
sky
UPOZORNĚNÍ:
POZOR
RIZIKO ÚRAZU ELEKTRICKÝM
PROUDEM NEOTVÍRAT
CHCETE-LI SNÍŽIT RIZIKO ÚRAZU ELEKTRICKÝM PROUDEM,
NEOTVÍREJTE KRYT (NEBO ZADNÍ PANEL PŘÍSTROJE). UVNITŘ
NEJSOU ŽÁDNÉ KOMPONENTY, KTERÉ BY MOHL UŽIVATEL SÁM
OPRAVIT. VŽDY SE OBRAŤTE
SERVISU.
NA VYŠKOLENÉ ZAMĚSTNANCE
Symbol blesku se šipkou v rovnoramenném trojúhelníku má varovat
uživatele před neizolovaným “nebezpečným napětím” uvnitř přístroje,
které může být dostatečně vysoké, aby osobám způsobilo úraz
elektrickým proudem.
Vykřičník v rovnostranném trojúhelníku má informovat uživatele o tom,
že v literatuře přiložené k přístroji se nachází mnoho důležitých pokynů
pro jeho provoz a údržbu (případně servis).
DŮLEŽITÉ INFORMACE
Zařízení vytváří, používá a může vyzařovat vysokofrekvenční energii a, pokud
není instalováno a používáno podle pokynů, může být příčinou škodlivého rušení
radiokomunikace. Neexistuje však záruka, že se rušení v určité instalaci neobjeví.
Pokud zařízení způsobuje škodlivé rušení příjmu radiových a televizních signálů,
což se dá určit vypnutím a zapnutím přístroje, doporučuje se uživateli, aby se
pokusil odstranit rušení jedním nebo několika z těchto opatření:
- Přemístěním antény
- Zvětšením odstupu mezi zařízením a přijímačem
- Zapojením zařízení do zásuvky jiného obvodu, než je obvod, do kterého je
přijímač zapojen
- Obraťte se na prodejce nebo zkušeného radiotechnika nebo televizního technika
a požádejte ho o pomoc
Veškeré změny nebo modifikace, které strana odpovědná za shodu s předpisy
výslovně neschválila, mohou zrušit platnost oprávnění uživatele zařízení
provozovat.
UPOZORNĚNÍ
Nepokoušejte se žádným způsobem modifikovat tento výrobek bez písemného
oprávnění dodavatele. Neoprávněné modifikace mohou zrušit platnost oprávnění
uživatele provozovat tento výrobek.
Nedoporučuje se ponechávat na obrazovce zobrazený statický obraz příliš
dlouho. Totéž platí o zobrazování neobyčejně jasných obrazů na obrazovce.
Obrázky a kresby v této uživatelské příručce jsou uvedeny pouze pro porovnání
a mohou se od aktuálního vzhledu výrobku lišit. Design a specifikace výrobku
mohou být změněny bez předchozího oznámení.
Page 57

Upozornění
2
VAROVÁNÍ
Chcete-li snížit riziko požáru nebo úrazu elektrickým pouzdrem, nevystavujte
přístroj působení deště nebo vlhka.
Větrací otvory nesmějí být zakryty takovými předměty jako noviny, ubrusy,
záclony atd., protože tím se zabraňuje nezbytnému větrání.
Nenechte na přístroj kapat vodu, nedovolte, aby do něj natekla voda a nestavte na
něj žádné předměty naplněné tekutinou jako např. vázy s květinami.
Nezapomínejte na ekologickou likvidaci baterie. Nevyhazujte baterie do směsného
odpadu v popelnicích. V případě potřeby můžete kvůli ochraně životního prostředí
kontaktovat svého prodejce.
Při instalaci televizoru zachovejte vzdálenost alespoň 4 palců mezi televizorem a
dalšími předměty (stěny, boční strany skříní atd.), aby byla umožněna příslušná
ventilace. Pokud nebude umožněna patřičná ventilace, může dojít k požáru nebo k
problémům s produktem zapříčiněným zvýšením teploty ve vnitřním prostoru.
Nestavte na přístroj zdroje přímého plamene jako např. hořící svíčky.
Chcete-li zabránit rozšíření ohně, nikdy se k tomuto výrobku nepřibližujte se
svíčkami nebo jinými zdroji otevřeného plamene.
Elektrostatický výboj může způsobit poškození zařízení. Lze manuálně obnovit
vypnutím napájení a jeho opětovným zapnutím.
Upozornění: Aby jste zabránili úrazu způsobeného převrácením produktu, vždy
dbejte na to, aby byl produkt položený na horizontální plochu.
POZOR při zapojování napájecí sňůry
U většiny přístrojů se doporučuje, aby byly zapojeny do předem určeného obvodu,
tj. do obvodu s jedinou zásuvkou, který bude napájet pouze tento přístroj a
nebude mít žádné další vývody nebo větvení.
Zásuvky nepřetěžujte. Přetížené, uvolněné nebo poškozené zásuvky,
prodlužovací kabel nebo napájecí šňůry s roztřepeným opletením nebo
poškozenou či popraskanou izolací jsou nebezpečné. Libovolná výše uvedená
závada může být příčinou úrazu elektrickým proudem nebo může způsobit požár.
Pravidelně kontrolujte napájecí šňůru vašeho přístroje, a pokud jeho vzhled
ukazuje na poškození nebo degradaci materiálu, vytáhněte ji ze zásuvky,
přestaňte používat přístroj a nechte šňůru vyměnit za přesně stejnou novou šňůru
pověřeným pracovníkem servisu. Chraňte napájecí šňůru před fyzickým nebo
mechanickým poškozením. Jedná např. o její překroucení, zauzlení, smáčknutí,
přivření do dveří nebo chození po ní. Dávejte také velký pozor na zásuvky,
nástěnné vývody a místo, kde šňůra vstupuje do přístroje.
Zásuvka zapojená do SÍTĚ se používá k odpojení zařízení a zůstává připravena
k použití.
Provozní teplota: °C až °C Provozní vlhkost: ≤80%
Teplota pro skladování: -°C až °C Vlhkost při skladování: ≤90%
Toto je zařízení klasifikované pomocí třídy Class II nebo zařízení s dvojitou
elektrickou izolací. Zařízení bylo vyrobeno takovým způsobem, aby nevyžadovalo
bezpečnostní připojení k elektrickému uzemnění.
Če
sk
y
Page 58

Upozornění
3
TruSurround HD je
Če
sky
je ochranná známka společnosti SRS Labs, Inc. Technologie
součástí licence od společnosti SRS Labs, Inc.
Toto zařízení DivX Certified® prošlo úspěšně přísnými zkouškami pro zajištění
kompatibility s videem DivX
Pokud chcete získat možnost přehrávání videozáznamů DivX, nejprve zaregistrujte
své zařízení na adrese vod.divx.com. Svůj registrační kód naleznete v sekci DivX
VOD v kapitole MENU-podpora.
Testovací sady HD Test Kit 1080p v1.1 a novější verze:
DivX Certified
obsahu.
®
, DivX Certified® a další související loga jsou obchodními známkami DivX,
DivX
LLC a jsou používány v rámci licence.
Zařízení je chráněno jedním nebo více z amerických patentů: 7,295,673;
7,460,668; 7,515,710; 7,519,274.
®
pro přehrávání videa DivX® až do HD 1080p, včetně prémiového
®
.
Vyrobeno podle licence Dolby Laboratories.
Symboly Dolby a DD jsou ochrannými známkami Dolby Laboratories.
Page 59
Bezpečnostní pokyny
4
DŮLEŽITÉ BEZPEČNOSTNÍ POKYNY
1. Přečtěte si tyto pokyny.
2. Uložte si tyto pokyny.
3. Dbejte na všechna upozornění.
4. Dodržujte všechny pokyny.
7. Neblokujte žádný větrací otvor.
Nainstalujte podle pokynů výrobce.
Če
sk
y
5. Nepoužívejte tento přístroj blízko
vody.
6. Otírejte pouze suchým hadříkem.
8. Neinstalujte v blízkosti žádného
tepelného zdroje jako jsou radiátory,
topné registry, kamna nebo jiné
přístroje (včetně zesilovačů), které
produkují teplo.
9. Neobcházejte bezpečnostní funkce
polarizovaných nebo zemnících typů
zástrček. Polarizovaná zástrčka má
dva kolíky, přičemž je jeden širší než
druhý. Zemnící typ zásuvky má dva
kolíky a jeden zemnící kontakt. Širší
kolík nebo zemnící kontakt zajišťují
vaši bezpečnost. Pokud se poskytnutá
zástrčka nehodí do vaší zásuvky,
obraťte se na svého elektrikáře, aby
vám zastaralou zásuvku vyměnil.
Page 60

Bezpečnostní pokyny
5
10. Chraňte napájecí šňůru, nešlapejte
po ní, zabraňte jejímu smáčknutí, a
to zejména v blízkosti zástrček,
Če
sky
objímek a míst, kde vystupují z
přístroje.
11. Používejte pouze přídavná
zařízení/příslušenství označená
výrobcem.
12. Používejte pouze vozíky, stojany,
trojnožky, konzole nebo stolky
označené výrobcem nebo
prodávané s přístrojem. Pokud
používáte vozík, buďte při převážení
opatrní, aby nedošlo k převržení a
zranění.
13. Přístroj vypojte ze sítě za bouřky
nebo v případě, že ho nebudete
dlouhou dobu používat.
14. Veškeré údržbu nechte na
vyškolených pracovnících servisu.
Servis je nezbytný, pokud je přístroj
jakýmkoli způsobem poškozen, např.
když je poškozena napájecí šňůra
nebo zástrčka, do přístroje se dostala
tekutina nebo do něj spadl nějaký
předmět, přístroj byl vystaven dešti
nebo vlhku, nefunguje normálně
nebo spadl.
LIKVIDACE
- Fluorescenční lampa používaná v tomto výrobku obsahuje malé množství rtuti.
- Nevyhazujte tento výrobek do směsného domácího odpadu.
- Likvidace tohoto výrobku musí proběhnout podle předpisů vydaných vašimi
místními orgány.
POZNÁMKA
- Když je televize na dotyk studená, mohlo dojít při jejím zapnutí k drobnému
“mihotání” obrazovky. To je normální, s televizí nic není.
- Některé drobné vady bodů mohou být na obrazovce vidět. Vypadají jako červené,
zelené nebo modré skvrnky na obrazovce. Nebudou však mít žádný nepříznivý
vliv na výkon monitoru.
- Nedotýkejte se obrazovky, ani u ní nedržte delší dobu prst. Můžete tím způsobit
dočasné zkreslení obrazu na obrazovce.
Page 61

Hlavní ovládání zařízení
1
CH+/CH-
5
6
Přední panel
Če
sk
1
y
2
3
4
6
Č. Název
2 VOL+/VOL3 MENU
4
Napájení a snímač
6
5
Popis
Změna kanálů.
Nastavení hlasitosti.
Otevření nabídky (Menu)
Přepínáníme z i z d r o j i si g n á l u.
Zapínání a vypínání zařízení.
Kontrolka pro napájení a infračervený snímač
Page 62

Hlavní ovládání zařízení
7
Zadní a boční panel
15
Če
17
sky
16
8
CONVERT TO
7
8 9 10 11 12 13
Č.
Název Popis
7 LAN Port sítě místní oblasti (Local Area Network - LAN).
Připojte kabel LAN k tomuto portu a připojte se k síti.
8 HDMI1/2
CONVERT TO SCART
9
Vstup HDMI1(ARC);
HDMI2 a MHL sdílejí jeden port.
Vstup/výstup SCART.
10 AV AV audio/video vstup pro signál
11 COMPONENT Vstup pro funkci Component.
12 Vstup PC
PC/DVI AUDIO-PC
ANT1/2
13
14
15
16 Vložte kartu CI
USB1/2
COMMON INTERFACE
Vstup pro anténu.
Výstup pro sluchátka.
Konektor pro funkci USB Play.
15
14
17 DIGITAL AUDIO OUT Výstup funkce DIGITAL AUDIO
Page 63

Začínáme
8
Používání dálkového ovladače
Při používání dálkového ovladače miřte na čidlo dálkového ovládání na televizi. Pokud
bude mezi dálkovým ovladačem a čidlem dálkového ovládání na přístroji nějaký
předmět, přístroj nemusí fungovat.
Zamiřte dálkový ovladač na ČIDLO DÁLKOVÉHO OVLÁDÁNÍ na televizi.
Pokud používáte tuto televizi ve velmi jasně osvětleném prostoru, infračervené
ČIDLO DÁLKOVÉHO OVLÁDÁNÍ nemusí řádně fungovat.
Doporučená účinná vzdálenost pro používání dálkového ovladače je asi max. 7
metrů.
Vkládání baterií do dálkového ovladače
1. Otevřete kryt na zadní straně dálkového ovladače.
2. Vložte dvě baterie AAA. Zkontrolujte, zda
označení “+” a “– ” na koncích baterie odpovídají
označení v prostoru pro baterie.
3. Vraťte kryt na místo.
Výměna baterií
Budete muset vložit přiložené baterie do dálkového ovladače, abyste ho podle níže
uvedených pokynů uvedli do provozu.
Když jsou baterie slabé, vzdálenost, na kterou dálkový ovladač funguje, je mnohem
menší, a bude třeba baterie vyměnit.
Poznámky k používání baterií:
Použití špatného typu baterií může způsobit unikání chemikálií a/nebo výbuch. Nikdy
nezapomeňte na následující pokyny a informace:
Vždy zkontrolujte, zda jsou baterie vloženy tak, aby označení “+” a “–” na koncích
baterie odpovídala označení v prostoru pro baterie.
Různé typy baterií mají různé charakteristické vlastnosti. Nelze je míchat dohromady.
Nemíchejte baterie dohromady. Míchání starých a nových baterií zkrátí životnost
baterie a/nebo způsobí unikání chemikálií.
Vyměňte baterie, jakmile přestanou fungovat.
Chemikálie, které unikají z baterií, mohou způsobovat podráždění kůže. Jestliže z
baterií uniká nějaká chemická látka, okamžitě ji otřete suchým
Baterie dodávané společně s výrobkem mohou mít kratší životnost kvůli podmínkám
skladování. Vyjměte baterie vždy, když předpokládáte, že dálkový ovladač nebudete
delší dobu používat.
Baterie (v obalu nebo již instalované) se nesmí vystavovat nadměrnému teplu
způsobenému např. slunečním svitem, ohněm apod.
POZOR:
Nesprávně vložené baterie mohou způsobit výbuch.
Nahrazujte vybité baterie pouze bateriemi stejného nebo rovnocenného typu.
hadříkem.
Če
sk
y
Page 64

Připojení a nastavení
9
Instalace kabelu
Před instalací a použitím si prosím pozorně přečtěte relevantní text kapitoly
„Upozornění a bezpečnostní pokyny“.
1. Vytáhněte televizor z obalu a uložte jej do větraného místa s rovným povrchem.
POZNÁMKA:
Če
• Pokud chcete připojit nebo odpojit televizi, počítač nebo jiné zařízení, musíte se
sky
nejprve ujistit o tom, že je vypnutý napájecí kabel;
• Při odpojování napájecího nebo signálního kabelu prosím přidržujte tento kabel za
zástrčku (její izolovanou část); netahejte za šňůru kabelu.
2. Terminál RF výstupu lze připojit ke vstupnímu portu RF na televizoru.
3. Výstupní AV terminál u DVD může být připojen ke vstupnímu portu AV na televizoru,
a to pomocí AV kabelu.
POZNÁMKA:
• AV a příslušný komponent nemohou být použity ve stejnou dobu, protože sdílejí
jeden zvukový kanál.
•
Pokud funguje KOMPONENT (YPbPr) a AV jako mini terminal, a stejné sdílené audio,
vyberte prosím kabel audio&video 1-3.
4. Výstupní terminál KOMPONENT (YPbPr) u DVD může být připojen ke vstupnímu
portu KOMPONENT (YPbPr) na televizoru, a to pomocí AV kabelu.
5. Připojte jeden konec VGA kabelu k VGA portu na počítači; připojte druhý konec VGA
kabelu k VGA portu na televizoru; nakonec utáhněte šrouby na obou koncích kabelu
VGA ve směru hodinových ručiček.
POZNÁMKA:
• Při připojování 15-kolikové zástrčky VGA nevkládejte tuto zástrčku přílišným tlakem.
Kolíky by se mohly zlomit.
6. Připojte jeden konec kabelu HDMI k výstupnímu portu HDMI; připojte druhý konec
kabelu HDMI k portu HDMI na televizoru.
POZNÁMKA:
• Při připojování HDMI postupujte pečlivě; nevyvíjejte přílišný tlak, protože by mohlo
dojít ke zlomení kolíků.
7. Odesílání zvukového signálu televizoru k externímu audio zařízení přes výstupní
port Digital Audio.
8. Proveďte kontrolu a ujistěte se, že jsou všechny AV kabely správně připojeny k
odpovídajícím portům.
9. Připojte napájecí kabel 100-240V~.
POZNÁMKA:
• Příkon pro TV funguje v rozsahu 100-240V~ 50/60Hz; nepropojujte TV vstupní
napájecí port s napájecím kabelem, pokud jsou tyto hodnoty mimo výše uvedený
rozsah.
• Při odpojování napájecího kabelu prosím přidržujte kabel za izolované části;
nedotýkejte se přímo kovové části kabelu.
Page 65

Dálkové ovládání
10
Popis tlačítek originálního dálkového ovladače:
1.
1
3
5
7
9
11
13
16
18
20
22
26
27
INFO EPG ANT
1 2
5
4
7 8 9
MENU
0
OK
BACK/
3D
SOURCE
APPS
LIST FAV
EXIT
HOME/
TOOLS
3
6
P
2
4
6
8
10
12
14
15
17
19
21
23
24
25
28
televizoru.
2. : Stisknutím tlačítka vypnete nebo
obnovíte zvuk.
3. II: Pauza (v režimu USB/PVR).
režimu MIX v teletextu.
4.
obrazovce; novým stisknutím tlačítka
tento teletext opustíte.
5. : Přehrávání (v režimu USB/PVR).
Pro výstup stiskněte toto tlačítko
znovu.
6.
:
spustíte nahrávání.
obrazovky v režimu zobrazení.
7.
8.
některých teletextových stránek.
9.
USB).
podstránky.
10.
USB).
zrušit, ale přitom z něj nechcete
odejít, stiskněte toto tlačítko znovu a
odejděte z této obrazovky.
11. EPG: Elektronický programový
průvodce (Electronic Programme
Guide); použití v režimu DTV.
12. ANT: Stisknutím tohoto tlačítka
vyberete zdroj antény.
13. INFO: Stisknutím tohoto tlačítka
zobrazíte aktuální informace k
programu na obrazovce.
14. NÁSTROJE: Pomocí tohoto tlačítka
můžete přejít do nabídky Nástroje.
15. ČÍSELNÁ TLAČÍTKA: Volby kanálů
nebo významu hesla.
: Napájení, zapnutí nebo vypnutí
: Stisknutím tlačítka vstoupíte do
: Stop (v režimu USB/PVR).
: Udržujte teletextové stránky na
: Vstupte do prostředí Teletextu.
Stisknutím tohoto tlačítka
: Změna velikosti teletextové
: Předchozí volba (v režimu USB).
i
: Přejděte na indexovou stránku.
: Další volba (v režimu USB).
?
: Odkrytí skrytých informací z
: Rychlé zpětné převíjení (v režimu
: Vstupte do režimu titulků nebo
: Rychlý posun dopředu (v režimu
: Pokud chcete příslušný teletext
Če
sk
y
Page 66
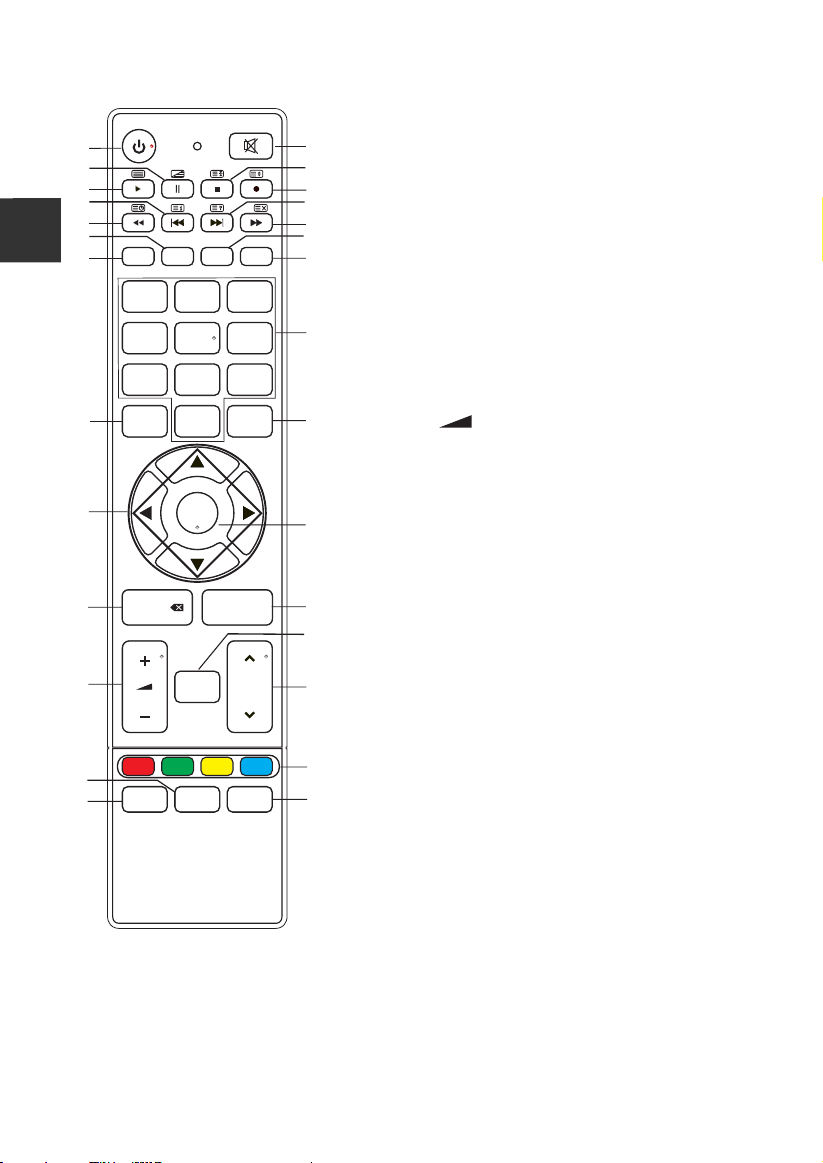
Dálkové ovládání
11
1
3
5
Če
7
9
sky
11
INFO EPG ANT
13
1 2
5
4
7 8 9
16
MENU
0
18
20
22
26
27
BACK/
3D
OK
APPS
LIST FAV
TOOLS
3
6
EXIT
HOME/
SOURCE
P
16. MENU: Pomocí tohoto tlačítka se
2
4
6
8
10
12
14
dostanete na obrazovku MENU, kde
můžete provádět různé možnosti
nastavení.
17. EXIT: Návrat do menu s poslední vrstvou
OSD nebo odchod z nabídky OSD.
18. ▲/▼/◄/►: Volba směru.
19. OK: Pomocí tohoto tlačítka můžete
realizovat zvolenou funkci na obrazovce
MENU.
15
20. ZPĚT: Návrat k předchozímu
zobrazenému programu.
21. VÝCHOZÍ STRANA/ZDROJ: Volba zdroje
signálu; odkaz k různým internetovým
17
22. +
službám.
-: Pomocí těchto tlačítek můžete
nastavit úroveň hlasitosti, a to směrem
nahoru nebo dolů.
23. APPS: Pomocí tohoto tlačítka se
19
dostanete k funkci APP Store (obchod s
aplikacemi).
24. ∧P∨: Pomocí tohoto tlačítka můžete volit
kanály ve vzestupném nebo sestupném
21
23
směru.
25. BAREVNÁ TLAČÍTKA: Navigační odkaz s
červenou/zelenou/žlutou/modrou
klávesou.
24
26. SEZNAM: Vyvolání seznamu kanálů.
Novým stisknutím tlačítka tuto funkci
opustíte.
27. 3D:
25
28
28. FAV: Zapnutí/vypnutí seznamu s
žádná funkce.
oblíbenými programy.
POZNÁMKA:
• Jakékoli obrázky v tomto manuálu slouží pouze jako příklady. Aktuální produkt může
mít zcela odlišné vlastnosti.
• Tlačítka, která zde nejsou uvedena, se nepoužívají.
Page 67
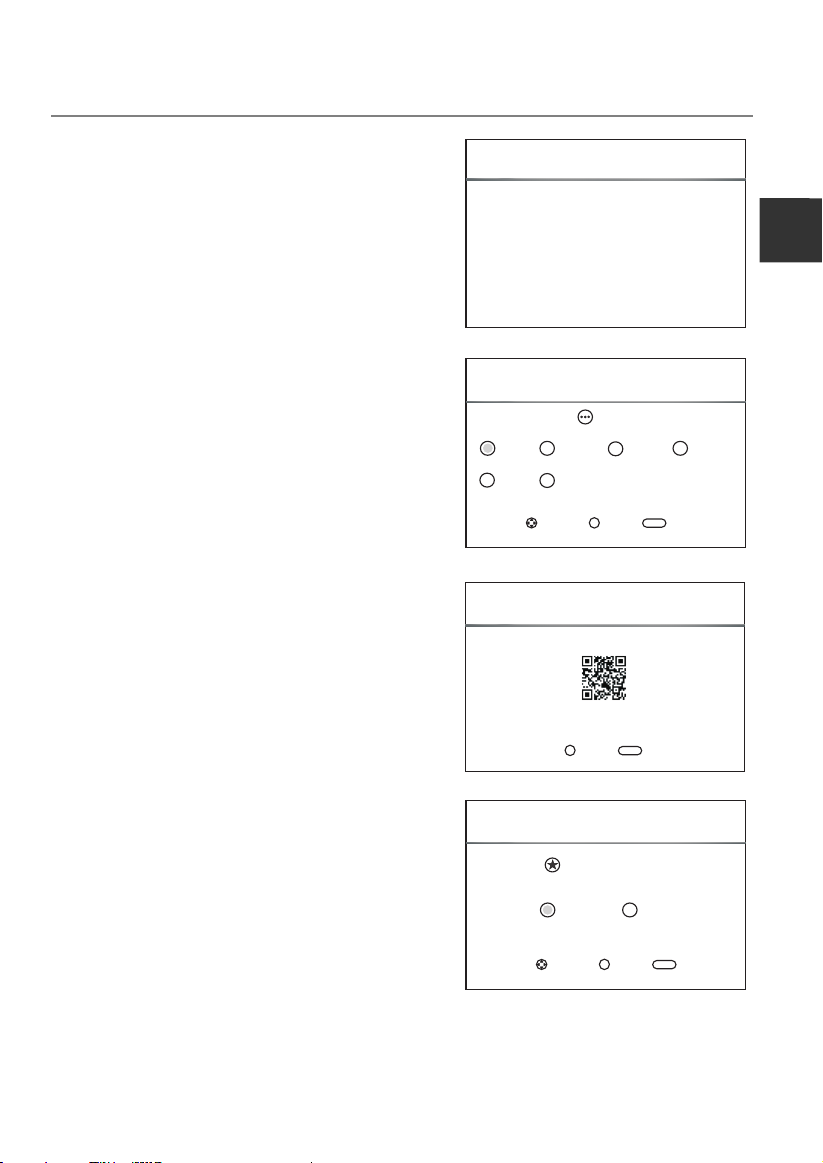
Základní provoz
12
PRŮVODCE RYCHLÝM STARTEM
■ Počáteční nastavení
1. Při prvním zapnutí televizoru se na obrazovc
e
objeví nápis "Installation Guide" (instalační
průvodce). Při první instalaci prosím
postupujte podle níže uvedeného postupu,
včetně funkce vyhledávání kanálů.
Volba jazyka
2.
Pomocí tlačítek ▲/▼/◄/► zvolte
; poté stiskněte tlačítko OK.
jazyk
3. Skenování QR kódu
Pro stažení příslušné aplikace prosím
naskenujte QR kód
(Podrobnosti naleznete na straně 15).
OK.
; poté stiskněte tlačítko
Průvodce instalací
Vít ejte v pr ůvodc i insta lací!
Pro s puště ní prův odce pr osím st iskně te [OK] !
Průvodce instalací
Jaz yk
Zpět
BACK
Fra nçais
Deu tsch
Čes ko
Ita liano
Slo venči n
OK
Vybra t
OK
Eng lish
Průvodce instalací
Nas kenuj te QR kód a s táhně te apli kaci.
Če
sk
y
4. Volba prostředí
Pomocí tlačítek ▲/▼/◄/► zvolte prostředí
poté stiskněte tlačítko OK.
Pokud zvolíte funkci „Obchod“, zobrazí se
obrázek „Ano/Ne“.
Pro s ystém y And roid a iO S
Udr žujte p rosím s vé zaří zení a TV v e stejn é síti
;
OK
OK
Průvodce instalací
Vybr at pros tředí
Dom a
Vybra t
OK
OK
Zpět
BACK
Ulo žit
BACK
Zpět
Page 68
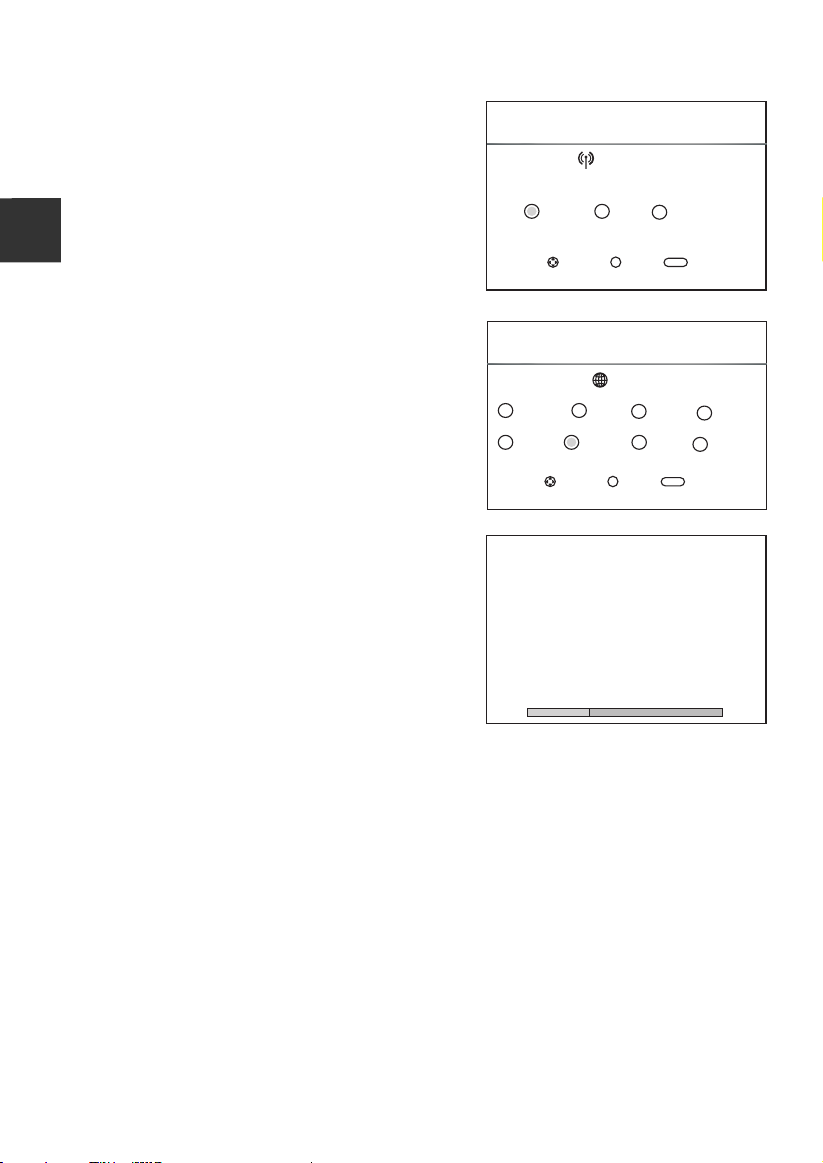
Základní provoz
13
5. Volba antény
Pomocí tlačítek ▲/▼/◄/►
poté stiskněte tlačítko OK.
vyberte anténu;
Průvodce instalací
Typ an tény
Če
sky
6. Volba země
Pomocí tlačítek ▲/▼/◄/► vyberte
zemi; poté stiskněte tlačítko OK.
Nyní bude probíhat automatické ladění
7.
televizoru.
Poz emní
Kab e
OK
Vybra t
Průvodce instalací
Cho rvats ko
Fra ncie
ATV
DTV
Rad io
Dat a
10 %. .. UHF CH 2 6 DTV
Čes ko
Něm ecko
OK
Vybra t
Lad ění kan álu
:
:
:
:
Sat elit
l
OK
BACK
Zpět
Zem ě
Dán sko
Řec ko
OK
0
0
0
0
Zpět
BACK
Pro gram( y)
Pro gram( y)
Pro gram( y)
Pro gram( y)
Fin sko
Maď arsko
POZNÁMKA:
• Pokud televizor nepřijímá žádné kanály, zkontrolujte prosím anténu
nebo zvolenou zemi. Poté spusťte automatické ladění znovu.
• Pokud televizor přijímá pouze některé z kanálů, znamená to, že anténní příjem není
dostatečný. V tomto případě doporučujeme servis antény.
•
Tento televizní přijímač funguje na základě operačního systému Linux. Televizor se
může automaticky restartovat nebo
při používání dálkového ovládání nemusí toto dálkové ovládání správně reagovat.
Pokud dálkové ovládání
nereaguje, vypněte prosím napájení a restartujte televizor.
Page 69
Základní provoz
14
Zapínání a vypínání televize
■ Zapněte TV
Připojte kabel napájení. Pokud je TV vybavena spínačem napájení, zapněte nejprve
tento spínač. Stisknutím tlačítka na dálkovém ovládači můžete zapnout televizor z
pozice pohotovostního režimu.
■ Vypněte TV
Stisknutím
Nenechávejte svůj televizor příliš dlouhou dobu v pohotovostní režim. Doporučujeme
vypínat televizor a anténu ze sítě.
Pokud dojde k přerušení napájení na základě poruchy, doporučujeme odpojit kabel
napájení ze zásuvky.
■ Ztráta signálu
V případě ztráty vstupního signálu se na obrazovce objeví nápis No Signal (stav bez
signálu). V režimu DTV/ATV se televizor automaticky vypne, pokud neobdrží žádný
signál po dobu pěti minut. V režimu PC-RGB se televizor automaticky vypne, pokud
neexistuje žádný vstupní signál po dobu jedné minuty. Po připojení VGA kabelu se
televizor spustí automaticky.
Volba programů
■ Používání funkce CH+/CH- na panelu televizoru nebo na dálkovém ovládači
∧P∨.
Pomocí tlačítka CH+/∧ zvýšíte číslo kanálu.
Pomocí tlačítka CH-/∨ snížíte číslo kanálu.
■ Používání digitálních tlačítek 0-9.
Číslo kanálu můžete zvolit pomocí tlačítek 0 až 9. (v režimu DTV, ATV)
■ Příklad
Volba kanálu - (například Kanál 5): Stiskněte 5.
Volba kanálu -- (například Kanál 20): Rychle po sobě stiskněte 2 a 0.
Nastavení hlasitosti
■ Stiskněte VOL+/VOL- na panelu TV nebo + - na dálkovém ovladači pro nastavení
hlasitosti.
■ Pokud chcete vypnout zvuk, stiskněte
■ Ztlumení zvuku můžete sukončit stisknutím nebo zvýšením hlasitosti.
Změna zdroje vstupu
1. Pomocí tlačítka HOME/SOURCE můžete zvolit a otevřít rozhraní Smart Home.
2. Pomocí tlačítka ▲/▼ můžete cyklicky procházet vstupní zdroj. Pro potvrzení své
volby stiskněte tlačítko OK
tlačítka na dálkovém ovládači přejdete do pohotovostního režimu.
.
Če
sk
y
Page 70

Nabídka pro provoz
15
Funkce iSmart TV
■ Instalace a připojení
Abyste mohli používat funkce iSmart TV, můžete si stáhnout aplikaci pomocí
naskenování QR kódu z návodu k instalaci. Instalaci můžete provést na svůj Android
nebo iOS mobilní zařízení, například chytrý telefon nebo tablet.
Če
Váš televizor a mobilní telefon musí být připojeny do stejné sítě a tato síť musí být
sky
připojena k Internetu. Po připojení zařízení k síti otevřete aplikaci nainstalovanou na
přenosném zařízení; vyberte TV v seznamu zařízení a proveďte připojení.
■ Zadejte Enter iSmart TV World
1. Ovládání pomocí virtuálního tlačítka
Můžete používat virtuální tlačítka pro ovládání televizoru v aplikaci, například v
dálkovém ovládání - menu, CH+/-, VOL+/- atd. Za účelem provedení funkce
kurzorových kláves (doprava a doleva, nahoru a dolů) stačí klouzat v prázdném
rozhraní ve středu obrazovky. Ovládání televizoru bez dálkového ovládání.
2. Sledujte TV v jakékoli kategorii
Systém iSmart TV vám pomůže zařadit program po připojení televizoru a
synchronizovat EPG informace. Můžete si vybrat program, který chcete právě
sledovat, nebo rezervovat program na později.
3. Rychlé nastavení
Za účelem dosažení co nejlepšího efektu přehrávání můžete rychle nastavit kvalitu
obrazu a zvuku pomocí místní nabídky; můžete nastavit jas, teplotu barvy, model
zoomu, režim zvuku atd.
4. Tlačítko pro Média
Systém iSmart TV nalezne multimediální soubory na vašem mobilním telefonu a
pomůže vám tyto soubory kategorizovat. Multimediální soubory můžete sdílet v
televizoru, pomocí snadného kliknutí na soubor. Můžete zažít vzrušení a potěšení
z velké obrazovky!
Poznámka:
(1) Pokud dojde u mobilní verze k problému způsobenému instalací aplikace,
prosím aktualizujte svůj telefon.
(2) Služba EPG informace pochází od třetí strany, nemůžeme zaručit přesnost a
aktuálnost.
(3) V případě funkční změny na straně aplikace bude mít aplikace přednost.
Page 71
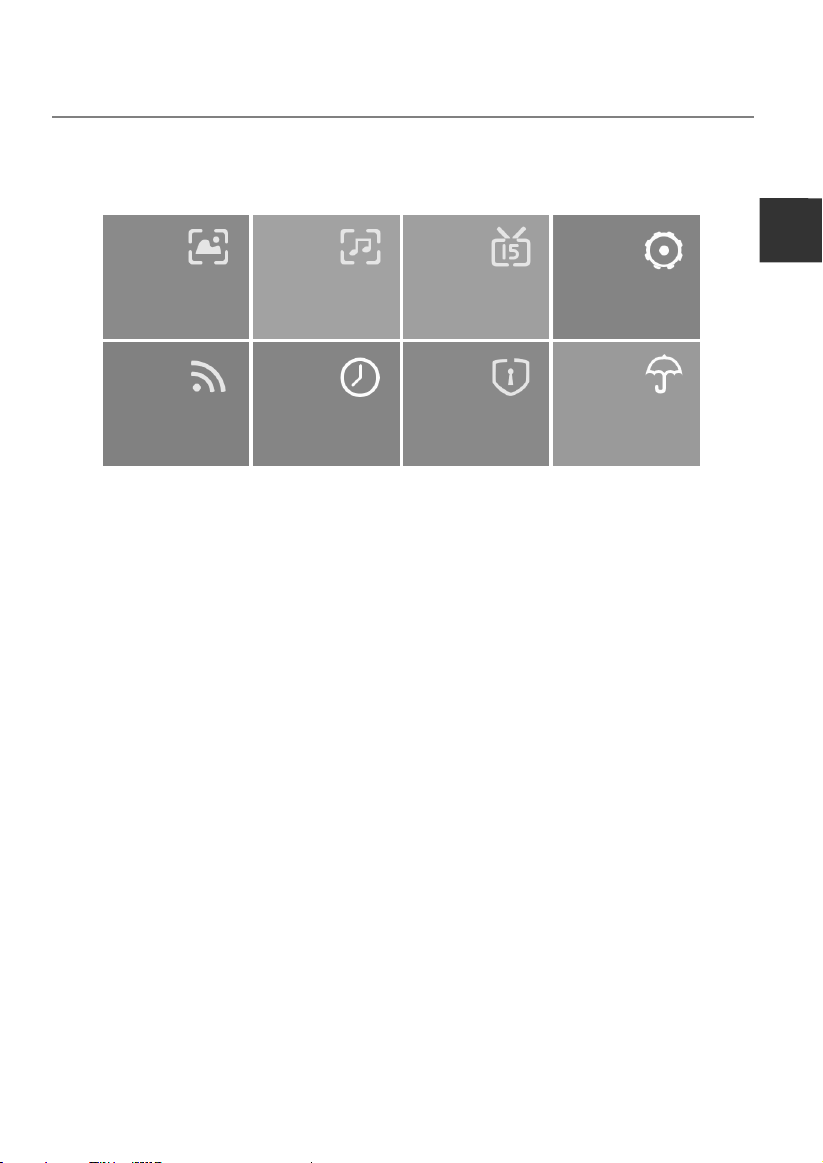
Nabídka pro provoz
16
Pohyb v rámci nabídky (Menu)
Před prvním použitím televizoru prosím postupujte podle následujícího návodu, v němž
naleznete informace pro orientaci v MENU a nastavení různých funkcí. Přístupové
kroky se mohou lišit v závislosti na zvoleném menu.
1. Stisknutím tlačítka MENU zobrazíte okno s hlavní nabídkou.
Če
sk
y
OBRAZ
Síť
ZVUK
ČA S
Kanál
Zámek
Nastavení
Podpora
2. Pomocí tlačítek ▲/▼/◄/► můžete procházet položkami hlavní nabídky. Pomocí
tlačítka OK se dostanete do sub-nabídky (submenu).
3. Pomocí tlačítka ▲/▼ zvolte požadovanou dílčí položku a poté stiskněte OK.
4. Pomocí tlačítek ▲/▼/◄/► zvolte požadovanou hodnotu. Nastavení v systému OSD
se může lišit v závislosti na zvoleném menu.
5. Stisknutím tlačítka MENU se můžete vrátit k předchozí nabídce.
6. Stisknutím tlačítka EXIT tuto nabídku opustíte.
POZNÁMKA:
• Pokud je položka v MENU zobrazena šedou barvou, znamená to, že tato položka není
k dispozici nebo nemůže být nastavena.
• Tlačítka na televizoru (TV) mají stejné funkce jako odpovídající tlačítka na dálkovém
ovladači. Pokud svůj dálkový ovladač ztratíte, nebo pokud tento dálkový ovladač
nefunguje, můžete používat tlačítka na televizoru. Tento návod je zaměřen na
používání dálkového ovladače.
• Některé položky nabídky mohou být skryty, v závislosti na režimech nebo zdrojích
signálu.
Page 72
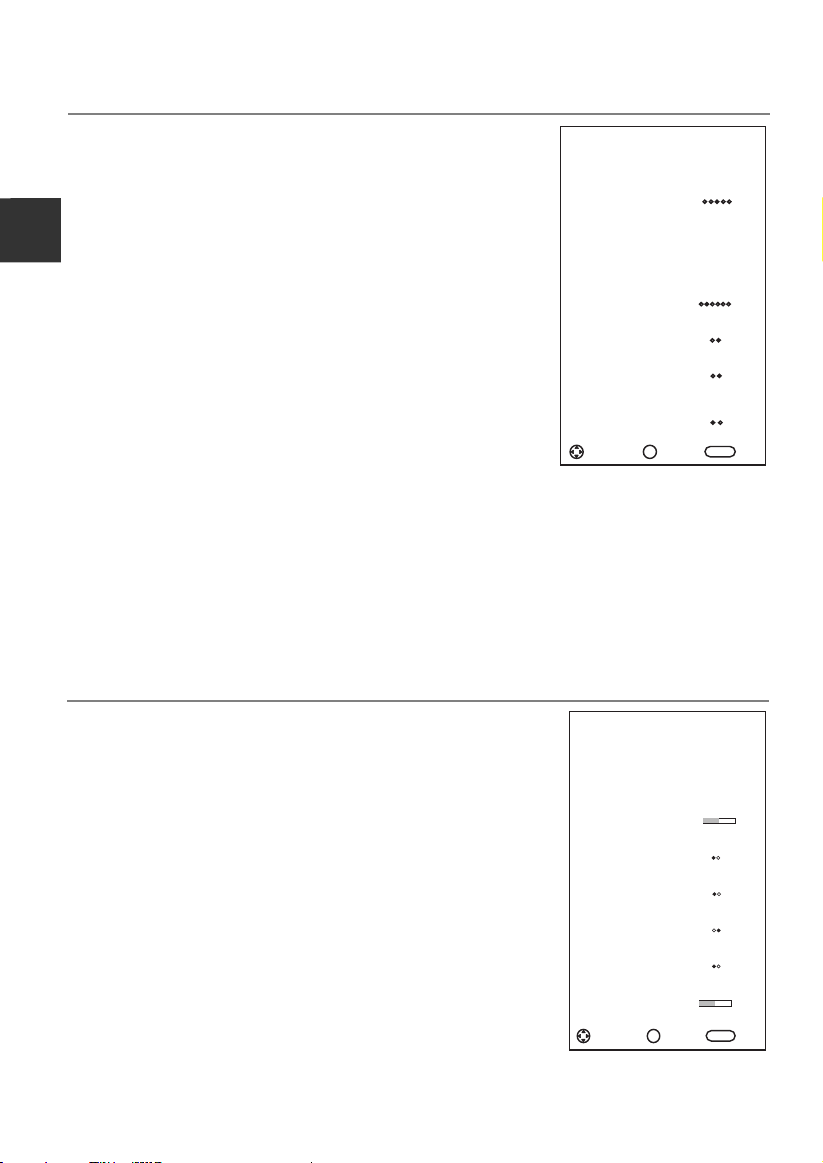
Nabídka pro provoz
17
Konfigurace nabídky OBRAZ
■ Režim obrazu: Můžete si zvolit typ obrazu, který
nejlépe odpovídá vašim požadavkům na zobrazení.
Výrobce doporučuje volbu režimu Home (výchozí režim)
■ UživatelVNê: Kontrast, světlost, saturace, ostrost a
Če
podsvícení mohou být nastaveny pomocí této funkce.
sky
■ Teplota barev: Zvolte teplotu barvy obraz.
■ Poměr stran: Můžete si vybrat velikost obrazu,
která nejlépe odpovídá vašim požadavkům na zobrazení.
■ Obrazovka (v režimu PC):
Auto nastavení: Proveďte automatické nastavení
obrazu.
Horizontální pozice: Vycentrování obrazu proveďte jeho
posouváním doleva a doprava.
Vertikální pozice: Vycentrování obrazu proveďte jeho
posouváním nahoru a dolů.
Velikost: Nastavte velikost obrazovky.
Fáze: Nastavení proveďte tehdy, když mají znaky nízký
kontrast, nebo když se obraz třepe.
■ Režim PC (v režimu PC): Přepněte režim PC pomocí tlačítek On nebo Off.
■ NR: Tato funkce snižuje hluk obrazovky bez narušení kvality videa.
■ Dynamický kontrast: Nastavte kontrast na optimální úroveň podle světlosti obrazu.
■ OverScan (v režimu DTV): Hodnota reprodukce obrazu je nastavena.
■ Resetování obrazu: Resetujte veškerá nastavení obrazu na výchozí tovární
hodnoty.
Konfigurace nabídky ZVUK
■ Typ zvuku: Můžete si vybrat typ audiozáznamu,
který nejlépe odpovídá vašim preferencím. Výšky a basy
můžete nastavit, pokud je typ zvuku nastaven na typ
Uživatel.
■ Stereo váha: Pomocí této funkce můžete nastavit
vyvážení
zvuku v reproduktorech na požadované hodnoty.
■ AVL (Auto Volume Level): Pomocí funkce AVL
můžete zajistit, že hlasitost bude automaticky udržována
na stejné úrovni při změnách programů. Každá vysílací
stanice má své podmínky související se signálem, proto
je třeba provést nastavení hlasitosti při každé změně
kanálu. Tato funkce umožňuje uživateli vychutnat si
stabilní úroveň hlasitosti, kterou lze zajistit pomocí
automatického nastavení u každého programu.
OBRAZ
Rež im obra zu
Uži vatel ský
Teplo ta bare v
Pom ěr stra n
NR
Dyn amick ý
kon trast
Ove rScan
Nas tavit
OK
OK
ZVUK
Typ zv uku
Ste reo váh a
AVL
SRS
Rež im SPDI F
AD zm ěna
AD ve likos t
Nas tavit
OK
OK
Dom a
< >
16: 9
< >
Zap nout
< >
Zap nout
<
Sta ndard ní
< >
BAC K
0
Vypn out
Vypn out
< >
PCM
< >
Vypn out
30
BAC K
>
>
>
Zpě t
>
><
><
><
Zpě t
Page 73

Nabídka pro provoz
18
Přepnutí na funkci SRS.
■ SRS:
SRS TruSurround HD
dvou reproduktorů, se silnou basovou funkcí, vysokofrekvenčním detailním
zpracováním a čistým zvukovým efektem.
■ Režim SPDIF: Můžete zvolit režim SPDIF. Funkce SPDIF (Sony Philips Digital
Interface) zajišťuje digitální zvukový výstup do reproduktorů a různých digitálních
zařízení, jako například do přijímačů A/V a přijímačů domácího videa. Tento systém
redukuje interference (rušení) a ztráty.
■ AD změna (v režimu DTV)
především v Severní Americe a v Evropě. Toto je pomocná audio funkce, která
poskytuje přídavnou zvukovou stopu pro zrakově postižené osoby. Tato funkce
funguje na základě systému Audio Stream pro AD (Audio Description), pokud je
realizováno vysílání pomocí hlavního zvukového rozhraní z vysílače. Uživatel může
funkci Audio Description zapnout nebo vypnout a ovládat hlasitost.
■ AD velikost:
Pokud je zapnuta funkce AD Switch, můžete provést nastavení hlasitosti AD.
■ Zpoždění zvuku: Náprava audio-video problémů se synchronizací při sledování DTV
a při poslechu digitálního zvukového výstupu prostřednictvím externího zařízení,
například audio přijímače (0 ms ~ 250 ms).
■ Resetování zvuku: Resetujte veškerá nastavení zvuku na výchozí tovární hodnoty.
Konfigurace nabídky Kanál
■ Typ antény: Volba zdroje anténového signálu.
◆
Pokud používáte TV signál Pozemní.
■ Automatické ladění
Stisknutím tlačítka OK vstupte do nabídky
automatického ladění (Auto Tuning).
– Typ ladění: Pomocí tlačítka ◄/► zvolte typ ladění.
– Země: Pomocí tlačítka ◄/► zvolte příslušnou zemi.
– Režim prohledávání: Zvolte Volné, Všechny nebo
Kódované kanály
– Typ služby: Zvolte typ kanálu pro paměti.
– Hledat: Pomocí tlačítka OK spustíte automatické
vyhledávání.
■ DTV Manuální ladění
Manuální nabídka pro digitální kanály.
1. Pomocí tlačítka ◄/► zvolte příslušný kanál.
2. Pomocí tlačítka ▲/▼ zvolte funkci Vyhledávání a stiskněte
tlačítko OK pro zahájení ladění kanálů. Po nalezení kanálu
se proces vyhledávání zastaví a kanál bude uložen
společně s aktuálním číslem. Pomocí tlačítka EXIT můžete odejít.
TM
vytváří vynikající bych použil “zážitek z okolního zvuku ze
*tato funkce je dostupná pouze v některých zemích,
Kanál
Typ an tény
Nas taven í satel itu
Aut omati cké lad ění
pro uložení.
DTV M anuál ní ladě ní
ATV Manua lní lad ění
Úpra va prog ramů
CI in forma ce
Nas tavit
OK
OK Zpět
Poz emní
>
<
>
>
>
>
>
BAC K
Če
sk
y
Page 74

Nabídka pro provoz
19
◆
Pokud používáte TV signál Kabel.
■ Automatické ladění
Stisknutím tlačítka OK vstupte do nabídky automatického
ladění (Auto Tuning).
Če
– Typ ladění: Pomocí tlačítka ◄/► zvolte typ ladění.
– Země: Pomocí tlačítka ◄/► zvolte příslušnou zemi.
sky
– Režim prohledávání: Zvolte Volné, Všechny nebo
Kódované kanály
– Typ služby: Zvolte typ kanálu pro paměti.
– Typ scan: Pomocí této funkce můžete skenovat
veškeré aktivní vysílací stanice
a ukládat je do televizoru.
Pokud zvolíte položku Full (Plná), funkce
automatického ladění bude provádět vyhledávání
v rámci všech frekvencí s cílem najít dostupné kanály.
Pokud zvolíte položku Network (Síť), funkce
automatického ladění bude provádět vyhledávání
v určených frekvencích s cílem najít
–
Frekvence: Z
adejte vlastní frekvenci.
(Pokud je frekvence nastavena na režim Rychlý,
můžete nastavit Symbol a Modulaci).
–
Symbol: Zobrazení dostupných hodnot symbolů.
(Symbol: Rychlost, ve které zařízení jako například
modem vysílá symboly ke kanálu).
–
Modulace: Zobrazení dostupných hodnot modulace.
(Modulace: Nahrávání zvukových a obrazových
signálů na
Hledat: Pokud jste se svým nastavením spokojeni,
–
stiskněte tlačítko OK/►. Televizor si bude pamatovat
všechny dostupné kanály.
příslušný nosič).
■ DTV Manuální ladění
Frekvence, Symbol, Modulace, Režim skenování a Typ
služby, to jsou aspekty potřebné pro správné přidávání
programu v kabelovém režimu DVB. Požádejte prosím
poskytovatele kabelových služeb o správné hodnoty. Po
dokončení nastavení zvolte funkci Vyhledávání a
stiskněte tlačítko OK. Tím spustíte ladění kanálů.
pro uložení.
dostupné kanály.
Kanál
Typ an tény
Nas taven í satel itu
Aut omati cké lad ění
DTV M anuál ní ladě ní
ATV Manua lní lad ění
Úpra va prog ramů
CI in forma ce
Nas tavit
OK
OK Zpět
Automatické ladění
Typ la dění
Zem ě Němec ko
Rež im
pro hledá vání
Typ sl užby
Typ sc an
Frekvence
Sym bol
Nas tavit
< >
OK
OK Zpět
Kab el
>
<
>
>
>
>
>
BAC K
DTV
><
>
Vše
><
DTV +Radi o
><
Sí ť
Aut o
Aut o
BAC K
Page 75

Nabídka pro provoz
20
◆Pokud používáte TV signál Satelit.
■ Nastavení satelitu
– Satelit/
Satelit/Transpondér; poté stiskněte Tlačítko OK.
Pomocí tlačítka ▲/▼ zvolte ze seznamu funkci
satelit/transpondér.
Vymazat: Pomocí červeného tlačítka můžete smazat
aktuální satelit/transpondér.
Upravit: Pomocí zeleného tlačítka můžete provést
editaci aktuálního satelitu/transpondéru.
Přidat: Pomocí žlutého tlačítka můžete přidat nový
satelit/transpondér.
– Napájení LNB: Zvolte typ napájení pro LBN.
– Typ LNB: Zvolte typ LBN.
Pomocí tlačítka OK se dostanete do sub-nabídky
(submenu). Jednotlivé položky můžete
nastavovat, pokud je typ LNB nastaven na pozici User
Mode (uživatelský režim).
– Tón 22kHz: 22KHz SPÍNAČ. Zvolte hodnotu 22KHz,
v závislosti na typu LNB.
– Přidat odstín: Můžete si zvolit jeden ze dvou satelitů.
Použití pro výběr správného zařízení.
– DiSEqC1.0: Můžete si zvolit jeden ze čtyř satelitů.
Použití pro výběr správného zařízení.
– DiSEqC1.1: Můžete si zvolit jeden ze šestnácti satelitů.
Použití pro výběr správného zařízení.
–
Motor: Nastavuje ustálený typ mezi DiSEqC1.2
a USALS.
Motor je nastaven na DiSEqC1.2 nebo USALS:
Nastavení limitu: Pomocí zeleného tlačítka nastavte
Limity pro rozsah rotace satelitní antény.
Pokračování posunutí: Pomocí této funkce můžete
otáčet
anténou až do dokončení rotačního pohybu. Anténu
můžete takto rovněž zastavit.
Move Step: Pomocí této funkce můžete otáčet
anténou v jednotlivých hodnotových krocích. Můžete
provádět jemné ladění antény.
Nastavit západní limit: Nastavení hodnoty
západního limitu.
Nastavit východní limit: Nastavení hodnoty východního limitu.
Přejít na odkaz: Přesun antény do nulové pozice.
Vypnout limit: Zrušení nastavení limitu. Tato funkce umožňuje otáčení antény kolem
celého oblouku.Zrušit východní a západní limit.
Nastavení Pozice: Pomocí červeného tlačítka můžete nastavit pozici.
Automatické posunutí: Automatické otáčení antény.
Pokračování posunutí: Pomocí této funkce můžete otáčet anténou tak dlouho,
Transpondér: Pomocí tlačítka ▲/▼ zvolte
Kanál
Typ an tény
Nas taven í satel itu
Aut omati cké lad ění
DTV M anuál ní ladě ní
ATV Manualn í laděn í
Úpra va prog ramů
CI in forma ce
Nas tavit
OK
Sa telit
<
OK
Nastavení satelitu
Sat elit
Transp ondér 1 0729 V 22 000
Nap ájení L NB
Typ LN B
Tón 2 2kHz >
Při dat ods tín
DiS EqC1. 0
Kval ita
Síla
Nas tavit
OK
OK
ASTRA 1+.
13/ 18 V
Uni verzá lní
Aut o
<
Žá dn ý
Žá dn ý
BAC K
BAC K
0%
0%
>
>
>
>
>
>
Zpě t
>
>
><
>
><
><
Zpě t
Če
sk
y
Page 76

Nabídka pro provoz
21
dokud nebude rotace dokončena nebo ručně zastavena.
Krok posunutí: Pomocí této funkce můžete otáčet anténou podle krokové hodnoty.
Můžete provádět jemné ladění pomocí antény.
Ulož pozici: Uložení pozice jako zvoleného polohovacího limitu.
Če
sky
Přejít na polohu: Otáčení antény k uložené pozici satelitu.
Přejít na odkaz: Přesun antény do nulové pozice.
Přejít na X: Přesun antény do polohy určené pomocí funkce Set Location (nastavení
polohy)
Motor je nastaven na USALS:
Nastavit Poloha: Pomocí žlutého tlačítka můžete nastavit umístění.
Poloha: Směr délky, úhel délky, směr šířky, úhel šířky - tyto hodnoty mohou být
nastaveny, pokud je umístění nastaveno na manuální režim.
Směr zeměpisné délky: Nastavení směru délky v daném umístění.
Úhel zeměpisné délky: Nastavení úhlu délky v daném umístění.
Směr zeměpisné šířky: Nastavení směru délky v daném umístění.
Úhel zeměpisné šířky: Nastavení úhlu délky v daném umístění.
– Vyhledat: Po dokončení nastavení zvolte funkci Go Search a stiskněte OK pro
přechod do nabídky Auto Tuning (automatické ladění).
– Resetovat: Nastavení satelitu bude resetováno na výchozí hodnoty. Po resetování
všech hodnot můžete resetovat zemi při automatickém ladění.
• Společnost vyrábějící satelitní televizory může provést nastavení transpondéru
během provozní doby; parametry programu tedy mohou být částečně upraveny.
Zákazníci, kteří pro příjem satelitních programů používají toto zařízení, by měli
pravidelně kontrolovat podrobné informace na webových stránkách
http://www.lyngsat.com/ a zadávat nové parametry transpondéru. V opačném
případě může dojít k negativnímu ovlivnění příjmu programu.
■ Automatické ladění: Stisknutím tlačítka OK vstupte do nabídky automatického
ladění (Auto Tuning).
1. Volba příslušné země pro kanály.
2. Pomocí tlačítka ▲/▼ můžete vybrat Vyhledávání; stiskněte tlačítko ◄/► a zvolte
funkce Quick Scan nebo Blind Scan. Poté stiskněte tlačítko OK a spusťte ladění
kanálu.
3. Televizní přijímač si začne pamatovat všechny
dostupné kanály.
■ DTV Manuální ladění
Manuální ukládání pro DVBS2 kanály.
Pomocí tlačítka ▲/▼ zvolte požadovanou dílčí položku.
Pomocí tlačítka ◄/► zvolte požadovanou hodnotu.
Pomocí tlačítka ▲/▼ zvolte funkci Vyhledávání a
stiskněte OK pro zahájení ladění kanálu.
Pomocí tlačítka EXIT můžete odejít.
DTV Manuální ladění
Sat elit
Fre kvenc e
Sym bol
Pol ariza ce
Rež im
pro hledá vání
Typ sl užby
Hle dat
Kval ita
Síla
Nas tavit
OK
OK Zp ět
ASTRA 1+.5
0
0
Vert ikáln í poz
<
Vše
<
DTV+ Radio
0%
0%
BACK
>
><
><
.
>
>
><
Page 77

Nabídka pro provoz
22
■ ATV Manualní ladění
Manuální ukládání pro ATV kanály.
Pomocí tlačítka ▲/▼ zvolte požadovanou dílčí položku.
Pomocí tlačítka ◄/► zvolte požadovanou hodnotu.
Stiskněte tlačítko ▲/▼ pro volbu funkce Vyhledávání; poté používejte tlačítko ◄/►
pro vyhledávání signálu ve směru nahoru/dolů; po vyhledání kanálu se systém
zastaví.
Pomocí tlačítka EXIT můžete odejít.
Pomocí tlačítka ▲/▼ zvolte Save (uložit); poté stiskněte OK a volbu uložte.
■ Úprava programů
1. Pomocí tlačítka ▲/▼ zvolte příslušné položky.
2. Vymazat: Pomocí červeného tlačítka můžete smazat příslušný kanál
Řadit: Pomocí zeleného tlačítka můžete příslušný kanál rozdělit.
Přesunout: Pomocí žlutého tlačítka můžete příslušný kanál posunout.
Přeskočit: Pomocí modrého tlačítka můžete příslušný kanál přeskočit.
Oblíbené položky: Pomocí tlačítka FAV můžete nastavit oblíbený kanál.
■ CI informace (režim DTV): Pomocí této funkce můžete sledovat některé kódované
služby (placené služby). Vložte prosím CI kartu do CI slotu podle směru šipky
na CI kartě.
POZNÁMKA:
• Tato funkce je dostupná pouze tehdy, když je k dispozici CI slot.
• Tento OSD slouží pouze pro orientaci. Možnosti nabídky a formáty obrazovky se
mohou lišit v závislosti na poskytovateli digitálních placených služeb.
• Po konzultaci se svým obchodním zástupcem můžete změnit obrazovku nabídky CI
(Common Interface) a službu.
• Kartu CI nesmíte vkládat nebo vytahovat, pokud je zapnuto napájení.
• Kartu CI nevkládejte a nevytahujte příliš často, aby nedocházelo k poškození
televize nebo CI karty.
• Během inicializace CI karty prosím nepoužívejte televizi.
■ Informace o signálu
Zobrazení aktuálních informací o signálu.
Če
sk
y
Page 78

Nabídka pro provoz
23
Konfigurace nabídky Nastavení
■
Jazyk: Zvolte si svůj jazyk pro obrazovku.
■
Jazyky zvuku: Zvolte si svůj upřednostňovaný
jazyk pro zvukovou složku. (Funkce je dostupná pro
digitální kanály v případě audio vysílání v několika
Če
jazycích)
sky
■
Jazyky titulků: Zvolte si svůj upřednostňovaný jazyk pro
titulky. (Funkce je dostupná pro digitální kanály v případě
vysílání s titulky v několika jazycích)
■
Titulky: Přepněte funkci titulků On nebo Off.
■ Pro sluchově postižené: Pokud jsou titulky zapnuty,
můžete seřídit funkci přenosu pro osoby se zhoršeným
sluchem. Pokud je funkce režimu pro osoby se
zhoršeným sluchem zapnuta, bude televizor poskytovat
určité informace osobám se zhoršeným sluchem. Pokud
je funkce režimu pro osoby se zhoršeným sluchem
vypnuta, budou tyto informace skryty.
■
Země: Zobrazení aktuální země.
■
Zapnout HBBTV: Přepínání funkce HBBTV-
zapnuto nebo vypnuto. (Při první volbě může být tato
funkce nedostupná; podruhé však již bude fungovat.)
■
Vybrat prostředí: Zvolte režim Volba prostředí
Home nebo Ukládání. Režim Ukládání je optimálním
řešením pro nastavení prostředí pro ukládání.
■
Úspora energie: Pokud je funkce Nastavení prostředí
zvolena v poloze Home, můžete provést nastavení
Úspory energie. Přepínání Ukládání slouží pro uložení
nastavení prostředí.
■
Zdravotní upozornění:
Přepínání funkce Health Remind - zapnuto
nebo vypnuto. Pokud je funkce Health Remind (zdravotní
připomínka) zapnuta, objeví se obrázek s upozorněním
na nutnost přestávek v intervalu dvou hodin.
■ HDMI_CEC:
Pomocí tlačítka OK se dostanete do
sub-nabídky (submenu). Systém HDMI_CEC můžete
používat pouze se zařízením, které obsahuje funkce HDMI_CEC. Zařízení
HDMI_CEC musíte připojit pomocí kabelu HDMI. Některé HDMI kabely nepodporují
funkce HDMI_CEC.
–Seznam zařízení: Zobrazení zařízení, jež jsou připojena k TV.
–HDMI_CEC: Funkci HDMI_CEC zapněte nebo vypněte.
–Automatický pohotovostní režim: Funkci automatického
pohotovostního režimu zapněte nebo vypněte.
–ARC: Funkci ARC zapněte nebo vypněte.
■ Indikátor napájení: Funkci indikátoru napájení zapněte nebo vypněte.
■ Zapnutí loga: Funkci Power On Logo zapněte nebo vypněte.
■ Stand. nast.: Přepněte veškerá nastavení systému na výchozí tovární hodnoty. Po
dokončení této operace přejde televizor do pohotovostního režimu.
Nastavení
Jaz yk
Jaz yky zvu ku
Jaz yky tit ulků
Titulk y
Pro s lucho vě
pos tižen é
Zem ě
PVR s oubor ový sys tém
Nas tavit
OK
Nastavení
Zap nout
HBB TV
Vybr at
pro střed í
Úspora energie
Zdr avotn í
upo zorně ní
HDM I_CE C Zapno ut
Ind ikáto r napáj ení
Zap nutí lo ga
Nas tavit
OK
OK Zpě t
OK Zp ět
Čes ko
>
>
>
Vypnou t
><
Vypnou t
Něm ecko
>
BAC K
Zapn out
><
Dom a
><
Zapn out
><
Vypn out
><
>
Zapn out
><
Zap nout
< >
BACK
Page 79

Nabídka pro provoz
24
Návod k použití funkce PVR
Způsob používání funkce PVR
Příprava
1. Zastrčte USB flash konektor nebo USB pevný disk do USB slotu na levé straně
televizoru.
POZNÁMKA:
• USB disk musí mít kapacitu alespoň 512 MB.
• USB zařízení musí podporovat specifikaci s vysokou rychlostí USB 2.0.
2. Stisknutím tlačítka HOME/SOURCE zobrazíte okno s nabídkou Smart Home.
Pomocí tlačítka ▲/▼ zvolte zdroj DTV; funkce PVR může být používána pouze v
režimu DTV.
3. Poté stiskněte tlačítko MENU na dálkovém ovládači a zobrazte hlavní menu;
stiskněte tlačítka ▲/▼/◄/► pro zvýraznění menu Nastavení; nakonec stiskněte
klávesu OK.
4. Pomocí tlačítka ▲/▼ zvýrazněte funkci PVR souborový systém (v režimu DTV);
poté stiskněte tlačítko OK a přejděte do submenu.
Nastavení
–Vybrat disk: Zvolte disk používaný pro PVR.
POZNÁMKA:
• Některé modely mají vstup složený ze dvou USB.
Můžete použít několik disků,
pokud máte zapojena dvě USB zařízení.
–Velikost časového posunu: Zde si můžete nastavit
velikost paměti pro funkci Time Shift.
– Formát Start (Zahájení formátování): Formátování
USB disku.
POZNÁMKA:
• Před formátováním prosím nezapomeňte zálohovat
všechny důležité soubory. • Během formátování
zařízení toto zařízení neodpojujte, ani nevypínejte z
napájení. Pokud vaše USB zařízení nemůže být
naformátováno nebo zkontrolováno systémem,
znamená to, že toto zařízení není kompatibilní s
televizorem nebo že je poškozeno. U větších USB
zařízení bude formátování trvat déle. Buďte prosím trpěliví.
– Kontrola rychlosti: Stisknutím tlačítka OK/► zkontrolujte rychlost ukládacího
zařízení.
PVR souborový systém
Vybrat d isk
Veli kost ča sovéh o
pos unu
For m t S tartá
Kontrol a ry chlosti
Nas tavit
OK
512 M
OK Zpět
BAC K
>
><
>
Če
sk
y
Page 80

Nabídka pro provoz
25
Nahrávání
K dispozici jsou dva typy nahrávání: Okamžité nahrávání a Plánované nahrávání.
Okamžitým nahráváním můžete pořizovat záznam aktuálních TV programů. Pomocí
plánovaného nahrávání můžete nastavit začátek nahrávání na určitý čas a nechat
toto nahrávání spustit automaticky v den, čas a v rámci specifické doby trvání, podle
Če
vaší volby.
sky
– Okamžité nahrávání
1. Zvolte požadovaný kanál a poté stiskněte tlačítko
Zobrazí se příslušné menu a televizor zahájí nahrávání.
2. Pomocí
tlačítka můžete zobrazit/skrýt manu pro nahrávání. Pomocí tlačítka
◄/► můžete zvolit funkce přehrávání, zastavení, pauza, rychlé převíjení vzad,
rychlý posun dopředu a nastavení času zahájení operace.
3. Nahrávání bude probíhat tak dlouho, dokud nebude stisknuto tlačítko
nebo nedojde k zaplnění paměti.
pro zahájení nahrávání.
(stop)
00:0 8
CH 6 ITV 2
00:2 4
>
Místo n a disk u: 7%
>
00:0 0
Plánované nahrávání
Zařízení může realizovat plánované nahrávání tehdy, když je televizor zapnutý nebo
se nachází v pohotovostním režimu.
1. Pomocí tlačítka EPG přejděte do nabídky EPG.
2. Poté stiskněte červené tlačítko a aktivujte submenu časovače nahrávání. V
tomto menu můžete nastavit čas nebo kanál.
3. Pomocí tlačítka ▲/▼ můžete zvýraznit různá nastavení. Pomocí tlačítka ◄/►
můžete tato nastavení změnit. Po dokončení nastavení na požadované hodnoty
stiskněte tlačítko OK a uložte naplánované funkce nahrávání.
POZNÁMKA:
• Pro nahrávání můžete nastavit několik plánovaných programů. Pro provedení této
operace budete muset stisknout žluté tlačítko v režimu EPG. Poté se vám zobrazí
celkový seznam. Různé naplánované úlohy se nesmějí překrývat. U nastavení
musí být mezi jednotlivými plány prodleva v trvání alespoň 1 minuty.
• Pokud je nahrávání zahájeno v pohotovostním režimu, na předních kontrolkách
se změní barva a v zařízení nebude žádný obrázek nebo zvuk. Pomocí tlačítka
můžete zapnout obrazovku.
Page 81

Nabídka pro provoz
26
Přehrávání nahraných programů
Možnost1:
Po dokončení nahrávání stiskněte tlačítko TOOLS (nástroje) na dálkovém ovládači;
poté stiskněte tlačítko ▲/▼ a zvolte Seznam nahrávek.
1. Pomocí tlačítka ▲/▼ můžete zvolit nahraný soubor a poté stisknout tlačítko OK
pro přehrávání tohoto souboru.
2. Červeným tlačítkem můžete smazat soubor, který již nebudete potřebovat.
3. Pomocí žlutého tlačítka můžete zvolit režim postupu vzhůru nebo dolů.
4. Pomocí modrého tlačítka můžete měnit seznam podle různých typů.
5. Stisknutím tlačítka EXIT tuto nabídku opustíte.
Možnost2:
Nahrané programy můžete přehrávat také v režimu USB.
1. Stisknutím tlačítka HOME/SOURCE můžete vstoupit do rozhraní Smart Home.
2. Pomocí tlačítka ◄/► můžete zvolit Film a poté můžete stisknout OK.
3. Pro vstup na požadovaný disk používejte tlačítka se šipkami a tlačítko OK.
4. Pro otevření složky používejte tlačítka se šipkami a tlačítko OK.
5. Stisknutím tlačítka MENU zobrazíte okno s nastavením.
6. Pomocí tlačítka
7. Stisknutím tlačítka EXIT se můžete vrátit k obrazovce s hlavní nabídkou USB.
Funkce Časový posun
Tato funkce umožňuje automatické nahrávání živého přenosu TV. Tento přenos pak
můžete kdykoli v budoucnosti sledovat. Pokud je funkce Time Shift zapnuta, můžete
sledovat jakékoli další programy TV, aniž byste přitom ztratili jakékoli z živých
vysílání.
Pomocí tlačítka NÁSTROJE na dálkovém ovládači a pomocí tlačítka ▲/▼ zvolte
položku Časový posun a aktivujte funkci Time Shift.
nastavením záznamu, který jste si vybrali.
zastavte přehrávání souboru.
00:0 8
CH 6 ITV 2
>
00:0 0
Televize uloží kanál s takovým
00:2 4
>
Místo n a disk u: 7%
Če
sk
y
Je-li zařízení USB, které je určeno k nahrávání, odpojeno, budou soubory Time Shift,
které byly uloženy, automaticky smazány.
Page 82

Nabídka pro provoz
27
HBBTV
Technologie hybridního širokopásmového vysílání (HbbTV) umožňuje uživateli získat
přístup ke službám poskytovatelů zábavy, on-line poskytovatelů a výrobců CE.
1. Když se objeví obrazovka indikující (červeným tlačítkem, apod.) získání přístupu ke
Če
službám HbbTV, otevřete nabídku HbbTV stisknutím červeného tlačítka.
sky
2. Ovládejte televizor s obsaženými informacemi.
POZNÁMKA:
•
Tato služba může být podporována v jiných zemích.
• Některé vysílání nemusí služby HbbTV podporovat.
•
V závislosti na podmínkách vysílací stanice nebo poskytovateli aplikace, nemusí
aplikace v hybridní televizi dočasně správně fungovat.
•
Aplikaci lze používat v hybridní televizi pouze tehdy, je-li televizní síť připojena k
externí síti. Aplikace nemusí správně pracovat v závislosti na stavu sítě.
Page 83

Nabídka pro provoz
28
Pokyny pro použití síťových funkcí
Televizor lze nastavit tak, že získá přístup k Internetu prostřednictvím sítě LAN, a to
pomocí kabelového nebo bezdrátového připojení.
Připojení k drátové síti
Televizor lze připojit k síti LAN propojením portu LAN na televizi s externím modem
pomocí kabelu LAN.
Če
sk
y
Konektor modemu na zdi
Kabel modemu
Externí modem
(ADSL/VDSL/Kabelová TV)
Konektor sítě LAN na
televizoru
Kabel LAN
Televizor lze připojit k síti LAN propojením portu LAN na zadní straně televizoru se
zařízením IP Sharer (přístupový bod nebo směrovač), které je připojeno k externímu
modemu.
Konektor modemu na zdi
Kabel modemu
Externí modem
(ADSL/VDSL/Kabelová TV)
Kabel LAN Kabel LAN
IP Sharer
Konektor sítě LAN na
(má server DHCP)
televizoru
Televizi můžete připojit k síti LAN kabelem LAN přímo propojením portu LAN v
televizoru se síťovou zásuvkou na zdi. Všimněte si, že nástěnná zásuvka je
připojena k modemu nebo směrovači kdekoliv v domě.
Konektor sítě LAN na zdi
Konektor sítě LAN na televizoru
Kabel LAN
Page 84

Nabídka pro provoz
29
Konfigurace kabelové sítě
1. Připojte TV ke svému LAN, jak je popsáno v předchozí
sekci.
2. Zapněte TV, stiskněte tlačítko MENU na dálkovém
ovládači; pomocí tlačítek ▲/▼/◄/► zvolte Síť;
Če
nakonec stiskněte tlačítko OK.
sky
3. Pomocí tlačítka ▲/▼ zvolte Síť; poté pomocí tlačítka
◄/► zvolte položku Kabelový.
4. Pomocí tlačítka ▲/▼ zvolte položku Select
konfigurace IP a potom stiskněte tlačítko OK.
– Režim: Zvolte Režim pro automatické nastavení
hodnot IP, Netmask, Gateway a DNS; případně tyto
hodnoty nastavte ručně.
IP: IP adresa televizoru.
–
Maska podsítě: Hodnota systému Netmask.
–
Brána: Adresa systému Gateway.
–
DNS: Adresa systému DNS.
–
MAC adr.: Zobrazení adresy MAC.
–
Nastavení kabelové Síť
– Způsob automatického nastavení (Kabelový)
Při připojování televize do sítě, která podporuje
systém DHCP, použijte funkci automatického
nastavení sítě.
1. Připojte TV ke svému LAN, jak je popsáno v
předchozí sekci.
2. Zapněte TV, stiskněte tlačítko MENU na dálkovém
ovládači, pomocí tlačítek ▲/▼/◄/► zvolte Síť a
poté stiskněte tlačítko OK.
. Pomocí tlačítka ▲/▼ zvolte položku Select
3
konfigurace IP
4. Nastavte Režim na
5. Automatický režim shromažďuje a zadává potřebné
hodnoty z Internetu automaticky.
6. Zvolte Potvrdit a stiskněte tlačítko OK pro
připojení k Internetu.
7. Pokud funkce Network Function nepřebrala žádné
hodnoty připojení, prostudujte si příslušný postup v návodu.
a potom stiskněte tlačítko OK.
Automatický.
Síť
Síť
kon figur ace IP
Nas tavit
OK
konfigurace IP
Rež im
IP
Mas ka
pod sítě
Brá na
DNS
adr
MAC : 00 :00: 0 0:01 00: 00:
Pot vrdit
Nas tavit
OK
Kab elový
OK Zpět
BAC K
Ruč ní
><
0. 0. 0.0 .
0. 0. 0.0 .
0. 0. 0.0 .
0. 0. 0.0 .
OK Zpět
BAC K
><
>
Page 85

Nabídka pro provoz
30
– Způsob manuálního nastavení (Kabelový)
Při připojování televizoru k síti, která vyžaduje statickou IP adresu, používejte
systém manuálního nastavení sítě (Manual Network Setup).
1. V tomto postupu Automatického nastavení postupujte podle kroků 1 až 3.
2. Nastavte Režim na
3. Pomocí tlačítka ▲/▼ můžete zvýraznit IP a poté můžete stisknout tlačítko OK.
4. Pomocí tlačítka ▲/▼ můžete zvýraznit pole, které chcete změnit. Poté použijte
tlačítka s čísly
5. Pomocí tlačítka ▲/▼ zvýrazníte funkce Maska podsítě, Brána a DNS. Pak
můžete stejným způsobem editovat IP adresu.
6. Po dokončení této úlohy zvolte pole Potvrdit a stiskněte OK. Následně se
můžete připojit k Internetu.
POZNÁMKA:
• Adresy IP, Maska podsítě, Brána a DNS musejí být označeny čísly 0 a
255.
• Pokud zadáváte IP adresu manuálně, nesmíte použít stejnou IP adresu pro
jakákoli další zařízení. IP adresa, kterou používáte, bude vaší privátní adresou.
Tipy pro připojení k síti:
• S televizorem používejte standardní LAN kabel. Cat5 nebo vyšší řadu, s
konektorem RJ45.
• Pokud máte Dynamickou síť, musíte použít ADSL modem nebo router s podporou
protokolu Dynamic Host Configuration Protocol (DHCP). Modemy a routery, které
automaticky podporují protokol DHCP, poskytují hodnoty IP adres, Netmask,
Gateway a DNS, který váš televizor potřebuje pro připojení k Internetu.
• Některé sítě požadují statickou IP adresu. Pokud vaše síť vyžaduje statickou IP
adresu, musíte vložit hodnoty IP adresy, Netmask, Gateway a DNS manuálně
během procesu nastavení síťového připojení. Pokud neznáte správné hodnoty, jež
mají být použity, kontaktujte prosím svého síťového správce nebo poskytovatele
internetových služeb.
• Mnoho problémů se síťovým připojením může být vyřešeno prostým restartováním
routeru a modemu. Po připojení hráče k domácí síti rychle odpojte kabel napájení u
routeru domácí sítě nebo u kabelového modemu. Poté tento napájecí kabel znovu
zapojte/připojte.
Ruční.
a vložte IP adresu. Pro návrat použijte tlačítko MENU/▲/▼.
Če
sk
y
Page 86
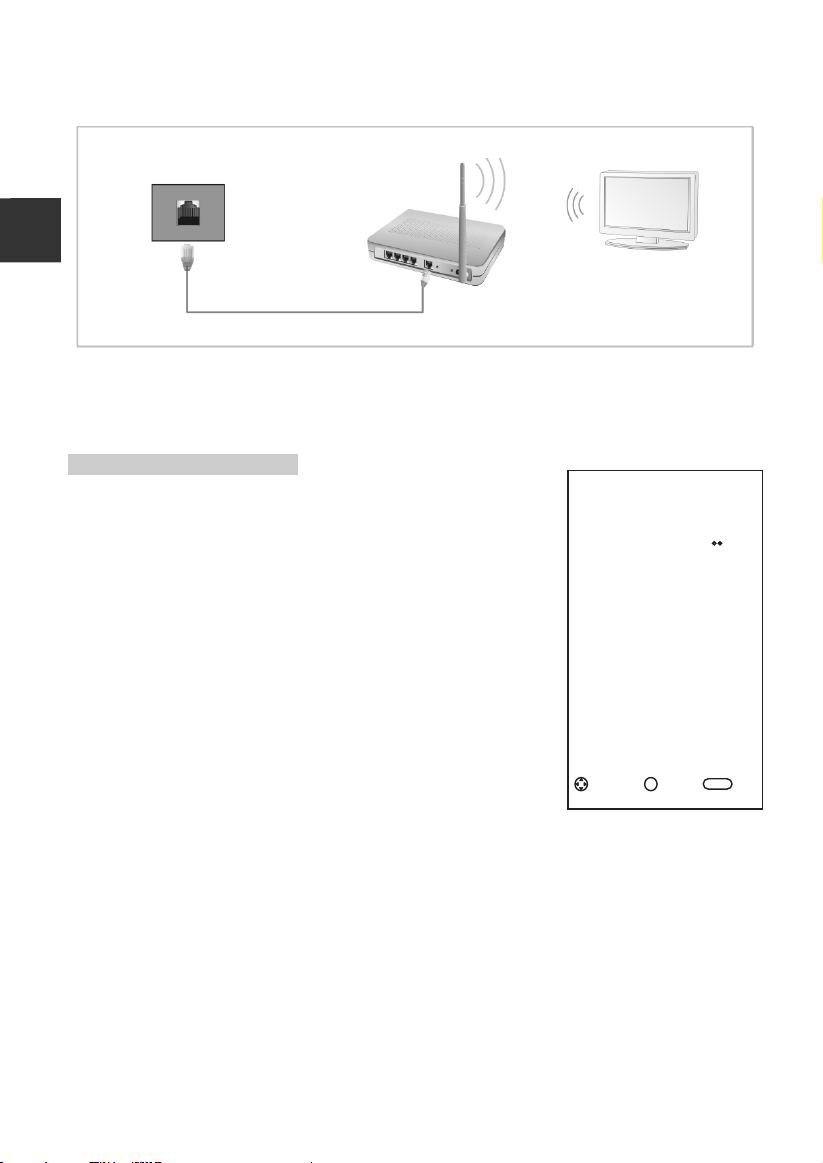
Nabídka pro provoz
31
Připojení k bezdrátové síti
LAN port na zdi
Če
Bezdrátové zařízení
sky
Televizor s vestavěným
LAN kabel
bezdrátovým systémem
• Abyste mohli používat bezdrátovou síť, musí být váš televizor připojen k
bezdrátovému zařízení IP Sharer. Pokud toto bezdrátové zařízení IP Sharer
podporuje protokol DHCP, pak můžete u svého televizoru používat DHCP nebo
statickou IP adresu pro připojení k bezdrátové síti.
Nastavení bezdrátové sítě
Pro zadání síťového nastavení ve vašem televizoru
postupujte podle následujících
Zapněte TV, stiskněte tlačítko MENU na dálkovém
1.
kroků.
ovládači; pomocí tlačítek ▲/▼/◄/► zvolte Síť;
nakonec stiskněte tlačítko OK.
Pomocí tlačítka ▲/▼ zvolte Síť; poté pomocí
2.
Síť
Síť
Kon figur ace Wif i
tlačítka ◄/► zvolte položku Wifi.
Pomocí tlačítka ▲/▼ můžete zvolit Konfigurace
3.
Wifi a poté můžete stisknout tlačítko OK.
–Základní stanice: Zvolte Základní stanice a poté
stiskněte tlačítko OK. Funkce Network bude
vyhledávat dostupné bezdrátové sítě. Po dokončení
vyhledávání se zobrazí seznam dostupných sítí.
V seznamu sítí stiskněte tlačítko ▲/▼ a zvolte
příslušnou síť. Poté stiskněte tlačítko OK.
Nas tavit
Wif i
><
>
OK
OK Zpět
BAC K
Page 87

Nabídka pro provoz
32
– Manuální vyhledávání Wifi: Zvolte funkci Manuální vyhledávání Wifi. Poté
stiskněte tlačítko OK.
SSID
Bezpečný
režim
Heslo
Spojit
SSID: Zadejte správnou hodnotu SSID (název sítě).
Heslo: Na obrazovce určené pro zadávání hesla zadejte heslo své sítě.
Při zadávání hodnoty SSID nebo hesla postupujte
podle následujícího návodu:
Pomocí tlačítka OK můžete zobrazit klávesnici na
obrazovce.
Pomocí tlačítek ▲/▼/◄/► můžete zvolit čísla a směry.
Funkce pro zadávání písmen nebo číslic. Stisknutím
tlačítka Pokračovat spustíte cyklické procházení čísel,
malých písmen a velkých písmen.
Pokud chcete vymazat písmeno nebo číslo, které jste
zadali, použijte tlačítka ▲/▼/◄/► a zvolte Del.
Pomocí tlačítek ▲/▼/◄/► můžete zvolit funkci Esc pro uzavření klávesnice.
POZNÁMKA:
• Do pole pro heslo můžete zadat až 8 znaků.
Bezpečný režim: Pomocí tlačítka ◄/► zvolte položky Žádný, WEP, WPA a
WPA2.
Žádný
Zrušit
><
Pokud se nepodaří připojit televizor k internetu:
• Váš televizor se nemůže připojit k internetu, protože systém ISP trvale registruje
MAC adresu (jedinečné identifikační číslo) vašeho PC nebo modemu, která
potom pokaždé ověřuje, zda se připojujete k internetu takovým způsobem, který
zabraňuje neautorizovanému přístupu. Pokud má televizor odlišnou adresu
MAC, nemůže systém ISP ověřit tuto MAC adresu; proto nemůže být provedeno
připojení televizoru.
• Pro vyřešení tohoto problému požádejte svůj ISP o postup požadovaný pro
připojení jiných zařízení než PC (například vaše TV) k Internetu.
• Pokud váš poskytovatel internetových služeb požaduje pro připojení ID nebo
heslo, může se stát, že nebude možné připojit vaši televizi k internetu.
• Internetové připojení může selhat kvůli problémům s bránou Firewall. V tomto
případě kontaktujte svého poskytovatele internetových služeb.
Če
sk
y
Page 88

Nabídka pro provoz
33
Funkce Smart Home
Systém Smart Home poskytuje užitečné a zábavné obsahy a služby přímo
z internetu směrem do vašeho televizoru.
Stiskněte tlačítko HOME/SOURCE na dálkovém ovládači. Objeví se obrazovka
Smart Home.
Če
Pomocí tlačítek se šipkami můžete rozbalit požadované obsahy a poté stisknout
sky
tlačítko OK.
Pomocí tlačítka EXIT uzavřete obrazovku Smart Home.
DTV
ATV
SCA RT
Kom ponen t
PC
App S tore
Pro hlíže č
Režim pro rozvržení výchozího rozhraní
Na levé straně obrazovky se nachází vstupní zdroj.
Na pravé straně obrazovky jsou funkce App Store, Prohlížeč, Multiscreen, Video,
Hudba, Fotografie a Free Share.
Pomocí tlačítek se šipkami můžete provést cyklický výběr všech možností.
– App Store
Pomocí tlačítek se šipkami zvolte App Store a stiskněte OK. Pomocí tlačítka
APPS se vrátíte k hlavnímu rozhraní App Store. Pomocí tlačítka EXIT můžete
odejít.
App Store: V hlavním rozhraní App Store použijte klávesy se šipkami a zvolte
APP STORE; poté stiskněte tlačítko OK.
Volba země: Po zvolení příslušné země se zobrazí dostupné aplikace.
APP STORE:
Funkce APP bude rozdělena do sedmi kategorií: Služby, Hry,
Zábava, Zprávy, Sport, Hudba a VOD. Pomocí tlačítek se šipkami zvolte různé
typy aplikací a poté stiskněte tlačítko OK pro přesun do seznamu s různými
aplikacemi. Pomocí tlačítek se šipkami zvolte ikonu aplikace; stiskněte tlačítko OK
a zadejte zvolenou hodnotu.
Přidat k oblíbeným položkám:
1. Pomocí tlačítek se šipkami můžete zvolit typ APP.
2. Pomocí zeleného tlačítka přidejte aplikaci k OBLÍBENÝM POLOŽKÁM.
OBLÍBENÉ POLOŽKY:
Zobrazte své osobní aplikace.
V seznamu OBLÍBENÝCH POLOŽEK použijte tlačítka se šipkami a vyberte
aplikaci. Potom stiskněte tlačítko OK. Bude zahájena služba aplikace.
Pomocí červeného tlačítka můžete příslušnou aplikaci smazat.
Page 89

Nabídka pro provoz
34
VYHLEDÁVÁNÍ:
Pomocí tlačítek se šipkami zvolte Hledat, poté stiskněte tlačítko OK.
Pomocí dálkového ovládače zvolte vyhledávaný termín. Uvnitř aplikace
vyhledávejte obsah. Nebo prohledávejte webové stránky.
1. Pomocí softwarové klávesnice na obrazovce zvýrazněte požadované znaky.
2. Pomocí tlačítek se šipkami zvolte „ZAHÁJIT VYHLEDÁVÁNÍ“, poté stiskněte
tlačítko OK.
HOME (výchozí obrazovka):
Pomocí tlačítek se šipkami zvolte pozici HOME pro návrat do hlavního rozhraní
App Store.
Prohlížeč
–
1. Pomocí tlačítek se šipkami zvolte Prohlížeč, poté stiskněte tlačítko OK.
2. Pro zadání adresy můžete použít klávesnici. Zvolte okno pro vstup prohlížeče
a stiskněte tlačítko OK pro zobrazení klávesnice na obrazovce. Zvolte znaky,
které mají být zadány.
3. Po přihlášení stiskněte tlačítka se šipkami a zvolte soubor, který chcete
zobrazit. Poté stiskněte tlačítko OK.
4. Pomocí tlačítka EXIT uzavřete internetový prohlížeč.
Používání ovládacího panelu s internetovým prohlížečem
Internetový prohlížeč je vybaven řadou ikon rozmístěných na horní liště obrazovky.
Pomocí těchto ikon můžete tento internetový prohlížeč snadno používat.
C D
A
B
Če
sk
y
A. Vstupte do zadávacího okna prohlížeče.
B. Otevřete historii.
C. Otevřete Správce záložek.
D. Otevřete Nastavení systému.
Ve spodní části se zobrazí čtyři barevná tlačítka:
Červené: Zvětšení internetové stránky.
Zelené: Zmenšení internetové stránky.
Žluté: Obnova internetové stránky.
Modré: Návrat na výchozí stranu (HOME).
Page 90

Nabídka pro provoz
35
POZNÁMKA:
• Tlačítka na televizoru nejsou dostupná, pokud používáte funkci Network (Síť).
• Může se stát, že se video nebude správně přehrávat. Problém může být zapříčiněn
rychlostí internetu.
• Internetovým prohlížečem u tohoto zařízení je TV prohlížeč. Tento systém může
Če
fungovat jinak než PC prohlížeč.
sky
• Ne všechny internetové obsahy, ke kterým můžete mít přístup přes počítač, mohou
být zobrazeny pomocí tohoto televizoru.
• Tento televizor pravděpodobně nebude schopen realizovat některé funkce, které je
schopen realizovat počítač.
• V závislosti na prostředí sítě a situaci používání se může stát, že zobrazení obsahu
bude obtížné.
• U této televize bude nějakou dobu trvat, než se příslušný obsah spustí a přehraje.
• Nemůžeme přebírat odpovědnost za obsahy, které nabízejí internetové stránky.
• Nepodporované fonty v obsahu poskytovatele služby se nebudou zobrazovat
normálním způsobem.
• Může docházet k pomalým reakcím nebo přerušením, v závislosti na podmínkách
sítě.
• Internetový prohlížeč podporuje funkci přehrávání videa HTML5.
– Systém Multiscreen
Systém Multiscreen umožňuje opakované zobrazení obrazovky a audio záznamu z
telefonu nebo tabletu do televizoru v reálném čase.
1. Na obrazovce zapněte režim Multiscreen: na dálkovém ovládači stiskněte
tlačítko HOME/SOURCE a přejděte do rozhraní Smart Home. Pomocí tlačítek se
šipkami zvolte položku Multiscreen a poté stiskněte OK.
POZNÁMKA: Naše TV potřebuje zvláštní WiFi hardwarový klíč na podporu této
funkce.
2. Aktivujte nastavení u funkce Screen Mirroring na zařízení, k němuž se chcete
připojit. Aktivujte také vyhledávací zařízení.
POZNÁMKA: Někdy se tento systém nazývá Bezdrátové zobrazení, v závislosti
na výrobci.
3. Na zařízení se zobrazí seznam zařízení, která mají být připojena.
4. Pro připojení zvolte TV nazvané ChangHong-ChangHong.
5. O několik sekund později dojde k úspěšnému připojení systému Multiscreen.
Page 91
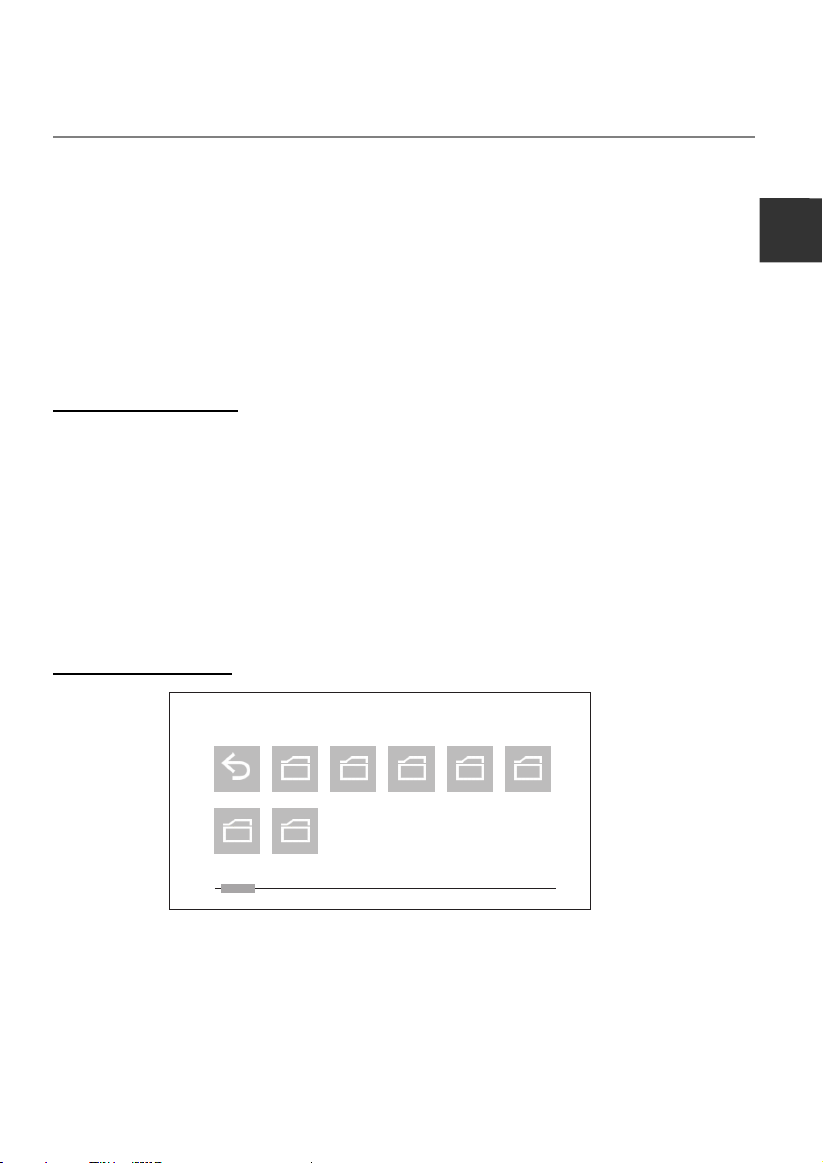
Nabídka pro provoz
36
– Hudba/fotografie/Film
Přístup k USB režimu/Opuštění USB režimu
1. Připojení USB zařízení.
2. Pomocí tlačítka HOME/SOURCE zobrazte nabídku Smart Home. Pomocí tlačítka
▲/▼/◄/► zvolte položku Hudba /
3. Pomocí tlačítka EXIT se vrátíte na hlavní nabídku Smart Home.
POZNÁMKA:
• Speciální USB zařízení nemusí být správně podporováno.
• USB max. zatížení: DC5V 500mA.
• Ve smyslu kapacity nahrávání nelze podporovat všechny modely mobilního pevného
disku. Doporučujeme
ne vyšší než 500mA.
Podporované formáty
Funkce USB může podporovat USB zařízení s USB pamětí.
Může přehrávat Hudba, Film a soubory s Fotografie.
Podpora formátů pro Hudba: MP3, AAC.
Podpora formátů pro Film: AVI, VOB, DAT, MPEG -1 / MPEG-2 / MPEG-4, TS/TP.
Podpora formátů pro Fotografie: JPEG, BMP, PNG.
POZNÁMKA:
• Dokumenty se speciálním algoritmem nemusejí být v tomto USB správně
podporovány.
• USB podporuje výše uvedené formáty. Pokud není formát souboru podporován,
změňte nastavení na uvedené formáty.
Zobrazení obrazovky
používat mobilní pevný disk s nízkou energií s hodnotou proudu
Film / Fotografie a poté stiskněte tlačítko OK.
Če
sk
y
Sou bor
Návr at
Hud ba
Fotografie Film
< >
01/ 01
1. Pomocí tlačítka ◄/► zvolte položku Hudba, Fotografie nebo Video a poté stiskněte
tlačítko OK.
2. Pomocí tlačítek se šipkami zvýrazněte složku, poté stiskněte tlačítko OK.
3. Pomocí tlačítek se šipkami zvýrazněte položky Hudba/Fotografie/Video. Pomocí
tlačítka OK můžete přehrát zvolené položky Hudba/Fotografie/Video.
4. Pomocí tlačítka BACK (zpět) se vrátíte na předchozí obrazovku.
5. Stisknutím tlačítka EXIT se můžete vrátit k obrazovce s hlavní nabídkou USB.
Page 92

Nabídka pro provoz
37
Konzola pro přehrávání hudby
1. Přehrávání/pauza: Pomocí tlačítka OK můžete přepínat mezi stavem přehrávání a
pauzy.
2. FR: Pomocí tlačítka ◄ zvolte funkci rychlého převíjení vzad.
3. FF: Pomocí tlačítka ► zvolte funkci rychlého posunu vpřed.
Če
4. Předchozí: Pomocí tlačítka ▲ zvolte předchozí soubor ve stejném adresáři.
sky
5. Další: Pomocí tlačítka ▲ zvolte další soubor ve stejném adresáři.
6. ZPĚT: Pomocí tlačítka BACK (zpět) se vrátíte na předchozí obrazovku.
7. Nastavení: Pro přístup k nabídce pro přehrávání použijte, nebo stiskněte MENU.
1). Režim opakování: Uživatel si může vybrat možnost „Jeden, Žádný, Vše“.
2). Zvuk: Pomocí tlačítka OK vstupte do submenu.
a. Režim zvuku: Můžete si vybrat takový režim zvuku, který odpovídá vašim
preferencím.
b. Výšky/Basy: Jednotlivé položky mohou být nastaveny tehdy, když je režim
zvuku v pozici Uživatel.
c. Vyváženost: Pomocí této funkce můžete nastavit vyvážení zvuku reproduktorů
na preferovanou úroveň.
d. SRS:
Konzola pro přehrávání fotografií
1. Přehrávání/pauza: Přepínání mezi stavem přehrávání a pauzou.
2. Stop: Zastavení přehrávání:
3. Zoom in: Zvětšení obrazu.
4. Zoom out: Zmenšení obrazu.
5. Předchozí: Přehrávání předchozího souboru ve stejném adresáři.
6. Další: Přehrávání následujícího souboru ve stejném adresáři.
7. Otáčení doleva: Otočení doleva o 90 stupňů.
8. Otáčení doprava: Otočení doprava o 90 stupňů.
9. Info: Informace k obrazu.
10. Nastavení: Pro přístup k nabídce pro přehrávání fotografií použijte tuto funkci, nebo
stiskněte MENU.
1). Režim opakování: Uživatel si může vybrat možnost „Jeden, Žádný, Vše“.
2). Úspora energie: Přepnutí na funkci Úspora energie. Nastavení můžete provádět
3). Rychlost: Uživatel si může vybrat možnost „Pomalý, Normální, Rychlý“.
4). Efekt: Uživatel si mlže vybrat možnost „Náhodná nebo Vypnuto“.
5). Režim obrazu: Můžete si zvolit typ obrazu, který nejlépe odpovídá vašim
6). Čítač: Uživatel si může vybrat režim „Přizpůsobení nebo Celá obrazovka“
7). BGM: Přepnutí na funkci Background Music (hudba v pozadí).
Přepnutí na funkci SRS.
tehdy, když je režim obrazu v pozici Home.
požadavkům na zobrazení.
Page 93

Nabídka pro provoz
38
Konzola pro přehrávání videa
1. Přehrávání/pauza: Přepínání mezi stavem přehrávání a pauzou.
2. Stop: Zastavení přehrávání:
3. FB: Rychlé převíjení vzad.
4. FF: Rychlý posun vpřed.
5. Přejít na: Zvolte nastavený čas pro přehrávání videa.
. Předchozí: Přehrávání předchozího souboru ve stejném adresáři.
6
7. Další: Přehrávání následujícího souboru ve stejném adresáři.
8. Info: Informace k obrazu.
9. Nastavení: Pro přístup k nabídce pro nastavení přehrávání videa použijte tuto funkci,
nebo stiskněte MENU.
1). Režim opakování: Uživatel si může vybrat možnost „Jedna, Žádná, Všechny“.
2). Titulky: Pokud video obsahuje titulky, může si uživatel zvolit tuto funkci.
3). Zvuková stopa: Pokud soubor s videem obsahuje několik zvukových stop, může
uživatel tyto stopy různě střídat.
4). Obraz: Pomocí tlačítka OK se dostanete do sub-nabídky (submenu).
a. Režim obrazu: Můžete si zvolit typ obrazu, který nejlépe odpovídá vašim
požadavkům na zobrazení.
b. Uživatel: Kontrast, světlost, saturace, ostrost a podsvícení mohou být
nastaveny pomocí této funkce.
c. Teplota barvy: Zvolte teplotu barvy obrazu.
d. Kompenzace pohybu: Zvolte pozici funkce Kompenzace obrazu: Vypnuto,
Nízká, Střední a Vysoká. Pomocí této funkce se odstraňuje rozmazání a
chvění v rychle se pohybujících obrazech.
e. Úspora energie: Přepnutí na funkci Úspora energie. Nastavení můžete
provádět tehdy, když je režim obrazu v pozici Home.
f. Čítač: Uživatel si může zvolit režim: „Celá obrazovka, Původ nebo Upravený
obraz“.
g. NR: Tato funkce snižuje hluk obrazovky bez narušení kvality videa.
h.
Dynamický kontrast: Nastavte kontrast na optimální úroveň, podle světlosti
obrazu.
i. Funkce OverScan: Hodnota reprodukce obrazu je nastavena.
5). Zvuk: Pomocí tlačítka OK se dostanete do sub-nabídky (submenu).
a.
Režim zvuku: Můžete si vybrat takový režim zvuku, který odpovídá vašim
preferencím.
b. Výšky/Basy: Jednotlivé položky mohou být nastaveny tehdy, když je režim
zvuku v pozici Uživatel.
c. Vyváženost: Pomocí této funkce můžete nastavit vyvážení zvuku reproduktorů
na preferovanou úroveň.
d. SRS:
Přepnutí na funkci SRS.
Če
sk
y
Page 94

Nabídka pro provoz
39
– Free Share
Tento televizor může zobrazovat a přehrávat mnoho typů videozáznamů, fotografií a
hudebních souborů ze serveru Free Share. Byl certifikován jako Free Share pro filmy,
fotografie a hudbu. Free Share je organizace působící v několika odvětvích, která se
vztahuje ke spotřební elektronice, výpočetní technice a společnostem vyrábějícím
Če
mobilní zařízení. Systém Digital Living umožňuje uživatelům snadné sdílení
sky
digitálních médií prostřednictvím kabelových nebo bezdrátových sítí domácnostech.
Logo certifikace Free Share usnadňuje vyhledávání produktů, které jsou kompatibilní se
systémem Free Share Interoperability Guidelines (operační průvodce systému Free
Share). Toto zařízení je plně kompatibilní se systémem Free Share Interoperability
Guidelines v1.5. Pokud je PC, které používá software serveru Free Share nebo jiné
kompatibilní zařízení Free Share, připojeno k tomuto televizoru, mohou se některá
nastavení softwaru měnit nebo mohou být požadována další zařízení. Prostudujte si
prosím Provozní pokyny k tomuto softwaru nebo zařízení. V nich naleznete podrobnější
informace.
Televizor s vestavěným
TV
PC nebo další mediální servery
TV
LAN port na TV
LAN kabel
Bezdrátové
zařízení IP
Externí modem
(ADSL/VDSL/kabelová TV)
V závislosti na verzi Windows se mohou aktuální obrazovky na PC lišit. V tomto
případě bude téměř vždy aplikována stejná základní informace pro nastavení.
Používání aplikace Windows Media Player 11 pro systém Windows XP
– Povolení funkce Universal Plug and Play (UPnP)
1. Klikněte na Start, klikněte na volbu Spustit, napište appwiz.cpl a potom
klikněte na tlačítko OK.
2. Klepněte na volbu Přidat nebo odebrat součásti systému Windows.
3. V okně Součásti klikněte na položku Síťové služby a potom klikněte na volbu
Podrobnosti.
4. Kliknutím zaškrtněte políčko Uživatelské rozhraní UPnP v okně Síťové služby
vyberte Dílčí součásti (pokud nejsou zaškrtnuty) a poté klikněte na tlačítko OK.
Page 95

Nabídka pro provoz
40
– Přidání položek do knihovny programu Windows Media Player
1. Klikněte na šipku pod kartou Knihovna a potom klikněte na položku Přidat do
knihovny, jak je znázorněno na následujícím obrázku.
2. V dialogovém okně Přidat do knihovny klikněte na jednu z následujících
možností, jak je znázorněno na následujícím obrázku.
Če
sk
y
Osobní složky. Použijte tuto volbu pro vyhledávání digitálních mediálních
souborů, které jsou uloženy v osobních složkách Hudba, Obrázky a Videa, ke
kterým má přístup každý, kdo používá počítač.
Osobní složky jsou obvykle umístěny na C:\Documents and
Settings\jménouživatele\Dokumenty, zatímco veřejné složky se obvykle nachází
na C:\Documents and Settings\Uživatelé\Dokumenty.
Kdykoli je soubor přidán nebo odstraněn z některé z těchto složek, vaše
knihovna je automaticky aktualizována prostřednictvím procesu nazývaného
monitorování složek.
Mé složky a složky jiných uživatelů, k nimž mám přístup. Pomocí této volby
můžete monitorovat soubory digitálních médií, které jsou uloženy v osobních
složkách Hudba, Obrázky a Videa, a soubory uložené ve veřejných složkách
Hudba, Obrázky a Videa, jakož i soubory uložené v osobních složkách Hudba,
Obrázky a Videa, které patří jiným uživatelům počítače.
Všimněte si, že můžete sledovat pouze soubory uložené v osobní složce jiného
uživatele, pokud se tato osoba rozhodla složku s vámi sdílet. Informace o
sdílení složky na vašem počítači s jinou osobou naleznete v nápovědě k
systému Windows a podpoře.
Page 96

Nabídka pro provoz
41
3. (Volitelné) Klikněte na volbu Upřesnit možnosti a potom vyberte některou z
následujících voleb, jak je znázorněno na následujícím obrázku.
Če
sky
Chcete-li monitorovat další složky, klikněte na tlačítko Přidat a potom specifikujte
umístění složky.
Chcete-li zastavit monitorování složky, která byla dříve přidána, klikněte na
složku, kterou chcete ze seznamu odebrat, a pak klikněte na volbu Odstranit.
Chcete-li zastavit monitorování složky, která byla automaticky přidána, klikněte
na složku a potom klikněte na volbu Ignorovat.
Má-li přehrávač přidat, nebo nepřidat soubory dříve odstraněné z knihovny,
zaškrtněte nebo zrušte zaškrtnutí políčka Přidat soubory dříve odstraněné
z knihovny.
Chcete-li zabránit, aby do knihovny byly přidávány soubory, které jsou menší
než určitá velikost, zadejte v okně Zvukové soubory a Video soubory
omezení velikosti souboru.
– Zapnutí sdílení médií
Pokud sdílení médií ještě není zapnuté, musíte ho zapnout.
1. Klikněte na šipku pod kartou Knihovna a potom klikněte na volbu Sdílení
médií.
2. V dialogovém okně Sdílení médií zaškrtněte políčko Sdílet médium.
Page 97

Nabídka pro provoz
42
– Volba zařízení pro sdílení média
Po zapnutí sdílení médií, musíte vybrat zařízení, které musí mít přístup k vaší
knihovně přehrávače.
1. V seznamu zařízení pod políčkem Sdílet média vyberte zařízení.
2. Proveďte jednu z těchto akcí:
Pokud chcete sdílet svá média s počítačem nebo zařízením, které jste vybrali,
klikněte na tlačítko Povolit.
Pokud nechcete sdílet svá média s počítačem nebo zařízením, které jste vybrali,
klikněte na tlačítko Odepřít.
Informace o tom, jak přizpůsobit média sdílená s přístrojem, naleznete
v nápovědě k programu Windows Media Player - v části „Změna nastavení pro
sdílení médií“.
Všimněte si, že můžete také povolit nebo zakázat zařízení kliknutím na
oznámení, které se objeví, když přehrávač detekuje nové zařízení v síti.
Používání aplikace Windows Media Player 12 pro systém Windows 7
– Nastavení umístění v síti
1. Klepněte na tlačítko Start a poté na Ovládací panely.
2. Klikněte na volbu Domácí síť. V okně Nastavit umístění v síti klikněte na volbu
Domácí síť
.
Če
sk
y
3. Klepněte na volbu Zobrazit nebo změnit nastavení domácí skupiny.
4. Klikněte na volbu Vysílat datový proud obrázků, hudby a videí do všech
zařízení v domácí síti a potom klikněte na položku Uložit změny.
Page 98
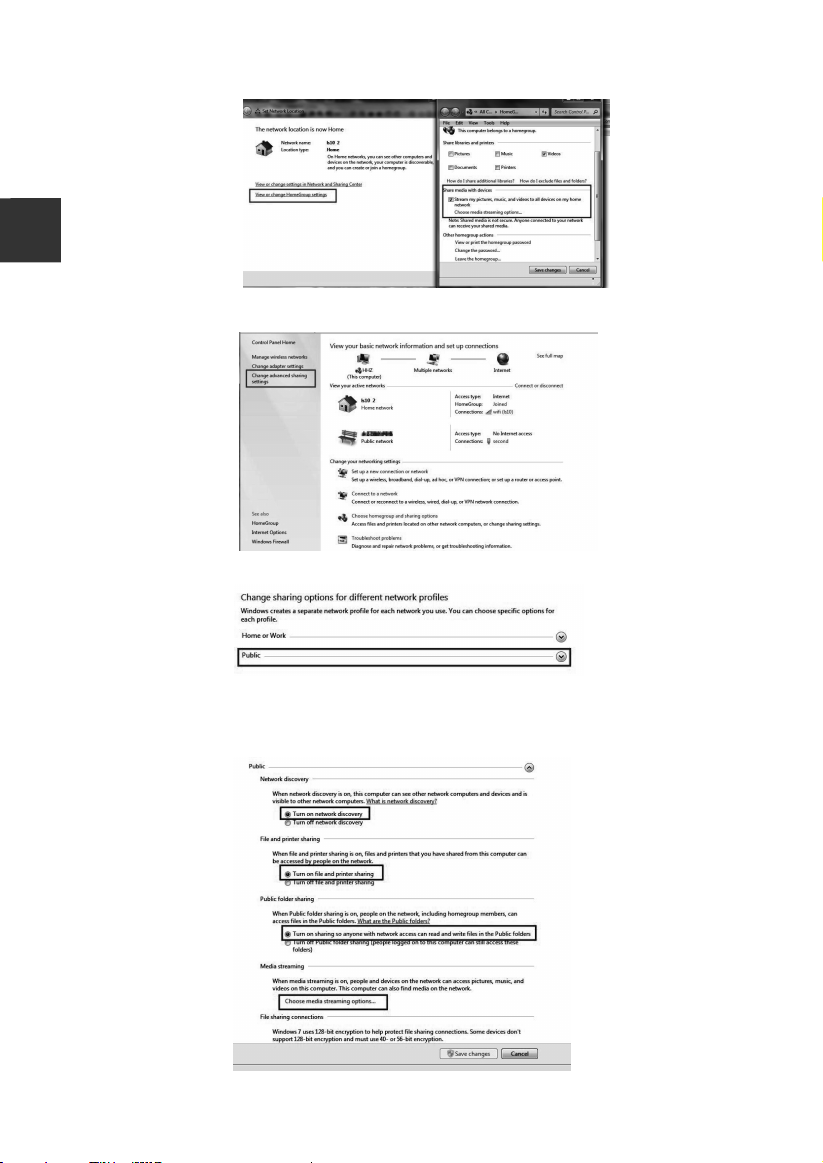
Nabídka pro provoz
43
Če
sky
5. Klikněte na položku Změnit pokročilé nastavení sdílení.
6. Klikněte na položku Veřejné.
7. Klepněte na volbu Zapnout zjišťování sítě, Zapnout sdílení souborů a
tiskáren a Zapnout sdílení, aby každý uživatel s přístupem k síti mohl číst
soubory ve veřejných složkách a zapisovat do nich.
Page 99

Nabídka pro provoz
44
8. Klikněte na položku Zvolit možnosti vysílání datového proudu médií...
9. Klikněte na volbu Povolit vše.
– Přidání položek do knihovny programu Windows Media Player
1. Klikněte na tlačítko Start, vyberte Všechny programy a potom klikněte na
položku Windows Media Player.
Pokud je již přehrávač otevřený a jste v režimu Přehrávání, klikněte na tlačítko
Přepnout do knihovny
2. V knihovně přehrávače, klikněte na položku Uspořádat .
3. Klikněte na položku Spravovat knihovny a potom klikněte na jednu z
následujících možností:
Hudební. Kliknutím na tuto možnost otevřete dialogové okno Umístění
knihovny hudby.
Videa Kliknutím na tuto možnost otevřete dialogové okno Umístění knihovny
videí.
Obrázky. Kliknutím na tuto možnost otevřete dialogové okno Umístění
knihovny obrázků.
Nahrané televizní pořady. Kliknutím na tuto možnost otevřete dialogové okno
Nahrané televizní pořady.
4. Klikněte na tlačítko Přidat.
5. V seznamu vyhledejte složku, klikněte na položku Zahrnout složku a potom
klikněte na tlačítko OK.
– Nastavení přehrávače Windows Media Player
Požadovaná verze přehrávače Windows Media Player:
Windows Media Player v. 9 nebo vyšší
Možnosti sdílení přehrávačem Windows Media Player:
• Podporované formáty videa: MPEG -1 / MPEG-2 / MPEG-4, TS.
• Podporované formáty fotografií: JPEG, PNG.
• Podporované hudební formáty: MP3, AAC.
Požadavky na síť a firewall
Pokud chcete sdílet počítač s dalšími multimediálními přístroji, musíte otevřít více
portů brány firewall. Pokud používáte bránu firewall systému Windows, porty pro
v pravém horním rohu okna přehrávače.
Če
sk
y
Page 100
Nabídka pro provoz
45
požadované protokoly TCP a UDP budou při sdílení automaticky otevřeny. Pokud
používáte firewall s jiným softwarem nebo hardwarem, budete pravděpodobně
muset otevřít tyto porty ručně.
Počítač nebo jiné mediální servery Free Share musí mít otevřené porty brány firewall,
jak je uvedeno níže:
Če
sky
POZNÁMKA:
• Pokud nelze vyhledat sdílené zařízení, zkontrolujte, zda služba UPnP není
firewallem blokována.
Přehrávání sdíleného obsahu
Spusťte server na vašem počítači nebo jiném zařízení, které je připojené k vaší
1.
domácí síti.
2. Na dálkovém ovladači stiskněte tlačítko HOME/SOURCE
3. Stisknutím tlačítka ▲/▼/◄/► vyberte položku Free Share a stiskněte tlačítko
OK.
4. Pomocí navigačních tlačítek vyberte počítač nebo jiné zařízení a stiskněte tlačítko
OK.
5. Pomocí navigačních tlačítek vyberte požadovanou složku a pak stiskněte tlačítko
OK.
6. Pomocí navigačních tlačítek vyberte požadované soubory a pak stisknutím
tlačítka OK provedete označení. Přehrávání zahájíte stisknutím tlačítka
POZNÁMKA:
• Televizor nemusí správně přehrávat soubory vytvořené určitými kodéry.
• Televizor nemusí plynule přehrávat video soubory s rozlišením vyšším, než je
podporované rozlišení pro každý snímek.
• Televizor podporuje kodek H.264/AVC až do úrovně profilu 4.1.
• Pokud přehráváte video soubor přes USB rozhraní, které nepodporuje vysokou
rychlost, video přehrávač nemusí fungovat správně.
• Názvy souborů s videonahrávkami, které obsahují speciální znaky, nemusí být
správně přehrávány.
• V závislosti na širokopásmové rychlosti může být přehrávání videí pozastaveno,
zastaveno nebo může nastat ukládání do vyrovnávací paměti.
• Chcete-li přehrát soubor v serveru médií, televizor a server médií musí být
připojeny ke stejnému přístupovému bodu. Doporučujeme umístit televizor i
počítač do stejné podsítě. První 3 části adresy sítě televizoru a IP adresy počítače
by měly být stejné a pouze poslední část (adresa hostitele) by měla být odlišná.
(např. IP adresa: 123.456.789.**)
Port Protokol Oblast působnosti
1900 UDP omezeno na místní podsíť
2869 TCP omezeno na místní podsíť
10243 TCP omezeno na místní podsíť
10280-10284 UDP omezeno na místní podsíť
.
.
 Loading...