

Page 1

Operation Manual
Model: LED32D2200DS
CHANGHONG EUROPE ELECTRIC S.R.O
Argentinská 286/38, 170 00 Praha 7, Czech Republic
Tel: 0042 (0) 24 2408849
Fax: 0042 (0 ) 220951190
Service E- ma il: info@ch anghongeuro pe.cz
Web s ite: www.cha nghongeurop e.com
.
32
TV
EN
C
Z
DE
)
(
SK
( )
H
C
AT/
FR
T
I
Page 2

Page 3

Contents
Warning……………………………………………………………………..…..……… 1
Safety instructions……………………………………………………....…………… 3
Main Unit Control …………………………...…………..………..……..…………… 5
Front Panel ……….......................………………………………………….……... 5
Rear & Sides Panel …………........................................……………..………… 6
Getting Started…………………………...………………………..……..…………… 7
Using the remote control…………………………………………………….……... 7
Installing Batteries in the Remote Control……………………………..………… 7
Battery replacement……………………………..……………………….………… 7
Connection and Setup…………………...…………………………………………... 8
Cable Installation……………………………………………………………………. 8
Remote Control…………………………..…………………………………………… 9
Basic Operation……………………………………………………………………...11
Turning on and off the TV…………………………………………………………..11
Programme Selection…………….……………………………………………......11
Volume adjustment……………………………………………………………….....11
Changing the Input Source…..…………………………………………………....11
Menu Operation………………………………………………………………………. 12
QUICK START GUIDE……………….………………………………………….…. 12
How to Navigate Menus………………………………………………………….... 12
Configuring the Picture Menu……..……………………………………………….1 3
Configuring the Sound Menu…………..……………………………………..…… 14
Configuring the Channel Menu……………………………………………...……..15
Configuring the Time Menu ………...……………………………………………....1 7
Configuring the Setup Menu……..…………………………………………..….… 18
Using USB mode………………………………………….………………….….… 22
Important Unique Buttons................................................................................. 25
EPG Weekly Mode ………....………………………….………………………..…25
Channel List……………………………………………………………………….… 25
Favorit List……..…………………………………………………………….....…… 25
Teletext…………………………………………………………………………...….....26
Using the teletext feature…………………........................................................ 26
Troubleshooting Guide……………………………………………………...…....... 27
Troubleshooting…………….………………………………………………...…..... 27
Maintenance…………………………………………………………………...........28
E
nglish
Page 4
Warning
1
E
ngli
sh
WARNING:
TO REDUCE THE RISK OF ELECTRIC SHOCK DO NOT REMOVE
COVER (OR BACK). NO USER SERVICEABLE PARTS INSIDE.
REFER TO QUALIFIED SERVICE PERSONNEL.
The lightning flash with arrowhead symbol, within an equilateral
triangle, is intended to alert the user to the presence of uninsulated
"dangerous voltage" within the products enclosure that may be of
sufficient magnitude to constitute a risk of electric shock to persons.
The exclamation point within an equilateral triangle is intended to alert
the user to the presence of important operating and maintenance
(servicing) instructions in the literature accompanying the appliance.
CAUTION
RISK OF ELECTRIC SHOCK
DO NOT OPEN
REGULATORY INFORMATION
This equipment generates uses and can radiate radio frequency energy and, if not
installed and used in accordance with the instructions, may cause harmful
interference to radio communication. However, there is no guarantee that
interference will not occur in a particular installation. If this equipment does cause
harmful interference to radio or television reception, which can be determined by
turning the equipment off and on, the user is encouraged to try to correct the
interference by one or more of the following measures:
-Relocate the receiving antenna.
-Increase the separation between the equipment and receiver.
-Connect the equipment into an outlet on a circuit different from that to which the
receiver is connected.
-Consult the dealer or experienced radio/TV technician for help.
Any changes or modifications not expressly approved by the party responsible
for compliance could void the user's authority to operate the equipment.
CAUTION
DO not attempt to modify this product in any way without written authorization
from supplier. Unauthorized modification could void the user's authority to operate
this product.
It is not recommended to keep a certain still image displayed on the screen for a
long time as well as displaying extremely bright images on screen.
Figures and illustrations in this User Manual are provided for reference only
and may differ from actual product appearance. Product design and
specifications may be changed without notice.
Page 5

Warning
2
WARNING
To Reduce The Risk Of Fire Or Electric Shock, Do Not Expose This Apparatus To
Rain Or Moisture.
The ventilation should not be impeded by covering the ventilation openings with
items, such as newspapers, table-cloths, curtains, etc.
The Apparatus shall not be exposed to dripping or splashing and that no objects
filled with liquids, such as vases, shall be placed on the apparatus.
Attention should be drawn to the environmental aspects of battery disposal. Don’t
throw used batteries in dustbin. Please contact your retailer in order to protect the
environment.
When you install your TV, maintain a distance of at least 4 inches between the TV
and other objects (walls, cabinet sides, etc.) to ensure proper ventilation. Failing to
maintain proper ventilation may result in a fire or a problem with the product
caused by an increase in its internal temperature.
No naked flame sources, such as lighted candles, should be placed on the
apparatus.
To prevent the spread of fire, keep candles or other open flames away from this
product at all times.
The device may be malfunction when under electrostatic discharge. It can be
manually resumed by power off and power on again.
CAUTION connecting the Power Cord
Most appliances recommend they be placed upon a dedicated circuit; that is, a
single outlet circuit which powers only that appliance and has no additional outlets
or branch circuits.
Do not overload wall outlets. Overloaded wall outlets, loose or damaged wall
outlets, extension cords, frayed power cords, or damaged or cracked wire
insulation are dangerous. Any of these conditions could result in electric shock or
fire. Periodically examine the cord of your appliance, and if its appearance
indicates damage or deterioration, unplug it, discontinue use of the appliance, and
have the cord replaced with an exact replacement part by an authorized servicer.
Protect the power cord from physical or mechanical abuse, such as being twisted,
kinked, pinched, closed in a door, or walked upon. Pay particular attention to
plugs, wall outlets, and the point where the cord exits the appliance.
The MAINS plug is used as the disconnect device, and the disconnect device shall
remain readily operable.
Operating Temperature: 5°C to 35°C Operating Humidity: ≤80%
Storage Temperature: -15°C to 45°C Storage Humidity: ≤90%
This equipment is a Class Ⅱ or double insulated electrical appliance. It has
been designed in such a way that it does not require a safety connection to
electrical earth.
Manufactured under license from Dolby Laboratories.
Dolby and the double-D symbol are trademarks of Dolby Laboratories.
E
nglish
Page 6
Safety instructions
3
E
ngli
IMPORTANT SAFETY INSTRUCTIONS
sh
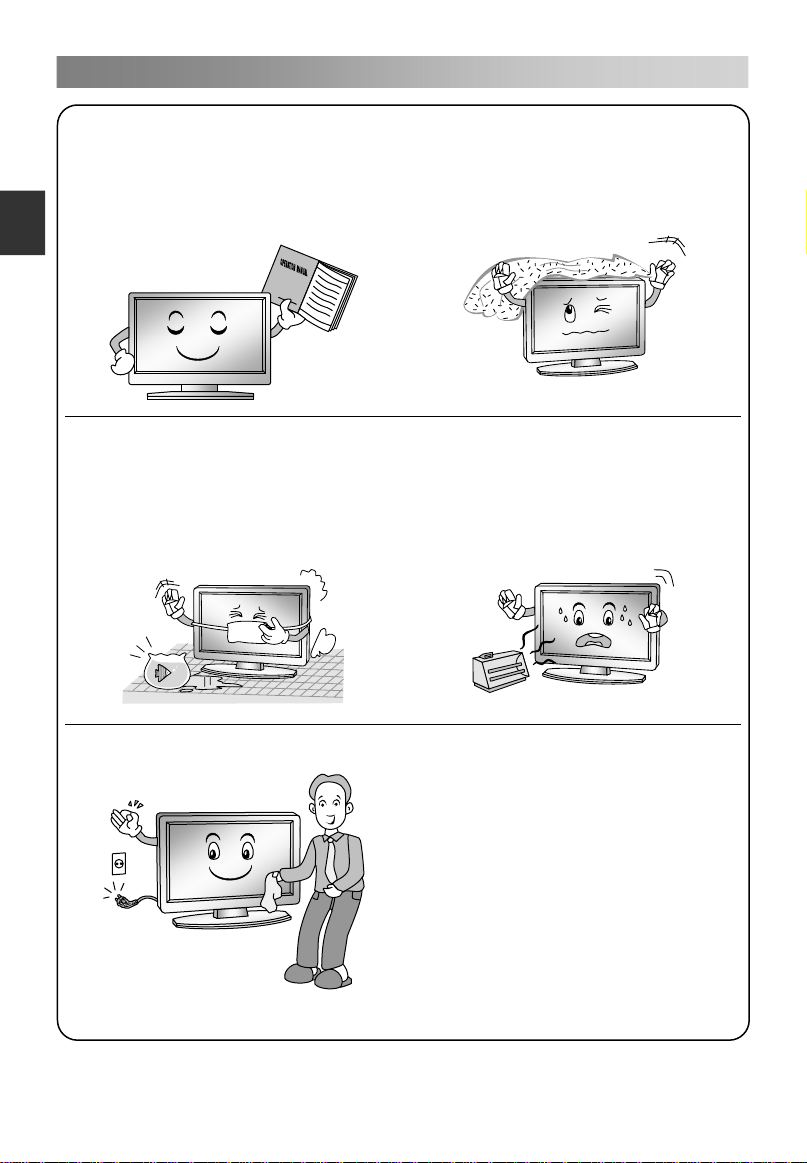
1. Read these instructions.
2. Keep these instructions.
3. Heed all warnings.
4. Follow all instructions.
7. Do not block any of the ventilation
openings. Install in accordance with
the manufacturer's instructions.
5. Do not use this apparatus near water.
6. Clean only with a dry cloth.
8. Do not install near any heat source
such as radiators, heat registers,
stoves, or other apparatus (including
amplifiers) that produce heat.
9. Do not defeat the safety purpose of
the polarized or grounding type plug.
A polarized plug has two blades with
one wider than other. A grounding
type plug has two blades and a third
grounding prong. The wide blade or
the third prong is provided for your
safety. When the provided plug does
not fit into your outlet, consult an
electrician for replacement of the
obsolete outlet.
Page 7
Safety instructions
4
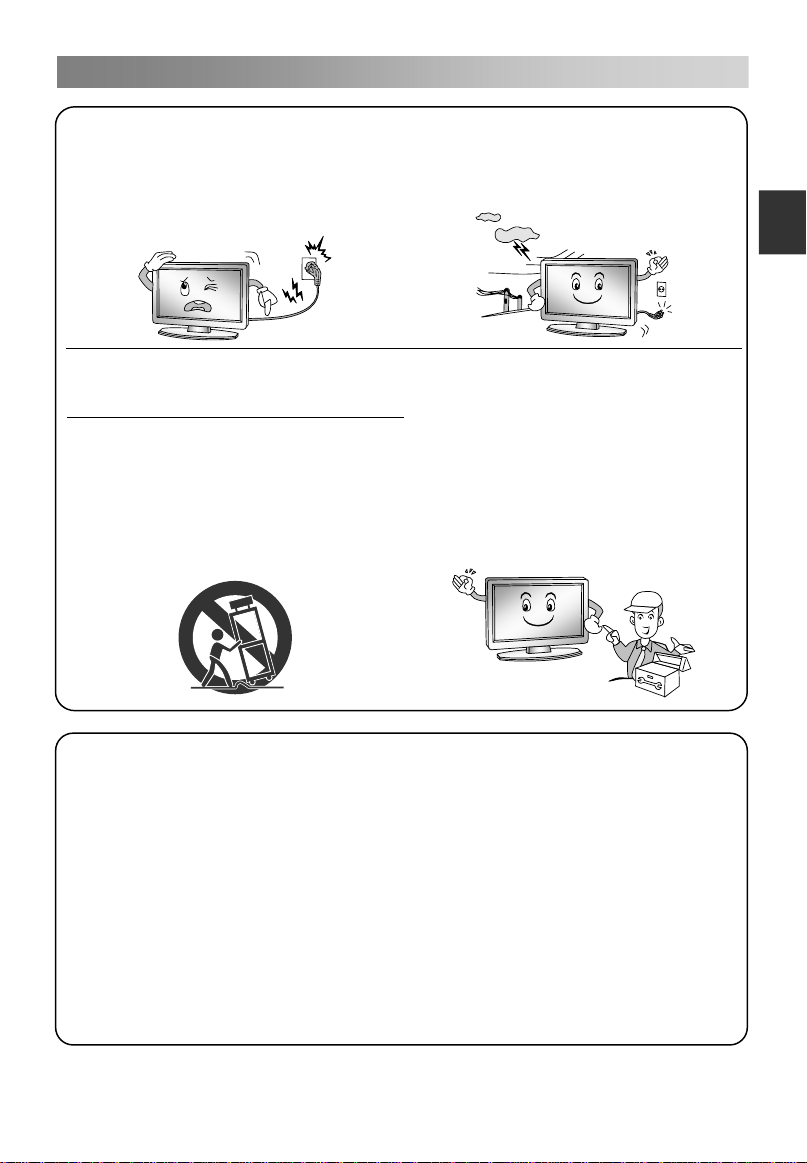
10. Protect the power cord from being
walked on or pinched particularly at
plugs, convenience receptacles,
and the point where they exit from
the apparatus.
13. Unplug this apparatus during
lightning storms or when unused for
long periods of time.
E
nglish
11. Only use the attachments/
accessories specified by the
manufacturer.
12. Use only with a cart, stand, tripod,
bracket, or table specified by the
manufacturer, or sold with the
apparatus. When a cart is used, use
caution when moving the cart/
apparatus combination to avoid
injury from tip-over.
ON DISPOSAL
-Do not dispose of this product with general household waste.
-Disposal of this product must be carried out in accordance to the regulations of
your local authority.
NOTE
-If the TV feels cold to the touch, there may be a small "flicker" when it is turned
on. This is normal; there is nothing wrong with TV.
-Some minute dot defects may be visible on the screen, appearing as tiny red,
green, or blue spots. However there has no adverse effect on the monitor's
performance.
-Avoid touching the screen or holding your finger(s) against it for long periods of
time. Doing so may produce some temporary distortion effect on the screen.
14. Refer all servicing to qualified
service personnel. Servicing is
required when the apparatus has
been damaged in any way, such as
power supply cord or plug is
damaged, liquid has been spilled or
objects have fallen into the
apparatus, the apparatus has been
exposed to rain or moisture, does not
operate normally, or has been
dropped.
Page 8

Main Unit Control
5
E
ngli
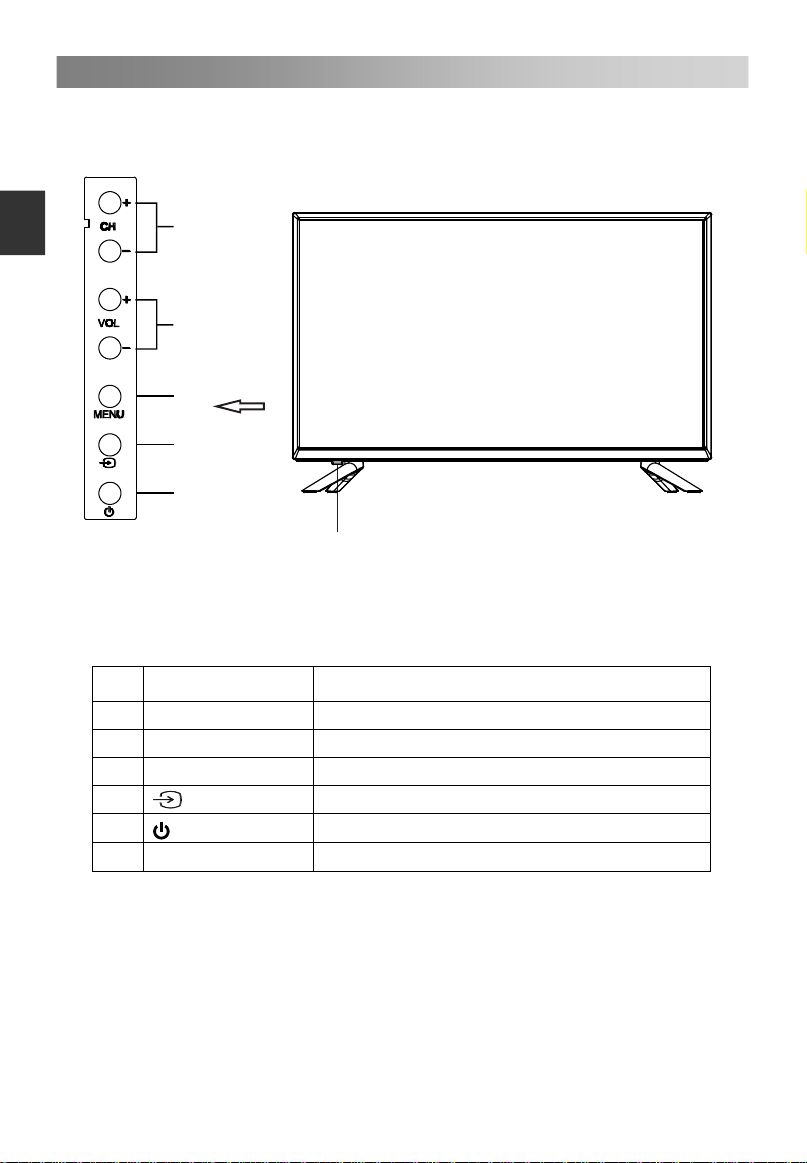
Front Panel
sh
1
2
3
4
5
6
Name Description
No.
1 CH+/CH- Changes the channels.
2 VOL+/VOL- Adjust the volume.
3 MENU Open the menu.
4
5
6
Power & Sensor
To switch among the signal source.
Turns the unit on and off.
Power Indicator and Infrared sensor.
Page 9
Main Unit Control
6
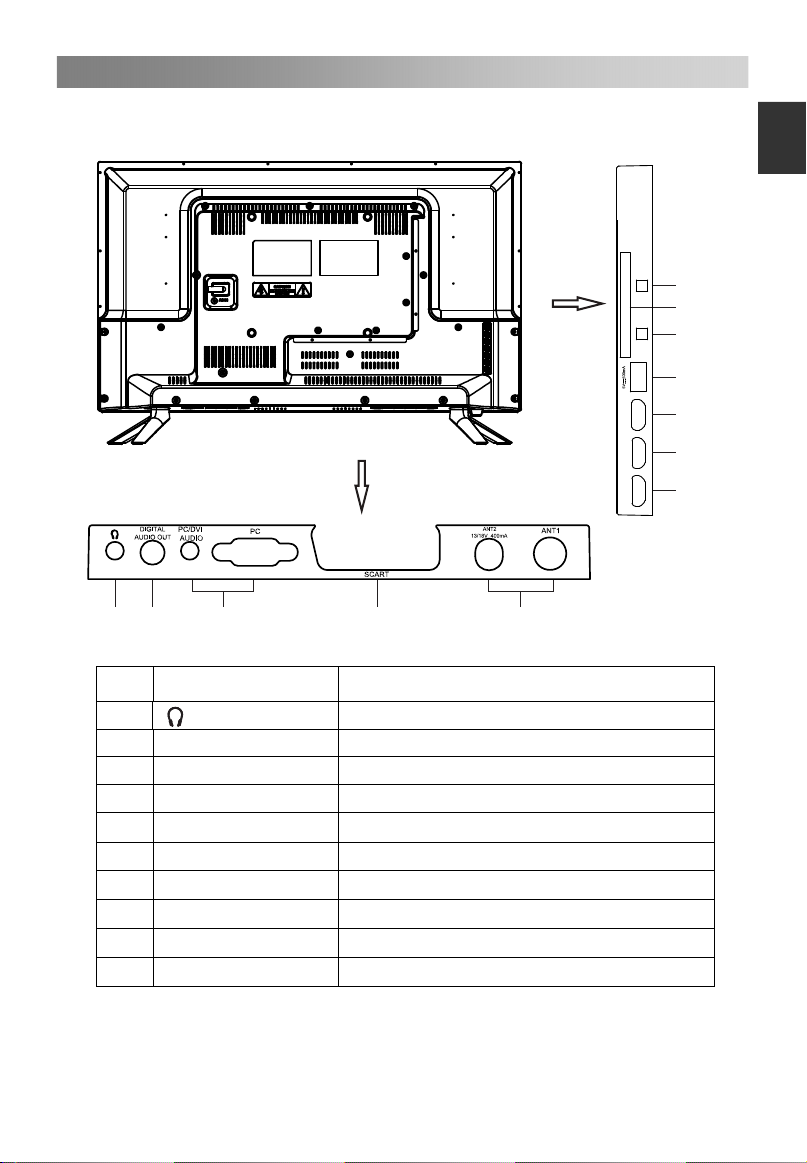
Rear & Sides Panel
COMMON INTERFACE
YPbPr AV
USB
HDMI1
HDMI2
HDMI3
E
nglish
15
16
14
13
12
12
12
8
7
No.
Name Description
7
8
9
10
11
12
13
14
15
16
9
DIGITAL AUDIO OUT
PC AUDIO/PC
Scart
ANT1/2
HDMI1/2/3
USB
YPbPr YPbPr input.
AV AV audio/video signal input.
COMMON INTERFACE
10
11
Ear phone output.
Digital audio output.
PC input.
Scart input/output.
Antenna input.
HDMI input;
Connector for USB Play.
Insert CI card.
Page 10
Getting Started
7
E
ngli
Using the remote control
When using the remote control, aim it at remote sensor on the television. If there is an
sh
object between the remote control and the remote sensor on the unit, the unit may not
operate.
Point the remote control at the REMOTE SENSOR located on the television.
When using this television in a very brightly lit area, the infrared REMOTE CONTROL
SENSOR may not work properly.
The recommended effective distance for using the remote control is about 7 meters.
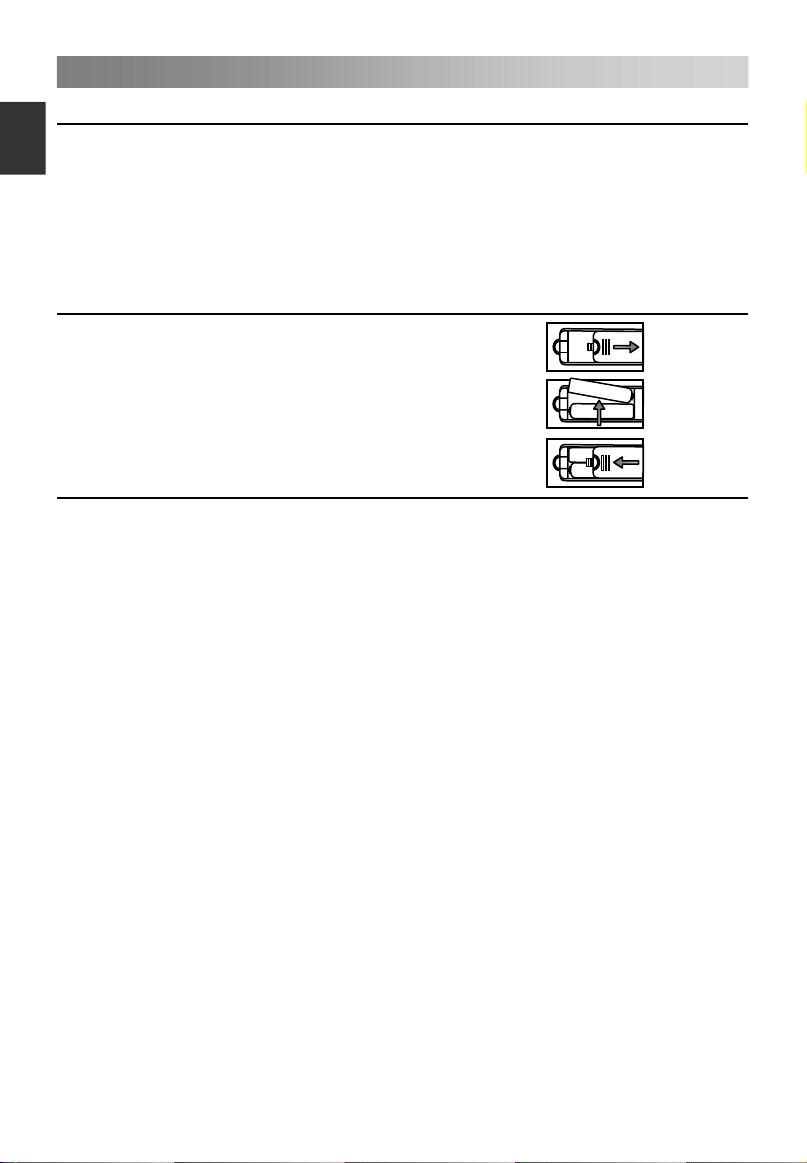
Installing Batteries in the Remote Control
1. Open the cover at the back of the remote control.
2. Install two AAA size batteries. Make sure to match
the “+” and “-” ends of the batteries with the
diagram inside the compartment.
3. Replace the cover.
Battery replacement
You will need to install the batteries into the remote control to make it operate following
the instruction below.
When the batteries become weak, the operating distance of the remote control will be
greatly reduced and you will need to replace the batteries.
Notes on Using Batteries:
The use of the wrong type of batteries may cause chemical leakage and/or explosion.
Please note the following:
Always ensure that the batteries are inserted with the + and - terminals in the correct
direction as shown in the battery compartment.
Different types of batteries have different characteristics. Do not mix different types.
Do not mix old and new batteries. Mixing old and new batteries will shorten battery
life and/or cause chemical leakage.
Replace batteries as soon as they do not work.
Chemicals which leak from batteries may cause skin irritation. If any chemical matter
seeps out of the batteries, wipe it up immediately with a dry cloth.
The batteries may have a shorter life expectancy due to storage conditions. Remove
the batteries whenever you anticipate that the remote control will not be used for an
extended period.
The batteries (battery pack or batteries installed) shall not be exposed to excessive
heat such as sunshine, fire or the like.
CAUTION:
It may result in an explosion if batteries are replaced incorrectly.
Only replace batteries with the same or equivalent type.
Page 11

Connection and Setup
8
Cable Installation
Please read the relevant content in “Warning and Safety instructions” carefully before
the
installation and use.
1. Take out the TV from the package and put it in a drafty and flat place.
NOTE:
When you plug or unplug the TV, computer or other equipment, you must make
sure
that the power cable has been already shut down;
When unplugging the power cable or
(the insulated part), do not draw the body of the cable.
2. The RF output terminal can be connected with the RF input port of the TV.
3. The output AV terminal of DVD can be connected with the AV input port of the TV
through
NOTE:
Component and AV can not be used at same time for they share of one audio
channel.
4. The output COMPONENT (YPbPr) terminal of DVD can be connected with the
COMPONENT (YPbPr) input port of the TV through AV cable.
5. Connect one end of the VGA cable with the VGA port on computer, connect the other
end
the
NOTE:
While connecting the 15-pin VGA, please do not insert the plug overexerted, for
fear
6. Connect one end of the HDMI cable with HDMI output port; connect the other end of
the
NOTE:
While connecting the HDMI, please aim at carefully, do not insert overexerted, for
fear
7. Connect SCART socket input or output from an external device to these jacks.
8. Sending the TV's audio signal to external audio equipment via the Digital Audio
Output port.
9. Check and make sure that all AV cables are connected with the corresponding ports
correctly.
10. Connect the power cable with 100-240V~ power supply.
NOTE:
The range of power input for the TV is 100-240V~ 50/60Hz; do not connect the TV
power input port with the power cable out of the above range.
Please hold the insulated part of the plug when you are unplugging the power cable,
do
AV cable.
If COMPONENT (YPbPr) and AV works as mini terminal, and shared same audio,
please choose to use a one-to-three audio&video cable.
of the VGA cable with the VGA port on the TV, and tighten the bolts clockwise on
each end of VGA cable.
the pin might be broken.
HDMI cable with the HDMI port on the TV.
the pin might be broken.
not touch directly the metallic part of the cable.
signal cable, please hold the plug
E
nglish
Page 12

Remote Control
9
E
ngli
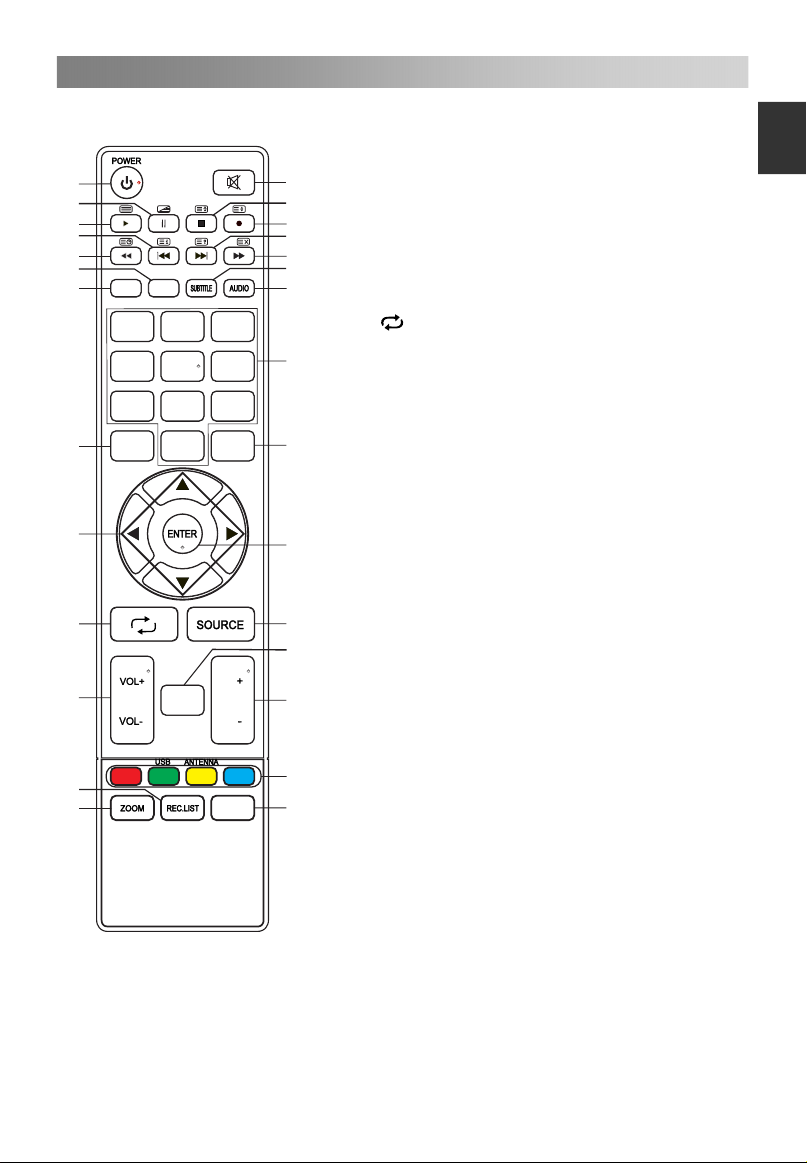
The buttons of the original remote control are as following:
sh
1
3
5
7
9
11
INFO EPG
13
1 2
4
3
5
6
7 8 9
MENU
16
18
20
22
26
27
LIST
EXIT
0
CH
CH
SAT.LIST
FAV
1.
: Power, switch on or off TV set.
2.
2
4
6
8
10
12
14
: Press to mute or restore sound.
3. II: Pause (in USB/PVR mode). Press
to enter the Time shift menu.
: MIX the teletext and signal in
teletext page.
4. : Stop (in USB/PVR mode).
: Hold the teletext page on display,
press again to release.
5. : Play (in USB/PVR mode).
15
: Enter the Teletext, press again
for MIX mode, and press this button
again to exit.
17
(in DTV mode).
: Press button to start recording
6.
: Change size of teletext screen in
display mode.
7. : Previous (in USB mode).
i
19
: Go to the index page.
8.
: Next (in USB mode).
?
: Reveal the hidden information of
some teletext pages.
9. : Fast reverse (in USB/PVR mode).
21
23
: Enter subtitle mode or subpage.
10.
: Fast forward (in USB/PVR mode).
: Cancel the teletext but not to exit
24
teletext, press again to exit.
11. EPG: Electronic Programme Guide,
use in the DTV mode.
12. SUBTITLE: Select the subtitle
25
28
language of available.
13. INFO: Press to display the current
program information on the screen.
14. AUDIO: The button can be used to
switch between DUAL I/ DUAL II/
DUAL I+II/MONO/Stereo and switch
Audio language in DTV mode.
Page 13
Remote Control
10
1
3
5
7
9
11
INFO EPG
13
LIST
3
5
6
EXIT
0
CH
CH
SAT.LIST
FAV
1 2
4
7 8 9
MENU
16
18
20
22
26
27
15. NUMBER BUTTONS: Choose channels
2
4
6
8
10
12
14
or password importation.
16. MENU: Press to enter the menu screen
for various optional adjustable settings.
17. EXIT: Exit OSD Menu.
18. ▲/▼/◄/►: To select the direction.
19. ENTER: Press to execute the selected
item in the menu screen.
20.
21. SOURCE: Press to select signal source.
15
22. VOL+/VOL-: Press to adjust the volume
: Return to last viewed program.
level up or down.
23. LIST: Press to call up the channel list.
17
Press again to exit it.
24. CH+/CH-: Press to select channels in
ascending or descending order.
25. COLOR BUTTONS: Red/ green/ yellow/
blue key navigation link.
19
USB: Press to enter the USB mode.
ANTENNA: Press to select an antenna
source.
SAT.LIST: Press to call up the satellite
21
23
list. Press again to exit it. (Satellite
signals only)
26. REC.LIST: Press to call up the record
list. Press again to exit it.
27. ZOOM: Press to select different images
24
sizes.
28. FAV: Press to call up the favorite list.
25
28
Press again to exit it.
E
nglish
NOTE:
All pictures in this manual are examples, only for reference, actual product may differ
from the pictures.
The buttons not mentioned here are not used.
Page 14
Basic Operation
11
E
ngli
Turning on and off the TV
sh
• Turn on the TV
Connect the power cable. If TV has a power switch, turn it on firstly. Press the
button on remote control can turn on TV from standby mode.
• Turn off the TV
Press the button on the remote control to enter standby mode.
Do not leave your set in standby mode for long periods of time. It is best to unplug the
set from the mains and aerial.
• No signal
There is No Signal menu on screen when there is no input signal. In ATV/DTV mode,
if there is no signal in 5 minutes, the TV will turn off automatically. In PC mode, the TV
set will automatically turn off in 60 seconds if no input signals. When VGA cable is
connected, the TV turns on automatically.
Programme Selection
• Using the CH+/CH- on the panel of TV or on the remote control
Press CH+ to increase channel number.
Press CH- to decrease channel number.
• Using 0- 9 digital buttons.
You can select the channel number by pressing 0 to 9. (In DTV/ATV mode)
• Example
To select - channel (e.g. Channel 5): Press 5.
To select -- channel (e.g. Channel 20): Press 2 and 0 in a short time.
Volume adjustment
• Press the VOL+/- button to adjust the volume.
• If you want to switch the sound OFF, press the
• You can release mute by pressing the or increase the volume.
Changing the Input Source
You can select the input source by pressing the SOURCE button on the remote control.
Press the▲/▼button to cycle through the input source, and press the ENTER button to
confirm your choice.
.
Page 15

Menu Operation
12
QUICK START GUIDE
• Connection
1. Connecting the mains and antenna.
2. If TV has a power switch, turn it on firstly. Then press Power button on the
remote to turn on the TV.
• First Time Setup
When the TV is initially powered on, a sequence of on-screen prompts will assist in
configuring basic settings.
1. Language
Press the ▲/▼ button to select the desired OSD (On Screen Display) language.
2. Demo Mode
Press the ▲/▼ button to select On or Off.
3. Country
Press the ▲/▼ button to select the country you want to.
4. LCN
Press the ▲/▼ button to select On or Off.
5. Auto Sleep
Press the ▲/▼ button to select the hours you want to.
6. TV Antenna
Press the ▲/▼ button to select the method of TV connection: Air , Cable or Satellite.
7. T/T2
Press the ▲/▼ button to select the signal type: T, T2, T+T2.
8. Auto Scan
Press the ▲/▼ button to select mode: All, ATV, DTV.
How to Navigate Menus
Please before using the TV follow the steps below to learn how to navigate the menu in
order to select and adjust different functions. The access step may differ depending on
the selected menu.
1. Press the MENU button to display the main menu.
2. Press the▲/▼button to select the desired sub item.
3. Press the ► button to access the submenu.
4. Press the ▲/▼/◄/► button to select the desired value. The adjustment in the
OSD may differ depending on the selected menu.
5. Press the MENU button to return to the previous menu.
6. Press the EXIT button to exit from the menu.
NOTE:
When an item in MENU is displayed gray, it means that the item is not available or
cannot be adjusted.
Buttons on the TV have the same function as corresponding buttons on the remote
control. If your remote control is lost or couldn’t work, you may use the buttons on the
TV to select menus. This manual focuses on operation of the remote control.
Some items in the menus may be hidden depending on modes or signal sources
used.
E
nglish
Page 16
Menu Operation
13
E
ngli
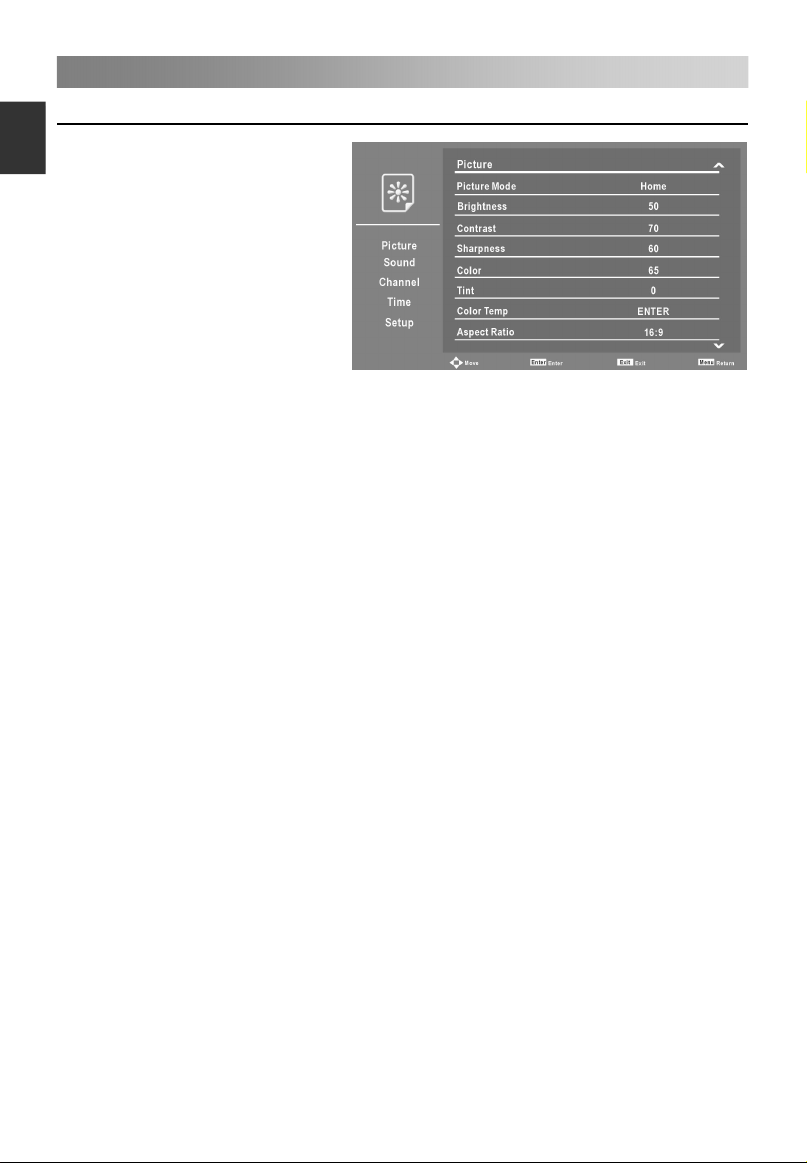
Configuring the Picture Menu
sh
• Picture Mode
You can select the type of picture
which best corresponds to your
viewing requirements.
Brightness, Contrast, Sharpness,
Color and Tint (NTSC) can be
adjusted when the picture mode is
set to User.
The manufacture's
recommendation mode is
Home.
• Brightness
Adjusts the base level of the signal in the picture.
• Contrast
Adjusts the signal level between black and white in the picture.
• Sharpness
Adjusts the level of crispness in the edges between the light and dark areas of the
picture.
• Color
Adjusts intensity of all colors.
• Tint (Only in the NTSC mode)
Adjusts the balance between red and green levels.
• Color Temp
Press the ENTER button to access the submenu.
Select the color temperature of the picture, and press the ▲/▼ button to select the
Standard, Cool, Warm and User.
R Gain, G Gain and B Gain can be adjusted when the Mode is set to User.
• Aspect Ratio
You can select the picture size which best corresponds to your viewing requirements.
• NR
Reduces screen noise without compromising video quality.
• Backlight
To control the brightness of the screen, adjust the brightness of panel.
• Energy Saving
Energy Saving can be adjusted when the Picture Mode is set to Home.
Switch the Energy Saving On or Off.
• PC Setup (In PC mode)
Press the ENTER button to access the submenu.
Auto Adjust: Adjust the image automatically.
H Position: Centre the image by moving it left or right.
V Position: Centre the image by moving it up or down.
Phase: Minimize horizontal distortion.
Clock: Minimize vertical stripes in the screen image.
Page 17
Menu Operation
14
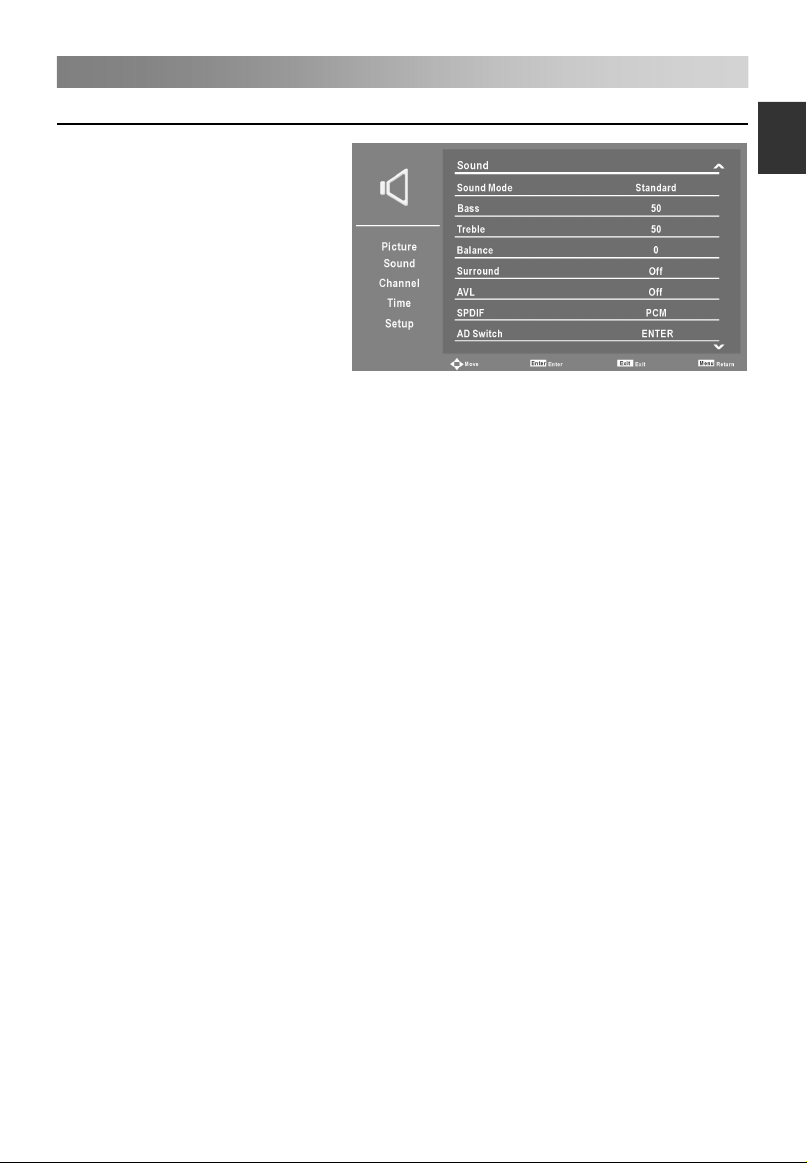
Configuring the Sound Menu
• Sound Mode
You can select a sound mode to
suit your personal preferences.
Bass and Treble can be adjusted
when the sound mode is set to
User.
• Bass
Adjust the bass effect. Increases
or decreases lower-pitched
sounds.
• Treble
Adjust the treble effect. Increases
or decreases high-pitched sounds.
• Balance
You can adjust the sound balance of the speakers to preferred levels.
• Surround
Switch the Surround On or Off.
• AVL (Auto Volume Level)
AVL automatically remains on the same level of volume if you change programmes.
Because each broadcasting station has its own signal conditions, volume adjustment
may be needed every time when the channel is changed. This feature allows users to
enjoy stable volume levels by making automatic adjustments for each program.
• SPDIF
You can select a desired SPDIF Output mode.
• AD Switch (In DTV mode)
This is an auxiliary audio function that provides an additional audio track for visually
challenged persons. This function handles the Audio Stream for the AD (Audio
Description), when it is sent along with the Main audio from the broadcaster.
Press the ENTER button to access the submenu.
When the mode is On, Volume can be adjusted by users.
• Audio Delay
Correct audio-video sync problems, when watching DTV and when listening to digital
audio output using an external device such as an audio receiver (-200ms~200ms).
E
nglish
Page 18
Menu Operation
15
E
ngli
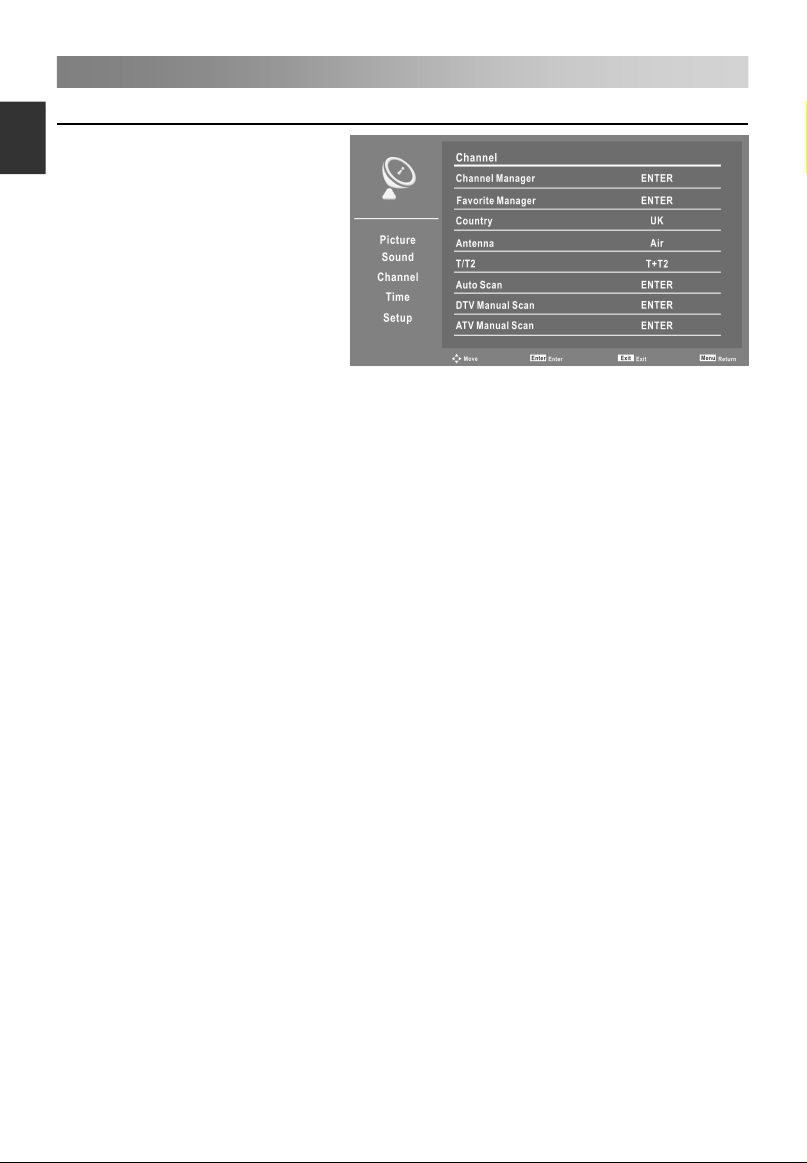
Configuring the Channel Menu
sh
• Channel Manager
Press the ENTER button to
access the submenu.
First press the ▲/▼ button to
highlight the channel you want to
delete, lock, skip or move.
Then press the red button to select
delete the channel.
Press the green button to lock the
channel.
Press the yellow button to skip the
select channel. (Your TV set will
skip the channel automatically when using CH+/CH- to view the channels.)
Press the blue button to set the channel to move, then press the number button to move
it to the position you want to put.
• Favorite Manager
Press the ENTER button to access the submenu.
Press the ▲/▼ button to select the items.
Press the CH+/CH- button to page up or down the Favorite list.
Press red, green, yellow, blue button to select the desired favorite group.
• Country
Select the country you want.
• Antenna
Select an antenna source.
• T/T2 ( In Air mode)
Select the signal type:
• Auto Scan
Press the ENTER button to access the submenu.
When TV signals is Air.
All: Press the ENTER button to search the digital channels and analog channels.
DTV: Press the ENTER button to search the digital channels.
ATV: Press the ENTER button to search the analog channels.
NOTE: The TV will begin memorizing all of the available Channels. Once the
progress bar is full, the found channels will be stored and the unit will proceed to the
search for ATV, DTV, Radio and Date.
When TV signals is Cable.
All: Press the ENTER button to access the submenu.
– Scan Mode: Press the ▲/▼ button to select scan mode: Blind Scan or Quick Scan.
Network ID and Frequency (KHz) can be adjusted when the Scan Mode is set to
Quick Scan.
– Network ID: Press the ◄/► button to select Network ID: Auto or enter digital
numbers.
– Frequency (KHz): Press the ◄/► button to select Frequency (KHz): Auto or enter
digital numbers.
T,T2,T+T2.
Page 19

Menu Operation
16
– Operator: Press the button to select the operator.
– Start: Press the ENTER button to start search channels.
DTV: Press the ENTER button to search the digital channels.
– Scan Mode: Press the ▲/▼ button to select scan mode: Blind Scan or Quick Scan.
Network ID and Frequency (KHz) can be adjusted when the Scan Mode is set to
Quick Scan.
– Network ID: Press the ◄/► button to select Network ID: Auto or enter digital
numbers.
– Frequency (KHz): Press the ◄/► button to select Frequency (KHz): Auto or enter
digital numbers.
– Operator: Press the button to select the operator.
– Start: Press the ENTER button to start search channels.
ATV: Press the ENTER button to search the analog channels.
When TV signals is Satellite.
DTV: Press the ENTER button to search the digital channels.
– Scan Mode: Press the ▲/▼ button to select scan mode: Default, Network Search or
Blind Scan.
– Satellite: Press the ▲/▼ button to select satellite names.
– Service Type: Press the ▲/▼ button to select service type.: All Services or Free
Service.
– Channel Type: Press the ▲/▼ button to select channel type: All or TV only.
– Start: Press the ENTER button to start search channels.
• DTV Manual Scan
Press the ENTER button to access the submenu.
When TV signals is Air.
Channel: Press the ▲
Frequency (KHz): Display the frequency of current TV signal, or enter a user-defined
frequency.
BandWidth (MHz): Press the ▲/▼ button to select the bandwidth.
Start: Press the ENTER button to start search channels.
When TV signals is Cable.
Frequency (KHz): Display the frequency of current TV signal.
SymbolRate (KS/s): Press the ◄/► button to select SymbolRate: Auto or enter digital
numbers.
Modulation(QAM): Press the ▲/▼ button to select Modulation: Auto, 16QAM, 32QAM,
64QAM, 128QAM or 256QAM.
Start: Press the ENTER button to start search channels.
▲/▼
▲/▼
/▼ button to select the channel number.
E
nglish
• ATV Manual Scan
Press the ENTER button to access the submenu.
Current Channel: Press the ▲/▼ button to select current channel.
Frequency: Display the frequency of current TV signal.
Scan: Press the ENTER button to enter scan, and then press ◄/► button to select
analog scan.
Page 20
Menu Operation
17
E
ngli
Fine Tune: Press the ENTER button to enter fine tune, and then press ◄/► button to
select fine tune.
sh
Color System: Press the ▲/▼ button to select Color System.
Sound System: Press the ▲/▼ button to select Sound System.
Press red button to save it.
• LCN
Press the ▲/▼ button to select LCN On or Off.
• Satellite System(Only In Satellite signal)
Press ENTER or ► to access the Satellite list.
• CI Information
Press ENTER or ► to access CI Information.
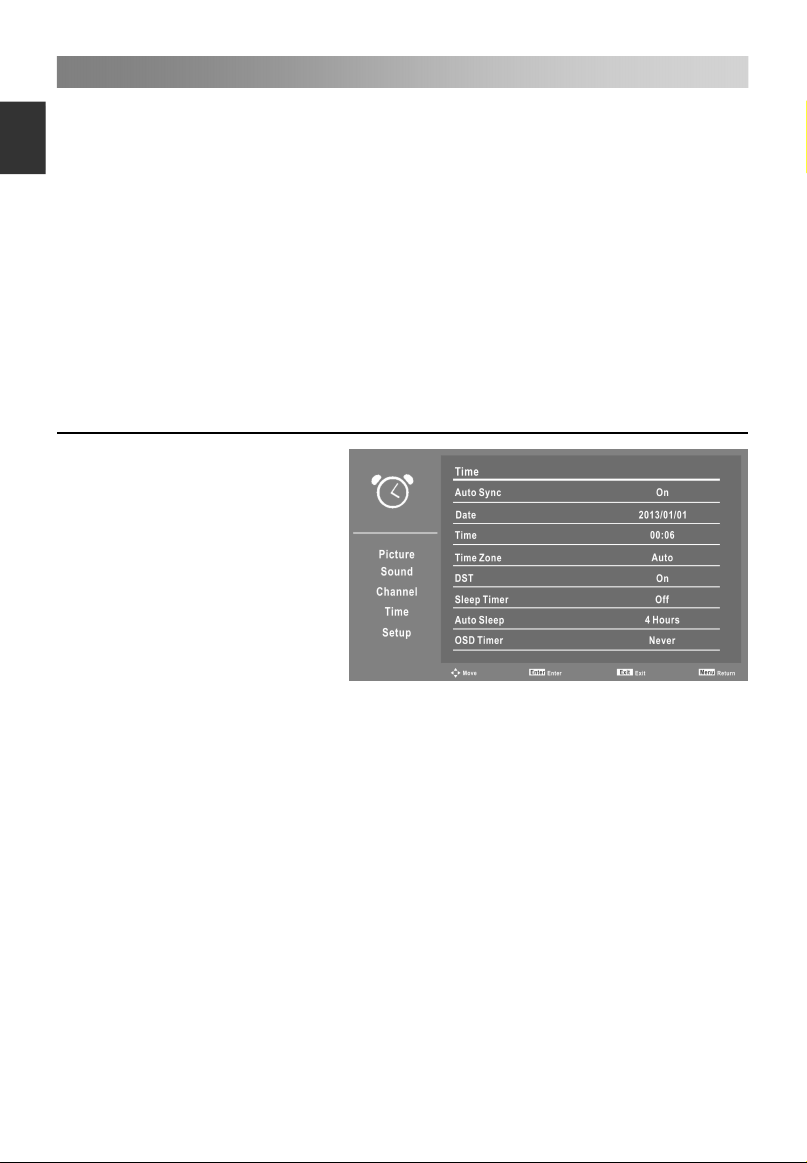
Configuring the Time Menu
• Auto Sync
Press the ▲/▼ button to select
Auto Sync On or Off.
Set Auto Sync to Off, then you
can set the Date and Time
manually.
• Date
Press the number buttons to set
the date.
• Time
Press the number buttons to set
the time.
• Time Zone
Select your time zone.
When the Auto Sync is On, Time Zone can be adjusted by users.
• DST (Daylight Saving Time)
When Time Zone set to any time, this item is available to enable daylight saving option
or not.
• Sleep Timer
Select the time to turn the TV to standby mode automatically.
• Auto Sleep
Select the Auto Sleep time you want.
• OSD Timer
Select On-Screen Menu displaying time.
Page 21
Menu Operation
18
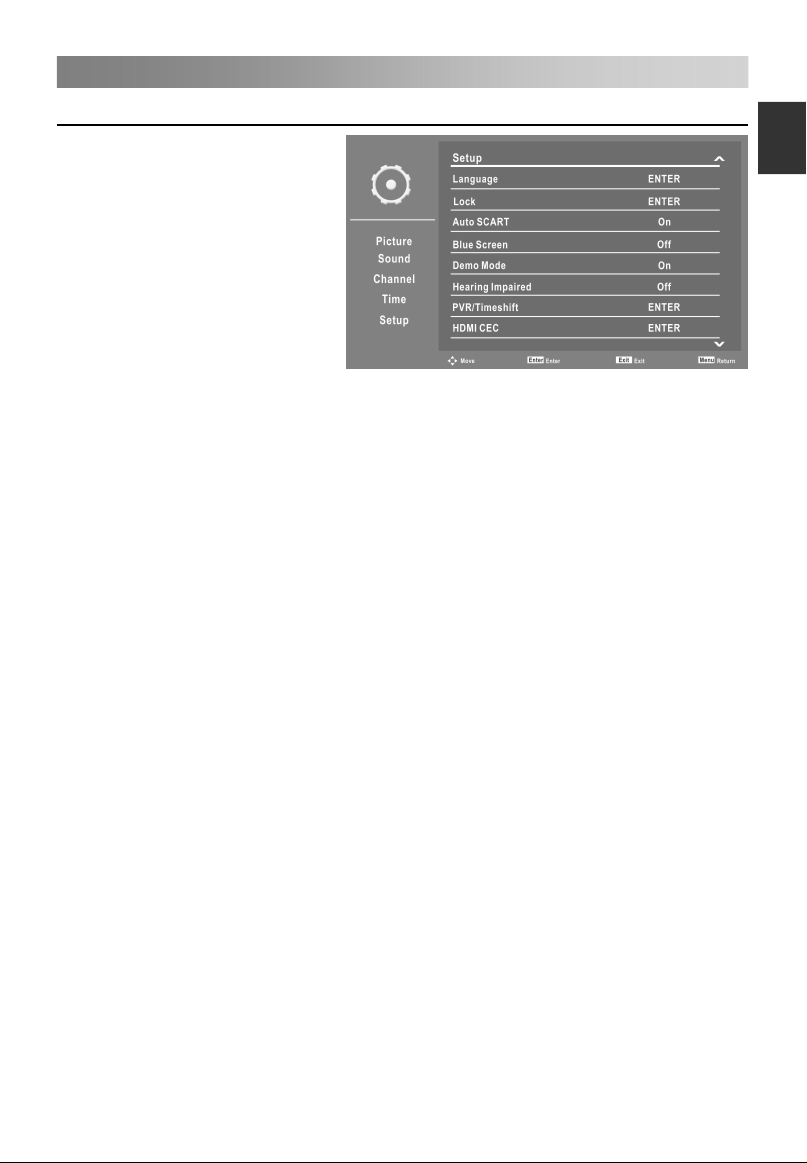
Configuring the Setup Menu
• Language
Press the ENTER button to
access the submenu.
– OSD Language: Press the ▲/▼
button to select On Screen
Display language.
– 1st Preferred Subtitle (In DTV
mode): Press the ▲/▼
button to select 1st Preferred
Subtitle language.
– 2nd Preferred Subtitle (In DTV
mode): Press the ▲/▼
button to select 2nd Preferred Subtitle language.
– 1st Preferred Audio (In DTV mode): Press the ▲/▼ button to select 1st Preferred
Audio language.
– 2nd Preferred Audio (In DTV mode): Press the ▲/▼ button to select 2nd Preferred
Audio language.
– DTV Teletext Language: Press the ▲/▼ button to select Digital Teletext Language.
– ATV Teletext Language: Press the ▲/▼ button to select Analog Teletext Language.
• Lock
Press the ENTER button to access the submenu.
Press your password (it is 0000 at first), then you will go the submenu as following.
NOTE: • If you forget, the super password of 1225 still is valid.
– Lock System
Press the ▲/▼ button to select Lock System On or Off.
When the Lock System is On, Parental Guidance can be adjusted by users.
– Parental Guidance
Press the ▲/▼ button to select Parental Guidance.
This feature can prevent children watching adult’s TV programmes, according to the
rating limit set.
– Change Password
Press the ENTER button to access the submenu.
You can set your private password. Press the numbers buttons on the remote
control to set the new password. If the new password has been input twice, the
setting is finished successfully.
• Auto SCART
Press the ▲/▼ button to select Auto SCART On or Off.
• Blue Screen
Press the ▲/▼ button to select Blue Screen On or Off.
NOTE: • In the DTV and USB mode are not available.
• Demo Mode
Press the ▲/▼ button to select Demo Mode On or Off.
• Hearing Impaired
When hearing Impaired is on, the TV screen will give some information to the people
whose hearing is impaired. When Hearing Impaired is off, the information will be
hidden.
E
nglish
Page 22
Menu Operation
19
E
ngli
NOTE: • In the DTV mode, when the Subtitle Language is not set “off” mode, Hearing
Impaired can be adjusted by users.
sh
• PVR/TimeShift (In DTV mode)
Press the ENTER button to access the submenu. It will check the USB.
– Partition Select: Select a disk used for PVR.
Press red button to format USB disk.
Press green button to set default partition.
NOTE:
• Some models have two USB input and several disk can be used when two USB
devices are plugged in.
• Before formatting, please back up all important files.
• During the device formatting, do not disconnect the device or turn off the power. If
your USB device can't be formatted or fail to be checked by the system, it means
the device isn't compatible with the TV or is damaged. The larger USB device will
take longer time to format please be patient until the formatting finishes.
– Auto Timeshift: Press the ▲/
– Timeshift Buffer: Press the ▲/▼ button to select Auto Timeshift: Auto, 30 Mins,
1hr, or 2hr.
This function allows the TV to automatically record live TV and make it available for
viewing at any time. With the Time shift turned on, you may rewind normal TV
viewing at any time without missing any of the live broadcast.
▼ button to select Auto Timeshift: Off or Auto.
1. Auto Timeshift:
1). When Auto Timeshift is set to Auto, the TV starts timeshift function in 6
seconds later. At the same time, there is a reminder menu on screen, and the
indicator light winking.
2). During the recording, press the ▲/▼ button to zoom in/out the record menu.
3). Press the ◄/► button to select paly, pause, stop, fast reverse, and fast
forward.
4). Press the MENU button, and press the ▲/▼ button to select Setup. Then
press the ► button to select items, and press the ▲/▼ button to select
PVR/TimeShift. Press ENTER button to access the submenu, and press the
▲/▼ button to select Auto Timeshift, and press the ▲/▼ button to select Off
to stop recording.
Page 23

Menu Operation
20
2. Manual Timeshift:
1). Press the II button to activate Time Shift function. The TV stores the channel
from the point of view you want to record.
2). During the recording, press the ▲/▼ button to zoom in/out the record menu.
3). Press the ◄/► button to select paly, pause, stop, fast reverse, and fast
forward.
4). Press button to stop recording, it will return to normal broadcast television.
– Timer: Press the ENTER button to access the submenu.
Ch No .
01
02
03
04
05
06
07
08
09
Del
Cha nnel
Del All
To set the parameters for schedule recording. Schedule Recording can start at a
specified time.
Del: Press red button to delete a timer.
Del All: Press green button to delete all timers.
Add: Press yellow button to add a timer.
-Recorder: Press the ▲/▼ button to select recorder On or Off.
When the Recorder is On, Duration can be adjusted by users.
-Type: Press the ▲/▼ button to select type: DVT or Radio.
When the Type is DTV, Duration can be adjusted by users.
-Channel: Press the ▲/▼ button to select channel.
-Start Time: Set the start time of recording.
-Duration: Set the duration of recording.
-Date: Set the date of recording.
-Mode: Press the ▲/▼ button to select mode: Once, Daily, Weekly or Monthly.
Press MENU button to save above settings.
Edit: Press blue button to edit a timer.
– Record List: Press the ENTER button to access the submenu.
When multiple recording devices are connected, the recording devices are listed.
Delete: Select one recording device in the Device List. Press red button to delete it.
– Recorder Start:
Instant Recording can record the current TV programmes.
Press the ENTER button to access the submenu, and then select OK to start
recording.
Timer
Sta rt
Add
01/ 01/20 07 12:0 0:03
Dur ation Dat e
Edit
Menu
Mod e
Retur n
E
nglish
Page 24
Menu Operation
21
E
ngli
sh
1. During the recording, press the ▲/▼ button to zoom in/out the record menu.
Press button to set record duration time.
2. Press button to stop recording, it will return to normal broadcast television.
3. Press the ◄/► button to select paly, pause, stop, fast reverse, and fast forward.
NOTE:
USB disk at least the capacity with 512MB.
USB device must support USB 2.0 high-speed specification.
Please format the inserted USB disk when it could not be recorded to.
During the Device formatting, do not disconnect the device while formatting is in
progress. If you format the device, all files will be deleted. Before formatting your
device through the TV, please back up your files to prevent them from damage or
loss of data. If USB disk has some virus files, the formatting perhaps fails.
When an USB device has several partitions, the PVR system can help to choose
anyone of that to perform recording.
If PVR recording system is used all the time, it will exit PVR system automatically.
USB memory must support USB2.0 high-speed specification.
Some of nonstandard USB device may not be supported.
• HDMI CEC
Press the ENTER button to access the submenu.
The HDMI CEC system can be used only with devices that have the HDMI CEC
feature. You must connect an HDMI CEC device using an HDMI cable. Some HDMI
cables may not support HDMI CEC functions.
– HDMI CEC: Press the ▲/▼ button to select HDMI CEC On or Off.
When the HDMI CEC is on, Auto Power On and Auto Standby can be adjusted by
users.
– Auto Power On: Press the ▲/▼ button to select Auto Power On or Off.
When Auto Power On enable, turn the active CEC enabled devices on the HDMI
input on, TV will power on.
– Auto Standby: Press the ▲/▼ button to select Auto Standby On or Off.
When the user turns off the TV, all active CEC enabled devices on the HDMI input
will go to Standby.
– Speaker Preference: Press the ▲/▼ button to select the Speaker Preference:
TV Speakers or Amplifier.
– Amplifier Support ARC: Press the ▲/▼ button to select Amplifier Support ARC
On or Off.
To enable
the audio through an AV receiver using HDMI.
Page 25

Menu Operation
22
• Default
Restore the system settings to help you to setup the TV.
• Software Upgrade
Update the TV with the latest software by USB.
• Version
Display the current software information.
E
nglish
Using USB mode
• To Access/Quit USB mode
1. Connect an USB device.
2. Press SOURCE button to display the main menu. Use the ▲/▼ to highlight USB,
and the ENTER button to access the USB mode.
3. You may also use the signal source selection menu to exit from the USB mode.
NOTE:
Special USB device may be not or well supported.
USB max. Load: DC5V 500mA
• The formats supported
The USB function can support the USB device with USB memory.
It can play Photo, Music, Movie or Text files.
Photo Format Support: JPEG, BMP, PNG.
Music Format Support: MP3, AAC, M4A.
Movie Format Support: AVI, DAT, MPEG -1 / MPEG-2 / MPEG-4, TS/TP.
Text Format Support: TXT.
NOTE:
• Special algorithm documents may not be or well be supported by the USB.
• The USB supports the format mentioned above, if the file format is not supported,
change it to the given format.
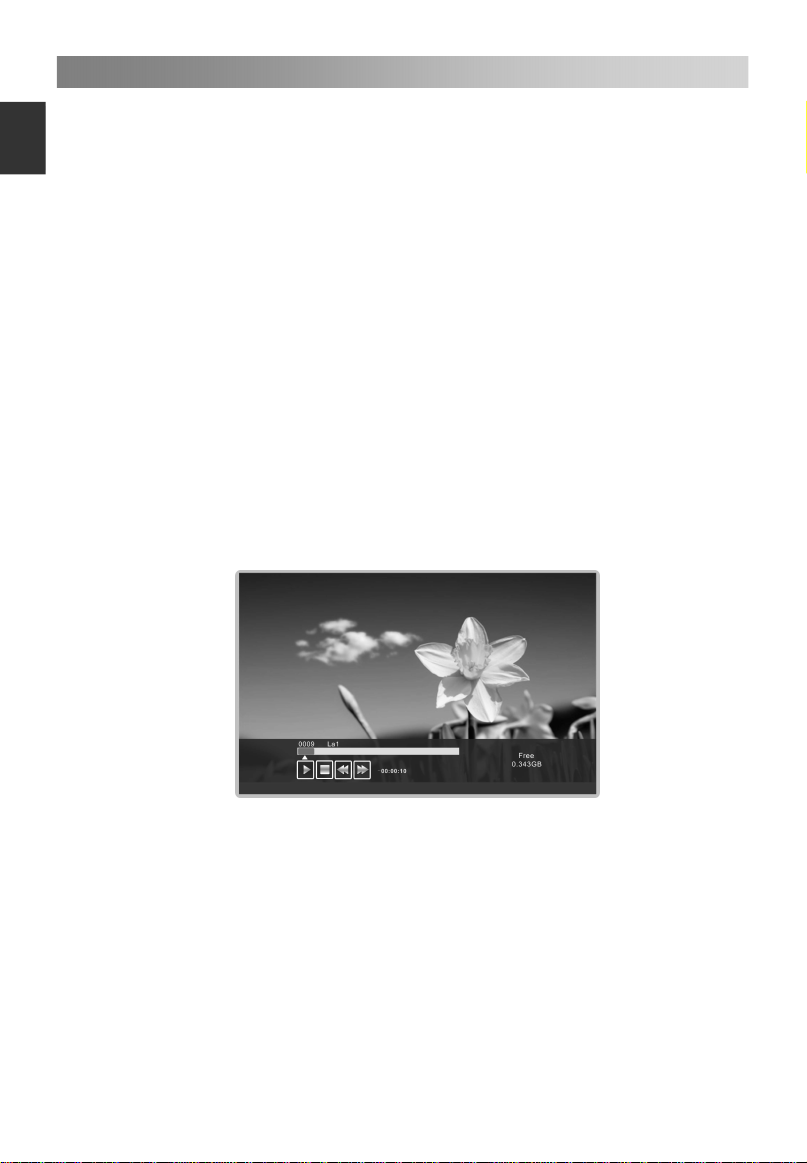
• Main Operating Interface
Use the ◄/► button to select Photo, Music, Movie or Text. Press ENTER button enter
into submenu.
Press the ▲/▼ button to select disk you want to watch, and then press ENTER button
to enter.
Press the CH+/CH- button to change page.
Press the red button to delete a photo/music/movie/text.
Press the green button to change display mode (in photo mode).
Page 26
Menu Operation
23
E
ngli
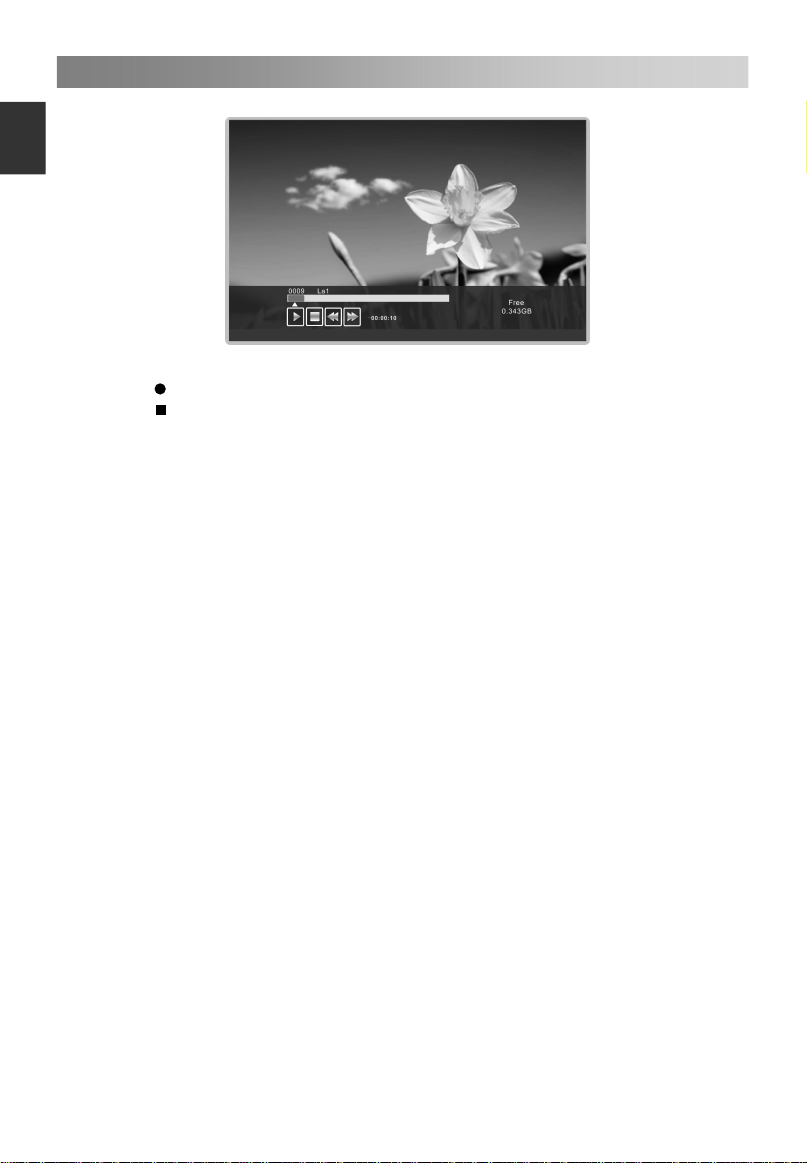
Use the ▲/▼ buttons to highlight the folder, and then press the ENTER button.
Use the ▲/▼ buttons to highlight a file, and then press the
sh
Press the ENTER button to access to the quick menu.
Press the
Press the EXIT button to back to the previous menu.
Photo Play Console
1. Play/pause: To switch between the play and pause status
2. Stop: To stop play.
3. Previous: To play the previous file in the same directory.
4. Next: To play the next file in the same directory.
5. Rotate Right: To rotate right for 0, 90, 180, and 270 degrees.
6. Zoom in: To magnify the picture.
7. Info: Picture information.
8. Photo Setup: Press the ▲/▼ button to select the Repeat Mode, Background Music,
Music Source, Slide Time, and Effect, and then press the ◄/► button to set you
want.
9. Playlists: Display the playlists. Press green button to delete a photo, and press red
button to delete all photos in the list.
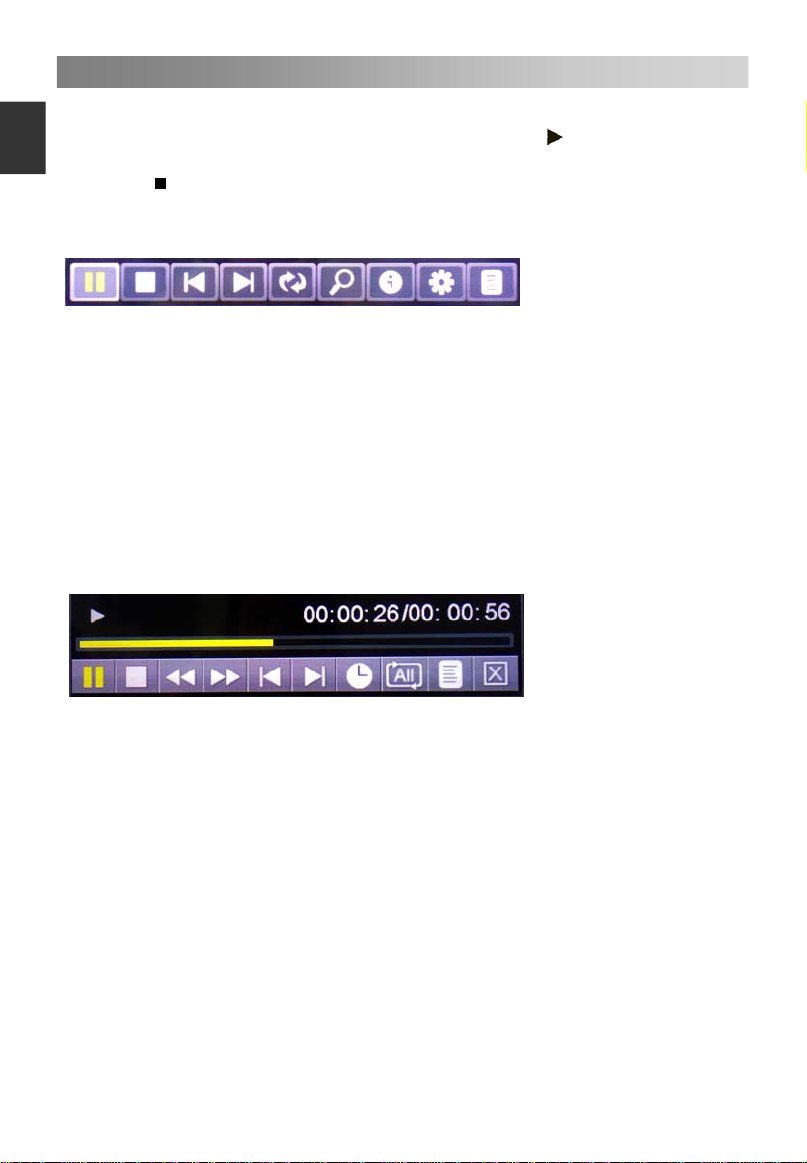
Music Play Console
to stop the playing files.
button to play.
1. Play/pause: To switch between the play and pause status
2. Stop: To stop play.
3. Fast Backward.
4. Fast Forward.
5. Previous: To play the previous file in the same directory.
6. Next: To play the next file in the same directory.
7. Goto Time: Select the settings time to play music.
8. Play mode: Press ENTER button to select 4 modes.
9. Play list: To display the music file in the same directory.
10. Exit: Press ENTER button to back to the previous menu.
Page 27
Menu Operation
24
Movie Play Console
1. Play/pause: To switch between the play and pause status
2. Stop: To stop play.
3. Fast Backward.
4. Fast Forward.
5. Slow motion play.
6. Play A-B: Between the two time points to play video.
7. Previous: To play the previous file in the same directory.
8. Next: To play the next file in the same directory.
9. Playlists: Display the playlists. Press green button to delete a photo, and press red
button to delete all photos in the list.
10. Info: Movie information.
11. Movie Setup: Press the ▲/▼ button to select the Program, Subtitle, Audio,
Encode Type, and Repeat Mode, and then press the ◄/► button to set you want.
12. Goto Time: Select the settings time to play movie.
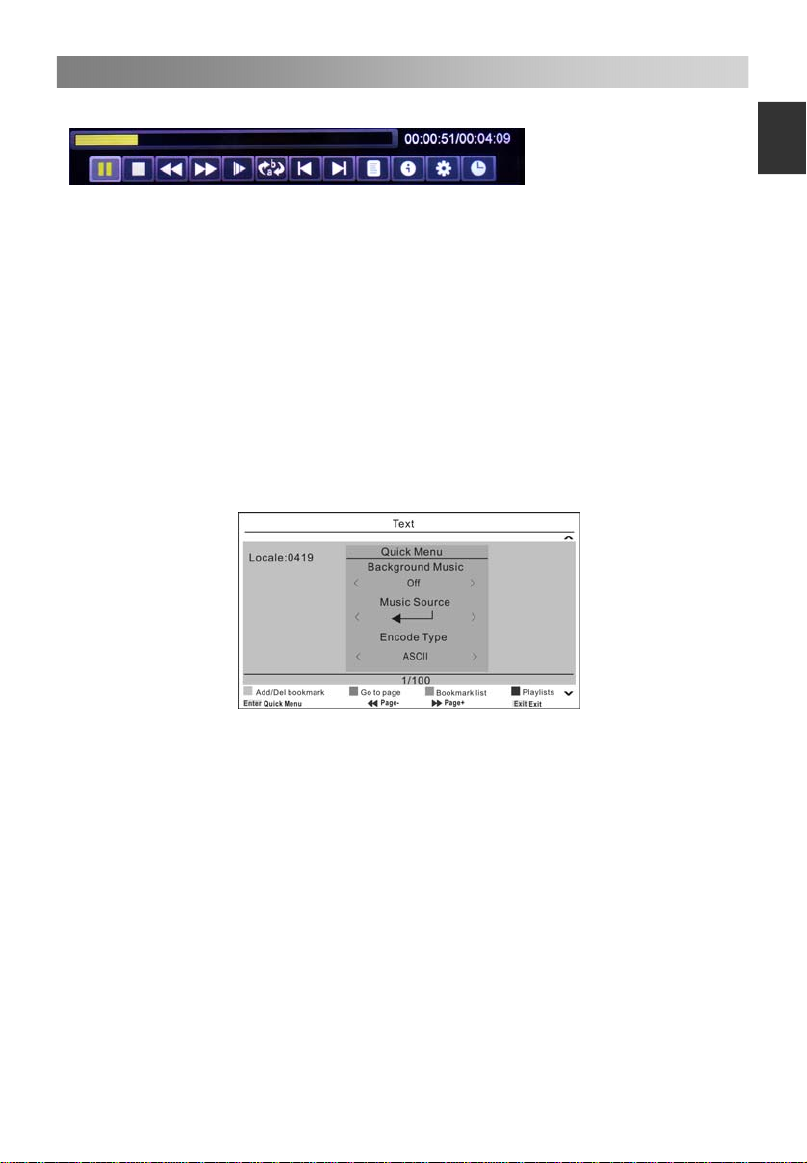
Text Play Console
E
nglish
1. Press the ENTER button to access to the quick menu.
2. Press the ▲/▼ button to select the Background Music, Music Source, and Encode
Type, and then press the ◄/► button to set you want.
3. Press red button to add or delete a bookmark.
4. Press green button to go to the page, and then input numbers buttons, press
ENTER to page you want.
5. Press yellow button to display the bookmark list.
6. Press blue button to display the Text Playlists.
Page 28

Important Unique Buttons
25
E
ngli
EPG Weekly Mode (In DTV mode)
Press EPG button to display the Electronic Program Guide. This function let you know
sh
the detailed information of the channel, indicating the time of the program playing.
Press arrow buttons to cyclically select all options.
Press EXIT button to exit.
Press the red button to set schedule recording.
Press the green button to reminder, recorder, cancel.
Press the yellow button to view the previous date’s guide.
Press the blue button to view the next date’s guide.
Channel List
Press LIST button to display the Channel List.
Press ◄/► button to select the ALL, DTV, Radio, and Others/data.
Press ▲/▼ to select the items. Press the ENTER button to enter the channel.
Press CH+/CH- button to page up or down the Channel list.
Press EXIT button to exit.
Favorit List
Press FAV button to display the favorite list.
Press ◄/► button to select Favorite 1,2,3,4.
Press ▲/▼ to select the items. Press the ENTER button to enter the channel.
Press CH+/CH- button to page up or down the Favorite list.
Press red button to rename favorite type.
Press EXIT button to exit.
Page 29
Teletext
26
Using the teletext feature
E
nglish
• Display teletext
1. Select a TV station with a teletext signal.
2. Press the
3. Press the
button to enter teletext mode.
button 2nd to enter Mix mode, this function enables you to
superimpose the teletext page over the TV program.
4. Press the button 3rd return or exit to the normal ATV/DTV mode.
• Page selection
1. Enter the page number (three digits) using the number buttons. If you press a
wrong number during input, you must complete the three digit number and then
reenter the correct page number.
2. The CH+/CH- button can be used to select the preceding or following page.
• Hold
You can press the
button to hold a page, and press it again to release the page.
• Index
Press the
i
button to enter the main index page directly.
• Enlarging Text
When a page is displayed, you can double the size of the text to make it easier to
read.
1. Press the
2. Press the
3. Press the
button to enlarge the top half of the page.
button again to enlarge the bottom half of the page.
button once more to return to the normal display.
• Reveal mode
You can display concealed teletext information (e.g. Answer to puzzles or riddles etc.)
?
by pressing
button. Press ? button again to remove the information from the
display.
• Subpage
Some teletext may contain several sub-pages which are automatically paged in a
certain cycle by the TV station.
1. Yon can enter into a certain sub page by pressing the
button directly and
select the page number with number buttons. Enter the sub page number (e.g. 0003)
for the third sub page.
2. Press the button again to exit the sub page mode.
• Color buttons (Red, Green, Yellow and blue)
Press these buttons to access directly to the corresponding color pages displayed at
the lower part of the teletext screen.
Page 30

Troubleshooting Guide
27
E
ngli
Troubleshooting
sh
Before contact the service technician, perform the following simple checks. If any
program still persists, unplug the TV and calling for serving.
PROBLEM POSSIBLE SOLUTION
- Check whether the main plug has been connected to
a wall let.
No sound and picture
Normal picture but no
sound
The remote control does
not work
Power is suddenly turned
off
Picture appears slowly
after switching on
No or poor color or poor
picture
Horizontal/vertical bars or
picture shaking
Poor reception on some
channels
Lines or streaks in
pictures
No output from one of the
speakers
- Check whether you have pressed the POWER
button on the front of TV set.
- Check the picture contrast and brightness settings.
- Check the volume.
- Sound muted? Press the MUTE button.
- Try another channel, the problem may be with the
broadcast.
- Are the audio cables installed properly?
- Check to see if there any object between the product
and remote control Causing obstruction.
- Are batteries installed with correct polarity (+ to +,
- to -)?
- Correct remote operating mode set: TV, VCR etc.?
- Install new batteries
- Is the sleep timer set?
- Check the power control settings. Power interrupted.
- No broadcast on station tuned with auto activated.
- This is normal, the image is muted during the
product startup process. Please contact your service
center, if the picture has not appeared after five
minutes.
- Adjust the color in menu option.
- Keep a sufficient distance between the product and
the VCR.
- Try another channel, the problem may be with the
broadcast.
- Are the VIDEO cables installed properly?
- Activate the any function to restore the brightness of
the picture.
- Check for local interference such as an electrical
appliance or power tool.
- Station or cable product experiencing problems.
Tune to another station.
- Station signal is weak, reorient antenna to receive
weaker station.
- Check for sources of possible interference.
- Check the antenna (Change the direction of the
antenna).
- Adjust balance in menu option.
Page 31

Troubleshooting Guide
28
NOTE:
Maintenance
Early malfunctions can be prevented. Careful and regular cleaning can extend the
amount of time you will have your new TV. Be sure to turn the power off and unplug the
power cord before you begin any cleaning.
Cleaning the screen
1. Here’s a great way to keep the dust off your screen for a while. Wet a soft cloth in a
mixture of lukewarm water and a little fabric softener or dish washing detergent. Wring
the cloth until it’s almost dry, and then used it to wipe the screen.
2. Make sure the excess water is off the screen, and then let it air-dry before you turn
on your TV.
Cleaning the cabinet
To remove dirt or dust, wipe the cabinet with a soft, dry, lint-free cloth. Please be sure
not to use a wet cloth.
Extended Absence
There is a problem in VGA mode (Only VGA mode applied).
PROBLEM POSSIBLE SOLUTION
- Adjust resolution, horizontal frequency, or vertical
frequency.
The signal is out of range.
Vertical bar or stripe on
back ground & Horizontal
Noise & Incorrect position.
Screen color is unstable or
single color.
If you expect to leave your TV dormant for a long time (such as a vacation), it’s a
good idea to unplug the power cord to protect against possible damage from
lightning or power surges.
- Check it whether the signal cable is connected or
loose.
- Check the input source.
- Work the auto configure or adjust clock, phase, or
H/V position.
- Check the signal cable.
- Reinstall the PC video card.
E
nglish
Disposal of old electrical appliances
The European directive 2012/19/EU on Waste Electrical and Electronic
Equipment (WEEE), requires that old household electrical appliances must
not be disposed of in the normal unsorted municipal waste stream. Old
appliances must be collected separately in order to optimize the recovery
and recycling of the materials they contain, and reduce the impact on human
health and the environment.
The crossed out “wheeled bin” symbol on the product reminds you of your
obligation, that when you dispose of the appliance, it must be separately
collected.
Consumers should contact their local authority or retailer for information
concerning the correct disposal of their old appliance.
This product complies with EU directive requirements on electromagnetic
compatibility and electrical safety.
Page 32

Page 33

Obsah
ě
Upozorn n …………………………………………………………………......……… 1
Bezpe nostn pokyny……………………………………………………......……… 3
Hlavn ovl d n
P edn panel ……….......................…………………………………………...…... 5
ř
Zadn a bo n panel …………........................................……………..………… 6
Za n me
č
í á
Pou v n d lkov ho ovlada e.…………………………………………….……... 7
Vkl d n bateri do d lkov ho ovlada e……………………………..………… 7
V m na bateri ......……………………………..……………………….………… 7
ř í í
P ipojen a nastaven
Instalace kabelu……………………………………………………………………. 8
á
D lkov
á í
Z
kladn provoz……………………………………………………………………...11
Zapnut
Volba program ………………………………………………………...............…..11
Nastaven
Zm
Nab dka pro provoz………………………………………………………….………. 12
í
PR VODCE RYCHL
Zp sob proch zen nab dek
Konfigurace nab
Konfigurace nab
Konfigurace nab
Konfigurace
Konfigurace Nastaven
Pou it
ů
D le it specifick tla
EPG t denn re im ………....………………………….………………………..…25
Seznam kan
Seznam obl ben ch………………………………………………………........….. 25
ů
Pr vodce pro e en probl m
Použ
š
Ř
e en problem
Odstra
Údržba…………………………………………………………………....................28
í
í
č
á
á
í
í
ž
í á í á é č
á á í í á é č
ý ě
é
na zdroje vstupu………………………………………………………….........11
ě
Ů
ů
ž
á
ž
ívaní funkce Teletext…………………....................................................... 26
í
í
í
č
í
…..…………………....……......…………...……………..……...………… 7
á
á
ovl d n
í a vypnutí TV…..………………………………………………..........…....11
hlasitosti…………….…………………………………………............11
í
á
nab
nab
ž
í re imu USB……………………………….…………………............….…22
ý
í
lů………………………………………………………………...…... 25
á
í
ř
ň
ov
ání problémů.……….……………………………………..……...….... 27
í
í
ř
za zen …………………………...…………..…….…..…………… 5
í
……………...…………………………….........……………... 8
í
………………………..…………………………….……………… 9
ů
M STARTEM……….………………………….……….…. 12
Ý
í í
ídky pro Obraz..……………………………………………....….1 3
ídky pro Zvuk
ídky pro Kanál
ídky pro
ídky pro
á
ž
ý
š
í
ů
.……………………………………………………...…................ 27
……………………………………………….…….... 12
………..……………………………………....…… 14
………………………………………….....……..15
as ...………………………………….......…………....17
č
í ………………………………………..….…1 8
í
č
tka............................................................................... 25
é
ů
.………………………………………….....….....26
Če
sk
y
Page 34

Upozornění
1
Če
sky
UPOZORNĚNÍ:
CHCETE-LI SNÍŽIT RIZIKO ÚRAZU ELEKTRICKÝM PROUDEM,
NEOTVÍREJTE KRYT (NEBO ZADNÍ PANEL PŘÍSTROJE). UVNITŘ
NEJSOU ŽÁDNÉ KOMPONENTY, KTERÉ BY MOHL UŽIVATEL SÁM
OPRAVIT. VŽDY SE OBRAŤTE
SERVISU.
Symbol blesku se šipkou v rovnoramenném trojúhelníku má varovat
uživatele před neizolovaným “nebezpečným napětím” uvnitř přístroje,
které může být dostatečně vysoké, aby osobám způsobilo úraz
elektrickým proudem.
Vykřičník v rovnostranném trojúhelníku má informovat uživatele o tom,
že v literatuře přiložené k přístroji se nachází mnoho důležitých pokynů
pro jeho provoz a údržbu (případně servis).
DŮLEŽITÉ INFORMACE
Zařízení vytváří, používá a může vyzařovat vysokofrekvenční energii a, pokud
není instalováno a používáno podle pokynů, může být příčinou škodlivého rušení
radiokomunikace. Neexistuje však záruka, že se rušení v určité instalaci neobjeví.
Pokud zařízení způsobuje škodlivé rušení příjmu radiových a televizních signálů,
což se dá určit vypnutím a zapnutím přístroje, doporučuje se uživateli, aby se
pokusil odstranit rušení jedním nebo několika z těchto opatření:
- Přemístěním antény
- Zvětšením odstupu mezi zařízením a přijímačem
- Zapojením zařízení do zásuvky jiného obvodu, než je obvod, do kterého je
přijímač zapojen
- Obraťte se na prodejce nebo zkušeného radiotechnika nebo televizního technika
a požádejte ho o pomoc
Veškeré změny nebo modifikace, které strana odpovědná za shodu s předpisy
výslovně neschválila, mohou zrušit platnost oprávnění uživatele zařízení
provozovat.
UPOZORNĚNÍ
Nepokoušejte se žádným způsobem modifikovat tento výrobek bez písemného
oprávnění dodavatele. Neoprávněné modifikace mohou zrušit platnost oprávnění
uživatele provozovat tento výrobek.
Nedoporučuje se ponechávat na obrazovce zobrazený statický obraz příliš
dlouho. Totéž platí o zobrazování neobyčejně jasných obrazů na obrazovce.
Obrázky a kresby v této uživatelské příručce jsou uvedeny pouze pro porovnání
a mohou se od aktuálního vzhledu výrobku lišit. Design a specifikace výrobku
mohou být změněny bez předchozího oznámení.
POZOR
RIZIKO ÚRAZU ELEKTRICKÝM
PROUDEM NEOTVÍRAT
NA VYŠKOLENÉ ZAMĚSTNANCE
Page 35

Upozornění
2
VAROVÁNÍ
Chcete-li snížit riziko požáru nebo úrazu elektrickým pouzdrem, nevystavujte
přístroj působení deště nebo vlhka.
Větrací otvory nesmějí být zakryty takovými předměty jako noviny, ubrusy,
záclony atd., protože tím se zabraňuje nezbytnému větrání.
Nenechte na přístroj kapat vodu, nedovolte, aby do něj natekla voda a nestavte na
něj žádné předměty naplněné tekutinou jako např. vázy s květinami.
Nezapomínejte na ekologickou likvidaci baterie. Nevyhazujte baterie do směsného
odpadu v popelnicích. V případě potřeby můžete kvůli ochraně životního prostředí
kontaktovat svého prodejce.
Při instalaci televizoru zachovejte vzdálenost alespoň 4 palců mezi televizorem a
dalšími předměty (stěny, boční strany skříní atd.), aby byla umožněna příslušná
ventilace. Pokud nebude umožněna patřičná ventilace, může dojít k požáru nebo k
problémům s produktem zapříčiněným zvýšením teploty ve vnitřním prostoru.
Nestavte na přístroj zdroje přímého plamene jako např. hořící svíčky.
Chcete-li zabránit rozšíření ohně, nikdy se k tomuto výrobku nepřibližujte se
svíčkami nebo jinými zdroji otevřeného plamene.
Elektrostatický výboj může způsobit poškození zařízení. Lze manuálně obnovit
vypnutím napájení a jeho opětovným zapnutím.
Upozornění: Aby jste zabránili úrazu způsobeného převrácením produktu, vždy
dbejte na to, aby byl produkt položený na horizontální plochu.
POZOR při zapojování napájecí sňůry
U většiny přístrojů se doporučuje, aby byly zapojeny do předem určeného obvodu,
tj. do obvodu s jedinou zásuvkou, který bude napájet pouze tento přístroj a
nebude mít žádné další vývody nebo větvení.
Zásuvky nepřetěžujte. Přetížené, uvolněné nebo poškozené zásuvky,
prodlužovací kabel nebo napájecí šňůry s roztřepeným opletením nebo
poškozenou či popraskanou izolací jsou nebezpečné. Libovolná výše uvedená
závada může být příčinou úrazu elektrickým proudem nebo může způsobit požár.
Pravidelně kontrolujte napájecí šňůru vašeho přístroje, a pokud jeho vzhled
ukazuje na poškození nebo degradaci materiálu, vytáhněte ji ze zásuvky,
přestaňte používat přístroj a nechte šňůru vyměnit za přesně stejnou novou šňůru
pověřeným pracovníkem servisu. Chraňte napájecí šňůru před fyzickým nebo
mechanickým poškozením. Jedná např. o její překroucení, zauzlení, smáčknutí,
přivření do dveří nebo chození po ní. Dávejte také velký pozor na zásuvky,
nástěnné vývody a místo, kde šňůra vstupuje do přístroje.
Zásuvka zapojená do SÍTĚ se používá k odpojení zařízení a zůstává připravena
k použití.
Provozní teplota: °C až °C Provozní vlhkost: ≤80%
Teplota pro skladování: -°C až °C Vlhkost při skladování: ≤90%
Toto je zařízení klasifikované pomocí třídy Class II nebo zařízení s dvojitou
elektrickou izolací. Zařízení bylo vyrobeno takovým způsobem, aby nevyžadovalo
bezpečnostní připojení k elektrickému uzemnění.
Vyrobeno podle licence Dolby Laboratories.
Symboly Dolby a DD jsou ochrannými známkami Dolby Laboratories.
Če
sk
y
Page 36
Bezpe nostní pokyny
3
DŮLEŽITÉ BEZPEČNOSTNÍ POKYNY
1. Přečtěte si tyto pokyny.
2. Uložte si tyto pokyny.
Če
3. Dbejte na všechna upozornění.
sky
4. Dodržujte všechny pokyny.
č
7. Neblokujte žádný větrací otvor.
Nainstalujte podle pokynů výrobce.
5. Nepoužívejte tento přístroj blízko
vody.
6. Otírejte pouze suchým hadříkem.
8. Neinstalujte v blízkosti žádného
tepelného zdroje jako jsou radiátory,
topné registry, kamna nebo jiné
přístroje (včetně zesilovačů), které
produkují teplo.
9. Neobcházejte bezpečnostní funkce
polarizovaných nebo zemnících typů
zástrček. Polarizovaná zástrčka má
dva kolíky, přičemž je jeden širší než
druhý. Zemnící typ zásuvky má dva
kolíky a jeden zemnící kontakt. Širší
kolík nebo zemnící kontakt zajišťují
vaši bezpečnost. Pokud se poskytnutá
zástrčka nehodí do vaší zásuvky,
obraťte se na svého elektrikáře, aby
vám zastaralou zásuvku vyměnil.
Page 37
Bezpe nostní pokyny
4
č
10. Chraňte napájecí šňůru, nešlapejte
po ní, zabraňte jejímu smáčknutí, a
to zejména v blízkosti zástrček,
objímek a míst, kde vystupují z
přístroje.
11. Používejte pouze přídavná
zařízení/příslušenství označená
výrobcem.
12. Používejte pouze vozíky, stojany,
trojnožky, konzole nebo stolky
označené výrobcem nebo
prodávané s přístrojem. Pokud
používáte vozík, buďte při převážení
opatrní, aby nedošlo k převržení a
zranění.
13. Přístroj vypojte ze sítě za bouřky
nebo v případě, že ho nebudete
dlouhou dobu používat.
14. Veškeré údržbu nechte na
vyškolených pracovnících servisu.
Servis je nezbytný, pokud je přístroj
jakýmkoli způsobem poškozen, např.
když je poškozena napájecí šňůra
nebo zástrčka, do přístroje se dostala
tekutina nebo do něj spadl nějaký
předmět, přístroj byl vystaven dešti
nebo vlhku, nefunguje normálně
nebo spadl.
Če
sk
y
LIKVIDACE
- Nevyhazujte tento výrobek do směsného domácího odpadu.
- Likvidace tohoto výrobku musí proběhnout podle předpisů vydaných vašimi
místními orgány.
POZNÁMKA
- Když je televize na dotyk studená, mohlo dojít při jejím zapnutí k drobnému
“mihotání” obrazovky. To je normální, s televizí nic není.
- Některé drobné vady bodů mohou být na obrazovce vidět. Vypadají jako červené,
zelené nebo modré skvrnky na obrazovce. Nebudou však mít žádný nepříznivý
vliv na výkon monitoru.
- Nedotýkejte se obrazovky, ani u ní nedržte delší dobu prst. Můžete tím způsobit
dočasné zkreslení obrazu na obrazovce.
Page 38
Hlavní ovládání zařízení
5
1
CH+/CH-
5
Přední panel
Če
sky
1
2
3
4
5
6
Č. Název
2 VOL+/VOL3 MENU
4
6
Napájení a snímač
Popis
Změna kanálů.
Nastavení hlasitosti.
Otevření nabídky (Menu)
Přepínáníme z i z d r o j i si g n á l u.
Zapínání a vypínání zařízení.
Kontrolka pro napájení a infračervený snímač
Page 39

Hlavní ovládání zařízení
6
Zadní a boční panel
ANT2
(SATELLITE)
13/18V 400mA
COMMON INTERFACE
YPbPr AV
USB
HDMI1
HDMI2
HDMI3
Če
sk
y
15
16
14
13
12
12
12
8
7
Č.
Název Popis
7
8
DIGITAL AUDIO OUT
9
PC AUDIO/PC
10
Scart
11
ANT1/2
12
HDMI1/2/3
USB
13
YPbPr
14
AV
15
COMMON INTERFACE
16
9
10
11
Výstup pro sluchátka.
Výstup funkce DIGITAL AUDIO
Vstup PC
Vstup/výstup SCART.
Vstup pro anténu.
Vstup HDMI.
Konektor pro funkci USB Play.
Vstup pro funkci YPbPr.
AV audio/video vstup pro signál
Vložte kartu CI
Page 40

Začínáme
7
Používání dálkového ovladače
Při používání dálkového ovladače miřte na čidlo dálkového ovládání na televizi. Pokud
bude mezi dálkovým ovladačem a čidlem dálkového ovládání na přístroji nějaký
předmět, přístroj nemusí fungovat.
Če
Zamiřte dálkový ovladač na ČIDLO DÁLKOVÉHO OVLÁDÁNÍ na televizi.
sky
Pokud používáte tuto televizi ve velmi jasně osvětleném prostoru, infračervené
ČIDLO DÁLKOVÉHO OVLÁDÁNÍ nemusí řádně fungovat.
Doporučená účinná vzdálenost pro používání dálkového ovladače je asi max. 7
metrů.
Vkládání baterií do dálkového ovladače
1. Otevřete kryt na zadní straně dálkového ovladače.
2. Vložte dvě baterie AAA. Zkontrolujte, zda
označení “+” a “– ” na koncích baterie odpovídají
označení v prostoru pro baterie.
3. Vraťte kryt na místo.
Výměna baterií
Budete muset vložit přiložené baterie do dálkového ovladače, abyste ho podle níže
uvedených pokynů uvedli do provozu.
Když jsou baterie slabé, vzdálenost, na kterou dálkový ovladač funguje, je mnohem
menší, a bude třeba baterie vyměnit.
Poznámky k používání baterií:
Použití špatného typu baterií může způsobit unikání chemikálií a/nebo výbuch. Nikdy
nezapomeňte na následující pokyny a informace:
Vždy zkontrolujte, zda jsou baterie vloženy tak, aby označení “+” a “–” na koncích
baterie odpovídala označení v prostoru pro baterie.
Různé typy baterií mají různé charakteristické vlastnosti. Nelze je míchat dohromady.
Nemíchejte baterie dohromady. Míchání starých a nových baterií zkrátí životnost
baterie a/nebo způsobí unikání chemikálií.
Vyměňte baterie, jakmile přestanou fungovat.
Chemikálie, které unikají z baterií, mohou způsobovat podráždění kůže. Jestliže z
baterií uniká nějaká chemická látka, okamžitě ji otřete suchým
Baterie dodávané společně s výrobkem mohou mít kratší životnost kvůli podmínkám
skladování. Vyjměte baterie vždy, když předpokládáte, že dálkový ovladač nebudete
delší dobu používat.
Baterie (v obalu nebo již instalované) se nesmí vystavovat nadměrnému teplu
způsobenému např. slunečním svitem, ohněm apod.
POZOR:
Nesprávně vložené baterie mohou způsobit výbuch.
Nahrazujte vybité baterie pouze bateriemi stejného nebo rovnocenného typu.
hadříkem.
Page 41

Připojení a nastavení
8
Instalace kabelu
Před instalací si přečtěte příslušný text sekce „Upozornění týkající se údržby a
bezpečnosti“.
1. Vyjměte televizor z obalu a umístěte jej na rovný povrch na dobře větraném místě.
POZN.:
Když budete připojovat nebo odpojovat televizor, počítač nebo jiné zařízení,
musíte předem vypnout napájení z elektrické sítě
Při odpojování napájecího nebo
(izolovanou část), ne za kabel.
2. RF výstup lze propojit s s RF vstupem televizoru.
3. AV výstup DVD lze propojit s AV vstupem televizoru kabelem AV.
POZN.:
signálového kabelu držte a tahejte za koncovku
Komponentní a AV vstup nelze použít současně, protože mají společný zvukový
kanál.
Pokud funguje KOMPONENT (YPbPr) a AV jako mini terminal, a stejné sdílené
vyberte prosím kabel audio&video 1-3.
audio,
4. KOMPONENTNÍ výstup (YPbPr) přehrávače DVD lze propojit s KOMPONENTNÍM
vstupem (YPbPr) televizoru kabelem AV.
5. Jeden konec kabelu VGA z portu VGA počítače propojte s portem VGA televizoru a
utáhněte šroubky na obou konektorech na koncích kabelu VGA.
POZN.:
Při zapojování 15pinového konektoru VGA nezasouvejte konektor silou, hrozí
ohnutí nebo zlomení pinů.
6. Jeden konec kabelu HDMI připojte k výstupu HDMI a druhý konec kabelu HDMI
připojte ke vstupu HDMI televizoru.
POZN.:
Při připojování kabelu HDMI se musíte strefit přesně, nezasouvejte jej silou, hrozí
ohnutí nebo zlomení pinů.
7. K těmto konektorům připojte vstup nebo výstup SCART vnějšího zařízení.
8. Výstup zvukového signálu televizoru pro vnější zařízení přes port Digital Audio
Output.
9. Zkontrolujte, zda jsou všechny kabely AV připojeny ke správným konektorům.
10. Napájecí kabel připojte k elektrické zásuvce 100 - 240V~.
POZN.:
Rozsah napájecích napětí televizoru je 100 - 240V~ 50/60Hz, nepřipojujte
televizor k žádnému jinému napájení.
Při odpojování napájecího kabelu nesahejte přímo na kovovou část, kabel
uchopte vždy za izolovanou část koncovky.
;
Če
sk
y
Page 42

Dálkové ovládání
9
Tlačítka původního dálkového ovládače:
1
Če
3
sky
5
7
9
11
INFO EPG
13
1 2
4
3
5
6
7 8 9
MENU
16
18
20
22
26
27
LIST
EXIT
0
CH
CH
SAT.LIST
FAV
2
4
6
8
10
12
14
15
17
19
21
23
24
25
28
1.
: Napájení, zapnutí nebo vypnutí
televizoru.
2. : Stisknutím ztlumíte nebo obnovíte
zvuk.
3. II: Pauza (v režimu USB/PVR).
Stisknutím přejdete do nabídky funkce
Timeshift (časový posun).
: MIX teletext a signál na stránce
teletextu.
4. : Stop (v režimu USB/PVR).
: Podržet stránku teletextu na
obrazovce. Uvolnit pomocí dalšího
stisknutí.
5.
: Přehrávání (v režimu USB/PVR).
: Vstup do Teletextu; novým stisknutím
vstup do režimu MIX; výstup po dalším
stisknutí.
: Stisknutí tlačítka pro zahájení
6.
nahrávání (v režimu DTV).
: Změna rozměru teletextové
obrazovky v režimu zobrazení.
7. : Předchozí (v režimu USB).
i
: Přechod na indexovou stranu.
8.
: Další (v režimu USB).
?
: Uvolnit ukryté informace ze stejných
stránek Teletextu.
9. : Rychlé zpětné převíjení (v režimu
USB/PVR).
: Vstup do režimu s titulky nebo
podstrany.
10. : Rychlé převíjení vpřed (v režimu
USB/PVR).
: Zrušení Teletextu, ale ne odchod z
něho; pro exit stiskněte klávesu znovu.
11. EPG: Elektronický programový průvodce,
použití v režimu DTV.
12. SUBTITLE: Zvolte dostupný jazyk titulků.
13. INFO: Stisknutím klávesy zobrazíte
aktuální informace o programu na
obrazovce.
14. AUDIO: Toto tlačítko můžete použít pro
přepínání mezi DUAL I/ DUAL II/ DUAL
I+II/MONO/Stereo a pro přepínání jazyka
Audio v režimu DTV.
Page 43

Dálkové ovládání
10
1
3
5
7
9
11
INFO EPG
13
1 2
5
4
7 8 9
MENU
16
18
20
22
26
27
0
LIST
3
6
EXIT
CH
CH
SAT.LIST
FAV
15. TLAČÍTKA S ČÍSLY: Volba kanálů nebo
2
4
6
8
10
12
14
15
17
19
21
23
24
25
28
zadávání hesla.
16. MENU: Stisknutím této klávesy vstoupíte
do obrazovky s nabídkou pro různá
volitelná nastavení.
17. EXIT: Exit z režimu OSD.
18. ▲/▼/◄/►: Volba směru.
19. ENTER: Stisknutím klávesy provedete
zvolený úkol na obrazovce s nabídkou.
20.
: Návrat k předchozímu zobrazenému
programu.
21. SOURCE: Stisknutím zvolíte zdroj signálu.
22. VOL+/VOL-: Stisknutím nastavíte hlasitost
(silněji, slaběji).
23. LIST: Stisknutím vyvoláte seznam
kanálů. Pro exit stiskněte klávesu znovu.
24. CH+/CH-: Pomocí těchto kláves budete
volit kanály ve vzestupném nebo
sestupném sledu.
25. TLAČÍTKA S BARVAMI: Červená/ zelená/
žlutá/ modrá - odkaz pro klávesovou
navigaci.
USB: Stisknutím vstoupíte do režimu USB.
ANTÉNA: Stisknutím zvolíte zdroj antény.
SAT.LIST: Stisknutím vyvoláte seznam
satelitů. Pro exit stiskněte klávesu znovu.
(pouze satelitní signály)
26. REC.LIST: Stisknutím vyvoláte seznam
záznamů. Pro exit stiskněte klávesu
znovu.
27. ZOOM: Stisknutím zvolíte různé velikosti
obrázků.
28. FAV: Stisknutím vyvoláte seznam
oblíbených položek. Pro exit stiskněte
klávesu znovu.
Če
sk
y
POZNÁMKA:
Veškeré obrázky v tomto návodu jsou pouze příklady a slouží pouze pro orientaci.
Aktuální produkt se může od těchto obrázků lišit.
Tlačítka, která zde nejsou uvedena, se nepoužívají.
Page 44

Základní provoz
11
Zapnutí a vypnutí TV
• Zapnutí TV
Připojte napájecí kabel. Pokud je televizor vybaven tlačítkem napájení, nejprve
zapněte toto tlačítko. Pomocí klávesy na dálkovém ovládači můžete zapnout TV z
Če
pohotovostního režimu.
sky
• Vypnutí TV
Pomocí klávesy na dálkovém ovládači můžete přejít do pohotovostního režimu.
Nenechávejte svůj televizor v pohotovostním režimu na příliš dlouhou dobu. Nejlépe
je odpojit televizor ze sítě a z antény.
• Bez signálu
Pokud není dostupný žádný vstupní signál, na obrazovce se objeví nabídka No Signal.
Pokud není v režimu ATV/DTV žádný signál déle než 5 minuty, TV se automaticky
vypne. V PC režimu se TV automaticky vypne po 60 sekundách, pokud v této době
nepřijme žádný signál. Po připojení VGA kabelu se systém TV automaticky zapne.
Volb a programů
• Používání kláves CH+/CH- na panelu TV nebo na dálkovém ovládači
Pomocí klávesy CH+ zvýšíte číslo kanálu.
Pomocí klávesy CH- snížíte číslo kanálu.
• Používání kláves 0- 9.
Číslo kanálu mžete zvolit pomocí kláves 0 až 9. (v režimu DTV/ATV)
• Příklad
Pro volbu - kanálu (např. kanálu 5): Stiskněte 5.
Pro volbu -- kanálu (např. kanálu 20): Stiskněte 2 a 0 krátce po sobě.
Nastavení hlasitosti
• Pomocí klávesy VOL+/- nastavte hlasitost.
• Pokud chcete vypnout zvuk, stiskněte .
• Můžete uvolnit ztišení stisknutím klávesy
Změna zdroje vstupu
Můžete si zvolit zdroj vstupu, a to pomocí klávesy SOURCE na dálkovém ovládači.
Pomocí klávesy ▲/▼můžete procházet zdroj vstupu; poté stiskněte klávesu ENTER
pro potvrzení výběru.
nebo zvýšit hlasitost.
Page 45

Nabídka pro provoz
12
PRŮVODCE RYCHLÝM STARTEM
• Připojení
1. Propojení antény se sítí.
2. Pokud je televizor vybaven tlačítkem napájení, nejprve zapněte toto tlačítko. Potom
stiskněte tlačítko napájení na dálkovém ovládači a zapněte TV.
• První nastavení
Po prvním zapnutí TV se objeví sekvence naváděcích kroků na obrazovce, která vám
pomůže s konfigurací základního nastavení.
1. Jazyk
Pomocí klávesy ▲/▼ zvolte požadovaný jazyk OSD (zobrazení na obrazovce).
2. Režim Demo
Pomocí klávesy ▲/▼ zvolte Zap nebo Vyp.
3. Země
Pomocí klávesy ▲/▼ zvolte požadovanou zemi.
4. LCN
Pomocí klávesy ▲/▼ zvolte Zap nebo Vyp.
5. Automatíck uspání
Pomocí klávesy ▲/▼ zvolte požadovaný počet hodin.
6. TV anténa
Pomocí klávesy ▲/▼ zvolte metodu připojení TV: Režim Air , Kabel nebo Satellite.
7.T/T2
Pomocí klávesy ▲/▼ zvolte typ signálu: T, T2, T+T2.
8. Autohledání
Pro volbu režimu stiskněte tlačítko ▲/▼: Vše, ATV, D T V.
Způsob procházení nabídek
Před prvním použitím televizoru postupujte podle níže uvedeného návodu a naučte se
používat menu s volbou a seřizováním různých funkcí. Krok určený pro přístupy se
může lišit v závislosti na zvoleném menu.
1. Pomocí klávesy MENU zobrazíte hlavní nabídku.
2. Pomocí klávesy ▲/▼zvolíte požadovanou dílčí položku.
3. Pomocí klávesy ► se dostanete do subnabídky.
4. Pomocí kláves ▲/▼/◄/► zvolíte požadovanou hodnotu. Nastavení OSD se může
lišit v závislosti na zvoleném menu.
5. Pomocí klávesy MENU se vrátíte k předchozímu menu.
6. Pomocí klávesy EXIT odejdete z menu.
POZNÁMKA:
é
Pokud je položka v MENU zobrazená v šedé barvě, znamená to, že položka není k
dispozici a nemůže být tedy nastavena.
Klávesy na TV mají stejnou funkci jako odpovídající klávesy na dálkovém ovládači.
Pokud dálkový ovládač ztratíte nebo pokud tento ovládač nefunguje, můžete
používat klávesy na televizoru. Tento návod je zaměřen na provoz dálkového
ovládače.
Některé položky v nabídkách mohou být skryty, v závislosti na režimech nebo
zdrojích používaných signálů.
Če
sk
y
Page 46

Nabídka pro provoz
13
Konfigurace nabídky pro Obraz
• Obrazový režim
Můžete si vybrat typ obrazu, který
nejlépe koresponduje s vašimi
Če
požadavky na zobrazení.
sky
Jas, kontrast, ostrost, Barva a
Odstín (NTSC) mohou být
nastaveny, když je režim obrazu
v pozici Uživatel.
Výrobce doporučuje používat
režim Výchozí obrazovka.
• Jas
Nastavení základní úrovně signálu v obrazu.
• Kontrast
Nastavení úrovně signálu mezi bílou a černou barvou obrazu.
• Ostrost
Nastavení úrovně jiskřivosti na hranách mezi světlými a tmavými oblastmi obrazu.
• Barva
Nastavení intenzity všech barev.
• Odstín (pouze v režimu NTSC)
Nastavení rovnováhy mezi červenými a zelenými úrovněmi.
• Barva Teplota
Pomocí klávesy ENTER vstoupíte do podmenu.
Zvolte teplotu barvy obrazu a stiskněte klávesu ▲/▼ pro volbu mezi režimy Standardn ,
Studený, Teplý a Uživ.
Zesílení R, zesílení G a zesílení B mohou být nastaveny, pokud je režim nastaven na
pozici Uživatel.
• Poměr stran
Můžete si vybrat velikost obrazu, která nejlépe koresponduje s vašimi požadavky na
zobrazení.
• NR
Redukce hluku na obrazovce bez jakéhokoli narušení kvality videa.
• Podsvícení
Kontrola jasu obrazovky, nastavení jasu panelu.
• Úspora energie
Úsporu energie můžete nastavovat, pokud je režim Obraz ve Výchozí poloze.
Zap a Vyp funkce Úspora energie.
• Nastavení PC (v režimu PC)
Pomocí klávesy ENTER vstoupíte do podmenu.
Autonastavení: Automatické nastavení obrazu.
H pozice: Centrování obrazu posunováním doleva a doprava.
V pozice: Centrování obrazu posunováním nahoru a dolů.
Fáze: Minimalizace horizontálního zkreslení obrazu.
Hodina: Minimalizace vertikálních pruhů na obrazu.
í
Page 47

Nabídka pro provoz
14
Konfigurace nabídky pro Zvuk
• Zvukový režim
Můžete si nastavit režim zvuku
podle svých preferencí.
Můžete nastavit vysoké a nízké
tóny,
pokud je nastaven režim
do polohy Uživatel.
zvuku
• Basy
Nastavení basového efektu. Tato
funkce zvyšuje nebo snižuje nižší
zvuky.
• Výšky
Nastavení efektu vysokých tónů. Tato funkce zvyšuje nebo snižuje vysoké zvuky.
• Vyvážení
Můžete seřídit rovnováhu zvuku v reproduktorech na požadovanou úroveň.
• Surround
Zap nebo Vyp funkce Surround.
• AVL (automatická úroveň hlasitosti)
Když změníte program, AVL zachovává automaticky stejnou úroveň hlasitosti. Každá
vysílací stanice má své vlastní podmínky signálu, proto je třeba při každé změně
kanálu provést úpravu hlasitosti. Tato funkce umožňuje uživatelům vychutnat si
stabilní zvuk zajištěný automatickým seřízením u každého programu.
• SPDIF
Můžete zvolit požadovaný režim SPDIF výstupu.
• AD změna (v režimu DTV)
Jedná se o pomocnou audio funkci, která poskytuje přídavnou zvukovou stopu pro
zrakově postižené osoby. Tato funkce pracuje se zvukovým proudem pro systém AD
(Audio Description), když je signál vyslán spolu s hlavním zvukem z vysílače.
Pomocí klávesy ENTER vstoupíte do podmenu.
Pokud je tento režim zapnutý, může si uživatel nastavit hlasitost sám.
• Zpoždění zvuku
Tato funkce opravuje audio-video problémy se synchronizací při sledování DTV a při
poslechu digitálního zvukového výstupu prostřednictvím externího zařízení, například
audio přijímače (-200ms~200 ms).
Če
sk
y
Page 48

Nabídka pro provoz
15
Konfigurace nabídky pro Kanál
• manažer kanálu
Pomocí klávesy ENTER vstoupíte
do podmenu.
Če
Nejprve stiskněte tlačítko ▲/▼ a
sky
zvýrazněte kanál, který chcete
odstranit, uzamknout, přeskočit
nebo vyměnit.
Potom stiskněte červenou klávesu a
smažte požadovaný kanál.
vybrat
Pomocí zelené klávesy můžete
kanál uzamknout.
Pomocí žluté klávesy můžete kanál přeskočit. (Váš televizor bude automaticky
přeskakovat kanály, pokud budete při zobrazování těchto kanálů používat CH+/CH-.)
Stisknutím modrého tlačítka nastavíte kanál určený k výměně; pak stiskněte tlačítko
pro přesunutí na pozici, kterou chcete vložit.
ítka
č
tla
• Správa oblíbených položek
Pomocí klávesy ENTER vstoupíte do podmenu.
Pro volbu položek stiskněte tlačítko ▲/▼.
Pomocí tlačítka CH+/CH- můžete posunovat stránky seznamu oblíbených položek
nahoru a dolů.
Pro volbu požadované skupiny oblíbených položek používejte červené, zelené, žluté
a modré tlačítko.
• Země
Zvolte požadovanou zemi.
• anténa
Zvolte zdroj antény.
• T/T2(v režimu Air)
Zvolte typ signálu: T, T2, T+T2.
• Autohledání
Pomocí klávesy ENTER se dostanete do submenu.
TV signál je nastaven na režim
Vše: Pomocí klávesy ENTER můžete vyhledávat digitální a analogové kanály.
DTV: Pomocí klávesy ENTER můžete vyhledávat digitální kanály.
ATV: Pomocí klávesy ENTER můžete vyhledávat analogové kanály.
POZNÁMKA: • Televize si nyní bude pamatovat všechny dostupné kanály. Když je
lišta pro indikaci postupu plná, budou nalezené kanály uloženy a jednotka bude dále
vyhledávat režimy ATV, DTV, Rádio a Datum.
Vzduch.
Page 49

Nabídka pro provoz
16
TV signál je nastaven na režim Kabel.
Vše: Pomocí klávesy ENTER vstoupíte do podmenu.
– Režim skenování: Pomocí klávesy ▲/▼ zvolte režim skenování: Hledání naslepo
nebo Rychlé hledání. ID sítě a Frekvence (kHz) můžete nastavit tehdy, když je
režim skenovánív pozici rychlého skenování.
– ID sítě: Pomocí klávesy ◄/► zvolte identifikaci sítě: Automatický režim nebo
zadávání digitálních čísel.
– Frekvence (kHz): Pomocí klávesy ◄/► můžete zvolit požadovanou frekvence (kHz):
Automatický režim nebo zadávání digitálních čísel.
– Operátor: ▲/▼ pro výběr poskytovatele služeb.Použijte tlačítka
– Start: Pomocí klávesy ENTER můžete zahájit vyhledávání kanálů.
DTV: Pomocí klávesy ENTER můžete vyhledávat digitální kanály.
– Režim skenování: Pomocí klávesy ▲/▼ zvolte režim skenování: Hledání naslepo
nebo Rychlé hledání. ID sítě a Frekvence (kHz) můžete nastavit tehdy, když je
režim skenování v pozici rychlého skenování.
– ID sítě: Pomocí klávesy ◄/► zvolte identifikaci sítě: Automatický režim nebo
zadávání digitálních čísel.
– Frekvence (kHz): Pomocí klávesy ◄/► můžete zvolit požadovanou frekvence (kHz):
Automatický režim nebo zadávání digitálních čísel.
– Operátor: ▲/▼ pro výběr poskytovatele služeb.Použijte tlačítka
– Start: Pomocí klávesy ENTER můžete zahájit vyhledávání kanálů.
ATV: Pomocí klávesy ENTER můžete vyhledávat analogové kanály.
TV signál je nastaven na režim Satelit.
DTV: Pomocí klávesy ENTER můžete vyhledávat digitální kanály.
– Režim skenování: Pomocí klávesy ▲/▼ zvolte režim skenování: Tovární, Hledání
sítě nebo Hledání naslepo.
– Satelit: Pomocí klávesy ▲/▼ můžete zvolit názvy satelitů.
– Typ služby: Pomocí klávesy ▲/▼ můžete zvolit typ služby: Všechny služby nebo
Volná služba.
– Typ kanálu: Pomocí klávesy ▲/▼ můžete zvolit typ kanálu: Vše nebo Pouze TV.
– Start: Pomocí klávesy ENTER můžete zahájit vyhledávání kanálů.
• DTV manuální skenování
Pomocí klávesy ENTER vstoupíte do podmenu.
TV signál je nastaven na režim Vzduch.
Kanál: Pomocí klávesy ▲/▼ můžete zvolit číslo kanálu.
Frekvence (kHz): Zobrazení frekvence aktuálního TV signálu, nebo zadání frekvence
definované uživatelem.
Šířka pásma (MHz): Pomocí klávesy ▲/▼ můžete zvolit šířku pásma.
Start: Pomocí klávesy ENTER můžete zahájit vyhledávání kanálů.
TV signál je nastaven na režim Kabel.
Frekvence (kHz): Zobrazení frekvence aktuálního TV signálu.
Hodnocení symbolu (KS/s): Pomocí klávesy ◄/► můžete zvolit funkci SymbolRate:
Automatický režim nebo zadávání digitálních čísel.
Modulace (QAM): Pomocí klávesy ▲/▼ můžete zvolit funkci Modulace: Auto, 16QAM,
32QAM, 64QAM, 128QAM nebo 256QAM.
Start: Pomocí klávesy ENTER můžete zahájit vyhledávání kanálů.
Če
sk
y
Page 50

Nabídka pro provoz
17
• Manuální skenování ATV
Pomocí klávesy ENTER vstoupíte do podmenu.
Současný kanál: Pomocí klávesy ▲/▼ můžete zvolit aktuální kanál.
Frekvence: Zobrazení frekvence aktuálního TV signálu.
Če
Hledání: Pomocí klávesy ENTER vstoupíte do režimu skenování; a potom pomocí
sky
klávesy ◄/► zvolte analogové skenování.
Jemné ladění: Pomocí klávesy ENTER vstoupíte do režimu jemného ladění; potom
stiskněte klávesu ◄/► a zvolte jemné ladění.
Barevný systém: Pomocí klávesy ▲/▼ zvolte funkci Color System.
Zvukový systém: Pomocí klávesy ▲/▼ zvolte funkci Sound System.
Stiskněte červené tlačítko pro uložení.
• LCN
Pomocí klávesy ▲/▼ zvolte LCN Zap nebo Vyp.
• Satelitní systém (pouze satelitní signál)
Pomocí klávesy ENTER nebo ► se dostanete do Satelitního systému.
• CI informace
Pomocí klávesy ENTER nebo ► se dostanete do režimu CI Informace.
Konfigurace Čas
• Auto synchro
Pomocí klávesy ▲/▼ můžete zvolit
následující položky Auto Sync Zap
nebo Vyp.
Nastavit Auto Sync na Off; potom
můžete nastavit Datum a Čas
manuálně.
• Datum
Stiskněte tlačítka s čísly a nastavte
datum.
• Čas
Stiskněte tlačítka s čísly a nastavte čas.
• Časové pásmo
Zvolte svou časovou zónu.
Pokud je funkce Auto Sync zapnuta (On), může uživatel nastavit časovou zónu.
• DST (Daylight Saving Time)
Pokud je Časová zóna nastavena na libovolnou hodnotu, je tato položka k dispozici
pro aktivaci letního času.
• Usínání
Volba doby do okamžiku automatického přepnutí televizoru do pohotovostní pozice.
• Autousínání
Zvolte požadovaný čas Auto Sleep.
• OSD časovač
Volba doby pro zobrazení menu na obrazovce.
nabídky pro
Page 51
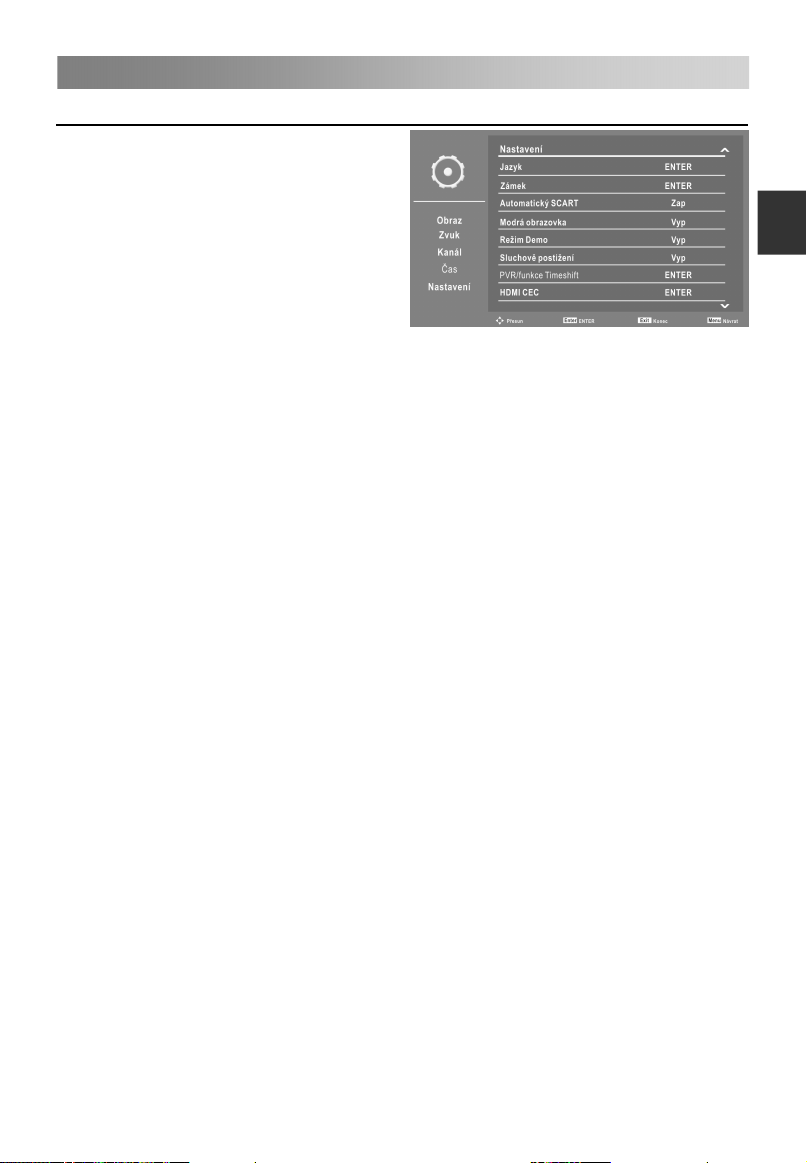
Nabídka pro provoz
18
Konfigurace Nastavení
• Jazyk
Pomocí klávesy ENTER se dostanete
do submenu.
– OSD jazyk: Pomocí klávesy ▲/▼
zvolíte funkci On Screen Jazyk
obrazovky.
– 1. preferovaný titulek (v DTV
režimu): Pomocí klávesy ▲/▼
zvolíte jazyk 1. preferovaných
titulků.
– 2. preferovaný titulek (v DTVrežimu): Pomocí klávesy ▲/▼ zvolíte jazyk 2.
preferovaných titulků.
– 1. preferované audio (v režimu DTV): Pomocí klávesy ▲/▼ zvolíte jazyk 1.
preferované funkce Audio.
– 2. preferované audio (v režimu DTV): Pomocí klávesy ▲/▼ zvolíte jazyk 2.
preferované funkce Audio.
– Jazyk teletextu DTV: Pomocí klávesy ▲/▼ zvolíte Jazyk digitálního Teletextu.
– ATV Teletext jazyk: Pomocí klávesy ▲/▼ zvolíte Jazyk analogového Teletextu.
• Zámek
Pomocí klávesy ENTER vstoupíte do podmenu.
Zadejte své heslo (nejprve 0000); potom následně přejdete do submenu.
POZNÁMKA: • Pokud zapomenete heslo, použijte super heslo 1225.
– Zámek systému
Pomocí klávesy ▲/▼ můžete systém uzamykání Zap nebo Vyp.
Pokud je Systém uzamykání zapnut (On), může uživatel nastavit rodičovské
nastavení.
– Hlavní vedení
Pomocí klávesy ▲/▼ zvolte režim Rodičovské nastavení.
Pomocí této funkce zabráníte dětem v sledování TV programů pro dospělé, podle
nastaveného hodnocení.
– Změnit heslo
Pomocí klávesy ENTER vstoupíte do podmenu.
Můžete si nastavit své soukromé heslo. Pro nastavení soukromého hesla použijte
klávesy s čísly na dálkovém ovládači. Po druhém zapsání hesla bude nastavení
úspěšně dokončeno.
• Automatický SCART
Pomocí klávesy ▲/▼ můžete Zap nebo Vyp funkci Auto SCART.
• Modrá obrazovka
Pomocí klávesy ▲/▼ můžete Zap nebo Vyp funkci Blue Screen.
POZNÁMKA: • V režimech DTV a USB nejsou dostupné.
• Režim Demo
Pomocí klávesy ▲/▼ můžete Zap nebo Vyp funkci Demo Mode.
• Sluchově postižení
Pokud je tato funkce zapnuta, bude televizor předávat určité informace uživatelům se
zhoršeným sluchem. Když je funkce pro sluchově postižené vypnutá, bude informace
skryta.
nabídky pro
Če
sk
y
Page 52

Nabídka pro provoz
19
POZNÁMKA: • Pokud není v režimu DTV Jazyk titulků vypnutý, může si uživatel
nastavit funkci pro sledování.
• PVR/funkce Timeshift (v režimu DTV)
Pomocí klávesy ENTER vstoupíte do podmenu. Bude provedena kontrola USB.
Če
– Volba oddílu: Zvolte disk pro PVR.
sky
Pomocí červené klávesy naformátujte disk USB.
Pomocí zelené klávesy můžete nastavit výchozí velikost příčky.
POZNÁMKA:
• Některé modely mají vstup složený ze dvou USB. Pokud jsou zapojeny dvě USB
zařízení, můžete použít několik disků.
• Před formátováním si prosím zálohujte všechny důležité soubory.
• Během formátování zařízení neodpojujte, ani nevypínejte napájení. Pokud
nemůžete své USB zařízení formátovat, nebo toto zařízení nemůže být
zkontrolováno systémem, znamená to, že zařízení není kompatibilní s televizorem
nebo je poškozeno. Formátování u většího zařízení USB bude trvat delší dobu.
Buďte trpěliví a vyčkejte na dokončení procesu formátování.
– Automatická funkce Timeshift: Pomocí klávesy ▲/▼ zvolte funkci Auto Timeshift:
Režim Vypnuto nebo Auto.
– Vel. Vyr. Pam ť: Pomocí klávesy ▲/▼ zvolte funkci Auto Timeshift: Auto, 30 minut,
1 hodina nebo 2 hodiny.
Díky této funkci je možné automaticky nahrávat Live pořady v TV. Tyto pořady si
pak můžete kdykoli později přehrát. Pokud je funkce TimeShift zapnuta, můžete
kdykoli převíjet normální obraz TV, a přitom nezmeškáte žádný z Live pořadů.
ä
1. Automatická funkce Timeshift (Auto Timeshift):
1). Pokud je v rámci funkce Auto Timeshift zvolen režim Auto, televize spustí
funkci časového posunu o 6 sekund později. Současně se na obrazovce
zobrazí menu s upomínkou a kontrolka bude blikat.
2). Během nahrávání stiskněte ▲/▼pro zvětšení/zmenšení nabídky.
3). Pomocí klávesy ◄/► můžete zvolit režim přehrávání, pauzy, zastavení,
rychlého pohybu vzad a rychlého pohybu vpřed.
4). Stiskněte klávesu MENU, poté stiskněte klávesu ▲/▼a zvolte Setup. Potom
stiskněte tlačítko ► a zvolte položky; poté stiskněte tlačítko ▲/▼ a zvolte
PVR/TimeShift. Pomocí klávesy ENTER můžete přejít do submenu; stiskněte
tlačítko ▲/▼ a zvolte Auto Timeshift; potom stiskněte tlačítko ▲/▼ a
zastavte proces nahrávání.
Page 53
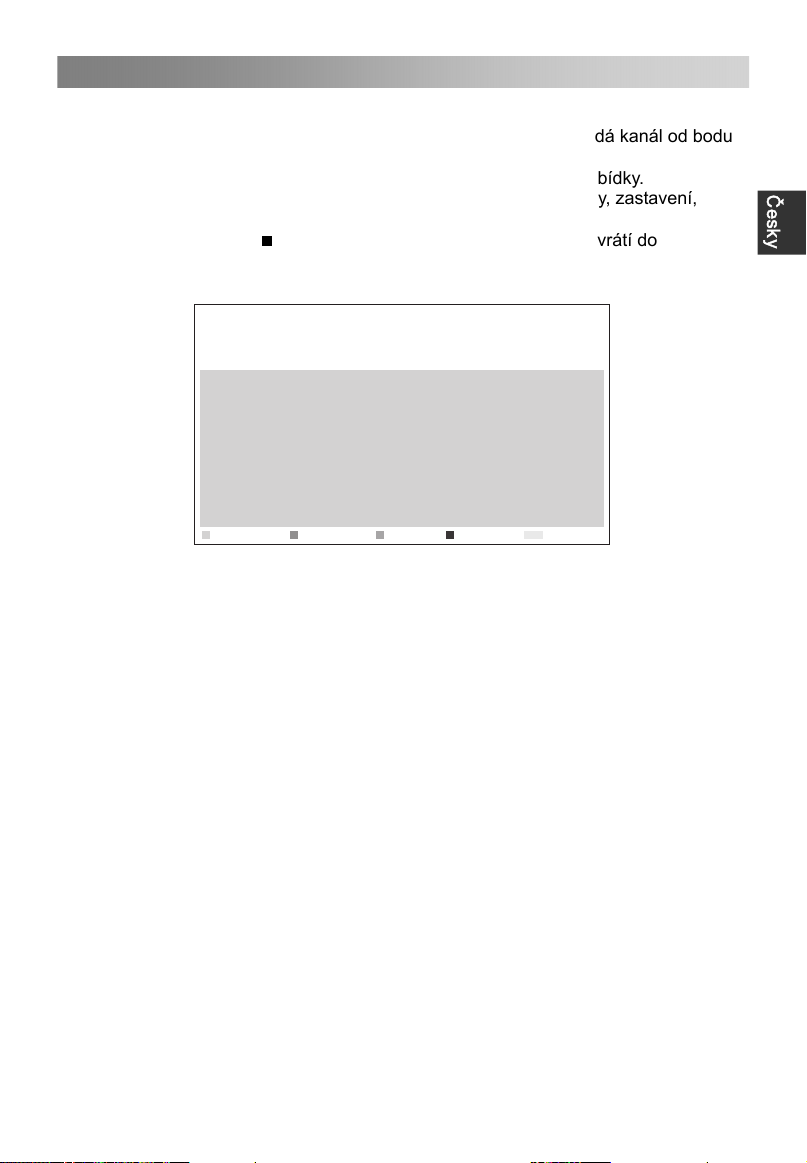
Nabídka pro provoz
20
2. Manuální časový posun (Manual Timeshift):
1). Pomocí klávesy II aktivujte funkci Time Shift. Televizor ukládá kanál od bodu
zobrazení, který chcete nahrávat.
2). Během nahrávání stiskněte ▲/▼pro zvětšení/zmenšení nabídky.
3). Pomocí klávesy ◄/► můžete zvolit režim přehrávání, pauzy, zastavení,
rychlého pohybu vzad a rychlého pohybu vpřed.
4). Pomocí klávesy
normálního režimu vysílání.
– Časovač: Pomocí klávesy ENTER vstoupíte do podmenu.
01
02
03
04
05
06
07
08
09
Sma ž
Pro nastavení parametrů pro plánované nahrávání. Plánované nahrávání může být
zahájeno v určeném čase.
Vymazat: Pomocí červené klávesy můžete asova smazat.
Vymazat vše: Pomocí zelené klávesy můžete smazat všechna asova e.
Přidat: Pomocí žluté klávesy můžete přidat asova .
-Nahrávání: Pomocí klávesy ▲/▼ můžete nahrávací zařízení Zap nebo Vyp.
Pokud je nahrávací zařízení zapnuto, může si uživatel nastavit dobu trvání sám.
-Type: Pomocí klávesy ▲/▼ můžete zvolit typ: DVT nebo R dio.
V případě nastavení typu DTV si může uživatel nastavit Dobu trvání.
-Kanál: Pomocí klávesy ▲/▼ můžete zvolit příslušný kanál.
-Čas startu: Zadejte čas zahájení nahrávání.
-Trvání: Nastavte dobu trvání nahrávání.
-Datum: Nastavte datum nahrávání.
-Režim: Pro volbu režimu stiskněte tlačítko ▲/▼: Jednou, denně, týdně nebo
měsíčně.
Pomocí klávesy MENU uložíte výše provedená nastavení.
Upravit: Pro editaci asova stiskněte modrou klávesu.
– Seznam nahrávání: Pomocí klávesy ENTER vstoupíte do podmenu.
Pokud jsou zapojena zařízení pro několikanásobné nahrávání, budou tato zařízení
uvedena na seznamu. Vymazat: V seznamu zvolte jedno zařízení pro nahrávání.
Stiskněte červené tlačítko pro smazání.
– Start rekordéru:
Funkce okamžitého nahrávání se používá pro nahrávání aktuálních TV programů.
Pomocí klávesy ENTER se dostanete do submenu; potom zvolte OK a začněte
nahrávat.
zastavíte proces nahrávání; televize se vrátí do
Čís lo kaná lu
Zma všež
Kanál
Čas ovač
Start
Při dat
01/01/2007 12:00:03
Trvání Datum Režim
Menu
Upr avit
Návr at
č č
č č
č č
č č
á
Če
sk
y
Page 54

Nabídka pro provoz
21
Če
sky
1. Během nahrávání stiskněte ▲/▼pro zvětšení/zmenšení nabídky. Stiskněte
klávesu pro nastavení doby nahrávání.
2. Pomocí klávesy
režimu vysílání.
3. Pomocí klávesy ◄/► můžete zvolit režim přehrávání, pauzy, zastavení, rychlého
pohybu vzad a rychlého pohybu vpřed.
POZNÁMKA:
USB disk s kapacitou alespoň 512MB.
USB zařízení musí podporovat vysokorychlostní specifikaci USB 2.0.
Pokud nebylo možné provést záznam, naformátujte prosím vložený USB zařízení.
Během formátování toto zařízení neodpojujte. Pokud provedete formátování tohoto
zařízení, budou všechny soubory smazány. Před formátování, zařízení přes televizi
proveďte zálohování všech souborů, aby nedošlo k poškození nebo ztrátě dat.
Pokud se v USB disku objeví zavirované soubory, pak formátování neproběhne
správně.
Pokud má USB zařízení několik segmentů, může si PVR systém vybrat jakýkoli z
nich a s ním pak provést nahrávání.
Pokud je po celou dobu používán nahrávací systém PVR, bude exit z tohoto
systému proveden automaticky.
USB paměť musí podporovat vysokorychlostní specifikaci USB 2.0.
Některá z nestandardních zařízení USB nemusejí být podporována.
• HDMI CEC
Pomocí klávesy ENTER přejděte do submenu.
Systém HDMI CEC můžete používat pouze s takovými zařízeními, která obsahují
funkci HDMI CEC. Zařízení HDMI CEC připojte pomocí kabelu HDMI. Některé kabely
HDMI nemusejí podporovat funkce HDMI CEC.
– HDMI CEC: Pomocí klávesy ▲/▼ můžete Zap nebo Vyp funkci HDMI CEC.
Když je zapnuta funkce HDMI CEC, může uživatel nastavit programy Auto Power
On a Auto Standby.
– Automatické napájení: Pomocí klávesy ▲/▼ můžete Zap nebo Vyp funkci Auto
Power.
Pokud je aktivní funkce Auto Power On, zapněte aktivní zařízení s CEC s aktivním
HDMI vstup; TV se zapne.
– Automatický pohotovostní režim: Pomocí klávesy ▲/▼ můžete zapnout nebo
vypnout funkci Auto Standby.
zastavíte proces nahrávání; televize se vrátí do normálního
Page 55

Nabídka pro provoz
22
Jakmile uživatel vypne televizor, všechna aktivní zařízení CEC na vstupu HDMI
přejdou do pohotovostního režimu.
– Preference reproduktoru: Pomocí klávesy ▲/▼ můžete zvolit preference pro
reproduktor: TV reproduktory nebo zesilovač.
– Podpora zesilovače ARC: Pomocí klávesy ▲/▼ můžete zapnout nebo vypnout
zesilovač s podporou ARC. Aktivace audio systému přes AV přijímač
prostřednictvím HDMI.
• Tovární
Obnova nastavení systému pro usnadnění nastavení TV.
• Aktualizace softwaru
Aktualizace TV pomocí nejnovějšího softwaru přes USB.
• Verze
Zobrazení aktuální informace softwaru.
Použití režimu USB
• Pro přístup do USB režimu/pro ukončení USB režimu
1. Připojte USB zařízení.
2. Pomocí klávesy SOURCE zobrazíte hlavní menu. Pomocí klávesy ▲/▼ můžete
zvýraznit USB; pomocí klávesy ENTER můžete přistoupit do USB režimu.
3. Pro odchod z režimu USB můžete použít také nabídku pro výběr zdroje signálu.
POZNÁMKA:
Zařízení USB nemusí být dostatečně podporováno, nebo nemusí být podporováno
vůbec.
USB max. Zatížení: DC5V 500mA.
• Podporované formáty
Funkce USB může podporovat USB zařízení s pamětí USB.
Můžete přehrávat Fotografie, Hudba, Film nebo Text soubory.
Podpora formátů fotografie: JPEG, BMP, PNG.
Podpora formátů hudba: MP3, AAC, M4A.
Podpora formátů film: AVI, DAT, MPEG -1 / MPEG-2 / MPEG-4, TS/TP.
Podpora formátů text: TXT.
POZNÁMKA:
• Dokumenty se speciálními algoritmy nemusejí být dostatečně podporovány pomocí
USB, nebo nemusejí být podporovány vůbec.
• Jednotka USB podporuje výše uvedené formáty. Pokud není formát podporován,
proveďte změnu na uvedené formáty.
• Hlavní operač
Če
sk
y
Page 56
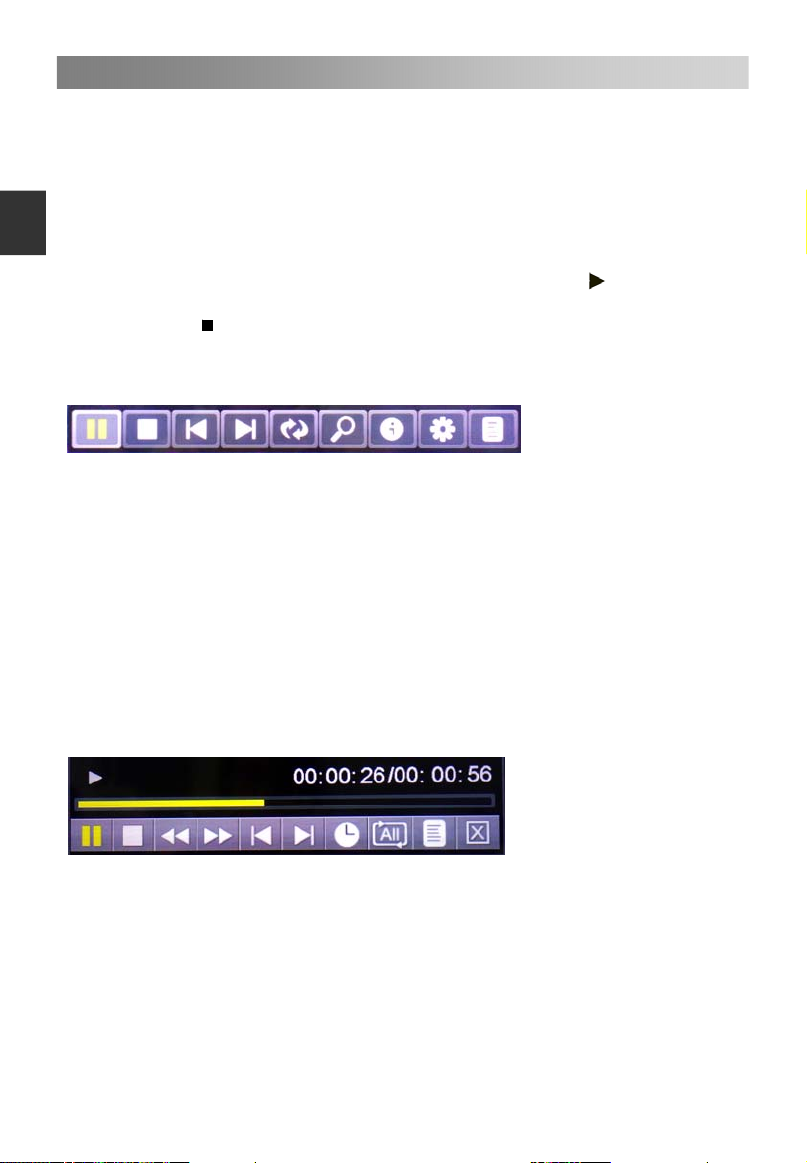
Nabídka pro provoz
23
Pomocí klávesy ◄/► vyberte režimy Fotografie, Hudba, Film nebo Text. Pomocí
klávesy ENTER vstupte do submenu.
Pomocí klávesy ▲/▼ vyberte disk, který chcete sledovat; potom stiskněte klávesu
ENTER.
Če
Pomocí klávesy CH+/CH- můžete změnit stránku.
sky
Pomocí červené klávesy smažete režim Fotografie/Hudba/Film/Text.
Pro změnu režimu zobrazení stiskněte zelenou klávesu (v režimu Fotografie).
Pomocí klávesy ▲/▼ zvýrazněte složku; poté stiskněte klávesu ENTER.
Pomocí klávesy ▲/▼ zvýrazněte soubor; poté stiskněte klávesu
Pomocí klávesy ENTER přejděte do rychlého menu.
Pomocí klávesy ukončíte přehrávání souborů.
Pomocí klávesy EXIT se vrátíte do předchozího menu.
Fotografie Konzola pro přehrávání
1. Přehrávání/pauza: Přepínání mezi stavem přehrávání a pauzy
2. Stop: Zastavení přehrávání.
3. Předchozí: Pro přehrávání předchozího souboru ve stejném adresáři.
4. Další: Pro přehrávání dalšího souboru ve stejném adresáři.
5. Otáčení doprava: Otáčení doprava o 0, 90, 180 a 270 stupňů.
6. Zvětšování: Zvětšování obrazu.
7. Info: Informace o obrazu.
8. Nastavení fotografie: Pomocí klávesy ▲/▼ zvolte režim Opakování, Hudba na
pozadí, Zdroj hudby, Doba snímku, Efekt. Potom pomocí klávesy ◄/► nastavte
požadovanou hodnotu.
9. Seznamy skladeb: Zobrazení seznamů skladeb. Pomocí zelené klávesy smažete
fotografii a pomocí červené klávesy smažete všechny fotografie v seznamu.
Hudba Konzola pro přehrávání
přehrávání.
1. Přehrávání/pauza: Přepínání mezi stavem přehrávání a pauzy
2. Stop: Zastavení přehrávání.
3. Rychlý posun vzad.
4. Rychlý posun vpřed.
5. Předchozí: Pro přehrávání předchozího souboru ve stejném adresáři.
6. Další: Pro přehrávání dalšího souboru ve stejném adresáři.
7. Doba přechodu: Zvolte nastavení doby pro přehrávání hudby.
8. Režim přehrávání: Pomocí klávesy ENTER vyberte 4 režimy.
9. Seznam skladeb: Pro přehrávání hudebního souboru ve stejném adresáři.
10. Odejít: Pomocí klávesy ENTER se vrátíte do předchozího menu.
Page 57
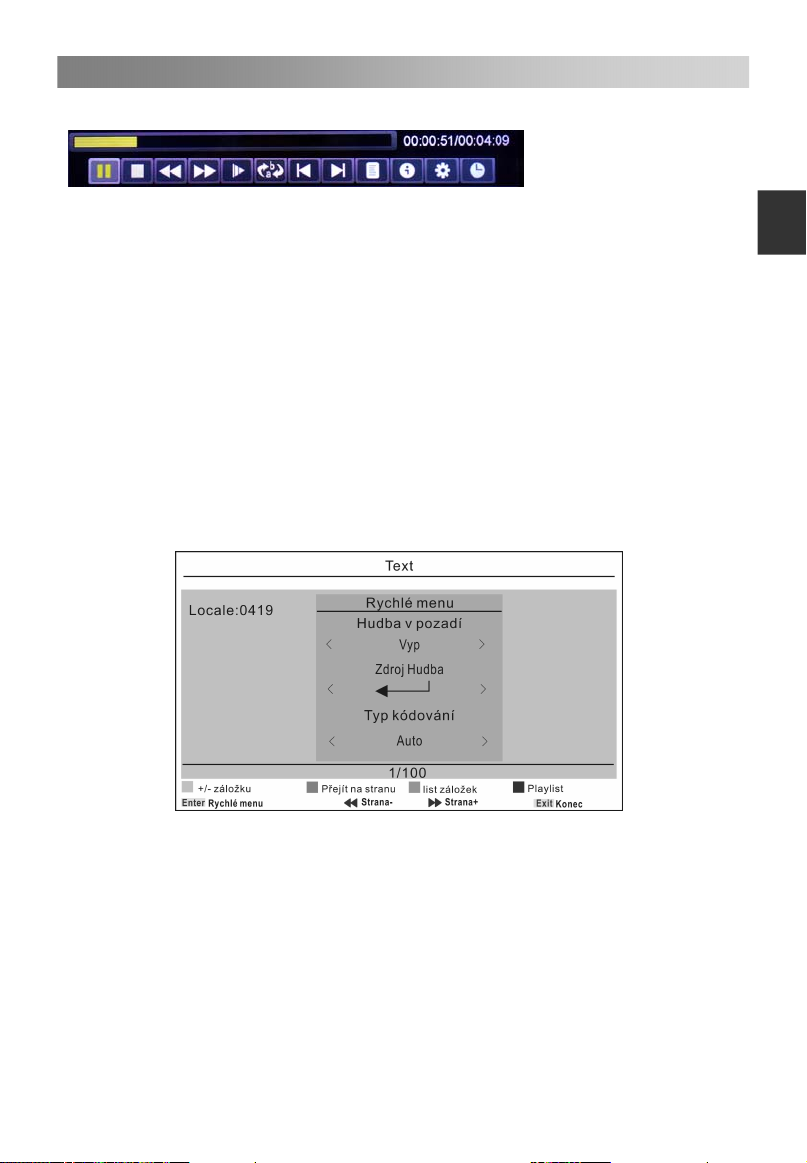
Nabídka pro provoz
24
Film Konzola pro přehrávání
1. Přehrávání/pauza: Přepínání mezi stavem přehrávání a pauzy.
2. Stop: Zastavení přehrávání.
3. Rychlý posun vzad.
4. Rychlý posun vpřed.
5. Přehrávání v pomalém pohybu.
6. Přehrávání A-B: Přehrávání videa mezi dvěma časovými body.
7. Předchozí: Pro přehrávání předchozího souboru ve stejném adresáři.
8. Další: Pro přehrávání dalšího souboru ve stejném adresáři.
9. Seznamy skladeb: Zobrazení seznamů skladeb. Pomocí zelené klávesy smažete
fotografii a pomocí červené klávesy smažete všechny fotografie v seznamu.
10. Info: Informace o filmu.
11. Nastavení filmu: Pomocí klávesy ▲/▼ můžete nastavit Program, Titulky, Audio,
Typ kódování, Režim opakování; potom stiskněte klávesu ◄/► a proveďte své
nastavení.
12. Doba přechodu: Zvolte nastavení doby pro přehrávání filmu.
Text Konzola pro přehrávání
Če
sk
y
1. Pomocí klávesy ENTER přejděte do rychlého menu.
2. Pomocí klávesy ▲/▼ zvolte režim Hudba na pozadí, Zdroj hudby a Typ kódování.
Potom pomocí klávesy ◄/► nastavte požadovanou hodnotu.
3. Pomocí červené klávesy můžete přidat nebo smazat záložku.
4. Pomocí zelené klávesy můžete přejít na požadovanou stranu. Potom zadejte
hodnoty pomocí kláves s čísly; stiskněte ENTER a přejděte na požadovanou
stranu.
5. Stisknutím žlutého tlačítka zobrazíte seznam záložek.
6. Stisknutím modrého tlačítka zobrazíte seznam pro přehrávání textů.
Page 58

ů á áž
25
D le it specifick tla ítka
EPG týdenní režim (režim DTV)
Pomocí klávesy EPG zobrazíte Elektronického programového průvodce. Pomocí této
funkce se můžete dostat k podrobným informacím o kanálu, včetně zobrazení doby
přehrávání programu.
Če
Pomocí kláves se šipkami můžete cyklicky volit mezi všemi možnostmi.
sky
Pomocí klávesy EXIT můžete odejít.
Pomocí červené klávesy můžete nastavit plánované nahrávání.
Pomocí zelené klávesy přejdete k zápisníku, nahrávání, zrušení.
Stiskněte žlutou klávesu a zobrazte průvodce s předchozím datem.
Stiskněte modrou klávesu a zobrazte průvodce s nadcházejícím datem.
Seznam kanálů
Stisknutím klávesy LIST zobrazíte seznam kanálů.
Pomocí klávesy ◄/► můžete zvolit VŠE, DTV, Rádio, Další/data atd.
Pomocí klávesy ▲/▼ můžete zvolit požadované položky. Pomocí klávesy ENTER
můžete přejít k požadovanému kanálu.
Pomocí tlačítka CH+/CH- můžete posunovat stránky seznamu kanálů nahoru a dolů.
Pomocí klávesy EXIT můžete odejít.
Seznam oblíbených
Pomocí klávesy FAV můžete zobrazit seznam oblíbených položek.
Použitím tlačítka ◄/►zvolte funkci Oblíbené položky 1,2,3,4.
Pomocí klávesy ▲/▼ můžete zvolit požadované položky. Pomocí klávesy ENTER
můžete přejít k požadovanému kanálu.
Pomocí tlačítka CH+/CH- můžete posunovat stránky seznamu oblíbených položek
nahoru a dolů.
Pomocí červené klávesy můžete přejmenovat oblíbený typ.
POZNÁMKA: Box pro přejmenování oblíbeného typu podporuje až 14 znaků; znak
„@“ zahrnuje 2 normální znaky.
Pomocí klávesy EXIT můžete odejít.
č
Page 59

Průvodce pro řešení problémů
26
Používání funkce Teletext
•
Zobrazení Teletextu
1. Zvolte TV stanici s teletextovým signálem.
2. Pomocí tlačítka
3. Pomocí tlačítka můžete vstoupit do režimu Mix. Tato funkce umožňuje
zobrazení stránky Teletextu přes plochu TV programu.
4. Stiskněte tlačítko pro druhý návrat nebo přejděte do normálního režimu
ATV/DTV.
•
Volba stránky
1. Pomocí tlačítek s číslicemi zadejte číslo stránky (tři číslice). Pokud při zadávání
stisknete nesprávné číslo, musíte dokončit volbu do třetí číslice a poté znovu zadat
správné číslo.
2. Tlačítko můžete použít pro zvolení předcházejícího nebo následujícího
čísla.
•
Podržení
CH+/CH-
Pomocí tlačítka
stiskněte tlačítko znovu.
•
Index
Pomocí Tlačítka
•
Zvětšení textu
Po zobrazení stránky můžete zdvojnásobit velikost textu. Tento text pak bude lépe
čitelný.
1. Pomocí tlačítka
2. Dalším stisknutím tlačítka
3. Pomocí dalšího stisknutí tlačítka
Režim odkrytí
•
Teletextové informace můžete snadno odkrýt (například hádanky nebo skládanky,
atd.) pomocí tlačítka
informaci z obrazu.
Dílčí strana
•
Některé teletextové obrazy mohou obsahovat několik dílčích stran, které se zobrazí
automaticky v určitém cyklu, v závislosti na příslušné TV stanici.
1. Můžete vstoupit přímo na určitou dílčí stránku pomocí tlačítka
strany pomocí číselných tlačítek. Zadejte číslo dílčí stránky
třetí dílčí stránku.
2. Pro odchod z režimu dílčí strany stiskněte tlačítko znovu.
•
Barevná tlačítka (červené, zelené, žluté a modré)
Pomocí těchto tlačítek se můžete dostat přímo k odpovídajícím stránkám s
příslušnými barvami, které jsou zobrazeny ve spodní části teletextové obrazovky.
se dostanete do režimu Teletextu.
můžete podržet příslušnou stránku. Pro uvolnění této stránky
i
můžete vstoupit přímo na stránku s indexem.
můžete zvětšit horní polovinu stránky.
?
můžete zvětšit spodní polovinu stránky.
se vrátíte zpět do normálního zobrazení.
. Stiskněte tlačítko
?
znovu a odstraňte příslušnou
a zvolení čísla
(například 0003) pro
Če
sk
y
Page 60

Řešení problémů
27
Odstraňování problémů
Než se obrátíte na servisního technika, zkuste problém vyřešit pomocí jednoduchých
kroků. Pokud problém i nadále přetrvává, odpojte televizi a zavolejte servis.
Če
sky
PROBLÉM MOŽNÉ ŘEŠENÍ
- Zkontrolujte, zda je zástrčka napájecí šňůry zapojena
Nenaskočil zvuk ani
obraz
Obraz je v pořádku, ale
nenaskočil zvuk
Dálkový ovladač
nefunguje
Televize se znenadání
sama vypnula
Po zapnutí se obraz
objevuje pomalu
Žádné nebo špatné
barvy nebo špatný
obraz
Vodorovné/svislé čáry
nebo se obraz třese
Špatný příjem
některých kanálů
Čáry nebo šmouhy v
obraze
Jeden reproduktor je
bez výstupu
do zásuvky
- Zkontrolujte, zda jste stiskli tlačítko POWER televizního
přístroje
- Zkontrolujte nastavení kontrastu a jasu obrazu
- Zkontrolujte hlasitost
- Zmizel zvuk? Stiskněte tlačítko pro vypnutí zvuku.
- Zkuste jiný kanál, vysílač může mít problémy s
vysíláním.
- Jsou audio kabely řádně zapojeny?
- Zkontrolujte, zda mezi přístrojem a dálkovým
ovladačem není nějaký předmět bránící přenosu
- Jsou baterie správně nainstalovány (+ k + a – k –)?
- Správné nastavení režimu dálkového ovládání: TV,
VCR atd.?
- Vložte do ovladače nové baterie
- Je nastaveno načasování režimu spánku?
- Zkontrolujte napájení. Došlo k výpadku proudu.
- Nebylo naladěno vysílání stanice s automatickým
spuštěním.
- Je to normální, obraz je pozastaven během aktivace
přístroje Obraťte se na svůj servis, pokud se obraz
neobjeví po pěti minutách.
- Upravte barvy v menu Nastavení
- Udržujte dostatečnou vzdálenost mezi výrobkem a
VCR.
- Zkuste jiný kanál, může se jednat o problém s
vysíláním.
- Jsou VIDEO kabely řádně zapojeny?
- Aktivujte libovolnou funkci pro obnovení jasu obrazu.
- Zkontrolujte místní rušení způsobené elektrickým
spotřebičem nebo elektrickým nářadím.
- DVB-T nebo DVB-C vysílání má problémy Nalaďte na
jinou stanici.
- Vysílaný signál je slabý, přesměrujte anténu, abyste
zachytili slabší vysílání.
- Zkontrolujte zdroje možného rušení.
- Zkontrolujte anténu (přesměrujte anténu).
- Upravte vyvážení hlasitosti v menu Výběr
Page 61

Řešení problémů
28
POZNÁMKA: Problém v režimu VGA (týká se pouze režimu VGA).
PROBLÉM MOŽNÉ ŘEŠENÍ
Signál je mimo dosah.
Vertikální pruh nebo pás na
pozadí a horizontální
šum a nesprávná pozice
obrazu.
Barvy na obrazovce jsou
nestabilní nebo se jedná
pouze o jednu barvu.
Údržba
Pomůže předcházet selhání přístroje. Pečlivé a pravidelné čištění může prodloužit
životnost televize. Než začnete s čištěním, zkontrolujte, zda jste vypnuli televizi a
odpojili napájecí šňůru.
Čištění obrazovky
1. Existuje skvělý způsob, jak na chvíli zabránit usazování prachu na obrazovce.
Navlhčete měkký hadřík ve vlažné vodě s malým množstvím avivážního prostředku
nebo prostředku na mytí nádobí. Vyždímejte hadřík, až je skoro suchý a pak jím
otřete obrazovku.
2. Zkontrolujte, že jste setřeli z obrazovky přebytečnou vodu a pak ji nechte volně
uschnout. Teprve potom zapněte televizi.
Čištění krytu
Chcete-li odstranit špínu nebo prach z krytu televize, otřete jej měkkým suchým
hadříkem bez žmolků. Nikdy nepoužívejte vlhký hadřík.
Delší nepřítomnost
Pokud očekáváte, že svou televizi nebude delší dobu používat (např. po dobu
dovolené), bude vhodné odpojit napájecí šňůru, abyste televizi ochránili před
poškozením bleskem nebo přepětím.
Likvidace starých elektrických spotřebičů
Evropská směrnice 2012/19/EU o odpadních elektrických a elektronických
zařízeních (WEEE) požaduje, aby se staré elektrické spotřebiče používané v
domácnosti nevyhazovaly do normálního směsného komunálního odpadu.
Staré spotřebiče se musí sbírat odděleně, aby se optimalizovalo zužitkování
a recyklace materiálů, které obsahují, a snížil se dopad na lidské zdraví a
životní prostředí.
Přeškrtnutý symbol popelnice na výrobku vám připomíná vaši povinnost při likvidaci
spotřebiče v rámci odděleného sběru odpadu.
Spotřebitelé se musí obrátit na své místní orgány nebo na prodejce, kde získají
informace o správné likvidace jejich starého spotřebiče.
Tento výrobek splňuje požadavky směrnic EU o elektromagnetické
kompatibilitě a elektrické bezpečnosti.
- Upravte rozlišení, horizontální nebo vertikální
kmitočet.
- Zkontrolujte, zda je signální kabel zapojen nebo
odpojen.
- Zkontrolujte zdroj vstupního signálu.
- Spusťte automatické konfigurování nebo nastavte
hodiny, fázi nebo H/V pozici.
- Zkontrolujte signální kabel.
- Přeinstalujte video kartu počítače
Če
sk
y
Page 62

Page 63

Inhaltsverzeichnis
Warnung…………………………………………………………………….…..……… 1
Sicherheit Anweisungen……………………………………………………....….… 3
Haupteinheit …………………………...…………..………..……..……….......…… 5
Vorderes Bedienfeld…….......................………………………..………….……... 5
Rückseite und Seitenflächen
Einleitung………………………...………………………..……..……............……… 7
Fernbedienung………………………………………………….…...................…... 7
Einsetzen der Batterien in die Fernbedienung……………………………..….… 7
Austauschen der Batterien……………………………..……………………….… 7
Anschluss und Einrichtung………………...…………………………………..…... 8
Anschlie ßen von Kabeln …………………………………………………………….8
Fernbedienung………………………..………………………………………….....… 9
Basismerkmale…………………………………………………………………..…...11
Ein- und Ausschalten des Fernsehers……………………………………..……..11
Programm-Auswahl……….……………………………………………................11
Lautst rkeregelung…………………………………………………………............11
ä
Ä
ndern der Eingangsquelle…..……………………………………………….......11
Men bedienung
ü
KURZANLEITUNG……………….………………………………………….......…. 12
Navigaton der Men s…………………………………………………………........ 12
Konfiguration des Bild Menüs……..……………………………………………….1 3
Konfiguration des Ton Menüs…………..…………………………………….……1 4
Konfiguration des Kanal Men
Konfiguration des Zeit Men
Konfiguration des Einrichtung Men
Benutzung des USB-Modus……………………………….…………………...… 23
Wichtige Sondertasten...................................................................................... 27
EPG Wochenmodus ………....………………………….……………………...… 27
Kanalliste……………………………………………………………………….....… 27
Favoritenliste………………………………………………………………….......… 27
Teletext…………………………………………………………………………...….... 2 8
Benutzung der Videotextfunktion …….…………............................................. 2 8
Fehlerbehebungsanleitung……………………………………………………....... 29
Fehlerbehebung…………….………………………………………………...….... 29
Wartung…………………………………………………………………..................30
………………………………………………………………………1 2
ü
........................................……………..………… 6
ü
s……………………………………………...…....15
ü
s ………...…………………………………………....1 7
s……..…………………………………....…1 8
ü
Deutsch
Page 64

Warnung
1
VORSICHT!
RISIKO EINES UNFALLES DURCH
ELEKTRISCHEN
STRO M NICHT ÖFFNEN
Deutsch
WARNUNG:
EMPFANGSSTÖRUNGEN
Dieses Gerät erzeugt und verwendet Funkwellen und kann diese emittieren.
Wenn
zu
Störungen der Funkkommunikation kommen. Es besteht jedoch keine
Garantie,
können.
verursachen
so können Sie eine der folgenden Maßnahmen ergreifen:
-Ve rs e tz e n Sie die Empfangsantenne.
-Erhöhen Sie den Abstand zwischen dem Gerät und dem Empfänger.
-Schließen Sie das Gerät und den Empfänger an einen jeweils unterschiedlichen
Str om kr ei se s an.
-Wenden Sie sich an Ihren Händler oder einen erfahrenen
Radio-/Fernsehtechniker.
Durch nicht ausdrücklich genehmigte Veränderungen kann die Erlaubnis zum
Betrieb des Geräts erlischen.
VORSICHT
Nehmen Sie ohne die schriftliche Genehmigung des Lieferanten keine
Veränderungen an diesem Produkt vor. Durch nicht genehmigte Veränderungen
kann die Erlaubnis zum Betrieb dieses Produkts erlischen.
Den Bildschirm nicht über einen längeren Zeitraum auf einem Standbild
eingeschaltet
heller
Figuren und Illustrationen in diesem Benutzerhandbuch sind nur für Referenz zur
Verfügung
Produktentwurf
Dieses Produkt erfüllt die Anforderung der EU-Richtlinien über
elektromagnetische Kompatibilität und elektrische Sicherheit.
STROMSCHLAGGEFAHR! GEHÄUSE NICHT ÖFFNEN.
REPARATUREN
Ein Dreieck mit Blitz dient als Warnung vor nicht isolierter gefährlicher
Spannung
Menschen
Ein Dreieck mit Ausrufezeichen weist auf wichtige Anweisungen für
Betrieb
und Wartung in der dem Gerät beigelegten Bedienungsanleitung
hin.
das Gerät nicht gemäß der Gebrauchsanweisung installiert wird, kann es
dass bei einer bestimmten Installation keine Störungen auftreten
Sollte dieses Gerät Störungen beim Radio- oder Fernsehempfang
(dies können Sie durch Ein- und Ausschalten des Geräts feststellen),
lassen. Bitte vermeiden Sie die dauerhafte Darstellung extrem
Bilder auf dem Bildschirm.
gestellt und dürfen sich von Aktualprodukterscheinung unterscheiden.
NUR VON FACHLEUTEN DURCHFÜHREN LASSEN.
im
Gehäuse des Geräts, die eine Stromschlaggefahr für
darstellen kann
und Spezifikationen dürfen ohne Kündigung geändert werden.
Page 65

Warnung
2
WARNUNG
Brand- und Stromschlaggefahr! Setzen Sie dieses Gerät nicht Regen oder
Feuchtigkeit aus.
Decken Sie die Lüftungsöffnungen nicht mit Gegenständen wie Zeitungen,
Tischdecken, Vorhängen etc. ab.
Setzen Sie das Gerät nicht Tropf- oder Spritzwasser aus. Stellen Sie keine mit
Flüssigkeiten gefüllte Behälter, z. B. Vasen, auf das Gerät.
Achten Sie auf eine umweltgerechte Entsorgung der Batterien. Batterien bitte
nicht in den Hausmüll werfen. Wenden Sie sich bei der Entsorgung von Batterien
bitte
Achten Sie beim Installieren des Fernsehgeräts darauf, dass Sie einen Abstand
von mindestens zehn Zentimetern zu anderen Objekten (Wand, Schrankseiten
usw.) einhalten, damit das Gerät ausreichend gelüftet wird. Bei nicht ausreichender
Belüftung kann es zu Feuer oder einem anderen Problem aufgrund von
Hitzebildung im Gerät kommen.
Stellen Sie keine offenen Flammen, z. B. angezündete Kerzen, auf das Gerät.
Zur Verhinderung der Verbreitung eines Brandes sollten Kerzen oder andere
offenen Flamen von dem Produkt stets fern gehalten werden.
Das Gerät kann nicht die volle Leistung erbringen, falls es unter elektrostatischer
Aufladung
behoben werden.
Um jegliche durch das Kippen des Produkts verursachtete Verletzungen zu
vermeiden, werden immer darauf zu achten, dass das ganze Produkt innerhalb
der Tischoberfläche in horizontal angelgt werden sollt.
VORSICHT Stromkabel anschließen
Bei den meisten Geräten ist es empfehlenswert, sie an einen eigenen
Stromkreis anzuschließen, das heißt, an einen Stromkreis mit nur einer
Steckdose,
weiteren Ausgänge oder Nebenkreise haben.
Steckdosen nicht überlasten. Überlastete, lose oder beschädigte Steckdosen,
Verlängerungs-
Kabelisolierung stellen eine Gefahr dar. Sie können einen Stromschlag oder
einen Brand verursachen. Untersuchen Sie deshalb in regelmäßigen Abständen
das
feststellen, so trennen Sie das Kabel vom Stromkreis, verwenden Sie das Gerät
nicht weiter und lassen Sie das Kabel durch ein geeignetes Ersatzteil von einer
autorisierten Servicestelle austauschen. Schützen Sie das Stromkabel vor
physischen
geknickt
Kabel zu treten. Achten Sie besonders auf Stecker, Steckdosen und den
Kabelbefestigung am Gerät.
Das Gerät muss jederzeit vom Stromnetz getrennt werden können, und der
Netzstecker muss sofort gezogen werden können.
Betriebstemperatur: 5°C bis 35°C
Lagertemperatur -15°C bis 45°C Lagerluftfeuchtigkeit: ≤90%
Hergestellt mit Lizenz von Dolby Laboratories.
Dolby und das Doppelt-D-Symbol sind Handelsmarken von Dolby Laboratories.
an
Ihren Händler.
steht. Es kann manuell durch Ausschalten und Einschalten wieder
über die nur dieses Gerät versorgt wird. Der Stromkreis sollte keine
oder Stromkabel, sowie Beschädigungen und Risse der
Kabel Ihres Geräts. Sollten Sie dabei Beschädigungen oder Abnutzungen
und mechanischen Einwirkungen. Das Kabel sollte nicht verdreht,
oder in einer Tür eingeklemmt werden. Vermeiden Sie es auch, auf das
Betriebsluftfeuchtigkeit: ≤80%
Deutsch
Page 66

Sicherheit Anweisungen
3
WICHTIGE SICHERHEITSHINWEISE
1. Lesen Sie diese
Sicherheitshinweise.
2. Bewahren Sie diese
Sicherheitshinweise gut auf.
3. Beachten Sie alle Warnungen.
4. Beachten Sie alle Anweisungen.
Deutsch
5. Verwenden Sie das Gerät nicht in
der Nähe von Wasser.
6. Nur mit einem trockenen Tuch
reinigen.
7. Halten Sie die Lüftungsöffnungen frei.
Installieren Sie das Gerät gemäß den
Anleitungen
des Herstellers.
8. Stellen Sie das Gerät nicht in der Nähe
von Wärmequellen wie Heizkörpern,
Öfen
oder anderen Wärme
erzeugenden
Verstärkern)
9. Manipulieren Sie nicht den gepolten
Stecker oder den Schutzkontaktstecker.
Ein
gepolter Stecker hat zwei
Kontaktstifte,
Ein Schutzkontaktstecker hat zwei
Kontaktstifte und eine dritten Pol zum
Ableiten
breite Kontaktstift bzw. der dritte Pol
dienen
Stecker
wenden Sie sich an einen Elektriker,
so
um die Steckdose austauschen zu
lassen.
Geräten (z. B.
auf.
wovon einer breiter ist.
gefährlicher Spannungen. Der
Ihrer Sicherheit. Sollte der
nicht in Ihre Steckdose passen,
Page 67

Sicherheit Anweisungen
4
10. Verlegen Sie das Stromkabel so,
dass niemand darüber stolpern oder
darauf
treten kann. Schützen Sie
das Kabel gegen Beschädigung,
besonders an den Steckern,
Steckdosen
am
Gerät.
und am Kabelaustritt
11. Verwe nden Sie nur vom Hersteller
zugelassenes Zubehör.
12. Verwe nden Sie nur vom Hersteller
zugelassene
Gerät
Stative
Gerätes
Ähnlichem
geschehen,
Gerätes
oder zusammen mit dem
verkaufte TV-Wagen, Ständer,
oder Tische. Der Transport des
durch einen TV-Wagen oder
sollte mit Vorsicht
um
ein Umfallen des
vermeiden.
zu
Entsorgung
- Entsorgen Sie dieses Produkt nicht im normalen Hausmüll.
- Halten Sie sich bei der Entsorgung an die geltenden gesetzlichen.
Bestimmungen.
Hinweis
- Wenn sich der Fernsehapparat kalt anfühlt, kann es beim Einschalten zu einem
leichten
ist
nicht beschädigt.
- Auf dem Bildschirm können kleine rote, grüne oder blaue Punkte erscheinen.
Diese
- Vermeiden Sie es, den Bildschirm zu berühren. Bei Berührung entstehen
vorübergehende
Flimmern kommen. Dies ist ein normaler Vorgang. Ihr Fernsehapparat
beeinträchtigen jedoch nicht die Bildschirmfunktion.
Verzerrungen auf dem Bildschirm.
13. Bei Gewitter oder längerem
Nichtgebrauch des Gerätes, sollten
Sie
das Netzkabel des Gerätes von
der
Steckdose trennen.
14. Lassen Sie alle Reparaturarbeiten
von Fachleuten durchführen.
Reparaturen sind erforderlich, wenn
das
Gerät beschädigt wurde, z. B.
Beschädigungen
oder
des Steckers, wenn Wasser
oder
Gegenstände in das Gerät
eingedrungen
Regen oder Feuchtigkeit ausgesetzt
war,
das Gerät nicht normal
funktioniert
des Stromkabels
sind, das Gerät
oder heruntergefallen ist.
Deutsch
Page 68
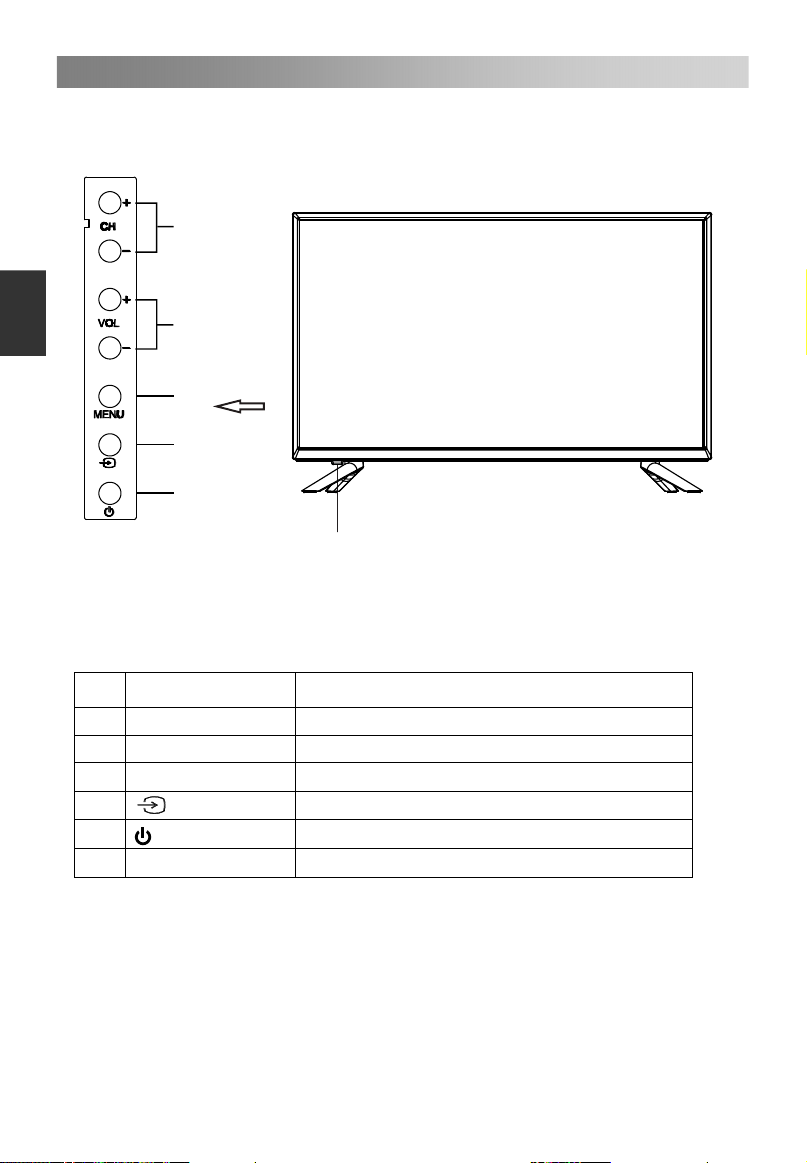
Haupteinheit
5
Vorderes Bedienfeld
Deutsch
1
2
3
4
5
6
Name Beschreibung
Nr.
1 CH+/CH2 VOL+/VOL3 MENU
4
5
6
Power & Sensor
Hiermit wechseln Sie die Kanäle.
Hiermit regeln Sie die Lautstärke.
Hiermit öffnen Sie das Menü.
Hiermit können Sie die Signalquelle.
Hiermit schalten Sie das Gerät ein und aus.
Stromanzeige und Infrarotsensor.
Page 69

Haupteinheit
6
Rückseite und Seitenflächen
8
7
No.
Name Description
7
8
9
10
11
12
13
14
15
16
9
DIGITAL AUDIO OUT
PC AUDIO/PC
Scart
ANT1/2
HDMI1/2/3
USB
Kopfhörerausgang.
Digitaler Audioausgang.
PC-Eingang.
SCART-Eingang/Ausgang.
Antennenausgang.
HDMI-Eingang.
Anschluss für USB Play.
YPbPr YPbPr-Eingang.
AV
COMMON INTERFACE
Ausgang für Audio/Video-Signal.
Setzen Sie hier eine CI-Karte ein.
COMMON INTERFACE
Deutsch
15
16
14
YPbPr AV
13
USB
12
HDMI1
12
HDMI2
12
ANT2
(SATELLITE)
13/18V 400mA
10
11
HDMI3
Page 70

Einleitung
7
Fernbedienung
Wenn Sie die Fernbedienung benutzen, richten Sie die Fernbedienung auf den
Infrarotsensor des Fernsehers. Wenn ein Gegenstand zwischen der Fernbedienung
und dem Infrarotsensor steht, funktioniert die Fernbedienung eventuell nicht.
Richten Sie die Fernbedienung auf den Infrarotsensor des Fernsehers.
Wenn Sie den Fernseher in hellen Räumen nutzen, funktioniert der Infrarotsensor
eventuell nicht richtig.
Die empfohlene Reichweite zur Benutzung der Fernbedienung beträgt ca. 7 Meter.
Deutsch
Einsetzen der Batterien in die Fernbedienung
1. Öffnen Sie das Batteriefach auf der
Rückseite der Fernbedienung.
2. Legen Sie zwei Batterien, AAA, ein. Stellen
Sie dabei sicher dass, die Pole“+” und “-” am
Anfang und Ende der Batterien den
Abbildungen im Batteriefach entsprechen.
3. Schließen Sie das Batteriefach.
Austauschen der Batterien
Die Batterien müssen nach den folgenden Anweisungen in die Fernbedienung
eingesetzt werden, damit diese richtig funktioniert.
Wenn die Batterien schwach sind, verringert sich die Reichweite der Fernbedienung
und Sie sollten die Batterien austauschen.
Anmerkung über die Anwendung der Batterien:
Die falsche Verwendung von Batterien kann zu einem chemischem Leck und / oder
zur Explosion führen. Achten Sie auf folgendes:
Gehen Sie sicher, dass die Batterien richtig eingesetzt wurden und die Pole + und –
an den richtigen Stellen sind, orientieren Sie sich an den Abbildungen im
Batteriefach.
Verschiedene Batterie-Typen haben verschiedene Merkmale. Vermeiden Sie die
verschiedenen Typen zu mischen.
Verwenden Sie alte und neue Batterien nicht zusammen. Dieses kann die
Lebensdauer der Batterien verringern und / oder ein chemisches Leck verursachen.
Tauschen Sie die Batterien aus, sobald diese nicht mehr funktionieren.
Chemische Substanzen in der Batterie können Hautreizungen verursachen.
Entfernen Sie eventuell austretende Batteriesäure sofort mit einem trockenen Tuch.
Die Batterien haben unter bestimmten Bedingungen eine verkürzte Lebensdauer.
Wenn Sie die Fernbedienung eine längere Zeit nicht verwenden, entnehmen Sie
die Batterien vorher.
Die Batterien (das Batteriepaket oder die eingesetzten Batterien) sollten nicht
übermäßiger Hitze ausgesetzt werden, wie erhöhter Sonnenstrahlung, Feuer etc.
Vorsicht:
Wenn die Batterien nicht richtig ausgetauscht werden, können sie zur Explosion
führen.
Tauschen Sie nur gleiche oder gleichwertige Batterie Typen aus.
Page 71

Anschluss und Einrichtung
8
Anschließen von Kabeln
Lesen Sie bitte die entsprechenden Inhalte unter „Hinweise zu Instandhaltung und
Sicherheit“, bevor Sie das Gerät installieren und verwenden.
1. Nehmen Sie das TV-Gerät aus der Verpackung, und legen Sie es auf einen flachen und gut
durchlüfteten Ort.
ANMERKUNG:
Bei Einstellen Sie bitte fest, ob der Hauptnetzschalter am Gerät au
Wenn Sie ein
(dem isolierten Teil) und nicht am Ka
2.Der RF Ausgang kann mit dem RF Eingang am TV verbunden werden.
3.Der AV Ausgang am DVD-Player kann mit dem AV Eingang am TV mit einem AV Kabel verbunden
werden.
ANMERKUNG:
Komponenten- und AV- Eingänge können nicht zur selben Zeit benutzt werden, denn sie
teilen sich einen Audio Kanal.
Falls COMPONENT (YPbPr) und AV als Mini-Terminal funktionieren und den gleichen
Audio-Kanal teilen,
4.Die Ausgänge der KOMPONENTEN(YPbPr) Anschlüsse des DVD kann mit den
KOMPONENTEN(YPbPr) Eingängen des TV mit einem AV Kabel verbunden werden.
5. Verbinden Sie das eine Ende des VGA Kabels mit dem VGA Anschluss am Computer, verbinden
Sie das andere Ende des VGA Kabel mit dem VGA Anschlussam TV,
die Stecker im Uhrzeigersinn an
ANMERKUNG:
Bei der Verbindung des 15-pin VGA, wenden Sie bitte keine große Kraft an, da die Pins
abbrechen können.
6.Verbinden Sie das eine Ende des HDMI Kabels mit dem HDMI Ausgang, verbinden Sie das
andere Ende des HDMI Kabels mit dem HDMI Eingang am TV.
ANMERKUNG:
Bei der Verbindung des HDMI, wenden Sie keine große Kraft an, da die Steckverbindung
abbrechen könnte.
7. Schließen Sie an diese Buchsen SCART-Eingangs- oder Ausgangsstecker von einem
externen Gerät an.
8. Senden des TV-Audiosignals an ein externes Audiogerät über den Digital Audio
Output-Anschluss.
9. Stellen Sie sicher, dass alle AV-Kabel ordnungsgemäß an die entsprechenden Anschlüsse
angeschlossen sind.
10. Schließen Sie das Netzkabel an ein 100-240V~ Netzgerät an.
ANMERKUNG:
Die Netzstromwerte zum Eingang des TV-Gerätes sind 100-240V~50/60Hz, verbinden Sie
Ihr TV nicht mit einem Anschluss außerhalb dieser Werte.
Bitte fassen Sie den isolierten Teil des Steckers beim Herausziehen des Stromkabels an,
fassen Sie nicht das metallene Teil an.
und Ausstecken des
Netzkabel oder ein Signalkabel
benutzen Sie bitte einen eins-zu-drei Audio&Video-Kabel.
Netzkabels des TV, eines Computers oder anderer Geräte
beiden Enden
bel selbst.
sgesch
abziehen, ziehen
fest.
altet ist;
Sie bitte am Stecker
und schrau
ben Sie
Deutsch
Page 72

Fernbedienung
r
9
Beschreibung der Tasten der Original-Fernbedienung:
1
3
5
7
9
11
Deutsch
13
16
18
20
22
26
27
INFO EPG
1 2
5
4
7 8 9
MENU
0
LIST
3
6
EXIT
CH
CH
SAT.LIST
FAV
2
4
6
8
10
12
14
15
17
19
21
23
24
25
28
: Ein- oder Ausschalten des Fernsehers
1.
2.
: Ton stummschalten oder wieder
aktivieren.
3. II: Pause (im USB/PVR-Modus). Öffnen des
TimeShift-Menüs (zeitversetztes
Fernsehen).
: MISCHT den Videotext und das Signal
auf der Videotext-Seite.
4. : Stopp (im USB/PVR-Modus).
: Anhalten der Videotextseite zum
Anzeigen; bei erneutem Drücken wird die
Seite gewechselt.
5.
: Wiedergabe (im USB/PVR-Modus).
: Öffnen des Videotextes; bei erneutem
Drücken wird der MIX-Modus geöffnet, und
wenn Sie die Taste ein drittes Mal drücken,
können Sie den Modus beenden.
6.
: Taste drücken, um die Aufnahme zu
starten (im DTV-Modus).
: Ändern der Größe des
Videotextbildschirms im Anzeigemodus.
7. : Zurück (im USB-Modus).
i
: Aufrufen der Indexseite.
: Weiter (im USB-Modus).
8.
?
: Einblenden der verborgenen
Informationen einiger Videotextseiten.
: Schnellrücklauf (im USB/PVR-Modus).
9.
: Öffnen des Untertitelmodus oder der
Unterseiten
10. : Schnellvorlauf (im USB/PVR-Modus).
: Abbrechen des Videotextes, ohne ihn
zu beenden; bei erneutem Drücken wird de
Videotext beendet.
11. EPG: elektronischer Programmführer, der
im DTV-Modus benutzt werden kann.
12. SUBTITLE: Auswahl der Untertitelsprache
unter den verfügbaren Sprachen.
13. INFO: Anzeige der aktuellen
Programminformationen auf dem
Bildschirm.
14. AUDIO: Umschalten zwischen DUAL
I/DUAL II/DUAL I+II/MONO/ Stereo und
Wechsel der Audiosprache im DTV-Modus.
Page 73

Fernbedienung
10
1
3
5
7
9
11
INFO EPG
13
1 2
4
3
5
6
7 8 9
MENU
16
EXIT
0
15. ZAHLENTASTEN: Auswahl der Kanäle oder
2
4
6
8
10
12
14
Eingabe des Kennworts.
16. MENU: Öffnen des Menübildschirms, um
verschiedene optionale Einstellungen
vorzunehmen.
17. EXIT: Beenden des Bildschirmmenüs.
18. ▲/▼/◄/►: Auswahl der Richtung.
19. ENTER: Ausführen des im Menübildschirm
markierten Punktes.
20.
15
: Rückkehr zum zuletzt angesehenen
Programm.
21. SOURCE: Auswahl einer Signalquelle.
22. VOL+/VOL-: Erhöhen oder Reduzieren der
Lautstärke.
23. LIST: Aufrufen der Kanalliste. Erneut
17
drücken, um die Liste zu schließen.
Deutsch
24. CH+/CH-: Auswahl der Kanäle in
aufsteigender oder absteigender
18
19
Reihenfolge.
25. FARBTASTEN: rote/grüne/gelbe/blaue
Tastennavigations-Link.
USB: Öffnen des USB-Modus.
ANTENNA: Auswahl einer Antennenquelle.
20
22
26
27
CH
LIST
CH
SAT.LIST
FAV
21
23
SAT.LIST: Aufrufen der Satellitenliste. Erneut
drücken, um die Liste zu schließen. (Nur
Satellitensignale)
26. REC.LIST: Aufrufen der Aufnahmeliste.
24
Erneut drücken, um die Liste zu schließen.
27. ZOOM: Auswahl der verschiedenen
Bildgrößen.
28. FAV: Aufrufen der Favoritenliste. Erneut
25
28
drücken, um die Liste zu schließen.
HINWEIS:
Alle Bilder in dieser Bedienungsanleitung sind Beispiele und dienen nur als Referenz.
Das aktuelle Produkt kann sich von den Bildern unterscheiden.
Die hier nicht genannten Tasten werden nicht benutzt.
Page 74

Basismerkmale
11
Ein- und Ausschalten des Fernsehers
• Einschalten des Fernsehers
Verbinden Sie das Netzkabel. Wenn der Fernseher über eine Betriebstaste verfügt,
schalten Sie zuerst den Fernseher mit dieser Taste ein. Drücken Sie die Taste auf
der Fernbedienung, um den Fernseher im Stand-by-Modus einzuschalten.
• Ausschalten des Fernsehers
Drücken Sie die Taste auf der Fernbedienung, um in den Stand-by-Modus zu
gehen.
Deutsch
Lassen Sie Ihren Fernseher nicht für längere Zeit im Stand-by-Modus. Es empfiehlt
sich, den Netzstecker und den Antennenstecker zu ziehen.
• Kein Signal
Auf dem Bildschirm wird ein „Kein Signal“-Menü angezeigt, wenn kein Eingangssignal
vorhanden ist. Wenn im ATV/DTV-Modus innerhalb von Minuten kein Signal
empfangen wird, schaltet sich der Fernseher automatisch aus. Im PC-Modus schaltet
sich der Fernseher automatisch nach 60 Sekunden aus, wenn er kein Signal
empfängt. Wenn das VGA-Kabel angeschlossen ist, schaltet sich der Fernseher
automatisch ein.
Programm-Auswahl
• Verwendung der CH+/CH-Tasten auf dem Bedienfeld des Fernsehers oder auf
der Fernbedienung
Drücken Sie CH+, um die Kanalnummer zu erhöhen.
Drücken Sie CH-, um die Kanalnummer zu verringern.
• Verwendung der 0 bis 9 Digitaltasten
Sie können die Kanalnummer durch Drücken der Tasten 0 bis 9 eingeben (im
DTV/ATV-Modus).
• Beispiel
Um - Kanal auszuwählen (z. B. Kanal 5): Drücken Sie 5.
Um -- Kanal auszuwählen (z. B. Kanal 20): Drücken Sie schnell aufeinanderfolgend 2
und 0.
Lautstärkeregelung
• Drücken Sie die VOL+/- Tasten, um die Lautstärke zu regulieren.
• Wenn Sie den Ton DEAKTIVIEREN möchten, drücken Sie
• Sie können den Ton wieder aktivieren, indem Sie
erhöhen.
Ändern der Eingangsquelle
Sie können die Eingangsquelle auswählen, indem Sie die SOURCE Taste auf der
Fernbedienung drücken.
Drücken Sie die▲/▼Tasten, um die verschiedenen Eingangsquellen anzuzeigen, und
drücken Sie die ENTER Taste, um Ihre Wahl zu bestätigen.
fǔnf
.
drücken oder die Lautstärke
Page 75

Menübedienung
12
KURZANLEITUNG
• Anschluss
1. Anschluss an den Netzstrom und die Antenne.
2. Wenn der Fernseher über eine Betriebstaste verfügt, schalten Sie zuerst den
Fernseher mit dieser Taste ein. Drücken Sie dann die Ein-/Aus-Taste auf der
Fernbedienung, um den Fernseher einzuschalten.
• Ersteinrichtung
Wenn Sie den Fernseher zum ersten Mal einschalten, werden Ihnen verschiedene
Bildschirmanzeigen helfen, die Grundeinstellungen zu konfigurieren.
1. Sprache
Drücken Sie die ▲/▼ Tasten, um die gewünschte OSD- (Bildschirmmenü) Sprache
auszuwählen.
2. Demo-Modus
Drücken Sie die ▲/▼ Tasten, um Ein oder Aus auszuwählen.
3. Land
Drücken Sie die ▲/▼ Tasten, um das gewünschte Land auszuwählen.
4. LCN
Drücken Sie die ▲/▼ Tasten, um Ein oder Aus auszuwählen.
5. Automatisches Stand-by
Drücken Sie die ▲/▼ Tasten, um die gewünschten Stunden auszuwählen.
6. TV-Antenne
Drücken Sie die ▲/▼ Tasten, um die Art des Fernseher-Anschlusses auszuwählen:
Antenne, Kabel, Satellit.
7. T/T2
Drücken Sie die ▲/▼ Tasten, um die
8. Automatische Suche
Drücken Sie die ▲/▼ Tasten, um den Modus auszuwählen: Alle, ATV, DTV.
Navigaton der Menüs
Bevor Sie Ihren Fernseher benutzen, folgen Sie bitte den unten stehenden Schritten,
um zu lernen, wie Sie durch die Menüs navigieren, damit Sie die verschiedenen
Funktionen auswählen und anpassen können. Je nach ausgewähltem Menü können
sich die Bedienschritte unterscheiden.
1.
Drücken Sie die MENU Taste, um das Hauptmenü anzuzeigen.
2.
Drücken Sie die▲/▼Tasten, um den gewünschten Unterpunkt zu markieren.
3.
Drücken Sie die ► Taste, um das Untermenü zu öffnen.
4.
Drücken Sie die ▲/▼/◄/► Tasten, um den gewünschten Wert auszuwählen. Das
Einstellen im Bildschirmmenü kann sich je nach gewähltem Menü unterscheiden.
5.
Drücken Sie die MENU Taste, um zum vorherigen Menü zurückzukehren.
6.
Drücken Sie die EXIT Taste, um das Menü zu schließen.
HINWEIS:
Wenn ein Punkt im MENÜ grau angezeigt wird, bedeutet das, dass dieser Punkt
nicht verfügbar ist oder nicht angepasst werden kann.
Die Tasten am Fernseher haben die gleiche Funktion wie die entsprechenden Tasten
auf der Fernbedienung. Falls Sie Ihre Fernbedienung nicht finden können oder sie
funktioniert nicht, können Sie mit den Tasten am Fernseher Menüs auswählen.
Diese Bedienungsanleitung erklärt schwerpunktmäßig die Benutzung der
Fernbedienung.
Einige Punkte in den Menüs können je nach Modus oder benutzter Signalquelle
ausgeblendet sein.
Auswahl des Signaltyps: T, T2, T+T2.
Deutsch
Page 76

Menübedienung
13
Konfiguration des Bild Menüs
• Bildmodus
Sie können den Bildtyp auswählen, der am
besten Ihren Anforderungen entspricht.
Helligkeit, Kontrast, Schärfe, Farbe und
Farbton (NTSC) können angepasst werden,
wenn der Bildmodus auf Benutzerdefiniert
eingestellt ist.
Deutsch
Die Empfehlung des Herstellers ist der
Heim-Modus.
• Helligkeit
Passt das Ausgangsniveau des Signals im Bild an.
• Kontrast
Stellt den Signalpegel zwischen Schwarz und Weiß im Bild ein.
• Schärfe
Stellt die Schärfe an den Kanten zwischen den hellen und dunklen Bereichen des
Bildes ein.
• Farbe
Reguliert die Intensität aller Farben.
• Farbton (nur im NTSC-Modus)
Reguliert die Balance zwischen Rot- und Grünstufen.
• Farbtemperatur
Drücken Sie die ENTER Taste, um das Untermenü zu öffnen.
Wählen Sie die Farbtemperatur des Bildes und drücken Sie die ▲/▼ Tasten, um
Standard, Kühl, Warm und Benutzer auszuwählen.
R-Gain, G-Gain und B-Gain können angepasst werden, wenn der Modus auf
Benutzerdefiniert eingestellt ist.
• Seitenverhältnis
Sie können die Bildgröße auswählen, die am besten Ihren Anforderungen entspricht.
• NR
Reduziert das Bildschirmrauschen, ohne die Videoqualität zu beeinträchtigen.
• Hintergrundbeleuchtung
Um die Helligkeit des Bildschirms zu regulieren, passen Sie die Helligkeit des Feldes
an.
• Energiesparen
Der Stromspar-Modus kann angepasst werden, wenn der Bildmodus auf Heim
eingestellt ist. Schalten Sie den Stromspar-Modus Ein oder Aus.
• PC-Konfiguration (im PC-Modus)
Drücken Sie die ENTER Taste, um das Untermenü zu öffnen.
Automatische Anpassung: Bild wird automatisch angepasst.
H-Position: Zentrierung des Bildes durch Verschieben nach links oder rechts.
V-Position: Zentrierung des Bildes durch Verschieben nach oben oder unten.
Phase: Minimierung der horizontalen Verzerrung.
Uhr: Minimierung der vertikalen Streifen im Bildschirmbild.
Page 77

Menübedienung
14
Konfiguration des Ton Menüs
• Klangmodus
Sie können einen Klangmodus nach
Ihren persönlichen Vorlieben wählen.
Bässe und Höhen können angepasst
werden, wenn der Klangmodus auf
Benutzerdefiniert eingestellt ist.
• Bass
Regulieren der Bässe. Verstärkt oder
reduziert die tiefen Töne.
• Höhen
Regulieren der Tonhöhe. Verstärkt oder reduziert hohe Töne.
• Balance
Sie können die Klang-Balance der Lautsprecher auf die bevorzugten Stufen einstellen.
• Surround
Schalten Sie den Raumklang Ein oder Aus.
• AVL (automatische Lautstärkeregelung)
AVL (automatische Lautstärkeregelung), die Lautstärke wird automatisch beibehalten,
wenn Sie das Programm wechseln. Da jeder Sender seine eigenen
Signalbedingungen hat, muss die Lautstärke eventuell jedes Mal angepasst werden,
wenn der Kanal gewechselt wird. Diese Funktion ermöglicht Ihnen, eine
gleichbleibende Lautstärke beizubehalten, da die Anpassungen für jedes Programm
automatisch vorgenommen werden.
• SPDIF
Sie können einen bevorzugten S/PDIF-Ausgangsmodus auswählen.
• AD-Schalter (im DTV-Modus)
Dies ist eine Audio-Zusatzfunktion, die eine zusätzliche Tonspur für sehbehinderte
Personen bietet. Diese Funktion bearbeitet den Audio-Stream für den AD (Audio für
Sehgeschädigte), wenn er zusammen mit dem Hauptton vom Sender übertragen wird.
Drücken Sie die ENTER Taste, um das Untermenü zu öffnen.
Wenn der Modus aktiviert ist, kann die Lautstärke von Benutzern reguliert werden.
• Audio-Verzögerung
Korrigieren Sie Probleme bei der Synchronisierung von Audio- und Video-Signal,
wenn Sie DTV nutzen und wenn Sie eine digitale Audioausgabe über ein externes
Gerät wie z. B. einen Audio-Empfänger hören (-200 ms ~ 200 ms).
Deutsch
Page 78

Menübedienung
15
Konfiguration des Kanal Menüs
• Kanalmanager
Drücken Sie die ENTER Taste, um
das Untermenü zu öffnen.
Drücken Sie erst die▲/▼Tasten, um
den Kanal zu markieren, den Sie
löschen, sperren, überspringen oder
beweg möchten.
Deutsch
Drücken Sie dann die rote Taste, um
auszuwählen
Drücken Sie die grüne Taste, um den
Kanal zu sperren.
Drücken Sie die gelbe Taste, um den markierten Kanal zu überspringen. (Ihr
Fernseher überspringt den Kanal automatisch, wenn Sie die CH+/CH-Taste
um Kanäle aufzurufen.)
Drücken Sie die blaue Taste, um das Verschieben des Kanals zu beweg.
Drücken Sie dann die zahlen
verschieben.
• Favoritenmanager
Drücken Sie die ENTER Taste, um das Untermenü zu öffnen.
Drücken Sie ▲/▼Tasten, um die Punkte auszuwählen.
Drücken Sie die CH+/CH-
scrollen.
Drücken Sie die rote, grüne, gelbe, blaue Taste, um die gewünschte Favoritengruppe
auszuwählen.
• Land
Auswahl des gewünschten Landes.
• Antenne
Auswahl der Antennenquelle.
• T/T2
Auswahl des Signaltyps: T, T2, T+T2.
• Automatische Suche
Drücken Sie die ENTER Taste, um das Untermenü zu öffnen.
Wenn die TV-Signale über Antenne empfangen werden.
Alle: Drücken Sie die ENTER Taste, um die digitalen Kanäle und analogen Kanäle zu
suchen.
DTV: Drücken Sie die ENTER Taste, um die digitalen Kanäle zu suchen.
ATV: Drücken Sie die ENTER Taste, um die analogen Kanäle zu suchen.
HINWEIS: • Der Fernseher beginnt daraufhin, alle verfügbaren Kanäle zu speichern.
Sobald die Fortschrittsanzeige voll ist, werden die gefundenen Kanäle gespeichert
und das Gerät beginnt mit der Suche nach ATV, DTV, Radio und Datum.
den Kanal zu löschen.
betätigen,
Tasten, um den Kanal an die gewünschte Position zu
Tasten, um die Favoritenliste nach oben oder unten zu
Page 79

Menübedienung
16
Wenn das TV-Signal über Kabel empfangen wird.
Alle: Drücken Sie die ENTER Taste, um das Untermenü zu öffnen.
– Suchmodus: Drücken Sie die ▲/▼ Tasten, um den Suchmodus auszuwählen:
Blinde Suche und Schnellsuche.
Netzwerk-ID und Frequenz (KHz) können angepasst werden, wenn der
Such-Modus auf Schnelle Suche eingestellt ist.
– Netzwerk-ID: Drücken Sie die ◄/► Tasten, um Netzwerk-ID auszuwählen:
automatisch oder digitale Nummern eingeben.
– Frequenz (kHz): Drücken Sie die ◄/► Tasten, um Frequenz (kHz) auszuwählen:
automatisch oder digitale Nummern eingeben.
– Betreiber:
– Starten: Drücken Sie die ENTER Taste, um die Kanalsuche zu starten.
DTV: Drücken Sie die ENTER Taste, um die digitalen Kanäle zu suchen.
– Suchmodus: Drücken Sie die ▲/▼ Tasten, um den Suchmodus auszuwählen:
Blinde Suche oder Schnellsuche.
Netzwerk-ID und Frequenz (KHz) können angepasst werden, wenn der
Such-Modus auf Schnelle Suche eingestellt ist.
– Netzwerk-ID: Drücken Sie die ◄/► Tasten, um Netzwerk-ID auszuwählen:
automatisch oder digitale Nummern eingeben.
– Frequenz (kHz): Drücken Sie die ◄/► Tasten, um Frequenz (KHz) auszuwählen:
automatisch oder digitale Nummern eingeben.
– Starten: Drücken Sie die ENTER Taste, um die Kanalsuche zu starten.
ATV: Drücken Sie die ENTER Taste, um die analogen Kanäle zu suchen.
Wenn die TV-Signale über Satellit empfangen werden.
DTV: Drücken Sie die ENTER Taste, um die digitalen Kanäle zu suchen.
– Suchmodus: Drücken Sie die ▲/▼ Tasten, um den Such-Modus auszuwählen:
Werkseinstellung, Netzwerksuche oder Blinde Suche.
– Satellit: Drücken Sie die ▲/▼ Tasten, um Satellitennamen auszuwählen.
– Diensttyp: Drücken Sie die ▲/▼ Tasten, um die Serviceart auszuwählen: Alle
Dienste oder Kostenloser Dienst.
– Kanaltyp: Drücken Sie die ▲/▼ Tasten, um den Kanal-Typ auszuwählen: Alle oder
Nur TV.
– Betreiber:
– Starten: Drücken Sie die ENTER Taste, um die Kanalsuche zu starten.
Bitte drücken Sie die Tasten , um einen▲/▼
Anbieter aus zu wählen.
Anbieter aus zu wählen. Bitte drücken Sie die Tasten , um einen▲/▼
Deutsch
Page 80

Menübedienung
17
• Manuelle DTV-Suche
Drücken Sie die ENTER Taste, um das Untermenü zu öffnen.
Wenn die TV-Signale über Antenne empfangen werden.
Kanal: Drücken Sie die ▲/▼ Tasten, um die Kanalnummer auszuwählen.
Frequenz (kHz): Anzeige der Frequenz des aktuellen TV-Signals oder Eingabe einer
benutzerdefinierten Frequenz.
Bandbreite (MHz): Drücken Sie die ▲/▼ Tasten, um die Bandbreite auszuwählen.
Starten: Drücken Sie die ENTER Taste, um die Kanalsuche zu starten.
Deutsch
Wenn die TV-Signale über Kabel empfangen werden.
Frequenz (kHz): Anzeige der Frequenz des aktuellen Fernsehsignals.
Symbolrate (KS/s): Drücken Sie die ◄/► Tasten, um Symbolrate auszuwählen:
automatisch oder digitale Nummern eingeben.
Modulation (QAM): Drücken Sie die ▲/▼ Tasten, um Modulation auszuwählen:
Automatisch, 16 QAM, 32 QAM, 64 QAM, 128 QAM oder 256 QAM.
Starten: Drücken Sie die ENTER Taste, um die Kanalsuche zu starten.
• Manuelle ATV-Suche
Drücken Sie die ENTER Taste, um das Untermenü zu öffnen.
Aktueller Kanal: Drücken Sie die ▲/▼ Tasten, um den aktuellen Kanal auszuwählen.
Frequenz: Anzeige der Frequenz des aktuellen Fernsehsignals.
Suche: Drücken Sie die ENTER Taste, um die Suche zu öffnen. Drücken Sie dann die
◄/► Tasten, um die analoge Suche auszuwählen.
Feinabst.: Drücken Sie die ENTER Taste, um Feinabst. zu öffnen. Drücken Sie dann
die ◄/► Tasten, um die Feinabstimmung auszuwählen.
Farbsystem: Drücken Sie die ▲/▼ Tasten, umFarbsystem auszuwählen.
Klangsystem: Drücken Sie die ▲/▼ Tasten, umKlangsystem auszuwählen.
Drücken Sie die rote Taste, um es zu speichern.
• LCN
Drücken Sie die ▲/▼ Tasten, um LCN Ein oder Aus zu wählen.
• Satellitensystem (nur im Satellitensignl)
Drücken Sie ENTER oder ►, um die Satellitenliste zu öffnen.
• CI-Information
Drücken Sie ENTER oder ►, um CI Information zu öffnen.
Konfiguration des Zeit Menüs
• Auto. Synchr.
Drücken Sie die ▲/▼ Tasten, um
Automatische Synchronisation Ein oder
Aus zu wählen.
Wenn Sie Automatische Synchronisation
auf Aus einstellen, können Sie das Datum
und die Uhrzeit manuell einstellen.
• Datum
Drücken Sie die Zahlentasten, um das
Datum einzustellen.
Page 81

Menübedienung
18
• Zeit
Drücken Sie die Zahlentasten, um die Uhrzeit einzustellen.
• Zeitzone
Wählen Sie Ihre Zeitzone aus.
Wenn Automatische Synchronisation aktiviert ist, kann die Zeitzone vom Benutzer
eingestellt werden.
• Sommerzeit
Wenn die Zeitzone auf eine beliebige Zeit eingestellt ist, steht dieser Menüpunkt zur
Verfügung, um die Sommerzeit-Option zu aktivieren oder zu deaktivieren.
• Stand-by-Timer
Wählen Sie die Dauer aus, nach welcher der Fernseher automatisch in den
Stand-by-Modus schaltet.
• Automatisches Stand-by
Wählen Sie die gewünschte automatische Stand-by-Zeit.
• OSD-Timer
Wählen Sie die Anzeigezeit des Bildschirmmenüs.
Konfiguration des Einrichtung Menüs
• Sprache
Drücken Sie die ENTER Taste, um das
Untermenü zu öffnen.
– OSD-Sprache: Drücken Sie die ▲/▼
Tasten, um Bildschirmmenü-Sprache
auszuwählen.
– 1. bevorzugter Untertitel (im
DTV-Modus): Drücken Sie die ▲/▼
Tasten, um Primäre bevorz.
Untertitelsprache auszuwählen.
– 2. bevorzugter Untertitel (im DTV-Modus): Drücken Sie die ▲/▼ Tasten, um
Sekundäre bevorz. Untertitelsprache auszuwählen.
– 1. bevorzugtes Audio (im DTV-Modus): Drücken Sie die ▲/▼ Tasten, um Primäre
bevorz. Audio-Sprache auszuwählen.
– 2. bevorzugtes Audio (im DTV-Modus): Drücken Sie die ▲/▼ Tasten, um Sekundäre
bevorz. Audio-Sprache auszuwählen.
– DTV-Videotextsprache: Drücken Sie die ▲/▼ Tasten, um Digitale Videotext-Sprache
auszuwählen.
– ATV-Videotextsprache: Drücken Sie die ▲/▼ Tasten, um Analoge
Videotext-Sprache auszuwählen.
• Sperren
Drücken Sie die ENTER Taste, um das Untermenü zu öffnen.
Geben Sie Ihr Kennwort ein (0000 ist voreingestellt). Gehen Sie dann wie folgt zum
Untermenü.
HINWEIS: • Falls Sie Ihr Kennwort vergessen, ist das Super-Kennwort 1225 noch
gültig.
Deutsch
Page 82

Menübedienung
19
– Sperr-System
Drücken Sie die ▲/▼ Tasten, um Sperr-System Ein oder Aus zu wählen.
Wenn das Sperr-System aktiviert ist, kann der Jugendschutz vom Benutzer
eingestellt werden.
– Jugendschutz
Drücken Sie die ▲/▼ Tasten, um Jugendschutz auszuwählen.
Diese Funktion kann verhindern, dass Kinder nicht jugendfreie Fernsehprogramme
ansehen können, gemäß der eingestellten Altersstufe.
Deutsch
– Kennwort ändern
Drücken Sie die ENTER Taste, um das Untermenü zu öffnen.
Sie können Ihr persönliches Kennwort einstellen. Drücken Sie die Zahlentasten auf
der Fernbedienung, um das neue Kennwort festzulegen. Wenn das neue Kennwort
zweimal eingegeben wurde, ist die Einstellung erfolgreich abgeschlossen.
• Automatisches SCART
Drücken Sie die ▲/▼ Tasten, um Automatische SCART-Verbindung Ein oder Aus zu
wählen.
• Bluescreen
Drücken Sie die ▲/▼ Tasten, um Bluescreen Ein oder Aus zu wählen.
HINWEIS: • In the DTV and USB mode are not available.
• Demo-Modus
Drücken Sie die ▲/▼ Tasten, um Demo-Modus Ein oder Aus zu wählen.
• Hörgeschädigt
Wenn Hörgeschädigt aktiviert ist, zeigt der Fernsehbildschirm einige Informationen für
Personen an, deren Gehör geschädigt ist. Wenn Hörgeschädigt deaktiviert ist, werden
die Informationen ausgeblendet.
HINWEIS: • Wenn im DTV-Modus die Untertitel-Sprache nicht deaktiviert ist, kann
die Funktion Hörgeschädigt vom Benutzer angepasst werden.
• PVR/Timeshift (im DTV-Modus)
Drücken Sie die ENTER Taste, um das Untermenü zu öffnen. Das USB-Gerät wird
geprüft.
– Partitionsauswahl: Wählen Sie einen Datenträger für PVR.
Drücken Sie die rote Taste, um den USB-Stick zu formatieren.
Drücken Sie die grüne Taste, um die Standard-Partition einzustellen.
HINWEIS:
• Manche Modelle haben zwei USB-Eingänge und es können mehrere Datenträger
benutzt werden, wenn zwei USB-Geräte verbunden sind.
• Bitte machen Sie eine Sicherungskopie aller wichtigen Dateien vor dem
Formatieren.
• Nicht die Verbindung zum Gerät trennen oder es ausschalten, während es
formatiert wird. Falls Ihr USB-Gerät nicht formatiert werden kann oder die Prüfung
durch das System schlägt fehl, heißt dies, dass das Gerät nicht mit dem Fernseher
kompatibel oder beschädigt ist. Das größere USB-Gerät benötigt länger zum
Formatieren. Bitte haben Sie etwas Geduld, bis der Formatierungsvorgang
abgeschlossen ist.
Page 83
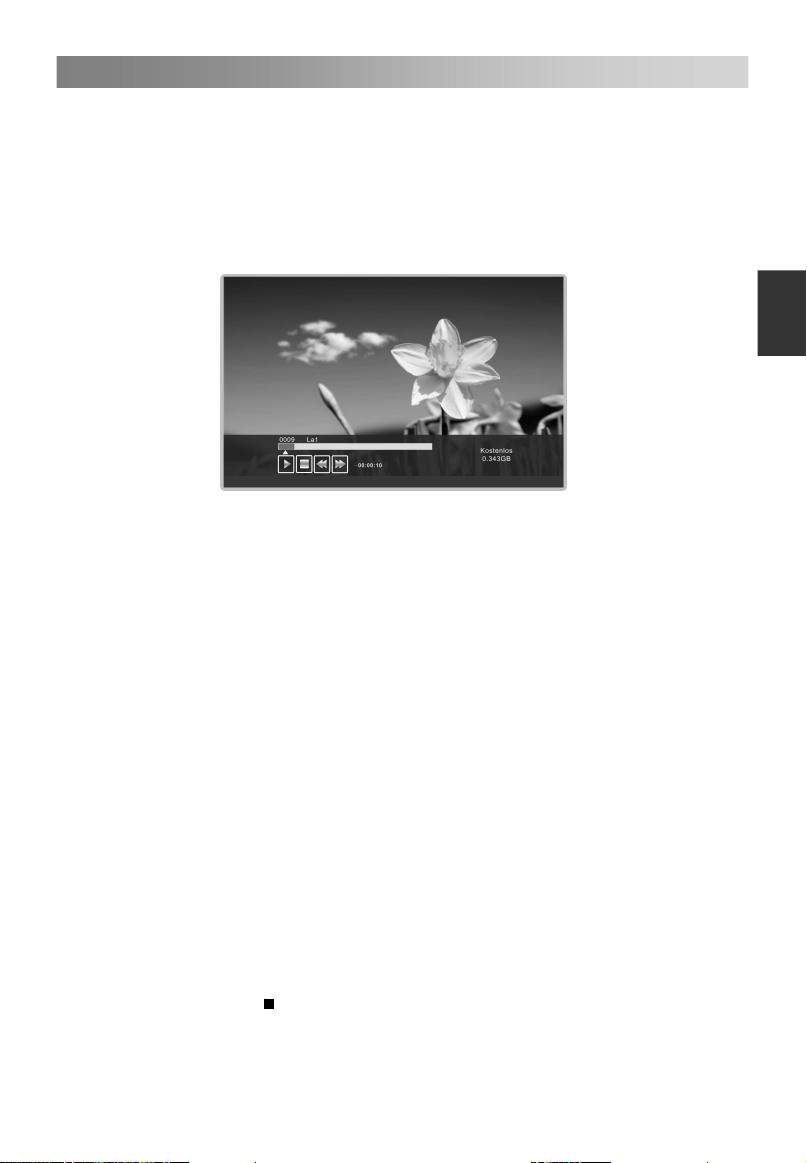
Menübedienung
20
– Automatisches Timeshift: Drücken Sie die ▲/▼ Tasten, um Timeshift
automatisch auszuwählen: Aus oder Automatisch.
– Timeshift-Puffer: Drücken Sie die ▲/▼ Tasten, um Timeshift automatisch
auszuwählen: Automatisch, 30 Min., 1 h oder 2 h.
Diese Funktion ermöglicht, dass der Fernseher automatisch Live-Fernsehen
aufnimmt und es zu einem späteren Zeitpunkt zum Abrufen zur Verfügung stellt.
Wenn die Timeshift-Funktion aktiviert ist, können Sie das normale Fernsehen
jederzeit „zurückspulen“, ohne etwas von der Live-Sendung zu verpassen.
Deutsch
1. Automatisches Timeshift:
1). Wenn Timeshift automatisch auf Automatisch gestellt ist, startet der
Fernseher die Timeshift-Funktion nach sechs Sekunden. Gleichzeitig ist ein
Erinnerungsmenü auf dem Bildschirm zu sehen und die Anzeigeleuchte
blinkt.
2). Drücken Sie während der Aufnahme die ▲/▼ Tasten, um das
Aufnahme-Menü heran-/herauszuzoomen.
3). Drücken Sie die ◄/► Tasten, um Wiedergabe, Pause, Stopp,
Schnellrücklauf und Schnellvorlauf zu wählen.
4). Drücken Sie die MENU Taste und die ▲/▼ Tasten, um Einrichtung
auszuwählen. Drücken Sie dann die ► Taste, um
und drücken Sie die ▲/▼ Tasten, um PVR/TimeShift auszuwählen. Drücken
Sie die ENTER Taste, um das Untermenü zu öffnen, und drücken Sie die
▲/▼ Tasten, um Timeshift automatisch auszuwählen. Drücken Sie die ▲/▼
Tasten, um Aus auszuwählen und die Aufnahme zu stoppen.
2. Timeshift manuell:
1). Drücken Sie die II Taste, um die Timeshift-Funktion zu aktivieren. Der
Fernseher speichert den Kanal ab dem Punkt im Programm, den Sie
aufnehmen möchten.
2). Drücken Sie während der Aufnahme die ▲/▼ Tasten, um das
Aufnahme-Menü heran-/herauszuzoomen.
3). Drücken Sie die ◄/► Tasten, um Wiedergabe, Pause, Stopp,
Schnellrücklauf und Schnellvorlauf zu wählen.
4). Drücken Sie die
normalen Fernsehübertragung zurück.
Taste, um die Aufnahme zu beenden. Das Gerät kehrt zur
Menüpunkte auszuwählen,
Page 84

Menübedienung
21
– Timer: Drücken Sie die ENTER Taste, um das Untermenü zu öffnen.
Deutsch
02
03
04
05
06
07
08
09
01
Kn- Nr.
Lösc h.
Kan al
Alle l ösch.
Timer
Sta rten
Hinz u.
01/ 01/20 07 12:0 0:03
Dau er Da tum
Bear b.
Mod us
Menu
Zurüc k
Um die Parameter für eine programmierte Aufnahme einzustellen. Die Funktion
Programmierte Aufnahme kann zu einer bestimmten Zeit starten.
Lösch.: Drücken Sie die rote Taste, um ein Timer zu löschen.
Alle lösch.: Drücken Sie die grüne Taste, um alle Timer zu löschen.
Hinzu.: Drücken Sie die gelbe Taste, um ein Timer hinzuzufügen.
Aufnahmegerät: Drücken Sie die ▲/▼ Tasten, um Rekorder Ein oder Aus zu
wählen.Wenn der Rekorder aktiviert ist, kann die Dauer vom Benutzer festgelegt
werden.
- Typ: Drücken Sie die ▲/▼ Tasten, um den Typ auszuwählen: DTV oder Radio.
Wenn der Typ DTV ist, kann die Dauer vom Benutzer festgelegt werden.
- Kanal: Drücken Sie die ▲/▼ Tasten, um den Kanal auszuwählen.
- Startzeit: Stellen Sie die Startzeit der Aufnahme ein.
- Dauer: Stellen Sie die Dauer der Aufnahme ein.
- Datum: Stellen Sie das Datum der Aufnahme ein.
- Modus: Drücken Sie die ▲/▼ Tasten, um den Modus auszuwählen: Einmal,
Täglich, Wöchentlich oder Monatlich.
Drücken Sie die MENU Taste, um die oben genannten Einstellungen zu
speichern.
Bearb.: Drücken Sie die blaue Taste, um ein Timer zu bearbeiten.
– Aufnahmeliste: Drücken Sie die ENTER Taste, um das Untermenü zu öffnen.
Wenn mehrere Aufnahmegeräte angeschlossen sind, werden die Geräte in
Listenform aufgeführt.
Löschen: Wählen Sie ein Aufnahmegerät aus der Geräteliste. Drücken Sie die rote
Taste, um es zu löschen.
– Rekorder-Start:
Durch sofortiges Aufnehmen können die aktuellen Fernsehsendungen
aufgenommen werden.
Drücken Sie die ENTER Taste, um das Untermenü zu öffnen, und wählen Sie dann
OK, um die Aufnahme zu starten.
Page 85

Menübedienung
22
Deutsch
1. Drücken Sie während der Aufnahme die ▲/▼ Tasten, um das Aufnahme-Menü
heran-/herauszuzoomen. Drücken Sie die Taste, um die Aufnahmedauer
einzustellen.
2. Drücken Sie die
normalen Fernsehübertragung zurück.
3. Drücken Sie die ◄/► Tasten, um Wiedergabe, Pause, Stopp, Schnellrücklauf
und Schnellvorlauf zu wählen.
HINWEIS:
Taste, um die Aufnahme zu beenden. Das Gerät kehrt zur
Der USB-Stick muss eine Kapazität von mindestens 512 MB haben.
Das USB-Gerät muss die USB 2.0 High-Speed-Spezifikation unterstützen.
Bitte formatieren Sie den eingelegten USB-Stick, wenn die Aufnahme nicht darauf
gespeichert werden konnte.
Entfernen Sie den USB-Stick nicht, während er formatiert wird. Wenn Sie den
USB-Stick formatieren, werden alle Dateien darauf gelöscht. Bevor Sie Ihr Gerät
über den Fernseher formatieren, sichern Sie bitte Ihre Dateien, um zu verhindern,
dass sie beschädigt werden oder Daten verloren gehen. Falls sich von Viren
befallene Dateien auf dem USB-Stick befinden, schlägt das Formatieren unter
Umständen fehl.
Wenn ein USB-Stick mehrere Partionierungen hat, kann das PVR-System helfen,
eine davon für die Aufnahme auszuwählen.
Wenn das PVR-Aufnahmesystem ständig benutzt wird, beendet das Gerät das
PVR-System automatisch.
Der USB-Speicher muss die USB2.0 High-Speed-Spezifikation unterstützen.
Einige der nicht normgerechten USB-Geräte werden möglicherweise nicht
unterstützt.
• HDMI CEC
Drücken Sie die ENTER Taste, um das Untermenü zu öffnen.
Das HDMI-CEC-System kann nur mit Geräten genutzt werden, die über die
HDMI-CEC-Funktion verfügen. Sie müssen ein HDMI-CEC-Gerät über ein
HDMI-Kabel verbinden. Manche HDMI-Kabel unterstützen möglicherweise keine
HDMI-CEC-Funktionen.
– HDMI CEC: Drücken Sie die ▲/▼ Tasten , um HDMI CEC Ein oder Aus zu wählen.
Wenn HDMI CEC aktiviert ist, können Automatisches Einschalten und
Automatisches Stand-by vom Benutzer angepasst werden.
Page 86

Menübedienung
23
– Automatisches Einschalten: Drücken Sie die ▲/▼ Tasten, um Automatisches
Einschalten Ein oder Aus zu wählen.
Wenn Automatisches Einschalten aktiviert ist, wird durch das Einschalten aktiver
CEC-fähiger Geräte am HDMI-Eingang der Fernseher eingeschaltet.
– Autom. Stand-by: Drücken Sie die ▲/▼ Tasten, um Automatisches Stand-by Ein
oder Aus zu wählen.
Wenn der Benutzer den Fernseher ausschaltet, gehen alle aktiven CEC-fähigen
Geräte am HDMI-Eingang in den Stand-by-Modus.
Deutsch
– Lautsprechereinstellung: Drücken Sie die ▲/▼ Tasten, um die
Lautsprecher-Präferenz
– Verstärker unterstützt ARC: Drücken Sie die ▲/▼ Tasten, um Verstärker
unterstützt ARC Ein oder
mithilfe von HDMI zu ermöglichen.
• Werkseinstellung
Wiederherstellen der Systemeinstellungen, um Ihnen beim Einrichten des Fernsehers
zu helfen.
• Software-Upgrade
Aktualisieren des Fernsehers mit der aktuellsten Software durch USB.
• Version
Anzeige der aktuellen Software-Informationen.
Benutzung des USB-Modus
• USB-Modus aktivieren/beenden
1. Verbinden Sie ein USB-Gerät.
2. Drücken Sie die SOURCE Taste, um das Hauptmenü anzuzeigen. Markieren Sie
mithilfe von ▲/▼ USB und drücken Sie die ENTER Taste, um den USB-Modus zu
aktivieren.
3. Sie können auch das Signalquelle-Auswahlmenü benutzen, um den USB-Modus
zu beenden.
HINWEIS:
Spezielle USB-Geräte werden möglicherweise gar nicht oder nicht einwandfrei
unterstützt.
USB max. Leistung: DC5V 500mA
• Unterstützte Formate
Die USB-Funktion kann das USB-Gerät mit USB-Speicher unterstützen.
Es können Foto-, Musik-, Film- oder Text wiedergegeben werden.
Unterstützte Foto formate: JPEG, BMP, PNG.
Unterstützte Musik formate: MP3, AAC, M4A.
Unterstützte Film formate: AVI, DAT, MPEG -1 / MPEG-2 / MPEG-4, TS/TP.
Unterstützte Text formate: TXT.
HINWEIS:
Dokumente mit speziellen Algorithmen werden möglicherweise nicht oder nicht
einwandfrei unterstützt.
• Die USB-Funktion unterstützt die oben aufgeführten Formate. Wenn das
Dateiformat nicht unterstützt wird, ändern Sie es in eines der aufgeführten Formate.
auszuwählen: Fernsehlautsprecher oder Verstärker.
Aus zu wählen. Um den Ton über einen AV-Empfänger
Page 87
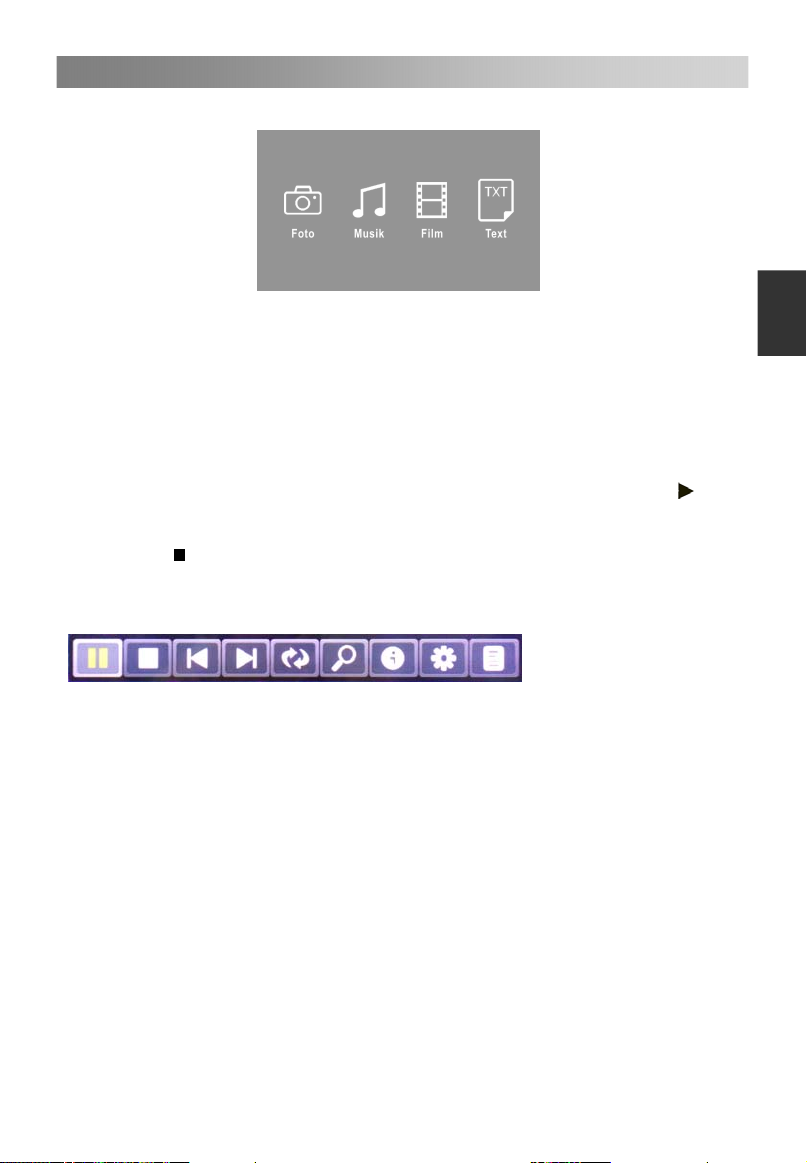
Menübedienung
24
• Hauptbenutzeroberfläche
Wählen Sie mithilfe der ◄/► Tasten Foto, Musik, Film oder Text. Drücken Sie die
ENTER Taste, um das Untermenü zu öffnen.
Drücken Sie die ▲/▼ Tasten, um den Datenträger zu wählen, den Sie ansehen
möchten; drücken Sie dann die ENTER Taste, um ihn zu öffnen.
Drücken Sie dieCH+/CH- Tasten, um die Seite zu wechseln.
Drücken Sie die rote Taste, um eine Foto-/Musik-/Film-/Textdatei zu löschen.
Drücken Sie die grüne Taste, um den Anzeigemodus (im Fotomodus) zu ändern.
Markieren Sie mithilfe der ▲/▼Tasten den Ordner und drücken Sie dann die ENTER
Taste.
Markieren Sie mithilfe der ▲/▼ Tasten eine Datei und drücken Sie dann die
um die Datei abzuspielen.
Drücken Sie die ENTER Taste, um das Schnellmenü zu öffnen.
Drücken Sie
Drücken Sie die EXIT Taste, um zum vorherigen Menü zurückzukehren.
Foto-Wiedergabekonsole
1. Wiedergabe/Pause: zum Wechseln zwischen Wiedergabe- und Pause-Modus.
2. Stopp: zum Abbrechen der Wiedergabe.
3. Zurück: zur Wiedergabe der vorherigen Datei im selben Verzeichnis.
4. Weiter: zur Wiedergabe der nächsten Datei im selben Verzeichnis.
5. Rechts drehen: um 0, 90, 180 und 270 Grad nach rechts drehen.
6. Heranzoomen: zum Vergrößern des Bildes.
7. Info: Bild-Informationen.
8. Foto einrichten: Drücken Sie die ▲/▼ Tasten, um den Wiederhol-Modus,
Hintergrundmusik, Musikquelle, Diashow-Intervall und -Effekt auszuwählen, und
drücken Sie dann die◄/► Tasten, um die gewünschte Einstellung vorzunehmen.
9. Wiedergabelisten: Anzeige der Wiedergabelisten. Drücken Sie die grüne Taste, um
ein Foto zu löschen, und drücken Sie die rote Taste, um alle Fotos in der Liste zu
löschen.
, um die Wiedergabe der Dateien abzubrechen.
Taste,
Deutsch
Page 88
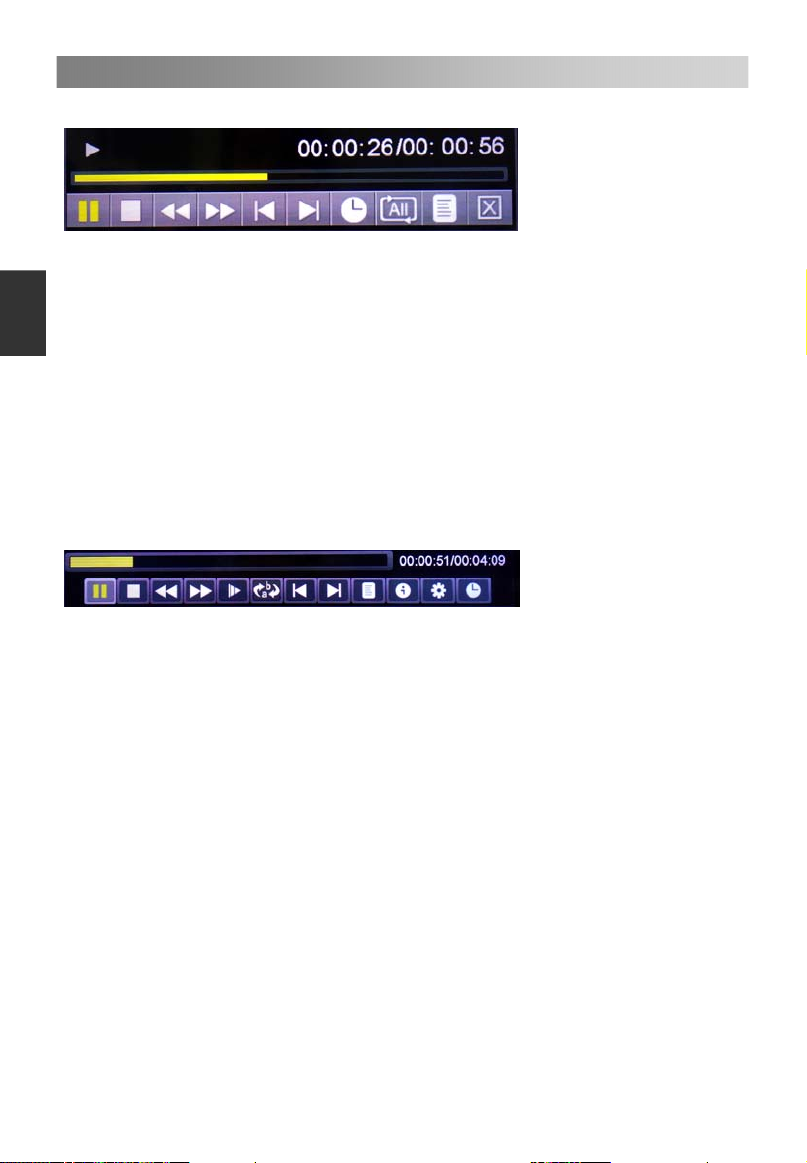
Menübedienung
25
Musik-Wiedergabekonsole
1. Wiedergabe/Pause: zum Wechseln zwischen Wiedergabe- und Pause-Modus.
2. Stopp: zum Abbrechen der Wiedergabe.
Deutsch
3. Schnellrücklauf.
4. Schnellvorlauf.
5. Zurück: zur Wiedergabe der vorherigen Datei im selben Verzeichnis.
6. Weiter: zur Wiedergabe der nächsten Datei im selben Verzeichnis.
7. Gehe-zu-Zeit: Wählen Sie die voreingestellte Zeit für die Musik-Wiedergabe
settings time to play music.
8. Wiedergabe-Modus: Drücken Sie die ENTER Taste, um unter vier Modi
auszuwählen.
9. Wiedergabeliste: zur Anzeige der Musikdatei im selben Verzeichnis.
10. Beenden: Drücken Sie die ENTER Taste, um zum vorherigen Menü
zurückzukehren.
Film-Wiedergabekonsole
1. Wiedergabe/Pause: zum Wechseln zwischen Wiedergabe- und Pause-Modus.
2. Stopp: zum Abbrechen der Wiedergabe.
3. Schnellrücklauf.
4. Schnellvorlauf.
5. Zeitlupen-Wiedergabe.
6. A-B-Wiedergabe: Abspielen des Videos zwischen zwei Zeitpunkten.
7. Zurück: zur Wiedergabe der vorherigen Datei im selben Verzeichnis.
8. Weiter: zur Wiedergabe der nächsten Datei im selben Verzeichnis.
9. Wiedergabelisten: Anzeige der Wiedergabelisten. Drücken Sie die grüne Taste, um
ein Foto zu löschen, und drücken Sie die rote Taste, um alle Fotos in der Liste zu
löschen.
10. Info: Film-Informationen.
11. Film einrichten: Drücken Sie die ▲/▼ Tasten, um Programm, Untertitel, Audio,
Verschlüsselungstyp und Wiederhol-Modus zu wählen, drücken Sie dann die ◄/►
Tasten, um die gewünschten Einstellungen vorzunehmen.
12. Gehe-zu-Zeit: Auswahl der voreingestellten Zeit für die Filmwiedergabe.
Page 89

Menübedienung
26
Text-Wiedergabekonsole
1. Drücken Sie die ENTER Taste, um das Schnellmenü zu öffnen.
2. Drücken Sie die ▲/▼ Tasten, um Hintergrundmusik, Musikquelle und
Verschlüsselungstyp auszuwählen, und drücken Sie dann die◄/► Tasten, um die
gewünschte Einstellung vorzunehmen.
3. Drücken Sie die rote Taste, um ein Lesezeichen hinzuzufügen oder zu löschen.
4. Drücken Sie die grüne Taste, um zur Seite zu gehen, und geben Sie die Zahlen
mithilfe der Tasten ein, drücken Sie ENTER, um zu der gewünschten Seite zu
gehen.
5. Drücken Sie die gelbe Taste, um die Lesezeichenliste anzuzeigen.
6. Drücken Sie die blaue Taste, um die Text-Wiedergabeliste anzuzeigen.
Deutsch
Page 90

27
Wichtige Sondertasten
EPG Wochenmodus (im DTV-Modus)
Drücken Sie die EPG Taste, um den elektronischen Programmführer anzuzeigen.
Diese Funktion liefert Ihnen ausführliche Informationen über den Kanal und zeigt die
Zeit des laufenden Programms an.
Drücken Sie die Pfeil-Tasten, um zyklisch alle Optionen auszuwählen.
Drücken Sie die EXIT Taste, um zu beenden.
Deutsch
Drücken Sie die rote Taste, um die programmierte Aufnahme einzustellen.
Drücken Sie die grüne Taste für die Funktionen Erinnerung, Rekorder, Abbrechen zu
aktivieren.
Drücken Sie die gelbe Taste, um das Programm des vorangegangenen Datums zu
sehen.
Drücken Sie die blaue Taste, um das Programm des nächsten Datums zu sehen.
Kanalliste
Drücken Sie die LIST Taste, um die Kanalliste anzuzeigen.
Drücken Sie die ◄/► Tasten, um ALL, DTV, Radio und Sonstige/Daten auszuwählen.
Drücken Sie ▲/▼, um die Punkte auszuwählen. Drücken Sie die ENTER Taste, um
den Kanal aufzurufen.
Drücken Sie die CH+/CH- Tasten, um die Kanalliste nach oben oder unten zu scrollen .
Drücken Sie die EXIT Taste, um die Liste zu schließen.
Favoritenliste
Drücken Sie die FAV Taste, um die Favoritenliste anzuzeigen.
Drücken Sie die ◄/► Tasten, um Favorit 1,2,3,4 auszuwählen.
Drücken Sie ▲/▼, um die Punkte auszuwählen. Drücken Sie die ENTER Taste, um
den Kanal zu öffnen.
Drücken Sie die CH+/CH- Tasten, um die Favoritenliste nach oben oder unten zu
scrollen.
Drücken Sie die rote Taste, um den Favoritentyp umzubenennen.
HINWEIS: Das Feld zum Umbenennen des Favoritentyps unterstützt bis zu 14
Buchstaben. Das Zeichen „@“ nimmt den Platz von zwei Buchstaben ein.
Drücken Sie die EXIT Taste, um die Liste zu schließen.
Page 91

Teletext
28
Benutzung der Videotextfunktion
• Videotext anzeigen
1. Wählen Sie einen Fernsehsender mit einem Videotextsignal.
2. Drücken Sie die Taste, um den Videotext-Modus zu aktivieren.
3. Drücken Sie die
Funktion ermöglicht Ihnen, die Videotextseite über dem Fernsehprogramm
einzublenden.
4. Drücken Sie die
zurückzukehren.
• Seitenauswahl
1. Geben Sie die Seitenzahl (dreistellig) mithilfe der Zahlententasten ein. Wenn Sie
während der Eingabe eine falsche Zahl drücken, müssen Sie die dreistellige Zahl
erst komplett eingeben und dann die korrekte Seitenzahl erneut eingeben.
2. Mit den CH+/CH- Tasten kann die vorherige oder nächste Seite aufgerufen werden.
•Anhalten
Sie können die
Sie die Taste erneut, um die Seite zu wechseln.
•Index
Drücken Sie die
• Text vergrößern
Wenn eine Seite angezeigt wird, können Sie die Größe des Textes verdoppeln, damit
er besser zu lesen ist.
1. Drücken Sie die
2. Drücken Sie die
3. Drücken Sie die
• Aufdecken
Sie können verborgene Videotextinformationen (z. B. Lösungen für Puzzle oder
Rätsel usw.) einblenden, indem Sie die?Taste drücken. Drücken Sie die? Taste
erneut, um die Informationen wieder auszublenden.
•Unterseite
Manche Videotextseiten können mehrere Unterseiten enthalten, die automatisch in
einem bestimmten Zyklus vom Fernsehsender nummeriert werden.
1. Sie können eine bestimmte Unterseite öffnen, indem Sie die
drücken und die Seitenzahl über die Zahlententasten eingeben. Geben Sie die
Seitenzahl der Unterseite für die dritte Unterseite ein (z. B. 0003).
2. Drücken Sie die Taste erneut, um den Unterseitenmodus zu beenden.
• Farbtasten (Rot, Grün, Gelb und Blau)
Drücken Sie diese Tasten, um direkt die entsprechend farbcodierten Seiten, die im
unteren Teil des Videotext-Bildschirms angezeigt werden, aufzurufen.
Taste ein zweites Mal, um in den Mix-Modus zu gehen. Diese
Taste ein drittes Mal, um in den normalen ATV/DTV-Modus
Taste drücken, um eine Seite zum Anzeigen anzuhalten. Drücken
i
Taste, um die Hauptindexseite direkt zu öffnen.
Taste, um die obere Hälfte der Seite zu vergrößern.
Taste erneut, um die untere Hälfte der Seite zu vergrößern.
Taste noch einmal, um zur normalen Anzeige zurückzukehren.
Taste direkt
Deutsch
Page 92

Fehlerbehebungsanleitung
29
Fehlerbehebung
Bevor Sie sich an den Kundendienst oder an Fachleute wenden, überprüfen Sie
folgende Checkliste. Kann der Fehler nicht behoben werden sollte, so trennen Sie
den Fernseher vom Stromkreis und suchen Sie professionelle Hilfe auf.
PROBLEM MÖGLICHE LÖSUNG
Kein Ton und Bild
Deutsch
Normale d, aber
kein Ton
Fernbedienung
funktioniert nicht
Gerät schaltet plötzlich
ab
Bild erscheint nach
dem Einschalten
langsam
Keine Farbe oder
schlechte Farb- oder
Bildqualität
Horizontale/vertikale
Streifen oder
wackelndes Bild
Schlechter Empfang
bei einigen
Programmen
Streifen im Bild - Antenne überprüfen (Ausrichtung ändern).
Einer der Lautsprecher
ist lautlos
- Überprüfen, ob der Hauptstecker an eine Steckdose
angeschlossen ist.
- Überprüfen, ob Sie den EIN/AUS-Knopf vorne an Ihrem
Fernsehapparat gedrückt haben.
- Einstellungen für Kontrast und Helligkeit überprüfen.
- Lautstärkeeinstellung überprüfen.
- Ton stummgeschaltet? Taste MUTE drücken.
- Auf ein anderes Programm umschalten, das Problem
könnte beim Sender liegen.
- Sind die Audiokabel ordnungsgemäß angeschlossen?
- Überprüfen Sie, ob sich zwischen Fernseher und
Fernbedienung Gegenstände befinden.
- Sind die Batterien korrekt eingesetzt (Pole: + an + und an -)?
- Ist der richtige Fernbedienungsmodus eingestellt: TV,
VCR etc.?
- Neue Batterien einsetzen
- Sleep-Timer eingestellt?
- Stromzufuhr überprüfen. Stromzufuhr unterbrochen?
- Keine Übertragung vom eingestellten Sender. Der
Fernseher schaltet nach einer bestimmten Zeit
automatisch in den Standby-Modus.
- Dies ist ein normaler Vorgang. Das Bild ist während des
Einschaltvorgangs unterdrückt. Bitte wenden Sie sich an
den Kundendienst, wenn das Bild nach fünf Minuten
nicht erscheint.
- Farbe im Bildmenü einstellen.
- Ausreichenden Abstand zwischen Fernseher und
Videorekorder einhalten.
- Schalten Sie auf ein anderes Programm. Das Problem
könnte beim Sender liegen.
- Sind die Videokabel richtig angeschlossen?
- Helligkeitseinstellung zurücksetzen.
- Störquellen in der Nähe des Fernsehers suchen. z. B.
Elektrogeräte oder Elektrowerkzeuge
- Probleme beim Sender oder Kabelanbieter. Anderen
Sender einstellen.
- Sendersignal ist schwach: Antenne neu ausrichten, bis
der schwächere Sender empfangen werden kann.
- Mögliche Störquellen suchen.
- Balance im Tonmenü ändern.
Page 93

Fehlerbehebungsanleitung
30
Hinweis: Problem im VGA-Modus (nur VGA-Modus verwendet).
PROBLEM MÖGLICHE LÖSUNG
Signal ist außerhalb des
Frequenzbereichs.
Vertikale Streifen im
Hintergrund und horizontales
Bildrauschen und inkorrekte
Position
Bildschirmfarbe ist instabil
oder nur einfarbig
Wartung
Fehlfunktionen können vermieden werden. Durch sorgsames und regelmäßiges
Reinigen können Sie die Haltbarkeit Ihres neuen Fernsehgeräts verlängern. Schalten
Sie das Gerät aus und ziehen Sie das Stromkabel, bevor Sie mit der Reinigung
beginnen.
Bildschirm reinigen
1. So halten Sie Ihren Bildschirm staubfrei: Feuchten Sie ein weiches Tuch in einer
Mischung aus lauwarmem Wasser und Weichspüler oder Geschirrspülmittel an.
Wringen Sie das Tuch gut aus bis es fast trocken ist. Wischen Sie dann damit den
Bildschirm.
2. Es dürfen keine Wasserreste auf dem Bildschirm zurück bleiben. Lassen Sie den
Bildschirm dann an der Luft komplett abtrocknen, bevor Sie Ihren Fernseher
einschalten.
Gehäuse reinigen
Reinigen Sie das Gehäuse mit einem weichen, trockenen, faserfreien Tuch. Bitte auf
keinen Fall ein feuchtes Tuch verwenden.
Längere Abwesenheit
Wenn Sie Ihren Fernseher über längere Zeit nicht verwenden (z. B. wenn Sie
in Urlaub fahren), empfiehlt es sich, das Stromkabel zu ziehen, um Schäden
durch Blitzschlag oder Überspannung zu vermeiden.
Entsorgung von Elektrogeräten
Gemäß der EG-Richtlinie 2012/19/EU über die Entsorgung von Elektro- und
Elektronik-Altgeräten (WEEE) dürfen elektronische Haushaltsgeräte nicht im
normalen Hausmüll entsorgt werden. Altgeräte sind separate zu sammeln,
damit die darin enthaltenen Rohstoffe recycelt werden können und
Gesundheits- und Umweltschäden vermieden werden.
Das Symbol der durchgestrichenen Mülltonne dient zur Erinnerung daran,
dass es Ihre Pflicht ist, das Altgerät bei einer speziellen Sammelstelle zu
entsorgen.
Wenden Sie sich an Ihre Kommunalbehörde oder Ihren Händler, um
Für das Gerät wird daher kein Schutzkontaktstecker benötigt.
Informationen zur ordnungsgemäßen Entsorgung von Altgeräten zu erhalten.
Dieses Gerät ist ein Gerät der Schutzklasse II, d.h. es besitzt eine doppelte Isolierung.
- Auflösung, horizontale Frequenz oder vertikale
Frequenz anpassen.
- Überprüfen, ob das Signalkabel angeschlossen
oder lose ist.
- Signalquelle überprüfen.
- Auf Werkseinstellungen zurücksetzen oder Uhr,
Phase oder H/V-Position ändern.
- Signalkabel überprüfen.
- Videokarte des Computers neu installieren.
Deutsch
Page 94

Page 95

Table des matières
Avertissement……………………………………………………………..…..……… 1
é
Consignes de s curit .………………………………………………....…………… 3
Unit de contr le principale.....…………...…………..………..……..…………… 5
Vue avant ..……….......................………………………………………….……... 5
Vue arri re et lat ral.......……........................................……………..………… 6
D marrage.......…………………………...………………………..……..…………… 7
é
Utiliser la t l commande…………………………………………………….……... 7
Installer les piles dans la t l commande..……………………………..………… 7
Remplacer les piles……………………………..……………………….………… 7
Connectique et installation………...…...…………………………………………... 8
Installation des c bles………...……………………………………………………. 8
é é
T l commande……….…………………..……………………………………...…… 9
é
Op rations basiques...……………………………………………………………..11
Allumer et teindre le t l viseur.…………………………………………………..12
S lection du programme.............……………………………………………......12
é
R gler le volume……………...………………………………………………….....12
é
Modifier la source d'ent e…..…..………………………………………………... 12
Reglages des menus……...………………………………………………………… 13
Naviguer dans les menus…………….…………………………………………... 13
Configurer le menu Image……..…….....…………………………………………1 4
Configurer le menu Cha ne…......…………………………………………...…… 16
Configurer le menu Heure.. ………...……………………………………………...1 8
Utiliser le mode USB…….……………………………….………………….….… 24
Boutons sp ciaux importants.......................................................................... 27
Mode EPG Hebdomadaire....………………………….…………………...…..…27
Liste des Cha nes…………..…………………………………………………....… 27
Liste des favoris.………………...…………………………………………....…… 27
T l texte.....……………………………………………………………………...........28
é é
Utiliser la fonctionnalit t l texte..………........................................................ 28
R solution de probl mes…………………………………………………...…...... 29
é
D pannage……………........………………………………………………..…..... 29
Entretien………………......………………………………………………….......... 30
é
ôé
è é
é é
é é
â
é
ÉGUIDE DE D MARRAGE RAPIDE……...…………………………………….… 1 3
é
î
é é
é
î
é éé
èé
15 Configurer le menu Son………........…..……………………………………....…
19Configurer le menu Configuration.………………………………………….....….
Français
Page 96
Avertissement
1
ATTENTION
Risque de choc electrique
Ne pas ouvrir
Avertissement:
AFIN DE REDUIRE LES RISQUES DE CHOC ELECTRIQUE, N’OUVREZ
JAMAIS LE CORPS (OU LE DOS) DE L’APPAREIL. AUCUNE PIECE INTERNE
NE PEUT ETRE REPAREE PAR L’UTILISATEUR. S’ADRESSER A UN
TECHNICIEN DE SERVICE QUALIFIE.
Le symbole de l’éclair avec une pointe de flèche inscrit dans un triangle
équilatéral sert à mettre en garde l’utilisateur contre la présence d’une tension
Français
dangereuse non isolée à l’intérieur du corps de l’appareil pouvant être
suffisamment importante pour constituer un risque de choc électrique pour les
personnes.
Le point d’exclamation inscrit dans un triangle équilatéral sert à prévenir
l’utilisateur de la présence d’instructions importantes d’utilisation et d’entretien
(réparation) dans la documentation accompagnant l’appareil.
INFORMATION DE CONTROLE
Cet équipement génère et utilise des ondes électromagnétiques pour son
fonctionnement. Il peut causer des interférences nuisibles aux communications
par radio s’il n’est pas installé et utilisé conformément aux instructions. Toutefois,
il n’y a aucune garantie que des interférences ne se produisent pas dans
certaines conditions particulières. Si cet équipement cause des interférences
nuisibles à la réception radio ou télévisuelle (ce qui peut être vérifié en mettant
l’équipement hors tension, puis sous tension), il est conseillé à l’utilisateur
d’essayer une ou plusieurs des mesures suivantes:
-Changer l’emplacement de l’antenne de réception.
-Augmenter la distance entre l’équipement et le récepteur.
-Brancher l’équipement dans une prise sur un circuit différent de celui auquel est
branché le récepteur.
-Consulter le revendeur ou un technicien radio/TV agréé pour obtenir de l’aide.
Tout changement ou toute modification n’ayant pas été expressément autorisé
par le responsable de la conformité peut entraîner l’annulation de la garantie.
ATTENTION
Ne pas tenter de modifier ce produit d’aucune façon sans l’accord écrit préalable
du fournisseur. Toute modification non autorisée peut entraîner l’annulation de la
garantie.
Il est déconseillé de garder un affichage d’une image fixe pendant une longue
période ainsi que des images extrêmement lumineuses sur l’écran.
Les chiffres et les illustrations dans ce manuel d’utilisation ne sont fournis qu’à
titre indicatif. Ils pourraient être différents de l’apparence actuelle du produit. La
conception et les spécifications de produit pourraient être modifiés sans préavis.
Ce produit est conforme aux normes de l'UE concernant
l'électromagnétisme et la sécurité électrique.
Page 97

2
Avertissement
AVERTISSEMENT
Afin de réduire les risques d’incendie ou de choc électrique, n’exposez pas cet
appareil ni à la pluie, ni à l’humidité. L’appareil ne doit pas être exposé à des
aspersions ou d’éclaboussures, et aucun objet contenant des liquides, tels que
les vases, ne doit être posé sur le dessus
La ventilation ne doit pas être gênée en recouvrant les orifices d'aération avec des
objets tels que journaux, nappes, rideaux, etc.
Il faut prêter l'attention sur les aspects environnementaux du recyclage des piles.
Ne pas jeter les piles usées dans la poubelle. Reportez vous à la
réglementation en vigueur, ou adressez vous à votre revendeur .
Lorsque vous installez votre téléviseur, maintenez une distance d'au moins 10cm
entre l'appareil et les objets environnants (murs, parois de meubles, etc) afin
d'assurer une bonne ventilation. Le fait de ne pas assurer une bonne ventilation
peut conduire à un incendie ou à des problèmes de l'appareil, causés par une
augmentation de sa température interne.
Aucune source de flamme nue, telle que des bougies allumées, ne doit être
placée sur l'appareil;
Pour éviter la propagation du feu, garder les chandelles ou autres flammes vives
éloignées de ce produit à tout moment.
Le dispositif peut mal fonctionner s’il est soumis à une décharge électrostatique. Il
peut être remis en marche manuellement en l’éteignant et en le rallumant de
nouveau.
Pour éviter toute blessure causée par le renversement du produit,assurez-vous
toujours que l’ensemble du produit est posé sur une surface horizontale et stable
S.V.P.
ATTENTION connexion du cordon d’alimentation
Nous vous conseillons de brancher cet appareil sur un circuit dédié,
c'est-à-dire sur une prise de courant unique qui alimente seulement l'appareil.
Ne pas surcharger les prises murales. Les prises de courant surchargées, les
prises de courant desserrées ou endommagées, des rallonges électiques, des
cordons d'alimentation effilochés ou les fils d’isolation endommagés ou fissurés
sont dangereux. Chacune de ces conditions peut entraîner un choc électrique ou
un incendie. Examinez périodiquement le cordon de votre appareil, et son
apparence. S’il montre des dommages ou des signes de détérioration,
débranchez-le, cessez de l’utiliser, et faites remplacer le cordon par une pièce de
rechange homologuée par un réparateur agréé. Protégez le cordon d'alimentation
de toute contrainte physique ou mécanique, évitez qu’il soit tordu, plié, pincé,
coincé dans une porte, ou piétiné. Prêtez une attention particulière aux fiches,
prises de courant, et au point où le cordon sort de l'appareil.
La prise PRINCIPALE est utilisée comme le dispositif de déconnexion, et
cette dernière doit rester facilement accessible.
Température d'utilisation: de 5°C à 35 C, niveau d'humidité d'utilisation: ≤80%
Température de stockage: de -15°C à 45°C, niveau d'humidité de stockage: ≤90%
Français
Fabriqué sous licence des Laboratoires Dolby.
Dolby et le symbole du Double D sont des marques déposées des Laboratoires
Dolby.
Page 98

Consignes de s curit
3
CONSIGNES DE SECURITE IMPORTANTE
1. Lisez ces instructions.
2. Conservez ces instructions.
3. Tenez compte de tous les
avertissements.
4. Suivez toutes les instructions.
Français
é
é
7. Ne pas obstruer les orifices d’aération.
Installez l’appareil en respectant les
instructions du fabricant.
5. N’utilisez pas cet appareil proche de
l’eau.
6. Nettoyez uniquement avec un chiffon
sec.
8. N’installez pas l’appareil près d’une
source de chaleur tel qu’un radiateur,
un registre de chaleur, un poêle ou
tout autre appareil qui produit de la
chaleur (y compris les amplificateurs).
9. N’inhibez pas les dispositifs de
sécurité de la prise polarisée ou de la
prise de terre. Une prise polarisée
dispose de deux fiches dont l’une est
plus large. Une prise de terre dispose
de deux fiches et d’une fiche de mise
à la terre. La fiche large ou la
troisième fiche sont là pour votre
sécurité. Si la prise fournie ne
s’adapte pas à votre prise de courant,
contactez un électricien pour faire
remplacer cette dernière.
Page 99
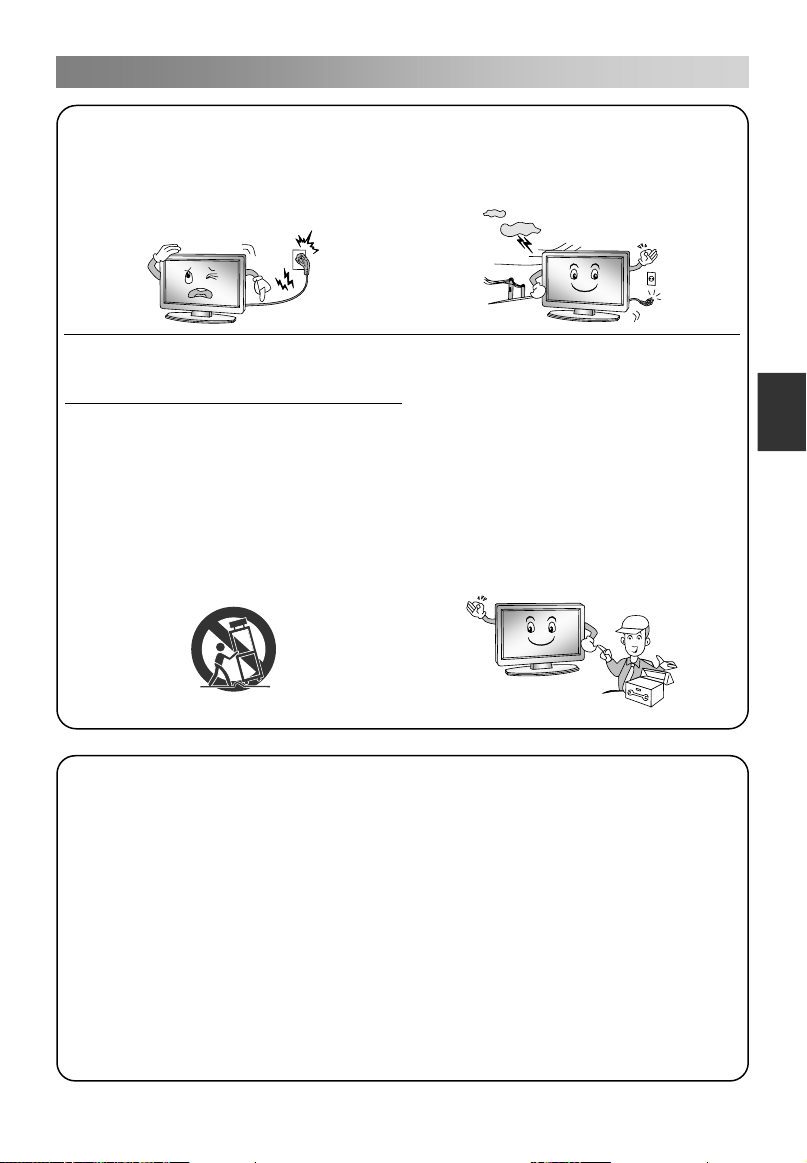
Consignes de s curit
4
é
é
10. Protégez le cordon d’alimentation
contre les piétinements ou les
coincements tout particulièrement
au niveau de la prise secteur et du
point de sortie de l’appareil.
11. N’utilisez que des accessoires et
pièces détachées certifiées par le
fabricant.
12. N’utilisez que les chariots, pieds,
trépieds, supports ou tables
spécifiés par le fabricant ou vendus
avec l’appareil. Si vous utilisez un
support à roulettes, soyez vigilant
lorsque vous déplacez l’ensemble
support à roulettes / téléviseur afin
d’éviter tout risque de blessure si
l’appareil bascule.
13. Débranchez l’appareil en cas
d’orage ou si vous ne l’utilisez pas
pendant une période prolongée.
14. Faites assurer toutes les
interventions de maintenance par le
personnel de réparation qualifié. Des
réparations sont nécessaires si
l’appareil a été endommagé, si le
cordon d’alimentation ou la prise
sont abîmés, si du liquide a été
déversé sur l’appareil ou qu’un corps
étranger a pénétré à l’intérieur, si
l’appareil a été exposé à la pluie ou à
l’humidité, s’il ne fonctionne pas
correctement ou s’il est tombé.
Français
Recyclage
- Ne déposez pas cet appareil avec les déchets ménagers.
- La mise au rebut de cet appareil doit être effectuée conformément aux
réglementations des autorités locales de votre pays ou région.
NOTE
-Si le téléviseur est utilisé dans un environnement particulièrement froid, il peut se
produire un scintillement à la mise en marche. Ce phénomène est normal, et il n’y a
aucun dommage causé au téléviseur.
-Certains défauts de pixels peuvent être visibles sur l’écran, montrant comme des
points rouges, verts ou bleus minuscules. Ces phénomènes sont sans effet sur la
performance du téléviseur.
-Evitez de toucher ou d’appuyer le(s) doigt(s) sur l’écran pendant une longue période
car ces gestes entraîneront l’effet de distorsion temporaire de l’image
Page 100

Unitédecontrôleprincipale
5
Vue avant
1
2
Français
3
4
5
No. Nom Description
6
1 CH+/CH- Changer les chaînes.
2 VOL+/VOL- Ajuster le volume.
3 MENU Ouvrir le menu.
4 Choisir une source de signal.
5
6
Power & Sensor
Allumer ou éteindre la TV.
Témoin d’alimentation et détecteur infrarouge.
 Loading...