

Page 1
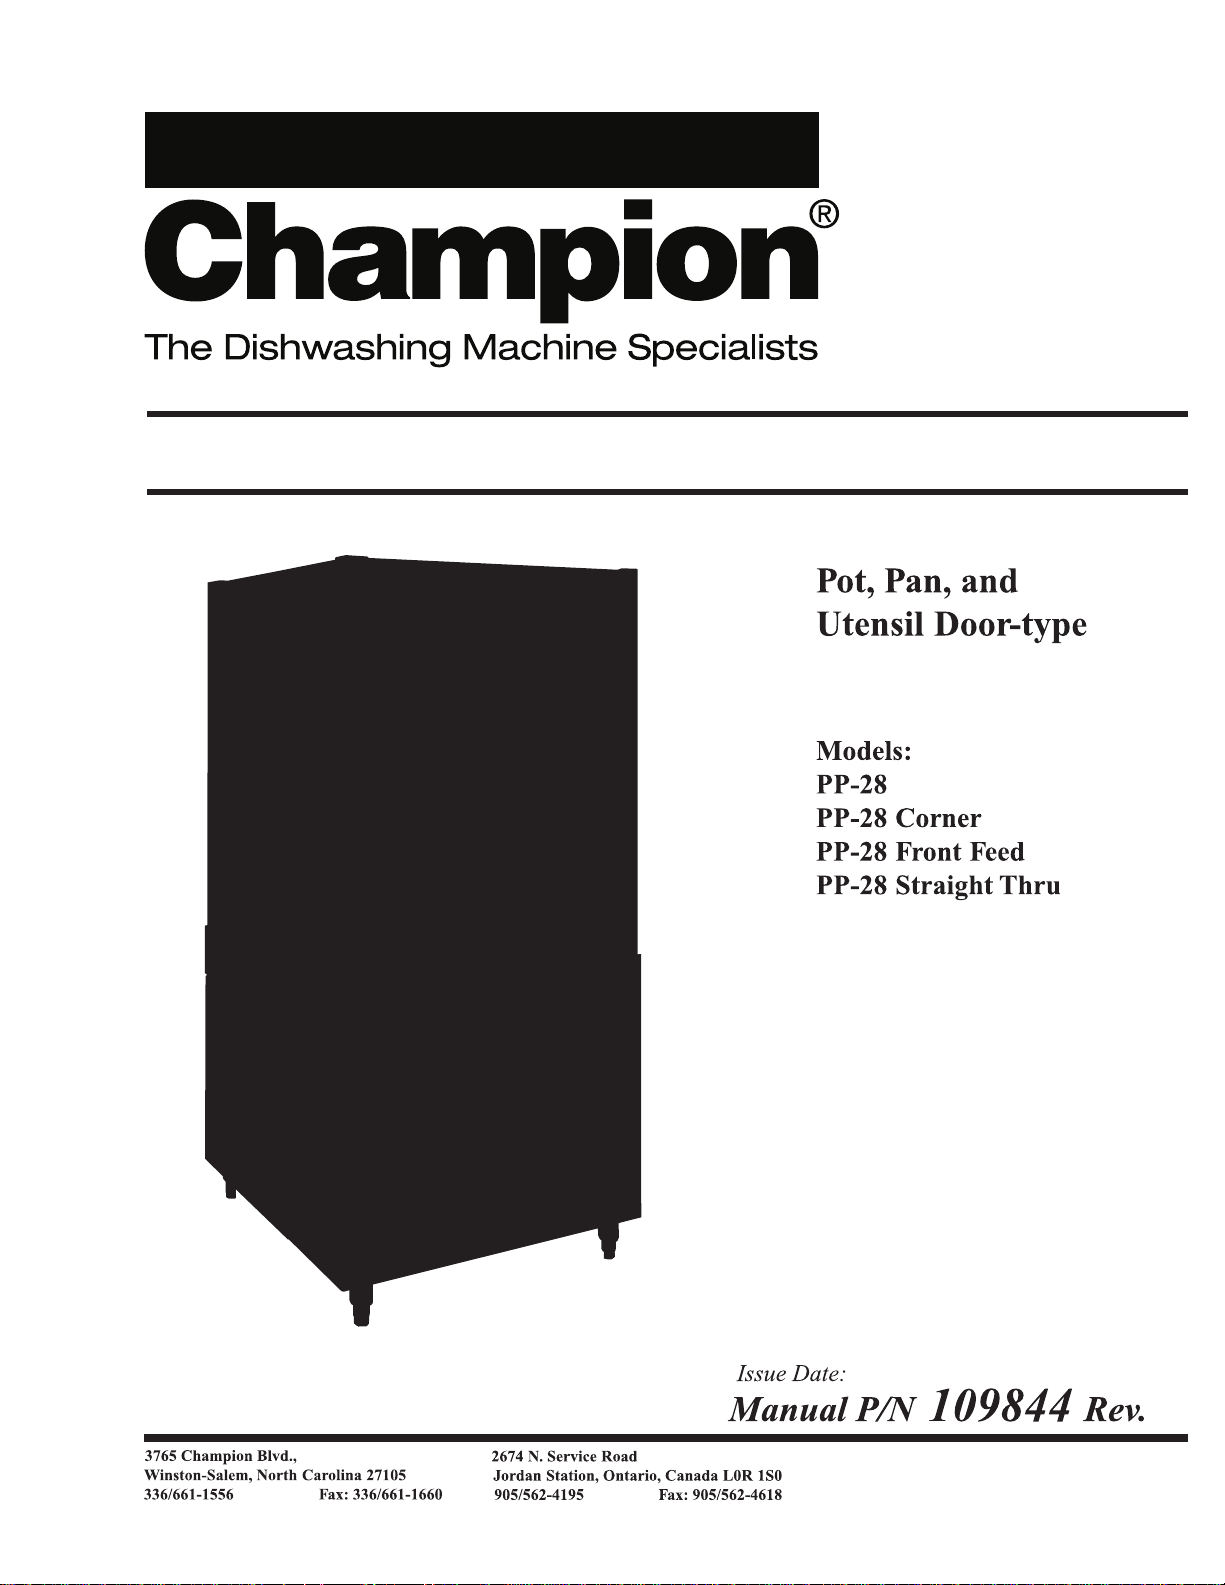
Installation/Operation Manual with Service Replacement Parts
www.championindustries.com
5.19.16
F
Printed in USA
Page 2

Complete the information below so it will be available for quick reference.
Model Number Serial Number
Voltage and Phase
Champion Service Agency Phone
Champion Parts Source Phone
Champion Service:
Champion (USA) Champion (Canada)
Phone: 1 (336) 661-1556 Phone: 1 (905) 562-4195
1 (800) 858-4477 1 (800) 263-5798
Fax: 1 (336) 661-1660 Fax: 1 (905) 562-4618
We strongly recommend that you Fax your orders.
NOTE:When calling to order parts, be sure to have the model number, serial
number, voltage and phase of your machine.
Machine Data Plate with
Model & Serial number
located on left side of
control cabinet panel.
COPYRIGHT © 206 by Champion Industries, Inc.
Page 3
6/21/04 48-49 Corrected P/N 314187 to 314185 drain overflow,
_____
added drain overflow gaskets and o-rings.
5/26/06 45 Changed rinse arm rebuild kit to P/N 900786
8/6/10 47 Changed Item 1 P/N to 307438
10/8/10 55, 63, 65, 69 Asco 1" solenoid valve P/N 110005 replaced by
5/19/16 63
_____
_____
10062779
_____
P/N 114800 for all serial numbers.
Changed Item 17 P/N 100269
Page 4

REVISION RECORD (CONT.)
REVISIONS
ii
Page 5

iii
CONTENTS
Page
REVISION HISTORY...................................................................................................................... i
WARRANTY .................................................................................................................................. v
SAFETY SUMMARY...................................................................................................................... vi
INTRODUCTION .......................................................................................................................... 1
GENERAL........................................................................................................................................ 2
INSTALLATION ............................................................................................................................ 3
Unpacking .......................................................................................................................... 3
Plumbing Connnections ...................................................................................................... 4
Electrical Connections ........................................................................................................ 5
Ventilation Connections ...................................................................................................... 5
Chemical Connections ........................................................................................................ 6
Dishtable Connections ........................................................................................................ 7
Completing Installation ...................................................................................................... 7
OPERATION .................................................................................................................................... 8
Inital Startup........................................................................................................................ 8
Basic Operation .................................................................................................................. 9
MAINTENANCE ............................................................................................................................ 10
Maintenance Schedule ........................................................................................................ 11
Deliming.............................................................................................................................. 12
Lubrication .......................................................................................................................... 12
TROUBLESHOOTING .................................................................................................................. 13
COMPONENTS .............................................................................................................................. 16
Electrical Service ................................................................................................................ 18
Component Replacement .................................................................................................... 25
REPLACEMENT PARTS ................................................................................................................ 35
LIST OF FIGURES
Figure 1 — Lubrication Points .................................................................................................... 12
Figure 2 — Fuse Blocks.............................................................................................................. 18
Figure 3 — Motor Overload ...................................................................................................... 18
Figure 4 — Wash Pump Timer.................................................................................................... 19
Figure 5 — Final Rinse Timer .................................................................................................... 19
Figure 6 — Dual Float Switch .................................................................................................... 20
Figure 7 — Tank Heat Thermostats ............................................................................................ 21
Figure 8 — Booster Thermostat Locations (Electric) ................................................................ 21
Figure 9 — Booster High Limit Thermostat (Electric) .............................................................. 21
Figure 10 — Vacuum Breaker ...................................................................................................... 25
Figure 11 — Parker Valve Replacement........................................................................................ 26
TABLE OF CONTENTS
Page 6

TABLE OF CONTENTS
CONTENTS (CONT.)
LIST OF FIGURES
Page
Figure 12 — Asco Valve Replacement.......................................................................................... 28
Figure 13 — Line Strainer ............................................................................................................ 29
Figure 14 — Rear View High Limit.............................................................................................. 30
Figure 15 — Tank Element Placement.......................................................................................... 30
Figure 16 — Rear View of Electric Heating Element .................................................................. 30
Figure 17 — Booster High Limit .................................................................................................. 31
Figure 18 Typical 40˚ Rise Booster.......................................................................................... 31
Figure 19 — Typical 70˚ Rise Booster.......................................................................................... 31
Figure 20 — Pump Assembly Breakdown .................................................................................... 33
Figure 21 — Door Switch and Magnet ........................................................................................ 34
Figure 22 — Panels ...................................................................................................................... 36
Figure 23 — Door Assemblies ...................................................................................................... 38
Figure 24 — Cable Pulley Assembly ............................................................................................ 40
Figure 25 — Counterweight System ............................................................................................ 42
Figure 26 — Wash & Rinse Assemblies ...................................................................................... 44
Figure 27 — Track Assembly........................................................................................................46
Figure 28 Drain System............................................................................................................ 48
Figure 29 — Wash Tank Components (Electric Heat).................................................................. 50
Figure 30 — Steam Coil Tank Heat .............................................................................................. 52
Figure 31 — Steam Coil (Low Pressure) Tank Heat .................................................................... 54
Figure 32 — Scrap Screens & Baskets.......................................................................................... 56
Figure 33 — Piping without Booster ............................................................................................ 58
Figure 34 — Piping with Steam Booster ...................................................................................... 60
Figure 35 — Steam Booster (Mounted under Tank) .................................................................... 62
Figure 36 — Side Mounted Steam Booster ................................................................................ 64
Figure 37 — Low Pressure Steam Booster .................................................................................. 68
Figure 38 — Electric Booster (Mounted under Tank) .................................................................. 70
Figure 9 — Electric Booster 70˚ Rise (Side Mounted) .............................................................. 74
— Side Mounted Booster Cabinet ................................................................................ 76
Figure 41 — Pump Assembly........................................................................................................ 78
Figure 42 — Machine Control Panel ............................................................................................ 80
Figure 43 — Machine Control Cabinet ........................................................................................ 82
Figure 44 — Booster Control Cabinet ........................................................................................ 84
Figure 45 — Vent Fan Control Cabinet (Optional) ...................................................................... 86
Figure 46 — Racks ........................................................................................................................ 88
iv
Figure 47 — Canister Steam
Booster............................................................................................. 90
Page 7

v
installed within the United States and Canada to be free from defects in material and workmanship for a period of one
(1) year after the date of installation or fifteen (15) months after the date of shipment by Champion, whichever occurs
first. [See below for special provisions relating to glasswashers.] The warranty registration card must be returned to
Champion within ten (10) days after installation. If warranty card is not returned to Champion within such period, the
warranty will expire after one year from the date of shipment.
Champion will not assume any responsibility for extra costs for installation in any area where there are jurisdictional
problems with local trades or unions.
If a defect in workmanship or material is found to exist within the warranty period, Champion, at its election, will
either repair or replace the defective machine or accept return of the machine for full credit; provided, however, as to
glasswashers, Champion’s obligation with respect to labor associated with any repairs shall end (a) 120 days after
shipment, or (b) 90 days after installation, whichever occurs first. In the event that Champion elects to repair, the labor
and work to be performed in connection with the warranty shall be done during regular working hours by a Champion
authorized service technician. Defective parts become the property of Champion. Use of replacement par ts not
authorized by Champion will relieve Champion of all further liability in connection with its warranty. In no event
will Champion’s warranty obligation exceed Champion’s charge for the machine. The following are not covered by
Champion’s warranty:
a. Lighting of gas pilots or burners.
b. Cleaning of gas lines.
c. Replacement of fuses or resetting of overload breakers.
d. Adjustment of thermostats.
e. Adjustment of clutches.
f. Opening or closing of utility supply valves or switching of electrical supply current.
g. Cleaning of valves, strainers, screens, nozzles, or spray pipes.
h. Performance of regular maintenance and cleaning as outlined in operator’s guide.
i. Damages resulting from water conditions, accidents, alterations, improper use, abuse, tampering, improper
installation, or failure to follow maintenance and operation procedures.
j. Wear on Pulper cutter blocks, pulse vanes, and auger brush.
Examples of the defects not covered by warranty include, but are not limited to: (1) Damage to the exterior or interior
finish as a result of the above, (2) Use with utility service other than that designated on the rating plate, (3) Improper
connection to utility service, (4) Inadequate or excessive water pressure, (5) Corrosion from chemicals dispensed in
excess of recommended concentrations, (6) Failure of electrical components due to connection of chemical dispensing
equipment installed by others, (7) Leaks or damage resulting from such leaks caused by the installer, including those at
machine table connections or by connection of chemical dispensing equipment installed by others, (8) Failure to comply
with local building codes, (9) Damage caused by labor dispute.
Warranty of Parts: Champion warrants all new machine parts produced or authorized by Champion to be free from defects
in material and workmanship for a period of 90 days from date of invoice. If any defect in material and workmanship is
found to exist within the warranty period Champion will replace the defective part without charge.
DI
SCLAIMER OF WARRANTIES AND LIMITATIONS OF LIABILITY. CHAMPION’S WARRANTY IS ONLY TO
THE EXTENT REFLECTED ABOVE.CHAMPION MAKES NO OTHER WARRANTIES, EXPRESS OR IMPLIED,
INCLUDING, BUT NOT LIMITED,TO ANY WARRANTY OF MERCHANTABILITY, OR FITNESS OF PURPOSE.
CHAMPION SHALL NOT BE LIABLE FOR INCIDENTAL OR CONSEQUENTIAL DAMAGES.THE REMEDIES
SET OUT ABOVE ARE THE EXCLUSIVE REMEDIES FOR ANY DEFECTS FOUND TO EXIST IN CHAMPION
DISHWASHING MACHINES AND CHAMPION PARTS,AND ALL OTHER REMEDIES ARE EXCLUDED,
INCLUDING ANY LIABILITY FOR INCIDENTALS OR CONSEQUENTIAL DAMAGES.
Champion does not authorize any other person, including persons who deal in Champion dishwashing machines to change this
warranty or create any other obligation in connection with Champion Dishwashing Machines.
WARRANTY
LIMITED WARRANTY
Champion Industries (herein referred to as Champion), 3765 Champion Blvd., Winston-Salem, North Carolina 27105,
and 2674 N. Service Road, Jordan Station, Canada, L0R 1S0, warrants machines, and parts, as set out below.
Warranty of Machines: Champion warrants all new machines of its manufacture bearing the name “Champion” and
Page 8

vi
SAFETY SUMMARY
Safety Symbols
• The following symbols appear throughut this manual alerting you to potential hazards.
Statements associated with each symbol are printed on italics.
WARNING:
Warning statements indicate any condition or practice that could result in personal injury or
possible loss of life.
CAUTION:
Caution statements indicate any condition or practice which, if not strictly observed or
remedied, could result in damage to or destruction of the dishwasher.
NOTE:
Note statements indicate any condition or practice which, if observed, will help in the safe
completion of a task.
General Safety Rules
• The following general safety rules must be observed in addition to the specific cautions
and warnings presented in this manual.
• Your Champion pot and pan washer uses hot water to clean and sanitize a variety of wares.
Machine surfaces and wares become hot during and immediately following normal
operations. Operators should use caution when loading and unloading wares from
the machine.
• Operators must NOT bypass a safety interlock or control(s) to operate unit.
• The service and maintenance instructions contained in this manual are intended for qualified
service personnel. These instructions assume that you are trained in basic electricity and
mechanical theory. If you are not a trained technician,then do not attempt to adjust or
repair the dishwasher as serious personal injury or damage to the dishwasher may result.
SAFETY SUMMARY
!
Page 9

1
INTRODUCTION
Welcome to Champion....
and thank you for allowing us to take care of your dishwashing needs.
This manual covers several models. Model numbers are shown on the front cover.
Your machine has been completely assembled, inspected, and thoroughly tested at our factory
before it was shipped to your installation site.
This manual contains:
• Warranty infor mation
• Operation and cleaning instructions
• Maintenance instructions
• Troubleshooting guide
• Basic service information
• Replacement parts lists
• Electrical schematics
Complete and return your warranty registration card within ten (10) days after the installation of
your machine.
All information, illustrations and specif ications contained in this manual are based upon the
latest product information available at the time of publication. Champion constantly improves its
products and reserves the right to make changes at any time or to change specifications or design
without notice and without incurring obligation.
For your protection, factory authorized par ts should always be used for repairs.
Replacement parts may be ordered from your Champion authorized service agency. When
ordering parts, please supply the model number, serial number, voltage and phase of your
machine, the part number, part description, and quantity.
INTRODUCTION
Page 10

GENERAL
This manual covers the Champion pot, pan, and utensil door type washing machine. This
machine is fully automatic and is equipped with a 7.5 Hp wash pump motor. This model is
available for straight-through, corner or front-loading operation.
Standard Features
• Balanced door system • Interchangeable upper and lower
• Detergent/chemical connection wash and rinse arms
provisions • Door safety switch on each door
• Low water tank heat protection • Enclosure panels (front and sides)
• Recessed, front-mounted controls • External lift-out refuse basket
• Six-inch diameter vent connections • Fully automatic wash and rinse cycle
• Hold-down grid • Tank heater (choice of electric, steam
• Ten-inch shelf on front-loading coils or steam injectors)
machines
• Field convertible to corner model
Options & Accessories
• Stainless Steel Booster (interplumbed and intewired)
Steam: 40˚F/23˚C-70˚F/39˚C rise (built in booster)
(externally mounted with cover for corner model)
Electric: 40˚F/23˚C rise (built-in)(externally mounted with cover for corner model)
70˚F/39˚C rise (externally mounted with cover)
NOTE:
ALL electric boosters require separate electrical connection.
• Exhaust Fan, 1/3Hp
• Stainless steel rack
Basket Rack P/N 109584
Pan Rack P/N 109585
Utility Rack P/N 109586
Bake Sheet Rack P/N 109587
GENERAL
2
Page 11
3
INSTALLATION
Unpacking
Your dishwasher was completely assembled, inspected, and thoroughly tested at our factory
before shipment to your installation site.
• The pot, pan, and utensil washer is shipped on a single pallet.
• Optional components may have been shipped separately.
• Check your packing list thoroughly.
NOTE:
Care should be taken when lifting the machine. The piping under the base can be damaged.
Remove the dishwasher front panels if lifting from the front with a forklift.
BE SURE TO COMPLETE AND RETURN
THE W ARRANTY CARD
INCLUDED WITH Y OUR MA CHINE
NOTE:
The installation of your pot, pan, and utensil washer must meet all applicable health and
safety codes and conform to good trade practice.
1. Immediately after unpacking your machine, inspect for any shipping damage. If damage is
found, save the packing material and contact the carrier immediately.
2. Check the interior of the dishwasher for the following items stowed inside:
• 1 set of dishracks
• Upper and lower spray arm assemblies
• Warranty information packet
3. Move the dishwasher to its permanent location. Move the machine while on the skid.
Do not lift on any of the piping under the base.
INSTALLATION
Page 12

PERMANENT PLACEMENT
Special T ools-
• Bubble Level (3ft)
Perform the following steps to place the dishwasher in its permanent location.
1. Before moving the dishwasher into position, inspect the location site to ensure the electrical,
plumbing, and ventilation services (if required) are provided in the correct locations.
Compare the site connections with the dishwasher to ensure they will match when the
machine is set in its permanent location.
2. Remove the skid.
3. Place a 3ft. level on top of the pot and pan washer or inside the dishwasher on the track
assembly to level the dishwasher front to back. Adjust the level by turning the adjustable
feet. Level side to side with the level place on the top of the unit.
4. Remove the control cabinet cover and the right side panel for the booster cabinet
(if applicable), to expose the electrical terminal connection points.
Plumbing Connections
WARNING:
The installation of this unit must conform to local codes or, in the absence of local codes,
to all National Codes governing plumbing, sanitation, safety and good trade practices.
1. Incoming water supply line is 1” for water connections. Connect the hot water supply at the
final rinse piping connection located at the top right rear of machines with boosters.
2. A “Y” line strainer is provided by Champion for machines without boosters. A pressure
reducing valve (PRV) is provided by Champion for machines with built-in boosters.
3. If the incoming hot water supply pressure exceeds 25 psi [173 kPa], a PRV must be installed
and set to 20-22 psi [138-151 kPa] flowing pressure. The PRV may be purchased from
Champion or supplied by others.
4. Install a manual shut-off valve in the steam and water supply lines to accommodate servicing
the machine. The valve should be the same size as or larger than the supply line.
5. Provide a suitable gravity drain to connect to the 1-1/2" NPT machine drain connection.
INSTALLATION
4
Page 13

5
Electrical Connections
NOTE:
Electrical and grounding connections must comply with the National Electrical Code and/or
Local Electrical Codes.
WARNING:
When working on the unit, disconnect the electric service and tag it to indicate work is being
done on that circuit.
1. A qualified electrician should compare the electrical specifications on the machine electrical
connection plate (located inside the control cabinet) to the electrical power supply before
connecting to the incoming service at a fused disconnect switch.
2. The unit is phased at the f actory. The phasing of the incoming service can be checked by the
rotation of the pump shaft. The pump shaft should rotate in the direction of the discharge,
indicated by an arrow on the casting. If the machine is out of phase, make changes at the
control cabinet main terminal block and not at the motor.
3. A knock-out plug is provided at the rear of the control cabinet for electrical service
connections. Electric booster requires a separate connection.
Ventilation
1. Stainless steel watertight ducting should be installed INSIDE the 6” diameter vent collar on
the top of the machine.
• The machine requires 200 CFM @ 1/4" (SP), [95 Liters/sec].
2. There shall be a minimum of 8 air changes per hour of kitchen air.
CAUTION:
Exhaust air should not be vented into a wall, ceiling, or concealed space of a building.
Condensation will cause damage.
INSTALLATION
!
Page 14

CHEMICAL CONNECTIONS
!! ATTENTION POT AND PAN WASHER OWNER!!
Your pot and pan washer is designed to work best with liquid commercial dishwashing
chemicals. Detergents must be a commercial non-foaming liquid. Champion strongly
recommends that you contact a qualified chemical supplier to supply these products and to
set-up your machine for the first time.
1. Use a qualified detergent/chemical supplier.
2. Labeled control circuit connection terminals are provided in the control cabinet for detergent
and rinse agent dispensing equipment (supplied by others).
3. Refer to the wiring schematic for connection points. Signal connection points include:
• Detergent signal 120VAC, 1 Amp Max amp load.
• Rinse aid signal 120VAC, 1 Amp Max amp load.
4. A removable black plastic plug is provided on the lower left side of the wash tank, behind
the panel, for the installation of the detergent conductivity cell.
5. The detergent input tube should be located above the conductivity cell and the scrap screens.
6. Liquid product is available in 1 to 30 gallon containers and should be located within the
sight of the operator.
CAUTION:
Never use residential nonautomatic dishwashing detergents such as JOY™ or DAWN™, or
any other liquid designed for the handwashing of wares, in your machine. Extreme foaming
inside your Champion pot and pan washer will cause operation problems.
Rinse Aid Connections
1. Rinse aid injection system should be installed by a qualified detergent/chemical company.
2. A removable plug in the fill line on top of the machine, at the rear, will be the rinse
injection point.
3. Since the final rinse is controlled by the machine timer, rinse aid is only introduced during
this cycle.
4. Refer to the wiring schematic for the connection points in the form of two terminal screws.
3. The reservoir should be placed within sight of the operator with machine doors in the open
position. The liquid product is available in 1 to 6 gallon containers.
iI
N
INSTALLATION
6
!
Page 15

7
Installation of Dish Tables
1. Load and unload machine openings are 28-7/8”, therefore, table width should be 29” with a
3/4” turned down lip. (33-1/2” max entry).
2. The formed down lip of the dishtable should be placed inside the machine. The dishtable
should be pitched toward the dishwasher for proper draining by adjusting its leveling feet.
The dishtable should be sealed to the dishwasher.
Completing Installation
WARNING:
Do not insert racks into machine before tanks fill with water. Operating pumps dry will cause
pump seal damage and leakage that can result in a motor failure.
1. Remove any foreign material from inside the machine.
2. Check to ensure that drains and overflow pipes are operational and sealed.
3. Position scrap screens on supports above the tanks.
4. After plumbing and electrical connections are completed, fill the tank and wait 10
minutes. Check all plumbing connections for leaks.
5. Drain the tank and check the drain lines for leaks.
INSTALLATION
Page 16

OPERATION
INITIAL START-UP
Check your site to ensure that all plumbing and electrical connections have been properly made by
qualified personnel. Check the installation of chemical dispensing systems. Perform the following
steps to prepare your machine for operation.
1. Check the exterior of the machine for any foreign material and remove.
2. Check the interior of the machine for any foreign material and remove.
3. Remove the lower spray arms and the scrap screens.
4. Make sure that all loose tape, nut, bolts and paper have been removed from the interior.
5. Replace the scrap screen and clean if required.
6. Make sure that the upper and lower spray arms are in place and that the nozzles are clean. The
arms are held in place by knurled retaining screws. The arms are interchangeable.
7. Check the chemical supply containers and fill as required. Detergent may be introduced by hand,
for the first initial start up, on the top of the screens (follow chemical supplier’s directions).
8. Open the water supply valve. Check for leaks and take any corrective action that may be
needed.
9. Open the final rinse pet cock under the pressure gauge.
10. Check the drain and/or drain connections to ensure that drains are functional.
11. Turn the main power on at the breaker panel or fused disconnect switch.
8
Page 17

9
OPERATION
BASIC OPERATION
Perform the following steps to prepare and load your wares for washing.
1. Scrap and rinse wares to remove any heavy food particles and other debris.
2. Place wares into rack.
3. Place rack into the machine and close all doors.
4. Flip the power toggle switch, located on the control cabinet, to ON.
5. The power ON red light will glow and the machine should begin to fill.
6. Wait until the machine has stopped f illing. Check for leaks and observe the wash
temperature gauge. The minimum wash temperature is 150˚F.
7. Turn the wash cycle timer face counterclockwise to stop (2 minutes). Push the GREEN start
button, machine will start. The GREEN in-cycle light will remain on. During the final rinse
(15 seconds) check the rinse temperature gauge. The minimum temperature for the final
rinse is 180˚F.
8. If for any reason the doors are opened during the cycle, the machine will stop. Closing the
doors will restart the machine where the cycle was stopped at timewise.
9. Check the Detergent/Rinse Aid feed during the machine operation.
10. For best results, clean the scrap screens and scrap baskets after each meal period. REPLACE
the tank water every 8 hours of operation.
11. Check the chemical supply. Replenish any chemicals as needed.
12. Follow the Maintenance section of this manual for DAILY and WEEKLY maintenance.
CAUTION:
DO NOT leave water in tank overnight.
!
Page 18

MAINTENANCE
MAINTENANCE
The efficiency and life of your machine is increased by regularly scheduled preventive maintenance.
A well maintained machine gives better results and service. An investment of a few minutes of
daily maintenance will be worthwhile.
The best maintenance you can provide is to keep your machine clean. Components that are not
regularly cleaned and flushed will clog and become inoperative.
Intervals shown in the following schedules represent an average length of time between necessary
maintenance. Maintenance intervals should be shortened whenever your machine is faced with
abnormal working conditions, hard water, or multiple shift operations.
CLEANING
Daily-Every 8 Hours of Operation
1. Turn power switch to OFF.
2. Drain the tank and flush with water.
2. Remove all scrap screens, scrap baskets and pull drain lever to drain water. Clean inside of
tank and flush with clean water. Backflush scrap screens and basket until clean. Do not strike
screens or basket against solid objects.
3. Remove the spray pipes. Remove the end plug from each spray pipe. Flush pipe and nozzles
until clean. Do not strike spray pipes against solid objects. Check bearings in arms to
ensure that they are clean of any debris and do not need replacing. Reinstall spray pipes.
At the End of Day
1. Drain the machine.
2. Check and clean scrap screens, scrap basket and pump suction screen.
3. Clean the spray arms.
4. Wash inside of machine with fresh water (tank, sides and top).
CAUTION:
Do not hose down the exterior of the machine with water.
5. Leave the doors open to aid in drying the interior of the machine.
6. Clean the exterior of machine with a mild soap solution.
6. Check detergent and rinse aid additive, replenish if necessary.
7. Report any unusual conditions to your supervisor.
10
!
Page 19

11
MAINTENANCE
PREVENTATIVE MAINTENANCE SCHEDULES
Daily Maintenance Requirements
1. Check the chemical supply containers and replenish as needed.
2. Inspect the scrap screens and baskets for bent or damaged parts.
3. Check the spray arm bearings and make sure that arms turn freely.
4. Check pump motor for leaks around shaft.
5. Check thermometers for proper readings.
Weekly Maintenance Requirements
1. Inspect for leaks including all piping and supply connections. Tighten or repair as needed.
2. Inspect the door for proper fit and ease of operation.
3. Check the operation of door safety switches.
4. Thoroughly clean any residue from the exterior of machine.
5. Check drain/overflow tube for leaks.
Semi-Annual Maintenance Requirements
1. Inspect all chemical connections and supply tubing for leaks.
2. Check the building drain system and clean as needed.
Yearly Maintenance Requirements
1. Inspect the installation site for cleanliness and any foreign material around the machine. Clean
as required.
2. Check the overall condition of the machine. Replace any worn or damaged parts.
Page 20

Figure 1
Lubrication Points
MAINTENANCE
DELIMING
Your dishwasher should be delimed regularly as required. This will depend on the mineral
content of your water. Inspect your machine interior for lime deposits. If deliming is required, a
deliming agent should be used for best results. Consult your chemical supplier for proper type
and procedures.
DANGER:
Deliming solution, rinse agents, or other acids must not come in contact with household
bleach (sodium hypochlorite) or any chemicals containing chlorine, iodine, bromine, or
fluorine. Mixing may cause hazardous gases to form. Consult your chemical supplier.
1. Remove all racks and wares from the machine.
2. Remove chemical pick-up tubes from the containers and place in a catch pan on the floor.
3. Place each tube in a container of fresh water and prime the chemical lines for several minutes
to throughly flush chemical from the lines. Leave pick-up tubes out of their containers.
4. Drain the machine and refill with fresh water.
5. Spray interior walls with deliming solution and let stand for 5 or 10 minutes depending on
the amount of buildup.
6. Open door and add deliming solution (per chemical supplier’s instructions) directly in
wash tank.
• PP-28 holds 24 US gallons (90.8 Liters) of water.
7. Close doors.
8. Push start button and run an automatic cycle.
9. Repeat steps 3 and 4 if necessary.
10. Drain machine.
11. Open door and inspect interior for mineral deposits. Repeat steps 3-10 if required.
12. Run two (2) additional cycles to flush all deliming chemicals from machine.
13. Drain and refill machine.
14. Replace chemical pick up tubes in containers and prime chemical dispensing system.
15. Deliming process is complete.
LUBRICATION
There are two lubrication points on the pump assembly
motor. The pump motor should be greased every 100
hours of running time with a high temperature and
high pressure bearing grease. DO NOT over
lubricate. One to two pumps of the grease gun is
sufficient.
12
Grease
Fittings
Page 21

13
TROUBLESHOOTING
OPERATOR TROUBLESHOOTING
The first step in troubleshooting your dishwasher is knowing how it works under normal
conditions. Review the Operation section in this manual for a description of proper loading,
operator controls and basic operating procedures. Check the general condition of dishwasher:
• Does the machine appear to be level?
• Are the spray arms and screens clean and in place?
• Are the doors fully closed?
Some problems may be resolved by double-checking the supply connections to your dishwasher.
Perform the following steps to double-check your dishwasher service connections.
• Push the POWER button on the pot and pan washer OFF, then tur n the main power OFF at the
main service disconnect switch or fused circuit breaker. Tur n the main power ON and recheck
the pot and pan washer operation.
• Turn the dishwasher water supply valve off and back on again.
• Check the water temperature supplied to the dishwasher. Are the building’s water heaters
operating properly.
• Check the flow of the building drain system. Are any drains clogged or running slow?
• Check the chemical dispensing supplies. Are the strainers clean? Are the pick-up tubes in the
correct containers?
Proceed to the next page if the above checks did not
resolve the trouble condition.
Page 22

TROUBLESHOOTING
OPERA T OR TROUBLESHOO TING (CONT .)
Troubleshooting Guide
In order to find the cause of a breakdown or abnormal operating condition in your dishwasher
please ensure that:
1. All switches are ON
2. Drain and overflow tube are in place and seated
3. Wash and rinse nozzles are clean
4. Scrap screen(s) and scrap basket are properly positioned
5. Spray arms are in their proper positions
6. Thermostat(s) are at their correct setting
7. Sanitizer, detergent, and rinse additive dispensers are adequately filled
8. Doors are fully closed.
If a problem still exists, use the following table for troubleshooting
CONDITION CAUSE SOLUTION
Machine will not start Door not closed.................................. Make sure doors are fully closed
Door safety switch faulty .................. Contact your service agency
Start switch faulty.............................. Contact your service agency
Main switch off.................................. Check disconnect
No rack inserted ................................ Place rack in unit
Overload protector tripped ................ Reset overload in control box
Low or no water Main water supply is turned off ........ Turn on house water supply
Drain/overflow tube is not
in place and seated ............................ Place and seat drain tube
Machine doors not fully closed ........ Close doors securely
Faulty fill valve.................................. Contact your service agency
Stuck or defective float...................... Check floats and clean
Clogged ‘Y’strainer .......................... Clean or replace
Continuous water filling Stuck or defective float...................... Check floats and clean
Fill valve will not close...................... Clean or replace
Drain tube not in place ...................... Look for drain tube in tank
Motor not running Overload protector tripped ................ Reset overload in control box
Defective motor ................................ Contact your service agency
Wash tank water temperature Incoming water temperature
is low when in use at machine too low ............................ Raise temperature to 140˚
Defective thermometer ...................... Check or replace
Defective thermostat.......................... Check for proper setting or replace
Defective heater element .................. Check or replace
Low steam pressure .......................... Check steam supply pressure
Defective steam trap.......................... Check or replace
Defective solenoid valve.................... Check or replace
14
Page 23

15
TROUBLESHOOTING
CONDITION CAUSE SOLUTION
Insufficient pumped spray Clogged pump intake screen.............. Clean
pressure Clogged spray pipe............................ Clean
Scrap screen full ................................ Must be kept clean and in place
Low water level in tank...................... Check drain and overflow tube
Pump motor rotation incorrect .......... Reverse connection between L1
and L2 in control cabinet (3 phase only)
Defective pump seal .......................... Contact service agent
Insufficient f inal rinse or no Faulty pressure reducing valve .......... Clean or replace
final rinse Improper setting on pressure
reducing valve.................................... Set flowing water pressure to 20-22 psi
............................................................ [138-151 kPa]
Clogged rinse nozzle and/or
pipe .................................................... Clean with paper clip/delime
Improper water line size.................... Have installer change to proper size
Clogged ‘Y’strainer .......................... Clean or replace
Low final rinse temperature Low incoming water ........................ Check the booster (if supplied with machine)
be sure the thermostat is set to maintain
180˚F/82˚C temperature.
Check valve to be sure it is clean
and operating.
Defective thermometer ...................... Check for proper setting or replace
Poor washing results Detergent dispenser not
operating properly.............................. Contact detergent supplier
Insufficient detergents ...................... Contact detergent supplier
Food Soil concentration too
high in wash tank .............................. Drain tank, clean and refill every 2 hours of
operation or after each meal period.
Wash water temperature
too low .............................................. See condition “Wash Tank
W ater Temperature” above
Wash arm clogged.............................. Clean
Wash arm not rotating........................ Clean ar m. Check bearing, replace if necessary.
Improperly scraped dishes ................ Check scraping procedures
Ware improperly
placed in rack .................................... Use proper racks. Do not overload racks
Improperly cleaned
equipment .......................................... Unclog wash sprays and rinse nozzles
to maintain proper pressure and flow
conditions. Overflows must be open.
Keep wash water as clean as possible.
Electric elements or steam
coils has soil/lime buildup ................ Clean and delime
Page 24

BASIC SERVICE
BASIC SERVICE
This next section provides photos, illustrations and basic instructions for the electrical service
and replacement of the main components. It does not cover all components such as the wash arm
supports, hoses or panels. These repairs require simple observation and basic mechanical skill
and therefore are not included in this manual.
WARNING:
Machine surfaces are hot during and after normal operation.
WARNING:
When working on the pot and pan washer, disconnect the electrical service and place a red
tag at the disconnect switch to indicate work is being done on the circuit.
WARNING:
Use extreme caution when testing circuits while power is applied to the machine.
Fill/Rinse Solenoid Valves
There are two different types of valves used on the PP-28; Hot Water and Steam valves, both of
which are rated 120VAC. The steam booster and steam f ill valves come with a four screw pattern
on the body. In all cases these valves must be installed with the coil above the valve body. Repair
kits include spring, piston, and diaphragm. The electrical solenoid coil is replaceable as well.
When ordering the replacement components as well as the complete valves, specify the size and
type needed.
Vacuum Breaker
The vacuum breaker is located on the top of the machine providing a anti-siphoning protection.
The diaphragm is replaceable by removing the bell shaped top and unscrewing the body.
Dual Float Switches
The tank has a dual float switch assembly. The float switch is on a 24 VAC circuit. When the tank
is empty and both floats are down, the switch for the float will be in a NO (Normally Open)
position calling for the tank to fill with no heat. When both floats rise to the top the switch will
be in a NC (Normally Closed) position. The tank heat will be activated and the f ill will stop.
Tank Heat
The tank heat can be electric, steam coils or steam injectors.
Electric: Uses 10KW elements that are coated with a special alloy to protect against detergents
in the tank. The element circuit is protected by a thermostat and a HI-Limit switch in the tank.
Steam Coils: Use a 120 volt power to a steam solenoid in a closed loop coil heat exchanger
using a diaphragm trap. The coil circuit is protected by a thermostat in the tank.
Steam Injectors: Use a 120 volt power to a steam solenoid valve that injects steam through a
two muffler system. A one-way check valve prevents back-siphoning should the valve fail.
This circuit is also controlled by a thermostat located in the tank.
16
Page 25

17
COMPONENTS
BASIC SERVICE (CONT.)
Hi-Limit Switch
On machines with electric tank and boosters, a separate thermostat is installed that interr upts the
power if the temperature exceeds a preset limit. When the over temperature condition is resolved,
the red button located on top of the switch, must be pushed to reset the power to the elements.
Pressure Reducing Valve (PRV)
A 3/4” PRV for the water supply or 1-1/4” for steam booster, is required if the incoming water
supply exceeds 20-22 PSI(138-151kPa) for water or 30 PSI for steam flowing pressure. The
PRV’s should be installed in the incoming supply lines before the machine connection.
Water Hammer Arrestor
Whenever a booster heater is installed in the final rinse line a water hammer arrestor shall be
installed between the booster outlet and the final rinse inlet valve. This helps to prevent the
knocking or hammering sound of the water as it flows through the pipes.
Wash Pump/Motor
The wash pump/motor is a closed centrifugal pump that is rated 7-1/2 HP running at 3600 RPM.
The motor is rated 3 phase, 60 hertz, and is multi-voltage.
Page 26

18
ELECTRICAL SERVICE
ELECTRICAL SERVICE
Fuse Blocks—120VAC Control Voltage
Two fuse blocks, located in the lower front corner of the main control
cabinet protect the main control transformer. Each fuse block holds a fuse.
The fuses are marked 1FU and 2FU on the electrical schematic.
To Replace the fuse:
• Disconnect power to the machine at the main service switch.
• Flip the tab on the top of the fuse block to open the block.
• Remove the fuse and replace it.
• Close the fuse block and turn the main power on.
• If the fuse blows again, DO NOT INCREASE THE FUSE SIZE.
• DETERMINE THE CAUSE OF THE OVERLOAD.
ÊFig. 2 shows the fuse block opened and the fuse exposed.
Motor Overloads
Motor overloads are located to the left of the fuse blocks inside
the control cabinet. The motor has an overload to protect it from line
voltage electrical overloads. In addition, an auxilary set of switch
contacts are built into the overload. The switch contacts
disconnect 120VAC power to the motor contactor coils in the
event of an overload condition.
Note the Switch Lever on the Overload.
• If the switch lever is off with the “0” showing then the
overload has tripped on an overload.
To Reset the Motor Overload:
• Flip the starter switch to the On position.
• Run the dishwasher and test the AMP draw of the motor in
question. If the motor checks okay then there may be a
wiring problem or the overload may be defective.
To Replace a Motor Overload:
• Disconnect the wires to the overload.
• Release the mounting catch on the front side of the overload,
push forward and lift out.
• Snap the new overload into place and reconnect the wires.
To adjust the overload setting:
The screwdriver in Fig.3 is positioned
to adjust the motor overload AMP setting.
• Read the FLA motor amps that applies for the
machine voltage on the Motor Nameplate.
• Turn the setting to 125% over the FLA .
Figure 2
Fuse Blocks
Figure 3
Motor Overloads
Page 27

19
ELECTRICAL SERVICE (CONT.)
Pump Timer
Refer to Fig.4 and Fig. 5
There are two timers in control cabinet of the PP-28,
one is located on the face of the cabinet panel and
controls the pump time, while the other one is
located inside the top of the control cabinet and
controls the final rinse time.
The Pump Timer controls the amount of time that the
pump will run during the wash cycle. This time is set
from the factory and pegged for the minimum time of
2 minutes. You are able to select the time settings from
2 minutes to 5 minutes depending on the amount of
soiled product. (See Fig. 4 for timer position).
The Final Rinse Timer controls the amount of time
for sufficient final rinse sanitizing. This timer is an
adjustable timer for 0 to 30 seconds. The factory
presets this timer for 16 seconds. (See Fig. 5 for
timer in cabinet).
The final rinse timer has the following user def ined settings:
1. Adjustable timer range
2. Timer knob setting
3. Indicator light (ON when timer is counting)
4. 50 Hz or 60 Hz setting on the back/bottom of the timer
To Replace a Timer:
• Disconnect power to the machine at the main service switch.
• Remove the defective timer and install the replacement.
• Adjust the new timer setting to match the setting
of the original timer.
ELECTRICAL SERVICE
Figure 5
Final Rinse Timer
Figure 4
Wash Pump Timer
Image unavailable
at time of printing.
Page 28

20
ELECTRICAL SERVICE
ELECTRICAL SERVICE (Cont.)
Automatic Fill/Low Water Heat Protection
Dual Float Switches –
Refer to F
ig. 6
Each tank contains a dual float. The device consists of
an angled stem containing two reed switches.
Two stainless steel ball floats slide over the
stem and are free to move up and down.
The floats contain magnets. When the float moves on the
stem, it opens and closes its associated reed switch inside the
stem. The reed switches control relays. The relays control the
automatic fill and heat for different parts of the machine.
Float switches and their relays operate on 24VAC.
Circuit Explanation –
The following is a general explanation of the float switch circuit.
Refer to the electrical schematic on your machine for a detailed description
of the individual floats, relays, and wiring.
Bottom Float and Reed Switch:
• The bottom float controls the heat.
• When the bottom float is down, the bottom reed switch contacts are open.
• When the bottom float is up, the bottom reed switch contacts close.
Top Float and Reed Switch:
• The top float controls a f ill valve.
• When the top float is down, the top reed switch contacts are open.
• When the top float is up, the top reed switch contacts are closed.
Initial Fill –
• When the tank is completely empty, both floats are down and their reed switch contacts
are open.
• The control relay for the float switch is de-energized.
• The f ill valve for the tank is energized and the tank begins to fill with water.
• As the water level in the tank rises, the bottom float begins to move up.
• When the bottom float is completely up, its NO reed switch contacts close.
• This prepares the heat circuit, but the heat Does Not energize at this time.
• The tank continues to f ill until the top float is completely up.
• The top float’s NO reed switch contacts close. Its control relay energizes.
• The f ill valve de-energizes.
• The heat circuit energizes through the float switch and the contacts of the control relay.
During Normal Operation –
• If the water level in a tank falls below the level of the top float, the top float moves down and
its reed switch contacts open.
• When the water level falls below the level of the bottom float, the bottom float moves down
and its reed switch opens.
• The control relay de-energizes. The fill valve energizes and refills the tank.
• The heat circuit will de-energize until the water level in the tank raises the top float again.
• The bottom float keeps the heat circuit ready as long as the water level is above the level of the
bottom float.
Figure 6
Dual Float
Switch
Page 29

21
ELECTRICAL SERVICE (Cont.)
Thermostat Locations and Adjustments
Refer to Fig. 7
Electric tank heat is controlled by two thermostats.
1. The control thermostat which regulates the
temperature.
2. The high limit thermostat which protects from
overheating.
Location:
Both thermostats are located on front of tank, inside
a black enclosure box behind the front access panel.
Adjustment:
The Control Thermostat has an adjustment screw
on one side.
• The thermostat is wired Normally Closed.
• Turn the adjustment screw clockwise to increase
the temperature in the tank and counterclockwise
to decrease the temperature in the tank.
The High Limit Thermostat is not adjustable.
It contains a red reset button in its center.
• The red button pops out if the temperature
in the tank exceeds 210˚F/99˚C.
• Press the red button in to reset the high limit.
Determine the cause of the high temperature condition.
Refer to F
ig. 7 and Fig. 8
Electric Booster Heat is controlled by two thermostats.
1. The control thermostat which regulates the
temperature.
2. The high limit thermostat which protects from
overheating.
3. The tank(s) have a control and a high limit thermostat.
Location:
The control thermostat is enclosed in a black box mounted
on the front of the wash tank behind the front access panel.
The high limit thermostat is enclosed in a box mounted
on top of the booster tank.
Adjustment:
The control thermostat has an adjustment screw on one side.
• The thermostat is wired Normally Closed.
• Turn the adjustment screw clockwise to increase the booster
tank temperature and counterclockwise to decrease the booster
tank temperature.
The high limit thermostat is a bimetal snap design.
It is not adjustable.
• A button with a red dot in the center pops out when
the temperature exceeds 210˚F/99˚C.
• Press the red reset button in to reset the high limit.
Determine the cause of the high temperature condition.
Figure 8
Booster Thermostat Locations
Figure 9
Booster – High Limit
Thermostat
Control
Thermostat
High Limit
Thermostat
Control Thermostat
High limit
Thermostat
Figure7
Tank Heat Thermostats
ELECTRICAL SERVICE
Page 30

22
ELECTRICAL SERVICE
ELECTRICAL SERVICE (Cont.)
Heater Element Wiring – Booster Tank and Wash Tank Heater Elements
Refer to the illustrations and follo
w the steps below to properly install terminal jumpers and
to make line power connections to a replacement element.
Step 1. Hold the element assembly with the calrod coils facing toward you.
Step 2. Match your element coil to Conf iguration A, B, C, or D.
Step 3. Rotate your element coils to match the correct configuration.
Step 4. Flip the element over and match your element to the correct terminal conf iguration.
Step 5. Install terminal jumpers according to the illustration for your voltage requirement.
Step 6. Install the element and make your line connections 1L1, 1L2, or 1L3 per the illustration.
Terminal Connections view of element
Terminal Connections view of element
Configuration A
Booster tank element
View of calrod coils
Configuration B
Booster tank element
View of calrod coils
Configuration D
Wash tank element
View of calrod coils
Terminal Connections view of element
Terminal Connections view of element
Configuration C
Booster tank element
View of calrod coils
208-240V/3 Phase
Delta Connection
208-240V/3 Phase
Delta Connection
208-240V/3 Phase
Delta Connection
208-240V/3 Phase
Delta Connection
208-240V/3 Phase
Wye Connection for
380-415V/3 Phase
208-240V/3 Phase
Wye Connection for
380-415V/3 Phase
208-240V/3 Phase
Wye Connection for
380-415V/3 Phase
208-240V/3 Phase
Wye Connection for
380-415V/3 Phase
480V/3 Phase
575V/3 Phase
Delta Connection
480V/3 Phase
575V/3 Phase
Delta Connection
480V/3 Phase
575V/3 Phase
Delta Connection
480V/3 Phase
575V/3 Phase
Delta Connection
3
3
3
3
3
3
3
3
3
31L3
3
1L
1L
1L
1L
1L
1L
1L
1L
1L
Page 31

23
Motors
Motor Specifications
Voltage: Standard motors are multi-voltage
Low voltage: 208-230VAC
High voltage: 460VAC or 575VAC only
Phase: Motors are rated as three phase.
Wiring Connections:
Refer to the diagrams below for 3 phase motor lead wiring.
Low voltage High Voltage 575V/3PH
208-230V/3PH 460V/3PH Only
Troubleshooting:
Motor will not run:
1. Check incoming power to control cabinet.
2. Check for tripped manual motor starter (overload) in control cabinet.
(Refer to Motor Overload service section for the proper setting)
3. Check power at motor contactor.
Motor runs hot and trips motor starter overload:
1. Check for proper voltage between L1-L2, L2-L3, L1-L3 for 3 phase.
2. Check FLA on motor leads L1, L2 and L3 using amp tester.
(Motor full load amp (FLA) ratings are stamped on motor nameplate).
Motor Replacement:
1. Disconnect the power to the machine.
2. Disconnect the wires at the motor junction box.
3. Make note of the motor connections in order to phase the replacement correctly.
4. Install the new motor and check for proper rotation.
5. Proper shaft rotation is clockwise looking at the rear of the motor.
6. Motor rotation can be reversed by switching L1 and L2 on 3 phase motors. Single phase
motor rotation cannot be reversed
7. Replacement motors are available as complete assemblies.
8. Champion cannot provide replacement bearings, stators, or rotors for motor repair parts.
654
987
321
LINE
654
987
321
LINE
ELECTRICAL SERVICE
321
LINE
Page 32

24
ELECTRICAL SERVICE
Dual Float Troubleshooting Diagrams:
Dual Float Switches –
Troubleshooting:
The dual float controls fill and heat circuits.
Identifying a Dual Float Problem:
The most common trouble conditions associated with a dual float failure are:
1. The tank fills constantly.
2. The tank heat will not come on.
Inspect the Dual Float:
1. Be sure that the dual float assembly is clean and free of scale build-up.
2. Be sure that the stainless steel balls on the float assembly move up and down freely.
In addition to checking the float operation, perform the following—
System Checks:
1. All drain valves are fully closed.
2. Incoming water supply Flow Pressure is 20-22 psi [138-151 kPa].
3. Fuses in control cabinet are good (Electric Heat Only).
4. Tank Heat thermostats and/or High limit thermostats operate cor rectly.
5. Booster Heat thermostats and/or High limit thermostats operate cor rectly.
S
ac
n
e
at
e
C
k
s
m
C
s
S
S
S
S
S
S
O
O
O
O
O
O
O
as
ash
ank Fills Constantly
Is
ank Ful
o
?
at
p?
C
e
ai
a
e
C
n
at
y
ON
e
d
?
e
ual
a
t
k
S
i
dVa
e
at
p?
C
k
S
d
alv
e
ON
when called
?
c
e
ual
at
C
n
at
ss
y
Clos
eDrain
V
alve
ank Ful
o
?
C
r
e
at
r
t
d
y
n
g
h or Prew
fWater
YE
Are the Flo
Balls U
YE
Is Heat
when call
for
YE
Chec
oleno
N
N
N
los
Dr
V
lea
Flo
Ass
Replac
D
Flo
System
hec
Water Runs Constantl
Through Final Rinse Pipi
heck to ensu
th
Rinse-Saver Leve
is no
Operate
Water Shuts OFF
N
Is
fWater
YE
Are the Flo
Balls U
YE
Is Heat
for
YE
YE
N
N
N
hine is i
M
Final Rinse Mod
Not a Dual Flo
Probl
lea
Flo
A
Repla
D
Flo
hec
olenoi
Syste
heck
Page 33

25
COMPONENT REPLACEMENT
COMPONENT REPLACEMENT
Pressure Reducing Valve (PRV) Adjustment
1. Turn the main water supply to machine off.
2. Flip the power toggle switch to OFF.
3. Turn off main incoming power.
4. Loosen the locknut on the adjusting screw in the top of the PRV.
5. Turn the adjusting screw clockwise to increase the flowing pressure to the machine.
6. Turn the adjusting screw counterclockwise to reduce the flowing pressure to the machine.
7. Observe the pressure reading on the control panel to conf irm the proper setting of
20-22 psi/138-151 kPa during the final rinse.
8. Tighten the locknut on the adjusting screw.
9. If the proper pressure cannont be acheived then check the water pressure before the PRV, it
may be too low, or replace the PRV.
Vacuum Breaker
The vacuum breaker is located at the top right rear corner of the unit. It prevents siphoning of
water from the unit back in into the potable water supply. The vacuum breaker contains a
replaceable float assembly.
CAUTION:
Use extreme caution when servicing the breaker to prevent damage to the final rinse
manifold.
1. Turn the main water supply to the machine off.
2. Flip the power toggle switch to OFF.
3. Turn off main incoming power.
4. Remove the retaining screw in the vacuum breaker cap. Remove cap.
5. Remove the vacuum breaker top with a wrench turning
counterclockwise.
6. Remove the float assembly with a pair of needle nose pliers.
7. Inspect the bore of the vacuum breaker. If pitted, replace the entire
vacuum breaker. Otherwise, install the repair kit.
8. Reassemble in the reverse order.
9. Restore the power and water, and check for proper operation.
Figure 10
Vacuum Breaker
!
Page 34

26
COMPONENT REPLACEMENT (CONT.)
Parker Solenoid Valves
These valves have a plunger and diaphragm in seperate enclosures. The diaphragm is between
the body and the bonnet. Be careful not to damage the machined faces while the valve is apart.
The electrical data for the valve will be found on the coil housing. Make sure that voltage and
frequency are correct.
To remove or change the coil:
1. Turn the main water supply to machine off.
2. Flip the power toggle switch on machine to OFF.
3. Turn off incoming power.
CAUTION:
De-energize coil before removal from valve or
equipment damage and/or personal injury may result.
4. Take out the retaining screw at the top of the coil housing.
5. Lift entire coil assembly off the enclosing tube.
6. Replace existing coil or replace new coil in reverse order.
7. Put on data tag and insert screw tightly.
8. Restore power and water.
9. Check for leaks and proper operation.
To disassemble the valve:
1. Turn the main water supply to machine off
2. Flip the power toggle switch to OFF.
3. Turn off incoming power.
4. Unscrew the bonnet and enclosing tube assembly from the valve body.
5. Carefully lift of the bonnet and the enclosing tube assembly. Don’t drop the plunger.
6. Lift out the o-ring seal and diaphragm cartridge.
7. Inspect the valve body. If pitted, replace entire valve assembly. Otherwise, install repair kit.
To reassemble valve:
1. Place the diaphragm cartridge in the body with the pilot port extension up.
2. Hold the plunger with the synthetic seat against the pilot port.
3. Put o-ring in place, lower bonnet and enclosing tube assembly over the plunger.
4. Screw bonnet assembly snugly down on the body assembly.
5. Turn on incoming water.
6. Restore power.
7. Check for leaks and proper operation.
COMPONENT REPLACEMENT
Figure 11
Parker Solenoid Valve
Coil
Bonnet & Enclosing
Tube Assembly
Spring
Plunger
Diaphragm Cartridge
20 Mesh Strainer
Body Assembly
Page 35

27
COMPONENT REPLACEMENT (CONT.)
Asco Solenoid Valves
All solenoid operators and valves should be cleaned periodically. The time between the cleanings
will vary on the water conditions and the amount of usage. In general, if the voltage to solednoid
is correct, sluggish valve operations, excessive noise or leakage will indicate that cleaning is
required. Clean strainer or filter when cleaning the valve. Replace any worn or damaged par ts.
Disassembly/Reassembly of Solenoid:
1. Turn the main water supply to machine off.
2. Flip the power toggle switch on the machine to OFF.
3. Turn off incoming power.
4. Disconnect conduit, coil leads, and grounding wire.
5. Snap off red cap from the top of solenoid base sub-assembly.
6. Push down on solenoid. Then using a suitable screwdriver, insert blade between solenid and
nameplate/retainer. Pry up slightly and push to remove.
7. Remove solenoid from solenoid base sub-assembly.
8. Remove spring washer from solenoid base sub-assembly.
9. Unscrew solenoid base sub-assembly from valve body.
10. Remove internal solenoid par ts for cleaning or replacement.
11. Reassemble in reverse order of disassembly.
Disassembly/Reassembly of Valve:
1. Follow instructions above to remove solenoid.
2. Unscrew solenoid base and remove core assembly, core spring, core guide and base gasket.
3. For normal maintenance (cleaning), it is not necessary to remove the valve seat. However, for
valve seat removal use a 7/16” thin wall socket wrench.
4. Remove bonnet screws and valve bonnet from the valve body. Then remove the following
parts: piston spring, support, lip seal, piston assembly, body passage eyelet or body passage
tube, body passage gasket, inner and outer body gaskets or large body gasket. (See Fig. 12).
5. Remove aspirator tube, disc, and disc washer from piston.
6. All parts are now available to clean or replace. If parts are damaged or worn, install a
complete repair kit.
7. Reassemble valve in reverse order.
8. Lubricate the solenoid base gasket and the surface of piston which contacts the lip seal with
high-grade silicone fluid.
9. Lubricate large body gasket or inner and outer body gaskets, body passage gasket, and disc
with a high-grade silicone grease.
10. Position the following parts in the valve body: support, body passage gasket, body passage
eyelet or body passage tube, inner or outer body gaskets or large body gasket.
11. Reassemble piston assembly following the views provided as per Fig. 12.
COMPONENT REPLACEMENT
Page 36

28
COMPONENT REPLACEMENT (CONT.)
Disassembly/Reassembly of Asco Valve (cont.)
12. Position lip seal, flanged end outward, onto piston assembly. Install piston assembly with lip
seal into support in valve body cavity.
13. Replace piston spring, valve bonnet, and bonnet screws. Torque bonnet screws in a crisscross
manner to 144 ± 15 in-lbs [16.3 ± 1.7Nm].
14. If removed, replace valve seat with a small amount of thread compound on male threads to
avoid possible leaking. Torque valve seat 65 ± 15 in-lbs [7.3 ± 1.7Nm].
15. Replace solenoid base gasket, core assmebly, core spring, core guide, and solenoid base subassembly. Torque solenoid base sub-assembly to 175 ± 25 in-lbs [19.8 ± 2.8Nm].
16. Install solenoid and make electrical hookup.
17. Restore water and power.
18. Check for proper operation.
Figure 12
Asco Solenoid Valve
valve seat *
body passage gasket *
body passage eyelet *
support
lip-seal *
piston assembly *
piston spring *
valve
bonnet
aspirator tube*
disc washer*
piston*
outer body gasket *
inner body gasket *
disc*
* Indicates that these
parts are included
in ASCO Rebuild Kit.
screw (6)
bonnet
valve
body
solenoid base
sub-assembly
core spring
solenoid base gasket *
core assembly *
core guide *
core assembly
core guide
core spring
Partial view showing
orientation of core guide,
core spring and core assembly
1 1/2”
One body gasket *
for 1” & 1 1/4” NPT
Valve constructions
NPT Construction Shown
*
COMPONENT REPLACEMENT
Page 37

29
Silencer
Whenever a booster heater is installed in the final rinse line, a water hammer arrestor shall be
installed after the valve and before the final water connection. The arrestor is factory precharged
at 22PSI and can handle a maximum shock pressure of 200PSI. A shrader valve is provided for
checking and recharging.We do not provide any repair parts for this component.
Water Line Strainer
A 1” line strainer is shipped with the PP-28. The line strainer is installed on the incoming water
supply line before the machine. The line strainer has a removable screen that should be cleaned
at least once a year depending on your water conditions, in some instances it may be as often as
every there months. There are no replaceable kits for the strainer. These are supplied as complete
units.
To clean the line strainer:
1. Turn the main water supply to the machine off.
2. Turn amchine on the off to bleed the pressure
off the line.
3. Remove the retaining nut from the line strainer
and extract the screen.
4. Flush the screen with water. If the screen is
damaged, replace the line strainer.
5. Reassemble in reverse order.
Figure 13
Line Strainer
COMPONENT REPLACEMENT
Page 38

30
COMPONENT REPLACEMENT
Figure 15
Tank Element Placement
Figure 16
Rear View of Element
COMPONENT REPLACEMENT (CONT.)
Wash Tank Heater and High Limit Thermostat
The wash tank heater is mounted on the side wall in the bottom of the tank. It maintains the
wash tank temperature at a minimum of 160˚F/70˚C. The heater is protected from a low water
condition by a surface mounted high limit switch.
Check the high limit thermostat before replacing a suspected heater:
1. Flip the power toggle switch to off.
2. Turn off the main incoming power.
3. Remove the lower left hand side panel.
4. Push the manual reset on the high limit.
Pull one lead from the high limit and check
for continuity. Replace if open.
5. Apply a coating of heat sink compound,
P/N 110563, to the high limit before
mounting to base.
To replace wash tank heater:
1. Perform steps 1-5 from above.
2. Open the front door and remove the
lower spray arms.
3. Remove the scrap screens amd pump
intake strainer. (See Fig 12 for
element location in tank).
4. From the outside bottom of tank,
disconnect the heater wires and remove the
retaining nuts. (See Fig 13 for the
rear view of the machine).
5. Remove the element from the inside of the tank.
6. Apply gasket to element and insert into tank.
7. Install retaining nuts.
8. Reconnect heater wires.
9. Replace panel.
10. Restore power to machine.
11. Check for leaks and proper operation.
Element
Element
Figure 14
Rear View of High Limit
High
Limit
Element
Page 39

31
COMPONENT REPLACEMENT (CONT.)
Booster Tank Heater and High Limit Thermostat
The booster assembly is mounted either to the side on the base or externally from the machine. It
raises the incoming water temperature to a minimum of 180˚F/82˚C for the final rinse cycle. The
heater is protected from a low water condition by a surfcae mounted high limit thermostat
Check the high limit thermostat before replacing a suspected heater:
1. Flip the power toggle switch to OFF.
2. Turn main incoming power off.
3. Remove the side access panel.
4. Push the manual reset on high limit. Pull one lead from
high limit and check for continuity. Replace if open.
5. Apply a coating of heat sink compound, P/N 110563,
to the high limit base before mounting to tank.
To replace the booster tank heater:
1. Perform steps 1-5 from previous page.
2. Turn off incoming water supply.
3. Remove drain plug in bottom of booster and
drain any remaining water from tank.
4. Remove element cover from booster to
expose elements. (Fig 15 & Fig 16)
5. Disconnect the heater wires.
6. Remove the (3) retaining element nuts and
washers from bad element(s).
7. Remove element(s).
8. Replace booster element gasket(s).
DO NOT USE OLD GASKET.
DO NOT APPLY RTV SEALANT TO
HEATER FLANGE.
9. Install the new element(s) and tighten the
retaining nuts in a cross pattern until the
element and gasket are tight and snug.
DO NOT OVERTIGHTEN THE RETAINING NUTS.
DOING SO WILL DAMA GE THE TANK STUDS.
10. Replace the drain plug in the booster tank.
11. Reconnect the element wires.
12. Replace element cover back on booster.
13. Restore power and water.
14. Check the element and the drain plug for leaks.
Check for proper operation.
16. Reinstall panel.
COMPONENT REPLACEMENT
Figure 18
Typical 40˚ Rise Booster
Figure 19
Typical 70˚ Rise Booster
9 KW
9 KW
9 KW
9 KW
9 KW
Block
Off Plate
M
a
c
h
i
n
e
S
i
d
e
Figure 17
Booster High Limit
9 KW
9 KW
9 KW
Page 40

32
COMPONENT REPLACEMENT (CONT.)
Wash Pump/Motor
The wash pump/motor assembly is bolted to bracket that bolted directly to the base of the
machine. The panel can be removed to gain easier access to the pump assembly.
To disassemble the pump/motor assembly:
1. Disconnect the power source to the motor.
2. Disconnect electrical connections. Tag wires carefully to preserve that the correct rotation.
Loosen pump base.
3. Loosen the eight 3/8-16” bolts holding the volute to the motor bracket. Volute may be left in
the piping.
4. Slide pump away from the volute until the impeller is exposed.
5. Hold pump and motor shaft with large locking pliers. Remove the 3/8-16” impeller lock bolt.
The use of a socket wrench is suggested.
6. Remove the impeller from the shaft. Two screwdrivers or other suitable levers against the
bracket will help, or you can use a puller to remove the impeller. Do not bend the impeller
shrouds.
7. Remove pump seal from shaft by using two screwdrivers as levers. Discard the old pump seal.
8. Remove seal seat. Discard the old seat.
9. Inspect the shaft sleeve. Depending on the amount of damage, it should be replaced unless it
can be polished to remove the score markings by using an extra fine emor y cloth. Make sure
that keyway area is clean.
10. Remove the shaft sleeve by heating the sleeve up to 300˚F(149˚C). This will loosen up the
sleeve and you should be able to slip it from the shaft using a bearing puller. Do not try to
force the sleeve off as this will cause unecessary damage to sleeve and shaft.
11. Replace any needed component(s).
To reassemble pump/motor assembly:
1. Clean motor shaft if any solvents or liquids have been used, dry throughly. Apply soap or
non-petroleum based product, as lubrication, to the shaft. Make sure that entire sleeve area is
covered.
2. Install new sleeve by tapping into place using a hollow rod or 1” pipe nipple.
3. Clean the seat cavity and motor shaft throughly. Place a small amount soap or non-petroleum
based product on the seat cup or “O” ring and start it into the seat cavity. Do not scratch the
seat surface. A rough or dirty cloth will scratch this surface, so be extremely careful. Tap the
seat into the cavity by using a wooden dowel, plastic rod, etc. Again, make sure that you do
not scratch the surface.
4. Place a small amount of vegetable oil or non-petroleum based product on shaft and slip seal,
with the carbon side toward the seat, over the motor shaft. Push as far as it will go without
having to force it.
5. Install the new sleeve gasket over the shaft.
COMPONENT REPLACEMENT
Page 41

33
COMPONENT REPLACEMENT
COMPONENT REPLACEMENT (CONT.)
To reassemble pump/motor assembly (cont.):
6. Place impeller on the shaft making sure that keyway aligns.
7. Install keyway using a punch and hammer, driving it in as far as possible.
8. Install the lock bolt and washer. Tighten down securely.
9. Install new volute gasket. Make sure that all of the mating surfaces of the gasket joint is
cleaned to the bare metal.
10. Mount volute onto the motor brackets. Install (2) bolts, making sure that they are finger
tight. Turn the shaft by hand and listen for any rubbing of the impeller inside of the volute. If
there is rubbing, reposition the voulte by tapping on the side of the volute. It will probably
need to be adjusted by moving up and to the left or right. Continue installing the remaining
bolts making sure that the impeller does not rub.
11. Reconnect the electrical connections as previously tagged.
12. Jog switch to determine if the rotation is correct, if not reconnect.
13. Restore power.
14. Check for leaks and proper operation.
J
A. Volute H. Seal/Seat
B. Impeller J. Impeller Lock Screw
C. Bracket K. Impeller Lock Gasket
D. Shaft Sleeve L. Motor Bolts
E. Volute Gasket M. Sleeve Gasket
F. Pipe Plug N. Impeller Shaft Key
G. Volute Bolts P. Motor
Figure 20
Price Pump Assembly
C
Page 42

34
COMPONENT REPLACEMENT
COMPONENT REPLACEMENT (CONT.)
Door Safety Switch and Magnet
This pot and pan washer utilizes a magnetic reed door safety switch mounted on the right hand side
of the base below the front door and to the left hand side of the side doors. A door magnet operates
the safety switch when the door is fully closed. The dishwasher will not operate if the door is open
when the power pushbutton is pushed ON to fill the machine. If the machine is in the cycle, opening
the door will pause the cycle. When the door is closed, the cycle will resume where it left off.
To replace door safety switch:
1. Flip the power switch to OFF.
2. Turn off main incoming power.
3. Remove the panel from the area where the switch is located.
4. Remove the panel from the control cabinet side.
5. Remove the switch cover.
6. Remove the two 6-32 grip nuts holding the switch.
7. Replace the switch.
8. Connect the wires to the cabinet as per schematic.
9. Reassemble in reverse order.
10. Restore power.
CAUTION:
Do not overtigthen the safety switch retaining nuts.
Overtightening can damage the switch.
Figure 21
Door Switch and Magnet
Door
Magnet
Door
Switch
!
Page 43

35
REPLACEMENT PARTS
REPLACEMENT
PARTS
Page 44

36
REPLACEMENT PARTS
5
2
5
1
5
4
3
5
5
5
6
9
7
10
11
12
A
B
A
A
8
Figure 22-
Panels
Page 45

37
REPLACEMENT PARTS
PANELS
Fig. 22 Part
Item No. No. Part Description Qty
1 310927 Panel, RH Perimeter ...................................................................... 1
2 310925 Panel Front Perimeter .................................................................... 1
310926 Panel Front Perimeter, (Used w/Hatco Booster or Straight Through) 1
310128 Panel ,Lower Front (Used w/Right Hand Side Mounted Booster) 1
3
4 310929 Panel LH Perimeter........................................................................ 1
5 100214 Screw 1/4-20 x 3/4 Truss Head...................................................... 4
6 100212 Screw 10-32 x 3/4 Truss Head ...................................................... 1
A DOOR SWITCH & COVER (Quantities per switch)
7 106486 Washer Lock #10 split.................................................................... 2
8 107033 Washer .028 x .437 x .047 ............................................................ 2
9 106481 Nut Acorn 10-32 ............................................................................ 2
10 314190 Cover Reed Switch ........................................................................ 1
11 111025 Switch, Large Reed........................................................................ 1
12 108954 Nut, Grip 6/32 w/Nylon Insert ...................................................... 2
B PANEL BRACKETS (Quantities per bracket)
108578 Bracket, Perimeter Panel................................................................ 1
106026 Washer 1/4 x 5/8 x 1/16 SST ........................................................ 4
100003 Nut, Plain 1/4-20 SST.................................................................... 2
107967 Grip Nut 1/4-20 w/Nylon Insert .................................................... 2
Page 46

38
REPLACEMENT PARTS
1
2
13
5
6
4
8
9
10
9
10
8
11
7
12
14
6
5
4
13
1
1
12
4
5
6
15
LEFT SIDE
DOOR
FRONT
DOOR
RIGHT SIDE
DOOR
16
3
Welded
to Lift Weldment
3
2
Figure 23-
Door Assemblies
Page 47

39
REPLACEMENT PARTS
DOOR ASSEMBLIES
Fig. 23 Part
Item No. No. Part Description Qty
1 307913 Door Assembly........................................................................................3
2 108966 Door Handle............................................................................................3
3 108022 Washer 8mm Plastic ...............................................................................6
4 111026 Magnet SS ...............................................................................................3
5 314187 Cover Magnet..........................................................................................3
6 108954 Nut Grip 6-32 w/Nylon Insert ................................................................6
7 308133 Door Catch Assy .....................................................................................3
8 105198 Spacer 1/2 x 9/32 x 3/4LG .....................................................................6
9 106026 Washer 1/4 x 5/8 x 1/16 SST.................................................................12
10 107967 Nut Grip 1/4-20 w/Nylon Insert ............................................................12
11 307910 U-Hook Lift Weld...................................................................................2
12 105286 Screw 1/4-20 X 1" Truss Head...............................................................8
13 100073 Screw 1/4-20 x 1/2" Truss Head.............................................................6
14 109674 Clip, Wire Rope ......................................................................................3
15 202996 Cable 68" Counterweight (Straight Through) ......................................A/R
204231 Cable 83" Counterweight (Front Feed & Corner) ................................A/R
16 109673 Thimble, Wire Rope................................................................................3
Page 48

40
REPLACEMENT PARTS
2
1
1
3
6
7
3
5
4
A
A
A
8
9
10
B
B
B
Figure 24
Cable Pulley Assembly
Page 49

41
REPLACEMENT PARTS
CABLE PULLEY ASSEMBLY
Fig. 24 Part
Item No. No. Part Description Qty
A CABLE PULLEYS (Quantities per Pulley)
1 102376 Washer 5/16 x 3/4 x 1/16 .............................................................. 4
2 100739 Bolt 5/16-18 x 3/4 Hex Head ........................................................ 4
3 100142 Nut Grip 5/16-18............................................................................ 5
4 109697 Sleeve Pulley.................................................................................. 1
5 109696 Wheel Pulley.................................................................................. 1
6 104002 Bolt 5/16-18 x 1-1/2" .................................................................... 1
7 313538 Bracket, Pulley .............................................................................. 2
B DOOR CATCH ASSEMBLY (Quantities per Catch)
8 100141 Nut, Grip 1/4-20 SST .................................................................... 2
9 317345 Bracket Door Catch ........................................................................ 1
10 317344 Hook, Door Catch .......................................................................... 1
11 202949 Rod, Door Catch (Not Shown) ...................................................... 1
12 308133 Door Catch Weld (Not Shown) ...................................................... 1
Page 50

42
REPLACEMENT PARTS
2
3
3
4
8
7
6
5
3
5
5
5
3
9
10
1
11
12
Figure 25 -
Counterweight System
Page 51

43
REPLACEMENT PARTS
COUNTERWEIGHT SYSTEM
Fig. 25 Part
Item No. No. Part Description Qty
1 313537 Cover Counterweight...................................................................... 2
2 308489 Stabilizer-Hold Down Grid RH .................................................... 1
3 106026 Washer 1/4 x 5/8 1/16 SST............................................................ 6
4 100141 Nut Grip 1/4-10 SST...................................................................... 22
5 112318 Screw 1/4-20 x 1/2" Hex Washer Head ........................................ 16
6 108418 Plug 1/2" Plastic ............................................................................ 2
7 309664 Door Counterweight ...................................................................... 2
8 105394 Lead Shot #9 Chilled (Included in 309664) .................................. 20Lbs
9 308488 Stabilizer-Hold Down Grid LH...................................................... 1
10 202996 Cable 68" Counterweight (Straight) .............................................. A/R
204231 Cable 83" Counterweight (Front Feed & Corner).......................... A/R
11 109674 Clip, Wire Rope.............................................................................. 2
12 109673 Thimble, Wire Rope ...................................................................... 2
Page 52

44
REPLACEMENT PARTS
3
4
3
6
7
10
8
9
11
12
13
14
15
16
17
20
14
19
18
17
2
1
2
28
22
25
26
23
28
22
21
24
23
5
29
30
30
27
28
28
31
32
Figure 26-
Wash & Rinse Assemblies
Page 53

REPLACEMENT PARTS
WASH & RINSE ASSEMBLIES
Fig. 26 Part
Item No. No. Part Description Qty
1 109837 Retaining Screw ............................................................................ 1
2 110679 Bearing, Rinse Arm........................................................................ 2
3 107336 Screw M4 x 12mm Pan Head ........................................................ 12
4 109500 Nozzle 1/8 NPT .............................................................................. 6
5 106407 Washer Lock 3/8 Split.................................................................... 6
6 110193 Nozzle top Rinse Arm .................................................................... 6
7 108021 O-ring ............................................................................................ 8
8 107328 Plug Wash Arm .............................................................................. 2
9 107337 Nut Plain M4.................................................................................. 12
10 107332 Nozzle Bottom .............................................................................. 6
11 109333 Threaded Ring NS .......................................................................... 1
12 109685 Retainer Ring ................................................................................ 1
13 109684 Bearing PP28 Wash Arm................................................................ 1
14 108442 Bolt M5 x 15mm Filister Head...................................................... 16
15 109503 Nozzle NS PPW ............................................................................ 4
16 108444 Nozzle Bottom .............................................................................. 4
17 108441 Nut Hex M5.................................................................................... 16
18 108447 Cap 1-1/4 Plastic............................................................................ 4
19 108445 Cap Adapter.................................................................................... 4
20 108446 Nozzle Top...................................................................................... 4
21 109332 Spindle Wash Arm.......................................................................... 2
22 109331 Wash Arm Support ........................................................................ 2
23 109312 Standpipe Weld .............................................................................. 1
24 100740 Bolt 5/16-18 x 1" Hex Head .......................................................... 4
25 100738 Bolt 1/40-20 x 1" Hex Head .......................................................... 2
26 107967 Nut Grip 1/4-20 w/Nylon Insert .................................................... 2
27 109303 Gasket 1-5/16 ID x 3/4OD x 1/8TK .............................................. 1
28 109299 Final Rinse Pipe Weld.................................................................... 1
29 313212 Bracket Standpipe .......................................................................... 1
30 112318 Screw 1/4-20 x 1/2 Hex Washer Head .......................................... 2
31 100141 Nut Grip 1/4-20 SST...................................................................... 2
32 109304 Gasket 3"SQ 15/16ID x 1/8TK...................................................... 1
--- 405902 Rinse Arm Assy PP28 W/Bearings (Includes items 2-10)
--- 900786 Kit*Nozzle PP28 Rinse Complete (Includes items 3-7, 9-10)(Makes up
one complete nozzle assembly)
--- 405903 Wash Ar m Assy PP28 w/Bearings (includes items 12-20)
--- 900743 Kit*Wash Ar m Rebuild PP28 (Includes items 12-20)(Complete rebuild
of arm components only, does not include spray pipe)
45
Page 54

46
REPLACEMENT PARTS
Figure 27
T rack Assembly
A
6
1
Straight Application/
Front Feed Application
A
A
A
B
A
1
6
B
5
A
B
A
4
B
3
2
A
CORNER APPLICATION
Page 55

TANK COMPONENTS
(ELECTRIC HEAT)
Fig. 27 Part
Item No. No. Part Description Qty
1 307438 Track PP-28 (Straight) .................................................................. 2
1 307438 Track PP-28 (Corner-Rear Track).................................................. 1
2 309638 Track PP-28 (Corner-Front Track) ................................................ 1
3 309621 Track PP-28 (Corner-Back track) .................................................. 1
4 309620 Support Rack, Track PP28C .......................................................... 1
5 310064 Support Track-Rack, PP28C .......................................................... 1
6 312670 Track, PP-28FF (Front Feed) ........................................................ 2
A TRACK ASSEMBLY HARDWARE (Quantities per Track)
105286 Screw 1/4 - 20 x 1" Truss Head .................................................... 4
105299 Spacer 1/2" .................................................................................... 4
100141 Nut, Grip 1/4-20 SST .................................................................... 4
B TRACK/SUPPORT HARDWARE (Quantities per Support/Track)
105286 Screw 1/4 - 20 x 1" Truss Head ....................................................
105299 Spacer 1/2" .................................................................................... 4
100141 Nut, Grip 1/4-20 SST .................................................................... 4
Page 56

48
REPLACEMENT PARTS
11
12
10
9
8
2
5
3
4
3
6
7
3
4
3
C
B
A
D
1
To Pump Suction
14
13
From Pump Discharge
Figure 28-
Drain System
Page 57

49
REPLACEMENT PARTS
DRAIN SYSTEM
Fig. 28 Part
Item No. No. Part Description Qty
1 314185 Drain Assy , Twist Type .................................................................. 1
2 313951 Strainer Suction.............................................................................. 1
3 111780 Hose Clamp Discharge .................................................................. 4
4 202241 Hose 1-7/8" x 4" ............................................................................ 2
5 205233 Discharge Pipe................................................................................ 1
6 317857 Hose Adapter Weldment ................................................................ 1
7 106488 Elbow Street 2" x 90˚ BI................................................................ 1
8 109702 Hose Clamp Suction ...................................................................... 1
9 307884 Suction Flange Weld ...................................................................... 1
10 109513 Gasket Pump Suction .................................................................... 1
11 112269 Nameplate Drain ............................................................................ 1
12 314185 Drain Assy Wash Twist Type.......................................................... 1
13 111606 Drain Klein Gasket ........................................................................ 1
14 111607 O-ring Drain Klein ........................................................................ 1
A SUCTION SCREEN HARDWARE
100141 Nut Grip 1/4-20 SST...................................................................... 1
106026 Washer 1/4 x 5/8 x 1/16 SST ........................................................ 1
B STANDPIPE HARDWARE
100740 Bolt 5/16-18 x 1" Hex Head .......................................................... 4
102376 Washer 5-16 x 3/4 x 1/16 (Bottom) .............................................. 8
106013 Washer Lock 5/16 Split (Top)........................................................ 4
100154 Nut Plain 5/16-18 .......................................................................... 4
C SUCTION HARDWARE
100739 Bolt 5/16-18 x 3/4 Hex Head SST................................................ 4
102376 Washer 5/16 x 3/4 x 1/16 .............................................................. 4
100142 Nut Grip 5/16-18............................................................................ 4
Page 58

50
REPLACEMENT PARTS
Figure 29-
W ash Tank Components
(Electric Heat)
22
13
12
11
C
14
15
23
B
A
16
17
18
9
10
10
9
10
9
20
19
8
7
6
6
21
A
5
4
2
3
2
1
Page 59

51
REPLACEMENT PARTS
TANK COMPONENTS
(ELECTRIC HEAT)
Fig. 29 Part
Item No. No. Part Description Qty
1 107966 Nut Grip 10-32 w/Nylon Insert ...................................................... 2
2 109682 Cover (Box) Moplenx.................................................................... 1
3 100212 Screw 10-32 x 3/4 Truss Head ...................................................... 2
4 110561 Thermostat, Hi-Limit .................................................................... 1
5 109069 Thermostat w/Capillar y.................................................................. 1
6 107966 Nut Grip 10-32 w/Nylon Insert ...................................................... 4
7 107967 Nut Grip 1/4-20 w/Nylon Insert .................................................... 4
8 100280 Transformer 250V 240/480:120/240.............................................. 1
9 201041 Washer 7/8 x 1-3/16 x 1/8.............................................................. 3
10 100547 Locknut 1/2NPT SST Forged ........................................................ 3
11 108417 Nut 1/2" Plastic .............................................................................. 2
12 109034 Washer 13/16 x 1-3/16 Fiber.......................................................... 2
13 108418 Plug 1/2" Plastic ............................................................................ 2
14 111151 C-Clip Float Switch (Included in item 15) .................................... A/R
15 111019 Dual Float Switch .......................................................................... 1
16 107589 Washer Lock 1/2" External............................................................ 1
17 104584 Nut Plain 1/2-13 Hex SST ............................................................ 1
--- 110750 Float Switch Gasket (Not Shown) ................................................ 1
18 108391 Thermometer 4' .............................................................................. 1
19 108345 Gasket 3 x 3 x 1/8" ........................................................................ 1
20 109751 Heater 10kW (208-220V, 380V).................................................... 1
107844 Heater 10kW (230-240V) .............................................................. 1
107846 Heater 10kW (460-480V) .............................................................. 1
111120 Heater 10kW (575V)...................................................................... 1
21 308949 Box Electric Stamped Flange ........................................................ 1
22 109683 Flange Plastic ................................................................................ 1
23 112257 O-Ring............................................................................................ 1
A HEATER ELEMENT HARDWARE
100154 Nut Plain 5/16-18 .......................................................................... 4
106013 Washer Lock 5/16 Split .................................................................. 4
100740 Bolt 5/16-18 x 1" Hex Head .......................................................... 4
102376 Washer Flat 5/16-18 ...................................................................... 4
B BLOCK FLANGE HARDWARE
100740 Bolt 5/16-18 x 1" Hex Head .......................................................... 4
102376 Washer 5/16 x 3/4 x 1/16 .............................................................. 8
100154 Nut Plain 5/16-18 .......................................................................... 4
106013 Washer Lock 5/16 Split .................................................................. 4
Page 60

52
REPLACEMENT PARTS
Figure 30-
Steam Coil Tank Heat
19
15
16
17
18
20
21
6
22
24
23
25
26
14
11
13
12
10
9
8
2
1
3
4
5
6
7
Condensate Out
Inlet Steam
32
30
27
28
29
31
29
30
35
34
36
33
From Steam Booster Supply
To Booster Condensate
38
37
4
Page 61

53
REPLACEMENT PARTS
STEAM COIL
TANK HEAT
Fig. 30 Part
Item No. No. Part Description Qty
1 305137 Steam Coil LH .............................................................................. 1
2 305137 Steam Coil RH .............................................................................. 1
3 100740 Bolt 5/16-18 x 1" Hex Head .......................................................... 4
4 102376 Washer 5/26 x 3/4 x 1/16 .............................................................. 8
5 112257 Oring .............................................................................................. 1
6 103465 Bushing Red 3/4" x 1/2" BI .......................................................... 2
7 102554 Union 3/4" NPT SST .................................................................... 1
8 XXXXX Nipple (Call Factory to Conf ir m Application) .............................. A/R
9 XXXXX Elbow Street (Call Factory to Confirm Application) .................... A/R
10 XXXXX Nipple (Call Factory to Conf ir m Application) .............................. A/R
11 109887 Valve, 3/4" Steam .......................................................................... 1
12 109903 Kit Repair 3/4" Steam-Water ........................................................ A/R
13 108516 Coil, Valve...................................................................................... A/R
14 111495 Nipple 3/4" x 6-1/4" BI.................................................................. 1
15 105730 Elbow 3/4" x 90 BI ........................................................................ 1
16 111490 Nipple 3/4" x 7-1/4" BI.................................................................. 1
17 105779 Union 3/4" NPT BI ........................................................................ 1
18 106485 Union Elbow 3/4" x 90 Female BI ................................................ 1
19 105803 Nipple Close 3/4"NPT BI .............................................................. 1
20 100123 Cock Gauge 1/4"............................................................................ 1
21 102402 Bush Red 1/2" x 1/4" BI ................................................................ 1
22 105765 Tee 1" x 3/4" x 3/4" BI .................................................................. 1
23 105847 Nipple Close 1" BI ........................................................................ 1
24 105773 Tee Red 1-1/4" x 1" x 1" BI .......................................................... 1
25 105875 Nipple Close 1-1/4" x 3" BI .......................................................... 1
26 100263 Strainer Line 1-1/4" BI w/Plug...................................................... 1
27 105757 Tee Red 3/4" x 1/2" x 1/2" BI........................................................ 1
28 105796 Nipple 1/2" x 7" BI ........................................................................ 1
29 102288 Elbow 1/2" x 90 BI ........................................................................ 1
30 105782 Nipple Close 1/2" BI...................................................................... 4
31 111380 Trap Steam 1/2".............................................................................. 1
32 105778 Union 1/2" NPT BI ........................................................................ 1
33 100547 Locknut 1/2NPT SST .................................................................... 1
34 100705 Nipple Rtoe 1/2" x 2" SST ............................................................ 1
35 100516 Elbow Street 1/2" x 90 SST .......................................................... 1
36 102436 Elbow 1/2" x 90 SST...................................................................... 1
37 106013 Washer Lock 5/16 Split.................................................................. 4
38 100154 Nut Plain 5/16-18 .......................................................................... 4
Page 62

54
REPLACEMENT PARTS
1414
1818
1717
2323
2121
2222
1010
1212
1515
1111
4444
1919
2525
2626
1111
1717
1616
1313
1212
1010
1818
9
8
2727
4
7
4
3
1
1
2
3
6
5
2424
Figure 31-
Steam Coil (Low Pressure)
Tank Heat
Page 63

STEAM COIL (LOW PRESSURE)
TANK HEAT
Fig. 31 Part
Item No. No. Part Description Qty
1 102554 Union 3/4" NPT SST .................................................................... 2
2 100023 Elbow, Street /34" NPT x 90˚ SST ................................................ 1
3 106937 Nipple Rtoe 3/4" x 1-3/4" SST Full .............................................. 2
4 102443 Elbow 3/4 x 90 SST ...................................................................... 3
5 103325 Nipple Rtoe 3/4" x 2-1/2" SST ...................................................... 1
6 100548 Locknut 3/4" NPT SST .................................................................. 2
7 101517 Nipple 3/4" x 7" SST .................................................................... 1
8 307404 Flange, Weldment .......................................................................... 1
9 105738 Elbow Red 3/4" x 90˚ BI................................................................ 1
10 105782 Nipple Close 1/2" BI ...................................................................... 4
11 102288 Elbow 1/2" x 90˚ BI ...................................................................... 2
12 105778 Union 1/2" NPT BI ........................................................................ 2
13 111380 Trap Steam 1/2".............................................................................. 1
14 112322 Nipple 1/2" x 23" BI ...................................................................... 1
15 105796 Nipple 1/2" x 7" BI ........................................................................ 1
16 105705 Bush Red 1" x 3/4" BI .................................................................. 1
17 105780 Union 1" NPT BI .......................................................................... 2
18 105847 Nipple Close 1" NPT BI ................................................................ 2
19 110005 Valve, 1" Steam ............................................................................ 1
*
20 112742 Nipple 1" NPT x 18-1/2" BI ........................................................ 1
21 105733 Elbow 1" x 90˚ BI .......................................................................... 2
22 111278 Nipple 1" x 14-1/2" BI .................................................................. 1
23 105858 Nipple 1" x 5" ................................................................................ 1
24 D5980-1 Steam Coil ...................................................................................... 1
25 110007 Kit Repair 1" Steam ...................................................................... A/R
*
26 110120 No longer Available ....................................................................... NLA
--- --- --- ---
*
* 110007 Repair Kit, Asco Valve No. L8220G007 Only
* 114800 1" Asco Steam Valve (Asco Valve No. L8220G410)
* 114830 Repair Kit, Asco Valve No. L8220G410 Only
110005 1" Steam Valve is no longer available
---
---
55
Page 64

56
REPLACEMENT PARTS
2
3
6
4
5
1
7
Figure 32-
Scrap Screens & Baskets
Page 65

57
REPLACEMENT PARTS
SCRAP SCREENS
& BASKETS
Fig. 32 Part
Item No. No. Part Description Qty
1 307360 Screen Weldment............................................................................ 6
2 108966 Handle Door .................................................................................. 1
3 100779 Screw1/4-20 x 5/8 Truss Head (Not Shown) ................................ 2
4 106482 Washer Lock 1/4" Split (Not Shown) ............................................ 2
5 308480 Weight Bucket Lid ........................................................................ 1
6 311378 Cover Weld Basket ........................................................................ 1
7 316275 Basket Weldment (Cor ner & Front Feed)...................................... 1
312652 Basket Weldment............................................................................ 1
Page 66

58
REPLACEMENT PARTS
Figure 33-
Piping without Booster
1
10
11
9
Prior To S/N J1788
8
23
7
6
5
34
2
1
20
13
12
1
14
15
4
24
21
19
6
4
18
16
17
22
14
10
11
23
8
15
16
3
4
2
1
7
12
1
6
5
AFTER S/N J1789
4
9
19
20
6
1
13
4
17
18
22
Page 67

59
REPLACEMENT PARTS
PIPING WITHOUT BOOSTER
Fig. 33 Part
Item No. No. Part Description Qty
1 102450 Elbow Street 1 x 90 Brass .............................................................. 3
2 101248 Strainer Line 1" Bronze ................................................................ 1
3 317740 Bracket Support Pipe .................................................................... 1
4 101000 Nipple Close 1NPT Brass.............................................................. 3
5 101026 Tee Red 1 x 1 1/2 Brass ................................................................ 1
6 102388 Bush Red 1/2 x 1/4 Brass .............................................................. 2
7 100123 Cock Gauge 1/4"............................................................................ 1
8 100135 Pressure Gauge 0-60 ...................................................................... 1
9 102764 Nipple 1" x 4" Brass ...................................................................... 1
10 102556 Vacuum Breaker 1" ........................................................................ 1
11 108352 Kit Repair 1" .................................................................................. A/R
12 102762 Nipple 1" x 3-1/2" Brass................................................................ 1
13 102551 Union 1NPT Brass ........................................................................ 1
14 111438 Valve 1".......................................................................................... 1
15 108516 Coil Valve ...................................................................................... A/R
16 109904 Kit Repair 1" Steam-Water............................................................ A/R
17 102394 Bush Red 1 x 1/2 Brass .................................................................. 1
18 110544 Cross 1NPT Brass.......................................................................... 1
19 102500 Plug 1/4NPT Brass ........................................................................ 1
20 102504 Plug 1/2NPT Brass Square Head .................................................. 1
21 100734 Bolt 1/4-20 x 1/2 Hex Head SST .................................................. 1
22 100585 Locknut .......................................................................................... 1
23 109765 Overlay Pressure Gauge ................................................................ 1
24 100141 Nut Grip 1/4-20 SST (Not Shown)................................................ 1
Page 68

60
REPLACEMENT PARTS
To Steam
Booster
To Top of Tank
Prior to S/N J1788
AFTER S/N J1789
2
1
3
6
7
20
19
18
7
8
9
11
10
14
13
15
17
14
12
21
7
8
21
22
24
23
4
5
16
1
2
3
4
5
6
7
8
9
7
5
10
11
12
13
14
15
16
17
14
18
19
20
21
22
21
23
24
To Steam
Booster
To Top of Tank
Figure 34-
Piping with Steam Booster
Page 69

61
REPLACEMENT PARTS
PIPING WITH STEAM BOOSTER
Fig. 34 Part
Item No. No. Part Description Qty
1 108342 Elbow 1C x 90 Copper .................................................................. 1
2 Nipple (Call Factory w/Length for Correct Part) .......................... A/R
3 108296 Union 1C x 1MPT .......................................................................... 1
4 102532 Tee Red 1 x 1/2 x 1........................................................................ 1
5 102504 Plug 1/2NPT Square Head ............................................................ 2
6 309602 Bracket Support Pipe .................................................................... 1
7 101000 Nipple Close 1NPT Brass.............................................................. 4
8 102388 Bush Red 1/2 x 1/4 Brass .............................................................. 1
9 100123 Cock Gauge 1/4 .............................................................................. 1
10 100135 Pressure Gauge 0-60PSI ................................................................ 1
11 109765 Overlay Pressure Gauge ................................................................ 1
12 102551 Union 1NPT Brass ........................................................................ 1
13 102764 Nipple 1 x 4 Brass .......................................................................... 1
14 102540 Elbow Street 1 x 90 Brass .............................................................. 2
15 102556 Vacuum Breaker 1" ........................................................................ 1
16 108352 Repair Kit 1" .................................................................................. A/R
17 102762 Nipple 1 x 3-1/2 ............................................................................ 1
18 111438 Valve 1" HW .................................................................................. 1
19 108516 Coil, Valve...................................................................................... A/R
20 109904 Kit Repair 1" Stm-Water................................................................ A/R
21 101026 Tee Red 1 x 1 x 1/2 Brass.............................................................. 2
22 100585 Locknut .......................................................................................... 1
23 100734 Bolt 1/4-20 x 1/2 Hex Head SST .................................................. 1
24 100141 Nut Grip 1/4-20 SST (Not Shown)................................................ 1
Page 70

62
REPLACEMENT PARTS
TO STEAM
(COND.)
COIL
2
INLET
STEAM
(STEAM)
TO STEAM
COIL
RINSE
TO FINAL
WATER
IN
46
1
6
10
10
6
35
34
33
31
26
25
11
12
20
28
30
29
42
37
4
40
32
2
25
36
25
37
43
42
44
15
38
39
41
23
24
45
21
14
18
17
19
14
12
11
3
4
5
7
9
10
6
8
10
16
7
9
22
6
10
6
CONDENSATE OUT
27
14
12
12
13
Figure 35-
Steam Booster
(Mounted under Tank)
Page 71

STEAM BOOSTER
Fig. 35 Part
Item No. No. Part Description Qty
1 110189 Booster K2 Spirec .......................................................................... 1
2 315596 Bracket Booster Support ................................................................ 2
3 105725 Coupling, Reducing 1 x 3/4 BI ...................................................... 1
4 105803 Nipple Close 3/4NPT BI ................................................................ 3
5 105738 Elbow Reducing 3/4 x 1/2 x 90˚ BI .............................................. 1
6 105782 Nipple Close 1/2NPT BI ................................................................ 9
7 105778 Union 1/2"NPT .............................................................................. 2
8 105796 Nipple 1/2 x 27 BI ........................................................................ 1
9 111380 Trap Steam 1/2".............................................................................. 2
10 102288 Elbow 1/2 x 90˚ BI ........................................................................ 6
11 102451 Elbow Red 1 x 3/4 x 90˚ ................................................................ 2
12 101000 Nipple Close 1"NPT Brass ............................................................ 5
13 102551 Union 1"NPT Brass........................................................................ 1
14 102450 Elbow Street 1 x 90 Brass .............................................................. 1
15 100135 Pressure Gauge 0-60 PSI .............................................................. 1
16 105785 Nipple 1/2 x 2-1/2 BI .................................................................... 1
17
18 101248 Strainer Line 1" Bronze ................................................................ 1
19 102505 Plug 3/4"NPT Brass ...................................................................... 1
20 102532 Tee Reducing 1 x 1/2 x 1 Brass .................................................... 1
21 102535 Tee Reducing 1 x 1 x 3/4 Brass .................................................... 1
22 105757 Tee Reducing 3/4 x 1/2 x 1/2 BI .................................................... 1
23 107211 Union Elbow 1 x 90 Female BI .................................................... 1
24 104649 Valve Relief 3/4" ............................................................................ 1
25 105847 Nipple Close 1"NPT BI ................................................................ 3
*
26 110005 Valve 1" Asco ................................................................................ 1
--- 110007 Kit Repair 1" Asco ........................................................................ A/R
*
--- 110120 No longer Available ....................................................................... NLA
27 107922 Thermostat Base & Cover.............................................................. 1
28 109069 Thermostat w/Capillary.................................................................. 1
29 100100 Screw 8-32 x 1/4 Round Head ...................................................... 2
30 106460 Screw 6-32 x 1/4 Truss Head ........................................................ 1
31 309498 Bracket Support Steam .................................................................. 1
32 105850 Nipple 1/2 x 2" BI .......................................................................... 1
33 105773 Tee Reducing 1-1/4 x 1 x 1 BI ...................................................... 1
34 105875 Nipple 1/2 x 2-1/2" BI .................................................................. 1
35 100263 Strainer Line 1-1/4" BI .................................................................. 1
36 105765 Tee Reducing 1 x 3/4 x 3/4 BI ...................................................... 1
37 106485 Union Elbow 3/4 x 90 Female BI .................................................. 2
38 111490 Nipple 3/4 x 7-1/4 BI .................................................................... 1
39 105730
40 109887 Valve 3/4" Steam ............................................................................ 1
--- 109903 Kit Repair 3/4" Stm-Water ............................................................ A/R
--- 108516 Coil, Valve ...................................................................................... A/R
41 111495 Nipple 3/4 x 6-1/4 BI .................................................................... 1
42 103465 Bushing, Red 3/4 x 1/2 BI ............................................................ 2
43 102402 Bushing Reducing 1/2 x 1/4 BI .................................................... 1
44 100123 Cock Gauge 1/4" ............................................................................ 1
45 108296 Union 1C x 1MPT.......................................................................... 1
46 100204 Coupling 1NPT BI ........................................................................ 1
9 Valve Pressure Reducing 1" .......................................................... 1
10026
Elbow 3/4 x 90 BI .......................................................................... 1
(MOUNTED UNDER TANK)
*
* 110007 Repair Kit, Asco Valve No. L8220G007 Only
* 114800 1" Asco Steam Valve (Asco Valve No. L8220G410)
* 114830 Repair Kit, Asco Valve No. L8220G410 Only
110005 1" Steam Valve is no longer available
---
---
63
Page 72

64
REPLACEMENT PARTS
TO FINAL RINSE
TO CONDENSATE
OUT
INLET
STEAM
INLET
WATER
1
2
8
10
9
3
4
5
7
6
31
32
49
19
50
52
53
54
56
48
55
51
38
41
41
38
43
38
44
38
41
47
46
23
22
21
20
18
17
16
15
14
6
13
12
24
25
27
26
28
29
30
45
41
38
44
43
42
41
40
39
38
31
32
66
33
33
36
35
37
33
32
2
Side Mounted Booster Base
6
11
19
5
TO STEAM
COIL CONNECTION
FROM STEAM
COIL CONNECTION
Figure 36Side Mounted Steam Booster
(Left Hand Mounted Shown)
Page 73

STEAM BOOSTER
Fig. 36 Part
Item No. No. Part Description Qty
1 110189 Booster K2 Spirec .......................................................................... 1
2 315596 Bracket Booster Support ................................................................ 2
3 100734 Bolt 1/4-20 x 1/2 Hex Head .......................................................... 2
4 106026 Washer, Flat /14" ............................................................................ 2
5 100204 Coupling 1"NPT BI........................................................................ 1
6 105847 Nipple Close 1"NPT BI ................................................................ 3
7 107211 Union Elbow 1 x 90 Female BI .................................................... 1
8 110005 Valve 1" Asco ................................................................................ 1
*
9 110007 Kit Repair 1" Asco ........................................................................ A/R
*
10 110120 No longer available ........................................................................ NLA
11 105850 Nipple 1 x 2 BI .............................................................................. 1
12 100263 Strainer Line 1-1/4" BI .................................................................. 1
13 105875 Nipple 1-1/4 x 3 BI ........................................................................ 1
14 105773 Tee Red 1-1/4" x 1 x 1 BI .............................................................. 1
15 105765 Tee Red 1 x 3/4 x 3/4 BI ................................................................ 1
16 103465 Bush Red 3/4 x 1/2 BI .................................................................. 1
17 102402 Bush Red 1/2 x 1/4 BI .................................................................. 1
18 100123 Cock Gauge 1/4.............................................................................. 1
19 105803 Nipple Close 3/4NPT BI ................................................................ 2
20 106485 Union Elbow 3/4 x 90 Female BI ................................................ 2
21 105779 Union 3/4"NPT BI ........................................................................ 1
22 111490 Nipple 3/4 x 90 BI ........................................................................ 2
23 105730 Elbow 3/4 x 90 BI .......................................................................... 1
24 111495 Nipple 3/4 x 6-1/4 BI .................................................................... 1
25 109887 Valve 3/4" Steam ............................................................................ 1
26 108516 Coil, Valve ...................................................................................... A/R
27 109903 Kit Repair 3/4" Stm-Water ............................................................ A/R
28 XXXXX Nipple (Call Factory to Confirm Application) .............................. A/R
29 XXXXX Elbow Street (Call Factory to Confirm Application) .................... A/R
30 XXXXX Nipple (Call Factory to Confirm Application) .............................. A/R
31 102451 Elbow Red 1 x 3/4 x 90 Brass ...................................................... 2
32 101000 Nipple Close 1" NPT Brass .......................................................... 5
33 102450 Elbow Street 1 x 90 Brass .............................................................. 3
34 102551 Union 1NPT Brass ........................................................................ 1
35 100269 Valve Pressure Reducing 1" Water ................................................ 1
36 101248 Strainer Line 1" Brass .................................................................... 1
37 105738 Elbow Red 3/4 x 1/2 x 90 Brass .................................................... 1
38 105782 Nipple Close 1/2NPT BI ................................................................ 7
39 100147 Elbow Street 1/2 x 90 BI................................................................ 1
40 XXXXX
41 102288 Elbow 1/2 x 90 BI .......................................................................... 5
42 XXXXX Nipple (Call Factory to Confirm Application) .............................. A/R
43 105778 Union 1/2 NPT BI .......................................................................... 2
44 111380 Trap Steam 1/2"NPT ...................................................................... 2
45 XXXXX Nipple (Call Factory to Confirm Application) .............................. A/R
46 105757 Tee Red 3/4 x 1/2 x 1/2 BI ............................................................ 1
Nipple (Call Factory to Conf irm Application) .............................. A/R
(SIDE MOUNTED)
*
*
* 114800 1" Asco Steam Valve (Asco Valve No. L8220G410)
* 114830 Repair Kit, Asco Valve No. L8220G410 Only
110005 1" Steam Valve is no longer available
110007 Repair Kit, Asco Valve No. L8220G007 Only
---
---
65
Page 74

66
REPLACEMENT PARTS
47 105796 Nipple 1/2 x 7 BI .......................................................................... 1
48 109069 Thermostat w/Capillar y.................................................................. 1
49 102532 Tee Red 1 x 1/2 x 1 Brass.............................................................. 1
50 104649 Valve Relief 3/4.............................................................................. 1
51 102535 Tee Red 1 x 1 x 3/4 Brass.............................................................. 1
52 108296 Union 1C x 1MPT .......................................................................... 1
53 XXXXX Copper Tubing................................................................................ A/R
54 108342 Elbow 1C x 90 Copper .................................................................. 1
55 203152 Tubing 1" x 10" Copper Type L .................................................... 1
56 109900 Tee Red 1C x 1/2 F x 1C Brass .................................................... 1
STEAM BOOSTER
(SIDE MOUNTED)
Fig. 35 Part
Item No. No. Part Description Qty
Page 75

67
REPLACEMENT PARTS
THIS PAGE
INTENTIONALLY
LEFT BLANK
Page 76

68
REPLACEMENT PARTS
WATER
IN
TO FINAL
RINSE
30
29
27
20
24
12
21
44
28
11
3
4
5
6
16
7
10
6
9
6
42
33
15
4
22
6
16
9
7
6
10
5
4
3
28
12
20
21
24
44
41
30
27
29
1
2
11
19
18
12
14
17
13
14
12
14
12
11
37
35
40
39
38
45
25
23
26
46
47
31
32
34
25
36
26
46
47
31
25
23
45
11
12
43
44
2
1
2
2
Figure 37-
Low Pressure Steam Booster
Page 77

LOW PRESSURE STEAM BOOSTER
Fig. 37 Part
Item No. No. Part Description Qty
1 110189 Booster K2 Spirec .......................................................................... 2
2 315596 Bracket Booster Support ................................................................ 4
3 105725 Coupling, Red 1" x 3/4" BI............................................................ 2
4 105803 Nipple Close 3/4" BI ...................................................................... 4
5 105738 Elbow, Red 3/4" x 1/2" x 90 BI .................................................... 2
6 105782 Nipple Close 1/2" BI ...................................................................... 8
7 105778 Union 1/2" BI ................................................................................ 2
8 105796 Nipple 1/2" x 7" BI ........................................................................ 1
9 111380 Trap Steam 1/2".............................................................................. 2
10 102288 Elbow 1/2" x 90 BI ........................................................................ 2
11 102451 ELbow, Red 1" x 3/4" x 90 Brass .................................................. 4
12 101000 Nipple Close 1" Brass .................................................................... 8
13 102551 Union 1"NPT Brass........................................................................ 1
14 102450 Elbow, Street 1" x 90 Brass............................................................ 3
15 105779 Union 3/4"NPT BI ........................................................................ 1
16 100147 Elbow, Street 1/2" x 90 BI ............................................................ 2
17 100269 Valve Pressure Red 1" Water ........................................................ 1
18 101248 Strainer Line 1" Bronze ................................................................ 1
19 102505 Plug 3/4"NPT Brass ...................................................................... 1
20 102532 Tee, Red 1" x 1/2" x 1" Brass ........................................................ 2
21 102535 Tee, Red 1" x 1" x 3/4" Brass ........................................................ 1
22 105757 Tee, Red 3/4" x 1/2" x 1/2" BI ...................................................... 1
23 107211 Union Elbow 1" x 90 Female BI.................................................... 2
24 104649 Valve Relief 3/4" ............................................................................ 2
25 105847 Nipple Close 1"NPT BI ................................................................ 6
26 110005 Valve 1" Steam .............................................................................. 2
*
27 107922 Thermostat Base & Cover.............................................................. 2
28 109069 Thermostat w/Capillary.................................................................. 2
29 100100 Screw 8-32 x 1/4" Round Head .................................................... 2
30 106460 Screw 6-32 x 1/4" Truss Head ...................................................... 4
31 309498 Bracket, Piping Support ................................................................ 2
32 105850 Nipple 1" x 2" BI .......................................................................... 1
33 105752 Tee 3/4"NPT BI .............................................................................. 1
34 105753 Tee 1"NPT BI ................................................................................ 1
35 106051 Strainer Line 2" BI w/Plug ............................................................ 1
36 106732 Tee, Red 1" x 1" x 2" BI ................................................................ 1
37 111280 Tee, Ree 2" x 1/2" x 2" BI ............................................................ 1
38 106607 Nipple Close 2"NPT BI ................................................................ 2
39 102402 Bushing, Red 1/2" x 1/4" BI .......................................................... 1
40 100123
41 108423 Elbow, Street 3/4C x
42 103465 Bushing, Red 3/4" x 1/2" BI .......................................................... 2
43 102448 Elbow 1" x 90 Brass ...................................................................... 1
44 108296 Union 1C x 1MPT.......................................................................... 3
45 100204 Coupling 1NPT BI ........................................................................ 2
46 110007 Kit Repair 1" Steam ...................................................................... A/R
*
47 110120 No longer available ........................................................................ NLA
Cock Gauge 1/4" ............................................................................ 1
90 Copper .................................................... 1
*
* 110007 Repair Kit, Asco Valve No. L8220G007 Only
* 114800 1" Asco Steam Valve (Asco Valve No. L8220G410)
* 114830 Repair Kit, Asco Valve No. L8220G410 Only
110005 1" Steam Valve is no longer available
---
---
69
Page 78

70
REPLACEMENT PARTS
To Final Rinse
Piping
From Incoming
Water Supply
1
2
3
4
9
11
16
10
17
22
3
25
33
7
23
25
26
32
30
31
34
35
A
6
15
2
28
29
27
30
5
7
10
10
14
18
19
21
20
36
12
13
10
8
24
Figure 38-
Electric Booster 40˚ Rise
(Mounted under Tank)
Page 79

71
REPLACEMENT PARTS
ELECTRIC BOOSTER 40˚ RISE
(MOUNTED UNDER TANK)
Fig. 38 Part
Item No. No. Part Description Qty
1 108576 Cover Booster No Cut Out ............................................................ 1
2 107967 Nut, Grip 1/4-20 w/Nylon Insert.................................................... 7
3 106026 Washer, Flat 1/4"............................................................................ 7
4 111334 Heater 9/12kW (208V, 240V, 380V) (After S/N 82569) ................ 3
108580 Heater 9kW (208V, 240V) (Prior to S/N 82568) .......................... 3
* 111235 Heater 5/6.6kW (208V, 240V) ...................................................... 1
111305 Heater 9kW (230V)........................................................................ 3
108579 Heater 9kW (480V) ...................................................................... 3
111122 Heater 9kW (575V)........................................................................ 3
5 111118 Cap 3/4" NPT Brass ...................................................................... 1
6 102470 Nipple 3/4 x 3 Brass ...................................................................... 1
7 102451 Elbow 1 x 3/4 x 90 Brass .............................................................. 2
8 102551 Union 1NPT Brass ........................................................................ 1
9 102540 Elbow Street 1 x 90 Brass .............................................................. 1
10 101000 Nipple Close 1NPT Brass.............................................................. 5
11 111438 Valve 1" hw .................................................................................. 1
12 108516 Coil, Valve...................................................................................... A/R
13 109904 Kit Repair 1" Stm-Water................................................................ A/R
14 101026 Tee Reducing 1 x 1 x 1/2 .............................................................. 1
15 102767 Nipple 1 x 5 Brass .......................................................................... 1
16 100269 Valve Pressure Reducing 1" .......................................................... 1
17 101248 Strainer Line 1" Bronze ................................................................ 1
18 102388 Bushing Red 1/2 x 1/4 Brass ........................................................ 1
19 100123 Cock Gauge 1/4 .............................................................................. 1
20 100135 Pressure Gauge 0-60 PSI .............................................................. 1
21 109765 Overlay Pressure Gauge ................................................................ 1
22 100734 Bolt 1/4-20 x 12/ Hex Head .......................................................... 4
23 108296 Union 1C x 1MPT .......................................................................... 1
24 203152 Tubing 1 x 10 Copper .................................................................... 1
25 109069 Thermostat w/Capillar y.................................................................. 1
26 109900 Tee Red 1C x 1/2F x 1C Brass ...................................................... 1
27 103217 Connector, Sealtite 1/2 x 90 .......................................................... 1
28 110930 Cover, Box ...................................................................................... 1
29 106460 Screw 6/32 x 3/8 Round Head ...................................................... 4
30 107966 Nut, Grip 10-32 w/Nylon Insert .................................................... 4
31 107033 Washer, Flat #10 ............................................................................ 2
32 110929 Box, Thermostat ............................................................................ 1
33 110562 Thermostat, Hi Limit .................................................................... 1
--- 110563 Compound Heat Sink .................................................................... A/R
34 305407 Tank, Booster ................................................................................ 1
35 102505 Pipe Plug 3/4NPT Brass ................................................................ 1
36 100184 Nipple Close 3/4NPT Brass .......................................................... 1
A ELEMENT HARDWARE (per element)
109985 Seal, Electric Heater Flanged ........................................................ 1
100003 Nut, Plain 1/4-20............................................................................ 3
106482 Washer, Lock 1/4 Split .................................................................. 3
*When less than 3 elements used in booster tank, requires the following to block off unused
element holes:
109458 Block Off, Heater .......................................................................... A/R
112257 O-ring ............................................................................................ A/R
100003 Nut, Plain 1/4-20............................................................................ 3
106482 Washer, Lock 1/4 Split .................................................................. 3
Page 80

72
REPLACEMENT PARTS
B
A
1
22
23
25
24
2
4
C
6
7
8
8
9
10
A
12
14
12
13
12
11
29
30
33
31
32
28
8
12
26
27
1
A
4
8
35
34
26
27
28
29
30
40
25
24
41
42
43
8
44
5
2
C
5
B
31
32
33
3
19
20
21
12
15
18
17
34
35
36
37
B
36
38
39
16
Figure 39-
Electric Booster 70˚ Rise
(Side Mounted Booster)
Page 81

73
REPLACEMENT PARTS
ELECTRIC BOOSTER 70˚ RISE
( SIDE MOUNTED BOOSTER)
Fig. 39 Part
Item No. No. Part Description Qty
1 108576 Cover Booster No Cut Out ............................................................ 2
* 2 111334 Heater 9kW (208V, 240V) (After S/N 82570) .............................. 5
108580 Heater 9kW (208V-240V) (Prior to S/N 82569)............................ 5
111305 Heater 9kW (230V) (After S/N 82570) ........................................ 5
111334 Heater 9kW (380V)........................................................................ 5
111305 Heater 9kW (415V)........................................................................ 5
108579 Heater 9kW (480V)........................................................................ 5
111122 Heater 9kW (575V)........................................................................ 5
3 111118 Cap 3/4NPT Brass .......................................................................... 2
4 102505 Plug 3/4NPT Brass ........................................................................ 2
5 305407 Booster Assy ................................................................................ 2
6 100734 Bolt 1/4-20 x 1" Hex Head ............................................................ 2
7 109682 Cover (Box) Moplenx.................................................................... 1
8 109069 Thermostat w/Capillar y.................................................................. 3
9 100141 Nut, Grip 1/4-20 ............................................................................ 2
10 314102 Dual Thermostat Box .................................................................... 1
11 101248 Strainer Line 1" Bronze ................................................................ 1
12 101000 Nipple Close 1NPT Brass.............................................................. 5
13 100269 Valve Pressure Reducing 1" .......................................................... 1
14 101026 Tee Red 1 x 1 x 1/2 Brass.............................................................. 1
15 102388 Bush Red 1/2 x 1/4 Brass (Not Shown) ........................................ 1
16 100123 Cock Gauge 1/4 .............................................................................. 1
17 100135 Pressure Gauge 0-60 PSI .............................................................. 1
18 109765 Overlay Pressure Gauge ................................................................ 1
19 111438 Valve 1" HW .................................................................................. 1
20 108516 Coil, Valve...................................................................................... A/R
21 109904 Kit Repair 1" Stm-Water................................................................ A/R
22 102450 Elbow Street 1 x 90 Brass .............................................................. 2
23 102551 Union 1NPT Brass ........................................................................ 1
24 102451 Elbow Red 1 x 3/4 x 90 Brass ...................................................... 2
25 102651 Nipple 3/4 x 2 Brass ...................................................................... 2
26 110562 Thermostat, Fixed Snap ................................................................ 2
27 107966 Nut, Grip 10-32 w/Nylon Insert .................................................... 4
28 106460 Screw 7-32 x 3/8 Round Head ...................................................... 4
29 110930 Cover, Booster Thermostat Box .................................................... 2
30 103217 CND Sealtite 90˚ 1/2".................................................................... 2
31 107966 Nut, Grip 10-32 w/Nylon Insert .................................................... 4
32 107033 Washer .028 x .437 x .047 ............................................................ 4
33 110929 Box Booster Thermostat ................................................................ 2
34 100184 Nipple Close 3/4NPT Brass .......................................................... 2
35 102444 Elbow Street 3/4 x 90 .................................................................... 2
36 109879 Fitting Compression 7/8OD x 3/4MPT Brass .............................. 2
37 XXXXX Copper Tubing (Call Factory to Confirm Application) ................ A/R
38 102525 Tee Red 3/4 x 1/2 x 3/4 Brass........................................................ 1
39 104682 Thermometer 1/2"NPT Stem ........................................................ 1
40 108296 Union 1C x 1MPT .......................................................................... 1
Page 82

74
REPLACEMENT PARTS
ELECTRIC BOOSTER 70˚ RISE
( SIDE MOUNTED BOOSTER)
(CONT’D)
Fig. 38 Part
Item No. No. Part Description Qty
41 XXXXX Copper Tubing (Call Factory to Confirm Application) ................ A/R
42 108342 Elbow 1C x 90 Copper .................................................................. 1
43 203152 Tubing 1 x 10 Copper .................................................................... 1
44 109900 Tee Red 1C x 1/2F x 1C ................................................................ 1
A HARDWARE FOR BOOSTER COVER (per tank)
107967 Nut, Grip 1/4-20 w/Nylon Insert.................................................... 3
106026 Washer, Flat 1/4" ............................................................................ 3
B HARDWARE FOR MOUNTING BOOSTER (per tank)
100734 Bolt 1/4-20 x 1/2 Hex Head .......................................................... 4
106026 Washer, Flat 1/4" ............................................................................ 4
107967 Nut, Grip 1/4-20 w/Nylon Insert.................................................... 4
C ELEMENT HARDWARE (per element)
109985 Seal, Electric Heater Flanged ........................................................ 1
100003 Nut, Plain 1/4-20............................................................................ 3
106482 Washer, Lock 1/4" Split ................................................................ 3
*When less than 3 elements used in booster tank, requires the following to block off unused
element holes:
109458 Block Off, Heater .......................................................................... A/R
112257 O-ring ............................................................................................ A/R
100003 Nut, Plain 1/4-20............................................................................ 3
106482 Washer, Lock 1/4 Split .................................................................. 3
Page 83

75
REPLACEMENT PARTS
THIS PAGE
INTENTIONALLY
LEFT BLANK
Page 84

76
REPLACEMENT PARTS
3
5
6
4
5
5
5
1
2
5
3
Figure 40-
Side Mount
Booster Cabinet
Page 85

77
REPLACEMENT PARTS
SIDE MOUNT
BOOSTER CABINET
Fig. 40 Part
Item No. No. Part Description Qty
1 305626 Door Slide Access Panel................................................................ 1
2 108581 Caplug ............................................................................................ 1
3 317571 Panel Weldment Front & End ........................................................ 2
4 317570 Cover Development Booster .......................................................... 1
5 100007 Screw 10-32 x 3/8 Truss Head ...................................................... 14
6 107967 Nut Grip 1/4-20 w/Nylon Insert .................................................... 4
Page 86

78
REPLACEMENT PARTS
1
2
3
4
7
8
6
9
10
4
11
12
13
5
Figure 41-
Pump Assembly
Page 87

79
REPLACEMENT PARTS
PUMP ASSEMBLY
Fig. 41 Part
Item No. No. Part Description Qty
1 111410 Plug 1/8 Pipe.................................................................................. 2
2 111403 Volute 7.5HP PP28 (Prior to S/N 86693) ...................................... 1
112005 Volute 7.5HP PP28 (After S/N 86694).......................................... 1
3 111189 Impeller Lock Screw...................................................................... 1
4 111405 Sleeve Gasket PP28........................................................................ 1
5 111379 Impeller Only (Prior to S/N 86693) .............................................. 1
112006 Impeller Only (After S/N 86694) .................................................. 1
6 110853 Seal & Seat .................................................................................... 1
7 109972 Gasket 7.5HP.................................................................................. 1
8 111404 Seal Housing 7.5HP ...................................................................... 1
9 111409 Bolt, Motor .................................................................................... 8
10 111408 Bolt, Volute .................................................................................... 8
11 111406 Sleeve PP28 .................................................................................... 1
12 111191 Impeller Key .................................................................................. 1
13 111186 Motor 7.5HP MV/60/3 .................................................................. 1
--- 900009 Kit*PP28 Seal & Gasket (Includes items 6 & 7)
--- 900010 Kit*PP28 Pump Only Old Style (Includes items 1-12) (Prior to S/N 86693)
--- 900751 Kit*PP28 Pump Only New Style (Includes items 1-12) (After S/N 86694)
--- 109518 Pump/Motor Assembly Complete
Pump Assembly (Wash Down) Navy Only
13 113458 Pump/Motor Assembly (Wash Down Motor) (Navy Machine Only)
(S/N J1575) .................................................................................... 1
--- 109514 Nipple Toe 3" x 2-1/2" (Not Shown) ............................................ 1
--- 106488 Elbow Street 2" x 90 (Not Shown)................................................ 1
Page 88

80
REPLACEMENT PARTS
3
4
5
6
7
8
10
1
2
9
11
11
Figure 42-
Machine Control Panel
Page 89

81
REPLACEMENT PARTS
MACHINE CONTROL PANEL
Fig. 42 Part
Item No. No. Part Description Qty
1 108391 Thermometer (Wash) .................................................................... 1
2 —— Overlay .......................................................................................... 1
3 101128 Pilot Light 120V Red .................................................................... 1
4 900725 Kit*Pushbutton Green NO ............................................................ 1
--- 111614 Green Pushbutton .......................................................................... A/R
--- 111617 Contact Block NO.......................................................................... A/R
--- 113140 Silicone Boot.................................................................................. A/R
5
Timer 0-5 Minute 120V ................................................................ 1
6 108311 Circuit Breaker 3Amp.................................................................... 1
7 106364 Pilot Light 120V Green .................................................................. 1
8 107351 Switch, Toggle DPDT On/None/On .............................................. 1
9 107440 Thermometer 8ft Flanged (Rinse) .................................................. 1
10 112090 Overlay .......................................................................................... 1
11 108370 Washer Lock .................................................................................. 2
900898
---
114489 Display, Digital (Not Shown)......................................................... 1
Page 90

82
REPLACEMENT PARTS
Figure 43-
Machine Control Cabinet
10
12
13
11
3
MACHINE ELECTRICAL
CONNECTION
14
TR
GROUND
15
WATER
16
GOAL ONLY
420V
LINE A/D/
COMMON
2
1
0
DETERGENT
120V
1
8
2
24V PWR
9
3
4
5
7
6
Page 91

83
REPLACEMENT PARTS
MACHINE CONTROL CABINET
Fig. 43 Part
Item No. No. Part Description Qty
1 112352 Timer Socket.................................................................................. 1
2
1
3 100735 Bolt 1/4-20 Hex Head.................................................................... 4
4 111153 Fuse Block Din Rail 600V 35Amp (Control) (After S/N J1263).. 2
100089 Fuse Block (Control) (208V-240V) (Prior to S/N J1262) ............ 1
106925 Fuse Block (Control) (480V) (Prior to S/N J1262) ...................... 1
* 107005 Fuse Block (Motor) (208V-240V) (Prior to S/N J1262)................ 1
* 106402 Fuse Block (Motor) (480V) (Prior to S/N J1262) ........................ 1
5 111823 Fuse ATDR-6 600V Time Delay (Control) (After S/N J1263) ...... 2
108506 Fuse TR-25 250V Time Delay
(Control)(208V-240V)(Prior to S/N J1262) 2
100473 Fuse ATMR-3 600V (Control) (480V) (Prior to S/N J1262) ........ 2
* 100927 Fuse TR-30 250V (Motor) (208V-240V) (Prior to S/N J1262) ...... 2
* 100929 Fuse ATMR-30 600V (Motor) (480V) (Prior to S/N J1262) ........ 2
6 109582 Contactor 25Amp (Pump Motor) .................................................. 1
7 111632 Starter Motor 18.0-25.0 (208V-240V) (After S/N J1264) ............ 1
111651 Overload Relay (208V-240V) (S/N Range 85020-J1263) ............ 1
109583 Overload Relay (208V-240V) (Prior to S/N 85019)...................... 1
111649 Overload Relay (380V, 415V, 575V) (After S/N 85256) .............. 1
108120 Overload Relay (380V, 415V, 480V, 575V) (Prior to S/N 85255) 1
113161 Starter Motor (480V) (After S/N J1264) ...................................... 1
111649 Overload Relay (480V) (S/N Range 85256-J1263) ...................... 1
8 100095 Screw 10-32 x 3/8 Round Head .................................................... 4
9 111277 Transformer 120V:24V 50/60Hz .................................................. 1
10 111826 Contactor 60FLA 3P (Tank Heat) (After S/N J1424).................... 1
105514 Contactor 50FLA 3 Pole (Tank Heat) (Prior to S/N J1423).......... 1
11 111068 Relay 2PDT 10Amp 120V ............................................................ 1
12 111067 Relay 2PDT 10Amp 24V .............................................................. 1
13 111833 Terminal Block 185Amp 3 Pole 600V .......................................... 1
14 111036 Relay Socket .................................................................................. 2
15 103310 Wire Lug ........................................................................................ 1
16 108607 Terminal Block 18PT .................................................................... 1
17 111639 Contact Auxiliary (Not Shown) (After S/N 85021) ...................... 1
108130 Contact Auxiliary (Not Shown) (Prior to S/N 85020) .................. 1
* Fuse blocks and fuses for the motors were removed from the control cabinets that
were built for machines after S/N J1263
11
5326
Timer Idec..................................................................................
Page 92

84
REPLACEMENT PARTS
7
7
3
6
5
9
1
2
4
8
Figure 44-
Booster Control Cabinet
(Single Tank Canister Shown)
Page 93

85
REPLACEMENT PARTS
BOOSTER CONTROL CABINET
Fig. 44 Part
Item No. No. Part Description Qty
1 317923 Cover Control Cabinet .................................................................. 1
2 100095 Screw 10-32 x 3/8 Hex Head ........................................................ 2
3 108424 Fuse Block 600V/100Amp 40˚ Rise (208V-240V)........................ 1
180171 Fuse Block 600V/60Amp 40˚ Rise (380V, 415V, 480V, 575V) .... 1
108424 Fuse Block 600V/100Amp 70˚ Rise (208V-240V)........................ 2
180171 Fuse Block 600V/60Amp 70˚ Rise (380V, 415V, 480V, 575V) .... 2
4 180042 Fuse 100A 300V (208V) 40˚ & 70˚ Rise .................................... 3
108448 Fuse 90A 250V (230V, 240V) 40˚ & 70˚ Rise .............................. 3
180176 Fuse 60A 600V (380V, 415V) 40˚ & 70˚ Rise .............................. 3
180175 Fuse 50A 600V (480V) 40˚ & 70˚ Rise ........................................ 3
180172 Fuse 35A 600V (575V) 40˚ Rise .................................................. 3
180060 Fuse 70A 250V (208V-240V) 70˚ Rise ........................................ 3
180174 Fuse 45A 600V (380V, 415V) 70˚ Rise ........................................ 3
180172 Fuse 35A 600V (480V) 70˚ Rise .................................................. 3
180172 Fuse 35A 600V (575V) 70˚ Rise .................................................. 6
5 103310 Wire Lug ........................................................................................ 1
6 111833 Terminal Block 185Amp 3Pole...................................................... 1
7 111827 Contactor 60FLA 3P 40˚ Rise (After S/N 86361) ........................ 2
103210 Contactor 60Amp 40˚ Rise (Prior to S/N 86360).......................... 1
105514 Contactor 50Amp 40˚ Rise (Prior to S/N 86360).......................... 1
8 111827 Contactor 60FLA 70˚ Rise
(208V-240V, 480V) (After S/N 86361) 3
111827 Contactor 60FLA 70˚ Rise (380V, 415V, 575V)(After S/N 86361) 2
103210 Contactor 60Amp 70˚ Rise (208V-240V, 480V)(Prior to S/N 86360) 2
103210 Contactor 60Amp 70˚ Rise(380V, 415V, 575V)(Prior to S/N 86360) 1
9 100735 Bolt 1/4-20 x 5/8 Hex Head .......................................................... 4
Page 94

86
REPLACEMENT PARTS
0
1
2
1
2
3
4
6
7
8
5
Figure 45-
Vent Fan Control Cabinet
(Optional)
Page 95

87
REPLACEMENT PARTS
VENT FAN CONTROL CABINET
(OPTIONAL)
Fig. 45 Part
Item No. No. Part Description Qty
1 313620 Cover Control Cabinet .................................................................. 1
2 100095 Screw 10-32 x 3/8 Round Head .................................................... 2
3
1
4
Timer Socket.................................................................................. 1
5 100735 Bolt 1/4-20 x 5/8 Hex Head .......................................................... 4
6 111626 Starter Motor 1.6-2.4Amp (208V-240V) (After S/N J1323) ........ 1
111645 Overload Relay (208V-240V) (S/N Range 85020 - J1322) .......... 1
108117 Overload Relay (208V-240V) (Prior to S/N 85019)...................... 1
111624 Starter Motor 0.6-1.0Amp (480V) (After S/N J1323) .................. 1
111643 Overload Relay (480V, 575V) (S/N Range 85020 - J1322) .......... 1
108119 Overload Relay (480V, 575V) (Prior to S/N 85019)...................... 1
7 108122 Contactor 12Amp (All Voltages).................................................... 1
* 8 100089 Fuse Block 250V 300Amp (Prior to S/N J1323) .......................... 1
106925 Fuse Block (480V, 575V) (Prior to S/N J1323) ............................ 1
* 9 106145 Fuse OT-6 250V (208V-240V) (Prior to S/N J1323) .................... 3
100473 Fuse ATMR-3 600V (480V, 575V) (Prior to S/N J1323) .............. 3
* Fuse blocks and fuses were removed from the control cabinets built after S/N J1323.
11
5326
11
2352
Timer Idec..................................................................................
Page 96

88
REPLACEMENT PARTS
1
2
3
4
5
Utensils, loose items
Large Pots & Pans
Baking sheets
Baking Pans
Figure 46-
Racks
Page 97

89
REPLACEMENT PARTS
RACKS
Fig. 46 Part
Item No. No. Part Description Qty
1 300960 Grid Hold Down PP28 .................................................................. 1
2 109586 Rack Utility.................................................................................... A/R
3 109584 Rack Basket .................................................................................... A/R
4 109585 Rack Pan ........................................................................................ A/R
5 109587 Rack Bake Sheet ............................................................................ A/R
Page 98

90
REPLACEMENT PARTS
Figure 47-
CANISTER STEAM BOOSTER
 Loading...