

Page 1
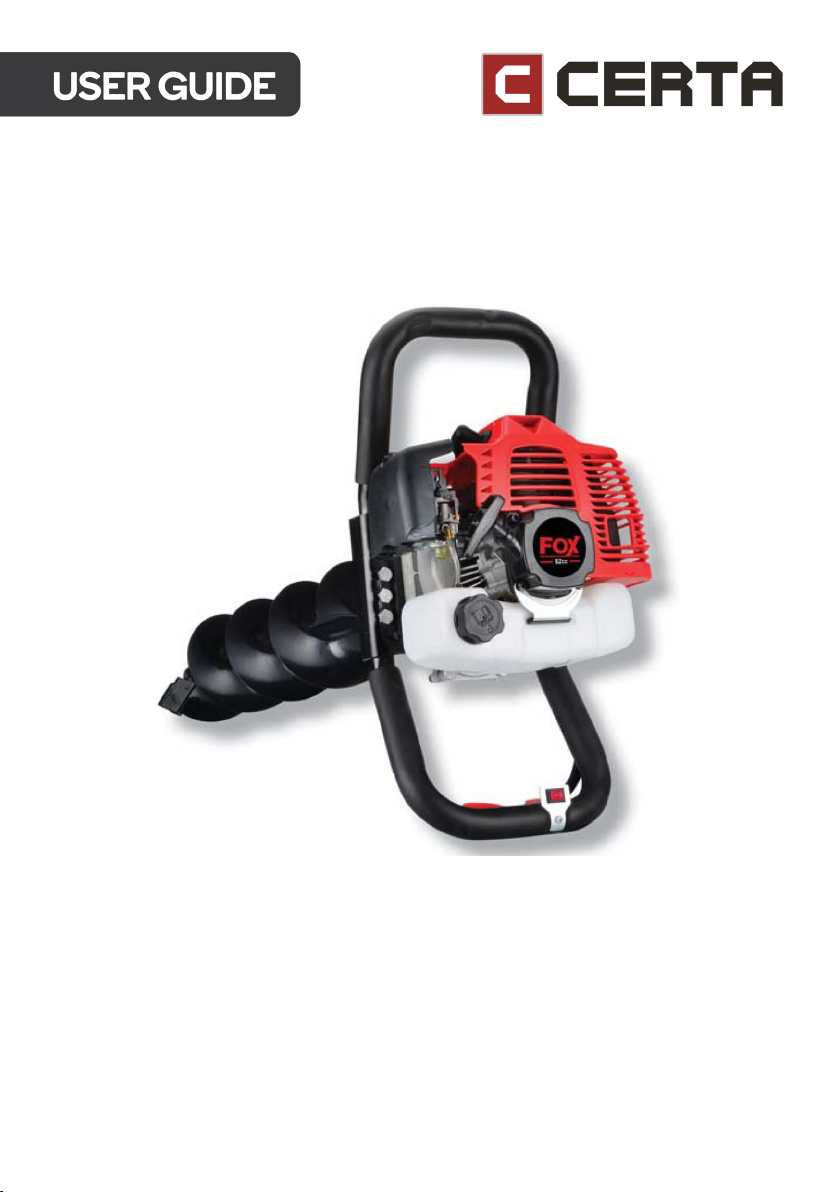
PETROL POST HOLE DIGGER
CTPTPHD58A
Page 2

Page 3
SAFETY & WARNINGS
WARNING: Read all safety instructions. Failure to comply with the following
safety instructions can cause electric shock, fire and/or serious injury or death.
Warning Symbols
These labels should appear on your machine.
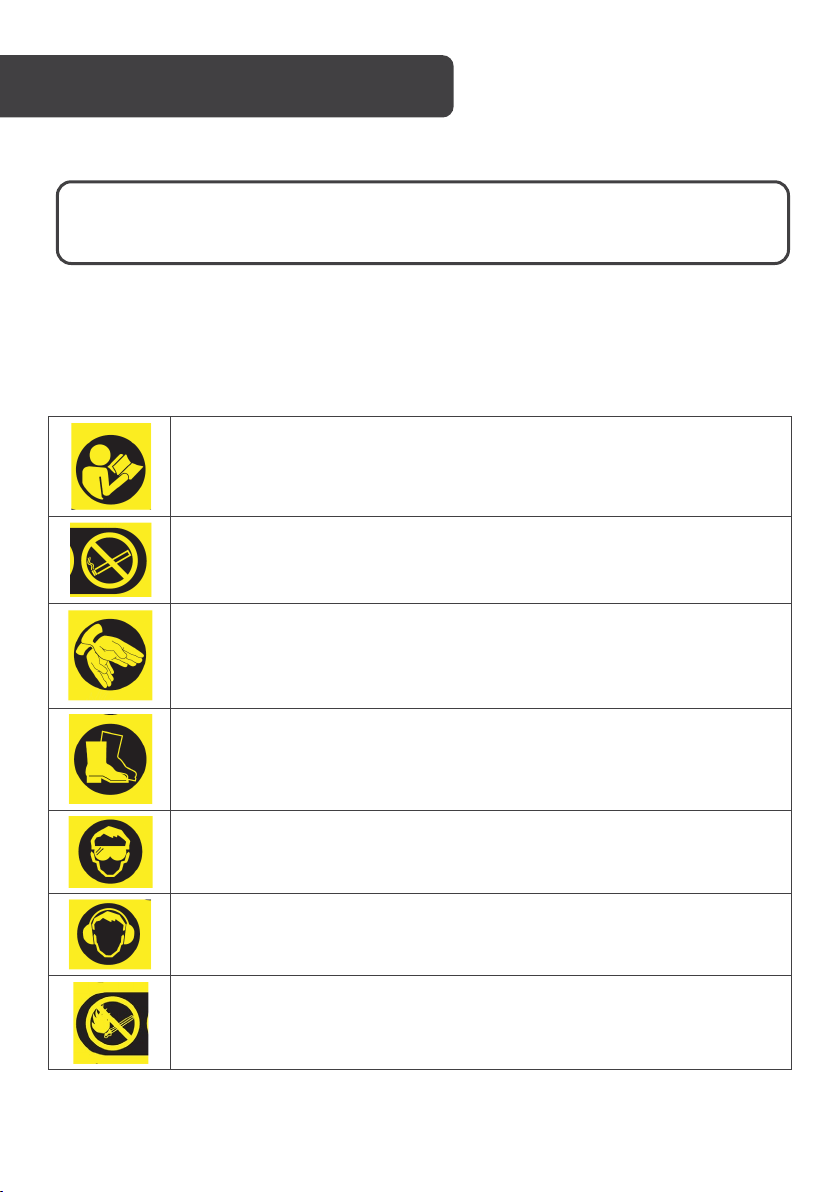
Carefully read the instruction manual before operating this product.
Do not smoke near or around the auger.
Wear CE approved hand protection at all times when operating the auger.
Wear CE approved foot protection at all times when operating the auger.
Wear CE approved eye protection at all times when operating the auger.
Wear CE approved ear protection at all times when operating the auger.
Fuel vapours are extremely flammable. Keep your auger away from any
potential fire hazards at all times.
Page 4

Exhausts contain poisonous carbon monoxide, a colourless and odourless
WARNING: Before boring any holes, you must check that the ground to be
gas. Breathing exhaust fumes can cause loss of consciousness and may
lead to death.
WARNING: Danger of fire.
WARNING: Hot surface.
Keep onlookers at least 15 metres away from the work area and beware of
objects being thrown.
Maintain a safe distance of 15 metres from onlookers and beware of objects
being thrown.
Stop the auger and remove the spark plug cap before carrying out any
maintenance or making changes.
WARNING: Do not touch. Hot surface.
Guaranteed sound power level.
Conforms to relevant safety standards.
Keep these instructions in a safe place
drilled has no hidden wires, cables, pipes, fuel lines, drains or any such hazards,
that the auger bit may come into contact with.
Page 5

Workplace
• Keep your workplace clean and tidy. Messy and/or poor lit workplaces can cause
accidents.
• Do not operate the product in explosive environments where flammable liquids,
fumes or dust are present. Petrol products produce sparks which can ignite dust or
fumes.
• Keep children and other people out of the area when operating the product.
Distractions may lead to loss of control over the product.
• Pay attention to environmental influences.
• Ensure your workplace is well lit.
Operator
Responsibilities
• Know how to stop the auger quickly in case of an emergency. Understand all auger
controls.
WARNING: Under no circumstances must the auger be left running when
unattended.
Fire and burn hazards
• The exhaust system will get hot enough to ignite some materials. Sparks can be
emitted from the exhaust causing ignition of nearby combustible materials. Keep
the auger at least 1 metre (3 feet) away from buildings and other equipment during
operation. Do not enclose the auger in any structure. Keep flammable materials
away from the auger.
• The exhaust becomes very hot during operation and remains hot for a while after
stopping the auger. Be careful not to touch the exhaust while it is hot. Let the
engine cool before storing the auger indoors.
• Petrol is extremely flammable and is explosive under certain conditions. Do not
smoke or allow flames or sparks near, when the auger is refuelled or where petrol is
stored. Refuel in a well-ventilated area with the auger switched off.
• Fuel vapours are extremely flammable and may ignite after the auger has started.
Make sure that any spilled fuel has been cleaned up before starting the auger.
Page 6

NO SMOKING
• Never smoke near or around the Auger at any time.
NO FLAMES, SPARKS
• Fuel vapours are extremely flammable. Keep your auger away
from any potential fire hazards at all times.
Personal Safety
• Be attentive, concentrate on the job and stay alert when working with this
product. Do not operate the product when you are tired or under the influence of
drugs, alcohol, or medication. A moment of carelessness when using the
product can lead to serious injury.
• Wear CE approved personal protective equipment and always use safety
goggles, ear protection and gloves. Wearing personal protective equipment
appropriate to the type of tool and the application (such as a dust mask, nonslip footwear, a safety helmet, safety goggles or ear protection), reduces the risk
of injury.
• Avoid unintentionally starting the product. Carrying the product with your finger
on the trigger can lead to accidents.
• Remove any adjusting tools or keys before turning the product on. A tool or key
connected to a rotating part of the product can lead to injuries.
• Do not over-reach. Maintain a stable posture and keep your balance. This can
improve your control over the product in unexpected situations.
• Wear appropriate CE approved clothing. Do not wear loose-fitting clothes or
jewellery. Keep hair, clothing, and gloves away from moving parts. Loose-fitting
clothes, jewellery or long hair can be caught up in moving parts.
Page 7

Correct handling and operation of augers
• Do not overload the auger. Use the appropriate auger for the job. You can work
more safely and effectively using the appropriate auger within the range of its
capacity.
• Do not use augers with defective on/off switches. An auger tool which can no
longer be switched on and off is dangerous and must be repaired.
• Turn the product off and remove the spark plug cap before carrying out
adjustments, changing tools or accessories and putting the product away. This
precautionary measure prevents unintentional starting.
• Store augers out of the reach of children when not in use. Do not allow a person
who is unfamiliar with the product or has not read these instructions to use the
product.
• Maintain the product with care. Ensure the moving parts function correctly and do
not stick. Check whether parts are broken or so badly damaged that the product’s
functions are impaired. Have damaged parts repaired before operating the
product. Many accidents are caused by badly maintained products.
• Keep cutting tools sharp and clean. Correctly maintained cutting tools with sharp
edges are less likely to stick and are easier to use.
• Operate augers, accessories and bits or tools according to these instructions and
according to any regulations which may apply. Consider your working environment
and the type of job you wish to do. Using augers for jobs other than those intended
can lead to dangerous situations.
• Keep the handles dry, clean, and free of oil and grease.
Service
• Ensure the product is repaired by Kogan.com and that original replacement parts
are used. This ensures continued safe operation of the product.
Specific safety instructions for augers
Please read this section carefully. Operate the auger according to the safety instructions
and recommendations outlined here and inserted throughout. Anyone who uses this auger
must read the instructions and be familiar with the controls.
• Do not carry the auger between holes with the engine running.
• The auger should not rotate when the engine is idling. If it does rotate when the
engine is idling, contact Kogan.com for assistance.
• Always keep hands, feet, hair and lose clothing away from any moving parts on the
engine and auger.
Page 8

• Do not allow children to operate this auger. Do not allow adults to operate the
auger without proper instructions.
• Do not operate any power equipment under the influence of alcohol or drugs.
• Keep all screws, nuts, and bolts tight.
• The engine should be turned off and cooled, and the spark plug cap must be
removed from the spark plug before any repairs are attempted.
• The temperature of the exhaust and nearby areas may exceed 150°F (65°C). Avoid
contact with these areas.
• Never run the auger indoors or in an enclosed area. Engine exhaust fumes contain
carbon monoxide, an odourless and deadly gas.
• If the auger will not turn in a hole, turn the engine off and allow cooling before
attempting to remove it manually.
Engine safety
precautions
All engines produce carbon monoxide from their exhaust. Carbon monoxide is a deadly,
colourless, tasteless, gas which may be present even if you do not smell or see it. Levels of
carbon monoxide, which can be deadly, can be present for days in an enclosed area that
has poor ventilation. Any level of carbon monoxide, if inhaled, can cause headaches,
drowsiness, nausea, dizziness, confusion and even death. If you notice any of these
symptoms, seek medical attention immediately.
Preventing carbon monoxide poisoning
WARNING: Carbon Monoxide is poisonous.
• Never run the auger indoors.
• Never try to ventilate exhaust fumes indoors. Carbon monoxide can reach
dangerous levels very quickly.
• Never run an auger outdoors where exhaust fumes may be pulled into a building.
Never run an auger outdoors in a poorly ventilated area where the exhaust fumes
may be trapped and not easily taken away. (Examples include in a large hole or
areas where hills and trees surround your working area.)
• Never run the auger in an enclosed or partially enclosed area. (Examples include
buildings that are enclosed on one or more sides, under tents, carports, or
basements.) Always run the auger with the exhaust pointed in a direction away
from the operator. Never point the exhaust towards anyone. Bystanders should
always be at least 3 feet away from the work area.
Page 9

Handling fuel safely
• Fuel and fuel vapours are highly flammable. Never use fuel where a spark or flame
may be present. Never use fuel where a potential source of ignition could occur.
(Examples include hot water or space heaters, clothes dryers, electric motors,
power tools etc.)
• Keep flames and sparks away from the auger and fuel to prevent fires. Fuel fires
spread very quickly and are highly explosive.
Prevention
of fuel fires
• Never fill your fuel tank with fuel indoors or undercover.
• Always fill the fuel tank outside in a well-ventilated area.
• Never remove the fuel cap or add fuel with the engine running. Stop the engine
and allow cooling before refuelling.
• Never drain the fuel from the engine in an enclosed area.
• Always wipe up excess or spilled fuel from the auger before starting. Clean up
spilled fuel immediately.
• Allow spilled fuel to dry after wiping.
• If fuel is spilt, clean it immediately and move at least 10 metres away from the area
of the spillage before starting the auger.
• Allow fuel fumes/vapours to escape from the area before starting the auger.
• Test the fuel cap for proper installation before starting and using the auger.
• Always run the auger with the fuel cap properly installed on the tank.
• Replace fuel caps that are damaged or leak.
• Never smoke while refilling the auger.
• Prevent fire and explosion caused by static electric discharge. Use only non-metal,
approved fuel containers.
• Do not store the auger with fuel in the tank indoors. Fuel and fuel vapours are
highly explosive.
• When storing, screw down the fuel cap tightly.
• Never pour fuel from the engine fuel tank.
• Never siphon fuel by mouth to drain the fuel tank.
• Never allow anyone under the influence of drugs or alcohol to fill the tank.
• Never allow children to fill the fuel tank.
Page 10

Burns and fires
The exhaust, exhaust guard and other parts of the engine become extremely hot during the
operation of the auger. These parts remain extremely hot after the auger has been stopped.
Prevention
of burns and fires
• Never remove the exhaust guard from the engine.
• Never touch the exhaust guard because it is extremely hot and will cause severe
burns.
• Never touch parts of the engine that become hot after and during operation.
• Always keep materials and debris away from the exhaust guard and other hot
parts of the engine to avoid fires.
IMPORTANT: Hot gases are a normal by-product of a functioning
catalytic converter. Follow all safety instructions to prevent burns and
fires.
Page 11
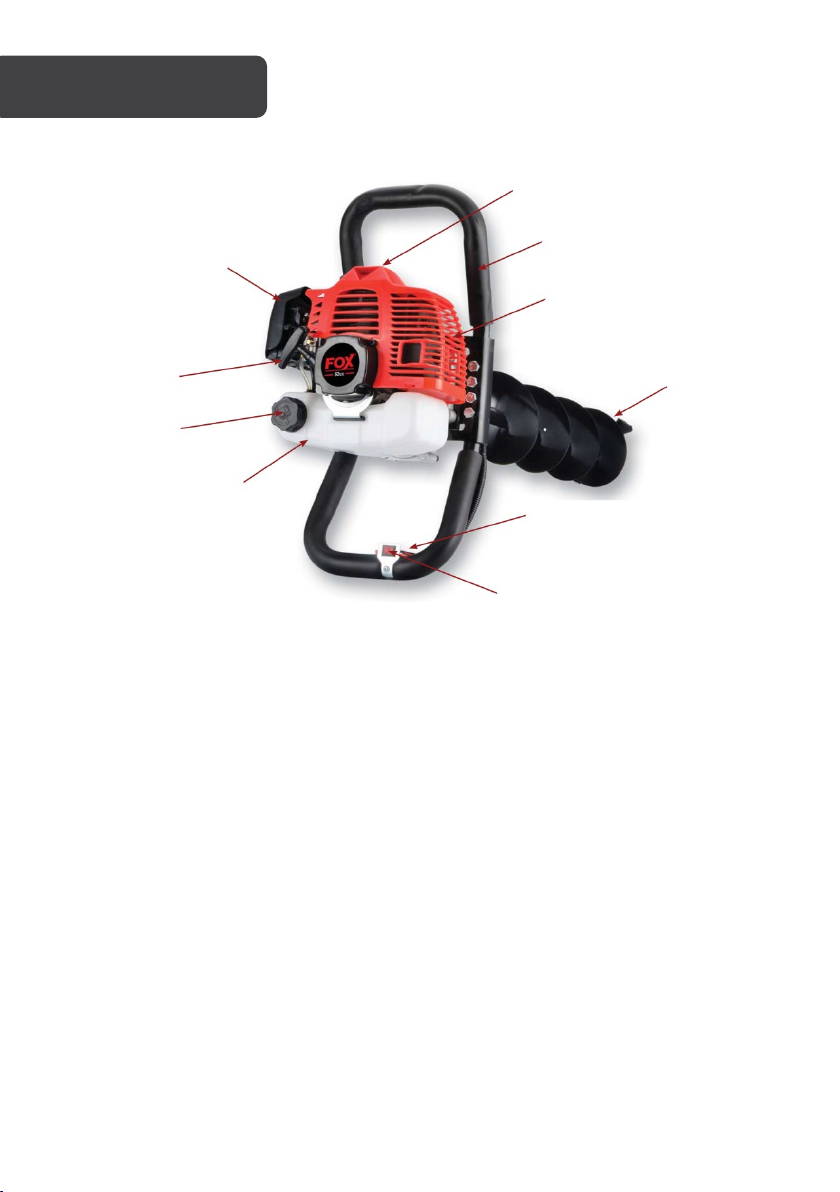
Spark plug
Handle
Exhaust
Auger bit
Throttle lever
STOP/RUN switch
Air filter
Recoil starter
Fuel cap
Fuel tank
OVERVIEW
Page 12
ASSEMBLY & OPERATION
IMPORTANT: Reactive torque may occur when the rotating auger makes
contact with hard debris during operation. A firm hold with both hands is
essential.
auger bits
Fitting
IMPORTANT: Always ensure that the auger engine is switched off before
making any adjustments. It is recommended that you remove the spark plug
cap to prevent accidentally starting the auger.
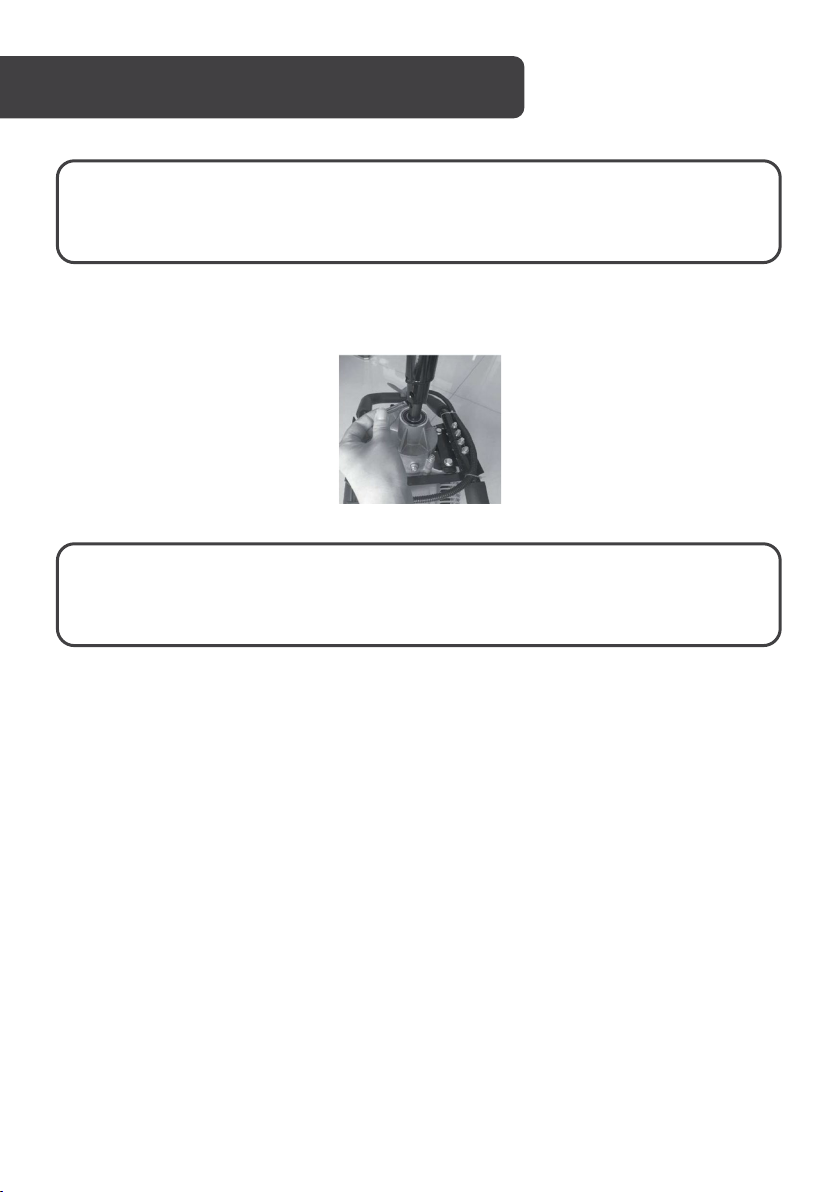
With the locking pin and split pin removed, place the hollow end of the auger bit onto the
drive shaft on the underside of the auger engine. Line the hole in the shaft of the auger bit
with the hole on the drive shaft of the auger engine, push the locking pin through the holes
and lock into position using the split pin provided.
Page 13
Fuelling
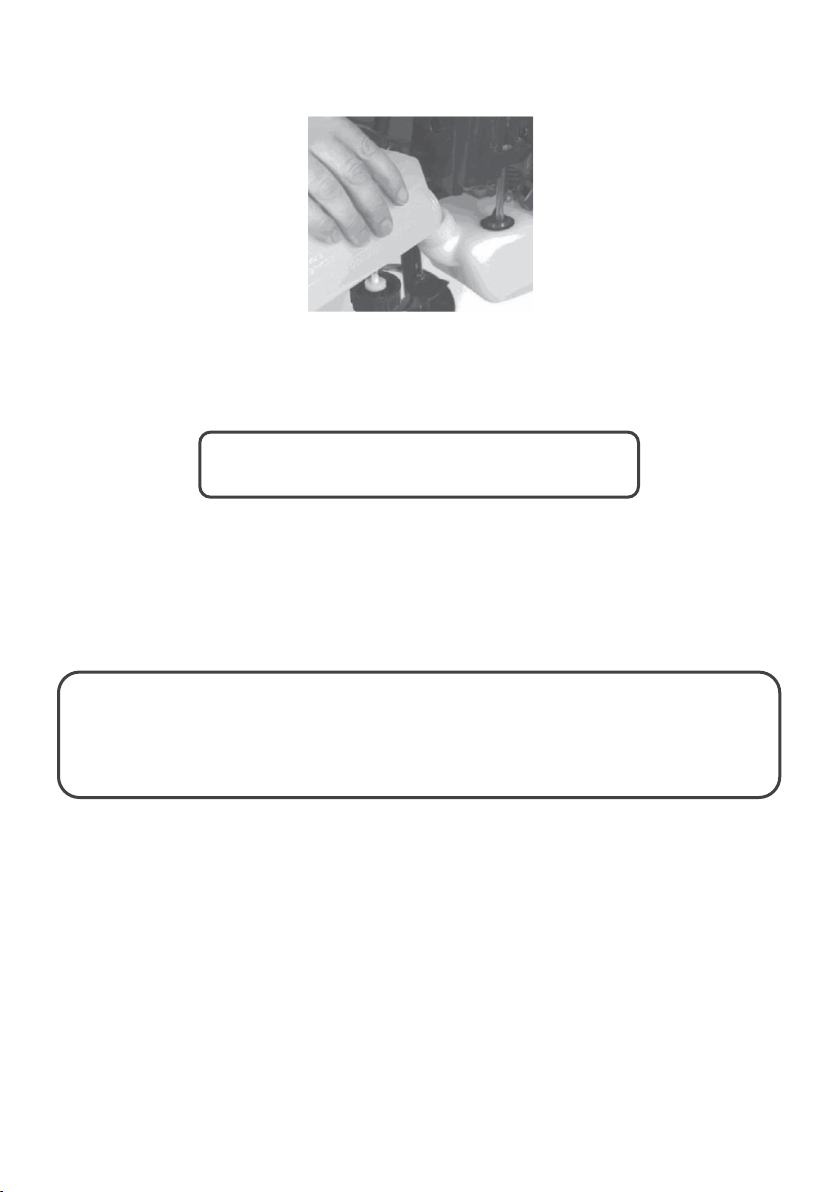
The auger is powered by a 2-stroke engine which uses a petrol and oil fuel mix. The correct
fuel mixture is a ratio of 25:1 of petrol and 2-stroke oil (25 parts of unleaded petrol to 1 part of
2 stroke oil).
Mixing
Fuel
The fuel tank has a maximum capacity of 1,2L. To mix the fuel correctly; use a fuel mixing
bottle to measure the correct amount of stroke 2 stroke oil to unleaded petrol.
WARNING: Use only synthetic 2-stroke oil.
WARNING: Do not mix the fuel in the fuel tank. Measure the fuel into the
fuel mixing bottle then add the correct proportion of 2 stroke oil according to
the markings on the fuel mixing bottle. Agitate the container to ensure
thorough mixing of the petrol and 2 stroke oil.
Filling the fuel tank
Use a suitable funnel to transfer the fuel mix from the mixing bottle to the fuel tank, taking
care not to spill any fuel or overfill the fuel tank.
Please note that for safety reasons, this product has been supplied with the fuel system
completely drained of fuel and the engine will require “running in”.
When starting for the first time you may experience some difficulty in starting the auger.
Once the fuel has fully circulated through the system the auger will start. Once started and
“run in”, future starts will be much easier.
Page 14
Starting the engine
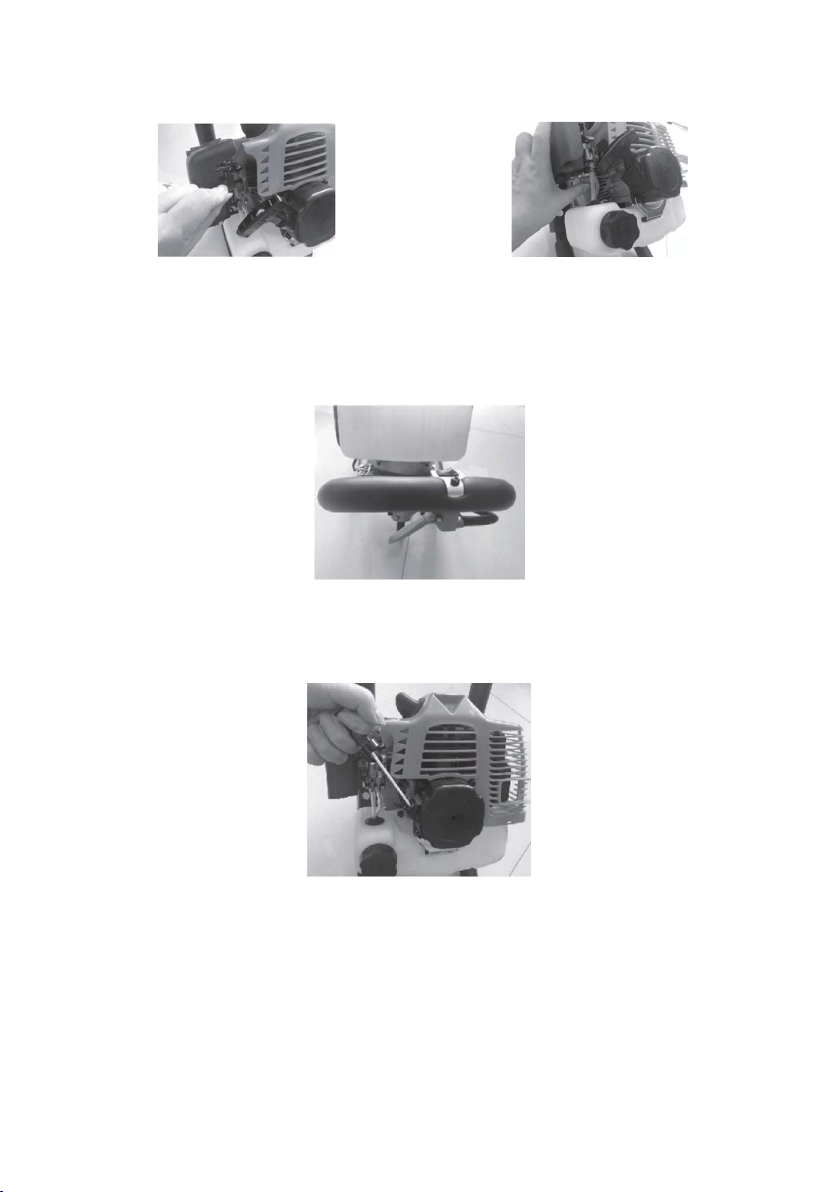
If the carburettor requires “priming”, pump
not need to prime the auger.
Set the choke lever to the ON position. As
shown in the image above.
Make sure that the STOP/RUN switch is in the RUN position, as shown in the image above.
Hold down the auger firmly with one hand. With the other hand, grip the recoil starter cord
handle and pull slowly until resistance is felt indicating that the recoil starter is engaged.
When resistance is felt pull the cord firmly. Continue this procedure until the engine starts.
When the engine has been successfully started and is running smoothly return the choke
lever to the off position.
the clear rubber priming button until fuel
appears in the button as shown in the
image above. For warm starts, you may
Page 15
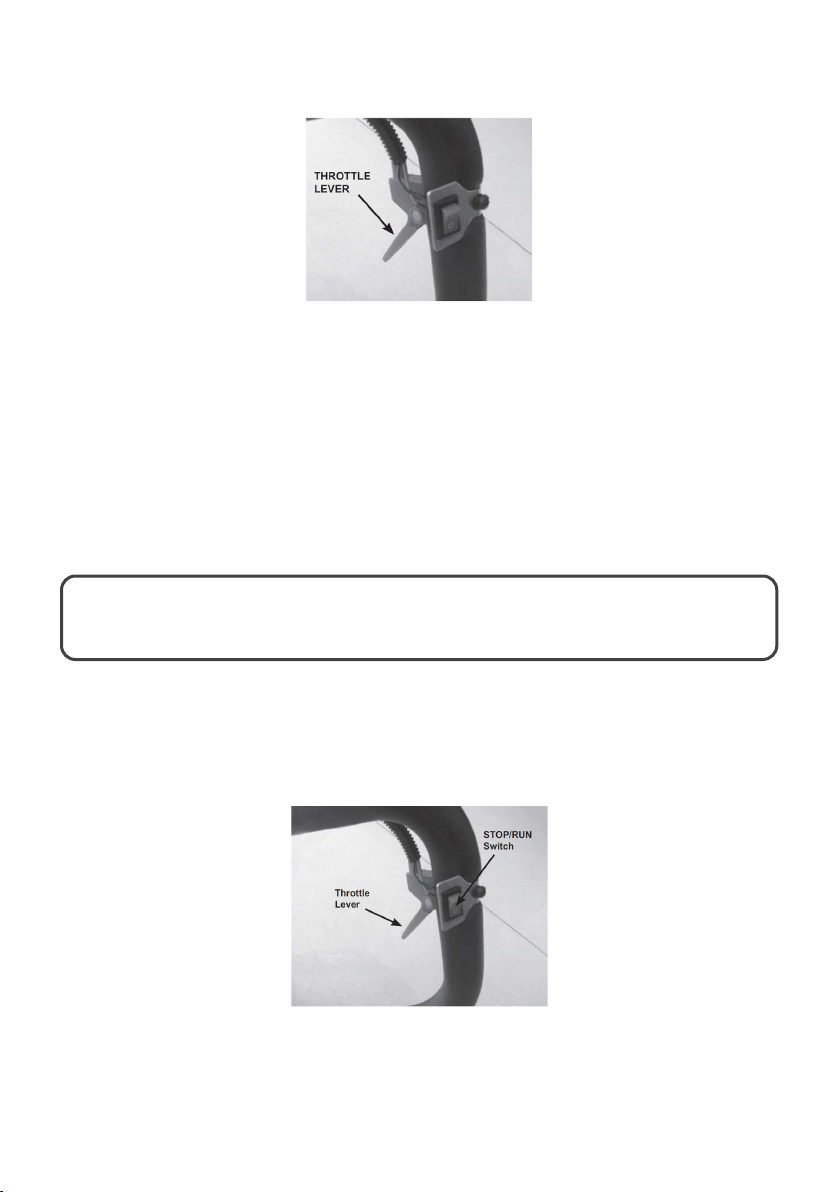
To stop the auger bit from rotating, briefly squeeze then release the throttle lever.
Operating
This product requires the use of two hands to ensure safe operation. Before boring any
holes, you must check that the ground to be drilled has no hidden wires, cables, pipes, fuel
lines, drains or other such hazards, that the auger bit may come into contact with. Inspect
the work area before starting. Remove any objects or debris that could be thrown, jammed,
or become entangled in the auger bit. Adopt a stable stance, always keeping the auger in
front of your body. Grip the handles with both hands ensuring you can safely operate the
control levers. Allow the auger bit to reach full speed before commencing the boring
operation.
the auger
WARNING: If the auger bit hits a stone or hard ground etc., the rotation
may stop immediately and give a hard torque reaction.
It is required that the operator always has a firm grip on both handles with both hands
during operation to compensate for a sudden torque reaction. Turn off the auger and
remove it from the hole. Then remove the spark plug cap from the spark plug. Remove any
jammed debris from the auger bit and examine for any damage before commencing work.
Stopping
the Auger
• Push the STOP/RUN switch to the STOP position.
Page 16
7 - 0.8mm
CLEANING & CARE
Always wear sturdy CE approved gloves when handling auger bits, as they can be very
sharp. Re-lubricate all moving parts at regular intervals.
If the body of the auger needs cleaning, wipe it with a soft damp cloth. A mild detergent can
be used. Do not use alcohol, petrol, or other such cleaning agents. Never use caustic agents
to clean plastic parts.
WARNING: Always ensure that the auger is switched off and the spark plug
cap is removed before making any adjustments or maintenance procedures.
plug
Spark
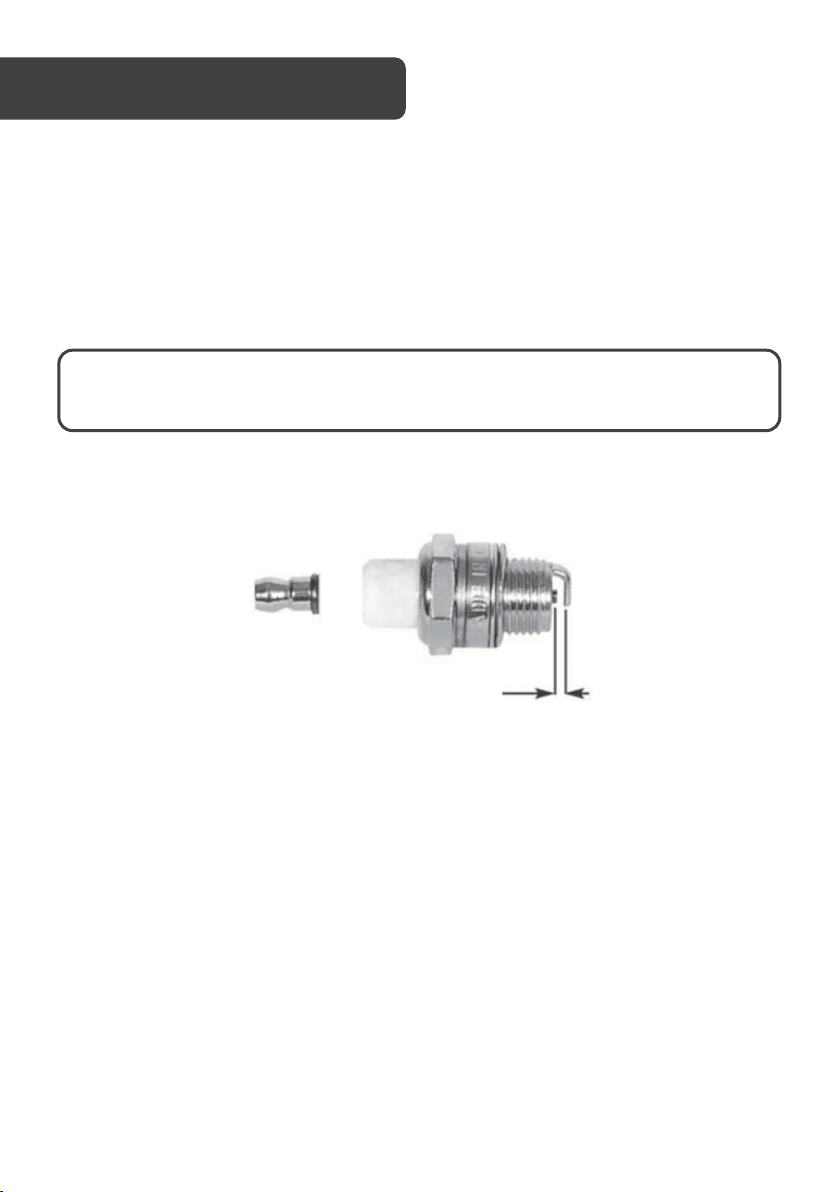
After every 10 hours of running the spark plug should be removed. Remove the spark plug
cap and clean any dirt from around the spark plug base, then use a spark plug wrench to
remove the spark plug. Check the colour of the deposits on the end of the spark plug; it
should be a “tan” colour. Remove all deposits using a stiff brush; a brass wire brush is ideal.
Check the spark plug gap and adjust if required. The correct gap should be 0.7 to 0.8mm.
Check that the spark plug washer is in good condition and thread the spark plug in by hand
to prevent cross-threading. After the spark plug is seated, tighten with a spark plug wrench
to compress the washer.
If installing a new spark plug, tighten 1/2 turn after the spark plug seats to compress the
washer. If reinstalling a used spark plug, tighten 1/8-1/4 turn after the spark plug seats to
compress the washer.
Page 17
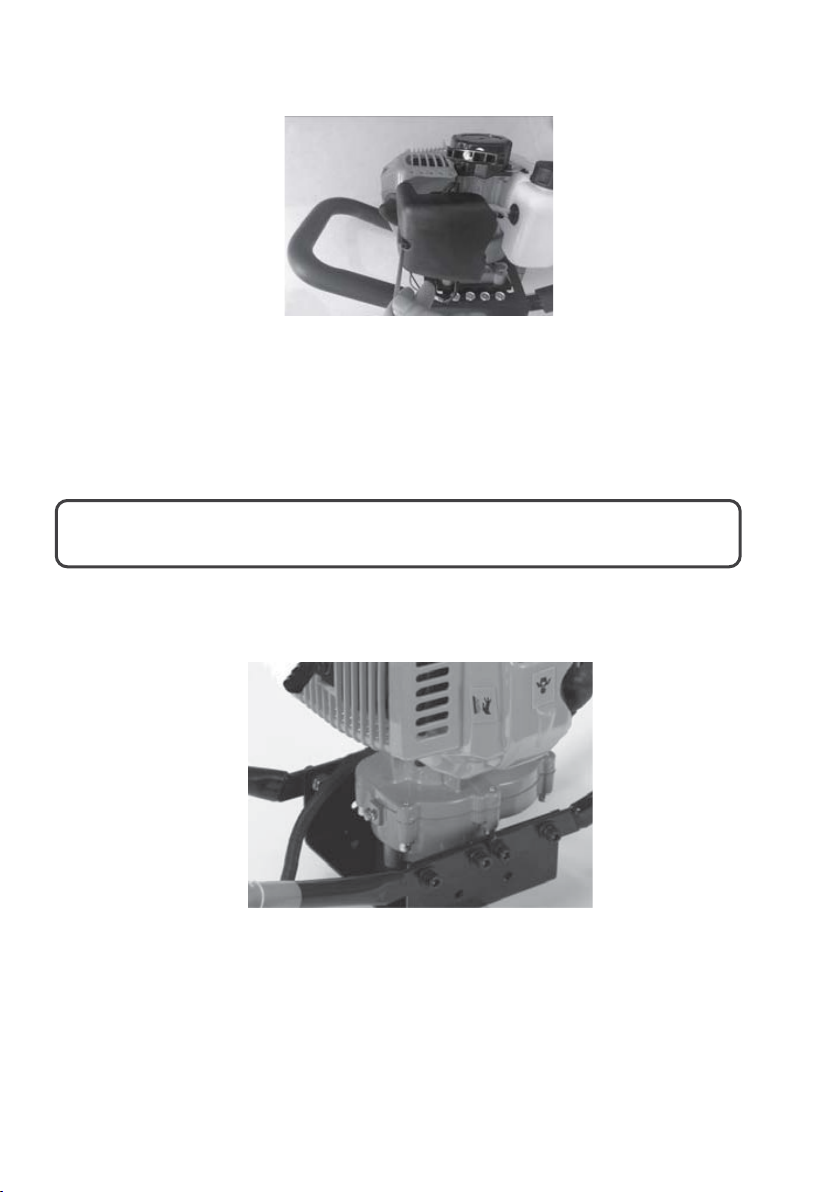
Air filter
After every 20 hours of operation (or every 4 hours of running in very dusty conditions), the air
filter should be removed, examined for deterioration, and cleaned. Remove the air filter
housing cover then remove the air filter. Clean the air filter thoroughly using
environmentally-friendly water-based degreasing agent. When the air filter has completely
dried out apply a little ordinary engine oil to coat the whole of the filter. Squeeze out any
excess oil and replace the air filter and cover.
WARNING: Never run the engine without the air filter fitted.
Lubricating the gearbox
It is recommended that after 8 hours of use the gearbox grease is topped up using suitable
Lithium grease. With the engine in its upright position remove the bolt on the grease filler
port and add the grease with a grease gun. Refit the grease filler port bolt ensuring it is
securely tightened.
Page 18

• Do not overfill.
• Keep all screws, nuts, and bolts tight.
• For cold weather operation, store the auger in a cool environment. Transferring the
auger from a warm to a cold place can cause the build-up of harmful
condensation.
• If the blade performance decreases, turn the auger off and disconnect the spark
plug cap. Carefully inspect the cutting edge of the blade for any signs of wear. If
the blades show any of wear or damage, they need to be sharpened or replaced.
• Cooling fans, air inlets and linkages must always be free from any debris.
IMPORTANT:
• The engine must be turned off and be cool and the spark plug cap
must be removed from the spark plug before checking and adjusting
the auger orbits/attachments.
• The temperature of the exhaust and nearby areas may exceed
(65“C) Avoid contact with these areas.
• After every 8 hours of operation check the auger for loose or missing
nuts and bolts. Keep these items tightened. Replace missing nuts
and bolts if required.
• Never store the auger with fuel in the tank inside a building. Potential
sparks may be present and ignite fuel and fuel vapours.
• Service, maintenance, and adjustments to the auger must be carried
out by Kogan.com
• Auger must be shut-off, cooled and the spark plug cap removed
before any repair or maintenance can be carried out.
Carburettor
• Never alter or in any way change the setting of the carburettor.
Page 19

Transporting the auger
• Never transport the auger inside an enclosed space or vehicle. Fuel or fuel vapours
may ignite causing serious injury or death.
• If fuel is present in the fuel tank, transport in an open vehicle in an upright position.
• If an enclosed vehicle must be used, remove all fuel and vapours into an approved
red fuel container. DO NOT siphon by mouth.
• Run the auger to use up the fuel in the carburettor and fuel tank. Always run the
auger in a well-ventilated area outside.
• Wipe away any spilled fuel from the auger and allow drying completely.
term storage
Long
If your auger will not be used for more than one month, prepare it for long term storage.
1. Remove all the fuel from the fuel tank into an approved fuel container. Do not
siphon by using your mouth.
2. Run the auger to use all fuel from the carburettor.
3. Remove auger bit and apply a thin layer of grease to the output shaft.
4. Store the auger and auger engine in a vertical position.
5. Remove all debris from the auger and the auger engine.
IMPORTANT:
• To avoid injury or death, never siphon fuel by using your mouth.
• Never store the auger with fuel in the fuel tank inside an enclosed
area, shed or building.
• Auger must be shut-off, cooled and the spark plug cap removed
before checking and adjusting the auger or equipment.
• Maintenance and repair on engine and auger must be carried out by
the authorised workshop.
• Always isolate equipment and ensure the engine is cool before any
repairs or maintenance is carried out.
Page 20

Problem
Possible cause
Solution
Power switch is off.
Flip switch to on position.
Connect spark plug cap to
spark plug.
Out of fuel.
Refuel.
Spark plug wet, faulty, or
improperly gapped.
Clean, replace or gap spark
plug.
Hold throttle control wide
handle.
Fuel line hose not positioned in
bottom of fuel tank.
Push fuel line down into fuel in
the fuel tank.
Dirty air filter.
Clean or replace air filter.
Choke partially engaged.
Turn off the choke.
Carburettor out of adjustment.
Contact Kogan.com
Drain old fuel and replace with
the end of the season.
Make sure the spark plug cap
spark plug.
Clean the carburettor, use fuel
can.
Prime the unit 3 more times,
handle.
Clogged fuel tank.
Remove and clean.
Clogged air filter.
Clean or replace.
Carburettor out of adjustment
or damaged.
Spark plug wet, faulty, or
improperly gapped.
Clean, replace or gap the
spark plug.
TROUBLESHOOTING
Spark plug cap is disconnected.
Engine will not start.
Engine runs rough,
floods during operation.
Engine is hard to start.
Engine skips or lacks
power.
Throttle control not held wide
open.
Stale fuel.
Spark plug cap is loose.
Dirty carburettor.
Throttle control not held wide
open.
open when pulling recoil
fresh fuel. Use fuel stabiliser at
is securely attached to the
stabiliser, and use a new fuel
then hold the throttle wide
open when pulling the recoil
Contact Kogan.com.
Page 21

Engine runs and then
Open the manual venting fuel
open (counter-clockwise)
Clogged fuel filter.
Clean or replace.
Carburettor out of adjustment
or damaged.
Engine revs too high.
Carburettor out of adjustment.
Contact Kogan.com
Idle speed too high.
Adjust idle speed lower.
Worn or stretched clutch spring.
Contact Kogan.com
Turn off choke after the engine
is running.
Carburettor out of adjustment.
Contact Kogan.com
Broken transmission.
Contact Kogan.com
Replace clutch shoes and
Replace or sharpen fishtail
Check ground conditions,
stops.
Auger turns at idle.
Intermittent drive.
Fuel cap not venting.
Choke on.
Worn clutch shoes.
Worn engine lower seat. Contact Kogan.com
cap and screw all the way
Contact Kogan.com
spring.
Dull blade.
Auger cuts slowly.
Damaged fishtail point.
Ground is too hard/rocky.
Buy a new blade or have the
blade sharpened.
point.
safely remove obstacles.
Page 22

NOTES
Page 23

Page 24

Need more information?
We hope that this user guide has given you
the assistance needed for a simple set-up.
For the most up-to-date guide for your product,
as well as any additional assistance you may require,
head online to help.kogan.com
 Loading...