

Page 1
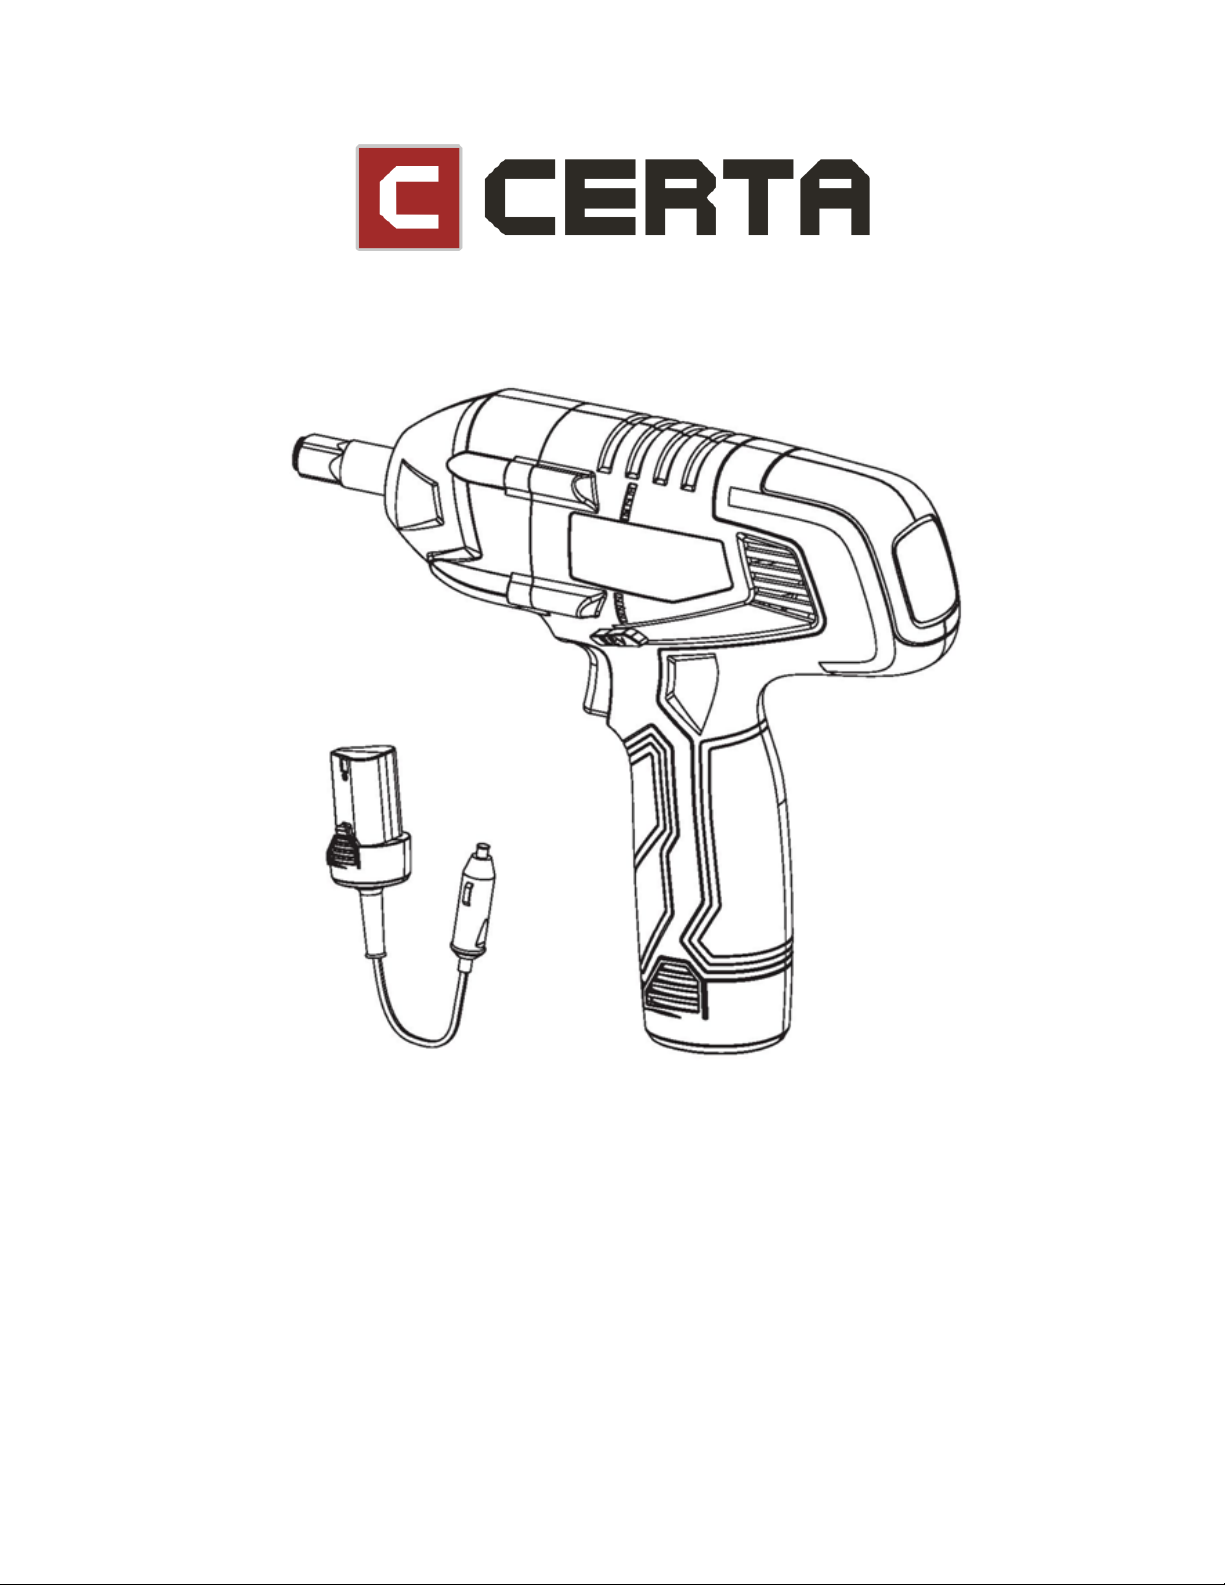
12V Cordless Impact Wrench
CTIMPWRNCLA
Quick Start Guide
Table of Contents
Safety & Warnings .................................................................................................................................................... 2
Overview ...................................................................................................................................................................... 4
Installation ................................................................................................................................................................... 5
Operation ..................................................................................................................................................................... 6
Cleaning & Care ......................................................................................................................................................... 8
Specifications ............................................................................................................................................................. 8
Troubleshooting ........................................................................................................................................................ 8
1
Page 2

Safety & Warnings
Please read these instructions carefully and keep for future reference
• Warning! Use the 12V impact wrench in accordance with these instructions,
considering the working conditions and the work to be performed. Using this
power tool for purposes other than those intended could result in rendering your
vehicle in an unsafe condition and may result in serious injury or death.
• Dress appropriately. Do not wear loose clothing or jewellery whilst operating this
tool.
Keep your hair, clothing and gloves away from moving parts as they may get
caught.
• Keep children and bystanders away while operating a power tool as distractions
can cause the operator to lose control.
• Screws, nuts and bolts that have been tightened to a specific torque, should be
tightened with a torque wrench once the tyres have been fitted in place.
• If you are in doubt of correct torque stipulated for your vehicle, consult your car
manufacturer and/or vehicle manual specifications.
Intended use:
• The 12V impact wrench is designed for the fast removal and tightening of vehicle
lug nuts when changing tyres. It is intended for occasional intermittent use and not
commercial purposes.
• Caution: The 12V impact wrench can only be used on small/midsize cars.
• It should not be used on trucks and heavy machinery.
• This 12V impact wrench is intended for domestic use only.
• This appliance is not intended for use by persons (including children) with reduced
physical, sensory or mental capabilities or lack of experience and knowledge,
unless they have been given appropriate supervision and instruction by a person
responsible for their safety.
• The 12V impact wrench is not a toy. Children should be supervised to ensure they
do not play with the appliance. Keep the appliance, any attachment and its power
cord out of reach of children.
• Do not use the appliance for anything other than its intended use.
Safe usage:
• Do not use the power tool if the switch does not turn off. Any power tool that
cannot be controlled with the switch is dangerous and must be repaired.
• Do not operate the tool if the 12V impact wrench or the power cord shows visible
signs of damage.
• Only connect the 12V impact wrench to a correctly installed cigarette lighter or
auxiliary outlet with 12V power.
• Do not use if the power tool or cord is wet. Never use the power tool in the rain.
Water penetrating an electrical device increases the risk of electrical shock.
• Do not use the 12V impact wrench in potentially explosive environments containing
combustible liquids, gases or dust. Electrical tools generate sparks that can ignite
the dust or vapours.
• Do not place or use the 12V impact wrench near open fire or water.
• Do not overload the tool. Do not apply excessive pressure to the 12V impact
wrench. If the nuts cannot be moved and the wrench freezes, cease the operation
immediately and continue with a manual wrench.
• Do not attempt to continue to turn the nut manually with the 12V impact wrench.
• Do not operate the tool without a load at full speed for an extended length of time.
2
Page 3
Safety Information:
Instruction manual
understand
• When using the electrical appliance, basic safety precautions should always be
followed to reduce the risk of fire, electrical shock and injury to persons, including
the following:
• Do not attempt to plug in or remove the appliances from the power supply with
wet hands.
• Before connecting the appliance to the power supply ensure the voltage
corresponds to the voltage limits on the rating plate.
• Warning! A reverse polarity connection will result in a blown fuse and may cause
permanent damage to the appliance.
the side contact is negative (-).
• This appliance should not be operated by means of an external timer or separate
remote-control system, other than any supplied with the appliance.
• Only use manufacturer recommended attachments or those specifically designed
for use with the unit.
• On some vehicles, the accessory socket may only become live when the ignition is
turned on.
• Warning! Do not use with positive ground electrical systems (i.e. older vehicles).
• To reduce the risk of fire, ensure that the 12V DC outlets are free from debris. When
the adapter plug is fitted, make sure that it is a tight connection.
• Do not operate the appliance if it has been submerged in water or any other liquid
to prevent against electric shock, damage and potential injury.
• Do not use the appliance if the connector or its supply cord is damaged. Seek
advice and repairs from qualified electricians or service personnel.
• Only a qualified electrician or service engineer should perform repairs to electrical
equipment. Improper repairs may place the user at serious risk.
• Do not leave the appliance unattended whilst connected to the mains power
supply.
• This appliance can be used for periods of up to 30 minutes without noticeably
affecting the power of a normally charged car battery which is in good condition.
• Warning! Extended use will drain the battery power.
Note: The tip of the plug is positive (+) and
Do not run the vehicles engine while using the 12V impact wrench as this can shorten the life
of the appliance. Before attempting any cleaning or user maintenance, the appliance must be
switched off and disconnected from the power supply. The connector must be disconnected,
and the appliance should be cool enough to touch, and all moving parts must have stopped.
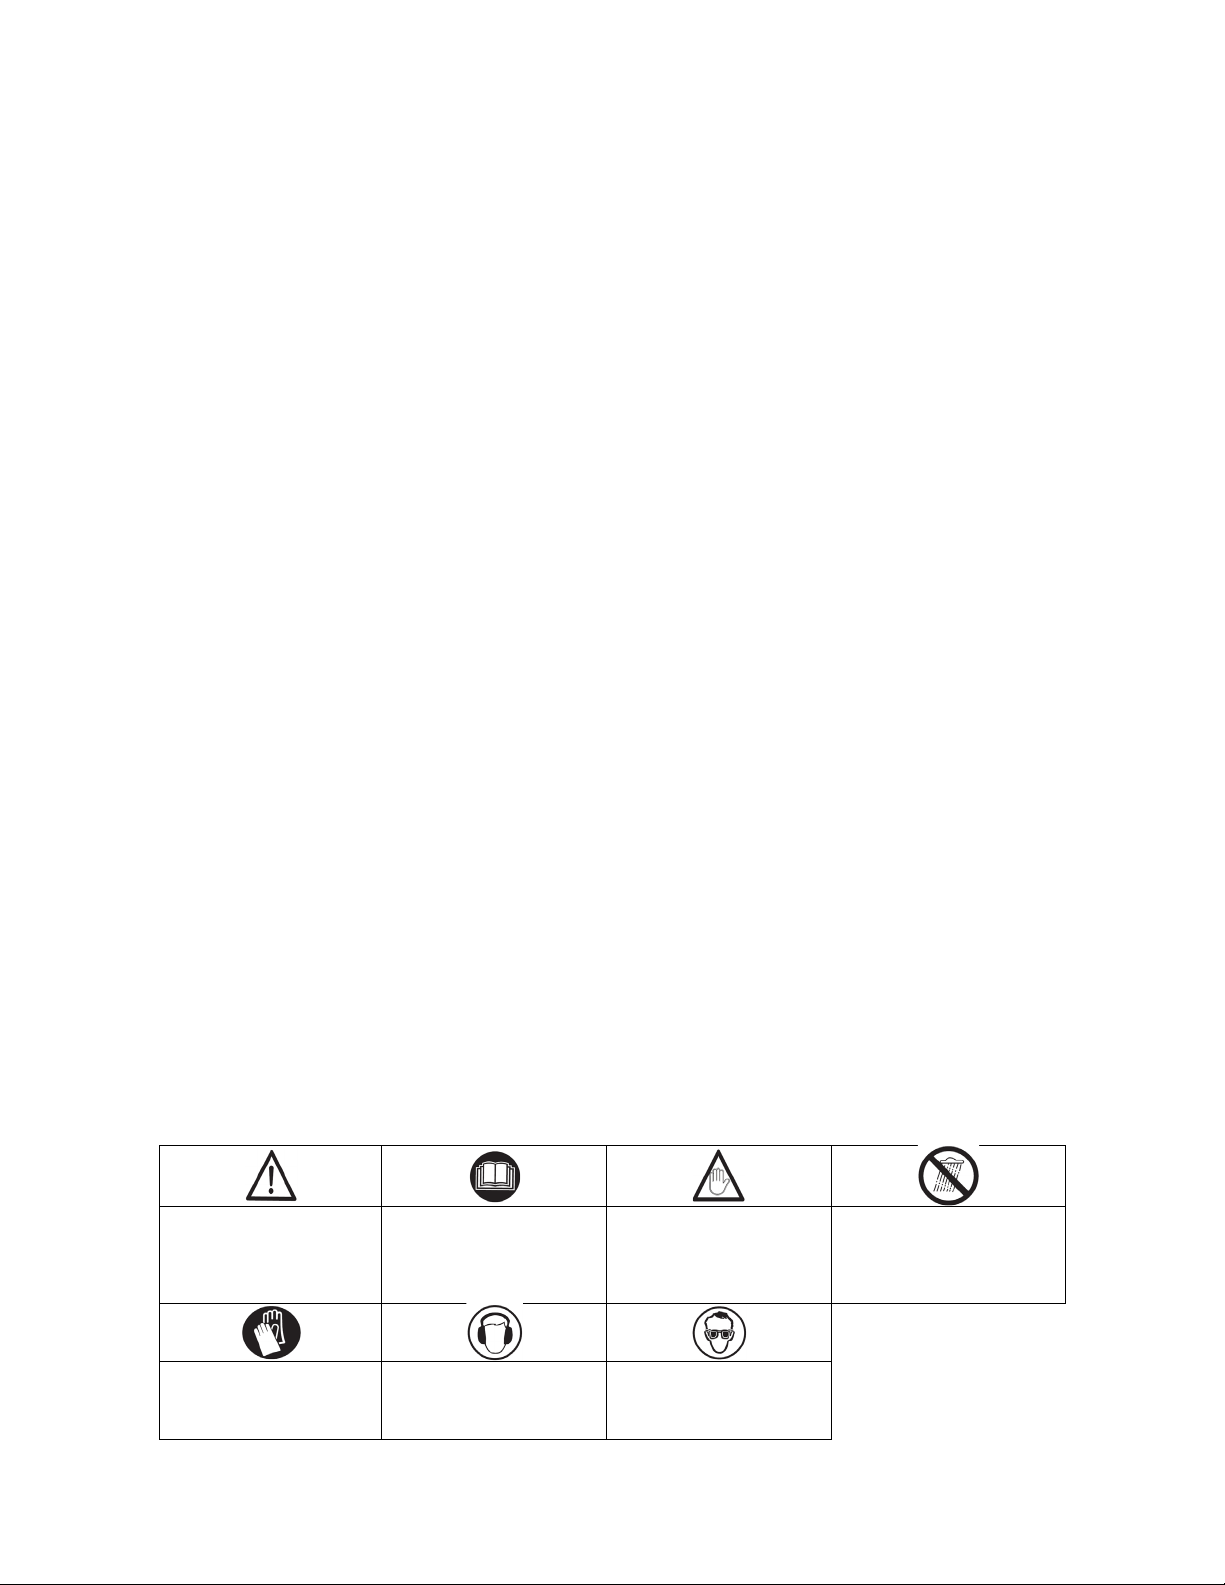
Safety symbols:
The following safety symbols may appear on this product. Please ensure you understand their
meanings before operating this tool in order to prevent personal injury and avoid damage to
the tool.
Protective gloves
must be worn when
Use precaution
for your safety
handling tools
to
read and
Ear protection
must be worn
Risk of injury.
Keep hands at a
safe distance
Eye protection
must be worn
3
Unsuitable weather.
Do not use in wet
conditions
Page 4
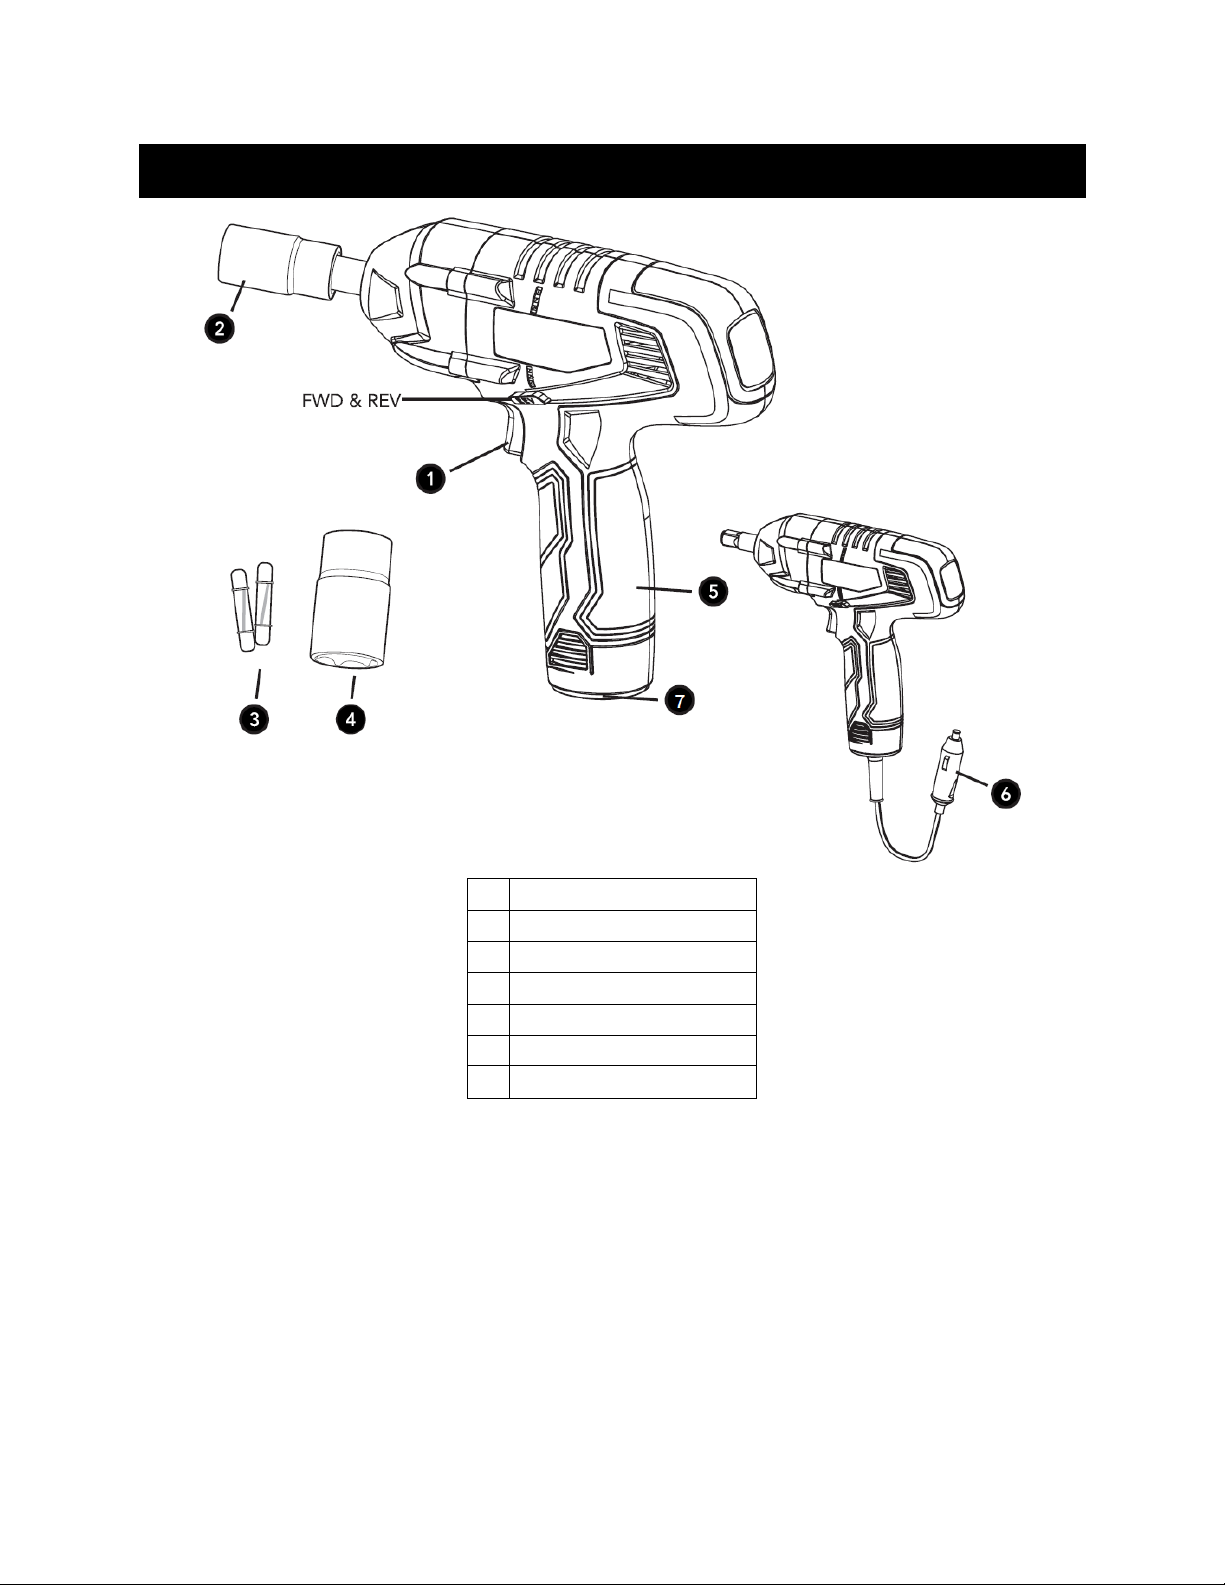
Overview
1
Switch trigger
2
17mm/19mm socket
3
15A fuse (x2)
4
21mm/23mm socket
5
Hand grip
6
12V cable with plug
7
Battery
4
Page 5
Installation
Installing the Socket
Caution: When removing the socket or bit from the tool, avoid contact with skin and use
proper protective gloves when grasping the socket, bit or accessory. Accessories may be hot
after prolonged use.
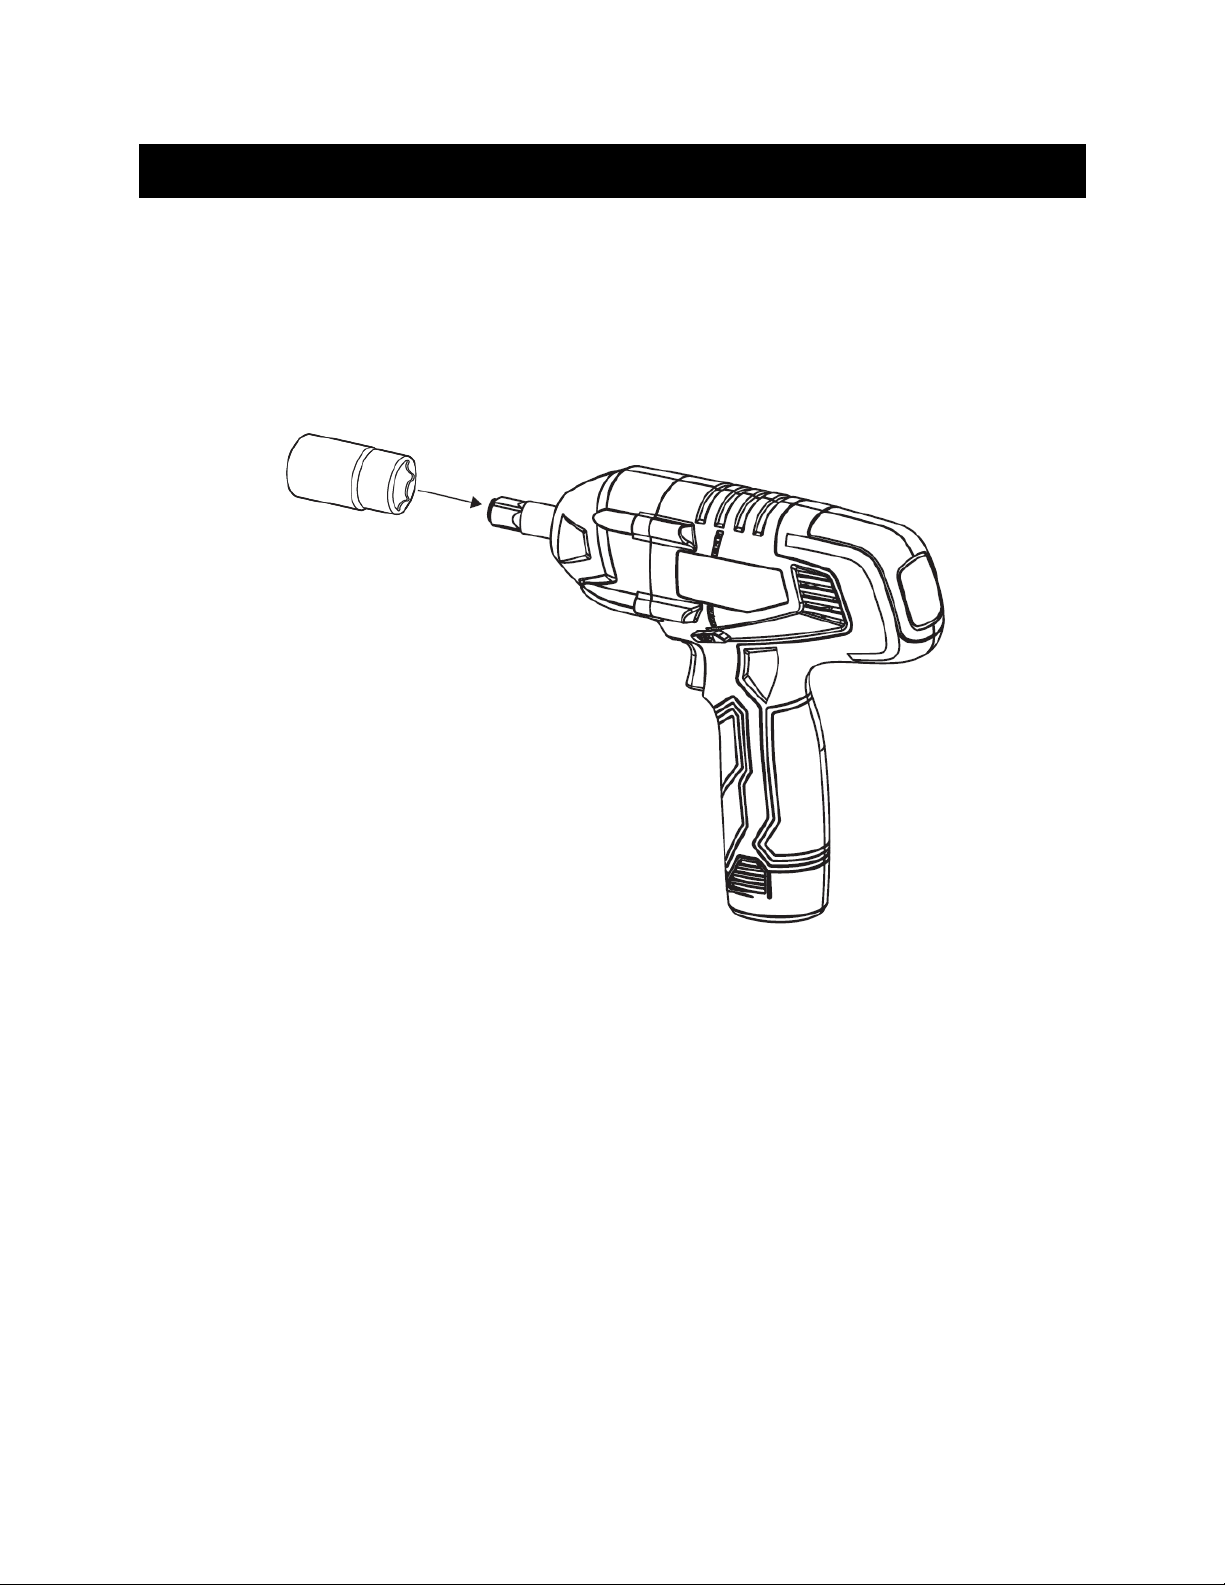
When installing a socket, align the holes in the side of the socket with the dent pin. Press the
socket until the dent pin engages in the hole.
To remove the socket, pull the socket off the driveshaft.
Removing Lug Nuts
Warning! Do not go underneath your vehicle without jack stands. Jacks are not designed to
maintain heavy loads for long periods of time.
1. Park vehicle in a safe outside location away from moving traffic. Always set the vehicle
parking brake and block the wheels so the vehicle will not move while the impact
wrench is in use.
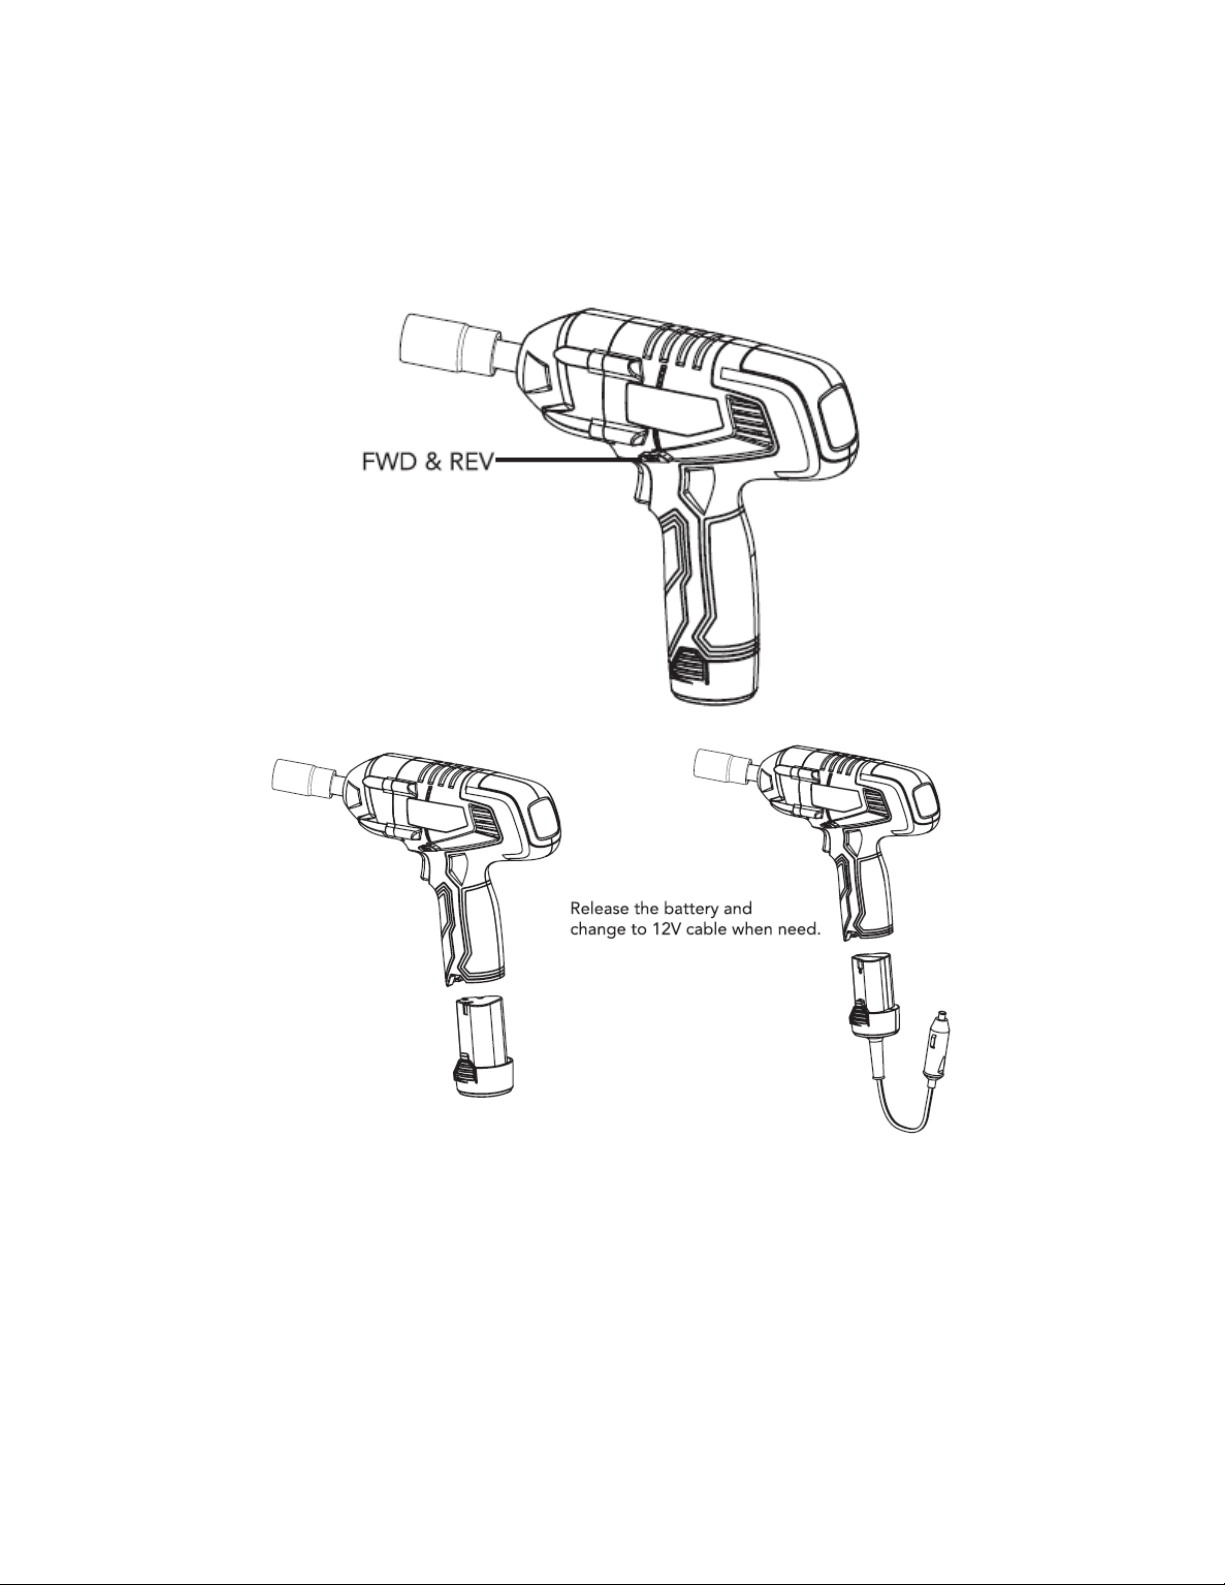
2. If you take off the battery and insert the 12V DC part to the device. Plug into your 12V
accessory socket.
3. Pick an impact socket that will fit the wheel lug nut. Press the socket onto the
driveshaft. Never use sockets that are not specifically designed for use with impact
wrenches.
4. Place a jack under the jacking point for the wheel to be removed and raise the vehicle.
5. Support the vehicle by placing jack stands at locations recommended by the vehicle
manufacturer.
6. Set the directional lever to “REV” and carefully loosen the lug nuts. Remove in the
order recommended by the manufacturer.
7. If the impact wrench cannot loosen the lug nut, use a breaker bar (not included) to
break the nut loose before trying again.
8. Remove the wheel.
5
Page 6
Reinstalling Lug Nuts
Important:
Warning! Do not get under the vehicle without jack stands. Jacks are not designed to
maintain heavy loads for long periods of time.
1. Lift wheel back into place.
2. Slide lug nuts onto the wheel bolts in the order recommended by the lug nut
manufacturer.
3. Set the directional lever to “FWD” and tighten the lug nuts by impact wrench. Keep
pressing the switch, then the device continuous FWD, until it stops working
automatically and the torque data will show as 000 at same time.
4. Use a torque wrench to check that the lug nuts are tightened enough as per the
manufacturer’s recommendations.
5. Remove jack stands. Carefully lower the vehicle and remove the jack. Unplug the
impact wrench and store.
It is highly recommended to use a torque wrench after use of the impact
wrench to correctly and safely set the wheel nut.
Replacing the Fuse
1. Twist off the upper cover of the 12V adapter tip.
2. Remove the faulty fuse.
3. Insert a new fuse of the same type and rating. (spare fuses are included in the case)
4. Twist the cover back onto the Adapter.
Operation
Charging the Battery
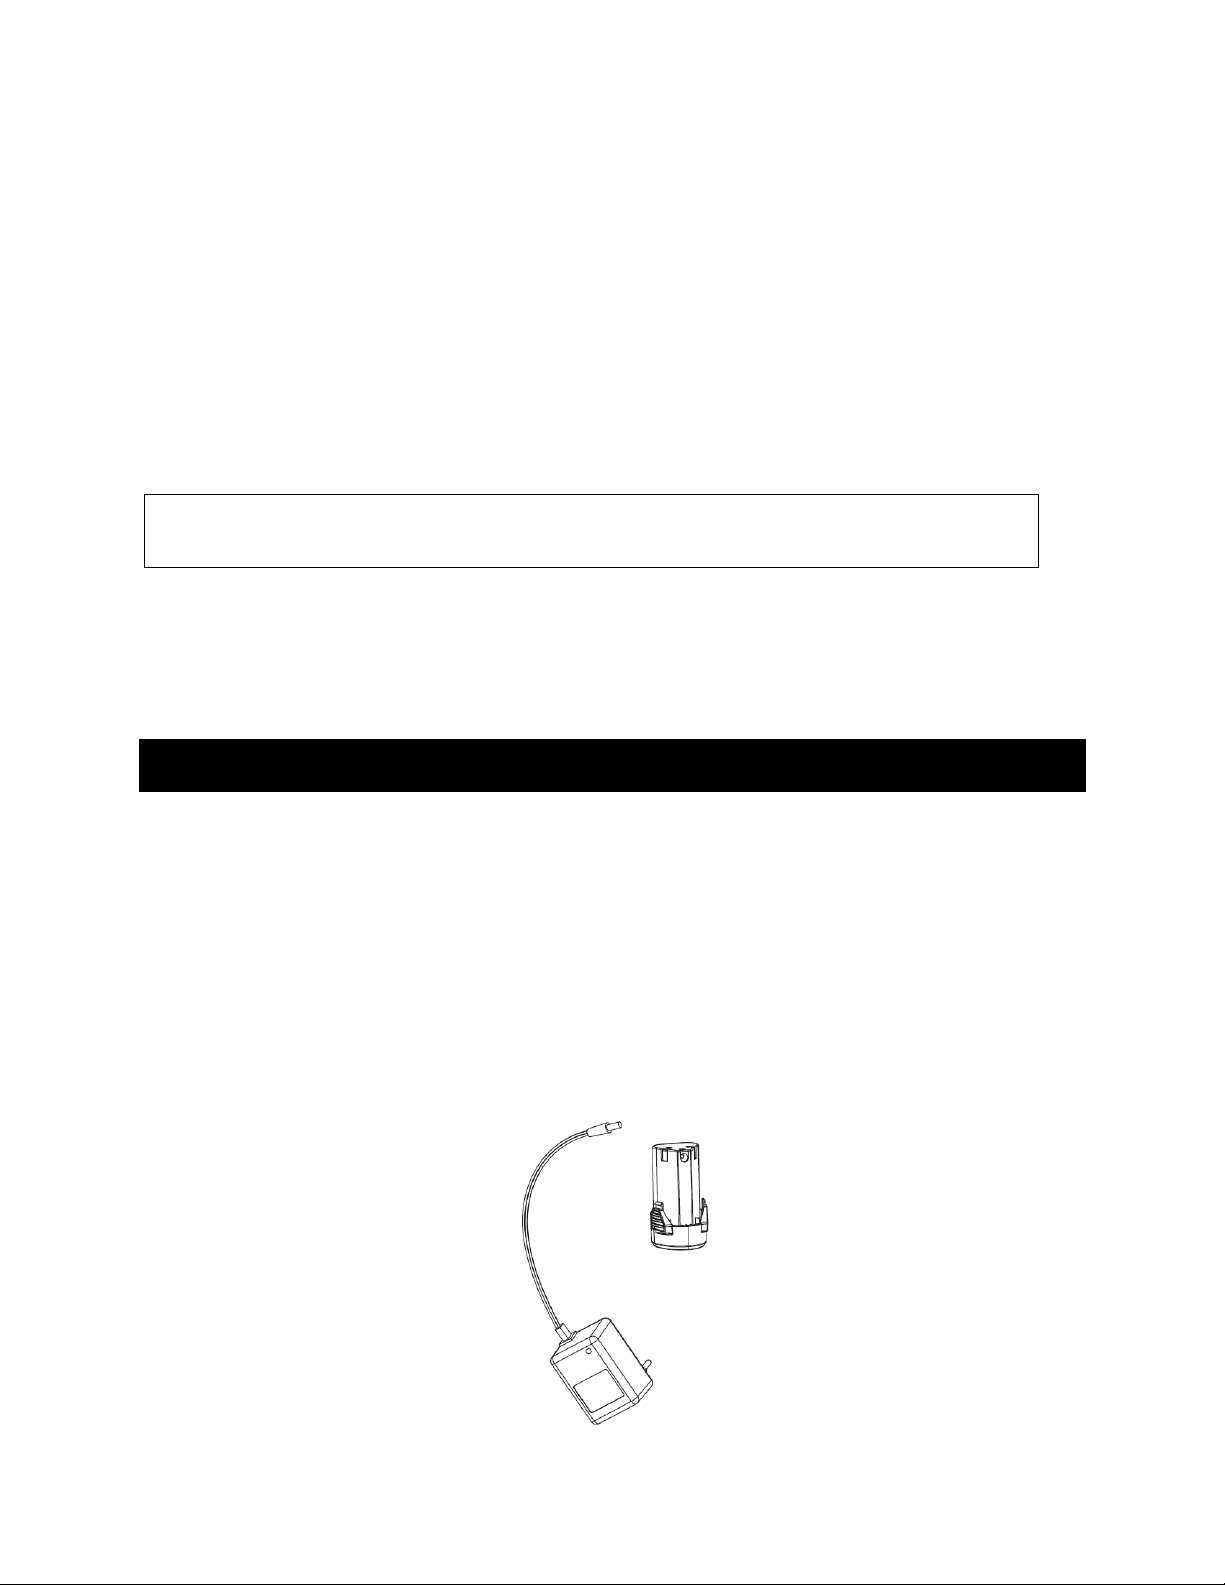
1. The battery of this device may be in a discharged state before first use, please charge
the battery until it is full. Charge the battery only with the supplied charger.
2. Make sure that the Voltage is 230V/120V AC/50Hz.
3. After about 90 minutes of continuous charging, the battery is fully charged. When the
light on the adaptor changes colour from red to green, the battery is full.
4. Do not set the charger in a place with extreme cold or heat. The device works best at
normal room temperature.
5. If the battery is fully charged, unplug the charger and take off the battery from the
charger.
6. If the device hasn’t been used for three months, test if it has enough charge and it
stays in the period of service life, and charge before using it.
6
Page 7
Direction Switch
1. Warning: Never tape the trigger switch down to provide continuous high speed. The
tool may fail under such conditions.
2. The impact wrench can move in two directions: Forward “FWD” for tightening.
Reverse “REV” for loosening.
7
Page 8
Cleaning & Care
Voltage
No load speed
Maximum
torque
Power
Output shaft
12V
4500rpm
(maximum)
400N·m
80W
1/2 inch
(1.27cm)
Problem
Solution
1. Check if the vehicle battery is dead
on to power the socket.
1. Ensure that the correct rotation direction has
1. Handle the tool and accessories with care and keep them clean to ensure an extended
product life.
2. Do not make any modifications to the tool. Repairs to the tool or power cord should
only be carried out by an authorised service technician.
3. Always disconnect the plug from the cigarette lighter or auxiliary outlet prior to
inspection or servicing of the 12V impact wrench.
4. Do not use caustic, abrasive or solvent-based products for cleaning.
5. Use a soft, dry cloth to wipe the tool clean.
6. Prevent oil or oil products from entering the plastic casing. The chemicals they contain
could corrode or damage the plastic.
7. Immediately wipe grease and oil-based grime off the tool and accessories with a
slightly damp cloth.
8. Store idle power tools out of reach of children and do not allow people unfamiliar with
the power tool or these instructions to operate the 12V impact wrench.
Specifications
Troubleshooting
Tool does not start
A wheel nut cannot be unscrewed
or tightened
Disposal
This marking indicates that this appliance should not be disposed with other
household wastes. To prevent possible harm to the environment or human
health from uncontrolled waste disposal, recycle it responsibly to promote
the sustainable reuse of material resources.
User manual is subject to change without notice. For the latest version of your user manual, please visit
https://www.kogan.com/usermanuals/
2. Check if the 12V socket is faulty
3. Check the fuse in the 12V adapter of the wrench
4. Check if your vehicle requires the ignition to be
been selected
8
 Loading...