


MC XL

Cleaning and Maintenance
CEREC MC XL Premium Package / MC XL / MC X / MC
and inLab MC XL

2
Contents
Maintenance Schedule
Water System
Changing the Filter Bag (CEREC Suction Device)
Changing the HEPA Filter (CEREC Suction Device)
Using the Cleaning Hose and Wet Cleaning Process
Clamping Cones for Instruments
Manual Block Clamp
Ball Pressure Screw in Manual Block Clamp
Set Screw (MC and MC X only)
Chamber Door
Instruments
Calibration
Annual Maintenance
Approved Accessories
Important Order Numbers
Maintenance Documentation
Notes
Dear Customer,
Thank you for your purchase of a milling and grinding unit from Dentsply
Sirona. The purpose of this document is to assist you with conducting routine
cleaning and maintenance on your unit. This will result in optimizing the unit’s
performance and extending its lifetime.
Additionally, to keep up to date on the latest CEREC news and information,
we welcome you to visit https://my.cerec.com.
Your CEREC Team
Introduction
03 |
04 |
04 |
05 |
06 |
07 |
07 |
07 |
08 |
08 |
09 |
09 |
09 |
09 |
10 |
12 |
15 |
02
3
Maintenance Schedule
Before every wet machining process
• Ensure that the water and Dentatec solution completely covers
the filter(s) in the water tank
Weekly
• Change water in water tank and add 75ml Dentatec
Monthly
• Clean water filter monthly or as needed depending on
usage (change filter every 3-4 cleanings)
• Check and clean water jets to ensure that water is striking
the tools during wet machining
• Clean manual block clamp inside of the block axle
• Clean motor clamping cones for instruments without chuck
Yearly
• Annual maintenance carried out by a Service Technician
Dry milling zirconia only:
Every 10 dry milled zirconia restorations
• Vacuum chamber and run wet cleaning program
Every 120 dry milled zirconia restorations
• Change filter bag (change HEPA filter every 3-4 filter bags)
03

04
Change the water at least once a week or when prompted by the system after
240 minutes wet machining time.
• Add 75ml Dentatec to the tank
• Fill the tank with water until the filter(s) is/are completely immersed
(up to the bottom edge of the cover thread, approx. 3 liters)
Clean the filter(s) when changing the water or when the “water pressure too
low“ message appears. Remove the filter(s) from tank and hold under warm
water while washing out material.
Change the filter(s) immediately if damaged; otherwise every 3 months or
after 3-4 filter cleanings.
Clean the cooling water jets if they do not strike the machining instruments by
carefully removing any foreign particles from the water nozzles with a cleaning
wire or probe. This will help to extend the life of the instruments.
Water System
Changing the Filter Bag (CEREC Suction Device)
If there is a significant fall in suction power when dry milling zirconia, the filter
bag (REF 65 78 095) could be full and will need replacing. Typically a filter
bag should oer capacity for ca. 120 restoration units. This number can vary
depending on the amount of zirconia material milled and extracted. To change
the filter bag:
1. Loosen and remove the two knurled nuts on the maintenance cover.
2. Remove the cover.
3. Remove the full bag from the nozzle and replace with a new one.
4. Place the cover back on and screw tighten the two knurled nuts.
Note: ensure that the cap is sealed properly and the filter bag is not jammed.
Removing the cover
Replacing the filter bag
1
2
05
If the suction power is still weak after replacing the filter bag, then also
replace the HEPA filter (REF 63 85 277). The HEPA filter is located behind
the filter bag. It is recommended to change the HEPA filter every 3-4 filter
bags. This number can vary depending on the amount of zirconia material
milled and extracted. To change the HEPA filter:
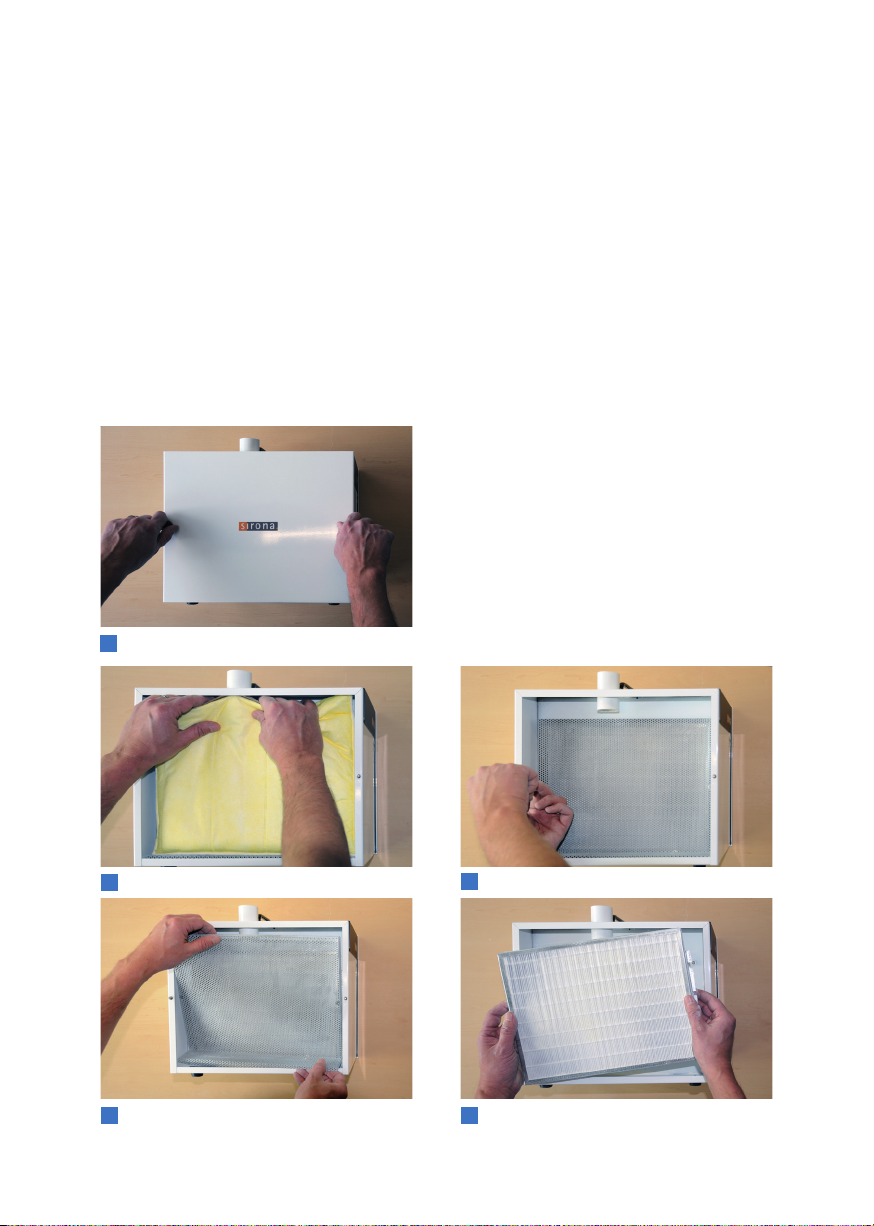
Changing the HEPA Filter (CEREC Suction Device)
1. Loosen and remove the two knurled nuts on the maintenance cover.
2. Remove the cover.
3. Remove the filter bag from the nozzle.
4. Then remove the two Phillips screws on the perforated sheet on the inside
of the suction device.
5. Take out the perforated sheet and remove the HEPA filter.
6. Place a new HEPA filter in the
designated area.
7. Insert the perforated sheet and
tighten the two Phillips screws.
8. Put the filter bag back on again.
9. Place the cover back on and
tighten the two knurled nuts.
Removing the cover
Removing the filter bag Unscrewing the Phillips screws
Removing the perforated sheet Replacing the HEPA Filter
4
1
3
2
5
 Loading...