

Page 1

1 I ENGLISH
INSTRUCTION MANUAL
MODEL # 44114
Page 2

1. INTRODUCTION
Thank you for purchasing the Celestron MicroSpin™ Digital Microscope. Please read this instruction manual carefully before
using this product and retain it for future reference. With proper care and maintenance, your microscope will provide you
years of service.
The MicroSpin Digital Microscope differs from a traditional optical microscope. Instead of an eyepiece, MicroSpin’s internal
camera sensor acts as a 10x eyepiece. The microscope connects to your computer via the USB 2.0 cable and the
magnified image of your specimen is displayed on your monitor. The integrated objective wheel has 6 objective lenses with
powers from 10x to 60x, resulting in 100x to 600x final magnification.*
You can capture and save still images and video to your computer using the included MicroSpin Digital Capture software.
*NOTE: The final magnification you can achieve depends on the size of your monitor—the larger the monitor, the higher the magnification.
Windows OS
• Windows 10 (32 bit or 64 bit)/Windows 7 (32 bit or 64
bit)/Windows XP SP2, SP3 systems/Windows Vista
(32 bit or 64 bit)
• CD-ROM drive
• CPU speed P4-1.8 GHz or above
• Minimum 512 MB RAM
• Minimum 8OO MB available hard disk space
Mac OS
• Mac OS X 10.4.8-Mac OS X systems 10.11.x
• CPU speed Power PC G3/G4/G5 or Intel-based
• CD-ROM drive
• Minimum 128 MB RAM
• Minimum 800 MB available hard disk space
• Available USB 2.0 port
• Available USB 2.0 port
SPECIFICATIONS
Magnification Powers 100x, 200x, 300x, 400x, 500x, 600x
Sensor 2 MP CMOS
Image File Format JPEG
Video Capturing Resolution 320 x 240, 640 x 480
Effective observation area Objective lens 100x = 3.6 x 2.70 mm
OS systems supported
Connection Type USB
Power 5V, 250 mA (through USB cable connected to computer)
Illuminators Upper and lower LED
Size 8.19in. x 5.12in. x 6.02in. / 208mm x 130mm x 153mm
Weight 0.77 lbs / 350 g
Objective lens 200x = 1.8 x 1.40 mm
Objective lens 300x = 1.2 x 0.90 mm
Objective lens 400x = 0.9 x 0.70 mm
Objective lens 500x = 0.7 x 0.50 mm
Objective lens 600x = 0.6 x 0.45 mm
Windows 10/7/XP/Vista
Mac OS X 10.4.8x - Mac OS X 10.11x
2 I ENGLISH
Page 3

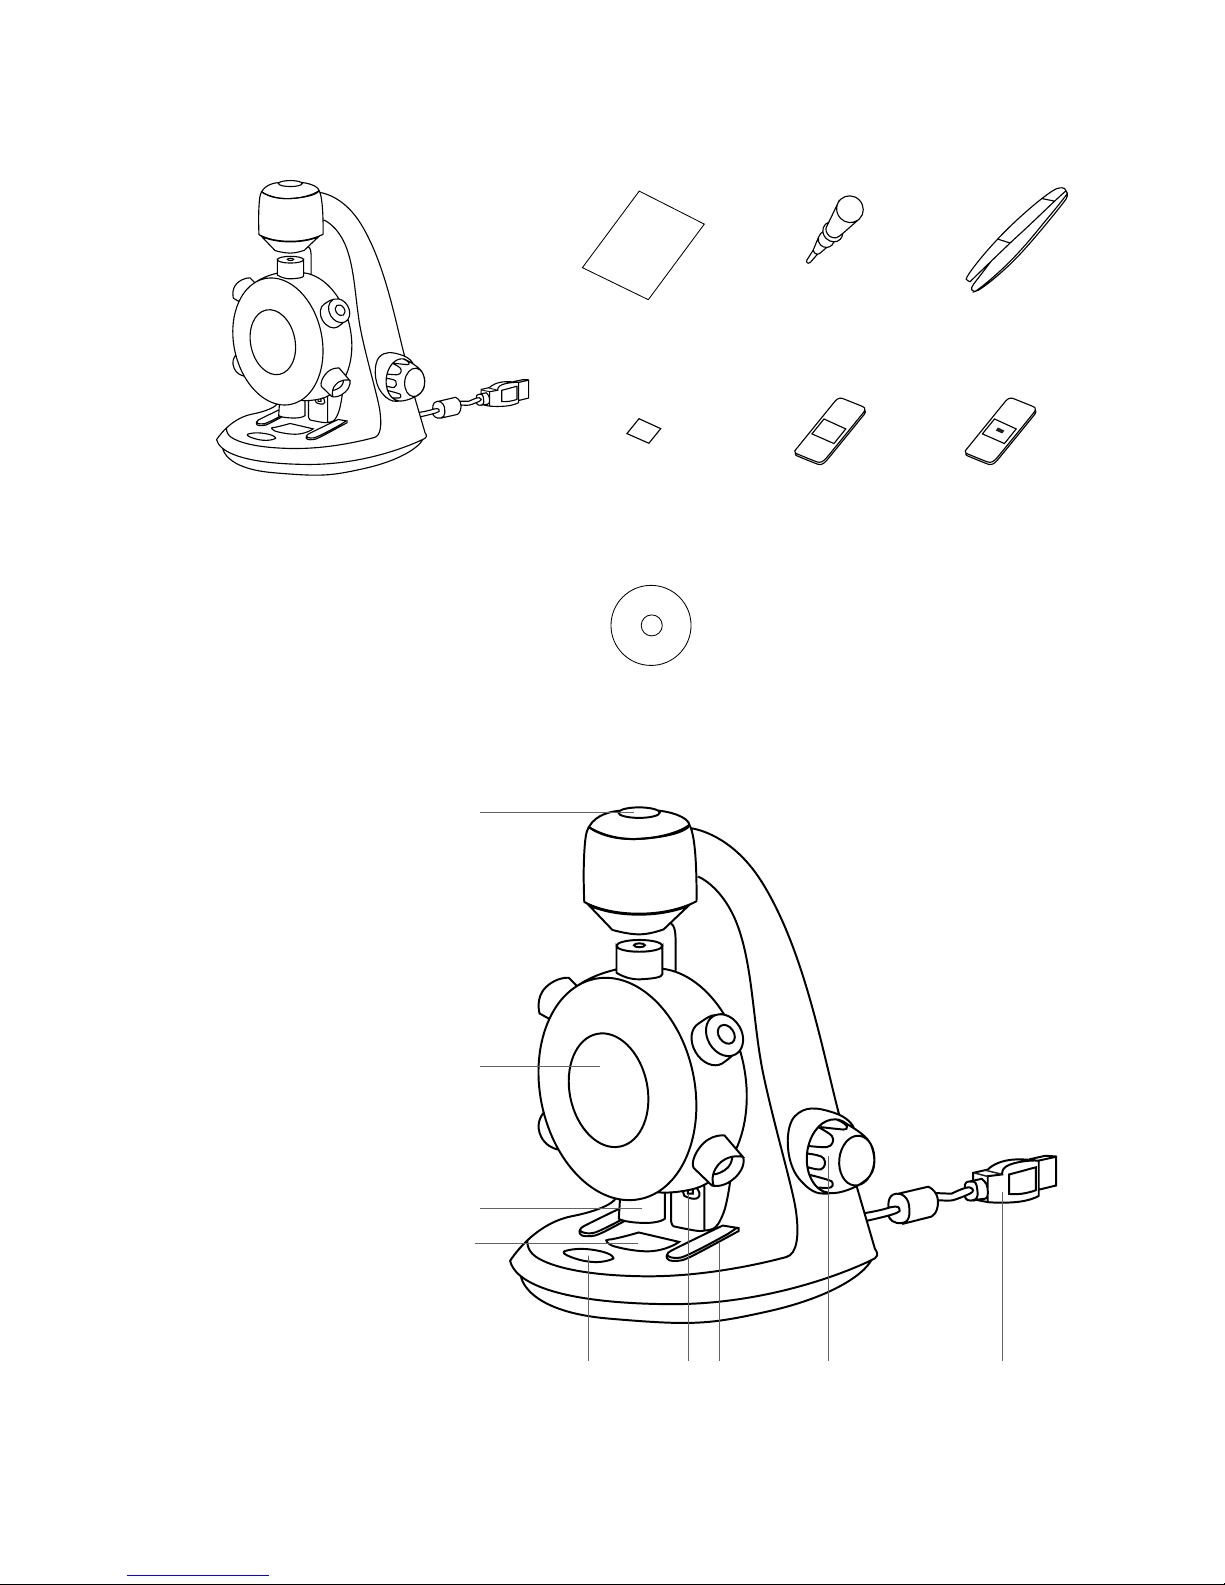
IN THE BOX
MicroSpin Digital
Microscope (1)
PARTS
1. Shutter trigger button
2. Objective wheel
3. Objective lenses (6)
4. Stage and lower illuminator LED
5. Illuminator selector switch
6. Upper iIluminator LED
7. Stage clips
8. Focus knob
9. USB cable
Guide
(3) Blank specimen
slide cover slips
(1) MicroSpin Digital
Capture software
(3) Blank specimen
slides
(1) Tweezers(1) Eye dropper(1) Quick Set-up
(1) Prepared slide
with cotton
swatch
1
2
3 I ENGLISH
3
4
5 8 96 7
Page 4

2. GETTING STARTED
SOFTWARE INSTALLATION
Windows OS
1. Insert the supplied MicroSpin Digital Capture CD to the
computer’s CD-ROM drive.
2. Double click the “MicroSpin Digital Capture.exe” icon within
the CD.
3. Follow the MicroSpin Digital Capture software wizard to
complete the installation.
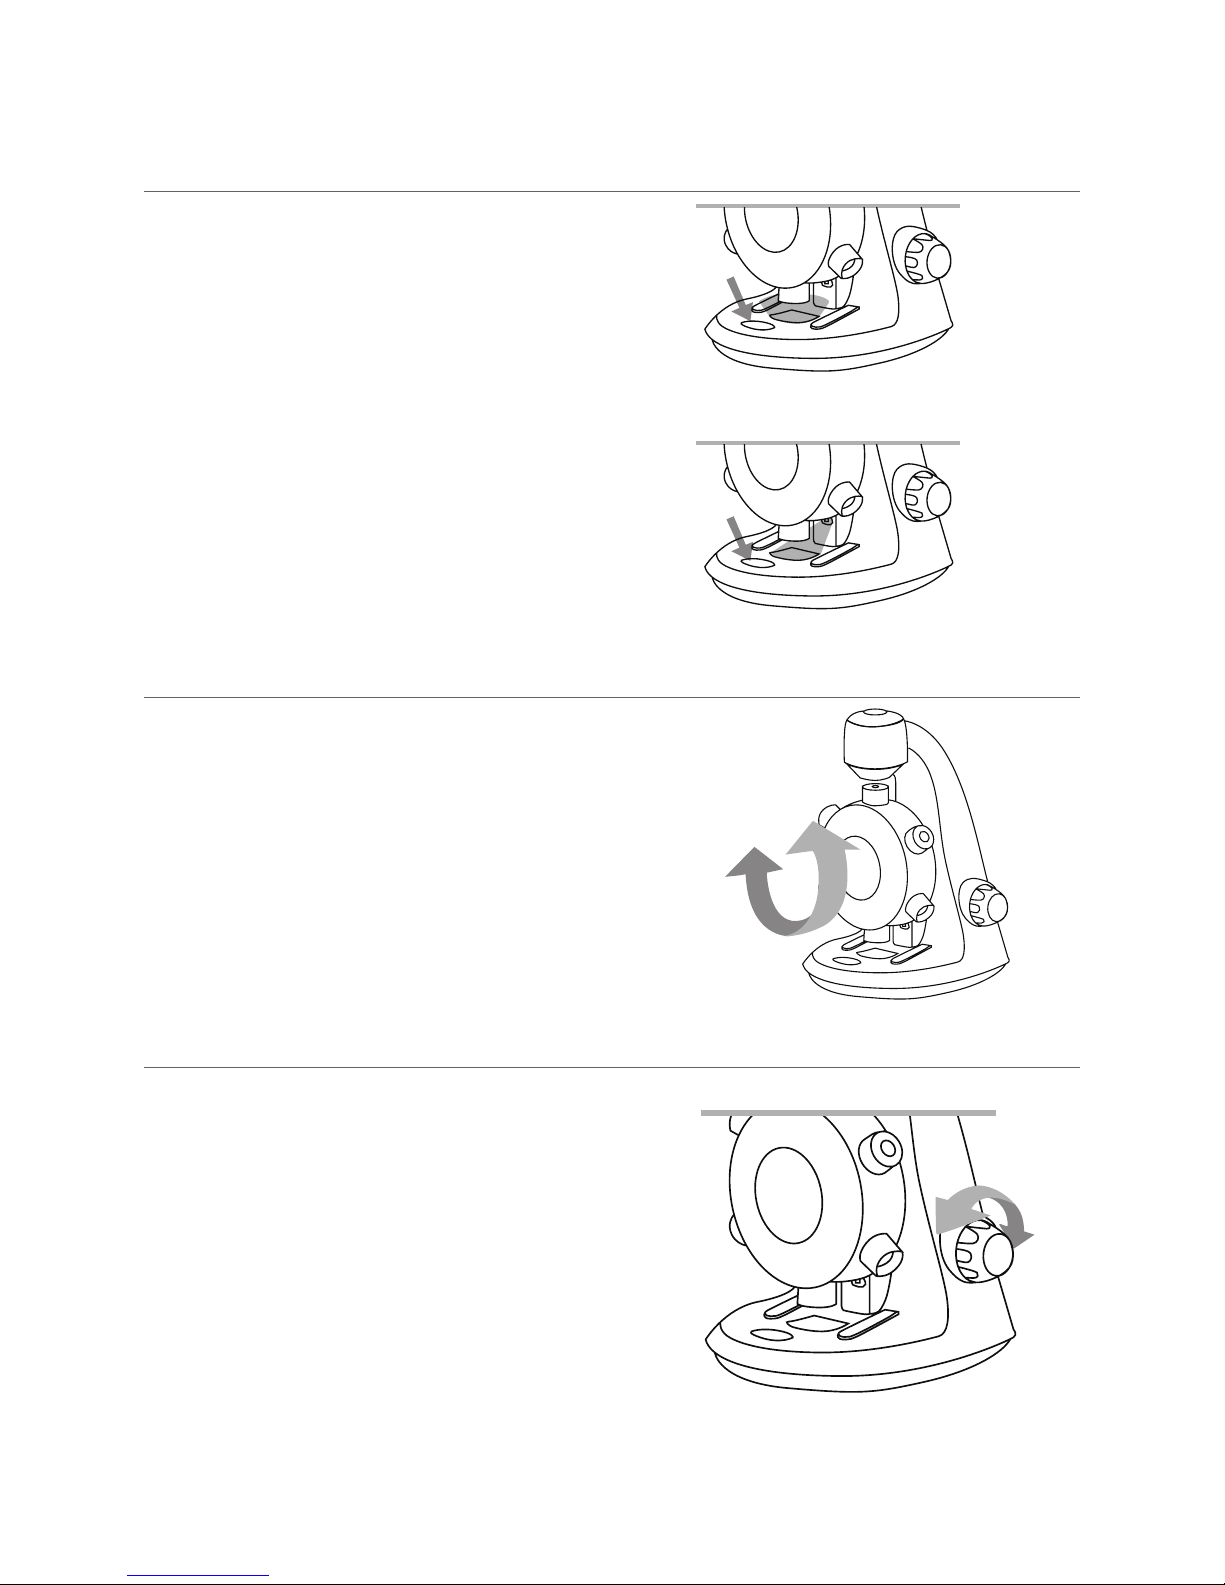
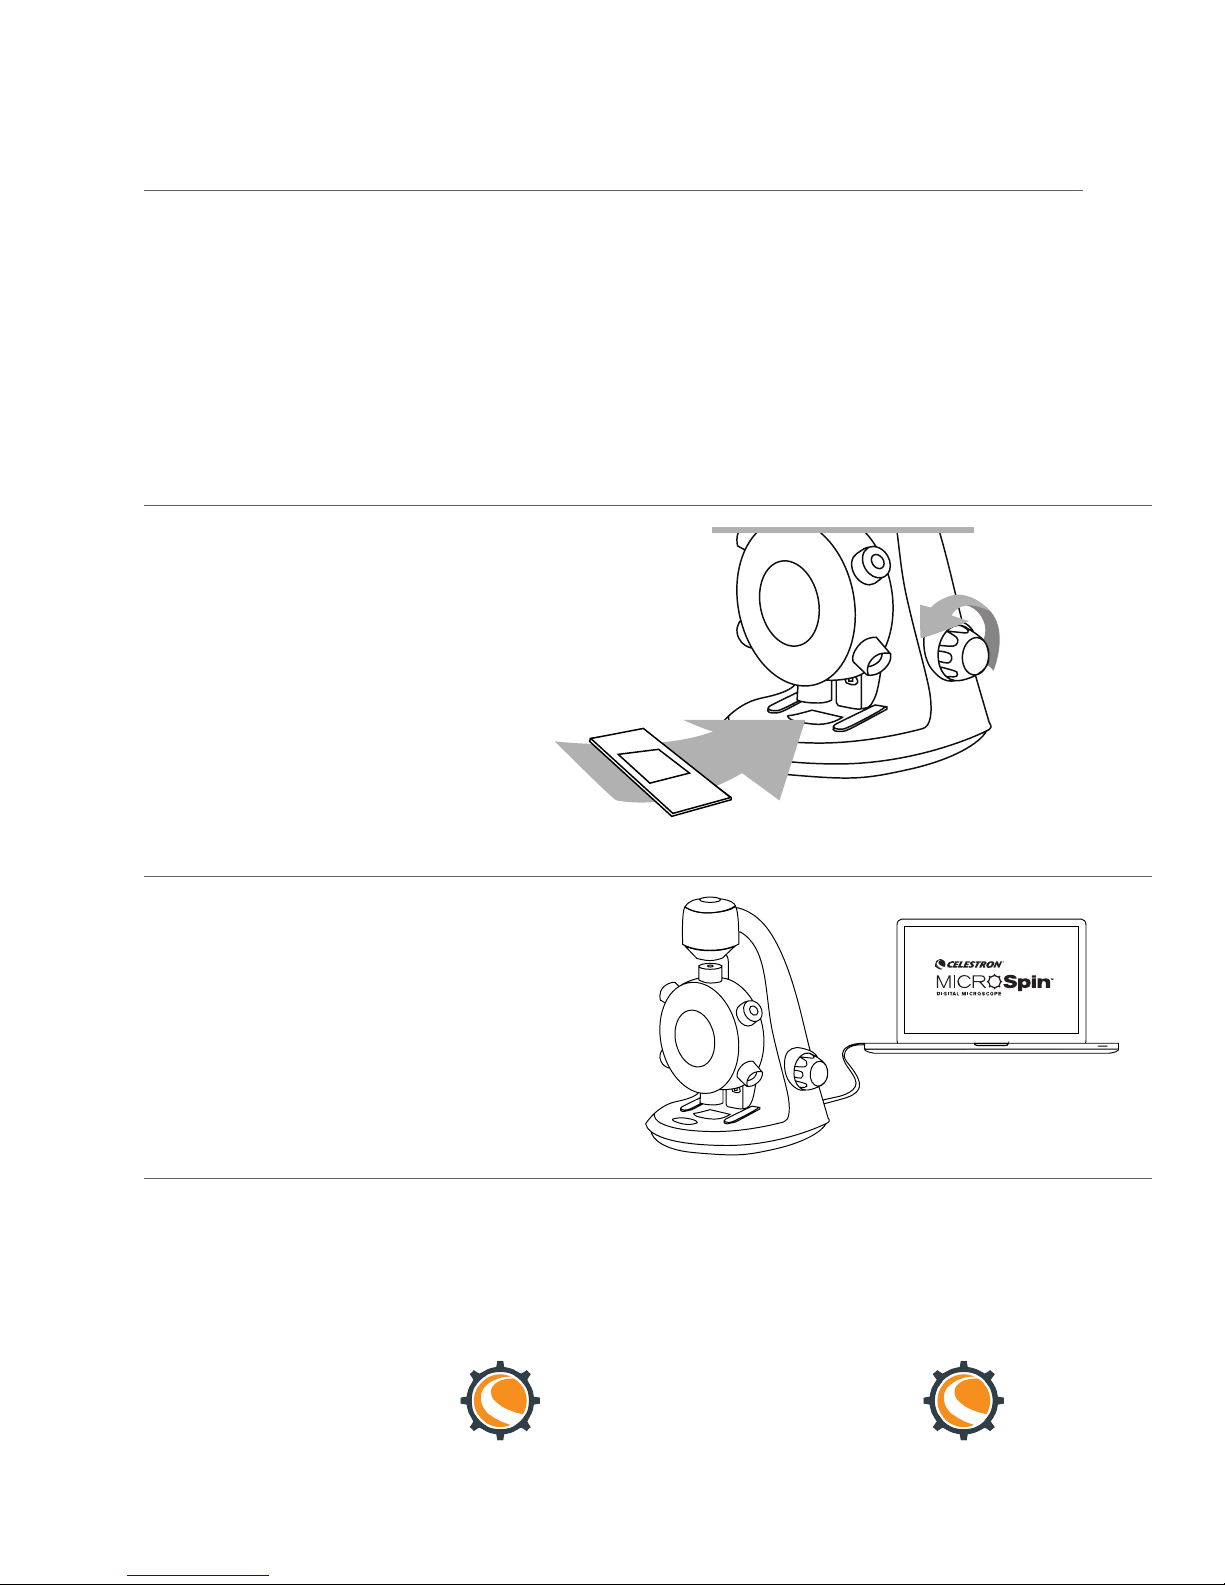
INSTALLING A SPECIMEN SLIDE
• Raise the objective wheel (2) by turning the focus knob (8)
counter-clockwise until it stops.
• Place a prepared specimen slide on the specimen stage (4)
and secure it in place with the stage clips (7).
Mac OS
1. Insert the supplied MicroSpin Digital Capture CD to the
computer’s CD-ROM drive.
2. Double click the “MicroSpin Digital Capture.dmg” icon
within the CD.
3. Drag the MicroSpin Digital Capture Viewer icon into the
Applications folder.
CONNECTING THE DEVICE
• Connect the device to the computer by plugging the USB 2.0
cable into an open USB port on your PC.
STARTING THE DIGITAL CAPTURE
SOFTWARE
Windows OS
Launch the MicroSpin Digital Capture software by double
clicking the desktop icon from the desktop, or from the start
menu {Start > All Programs > MicroSpin Digital Capture >
MicroSpin Digital Capture}.
Mac OS
Launch the MicroSpin Digital Capture software by double
clicking the icon in the Applications menu.
MicroSpin Digital Capture MicroSpin Digital Capture
4 I ENGLISH
Page 5

SELECTING A LIGHT SOURCE
• This digital microscope contains an upper (6) and lower (4) LED
illuminator. Once connected to your computer, one of the lights will
turn on. Press the illuminator selector switch (5) to toggle between
the illuminators.
SELECTING A MAGNIFICATION POWER
• The objective wheel (2) can be rotated clockwise or counterclockwise. Rotate the wheel until the desired objective is directly
over the specimen and you feel a ‘click.’ This means the objective
lens is correctly aligned.
FOCUSING
• The Focus knob (8) can be rotated clockwise or counter-clockwise.
Rotate the focusing knob (8) while viewing the streaming image on
the computer monitor. Stop when the image is in focus.
NOTE: Make sure that the objective is clear from obstructions and does not hit the specimen slide
while lowering the objective’s wheel during focusing.
5 I ENGLISH
Page 6

3. USING THE DIGITAL CAPTURE SOFTWARE
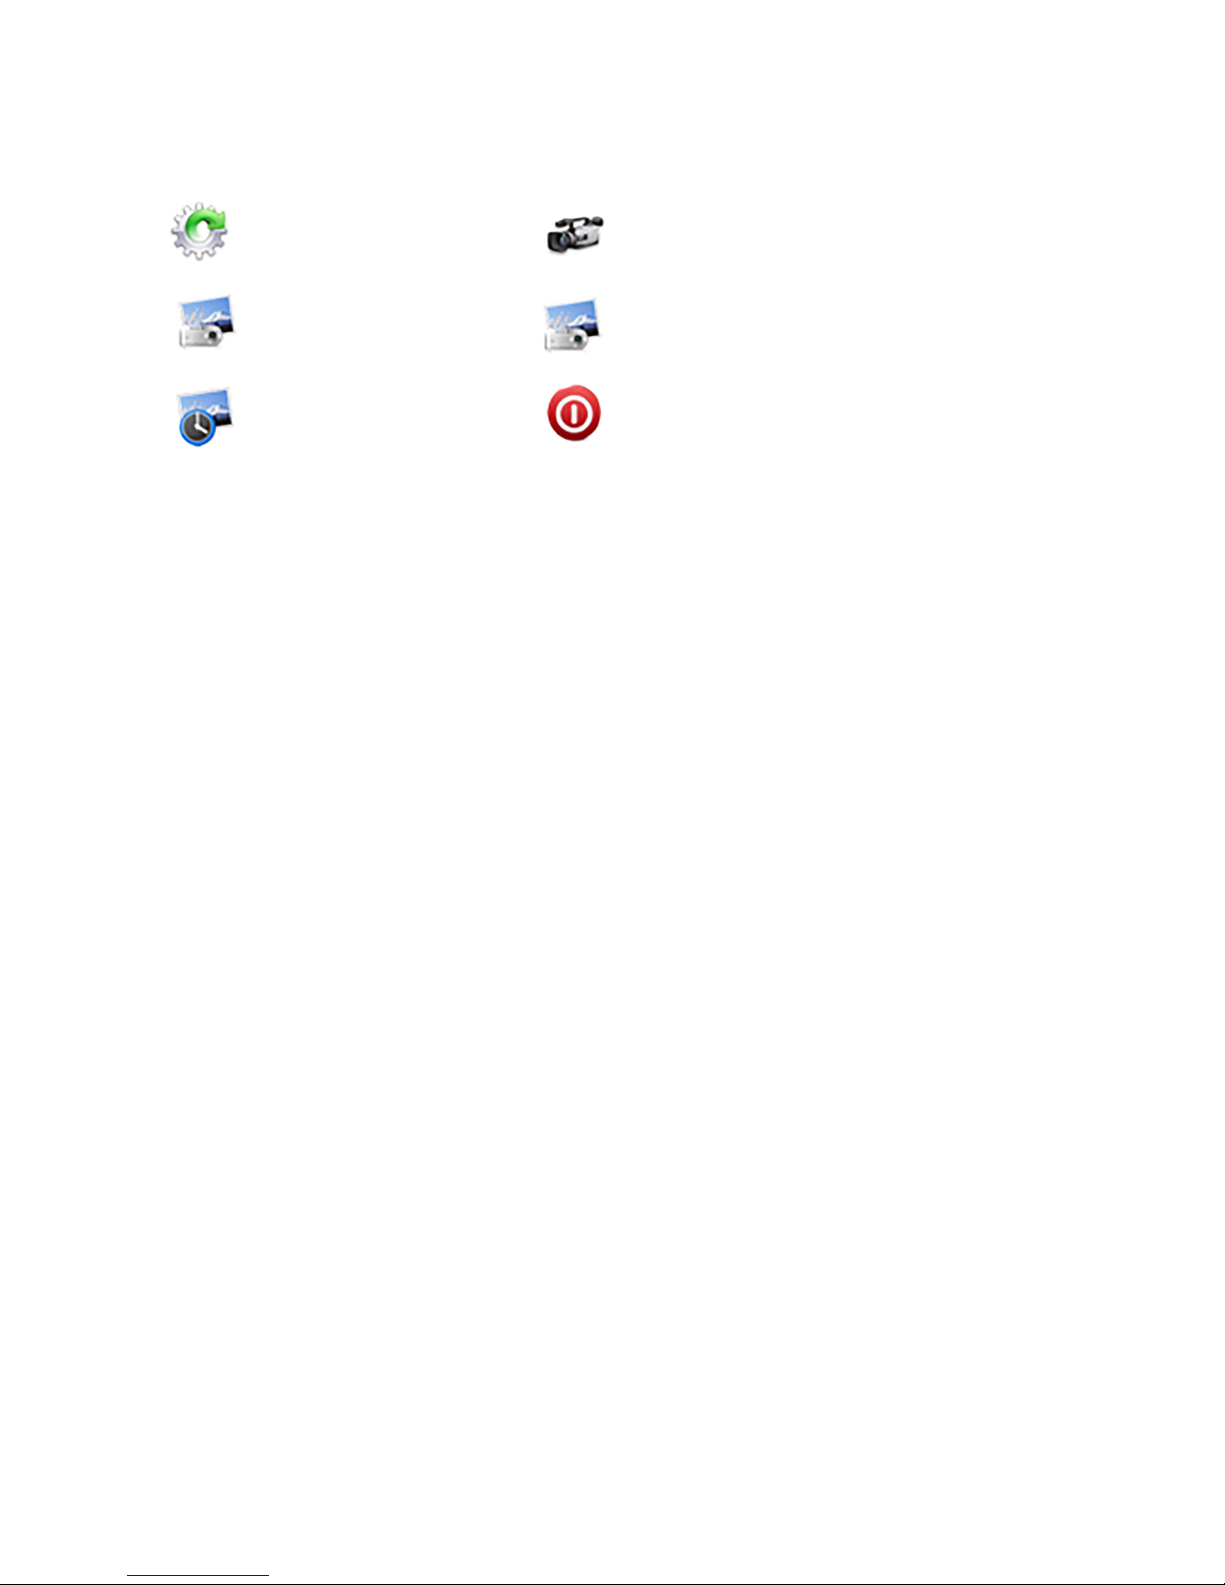
MAIN WINDOW ICONS
Settings icon
Shutter trigger
Timer
Video Record/Stop
Information
Power off
SYSTEM SETTINGS MENU
The first time the MicroSpin Digital Capture software is started, the default settings will be loaded, and you may change these settings
manually in the system settings menu.
Device - Choose your video streaming device (in this case the MicroSpin Digital Microscope).
Resolution - Change the capture resolution settings here.
Timed shot setup - Setup automatic image capture here.
Movie setup - Choose your video resolution here (640x480 or 320x240).
Save setting - Choose the destination folder on your computer where all images and video will be saved.
Language setting - The language of the MicroSpin Digital Capture software can be changed using this setting.
Advanced settings - Clicking the “More…” button on the right of the system settings menu will allow you to manually adjust all of
the image settings.
These may include:
- Brightness
- Contrast
- Hue
- Saturation
- Sharpness
NOTE: These settings available may vary depending on your operating system.
Saved files - With the MicroSpin Digital Capture software open, you can locate the saved files folder by clicking the “More… “ button
located on the left of the main window.
Full screen - To activate full screen mode, click the full screen button located in the bottom right hand comer of the MicroSpin Digital
Capture software window.
- To exit full screen mode, either double click on the screen, or press the “Esc” button on the keyboard.
- Gamma
- White Balance
- Backlight comp
- Gain
6 I ENGLISH
Page 7

CARE AND MAINTENANCE
• Keep the device dry and protect it from water or vapor.
• Do not leave your device in a place with an extreme high or low temperature.
• Do not touch the device with wet hands. Doing so may damage the device or cause an electric shock to the user.
• Do not use or store the device in dusty, dirty areas as its moving parts may be damaged.
• Do not use harsh chemicals, cleaning solvents or strong detergents to clean the device. Instead, wipe it with a soft cloth slightly dampened in a mild soapand-water solution.
WARNING
• Do not look into the digital microscope’s illuminators. Doing so may cause permanent eye damage.
• Do not attempt to open or dismantle the digital microscope.
LEGAL INFORMATION
This document is published without any warranty. While the information provided is believed to be accurate, it may include errors or inaccuracies. In no
event shall the manufacturer or its distributors be liable for incidental or consequential damages of any nature, including but not limited to loss of profits or
commercial loss, arising out of the use of the information in this document. Intel is a trademark of Intel Corp. In the U.S. and other countries. Mac, Mac OS
and OS X are trademarks of Apple Inc., registered In the U.S. and other countries.
WARRANTY
Your MicroSpin Digital Microscope has a two year limited warranty. Please visit the Celestron website for detailed
information on all Celestron microscopes:
© 2015 Celestron • All rights reserved. • celestron.com
2835 Columbia Street • Torrance, CA 90503 U.S.A.
Telephone: 1(800) 421-9649 • Printed in China 2013
FCC Note: This equipment has been tested and found to comply with the limits for a Class B digital device, pursuant to part 15 of the FCC Rules. These limits are designed to provide reasonable protection against
harmful interference in a residential installation. This equipment generates, uses, and can radiate radio frequency energy and, if not installed and used in accordance with the instructions, may cause harmful
interference to radio communications. However, there is no guarantee that interference will not occur in a particular installation. If this equipment does cause harmful interference to radio or television reception,
which can be determined by turning the equipment off and on, the user is encouraged to try to correct the interference by one or more of the following measures:
+ Reorient or relocate the receiving antenna.
+ Increase the separation between the equipment and receiver.
This product is designed and intended for use by those 14 years of age and older. Product design and specifications are subject to change without prior notification.
V.2
+ Connect the equipment into an outlet on a circuit different from
that to which the receiver is connected.
+ Consult the dealer or an experienced radio/TV technician for help.
7 I ENGLISH
Page 8

MICROSCOPE NUMÉRIQUE
8 I FRANÇAIS
GUIDE DE L’UTILISATEUR
MODÈLE NO 44114
Page 9

1. INTRODUCTION
Nous vous remercions pour l’achat du microscope numérique Celestron MicroSpin™. Veuillez lire ce manuel attentivement
avant d’utiliser ce produit et conservez ce manuel pour référence ultérieure. Vous pourrez profiter de l’utilisation de votre
télescope pendant de nombreuses années si vous en prenez soin et en faites l’entretien de manière adéquate.
Votre microscope numérique MicroSpin diffère d’un microscope optique traditionnel. Le MicroSpin est muni d’un capteur
de caméra interne servant d’oculaire 10x. Le microscope se connecte à votre ordinateur via le câble USB 2.0 et l’image
agrandie de votre spécimen est affichée sur votre écran. Le revolver porte-objectifs intégré est doté de 6 lentilles d’objectif
ayant des puissances de 10x à 60x et qui permettent d’obtenir un grossissement final de 100x à 600x.*
Vous pouvez capturer et enregistrer des images fixes et de la vidéo sur votre ordinateur en utilisant le logiciel MicroSpin
Digital Capture, lequel est inclus.
*REMARQUE: Le grossissement final que vous pouvez obtenir dépend de la taille de votre écran, plus l’écran est grand, plus le grossissement sera élevé.
Windows OS
• Windows 10 (32 bits ou 64 bits) / Windows 7 (32
bits ou 64 bits) / Systèmes Windows XP SP2, SP3 /
Windows Vista (32 bits ou 64 bits)
• Lecteur de CD-ROM
• Processeur P4-1,8 GHz ou de vitesse supérieure
• Minimum de 512 Mo RAM
• Minimum de 800 Mo disponibles sur le disque dur
Mac OS
• Systèmes Mac OS X 10.4.8 à Mac OS X 10.11.x
• Vitesse de processeur Power PC G3/G4/G5 ou
processeur Intel
• Lecteur de CD-ROM
• Minimum de 128 Mo RAM
• Minimum de 800 Mo disponibles sur le disque dur
• Un port USB 2.0 libre
• Un port USB 2.0 libre
CARACTÉRISTIQUES
Grossissements 100x, 200x, 300x, 400x, 500x, 600x
Capteur CMOS 2 Mpx
Format de fichier d'image JPEG
Résolution de capture vidéo 320 x 240, 640 x 480
Champ d'observation efficace Lentille d’objectif 100x = 3,6 x 2,70 mm
Systèmes d'exploitation pris en charge Windows 10/7/XP/Vista
Type de connexion USB
Alimentation 5 V, 250 mA (par le câble USB connecté à l’ordinateur)
Lampes Supérieure et inférieure à DEL
Dimensions 8,19 po x 5,12 po x 6,02 po / 208 mm x 130 mm x 153 mm
Poids 350 g / 0,77 lb
Lentille d’objectif 200x = 1,8 x 1,40 mm
Lentille d’objectif 300x = 1,2 x 0,90 mm
Lentille d’objectif 400x = 0,9 x 0,70 mm
Lentille d’objectif 500x = 0,7 x 0,50 mm
Lentille d’objectif 600x = 0,6 x 0,45 mm
Mac OS X 10.4.8x - Mac OS X 10.11x
9 I FRANÇAIS
Page 10

CONTENU DE LA BOÎTE
(1) MicroSpin Digital
Microscope
COMPOSANTS
1. Déclencheur
2. Revolver porte-objectifs
3. Lentilles d’objectif (6)
4. Platine et lampe à DEL inférieure
5. Commutateur de sélection de lampe
6. Lampe à DEL supérieure
7. Valets
8. Molettes de mise au point
9. Câble USB
rapide
(3) Lamelles vides
(1) MicroSpin Digital
Capture software
(3) Lames porte-objets
vides
(1) Pince(1) Compte-gouttes(1) Guide ’installation
(1) Lame préparée
avec échantillon
de coton
1
2
10 I FRANÇAIS
3
4
5 8 96 7
Page 11

2. MISE EN ROUTE
INSTALLATION DU LOGICIEL
Windows OS
1. Placez le CD du logiciel MicroSpin Digital Capture dans le
lecteur de CD-ROM de votre ordinateur.
2. Double-cliquez sur l’icône « MicroSpin Digital Capture.exe »
que l’on retrouve sur le disque compact.
3. Suivez les instructions de l’assistant de configuration Digital
Capture pour terminer l’installation.
INSTALLATION D’UNE LAME
PORTE-OBJETS
• Élevez le revolver porte-objectifs (2) en tournant la molette
de mise au point (8) dans le sens antihoraire jusqu’en fin de
course.
• Placez une lame porte-objets préparée sur la platine (4) et
fixez-la en place à l’aide des valets (7).
Mac OS
1. Placez le CD du logiciel MicroSpin Digital Capture dans le
lecteur de CD-ROM de votre ordinateur.
2. Double-cliquez sur l’icône « MicroSpin Digital Capture.dmg
» que l’on retrouve sur le disque compact.
3. Faites glisser l’icône MicroSpin Digital Capture Viewer
dans le dossier Applications.
CONNEXION DE L’APPAREIL
• Connectez le microscope à l’ordinateur en branchant le câble
USB 2 à un port USB disponible de votre ordinateur.
LANCEMENT DU LOGICIEL
DIGITAL CAPTURE
Windows OS
Lancez le logiciel MicroSpin Digital Capture en double cliquant
sur l’icône située sur le Bureau de l’ordinateur, ou depuis
le menu Démarrer {Démarrer > Tous les programmes >
MicroSpin Digital Capture > MicroSpin Digital Capture}.
MicroSpin Digital Capture MicroSpin Digital Capture
Mac OS
Lancez le logiciel MicroSpin Digital Capture en doublecliquant sur l’icône dans le menu Applications.
11 I FRANÇAIS
Page 12
SÉLECTION D’UNE
SOURCE LUMINEUSE
• Ce microscope numérique est muni d’une lampe supérieure (6)
et d’une lampe inférieure (4) à DEL. Une des lampes s’allume
lorsque le microscope est branché à l’ordinateur. Appuyez sur le
commutateur de sélection de lampes (5) pour choisir une des deux
lampes.
SÉLECTION D’UNE PUISSANCE DE
GROSSISSEMENT
• Le revolver porte-objectifs (2) peut être tourné dans le sens horaire
ou antihoraire.
Faites pivoter le revolver jusqu’à ce que la lentille désirée soit placée
directement au-dessus du spécimen et que vous sentiez un « clic ».
Ce « clic » confirme que la lentille est correctement alignée.
MISE AU POINT
• La molette de mise au point (8) peut être tournée dans le sens
horaire ou antihoraire.
Tournez la molette de mise au point (8) tout en regardant l’image
reproduite sur l’écran d’ordinateur. Arrêtez lorsque l’image est au
point.
REMARQUE : Assurez que l’objectif est dégagé et qu’il ne touche pas la lame porte-objets
12 I FRANÇAIS
lorsque vous abaisser le revolver porte-objectif pendant la mise au point.
Page 13
3. UTILISATION DU LOGICIEL DIGITAL CAPTURE
ICÔNES DE LA FENÊTRE PRINCIPALE
Icône des paramètres
Déclencheur
Minuteur
Enregistrement vidéo/Arrêt
Information
Mise hors tension
MENU DES PARAMÈTRES DU SYSTÈME
Au premier lancement du logiciel MicroSpin Digital Capture, les paramètres par défaut seront chargés, et vous pouvez changer ces
paramètres manuellement dans le menu des paramètres du système.
Appareil - Choisissez votre appareil de lecture vidéo en continu (dans ce cas le Microscope numérique MicroSpin).
Résolution - Modifiez ici les paramètres de résolution de capture.
Configuration du temps de capture - Configurez ici la capture d’image automatique.
Configuration vidéo - Choisissez ici votre résolution vidéo (640 x 480 ou 320 x 240).
Paramètre de sauvegarde - Choisissez le dossier de destination où toutes les images et vidéos seront sauvegardées
sur votre ordinateur.
Paramètre de langue - La langue du logiciel Digital Capture peut être modifiée à l’aide de ce paramètre
Paramètres avancés - La pression du bouton « Plus... » à droite du menu des paramètres du système vous permettra d’ajuster
manuellement tous les paramètres d’image.
Ces paramètres sont :
- Luminosité
- Contraste
-Teinte
-Saturation
-Netteté
REMARQUE: L’accessibilité à ces paramètres peut varier en fonction de votre système d’exploitation.
Fichiers sauvegardés - À l’aide du logiciel MicroSpin Digital Capture, vous pouvez localiser le dossier des fichiers sauvegardés en
cliquant sur le bouton « Plus... » situé à gauche de la fenêtre principale.
Plein écran - Pour activer le mode plein écran, cliquez sur le bouton plein écran situé dans le coin inférieur droit de la fenêtre du
logiciel MicroSpin Digital Capture.
- Pour quitter le mode plein écran, cliquez deux fois sur l’écran, ou appuyez sur la touche « Échap » [Esc] du clavier.
-Gamma
-Équilibrage des blancs
-Compensation de contre-jour
-Gain
13 I FRANÇAIS
Page 14

ENTRETIEN ET NETTOYAGE
• Gardez l’appareil au sec et protégez-le de l’eau ou de la vapeur.
• Ne laissez pas votre appareil dans un endroit où la température est très élevée ou très basse.
• Ne touchez pas à votre appareil lorsque vous avez les mains mouillées. Le faire dans ces conditions peut endommager l’appareil ou l’utilisateur peut être
victime d’une décharge électrique.
• N’utilisez pas l’appareil ou ne le rangez pas dans des endroits sales et poussiéreux, car ses pièces mobiles peuvent alors être endommagées.
• N’utilisez pas de produits chimiques corrosifs, de solvants de dégraissage ou de détergents puissants pour nettoyer l’appareil. Essuyez-le plutôt à l’aide
d’un chiffon doux légèrement humecté dans une solution à base d’eau et de savon doux.
AVERTISSEMENT
• Ne regardez pas directement les lampes du microscope numérique. Cela peut causer des dommages permanents aux yeux.
• Ne tentez pas d’ouvrir ou de démonter le microscope numérique.
MENTIONS LÉGALES
Ce document est publié sans aucune garantie. Nous considérons que les informations fournies sont précises, mais des erreurs ou inexactitudes pourraient
s’y retrouver. En aucun cas le fabricant ou ses distributeurs seront tenus responsables pour des dommages accessoires ou indirects de quelque nature,
y compris, mais non limité à, la perte de profits ou une perte commerciale, découlant de l’utilisation des informations contenues dans ce document. Intel
est une marque de commerce d’Intel Corp. aux États-Unis et dans d’autres pays. Mac, Mac OS et OS X sont des marques de commerce d’Apple Inc.,
enregistrées aux États-Unis et dans d’autres pays.
GARANTIE
Votre microscope MicroSpin Digital est couvert par une garantie limitée de deux ans. Veuillez consultez le site Web de Celestron pour obtenir des informations détaillées sur tous les microscopes Celestron.
© 2015 Celestron • Tous droits réservés. • celestron.com
2835 Columbia Street • Torrance, CA 90503 É.-U.
Téléphone : 1 (800) 421-9649 • Imprimé en Chine 2015
Remarque relative à la FCC : Cet équipement a été testé et jugé conforme aux limites établies pour un dispositif numérique de classe B, conformément à la partie 15 de la réglementation de la FCC. Ces limites
sont conçues pour fournir une protection raisonnable contre les interférences nuisibles dans une installation résidentielle. Cet équipement génère, utilise et peut émettre une énergie de fréquences radio et, s’il n’est
pas installé et utilisé conformément aux instructions, peut causer des interférences nuisibles aux communications radio. Cependant, il n’y a aucune garantie que des interférences ne se produiront pas dans une
installation particulière. Si cet équipement génère des interférences nuisibles à la réception de programmes de radio ou de télévision, ce qui peut être déterminé en allumant et éteignant l’équipement, l’utilisateur
est encouragé à essayer de corriger l’interférence à l’aide de l’une ou de plusieurs des mesures suivantes :
+ Réorientez ou déplacez l’antenne de réception.
+ Augmentez la distance séparant l’équipement et le récepteur.
+ Branchez l’équipement dans une prise de courant faisant partie
d’un circuit différent de celui sur lequel le récepteur est branché.
Ce produit a été conçu à l’intention des utilisateurs de 14 ans et plus. La conception et les caractéristiques du produit sont indiquées sous réserve de modifications sans préavis.
V.2
+ Consultez le détaillant ou un technicien radio ou TV d’expérience
pour de l’assistance.
14 I FRANÇAIS
Page 15

DIGITALES MIKROSKOP
15 I DEUTSCH
BEDIENUNGSANLEITUNGL
MODELL-NR. 44114
Page 16

1. EINLEITUNG
Vielen Dank für den Kauf des digitalen Mikroskops MicroSpin™ von Celestron. Bitte lesen Sie die Anweisungen sorgfältig
durch, bevor Sie das Produkt verwenden, und bewahren Sie sie für künftiges Nachschlagen auf. Mit der richtigen Pflege
und Instandhaltung wird Ihnen Ihr Mikroskop viele Jahre gute Dienste leisten.
Das digitale MicroSpin™-Mikroskop unterscheidet sich von traditionellen optischen Mikroskopen. Anstelle eines Okulars
fungiert die interne Kamera des MicroSpin™ als Okular mit 10-facher Vergrößerung. Das Mikroskop wird über ein USB
2.0-Kabel an Ihren Computer angeschlossen und das vergrößerte Bild wird auf Ihrem Bildschirm dargestellt. Der integrierte
Objektivrevolver mit 6 Objektiven von 10- bis 60-fachen Vergrößerungsleistungen bietet im Endeffekt eine 100- bis
600-fache Vergrößerung.*
Mit der inbegriffenen MicroSpin-Software für Digitalaufnahmen können Sie Bilder und Videos aufnehmen und auf Ihrem
Computer speichern.
*ANMERKUNG: Die letztendlich erreichbare Vergrößerung hängt von der Größe Ihres Monitors ab - je größer der Monitor, desto höher die Vergrößerung.
Windows OS
• Windows 10 (32 bit oder 64 bit)/Windows 7 (32 bit
oder 64 bit)/Windows XP SP2, SP3 System/Windows
Vista (32 bit oder 64 bit)
• CD-ROM-Laufwerk
• CPU-Geschwindigkeit P4-1,8 GHz oder mehr
• Minimum 512 MB RAM
• Minimum 800 MB verfügbarer Festplattenspeicher
• Verfügbarer USB 2.0-Port
Mac OS
• Mac OS X 10.4.8-Mac OS X Systeme 10.11.x
• CPU-Geschwindigkeit PC G3/G4/G5 oder Intelbasierend
• CD-ROM-Laufwerk
• Minimum 128 MB RAM
• Minimum 800 MB verfügbarer Festplattenspeicher
• Verfügbarer USB 2.0-Port
TECHNISCHE DATEN
Vergrößerungsleistungen 100x, 200x, 300x, 400x, 500x, 600x
Sensor 2 MP CMOS
Bilddateiformat JPEG
Videoauflösung 320 x 240, 640 x 480
Effektiver Betrachungsbereich: Objektiv 100x = 3,6 x 2,70 mm
Unterstützte OS-Systeme Windows 10/7/XP/Vista
Anschlussart USB
Leistung 5 V, 140 mA (Anschluss an den Computer via USB)
Beleuchtung Obere und untere LED
Size 20,80 cm x 13,00 cm x 15,30 cm /8,19 Zoll x 5,12 Zoll x 6,02 Zoll
Weight 0.77 lbs / 350 g
Objektiv 200x = 1,8 x 1,40 mm
Objektiv 300x = 1,2 x 0,90 mm
Objektiv 400x = 0,9 x 0,70 mm
Objektiv 500x = 0,7 x 0,50 mm
Objektiv 600x = 0,6 x 0,45 mm
Mac OS X 10.4.8x - Mac OS X 10.11x
16 I DEUTSCH
Page 17

PACKUNGSINHALT
(1) Digitales Mikroskop
MicroSpin
PARTS
1. Auslöser
2. Objektivrevolver
3. Objektive (6)
4. Objekttisch und untere
LED-Beleuchtung
5. Schalter für die
Beleuchtungseinstellung
6. Obere LED-Beleuchtung
7. T ischklammern
8. Fokussierknopf
9. USB-Kabel
zum Aufbau
(3) Leere Deckgläser
für Objektträger
(1) MicroSpin Digital
Capture software
(3) Leere Objektträger
(1) Pinzette(1) Pipette(1) Kurzanleitung
(1) Präparierte
Objektträger
mit Baumwolle
1
2
17 I DEUTSCH
3
4
5 8 96 7
Page 18

2. ERSTE SCHRITTE
SOFTWARE-INSTALLATION
Windows OS
1. Legen Sie die mitgelieferte MicroSpin-CD mit der Software
für Digitalaufnahmen in das DC-ROM-Laufwerk Ihres
Computers ein.
2. Doppelklicken Sie auf das Symbol “MicroSpin Digital
Capture.exe” der CD.
3. Folgen Sie für eine vollständige Installation den
Anweisungen des Installationsassistenten.
EINEN OBJEKTTRÄGER EINLEGEN
• Heben Sie den Objektrevolver (2) durch Drehen am
Fokussierknopf (8) gegen den Uhrzeigersinn bis zum
Anschlag an.
• Legen Sie einen vorbereiteten Objektträgt auf den Objekttisch
(4) und fixieren Sie ihn mithilfe der Tischklammern (7).
Mac OS
1. Legen Sie die mitgelieferte MicroSpin-CD mit der
Software für Digitalaufnahmen in das DC-ROM-Laufwerk
Ihres Computers ein.
2. Doppelklicken Sie auf das Symbol “MicroSpin Digital
Capture.dmg” der CD.
3. Ziehen Sie das Symbol des MicroSpin Digital Capture
Viewers ins Anwendungsfenster.
DAS GERÄT AN DAS STROMNETZ
ANSCHLIESSEN
• Schließen Sie das USB-Kabel an den USB-Anschluss Ihres
Computers an.
DIE DIGITAL VIEWER SOFTWARE
STARTEN
Windows OS
Starten Sie die MicroSpin-Software für Digitalaufnahmen,
indem Sie auf das Symbol auf dem Desktop oder im Starmenü
{Start > Alle Programme >MicroSpin Digital Capture >
MicroSpin Digital Capture} doppelklicken.
Mac OS
Starten Sie die MicroSpin-Software für Digitalaufnahmen,
indem Sie auf das Symbol im Anwendungsmenü
doppelklicken.
MicroSpin Digital Capture MicroSpin Digital Capture
18 I DEUTSCH
Page 19

EINE LICHTQUELLE AUSWÄHLEN
• Dieses digitale Mikroskop verfügt über eine obere (6) und
eine untere (4) LED-Beleuchtung. Sobald die Verbindung zum
Computer hergestellt ist, leuchtet eine der beiden Lichtquellen auf.
Drücken Sie auf die Beleuchtungsauswahl (5), um zwischen den
Beleuchtungsoptionen zu wechseln.
EINE VERGRÖSSERUNGSLEISTUNG
AUSWÄHLEN
• Der Objektrevolver (2) kann am Rad im und gegen den
Uhrzeigersinn gedreht werden. Drehen Sie das Rad, bis sich das
gewünschte Objektiv direkt über der Probe befindet; Sie fühlen ein
‘klickendes Einrasten’. Nun ist das Objektiv korrekt ausgerichtet.
FOKUSSIEREN
• Der Fokussierknopf (8) kann im und gegen den Uhrzeigersinn
gedreht werden.
Drehen Sie während des Betrachtens des Bild-Streams am
Computerbildschirm am Fokussierknopf (8), bis das Bild scharf ist.
ANMERKUNG: Vergewissern Sie sich, dass das Objektiv frei von Fremdkörpern ist
19 I DEUTSCH
und beim Absenken des Objektivrevolvers beim Fokussieren der
Objektträger nicht berührt wird.
Page 20

3. DIE DIGITAL VIEWER SOFTWARE VERWENDEN
SYMBOLE AUF DEM HAUPTBILDSCHIRM
Das Symbol für Einstellungen
Auslöser
Timer
Videoaufnahme/Stopp
Information
Ausschalten
MENÜ FÜR SYSTEMEINSTELLUNGEN
Beim ersten Start der MicroSpin-Software für Digitalaufnahmen werden die Standardeinstellungen geladen, die im Menü für
Systemeinstellungen manuell geändert werden können.
Gerät - Wählen Sie Ihr Gerät für das Video-Streaming aus (in diesem Fall das digitale MicroSpin-Mikroskop).
Auflösung - hier werden die Einstellungen für die Aufnahmeauflösung geändert.
Zeitgesteuerte Aufnahme - hier wir die automatische Aufnahme eingestellt.
Filmeinstellungen - wählen Sie hier die gewünschte Videoauflösung (640 x 480 oder 320 x 240).
Speichereinstellungen - wählen Sie hier den Zielordner auf Ihrem Computer, in dem alle Bilder und
Videos gespeichert werden sollen.
Spracheinstellungen - hier kann die Sprache der Digital Viewer Software geändert werden.
Erweiterte Einstellungen - Klicken Sie rechts im Menü für Systemeinstellungen auf “Menü ...” und stellen Sie manuell die
Bildeinstellungen ein.
Diese umfassen:
- Helligkeit
- Kontrast
- Farbton
- Sättigung
- Schärfe
ANMERKUNG: Je nach Betriebssystem kann die Verfügbarkeit dieser Einstellungen variieren.
Gespeicherte Dateien - Ist die MicroSpin-Software für Digitalaufnahmen geöffnet, können Sie über das Anklicken von “Menü” links
vom Hauptfenster den Ordner mit allen gespeicherten Dateien ausmachen.
Vollbild - klicken Sie zum Aktivieren des Vollbildmodus unten rechts im Fenster der MicroSpin-Software für Digitalaufnahmen auf die
Schaltfläche für den Vollbildmodus.
- Zum Verlassen des Vollbildmodus entweder auf den Bildschirm doppelklicken oder auf der Tastatur auf “Esc” drücken.
- Gamma
- Weißabgleich
- Hintergrundbeleuchtung
- Gain
20 I DEUTSCH
Page 21

PFLEGE UND INSTANDHALTUNG
• Halten Sie das Gerät trocken und schützen Sie es vor Wasser und Dämpfen.
• Lassen Sie Ihr Gerät nicht in Bereich mit extrem hohen oder niedrigen Temperaturen stehen.
• Berühren Sie das Gerät nicht mit nassen Händen. Dies könnte das Gerät beschädigen oder ein einen Stromschlag verursachen.
• Bewahren Sie das Gerät nicht an staubigen oder schmutzigen Orten auf, da die beweglichen Teile des Geräts dadurch Schaden nehmen könnten.
• Reinigen Sie das Gerät nicht mit scharfen Chemikalien, Reinigungsmitteln oder Spülmitteln. Wischen Sie es stattdessen mit einem in milder WasserSpülmittel-Lösung angefeuchteten Tuch ab.
WARNUNG
• Schauen Sie nicht in die Beleuchtungen des digitalen Mikroskops. Dies könnte zu permanenten Augenschäden führen.
• Versuchen Sie nicht, das digitale Mikroskop zu demontieren.
RECHTLICHE INFORMATIONEN
Das vorliegende Dokument wird ohne Gewährleistung veröffentlicht. Obwohl alle bereitgestellten Informationen als zuverlässig gelten, können sie dennoch
Fehler oder Ungenauigkeiten enthalten. In keinem Fall ist der Hersteller oder sind dessen Vertriebshändler haftbar für zufällige oder Folgeschäden jeder
Art, einschließlich jedoch nicht beschränkt auf Gewinnverluste oder wirtschaftliche Nachteile, die sich aus der Nutzung dieser Dokumenteninformationen
ergeben. Intel ist ein Markenname der Intel Corp. in den USA und anderen Ländern. Mac, Mac OS und OSX sind in den USA und anderen Längern
eingetragene Handelsnamen von Apple Inc.,
GEWÄHRLEISTUNG
Ihr digitales MicroSpin™-Mikroskop verfügt über eine zweijährige eingeschränkte Gewährleistung. Besuchen Sie bitte für weitere Informationen bezüglich
Celestron-Mikroskopen die Celestron-Website:
©2015 Celestron • Alle Rechte vorbehalten. • celestron.com
2835 Columbia Street • Torrance, CA 90503 U.S.A.
Telefon: 1(800) 421-9649 • Gedruckt in China 2015
FCC-Erklärung: Dieses Gerät wurde getestet und entspricht den Grenzwerten für digitale Geräte der Klasse B in Übereinstimmung mit Artikel 15 der FCC-Bestimmungen. Diese Grenzwerte bieten einen
angemessenen Schutz vor Störungen in Wohnanlagen. Dieses Gerät erzeugt, verwendet und strahlt Hochfrequenzenergie aus und kann den Funkverkehr stören, wenn es nicht gemäß den Anweisungen installiert
und verwendet wird. Es kann jedoch nicht garantiert werden, dass in einer bestimmten Einrichtung keine Störungen auftreten. Falls dieses Gerät Störungen des Radio- oder Fernsehempfangs verursacht, was durch
ein vorübergehendes Ausschalten des Geräts festgestellt werden kann, wird der Benutzer dazu angehalten, die Störung durch eine oder mehrere der nachstehenden Maßnahmen zu beheben:
+ Neuausrichtung oder Positionsveränderung der Empfangsantenne.
+ Den Abstand zwischen dem Gerät und dem Empfänger vergrößern.
+ Anschluss des Geräts an eine Steckdose, die nicht am selben
Stromkreis angeschlossen ist, wie die des Empfängers.
Dieses Produkt wurde für die Verwendung durch Personen von 14 Jahren und darüber entworfen und vorgesehen. Produktdesign und technische Daten können ohne Vorankündigung geändert werden.
V.2
+ Den Händler oder einen erfahrenen Radio- und Fernsehtechniker
um Hilfe bitten.
21 I DEUTSCH
Page 22
MICROSCOPIO DIGITALE
22 I ESPAÑOL
MANUAL DE INSTRUCCIONES
MODELO # 44114
Page 23

1. INTRODUCCIÓN
Gracias por adquirir el microscopio digital Celestron MicroSpin™. Lea atentamente este manual de instrucciones antes de
usar el producto y consérvelo como referencia en el futuro. Con un cuidado y mantenimiento adecuados, su microscopio le
ofrecerá años de servicio.
El microscopio digital MicroSpin es distinto a los microscopios ópticos tradicionales. En lugar de un ocular, el sensor de
cámara interno del MicroSpin actúa como un ocular 10x. El microscopio conecta con su ordenador con el cable USB 2.0 y
se muestra la imagen ampliada del espécimen en el monitor. La rueda de objetivo integrada tiene 6 lentes de objetivo con
potencias entre 10x y 60x, resultando en un aumento final entre 100x y 600x.*
Puede capturar y guardar imágenes fijas y video en su ordenador usando el software MicroSpin Digital Capture incluido.
*NOTA: El aumento final que se pueda obtener depende del tamaño del monitor - cuanto mayor sea el monitor, mayor será el aumento.
Windows OS
• Windows 10 (32 bits o 64 bits)/Windows 7 (32 bits o
64 bits)/Sistemas Windows XP SP2, SP3/Windows
Vista (32 bits o 64 bits)
• Unidad CD-ROM
• Velocidad de CPU P4-1,8 GHz o superior
• Mínimo 512 MB RAM
• Mínimo 800 MB de espacio disponible en disco duro
Mac OS
• Sistemas Mac OS X 10.4.8-Mac OS X 10.11.x
• Velocidad de CPU Power PC G3/G4/G5 o
basado en Intel
• Unidad CD-ROM
• Mínimo 128 MB RAM
• Mínimo 800 MB de espacio disponible en disco duro
• Puerto USB 2.0 disponible
• Puerto USB 2.0 disponible
ESPECIFICACIONES
Potencias de aumento 100x, 200x, 300x, 400x, 500x, 600x
Sensor CMOS 2 MP
Formato de archivo de imagen JPEG
Resolución de captura de video 320 x 240, 640 x 480
Ärea de observación efectiva Lente objetivo 100x = 3,6 x 2,70 mm
Sistemas operativos soportados Windows 10/7/XP/Vista
Tipo de conexión USB
Alimentación 5V 140mAh (por cable USB conectado al ordenador)
Iluminadores LED superior e inferior
Tamaño 8,19in x 5,12in x 6,02in / 208mm x 130mm x 153mm
Peso 0,77 lbs / 350 g
Lente objetivo 200x = 1,8 x 1,40 mm
Lente objetivo 300x = 1,2 x 0,90 mm
Lente objetivo 400x = 0,9 x 0,70 mm
Lente objetivo 500x = 0,7 x 0,50 mm
Lente objetivo 600x = 0,6 x 0,45 mm
Mac OS X 10.4.8x - Mac OS X 10.11x
23 I ESPAÑOL
Page 24
CONTENIDO DEL EMBALAJE
(1) Microscopio digital
MicroSpin
PIEZAS
1. Botón del obturador
2. Rueda de objetivos
3. Lentes de objetivo (6)
4. Soporte e iluminador LED inferior
5. Interruptor selector de iluminador
6. Iluminador LED superior
7. Clips del soporte
8. Mando de enfoque
9. Cable USB
Instalación
(3) Cubiertas de
especímenes vacías
(1) MicroSpin Digital
Capture software
(3) Portamuestras
vacíos
(1) Pinzas(1) Cuentagotas(1) Guía Rápida De
(1) Portamuestras
preparado
con retal de
algodón
1
2
24 I ESPAÑOL
3
4
5 8 96 7
Page 25

2. COMENZANDO
INSTALACIÓN DE SOFTWARE
Windows OS
1. Introduzca el CD incluido de MicroSpin Digital Capture en la
unidad CD-ROM del ordenador.
2. Pulse dos veces en el icono “MicroSPin Digital Capture.exe”
en el CD.
3. Siga el asistente de instalación de Digital Capture para
completar la instalación
INSTALACIÓN DE UN
PORTAMUESTRAS DE ESPECÍMEN
• Levante la rueda de objetivos (2) girando el mando de
enfoque (8) en sentido contrario a las agujas del reloj hasta
que se detenga.
• Coloque un portamuestras con espécimen preparado sobre el
soporte de especímenes (4) y asegúrelo en posición con los
clips del soporte (7).
Mac OS
1. Introduzca el CD incluido de MicroSpin Digital Capture en
la unidad CD-ROM del ordenador.
2. Pulse dos veces en el icono “MicroSPin Digital Capture.
dmg” en el CD.
3. Arrastre el icono de MicroSpin Digtial Capture Capture a la
carpeta de Aplicaciones.
CONECTAR EL DISPOSITIVO
• Conecte el dispositivo al ordenador conectando el cable USB
2.0 a un puerto USb libre de su PC.
EJECUTAR EL SOFTWARE DE
VISIONADO DIGITAL
Windows OS
Ejecute el software MicroSpin Digital Capture pulsando dos
veces en el icono del escritorio o el menú de inicio {Inicio >
Programas > MicroSpin Digital Capture> MicroSpin Digital
Capture}.
Mac OS
Ejecute el software MicroSpin Digital Captura pulsando dos
veces el icono en el menú de Aplicaciones.
MicroSpin Digital Capture MicroSpin Digital Capture
25 I ESPAÑOL
Page 26

SELECCIONAR UNA FUENTE DE LUZ
• Este microscopio digital contiene un iluminador LED superior (6)
y uno inferior (4). Una vez conectado al ordenador, se encenderá
una de las luces. Pulse el interruptor selector de iluminador (5) para
cambiar entre iluminadores.
SELECCIÓN DE UNA POTENCIA
DE AUMENTO
• La rueda de objetivos (2) puede girarse a derecha o izquierda.
Gire la rueda hasta que el objetivo deseado esté directamente sobre
el espécimen y escuche un chasquido. Indica que la lente de objetivo
está correctamente alineada.
ENFOQUE
• El mando de enfoque (8) puede girarse a derecha o izquierda. Gire
el mando de enfoque (8) mientras observa la imagen en el monitor
del ordenador. Deténgase cuando la imagen esté enfocada.
NOTA: Asegúrese de que el objetivo no tenga obstrucciones ni contacte con el portamuestras
cuando baje la rueda de objetivos durante el enfoque.
26 I ESPAÑOL
Page 27

3. USO DEL SOFTWARE DE DIGITAL CAPTURE
ICONOS DE LA VENTANA PRINCIPAL
Icono de Configuración
Activador del obturador
Temporizador
Grabación/Detención video
Información
Apagado
MENÚ DE CONFIGURACIÓN DEL SISTEMA
La primera vez que se ejecute el software MicroSpin Digital Capture se cargará la configuración por defecto, y podrá cambiarla
manualmente en el menú de configuración del sistema.
Dispositivo - Elija el dispositivo de emisión de video (en este caso el microscopio digital MicroSpin).
Resolución - Cambie aquí la configuración de resolución de la captura.
Configurar captura con temporizador - Configure aquí la captura automática de imágenes.
Configuración de video - Elija aquí su resolución de video (640x480 o 320x240).
Configuración de guardado - Elija la carpeta de destino de su ordenador en la que se guardaran todas las imágenes y videos.
Configuración de idioma - Con esta configuración puede cambiar el idioma del software de visionado digital.
Configuración avanzada - Pulsando el botón “Más...” a la derecha del menú de configuración del sistema permite ajustar
manualmente todas las configuraciones de imagen.
Pueden incluir:
- Brillo
- Contraste
- Tono
- Saturación
- Definición
NOTA: Las configuraciones disponibles pueden variar según el sistema operativo.
Archivos guardados - Con el software MicroSpin Digital Capture abierto, puede encontrar la carpeta de archivos guardados
pulsando el botón “Más...” situado a la izquierda en la pantalla principal.
Pantalla completa - Para activar el modo de pantalla completa, pulse el botón de pantalla completa situado en la esquina inferior
derecha de la ventana del software MicroSpin Digital Capture.
- Para salir del modo de pantalla completa, pulse dos veces con el ratón en la pantalla o pulse
el botón “Esc” del teclado.
- Corrección gamma
- Balance de blancos
- Compensación de retroiluminación
- Captura de luz
27 I ESPAÑOL
Page 28

CUIDADOS Y MANTENIMIENTO
• Mantenga seco el dispositivo y protéjalo de la exposición al agua o el vapor.
• No deje el dispositivo en lugares con temperaturas extremadamente elevadas o bajas.
• No toque el dispositivo con las manos mojadas. Hacerlo puede dañar el dispositivo o causar un choque eléctrico al usuario.
• No guarde ni use el dispositivo en lugares con polvo ni suciedad, las piezas móviles podrían dañarse.
• No use químicos agresivos, disolventes limpiadores ni detergentes abrasivos para limpiar el dispositivo. Use una gamuza suave ligeramente humedecida
con una solución de jabón suave y agua.
ADVERTENCIA
• No mire directamente a los iluminadores del microscopio digital. Hacerlo puede causar daños permanentes a la vista.
• No intente abrir ni desmontar el microscopio digital.
INFORMACIÓN LEGAL
Este documento se publica sin ninguna garantía. Aunque la información proporcionada se considera correcta, puede incluir errores o imprecisiones. En
ningún caso serán el fabricante o sus distribuidores responsables de daños incidentales o consiguientes de ningún tipo, incluyendo pero sin limitación a
pérdidas de beneficios o comerciales, debidos al uso de la información de este documento. Intel es una marca comercial de Intel Corp. en EE.UU. y otros
países. Mac, Mac OS y OS X son marcas comerciales de Apple Inc., registradas en EE.UU. y otros países.
GARANTÍA
Su microscopio digital MicroSpin tiene una garantía limitada por dos años. Visite el sitio web de Celestron para obtener información detallada de todos
los microscopios Celestron:
© 2015 Celestron • Todos los derechos reservados. • celestron.com
2835 Columbia Street • Torrance, CA 90503 EE.UU.
Teléfono: 1 (800) 421-9649 • Impreso en China 2015
Nota FCC: Este equipo ha sido probado y cumple con los límites de un dispositivo digital de Clase B, según el apartado 15 de las normas FCC. Estos límites están diseñados para proporcionar una protección
razonable contra interferencias dañinas en una instalación doméstica. Este equipo genera, usa e irradia energía de radiofrecuencia y, si no se instala y utiliza de acuerdo con las instrucciones, puede provocar
interferencias dañinas en comunicaciones por radio. Sin embargo, no existe ninguna garantía de que no se produzcan interferencias en una instalación concreta. Si este equipo causa interferencias dañinas en la
recepción de radio o televisión, lo que puede determinarse apagando y encendiendo el equipo, se recomienda al usuario intentar corregir las interferencias con una o varias de las medidas siguientes:
+ Reorientar o recolocar la antena receptora.
+ Aumentar la separación entre el equipo y el receptor
Este producto ha sido diseñado y está pensado para ser usado por personas de 14 años o más de edad. El diseño y las especificaciones del producto están sujetos a cambios sin notificación previa.
V.2
+ Conectar el equipo a una toma de corriente o circuito distinto de aquél al que esté
conectado el receptor.
+ Consultar al vendedor o a un técnico experimentado de radio/TV para obtener ayuda.
28 I ESPAÑOL
Page 29

MICROSCOPIO DIGITALE
29 I ITALIANO
MANUALE DI ISTRUZIONI
MODELLO N. 44114
Page 30

1. INTRODUCTION
Grazie per aver acquistato il microscopio digitale MicroSpin™ Celestron. Prima di iniziare a utilizzare il prodotto leggere
attentamente il presente manuale di istruzioni e conservarlo per consultazioni future. Attraverso un’adeguata cura e
manutenzione, il microscopio offrirà numerosi anni di servizio.
Il microscopio digitale MicroSpin differisce da un microscopio ottico tradizionale. Al posto di un oculare, il sensore
fotocamera interno del MicroSpin funge da oculare 10x. Il microscopio si collega al computer tramite un cavo USB 2.0 e
l’immagine ingrandita del campione viene visualizzata sul monitor. La ruota degli obiettivi integrata presenta 6 obiettivi con
potenze di ingrandimento da 10x a 60x, ottenendo un ingrandimento finale di 100x - 600x.*
È possibile catturare e salvare immagini e video sul computer tramite il software MicroSpin Digital Capture.
*NOTA: L’ingrandimento finale che si può ottenere dipende dalle dimensioni del monitor, più grande è il monitor maggiore sarà l’ingrandimento.
Windows OS
• Windows 10 (32 bit o 64 bit)/Windows 7 (32 bit o
64 bit)/Windows XP sistemi SP2, SP3/Windows Vista
(32 bit o 64 bit)
• Lettore CD-ROM
• Velocità CPU P4-1,8 GHz o superiore
• Minimo 512 MB RAM
• Minimo 800 MB di spazio disponibile sul disco rigido
Mac OS
• Mac OS X 10.4.8-Sistemi Mac OS X 10.11.x
• Velocità CPU Power PC G3/G4/G5 o Intel
• Lettore CD-ROM
• Minimo 128 MB RAM
• Minimo 800 MB di spazio disponibile sul disco rigido
• Porta USB 2.0 disponibile
• Porta USB 2.0 disponibile
SPECIFICHE
Potenze di ingrandimento 100x, 200x, 300x, 400x, 500x, 600x
Sensore 2 MP CMOS
Formato file immagine JPEG
Risoluzione video 320 x 240, 640 x 480
Area effettiva di osservazione Obiettivo 100x = 3,6 x 2,70 mm
Sistemi OS compatibili Windows 10/7/XP/Vista
Tipo di connessione USB
Alimentazione 5 V, 140 mAh (attraverso cavo USB collegato al computer)
Illuminatori LED superiore e inferiore
Dimensioni 8,19" x 5,12" x 6,02"/208 mm x 130 mm x 153 mm
Peso 0,77 lbs/350 g
Obiettivo 200x = 1,8 x 1,40 mm
Obiettivo 300x = 1,2 x 0,90 mm
Obiettivo 400x = 0,9 x 0,70 mm
Obiettivo 500x = 0,7 x 0,50 mm
Obiettivo 600x = 0,6 x 0,45 mm
Mac OS X 10.4.8x - Mac OS X 10.11x
30 I ITALIANO
Page 31

CONTENUTO DELLA CONFEZIONE
(1) Pinzette(1) Contagocce(1) Guida rapida
(1) Microscopio digitale
MicroSpin
COMPONENTI
1. Pulsante otturatore
2. Ruota obiettivi
3. Obiettivi (6)
4. Piano e illuminatore LED inferiore
5. Interruttore di selezione illuminatore
6. Illuminatore LED superiore
7. Mollette fermavetrino
8. Manopola di messa a fuoco
9. Cavo USB
(3) Vetrini coprioggetti
vuoti
(1) MicroSpin Digital
Capture software
(3) Vetrini per
campioni vuoti
(1) Vetrino pronto
con campione
1
2
31 I ITALIANO
3
4
5 8 96 7
Page 32
2. PER INIZIARE
INSTALLAZIONE SOFTWARE
Windows OS
1. Inserire il CD in dotazione MicroSpin Digital Capture nel
lettore CD del computer.
2. Fare doppio clic sull’icona “MicroSpin Digital Capture.exe”
nel CD.
3. Seguire la procedura guidata di configurazione Digital
Capture per completare l’installazione.
INSTALLAZIONE DI UN VETRINO
• Sollevare la ruota degli obiettivi (2) ruotando la manopola di
messa a fuoco (8) in senso antiorario fino al suo arresto.
• Sistemare un vetrino preparato con campione sul relativo
piano (4) e fissarlo con le mollette fermavetrino (7).
Mac OS
1. Inserire il CD in dotazione MicroSpin Digital Capture nel
lettore CD del computer.
2. Fare doppio clic sull’icona “MicroSpin Digital Capture.dmg”
nel CD.
3. Trascinare l’icona MicroSpin Digital Capture Viewer nella
cartella Applicazioni.
COLLEGAMENTO DEL DISPOSITIVO
• Collegare il dispositivo al computer inserendo il cavo USB 2.0
in una porta USB libera del PC.
AVVIO DEL SOFTWARE
DIGITAL CAPTURE
Windows OS
Avviare il software MicroSpin Digital Capture facendo doppio
clic sull’icona del desktop oppure dal menù start {Start > Tutti
i programmi > MicroSpin Digital Capture > MicroSpin Digital
Capture}.
Mac OS
Avviare il software MicroSpin Digital Capture facendo doppio
clic sull’icona nel menù Applicazioni.
MicroSpin Digital Capture MicroSpin Digital Capture
32 I ITALIANO
Page 33

SELEZIONE DELLA FONTE LUMINOSA
• Il microscopio digitale è dotato di un illuminatore LED superiore (6)
e di uno inferiore (4). Una volta collegato al computer, una delle luci
si accende. Premere l’interruttore di selezione dell’illuminatore (5) per
scegliere l’illuminatore.
SELEZIONE DI UNA POTENZA
DI INGRANDIMENTO
• La ruota degli obiettivi (2) può essere ruotata in senso orario o
antiorario. Ruotarla fino a quando l’obiettivo desiderato si trova
direttamente sopra il campione ed è udibile un “clic”. Ciò significa
che l’obiettivo è allineato correttamente.
MESSA A FUOCO
• La manopola di messa a fuoco (8) può essere ruotata in senso
orario o antiorario. Ruotare la manopola di messa a fuoco (8) mentre
si visualizza l’immagine sul monitor del computer. Fermarsi quando
l’immagine è a fuoco.
NOTA: Assicurarsi che l’obiettivo sia privo di ostruzioni e non colpisca il vetrino con il campione
durante l’abbassamento della ruota degli obiettivi per la messa a fuoco.
33 I ITALIANO
Page 34

3. UTILIZZO DEL SOFTWARE DIGITAL CAPTURE
ICONE FINESTRA PRINCIPALE
Icona Impostazioni
Tasto otturatore
Timer
Registrazione/arresto video
Informazioni
Spegnimento
MENÙ IMPOSTAZIONI DI SISTEMA
La prima volta che si avvia il software MicroSpin Digital Capture, vengono caricate le impostazioni predefinite; è possibile modificare
queste impostazioni manualmente nel menù impostazioni di sistema.
Dispositivo - Scegliere il dispositivo per la visualizzazione dei video (in questo caso il microscopio digitale MicroSpin).
Risoluzione - Modificare qui le impostazioni relative alla risoluzione delle immagini.
Impostazione a tempo - Impostare qui la funzione di cattura immagini automatica.
Impostazione filmato - Scegliere qui la risoluzione del video (640x480 o 320x240).
Salvataggio impostazioni - Scegliere la cartella di destinazione sul computer in cui verranno salvati tutti i video e tutte le immagini.
Impostazione lingua - È possibile modificare la lingua del software MicroSpin Digital Capture utilizzando questa impostazione.
Impostazioni avanzate - Facendo clic sul pulsante “Ulteriori…” sulla destra del menù impostazioni di sistema sarà possibile
regolare manualmente tutte le impostazioni delle immagini.
Tali impostazioni includono:
- Luminosità
- Contrasto
- Tonalità
- Saturazione
- Nitidezza
NOTA: Le impostazioni disponibili dipendono dal sistema operativo dell’utente.
File salvati - Con il software MicroSpin Digital Capture aperto, è possibile localizzare la cartella dei file salvati facendo clic sul
pulsante “Ulteriori… “ posto a sinistra della finestra principale.
Schermo intero - Per attivare la modalità a schermo intero, fare clic sul pulsante schermo intero posto nell’angolo in basso a destra
della finestra del software MicroSpin Digital Capture.
- Per abbandonare la modalità a schermo intero, fare doppio clic sullo schermo oppure premere il pulsante “Esc”
sulla tastiera.
- Gamma
- Bilanciamento del bianco
- Retroilluminazione
- Guadagno
34 I ITALIANO
Page 35

CURA E MANUTENZIONE
• Tenere il dispositivo asciutto e protetto da acqua e umidità.
• Non lasciare il dispositivo in luoghi con temperature estremamente elevate o estremamente basse.
• Non toccare il dispositivo con le mani bagnate. Ciò può provocare danni al dispositivo o causare scosse elettriche all’utente.
• Non usare o conservare il dispositivo in zone polverose o sporche, poiché le parti in movimento potrebbero danneggiarsi.
• Non usare prodotti chimici, detergenti o solventi aggressivi per pulire il dispositivo. Utilizzare invece un panno morbido leggermente inumidito con una
soluzione di acqua e sapone delicato.
ATTENZIONE
• Non guardare direttamente negli illuminatori del microscopio. Ciò potrebbe causare danni permanenti agli occhi.
• Non provare ad aprire o smontare il microscopio digitale.
LEGAL INFORMATION
Il presente documento è pubblicato senza alcuna garanzia. Sebbene le informazioni fornite sono ritenute accurate, potrebbe contenere errori o
inaccuratezze. In nessun caso il produttore o i suoi distributori possono essere ritenuti responsabili per danni incidentali o conseguenti di qualsiasi natura,
compresi ma non solo, perdita di profitti o di guadagni, derivanti dall’utilizzo delle informazioni contenute nel presente documento. Intel è un marchio
commerciale di Intel Corp. Negli Stati Uniti e in altri Paesi. Mac, Mac OS e OS X sono marchi commerciali di Apple Inc., registrati negli Stati Uniti e in altri
Paesi.
GARANZIA
Il microscopio digitale MicroSpin presenta una garanzia limitata di due anni. Visitare il sito Web Celestron per informazioni dettagliate su tutti i microscopi
Celestron:
© 2015 Celestron • Tutti i diritti riservati. • celestron.com
2835 Columbia Street • Torrance, CA 90503 U.S.A.
Telefono: 1(800) 421-9649 • Stampato in Cina 2015
Nota FCC: la presente apparecchiatura è stata testata ed è risultata conforme ai limiti imposti per i dispositivi digitali di Classe B, ai sensi della Parte 15 delle Norme FCC. Tali limiti sono stati ideati per fornire
un’adeguata protezione nei confronti di interferenze dannose in installazioni residenziali. La presente apparecchiatura genera, utilizza e può irradiare energia in radio frequenza e, se non installata e utilizzata
conformemente alle istruzioni, può causare interferenze dannose alle radiocomunicazioni. Tuttavia, non vi è alcuna garanzia che l’interferenza non si verifichi in una particolare installazione. Nel caso in cui la
presente apparecchiatura causi interferenze dannose alla ricezione radio o televisiva, il che potrebbe essere determinato dall’accensione e spegnimento dell’apparecchiatura, l’utente è incoraggiato a tentare di
correggere l’interferenza mediante una o più delle misure seguenti:
+ Riorientare o riposizionare l’antenna di ricezione.
+ Aumentare la distanza tra l’apparecchiatura e il ricevitore.
Questo prodotto è progettato per essere utilizzato da persone di età pari o superiore ai 14 anni. Il design del prodotto e le specifiche sono soggetti a modifiche senza previa notifica.
V.2
+ Collegare l’apparecchiatura a una presa su un circuito diverso da quello a cui è
collegato il ricevitore.
+ Consultare il rivenditore o un tecnico radio/TV esperto per l’assistenza.
35 I ITALIANO
 Loading...