

Page 1
CE labs MP400A HD Media Player
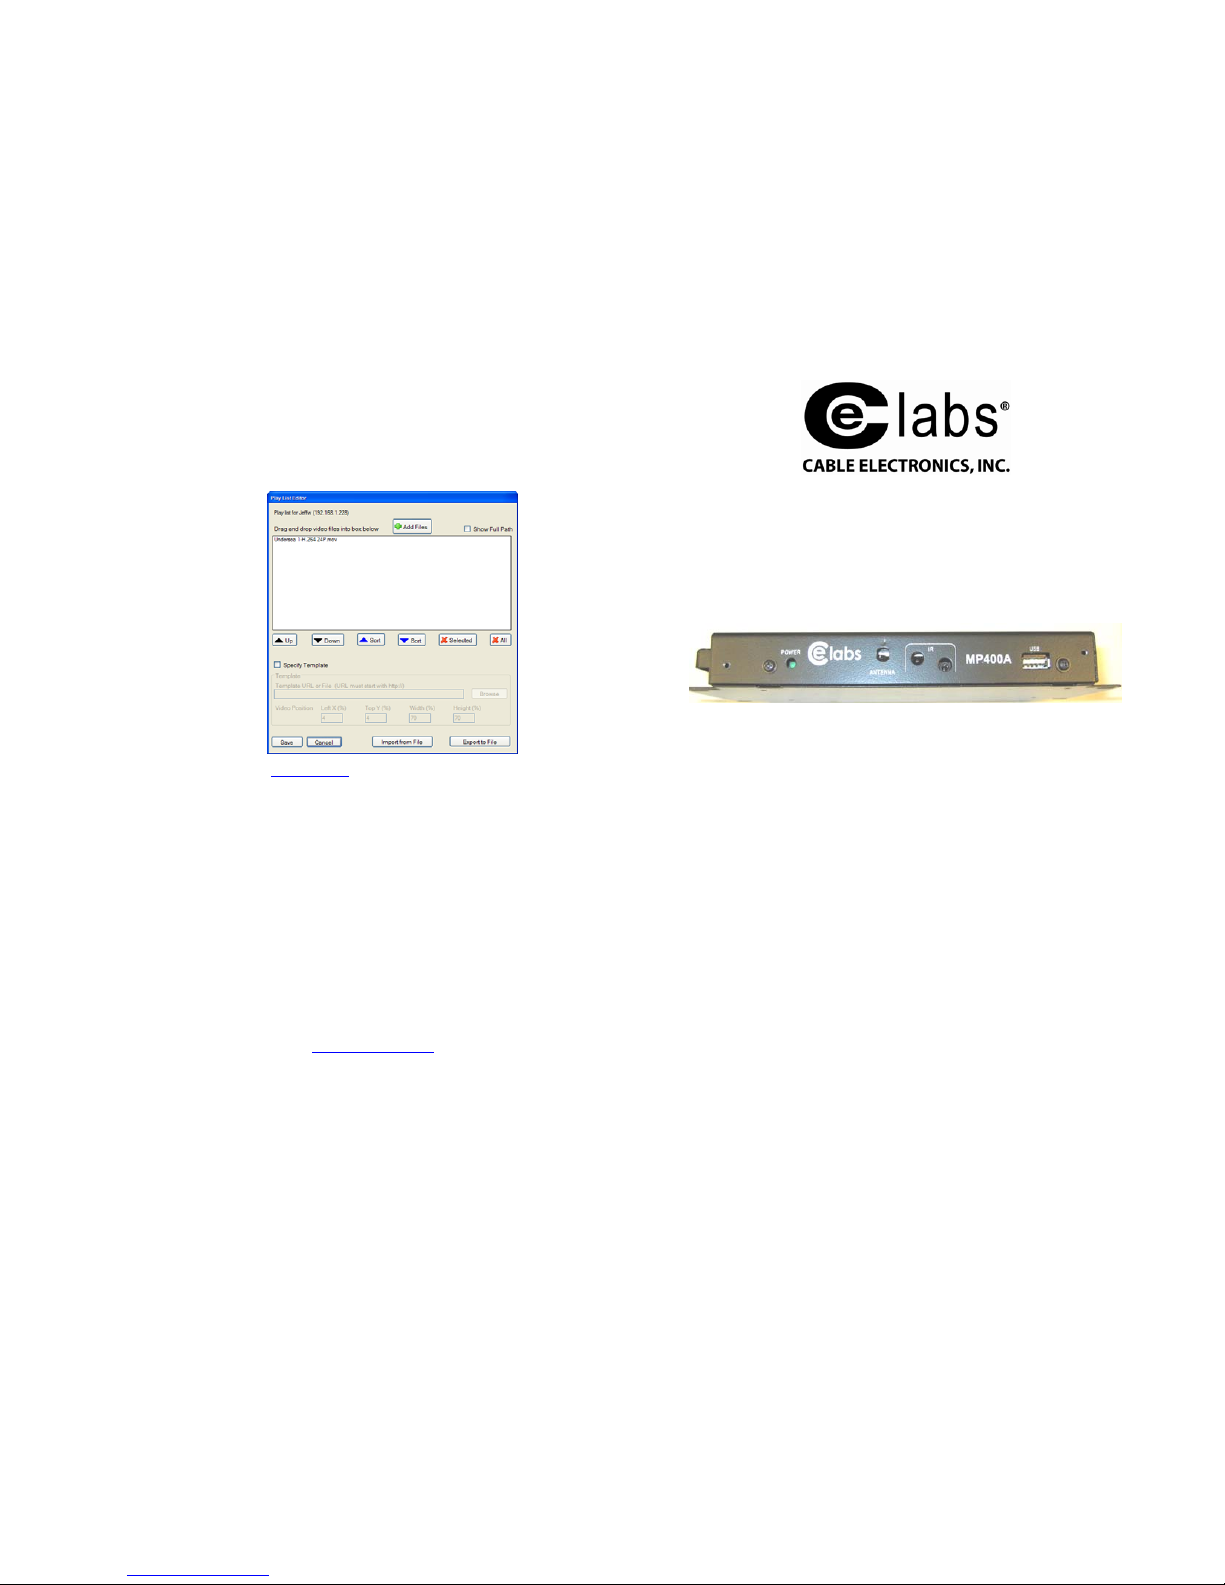
The Create/Playlist Editor allows you to make a list of a group of media for playback. If
the media player is equipped with a browser layer, it is possible to scale the video screen
and display a HTML template around the perimeter of the screen. Click on Specify
Template and set the scale to fit the template HTML page defined in the Template URL
box. Save the playlist and it will now appear in the playlist window under Player Control.
Click on Load/Play button to
launch playlist.
CE labs can support many areas
of your video playback and
distribution needs.
We manufacture RF modulators,
HDTV compatible RF
amplifiers, HD distribution
amplifiers, and cables of all
types.
See our full product line at
www.celabs.net
.
WARANTY
Cable Electronics, Inc. warrants this product to be free from defects in material and
workmanship, under normal use and service, for a period of one year from the purchase
by the original purchaser. If this product is defective or malfunctions, Cable Electronics
will replace or repair this unit (at our option) within a reasonable time. No expressed or
implied warranty is made for any defects or damage caused by immersion or exposure to
liquids, abuse, neglect, improper operation of unit, excess wear and tear and or defects
resulting from unauthorized disassembly and or modification.
Cable Electronics, Inc.
http://www.celabs.net
3209 Wood Drive
Garland, TX 75041
(469) 429-9200 Fax (469) 429-9200
Document: MP400A Quick Start Guide_B.doc
CE labs MP400A HD Media Player
MP400A Quick Start Guide
This guide will explain the basic connection and operation of the MP400A. For full details on
operation, refer to the MP400A manual.
Unpacking:
The box should contain the following items:
MP400A Media Player
Universal Power Supply and power cable
Remote Control
Quick Start Guide
Operations CD with manual and demo CCM Quick Sign 400 Software
Optional cable(s) that were ordered at time of purchase.
Page 2
CE labs MP400A HD Media Player
Connections:
The MP400A is capable of driving a wide variety of displays at up to 1080P resolution at bit rates
up to 25 Mbps. Connect the following cables to operate the unit.
• Display cable – Depending on the application, plug in the cable from the media player
to the display. The HDMI and VGA cables are run directly. The component video
output uses a DB-15 to RCA cable to break out the video signal. The appropriate cable
should be ordered at the time of player purchase.
• Audio cable – The audio output is a 3.5mm (1/8
th
inch) jack on the rear panel. Connect
a patch cable from the rear jack to the display or audio system as desired.
• Network cable – Certain operations require a network connection in order to
implement. Connect an Ethernet cable between the MP400A 10/100 port and a local
Ethernet switch. Alternatively, you may connect the player to a local PC using a
crossover cable.
• Connect the power plug into the MP400A. Plug the power supply cord into an electrical
outlet.
• Please wait for approximately 45 seconds until the unit completes the boot-up process.
If a default startup playlist has been defined and content is on the local storage
medium, the unit will begin to display video. If no video appears, press the menu
button on the remote control to check on the unit’s status.
Note: The RS-232 and GPIO ports are not used at the present time.
Network Setup:
The unit may be assigned a fixed IP address, or DHCP may be used to obtain an address
automatically. Press the menu button on the remote control and follow the onscreen instructions to
set up the network address.
CE labs MP400A HD Media Player
CCM Quick Sign 400 Software Installation and Operations:
Included with the player is a time limited demo of our CCM Quick Sign software. This will allow you to
perform basic operations over a local network. More sophisticated features such as Internet remote
control, playlist scheduling, and data logging are available in our full CCM (CE labs Content Manager).
Please contact our sales department at www.celabs.net
for more details.
Install the CCM Quick Sign application from the CD.
Quick Sign demo will function for 15 days on one
player. Contact your sales representative for the
software activation code.
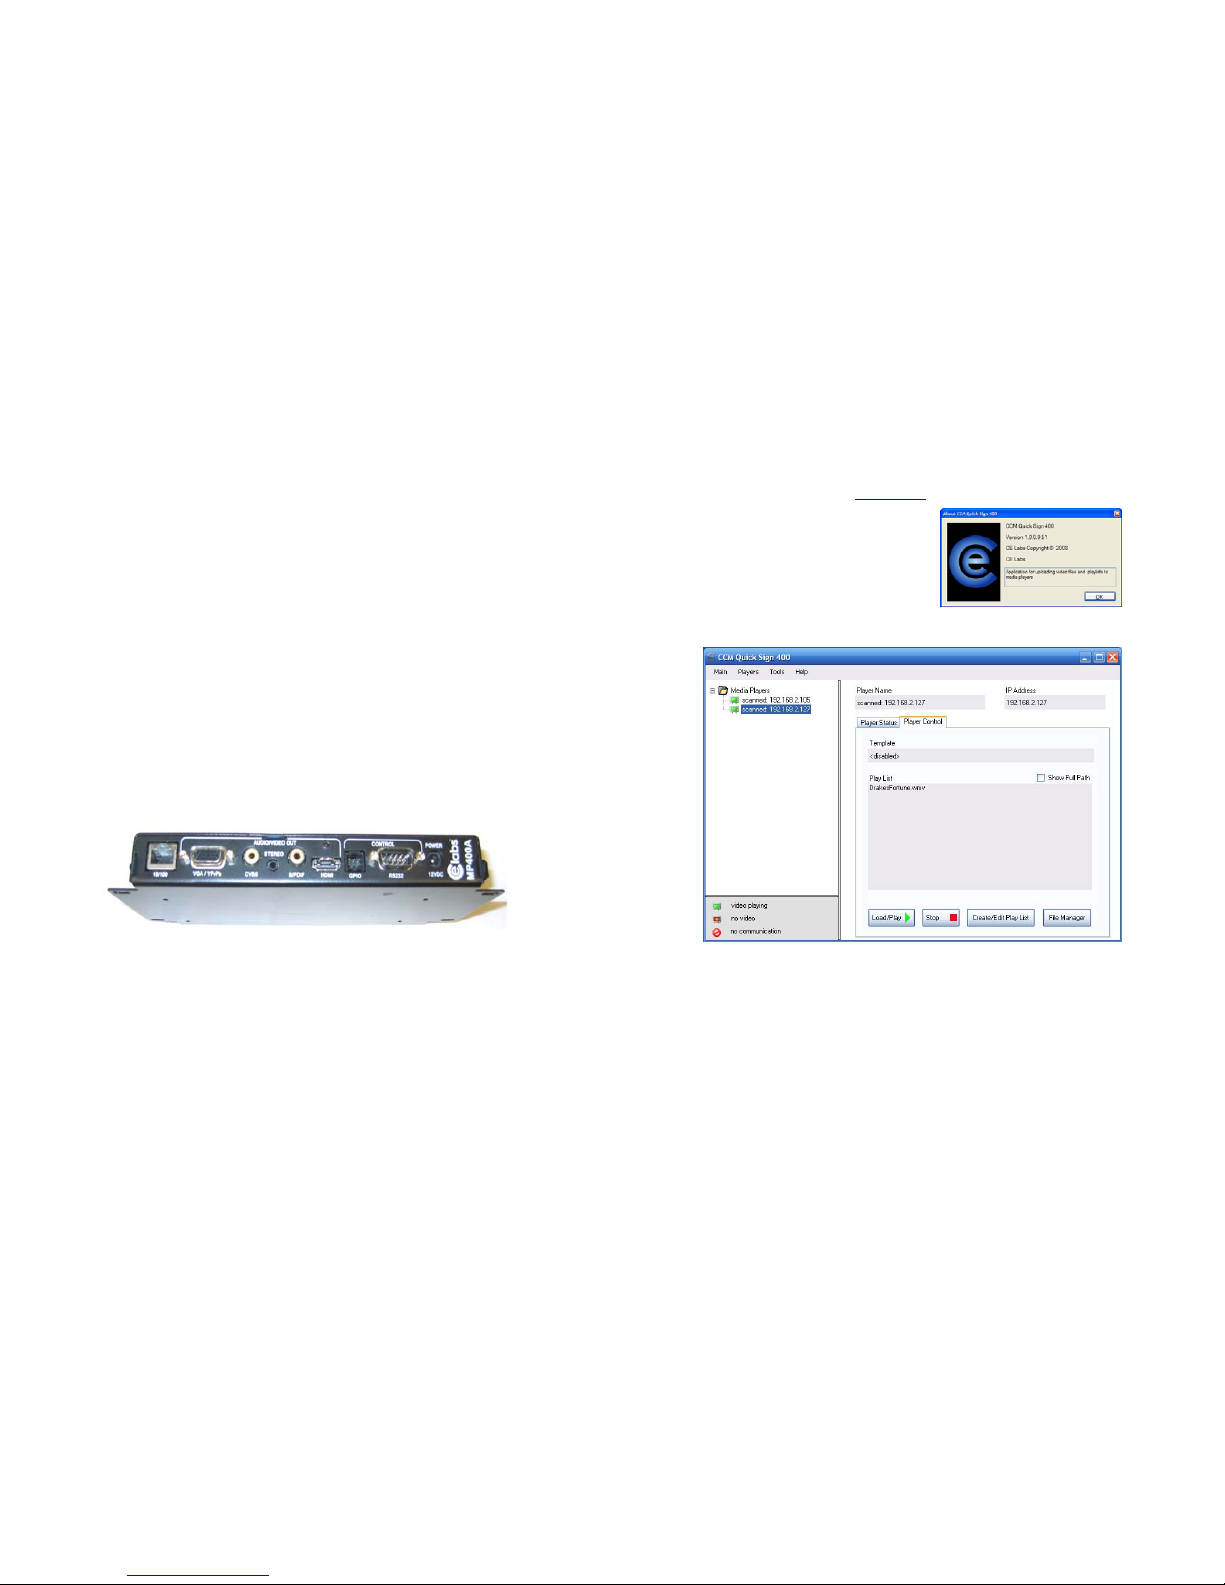
Click on Tools and select Player Search and Start
Scan. When player(s) on local network are found, click
on Add Players.
The Player Status screen will tell you what file is currently playing and if there is a playlist.
The Player Control tab controls several functions:
Load / Play, Stop, Create / Edit Playlist, and File Manager
• File Manager allows you to directly see the player content and launch a file. This is also
where you may delete files from the player.
• Create / Edit Playlist is used to select the desired files for playback. This is also where you
specify the video scale in case there is a template.
• After creating and saving a playlist, select the desired playlist and click on the Load / Play
button. This will launch the selected playlist. If the files in the playlist are not already on
the player, they will be downloaded into the player.
• Pressing Stop of course sends a stop command to the player. The player icon will change
from green to red when the player is not playing a file.
 Loading...