

Page 1
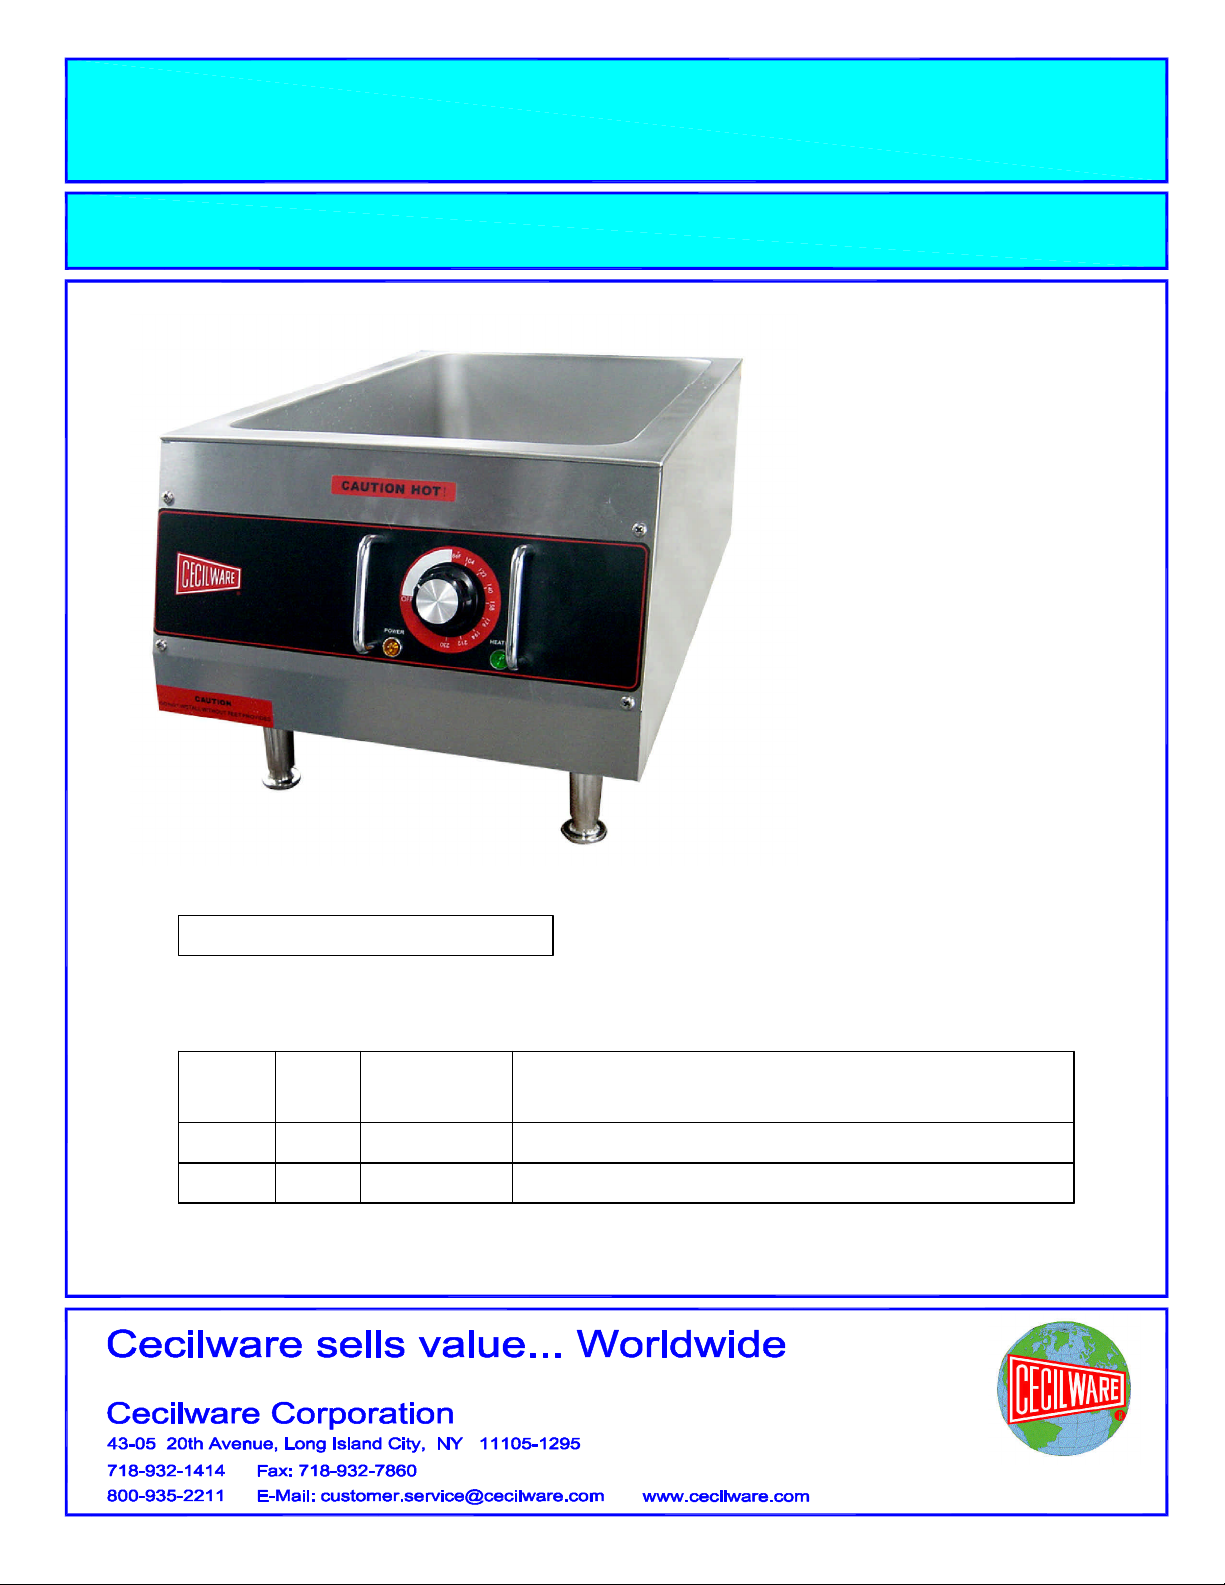
HEAVY DUTY ELECTRIC FOOD WARMER
Model HDEFW
Thank you for purchasing this product.
To ensure proper use, we recommend that you
read this instruction manual before operating the
unit.
GENERAL SPECIFICATIONS
Width: 14.5" Depth: 24.8" Height: 12.4"
ELECTRICAL SPECIFICATIONS
Volts
120
240
KW
1.0
1.0 4.2
Amps 1 Phase
8.4
Type Receptacle Req'd.
1 Phase Only
15A - 120V (NEMA 5 - 15R)
15A - 240V (NEMA 6 - 15R)
Operation Manual
NQ19A December 2006
Page 2

UNPACKING AND INSPECTION:
Carefully lift Warmer out of shipping container, and inspect immediately for shipping damage. Install 4-inch legs as
follows: Remove the legs from plastic shipping bag, turn Warmer on its back and screw legs into the four holes
provided in bottom.
NOTE: Your heavy-duty commercial Warmer was shipped in a carton designed to give it maximum protection in
normal handling. It was thoroughly inspected before leaving the factory and the carrier accepted and signed for it.
File any claims for shipping damage or irregularities directly with the carrier, not with company.
Level unit by screwing legs up or down as necessary. Be certain that all protective plastics and residues are
thoroughly cleaned from its surface.
Insert Line Cord plug into appropriate NEMA receptacle as specified.
NOTE: A separate circuit should be supplied for each of these warmers with a matched circuit breaker or fuse. Check
local codes for compliance in installation.
WARNING: WARRANTY IS VOID IF WARMER IS CONNECTED TO ANY VOLTAGE OTHER THAN THAT SPECIFIED.
WARNING: INSTALL WARMER AT LEAST 1" FROM WALL. DO NOT OPERATE WARMER UNLESS LEGS ARE INSTALLED.
** PACKAGING **
Cecilware prides itself on quality and service, ensuring that at the time of packing all products are
supplied fully functional and free of damage.
Provided in this package are the following:
* Warmer
* 4 Inch Legs
* Manual
** OPERATION **
Fill the Warmer pan with 4 quarts of water. Do not overfill; under no circumstances, should the food
pans float. If this occurs, remove excess water. It is recommended to use fresh clean water for each
use.
To switch on, simply turn the temperature dial clockwise to the desired setting. The amber light will
glow to indicate the unit is on. To turn off, simply turn the temperature dial counter clockwise to the 0
setting. It is recommended that the thermostat be set to the maximum heat (1 full turn clockwise) for
pre-heating the warmer. An operating setting of 165 - 170º F should be sufficient once the unit is
pre-heated.
NOTE: Do not lift, move or carry the warmer when on; nor should you move the unit when it contains
food or water.
Page 3

2
** CLEANING INSTRUCTIONS **
Switch off the power and disconnect from the source. Ensure that the unit is always switched off and
unplugged while cleaning, maintaining, or moving.
The Warmer should be cleaned after each day’s operation; however, additional cleaning may be
required depending on daily use.
Before cleaning, allow the warmer to cool down, empty the water basin, and clean after each use. Pans
and lids can be removed to be cleaned. The Warmer can be wiped down with a damp cloth. Do not
immerse the Warmer in water or use hose to clean.
Warm soapy water is recommended for cleaning. Cleaning agents may cause damage when used for a
prolonged period on stainless steel.
** SAFETY NOTICE **
A Cecilware Recommended Qualified Service Technician should carry out repairs if necessary.
Switch off power to and disconnect from the outlet when cleaning, maintaining or moving.
To avoid over-heating or damage to the element, this unit has been installed with a Hi Limit. If the Hi
Limit is tripped, please call a Recommended Qualified Service Technician to check over the warmer,
repair if needed and reset the Hi Limit.
** TROUBLESHOOTING **
If your Cecilware Warmer does not operate, please check the following before placing a service call.
Please ensure:
*There is correct power supply.
*The machine is plugged in correctly and power is switched on.
*The thermostat dial has been turned on.
Note: All Cecilware products are tested prior to packing.
A circuit diagram has been provided to assist qualified technicians. A Recommended
Qualified Service Technician should carry out repairs if needed. Do not remove any
components or service panels on this product.
Page 4

7 8 2 9
QTY
1
1
6
3
5
** SPARE PARTS LIST **
1 02321 Heating Element 1
2 02322 Thermostat knob 1
3 02323 Thermostat 1
Item Part No. Description
4 02324 Hi-Limit 1
FRONT COVER REMOVED
4
5 C032A Power Cord 15Amp - 120V 1
C770A
6 Power Cord 15Amp - 240V 1
7 02326 4" Adjustable legs (set of 4) 1
02305
8 Indicator Light - Amber 1
02306
9 Indicator Light - Green 1
BOTTOM COVER REMOVED
Page 5

EH
NE284
ST2:THERMOSTATST1:UNADJUSTABLE THERMOSTAT
EH:HEATING ELEMENT
(120V 60Hz 1kW)
WIRING DIAGRAMS
HDEFW FOOD WARMER
ST1 ST2
HL1 HL2
HEAVY DUTY ELECTRIC FOOD WARMER
L1
N
GND
HL1:POWER LED HL2:HEATING LED
 Loading...