

Casio FX-890P, Z-1, Z-1GR Owner's Manual

1
PERSONAL COMPUTER
FX-890P / Z-1 / Z-1GR
OWNER’S MANUAL
This manual has been written by a non-Japanese speaking CASIO fan to help other
non-Japanese speaking CASIO fans to make the best out of their FX-890P, Z-1GR,
Z-1GRa or Z-1GR pocket computer. It is based on the Japanese Z-1 users’ manual,
the FX-880 & PB2000C English manuals, and all kind of other information gathered
on the web. Even if most of the content is based on material with a CASIO copyright,
the company CASIO cannot be held responsible for any inaccuracy within this
document.
This document is not intended for any commercial purpose. Do not pay anything for
it, and use it at your own risk.
Thanks to Ledudu.com, Daniel Pratlong, Marcus von Cube, and all the other guys
whose information posted on the web helped me with this project.

2
CONTENTS
1! Unit Configuration .................................................................................................. 5!
1.1! General Guide ................................................................................................. 5!
1.2! Operational Functions ..................................................................................... 6!
1.3! Symbol Display................................................................................................ 9!
1.4! Keyboard ....................................................................................................... 10!
1.4.1! Keytop Functions .................................................................................... 10!
1.4.2! Functions Noted Above the Keys ........................................................... 11!
1.5! Screen ........................................................................................................... 11!
1.5.1! Physical Lines and Logical Lines............................................................ 11!
1.5.2! Virtual Screen ......................................................................................... 11!
1.5.3! Screen Editor .......................................................................................... 12!
1.5.4! Display Contrast ..................................................................................... 12!
1.6! Display Characters ........................................................................................ 12!
1.7! Power Supply ................................................................................................ 13!
1.8! Auto Power Off .............................................................................................. 13!
1.9! SYSTEM* Self Test Function ........................................................................ 13!
2! Fundamental Operation ....................................................................................... 15!
2.1! CAL Mode ..................................................................................................... 15!
2.2! Formula Storage Function............................................................................. 15!
2.3! BASIC Mode.................................................................................................. 16!
2.4! C Mode.......................................................................................................... 17!
2.5! CASL Mode ................................................................................................... 17!
2.6! Assembler Mode ........................................................................................... 17!
3! Calculation Function ............................................................................................ 18!
3.1! Manual Calculation Preparations .................................................................. 18!
3.2! Manual Calculation Input and Correction ...................................................... 18!
3.3! Priority Sequence .......................................................................................... 20!
3.1! Scientific Calculations ................................................................................... 21!
3.1.1! Trigonometric and Inverse Trigonometric Functions .............................. 21!
4! Formula Storage Function ................................................................................... 22!
4.1! Utilization for Preparing Tables ..................................................................... 23!
5! BASIC Programming............................................................................................ 26!
5.1! Features of BASIC ........................................................................................ 26!
5.2! BASIC Program Configuration ...................................................................... 27!
5.2.1! BASIC Program Format.......................................................................... 27!
5.3! BASIC Program Input.................................................................................... 28!
5.3.1! Preparation ............................................................................................. 28!
5.3.2! Program input ......................................................................................... 28!
5.3.3! Program Editing ...................................................................................... 29!
5.4! BASIC Program Execution ............................................................................ 31!
5.4.1! Program Execution ................................................................................. 31!
5.4.2! Errors ...................................................................................................... 31!
5.5! Commands .................................................................................................... 32!
5.5.1! REM........................................................................................................ 33!
5.5.2! INPUT ..................................................................................................... 33!
5.5.3! PRINT ..................................................................................................... 33!

3
5.5.4! END ........................................................................................................ 33!
5.5.5! IF – THEN............................................................................................... 33!
5.5.6! GOTO ..................................................................................................... 34!
5.5.7! FOR/NEXT.............................................................................................. 34!
5.5.8! READ/DATA/RESTORE......................................................................... 34!
5.5.9! GOSUB/RETURN................................................................................... 34!
5.5.10! Labels ................................................................................................... 35!
5.6! Operators ...................................................................................................... 36!
5.7! Constants and Variables ............................................................................... 37!
5.7.1! Constants................................................................................................ 37!
5.7.2! Variables................................................................................................. 38!
5.7.3! Summary ................................................................................................ 40!
5.8! BASIC Command Reference ........................................................................ 41!
5.8.1! Format elements..................................................................................... 41!
5.8.2! Manual Commands................................................................................. 42!
5.8.3! Fundamental Commands ....................................................................... 48!
5.8.4! Mathematical Functions.......................................................................... 57!
5.8.5! String Functions...................................................................................... 68!
5.8.6! Graphical Functions................................................................................ 73!
5.1! BASIC Commands Index .............................................................................. 75!
6! C Programming.................................................................................................... 76!
6.1! The Basics of C ............................................................................................. 76!
6.1.1! C and the other programming languages ............................................... 76!
6.1.2! Learning about C with your pocket computer ......................................... 77!
6.1.3! Meet the Casio C interpreter................................................................... 77!
6.2! C Program Input ............................................................................................ 78!
6.2.1! About the C Interpreter and Editor.......................................................... 78!
6.2.2! Activating the C mode............................................................................. 78!
6.2.3! Using the Editor ...................................................................................... 79!
6.1! C Program Execution .................................................................................... 82!
6.1.1! To execute a program............................................................................. 82!
6.1.1! Using Command line Operation.............................................................. 82!
6.1.2! Using the Trace Function........................................................................ 82!
6.2! Introduction to C ............................................................................................ 84!
6.2.1! Outputting characters ............................................................................. 84!
6.2.2! Variable types and operations ................................................................ 88!
6.2.3! Entering characters and values .............................................................. 90!
6.2.4! Using selection statements..................................................................... 92!
6.2.5! Using loops ............................................................................................. 94!
6.2.6! Defining functions ................................................................................... 99!
6.1! Constants and Variables ............................................................................. 102!
6.1.1! Local variables and global variables..................................................... 102!
6.1.2! Pointers and variable storage locations................................................ 103!
6.1.3! Data types and lengths ......................................................................... 104!
6.1.4! Assigning variable names and function names .................................... 104!
6.1.5! Data expressions .................................................................................. 104!
6.1.6! Storage classes .................................................................................... 106!
6.1.7! Arrays and pointers............................................................................... 107!
6.2! Operators .................................................................................................... 108!
6.2.1! Cast operator ........................................................................................ 110!

4
6.3! C Command Reference............................................................................... 111!
6.3.1! Manual Commands............................................................................... 111!
6.3.1! Fundamental commands ...................................................................... 112!
6.3.1! Mathematical Functions........................................................................ 118!
6.3.2! String Functions.................................................................................... 123!
6.3.3! Graphical Functions.............................................................................. 125!
6.4! C Commands Index..................................................................................... 126!
5
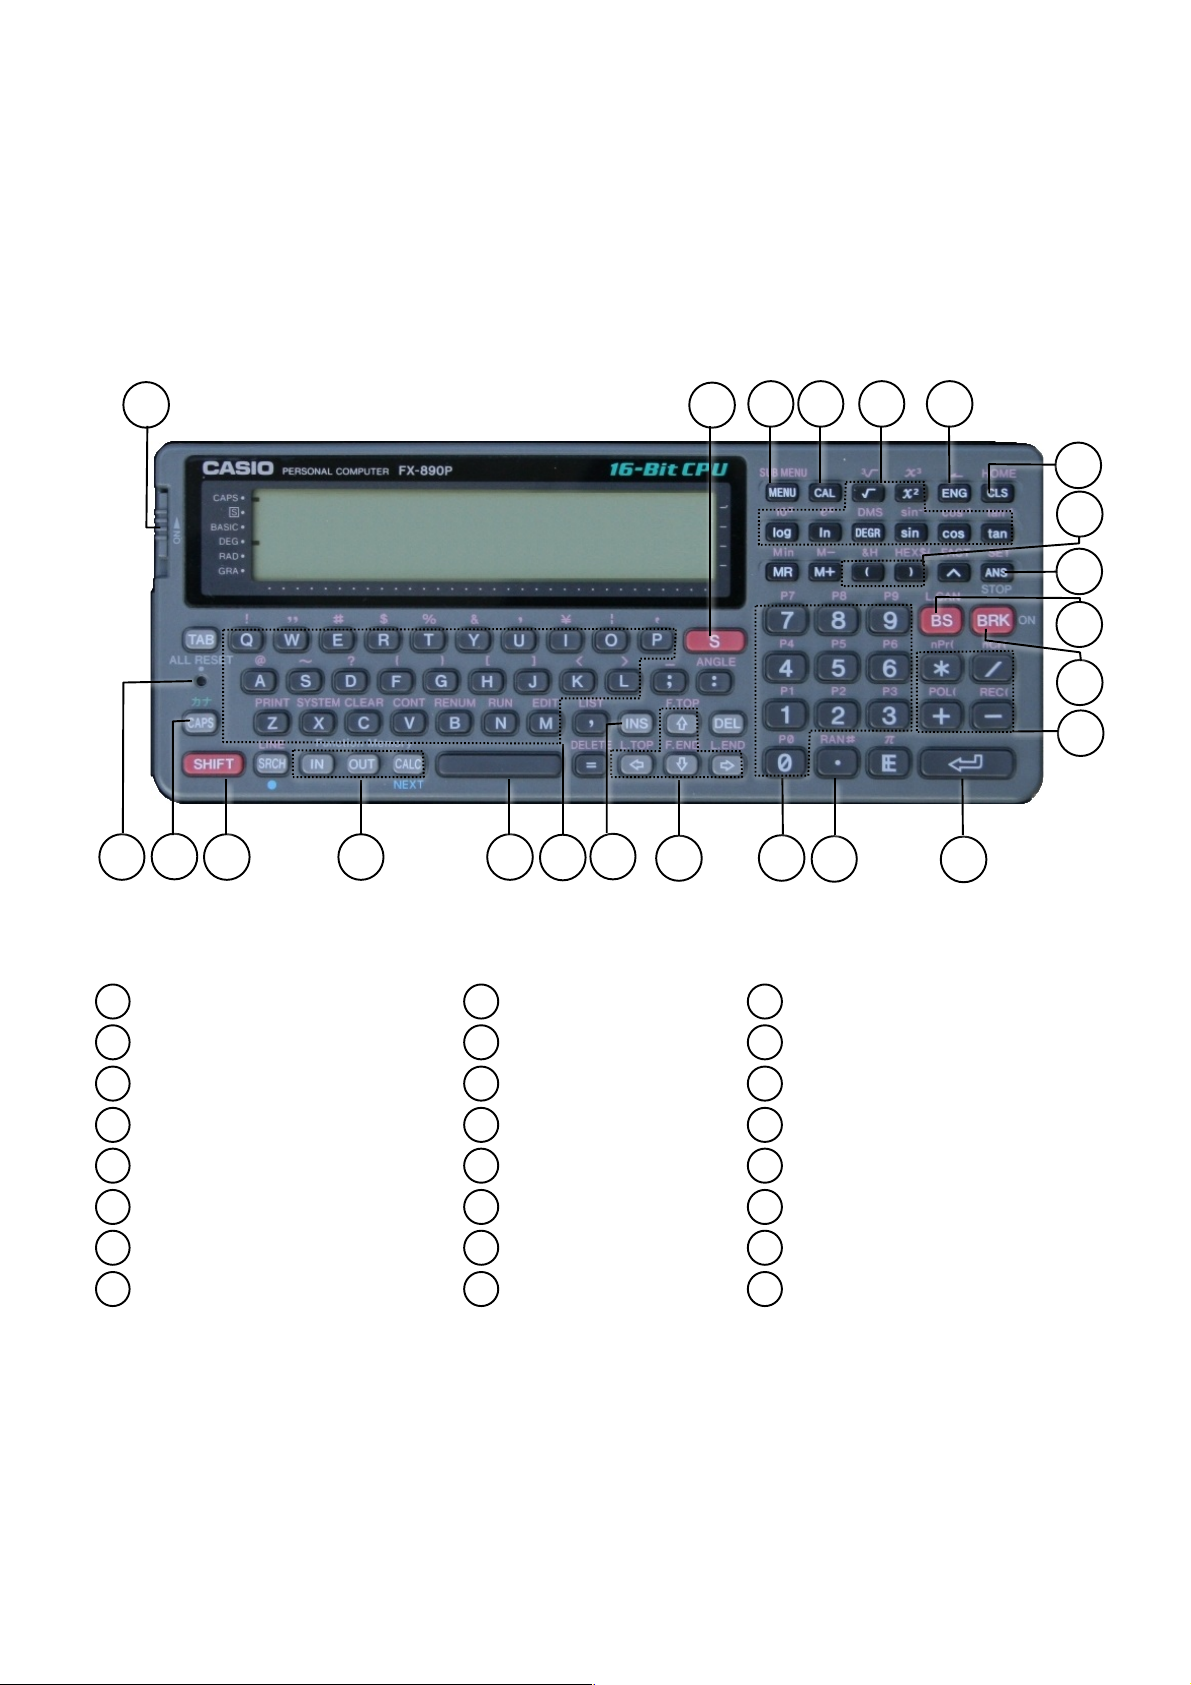
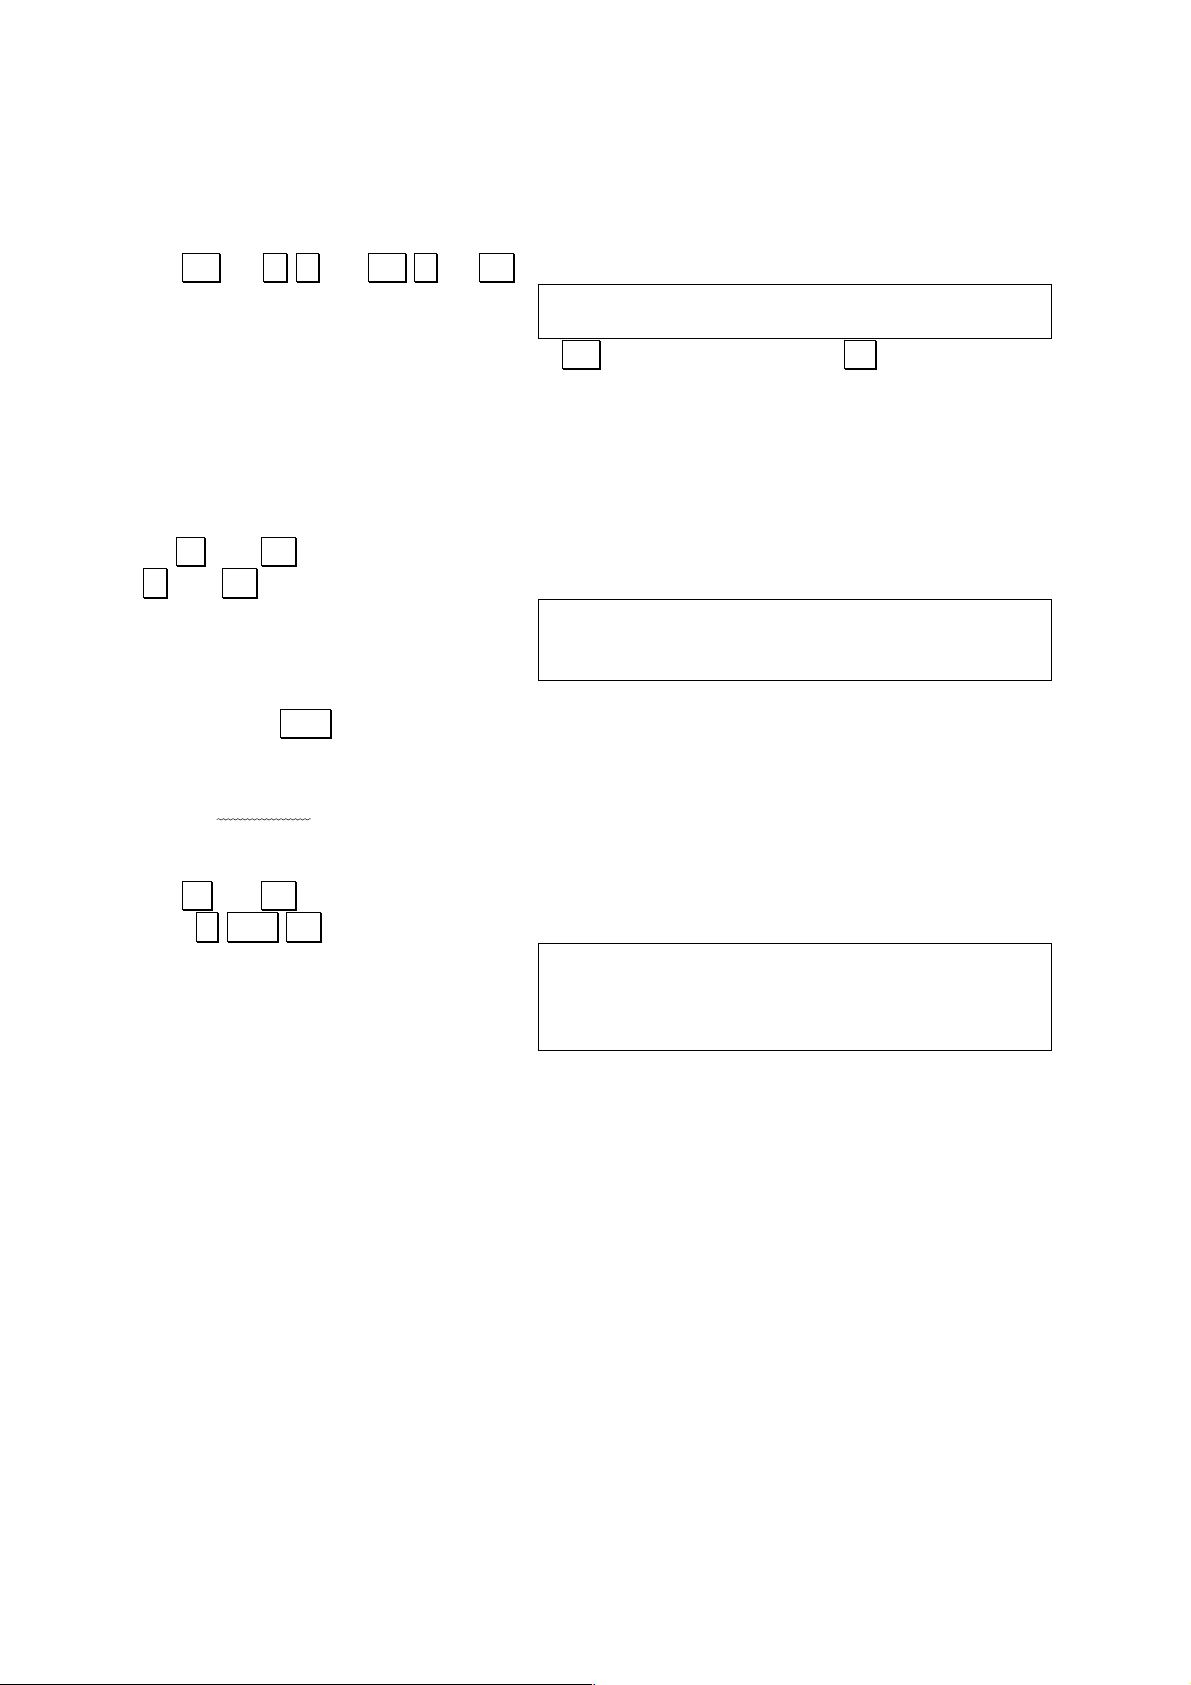
1 Unit Configuration
1.1 General Guide
Power Switch
Shift Key
Volatile Shift Key
Numeric Keys
Decimal Key
Arithmetic Operator Keys
Execute Key
Parentheses Keys
Answer Key
Engineering Key
Alphabet Keys
Space Key
CAPS Key
Cursor Keys
Insert/Delete Keys
Break Key
Backspace/Clear Line Key
Clear Screen / Home Key
Menu / Sub Menu Key
Calculator Key
Program Area Keys
Function Keys
Formula Storage Keys
ALL RESET Button
1 2 3
4
5
6
7
8 9 10
11
12
13
14
15
16
17
18
19
20
21
22
23
24
1 2 4 5 6
7
8
9
10
11
12
13
14
15
16
18
3
19
20
22
17
23
24

6
1.2 Operational Functions
Power Switch
Slide up to switch power ON and down to switch power OFF.
Shift Key ( S )
Used to enter BASIC commands and symbols noted above the keys of the keyboard.
Each press of this key causes the symbol “[S]” to switch on and off on the display.
Throughout this manual, this key is represented by Shift in order to distinguish it from
the alphabetic S key.
Volatile Shift Key ( SHIFT )
Same function as the Shift key but needs to be held when pressing the various keys,
like on table top computers.
Numeric Keys ( 0 - 9 )
Enter the numeric values noted on each key.
Decimal Key ( . )
Enters a decimal point.
Arithmetic Operator Keys ( + , - , * , / )
Enter the arithmetic operators noted on the keys.
+ : Addition
- : Substraction
* : Multiplication
/ : Division
Execute Key (. . )
Finalizes entry of a calculation and produces the result. The function of this key is
equivalent to an “=” key on a standard calculator.
This key is also used to enter lines of a program and for actual execution of
programs.
Parentheses Keys ( ( , ) )
Enter parentheses in such parenthetical calculations as: 5 x (10+20).
Answer Key ( ANS )
Recalls the result of the most recently performed manual or program calculation.
Pressing this key during program execution causes the execution to be suspended
until the . . key is pressed (STOP displayed).
Engineering Key ( ENG , )
Converts a calculation result to an exponential display.
Alphabet Keys
Enter the alphabetic characters noted on each key.
Space Key ( SPC )
Enters a space
CAPS Key ( CAPS )
1
2 3 4
5
6 7 8
9
10
11
12
13
7
Switches the alphabet keys between upper case and lower case characters. The
upper case mode is indicated by the “CAPS” symbol on the display.
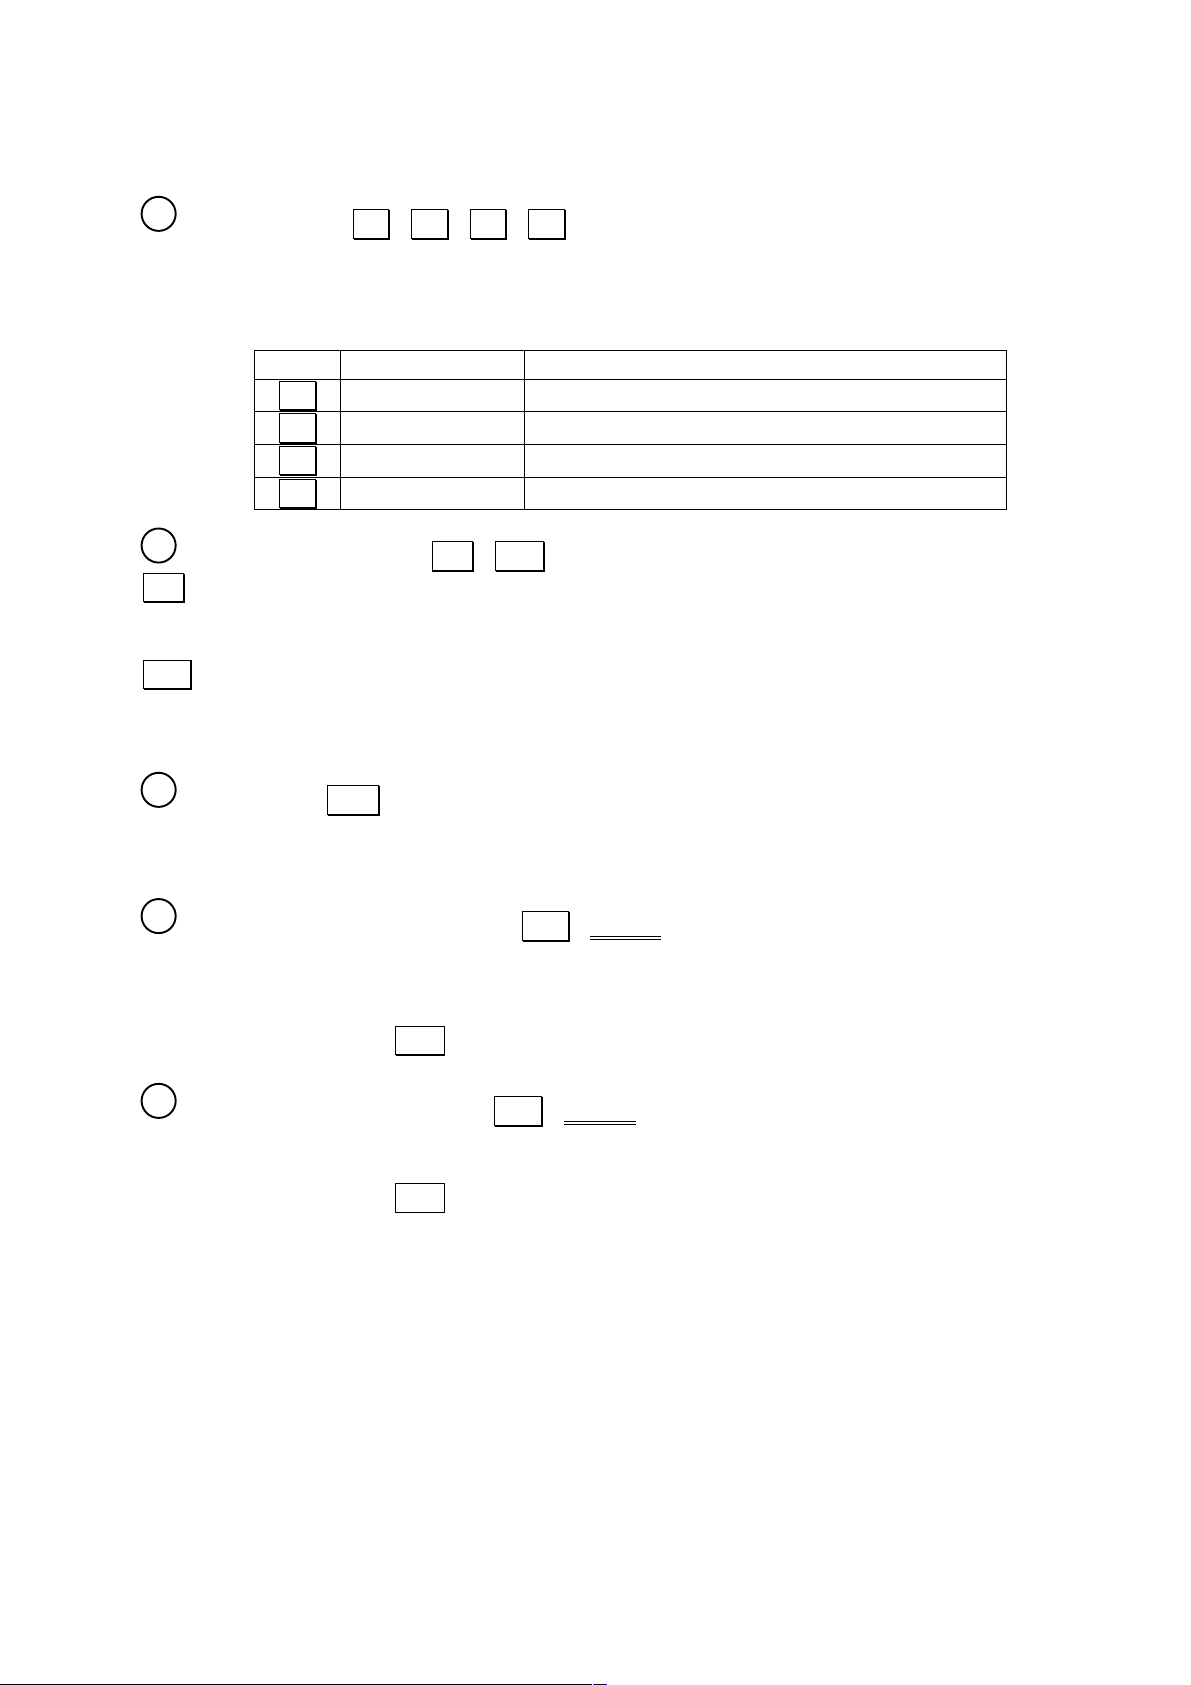
Cursor Keys ( , , , )
Move the cursor on the screen. Each press moves the cursor in the direction noted
on the keys pressed, while holding down the keys causes continuous, high speed
movement. Each cursor key also takes on a different function when pressed in
combination with the [Shift] key.
KEY
FUNCTION
[Shift] +
..
Cursor left
Moves to beginning of logical line (L.TOP)
..
Cursor right
Moves to end of logical line (L.END)
..
Cursor up
Moves to File top in editor mode (F.TOP)
..
Cursor down
Moves to File end in editor mode (F.END)
Insert / Delete Keys ( INS , DEL )
INS inserts a space at the current cursor position by shifting everything from the
cursor position right one space to the right. Its function is different when editing C
programs though.
DEL deletes the character at the current cursor position and automatically fills in the
space by shifting everything to the right of the cursor one space to the left.
Holding down either of these keys causes continuous high-speed operation of the
respective function.
Break Key ( BRK )
Terminates manual operations, program execution, printer output, and LIST output.
Also reactivates the power supply when it has been interrupted by the Auto Power
OFF function.
Backspace / Clear Line Key ( BS / L.CAN )
Deletes the character located immediately to the left of the cursor and automatically
fills in the space created by shifting everything from the cursor position right one
space to the left.
In combination with the Shift key, clears the content of the line where the cursor is
located, and brings the cursor to the left of the screen.
Clear Screen / Home Key ( CLS / HOME )
Clears the content of the screen and locates the cursor at the upper left corner of the
screen.
In combination with the Shift key, locates the cursor at the upper left corner of the
screen.
14
15
16
17
18
8
Menu / Sub Menu Key ( MENU / SUB MENU)
Used in combination with numeric keys to specify operational modes.
MENU 1 …. Serial Port communication mode
MENU 2 …. BASIC mode (program writing/editing)
MENU 3 …. C mode (program writing/editing)
MENU 4 …. CASL mode (program writing/editing)
MENU 5 …. ASSEMBLER mode (program writing/editing)
MENU 6 …. FX Statistics mode
MENU 7 …. Default configuration selection menu allowing to chose the default
configuration at switch ON (mode, default program file, display of the Carriage Return
characters ↵ ) and the current angle unit and printer mode.
In combination with the Shift key, allows within a specific mode to show the Sub
Menu of the mode.
Calculator Key ( CAL )
Switch to the CAL calculator mode.
Program Area Keys ( Shift P0 – P9 )
Executes the BASIC program in the corresponding program area in the CAL mode.
Specifies a program area for writing or editing in the BASIC mode.
Function Keys ( log , ln , sin , etc. )
Allow one-touch entry of often-used functions.
• Direct input functions
2√ , x2 , log , ln , DEGR , sin , cos , tan , ^p
• Shift functions
3√ , x3 , 10x , ex , DMS , sin-1, cos-1, tan-1, &H, HEX$, FACT
Formula Storage Keys ( IN , OUT , CALC )
Used when working with the formula storage fuction. See PART 4 FORMULA
STORAGE FUNCTION for details.
ALL RESET Button ( ALL RESET )
Clears all memory contents end enters the CAL mode. All important data should be
saved elsewhere before pressing this button. If pressing this button does not clear
memory contents, first press the P button and then press ALL RESET button again.
P Button ( P ) (rear panel)
Hardware reset button to halt misoperation caused by static electricity. Though
execution is interrupted, memory contents are retained. The ALL RESET button
should be used when the misoperation damages memory contents. Note that power
switches OFF and then ON again when the P button is pressed.
19
20
21
22
23
24
25

9
1.3 Symbol Display
The symbols noted on the display illustrated below appear to show the current status
of a calculation
CAPS .
S .
BASIC .
DEG .
RAD .
GRA .
CAPS: Upper case alphabetic characters (lower cases when not displayed)
S : Shift mode (commands/functions marked above the keys can be input
BASIC: BASIC mode (BASIC program input, editing, execution)
DEG: Angle unit – degrees
RAD: Angle unit – radians
GRA: Angle unit – grads

10
1.4 Keyboard
A look at the keyboard of the unit reveals characters and symbols located above the
keys. These are accessed using the CAPS and Shift keys.
1.4.1 Keytop Functions
Normal Mode
In this mode, each key inputs the characters, symbols, or commands noted on the
keys themselves. (this status is automatically set when power is switched ON and
immediately following a RESET procedure.)
EXAMPLE:
Operation Display
A A
E E
Lower Case Mode
Pressing the CAPS key shifts the alphabetic keys (only) to lower case characters,
indicated by the CAPS symbol disappearing from the display. Pressing the CAPS
key once locks the keyboard into the lower case mode, while pressing again returns
to upper case.
EXAMPLE:
Operation Display
CAPS A a
B b
D d

11
1.4.2 Functions Noted Above the Keys
The BASIC one-key commands, and the symbols and commands noted above the
keys are entered when the corresponding keys are pressed following the Shift key.
Note, however, that pressing the numeric keys ( 0 - 9 ) after Shift in the CAL
mode executes the BASIC program in the corresponding program area.
EXAMPLE:
Operation Display
Shift Z PRINT
Shift * NPR(
1.5 Screen
The screen is a 32-column x 2-line liquid crystal display. Characters are formed by a
5 x 7 dot matrix.
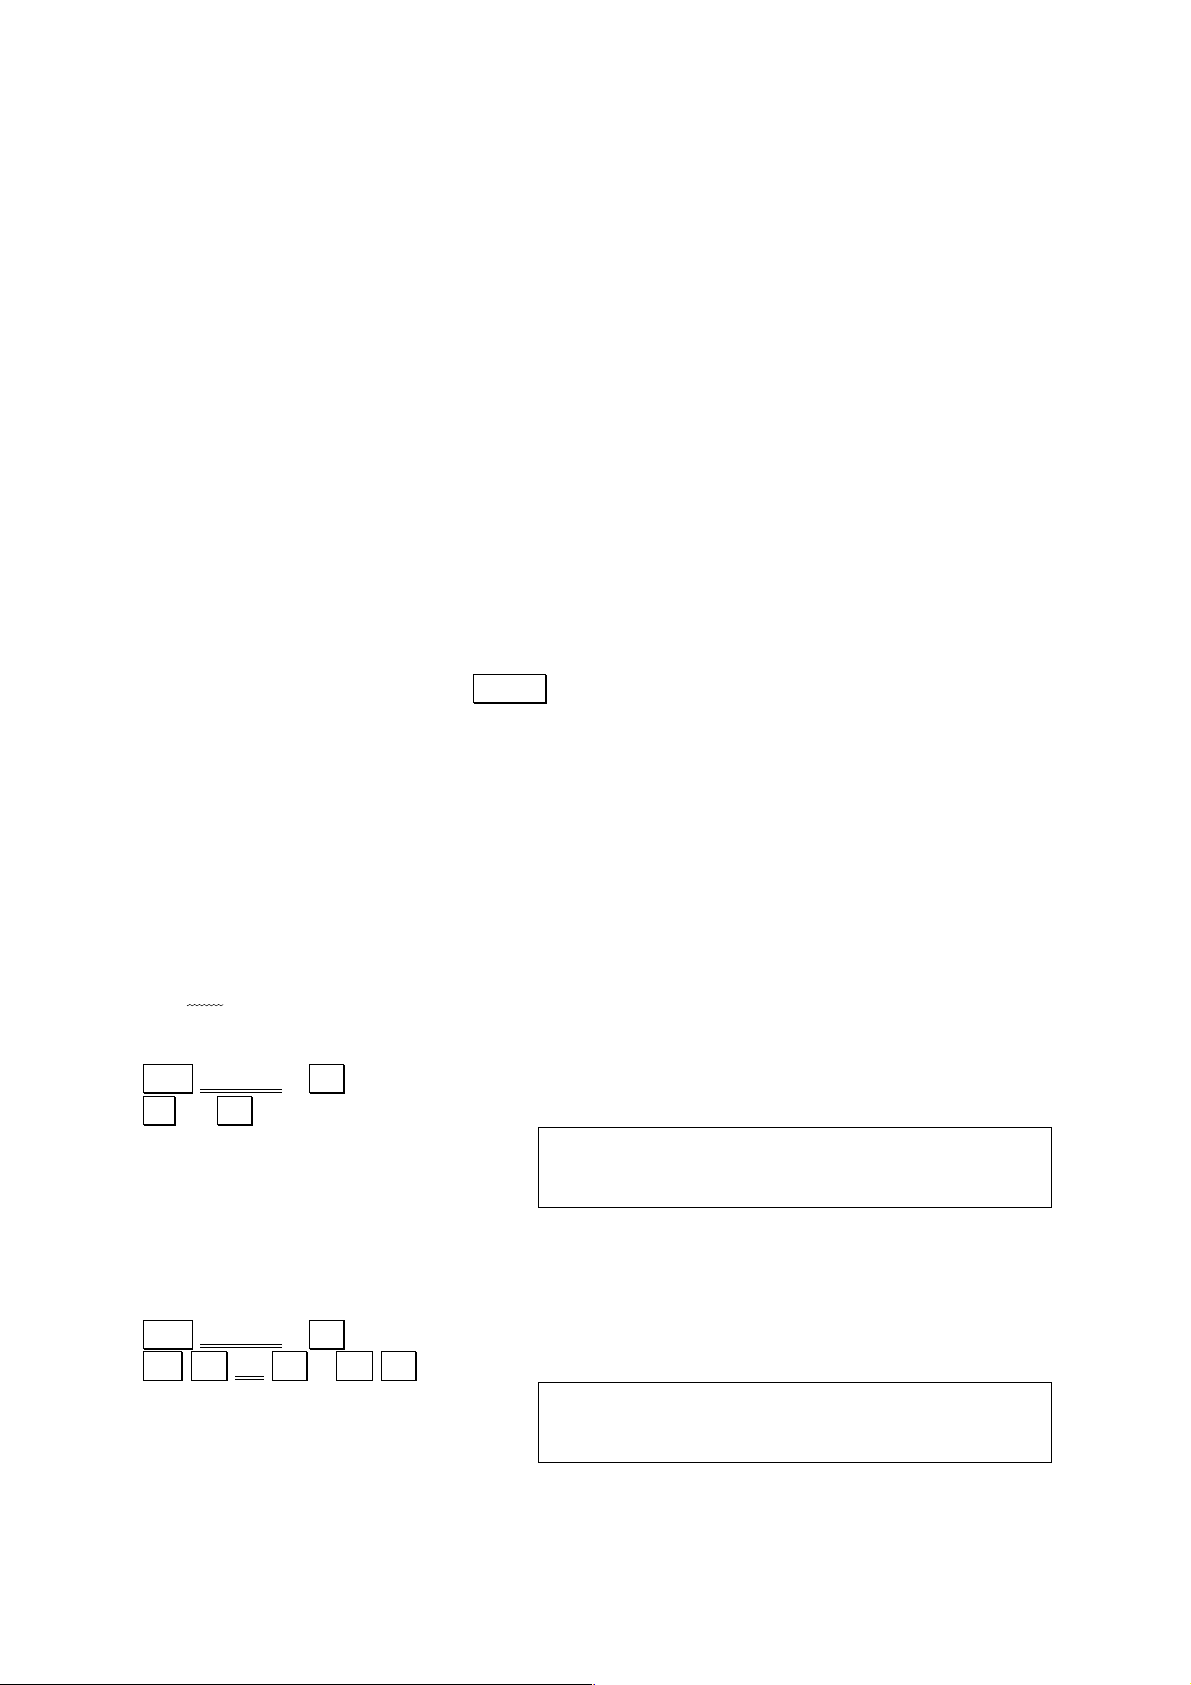
1.5.1 Physical Lines and Logical Lines
The maximum display capacity of one line is 32 columns, but internally the unit is
capable of handling lines up to 255 characters long. The display capacity line (32
characters) is referred to as the physical line, while the internal capacity line is called
a logical line. A logical line is a continuous line of characters in which any column on
the extreme right of the screen is not a null.
One physical line →
One physical line →
1+2+3+4+5+6+7+8+9+10+11+12+12+14
+15+16+17_
One logical line, from the first character to the last
Pressing Shift moves the cursor to the beginning of the logical line, while Shift
. moves the cursor to the end of the logical line. These operations are useful in
determining the extent of logical lines.
1.5.2 Virtual Screen
The screen can display four lines at one time, and as the 5th line is input, the first line
scrolls off the top of the screen. Lines that scroll off of the screen can, however, be
brought back into view using the cursor ( / ) keys, because the unit is able to
store up to eight lines internally. These eight lines make up the virtual screen, while
the four lines actually displayed are called the actual screen.
1 AAAA
2 BBBB
3 CCCC
4 DDDD
5 EEEE
6 FFFF
Actual screen
(4 lines)
Virtual screen (8 lines)
7 GGGG
8 HHHH
12
1.5.3 Screen Editor
Any program lines or data included on the virtual screen can be edited. First the
portion of the program or data is brought onto the actual screen, and then the cursor
is located at the position to be edited
1.5.4 Display Contrast
The display may appear dark or dim depending upon the strength of the batteries or
the viewing angle. The contrast of the display can be adjusted to the desired level by
rotating the control dial down darkens the display, while rotating it up lightens the
display.
A weak display when contrast is set to high level indicates weakened batteries, and
batteries should be replaced as soon as possible.
1.6 Display Characters
The relationship between characters and character codes is illustrated in the
following table.
Character Code Table
High-order digit
0
16
32
48
64
80
96
112
128
144
160
176
192
208
224
240
HEX
0
1 2 3 4 5 6 7 8 9 A B C D E F
0 0
SPC
0 @ P ` p
Ä
0
SPC
-
タ
ミ
≥
1 1
DEL
1 A Q a q ∫ 1 °
ア チ ム ≤ 円
2
2
LINE
TOP
INS
“ 2 B R b r √
2
┏
イ ツ メ ± 年
3
3 # 3 C S c s
´
3
┛
ウ テ モ 月
4
4
SHIFT
RELEASE
4 D T d t
∑ 4 `
エ ト ヤ 日
5
5
LINE
CANCEL
5 E U e u
Ω 5 .
オ ナ ユ 千
6
6
LINE
END
& 6 F V f v
6
ヲ カ ニ
ヨ 万
7
7
BEL
’ 7 G W g w
7
ァ キ ヌ
ラ
π
£
8
8
BS
( 8 H X h x
α 8 ィ ク ネ リ ♠
¢
9
9
CAPS
L-U
) 9 I Y i y
β 9 ゥ ケ ノ ル ♥
±
10
A
LF
* : J Z j z γ +
ェ コ ハ レ ♦
〒
11
B
HOME
+ ; K [ k { ε -
ォ サ ヒ ロ ♣
o
12
C
CLS
, < L ¥ l
|
θ n ャ シ フ
ワ
13
D
CR
- = M ] m
}
μ x ュ ス ヘ
ン
14
E
SHIFT
SET
. > ^ n
~
σ
-1
ョ セ ホ
¨ ∆
Low-order digit
15
F
CAPS
U-L
/ ? _ o
φ ッ ソ マ
°
\
CONTRAST
13
Characters which cannot be displayed using keyboard input can be displayed using
the CHR$ function.
1.7 Power Supply
This unit is equipped with a main power supply (four AA Alkaline batteries) and a
backup power supply (one CR2032 lithium battery). Batteries should be replaced
whenever the display remains dim, even after contrast adjustment. Batteries should
also be replaced once every two years regardless of how much the unit has been
used.
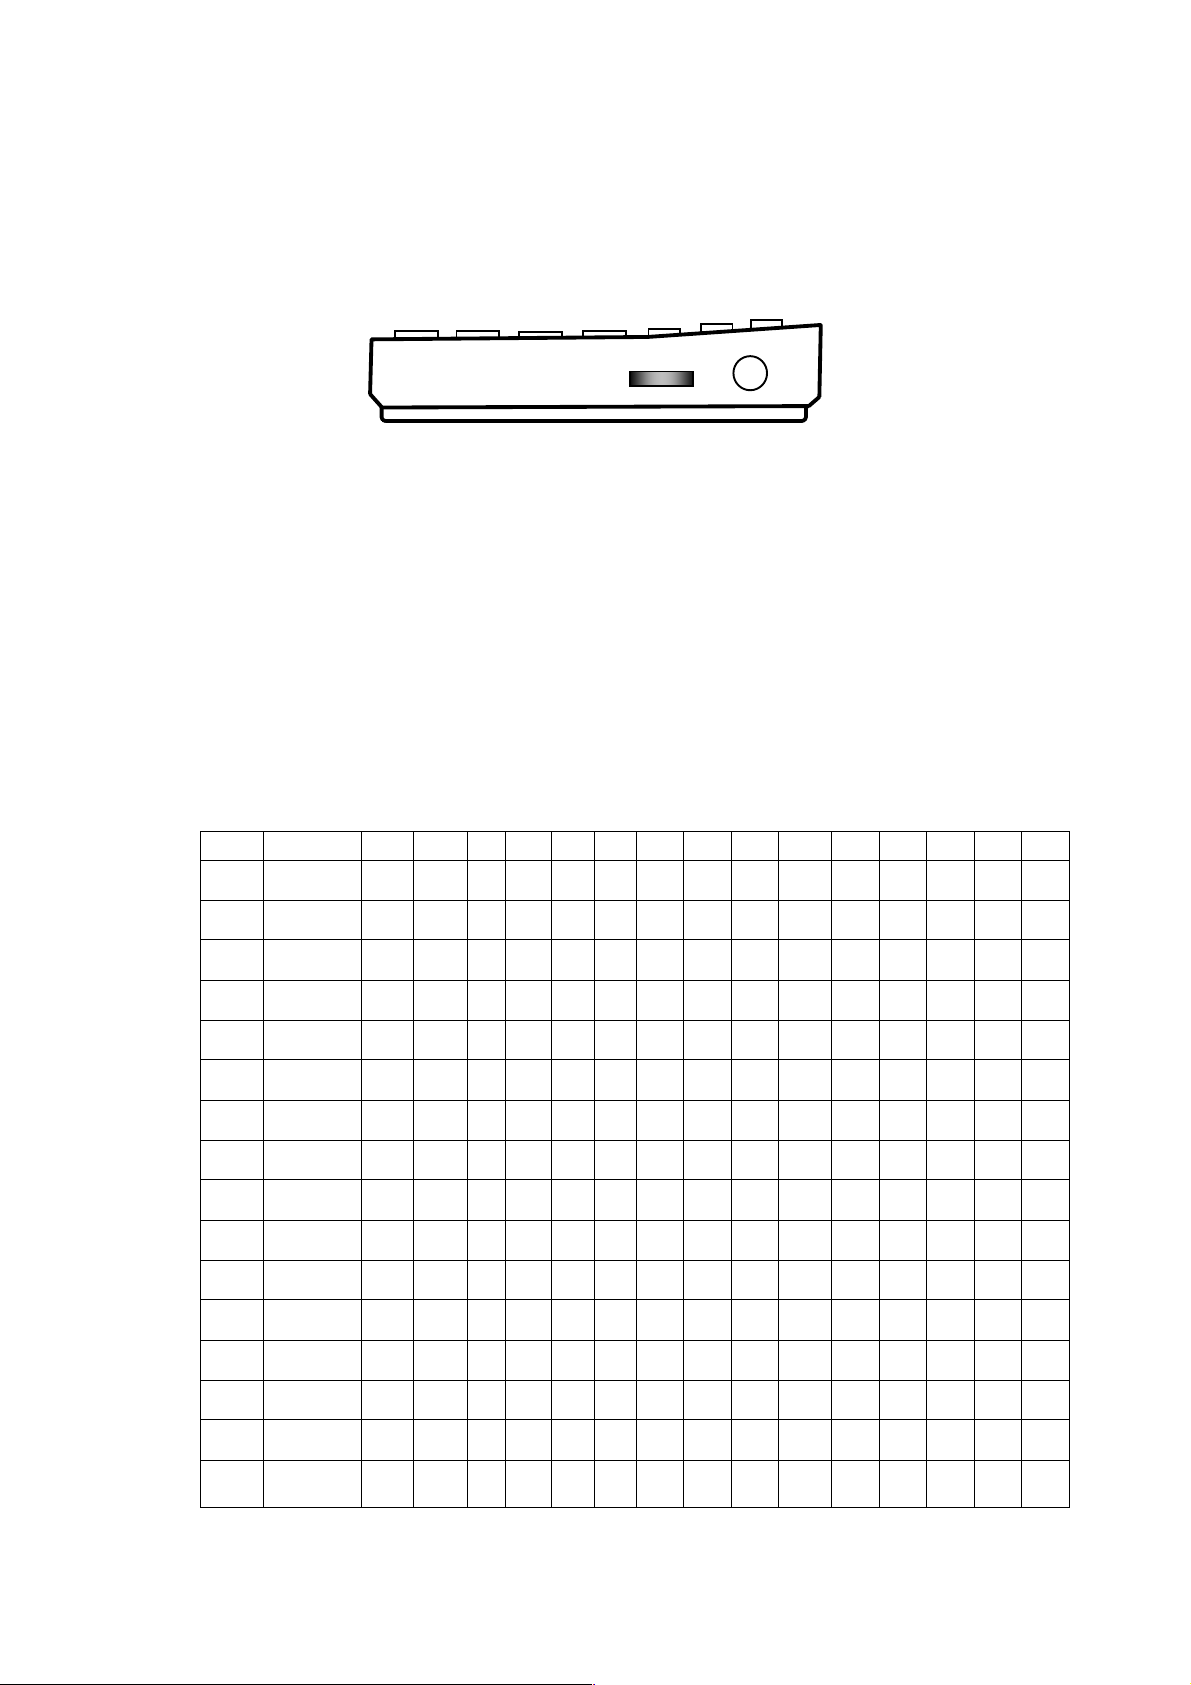
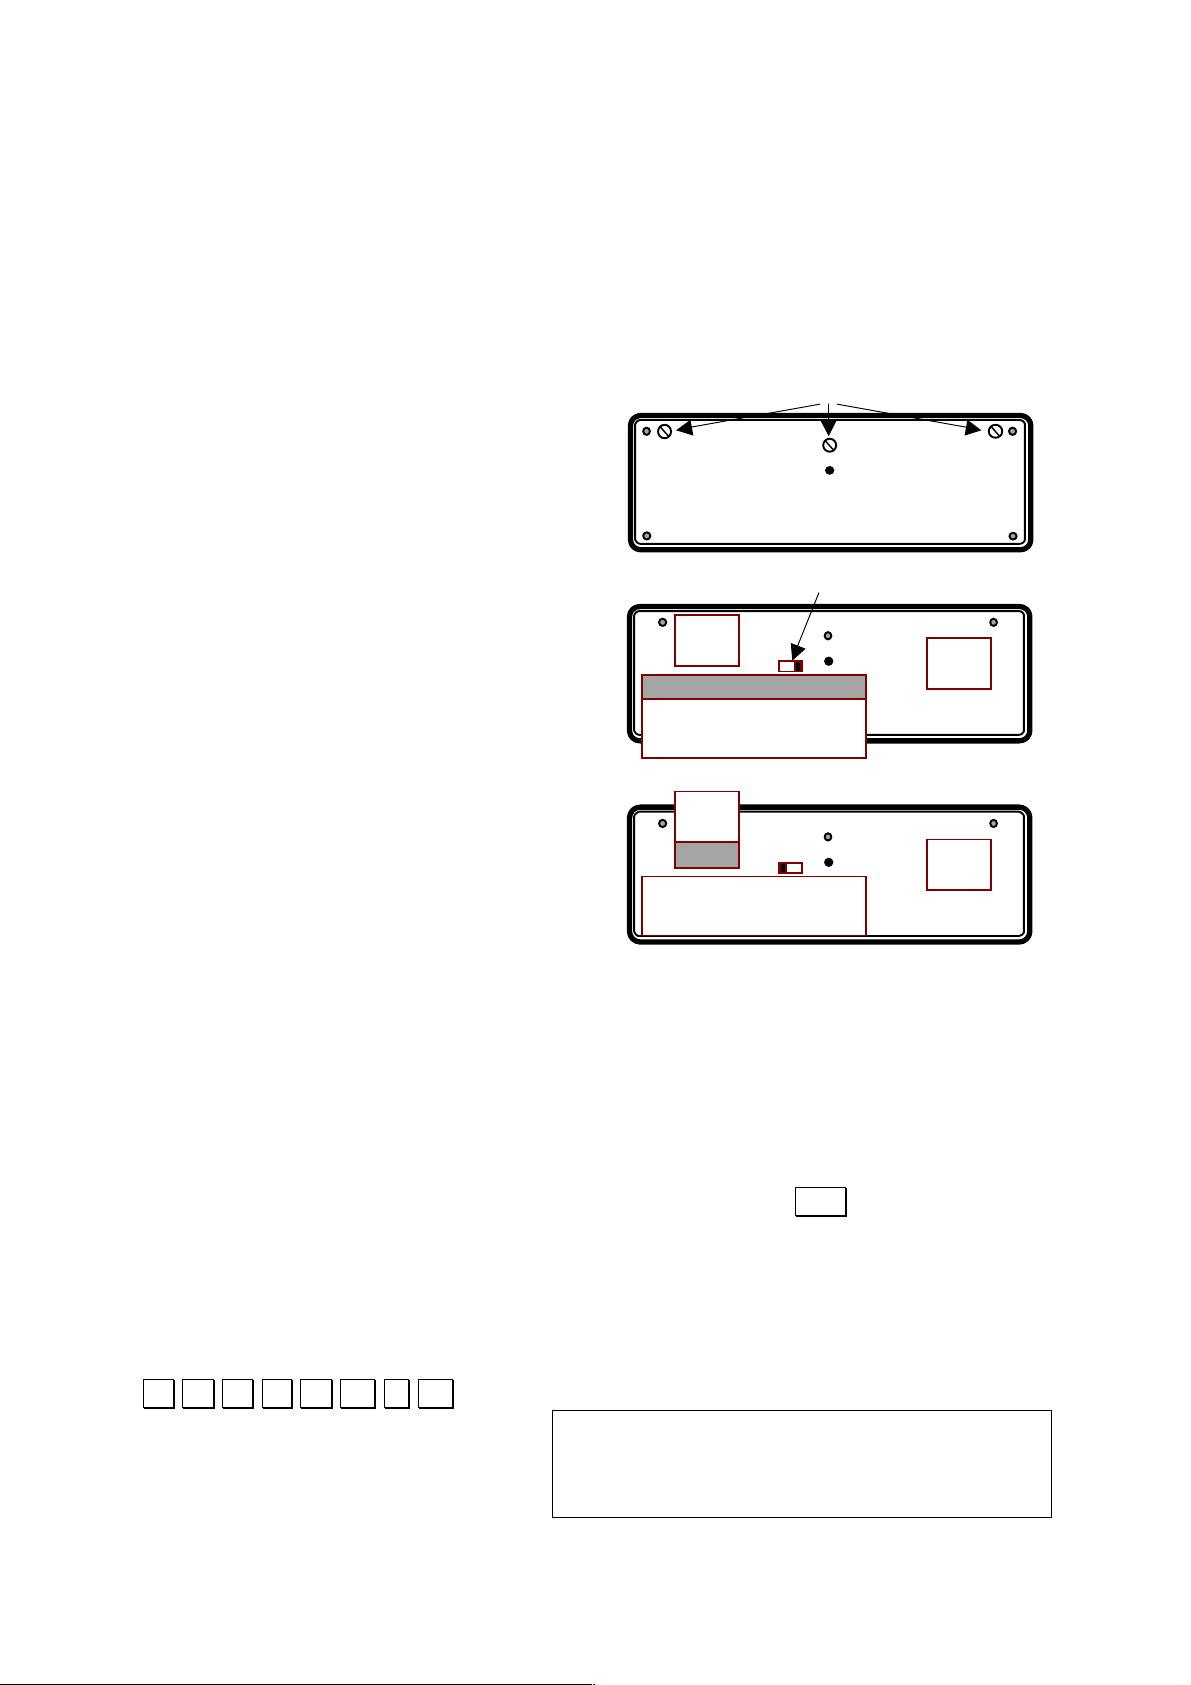
Battery Replacement
1) Switch the power of the unit OFF and
remove the rear panel of the unit after
removing the three screws holding it in
place.
2) To replace the four batteries of the main
power supply, position the internal switch to
the right, slide the cover of the battery
compartment and replace the four AA
batteries.
Put back the internal switch in its central
position
3) To replace the memory backup battery,
position the internal switch to the left, slide
the cover of the battery compartment and
replace the CR2032 battery.
Put back the internal switch in its central
position
4) Replace the rear panel on the unit and three screws to hold it in place.
1.8 Auto Power Off
The power of the unit is automatically switched OFF approximately 6 minutes after
the last key operation (except during program execution), or the last input for an
INPUT statement or PRINT statement. Power can be resumed by either switching
the power switch OFF and then ON again, or by pressing the BRK key.
Program and data contents are retained even when power is switched OFF, but
settings such as the number of digits or the mode (i.e. BASIC mode) are cancelled.
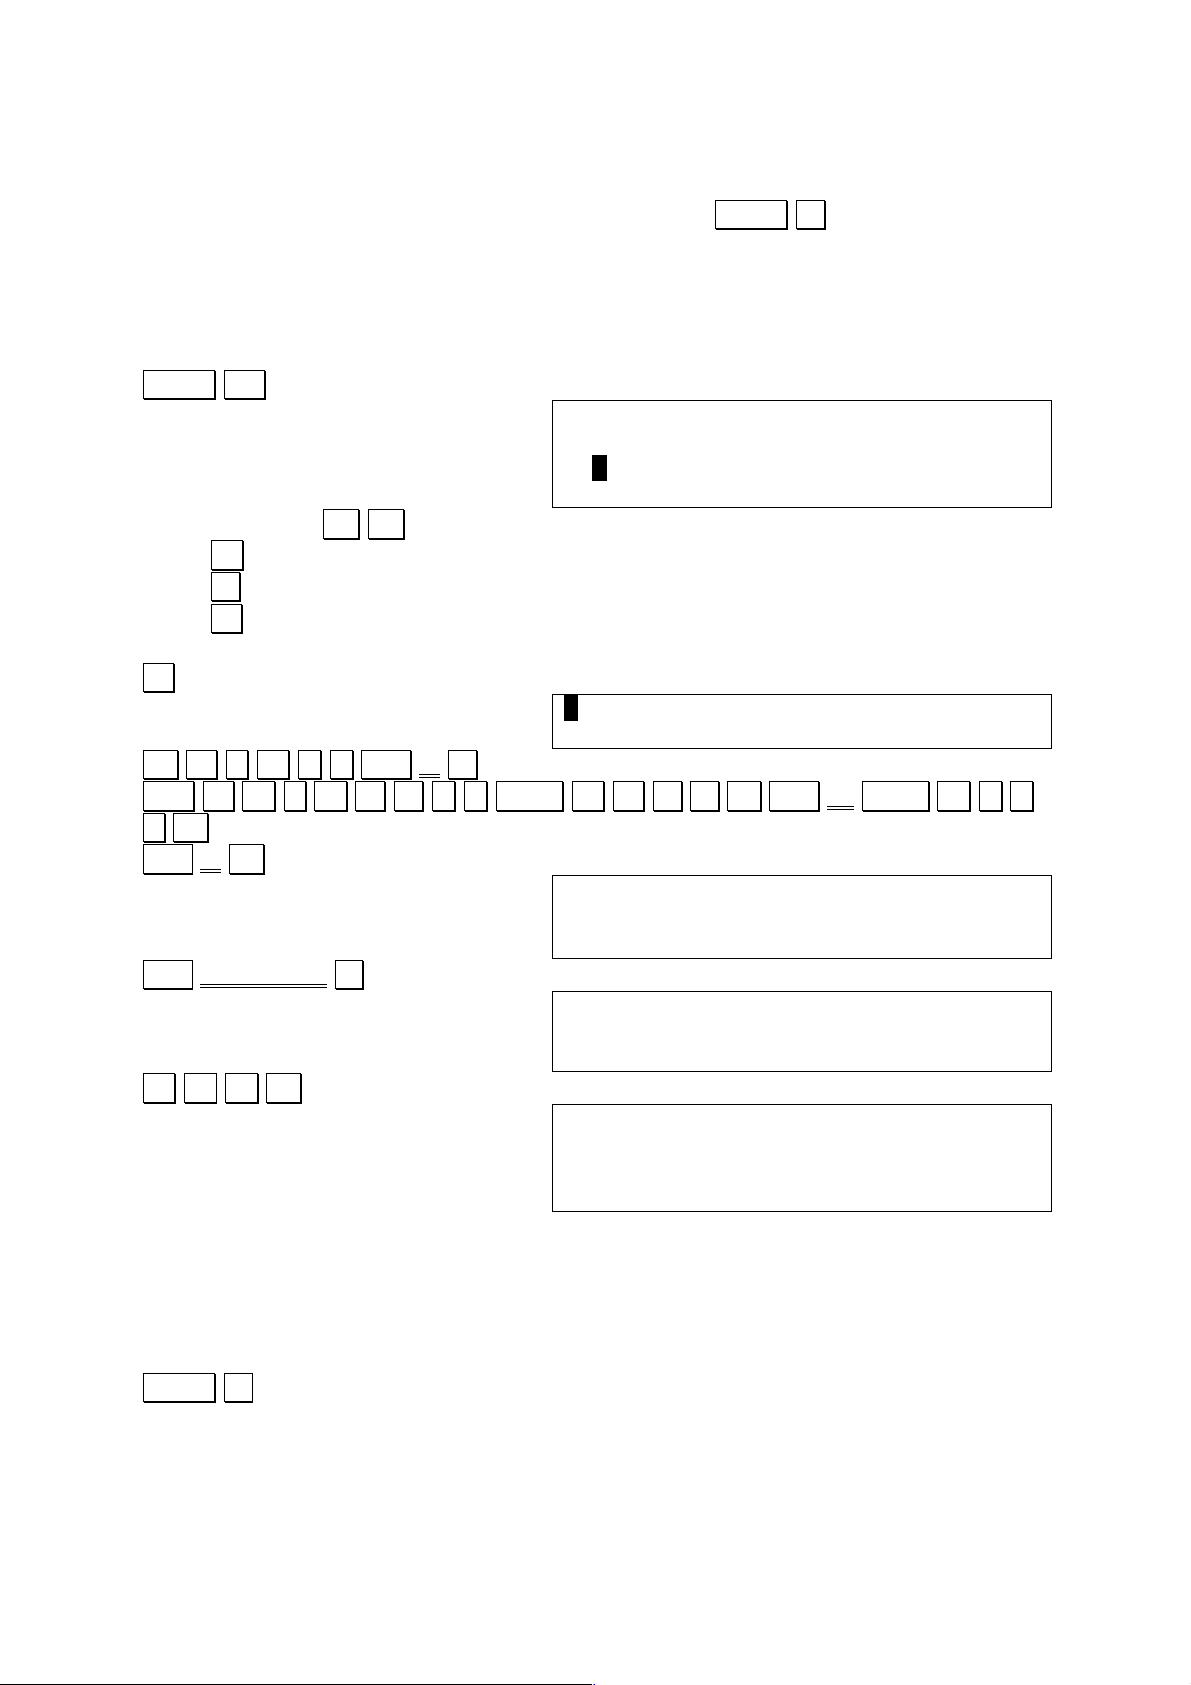
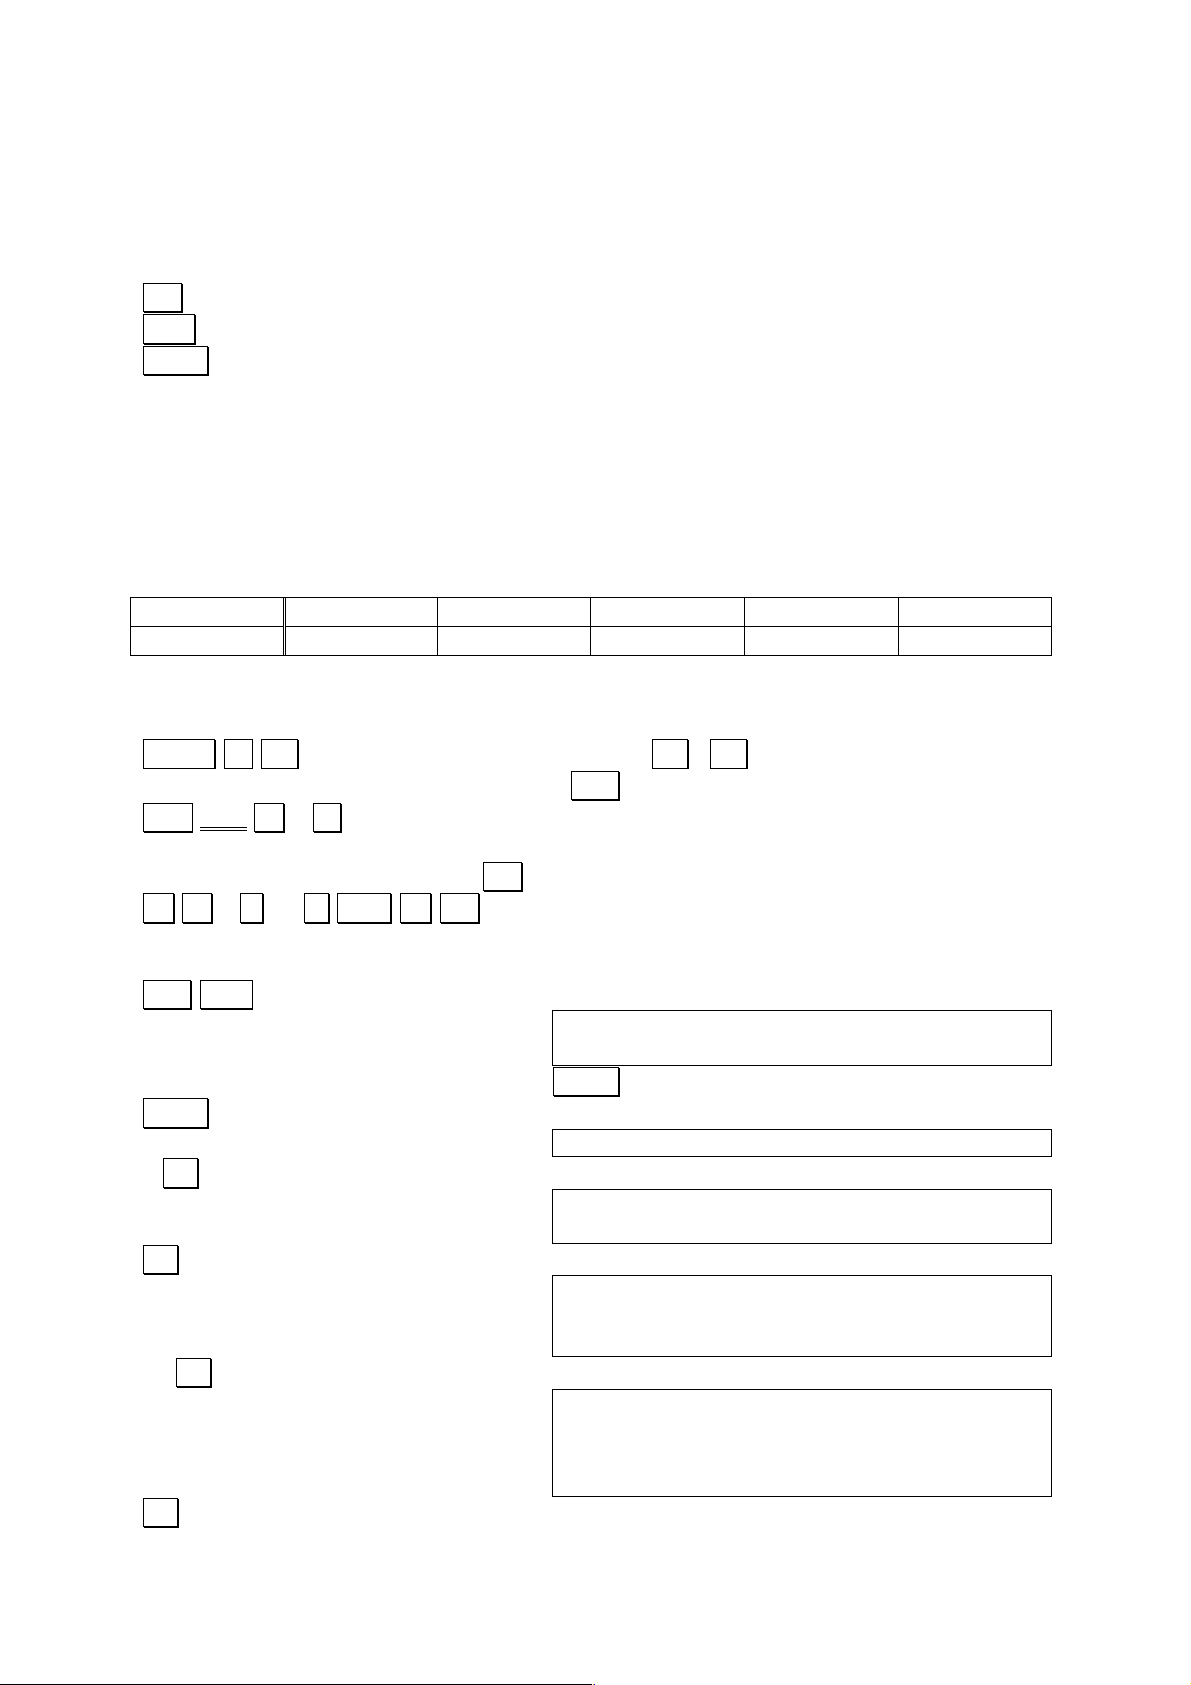
1.9 SYSTEM* Self Test Function
The unit has a powerful built-in self-test function you can address by entering the
following command:
.S Y S T E M * . .
[0]ROM [1]LCD [2]KEY [3]LB
[4]RAM [5]RAMW [6]RAMR [7]DISP
[8]3Pin Connector[9]DISPLOOP
[+]I/O
P
Screws
Switch

14
Note: This hardware test will erase all programs and data stored in the unit.
Selecting one of the options of the self-test menu will allow following tests
0. Test of the Read Only Memory, computing check sum and XOR check
1. Test of the symbol displays, outside pixels, uneven pixels, even pixels, all
pixels together. Go from one test to another with the . . key.
2. Test of each key, starting with MENU and finishing with . . The computer
will ask to depress each key, notifying a successful result with the beeper.
3. Low Battery test. This allows testing the main battery and backup (SUB)
battery status. Press BRK key to go back to the SYSTEM* menu.
4. Test of the Random Access Memory. This test will return the amount of RAM
in the unit (main and optional extension pack) and test it by writing and
reading it, returning “CHECK OK” when successful. Press any key to go back
to SYSTEM* menu.
5. Writing test of the RAM. This is the first phase of the [4]RAM test.
6. Reading test of the RAM. This is the second phase of the [4]RAM test, and it
will work properly only if executed just after the writing test. Use the BRK key
to exit the test in case of an error.
7. Rest of the display and the beeper. Press the BRK key to go back to
SYSTEM* menu.
8. Test of the 3-pin connector.
9. Test of the display using a loop printing the character set. Exit the loop with
the BRK key.
+ Test of the Input / output port.
Exit the SYSTEM* menu by pressing the CAL key.

15
2 Fundamental Operation
This section covers the various modes available with the computer using a series of
simple examples. These procedures should be mastered before attempting more
complex operations.
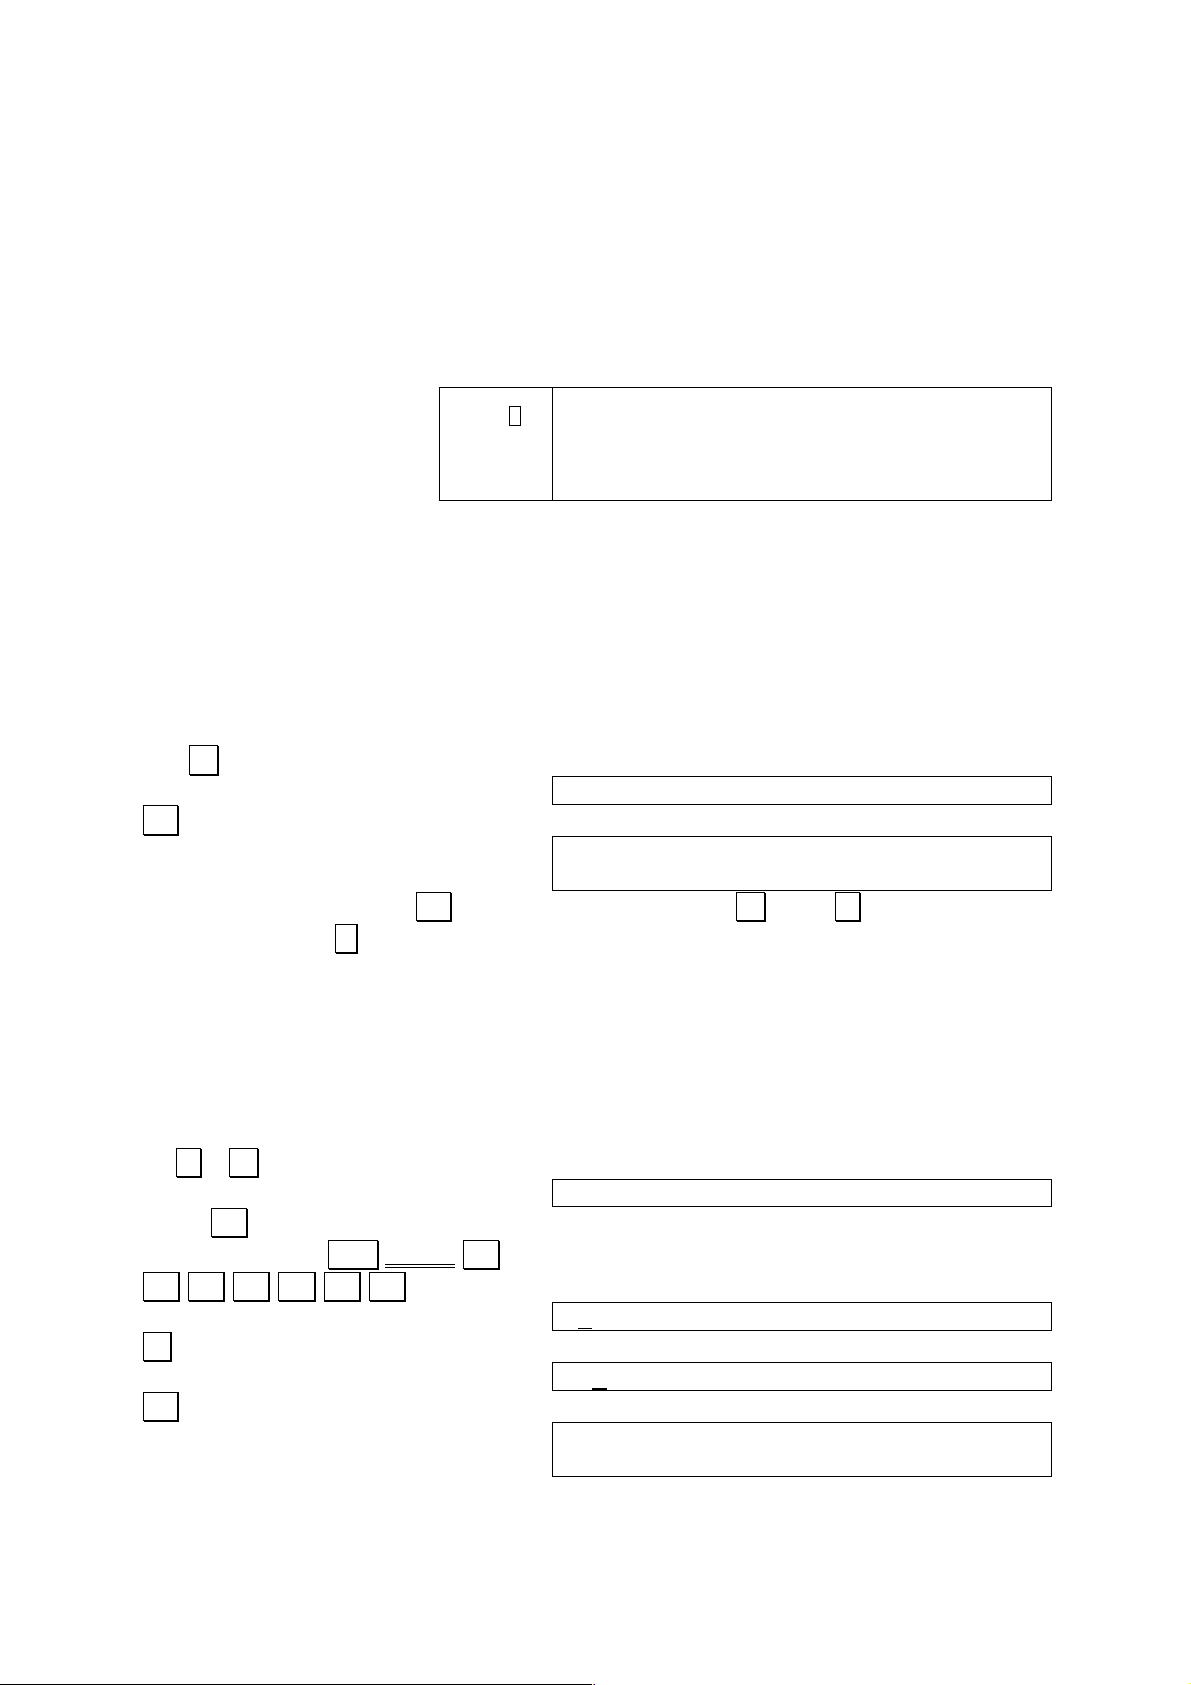
2.1 CAL Mode
The CAL mode is in effect each time the power of the unit is switched ON. Arithmetic
calculations, function calculations, formula storage calculations, program execution
can be performed in this mode.
EXAMPLE:
2.5+3.5-2=
OPERATION:
2 . 5 + 3 . 5 - 2 . .
3.5+3.5–2
4
The touch . . is used instead of the = key, operation is identical to that used in a
standard calculator.
The CAL mode can be entered from another mode by pressing the CAL key.
2.2 Formula Storage Function
The formula storage function makes it possible to store often-used formulas in
memory for calculation when values are assigned to variables. This function is
applied in the CAL mode using the IN , OUT , and CALC keys.
EXAMPLE:
Determining the selling price of a product by applying a profit rate based on the
purchase price and selling price.
SELLING PRICE = PURCHASE PRICE / (1 – PROFIT%)
KEY INPUT
CAL
S E L L = P U R C H A S E / ( 1 - P R O F I T ) IN.
Ensure that input of the formula is correct by pressing the OUT key.
OPERATION:
OUT
SELL=PURCHASE/(1–PROFIT)
SELL=PURCHASE/(1–PROFIT)_

16
Now, calculate the selling prices of the following:
PURCHASE PRICE
PROFIT
$1000
30%
$960
25%
CALC
PURCHASE?_
1000 . .
PURCHASE?1000
PROFIT?_
0 . 3 . .
PURCHASE?1000
PROFIT?0.3
SELL= 1428.571429
CALC
PURCHASE?_
960 . .
PURCHASE?960
PROFIT?_
. 25 . .
PURCHASE?960
PROFIT?.25
SELL= 1280
As can be seen in this example, once a formula is input, it can be used repeatedly by
simply assigning values for the variables. See PART 4 FORMULA STORAGE
FUNCTION for details.
* The BRK key can be used to terminate this function.
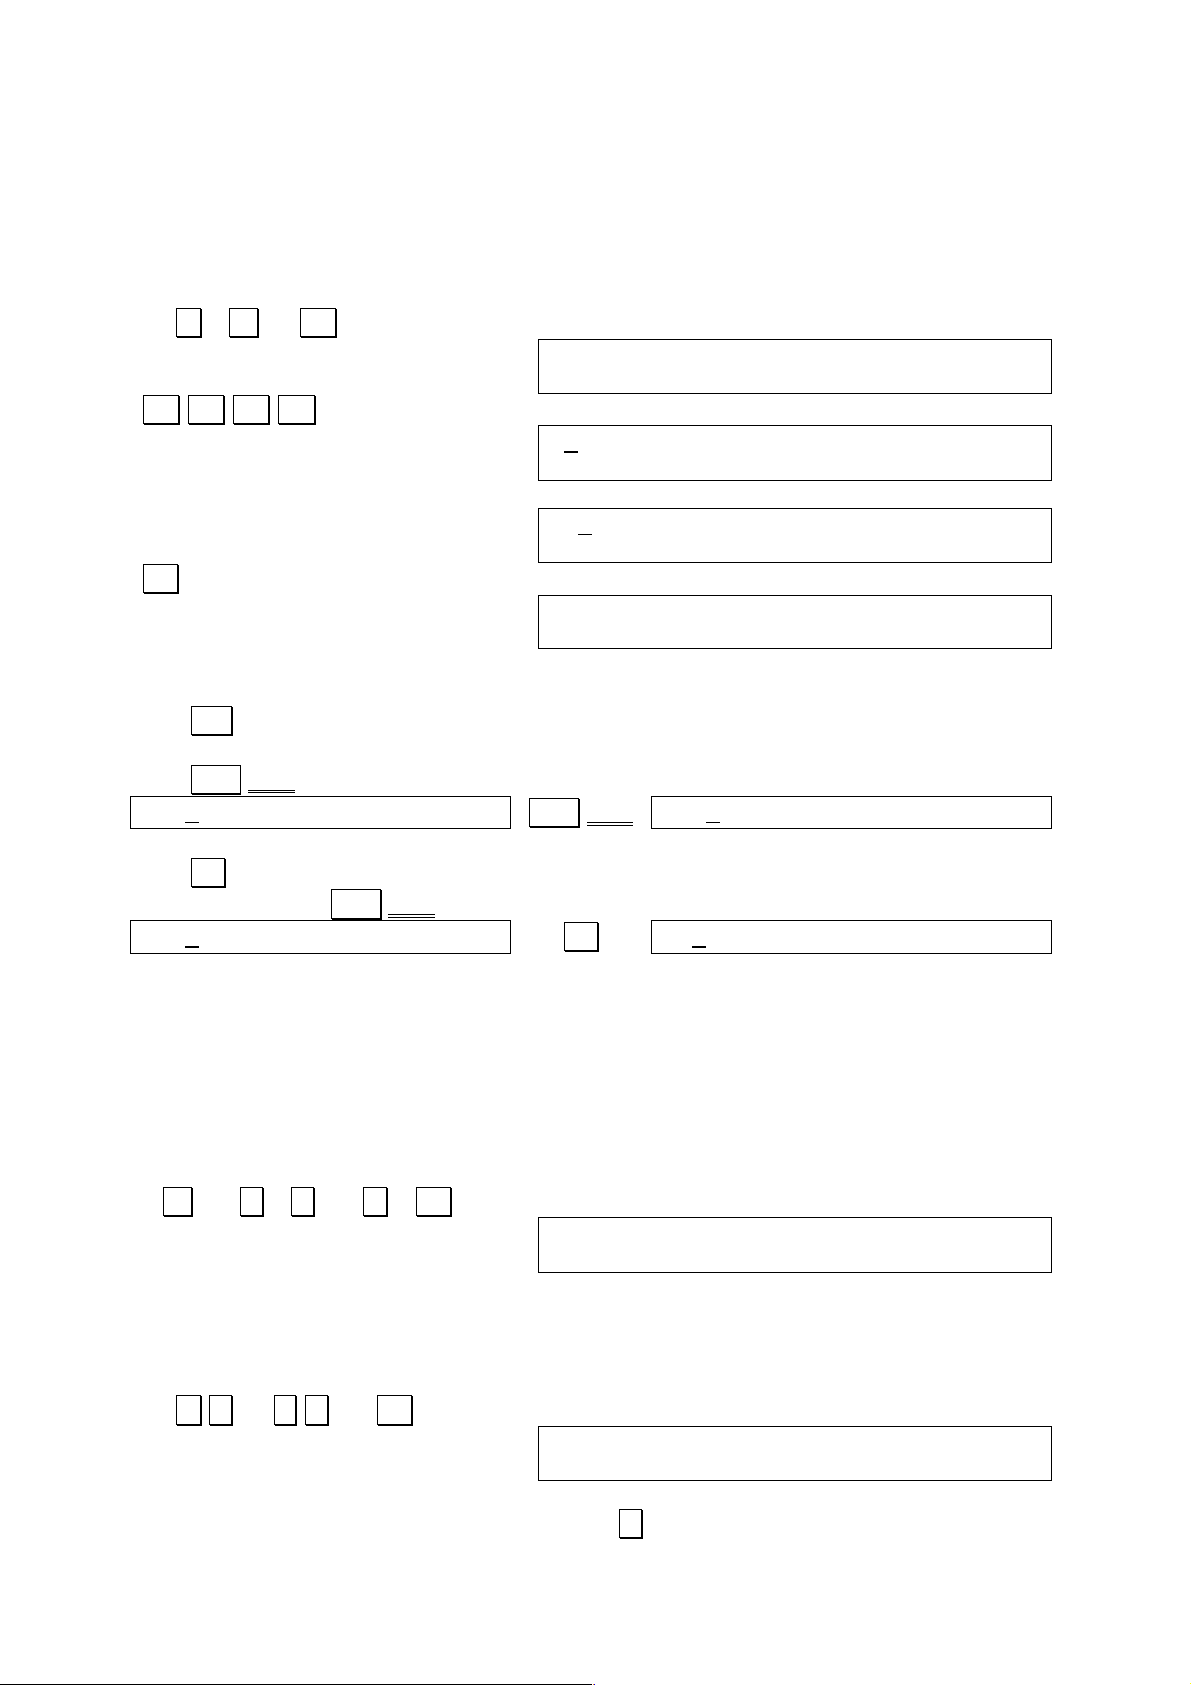
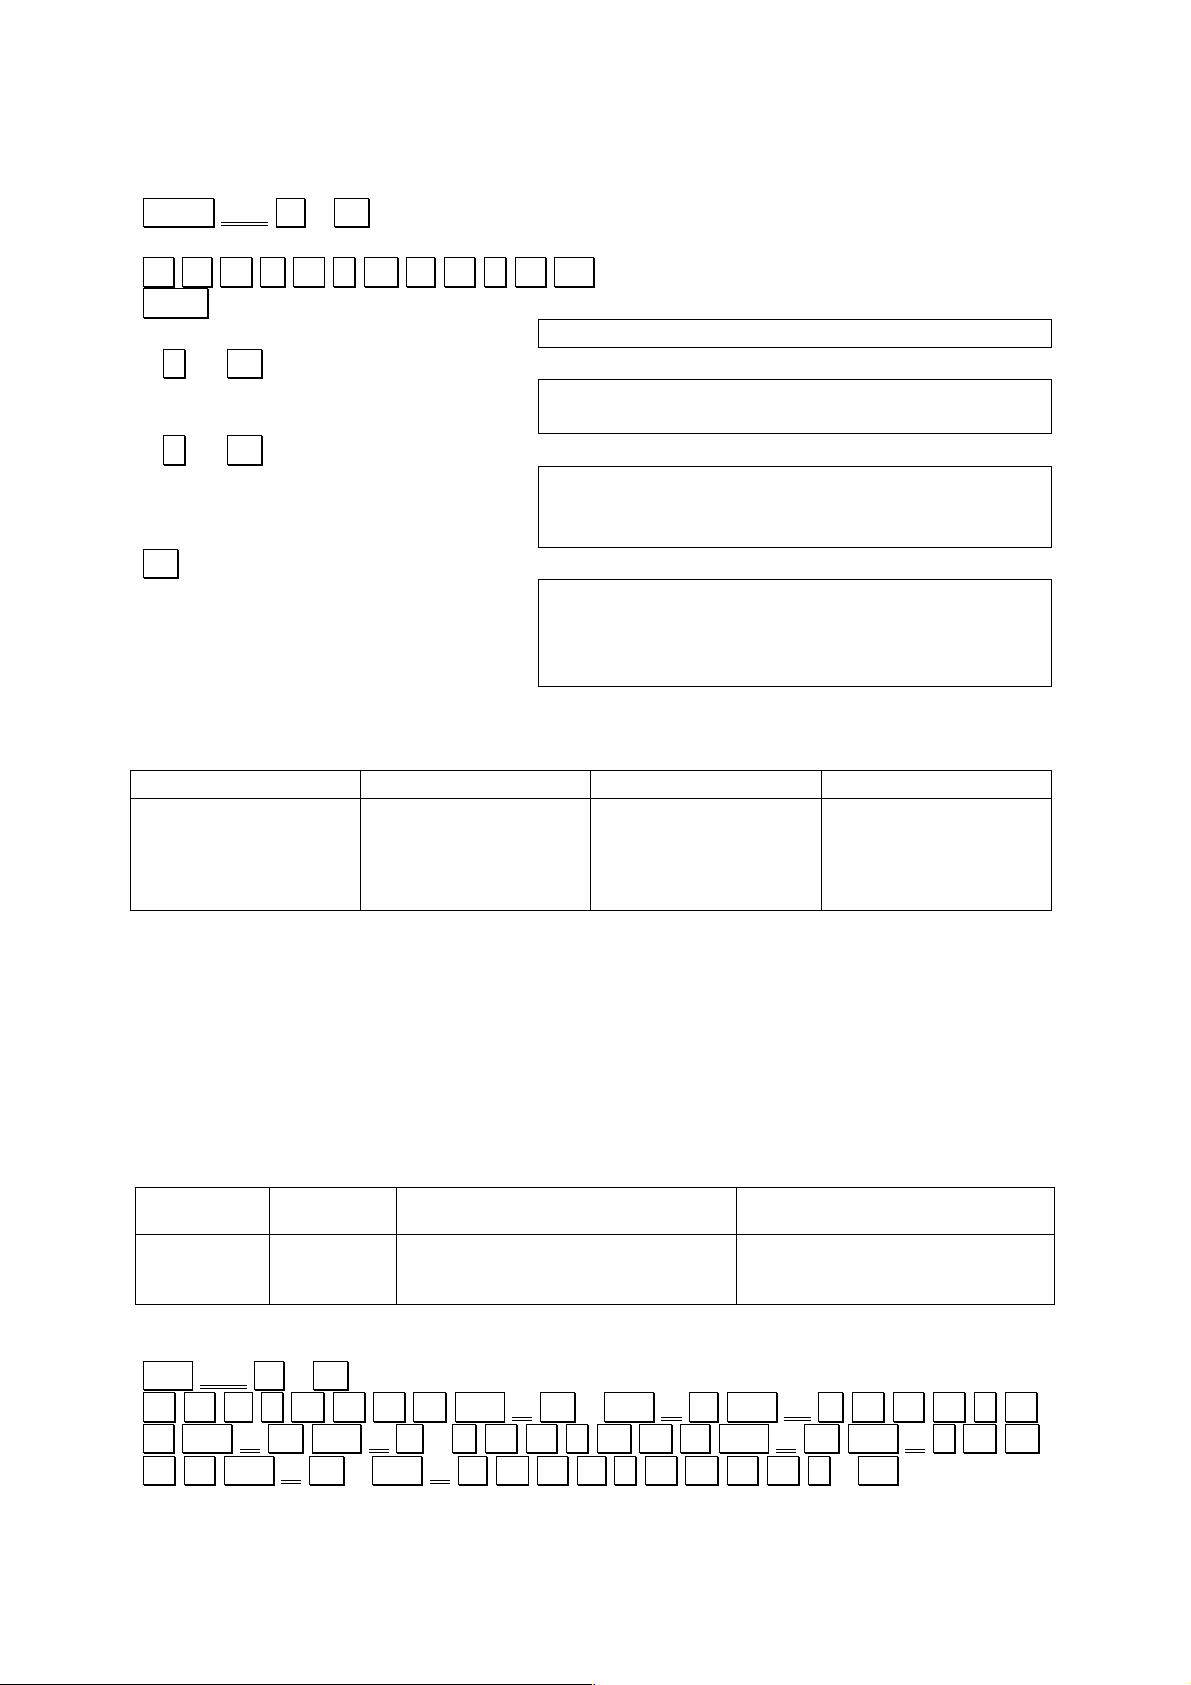
2.3 BASIC Mode
The BASIC mode is used for the creation, execution and editing of BASIC programs.
The BASIC mode can be entered from another mode by pressing MENU 2 .
EXAMPLE:
Create and execute a program that calculates the sum of two values A and B.
PROGRAM INPUT
MENU 22
P 0 1 2 3 4 5 6 7 8 9 51146B
Ready P0
Shift P0.
10 A = 5 .
20 B = 6 .
30 P R I N T A + B . .
40 E N D . .
PROGRAM EXECUTION
R U N . .
RUN
11
Ready P0
17
2.4 C Mode
The C mode is used for the creation, execution and editing of C programs. The C
mode can be entered from another mode by pressing MENU 3 .
EXAMPLE:
Create and execute a program that prints HELLO.
PROGRAM INPUT
MENU 32
< C >
F 0 1 2 3 4 5 6 7 8 9 51113B
F0>Run/Load/Source
You can use the cursor keys to select the program area 0 - 9
Press R (Run) to run the C program
Press L (Load) to load the C program for the interpreter
Press S (Source) to edit the C source code.
S.
O
M A I N ( ) Shift { .
SPC P R I N T F ( “ CAPS H E L L O Shift ¥ CAPS N ” ).
.;. . .
Shift } . .
main(){↵
printf(“HELLO¥n”);↵
}
Shift SUB MENU L.
Load F0
>
R U N . .
>run
HELLO
>
2.5 CASL Mode
The CASL mode is used for the creation, execution and editing of the assembler
language dedicated to the virtual machine COMET widely used in Japan to teach
computer science. The CASL mode can be entered from another mode by pressing
MENU 4..
2.6 Assembler Mode
18
3 Calculation Function
This section covers fundamental arithmetic calculations and function calculations,
which are performed manually.
3.1 Manual Calculation Preparations
Switch the power of the unit ON
CAPS .
S .
BASIC .
DEG .
RAD .
GRA .
_
The display illustrated above appears whenever the power is switched ON. It
indicates the CAL mode in which manual calculations can be performed. Currently
specified angle units, however, is retained even when the power is switched OFF.
3.2 Manual Calculation Input and Correction
Perform the following fundamental calculations to become familiar with this mode.
EXAMPLE:
123 + 456 = 579
123 + 456 (Formula input)
123+456_
. . (Obtains result)
123+456
579
As can be seen here, the . . key is pressed in place of = . The * key is used for
multiplication and / is used for division.
The following procedure can be used to correct entered data.
EXAMPLE:
33 x 5 + 16 = 181
For the sake of example, the value 33 here will be mistakenly entered as 34.
34 * 5 + 16
34*5+16_
Press six times to move cursor back to position of 4. This can also be
accomplished by Shift L.TOP .
. .
34*5+16
3. (Replaces 4 with 3)
33*5+16
. .
33*5+16
181
19
EXAMPLE:
33 x 5 + 16 = 181
For the sake of the example, the above calculation will be performed with the value
33 mistakenly entered as 34.
34 * 5 + 16 . .
34*5+16
186
. . (Move cursor to position for correction.)
34*5+16
186
3
33*5+16
186
. . (Re-execute calculation.)
33*5+16
181
Correction of entries can use following keys:
The INS key is used to insert spaces at the current cursor location for input of
characters or symbols.
The Shift DEL key is used to delete characters at the current cursor location.
ABCDEFGH
Shift DEL
ABCEFGH
The BS key can also be used to delete characters, but its operation is slightly
different from the Shift DEL .
ABCDEFGH
BS
ABDEFGH
Practice the following examples to become familiar with the fundamental calculation
procedure.
EXAMPLE 1:
9 + 7.8 6 – 3.5 x 2 = 3.3
OPERATION:
9 + 7.8 / 6 - 3.5 * 2 . .
9+7.8/6-3.5*2
3.3
EXAMPLE 2:
56 x (-12) (-2.5) = 268.8
OPERATION
56 * - 12 / - 2.5 . .
56*-12/-2.5
268.8
Negative values are entered by pressing the - key before entering the value.
20
EXAMPLE 3:
(4.5 x 1075) x (-2.3 x 10
-78
) = -0.01035
OPERATION:
4.5 IE 75 * - 2.3 IE - 78 . .
4.5E75*-2.3E-78
-0.01035
Exponents are entered by pressing the IE key (or the alphabetic E key) before
entering the value.
EXAMPLE 4:
(23 + 456) x 567 = 271593
OPERATION:
23 + 456 . .
* 567 . .
23+456
479*567
271593
The last result obtained can be entered at any point in a subsequent calculation by
pressing the ANS key.
EXAMPLE 5:
81.3 / (5.6 + 8.9) = 5.6
↑ This process performed first
OPERATION:
5.6 + 8.9 . .
81.2 / ANS . .
5.6+8.9
14.5
81.2/ 14.5
5.6
3.3 Priority Sequence
Arithmetic, relational and logical operations are performed in the following priority
sequence:
1. ( , )
2. Functions
3. Power
4. Signs (+, -)
5. *, /, ¥, MOD
6. +, -
7. Relational operators
8. NOT
9. AND
10. OR, XOR
21
3.1 Scientific Calculations
The scientific functions can be used either with BASIC programs or for manual
calculations. For the sake of the explanation, all the examples here will cover only
manual calculations.
3.1.1 Trigonometric and Inverse Trigonometric Functions
SIN (Sine), COS (Cosine), TAN (Tangent),
ARCSIN (Arc Sine), ARCCOS (Arc Cosine), ARCTAN (Arc Tangent).
These functions return a trigonometric function value for a given angle, or an angle
value of a given trigonometric function value. The ANGLE command should be used
to specify the unit for the angle value when these functions are used. Angle unit
specification is only required once for all subsequent trigonometric / inverse
trigonometric functions. Angle units can be specified using either the MODE
command or the ANGLE command.
• DEG (Degrees) ANGLE0 MODE4
• RAD (Radians) ANGLE1 MODE5
• GRAD (Grads) ANGLE2 MODE6
It is as well possible to use the MENU 7.
The relationship among these three specifications is:
90 Degrees = π/2 Radians = 100 Grads
The current angle unit is retained when the power of the unit is switched OFF, and
the angle unit becomes ANGLE0 (DEG) when ALL RESET button is pressed.
The value for π can be directly entered into a formula using “PI” (3.141592654).
EXAMPLE 1:
sin (30°) = 0.5
OPERATION:
Shift ANGLE 0 . .
sin 30 . .
ANGLE 0
SIN30
0.5
EXAMPLE 2:
cos (π/3) = 0.5
OPERATION:
Shift ANGLE 1 . .
cos ( π / 3 ) . .
ANGLE 1
COS(PI/3)
0.5
22
4 Formula Storage Function
The formula Storage function is very useful when performing repeat calculations.
Three different keys are used when working with the formula Storage function.
IN key……. Stores presently displayed formula.
OUT key…… Displays formula stored in memory.
CALC key…. Assigns values to variables in formula, and displays formula
calculation result.
Sample Application
EXAMPLE:
Obtain the value for each of the value assigned to x when y = 3.43 cosx. (Calculate in
three decimal places.)
x
8°
15°
22°
27°
31°
y
OPERATION:
First, specify the angle unit and number of decimal places
MENU 7 , select the DEG unit using the ( / .. ) cursor keys. Exit the
angle units selection menu pressing the CAL key.
Shift SET F 3 . (Obtain in 3 decimal places by rounding off the 4th decimal place.)
Next, input a formula and press IN key to store it.
Y = 3 . 43 * COS X IN.
Press the OUT key to confirm that the formula has been stored.
CLS OUT
Y=3.43*COSX_
Then, start calculating by pressing the CALC key.
CALC
X?_
8 . .
X?8
Y= 3.397
. .
X?8
Y= 3.397
X?_
15 . .
X?8
Y= 3.397
X?15
Y=3.313
. .

23
Y= 3.397
X?15
Y=3.313
X?_
22 . .
X?15
Y=3.313
X?22
Y= 3.180
. .
Y=3.313
X?22
Y= 3.180
X?_
27 . .
X?22
Y= 3.180
X?27
Y= 3.056
. .
Y= 3.180
X?27
Y= 3.056
X?_
31 . .
X?27
Y= 3.056
X?31
Y= 2.940
BRK
Y= 3.056
X?31
Y= 2.940
_
The CALC key can be used in place of the . . key to perform repeat calculations.
The BRK key can be used to terminate this function to automatically return to the
CAL mode.
4.1 Utilization for Preparing Tables
Multiple formulas can be written by separating with colons ( : ). Tables such as that
shown below can be easily prepared by using this method.
EXAMPLE:
Complete the following table. (Calculate in 3 decimal places by rounding off.)
X
Y
P=X*Y
Q=X/Y
4.27
8.17
6.07
2.71
1.17
6.48
9.47
4.36
24
OPERATION:
SHIFT SET F 3 . . Specification of number of decimal
places
P = X * Y : Q = X / Y IN. Storing the formula
CALC
X?_
4 . 27 . .
X?4.27
Y?_
1 . 17 . .
X?4.27
Y?1.17
P= 4.996
. .
X?4.27
Y?1.17
P= 4.996
Q= 3.650
Continue to input the values of X and Y in this manner, and the values of P and Q will
be calculated in successive order and the table will be completed as shown below.
X
Y
P=X*Y
Q=X/Y
4.27
8.17
6.07
2.71
1.17
6.48
9.47
4.36
4.996
52.942
57.483
11.816
3.650
1.261
0,641
0.622
Variable names consist of up to 15 upper case or lower case alphabetic characters.
This means that variable names can be created which actually describe their
contents. Remarks can also be affixed following variable names by enclosing the
remarks within square brackets [ ]. Any character except for commas can be used
within the remarks brackets.
EXAMPLE:
Complete the following table. (Calculate in two decimal places by rounding off.)
Radius r (m)
Height h
(m)
Volume of a cylinder (V0=πr2h) (m3)
Volume of a cone (V1=1/3 V0)
(m3)
1.205
2.174
3.357
2.227
3.451
7.463
OPEARTION:
Shift SET F 2 . .
C Y L I N D E R Shift [ M 3 Shift ] = Shift π * R A D. .I. U.
.S Shift [ M Shift ] ^ 2 * H E I G H T Shift [ M. Shift ] :. C O.
.N E Shift [ M 3 Shift ] = C Y L I N D E. .R. / 3 IN.

25
CALC
RADIUS[M]?_
1 . 205 . .
RADIUS[M]?1.205
HEIGHT[M]?_
2 . 227 . .
RADIUS[M]?1.205
HEIGHT[M]?2.227
CYLINDER[M3]= 10.16
. .
RADIUS[M]?1.205
HEIGHT[M]?2.227
CYLINDER[M3]= 10.16
CONE[M3]= 3.39
. .
HEIGHT[M]?2.227
CYLINDER[M3]= 10.16
CONE[M3]= 3.39
RADIUS[M]?_
2 . 174 .
CYLINDER[M3]= 10.16
CONE[M3]= 3.39
RADIUS[M]?2.174
HEIGHT[M]?_
And so on…
If the radius (r) and height (h) are input in this manner, volume (V0) of the cylinder
and volume (V1) of the cone will be calculated successively and the table will be
completed as shown below.
Radius r (m)
Height h
(m)
Volume of a cylinder (V0=πr2h) (m3)
Volume of a cone (V1=1/3 V0)
(m3)
1.205
2.174
3.357
2.227
3.451
7.463
10.16
51.24
262.22
3.39
17.08
88.07
IMPORTANT
1. Up to 255 characters can be stored using the IN key. Storing new formula clears
the currently stored formula.
2. Memory contents are retained even when power is switched OFF, either manually
or by the auto power OFF function.
3. The CALC key can only be used to execute numeric expressions stored using the
.IN. key.
4. An error is generated when an entry stored by the IN key is not a numeric
expression.
5. The same limitations that apply to BASIC variables apply to formula storage
function variables (see page 38).
6. Calculations are terminated under the following conditions:
- Pressing the BRK key.
- When an error is generated.

26
5 BASIC Programming
Standard BASIC is employed as the programming language for this unit, and this
section covers application of the BASIC language.
5.1 Features of BASIC
1. BASIC is much easier to use than other programming languages such as
FORTRAN, making it suitable even for novices.
2. Writing programs is also easier because program creation, editing and execution
are all performed by interacting with the computer itself.
The following functions are also available:
1. High-precision calculations are made possible by display of numeric values with
10-digit mantissas and 2-digit exponents (13-digit mantissa and 2-digit exponents
for internal operations)
2. A wide selection of built-in functions makes operation easier.
Standard mathematical functions
SIN COS TAN ASN ACS ATN LOG LN EXP SQR ABS SGN INT FIX FRAC PI
ROUND RAN# DEG
Powerful string handling functions
CHR$ STR$ MID$ LEFT$ RIGHT$ HEX$ DMS$ ASC VAL LEN
High-level mathematical functions
POL REC NCR NPR HYPSIN HYPCOS HYPTAN HYPASN HYPACS HYPATN
CUR
3. 10 independent program areas
up to ten programs can be stored independently in memory at the same time (P0
– 9).
4. Extended variable names
Variable names up to 15 characters long can be used, making it possible to use
names that make contents easy to understand.
5. Powerful debugging function
A TRON command displays the number of the program line currently being
executed, making it possible to easily trace execution and locate mistakes in
programming.
6. Powerful screen editor
Programs can be easily modified and corrected on the screen.
7. Virtual screen function
Thought the actual physical display of the unit has a 32-column x 4-line capacity,
the virtual screen is 32 columns x 8 lines. The virtual screen can be easily
scrolled using the cursor keys.
1 AAAA
2 BBBB
3 CCCC
4 DDDD
5 EEEE
6 FFFF
Actual screen
(4 lines)
Virtual screen (8 lines)
7 GGGG
8 HHHH

27
5.2 BASIC Program Configuration
5.2.1 BASIC Program Format
The following is a typical BASIC program, which calculates the volume of a cylinder.
EXAMPLE:
10 REM CYLINDER
20 R=15
30 INPUT “H=”;H
40 V=PI*R^2*H
50 PRINT “V=”;V
60 END
As can be seen, the BASIC program is actually a collection of lines (six lines in the
above program). A line can be broken down into a line number and a statement.
20 R=15
Line Statement
number
Computers execute programs in the order of their line numbers. In the sample
program listed above, the execution sequence is 10, 20, 30, 40, 50, 60. Program
lines can be input into the computer in any sequence, and the computer
automatically arranges the program within its memory in order from the smallest line
number to the highest. Lines can be numbered using any value from 1 to 65535.
20 R=15
40 V=PI*R^2*H
60 END
10 REM CYLINDER
30 INPUT “H=”;H
50 PRINT “V=”;V
10 REM CYLINDER
20 R=15
30 INPUT “H=”;H
40 V=PI*R^2*H
50 PRINT “V=”;V
60 END
Input sequence
Memory contents
Following the line number is a statement or statements which actually tell the
computer which operation to perform. The following returns to the sample program to
explain each statement in detail
10 REM CYLINDER
20 R=15
30 INPUT “H=”;H
40 V=PI*R^2*H
50 PRINT “V=”;V
60 END
REM stands for “remark”. Nothing in this line is executed.
Assigns the constant 15 (radius) to variable R.
Displays H= to prompt a value input for height.
Calculates volume (V) of cylinder.
Prints result of line 40
Ends program.
As can be seen, a mere six lines of programming handles quite a bit of data. Multiple
BASIC program lines can also be linked into a single line using colons.
EXAMPLE:
100 R==15:A=7:B=8
Such a program line is known as “multi-statement”.
28
5.3 BASIC Program Input
5.3.1 Preparation
First, switch the power of the computer ON. At this time, the display should appear as
illustrated below.
CAPS .
S .
BASIC .
DEG .
RAD .
GRA .
_
This is the CAL mode, so the operation MENU 2 should first be performed to allow
input of BASIC programs. The display should now appear as illustrated below.
CAPS .
S .
BASIC .
DEG .
RAD .
GRA .
P 0 1 2 3 4 5 6 7 8 9 51146B
Ready P0
Note the BASIC indicator on the left of the screen indicates the BASIC mode. This is
the mode used for BASIC program input. The other indicators on tne display in the
BASIC mode have the following meanings.
P : Program area
0 – 9 : Program area numbers. The numbers of program areas which alreasy
contain programs are replaces by asteriks.
51146B : Capacity (number of bytes) remaining in area for writing programs and
data (free area). This number depends on the type of unit (FX-890P, Z1),
the presence of the optional RP-33 memory module, and will decrease
as storage space is used.
Ready P0 : Current program area = area 0. The current program area can be
switched by pressing Shift followed by the desired program area.
Previously stored programs can be deleted using one of two different procedures.
NEW : Deletes program stored in the current program area only.
NEW ALL : Clears all BASIC programs stored in memory.
5.3.2 Program input
The following input procedure inputs the sample program for calculation of the
volume of a cylinder.
10 R E M SPC C Y L I N D E R . .
20 R = 15 .
30 I N P U T Shift “ H = Shift “ ; H . .
40 V = P I * R ^ 2 * H . .
50 P R I N T Shift “ V = Shift “ ; V . .
60 E N D . .
Note that the . . key is pressed at the end of each line. A program line is not entered
into memory unless the . . key is pressed.
ONE KEY INPUT
The one-key BASIC commands help to make program input even easier.
29
EXAMPLE:
Line 50 input
50 Shift PRINT Shift “ V = Shift “ ; V . .
5.3.3 Program Editing
The procedure used for making corrections or changes to a program depends upon
what step of program input the changes are to be made.
1. Changes in a line before . . key is pressed
2. Changes in a line after . . key is pressed
3. Changes within a program already input
4. Changes within a program following the EDIT command
Changes in a line before . . key is pressed
EXAMPLE:
20 E=15 mistakenly input for 20 R=15
10 REM CYLINDER
20 E=15_
. (Move cursor to E)
10 REM CYLINDER
20 E=15
.R. (Input correct character)
10 REM CYLINDER
20 R=15
. . (Editing complete)
10 REM CYLINDER
20 R=15
_
Note that once the desired changes are made, the . . key must be pressed to store
the entered line into memory.
Changes in a line after . . key is pressed
EXAMPLE:
40 V=P1*R^2*H mistakenly input for 40 V=PI*R^2*H
40 V=P1*R^2*H
_
. .. .. .. .. .. .. (Move cursor to 1)
40 V=P1*R^2*H
.I. (Input correct character)
40 V=PI*R^2*H
. . (Editing complete)
40 V=PI*R^2*H
_
30
Again, the . . key must be pressed to store the corrected line into memory after
changes are made.
Changes within a program already input
The LIST command displays the program stored in the current program area form
beginning to end.
Shift LIST . .
10 REM CYLINDER
20 R=15
30 INPUT “H=”;H
40 V=PI*R^2*H
…
40 V=PI*R^2*H
50 PRINT “V=”;V
60 END
Ready P0_
The last line of the program is displayed when the LIST operation is complete.
.. .. .. .. .. ..
10 REM CYLINDER
20 R=15
30 INPUT “H=”;H
40 V=PI*R^2*H
The 8-line virtual screen of the computer now makes it possible to use the cursor
keys to scroll to preceding lines not shown on the display.
When a program greater than eight lines is stored in memory, the LIST operation
should be performed by specifying the line numbers to be displayed.
EXAMPLE:
Displaying from line 110 to line 160 on the virtual screen.
Shift LIST 110 - 160 . .
Note: The BRK key can be used to terminate the LIST operation. The Shift STOP
key suspends the operation, and listing can be resumed by pressing . . .
Changes within a program following the EDIT command
The EDIT command makes it easier to edit or review programs already stored in
memory.
Shift EDIT . .
CAPS .
S .
BASIC .
DEG .
RAD .
GRA .
10 REM CYLINDER
20 R=15
30 INPUT “H=”;H
40 V=PI+R^2*H
From the display, .. (or . .) advances to the following line, while .. (or Shift . .)
returns to the previous line.
 Loading...