

Page 1

YW-2L
Wireless Adapter
Wireless LAN Connection Guide
z Be sure to read the precautions in the User’s Guide (Basic Operation) that comes with the
Data Projector.
z Be sure to keep all user documentation handy for future reference.
• Microsoft, Windows, Windows Vista, Aero and PowerPoint are registered trademarks or
trademarks of Microsoft Corporation in the United States and other countries.
• Other company and product names may be registered product names or trademarks of
their respective owners.
• The contents of this manual are subject to change without notice.
• Copying of this manual, either in part or its entirety, is forbidden. You are allowed to
use this manual for your own personal use. Any other use is forbidden without the
permission of CASIO COMPUTER CO., LTD.
• CASIO COMPUTER CO., LTD. shall not be held liable for any lost profits or claims
from third parties arising out of the use of this product or this manual.
• CASIO COMPUTER CO., LTD. shall not be held liable for any loss or lost profits due
to loss of data due to malfunction or maintenance of this product, or any other reason.
• The sample screens shown in this manual are for illustrative purposes only, and may
differ somewhat from the screens actually produced by the product.
E
1
Page 2

Contents
About this manual........................................................... 4
Terms and Conventions ................................................................................. 4
Minimum System Requirements.................................... 5
Performing a Presentation using a Wireless LAN
(Projecting Computer Screen Contents Over a
Wireless LAN).................................................................. 6
Requirements for Wireless LAN Connection..........................................6
Establishing a Wireless LAN Connection between the
XJ-S35/YP-100 and a Computer ............................................................7
Connection Profiles ................................................................................7
Starting Up and Exiting Wireless Connection 2......................................8
Limitations on Wireless LAN Connection Using
Wireless Connection 2............................................................................8
Using a Simple Connection Profile for a Wireless LAN Connection
between the Data Projector and a Single Computer ..............................9
Using a Manual Connection Profile for Wireless LAN Connection
between the Data Projector and One or More Computers ...................11
First Wireless LAN Connection between the Data Projector and
Four Computers ........................................................................................... 11
Subsequent Wireless LAN Connection between the Data Projector and
Four Computers ........................................................................................... 19
2
Page 3

Advanced Wireless LAN Connection Settings......................................20
Web Setup ................................................................................................... 20
Enabling and Disabling Web Setup.............................................................. 22
Switching the Data Projector Connection Profile ......................................... 23
Assigning a Name to a Data Projector ......................................................... 26
Configuring a Connection Keyword.............................................................. 27
Modifying Data Projector Manual Connection Settings ................................ 29
Creating a Computer Connection Profile ..................................................... 30
Sending Settings from a Computer to the Data Projector ............................ 34
Deleting a Computer Connection Profile...................................................... 36
Assigning a User Name to a Computer for Projection ................................. 37
Specifying the Quality of Images Sent from a Computer ............................. 37
Selecting the Network to Use for Wireless LAN Connection........................ 38
Manual Connection Setting Reference ........................................................ 40
Returning Data Projector Wireless Settings to Their Initial Defaults ............ 44
Viewing Wireless Connection 2 Help ........................................................... 45
Viewing Wireless Connection 2 Version Information ................................... 45
Wireless LAN Connection Troubleshooting..........................................46
Check the following on the computer. .......................................................... 46
Check the following on the Data Projector. .................................................. 46
Also check the following. .............................................................................. 46
Wireless Connection 2 Menus and Button Reference..........................49
Using Wireless LAN for Projection .......................................................50
Operations while a Single Computer is Connected to the
Data Projector over a Wireless LAN ............................................................ 50
Operations while Multiple Computers are Connected to the
Data Projector over a Wireless LAN ............................................................ 52
3
Page 4

About this manual...
This manual explains how to establish a wireless LAN connection between a CASIO Data
Projector and a computer, and send computer screen shots to the projector for projection.
Terms and Conventions
z Unless expressly stated otherwise, the term “projector” in this manual refers to a CASIO
Data Projector that supports wireless connection using a YW-2 wireless adapter* or to
the CASIO YP-100 Multifunctional Presentation Kit.
* For details about applicable products, visit the website at the following URL:
http://world.casio.com/projector/support/en
z In this manual, there are many procedures that require parallel operations on the Data
Projector and your computer. The following are special terms and conventions used in
this manual to differentiate between the Data Projector and computer.
• projection area
This is the entire rectangular area that is projected by the Data Projector. Certain
Data Projector operations will cause messages and menus to appear within the
projection area.
• computer screen
This is the physical display device of your computer.
4
Page 5

Minimum System Requirements
You need to install Wireless Connection 2 on your computer in order to send shots of your
computer screen to and project them with the projector over a wireless connection.
The following is the minimum operating environment for Wireless Connection 2.
®
• Operating System: Microsoft
• Computer: IBM PC/AT or compatible that conforms to the following conditions.
•Windows Vista
• CPU: Pentium III or higher
• Memory: 256MB minimum or amount of memory recommended for operating system
being run
• Hard Disk: At least 40MB for installation or at least 60MB when running
• Display: Full-color display with resolution of at least 800 × 600 that is supported by
above operating systems and the computer being used.
• Input Device: Keyboard or other pointing device (mouse supported above operating
system or equivalent device)
• Normal operation may not be possible under certain hardware configurations.
• Operation is not supported on a computer running Windows
3.1, or on a Macintosh or Mac OS computer.
• Operation on a computer upgraded to Windows Vista
from another operating system is not supported.
• Operation is not supported under Windows Vista
• Operation on a computer running Windows
®
, Windows® XP, or 2000 Professional pre-installed
Windows Vista®, Windows® XP SP2, or 2000 Professional SP4
®
NT, Me, 98SE, 98, 95, or
®
, Windows® XP, 2000 Professional
®
64-bit version.
®
XP Professional x64 Edition is not supported.
5
Page 6

Performing a Presentation using a Wireless LAN
(Projecting Computer Screen Contents Over a Wireless LAN)
Wireless LAN lets you establish a connection between the Data Projector and a computer
without using a cable, and project the computer’s display contents with the Data Projector.
Important!
z Note that only shots of your computer screen can be sent from your computer to the
Data Projector over a wireless LAN connection. Audio data cannot be sent.
z The procedure below assumes that the Data Projector’s plug-and-play feature is turned
on (which is the initial default setting). If you have turned off plug-and-play, turn it
back on before performing the procedure below. For details about configuring plugand-play settings, see “Setup Menu Contents” in the User’s Guide that comes with
the Data Projector.
z If you are running Wireless Connection 2 under Windows Vista, do not perform any
of the operations that display the “User Account Control” message (such as software
installation, new hardware connection, etc.) while there is no connection between the
computer and Data Projector.
Requirements for Wireless LAN Connection
The following devices and software are required to establish a wireless LAN connection
between the Data Projector and a computer.
Projector..... 1
1
Prepare a CASIO Data Projector that supports wireless connection* or a CASIO YP-100
Multifunctional Presentation Kit. If you are using the XJ-S35 or YP-100, be sure to read
“Establishing a Wireless LAN Connection between the XJ-S35/YP-100 and a Computer”
(page 7).
* For details about applicable products, visit the website at the following URL:
http://world.casio.com/projector/support/en
CASIO YW-2 Wireless Adapter .... 1
2
A YW-2 Wireless Adapter must be connected to the Data Projector for wireless receipt of
computer display data.
Computer(s) with Wireless LAN Function (IEEE 802.11b Standard).....1 to 4
3
Either of the following is required.
• Computer(s) with built-in wireless LAN adapter(s)
• Computer(s) with commercially available wireless LAN adapter(s) installed
Wireless Connection 2
4
Install Wireless Connection 2 on the computer(s) described in
installation, see the YW-2L Wireless Adapter User’s Guide.
above. For details about
3
6
Page 7
Establishing a Wireless LAN Connection between the XJ-S35/YP-100 and a Computer
Note the following precautions when trying to establish a wireless LAN connection between
the XJ-S35/YP-100 and a computer.
z The XJ-S35/YP-100 comes with Wireless Connection, which is a previous version of the
wireless connection software. Do not try to perform the procedures in this manual using
the older version of Wireless Connection. Be sure to install Wireless Connection 2, which
is the newest version, on your computer.
z The XJ-S35/YP-100 does not have manual connection (page 7) initial values registered.
Before performing the procedures in this manual, it is recommended that you first use the
procedure under “Sending Settings from a Computer to the Data Projector” (page 34) to
send Manual Connection 1, Manual Connection 2, and Manual Connection 3 connection
profile settings from your computer to the projector.
Connection Profiles
The Data Projector has two types of connection profiles named “simple connection” (1, 2,
and 3) and “manual connection” (1, 2, and 3).
You should use a simple connection profile to establish a wireless LAN connection between
the Data Projector and a single computer using initial default settings. You can use a manual
connection profile to change the initial default settings and establish a wireless LAN
connection between the Data Projector and up to four computers.
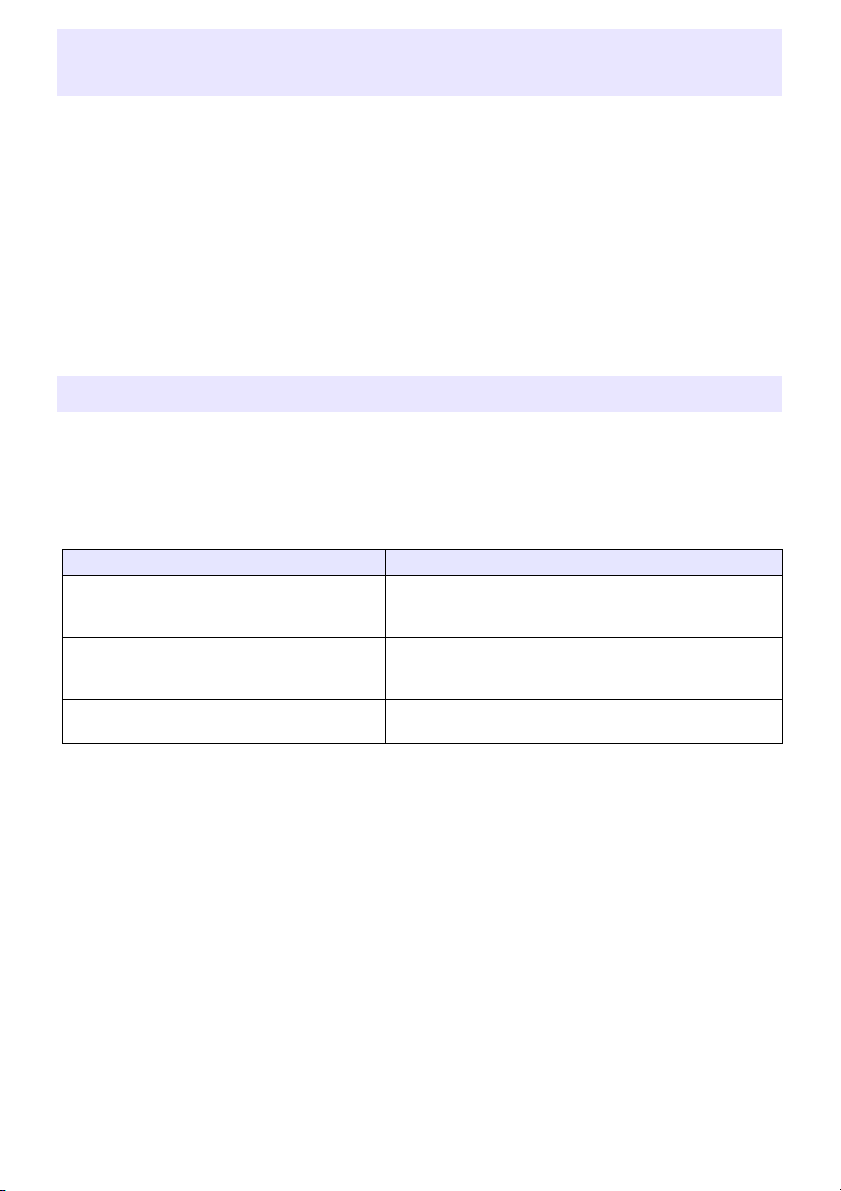
When you want to do this: Refer to this section of this manual:
Use a simple connection profile to connect
the Data Projector and one or more
computers
Use a manual connection profile to connect
the Data Projector and one or more
computers
Modify manual connection profile initial
default settings
“Using a Simple Connection Profile for a Wireless LAN
Connection between the Data Projector and a Single
Computer” (page 9)
“Using a Manual Connection Profile for Wireless LAN
Connection between the Data Projector and One or
More Computers” (page 11)
“Advanced Wireless LAN Connection Settings”
(page 20)
7
Page 8

Starting Up and Exiting Wireless Connection 2
To establish a wireless LAN connection between a computer and the Data Projector, Wireless
Connection 2 must be running on the computer.
To start up Wireless Connection 2
Perform either of the following operations to start up Wireless Connection 2 on the
computer.
• Double-click the icon on your Windows desktop.
• On your computer’s Windows Start menu, select [All Programs] - [CASIO] - [Wireless
Connection 2].
Important!
If your computer is running Windows Vista, starting up Wireless Connection 2 will cause
the “User Account Control” message to appear. When it does, click “Allow”.
To exit Wireless Connection 2
Perform either of the following operations.
• On the Wireless Connection 2 window, select [Connection] - [Exit].
• Click the [×] button in the upper right corner of the Wireless Connection 2 window.
Limitations on Wireless LAN Connection Using Wireless Connection 2
The restrictions described below apply whenever using Wireless Connection 2 for wireless
LAN connection.
z When using Wireless Connection 2 for wireless LAN connection with a previous projector
model (XJ-S35 or YP-100), local conditions may result in unstable connection or even
make connection impossible. Supplementary information is available on the CASIO website
at: (http://world.casio.com/projector/support/en/)
z If your computer is running Windows Vista, the wireless LAN connection data rate may
slow down if you have Windows Aero™ enabled. If this happens, disable Windows Aero™.
8
Page 9
Using a Simple Connection Profile for a Wireless LAN Connection between the Data Projector and a Single Computer
The following procedure uses the preset Simple Connection 1 connection profile to
establish a wireless LAN connection between the Data Projector and a single computer for
the first time.
To establish a wireless LAN connection between a single computer and the
Data Projector
Turn on the Data Projector.
1
z Wait until the Data Projector’s POWER/STANDBY indicator is lit green.
Connect the CASIO YW-2 wireless adapter to the Data Projector’s USB port.
2
z You also can connect the wireless adapter to the Data Projector before turning on the
Data Projector.
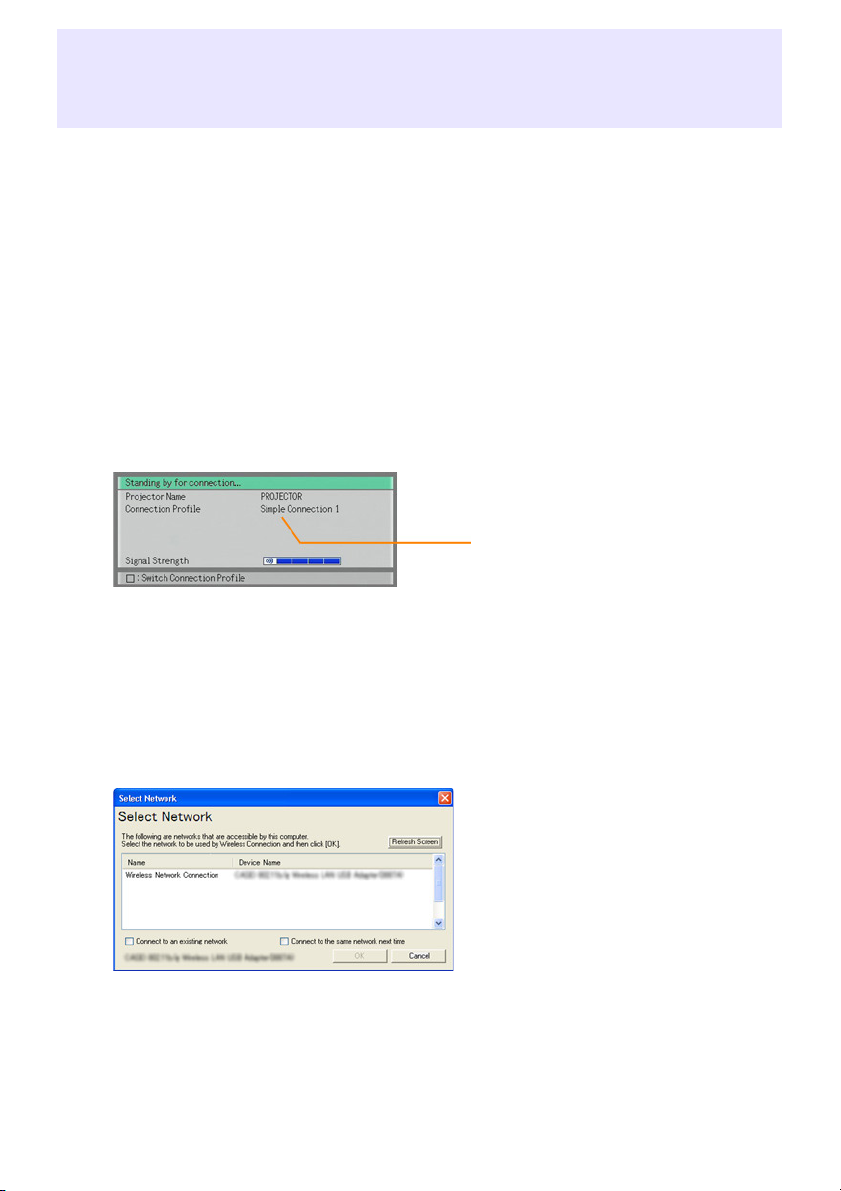
z The Data Projector will detect the wireless adapter and start up its Wireless function
automatically. The message shown below will appear in the projection area.
Check to make sure that “Simple Connection 1”
is shown.
Turn on your computer and start up Windows.
3
On your computer, start up Wireless Connection 2.
4
z If your computer is running Windows Vista, starting up Wireless Connection 2 will cause
the “User Account Control” message to appear. When it does, click “Allow”.
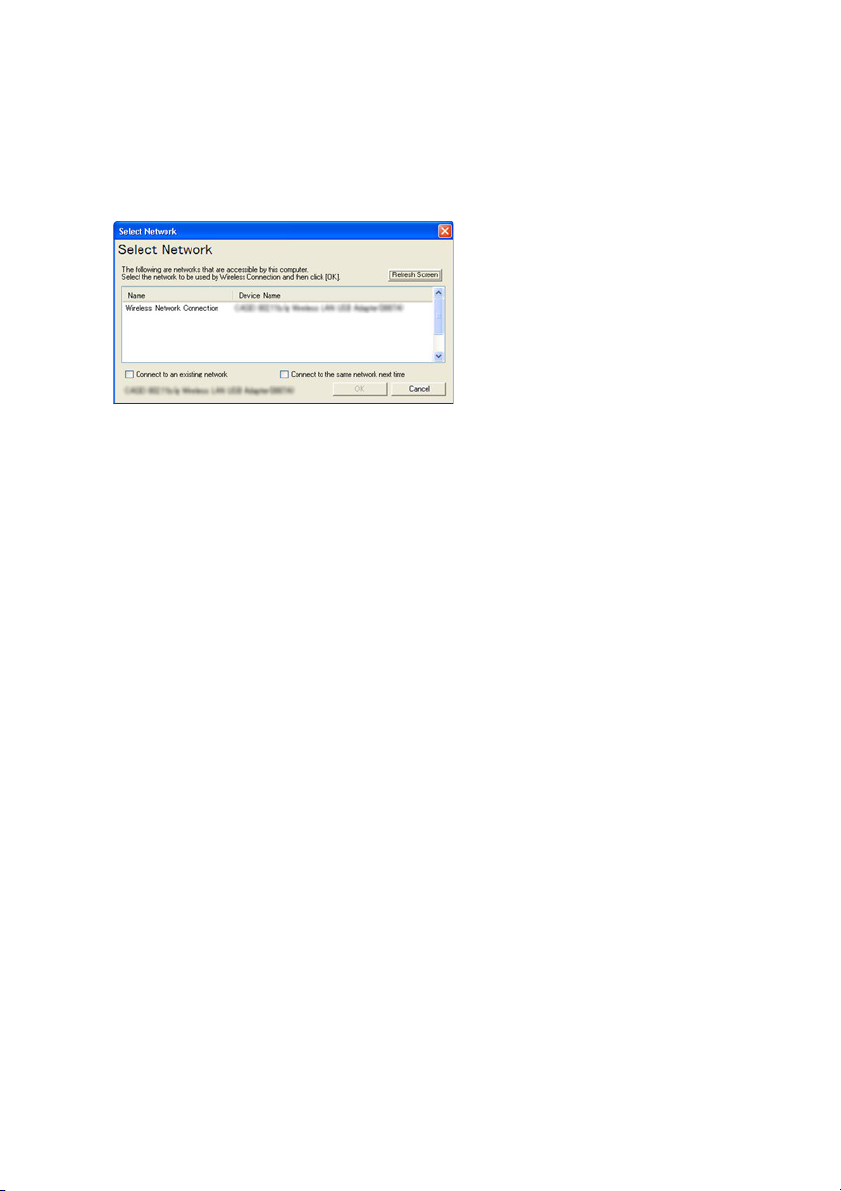
z If the “Select Network” dialog box like the one shown below appears, click the wireless
LAN adapter you want to use for connection with the Data Projector and then click the
[OK] button.
z If your computer is running Windows XP or 2000, do not select the “Connect to an
existing network” check box.
9
Page 10
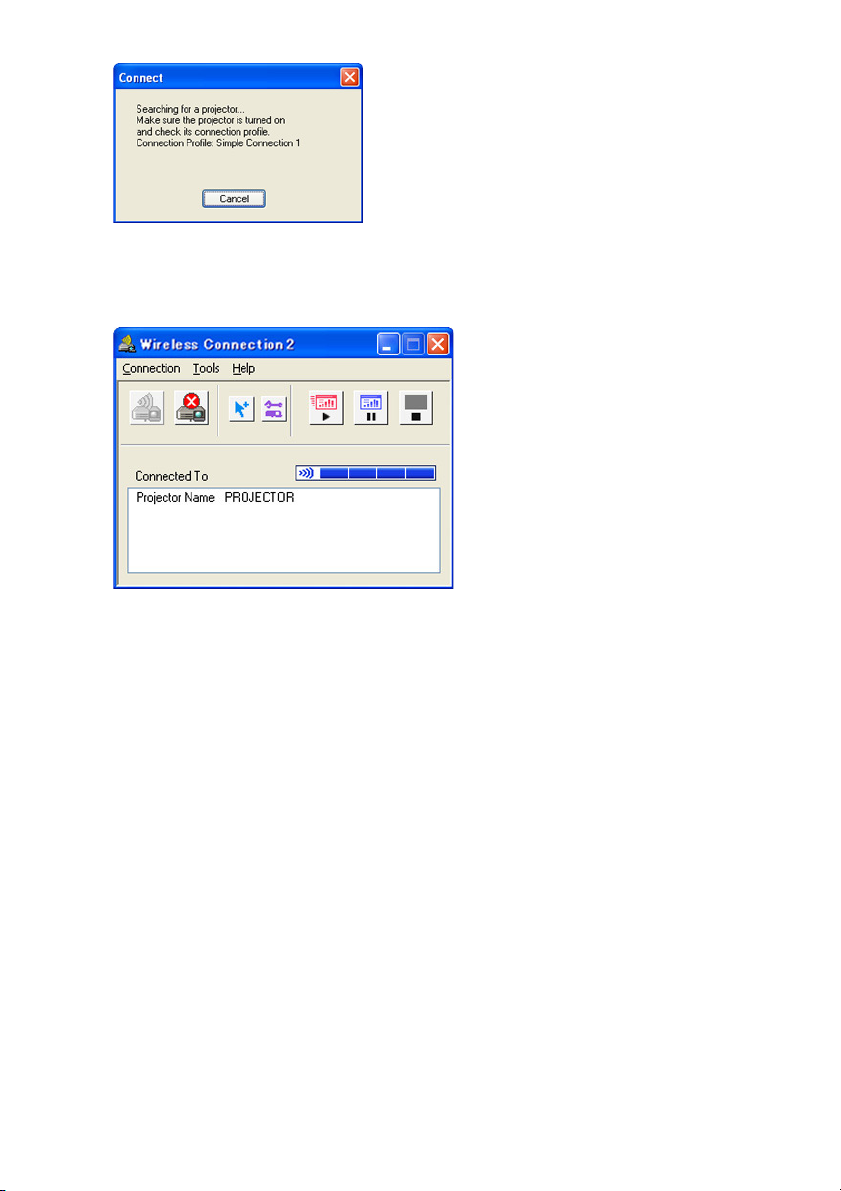
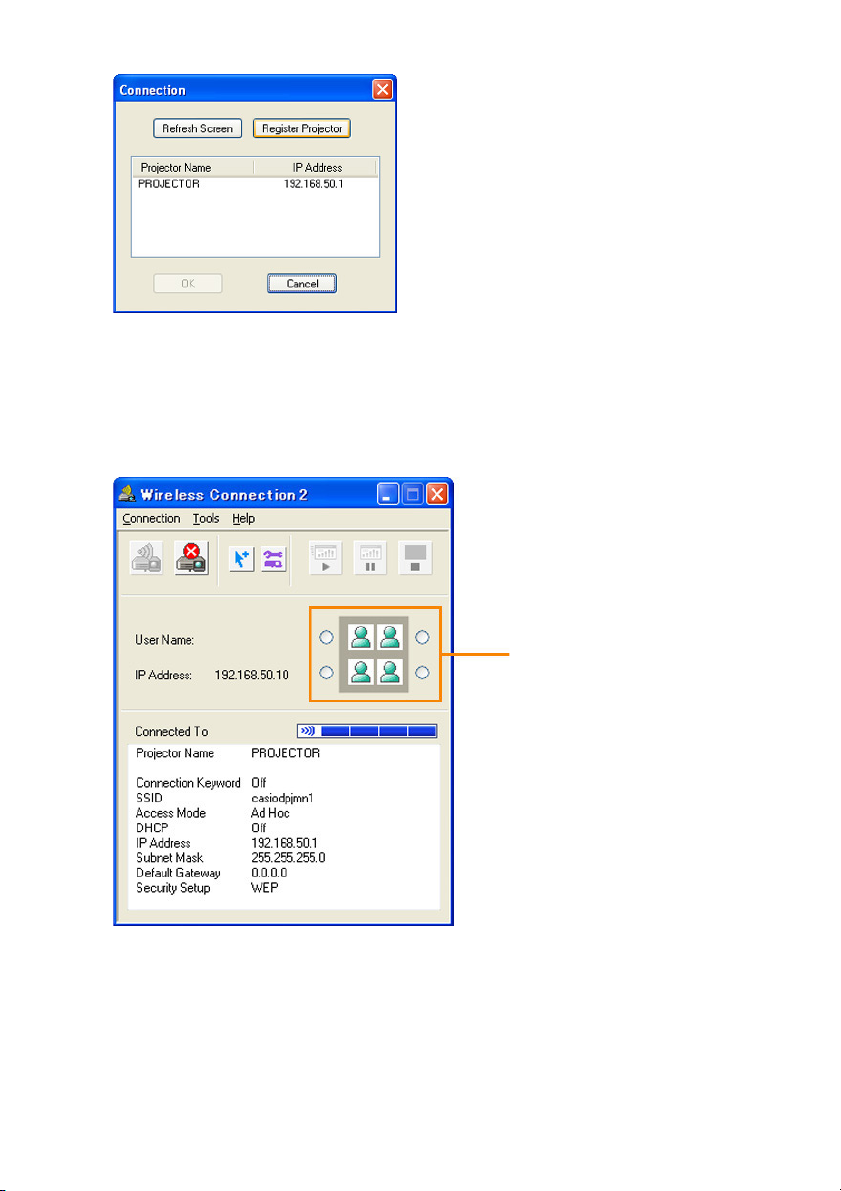
Wait until the “Connect” dialog box like the one shown below appears.
5
z If your computer is running Windows Vista and the “Set Network Location” dialog box
appears, click [Cancel] to close it.
z The above dialog box will close when the computer finds the Data Projector. Next, the
Wireless Connection 2 window will appear on the computer’s display.
z Computer display contents will appear automatically on the projection screen.
z For details about Wireless Connection 2 window operations and Data Projector remote
controller operations you can perform after establishing a connection, see “Using Wireless
LAN for Projection” (page 50).
To terminate the wireless LAN connection between the computer and the Data
6
Projector, exit Wireless Connection 2.
10
Page 11

Using a Manual Connection Profile for Wireless LAN Connection between the Data Projector and One or More Computers
First Wireless LAN Connection between the Data Projector and Four Computers
The following procedure uses the initial default settings of the Manual Connection 1
connection profile to establish wireless LAN connections between the Data Projector and
four computers for the first time.
Important!
z The XJ-S35/YP-100 does not have manual connection initial values registered. Before
performing the following procedure, use the procedure under “Sending Settings from a
Computer to the Data Projector” (page 34) to send Manual Connection 1 profile
settings from your computer to the projector.
z You should use Wireless Connection 2 on all of the computers connecting to the
Data Projector. Do not use an older version of Wireless Connection.
To change the Data Projector connection profile to Manual Connection 1
Turn on the Data Projector and connect the CASIO YW-2 wireless adapter to the
1
Data Projector’s USB port.
z This will start up Wireless automatically and display the “Standing by for connection...”
message on the projection screen.
On the Data Projector’s remote controller, press the [] key.
2
z This will cause the connection profile menu to appear in the projection area.
Press the [T] key three times to move the highlighting to “Manual Connection
3
1” and then press the [ENTER] key.
z This will display a connection profile change confirmation dialog box.
Press the [S] key to move the highlighting to “Yes” and then press the [ENTER]
4
key.
z This will close the confirmation dialog box and return to the “Standing by for
connection...” message.
z Next, perform the procedure under “To establish a wireless LAN connection with Manual
Connection 1 between the first computer and the Data Projector” below.
11
Page 12
To establish a wireless LAN connection with Manual Connection 1 between
the first computer and the Data Projector
On your computer, start up Wireless Connection 2.
1
z If your computer is running Windows Vista, starting up Wireless Connection 2 will cause
the “User Account Control” message to appear. When it does, click “Allow”.
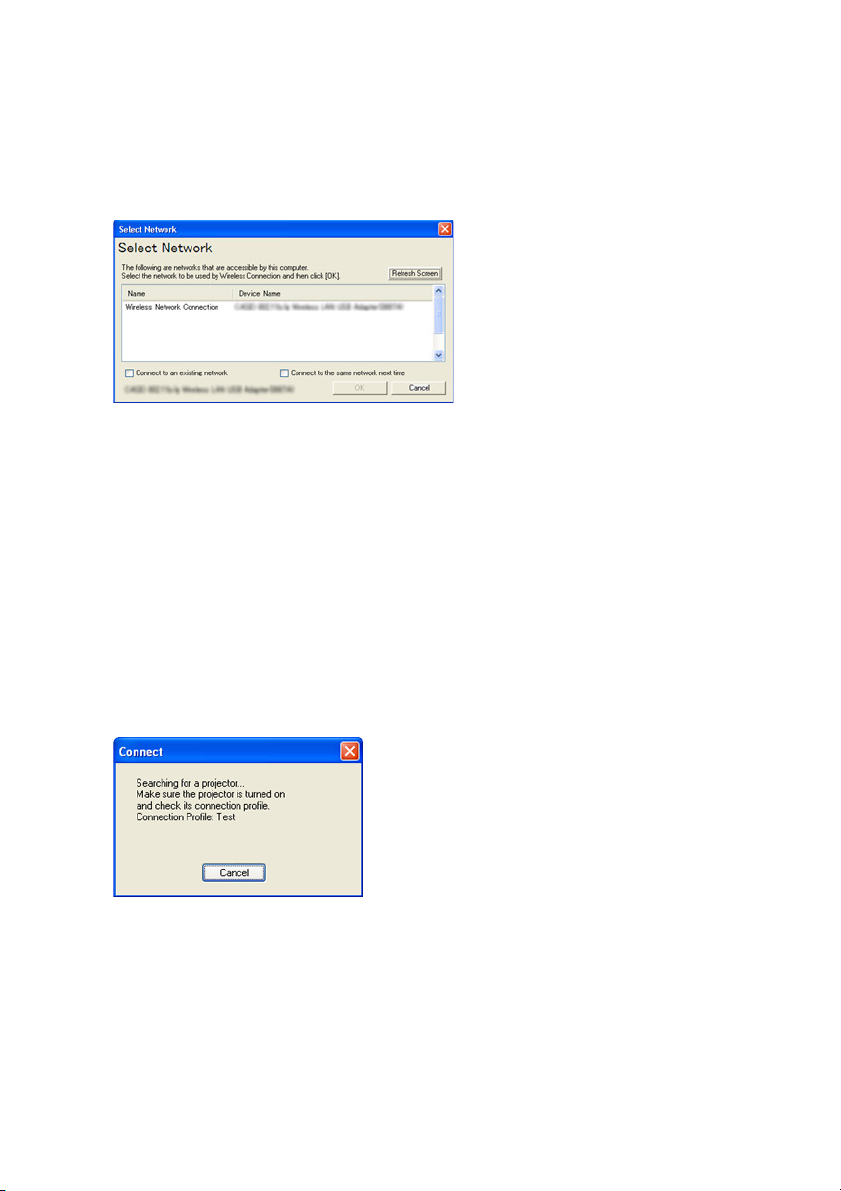
z If the “Select Network” dialog box like the one shown below appears, click the wireless
LAN adapter you want to use for connection with the Data Projector and then click the
[OK] button.
z If your computer is running Windows XP or 2000, do not select the “Connect to an
existing network” check box. See page 39 for more information about using this check
box.
Click [Cancel] to close the “Connect” dialog box that appears.
2
On the Wireless Connection 2 window, select [Connection] - [Switch Connection
3
Profile].
z This will display the Switch Connection Profile dialog box.
Click the “Profile Name” down arrow button and then select “Manual Connection
4
1” from the list that appears.
Click the [Connect] button.
5
Wait until the “Connect” dialog box like the one shown below appears.
6
12
Page 13
z When the computer finds the Data Projector, a Connection dialog box like the one shown
below will appear.
If there are other Data Projectors with wireless adapters
connected in the area, all that are detected will appear in the
list.
z If your computer is running Windows Vista and the “Set Network Location” dialog box
appears, click [Cancel] to close it.
Move the highlighting to the Data Projector to which you want to connect and
7
then click the [OK] button.
z The computer will connect with the Data Projector and then the Wireless Connection 2
window shown below will appear.
13
Projection area position buttons (Step 8)
Page 14
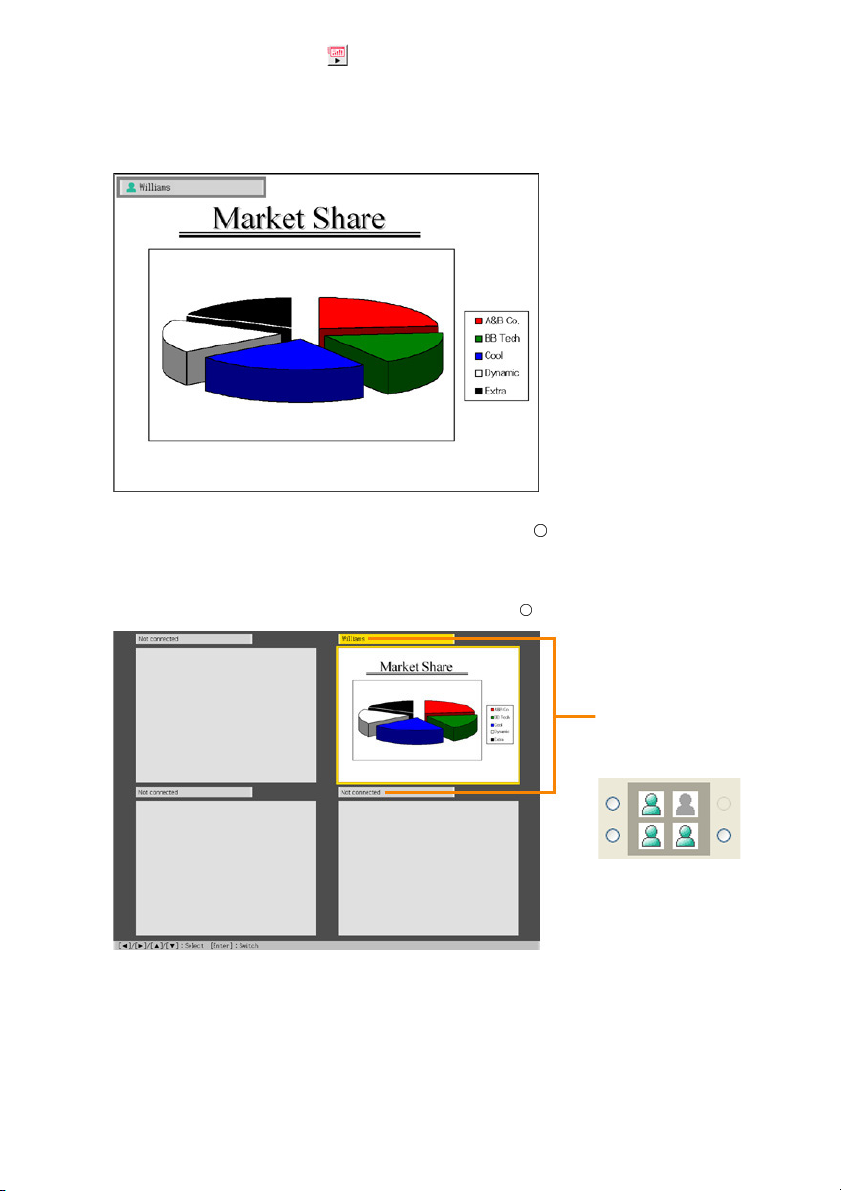
On the Wireless Connection 2 window, click one of the projection area position
8
buttons and then click the button.
z This will cause the contents of the computer screen to be projected so they fill the
entire projection area. At this time the user name assigned to the computer will appear
in the upper left corner of the projection area.
z For information about the computer user name, see “Assigning a User Name to a
Computer for Projection” (page 37).
On the Data Projector’s remote controller, press the [ ] key.
9
z This will switch to the user list screen. When the Data Projector is connected to multiple
computers, you can use the user list screen to control user whose computer screen
image is currently being projected.
z To exit the user list screen, press the [ENTER] key or [ ] key on the remote controller.
The projection area position
buttons are arranged in the
same sequence as the screens
on the user list screen.
z To establish wireless LAN connections between the Data Projector and a second and
subsequent computers, perform the procedure under “To establish a wireless LAN
connection with Manual Connection 1 between the second and subsequent computers
and the Data Projector” below.
14
Page 15
To establish a wireless LAN connection with Manual Connection 1 between
the second and subsequent computers and the Data Projector
On the computer, start up Wireless Connection 2.
1
z If your computer is running Windows Vista, starting up Wireless Connection 2 will cause
the “User Account Control” message to appear. When it does, click “Allow”.
z If the “Select Network” dialog box like the one shown below appears, click the wireless
LAN adapter you want to use for connection with the Data Projector and then click the
[OK] button.
z If your computer is running Windows XP or 2000, do not select the “Connect to an
existing network” check box. See page 39 for more information about using this check
box.
Click [Cancel] to close the “Connect” dialog box that appears.
2
On the Wireless Connection 2 window, select [Connection] - [Switch Connection
3
Profile].
z This will display the Switch Connection Profile dialog box.
Click the “Profile Name” down arrow button and then select “Manual Connection
4
1” from the list that appears.
Click the [Change Setup] button.
5
z This will display the Manual Connection Setup dialog box.
15
Page 16

Change the “IP Address” setting to “192.168.50.12” and then click the [Register]
6
button.
Important!
The Data Projector and each of the computers (1 to 4) that will be connecting to the
Data Projector over the wireless LAN all must have different IP addresses.
On the confirmation dialog box that appears, click the [OK] button. Next, on the
7
Switch Connection Profile dialog box that appears, click the [Connect] button.
Wait until the “Connect” dialog box like the one shown below appears.
8
z When the computer finds the Data Projector, a Connection dialog box like the one shown
below will appear.
If there are other Data Projectors with wireless adapters
connected in the area, all that are detected will appear in the
list.
z If your computer is running Windows Vista and the “Set Network Location” dialog box
appears, click [Cancel] to close it.
16
Page 17

Move the highlighting to the Data Projector to which you want to connect and
9
then click the [OK] button.
z The computer will connect with the Data Projector and then the Wireless Connection 2
window shown below will appear.
Projection area position buttons (Step 10)
On the Wireless Connection 2 window, click one of the projection area position
10
buttons and then click the button.
z A projection area that is already occupied by another computer will be indicated by a
dimmed icon ( ). Select one of the projection area buttons that is next to an icon
that is not dimmed ( ).
Assign a user name, if you want.
11
z For information about the computer user name, see “Assigning a User Name to a
Computer for Projection” (page 37).
Repeat steps 1 through 11 for the third and fourth computers.
12
z Use the following IP addresses in step 6 for the remaining computers.
Computer 3: 192.168.50.13
Computer 4: 192.168.50.14
17
Page 18

On the Data Projector’s remote controller, press the [ ] key.
13
z This will display the user list screen, which shows thumbnails of the screen contents of
each connected computer.
On the Data Projector’s remote controller, use the [S], [T], [W] and [X] keys to
14
select one of the thumbnails and then press the [ENTER] or [ ] key.
z This will cause the contents of the selected computer screen to be projected so they fill
the entire projection area.
z For details about Wireless Connection 2 window operations and Data Projector remote
controller operations you can perform after establishing a connection, see “Using Wireless
LAN for Projection” (page 50).
18
Page 19

Subsequent Wireless LAN Connection between the Data Projector and Four Computers
Important!
You can use the following procedure when the following condition exists.
z You already have performed the procedure under “First Wireless LAN Connection
between the Data Projector and Four Computers” (page 11), and that you have not
changed the Data Projector and/or computer settings since then.
To establish a wireless LAN connection between four computers and the
Data Projector using the same settings as the last connection
Turn on the Data Projector and connect the CASIO YW-2 wireless adapter to the
1
Data Projector’s USB port.
z This will start up Wireless automatically and display the “Standing by for connection...”
message on the projection screen.
Turn on the first computer and start up Windows.
2
On the first computer, start up Wireless Connection 2.
3
z When the computer finds the Data Projector, a Connection dialog box will appear.
Move the highlighting to the Data Projector to which you want to connect and
4
then click the [OK] button.
z This will close the Connection dialog box and display the Wireless Connection 2 window.
On the Wireless Connection 2 window, click one of the projection area position
5
buttons and then click the button.
z This will cause the contents of the computer screen to be projected so they fill the
entire projection area.
Repeat steps 2 through 5 for all of the other computers.
6
On the Data Projector’s remote controller, press the [ ] key.
7
z This will display the user list screen, which shows thumbnails of the screen contents of
each connected computer.
On the Data Projector’s remote controller, use the [S], [T], [W] and [X] keys to
8
select one of the thumbnails and then press the [ENTER] or [ ] key.
z This will cause the contents of the selected computer screen to be projected so they fill
the entire projection area.
19
Page 20

Advanced Wireless LAN Connection Settings
This section explains how to configure advanced settings for a wireless LAN connection
between the Data Projector and a computer.
Web Setup
In order to modify the settings of a Data Projector manual setup profile and to configure
advanced settings of other Data Projector settings, you need first to display a special web
browser page named “Web Setup” on you computer screen. To display Web Setup, use a
web browser running on a computer that is connected to the Data Projector over a
wireless LAN.
To display and log into the Web Setup page
Establish a wireless LAN connection between a computer and the Data Projector.
1
z For information about connection procedures, see “Using a Simple Connection Profile for
a Wireless LAN Connection between the Data Projector and a Single Computer” (page 9)
and “Using a Manual Connection Profile for Wireless LAN Connection between the Data
Projector and One or More Computers” (page 11).
z If a wireless LAN connection is already established between the computer and the Data
Projector, proceed to step 2.
On the Wireless Connection 2 window of the computer, click the button.
2
z This will start up the computer’s default browser and display an initial page like the one
shown below.
z The Web Setup page may not appear if your browser is running already. In this case,
quit the browser and then click the button again.
20
Page 21

Enter the password and then click the [OK] button.
3
z The initial default password is “casio”.
z The above step will display the Web Setup top page like the one shown below.
Note
z For security reasons, be sure to change the password to something else as soon as
possible. For details, see “To change the Web Setup login password” (page 22).
z You also can display the Web Setup page by selecting [Tools] - [Options] on the
Wireless Connection 2 window. On the Options dialog box that appears, click the
[Web Setup] button.
To log out of Web setup
Click “Logout” in the upper right corner of the page.
Note
You also will be logged out automatically if you do not perform any Web Setup page
operation for about five minutes.
21
Page 22

To change the Web Setup login password
On the initial Web Setup page, click the [Change Password] button.
1
z This will display the change password page.
In the “Current Password” box, enter the current password (“casio” if you have
2
not yet changed the initial default password) and then enter the new password
into the “New Password” box.
z A password must have at least four single-byte characters and it can be up to 16
characters long.
Input the new password again into the lower “New Password” box.
3
Click the [Change] button.
4
z If you input all of the required information correctly, your password will be changed and
the Web Setup top page will reappear.
Enabling and Disabling Web Setup
This section explains how you can disable the Web Setup page so it is not displayed. You
can disable the Web Setup page when you want to restrict access to Web Setup while
there are multiple computers connected to the Data Projector.
To enable and disable Web Setup
While Wireless is shown in the projection area, press the [MENU] key on the
1
Data Projector’s remote controller.
z This will display the setup menu.
Press the [T] key to move the highlighting to “USB” and then press the
2
[ENTER] key.
Press the [T] key once to move the highlighting to “Setup” and then press the
3
[ENTER] key.
z This will display the Wireless setup menu.
Press the [T] key to move the highlighting to “Web Setup”.
4
Use [X] and [W] to select “Enable” or “Disable”.
5
z Selecting “Disable” will make it impossible to access the Web Setup page from any
computer.
To exit the Wireless setup menu, press the [ESC] key.
6
22
Page 23

Switching the Data Projector Connection Profile
The Data Projector uses one of its six connection profiles to connect to a computer over
a wireless LAN. You can use the following procedure to switch the connection profile as
required.
To view the Data Projector’s current connection profile information
While Wireless is shown in the projection area, press the [FUNC] key on the
1
Data Projector’s remote controller.
z This will display the Wireless function menu.
z The contents of the Wireless function menu will differ according to the operational status
of the Data Projector when you press the [FUNC] key. The above example shows the
menu when the [FUNC] key is pressed while “Standing by for connection...” is displayed
in the projection area.
Check to make sure that “View Connection Info” is selected and then press the
2
[ENTER] key.
z This will display the connection information window, which shows the currently selected
profile and the settings of the profile.
(Simple Connection Profile)
(Manual Connection Profile)
To close the connection information window, press the [ESC] key of the Data
3
Projector’s remote controller.
Note
You can also view the Data Projector’s current connection profile information using the
Web Setup top page. For more information, see “To display and log into the Web Setup
page” (page 20).
23
Page 24

To switch the Data Projector connection profile
On the Data Projector’s remote controller, press the [] key.
1
z This will cause the connection profile menu to appear in the projection area.
The currently selected connection
profiled is highlighted.
Use the [T] and [S] keys to move the highlighting to the connection profile you
2
want to select and then press the [ENTER] key.
z This displays the dialog box shown below.
Press the [S] key to move the highlighting to “Yes” and then press the [ENTER]
3
key.
z This will switch to the Data Projector connection profile you highlighted in step 2 and
then display the “Standing by for connection...” message.
This is the display of the connection
profile name after switching.
24
Page 25

To use Web Setup to modify the Data Projector connection profile from a
computer
Important!
Performing the procedure below will terminate the current wireless LAN connection
between the Data Projector and computer. To re-establish a connection, reconfigure the
computer’s wireless LAN settings so they match those of the new Data Projector
connection profile.
Perform the procedure under “To display and log into the Web Setup page”
1
(page 20) to display the Web Setup top page.
Click the “Connection Profile” down arrow button and then select the connection
2
profile you want from the menu that appears.
Click the [Switch] button.
3
z This will display the following message on the Web Setup page.
The connection profile has been changed.
Switch the settings on the computer and then re-connect.
z This will switch the Data Projector to the connection profile you selected in step 2 and
terminate the current wireless LAN connection between Data Projector and computer.
z At this time, the message “Standing by for connection...” will appear in the projection
area, along with the connection profile you switched with “Connection Profile” in step 2
above.
25
Page 26

Assigning a Name to a Data Projector
You can use Web Setup to assign a unique name to each Data Projector, which comes in
handy when you are using multiple projectors. The projector name you assign is displayed
in the following locations.
• In the “Projector Name” box of the Wireless “Standing by for connection...” message
• In the “Projector Name” box of the Wireless connection information window (page 23)
• In the “Projector Name” box of the Wireless Connection 2 window (pages 10, 13)
• In the “Projector Name” box of the Connection dialog box (pages 13, 16)
To assign a name to a Data Projector
Perform the procedure under “To display and log into the Web Setup page”
1
(page 20) to display the Web Setup top page.
In the “Projector Setup” area, click the [Edit] button.
2
z This will display a projector setup page.
Enter up to 12 characters for the name into the “Projector Name” box.
3
Click the [Save] button.
4
Note
You also can use the projector setup page to define a connection keyword (page 27).
26
Page 27

Configuring a Connection Keyword
A connection keyword protects the Data Projector against unauthorized access when there
are multiple computers connected over a wireless LAN using a manual connection profile.
You can specify whether or not input of the connection keyword is required (connection
keyword on/off) to establish a wireless LAN connection with the Data Projector from a
computer, and you can register and modify the connection keyword as required.
You can turn the connection keyword on or off using either Web Setup or the Wireless
setup menu. Connection keyword registration and modification can be performed using Web
Setup.
To modify an existing connection keyword
Perform the procedure under “To display and log into the Web Setup page”
1
(page 20) to display the Web Setup top page.
In the “Projector Setup” area, click the [Edit] button.
2
z This will display a projector setup page.
Select “On” when you want to require input for connection from a computer to
3
the Data Projector over a wireless LAN, or “Off” to turn off the connection
keyword.
Enter up to 16 single-byte characters or symbols into the “Connection Keyword”
4
box.
After the settings are the way you want, click the [Save] button.
5
27
Page 28

To turn connection keyword input on or off on the Data Projector
While Wireless is shown in the projection area, press the [MENU] key on the
1
Data Projector’s remote controller.
z This will display the setup menu.
Press the [T] key to move the highlighting to “USB” and then press the
2
[ENTER] key.
Press the [T] key once to move the highlighting to “Setup” and then press the
3
[ENTER] key.
z This will display the Wireless setup menu with “Connection Keyword” highlighted.
Use [X] and [W] to select “On” or “Off”.
4
z Selecting “On” will require connection keyword input whenever a computer tries to
connect to the Data Projector.
To exit the Wireless setup menu, press the [ESC] key.
5
To connect to the Data Projector from a computer over a wireless LAN
when connection keyword input is required
On the computer, perform the required operation to connect to the Data
1
Projector.
z To do this, perform the procedures under “Using a Manual Connection Profile for
Wireless LAN Connection between the Data Projector and One or More Computers”
(page 11).
On the Wireless Connection 2 window, click the button.
2
z This will display a dialog box for inputting a connection keyword.
Enter the connection keyword that is preset for the Data Projector and then click
3
the [OK] button.
z If the input connection keyword is correct, a wireless LAN connection will be established
between the Data Projector and computer and the computer screen contents will be sent
to the Data Projector.
z The connection keyword you input will be cleared if it does not match the one that is
assigned to the Data Projector. Re-enter the correct keyword.
z If you input the wrong keyword three times in a row, the connection keyword input dialog
box will not appear again when you click the [OK] button on the error dialog box. To
display the connection keyword input dialog box again, click the button.
28
Page 29

Modifying Data Projector Manual Connection Settings
The following are example cases in which you may want to modify Data Projector manual
connection settings.
• When you want to configure Data Projector settings to be compatible with information
configured on the wireless LAN access point you are using
• When you want to enhance security by modifying initial default settings
You can modify manual connection settings using Web Setup.
To modify Data Projector manual connection settings
Important!
Performing the procedure below to modify the connection profile being used for the
wireless LAN connection between the Data Projector and computer will terminate the
current connection. To re-establish a connection, reconfigure the computer’s wireless LAN
settings so they match those of the new Data Projector connection profile.
Perform the procedure under “To display and log into the Web Setup page”
1
(page 20) to display the Web Setup top page.
In the “Connection Profile Setup” area, click the [Edit] button.
2
z This will display a page for configuring the connection profile.
Click a tab (Manual Connection 1, 2, or 3) to display the connection profile
3
whose settings you want to modify.
Configure the settings on the tab that is displayed.
4
z For details about each of the settings on the dialog box, see “Manual Connection Setting
Reference” (page 40).
To save your settings, click the [Save] button.
5
z This should cause the message “Your settings have been saved.” to appear.
z If there is anything wrong with the settings, the message “Something is wrong with one
or more input items.” will appear. If this happens, click [Return] in the lower left corner of
the page to return to the “Connection Profile Settings” page, and correct the settings as
required. When checking your settings, refer to “Manual Connection Setting Reference”
(page 40).
Note
To use a modified connection profile for a wireless LAN connection, you will need to
switch to the profile. For details, see “To switch the Data Projector connection profile”
(page 24).
29
Page 30

Creating a Computer Connection Profile
After you modify the settings of the Data Projector’s manual setting profile, you will also
need to modify the existing wireless LAN connection settings (connection profile) of the
computer accordingly, or you will have to create a new connection profile. This section
explains the procedure for using Wireless Connection 2 to create a new profile or to
modify the existing profile of a computer.
To create a new computer connection profile
Note
This procedure shows how to create a new computer connection profile to match
modifications made in the settings of the Data Projector’s connection profile named
“Manual Connection 3”. In this example, the projector’s name (page 26) is “Projector A”.
Perform the procedure under “To modify Data Projector manual connection
1
settings” (page 29) to modify Data Projector’s “Manual Connection 3” profile
settings as shown below.
Dialog Box Item Setting
Profile Name RoomB
SSID ROOM_B
Access Mode Ad Hoc
Security Setup WEP
WEP Key Format ASCII/128bit
WEP Key/WPA/WPA2 Pass Phrase 1234567890abc
DHCP Off
IP Address 192.168.10.1
Subnet Mask 255.255.255.0
Default Gateway 0.0.0.0
Channel Auto
z The above settings are provided as an example only. When you are establishing a
wireless LAN connection using the Access Point Mode, you need to configure settings to
match the actual access point. When configuring the IP address of the Data Projector
(and the computer connecting to the Data Projector over the wireless LAN connection),
you need to make sure that the IP address of the access point is different from all other
IP addresses within the same network.
z For details about each of the settings on the dialog box, see “Manual Connection Setting
Reference” (page 40).
30
Page 31

Perform the procedure under “To switch the Data Projector connection profile”
2
(page 24) to switch the Data Projector connection profile to “Manual Connection
3”.
z This will cause the “Standing by for connection...” screen to appear in the projection
area. Confirm that the screen shows “Manual Connection 3” for the connection profile.
On the Wireless Connection 2 window, select “Switch Connection Profile” on the
3
“Connection” menu.
z This will display a dialog box for switching the connection profile.
Click the [New] button.
4
z This will display a dialog box for configuring a new manual connection profile.
On the dialog box for configuring the manual connection setup, configure the
5
settings so they are the same as those that you configured for Manual
Connection 3 in step 1 of this procedure.
z Make sure that the IP address is different from the IP address you set in step 1, the IP
address of the access point, and any other IP address within the same network.
z For details about each of the settings on the dialog box, see “Manual Connection Setting
Reference” (page 40).
31
Page 32

After configuring all of the settings you want, click the [Register] button.
6
On the confirmation dialog box that appears, click the [OK] button.
7
z This will register your settings as a new connection profile and return to the connection
profile switching dialog box in step 1.
Click the [Connect] button.
8
z This closes the connection profile switching dialog box and displays the dialog box shown
below.
z When the computer finds the Data Projector, the display will change to a dialog box like
the one shown below for selecting the connected device.
Move the highlighting to “Projector A” for the projector name and then click the
9
[OK] button.
z This will establish a wireless LAN connection between the computer and Data Projector.
z This will close the connected device selection dialog box and display the Wireless
Connection 2 window on the computer screen.
On the Wireless Connection 2 window, click one of the projection area position
10
buttons and then click the button.
z This will cause the contents of the computer screen to be projected so they fill the
entire projection area.
z For details about Wireless Connection 2 window operations and Data Projector remote
controller operations you can perform after establishing a connection, see “Using Wireless
LAN for Projection” (page 50).
32
Page 33

To modify an existing computer connection profile
Display the Wireless Connection 2 window by double-clicking the icon on
1
your computer desktop, or select the following from the windows Start menu:
[All Programs] - [CASIO] - [Wireless Connection 2].
z This step is not necessary if the Wireless Connection 2 window is already displayed.
On the Wireless Connection 2 window, select “Switch Connection Profile” on the
2
“Connection” menu.
z This will display a dialog box for switching the connection profile.
Click the “Profile Name” down arrow button and then select the connection
3
profile you want to modify from the menu that appears.
Click the [Change Setup] button.
4
z This will display a dialog box for configuring a new manual connection profile.
On the dialog box, modify the settings as required.
5
z For details about each of the settings on the dialog box, see “Manual Connection Setting
Reference” (page 40).
After configuring all of the settings you want, click the [Register] button.
6
z This will cause the dialog box shown below to appear.
Click the [OK] button.
7
z This registers the settings you modified in the manual setting in step 5 and returns to
the connection profile switching dialog box.
Click the [Close] button.
8
z This will return to the Wireless Connection 2 window.
33
Page 34

Sending Settings from a Computer to the Data Projector
You can use the Send Settings function of Wireless Connection 2 to send the settings to
the Data Projector.
To send connection profile settings from a computer to the Data Projector
Establish a wireless LAN connection between the computer and Data Projector.
1
z For information about connection procedures, see “Using a Simple Connection Profile for
a Wireless LAN Connection between the Data Projector and a Single Computer” (page
9).
On the Wireless Connection 2 window, select [Connection] - [Switch Connection
2
Profile], which will display the Switch Connection Profile dialog box.
Click the “Profile Name” down arrow button and then select the manual
3
connection profile you want to send from the menu that appears.
z If you want to send Wireless Connection 2 initial manual connection profile values to the
XJ-S35/YP-100, here you should select Manual Connection 1, Manual Connection 2, or
Manual Connection 3.
z You cannot select Simple Connection 1, Simple Connection 2, or Simple Connection 3.
Click the [Send Settings] button.
4
z This will display the Send Settings dialog box.
z If you want to send Wireless Connection 2 initial manual connection profile values to the
XJ-S35/YP-100, use this dialog box to select the same connection profile that you
selected in step 3, above.
Select a destination (Manual Connection 1, Manual Connection 2, or Manual
5
Connection 3), and then click the [OK] button.
z This will display a dialog box prompting you to enter the password.
z Enter the password that you use when logging in to Web Setup (page 20). The initial
default password is “casio”.
34
Page 35

Enter the password and then click the [OK] button.
6
Keep clicking the [OK] button on the dialog boxes that appear.
7
z Clicking the [OK] button in response to the “Overwrite it?” message will cause the
settings of the computer to be sent to the Data Projector. This will cause the Data
Projector manual connection profile you selected in step 5 to be overwritten with the
connection profile settings you selected in step 3. Note, however that the IP address of
the Data Projector will become the IP address of the computer plus 1.
Note
You can change the projector’s IP address by clicking the [Send Options] setting on the
“Send Settings” dialog box.
To return to the Send Settings dialog box, click the [Cancel] button.
8
z This will return to the Switch Connection Profile dialog box.
Click the [Close] button.
9
z This will return to the Wireless Connection 2 window.
Note
After performing the above operation to send manual connection profile settings, perform
the following steps to establish a wireless LAN connection between the Data Projector
and the computer that is using the sent settings.
1. On the Wireless Connection 2 window, click the button to terminate the
connection.
2. Change the Data Projector connection profile to the manual connection profile you
selected in step 5 of the above procedure.
z For more information, see “To switch the Data Projector connection profile” (page 24).
3. On the Wireless Connection 2 window [Connection] menu, select [Switch Connection
Profile] to switch the computer connection profile to the manual connection profile you
selected in step 3 of the above procedure.
35
Page 36

Deleting a Computer Connection Profile
You can use the procedure in this section to delete computer connection profiles you
created with Wireless Connection 2 when you no longer need them. Wireless Connection 2
can also be used to delete the default connection profiles (Manual Connection 1, 2, and
3).
To delete a computer connection profile
Display the Wireless Connection 2 window by double-clicking the icon on
1
your computer desktop, or select the following from the windows Start menu:
[All Programs] - [CASIO] - [Wireless Connection 2].
z This step is not necessary if the Wireless Connection 2 window is already displayed.
On the Wireless Connection 2 window, select “Switch Connection Profile” on the
2
“Connection” menu.
z This will display a dialog box for switching the connection profile.
Click the “Profile Name” down arrow button and then select the connection
3
profile you want to delete from the menu that appears.
After the settings are the way you want, click the [Delete] button.
4
To close the connection profile switching dialog box, click the [Close] button.
5
z This will return to the Wireless Connection 2 window.
36
Page 37

Assigning a User Name to a Computer for Projection
User names make it possible to identify each computer when multiple computers are
connected to the Data Projector at the same time. The user name assigned to a computer
will appear in the projection area when the computer’s screen contents are projected. Use
Wireless Connection 2 to assign a user name to each computer.
To assign a user name to a computer for projection
On the Wireless Connection 2 window, select “Options” on the “Tools” menu.
1
z This will display a dialog box for configuring the option setting.
In the “User Name” box, enter the user name for the computer.
2
z Input up to 12 characters.
Click the [OK] button.
3
z This will register the user name.
Specifying the Quality of Images Sent from a Computer
Use the procedure below to specify the quality of images you send from a computer. The
“High-quality” setting provides better image quality, while the “Normal-quality” setting makes
the send operation faster.
To specify image quality
On the Wireless Connection 2 window, select “Options” on the “Tools” menu.
1
z This will display the [Options] dialog box.
Under [Quality], select the quality setting you want.
2
When the setting is the way you want, click [OK].
3
z This will apply your setting.
37
Page 38

Selecting the Network to Use for Wireless LAN Connection
When connecting to the Data Projector with a computer that has multiple wireless LAN
adapters, you can select a specific wireless LAN adapter to be used for connection with
the Data Projector.
To check the current network (wireless LAN adapter)
On the Wireless Connection 2 window, select [Connection] - [Select Network].
1
z This will display the Select Network dialog box. The network (wireless LAN adapter)
currently being used for the wireless LAN connection with the Data Projector will be
shown in the lower left corner or the dialog box that appears.
To close the dialog box, click the [Cancel] button.
2
To change the network (wireless LAN adapter) being used for connection
Important!
The following operation can be used only while the wireless LAN connection between
the computer and projector is terminated (broken).
On the Wireless Connection 2 window, select [Connection] - [Select Network].
1
z This will display the Select Network dialog box.
On the dialog box, click the wireless LAN adapter (wireless network connection)
2
you want to use for connection with the Data Projector and then click the [OK]
button.
38
Page 39

“Connect to an existing network” check box
A “Connect to an existing network” check box also will appear on the “Select Network”
dialog box if you are running Wireless Connection 2 under Windows XP or 2000. Select
this check box only if you want to establish a connection between the computer and Data
Projector via an existing wireless LAN access point.
To establish a connection via an existing wireless LAN access point
Change the projector’s Manual Connection 1 settings so they match the settings
1
of the access point (page 29).
Establish a wireless LAN connection between the access point and computer,
2
and then start up Wireless Connection 2.
Click [Cancel] to close the connection dialog box that appears.
3
Select [Connection] - [Select Network].
4
On the “Select Network” dialog box that appears, select the “Connect to an
5
existing network” check box and then click [OK].
z This will cause Wireless Connection 2 to shut down automatically.
Restart Wireless Connection 2.
6
Perform the procedure starting from step 7 under “To establish a wireless LAN
7
connection with Manual Connection 1 between the first computer and the Data
Projector” (page 12).
To establish connections with a second and subsequent computers, for each of
8
the additional computers perform steps 2 through 6 above and then perform
steps 9 through 12 under “To establish a wireless LAN connection with Manual
Connection 1 between the second and subsequent computers and the Data
Projector” (page 15).
To return to the setting that does not use the existing wireless LAN access point, select
[Connection] - [Select Network] on the Wireless Connection 2 window, and then clear the
check box next to “Connect to an existing network” on the “Select Network” dialog box.
Important!
No connection profile operations (switching, creation, editing, setting send) can be
performed while there is a connection between a computer and the Data Projector via
an existing access point. Also, the “Connect to the same network next time” option is
not available on the “Select Network” dialog box while “Connect to an existing network”
is selected.
39
Page 40

Manual Connection Setting Reference
This section provides detailed explanations of all of the manual connection settings.
• See “To modify Data Projector manual connection settings” (page 29) for information
about how to change Data Projector manual connection settings.
• For information about creating a computer manual connection setting profile for wireless
LAN connection with the Data Projector, refer to “To create a new computer connection
profile” (page 30). For information about modifying a manual connection setting profile,
refer to “To modify an existing computer connection profile” (page 33).
Data Projector Manual Connection Setting
Screen
Connection Profile Setup Page
Computer Manual Connection Setting Screen
Wireless Connection 2 Manual Connection Setup
Dialog Box
40
Page 41

Note
The initial default setting for each item is indicated by an asterisk (*).
Setting Name Description
Profile Name This is a name assigned to identify each individual manual connection.
SSID Wireless network ID name. This is normally referred to as the SSID, ESS-ID,
Access Mode Specifies either wireless LAN connection through an access point or direct
Security
Setup
Input up to 10 characters.
or network name. Input up to 32 single-byte alphanumeric characters.
connection between the Data Projector and computer without going through
an access point.
Access Point:
Specifies wireless LAN connection through an access point.
Ad Hoc*:
Specifies direct wireless LAN connection between the Data Projector and
computer.
Specifies whether or not communication over the wireless LAN connection is
encrypted. A setting to select the encryption type is also provided. The Data
Projector supports three types of encryption: WEP, WPA-PSK, and WPA2PSK.
Off*:
Encryption turned off.
WEP:
Turns on WEP encryption. When this option is selected, you also must
specify a WEP key format and a WEP key.
z The letters “WEP” stand for “Wired Equivalent Privacy”. It is a security
protocol that uses a character string to encrypt data and protect against
unauthorized access to wireless communications.
WPA-PSK:
Turns on WPA-PSK encryption. When this option is selected, you also must
specify a WPA/WPA2 encoding and a WPA/WPA2 pass phrase.
z The letters “WPA” stand for “Wi-Fi Protected Access”. Like WEP, it is a
security protocol that encrypts communication data. WPA uses an
automatically generated encryption key that is changed at preset
intervals, which provides stronger security than WEP.
WPA2-PSK:
Turns on WPA2-PSK encryption. When this option is selected, you also
must specify a WPA/WPA2 encoding and a WPA/WPA2 pass phrase.
z WPA2 is a new standard of WPA.
Note
z You cannot select WPA-PSK or WPA2-PSK when “Ad Hoc” is
selected for the “Access Mode” setting.
z WPA-PSK and WPA2-PSK encryption cannot be selected on a
computer running Windows XP or 2000. If you want to use either
of these encryption systems, connect to an existing network that is
using the system you want to use. See ““Connect to an existing
network” check box” (page 39) for information about connecting to
an existing network.
z Depending on your computer system setup, connecting with WPA-
PSK or WPA2-PSK encryption may not be possible. If you
experience problems, contact your network administrator.
41
Page 42

Setting Name Description
WEP Key
Format
WPA/WPA2
Encoding
WEP Key/
WPA/WPA2
Pass Phrase
DHCP Specifies whether the IP address that is set manually on the device being
IP Address Configuration of this setting is required when “Off” is selected for “DHCP”.
You only need to configure this setting when “WEP” is selected for “Security
Setup”.
You can specify any one of the following formats for input of the WEP key.
ASCII/64bit, ASCII/128bit, HEX/64bit, HEX/128bit*
For more information about inputting the WEP key using the format specified
here, see the “WEP Key / WPA/WPA2 Pass Phrase” item below.
You only need to configure this setting when “WPA-PSK” or “WPA2-PSK” is
selected for “Security Setup”.
TKIP*:
Select “TKIP” as the encryption type.
AES:
Select “AES” as the encryption type.
Use this input box to enter a WEP key or WPA/WPA2 pass phrase. What
you need to input depends on the encryption type you selected for “Security
Setup”.
z When “WEP” is selected for “Security Setup”
Enter the WEP key. The WEP key character string should be input using
one of the following formats, in accordance with the “WEP Key Format”
setting.
ASCII/64bit
Five single-byte alpha-numeric characters (Example: “MyKey”)
ASCII/128bit
13 single-byte alpha-numeric characters (Example: “MyKey12345678”)
HEX/64bit
10-digit hexadecimal value (Example: 11AA22BB33)
HEX/128bit
26-digit hexadecimal value (Example: 00112233445566778899AABBCC)
z When “WPA-PSK” or “WPA2-PSK is selected for “Security Setup”
Enter the WPA/WPA2 pass phrase (encryption key).
Enter the same encryption key that is currently set on the wireless LAN
access point to which you are planning to connect. You should enter at
least eight and up to 63 single-byte characters, or 64-digit hexadecimal
value.
configured (Data Projector or computer) or the IP address assigned
automatically by the DHCP server should be used during wireless LAN
connection.
On*:
Specifies use of the IP address assigned automatically by the DHCP
server. You do not need to configure the “IP Address”, “Subnet Mask”, or
“Default Gateway” settings when this option is selected.
Off:
Specifies use of the manually set IP address. You need to configure the
“IP Address”, “Subnet Mask”, and “Default Gateway” settings when this
option is selected.
Enter the IP address that is assigned to the Data Projector/computer. The IP
address consists of four values in the range of 1 to 254, separated by
periods (such as 192.168.10.3).
42
Page 43

Setting Name Description
Subnet Mask Configuration of this setting is required when “Off” is selected for “DHCP”.
Default
Gateway
Channel Configuration of this setting is required when “Ad Hoc” is selected for
Enter a subnet mask value, which specifies the range of the IP address of
the subnet to which the Data Projector/computer belongs. The subnet mask
consists of four values in the range of 0 to 255, separated by periods (such
as 255.255.255.0).
Configuration of this setting is required when “Off” is selected for “DHCP”.
When “Access Point” is selected for “Access Mode”, specify the same value
as the wireless LAN access point.
“Access Mode”. When there is a large number of devices performing wireless
LAN communication using frequencies in the same frequency band (2.4 GHz)
used by the Data Projector, you can improve communication performance by
assigning different channels to each wireless LAN network. Normally you
should leave this item set to “Auto” (initial default setting).
Auto*:
Automatically assigns a communication channel for wireless LAN
communication. If “Auto” is selected on the Data Projector, also select
“Auto” for the computer as well.
1, 2, 3, 4, 5, 6, 7, 8, 9, 10, 11:
Specify a channel that should be used for wireless LAN communication.
The same channel must be set on the Data Projector and the computer
that will be communicating with each other over the wireless LAN
connection.
43
Page 44

Returning Data Projector Wireless Settings to Their Initial Defaults
You can return all Data Projector Wireless function settings to their initial defaults by
executing “Initialize Wireless Setup”. The following are the Wireless initial default settings
configured by this operation.
Dialog Box Item Initial Default
Connection Keyword (page 27) Off (no keyword)
Show User Name Display (page 53) On
Web Setup (page 22) Enable
To return Data Projector Wireless function settings to their initial defaults
While Wireless is shown in the projection area, press the [MENU] key on the
1
Data Projector’s remote controller.
z This will display the setup menu.
Press the [T] key to move the highlighting to “USB” and then press the
2
[ENTER] key.
Press the [T] key once to move the highlighting to “Setup” and then press the
3
[ENTER] key.
z This will display the Wireless setup menu.
Press the [T] key to move the highlighting to “Initialize Wireless Setup”.
4
Press the [ENTER] key.
5
z This displays the dialog box shown below.
Press the [S] key to move the highlighting to “Yes” and then press the [ENTER]
6
key.
z This initializes all Wireless settings.
44
Page 45

Viewing Wireless Connection 2 Help
To view Wireless Connection 2 help, select “Help” on the Wireless Connection 2 window
“Help” menu.
Viewing Wireless Connection 2 Version Information
To view Wireless Connection 2 version information, select “About Wireless Connection” on
the Wireless Connection 2 window “Help” menu.
45
Page 46

Wireless LAN Connection Troubleshooting
Whenever you experience problems with the wireless LAN connection between the Data
Projector and the computer, check the following points first.
Check the following on the computer.
• Is a wireless LAN utility other than Wireless Connection 2 running?
If so, shut down the other utility.
Check the following on the Data Projector.
• Is the same connection profile selected on the computer and on the Data
Projector?
Wireless LAN connection is not possible when different connection profiles are selected
on the computer and the Data Projector (such as “Manual Connection 1” on the
computer and “Simple Connection 1” on the Data Projector). Make sure the same
connection profile is selected on both.
Also check the following.
• Are the Data Projector and computer too far apart or are they separated by a wall
or other barrier?
Try moving the Data Projector and computer so they are closer to each other.
• Is a microwave oven or a Bluetooth device being used nearby?
Operation of a device that uses the 2.4 GHz frequency band (which is the same
frequency band as the IEEE802.11b wireless standard used by the Data Projector) in the
vicinity of the Data Projector can cause radio interference, resulting in a wireless
communication error. Avoid using the nearby microwave oven or Bluetooth device when
performing Data Projector wireless LAN communication.
If the above countermeasures do not resolve your problem, try the following depending on
the problem you are experiencing.
46
Page 47

You cannot establish a Manual Connection between the Data Projector and
a single computer or multiple computers.
Except for the IP address setting, all of the settings configured for the Data Projector and
the computer(s) must match in order to establish a Manual Connection. Use the following
procedures to display and check the Data Projector and computer settings. If there are any
differences in the settings, change the settings on the computer(s)
important to remember here, however, that the IP addresses must be different
To check Data Projector settings
Press the [FUNC] key, confirm that “View Connection Info” is highlighted, and then press
the [ENTER] key.
To check computer settings
On the Wireless Connection 2 window, select “Switch Connection Profile” on the
1
“Connection” menu.
On the connection profile switching dialog box that appears, click the “Profile
2
Name” down arrow button and select the connection profile whose settings you
want to view.
Click the [Change Setup] button.
3
z This will display a dialog box for configuring a new manual connection profile. Use the
dialog box to check the settings and make any changes that are required.
so they match. It is
.
Important!
When establishing wireless LAN connections between the Data Projector and multiple
computers, the Data Projector and each of the computers must have their own unique
IP addresses. For example, you could assign the IP address 192.168.1.100 to the Data
Projector, and assign the following IP addresses to the computers: 192.168.1.10, 192.
168.1.20, 192.168.1.30, etc.
47
Page 48

The wireless LAN connection between the Data Projector and computer
keeps dropping.
This can be caused by the following.
• Data communication can slow down and the connection may tend to drop when the
Data Projector and computer are far from each other (in different rooms, on different
floors, etc.) Move the Data Projector and computer as close together as possible.
• Operation of a device that uses the 2.4 GHz frequency band (which is the same
frequency band as the IEEE802.11b wireless standard used by the Data Projector) in the
vicinity of the Data Projector can cause radio interference that results in a wireless
communication error. Avoid using the nearby microwave oven or Bluetooth device when
performing Data Projector wireless LAN communication.
After checking the above two points, select [Exit] on the [Connection] menu of the Wireless
Connection 2 window to exit Wireless Connection 2, and then restart Wireless Connection
2.
You cannot display the Web Setup page
The Web Setup page can be displayed only while there is a wireless LAN connection
between the Data Projector and computer. Use a Simple Connection or Manual Connection
to establish a wireless connection between the Data Projector and computer, and then
display the Web Setup page. For more information, see “Web Setup” (page 20).
If the Web Setup page does not appear even through there is a wireless LAN connection
between the Data Projector and computer, check the following points.
• The Web Setup of the Data Projector may be disabled. Use the procedure under “To
enable and disable Web Setup” (page 22) to check the current setting. If it is “Disable”,
change it to “Enable”.
• The browser you are using may be configured to use a proxy server. This can make it
impossible to display the Web Setup page, and so the proxy server settings should be
canceled. See the help and other user documentation for your browser for information
about proxy server settings.
48
Page 49

Wireless Connection 2 Menus and Button Reference
This section provides detailed information about the Wireless Connection 2 window menu
commands and buttons.
To do this:
Use the currently selected connection profile to open a
wireless LAN connection between a computer and the
Data Projector
Terminate a wireless LAN connection between a
computer and the Data Projector
On the computer, switch the connection profile used
for wireless connection between a computer and the
Data Projector
Switch the network used for wireless connection
between a computer and the Data Projector
Terminate the wireless LAN connection between a
computer and the Data Projector and quit Wireless
Connection 2
Select the mouse cursor shape for the projection
screen or turn mouse cursor display off
Display the Wireless Connection 2 option setting dialog
box (for specifying a user name, image quality, or to
display the Web Setup page)
Display the Web Setup page —
Pause computer screen contents as they are being
projected
Project computer screen contents —
Stop projection of computer screen contents while
maintaining the connection
View Wireless Connection 2 Help [Help] - [Help] —
View Wireless Connection 2 version information
Perform this menu
operation:
[Connection] - [Connect]
[Connection] [Disconnect]
[Connection] - [Switch
Connection Profile]
[Connection] [Select Network]
[Connection] - [Exit] —
[Tools] [Mouse Cursor Emulation]
[Tools] - [Options] —
—
—
[Help] - [About Wireless
Connection]
Or click this
button:
—
—
—
49
Page 50

Using Wireless LAN for Projection
This section explains operations you can perform after a connection is established between
the Data Projector and computer.
For this type of connection: Refer to this section of this manual:
Single computer connected to the Data
Projector over a wireless LAN
Multiple computers connected to the
Data Projector at the same time over
a wireless LAN
Operations while a Single Computer is Connected to the Data Projector over a Wireless LAN
To project computer screen contents
On the computer screen, click the button on the Wireless Connection 2 window.
• An image of the computer screen contents will be projected automatically, immediately
after a connection using Simple Connection is established. This means you do not have
to click the button to project the image.
• This will send the contents of the computer screen to the Data Projector, which will
project it. The color of the button at this time will change from black to green.
Note
While the computer screen contents are being projected, the mouse cursor will be
displayed in accordance with the Mouse Cursor Emulation settings configure with
Wireless Connection 2. For details, see “To display a mouse cursor in the projection
area” (page 51).
“Operations while a Single Computer is Connected to the
Data Projector over a Wireless LAN” (below)
“Operations while a Single Computer is Connected to the
Data Projector over a Wireless LAN” (below) and
“Operations while Multiple Computers are Connected to the
Data Projector over a Wireless LAN” (page 52)
To pause computer screen contents as they are being projected
On the computer screen, click the button on the Wireless Connection 2 window. This
will cause the button color to change from black to green, and pause the screen
contents in the projection area.
To unpause projection of the mage, click the button.
To stop projection of computer screen contents while maintaining the
connection
On the computer screen, click the button on the Wireless Connection 2 window. This
will cause the button color to change from black to green the projection area to go
black.
To resume projection of the image, click the button.
50
Page 51

To display a mouse cursor in the projection area
Click the button or select [Mouse Cursor Emulation] on the [Tools] menu.
1
z This will display a mouse cursor emulation dialog box.
Select the type of mouse cursor you want to use and then click the [OK]
2
button.
z This will display the selected mouse cursor in the projection area. The mouse cursor will
be located at the same location as the mouse cursor on the computer screen.
Note
z The mouse cursor displayed using mouse cursor emulation is not the same mouse
cursor as displayed on the computer screen. Wireless Connection 2 detects the
location of the mouse cursor on the computer screen and displays the mouse cursor
emulation in the projection area.
z If you do not want a mouse cursor in the projection area, select “Off” in step 2
above.
To terminate the wireless LAN connection between a computer and Data
Projector from the computer
On the computer screen, click the button on the Wireless Connection 2 window, or
select “Disconnect” on the “Connection” menu.
This will terminate the wireless LAN connection between the computer and Data Projector
and display “Standing by for connection...” in the projection area.
To restore the wireless LAN connection between a computer and Data
Projector from the computer
On the computer screen, click the button on the Wireless Connection 2 window, or
select “Connect” on the “Connection” menu.
51
Page 52

Operations while Multiple Computers are Connected to the Data Projector over a Wireless LAN
While multiple computers are connected to the Data Projector over a wireless LAN, you
can check which computer’s screen contents currently are being projected, and you can
switch projection between computer screens as required. Use the Data Projector’s remote
controller to perform these operations.
To check which computer’s screen contents currently are being projected.
On the Data Projector’s remote controller, press the [U] key. This will display the user
name of the computer whose screen contents are currently being projected.
To switch projection from the screen contents of one computer to another
While the screen contents of one of the computer’s connected over a wireless
1
LAN connection are being projected, press the [ ] key on the Data Projector’s
remote controller.
z This will switch to the user menu that shows thumbnails of the screen contents of all the
connected computers along with their user names, as shown below.
Use the cursor keys on the Data Projector’s remote controller to move the
2
highlighting to the thumbnail you want to select.
Press the [ENTER] key or the [ ] key.
3
z This will cause the contents of the selected computer screen to be projected so they fill
the entire projection area.
52
Page 53

To turn display of user names in the projection area on and off
Note
Under initial default settings, the user name is displayed in the upper left corner of the
projection area whenever you switch projection from the contents of one computer
screen to another, or when a single computer is connected to the Data Projector over
a wireless LAN.
While Wireless is shown in the projection area, press the [MENU] key on the
1
Data Projector’s remote controller.
z This will display the setup menu.
Press the [T] key to move the highlighting to “USB” and then press the
2
[ENTER] key.
Press the [T] key once to move the highlighting to “Setup” and then press the
3
[ENTER] key.
z This will display the Wireless setup menu.
Press the [T] key to move the highlighting to “Show User Name Display”.
4
Use [X] and [W] to select “On” (user name displayed) or “Off” (user name not
5
displayed).
To exit the Wireless setup menu, press the [ESC] key.
6
53
Page 54

MA0805-C
 Loading...