

Page 1

PJ Camera Software 1.1
Multi PJ Camera System
Controller Software for Windows
User’s Guide
Keep this manual in a safe place for future reference.
• The contents of this User’s Guide are subject to change without notice.
• Copying of this manual, either in part or its entirety, is forbidden. You are
allowed to use this manual for your own personal use. Any other use is
forbidden without the permission of CASIO COMPUTER CO., LTD.
• CASIO COMPUTER CO., LTD. shall not be held liable for any lost profits or
claims from third parties arising out of the use of this product or this
manual.
• CASIO COMPUTER CO., LTD. shall not be held liable for any loss or lost
profits due to loss of data caused by malfunction or maintenance of this
product, or any other reason.
• The sample screens shown in this manual are for illustrative purposes only,
and may not be exactly the same as the screens actually produced by the
product.
E
• Microsoft, PowerPoint, Windows, Windows NT, Windows XP, and the Windows
logo are registered trademarks or trademarks of Microsoft Corporation of the
United States in the United States and other countries.
• Other company and product names may be registered trademarks or trademarks
of their respective owners.
MA0505-C
Page 2
Contents
Introduction . . . . . . . . . . . . . . . . . . . . . . . . . . . . . . . . . . 5
Using This Manual . . . . . . . . . . . . . . . . . . . . . . . . . . . . . . . . . . . 6
Startup Modes and this Manual . . . . . . . . . . . . . . . . . . . . . . . . . . . . . . . . . 6
Precautions when Using the PJ Camera Software . . . . . . . . . 7
Chapter 1
PJ Camera Software Overview . . . . . . . . . . . . . . . . . . 12
Starting Up PJ Camera Software . . . . . . . . . . . . . . . . . . . . . . 13
PJ Camera Software Startup Modes. . . . . . . . . . . . . . . . . . . . . . . . . . . . . 13
Starting Up PJ Camera Software . . . . . . . . . . . . . . . . . . . . . . . . . . . . . . . 14
PJ Camera Software Modes and Basic Operations . . . . . . . . . . . . 16
Using PJ Camera Software Modes . . . . . . . . . . . . . . . . . . . . . . . . . . . . . . 16
Operation Bar . . . . . . . . . . . . . . . . . . . . . . . . . . . . . . . . . . . . . . . . . 17
PJ Camera Software Window . . . . . . . . . . . . . . . . . . . . . . . . . . . . . . . . . . 18
Using the Guide Icon . . . . . . . . . . . . . . . . . . . . . . . . . . . . . . . . . . . 19
Selecting a Mode . . . . . . . . . . . . . . . . . . . . . . . . . . . . . . . . . . . . . . 23
Using Projection Area Capture and Board Area Capture . . . . . . . 25
Projection Area Capture . . . . . . . . . . . . . . . . . . . . . . . . . . . . . . . . . . . . . . 25
Board Area Capture . . . . . . . . . . . . . . . . . . . . . . . . . . . . . . . . . . . . . . . . . 26
Quitting PJ Camera Software . . . . . . . . . . . . . . . . . . . . . . . . . 27
Chapter 2
Using PJ Camera Software . . . . . . . . . . . . . . . . . . . . . 28
Using the PJ System Like an OHP Projector
(Document Camera Mode) . . . . . . . . . . . . . . . . . . . . . . . . . . . . 29
Document Camera Mode Overview . . . . . . . . . . . . . . . . . . . . . . . . 29
Projecting Images in the Document Camera Mode . . . . . . . . . . . . 33
Operations Available During Projection in the
Document Camera Mode . . . . . . . . . . . . . . . . . . . . . . . . . . . . . . . . 43
Scanning Images (Scanner Mode) . . . . . . . . . . . . . . . . . . . . . . . . . . 46
Scanner Mode Overview. . . . . . . . . . . . . . . . . . . . . . . . . . . . . . . . . . . . . . 46
Using Auto Scanning. . . . . . . . . . . . . . . . . . . . . . . . . . . . . . . . . . . . . . . . . 48
Using Manual Scanning . . . . . . . . . . . . . . . . . . . . . . . . . . . . . . . . . . . . . . 51
2
Page 3

Contents
Using Image Files Stored on the Computer’s Hard Disk in a
Presentation (PC Image Mode). . . . . . . . . . . . . . . . . . . . . . . . . . . . . 55
PC Image Mode Overview . . . . . . . . . . . . . . . . . . . . . . . . . . . . . . . . . . . . 55
Using the Preview List. . . . . . . . . . . . . . . . . . . . . . . . . . . . . . . . . . . . . . . . 58
Using Playlists. . . . . . . . . . . . . . . . . . . . . . . . . . . . . . . . . . . . . . . . . . . . . . 67
Using Projection Area Capture and Board Area Capture . . . . . . . . . . . . . 79
Using Image Files Stored in PJ Camera Memory in a
Presentation (Camera Image Mode) . . . . . . . . . . . . . . . . . . . . . . . . 80
Camera Image Mode Overview . . . . . . . . . . . . . . . . . . . . . . . . . . . . . . . . 80
Using the Preview List. . . . . . . . . . . . . . . . . . . . . . . . . . . . . . . . . . . . . . . . 82
Camera Image Mode Playlist Area . . . . . . . . . . . . . . . . . . . . . . . . . . . . . . 84
Using Projection Area Capture and Board Area Capture . . . . . . . . . . . . . 84
Using PJ Camera Software with PowerPoint or Other
Presentation Software (Presentation Mode) . . . . . . . . . . . . . . . . . . 85
Entering the Presentation Mode . . . . . . . . . . . . . . . . . . . . . . . . . . . 85
Presentation Mode Menus . . . . . . . . . . . . . . . . . . . . . . . . . . . . . . . 85
Using Projection Area Capture and Board Area Capture . . . . . . . . . . . . . 86
Using Projection Features . . . . . . . . . . . . . . . . . . . . . . . . . . . . 87
Zooming and Scrolling . . . . . . . . . . . . . . . . . . . . . . . . . . . . . . . . . . . . . . . 87
Editing the Projected Image . . . . . . . . . . . . . . . . . . . . . . . . . . . . . . . . . . . 89
Viewing the Recorded Image of the Currently Projected Image . . . . . . . . 92
Saving the Projected Image . . . . . . . . . . . . . . . . . . . . . . . . . . . . . . . . . . . 93
Viewing the Image Properties . . . . . . . . . . . . . . . . . . . . . . . . . . . . . . . . . . 95
Projection Area Capture . . . . . . . . . . . . . . . . . . . . . . . . . . . . . . . . . . 97
Using Projection Area Capture . . . . . . . . . . . . . . . . . . . . . . . . . . . . . . . . . 98
Board Area Capture. . . . . . . . . . . . . . . . . . . . . . . . . . . . . . . . . . . . . 104
Using Board Area Capture . . . . . . . . . . . . . . . . . . . . . . . . . . . . . . . . . . . 104
3
Page 4

Contents
Chapter 3
Configuring PJ Camera Software Settings . . . 108
PJ Camera Software Operating Environment. . . . . . . . . . . . . . . . 109
Operating Environment Dialog Box . . . . . . . . . . . . . . . . . . . . . . . . . . . . . 109
Configuring Operating Environment Settings . . . . . . . . . . . . . . . . 110
Operating Environment Settings . . . . . . . . . . . . . . . . . . . . . . . . . . . . . . . 111
Operation Bar Properties . . . . . . . . . . . . . . . . . . . . . . . . . . . . 117
Configuring Operation Bar Properties. . . . . . . . . . . . . . . . . . . . . . . . . . . 117
Chapter 4
Reference . . . . . . . . . . . . . . . . . . . . . . . . . . . . . . 120
Menus and Commands . . . . . . . . . . . . . . . . . . . . . . . . . . . . . . . . . . 121
[File] Menu . . . . . . . . . . . . . . . . . . . . . . . . . . . . . . . . . . . . . . . . . . . . . . . 121
[Edit] Menu . . . . . . . . . . . . . . . . . . . . . . . . . . . . . . . . . . . . . . . . . . . . . . . 122
[View] Menu . . . . . . . . . . . . . . . . . . . . . . . . . . . . . . . . . . . . . . . . . . . . . . 123
[Camera] Menu . . . . . . . . . . . . . . . . . . . . . . . . . . . . . . . . . . . . . . . . . . . . 124
[Tools] Menu . . . . . . . . . . . . . . . . . . . . . . . . . . . . . . . . . . . . . . . . . . . . . . 125
[Image] Menu . . . . . . . . . . . . . . . . . . . . . . . . . . . . . . . . . . . . . . . . . . . . . 125
[Playlist] Menu. . . . . . . . . . . . . . . . . . . . . . . . . . . . . . . . . . . . . . . . . . . . . 126
[Help] Menu. . . . . . . . . . . . . . . . . . . . . . . . . . . . . . . . . . . . . . . . . . . . . . . 126
Shortcut Menu Reference . . . . . . . . . . . . . . . . . . . . . . . . . . . . . . . . 127
Document Camera Mode Shortcut Menu Commands . . . . . . . . . 127
PC Image Mode and Scanner Mode Shortcut Menus. . . . . . . . . . . . . . . 128
Camera Image Mode Shortcut Menus . . . . . . . . . . . . . . . . . . . . . . . . . . 130
Toolbar Button Reference . . . . . . . . . . . . . . . . . . . . . . . . . . . . . . . 132
Standard Toolbar Buttons . . . . . . . . . . . . . . . . . . . . . . . . . . . . . . . . . . . . 132
Playlist Toolbar Buttons . . . . . . . . . . . . . . . . . . . . . . . . . . . . . . . . . . . . . 133
Function Keys and Shortcut Key Operations. . . . . . . . . . . . . . . . 134
Guide Icon Menu . . . . . . . . . . . . . . . . . . . . . . . . . . . . . . . . . . . . . . 135
Image File Properties Dialog Box Contents . . . . . . . . . . . . . . . . . 136
PJ Camera Software Folder Structure. . . . . . . . . . . . . . . . . . . . . . 138
Error Messages . . . . . . . . . . . . . . . . . . . . . . . . . . . . . . . . . . . 140
4
Page 5

Introduction
This User’s Guide describes how to use PJ Camera Software, which is special
controller software for the Multi PJ Camera System.
5
Page 6

Using This Manual
The contents of this manual are written assuming that you have read the “MULTI PJ
CAMERA/Multifunctional Camera System YC-400 User’s Guide” and have already set up the
Multi PJ Camera System.
Be sure to read the “MULTI PJ CAMERA/Multifunctional Camera System YC-400 User’s
Guide” before reading this manual.
z Most of the operations presented in this manual are performed using the menus and
toolbar. Some examples also include information about using keyboard shortcut keys.
z As a general rule, operations using the shortcut menu that appears when you right-click
with the mouse are not included. For information about the shortcut menu, see “Chapter 4
Reference”.
■ MULTI PJ Camera
The term “PJ Camera” in this manual refers to the camera unit of the Multi PJ Camera
System.
■ Projection
PJ Camera Software is basically software for projecting images from a projector. Because of
this, the term “projection” is used in this manual to refer to operations that actually cause the
image to fill the computer screen (without actually projecting it).
Startup Modes and this Manual
PJ Camera Software has two startup modes: a Multi PJ startup mode and a Business
Document startup mode (“PJ Camera Software Startup Modes” page 13). The startup mode
you select determines the PJ Camera Software functions that are available to you.
z All of the explanations in this manual apply when you start up PJ Camera Software in the
Multi PJ startup mode.
z Only functions and explanations with next to their title apply when you start up PJ
Camera Software in the Business Document startup mode.
z Descriptions of items that explain particular differences between the Multi PJ and the
Business Document startup modes are presented as shown below.
z (Text describing difference)
6
Page 7

Precautions when Using the PJ Camera Software
PJ Document Stage
z Never write on the document stage and take care to guard against scratching or otherwise
damaging it. Writing or other marks on the document stage can interfere with projection in
the Document Camera Mode and scanning in the Scanner Mode.
z External Light
Room illumination, sunlight, or light from some other source shining onto the document
stage during a Document Camera Mode or Scanner Mode image recording operation can
cause white out and other image abnormalities.
Document Camera Mode
The Multi PJ Camera System automatically monitors the status of the document stage in
order to optimize contour extraction and automatic image recording operations under a variety
of different conditions. Because of this, you should adjust the camera position whenever
recording conditions change or when you move the camera due to a mode change, etc.
■ Automatic Image Recording
The automatic image recording function detects changes in brightness and contrast. Though
the Multi PJ Camera System can adapt to a wide range of conditions, automatic image
recording may not be possible under the following conditions.
z In a room where there is insufficient lighting to detect contours
z In a room where there are large fluctuations in the lighting level
z A document that is smaller than the specified size
In the above cases, use manual recording.
Tip
If the shutter releases even though there is nothing on the document stage, check the
following.
z If the document stage is badly damaged, have it repaired.
z If the document stage is very dirty, clean it.
z If there has recently been a change in the camera recording conditions, perform camera
position adjustment.
7
Page 8

Precautions when Using the PJ Camera Software
■ Contour Extraction
Contour extraction uses brightness contrast to extract the rectangular shapes in an image.
Though the Multi PJ Camera System can adapt to a wide range of conditions, certain types
of documents may not be compatible with automatic contour detection. The following are the
conditions that promote successful automatic contour detection.
z Make sure the room is lit sufficiently.
z Place the document in the center of the document stage, and make sure that no part of it
is extending off of the stage.
z Make sure the document is free of creases and curls, and is either rectangular or square.
z Make sure the document is free of creases and wrinkles.
z Use only documents that are within the stipulated range of sizes (from business card size
to A4 (210 × 297mm)(8.3 × 11.7inch)/Letter size).
z Use documents whose color provides sufficient contrast with the document stage color. Also,
the color surface of the table where the PJ Camera Stand is located should be a different
color from the document stage.
z Place the PJ Camera Stand on a surface that does not reflect light.
z When placing a document onto the document stage, make sure the document is relatively
straight (tilted no more than about 30 degrees).
Tip
Check for the following if you experience occasional contour detection problems.
z In the case of a color document, is there sufficient color contrast around the contours?
If not, use a setting that does not perform contour extraction.
z Is room lighting too dim to allow adequate contour contrast detection?
Increase the level of room lighting or use a setting that does not perform contour extraction.
z Is part of the document outside of the document stage area?
Re-position the document taking care to ensure that no part of the document extends past
the edges of the document stage. Make sure that the entire document is within the area of
the document stage.
z The document is curled or bent.
Flatten the document so it forms a rectangle or square.
Tip
Check the following points if contour detection does not work at all.
z Is the document smaller than the specified size?
If it is, extraction cannot be performed.
z Is the document in the center of the document stage with no part of the document
extending off the sides of the stage?
Position the document in the center of document stage and ensure that no part of it extends
off the sides.
8
Page 9

Precautions when Using the PJ Camera Software
Tip
Check the following points if you suddenly start to have problems with contour detection.
z Has there been a change in the conditions under which you are using the camera?
Perform camera position adjustment.
z Have you changed to a different type of document?
Check to make sure that the document contents conform to contour extraction requirements.
z Is an edge of the document running along a joint of the document stage?
Reposition the document so its edges do not run along any document stage joint.
z Is the document positioned in the center of the document stage?
Make sure that the document is positioned so one part of it is located on the cross mark
in the center of the document stage.
z Is the document too small?
Use the “Small Document” setting.
Projection Area Capture
When capturing the image area, compose the image so the entire projection area fits within it.
Adjust the position of the projector to make sure that the projected image is rectangular or
square.
z The PJ Camera Software corrects for distorion of the projection image. This can cause
written text or graphics in the combined Projection Area Capture image to appear somewhat
different from the original.
z For best results, make sure to check for the following when composing an image for
Projection Area Capture.
• Make sure that the projection area is included within the image.
• Make sure that the projection area fills the entire image.
• Make sure that the center of the image is located within the projection area on the
whiteboard.
• Make sure that all of the projection area is on the whiteboard, and that it forms a
rectangular or square shape.
• Make sure there is sufficient contrast around the periphery of the projection area.
• Make sure there is no light from a fluorescent or incandescent light source shining into
the projection area.
z A slow shutter speed setting is used in order to produce high-resolution images. Avoid
shaking or moving the camera while recording images.
9
Page 10

Precautions when Using the PJ Camera Software
Board Area Capture
When capturing the board area, compose the image so the entire board area fits within it.
For best results, make sure to check for the following when composing an image for Board
Area Capture.
z Make sure that the whiteboard contour fits within the image.
z Make sure the whiteboard fills the entire image.
z Make sure that the center of the image is located within the whiteboard area.
z Make sure there is sufficient contrast around the periphery of the whiteboard.
z Make sure there is no light from a fluorescent or incandescent light source shining onto the
whiteboard.
z Make sure that the angle between the projector and the whiteboard is no greater than 30
degrees.
A slow shutter speed setting is used in order to produce high-resolution images. Avoid
shaking or moving the camera while recording images.
Scanner Mode
■ Contour Extraction
See “Contour Extraction” on page 8 for details.
Scanner resolution is 160dpi at the center of the image if fully zoomed out. Resolution is
lower at the periphery of the image.
PJ Camera Software Precautions
■ USB Hub Connection
In rare cases, you may not be able to turn off the camera when it is connected to a USB
hub.
If this happens, do not use a USB hub.
■ Recovering after your computer goes into standby
The camera may not operate correctly after you recover from a suspend/standby state on
your computer. After recovering from a suspend/standby state on your computer, press the PJ
Camera stand’s power button to turn power off and then back on again.
10
Page 11

Precautions when Using the PJ Camera Software
■ Administrator Privileges Required
z You must be logged in with administrator privileges on the PC in order to use PJ Camera
Software. An error will occur if a user logged in without administrator privileges attempts to
use it.
z Note the following precautions when there are multiple users logged onto a computer
running Windows XP.
z Do not use the Windows XP Switch User function to switch users while PJ Camera
Software is running. To change Windows XP users, you should exit PJ Camera Software,
the current user should log out, the new user should log in, and PJ Camera Software
should be restarted.
z An error will occur if you attempt to use PJ Camera Software after using the Windows
XP Switch User function to switch users. If this happens, restart Windows, log in as the
new user, and then restart PJ Camera Software.
■ Software Operation Conditions
z Image projection in the PC Image Mode and image rotation are supported only when the
camera is mounted on the PJ Camera Stand.
11
Page 12

Chapter 1 PJ Camera Software Overview
PJ Camera Software is controller software for the Multi PJ Camera System. You
can use it with a projector to project images from the PJ Camera and from a
computer’s hard disk.
This chapter provides you with information you need to know before using PJ
Camera Software for the first time. It explains how to start up the software, and
describes screen contents, what you can do in each mode, etc.
12
Page 13
Starting Up PJ Camera Software
PJ Camera Software Startup Modes
PJ Camera Software has two startup modes: a Multi PJ startup mode and a Business
Document startup mode. The startup mode you select determines the PJ Camera Software
functions that are available to you.
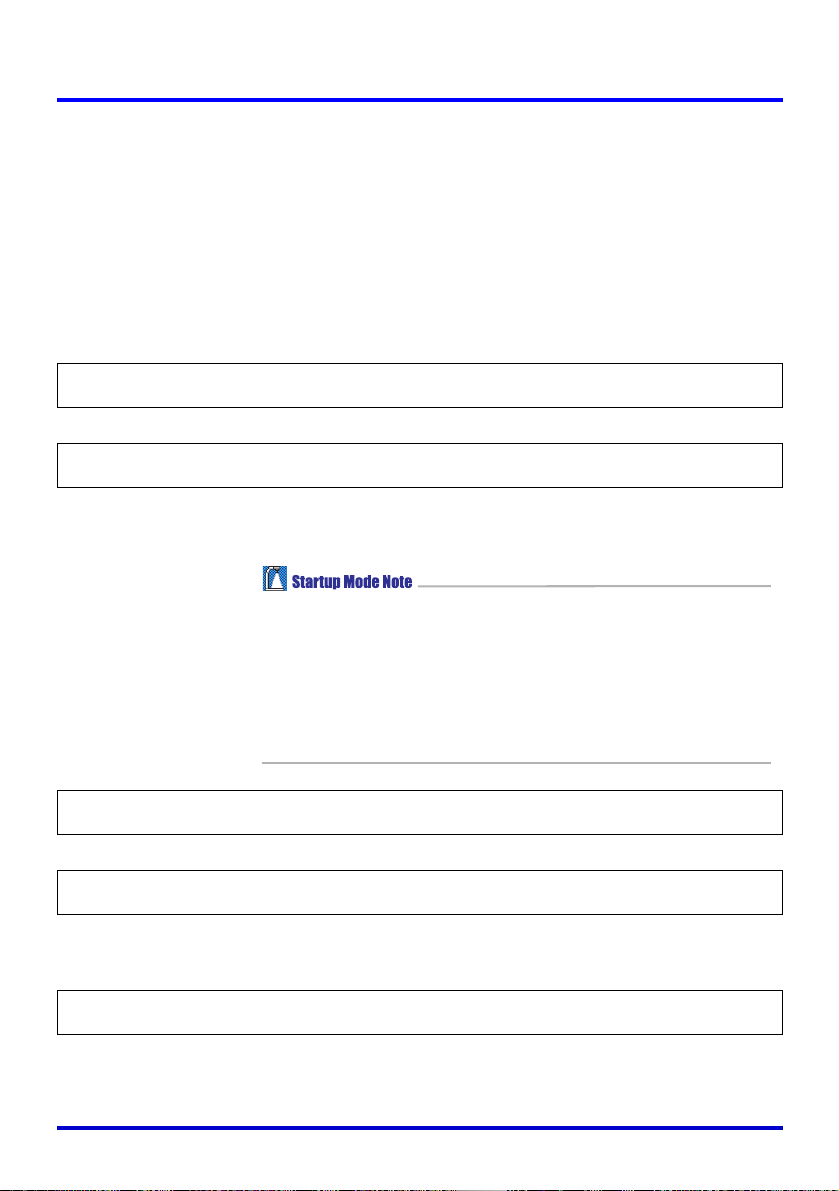
Starting up in the Multi PJ startup mode allows access to all
Multi PJ Startup Mode
Business Document Startup
Mode
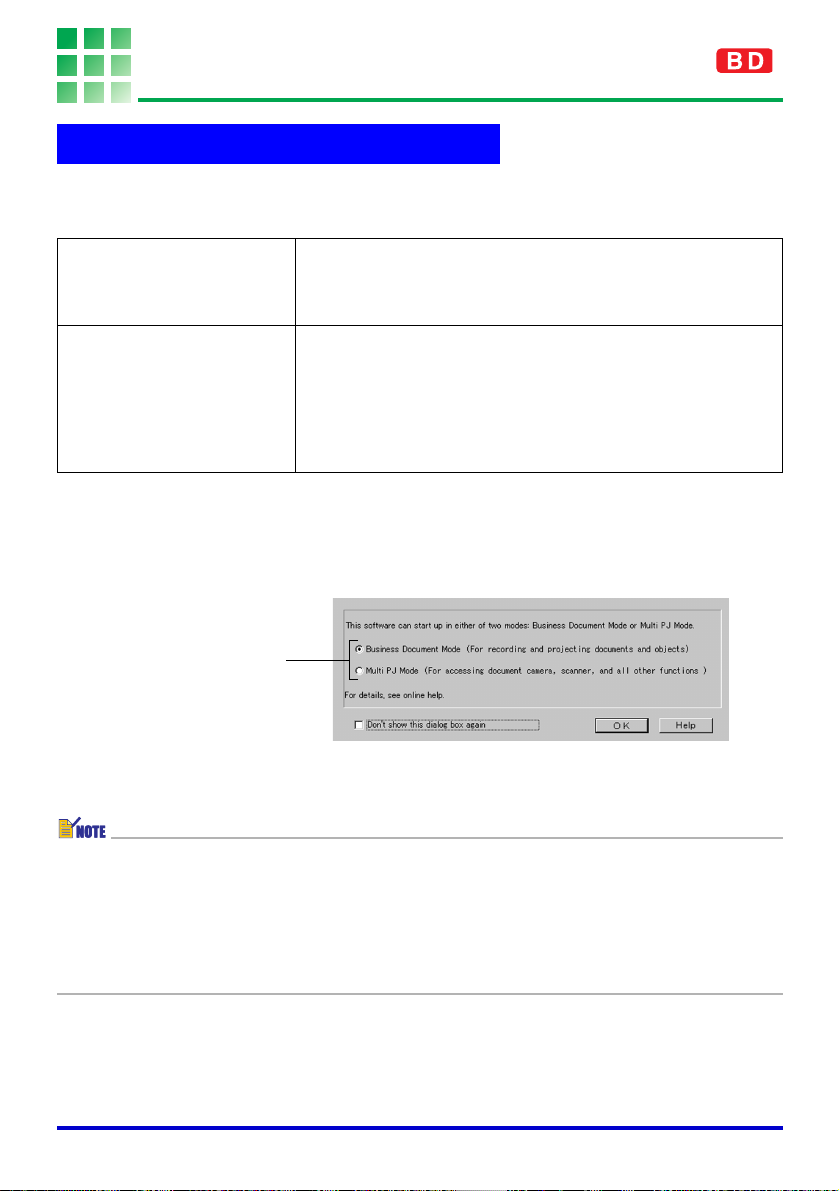
Selecting the Startup Mode
You can select the startup mode on the Startup Mode dialog box that appears when you
start up PJ Camera Software.
five of the PJ Camera Software modes (Document Camera
Mode, Scanner Mode, Camera Image Mode, PC Image Mode,
Presentation Mode), and all of their functions.
Starting up in the Business Document startup mode gives
you access to the Document Camera Mode and the
Presentation Mode only, which helps to make PJ Camera
Software operation more streamlined and simpler. This easyto-use, easy-to-understand mode is also the perfect choice for
those who are using the PJ Camera Software for the first
time.
Select the button next to the
startup mode you want to
use by clicking it.
Clicking the [OK] button starts up PJ Camera Software in the startup mode that is
currently selected on the dialog box.
z To change the startup mode after PJ Camera Software is already running, display the
operation bar. Next, click [Tools] and then [Operating Environment]. For more information,
see “[Common] Tab” on page 111.
z If you select the “Don’t show this dialog box again” check box and then click [OK], the
Startup Mode dialog box will not appear any more when you start up PJ Camera
Software. If you change your mind and want to the Startup Mode dialog box to be
displayed again, perform the operation under “[Common] Tab” on page 111.
13
Page 14
Starting Up PJ Camera Software
Starting Up PJ Camera Software
You can use any one of three methods to start up PJ Camera Software.
z Start up by turning on the PJ Camera Stand
z Start up from the Windows [Start] menu
z Start up by clicking the PJ Camera Software taskbar icon
■ To start up PJ Camera Software by turning on the PJ Camera
Stand
1. Set up the Multi PJ Camera System.
z See the separate “MULTI PJ CAMERA/Multifunctional Camera System YC-400 User’s
Guide” for more information.
2. Start up the computer (which already has PJ Camera Software installed
on it).
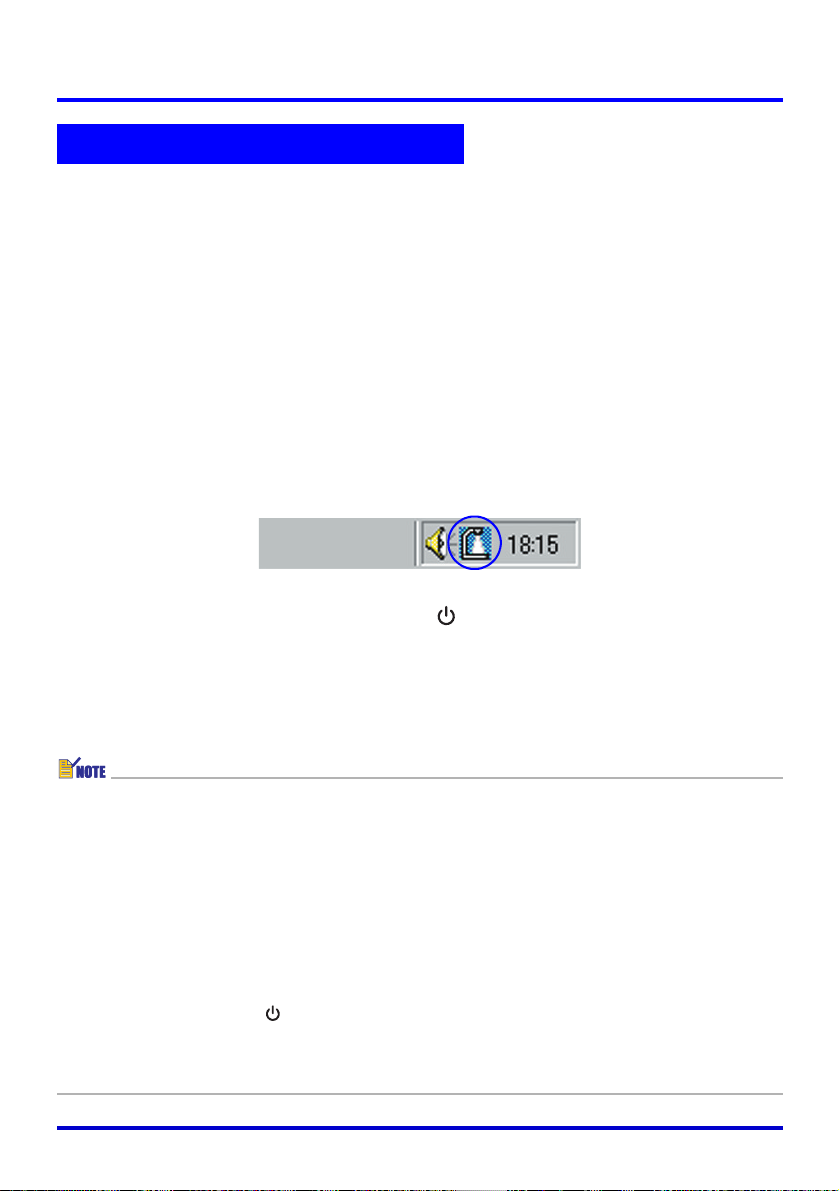
z After the computer starts up, check to make sure that the PJ Camera Software icon is
in the Windows taskbar.
3. On the PJ Camera Stand, press the [ ] (power) button.
z This turns on the PJ Camera and automatically starts up the PJ Camera Software on
the computer.
z If the Startup Mode dialog box appears here, click the [OK] button without changing the
current setting, or select the startup mode you want and then click [OK]. For details,
see “Selecting the Startup Mode” (page 13).
z If this is the first time you are starting up PJ Camera Software after installing it, pressing
the power button in step 3 will cause one of the dialog boxes described below to
appear. The dialog box that appears depends on the operating system that is running on
the computer.
z If you are running Windows XP, the “Found New Hardware Wizard” dialog box will
appear. Select the “Install the software automatically (Recommended)” check box, and
then click [Next].
z Some operating systems may display the “CASIO MULTI PJ CAMERA has not passed
Windows logo testing” dialog box or the “Digital Signature Not Found” dialog box. In
this case, click [Continue Anyway] or [Yes].
z In step 3 of the above procedure, you can press the PJ Camera power button instead of
the PJ Camera Stand [ ] (power) button.
z PJ Camera Software automatically enters the Document Camera Mode when you start it
up using the above procedure. For information about the Document Camera Mode and
other PJ Camera Software modes, see “Using PJ Camera Software Modes” (page 16).
14
Page 15

Starting Up PJ Camera Software
■ To start up PJ Camera Software from the Windows [Start] menu
1. Start up the computer (which already has PJ Camera Software installed
on it).
2. On the Windows [Start] menu, select [Programs] [CASIO] and then
click [PJ Camera Software].
z If the Startup Mode dialog box appears here, click the [OK] button without changing the
current setting, or select the startup mode you want and then click [OK]. For details,
see “Selecting the Startup Mode” (page 13).
z PJ Camera Software will start up in the currently selected startup mode.
■ To start up PJ Camera Software by clicking its taskbar icon
1. Start up the computer (which already has PJ Camera Software installed
on it).
2. Click the PJ Camera Software icon in the taskbar tray.
3. On the menu that appears, select [PJ Camera Software].
z If the Startup Mode dialog box appears here, click the [OK] button without changing the
current setting, or select the startup mode you want and then click [OK]. For details,
see “Selecting the Startup Mode” (page 13).
z PJ Camera Software will start up in the currently selected startup mode.
z PJ Camera Software automatically enters the Presentation Mode when you start it up
using the above procedure. For information about the Presentation Mode and other PJ
Camera Software modes, see “Using PJ Camera Software Modes” (page 16).
15
Page 16
PJ Camera Software Modes and Basic Operations
This section explains the five modes you can access using PJ Camera Software, and about
the operation bar that you use to perform actual PJ Camera Software operations.
Using PJ Camera Software Modes
PJ Camera Software has the following five modes.
z Document Camera Mode z Camera Image Mode
z Scanner Mode z Presentation Mode
z PC Image Mode
Before recording an image or performing an operational procedure, be sure to select the
correct mode first.
z If you startup PJ Camera Software in the Business Document startup mode, you will be
able to use the Document Camera Mode or Presentation Mode only. You will not be able
to perform Projection Area Capture or Board Area Capture in the Presentation Mode if
you start up in the Business Document startup mode.
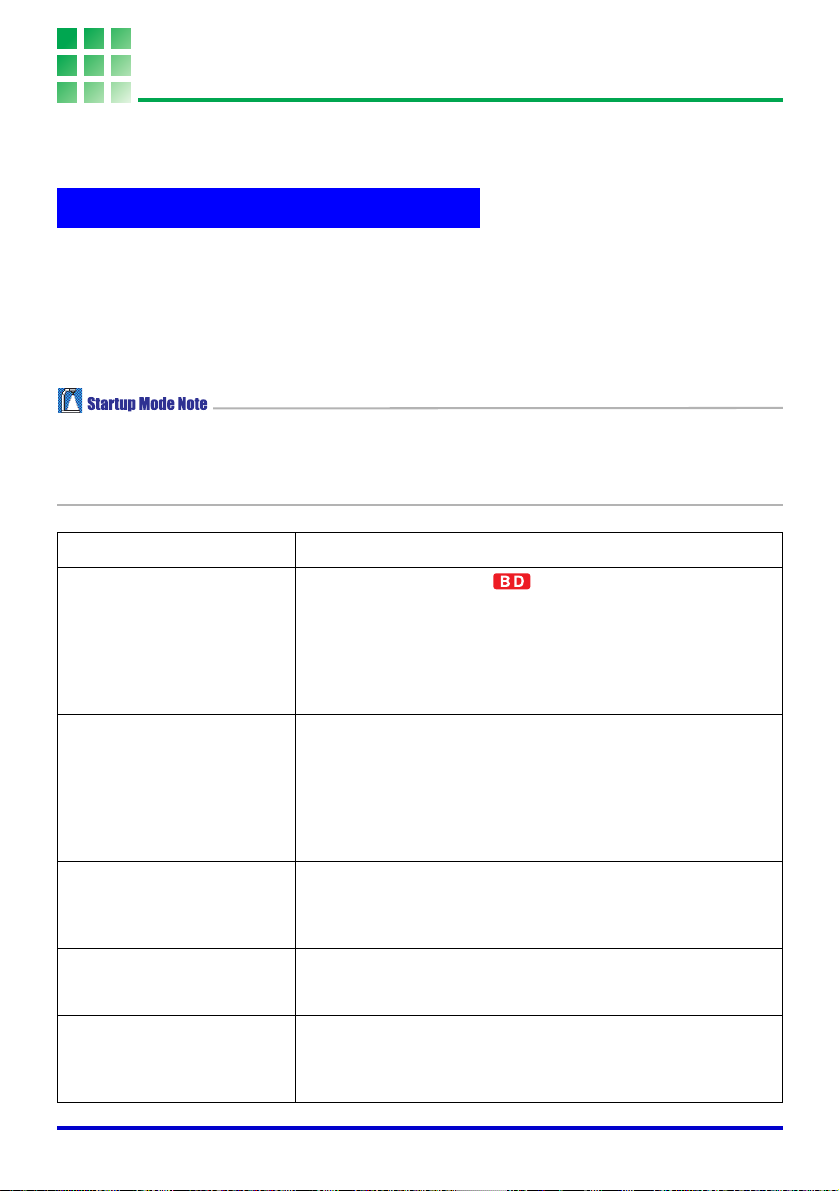
When you want to do this: Select this mode:
Document Camera Mode
With this mode, you can use the PJ Camera to record the
Record the image of a
document or object
Record the image of a
document or object and save
it in an image file
Project images from files
stored on a computer
Project images in a specific
sequence from files stored
on a computer
Project images from files
stored on the PJ Camera
image of a document or object on the PJ Camera Stand,
and then project it. An image is recorded automatically
whenever you place a document on the PJ Camera Stand,
which means that operation is similar to that of an OHP
projector.
Scanner Mode
With this mode, you can use the PJ Camera to record the
image of a document or object on the PJ Camera Stand,
and then store it as an image file. During recording, you can
view a pre-recording monitor image, release the shutter,
check the recorded image, and perform other operations from
your computer.
PC Image Mode or Scanner Mode
These modes can be used to project images that have been
recorded in the Scanner Mode or with the PJ Camera and
stored on a computer.
PC Image Mode or Scanner Mode
Create a play list to specify the projection sequence.
Camera Image Mode
In this mode, the screen shows a list of all PJ Camera
images stored on your computer’s hard disk, so you can
select the ones you want.
16
Page 17
PJ Camera Software Modes and Basic Operations
When you want to do this: Select this mode:
Project images in a specific
sequence from files stored
on the PJ Camera
Project images created using
PowerPoint or other
presentation software
Camera Image Mode
Create a play list to specify the projection sequence.
Presentation Mode
In this mode, PJ Camera Software remains running in the
background, so you can instantly access it any time you
need to project a document image during the presentation.
PC Image Mode, Scanner Mode, or Presentation Mode
Use Board Area Capture or Projection Area capture.
With Board Area Capture, a snapshot image of the
Record and save an image
projected onto a whiteboard,
along with text and graphics
hand written on the
whiteboard
whiteboard and its contents is recorded. Use Board Area
Capture when the handwritten text and graphics you want to
record are located outside of the projection area.
With Projection Area Capture, the handwritten text and
graphics are extracted, and then combined with the original
projection image for optimum clarity. Use Projection Area
Capture when the handwritten text and graphics you want to
record are located within the projection area.
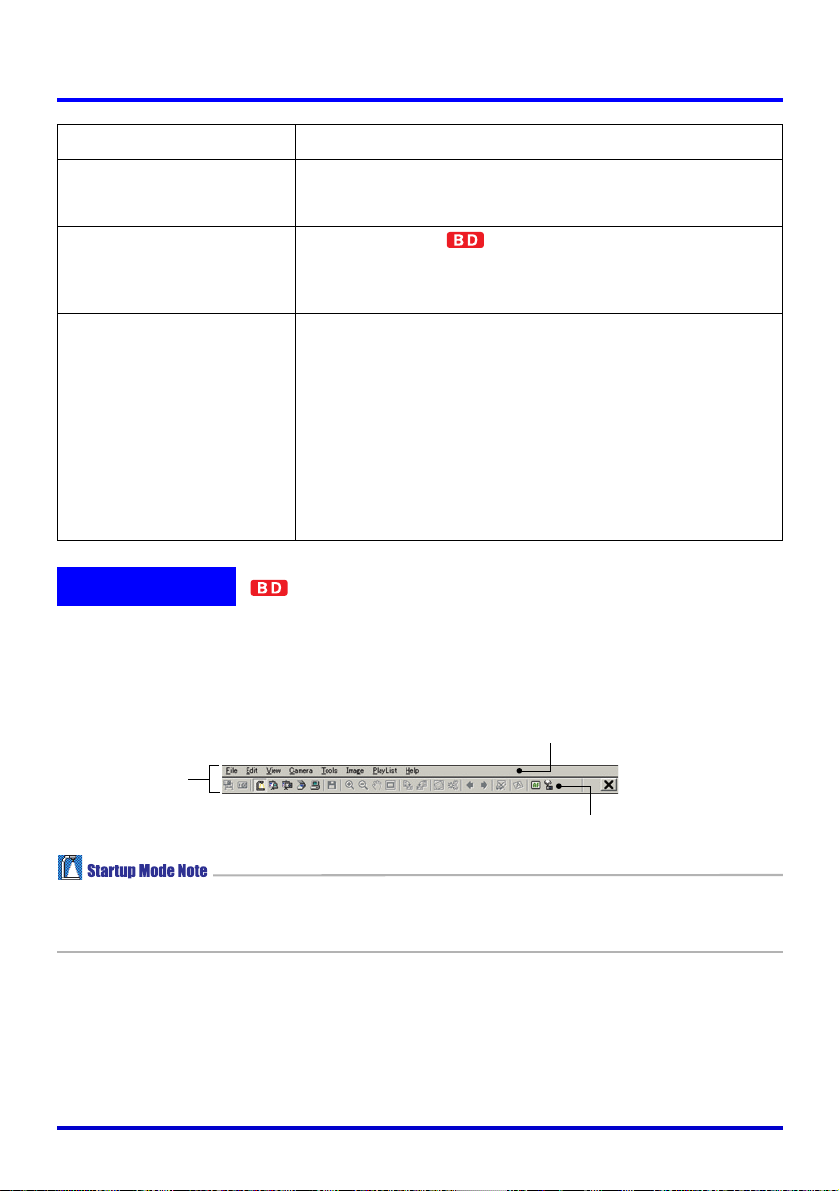
Operation Bar
In some cases, you will not see a window or even a menu bar on your computer screen
while PJ Camera Software is running. In such a case, you can display the PJ Camera
Software operation bar by moving your mouse pointer to the edge of your computer screen
where it is hidden (the top of the screen is the initial default location). The operation bar
combines a menu bar and toolbar, as shown below.
Menu bar
Operation Bar
Toolbar
z The operation bar shown above is the one that appears when you start up in the Multi
PJ startup mode. Different tool buttons and menus appear when you start up in the
Business Document startup mode.
zzzz Menu Bar
This bar contains various menus for performing PJ Camera Software operations.
zzzz To olb ar
This bar contains buttons for performing PJ Camera Software operations. These buttons
provide one-click access to most of the menu commands.
17
Page 18
PJ Camera Software Modes and Basic Operations
z Under initial default settings, the operation bar disappears automatically whenever you
move the mouse away from it.
z You can specify the location on the screen where the operation bar will appear when you
move the mouse pointer there. For more information, see “Operation Bar Properties”
(page 117).
z In some modes, a PJ Camera Software window remains on the screen with a menu bar
and toolbar continuously displayed at the top. You do not need to use the operation bar
to perform menu and toolbar operations in this case.
z If this manual instructs you to perform a menu or toolbar operation and there is no PJ
Camera Software window on your computer screen, display the operation bar and then
perform the specified menu or toolbar operation.
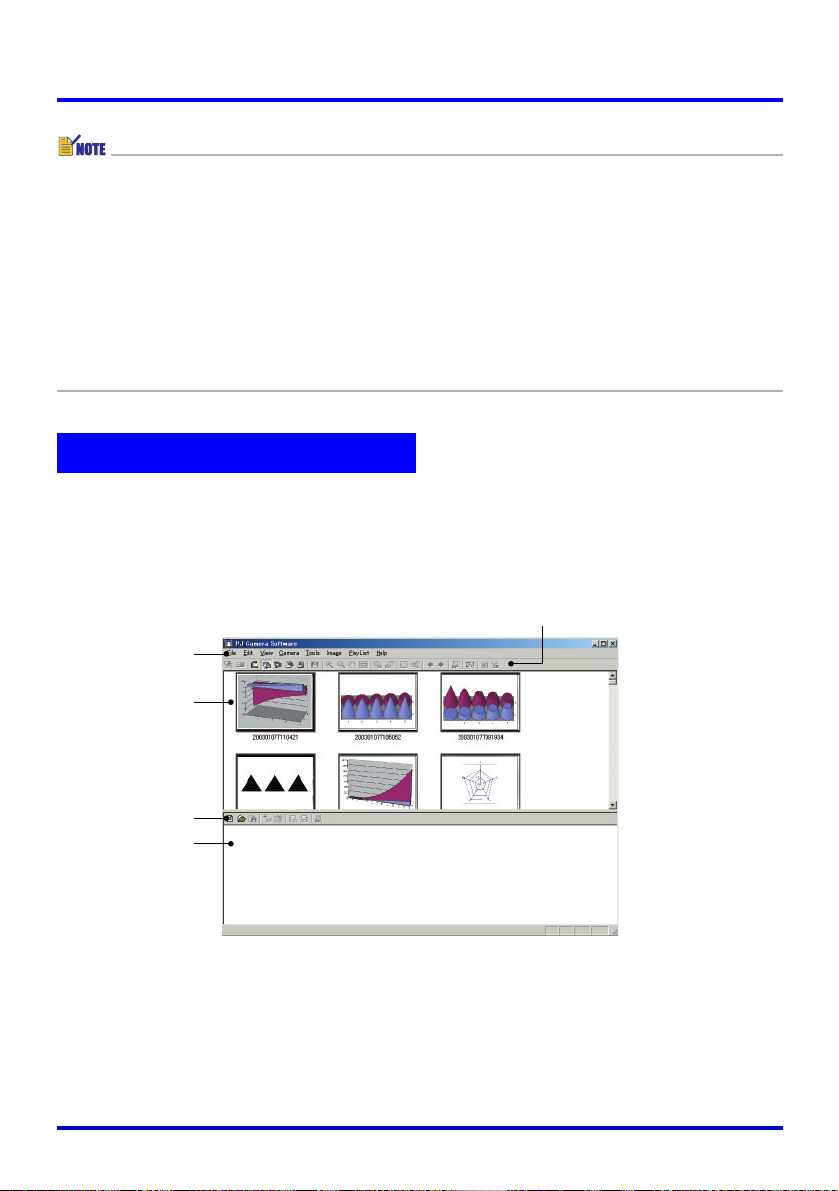
PJ Camera Software Window
Except for when you are projecting images, the PJ Camera Software window (including the
menu bar and toolbar) remains on your computer screen in the Scanner Mode, PC Image
Mode, and Camera Image Mode. The following shows the PC Image Mode window, and
indicates the window components that are included in all PJ Camera Software windows,
regardless of mode.
Toolbar
Menu bar
Preview list area
Playlist toolbar
Playlist area
18
Page 19

PJ Camera Software Modes and Basic Operations
Using the Guide Icon
You can configure the PJ Camera Software’s guide icon so it is always on top of all the
windows on your computer’s screen. You can use the guide icon to display the operation bar,
and to exit PJ Camera Software.
Showing and Configuring the Guide Icon
■ To show the guide icon
1. Display the operation bar, and then select [Operation Bar Properties] on
the [Tools] menu.
z This displays the operation bar properties dialog box.
2. Select the [Show Guide Icon] check box.
3. Click the [OK] button to apply the setting and close the dialog box.
z This causes a guide icon like the one shown below to appear.
z To hide the guide icon, right-click it, and then select [Hide Guide Icon] on the shortcut
menu that appears.
19
Page 20

PJ Camera Software Modes and Basic Operations
Specifying the Guide Icon Graphic
You can use the following procedure to specify a JPG or BMP graphic file created by you for
the guide icon.
1. Perform the required procedure to display the guide icon.
2. Right-click the guide icon, and then select [Change Guide Icon] on the
shortcut menu that appears.
z This displays a file selection dialog box.
3. Select the file that contains the graphic you want to use for the guide
icon, and then click [OK].
z This closes the dialog box and displays the graphic you selected as the guide icon.
z The guide icon will become the size (in pixels) of the graphic you select. Select a
graphic whose size is at least 8 × 8 pixels and no more than 1024 × 768 pixels.
20
Page 21

PJ Camera Software Modes and Basic Operations
Specifying a Transparent Color for the Guide Icon
Use the procedure below to make one of the colors of the guide icon graphic transparent.
This capability makes it possible for you to configure exactly the type of guide icon
appearance you want.
Red selected as the transparent color.
1. Perform the required procedure to display the guide icon.
2. Right-click the guide icon, and then select [Specify Transparent Color]
on the shortcut menu that appears.
z This changes the mouse pointer to .
3. Click the color of the guide icon that you want to select as the
transparent color.
4. To actually apply your selection, right-click the guide icon, and then
select [Use Transparent Color] on the shortcut menu that appears. This
should cause a check mark to appear next to [Use Transparent Color].
21
Page 22

PJ Camera Software Modes and Basic Operations
Guide Icon Operations
■ To display the operation bar
Clicking the guide icon displays the operation bar. You can use the Operation Bar Properties
to select either of the following settings.
z Auto Hide On
When Auto Hide is turned on, the operation bar appears on the display when you click the
guide icon. The operation bar will disappear again after about three seconds.
z Auto Hide Off
When Auto Hide is turned off, clicking the guide icon causes the operation bar to appear. It
remains displayed until you click the guide icon again.
■ To display PJ Camera Software help
Right-click the guide icon, and then select [Help] on the shortcut menu that appears.
■ To quit PJ Camera Software
Right-click the guide icon, and then select [Exit PJ Camera Software] on the shortcut menu
that appears.
22
Page 23
PJ Camera Software Modes and Basic Operations
Selecting a Mode
You can select a PJ Camera Software mode using a menu or toolbar operation, or by
performing a keyboard function key operation.
z The menu items and buttons for switching to the Scanner Mode, Camera Image Mode
and PC Image Mode are not displayed if you start up PJ Camera Software in the
Business Document startup mode.
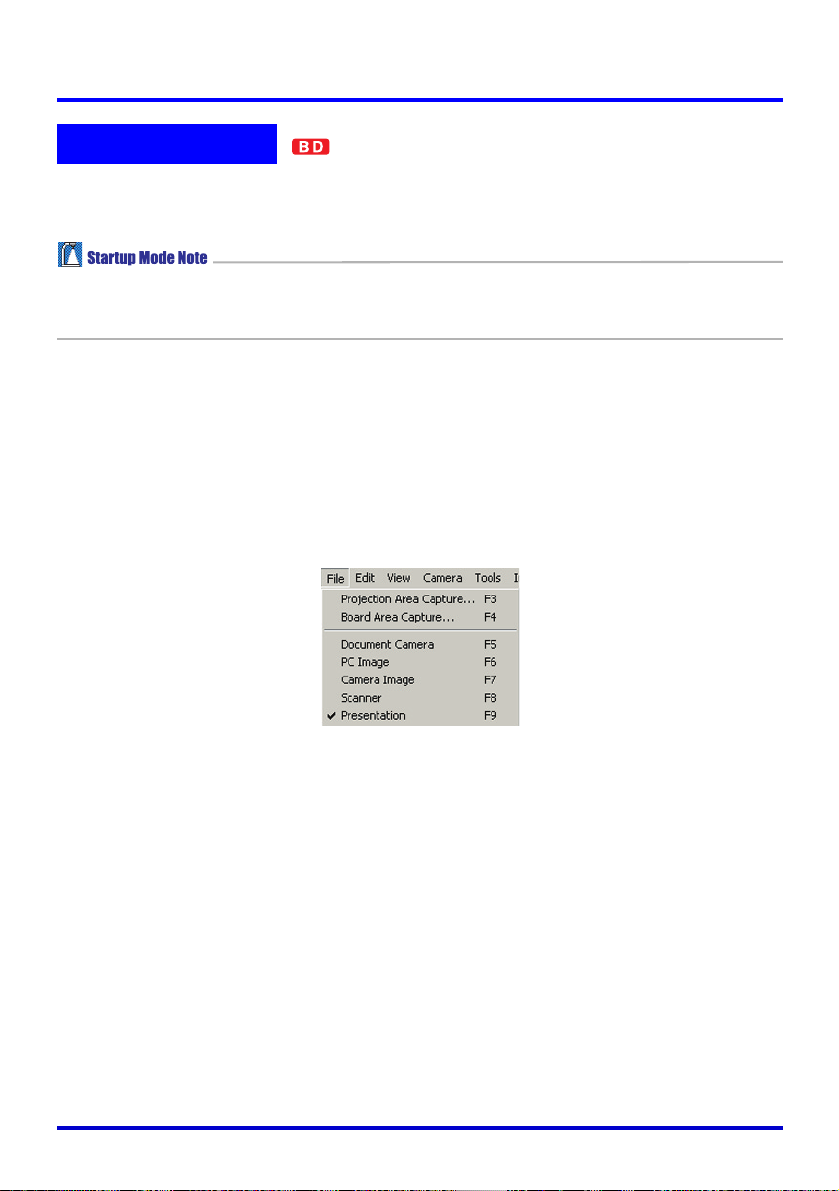
■ To select a mode using a menu operation
1. If the PJ Camera Software window is not on your computer screen,
display the operation bar.
z See “Operation Bar” (page 17) for information about using the operation bar.
2. On the menu bar, click [File] to display its menu.
Modes
3. Click the mode you want to select.
23
Page 24
PJ Camera Software Modes and Basic Operations
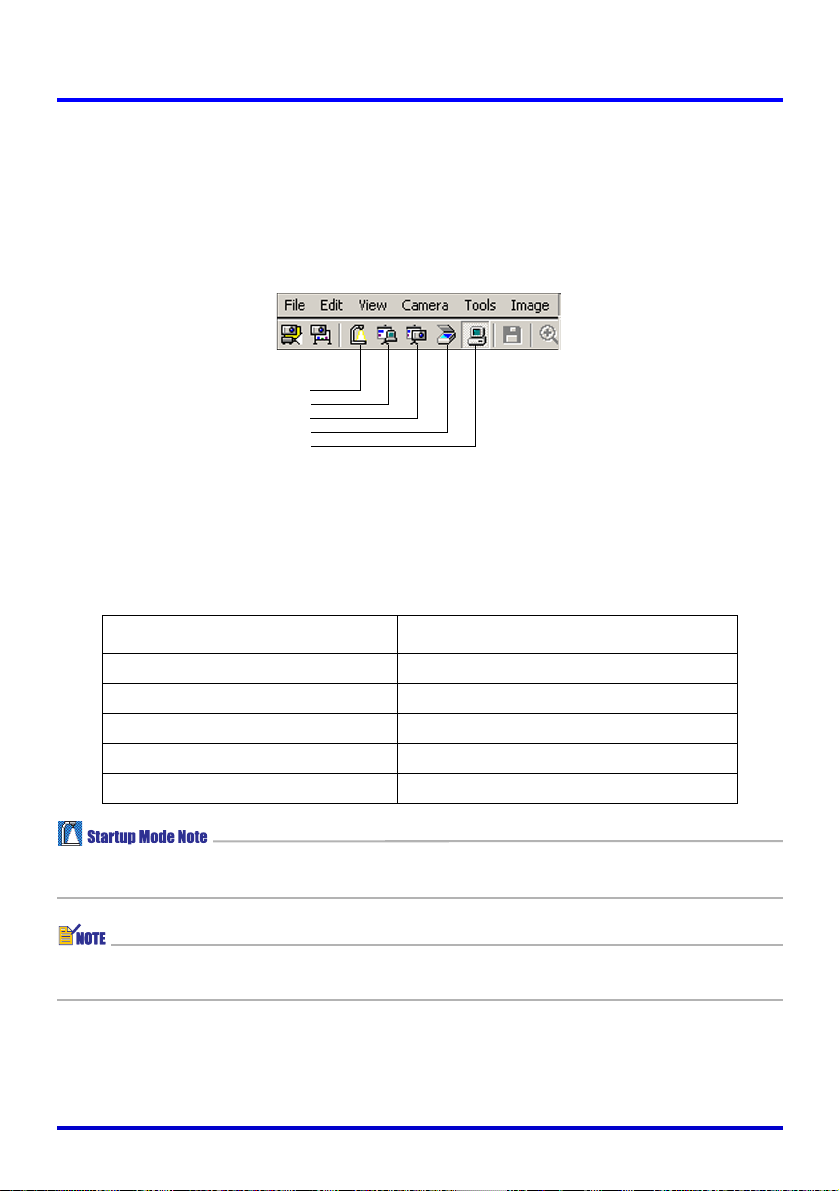
■ To select a mode using a toolbar operation
1. If the PJ Camera Software window is not on your computer screen,
display the operation bar.
2. Click the toolbar button for the mode you want to select.
Document Camera Mode
PC Image Mode
Camera Image Mode
Scanner Mode
Presentation Mode
■ To select a mode using a shortcut key operation
You can use the following function key operations to select the PJ Camera Software mode
you want.
Function Key
Pressing this function key: Selects this mode:
[F5] Document Camera Mode
[F6] PC Image Mode
[F7] Camera Image Mode
[F8] Scanner Mode
[F9] Presentation Mode
z Function key [F6], [F7], and [F8] functions are disabled when you start up in the
Business Document startup mode.
z See “Chapter 2 Using PJ Camera Software” for details about what you can do in each
mode.
24
Page 25

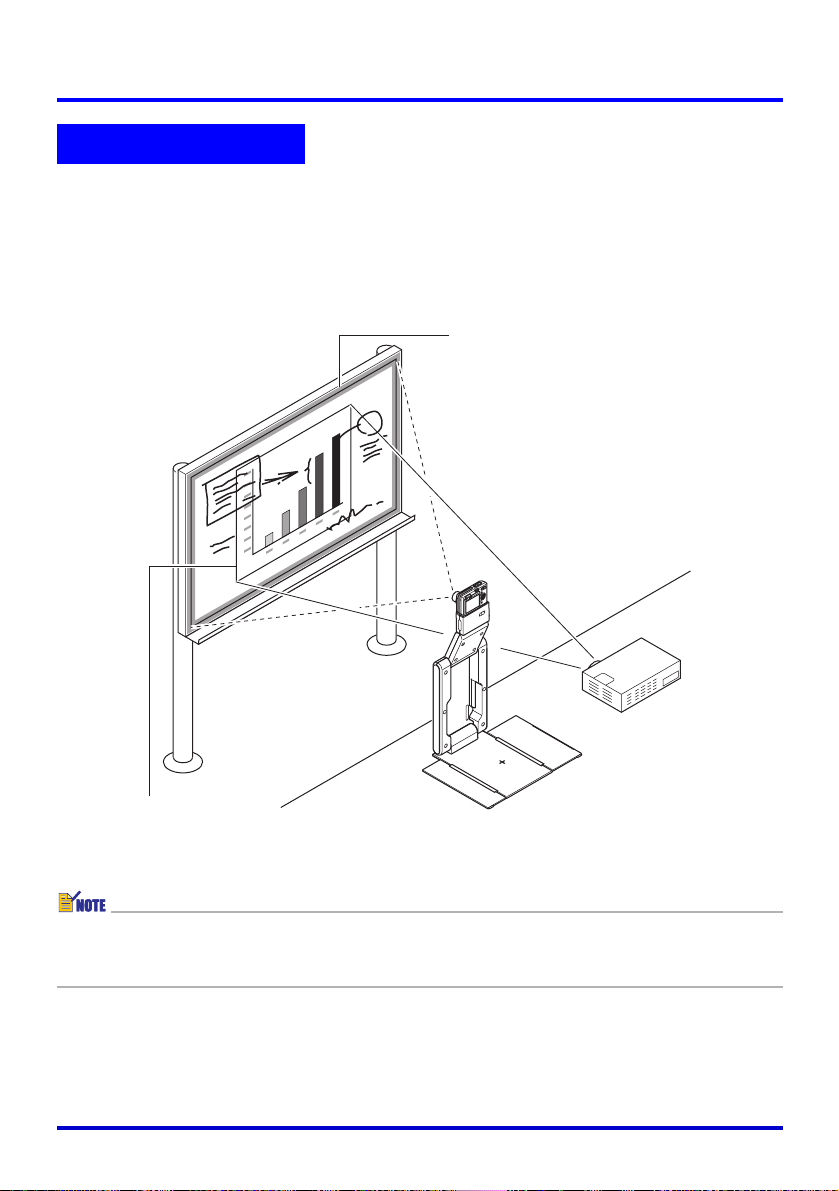
Using Projection Area Capture and Board Area Capture
Projection Area Capture and Board Area Capture let you use the PJ Camera to record an
image being projected onto a whiteboard, along with text and graphics written on the
whiteboard. This section provides details about what each of these functions does, along with
guidelines for deciding which one you should use for recording.
Projection Area Capture
Projection Area Capture extracts text and graphics that are handwritten within the projection
image area on the whiteboard. It then combines this with the original projection image,
providing a clear view of both the projection image and the handwritten information.
z Projection Area Capture does not record handwritten text and graphics that are on the
whiteboard outside of the projection image area.
z Use Projection Area Capture when the handwritten text and graphics you want to record
are located within the projection area.
Recording area
Image projection area
z Except for the Document Camera Mode and Scanner Mode, you can use Projection Area
Capture in all modes.
z For full details about Projection Area Capture, see “Projection Area Capture” (page 97).
25
Page 26
Using Projection Area Capture and Board Area Capture
Board Area Capture
Board Area Capture extracts the entire whiteboard area, including the projected image as well
as handwritten text and graphics both inside and outside the projection area, and stores it as
an image.
z Use Board Area Capture when the handwritten text and graphics you want to record are
located outside of the projection area.
z The whiteboard area is extracted and repositioned so it is straight. You can also correct the
brightness of the image to make text more legible.
Recording area
Image projection area
z Except for the Document Camera Mode and Scanner Mode, you can use Board Area
Capture in all modes.
z For full details about Board Area Capture, see “Board Area Capture” (page 104).
26
Page 27

Quitting PJ Camera Softwar
■ To quit PJ Camera Software
e
1. If the PJ Camera Software window is not on your computer screen,
display the operation bar.
z See “Operation Bar” (page 17) for information about using the operation bar.
2. On the operation bar [File] menu, select [Exit].
z This quits PJ Camera Software and turns off the PJ Camera.
z Turning off the PJ Camera Stand or the PJ Camera does not quit PJ Camera Software.
27
Page 28

Chapter 2 Using PJ Camera Software
This chapter explains what you can do in each of the PJ Camera Software modes,
and provides details about each operational procedure.
All of the procedures in this chapter are based on the following preconditions.
z That you already have the Multi PJ Camera System set up (PJ Camera Stand, PJ
Camera, computer with PJ Camera Software installed, and projector are connected and
configured for operation.)
z That the projector is turned on ready to project
z That the PJ Camera is turned on
z That a computer with PJ Camera Software installed is running and that the PJ Camera
Software is also running
28
Page 29

Using the PJ System Like an OHP Projector (Document Camera Mode)
With the Document Camera Mode, you can record and project images of documents and
objects placed on the PJ Camera Stand, just like an overhead projector.
Document Camera Mode Overview
This section explains how the Document Camera Mode works, and introduces some of the
terminology you need to know when using it.
■ Document Camera Mode Window
Entering the Document Camera Mode displays a window like the one shown below.
Operation bar
The operation bar is displayed and hidden automatically (page 17).
Image of document on the PJ Camera Stand
This can be either a document camera image or a rough (monitor)
image. See the next page for more information.
29
Page 30
Using the PJ System Like an OHP Projector (Document Camera Mode)
Document camera images and Rough (Monitor) Images
When you place a document on the PJ Camera Stand in the Document Camera Mode, the
PJ Camera records its image (recorded image). Then PJ Camera Software automatically
performs a number of procedures on the image data, before finally projecting a document
camera image.
During the time it takes for these procedures to be performed, PJ Camera Software will
project a rough version of the image, which is similar to the image that appears on the PJ
Camera’s monitor screen. This is the rough (monitor) image. The rough (monitor) image will
be replaced by the document camera image as soon as it becomes available.
The following shows the flow starting with recording of an image and ending with projection
of the document camera image.
Document Recording with the PJ Camera (Recorded Image)
L Rough (monitor) image is projected.
Contour Extraction
Extracts the document portion from the recorded image and
adjusts its orientation so it is straight. See “What is contour
extraction?” for more information.
z When you start up PJ Camera Software in the Business
L
Document startup mode, contour extraction is turned off
under initial default settings. To turn on automatic contour
extraction, display the operation bar, and then select
[Trapezoid Correction On] on the [Image] menu (so there is a
check mark next to Trapezoid Correction). You can also
toggle trapezoid correction on and off by pressing the space
bar on your computer.
Brightness Correction
L Adjusts brightness and contrast to make text more legible.
Image Resolution Conversion
Converts the image size to XGA (1024 × 768) (800 × 600 when
L
Document Camera Image Projection (Replaces the rough (monitor) image.)
an SVGA computer screen is being used), which is the optimal
size for projection.
30
Page 31

Using the PJ System Like an OHP Projector (Document Camera Mode)
What is contour extraction?
Contour extraction is a process performed by PJ Camera Software to automatically detect the
outline of the document in a recorded image, and adjust the outline so the document is
straight.
Before contour extraction
(recorded image)
Contour extraction is performed automatically when Trapezoid Correction is turned on. You can
use any one of the operations below to toggle Trapezoid Correction on and off.
z Display the operation bar, and then select [Trapezoid Correction On] on the [Image] menu
to toggle it on (check mark) and off (no check mark).
z Display the operation bar and then click the (Trapezoid Correction) button to turn
Trapezoid Correction on ( ) and off ( ).
z Press the space bar on your computer keyboard.
z The initial default Trapezoid Correction setting depends on the startup mode you are
using, as shown below.
Multi PJ startup mode: On
Business Document startup mode: Off
After contour extraction
31
Page 32

Using the PJ System Like an OHP Projector (Document Camera Mode)
Document Camera Mode Image Buffering
A copy of each document camera image you project in the Document Camera Mode is
stored automatically in a folder on your computer’s hard disk, where it remains until you quit
PJ Camera Software. This makes it possible to scroll back and re-display a previous image in
your presentation, without re-recording its document.
You can even access a temporary document camera image file and rename it so it will not
be deleted when you quit PJ Camera Software.
Auto Projection and Manual Projection
You can use the PJ Camera Software operating environment settings to select either [Auto] or
[Manual] for the Document Camera Mode. See “PJ Camera Software Operating Environment”
on page 109 for information about configuring operating environment settings.
■ Auto
With [Auto], document recording and projection are both performed automatically. When you
place a document onto the PJ Camera Stand, PJ Camera Software automatically detects
when it stops moving, records its image, and then projects it.
■ Manual
With [Manual], you need to trigger the record and project operations manually.
32
Page 33

Using the PJ System Like an OHP Projector (Document Camera Mode)
Projecting Images in the Document Camera Mode
This section details the steps you need to perform to project images while in the Document
Camera Mode.
■ Projecting Documents Using Auto
z If you have changed the Document Camera Mode setting to [Manual], be sure to change
back to [Auto] before performing the following procedure. Use the [Document Camera] tab
of the operating environment dialog box to change the Document Camera Mode setting.
For more information, see “PJ Camera Software Operating Environment” (page 109).
1. Make sure there is no document on the PJ Camera Stand.
2. Select [Document Camera] on the [File] menu or click on the
toolbar.
z This enters the Document Camera Mode.
z If the dialog box for adjusting camera position appears, point the PJ Camera downwards
at the document stage, and make sure there is no document on it. For more
information about camera position adjustment, see “Adjusting the Camera Position” (page
36).
z The above causes a rough (monitor) image of the PJ Camera Stand document stage to
be projected.
z Nothing will be displayed on the PJ Camera monitor screen at this time.
33
Page 34

Using the PJ System Like an OHP Projector (Document Camera Mode)
3. Place the document you want to project onto the PJ Camera Stand’s
document stage.
z Initially, a rough (monitor) image of the document will be projected, followed by the
document camera image.
Rough (monitor) image
Document camera image
4. Replace the document on the document stage with the next one.
z The currently projected image is replaced by the new image.
Current document camera image
34
New document camera image
Page 35

Using the PJ System Like an OHP Projector (Document Camera Mode)
5. Repeat step 4 as many times as necessary to project all of the images
you want.
6. To scroll back to a previously projected image, select [Back] on the
[View] menu.
z To scroll forward through images, select [Forward] on the [View] menu.
z For details about other operations you can perform while projecting document camera
images, see “Operations Available During Projection in the Document Camera Mode”
(page 43).
[Back]
[Forward]
7. To quit auto projection, select [Exit] on the [File] menu.
z This exits PJ Camera Software and turns off the PJ Camera.
z All buffered images are deleted at this time.
z [Auto] automatically detects when the document on the document stage stops moving,
and then records and projects its image. Even if you are still holding the document,
[Auto] will record its image if it detects that it has stopped moving. If [Auto] automatically
records the document before you are ready, remove the document and then replace it
onto the document stage to re-record its image.
z Writing or other marks on the document stage can interfere with proper document
detection. Never write on the document stage and take care to guard against scratching
or otherwise damaging it.
z You can zoom and rotate a projected document camera image while it is being projected,
and save the result as an image file for later use. For details about such operations, see
“Operations Available During Projection in the Document Camera Mode” (page 43).
35
Page 36

Using the PJ System Like an OHP Projector (Document Camera Mode)
■ Adjusting the Camera Position
Performing any one of the following operations causes a dialog box for adjusting camera
position to appear on the screen.
z Starting up PJ Camera Software by turning on the PJ Camera Stand (which automatically
enters the Document Camera Mode)
z Performing a Projection Area Capture or Board Area Capture operation, and then changing
to the Document Camera Mode or Scanner Mode
z Bumping the PJ Camera so it moves considerably while in the Document Camera Mode or
Scanner Mode
If the dialog box for adjusting camera position appears, point the PJ Camera downwards at
the document stage, and make sure there is no document on the stage. The camera position
will be adjusted automatically to record documents placed onto the document stage.
z If the camera is pointed at the document stage and there is nothing on it, camera
position adjustment will end automatically.
Triggering a Manual Record Operation during Auto Projection
Even when using [Auto] for automatic recording and projection of images, you can trigger a
record operation manually by selecting [Shutter] on the [Camera] menu (page 124). This
comes in handy when the document cannot be recorded automatically because slight
movement is being detected, or when you simply do not want to wait for the PJ System to
record automatically.
Configuring Document Camera Settings
Selecting [Operating Environment] on the [Tools] menu displays an operating environment
dialog box. You can configure the following settings on the [Document Camera] tab of the
dialog box.
z Selecting [Auto] or [Manual]
z Turning display of the rough (monitor) image on and off
z Settings for auto rotation of the document camera image
For details about what these settings do and how to configure them, see “Configuring
Operating Environment Settings” (page 110).
36
Page 37

Using the PJ System Like an OHP Projector (Document Camera Mode)
Projecting Images Using Manual
With [Manual], you need to trigger the recording operation manually after placing a document
onto the document stage. After the image is recorded, its document camera image is
projected.
The projected image does not change until you release the shutter button.
The following are the steps you should perform when using [Manual] projection.
z Steps 1 through 4 are not required in either of the following cases.
• When [Manual] was selected the last time the Document Camera Mode was used
• When settings were not initialized by starting up in the Business Document startup
mode
1. Select [Operating Environment] on the [Tools] menu.
z This displays the [Common] tab of the operating environment dialog box.
2. Click the [Document Camera] tab.
3. Under “Operation Mode”, click “Manual”.
z This should turn on ( ) “Manual” and turn off ( ) “Auto”.
4. Click the [OK] button to apply the setting and close the dialog box.
5. Select [Document Camera] on the [File] menu or click on the
toolbar.
z This will cause a rough (monitor) image of the PJ Camera Stand document stage to be
projected.
6. Place the document you want to project onto the PJ Camera Stand’s
document stage.
37
Page 38

Using the PJ System Like an OHP Projector (Document Camera Mode)
7. Select [Shutter] on the [Camera] menu.
z This records the image and displays a rough (monitor) image, which is replaced by the
document camera image after a short while.
Rough (monitor) image
Document camera image
8. Repeat steps 6 and 7 as many times as necessary to record and
project the other documents.
z The last document camera image you recorded continues to be projected until you
record a new image. At that time, the currently projected image is replaced by the new
image.
Current document camera image
z If you want to display rough (monitor) images, select [Show Document Monitor] on the
[Camera] menu.
New document camera image
38
Page 39

Using the PJ System Like an OHP Projector (Document Camera Mode)
9. To scroll back to a previously projected image, select [Back] on the
[View] menu.
z To scroll forward through images, select [Forward] on the [View] menu.
[Back]
[Forward]
z For details about other operations you can perform while projecting document camera
images, see “Operations Available During Projection in the Document Camera Mode”
(page 43).
10.
To quit manual projection, select [Exit] on the [File] menu.
z This exits PJ Camera Software and turns off the PJ Camera. All buffered images are
deleted at this time.
z In place of step 7 of the above procedure, you could also perform either of the following
operations to trigger the record operation.
• Right-click anywhere on the window and then select [Shutter] from the shortcut menu
that appears.
• Press the [Enter] key on your computer keyboard.
z To switch back to [Auto] after performing a [Manual] operation, repeat steps 1 through 4
of the above operation, and then click [Auto] so it is turned on ( ).
z You can zoom and rotate a projected document camera image while it is being projected,
and save the result as an image file for later use. For details about such operations, see
“Operations Available During Projection in the Document Camera Mode” (page 43).
39
Page 40

Using the PJ System Like an OHP Projector (Document Camera Mode)
Configuring Projection Object Settings
The initial default PJ Camera Software settings are setup for recording of images of
documents that are A5 (148 × 210mm)(5.8 × 8.3inch)/HLT (Half Letter) size or larger. You can
also use the operations described below to configure settings for recording images of 3dimensional objects or small documents (A5/Half Letter size or smaller).
■ Recording Images of 3D Objects
To turn on 3D recording, select [3D Object] on the [Camera] menu, or click on the
toolbar so it appears as .
z Turning on 3D recording causes the PJ Camera to enter the Auto Focus mode
automatically. If the [Trapezoid Correction On] item on the [Image] menu is turned on
(indicated by a check mark next to it), turning on 3D recording automatically turns it off.
■ Recording Small Documents
To turn on recording of documents that range from business card size to A5 (148 × 210mm)
(5.8 × 8.3inch)/HLT (Half Letter) size, select [Small Document] on the [Camera] menu, or click
on the toolbar so it appears as .
z Turning on small document recording automatically increases the zoom factor of the PJ
Camera to suit small documents.
40
Page 41

Using the PJ System Like an OHP Projector (Document Camera Mode)
Adjusting PJ Camera Settings
You can perform the following PJ Camera Software steps to configure the zoom and focus
settings of the PJ Camera from your computer.
1. Select [Adjust Document Camera] on the [Camera] menu.
z This displays the dialog box shown below for adjusting the document camera. This
dialog box shows the same image that is currently displayed on the camera’s monitor
screen.
2. If you want to configure settings for particular document, place that
document on the document stage.
41
Page 42

Using the PJ System Like an OHP Projector (Document Camera Mode)
3. While watching the monitor screen image, configure the settings you
want.
z To change the zoom setting, click the [Wide] or [Tele] button. You can select a zoom
factor in the range of 1X to 3X. The initial default zoom setting is 1X.
z To adjust focus, display the operation bar and then select [Camera] and then [Refocus],
or press the computer keyboard’s [F2] function key. If the currently selected zoom factor
is larger than 1.8X when you press the [F2] function key, it will change to 1.8X.
You can also focus manually using the four buttons to the right of the [Refocus] button.
To do this: Click this button:
Make a relatively large change in the focus setting [<<] / [>>]
Make a fine adjustment of the focus setting [<] / [>]
4. After all the settings are the way you want, click [OK] to apply them
and close the dialog box.
z You can display the dialog box for adjusting the document camera while a document
camera image or rough (monitor) image is being projected.
z PJ Camera settings you configure are retained until you change them again, or until you
quit PJ Camera Software. Quitting PJ Camera Software causes settings to return to their
initial defaults.
z Pressing the [Refocus] button during manual focus and while the current zoom setting is
greater than 1.8X will cause the zoom setting to change automatically to 1.8X.
42
Page 43

Using the PJ System Like an OHP Projector (Document Camera Mode)
Operations Available During Projection in the Document Camera Mode
This section explains the various different operations that you can perform during [Auto] or
[Manual] projection.
z For information about common operations that can be performed during projection in all
modes, see “Using Projection Features” (page 87).
Scrolling Between Document camera images
A copy of each document camera image you project in the Document Camera Mode is
stored automatically in a folder on your computer’s hard disk, where it remains until you quit
PJ Camera Software. This makes it possible to scroll back and re-display a previous image in
your presentation, without re-recording its document.
z To scroll back to the previously projected image, select [Back] on the [View] menu or click
on the toolbar. This operation scrolls back one image each time you perform it. You
can scroll up to the first image you projected since starting up PJ Camera Software.
z To scroll forward through images, select [Forward] on the [View] menu or click on the
toolbar. You can scroll forward up to the last image.
Two images before
the current image
Recording a new image (using either [Auto] or [Manual]) after scrolling to a previous image
cancels the scrolling operation and projects the new image.
z The operation bar and buttons are not displayed when you start up in the
Business Document startup mode. In order to scroll between images you will have to
perform the applicable menu operation or keyboard shortcut operation (page 127).
One image before
the current image
Last image you
projected
43
Page 44

Using the PJ System Like an OHP Projector (Document Camera Mode)
Saving the Currently Projected Image
Normally, buffered document camera images are deleted when you quit PJ Camera Software.
This section explains how to save a document camera image to keep it from being deleted.
z Performing the procedure below while projecting the extracted document portion of a
recorded image saves the (extracted) document camera image. The resulting file size in
this case depends on the size of the document portion extracted from the recorded
image. This means there is virtually no loss of image quality compared with the original
recorded image.
z Performing the procedure below while projecting an image for which contour extraction
was not performed (because the subject is 3-dimensional or because contour extraction
failed for some reason) causes the entire recorded image to be saved.
z To save a recorded image (without extraction), first select [Trapezoid Correction On] on
the [Image] menu to remove the check mark next to it. Next, while the full-screen image
is on the display, perform the required operation to save it. For details about displaying
the recorded image, see “Viewing the Recorded Image of the Currently Projected Image”
(page 92).
■ To save the currently projected image (document camera image or
recorded image)
1. Project the document camera image (or recorded image) you want to
save.
z If necessary, select [Back] and [Forward] on the [View] menu to scroll through images
until the one you want is projected.
2. Select [Save] on the [File] menu.
z If you previously saved the current document camera image (or recorded image), this
will overwrite the file with the currently projected image, and you are finished.
z If this is the first time you are saving the currently projected image, a dialog box for
saving the file will appear. In this case, advance to step 3.
44
Page 45

Using the PJ System Like an OHP Projector (Document Camera Mode)
3. You can leave the initial default folder and file name settings of the
dialog box the way they are, or change them to something else.
z The following shows the initial default folder and file name settings.
Folder:
C:\CASIO\PJ_System\Document_Camera
File Name:
Date and time that the image was recorded
Example: 20040218T104525.JPG
(Year: 2004; Month: 2; Day: 18; Time: 10:45:25)
4. After everything is the way you want, click the [Save] button.
z This saves the image file.
■ To save the currently projected image (document camera image or
recorded image) under a different name
1. Project the document camera image (or recorded image) you want to
save.
z If necessary, select [Back] and [Forward] on the [View] menu to scroll through images
until the one you want is projected.
2. Select [Save As] on the [File] menu.
z This displays a dialog box for saving files.
3. Leave the initial default folder and file name settings of the dialog box
the way they are, or change them to something else.
4. After everything is the way you want, click the [Save] button.
z This creates a new image file.
z For information about the initial default settings of the dialog box for saving files, see “PJ
Camera Software Folder Structure” (page 138).
45
Page 46

Scanning Images (Scanner Mode)
The Scanner Mode makes it quick and easy to record images of a document or object
placed on the PJ Camera Stand, and store it in a file on your computer’s hard disk.
Scanner Mode Overview
This section provides a general overview of the Scanner Mode window and its functions.
Scanner Mode Screen
Entering the Scanner Mode displays a window like the one shown below.
Scanner window
z The above example shows the screen when the computer monitor resolution setting is
XGA (1024 × 768). The appearance of the screen is somewhat different when resolution
is SVGA (800 × 600).
Preview list area
Playlist area
■ Scanner window
Use this window to trigger the scan operation that records the image of the document on the
PJ Camera Stand. The window’s monitor screen shows the same image that is currently
displayed on the camera’s monitor screen.
■ Preview list area
This area shows thumbnails (160 × 120 pixels) of image files that have been recorded with
the Scanner Mode. You can use the preview list area to select an image file for full-screen
display.
46
Page 47

Scanning Images (Scanner Mode)
■ Playlist Area
The playlist area shows thumbnails of the images that are contained in the currently opened
playlist. You can add images to the playlist area by dragging them from the preview list area
of the Scanner Mode window or by dragging image files from a Windows Explorer window.
You can change the sequence of the images in the playlist area by dragging them to location
in you want.
z For details about preview list and playlist operations, see “Using Image Files Stored on
the Computer’s Hard Disk in a Presentation (PC Image Mode)” (page 55) and “Using the
Preview List” (page 58).
Auto Scanning and Manual Scanning
You can use the PJ Camera Software operating environment settings to select either “Auto” or
“Manual” for the Scanner Mode. See “PJ Camera Software Operating Environment” on page
109 for information about configuring operating environment settings.
■ Auto Scanning
With auto scanning, document recording is performed automatically. When you place a
document onto the PJ Camera Stand, auto scanning automatically detects when it stops
moving, and records its image.
■ Manual Scanning
With manual scanning, you need to trigger the scan operation manually for each document or
object.
47
Page 48

Scanning Images (Scanner Mode)
Using Auto Scanning
Auto scanning automatically detects when a document placed onto the PJ Camera Stand
stops moving, and records its image automatically. Auto scanning is best when you need to
record a large number of images for storage on your computer’s hard disk.
z Auto scanning automatically detects when the document on the document stage stops
moving and records its image. Even if you are still holding the document, auto scanning
will record its image if it detects that it has stopped moving. If auto scanning
automatically records the document before you are ready, remove the document and then
replace it onto the document stage.
z Never write on the document stage and take care to guard against scratching or
otherwise damaging it. Writing or other marks on the document stage can interfere with
proper document detection.
Scanning Documents Using Auto Scanning
Auto scanning is the initial default setting for the Scanner Mode.
z If you have changed the Scanner Mode setting to Manual, be sure to change back to
Auto before performing the following procedure. Use the [Scanner] tab of the operating
environment dialog box to change the Scanner Mode setting. For more information, see
“PJ Camera Software Operating Environment” (page 109).
1. Select [Scanner] on the [File] menu or click on the toolbar.
z If the dialog box for adjusting camera position
appears, point the PJ Camera downwards at the
document stage, and make sure there is no
document on it. For more information about
camera position adjustment, see “Adjusting the
Camera Position” (page 36).
z Entering the Scanner Mode displays the scanner
window. The image area of the scanner window
shows a rough (monitor) image of the document
on the document stage of the PJ Camera Stand.
z The preview list and playlist areas will also
appear to the right of the scanner window, but
these lists are not used for scanning operations.
All scanning operations are performed using the
scanner window.
z Nothing will be displayed on the PJ Camera
monitor screen.
48
Page 49

Scanning Images (Scanner Mode)
2. Place the document you want to scan onto the document stage of the
PJ Camera Stand.
3. Focus the PJ Camera.
z Adjust focus by selecting the type of object whose image you want to project.
The toolbar button should be depressed (on) to project the image of an object that
is not flat, and raised (off) to project the image of a document. If you want to project
the image of any small document from business card size to HLT (half-letter) size,
depress the toolbar button to turn it on.
z You can also focus automatically by clicking the [Refocus] button on the scanner
window.
4. You can also turn on white enhancement if you want.
z The white enhancement setting enhances the white of the background, to make text
and other figures stand out more clearly. Click the [White Enhancement] down arrow
button on the scanner window and then select the white enhancement you want to use.
Automatically: The decision whether or not to perform white enhancement is made
Enhance White: Turns on white enhancement.
Normal Color: Turns off white enhancement.
automatically in accordance with the image being recorded.
49
Page 50

Scanning Images (Scanner Mode)
5. When you are ready to start auto scanning, click the [Start] button on
the scanner window.
z This causes the [Start] button to change to a [Stop] button, and starts auto scanning.
z An image of the document you placed onto the document stage in step 3 is recorded
automatically, and a preview image appears. The preview image will close automatically
after a few seconds.
z After an image file of the scanned document is created, its thumbnail is added at the
top of the preview list area.
Thumbnail of the recorded image
50
Page 51

Scanning Images (Scanner Mode)
6. After confirming that the preview image of the previous image is no
longer displayed, replace the document on the document stage with the
next one you want to scan.
z Scanning is performed each time you replace the current document with another one.
After the preview image appears, the thumbnail of the new document is added to the
top of the preview list area.
Thumbnail of the newly recorded image
z Repeat step 6 to record all of the pages that you want.
7. When you are finished auto scanning, click the [Stop] button on the
scanner window.
z This causes the [Stop] button to change back to a [Start] button, and stops auto
scanning.
8. To quit scanning, select [Exit] on the [File] menu.
z This exits PJ Camera Software and turns off the PJ Camera.
Using Manual Scanning
Use manual scanning when you want to be able to execute the scanning operation manually
for each document you place on the PJ Camera Stand. This option is best for small-volume
scanning jobs, or when scanning a document that is not compatible with auto scanning for
some reason.
Scanning Documents Using Manual Scanning
1. Select [Operating Environment] on the [Tools] menu.
z This displays the [Common] tab of the operating environment dialog box.
2. Click the [Scanner] tab.
51
Page 52

Scanning Images (Scanner Mode)
3. Under “Operation Mode”, click “Manual”.
z This should turn on ( ) “Manual” and turn off ( ) “Auto”.
4. Click the [OK] button to apply the setting and close the dialog box.
5. Select [Scanner] on the [File] menu or click on the toolbar.
z If the dialog box for adjusting camera position appears, point the PJ Camera downwards
at the document stage, and make sure there is no document on it. For more
information about camera position adjustment, see “Adjusting the Camera Position” (page
36).
z Entering the Scanner Mode displays a scanner window. The image area of the scanner
window shows a rough (monitor) image of the document on the document stage of the
PJ Camera Stand.
z The preview list and playlist areas will also appear to the right of the scanner window,
but these lists are not used for scanning operations. All scanning operations are
performed using the scanner window.
z Nothing will be displayed on the PJ Camera monitor screen.
6. Place the document you want to scan onto the document stage of the
PJ Camera Stand.
7. Use the scanner window to configure PJ Camera settings.
z You can use the scanner window to configure PJ Camera zoom and focus settings. For
details see step 3 under “Adjusting PJ Camera Settings”
(page 41).
z The white enhancement setting enhances the white of the background, to make text
and other figures stand out more clearly. Click the [White Enhancement] down arrow
button on the scanner window and then select the white enhancement you want to use.
Automatically: The decision whether or not to perform white enhancement is made
Enhance White: Turns on white enhancement.
Normal Color: Turns off white enhancement.
automatically in accordance with the image being recorded.
52
Page 53

Scanning Images (Scanner Mode)
8. When you are ready to scan, click the [Shutter] button on the scanner
window.
z This records the image and displays a preview dialog box. Click the [Save] button on
the dialog box to close it.
z For details about operations you can perform on the preview dialog box, see “Preview
Dialog Box Operations” (page 54).
z After an image file of the scanned document is created, its thumbnail is added at the
top of the preview list area.
9. Repeat steps 6 through 8 as many times as necessary to scan all of
the images you want.
10.
To quit scanning, select [Exit] on the [File] menu.
z This exits PJ Camera Software and turns off the PJ Camera.
53
Page 54

Scanning Images (Scanner Mode)
Preview Dialog Box Operations
The following explains the manual operations you can perform on the preview dialog box that
appears each time you record an image during a scanning operation.
Button Description
Displays a dialog box for specifying a contour when auto contour
[Specify Contour]
[Correct Brightness]
[Enhance White]/
[Normal Color]
[Save] Closes the preview dialog box.
[Try Again]
extraction selects the wrong contour. For details on using the
dialog box, see “Specifying the Contour of a Projected Image
Area for Extraction” (page 89).
Displays a dialog box for adjusting the brightness of the image to
make text more legible or to make colors clearer. For details on
using the dialog box, see “Adjusting the Brightness of the
Projected Image (Brightness Correction)” (page 91).
Clicking the [Enhance White] button (which causes the button
name to change to [Normal Color]) turns on white enhancement
of the background of the image. Clicking the [Normal Color]
button (which causes the button name to change to [Enhance
White]) turns off white enhancement.
Closes the preview dialog box and re-records the image of the
document that is on the document stage.
z To switch back to auto scanning after performing an manual scanning operation, repeat
steps 1 through 4 of the above operation, and then click “Auto” so it is turned on ( ).
z If you want to project image files immediately after scanning them, perform the following
steps before exiting the Scanner Mode.
1. In the preview list area, click the thumbnail of the image whose full-screen version
you want to display.
2. Select [Full Screen] on the [View] menu or click on the toolbar.
z To stop projection, select [Full Screen Off] on the [View] menu or click on
the toolbar.
z You can also create a playlist of scanned image files for playback in a specific sequence.
For more information, see “Using the Preview List” (page 82) and “Using Playlists” (page
67).
54
Page 55

Using Image Files Stored on the Computer’s Hard Disk in a Presentation (PC Image Mode)
With the PC Image Mode, you can create a projector presentation using image files recorded
in the Scanner Mode and saved on your computer’s hard disk.
PC Image Mode Overview
This section provides a general overview of the PC Image Mode window, and provides
information about the types of files that can be included in a presentation.
PC Image Mode Window
Entering the PC Image Mode displays a window like the one shown below.
Preview list area (images stored on the computer’s hard disk)
Playlist area (images included in the pr esentation)
■ Preview list area
This area shows thumbnails (160 × 120 pixels) of image files that have been recorded with
the Document Camera Mode or Scanner Mode, and saved to the computer’s hard disk.
You can drop a thumbnail from the preview list area into the playlist area to include it in a
presentation.
55
Page 56

Using Image Files Stored on the Computer’s Hard Disk in a Presentation (PC Image Mode)
■ Playlist Area
The playlist area shows the image files that are included in the presentation. You can add
images to the playlist area by dropping in images from the preview list area or image files
from a Windows Explorer window, etc.
z The PC Image Mode preview list area and playlist area are identical to those that appear
in the Scanner Mode. Note, however, that you cannot use Projection Area Capture (page
97) or Board Area Capture (page 104) in the Scanner Mode.
Image Files Supported by the PC Image Mode
The following types of image files are supported by PC Image Mode operations (inclusion in
a playlist, projection from a playlist, save as a JPG format image file).
z Image files saved in the Document Camera Mode (page 29)
z Image files saved in the Scanner Mode (page 46)
z Image files saved using Projection Area Capture (page 97)
z Image files saved using Board Area Capture (page 104)
z Other image files saved on your computer hard disk (JPEG files only)
Playlist Overview
Playlists let you arrange up to 300 image files for projection. Projecting with a playlist makes
it possible to conduct a visual presentation with minimal fuss.
After creating a playlist, you can give it a name and save it on your computer’s hard disk.
You can maintain a library of playlists and recall the one you want when you need it.
The playlist area on the PC Image window shows the current playlist. You can add files to
and delete files from the current playlist, and you can change the sequence of its image files.
Note that playlist data includes the name of each image file, the folder where it is stored,
and its relative position in the playlist. Playlist data does not include the image data itself.
Because of this, moving, copying, or deleting an image on a playlist has no affect on the
actual image file.
z You can also create, recall, and edit playlists in the Scanner Mode (page 46) and
Camera Image Mode (page 80).
z A PC Image Mode and Scanner Mode playlist contains image files that are stored on the
computer’s hard disk. A Camera Image Mode playlist, however, contains image files that
are stored on the memory card loaded in the PJ Camera or in PJ Camera memory.
Though the playlist areas in these modes look the same, keep in mind that the locations
of their image files are different.
56
Page 57

Using Image Files Stored on the Computer’s Hard Disk in a Presentation (PC Image Mode)
Auto Trapezoid Correction
The PC Image Mode’s auto trapezoid correction feature detects the intended subject of an
image recorded with the PJ Camera’s Business Shot Mode, and automatically corrects any
distortion in the image.
Before auto trapezoid correction
(recorded image)
z Auto trapezoid correction is turned on under the initial default settings of the PC Image
Mode. You can use the [Image] tab of the operating environment dialog box to turn auto
trapezoid correction on or off. For more information, see “PJ Camera Software Operating
Environment” (page 109).
z Auto trapezoid correction may not be possible for the following types of image files.
• Image files recorded in any PJ Camera mode besides the Business Shot Mode.
• Image files for which PJ Camera Software cannot detect any keystoning
• Images of 3-dimensional subjects, scenery, or other subjects that do not include a
document page, whiteboard, or other rectangular shape, images drawn or created with a
computer, etc.
• Trapezoid corrected or contour extracted image files (page 31)
In this case, the image file contents are projected, without modification.
After auto trapezoid correction
57
Page 58

Using Image Files Stored on the Computer’s Hard Disk in a Presentation (PC Image Mode)
Using the Preview List
This section explains the different operations you can perform with the PC Image Mode’s
preview list area.
Controlling the Files that Appear in the Preview List Area
You can use the following procedure to control what files appear in the preview list area. You
can specify images recorded using a specific mode and a time limit for recording dates.
1. Select [PC Image] on the [File] menu or click on the toolbar.
z This enters the PC Image Mode.
z The preview list area shows the thumbnails of image files on your computer’s hard
disk, in accordance with current PC Image Mode settings.
2. On the [Tools] menu, select [Operating Environment].
z This displays the [Common] tab of the operating environment dialog box.
3. Click the [Image] tab.
58
Page 59

Using Image Files Stored on the Computer’s Hard Disk in a Presentation (PC Image Mode)
4. Under “Folder”, select the check boxes of all the types of images you
want in the preview list area.
To display these image files: Select this check box:
Image files saved in the Document Camera Mode Document Camera Image
Image files saved using Projection Area Capture Projection Area Capture Image
Image files saved using Board Area Capture Board Area Capture Image
Image files saved in the Scanner Mode Scanner Image
All other images saved in the PJ_System folder
(page 138)
z For details about folders, see “PJ Camera Software Folder Structure” (page 138).
All Others
5. If you want to specify a time limit for the files, select the [Time Limit]
check box, and then specify the number of days from the current date
as the display time limit.
z To specify the time limit, either type a value into the “[ ] days” box, or use the arrow
buttons to change the displayed value.
z If you do not want to specify a time limit, clear the “Time Limit” check box.
6. After all the settings are the way you want, click the [OK] button to
apply them and close the dialog box.
z This returns to the PC Image window and updates the preview list area in accordance
with the new settings.
z For more information about operating environment settings, see “PJ Camera Software
Operating Environment” (page 109).
59
Page 60

Using Image Files Stored on the Computer’s Hard Disk in a Presentation (PC Image Mode)
Selecting Image Files in the Preview List Area
The following are the various methods you can use to select one or more image files in the
preview list area.
■ To select a single image file
Click the thumbnail of the image file you want to select. This causes a blue boundary to
appear around the thumbnail.
■ To select the image that comes before the currently selected image
Select [Forward] on the [View] menu or click on the toolbar.
■ To select the image that comes after the currently selected image
Select [Back] on the [View] menu or click on the toolbar.
60
Page 61

Using Image Files Stored on the Computer’s Hard Disk in a Presentation (PC Image Mode)
■ To select a series of multiple images
1. Click the thumbnail at one end of the range of the images you want to
select.
2. While holding down the [Shift] key on your computer keyboard, click the
thumbnail at the other end of the range of images.
61
Page 62

Using Image Files Stored on the Computer’s Hard Disk in a Presentation (PC Image Mode)
■ To select multiple images that are not in a series
While holding down the [Ctrl] key on your computer keyboard, individually click the thumbnails
of each of the images you want to select. To deselect an image, hold down [Ctrl] as you
click it again. Holding down [Ctrl] when you click the thumbnail of an image selects or
deselects it without affecting any other images that are selected.
62
Page 63

Using Image Files Stored on the Computer’s Hard Disk in a Presentation (PC Image Mode)
Rotating an Image
You can use the following procedure to rotate the image of the selected file 90 degrees to
the left or right.
1. In the preview list area, select the thumbnail of the file whose image
you want to rotate.
z You could also select multiple files for this procedure, if you want.
2. Perform one of the following operations to rotate the selected image.
z 90 degrees right rotation: Select [Rotate Right] on the [Image] menu, or click on
the toolbar.
z 90 degrees left rotation: Select [Rotate Left] on the [Image] menu, or click on the
toolbar.
63
Page 64

Using Image Files Stored on the Computer’s Hard Disk in a Presentation (PC Image Mode)
3. In response to the “Do you want the image saved in its rotated
orientation?” message that appears, click [Yes].
z If you do not want the rotated image to replace the original (unrotated) image in the
image file, click [No].
z You can also rotate an image by selecting its thumbnail in the playlist area. This rotates
the image contained in the source file, the same as when the image’s thumbnail is
selected in the preview list area.
Updating the Preview List Area with the Latest Image File
Information
On the [View] menu, select [Refresh]. This will update the preview list area with the latest
image file information available.
z The preview list area initially shows the image file information that is available when you
start up PJ Camera Software. Its contents do not change, even if you rename, move,
copy, or delete files using another application or Windows Explorer. Performing the above
procedure refreshes the contents of the preview list area so it contains the newest
information available.
Saving an Image Under a Different Name
You can use the following procedure to select the thumbnail of an image in the preview list
area and save the image file under a different name.
1. In the preview list area, select the thumbnail of the image file you want
to save under a different name.
z In this case, you can select only one image file.
2. Select [Save As] on the [File] menu.
z This displays a dialog box for saving the file.
3. Type in a new file name and specify the folder where you want the file
to be saved.
4. After everything is the way you want, click the [Save] button.
z This saves a copy of the file under the new file name in the folder you specified.
z If the folder where you saved the image file is specified for display in the preview list
area, the thumbnail of the new file will appear there.
64
Page 65

Using Image Files Stored on the Computer’s Hard Disk in a Presentation (PC Image Mode)
Viewing the Properties of an Image File
You can use the following procedures to view the properties of an image file, and to change
the name of the file.
■ To view to properties of an image file
1. In the preview list area, select the thumbnail of the image file whose
properties you want to view.
z In this case, you can select only one image file.
2. On the [File] menu, select [Properties].
z This displays the properties dialog box for the selected image.
3. To close the properties dialog box, click [OK] or [Cancel].
z For more information, see “Image File Properties Dialog Box Contents” (page 136).
■ To rename an image file using the properties dialog box
1. Select the thumbnail of the image file you want to rename and display
its properties.
z See “To view to properties of an image file” above for details.
2. On the properties dialog box, type the new name into the [File Name]
box.
3. After everything is the way you want, click the [OK] button.
z If you want to exit the properties dialog box without changing anything, click [Cancel]
instead.
65
Page 66

Using Image Files Stored on the Computer’s Hard Disk in a Presentation (PC Image Mode)
Deleting an Image
The following procedure moves the file whose thumbnail is selected on the preview list area
to the Windows trash can.
1. In the preview list area, select the thumbnail of the file whose image
you want to delete.
z You could also select multiple files for this procedure, if you want.
2. On the [Edit] menu, select [Delete].
3. In response to the confirmation dialog box that appears, click [OK] to
delete the image or [Cancel] to cancel without deleting anything.
Projecting an Image
Use the following procedure to project the image whose thumbnail is selected in the preview
list area.
1. In the preview list area, select the thumbnail of the file whose image
you want to project.
z In this case, you can select only one image file.
2. Select [Full Screen] on the [View] menu or click on the toolbar.
z This projects the image whose thumbnail is selected in the preview list area.
z If you have auto trapezoid correction turned on (page 109), the image in the source
file will be trapezoid corrected before being projected.
3. Here, you could scroll forward or back through the files whose
thumbnails are in the preview list area.
z To scroll back to the image whose thumbnail comes before the current image in the
preview list area, select [Back] on the [View] menu or click on the toolbar.
z To scroll forward to the image whose thumbnail comes after the current image in the
preview list area, select [Forward] on the [View] menu or click on the toolbar.
4. To stop projecting, select [Full Screen Off] on the [View] menu or click
on the toolbar.
z For information about zooming and other operations you can perform during image
projection, see “Using Projection Features” (page 87).
66
Page 67

Using Image Files Stored on the Computer’s Hard Disk in a Presentation (PC Image Mode)
Using Playlists
This section explains everything you need to know about creating and maintaining playlists.
Creating a New Playlist
Use the following procedure to create a new blank playlist.
1. On the [Playlist] menu, select [New Playlist].
z This creates new blank playlist and displays it in the playlist area of the window.
2. Refer to the sections listed below for information about operations you
need to perform to configure the contents of the playlist.
z “Adding Image Files to a Playlist” (page 68)
z “Duplicating an Image in a Playlist” (page 73)
z “Shifting Image Files Forward or Back within a Playlist” (page 75)
z “Moving an Image File to a New Location in a Playlist” (page 76)
z “Deleting an Image File from a Playlist” (page 77)
3. After the playlist is configured the way you want, select [Save] on the
[Playlist] menu, and save the playlist.
z For details, see “Saving a Playlist” (page 77).
67
Page 68

Using Image Files Stored on the Computer’s Hard Disk in a Presentation (PC Image Mode)
Opening an Existing Playlist
Perform the following procedure when you want to open a playlist that you previously saved
to a file.
1. On the [Playlist] menu, select [Open Playlist].
z This displays a dialog box for opening files.
2. Select the playlist file you want to open, and then click the [Open]
button.
z This opens the selected playlist file and displays its contents in the playlist area.
z In the PC Image Mode, you can open only playlist files that were originally created in
the PC Image Mode or the Scanner Mode. You cannot open playlist files that were
created in the Camera Image Mode.
Adding Image Files to a Playlist
This section explains the various different methods you can use to add image files to a
playlist. You can add images from the preview list area or from a Windows Explorer window.
■ To add an image to a playlist from the preview list area using the
[Add To Playlist] command
1. In the preview list area, select the thumbnail of the image file you want
to add to the playlist.
z You could also select multiple files for this procedure, if you want.
68
Page 69

Using Image Files Stored on the Computer’s Hard Disk in a Presentation (PC Image Mode)
2. On the [Playlist] menu, select [Add To Playlist].
z This adds the image you selected in step 1 and displays its thumbnail at the end of
the playlist.
69
Page 70

Using Image Files Stored on the Computer’s Hard Disk in a Presentation (PC Image Mode)
■ To add an image to a playlist from the preview list area using copy
and paste
1. In the preview list area, select the thumbnail of the image file you want
to add to the playlist.
z You could also select multiple files for this procedure, if you want.
2. On the [Edit] menu, select [Copy].
3. Click inside of the playlist area to make it active.
4. On the [Edit] menu, select [Paste].
z This adds the image file you selected in step 1 to the playlist, so it is located above
the image whose thumbnail is currently selected.
70
Page 71

Using Image Files Stored on the Computer’s Hard Disk in a Presentation (PC Image Mode)
■ To add an image to a playlist from the preview list area using drag
and drop
1. In the preview list area, select the thumbnail of the image file you want
to add to the playlist.
z You could also select multiple files for this procedure, if you want.
2. Drag the selected thumbnail from the preview list area and drop it at
the location in the playlist where you want the image file inserted.
Drag and drop
z This adds the image you selected in step 1 and displays its thumbnail at the location
in the playlist where you dropped it.
■ To add an image to a playlist from a Windows Explorer window
using copy and paste
1. In the Windows Explorer window, select the image file you want to add
to the playlist.
z You could also select multiple files for this procedure, if you want.
2. On the Windows Explorer window [Edit] menu, select [Copy].
3. Click the PJ Camera Software icon on the Windows taskbar or click
anywhere on the PJ Camera Software window.
z This makes the PJ Camera Software window active.
71
Page 72

Using Image Files Stored on the Computer’s Hard Disk in a Presentation (PC Image Mode)
4. In the playlist area, select the thumbnail of the image file where you
want the added file to be inserted by clicking it.
5. On the [Edit] menu, select [Paste].
z This adds the image file to the playlist so it is located above the image whose
thumbnail you selected in step 4.
■ To add a file to a playlist from a Windows Explorer window using
drag and drop
1. Arrange the PJ Camera Software window and the Windows Explorer
window so they are both visible on your screen.
2. In the Windows Explorer window, select the image file you want to add
to the playlist.
z You could also select multiple files for this procedure, if you want.
72
Page 73

Using Image Files Stored on the Computer’s Hard Disk in a Presentation (PC Image Mode)
3. Drag the selected thumbnail from the Windows Explorer window and
drop it at the location in the playlist where you want the image file
inserted.
z This adds the image you selected in step 2 and displays its thumbnail at the location
in the playlist where you dropped it.
z As a general rule, you should avoid deleting, renaming, or moving a file that is contained
in a playlist. Otherwise, PJ Camera Software will not be able to find the file when you
play the playlist, and so it will skip it.
Duplicating an Image in a Playlist
Use the following procedure to copy an image contained in a playlist and duplicate it at
another location inside the same playlist.
1. In the playlist area, select the thumbnail of the image you want to
duplicate.
z You could also select multiple files for this procedure, if you want.
2. On the [Edit] menu, select [Copy].
73
Page 74

Using Image Files Stored on the Computer’s Hard Disk in a Presentation (PC Image Mode)
3. In the playlist area, select the thumbnail of the image file where you
want the added file to be inserted by clicking it.
4. On the [Edit] menu, select [Paste].
z This adds the image file to the playlist so it is located above the image whose
thumbnail you selected in step 3.
z If you want to add the copied image file to the end of the playlist, perform the paste
operation described above and then use the procedures on the next page to move the
pasted file to the end of the playlist.
74
Page 75

Using Image Files Stored on the Computer’s Hard Disk in a Presentation (PC Image Mode)
Shifting Image Files Forward or Back within a Playlist
Use the following procedure to shift the position of an image upwards or downwards within a
playlist.
1. In the playlist area, select the thumbnail of the image you want to shift.
z In this case, you can select only one image file.
2. Perform one of the following operations to shift the position of the
selected image.
z To shift one position back: Select [Back] on the [Playlist] menu.
z To shift one position forward: Select [Forward] on the [Playlist] menu.
75
Page 76

Using Image Files Stored on the Computer’s Hard Disk in a Presentation (PC Image Mode)
Moving an Image File to a New Location in a Playlist
You can use cut and paste or drag and drop to move an image file from one location to
another within a playlist.
■ To move an image file using cut and paste
1. In the playlist area, select the thumbnail of the image you want to
move.
z You could also select multiple files for this procedure, if you want.
2. On the [Edit] menu, select [Cut].
3. In the playlist area, select the thumbnail of the image file where you
want the file to be inserted by clicking it.
4. On the [Edit] menu, select [Paste].
z This moves the image file so it is located above the image whose thumbnail you
selected in step 3.
■ To move an image file using drag and drop
1. In the playlist area, select the thumbnail of the image you want to
move.
z You could also select multiple files for this procedure, if you want.
2. Drag the selected thumbnail from its current location and drop it at the
location in the playlist where you want to move it.
Drag and drop
z This moves the image you selected in step 1 to the location in the playlist where you
dropped it.
76
Page 77

Using Image Files Stored on the Computer’s Hard Disk in a Presentation (PC Image Mode)
Deleting an Image File from a Playlist
Use the following procedure to delete an image file from a playlist. Note that the image is
deleted from the playlist only. The original image file is not deleted.
1. In the playlist area, select the thumbnail of the image you want to
delete.
z You could also select multiple files for this procedure, if you want.
2. On the [Edit] menu, select [Delete].
z This deletes the file you selected in step 1 from the playlist.
Saving a Playlist Under a Different Name
Use the following procedure when you want to save the current playlist as a new file with a
different name.
1. On the [Playlist] menu, select [Save As].
z This displays a dialog box for saving a file.
2. Type in the new file name.
3. Click the [Save] button.
z This creates a new playlist file with the name you specified.
Saving a Playlist
Use the following procedure to save a playlist after you have edited it.
1. On the [Playlist] menu, select [Save].
z If you previously saved the current playlist, the edited version overwrites the playlist in
the existing file, and you are done.
z If this is the first time you are saving the current playlist, a dialog box for saving a file
will appear. In this case, advance to step 2.
2. Type in a file name. You can leave the default storage folder the way it
is, or specify a different folder, if you want.
3. After everything is the way you want, click the [Save] button.
z This creates a new playlist file with the name you specified.
77
Page 78

Using Image Files Stored on the Computer’s Hard Disk in a Presentation (PC Image Mode)
Playing a Playlist
You can play an existing playlist and project its images starting either from the beginning or
from any particular image in the list.
■ To play a playlist starting from the beginning
1. Open the playlist you want to play.
z See “Opening an Existing Playlist” (page 68).
2. On the [Playlist] menu, select [Play Playlist].
z This plays the playlist, projecting its images starting from the beginning.
z If you have auto trapezoid correction turned on (page 109), the image in the source
file will be trapezoid corrected before being projected.
3. To advance to the next image, click on the toolbar or select
[Forward] on the [View] menu.
4. To return to the previous image, click on the toolbar or select
[Back] on the [View] menu.
5. To terminate playlist play, click on the toolbar or select [Full Screen
Off] on the [View] menu.
z Clicking on the toolbar (or selecting [Forward] on the [View] menu) while the last
image file in the playlist is being projected causes the following message to appear “This
is the final image. Do you want to stop projection?” Click [Yes] to terminate playlist play
and return to the PC Image window. Clicking [No] continues projecting the current (final)
image.
z For information about zooming and other operations you can perform during image
projection, see “Using Projection Features” (page 87).
78
Page 79

Using Image Files Stored on the Computer’s Hard Disk in a Presentation (PC Image Mode)
■ To play a playlist starting from a particular image
1. Open the playlist you want to play.
z See “Opening an Existing Playlist” (page 68).
2. In the playlist area, select the thumbnail of the image file from which
you want to start by clicking it.
3. On the [View] menu, select [Full Screen].
z This projects the image file you selected in step 2.
z For the remainder of this procedure, perform the steps starting from step 3 under “To
play a playlist starting from the beginning” (page 78).
Using Projection Area Capture and Board Area Capture
You can use Projection Area Capture and Board Area Capture in the PC Image Mode.
z For full details about Projection Area Capture operations, see “Projection Area Capture”
(page 97).
z For full details about Board Area Capture operations, see “Board Area Capture” (page 104).
79
Page 80

Using Image Files Stored in PJ Camera Memory in a Presentation (Camera Image Mode)
The Camera Image Mode lets you use PJ Camera Software to control projection of images
recorded with the PJ Camera and stored on the memory card loaded in the PJ Camera (or
in PJ Camera built-in memory).
Since the Camera Image Mode lets you project images without transferring them to a
computer, you can incorporate new images into your presentations as soon as you record
them with the PJ Camera.
Camera Image Mode Overview
This section provides a general overview of the Camera Image Mode window, and provides
information about the types of files that can be included in a presentation.
Camera Image Mode Window
Preview list area (images stored in PJ Camera memory)
Playlist area (images included in the presentation)
80
Page 81

Using Image Files Stored in PJ Camera Memory in a Presentation (Camera Image Mode)
■ Preview list area
This area shows thumbnails (160 × 120 pixels) of the image files stored on the memory card
loaded in the PJ camera, or in PJ Camera built-in memory. You can drop a thumbnail from
the preview list area into the playlist area to include it in a presentation. You can save
individual PJ Camera image files on your computer’s hard disk, or you can batch copy
multiple files.
■ Playlist area
The playlist area shows camera image files that are included in a presentation. You can add
images to the playlist area by dragging them from the preview list area.
Image Files Supported by the Camera Image Mode
The Camera Image Mode supports use of files that are stored on the memory card loaded in
the PJ Camera, or in PJ Camera built-in memory.
Playlists
For information about playlists, see “Playlist Overview” (page 56).
Auto Trapezoid Correction
The Camera Image Mode’s auto trapezoid correction feature detects the intended subject of
an image recorded with the PJ Camera’s Business Shot Mode, and automatically corrects any
distortion in the image.
Before auto trapezoid correction
(recorded image)
z Auto trapezoid correction is turned on under the initial default settings of the Camera Image
Mode. You can use the [Image] tab of the operating environment dialog box to turn auto
trapezoid correction on or off. For more information, see “PJ Camera Software Operating
Environment” (page 109).
z Auto trapezoid correction may not be possible for the following types of image files.
• Image files recorded in any PJ Camera mode besides the Business Shot Mode.
• Image files for which PJ Camera Software cannot detect any keystoning
• Images of 3-dimensional subjects, scenery, or other subjects that do not include a
document page, whiteboard, or other rectangular shape, images drawn or created with a
computer, etc.
In this case, the image file contents are projected, without modification.
After auto trapezoid correction
81
Page 82

Using Image Files Stored in PJ Camera Memory in a Presentation (Camera Image Mode)
Using the Preview List
This section explains the different operations you can perform with the Camera Image Mode’s
preview list.
Common Camera Image Mode and PC Image Mode Operations
The following preview list area operations are identical for both the Camera Image Mode and
the PC Image Mode. See the PC Image Mode section pages referenced below for more
information.
z Limiting preview list area contents by file creation date, etc.
See “Controlling the Files that Appear in the Preview List Area” (page 58)
z Selecting an image in the preview list area
See “Selecting Image Files in the Preview List Area” (page 60)
z Viewing image properties
See “To view to properties of an image file” (page 65)
z Projecting an image
See “Projecting an Image” (page 66)
The following operations are not supported on the Camera Image Mode preview list area.
z Image rotation
z Image save
z Image delete
z Refresh
z Image renaming on the image file properties dialog box
Copying a PJ Camera Image File to Your Computer
You can use the following procedure to select the thumbnail of a PJ Camera image in the
preview list area and copy the image to your computer’s hard disk.
1. In the preview list, select the thumbnail of the image file you want to
copy.
z In this case, you can select only one image file.
2. Select [Save As] on the [File] menu.
z This displays a dialog box for saving a file.
82
Page 83

Using Image Files Stored in PJ Camera Memory in a Presentation (Camera Image Mode)
3. Type in a file name and specify the folder where you want the file to
be saved.
4. Click the [Save] button.
z This copies the file and saves it under the new file name in the folder you specified.
Batch Copying Multiple PJ Camera Image Files to Your
Computer
Use the following procedure to select the thumbnails of multiple PJ Camera image files in the
preview list area and batch copy them to your computer’s hard disk.
1. In the preview list area, select the thumbnails of the image files you
want to copy to your computer.
2. On the [File] menu, select [Copy Image Files].
z This displays a dialog box for saving a file.
3. Specify the folder on your computer where you want the files to be
copied.
z The initial default destination folder is C:\CASIO\PJ_System\Board_Area_Capture.
4. Click the [Save] button.
z This copies the image files you selected in step 1 to the folder you specified.
z The copy operation will take some time to complete if you selected a large number of
files. Wait until the file copy operation is complete.
z The files are saved using the same file names as the original files.
z Note that you cannot use the Camera Image Mode to project files that you copied to
your computer using the above batch copy operation. Use the PC Image Mode to project
image files that are located on your computer’s hard disk.
83
Page 84

Using Image Files Stored in PJ Camera Memory in a Presentation (Camera Image Mode)
Camera Image Mode Playlist Area
The operations you can perform in the playlist area of the Camera Image Mode are basically
identical to those of the PC Image Mode playlist area. For details, see “Using Playlists”
(page 67).
This section provides details only about operations that are different from those in the PC
Image Mode.
Adding Images to a Playlist
In the Camera Image Mode, you can add images to a playlist from the preview list area only.
You cannot add images from a Windows Explorer window.
Because of this, the following PC Image Mode procedures are not possible when adding
images to a playlist in the Camera Image Mode.
z “To add an image to a playlist from a Windows Explorer window using copy and paste”
(page 71)
z “To add a file to a playlist from a Windows Explorer window using drag and drop”
(page 72)
Playlist Files
Note the following points about playlist files created with the Camera Image Mode.
z In the Camera Image Mode, you can open only playlists that were created in the Camera
Image Mode. You cannot open playlist files that were created in the PC Image Mode or
the Scanner Mode.
z Playlists created in the Camera Image Mode access image files located on the memory
card loaded in the PJ Camera. Because of this, the memory card that contains the image
files included in the playlist must be loaded in the PJ Camera when you use a Camera
Image Mode playlist file for projection.
Using Projection Area Capture and Board Area Capture
You can use Projection Area Capture and Board Area Capture in the Camera Image Mode.
z For full details about Projection Area Capture operations, see “Projection Area Capture”
(page 97).
z For full details about Board Area Capture operations, see “Board Area Capture” (page 104).
84
Page 85

Using PJ Camera Software with PowerPoint or Other Presentation Software (Presentation Mode)
The Presentation Mode lets you keep PJ Camera Software running in the background when
projecting with Microsoft PowerPoint or some other application. This keeps PJ Camera
Software instantly available during the presentation whenever you need it.
Entering the Presentation Mode
PJ Camera Software automatically enters the Presentation Mode whenever you start it up on
your computer. If you have entered another PJ Camera Software mode, you can return to the
Presentation Mode by selecting [Presentation] on the [File] menu, or by clicking on the
toolbar.
Presentation Mode Menus
While you are using another application with PJ Camera Software running in the background
in the Presentation Mode, you can display the operation bar and perform the following menu
operations as required.
To do this: Perform this menu operation: See:
Activate PJ Camera Software and display the
Projection Area Capture dialog box
Activate PJ Camera Software and display the
Board Area Capture dialog box
Activate PJ Camera Software in the
Document Camera Mode
Activate PJ Camera Software in the PC
Image Mode
Activate PJ Camera Software in the Camera
Image Mode
Activate PJ Camera Software in the Scanner
Mode
Quit PJ Camera Software
(other application continues to run)
Activate PJ Camera Software and display the
operating environment dialog box
Activate PJ Camera Software and display the
operation bar properties dialog box
[File] [Projection Area Capture] Page 99
[File] [Board Area Capture] Page 104
[File] [Document Camera] Page 33
[File] [PC Image] Page 55
[File] [Camera Image] Page 80
[File] [Scanner] Page 46
[File] [Exit] Page 27
[Tools]
[Tools]
[Operation Bar Properties]
[Operating Environment]
Page 109
Page 117
z PJ Camera Software menu items other than those described above are not available in
the Presentation Mode.
85
Page 86

Using PJ Camera Software with PowerPoint or Other Presentation Software (Presentation Mode)
Using Projection Area Capture and Board Area Capture
You can use Projection Area Capture and Board Area Capture in the Presentation Mode.
z The Projection Area Capture and Board Area Capture functions are not available when
PJ Camera Software is started up in the Business Document startup mode.
Projection Area Capture
Projection Area Capture records text and illustrations that have been handwritten into a
projected image and combines it with the original projected image.
A combined image (handwritten data + original projected image) produced using Projection
Area Capture is clearer and much easier to read than an image produced by simply
recording a snapshot of the whiteboard.
For full details about Projection Area Capture, see “Projection Area Capture” (page 97).
Board Area Capture
Board Area Capture is for recording whiteboard contents (both projected image, and
handwritten text and graphics). The whiteboard portion can be extracted from the recorded
image and repositioned so it is straight. You can also correct the brightness of the image to
make text more legible.
For full details about Board Area Capture operations, see “Board Area Capture” (page 104).
86
Page 87

Using Projection Features
This section explains the common projection features you can use when projecting images in
the Document Camera Mode, Scanner Mode, PC Image Mode, and Camera Image Mode.
Zooming and Scrolling
When projecting an image, you can enlarge it to the size you want. After enlarging an image,
you can scroll it so the portion you want is visible.
Enlarging the Projected Image
1. Select [Zoom In] on the [View] menu or click on the toolbar.
z This changes the mouse pointer to .
2. Move the pointer to the part of the image that you want as the
center of the enlarged image, and click.
z This enlarges the image 1.25 times and displays the result with point you clicked in the
center.
z You can click an image up to 10 times with the pointer. The image is enlarged up
to 7.5 times its original size.
Scrolling an Enlarged Image
You can perform the following operation only while the projected image is enlarged by a
zoom operation.
1. Select [Scroll] on the [View] menu or click on the toolbar.
z This changes the mouse pointer to .
2. Drag the pointer on the screen.
z This causes the image to scroll in the direction you drag.
87
Page 88

Using Projection Features
Reducing the Size of an Enlarged Image
You can perform the following operation only while the projected image is enlarged by a
zoom operation.
1. Select [Zoom Out] on the [View] menu or click on the toolbar.
z This changes the mouse pointer to .
2. Move the pointer to the part of the image that you want as the
center of the reduced image, and click.
z This reduces the size of the image and displays the result with the point you clicked in
the center.
z Each click with the pointer reduces the size of the image, until it reaches its
original size.
Returning an Enlarged Image to Its Original Size
Select [Fit Image] on the [View] menu or click on the toolbar.
Rotating a Projected Image
Use the following operations to rotate the projected image 90 degrees left or right.
z 90 degrees right rotation:
Select [Rotate Right] on the [Image] menu or click on the toolbar.
z 90 degrees left rotation:
Select [Rotate Left] on the [Image] menu or click on the toolbar.
z You can rotate an enlarged image without changing its size.
z You can rotate an image and save it by selecting its icon in the PC Image Mode or
Scanner Mode preview list area or playlist area. For details, see “Rotating an Image”
(page 63).
88
Page 89

Using Projection Features
Editing the Projected Image
You can perform contour extraction or brightness correction on the currently projected image.
z To save the results of your edit and apply them to the image file, select [Save] or [Save
As] on the [File] menu. For details about saving data to an image file, see “Saving the
Projected Image” (page 93).
Specifying the Contour of a Projected Image Area for Extraction
You can use the procedures in this section to specify the contour of the area that you want
to extract from a projected image.
z Contour specification cannot be performed on a file that was saved after performing auto
trapezoid correction in the PC Image Mode, Scanner Mode, or Camera Image Mode
(page 93).
z Contour specification may not be possible on certain files due to other reasons than the
one described above.
89
Page 90

Using Projection Features
Specifying a Contour
Use the following procedure for contour specification of the currently projected image.
1. Select [Specify Contour] on the [Image] menu or click on the
toolbar.
Selection boundary
Drag the handles to
reshape.
2. On the contour specification dialog box, use your mouse to drag the
handles on the selection boundary to change its size and shape until
the boundary encloses the area you want to extract.
z Clicking with the mouse near a corner handle causes the handle to jump to the point
where you clicked.
z Use the corner handles to change the size and orientation of the selection boundary.
z Drag the selection boundary lines to change the size of the selection boundary, without
changing its orientation.
3. When the selection boundary is the way you want, click [OK].
z This extracts the area enclosed in the boundary of the selection boundary and adjusts
the extracted area so it is rectangular.
90
Page 91

Using Projection Features
Adjusting the Brightness of the Projected Image
(Brightness Correction)
You can use brightness correction to make adjustments in an image that is too dark or too
bright.
■ Adjusting the Brightness of an Image
Use the following procedure to adjust the brightness of the currently projected image.
1. Select [Correct Brightness] on the [Image] menu or click on the
toolbar.
z This displays a dialog box for adjusting brightness.
2. Drag the slider along the bottom of the dialog box left and right to
adjust brightness.
z Slide to the left to make the image darker, or to the right to make it brighter.
z The preview image on the dialog box will change in accordance with your setting.
3. When the setting is the way you want, click [OK].
z This will adjust the brightness of the projected image.
z After adjusting the brightness of an image once, you may not be able to change its
brightness setting again.
91
Page 92

Using Projection Features
Viewing the Recorded Image of the Currently Projected Image
When Trapezoid Correction is turned on, PJ Camera Software normally extracts the document
area out of the recorded image and projects only the extracted image.
You can switch from projection of the extracted image and project the full recorded image, if
you want.
1. On the [Image] menu, select [Trapezoid Correction On] to remove the
check mark next to it, or press the space bar on your computer
keyboard.
z This projects the full recorded image.
2. To return to the extracted image, select [Trapezoid Correction On] on
the [Image] menu so the check mark appears next to it again, or press
the space bar again.
z You can toggle between the recorded image and extracted image by pressing the space
bar on your computer keyboard.
z If contour extraction could not be performed for some reason, PJ Camera Software will
project the recorded image as-is. The [Trapezoid Correction On] command will not be
available on the [Image] menu while such an image is being projected.
92
Page 93

Using Projection Features
Saving the Projected Image
After you edit the projected image, you can use one of the procedures below to save it as
an image file. The procedure you should use depends on the current PJ Camera Software
Mode and operating environment settings.
■ In the Document Camera Mode
Use the procedure under “Saving the Currently Projected Image” (page 44).
■ In the PC Image Mode
What happens when you save an image in this mode depends on whether the “Auto
Trapezoid Correction” option on the [Image] tab of the operating environment dialog box is on
or off.
Auto Trapezoid Correction on:
Auto trapezoid correction is performed on the recorded image and the result is saved in
an image file. If the currently projected image has not been auto trapezoid corrected, it is
saved as-is.
Auto Trapezoid Correction off:
The recorded image is saved as-is.
■ In the Camera Image Mode
What happens when you save an image in the Camera Image Mode depends on whether the
“Auto Trapezoid Correction” option of the [Image] tab of the operating environment dialog box
is on or off.
Auto Trapezoid Correction on:
Auto trapezoid correction is performed on the recorded image and the result is saved in
an image file. If the correctly projected image has not been auto trapezoid corrected, it is
saved as-is.
Auto Trapezoid Correction off:
The recorded image is saved as-is.
■ In the Scanner Mode
Auto trapezoid correction is performed on the recorded image and the result is saved in an
image file. If the correctly projected image has not been auto trapezoid corrected, it is saved
as-is.
93
Page 94

Using Projection Features
Saving the Projected Image in the Existing Image File
z The following procedure cannot be performed in the Camera Image Mode.
1. While the image to be saved is being projected, select [Save] on the
[File] menu or click on the toolbar.
z If you previously saved the current document camera image, this will overwrite the file
with the currently projected image, and you are finished.
z If this is the first time you are saving the currently projected image, a dialog box for
saving the file will appear. In this case, advance to step 2.
2. You can leave the initial default folder and file name settings of the
dialog box the way they are, or change them to something else.
z Advance directly to step 3 if you want to use the default settings.
3. Click the [Save] button.
z This saves the image file.
Saving the Projected Image Under a Different Name
1. While the image you want to save is being projected, select [Save As]
on the [File] menu.
z This displays a dialog box for saving a file.
2. Type in a file name and specify the folder where you want to save the
image.
3. Click the [Save] button.
z This creates a new image file with the name you specified.
94
Page 95

Using Projection Features
Viewing the Image Properties
You can display an image properties dialog box, which contains information about the currently
projected image. You can also use the properties dialog box to change the name of the
image’s file.
z The image file properties dialog box cannot be displayed if PJ Camera Software was
started up in the Business Document startup mode.
z In the Document Camera Mode, properties can be displayed only for document camera
images that have been saved to the computer’s hard disk. You cannot display properties
for an unsaved temporary document camera file.
z You cannot change the file name on a properties dialog box displayed in the Camera
Image Mode.
■ To view the properties of a saved image
1. Project the image file whose properties you want to view.
2. Select [Properties] on the [File] menu.
z This display the properties dialog box.
3. To close the properties dialog box, click [OK] or [Cancel].
z For more information, see “Image File Properties Dialog Box Contents” (page 136).
95
Page 96

Using Projection Features
■ To rename a file with the properties dialog box
1. Project the image file you want to rename.
2. Select [Properties] on the [File] menu.
z This displays the properties dialog box.
3. In the [File Name] box, type in the new name you want to assign to
the file.
z File name rules (number of characters, supported character types) are the same as
those for general Windows files. See Windows help for more information.
4. After the file name is the way you want, click the [OK] button.
z This renames the file and closes the proper ties dialog box.
z To cancel renaming of the file, click the [Cancel] button. This closes the properties
dialog box without changing the file name.
96
Page 97

Projection Area Capture
Projection Area Capture extracts text and graphics that are handwritten within the projection
image area on the whiteboard. It then combines this with the original projection image,
providing a clear view of both the projection image and the handwritten information.
z Projection Area Capture does not record handwritten text and graphics that are on the
whiteboard outside of the projection image area.
z Use Projection Area Capture when the handwritten text and graphics you want to record
are located within the projection area.
97
Page 98

Projection Area Capture
Using Projection Area Capture
Except for the Document Camera Mode and Scanner Mode, you can use Projection Area
Capture in all modes.
Positioning the PJ Camera Stand for a Projection Area Capture
Operation
Position the PJ Camera Stand as shown below to prepare for a Projection Area Capture operation.
PJ Camera Stand
±30 degrees max.
±30 degrees max.
PJ Camera Stand
z The above ranges apply only when a square or rectangular image is being projected.
98
Page 99

Projection Area Capture
Projection Area Capture Requirements
The following are the requirements in each mode when performing the procedure under
“Performing a Projection Area Capture Operation” (page 99).
■ In the Presentation Mode
z Projection onto the whiteboard is being performed by an application other than PJ Camera
Software (PowerPoint, etc.)
z Text and/or illustrations handwritten with a marker on the whiteboard
■ In the PC Image Mode or Camera Image Mode
z Projection of an image file onto the whiteboard
z Text and/or illustrations handwritten with a marker on the whiteboard
Performing a Projection Area Capture Operation
Use the following procedure to perform a Projection Area Capture operation.
1. Select [Projection Area Capture] on the [File] menu or click on the
toolbar.
z In any mode other than the Presentation Mode, you could press the keyboard’s [F3]
function key instead.
z This displays the Projection Area Capture dialog box.
99
Page 100

Projection Area Capture
2. Point the PJ Camera at the whiteboard.
Image projection area
Point the camera at the whiteboard so it is at
an angle that is within the allowable range.
Recording area
3. While watching the PJ Camera’s monitor screen, use the camera’s zoom
buttons to compose the image.
z
Zoom the image until the projection area on the whiteboard fills the camera’s monitor screen
as much as possible. Keep the whiteboard in the center of the camera’s monitor screen.
z On the Projection Area Capture dialog box, click the [View Monitor] button. This displays
the camera’s monitor screen image on your computer screen.
z For details, see “Displaying the Camera’s Monitor Screen Image on Your Computer
Screen” (page 101).
100
 Loading...