

Page 1
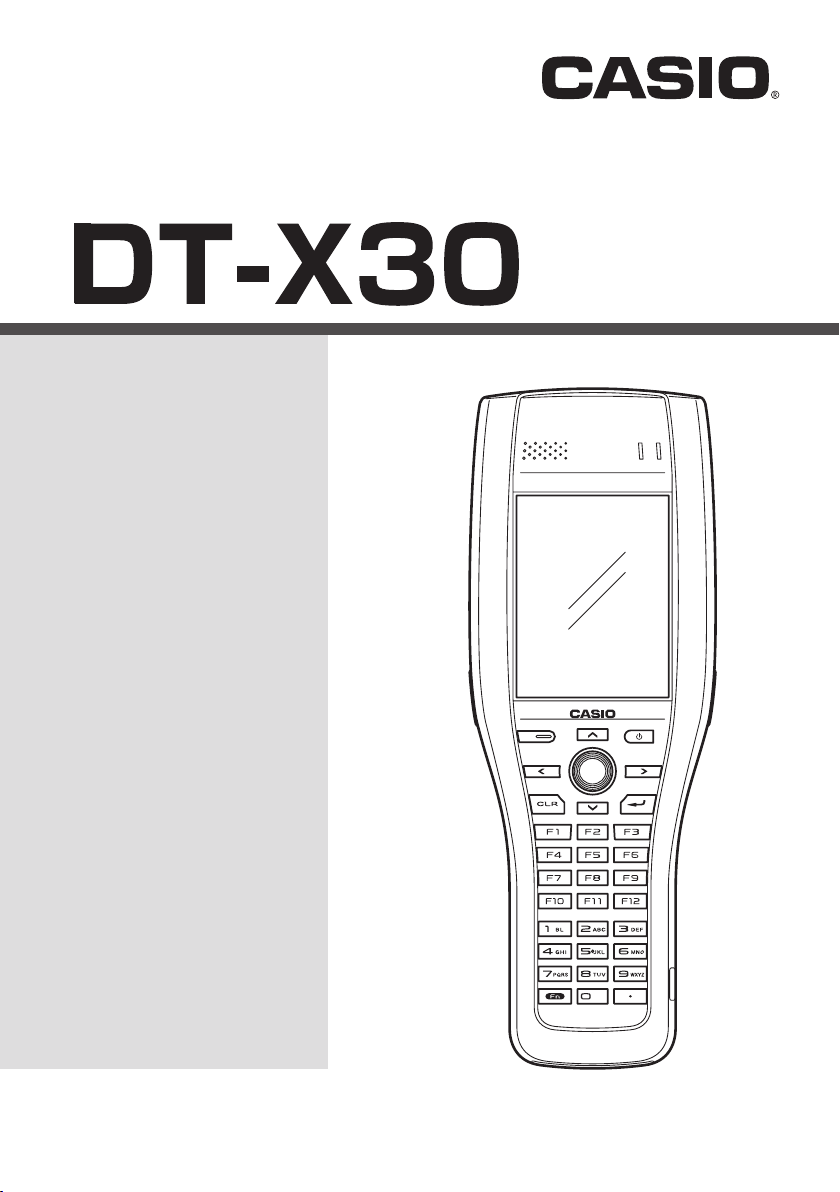
Handheld Terminal
User’s Guide
E
R-50C/R-50
Be sure to read “Safety
Precautions” inside this
guide before trying to use
your Handheld Terminal.
Page 2
This Product is equipped with the Brycen BL-RAPPORE Stack and My Wirefree
x
Network Bluetooth User Interface Application, the use of which is governed by a license
granted by Brycen Co., Ltd.
BLUETOOTH is a registered trademark owned by Bluetooth SIG, Inc. and licensed to
x
CASIO COMPUTER CO., LTD.
Microsoft and Windows are either registered trademarks or trademarks of Microsoft
x
Corporation in the United States and/or other countries.
Information in this document is subject to change without advance notice. CASIO Computer Co.,
Ltd. makes no representations or warranties with respect to the contents or use of this manual
and specifi cally disclaims any express or implied warranties of merchantability or fi tness for any
particular purpose.
Page 3

Contents
Safety Precautions ........................................................................................E-3
Operating Precautions ..................................................................................E-8
Important ........................................................................................................E-8
After Service ........................................................................................................E-8
Regulatory Information .................................................................................E-9
Handheld Terminal System Confi guration ................................................E-15
General Guide ...............................................................................................E-17
Loading and Removing the Battery Pack ..................................................E-20
Loading ..............................................................................................................E-21
Removing ...........................................................................................................E-22
Charging the Battery Pack .........................................................................E-23
USB Cradle/Ethernet Cradle/Cradle-type Battery Charger ...............................E-23
Dual Battery Charger .........................................................................................E-23
Car Mounted-type Battery Charger ....................................................................E-24
Attaching the Hand Belt ..............................................................................E-25
Confi guring Handheld Terminal Settings ..................................................E-26
Calibrating Touch Screen Alignment .................................................................E-26
Using the CMOS Imager ................................................................................E-27
Warning Label ..............................................................................................E-28
Laser Beam ........................................................................................................E-28
Performing Communications .....................................................................E-29
IR Communication .............................................................................................E-29
Bluetooth
Handling microSD Cards ............................................................................E-31
Installing.............................................................................................................E-31
Removing ...........................................................................................................E-32
Resetting the Handheld Terminal ...............................................................E-33
DT-X30 Specifi cations .................................................................................E-34
Using the USB Cradle (HA-G60IO) .............................................................E-37
General Guide ....................................................................................................E-37
Specifi cations .....................................................................................................E-39
®
Communication ...............................................................................E-30
E-1
Page 4

Using the Ethernet Cradle (HA-G62IO) ......................................................E-40
General Guide ...................................................................................................E-40
Specifi cations .....................................................................................................E-42
Using the Cradle-type Battery Charger (HA-G30CHG) ............................E-43
General Guide ....................................................................................................E-43
Specifi cations .....................................................................................................E-44
Using the Car Mounted-type Battery Charger (HA-G35CHG) .................E-45
General Guide ....................................................................................................E-45
Specifi cations .....................................................................................................E-46
Using the Dual Battery Charger (HA-G32DCHG) ......................................E-47
General Guide ....................................................................................................E-47
Connecting Multiple Dual Battery Chargers......................................................E-49
Specifi cations .....................................................................................................E-50
Using Rechargeable Battery Pack .............................................................E-51
Specifi cations .....................................................................................................E-51
E-2
Page 5
Safety Precautions
Congratulations upon your selection of this CASIO product. Be sure to read the
following Safety Precautions before trying to use it for the fi rst time.
Your neglect or avoidance of the warning and caution statements in the
subsequent pages causes the danger of fi re, electric shock, malfunction and
damage on the goods as well as personal injury.
Markings and Symbols
The following are the meanings of the markings and symbols used in these Safety
Precautions.
Danger
Warning
Caution
A diagonal line indicates something you should not do. The symbol shown
x
here indicates you should not try to take the unit apart.
A black circle indicates something you should do. The symbol shown here
x
indicates you should unplug the unit from the wall outlet.
This symbol indicates information that, if ignored or applied
incorrectly, creates the danger of death or serious personal injury.
This symbol indicates information that, if ignored or applied
incorrectly, creates the possibility of death or serious personal
injury.
This symbol indicates information that, if ignored or applied
incorrectly, creates the possibility of personal injury or property
damage.
Disassembly and Modifi cation
Never try to disassemble or modify the Handheld Terminal and its options
x
including battery pack and battery in any way.
Abnormal Conditions
Should the Handheld Terminal and/or its options including battery pack and
x
battery become hot or start to emit smoke or a strange odor, immediately turn
off the power and contact your dealer or distributor whom you purchased the
product from, or an authorized CASIO service provider.
Warning
E-3
Page 6
Warning
Dust and Moisture
Though the Handheld Terminal is dust and water splash resistant, its options
x
including the battery pack are not. Keep loose metal objects and containers
fi lled with liquid away from your Handheld Terminal and the options. Also,
never handle the Handheld Terminal and the options while your hands are
wet.
Laser Light
This product with the integrated laser scanning module scans bar codes
x
using laser light. Never look directly into the laser light or shine the laser
light into the eyes.
Warning
Interference with the Operation of Other Equipment
(Using Wireless Data Communication)
Keep your Handheld Terminal at least 22 centimeters (811/16") away from
x
anyone wearing a pacemaker. Radio waves emitted by the Handheld
Terminal can affect the operation of a pacemaker.
Before the use in aircraft, be sure to consult with cabin crew for interference
x
the Handheld Terminal emits.
Before the use in medical facility, be sure to consult with the facility
x
management or the manufacture of a specifi c medical equipment that the
Handheld Terminal may interfere with.
Do not use the Handheld Terminal nearby gas pump or chemical tank or any
x
other places fl ammable or explosive.
E-4
Foreign Objects
Take care to ensure that metals or combustible objects are not inserted into
x
the openings of the Handheld Terminal or its options, and not to allow
moisture to get inside of them.
Location
Install the cradle properly on a fl at and stable surface so that it cannot fall
x
down onto fl oor.
LCD Screen
Never apply strong pressure to the screen or subject it to strong impact.
x
Doing so can crack the LCD Screen.
Caution
Page 7
Avoiding Traffi c Accidents
Never use your Car Mounted-type Battery Charger while operating a motor
x
vehicle. Park your vehicle in a safe place before performing any operation.
Never locate the Car Mounted-type Battery Charger where it might interfere
x
with proper operation of the vehicle.
Locate connecting cables as instructed by the manual, avoiding locations
x
that can interfere with driving operations.
Car Battery Power
Should the Car Power Cable become damaged, replace it immediately with
x
a new Car Power Cable when using the Car Mounted-type Battery Charger.
Installing in Vehicle
To save your vehicle’s battery from running down, be sure that the Car
x
Power Cable should be unplugged from the cigarette lighter socket when
you do not use the Car Mounted-type Battery Charger and that the use of
the battery charger should be avoid while the vehicle’s engine is turned off.
Do not handle the Car Power Cable with wet hands.
x
Install the Car Mounted-type Battery Charger at location in a vehicle where
x
strong vibration, unstable, excessive of humidity and dust, and under direct
sunlight can be avoid. Also, avoid the area where the air bag infl ates or any
other area where your safe driving is blocked.
Do not leave the Handheld Terminal in vehicle for a long period of time.
x
Warning
Caution
E-5
Page 8
Optional Lithium-ion Battery Pack
Danger
Never use the Handheld Terminal and its option including the battery pack
x
and battery next to open fl ame, near a stove, or any other area exposed to
high heat, or leave them for a long period of time in a vehicle parked in
direct sunlight.
Never use the battery pack with any device other than the Handheld
x
Terminal.
Never dispose of the battery pack by incinerating it or otherwise expose it
x
to heat.
Never transport or store the battery pack together with metal objects that
x
may result in shorting positive (+) and negative (–) terminals of the battery
pack. Be sure to place the battery pack in its case whenever transporting or
storing it.
Never throw the battery pack or otherwise subject it to strong impact.
x
Never pierce the battery pack with nails, hit it with a hammer, or step on it.
x
Use only the specifi ed battery charger to charge the battery pack.
x
Warning
Never place the battery pack in a microwave oven or any other high-voltage
x
device.
If the amount of time period the battery pack can serve becomes
x
considerably short even after it has been fully charged for the specifi ed time
period, stop using it.
Should the battery pack start to leak or emit a strange odor, immediately
x
move it away from any fl ame nearby. Leaking battery fl uid is combustible.
Should fl uid from the battery pack accidentally get into your eyes or on the
x
skin, do not rub it. Immediately rinse it off with clean tap water and then
consult a physician.
E-6
Caution
Replace only with the same type of battery pack recommended by CASIO.
x
Dispose of used battery packs according to the local regulation.
Keep the battery pack out of the reach of small children.
x
Page 9
Power Supply / AC Adaptor
Do not use the Handheld Terminal at a voltage other than the specifi ed
x
voltage. Also, do not connect the Handheld Terminal to a multi-plug power
strip.
Never modify, sharply bend, twist, or pull on the power cord.
x
Never use a detergent to clean AC adaptor and its power cable, especially
x
on the plug and the jack.
When using the battery chargers and the cradles, be sure to use the
x
respective AC adaptors.
Never pull on the power cord when unplugging it. Always hold the plug
x
when unplugging it from the wall outlet.
Never touch the plug while your hands are wet.
x
Be sure to unplug the power cord from the wall outlet before cleaning the
x
battery chargers and the cradles.
Unplug the power cord from the wall outlet whenever leaving the battery
x
chargers and the cradles unattended for a long period.
The housing of the AC adaptor can become warm during normal use.
x
At least once a year, unplug the AC adaptor from the wall outlet and clean
x
any dust that builds up between the prongs of the plug.
Dust built up between the prongs can lead to the danger of fi re.
Warning
Caution
Backup Copies of All Important Data
Caution
Note that CASIO Computer Co., Ltd. shall not be held liable to you or any
x
third party for any damages or loss caused by deletion or corruption of data
due to use of the Handheld Terminal, malfunction or repair of the Handheld
Terminal or its peripherals, or due to the batteries going dead.
The Handheld Terminal employs electronic memory to store data, which
x
means that memory contents can be corrupted or deleted if power is
interrupted due to the batteries going dead or incorrect battery replacement
procedures. Data cannot be recovered once it is lost or corrupted. Be sure to
make backup copies of all important data. One way to do this is to use the
separately sold cradles to transfer data to a computer.
E-7
Page 10

Operating Precautions
Your Handheld Terminal and its options are precision. Improper operation or rough
handling can cause problems with data storage and other problems. Note and observe
the following precautions to ensure proper operation.
Do not leave dead battery pack in the Handheld Terminal for a long period.
x
Dead battery pack can leak, leading to malfunction and damage to the Handheld
Terminal.
Stop or avoid using the Handheld Terminal and its options in areas and
x
conditions subject to the following.
— Large amounts of static electricity
— Extreme heat or cold or humidity
— Sudden temperature change
— Large amount of dust
— After large amount of rain or water falls on the Handheld Terminal
— Pressing the screen or keys with excessive force when using in the rain
Dead Pixels
x
The LCD panel employed in this product uses high precision and substantial number
of components which commonly cause a small number of the pixels not to light or
to remain lit all the time. This is due to the characteristics of LCD panel yield in
accuracy over 99.99% and permissible.
Important
This guide does not include any information about programming and download
x
procedures. See the applicable separate documentation for information about the
procedures.
After Service
Should this product ever malfunction, contact your original retailer providing
x
information about the product name, the date you purchased it, and details about the
problem.
This mark applies to EU countries and Turkey only.
E-8
Page 11

Regulatory Information
DECLARATION OF CONFORMITY
We, the under signed, CASIO Europe GmbH, hereby declare that the following equipment:
Product: Handheld Terminal
Models: DT-X30R
Brand: CASIO
are in conformity with all the provisions of the following EC directive with meeting the
related test standards:
Council Directive: 1999/5/EC (R&TTE Directive):
Standards for all models:
EN 60950-1: 2001
EN 50371: 2002
EN 301 489-17 v1.2.1 (2002-08)
EN 300 328 v1.7.1 (2006-10)
Hereunder, that this declaration is based on the above standards have been complied
fully, constructing into a Technical File and reviewing by the Notifi ed Body, Compliance
Certifi cation Services (NB Number; 0984).
Certifi cate/Expert Opinion issued by Compliance Certifi cate Services is available.
Manufacturer:
CASIO COMPUTER CO., LTD.
6-2, Hon-machi 1-chome, Shibuya-ku, Tokyo 151-8543, Japan
Representative within the European Union:
CASIO Europe GmbH
Casio-Platz 1, 22848 Norderstedt, Germany
E-9
Page 12
Products are for distribution within
0984
all member states of the EU.
0984
France limited to 2446.5-2483.5 MHz Indoor use.
Belgium limited to 2400-2483.5 MHz Indoor, 2460-2483.5 MHz Outdoor use.
The information described above dates from January 2008 and may be subjected to future
changes.
Optional models HA-G60IO, HA-G62IO, HA-G30CHG, HA-G32DCHG and HA-G21BAT are
in conformity with the Council Directive 2004/108/EC.
Manufacturer:
CASIO COMPUTER CO., LTD.
6-2, Hon-machi 1-chome, Shibuya-ku, Tokyo 151-8543, Japan
Representative within the European Union:
CASIO EUROPE GmbH
Casio-Platz 1, 22848 Norderstedt, Germany
Declaration of compliance with other relevant standards can be referred to at
http://world.casio.com/system/pa/UsersGuide/sup85_e.html.
The CASIO DT-X30 models are designed, tested and found to meet the relevant regulatory
standards described below.
DT-X30R
International standards:
IEC 60825-1
IEC 60529, IP64 level
Europe standards:
EN 60950-1
EN 60825-1
EN 300 328
EN 301 489-17
EN 50371
E-10
Page 13

ENGLISH
Disposal of Waste Electrical & Electronic
Equipment of products for Household use
(Applicable in the European Union only)
The symbol (crossed out wheeled-bin) on your
product indicates that the product shall not be
mixed or disposed with your household waste,
at their end of use.
This product shall be handed over to your local
community waste collection point for the
recycling of the product.
For more information, please contact your
Government Waste-Disposal department in your
country.
Inappropriate waste handling could possibly
have a negative effect on the environment and
human health due to potential hazardous
substances. With your cooperation in the co rrect
disposal of this product, you contribute to reuse,
recycle and recover the product and our
environment will be protected.
Disposal of Waste Electrical & Electronic
Equipment of products for business use
(Applicable in the European Union only)
For further information regarding the disposal o f
products for business purposes, please contact
your dealer or distributor in your country. This
product shall not be mixed or disposed with
commercial waste.
Deutsch
Entsorgung von elektrischen &
elektronischen Produkten für den
Haushaltsgebrauch
(anzuwenden nur in den Ländern der
Europäischen Union)
Dieses Symbol (ausgekreuzte Mülltonne) auf
dem Produkt bezeichnet, dass Altgeräte usw.
nicht wie normaler Haushaltsabfall in den Müll
gegeben werden dürfen, sondern zum
Recycling an einer hierfür vorgesehenen
Annahmestelle abzugeben ist.
Für nähere Informationen wenden Sie sich bitte
an die für Müllentsorgung zuständigen örtlichen
Behörden.
Bei unsachgemäßer Entsorgung besteht das
Risiko nachteiliger Auswirkungen auf Umwelt
und Gesundheit durch potentiell gefährliche
Substanzen. Durch Ihre Kooperation zur
ordnungsgemäßen Entsorgung fördern Sie die
Wiederverwendung, das Recycling und die
Rückgewinnung von Stoffen und tragen zum
Umweltschutz bei.
Entsorgung von elektrischen &
elektronischen Produkten durch gewerbliche
Benutzer
(anzuwenden nur in den Ländern der
Europäischen Union)
Für nähere Informationen zur Entsorgung durch
gewerbliche Benutzer wenden Sie sich bitte an
Ihren Händler oder den zuständigen Vertrieb.
Das Produkt darf nicht in den normalen
Gewerbemüll gegeben werden.
Français
Traitement des appareils électriques et
électroniques en fin de vie par les
particuliers
(Applicable dans les pays de l’Union
Européenne seulement)
Ce symbole (poubelle interdite) apposé sur le
produit indique qu’en fin de vie ce p roduit ne doit
pas être traité avec les déchets ménagers.
Il doit être remis à un point de collecte approprié
pour le recyclage des appareils électriques et
électroniques.
Pour de plus amples informations, veuillez
contacter le service de collecte des déchets
ménagers local.
Ce produit contient des substances
potentiellement dangereuses qui peuvent avoir
des effets néfastes sur l’environnement et la
santé humaine. En veillant à la mise au rebut
correcte de ce produit, vous contribuerez à
assurer le traitement, la récupération et le
recyclage de ce produit et à protéger
l’environnement.
Traitement des appareils électriques et
électroniques en fin de vie par les
enterprises
(Applicable dans les pays de l’Union
Européenne seulement)
Pour de plus amples informations sur la collecte
des déchets des professionnels, veuillez
contacter votre revendeur ou distributeur local.
Ce produit ne doit pas être traité avec les
déchets d’entreprises.
Italiano
Smaltimento di rifiuti costituiti da prodotti
elettrici e elettronici per uso domestico
(applicabile soltanto nell’Unione Europea)
Il simbolo (un bidone con ruote sbarrato da una
croce) sul prodotto indica che il prodotto non
deve essere mescolato o smaltito con i rifiut i
domestici, alla fine della sua durata.
Questo prodotto deve essere consegnato al
punto di raccolta rifiuti della propria comunità
locale per il suo riciclaggio.
Per ulteriori informazioni, rivolgersi all’organo
statale preposto allo smaltimento dei rifiuti nel
proprio paese.
Uno smaltimento dei rifiuti inappropriato può
avere effetti negativi sull’ambiente e sulla salu te
umana a causa di sostanze potenzialmente
pericolose. Collaborando allo smaltimento
corretto di questo prodotto, si contribuisce al
riutilizzo, al riciclaggio e al recupero del
prodotto, e alla protezione del nostro ambiente.
Smaltimento di rifiuti costituiti da prodotti
elettrici e elettronici per uso commerciale
(applicabile soltanto nell’Unione Europea)
Per ulteriori informazioni riguardanti lo
smaltimento di prodotti per uso commerciale,
rivolgersi al proprio rivenditore o distributore nel
proprio paese. Questo prodotto non deve essere
mescolato o smaltito con i rifiuti commerciali.
Español
Disposición sobre Residuos de aparatos
eléctricos y electrónicos para los productos
de uso doméstico
(Aplicable sólo a la Unión Europea)
Los productos identificados con este símbolo
(papelera tachada) no deben eliminarse como
residuos domésticos una vez finalizada su vida
útil.
Este producto debe entregarse a un punto de
recogida de la comunidad local para su
recuperación y reciclado.
Para mayor información, sírvase ponerse en
contacto con el Departamento de Disposición de
Desechos de su Ayuntamiento.
El manejo inadecuado de los residuos supone
riesgos para la salud humana o el medio
ambiente. Con la reutilización, el reciclado de
los materiales u otras formas de valorización de
tales productos usted contribuye de manera
importante a la protección de nuestro medio
ambiente.
Disposición de Residuos aparatos eléctricos
y electrónicos para los productos de uso
comercial
(Aplicable sólo a la Unión Europea)
Para mayor información sobre la disposición de
productos para fines comerciales, sírvase
ponerse en contacto con el concesionario o
distribuidor de su país. Este producto no deber
mezclarse ni desecharse junto con los resi duos
comerciales.
Nederlands
Afvalverwijdering van Elektrische &
Elektronische Apparatuur voor
Huishoudelijk Gebruik
(Alleen van toepassing in de Europese Unie)
Het symbool (doorgekruisde afvalbak op wielen)
op het product geeft aan dat het product aan het
einde van haar levensduur niet samen met of in
de vorm van huishoudafval mag worden
weggegooid.
Het product moet naar een verzamelplaats
(milieudepot) worden gebracht waar dergelijke
producten worden gerecycled.
Neem voor meer informatie contact op met de
relevante overheidsafdeling voor afval/vuilnis
die in uw land bestaat.
Het kan nadelige gevolgen hebben op voor
mens en milieu als afval op een verkeerde
manier wordt behandeld waardoor potentieel
schadelijke stoffen vrij komen. Door uw
medewerking te verlenen en dit product op de
juiste wijze wegwerpt, kunt u een bijdrage
leveren aan het herstellen, hergebruiken en
recyclen van dit product om zo ons milieu te
beschermen.
Afvalverwijdering van Elektrische &
Elektronische Apparatuur voor Zakelijk
Gebruik
(Alleen van toepassing in de Europese Unie)
Voor nadere informatie aangaande het
wegwerpen van producten voor zakelij ke
doeleinden, wordt u verzocht contact op te
nemen met uw dealer of de distributeur i n uw
land. Dit product mag niet samen met of in de
vorm van commercieel afval worden weggegooi d.
E-11
Page 14

Svenska
Bortskaffning av förbrukade elektriska &
elektroniska produkter för hushållsbruk
(Gäller enbart i den Europeiska Unionen)
Denna symbol (en överkorsad soptunna) på
produkten innebär att produkten ej ska blandas
eller slängas med ditt hushållsavfall när den är
förbrukad.
Produkten ska lämnas till en lokal
insamlingsplats för denna slags produkter för
återvinning.
Kontakta kommunkontoret för närmare detaljer
om var du finner sådana insamlingsplatser.
Olämplig avfallshantering kan få negativa
effekter på miljön och på mänsklig hälsa då en
produkt kan innehålla farliga ämnen. Vi ber om
ditt samarbeta i bortskaffningen av denna
produkt för att bidra till återvinning,
återanvändning och en hälsosammare miljö.
Bortskaffning av förbrukade elektriska &
elektroniska produkter för affärsbruk
(Gäller enbart i den Europeiska Unionen)
Kontakta din handlare eller distributör för
närmare detaljer om bortskaffning av produkter
som använts i affärssyfte. Denna produkt får inte
blandas eller slängas med annat affärsavfall.
Dansk
Bortskaffelse af udtjent elektrisk og
elektronisk udstyr i produkter til
hjemmebrug
(Gælder kun i EU)
Symbolet (en overstreget affaldsspand med
hjul) på produktet angiver, at produktet ikke må
blandes med eller bortskaffes sammen med
almindeligt husholdningsaffald, når det er
udtjent.
Produktet skal afleveres til det lokale
affaldsindleveringssted til genbrug.
Kontakt venligst afdelingen for bortskaffelse af
affald i din kommune angående yderligere
information.
Uhensigtsmæssig bortskaffelse af affald kan
have en negativ virkning på miljøet og folks
helbred, da det kan indeholde potentielle, farlige
substanser. Med din medvirken i henseende til
forskriftsmæssig bortskaffelse af dette produkt,
kan du bidrage til genbruge, recirkulere og
genindvinde produkterne og samtidigt medvirke
til, at vores miljø vil blive beskyttet.
Bortskaffelse af udtjent elektrisk og
elektronisk udstyr i produkter til
forretningsbrug
(Gælder kun i EU)
Kontakt venligst din forhandler eller distributør
der, hvor du bor, angående yderligere
information om bortskaffelse af produkter til
forretningsbrug. Dette produkt må ikke blandes
med eller bortskaffet sammen med kommercielt
affald.
E-12
Português
Eliminação de Equipamentos Eléctricos e
Electrónicos para Uso Doméstico
(Aplicável somente na União Europeia)
O símbolo (caixote de lixo de rodas com uma
linha cruzada) em seu produto indica que o
produto, no fim da sua vida útil, não deve ser
misturado ou eliminado com o lixo doméstico
comum.
Este produto deverá ser entregue a uma
estação de recolha de lixo da comunidade local
para a reciclagem do produto.
Para mais informações, entre em contacto com
o Departamento de Tratamento de Lixo do
Governo do seu país.
O tratamento de lixo incorrecto poderia provocar
um efeito negativo no meio ambiente e saúde
humana devido a substâncias potencialmente
perigosas. Com a sua cooperação para a
eliminação correcta deste produto, contribuir á
para a reutilização, reciclagem e recuperação
do produto, e nosso meio ambiente será
protegido.
Eliminação de Equipamentos Eléctricos e
Electrónicos para Uso Comercial
(Aplicável somente na União Europeia)
Para mais informações sobre a eliminação de
produtos para propósitos comerciais, entre em
contacto o seu revendedor ou distribuidor em
seu país. Este produto não deverá ser
misturado ou eliminado com lixo comercial.
Page 15
Suomi
j
Sähkö- ja elektroniikkatuotteiden
hävitysohjeet kotitalouksia varten
(Vain Euroopan Unionia varten)
Tuotteeseen merkitty symboli (ylitse ruksattu
ätesäiliö) osoittaa, että tuotetta ei saa sekoittaa
eikä hävittää talousjätteiden kanssa.
Tuote on luovutettava sopivaan tällaisten
laitteiden kierrätyksestä huolehtivaan
keräyspisteeseen.
Pyydä lisätietoja jäteasioista vastaavilta
paikallisilta viranomaisilta.
Tämän tuotteen asianmukaisen hävittämisen
varmistamisella autetaan estämään sen
mahdolliset ympäristöön ja terveyteen
kohdistuvat haittavaikutukset, joita voi aiheutua
muussa tapauksessa tämän tuotteen
epäasianmukaisesta käsittelystä. Hävittämällä
tuotteen asianmukaisesti autat varmistamaan,
että tuote uudelleenkäytetään, kierrätetään ja
kerätään ja ympäristöä suojellaan.
Sähkö- ja elektroniikkatuotteiden
hävitysohjeet yrityskäyttäjille
(Vain Euroopan Unionia varten)
Lisätietoja tuotteiden hävitysohjeista
yrityskäyttäjille antavat jälleenmyyjät tai
edustajat kussakin maassa. Tätä tuotetta ei saa
sekoittaa eikä hävittää kaupallisten jätteiden
kanssa.
E-13
Page 16
E-14
Page 17
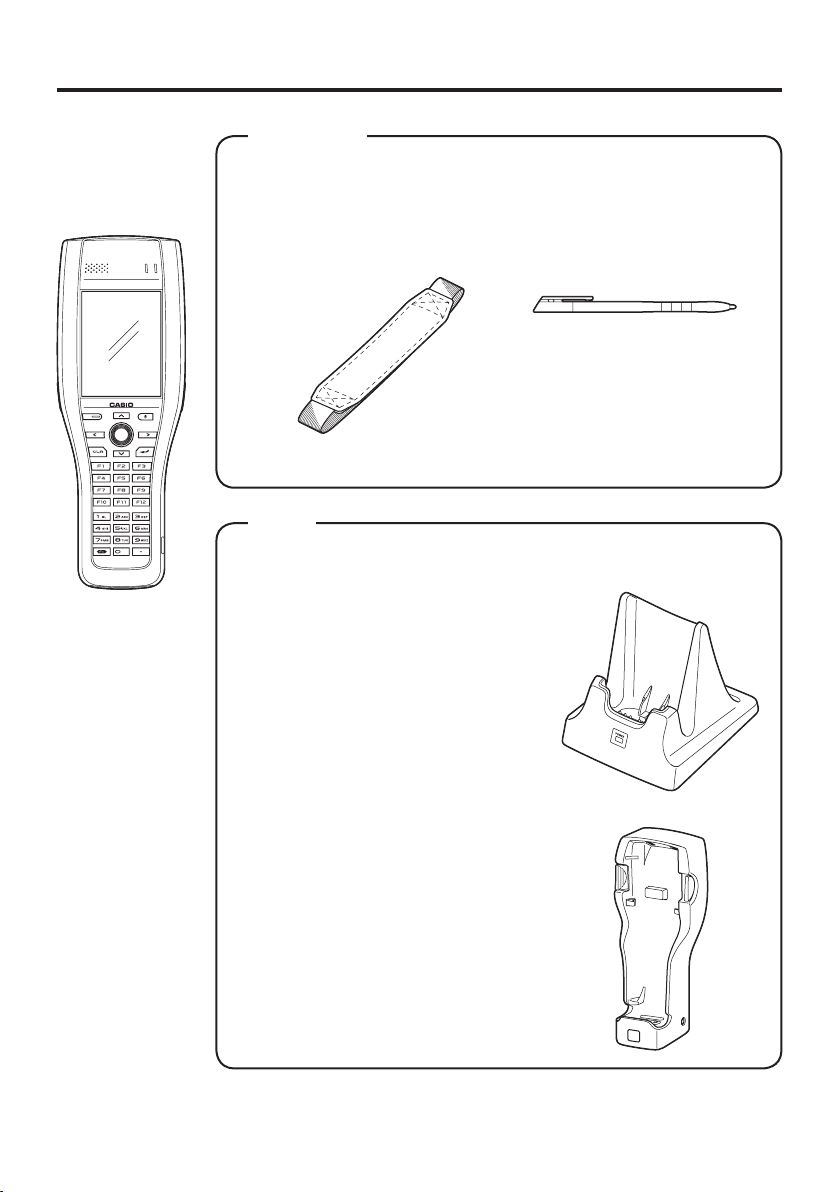
Handheld Terminal System Confi guration
Bundled Items
Please check the contents in the box before using the Handheld
Terminal for the fi rst time.
DT-X30 Series
DT-X30 Series
Handheld Terminal
Hand Belt Stylus
User's Guide
Options
USB Cradle
HA-G60IO
Ethernet Cradle
HA-G62IO
The stylus is attached to
the Handheld Terminal.
The illustration shows the
USB Cradle(HA-G60IO).
Cradle-type Battery Charger
HA-G30CHG
Car Mounted-type
Battery Charger
HA-G35CHG
E-15
Page 18

Options
HA-G20BAT
(Battery Pack)
Battery Pack
Soft Case
Dual Battery Charger
AC Adaptor for USB Cradle/Ethernet Cradle/
Dual Battery Charger
AD-S42120B-N
Power Cord for Europe
Power Cord for North America
Power Cord for Taiwan
Power Cord for Korea
Power Cord for Australia
Screen Protect Sheet
HA-G90PS5
HA-G32DCHG
AC-CORD-EU
AC-CORD-US
AC-CORD-TW
AC-CORD-KR
AC-CORD-AU
E-16
Cable
DT-380USB
Page 19

General Guide
Left Front Right Back
14
15
TOP
18 19
1 23
4
5
8
7
12
6
10
9
13
11
14
16
17
19 18
20
21
22
23
14
2424
25
26
26
Bottom
27
Battery compartment
28
14
1 Speaker Generates audio and buzzer tones.
2 Indicator 1 Orange: Charging
Green: Charging complete
Red: Battery pack error or the surrounding temperature is out of
the charging temperature range.
3 Indicator 2 Flashes blue when operating via Bluetooth or orange when
operating via W-LAN. Lights red when there is a bar code
scanning error and lights green when a bar code scans
successfully.
Lights red when the alarm function is activated.
E-17
Page 20

4 Screen Displays text and operating instructions. In addition, operations
can be performed and data can be input using the stylus
provided.
5 Microphone Used for audio input (including voice).
6 Power Key Turns the power on and off.
7 CLR Key Used to clear one letter to the left of the cursor.
8 Center Trigger Key Used to perform bar code reading. Can be assigned an arbitrary
function.
9 Enter Key Press when fi nishing entering numerical values or when moving
to the next step.
10 Cursor Keys Perform the same functions as the up and down arrow keys on a
PC keyboard.
11 Numeric Keys Used to enter numeric values and decimal points.
12 Fn Key Used to make various settings in combination with the function
keys or numeric keys or when starting a pre-registered
application.
Fn+3: Selects text entry mode by toggling the modes in sequential
order below.
Numeric Uppercase letter Lowercase letter
13 Function Keys Application software can assign a desired function to each one
of the keys, F1 to F12.
14 Hand Belt Holes Used to attach the hand belt.
15 L Trigger Key Used to perform bar code reading.
16 R Trigger Key Used to perform bar code reading.
17 IR Port Used for communication with another Handheld Terminal.
18
Barcode Reader Port
19 Stylus Holder Holds the stylus.
20 Reset Switch Used to reset the Handheld Terminal.
21 Camera Lens
(Camera models)
22 Flash LED
(Camera models)
23 Expansion Port Provided for future expansion.
24 Battery Pack Cover
Lock Switch
Laser light or LED light is emitted from this window that reads
bar codes.
Takes photos.
Used for taking photos.
Used to lock the battery cover and to release.
E-18
Page 21

25 Battery Pack Cover Used to cover the battery compartment that holds the battery
pack inside.
26 Strap Holes Used to attach the hand strap.
27 Power Contacts Used to receive power provided by the USB Cradle or Ethernet
Cradle. Also used for data communication.
28
microSD Card Slot
microSD card slot. (Remove the battery pack to load a card.)
E-19
Page 22

Loading and Removing the Battery Pack
Your Handheld Terminal uses two types of battery: a battery pack and a memory
backup battery.
The battery pack is used to power normal operations and to store data, while the
memory backup battery (built-in) provides the power required to maintain memory
contents when the battery pack power is unable to supply power for some reason.
When the battery pack power goes low, immediately charge it or replace it with a
charged battery pack.
You can use either Dual Battery Charger, Cradle-type Battery Charger, USB Cradle,
or Ethernet Cradle to charge a battery pack. See the respective user’s guides for
information about how to charge.
Important!
Remaining capacity on a battery pack when you purchase it may be depleted
x
due to testing at the factory or natural discharge during shipment and storage.
Be sure to charge the battery pack before you use it.
The life of a battery pack is limited, and charging a battery pack causes it to
x
gradually lose its ability to maintain the charge. If your battery pack seems to
require charging very frequently, it probably means it is time to purchase a new one.
If a battery pack is used past the end of its service life, it may swell up in size. In
x
such a case, replace the battery pack with a new one.
When the battery pack is attached, it takes 30 minutes for the backup battery to
x
obtain enough charge for maintaining memory (RAM) contents for 10 minutes.
It takes four days for the backup battery to achieve a full charge.
Before replacing the battery pack, make sure that the power on the Handheld
x
Terminal is completely shut down.
E-20
Page 23

Loading
1. Turn over the Handheld Terminal.
2. Remove the battery pack cover as follows:
Slide the left and right lock switches for the battery pack cover to the “FREE”
position.
Hook your fi ngertips into the notches in the Handheld Terminal and lift the
battery pack cover up in the direction indicated by the arrow.
Notch
Notch
3. Load a battery pack (HA-G20BAT). Take care that the battery pack is oriented
correctly when you load it. In addition, load the battery pack while making sure that
the end of the battery pack removal tape is protruding above the battery pack.
4. Put back the battery pack cover in the compartment as instructed by the arrows,
and in the illustration and then return the battery pack cover lock switches to the
“LOCK” position.
E-21
Page 24

Removing
1. Make sure that the Handheld Terminal is turned off.
If the power is on, press the power key to turn it off.
2. Turn over the Handheld Terminal.
3. Refer to “Loading” on the previous page and remove the battery pack cover.
4. Remove the battery pack by pulling up the removal tape as shown in the illustration.
Important!
Before starting to use the Handheld Terminal, ensure that the battery pack cover
x
is properly closed. If not, the power is not turned on or is turned off abruptly
while it is in use.
E-22
Page 25

Charging the Battery Pack
To charge the battery pack, use one of the cradles and the battery chargers following
the procedure described below. Be sure to use the separately sold AC adaptor (ADS42120B-N) to power the cradle or charger.
Or, if you use the Car Mounted-type Battery Charger in a vehicle, use the accompanied
Car Power Cable to power the charger.
USB Cradle/Ethernet Cradle/Cradle-type Battery Charger
The power LED on the front of the Cradle will light green if the Handheld Terminal has
been properly mounted.
AD-S42120B-N
Status of Indicator 1 on DT-X30:
Orange: Charging
Red: Standby due to battery pack error or the surrounding temperature is out of the
charging temperature range
(charging begins when the temperature is within the charging temperature range)
Green: Charging complete
Dual Battery Charger
Taking care that the battery pack is oriented correctly, insert it into the Dual Battery
Charger.
This causes the Charge Indicator LED to light in red, indicating that charging has
started.
AD-S42120B-N
Status of Charge Indicator LED
Off: Not charging
Red: Charging
E-23
Page 26

Red Flashing: Battery pack problem
Green: Charging complete
Green Flashing: Standby due to the surrounding temperature being beyond the
specifi ed temperature range (Approximately 0°- 40°C) (charging
resumes when the temperature reaches the range.)
Car Mounted-type Battery Charger
Plug in the Car Power Cable accompanied in the box to the Car Mounted-type Battery
Charger as illustrated below and the other end to the cigarette lighter socket in vehicle.
The power LED on the front of the Car Mounted-type Battery Charger will light green
if the Handheld Terminal has been properly mounted.
Status of Indicator 1 on DT-X30:
Orange: Charging
Red: Standby due to battery pack error or the surrounding temperature is out of the
charging temperature range
(charging begins when the temperature is within the charging temperature range)
Green: Charging complete
E-24
Page 27

Attaching the Hand Belt
The hand belt can be used to prevent the Handheld Terminal from fall when carrying it
around. Attach the hand belt according to the procedure described below.
To attach the hand belt
1. Thread the belt through the hand belt hole as shown in the fi gure. Then fold it back
and secure using the hook-loop fastener.
2. Thread the other end of the belt through the hand belt hole and adjust the length so
that it fi ts comfortably on your hand. Then secure using the hook-loop fastener.
Important!
Stick the hook-loop fastener down straight.
x
Ensure that the folded-back part does not overlap.
x
See "Bad" example at right.
Good Bad Bad
E-25
Page 28

Confi guring Handheld Terminal Settings
Calibrating Touch Screen Alignment
Whenever the response of the touch screen is poor, or the operations being executed do
not match with the location you are tapping on the touch screen, please recalibrate the
alignment of the touch screen using the following method.
Press the “Fn” key and then press the “4” key after confi rming that “F” is displayed
x
in the lower right corner of the screen. The following screen is displayed.
You can also display this screen by navigating as follows:
Start Settings Stylus Calibration
Press the stylus against the center of the target mark (+ mark) as indicated on the
x
screen. The screen shown below appears after you press the stylus against the target
at fi ve different locations.
E-26
Press the Enter key or tap anywhere on the touch screen.
x
Page 29

Using the CMOS Imager
1. Turn on the Handheld Terminal, position its CMOS Imager reader port near the bar
code or 2D code, and then press the Trigger Key.
The aimer in a round
shape is emitted onto
barcode.
2. The Handheld Terminal reads the code by emitting laser and red lights.
Indicator 2 (read operation indicator lamp) lights in green when the reading is
successful.
Bar code and stacked 2D code Reading Guide
When you press the Trigger key, LEDs in the Handheld Terminal emit laser and red
lights. Align the laser pointer with the center of the bar code or 2D code you are
trying to read. Take particular care aligning the light when there are other bar codes
nearby.
When reading a bar code in large size, adjust the position of the Handheld Terminal
so that the entire code is at proper distance. For small size, move the Handheld
Terminal closer to it.
Important!
If you have problem not properly reading a code, change the angle and/or the
x
distance between the code and the Handheld Terminal and try reading it again.
A bar code can be read from a distance of 130mm to 2500mm (5
x
and a stacked 2D code can be read from a distance of 120mm to 650mm (4
9
to 25
/16") and matrix 2D code can be read from a distance of 100mm to 600mm
15
(3
/16" to 235/8"). The actual reading distance depends on the symbology and the
resolution.
Note that a special reader application is required to read bar codes and 2D
x
codes.
Fingerprints, dust, dirt, or stain on the CMOS Imager reader port can cause
x
abnormal reading. Should the reader port become dirty, wipe it clean with a soft
and dry cloth.
1
/8" to 987/16"),
3
/4"
E-27
Page 30

Warning Label
Laser Beam
This label is a warning and caution label for Class 2 laser products that comply
x
with IEC60825-1:2007.
Although Class 2 laser light is only emitted momentarily, never look directly into
x
the beam light.
The laser light emitted by this laser scanner has a maximum output of less than
x
1 mW and a wavelength of 650 nm.
Use of controls or adjustments or performance of procedures other than those
x
specifi ed herein may result in hazardous radiation exposure.
Warning!
Never look directly into the laser light.
This product with the integrated laser scanning module scans bar codes
x
using laser light. Never look directly into the laser light or shine the laser
light into the eyes.
E-28
Page 31

Performing Communications
IR Communication
IR communication can be used to transfer data between two Handheld Terminals.
When performing IR communication, orient the IR ports of both Handheld Terminals
so they are pointing directly at each other.
The ports can be in direct contact with each other, or they can be separated by up to
30cm (
11
"
) (up to 20cm (7
e
Important!
A high-sensitivity communication element is used during IR communication.
x
In order to ensure successful communication, avoid using cellular phones or
x
other devices that emit radio wave in the area where you are performing IR
communication.
If you need to use such a device, move away from the communicating Handheld
x
Terminals. In case of a cellular phone, keep it at least 30cm (
7
8
"
) for communication between units).
e
11
"
e
) away.
E-29
Page 32

Bluetooth® Communication
Bluetooth® interface can also be used to transfer data between two Handheld Terminals.
With Bluetooth
'10
"
(9
e
Important!
Observe the following precautions to help ensure that Bluetooth communication is
successful.
Make sure two Handheld Terminals face each other within three meters (9
x
Surroundings (obstacles) between the Handheld Terminals may cause a shorter
distance.
Make sure there is at least two meters (6'7") between the Handheld Terminal and
x
other equipment (electrical appliances, audio-visual equipment, OA equipment,
and digital cordless telephones, facsimile machines, etc.). (Take special care with
microwave ovens. Allow at least three meters (9'10
Terminals in wireless operation and a microwave oven.) When approaching such a
device when its power is turned on, proper communication may pr ove impossible
while this may also cause interference with TV and radio r eception (images
produced by certain UHF and br oadcast satellite channels may become blurry).
Normal communication may not be possible in an area near a broadcast trans-
x
mitter or wireless transmitter. If this happens, move the Handheld Terminal to a
different location. Normal communication may not be possible in areas exposed
to strong radio waves.
RF Wireless LAN Interference
x
Because Bluetooth
(2.4GHz), radio interference can occur if there is a wireless LAN device nearby.
This can result in lower communication speeds, or even make it impossible to
establish a connection. If this happens, try the following countermeasures.
Move at least 10 meters (32
x
If you cannot keep the distance at least 10 meters (32
x
Handheld Terminal and a wireless LAN device, turn off the power of either the
Handheld Terminal or the wireless LAN device.
Although the Handheld Terminal enables wireless LAN and Bluetooth
x
communication to be used simultaneously as a result of being equipped with
Bluetooth
surrounding radio wave environment.
®
the two Handheld Terminals should be located within about three meters
) from each other, as long as there is nothing blocking the path between them.
) between the Handheld
e
®
and RF wireless LAN use the same frequency band
'10
"
) away from the wireless LAN device.
e
®
Ver.2.0, communication may not be possible depending on the
'10
"
) or more between the
e
'10
"
).
e
®
E-30
Page 33

Handling microSD Cards
The Handheld Terminal supports microSD card.
Since the microSD card slot is located inside the battery pack compartment, fi rst
remove the battery pack when installing or removing a microSD card.
Refer to pages 20 to 22 for information on “Loading and Removing the battery pack”.
Install (or replace) a microSD card according to the procedure described below.
Installing
1. Check that the power is turned off. If the power is on, always make sure to turn it off
by pressing the Power Key.
2. Remove the battery pack.
3. Insert the microSD card with the top of the card (containing lettering) facing up by
properly aligning with the slot.
Although some resistance may be felt when the card is inserted, gently insert the card
x
all the way into the slot until it contacts the back of the slot.
Do not push in the card on the angle.
x
4. Load the battery pack.
E-31
Page 34

Removing
Press
1. Check that the power is turned off.
If the power is on, always make sure to turn it off by pressing the Power Key.
2. Remove the battery pack.
3. Push in the card. Slowly remove the card after it slightly pops out.
Press
Press
4. Load the battery pack.
Important!
A microSD card must be inserted with the top and bottom properly aligned and
x
in the proper direction. Attempting to insert it with an excessive force in the
incorrect orientation can risk damage to the connectors and slot. Be careful
when inserting a microSD card.
The battery pack will not be able to be properly installed if the microSD card is
x
not properly installed. Reinstall the microSD card properly if this happens.
E-32
Page 35

Resetting the Handheld Terminal
Resetting the Handheld Terminal is the same as resetting a PC. Performing a reset
causes all unsaved inputs and edits to be lost, but data that is already stored in the
memory as well as all settings should be unaffected.
Use reset to restore normal operation whenever the Handheld Terminal operates
abnormally due to misoperation or some other reason.
Use a stylus to press the reset switch on the back of the DT-X30.
This starts the reset operation.
Do not use a toothpick or pencil or other sharp
*
object whose tip may break off the reset switch.
If reset does not fi nd a memory problem
The Handheld Terminal restarts, and normal operation is restored.
If reset fi nds a memory problem
A message like the one shown below appears on the display when the reset operation
discovers a memory problem.
R Trigger
Key
When this message appears, press the Trigger key to continue with the reset operation.
E-33
Page 36

DT-X30 Specifi cations
Model: DT-X30R-50C/R-50
CPU: Marvell
Memory: 128MB RAM, 128MB Flash ROM (user defi ned: 80MB)
OS: Microsoft
Display: 3.5-inch, 320
®
PXA320 624MHz
®
Windows® CE6.0R2 operating system, English Version
240-dot 2-Way TFT color LCD
u
CMOS Imager:
Type: Long Range Imager
Readable symbologies: 1D: UPC-A/UPC-E/EAN8 (JAN8)/EAN13 (JAN13)/Codabar
(NW-7)/Code39/Interleaved 2 of 5 (ITF)/MSI/Code93/Code32/ISBT
Code128 (EAN128 (GS1-128))/Code11/IATA/RSS-14 (GS1 DataBar
Omnidirectional)/RSS Limited (GS1 DataBar Limited)/
RSS Expanded (GS1 DataBar Expanded)
Stacked 2D: PDF417/Micro PDF/Composite/Codablock F/
RSS Expanded Stacked (GS1 DataBar Expanded Stacked)/RSS-14
Stacked (GS1 DataBar Stacked)
Matrix 2D: Aztec/DataMatrix/Maxicode/QR Code
Scanning distance: 1D: 130 mm – 2500 mm (5
Stacked 2D: 120 mm – 650 mm (4
Matrix 2D: 100 mm – 600 mm (3
1
/8"-987/16")
3
15
/4"-259/16")
/16"-235/8")
IR Port:
Interface: IrDA Ver. 1.3 LowPower
Synchronization: Asynchronous, frame synchronization
Transmission Rate: Up to 4Mbps (max.)
Bluetooth
Protocol: Bluetooth
Range: Approximately 3 m (9'10
®
:
®
Specifi cation Ver.2.0 + EDR
3
/8") (depends on radio wave conditions
and environment)
Output: 4dBm max. (PowerClass2)
WLAN
:
Standards: IEEE 802.11b/g
Diffusion Modulation: DS: 802.11b
DS/OFDM: 802.11g
Frequency: 802.11b/g: 2.400-2.4835 GHz
Transmission Rate: 802.11b: Max. 11 Mbps
802.11g: Max. 54 Mbps
Communication Range: 50 m indoors, 150 m outdoors (varies according to usage
environment and transmission rate)
Camera (DT-X30R-50C):
Approx. 2,000,000 pixels
Autofocus function
Power Requirements:
Power Source: HA-G20BAT Battery Pack
Memory Backup: Rechargeable Lithium Battery (Built-in)
Consumption Current:
DC 2.4A
E-34
Page 37

Battery Life:
Battery pack:
Approximately 18 hours*
Approximately 10 hours**
*
under the conditions that CPU speed is set to the auto power
save mode, backlight is set to off, and the ratio of cyclic
operation of “Standby, Key input, and Scanning” is set at
20:1:1.
** under the conditions that CPU speed is set to the auto power
save mode, backlight is set to off, and the ratio of cyclic
operation of “Standby, Scanning, and WLAN” is set at
6.5:1.5:2.
3 days for backup of built-in clock
Operating T emperatur e: –20°C to 50°C (–4°F to 122°F)
Operating Humidity: 10% to 80% RH (non-condensation)
Dust and Water Splash Proof:
IEC60529 standard, IP67 level
Dimensions:
Weight: Approximately 560g (19.8oz) (when battery pack is installed)
Memory backup: 10 minutes for protection of data in memory
Refer to “Dimensional Drawing” on the next page.
E-35
Page 38

Dimensional Drawing
Approx.
87 mm (3
Approx.
15
/
7
/
")
16
")
2
/
1
49 mm (1
16
")
Approx. 242 mm (9
E-36
Approx.
59 mm (2
5
/
")
16
Approx.
46 mm (1
13
/
")
16
Page 39

Using the USB Cradle (HA-G60IO)
The optionally available USB Cradle (HA-G60IO) makes it possible to transmit
system data and fi le data between the Handheld Terminal and a PC via a USB
connection (download or upload). You can also use the USB Cradle to charge the
battery pack installed in the Handheld Terminal.
General Guide
To p
5
6
Front
Back
7
4 3 2 1
E-37
Page 40

1 USB Client Port This port is used to transmit system data and fi le data (download,
upload) by connecting the Cradle to a PC using a USB cable
(DT-380USB). A dedicated driver must be installed in the PC
before connecting the Cradle to the PC.
2 USB Host Port This port is used to connect a corresponding USB peripheral
device.
3 Selector Switch This switch is used to switch between the USB host port and
USB client port. Set the switch to the “A” position when using
the unit as a USB host, or set it to the “B” position when using
the unit as a USB client.
4 AC Adaptor Jack Connect the AC adaptor (sold separately) here.
5 Terminal Detect
Switch
6 Power Contacts Power is supplied to the DT-X30 via these contacts. Also used for
7 Power LED This LED indicates the power status and the mounting status of
This switch detects when the DT-X30 is seated correctly on the
Cradle.
data communication.
the DT-X30.
Off: DT-X30 is not installed.
Green: Power on, DT-X30 mounted correctly.
Important!
Always make sure to fi rst remove the Handheld Terminal from the USB Cradle
x
when switching the selector switch.
Allowing the power contacts become wet can cause an electric shock or fi re. In
x
addition, if the contacts become soiled, contact may be impaired resulting in
poor charging. For reasons of safety and maintaining charging battery pack(s)
in optimum condition, clean the power contacts by wiping with a dry cloth or
cotton swab after disconnecting the AC adaptor.
Never short out the power contacts of the USB Cradle. This can damage the
x
USB Cradle.
Do not subject the Handheld Terminal and USB Cradle to vibration or impact
x
during communication. This can cause communication to be interrupted.
When placing the DT-X30 into the cradle, make sure that it is seated properly and
x
that the power LED at the front of the USB Cradle is lit in green. Charging and
communication will not proceed properly if the Handheld Terminal is not seated
properly.
Always cap ports that are not being used. Using the USB Cradle while the ports
x
are uncapped can cause damage.
E-38
Page 41

Specifi cations
1. USB
Protocol: USB Ver1.1 Standard
Transfer Rate: 12Mbps (max.)
2. Charging
Charging Method: Constant current/voltage
Charge Period: Approximately 5 hours
3. Power Supply
Power Source: AC adaptor (AD-S42120B)
Consumption Current: 12V DC approximately 3.0A
Output to Handheld Terminal
USB Host Output: 5V DC 0.5A (max.)
4. AC Adaptor
Model: AD-S42120B
Input: 100V to 240V AC 50/60Hz 1.2A
Output: 12V DC 3.5A
5. Dimensions and Weight
Dimensions: Approximately 120(W) u 144(D) u 129(H) mm
Weight: Approximately 300g (10.6oz)
6. Operating Environment
Temperature: 0°C to 40°C (32°F to 104°F)
Humidity: 30% to 80% RH (non-condensation)
The AD-S42120 series comes available in the following models depending on area or region
where you are in.
Model no. of AC Adaptor Area/Region Compliance
AD-S42120BE
AD-S42120B-N
AD-S42120BE-CN China only Compliant with Energy
: 9.5V DC 2.7A (max.)
(4
e
"W u 5
e
"Du 5
"H)
e
All except China Compliant with CE,
UL, FCC, and Energy
Effi ciency Standards.
Effi ciency Standards and
CCC.
E-39
Page 42

Using the Ethernet Cradle (HA-G62IO)
The optionally available Enthernet Cradle (HA-G62IO) makes it possible to
transmit system data and fi le data between the Handheld Terminal and a PC via
a USB or LAN connection (download or upload). You can also use the Ethernet
Cradle to charge the battery pack installed in the Handheld Terminal.
General Guide
To p
8
9
Front
E-40
10
Back
7 6 54 3 2 1
Page 43

1 USB Client Port This port is used to transmit system data and fi le data (download,
upload) by connecting the Ethernet Cradle to a PC using a USB
cable (DT-380USB). The dedicated driver must be installed in
the PC before connecting the Ethernet Cradle to the PC.
2 USB Host Port This port is used to connect a corresponding USB peripheral
device.
3 LAN Connection
Status LED
4 LAN
Communication
Status LED
5 LAN Port This port is used for connecting the cradle to a PC or hub via a
6 Selector Switch This switch is used to switch between a USB connection and a
7 AC Adaptor Jack Connect the AC adaptor (sold separately) here.
8 Terminal Detect
Switch
9 Power Contacts Power is supplied to the DT-X30 via these contacts.
10 Power LED This LED indicates the power status and the mounting status of
This LED shows the status of the LAN connection.
Off: LAN cable not connected correctly.
Lit orange: LAN cable connected correctly.
This LED shows the LAN operation status.
Off: No communication.
Blinking: Communication in progress.
LAN cable so that system data and fi le data can be transmitted
(uploaded or downloaded).
The special driver software must be installed in the DT-X30.
LAN connection.
LAN: LAN
A: USB host
B: USB client
This switch detects when the DT-X30 is seated correctly on the
Ethernet Cradle.
the DT-X30.
Off: DT-X30 is not installed.
Green: Power on, DT-X30 mounted correctly.
Important !
Never short out the contacts of the Ethernet Cradle. This can damage the
x
Ethernet Cradle.
Allowing the power contacts become wet can cause an electric shock or fi re. In
x
addition, if the contacts become soiled, contact may be impaired resulting in
poor charging. For reasons of safety and maintaining charging battery pack(s)
in optimum condition, clean the power contacts by wiping with a dry cloth or
cotton swab after disconnecting the AC adaptor.
E-41
Page 44

Do not subject the Handheld Terminal and Ethernet Cradle to vibration or
x
impact during communication. This can cause communication to be interrupted.
When placing the DT-X30 into the cradle, make sure that it is seated properly
x
and that the power LED at the front of the Ethernet Cradle is lit in green.
Charging and communication will not proceed properly if the Handheld
Terminal is not seated properly.
Always cap ports that are not being used. Using the Ethernet Cradle while the
x
ports are uncapped can cause damage.
Specifi cations
1. LAN Specifi cations
Communications protocol: IEEE 802.3
Media type: 10base-T/100base-TX auto-switched
2. USB
Protocol: USB Ver1.1 Standard
Transmission Rate: 12Mbps (max.)
3. Charging
Charging Method: Constant current/voltage (the charging circuit is built in
Charge Period: Approximately 5 hours
4. Power Supply
Power Source: AC adaptor (AD-S42120B*)
Consumption Current: 12V DC approximately 3.0A
Output to Handheld Terminal
USB Host Output: 5V DC 0.5A (max.)
5. AC Adaptor
Model: AD-S42120B
Input: 100V to 240V AC 50/60Hz 1.2A
Output: 12V DC 3.5A
6. Dimensions and Weight
Dimensions: Approximately 120(W) u 144(D) u 129(H) mm
Weight: Approximately 300g (10.6oz)
7. Operating Environment
Temperature: 0°C to 40°C (32°F to 104°F)
Humidity: 30% to 80% RH (non-condensation)
DT-X30)
: 9.5V DC 2.7A (max.)
(4
"W u 5
e
e
"Du 5
"H)
e
E-42
*See page 39.
Page 45

Using the Cradle-type Battery Charger (HA-G30CHG)
The optionally available Cradle-type Battery Charger (HA-G30CHG) lets you charge
the Handheld Terminal’s battery simply by placing the Handheld Terminal onto the
charger.
General Guide
To p
2
Front
3
4
Back
1
1 AC Adaptor Jack Connect the AC adaptor (sold separately) here.
2 Terminal Detect
Switch
This switch detects when the DT-X30 is mounted correctly on the
charger.
3 Power Contacts Power is supplied to the DT-X30 via these contacts.
4 Power LED This LED indicates the power status and the mountting status of
the DT-X30.
Off: DT-X30 is not installed
Green: Power on, DT-X30 mounted correctly
E-43
Page 46

Important !
Never short out the power contacts of the Cradle-type Battery Charger. This
x
can damage the Cradle-type Battery Charger.
Allowing the power contacts become wet can cause an electric shock or fi re. In
x
addition, if the contacts become soiled, contact may be impaired resulting in
poor charging. For reasons of safety and maintaining charging battery pack(s)
in optimum condition, clean the power contacts by wiping with a dry cloth or
cotton swab after disconnecting the AC adaptor.
When placing the DT-X30 into the cradle, make sure that it is seated properly
x
and that the power LED at the front of the Cradle-type Battery Charger is lit in
green. Charging and communication will not proceed properly if the Handheld
Terminal is not seated properly.
Specifi cations
1. Charging Specifi cations
Charging Method: Constant current/voltage (the charging circuit is built in
Charge Period: Approximately 5 hours
2. Power Supply
Power Source: AC adaptor (AD-S42120B*)
Consumption Current: 12V DC 2.6A
Output to Handheld Terminal:
3. AC Adaptor
Model: AD-S42120B
Input: 100V to 240V AC 50/60Hz 1.2A
Output: 12V DC 3.5A
4. Dimensions and Weight
Dimensions: Approximately
Weight: Approximately 300g (10.6oz)
5. Operating Environment
Temperature: 0°C to 40°C (32°F to 104°F)
Humidity: 30% to 80% RH (non-condensation)
DT-X30)
9.5V DC 2.7A (max.)
120(W)u 144(D) u 129(H) mm
(4
"W u 5
e
"Du5
e
"H)
e
E-44
* See page 39.
Page 47

Using the Car Mounted-type Battery Charger (HA-G35CHG)
The optionally available Car Mounted-type Battery Charger (HA-G35CHG) can be
used to charge the battery installed in the Handheld Terminal using power from the
cigarette lighter in your car.
General Guide
Left
2
To p
4
Front
2 2
Back
2
3
5
1
1 AC Adaptor Jack Connect the Car Power Cable (bundled) here.
2 Removal Buttons Press when removing the DT-X30.
3 Terminal Detect
Switch
This switch detects when the DT-X30 is mounted correctly on the
charger.
4 Power Contacts Power is supplied to the DT-X30 via these contacts.
5 Power LED This LED indicates the power status and the mountting status of
the DT-X30.
Off: DT-X30 is not installed
Green: Power on, DT-X30 mounted correctly
E-45
Page 48

Important!
Take care to avoid allowing the power contacts to become connected to each
x
other, which creates a short.
Regarding the installation of HA-G35CHG in your car, no technical advice
x
is available from CASIO. Consult with automotive parts store or specialized
store regarding the installation method and mounting strength of the products
installed in your car.
Precaution
The Car Power Cable cigarette lighter plug may not fi t the cigarette lighter sockets of
x
certain 12/24V DC vehicles.
Specifi cations
1. Charging
Charging System : Constant current/voltage (the charging circuit is built in DT-X30)
Charge time : Approximately 5 hours
2. Dimensions and Weight
Dimensions : Approximately 121(W) × 287(D) × 75(H) mm (
Weight : Approximately 620g (21.9oz) (not including brackets)
3. Operating Environment
Temperature : -20°C to 50°C (-4°F to 122°F)
Humidity :30% to 80% RH (non-condensation)
4
"W ×
e
11
e
"D ×
2
"H)
e
E-46
Page 49

Using the Dual Battery Charger (HA-G32DCHG)
The optionally available Dual Battery Charger (HA-G32DCHG) can be used to
simultaneously charge two battery packs.
General Guide
Left
4
To p
1
2
Right
Bottom
3
4
5
Bundled Items
Connection Bracket
2 screws
E-47
Page 50

1 Charge Indicator
LED
2 Power Contacts Power is supplied to the Handheld Terminal via these contacts.
3 AC Adaptor Jack This is used to supply power by connecting the AC adaptor (sold
4 Dual Battery
Charger
Connection Port
5 Connection
Bracket
Attachment Holes
This LED indicates the charge status of the battery pack(s).
Off: Not charging
Red: Charging
Red Flashing: Battery pack problem
Green Flashing: Standby
Green: Charging complete
separately).
Use this port to connect multiple Dual Battery Chargers to each
other.
The connection bracket attaches here when you connect multiple
Dual Battery Chargers to each other.
Important!
Allowing the power contacts become wet can cause an electric shock or fi re. In
x
addition, if the contacts become soiled, contact may be impaired resulting in
poor charging. For reasons of safety and maintaining charging battery pack(s)
in optimum condition, clean the power contacts by wiping with a dry cloth or
cotton swab after disconnecting the AC adaptor.
Although the battery may become warm during charging, this is normal and
x
does not indicate a malfunction.
Repeated “Mounting and Removing” of battery pack in excess of times may
x
cause the quality deterioration of the battery pack.
Each Dual Battery Charger comes with one connection bracket.
x
Since only one connection bracket is required when you connect two Dual
Battery Chargers, you will always have one left over.
Simply keep the other connection bracket on hand as an extra, in case you ever
need it.
E-48
Page 51

Connecting Multiple Dual Battery Chargers
You can connect up to three Dual Battery Chargers. Doing so makes it possible to
supply power to all the Dual Battery Chargers using one dedicated AC adaptor.
1. As shown in the illustrations below, remove the connector covers of the Dual Battery
Chargers you want to connect to each other.
Connectorcover
2. Connect the two Dual Battery Chargers as shown below.
3. Turn over the connected Dual Battery Chargers and attach a connection bracket,
securing it in place with screws.
You can repeat the above steps to connect up to 3 Dual Battery Chargers.
E-49
Page 52

Specifi cations
1. Charging Specifi cation
Charging Method: Constant current/voltage
Charge Period: Approx. 4 hours (1 standard battery pack, normal temperature)
When charging two battery packs:
Approx. 5.5 hours (2 standard battery packs, normal
2. Power Supply
Power Source: AC adaptor (AD-S42120B*)
Consumption Current: 12V DC 3.5A
Output: 8.2V DC 1.0A (max.)
3. AC Adaptor
Model: AD-S42120B
Input: 100V to 240V AC 50/60Hz 1.2A
Output: 12V DC 3.5A
4. Dimensions and Weight
Dimensions: Approximately 104(W) u 100(D) u 50(H) mm
Weight: Approximately 168g (5.9oz)
5. Operating Environment
Temperature: Approximately 0°C to 40°C (32°F to 104°F) (stand-alone)
Approximately 0°C to 35°C (32°F to 95°F) (with 3 connected)
Humidity: 30% to 80% RH (non-condensation)
temperature)
(4
"W u 3
e
"Du 1
e
"H)
e
E-50
*See page 39.
Page 53

Using Rechargeable Battery Pack
HA-G20BAT
Important!
Store a battery pack in its special soft case whenever you are not using it.
x
If the battery pack has been left over unused for a long period of time, the
x
capacity remained decreases due to spontaneous discharge or chemical
decomposition by the battery pack itself. If the battery pack fails to hold its
operating duration after it has been fully charged, replace it with a new one. The
battery pack may reach the end of its service life.
Specifi cations
Model: HA-G20BAT
Rated Capacity: 14.8WH (or 2000mAh)
Rated V oltage: 7.4V
Dimensions:
Approximately 39(W) u 72(D)
21(H) mm (1
u
e
"W u 2
e
"D
Warning LabelWarning Label
"H)
e
u
Weight: Approximately 110g (3.9oz)
Bundled Item: Soft case
E-51
Page 54

CASIO COMPUTER CO., LTD.
6-2, Hon-machi 1-chome
Shibuya-ku, Tokyo 151-8543, Japan
 Loading...