

Page 1
OTHER RECORDING FUNCTIONS
1200
1600
NORMAL
99
24
12
58
1 / 1000
F2.6
OTHER RECORDING FUNCTIONS
This section describes other powerful features and
functions that are available for recording.
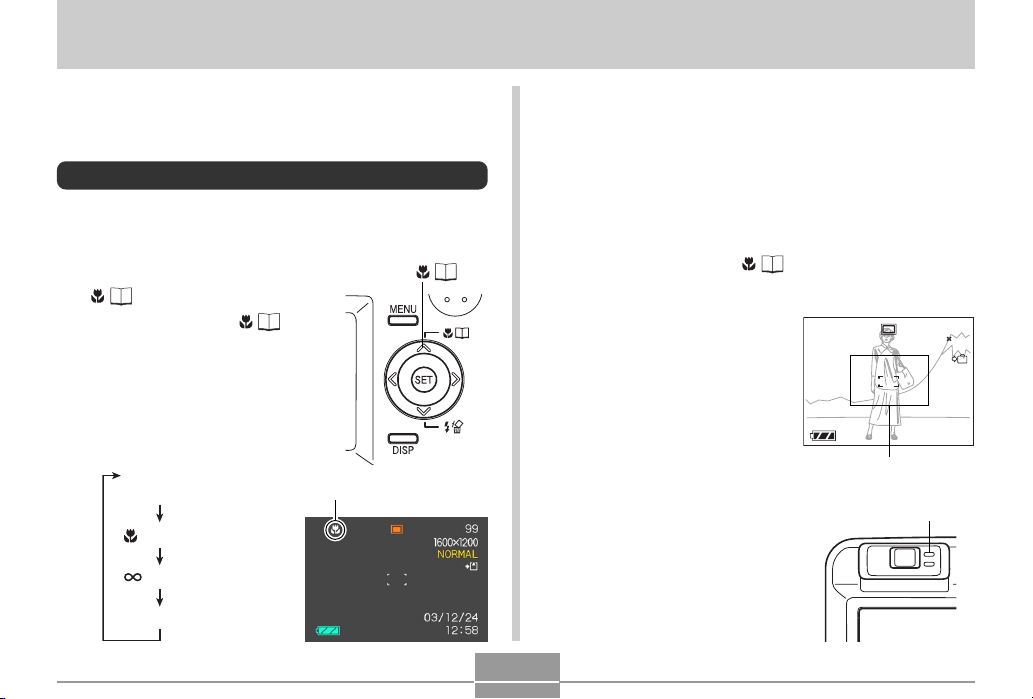
Selecting the Focus Mode
You can select one of four different focus modes: Auto
Focus, Macro, Infinity, and Manual.
1.
In the REC mode, press []
( ).
• Each press of [] ( )
cycles thorough the focus
mode settings in the
sequence shown below.
No indicator
(Auto Focus)
(Macro)
(Infinity)
MF (Manual Focus)
Focus mode indicator
[] ( )
Using Auto Focus
As its name suggests, Auto Focus focuses the image
automatically. The automatic focus operation starts when
you press the shutter release button down half way. The
following is the Auto Focus range.
Range: Approximately 60cm to ∞ (2´ to ∞)
1.
Keep pressing [] ( ) until there is no
focus mode indicator on the display.
2.
Compose the image
so the main subject is
within the focus
frame, and then press
the shutter release
button half way.
• You can tell whether the
image is focused by
observing the focus
frame and the green
operation lamp.
Focus frame
Green operation lamp
65
1200
1600
NORMAL
1 / 1000
F2.6
0303/1212/24
:
12
99
IN
58
Page 2
OTHER RECORDING FUNCTIONS
When you see this:
Green focus frame
Green operation lamp
Red focus frame
Flashing green operation lamp
3.
Press the shutter release button the rest of
It means this:
The image is focused.
The image is not in
focus.
the way to record the image.
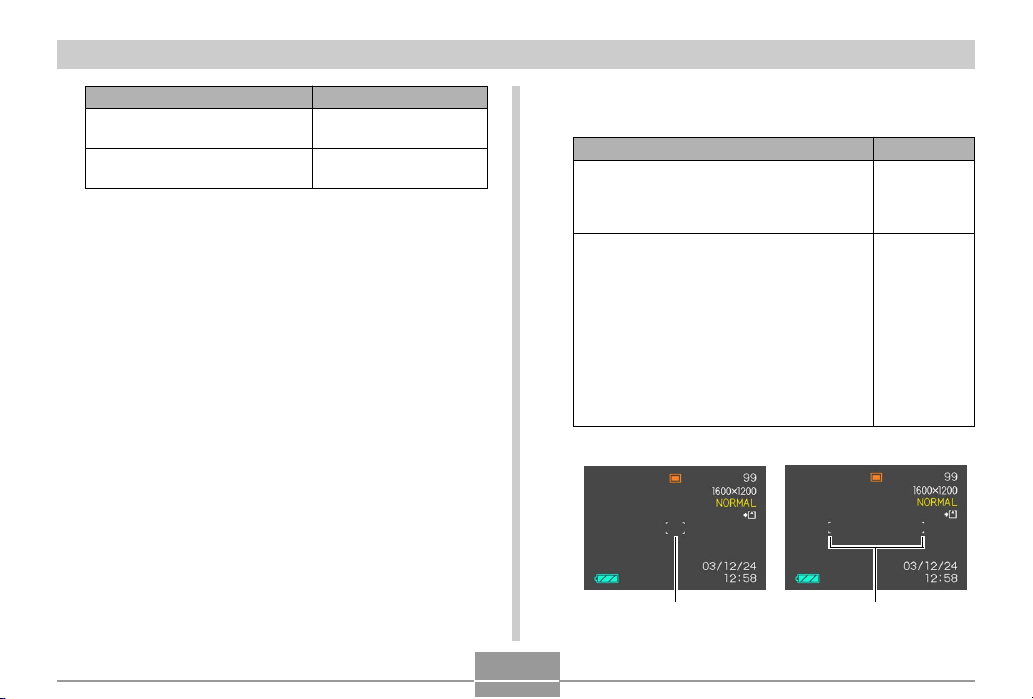
■ Specifying the Auto Focus Area
You can use the following procedure to change the Auto
Focus area used in the Auto Focus Mode and the Macro
Mode. Note that the configuration of the focus frame
changes in accordance with the Auto Focus area you
select.
1.
In the REC mode, press [MENU].
2.
On the “REC” tab, select “AF Area”, and then
press [].
3.
Select the Auto Focus area you want, and
then press [SET].
For this type of Auto Focus area:
Very limited range in the center of the
screen
• This setting works well with focus lock
(page 69).
Automatic selection of the focus area where
the subject closest to the camera is located
• With this setting, a wide focus frame,
which contains five focus points, appears
on the monitor screen first. When you
press the shutter release button half way,
the camera automatically selects the focus
point where the subject closest to the
camera is located, and a focus frame
appears at that point.
• This setting works well for group photos.
• Spot • Multi
Focus frameFocus frame
Select this:
Spot
Multi
66
Page 3
OTHER RECORDING FUNCTIONS
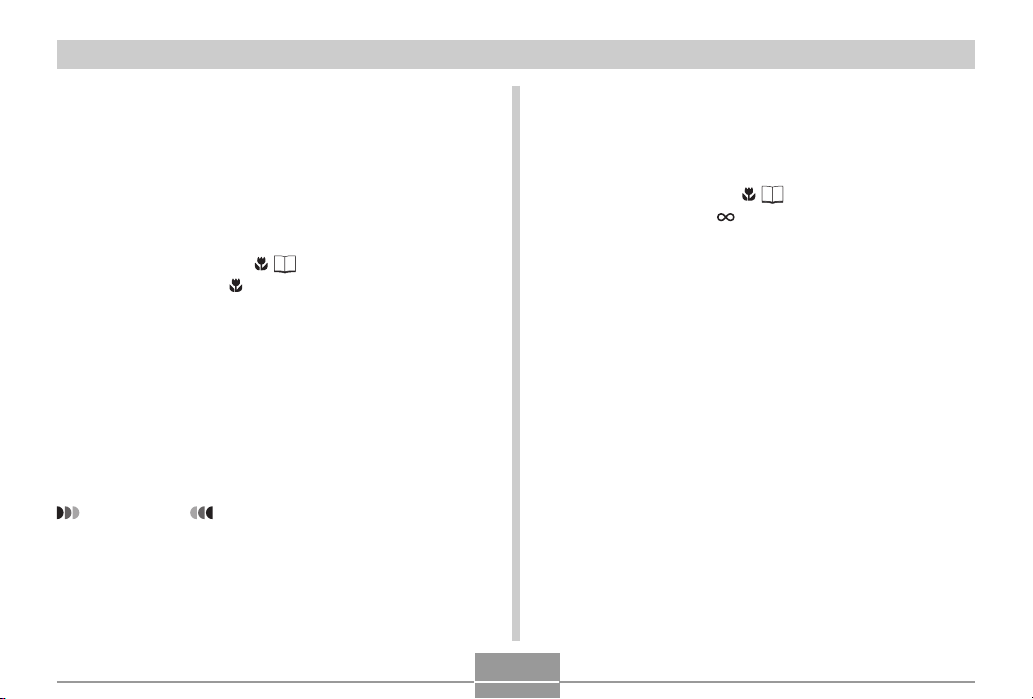
Using the Macro Mode
The Macro mode lets you focus automatically on close up
subjects. The automatic focus operation starts when you
press the shutter release button down half way. The
following is the focus range in the Macro mode.
Approximately 10cm to 70cm (3.9˝ to 27.6˝)
1.
Keep pressing [] ( ) until the focus mode
indicator shows .
2.
Record the image.
• The focus and image recording operations are
identical to those in the Auto Focus mode.
• You can tell whether the image is focused by
observing the focus frame and the green operation
lamp. The indications of the focus frame and green
operation lamp are the same as those in the Auto
Focus mode.
IMPORTANT!
• In the Macro mode, the optical zoom range is 1x to
1.2x.
Using the Infinity Mode
Use this mode when recording scenery and other faraway
images.
1.
Keep pressing [] ( ) until the focus mode
indicator shows .
2.
Record the image.
67
Page 4
OTHER RECORDING FUNCTIONS
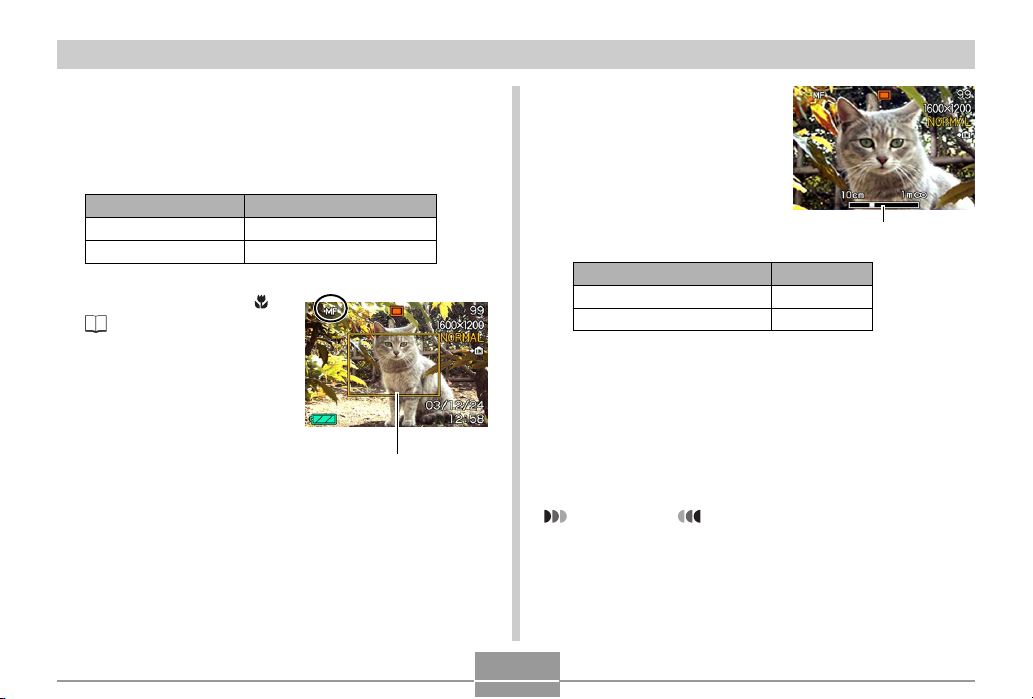
Using Manual Focus
With the Manual Focus mode, you can adjust the focus of
an image manually. The following shows focus ranges in
the Macro mode for two optical zoom factors.
2.
While watching the
image on the monitor
screen, use [] and
[] to focus.
Optical Zoom Factor
1X
3X
1.
Keep pressing [] (
) until the focus
mode indicator shows
MF.
• At this point, a
boundary also appears
on the display,
indicating the part of the
image that will be used
for manual focus.
Approximate Focus Range
10cm (3.9˝) to infinity (∞)
60cm (23.6˝) to infinity (∞)
Boundary
68
Manual focus position
To do this:
Focus out on the subject
Focus in on the subject
• Pressing [] or [] causes the area inside of the
boundary displayed in step 1 to fill the monitor
screen momentarily to aid in focus. The normal
image reappears a short while later.
3.
Press the shutter release button to record the
Do this:
Press [].
Press [].
image.
IMPORTANT!
• In the Manual Focus mode, the [] and [] keys
adjust focus, even if you used key customization to
assign other functions to them (page 89).
Page 5

OTHER RECORDING FUNCTIONS
1200
1600
NORMAL
99
24
12
58
1 / 1000
F2.6
1200
1600
NORMAL
99
24
12
58
1 / 1000
F2.6
Using Focus Lock
Focus lock is a technique you can use to focus on a subject
that is not located within the focus frame when you record
an image. You can use focus lock in the Auto Focus mode
and the Macro mode ( ).
1.
Using the monitor
screen, compose the
image so the main
subject is within the
focus frame, and then
press the shutter
release button half
way.
• You can tell whether the image is focused by
observing the focus frame and the green operation
lamp. The indications of the focus frame and green
operation lamp are the same as those in the Auto
Focus mode.
Focus frame
1200
1600
NORMAL
1 / 1000
F2.6
0303/1212/24
:
12
99
58
2.
Keeping the shutter
release button half
way down, recompose the image
as you like.
• This locks the focus on
1200
1600
NORMAL
1 / 1000
F2.6
0303/1212/24
:
12
99
IN
58
the subject that is
currently within the
IN
focus frame.
3.
When the image is composed the way you
want, press the shutter release button the rest
of the way to record it.
• The focus and image recording operations are
identical to those in the Auto Focus mode.
NOTE
• Locking the focus also locks the exposure.
69
Page 6
OTHER RECORDING FUNCTIONS
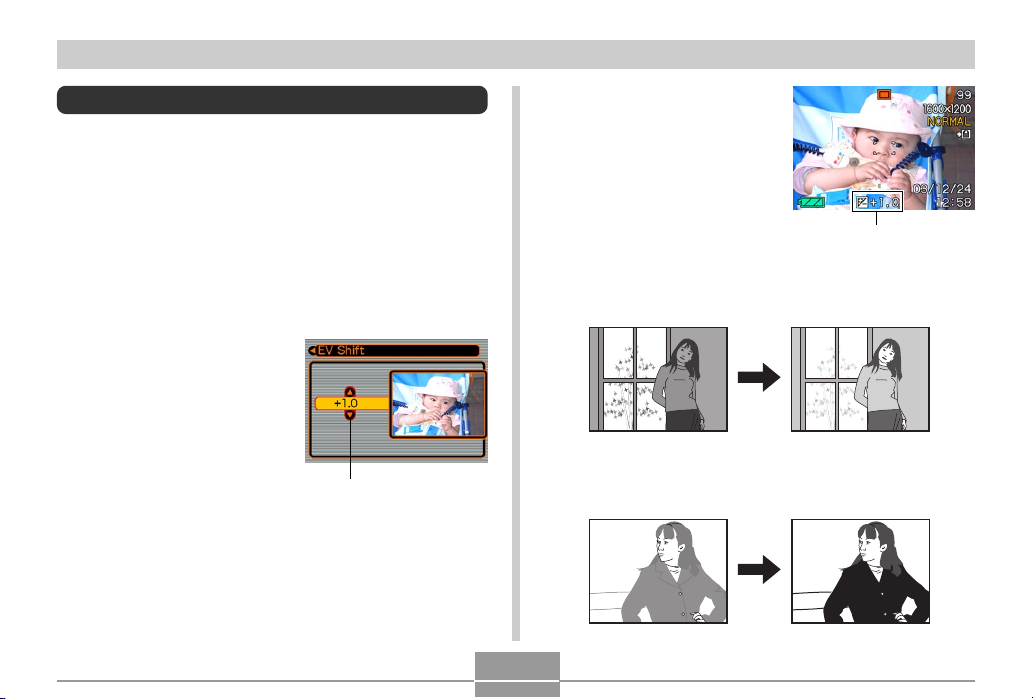
Exposure Compensation (EV Shift)
Exposure compensation lets you change the exposure
setting (EV value) manually to adjust for the lighting of your
subject. This feature helps to achieve better results when
recording a backlit subject, a strongly lit subject indoors, or
a subject that is against a dark background.
EV Shift Range: –2.0EV to +2.0EV
Steps: 1/3EV
1.
In the REC mode, press [MENU].
2.
Select the “REC” tab,
select “EV Shift”, and
then press [].
Exposure compensation
value
3.
Use [] and [] to
change the exposure
compensation value,
and then press [SET].
• Pressing [SET] registers
the displayed value.
EV value
Up : Increases the EV value. A higher EV value is best
used for light-colored subjects and backlight
subjects.
Down : Decreases the EV value. A lower EV value is best
for dark-color subjects and for shooting outdoors
on a clear day.
70
Page 7
OTHER RECORDING FUNCTIONS
• To cancel EV Shift, adjust the value until it becomes
0.0.
4.
Record the image.
IMPORTANT!
• When shooting under very dark or very bright
conditions, you may not be able to obtain satisfactory
results even after performing exposure
compensation.
NOTES
• Performing an EV shift operation causes the
metering mode to switch automatically to center
weighted metering. Returning the EV shift value to
0.0 causes the metering mode to change back to
multi-pattern metering.
• You can use key customization (page 89) to
configure the camera to perform exposure
compensation whenever you press [] or [] while in
the REC mode.
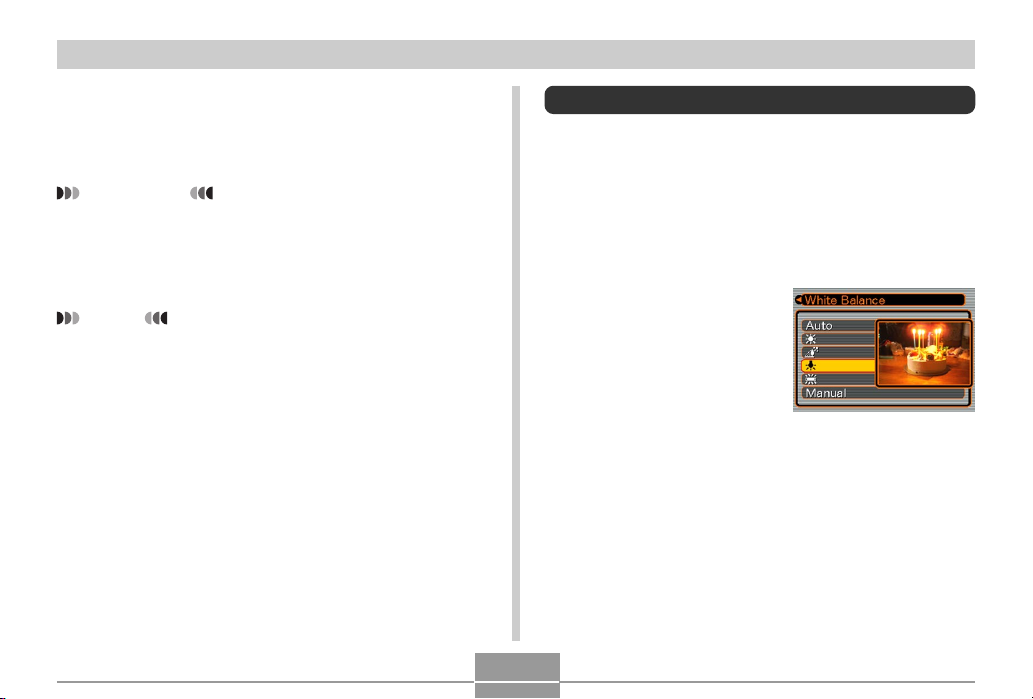
Adjusting White Balance
The wavelengths of the light produced by various light
sources (sunlight, light bulb, etc.) can affect the color of a
subject when it is recorded. White balance lets you make
adjustments to compensate for different lighting types, so
the colors of an image appear more natural.
1.
In the REC mode, press [MENU].
2.
Select the “REC” tab,
select “White
Balance”, and then
press [].
71
Page 8
OTHER RECORDING FUNCTIONS
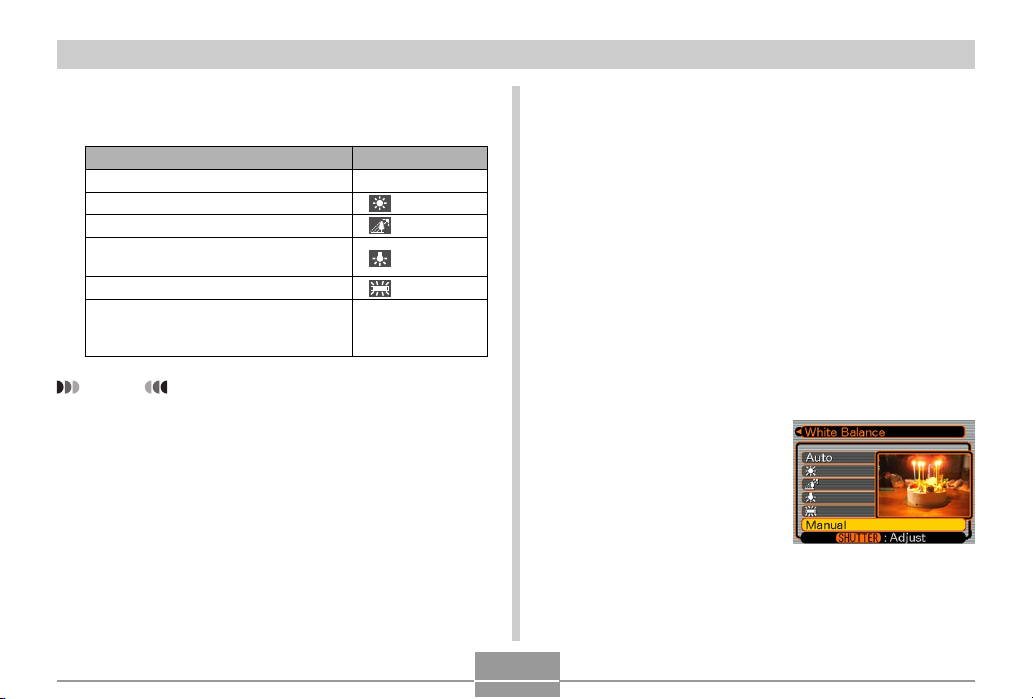
3.
Use [] and [] to select the setting you
want, and then press [SET].
When shooting under these conditions:
Normal conditions
Outdoor daylight
Shade
Incandescent light bulb
(reddish tinge)
Fluorescent light (greenish tinge)
Difficult lighting that requires manual
control (See “Adjusting White Balance
Manually”.)
NOTES
• Selecting “Manual” changes white balance to the
settings achieved the last time a manual white
balance operation was performed.
• You can use the key customization feature (page 89)
to configure the camera so the white balance setting
changes whenever you press [] or [] while in the
REC mode.
Select this setting:
Auto
Manual
Adjusting White Balance Manually
Under some light sources, automatic white balance under
the “Auto” setting can take a long time to complete. Also,
the auto white balance range (color temperature range) is
limited. Manual white balance helps to ensure that colors
are recorded correctly for a particular light source.
Note that you must perform manual white balance under
the same conditions you will be shooting under. You must
also have a white piece of paper or other similar object on
hand in order to perform manual white balance.
1.
In the REC mode, press [MENU].
2.
Select the “REC” tab, select “White Balance”,
and then press [].
3.
Use [] and [] to
select “Manual”.
• This causes the object
you last used to adjust
manual white balance to
appear on the monitor
screen.
72
Page 9
OTHER RECORDING FUNCTIONS
4.
Point the camera at a white piece of paper or
similar object under the lighting conditions
for which you want to set the white balance,
and then press the shutter release button.
• This starts the white balance adjustment procedure.
The message “Complete” appears on the monitor
screen after white balance adjustment is complete.
• Dim lighting or pointing the camera at a dark colored
object while performing manual white balance
adjustment can cause the procedure to take a long
time to complete.
5.
Press [SET].
• This registers the white balance settings and returns
to the REC mode.
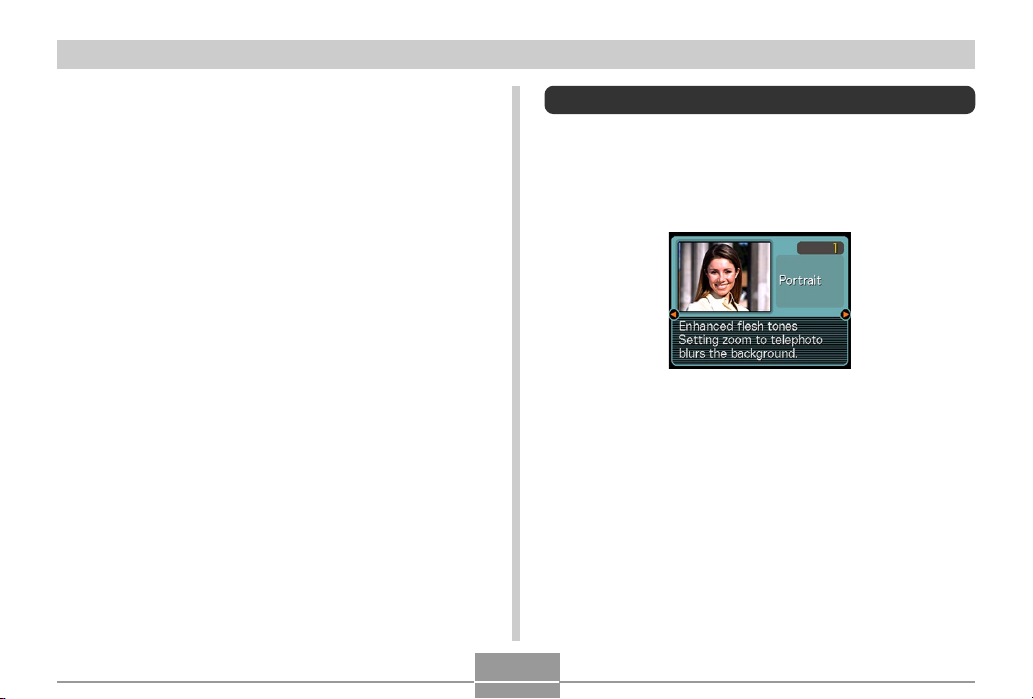
Using the Best Shot Mode
Selecting one of the 21 Best Shot scenes automatically
sets up the camera for recording a similar type of image.
■ Example Sample Scene
73
Page 10

OTHER RECORDING FUNCTIONS
1.
In the REC mode, press [MENU].
2.
Select the “REC” tab, select “REC Mode”, and
then press [].
3.
Use [] and [] to
select “ (Best
Shot)”, and then press
[SET].
• This enters the Best Shot
mode and displays a
sample scene.
4.
Use [] and [] to select the sample scene
you want, and then press [SET].
5.
Record the image.
IMPORTANT!
• Sample scene number 4 is Coupling Shot scene
(page 77). Sample scene number 5 is a Pre-shot
scene (page 79).
• Best Shot scenes were not recorded using this
camera. They are provided as samples only.
• Images recorded using a Best Shot scene may not
produce the results you expected due to shooting
conditions and other factors.
• After selecting a Best Shot scene, you can change to
a different one by using [] and [] to scroll through
available scenes. When the one you want is
displayed, press [SET].
74
Page 11

OTHER RECORDING FUNCTIONS
Creating Your Own Best Shot Setup
You can use the procedure below to save the setup of an
image you recorded for later recall when you need it again.
Recalling a setup you save automatically sets up the
camera accordingly.
1.
In the REC mode, press [MENU].
2.
Select the “REC” tab, select “REC Mode”, and
then press [].
3.
Use [] and [] to select “ (Best Shot)”,
and then press [SET].
• This enters the Best Shot mode and displays a
sample scene.
4.
Use [] and [] to
display “Register
User Scene”.
5.
Press [SET].
6.
Use [] and [] to
display the image
whose setup you
want to register as a
Best Shot scene.
7.
Use [] and [] to
select “Save”, and
then press [SET].
• This registers the setup.
• Now you can use the
procedure on page 74
to select your user
setup for recording.
75
Page 12

OTHER RECORDING FUNCTIONS
IMPORTANT!
• Setups that you register as Best Shot sample scenes
are located after the built-in sample scenes.
• When a Best Shot user setup is recalled, the monitor
screen in step 4 of the procedure on page 74
displays the text “Recall User Scene”.
• Note that formatting the built-in memory (page 128)
deletes all Best Shot user setups.
NOTES
• The following are the settings that are included in a
Best Shot user setup: focus mode, EV shift value,
filter, metering mode, white balance mode, flash
intensity, sharpness, saturation, contrast, flash
mode, and ISO sensitivity.
• Note that images recorded with this camera only can
be used to create a Best Shot user setup.
• You can have up to 999 Best Shot user setups in the
camera’s built-in memory at one time.
• You can check the current setup of a scene by
displaying the various setting menus.
• User setups are assigned file names using the format
“UQR40nnn.jpe” (where n = 0 to 9).
■ To delete a Best Shot user setup
1.
In the REC mode, press [MENU].
2.
Select the “REC” tab, select “REC Mode”, and
then press [].
3.
Use [] and [] to select “ (Best Shot)”,
and then press [SET].
• This enters the Best Shot mode and displays a
sample scene.
4.
Use [] and [] to display the user setup you
want to delete.
5.
Press [] ( ) to delete the user setup.
• You can also delete a user setup by using your
computer to delete its file in the “SCENE” folder in
the camera’s built-in memory (page 146).
76
Page 13

OTHER RECORDING FUNCTIONS
Combining Shots of Two People into a
Single Image (Coupling Shot)
The Coupling Shot mode lets you record images of two
people and combine them into a single image. This makes
it possible for you to include yourself in group images, even
when there is no one else around to record the image for
you. Coupling Shot is available in the Best Shot mode
(page 73).
• Combined
Images
• First Image This is the part
• Second
Image
of the image that
does not include
the person who
is recording the
first image.
Making sure that
the background
of the image is
aligned correctly,
record the image
of the person
who recorded
the first image.
77
1.
In the REC mode, press [MENU].
2.
Select the “REC” tab, select “REC Mode”, and
then press [].
3.
Use [] and [] to select “ (Best Shot)”,
and then press [SET].
4.
Use [] and [] to select “Coupling Shot”,
and then press [SET].
Page 14

OTHER RECORDING FUNCTIONS
5.
Align the focus frame
on the monitor screen
with the subject you
want on the left side
of the image, and
then press the shutter
release button to
record the image.
• The focus, exposure, white balance, zoom, and flash
settings are fixed for this type of image.
• While “Coupling Shot” is selected, the “AF Area”
(page 66) setting automatically becomes “Spot”.
Focus frame
6.
Next, align the focus
frame with the
subject you want in
the right side of the
image, taking care to
align the actual
background with the
semi-transparent
image of the
Semi-transparent
image
background of the
first image, which is
shown on the monitor
screen. When
everything is aligned
correctly, record the
image.
• Pressing [MENU] any time after step 5 of the above
procedure cancels the first image and returns to step
5.
IMPORTANT!
• Coupling Shot temporarily uses file memory to store
data. You may get an error during Coupling Shot
recording if there is not enough file memory available
to store the required data. If this happens, delete
images you no longer need and try again.
78
Page 15

OTHER RECORDING FUNCTIONS
Recording a Subject onto an Existing
Background Image (Pre-shot)
Pre-shot helps you get the background you want, even if
you need to ask someone else to record the image for you.
Basically, Pre-shot is a two-step process.
1. You compose the background you want and press the
shutter release button, which causes a semi-transparent
image of the background to remain on the monitor
screen.
2. Ask someone else to record a shot of you against your
original background, telling them to compose the image
by using the semi-transparent monitor screen image as a
guide.
• The camera stores the image produced by step 2 only.
• Depending on how the image is actually composed in
step 2, its background may not be exactly the same as
the one you composed in step 1.
Note that Pre-shot is available in the Best Shot mode only
(page 73).
• Freeze the background on
the monitor screen.
• Record the image, using
the background on the
monitor screen as a guide.
• This records the image.
79
Page 16

OTHER RECORDING FUNCTIONS
1.
In the REC mode, press [MENU].
2.
Select the “REC” tab, select “REC Mode”, and
then press [].
3.
Use [] and [] to select “ (Best Shot)”,
and then press [SET].
4.
Use [] and [] to select “Pre-shot”, and then
press [SET].
5.
Freeze the background on the monitor screen.
• Though a semi-transparent image of the background
appears on the monitor screen in step 6, the
background image is not saved in memory at this
time.
• The focus, exposure, white balance, zoom, and flash
settings are fixed for this type of image.
6.
Next, align the focus
frame with the
subject, composing
the subject with the
semi-transparent
background shown
on the monitor
screen. When
everything is aligned
correctly, record the
image.
• This records the image composed on the monitor
screen in step 6. The reference background image is
not recorded.
• Pressing [MENU] any time after step 5 of the above
procedure cancels the background image and
returns to step 5.
Semi-transparent image
80
Page 17

OTHER RECORDING FUNCTIONS
Using the Movie Mode
You can record movies up to 30 seconds long.
• File Format: AVI
AVI format conforms to the Motion JPEG format promoted
by the Open DML Group.
• Image Size: 320 x 240 pixels
• Movie File Size: Approximately 150KB/second.
• Maximum Movie Length
— One Movie: 30 seconds
— Total Movie Time:
60 seconds with built-in memory; 410 seconds with
64MB SD memory card
1.
In the REC mode, press [MENU].
2.
Select the “REC” tab, select “REC Mode”, and
then press [].
3.
Use [] and [] to
Remaining capacity
select (Movie), and
then press [SET].
•“Remaining capacity”
shows how many 30second movies can still
be recorded to memory.
Remaining recording time
4.
Point the camera at
Movie recording indicator
the subject and then
press the shutter
release button.
• Movie recording
continues for 30
seconds, or until you
stop it by pressing the
shutter release button
again.
• Starting a movie record operation causes optical
zoom to be disabled. Only digital zoom is available
while a movie record operation is in progress. If you
want to use optical zoom to record a movie, perform
the zoom operation before starting the record
operation.
81
Page 18

OTHER RECORDING FUNCTIONS
• The remaining recording time value counts down on
the monitor screen as you record.
5.
When movie recording is complete, the movie
file is stored in file memory.
• To cancel storage of the movie file, use [] to select
“Delete” while file storage is being performed, and
then press [SET].
IMPORTANT!
• The flash does not fire in the Movie mode.
Using the Histogram
You can use the [DISP] button to display a histogram on
the monitor screen. The histogram lets you check exposure
conditions as you record images (page 31). You can also
display the histogram of a recorded image in the PLAY
mode.
Histogram
A histogram is a graph that represents the lightness of an
image in terms of the number of pixels. The vertical axis
indicates the number of pixels, while the horizontal axis
indicates lightness. You can use the histogram to
determine whether an image includes the shadowing (left
side), mid tones (center), and highlighting (right) required to
bring out sufficient image detail. If the histogram appears
too lopsided for some reason, you can use EV shift
(exposure compensation) to move it left or right in order to
achieve better balance. Optimum exposure can be
achieved by correcting exposure so the graph is as close to
the center as possible.
82
Page 19

OTHER RECORDING FUNCTIONS
• When the histogram is too far
to the left, it means that there
are too many dark pixels.
This type of histogram results
when the overall image is
dark. A histogram that is too
far to the left may result in
“black out” of the dark areas
of an image.
• When the histogram is too far
to the right, it means that
there are too many light
pixels.
This type of histogram results
when the overall image is
light. A histogram that is too
far to the right may result in
“white out” of the light areas of
an image.
• A centered histogram
indicates that there is good
distribution of light pixels and
dark pixels. This type of
histogram results when the
overall image is at optimal
lightness.
IMPORTANT!
• Note that the above histograms are shown for
illustrative purposes only. You may not be able to
achieve exactly the same shapes for particular
subjects.
• A centered histogram does not necessarily
guarantee optimum exposure. The recorded image
may be over-exposed or under-exposed, even
though its histogram is centered.
• You may not be able to achieve an optimum
histogram configuration due to the limitations of EV
shift.
• Use of the flash as well as certain shooting
conditions can cause the histogram to indicate
exposure that is different from the actual exposure of
the image when it was recorded.
• This histogram does not appear when you are using
Coupling Shot (page 77).
83
Page 20

OTHER RECORDING FUNCTIONS
REC Mode Camera Settings
The following are the settings you can make before
recording an image using a REC mode.
• ISO sensitivity
• Metering
• Color filtering
• Saturation
• Contrast
• Sharpness
• Grid on/off
• Image Review on/off
• L/R key setting
• Power on default settings
• Resetting the camera
NOTE
• You can also configure the settings listed below. See
the referenced pages for more information.
— Size and Quality (page 63)
— White Balance (page 71)
— Flash Intensity (page 60)
— Digital Zoom (page 56)
— AF Area (page 66)
Specifying ISO Sensitivity
Use the following procedure to select the ISO sensitivity
setting that suits the type of image you are recording.
1.
In the REC mode, press [MENU].
2.
Select the “REC” tab, select “ISO”, and then
press [].
3.
Use [] and [] to select the setting you
want, and then press [SET].
To get this:
Automatic sensitivity selection
Conforms to ISO 80
Conforms to ISO 160
Conforms to ISO 320
IMPORTANT!
• Increasing ISO sensitivity can cause static to appear
inside an image. Select the ISO sensitivity setting
that suits your shooting needs.
• Using a high ISO sensitivity setting along with the
flash to shoot a nearby subject may result in
improper illumination of the subject.
Select this setting:
Auto
ISO 80
ISO 160
ISO 320
84
Page 21

OTHER RECORDING FUNCTIONS
Selecting the Metering Mode
Use the following procedure to specify multi-pattern
metering, spot metering, or center-weighted metering as
the metering mode.
1.
In the REC mode, press [MENU].
2.
Select the “REC” tab, select “Metering”, and
then press [].
3.
Select the setting you want, and then press
[SET].
Multi (Multi-pattern):
Multi-pattern metering divides the image
into sections and measures the light in
each section for a balanced exposure
reading. The camera automatically
determines shooting conditions
according to the measured lighting
pattern, and makes exposure settings
accordingly. This type of metering
provides error-free exposure settings for
a wide range of shooting conditions.
Center weighted (Center-weighted):
Center-weighted metering measures
light concentrating on the center of the
focus area. Use this metering method
when you want to exert some control
over exposure, without leaving settings
totally up to the camera.
Spot (Spot):
Spot metering takes readings at a very
small area. Use this metering method
when you want exposure to be set
according to the brightness of a
particular subject, without it being
affected by surrounding conditions.
IMPORTANT!
• When “Multi” is selected as the metering mode,
certain procedures cause the metering mode setting
to change automatically as described below.
• Changing the exposure compensation setting (page
70) to a value other than 0.0 changes the metering
mode setting to “Center Weighted.” The metering
mode changes back to “Multi” when you return the
exposure compensation setting to 0.0.
85
Page 22

OTHER RECORDING FUNCTIONS
Using the Filter Function
The camera’s filter function lets you alter the tint of an
image when you record it.
1.
In the REC mode, press [MENU].
2.
Select the “REC” tab, select “Filter”, and then
press [].
3.
Select the setting you want, and then press
[SET].
• Available filter settings are: Off, B/W, Sepia, Red,
Green, Blue, Yellow, Pink, Purple
IMPORTANT!
• Using the camera’s filter feature produces the same
effect as attaching a color filter to the lens.
Specifying Color Saturation
Use the following procedure to control the intensity of the
image you are recording.
1.
In the REC mode, press [MENU].
2.
Select the “REC” tab, select “Saturation”, and
then press [].
3.
Select the setting you want, and then press
[SET].
To get this:
High color saturation (intensity)
Normal color saturation (intensity)
Low color saturation (intensity)
Select this setting:
High
Normal
Low
86
Page 23

OTHER RECORDING FUNCTIONS
Specifying Contrast
Use this procedure to adjust the relative difference
between the light areas and dark areas of the image you
are recording.
1.
In the REC mode, press [MENU].
2.
Select the “REC” tab, select “Contrast”, and
then press [].
3.
Select the setting you want, and then press
[SET].
To get this:
High contrast
Normal contrast
Low contrast
Select this setting:
High
Normal
Low
Specifying Outline Sharpness
Use the following procedure to control the sharpness of
image outlines.
1.
In the REC mode, press [MENU].
2.
Select the “REC” tab, select “Sharpness”, and
then press [].
3.
Select the setting you want, and then press
[SET].
To get this:
High sharpness
Normal sharpness
Low sharpness
Select this setting:
Hard
Normal
Soft
87
Page 24

OTHER RECORDING FUNCTIONS
Turning the On-screen Grid On and Off
You can display gridlines on the monitor screen to help you
compose images and ensure that the camera is straight
when recording.
1.
In the REC mode, press [MENU].
2.
Select the “REC” tab, select “Grid”, and then
press [].
3.
Select the setting you want, and then press
[SET].
To do this:
Display the grid
Hide the grid
Select this setting:
On
Off
Turning Image Review On and Off
Image review displays an image on the monitor screen as
soon as you record it. Use the following procedure to turn
image review on and off.
1.
In the REC mode, press [MENU].
2.
Select the “REC” tab, select “Review”, and
then press [].
3.
Use [] and [] to select the setting you
want, and then press [SET].
To do this:
Display images on the monitor
screen for about one second
immediately after they are recorded
Do not display images immediately
after they are recorded
Select this setting:
On
Off
88
Page 25

OTHER RECORDING FUNCTIONS
Assigning Functions to the [] and []
Keys
A “key customization” feature lets you configure the []
and [] keys so they change camera settings whenever
they are pressed in the REC mode. After you configure the
[] and [] keys, you can change the setting assigned to
them without going through the menu screen.
1.
In the REC mode, press [MENU].
2.
Select the “REC” tab, select “L/R Key”, and
then press [].
3.
Use [] and [] to select the setting you
want, and then press [SET].
89
When you want to assign this function to
[] and [] keys:
Recording mode
• [] and [] cycle through recording
modes: Snapshot, Best Shot, Movie
(page 162).
EV shift
• [] decreases compensation, []
increases compensation (page 70).
White balance setting
• [] and [] cycle through white
balance settings (page 71).
ISO sensitivity
• [] and [] cycle through sensitivity
settings (page 84).
Self-timer mode
• [] and [] cycle through self-timer
modes (page 61).
No function assigned
NOTE
• The initial default setting is “REC Mode”.
Select this:
REC Mode
EV Shift
White Balance
ISO
Self-timer
Off
Page 26

OTHER RECORDING FUNCTIONS
Specifying Power On Default Settings
The camera’s “mode memory” feature lets you specify the
power on default settings individually for the REC mode,
flash mode, focus mode, white balance mode, ISO
sensitivity, AF Area, metering mode, flash intensity, digital
zoom mode, and manual focus position. Turning on mode
memory for a mode tells the camera to remember the
status of that mode when you turn off the camera, and
restore it the next time you turn the camera back on. When
mode memory is turned off, the camera automatically
restores the initial factory default setting for the applicable
mode.
The following table shows what happens when you turn
mode memory on or off for each mode.
90
Function
REC Mode
Flash
Focus
White Balance
ISO
AF Area
Metering
Flash Intensity
Digital Zoom
MF Position
On
Setting when
camera is
turned off
Off
(Snapshot)
Auto
Auto
Auto
Auto
Spot
Multi
Normal
On
Last Auto Focus
position that was in
effect before you
switched to manual
focus
Page 27

OTHER RECORDING FUNCTIONS
1.
In the REC mode, press [MENU].
2.
Select the “Memory” tab, select the item you
want to change, and then press [].
3.
Use [] and [] to select the setting you
want, and then press [SET].
To do this:
Turn on mode memory so settings
are restored at power on
Turn off mode memory so settings
are initialized at power on
IMPORTANT!
• Note that Best Shot mode settings take priority over
mode memory settings. If you turn the camera off
while in the Best Shot mode, the camera’s Flash,
White Balance, and ISO Sensitivity will be configured
according to the Best Shot sample scene when you
turn it back on again, regardless of mode memory
on/off setting.
• If you turn the camera off while in the Movie mode,
the flash will be turned off when you turn the camera
back on again, regardless of mode memory on/off
setting.
Select this setting:
On
Off
Resetting the Camera
Use the following procedure to reset all of the camera’s
settings to their initial defaults as shown under “Menu
Reference” on page 162.
1.
In the REC mode or the PLAY mode, press
[MENU].
2.
Select the “Set Up” tab, select “Reset”, and
then press [].
3.
Select “Reset”, and then press [SET].
• To cancel the procedure without resetting, select
“Cancel” and press [SET].
91
 Loading...