

Page 1

PV-S1600
User’s Guide
E
Page 2

GUIDELINES LAID DOWN BY FCC RULES FOR USE OF THIS UNIT IN THE
U.S.A. (not applicable to other areas).
NOTICE
This equipment has been tested and found to comply with the limits for a Class B digital
device, pursuant to Part 15 of the FCC Rules. These limits are designed to provide reasonable
protection against harmful interference in a residential installation. This equipment generates, uses and can radiate radio frequency energy and, if not installed and used in accordance
with the instructions, may cause harmful interference to radio communications. However,
there is no guarantee that interference will not occur in a particular installation. If this
equipment does cause harmful interference to radio or television reception, which can be
determined by turning the equipment off and on, the user is encouraged to try to correct the
interference by one or more of the following measures:
• Reorient or relocate the receiving antenna.
• Increase the separation between the equipment and receiver.
• Connect the equipment into an outlet on a circuit different from that to which the receiver
is connected.
• Consult the dealer or an experienced radio/TV technician for help.
FCC WARNING
Changes or modifications not expressly approved by the party responsible for compliance
could void the user's authority to operate the equipment.
Proper connectors must be used for connection to host computer and/or peripherals in order
to meet FCC emission limits.
Cable ....................... PV-S1600 to Windows PC or SB-90
Declaration of Conformity
Model Number: PV-S1600
Trade Name: CASIO COMPUTER CO., LTD.
Responsible party: CASIO, INC.
Address: 570 MT. PLEASANT AVENUE, DOVER, NEW JERSEY 07801
Telephone number: 973-361-5400
This device complies with Part 15 of the FCC Rules. Operation is subject to the following
two conditions: (1) This device may not cause harmful interference, and (2) this device must
accept any interference received, including interference that may cause undesired operation.
• CASIO COMPUTER CO., LTD. assumes no responsibility for any damage or loss
resulting from the use of this manual.
• CASIO COMPUTER CO., LTD. assumes no responsibility for any loss or claims by third
parties which may arise through the use of the PV Unit.
• CASIO COMPUTER CO., LTD. assumes no responsibility for any damage or loss caused
by deletion of data as a result of malfunction, repairs, or battery replacement. Be sure to
back up all important data on other media to protect against its loss.
• No part of this manual may be reproduced in any form without the express written consent
of the manufacturer.
Microsoft and Windows are registered trademarks of Microsoft Corporation in the United
States and/or other countries.
Page 3
Before using the PV-S1600
for the first time…
Use the following procedure to load batteries before using it for the first time.
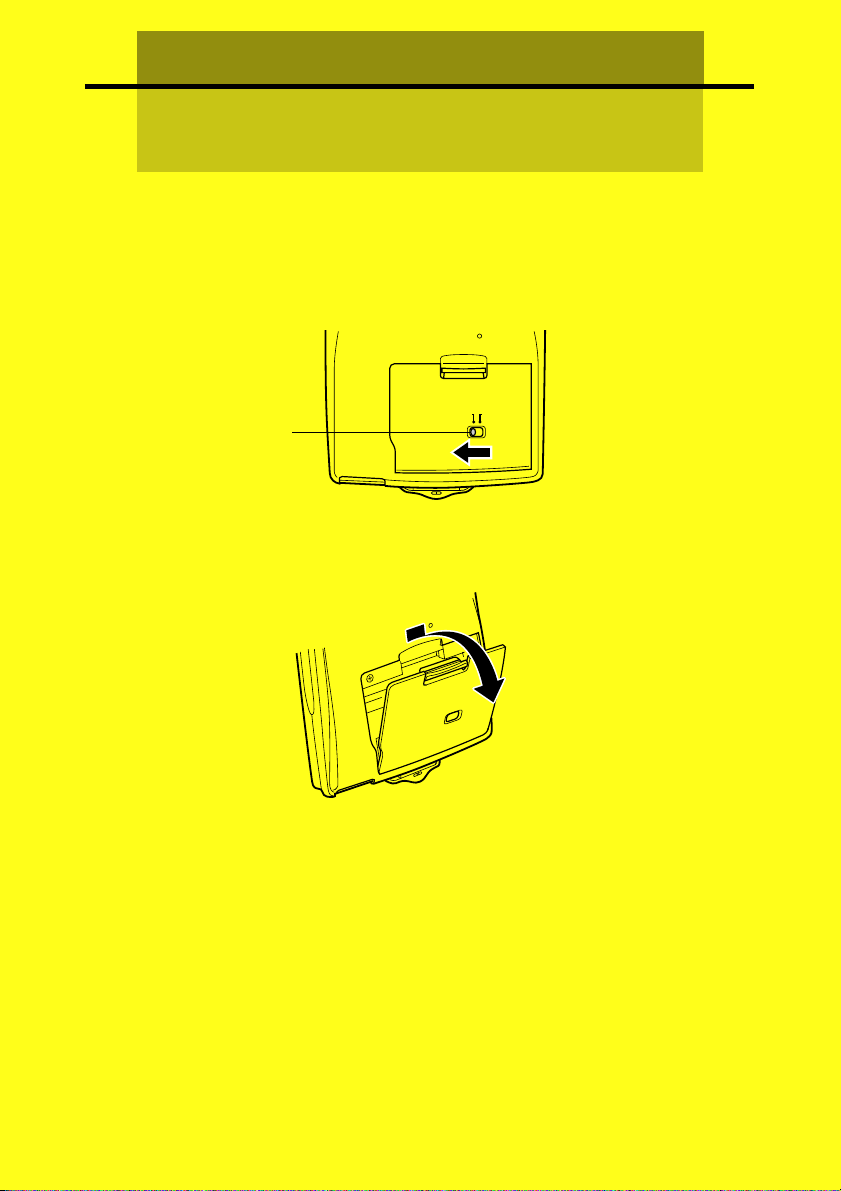
1. Slide the battery switch on the back of the PV Unit to the REPLACE
BATTERIES position.
RESET
REPLACE BATTERIES NORMAL OPERATION
Battery switch
2. Pull with your finger on the battery compartment cover tab to release it,
and then open the cover.
1
Page 4
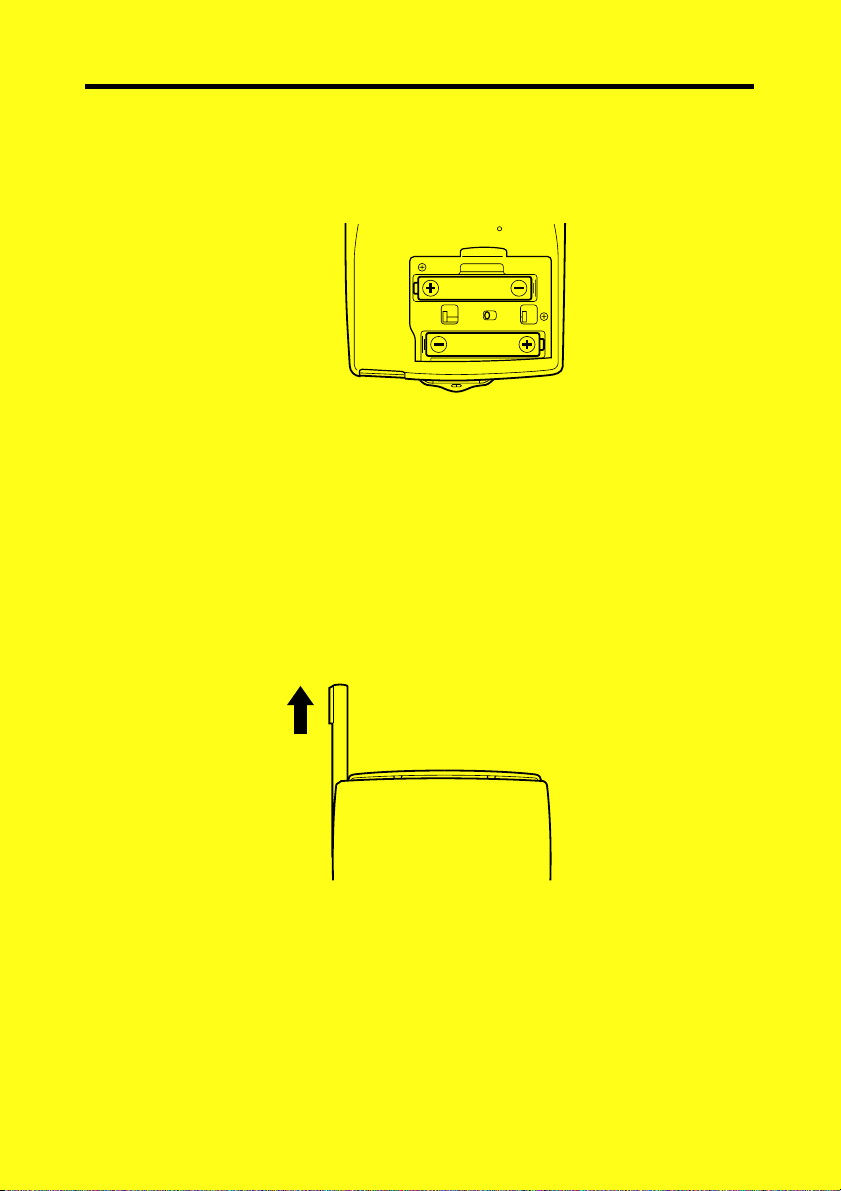
3. Load two new batteries, making sure that their positive (+) and negative
(–) ends are facing in the proper directions.
RESET
4. Taking care not to damage its tabs, replace the battery compartment
cover back onto the PV Unit.
5. Slide the battery switch back to the NORMAL OPERATION position.
Important!
• Always make sure the battery switch is in the NORMAL OPERATION
position at all times, except when loading batteries.
6. Remove the stylus from the PV Unit.
• Pull the stylus straight out in the direction indicated by the arrow.
2
Page 5
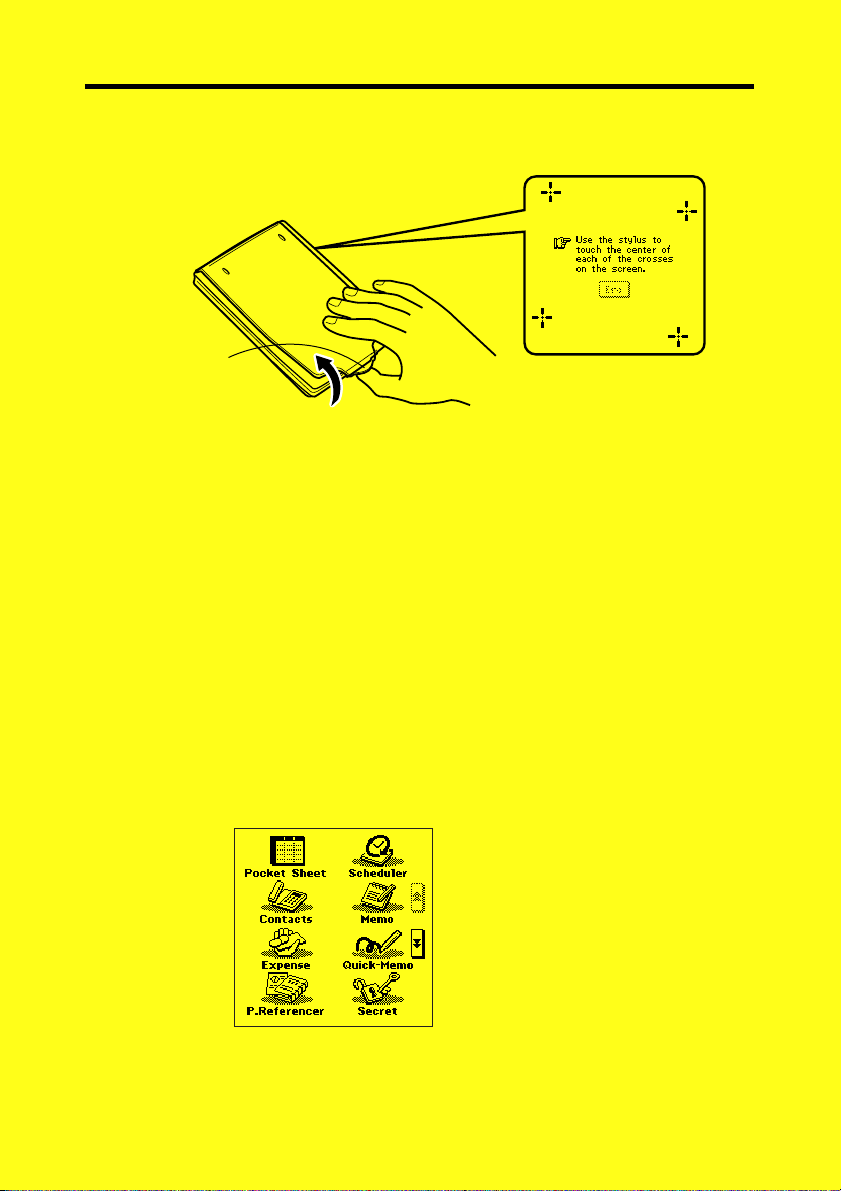
7. Pressing down lightly on the center of the cover, pull upwards on the
bottom of the cover, and then lift up to remove it.
Tirez ici.
• If the above does not appear on the display, remove the batteries and
then reload them into the PV Unit, making sure you follow proper
procedures.
8. Tap the center of each of the four cross marks as they appear on the
screen.
• The contrast adjustment screen appears next.
9. Tap H or J to adjust the contrast of the display, and then tap OK.
• This causes the system language selection screen to appear.
10. Tap the button next to the language you want to select as the system
language, and then tap Set.
11. In response to the message that appears (Check your home time setting
and correct it if necessary!), tap OK to change to the pop up tool screen.
12. Check the time setting and correct it if necessary (page 160).
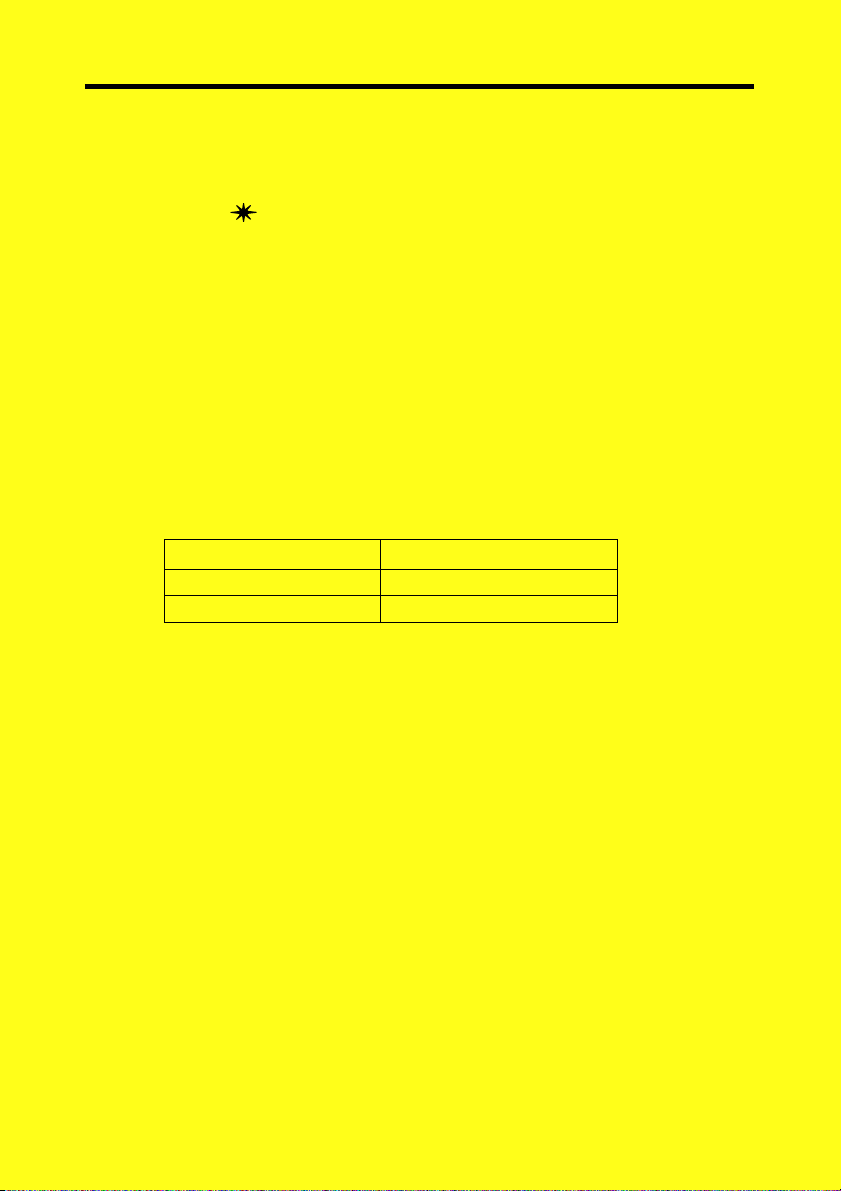
13. Tap the Menu icon to display the on-screen icon menu (page 26).
3
Page 6
About the EL backlight
• The PV Unit is equipped with an EL backlight that allows easy viewing
of display contents in a theater, or anywhere else where lighting is dim.
• Tap the
screen.
• You can use the procedure on page 23 to specify how long the EL
backlight stays on (approximately 15 or 30 seconds).
• Note that EL backlight operation consumes large amounts of electrical
power and can greatly shorten battery life.
• Note that frequent or extended use of the EL backlight shortens battery
life.
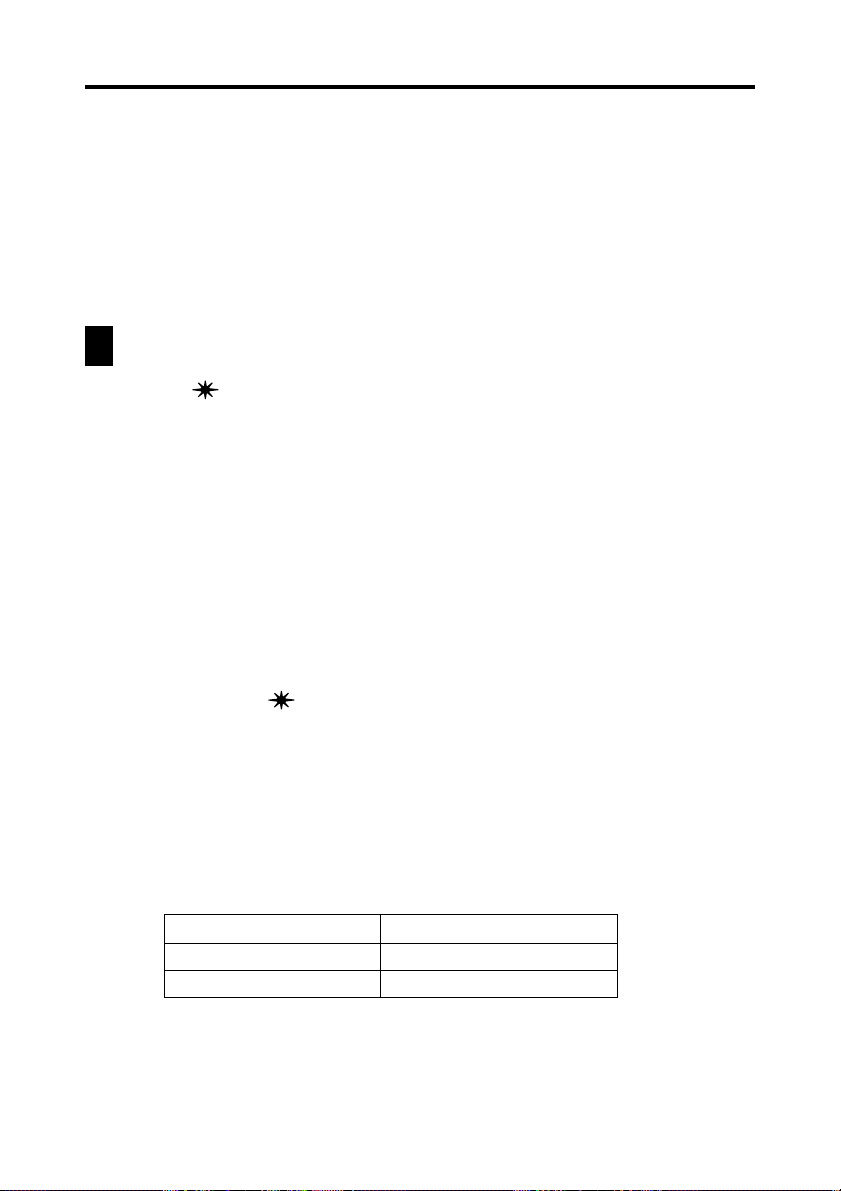
The following shows how backlight use affects battery life under controlled
test conditions*. For comparison with the values below, battery life is
normally approximately 80 hours with 55 minutes of continuous display
only and 5 minutes of processing operation per hour in the Contacts Mode
when no backlight operation is performed.
Backlight Operation Battery Life
3 minutes per hour Approximately 60 hours
15 minutes per hour Approximately 30 hours
* Test Conditions
• “Battery Life” is the number of hours before battery failure when
the unit is left on (5 minutes of a processing operation and 55 minutes
of continuous display only (no processing operation) per hour in the
Contacts Mode, plus the backlight operation described below). The
above values assume ambient temperature of 20°C, starting with a
fresh set of new batteries.
• “Backlight Operation” is the number of minutes the backlight is
turned on per hour during the display only (no processing operation)
period.
• Be sure to use alkaline batteries. Manganese batteries provide very
short battery life.
icon to turn on the EL backlight and illuminate the display
4
Page 7

If you do not plan to use the PV Unit for a long time...
Remove the batteries. Batteries will go dead after about six months if you leave
them in the PV Unit while it is not used.
Turning On the PV Unit
You can turn on the PV Unit by pressing the center key. You can also set up the
PV Unit so it turns on when you tap its screen with the stylus (screen tap power
on).
Note
• Use the procedure under “To turn the screen tap power on feature on and off”
on page 21 to control the screen tap power on setting.
• The screen tap power on feature is turned on when you use the PV Unit for
the first time after purchasing it.
5
Page 8

Contents
Before using the PV-S1600 for the first time… ......................... 1
Chapter 1
Read this first! ................................................................................................... 14
Make backup copies of important data! ............................................................. 14
Important Precautions ....................................................................................... 15
Data Errors ........................................................................................................ 16
To reset after viewing data ............................................................................................... 16
General Guide ................................................................................................... 17
Using the Cover ................................................................................................. 18
To remove the cover ......................................................................................................... 18
To replace the cover ......................................................................................................... 18
Power Supply .................................................................................................... 19
Low Battery Warning ....................................................................................................... 19
Battery Precautions .......................................................................................................... 19
To replace the batteries..................................................................................................... 21
To turn power on and off .................................................................................................. 21
To turn the screen tap power on feature on and off .......................................................... 21
Auto Power Off ................................................................................................................ 22
To set the Auto Power Off Interval .................................................................................. 22
Configuring the Start-up Screen ........................................................................ 22
To select a start-up screen ................................................................................................ 22
To enable and disable start-up screen operation .............................................................. 23
Using the Backlight ............................................................................................ 23
To specify the backlight duration ..................................................................................... 23
About the EL backlight .................................................................................................... 23
Cursor Keys and Stylus ..................................................................................... 24
Stylus ................................................................................................................................ 24
Cursor Keys ...................................................................................................................... 25
Using the Icon Menu ......................................................................................... 25
Modes ................................................................................................................ 26
To enter a mode using the icon menu............................................................................... 26
To enter a mode using the on-screen icon menu .............................................................. 27
To enter a mode using the Action Menu .......................................................................... 27
Customizing the Appearance of the Mode Menu .............................................. 28
Swapping Two Icons ........................................................................................................ 28
Moving an Icon to a Specific Location ............................................................................ 28
Getting Acquainted ............................................. 14
6
Page 9
Chapter 2
Scheduler ............................................................ 29
Entering the Scheduler Mode ............................................................................ 29
Inputting New Scheduler Data ........................................................................... 29
To input a single-date Schedule item ............................................................................... 30
To input a multiple-date Schedule item with the New button .......................................... 30
To input a To Do item ...................................................................................................... 31
To input a Reminder item................................................................................................. 32
Reminder Types and Settings ........................................................................... 33
Importing Contacts Data Into a Schedule Item .................................................. 34
To import Contacts data into a Schedule item ................................................................. 35
Viewing Scheduler Data .................................................................................... 37
Screen Organization ......................................................................................................... 37
Calendar Screens .............................................................................................................. 38
Periodic Schedule Screens ............................................................................................... 41
Schedule Data Screen ....................................................................................................... 44
Reminder Screens ............................................................................................................ 45
To Do Screens .................................................................................................................. 46
Date Highlighting ............................................................................................... 48
To highlight dates ............................................................................................................. 48
To unhighlight dates ......................................................................................................... 48
Jumping to a Specific Date ................................................................................ 49
Renaming To Do Categories ............................................................................. 49
Chapter 3
Contacts .............................................................. 50
Entering the Contacts Mode .............................................................................. 50
To enter the Contacts Mode from the icon menu ............................................................. 50
To enter the Contacts Mode from the Action Menu ......................................................... 50
To enter the Contacts Mode from the Mode Menu using the stylus ................................ 50
Changing the Display Category ......................................................................... 51
Latest Calls List ................................................................................................. 52
Resizing Contacts List Screen Columns ........................................................... 52
Inputting New Contacts Data ............................................................................. 53
Viewing Contacts Data ...................................................................................... 54
To view Business data ...................................................................................................... 54
To view other data ............................................................................................................ 55
Changing Contacts List Screen Contents ......................................................... 56
To change the contents of a category’s list ....................................................................... 56
Changing Contacts Input Screen Contents ....................................................... 57
To change the contents of a category’s input screen ........................................................ 57
Managing Untitled Categories and Free Entries ............................................... 58
Contacts Categories .......................................................................................................... 58
To edit Contacts Untitled category and Free entry names ............................................... 59
Copying Data Items Between the Personal and Business Categories .............. 60
Exporting Contacts Data Into a Schedule Item ................................................. 60
7
Page 10
Chapter 4
Entering the Memo Mode .................................................................................. 61
Changing the Display Category ......................................................................... 61
Inputting New Memo Data ................................................................................. 62
Viewing Memo Data .......................................................................................... 63
To view memo data .......................................................................................................... 63
To display an item in the full-screen view ....................................................................... 64
Moving a Memo within a List Screen ................................................................. 65
Renaming Memo Categories ............................................................................. 65
Memo ................................................................... 61
Chapter 5
Entering the Expense Manager Mode ............................................................... 66
Inputting a New Transaction .............................................................................. 66
Recalling Expense Manager Data ..................................................................... 68
Calculating Periodic Totals ................................................................................ 69
Managing Payment and Expense Types ........................................................... 70
To change a payment type or expense type name ............................................................ 70
Chapter 6
Entering the Currency Converter Mode ............................................................. 71
General Currency Conversion ........................................................................... 71
Performing a Conversion ................................................................................................. 71
Changing the Currency Name and Rate ........................................................................... 72
Displaying the Current General Rates ............................................................................. 73
Euro Conversion ................................................................................................ 73
Performing a Conversion ................................................................................................. 73
Changing the Displayed National Currencies .................................................................. 75
Displaying the Current Euro Rates .................................................................................. 75
Changing the Currency Name and Rate ........................................................................... 75
Specifying the Rounding Method ...................................................................... 76
Chapter 7
Entering the Quick-Memo Mode ........................................................................ 78
Quick-Memo Categories .................................................................................... 78
To select a Quick-Memo category ................................................................................... 78
Using the Quick-Memo Drawing Tools .............................................................. 79
Creating a New Quick-Memo ............................................................................ 80
To input a new Quick-Memo ........................................................................................... 80
To draw a line or rectangle ............................................................................................... 80
Recalling a Quick-Memo ................................................................................... 81
Screen Copy ...................................................................................................... 82
To record a screen copy.................................................................................................... 82
Expense Manager ............................................... 66
Currency Converter ............................................71
Quick-Memo ........................................................ 78
8
Page 11

Chapter 8
Pocket Sheet ....................................................... 83
Entering the Pocket Sheet Mode ....................................................................... 83
Pocket Sheet Basics ......................................................................................... 83
Creating a New Sheet from Scratch ................................................................................. 84
Making a Cell the Active Cell .......................................................................................... 85
Selecting a Range of Cells ............................................................................................... 85
Jumping to a Specific Cell in a Sheet .............................................................................. 85
Inputting Data Into a Cell ................................................................................... 86
General Input Rules ......................................................................................................... 86
Cell References ................................................................................................................ 86
Relative Cell References .................................................................................................. 87
Absolute Cell References ................................................................................................. 87
Mixed Cell References ..................................................................................................... 88
Using the On-screen Keyboards ...................................................................................... 88
Inputting Mathematical Expressions ................................................................................ 89
Inputting Text ................................................................................................................... 91
Input Example ................................................................................................... 92
Example Data ................................................................................................................... 92
Controlling the Appearance of a Cell ................................................................. 93
Changing the Format Settings of a Cell ........................................................................... 93
Specifying Cell Border Lines ........................................................................................... 96
Row and Column Operations ............................................................................ 97
Changing the Width of a Column .................................................................................... 97
Scroll Freezing Rows and Columns ................................................................................. 98
Inserting Rows ............................................................................................................... 100
Inserting Columns .......................................................................................................... 101
Deleting Rows and Columns .......................................................................................... 101
Sheet Operations ............................................................................................ 102
Opening a Sheet ............................................................................................................. 102
Displaying the Input Screen ........................................................................................... 102
Saving a New Sheet ....................................................................................................... 102
Saving an Existing Sheet Under a New Name ............................................................... 102
Exiting a Sheet ............................................................................................................... 103
Renaming a Sheet ........................................................................................................... 103
Cut, Copy, Paste, Clear ................................................................................... 103
Cutting and Copying Cell Data ...................................................................................... 103
Pasting Cell Data ............................................................................................................ 104
Copying a Relative Cell Reference ................................................................................ 105
Copying an Absolute or Mixed Cell Reference ............................................................. 105
Clearing Cell Data .......................................................................................................... 105
Searching for Data in a Sheet ......................................................................... 106
To search for data in a sheet ........................................................................................... 106
Setting Sheet Calculation, Gridline, and Protect Options ................................ 107
Date and Size Information ............................................................................... 107
Displaying Date and Size Information ........................................................................... 107
Pocket Sheet Sync .......................................................................................... 108
Pocket Sheet Errors ........................................................................................ 108
9
Page 12
Chapter 9
Preparing and Transferring Data from Your PC ............................................... 109
Entering the P.Referencer Mode ..................................................................... 109
Searching for Text in a Data File ...................................................................... 110
Viewing Database Data ................................................................................... 110
To view database data .................................................................................................... 110
P.Referencer ...................................................... 109
Chapter 10
Creating a New Secret Memory Area .............................................................. 112
Using the Secret Memory Area ....................................................................... 113
To enter an existing secret memory area .........................................................................113
To exit the secret memory area ....................................................................................... 113
To change your password ................................................................................................113
To transfer data from the open memory area to the secret memory area ........................ 114
To transfer data from the secret memory area to the open memory area ........................ 114
Chapter 11
Displaying the Pop Up Tool Screen ................................................................. 115
Using the Clock Screen ................................................................................... 115
To display the clock screen ............................................................................................. 116
To make one of the clocks the main clock ......................................................................116
To select a time zone city ................................................................................................ 117
To switch between standard time and daylight saving time (DST) ................................ 117
Using the Calculator Screen ............................................................................ 117
To display the calculator ................................................................................................. 117
Calculator Keys ...............................................................................................................118
To perform calculations................................................................................................... 119
To perform constant calculations ................................................................................... 120
To correct entries during calculations ............................................................................ 120
About calculation errors ................................................................................................. 120
To clear an error ............................................................................................................. 121
Next Appointment Screen................................................................................ 121
To display the next appointment screen ......................................................................... 121
Secret Function ................................................. 112
Pop Up Tools ..................................................... 115
10
Page 13
Chapter 12
Specifying the Type of Cable You are Using ................................................... 122
Using the Cable ............................................................................................... 123
To connect the cable to the PV Unit ............................................................................... 123
To disconnect the cable from the PV Unit ..................................................................... 123
Data Communications Between Two PV Units ............................................... 124
To connect two PV Units ............................................................................................... 124
To send data from the host unit to the terminal unit ...................................................... 125
To receive data from the terminal unit on the host unit ................................................. 126
Data Communications Between a PV Unit and a BN Unit .............................. 127
To connect a BN Unit to your PV Unit .......................................................................... 127
To send data from the PV Unit to the BN Unit .............................................................. 128
To receive data from the BN Unit on the PV Unit ......................................................... 130
Receiving Data From an SF/CSF/NX Series Unit ........................................... 131
To connect an SF/CSF/NX Series Unit to your PV Unit ............................................... 131
To make communication parameter settings .................................................................. 132
To receive data from an SF/CSF/NX Series Unit .......................................................... 132
Data Communication ........................................ 122
Chapter 13
PV Applications ............................................................................................... 134
Obtaining PV Applications ............................................................................................ 134
Installing a PV Application to your PV Unit ................................................................. 135
Deleting PV Application Data Files ............................................................................... 136
Updating Your PV Unit Operating System .................................................................... 136
Transferring Files............................................................................................. 137
Chapter 14
Entering the Game Mode and Selecting a Game ............................................ 138
Game-1 ........................................................................................................... 138
How to play .................................................................................................................... 139
To move a card or stack of cards.................................................................................... 139
Game Levels .................................................................................................................. 140
Game-2 ........................................................................................................... 140
How to play .................................................................................................................... 140
Game Levels .................................................................................................................. 141
General Game Procedures ............................................................................. 142
To change the level......................................................................................................... 142
To undo the last play ...................................................................................................... 142
PV Applications and File Transfer ...................134
Game .................................................................. 138
11
Page 14
Chapter 15
Scroll Bars ....................................................................................................... 143
Cursor Key Scrolling ........................................................................................ 144
Menu Bar ......................................................................................................... 144
To execute a menu bar command................................................................................... 144
Data Input and Editing ..................................................................................... 144
Moving Between Entries (Fields) .................................................................................. 145
On-screen Keyboards ..................................................................................................... 145
Time Setting Screens ...................................................................................................... 147
Selecting a Range of Text by Dragging ......................................................................... 149
Cut, Copy, Paste ............................................................................................................. 150
Initial Default Dates for new items ................................................................... 151
Scheduler ........................................................................................................................ 151
Expense Manager ........................................................................................................... 151
Closing a Screen ............................................................................................. 151
Using the Quick Find Feature .......................................................................... 152
To input a word with the Quick Find feature ................................................................. 152
Editing Data Items ........................................................................................... 153
Creating a Copy of a Data Item ....................................................................... 153
Deleting Data ................................................................................................... 154
Searching for Data .......................................................................................... 156
To perform a search........................................................................................................ 156
Search Results ................................................................................................................ 157
Changing the Display Font .............................................................................. 158
Program Version Information ........................................................................... 158
To display version information ...................................................................................... 159
General Reference ............................................143
Chapter 16
Setting the Date and Time ............................................................................... 160
Turning Sound On and Off .............................................................................. 161
Setting a Daily Alarm Time .............................................................................. 161
Setting the Date, Time, Calendar, and Keyboard Formats .............................. 162
Setting the System Language ......................................................................... 163
Adjusting Display Contrast .............................................................................. 163
Calibrating the Touch Screen .......................................................................... 164
Checking Memory Capacity ............................................................................ 164
Memory Management ..................................................................................... 165
To perform memory management .................................................................................. 165
Configuring the Unit .........................................160
12
Page 15

Chapter 17
Date Formats ................................................................................................... 166
Time Formats .................................................................................................. 166
Tool Bars ......................................................................................................... 167
Keyboard Formats ........................................................................................... 169
Scheduler Mode Alarms .................................................................................. 169
Input Limits ...................................................................................................... 170
Resetting the PV Unit ...................................................................................... 170
Euro Conversion Rate Presets ........................................................................ 172
Storage Capacity ............................................................................................. 173
Auto Sort Sequence ........................................................................................ 174
City Name List ................................................................................................. 175
Message Table ................................................................................................ 177
Troubleshooting ............................................................................................... 182
Power Supply ................................................................................................................. 182
Display Contrast ............................................................................................................. 182
Key Tone ........................................................................................................................ 182
Operation ........................................................................................................................ 183
Data Communication ..................................................................................................... 184
Specifications .................................................................................................. 185
Technical Reference ......................................... 166
13
Page 16

Chapter
1
Getting Acquainted
Read this first!
• Be sure to read this part of the User’s Guide before doing anything else! It
includes important information that you need to know in order to use the
PV-S1600 (hereinafter referred to as the “PV Unit”) correctly.
• You can find more detailed information about other PV Unit operations in
“Chapter 15 – General Reference” on page 143 and “Chapter 17 – Technical
Reference” on page 166.
Important!
Please keep this User’s Guide and all information handy for future reference.
Note
The screen shots shown in this User’s Guide may differ slightly from the displays
actually produced by your PV Unit.
Make backup copies of important data!
Your PV Unit employs flash memory, which makes it possible to store large
volumes of data and to recall data quickly and easily. Data is retained when power
is turned off and even when batteries go dead, but it can be corrupted or lost
entirely due to operational mistakes or malfunction. Data contents can also be
corrupted or lost due to strong electrostatic charge, strong impact, or extremes in
temperature and humidity. All of this means that you should always keep backup copies of important data by transferring it to a personal computer or by writing
it down somewhere.
14
Page 17

Chapter 1 Getting Acquainted
Important Precautions
Note the following important precautions whenever using your PV Unit.
• Never expose the PV Unit to fire.
• Avoid temperature extremes. Do not locate the PV Unit in direct sunlight,
near a window, near a heater, etc.
• In very low temperatures display response may slow down or fail entirely.
This condition is temporary and operation should resume under normal
temperatures.
• Avoid areas subject to excessive moisture, dirt, and dust.
• Avoid dropping the PV Unit and otherwise subjecting it to strong impact.
• Never bend or twist the PV Unit.
• Never try to take the PV Unit apart.
• Make sure nothing gets between the hard cover and the touch screen.
Besides creating the risk of scratching the touch screen, an object coming
into contact with the screen can cause power to turn on and run down
the batteries.
• Do not use a pen, pencil, or other sharp object to touch or press the
display.
• To clean the exterior of the PV Unit, wipe it with a soft cloth dampened
in a weak solution of a mild neutral detergent and water. Be sure to
wring out any excess moisture from the cloth before wiping off the PV
Unit. Never use benzene, thinner, or any other volatile agent to clean
the unit. Doing so can remove the figures printed on the case or otherwise
damage the case finish.
• The contents of this manual are subject to change without notice.
• CASIO COMPUTER CO., LTD. assumes no responsibility for any loss
or claims by third parties that may arise from the use of this product.
15
Page 18

Chapter 1 Getting Acquainted
Data Errors
The PV Unit performs a self-check routine whenever you turn it on. The message
shown below appears if the PV Unit detects a problem with data stored in its
memory.
Once data is lost due to a data error it cannot be recovered. Data errors are generally
caused by one of the following problems.
• Interruption of battery power
• Severe electrostatic charge, strong impact, changes in temperature, or
changes in humidity
• Hardware problems
Once the data error message appears, the PV Unit will not accept any input or
editing of data. In order to return memory to normal (and permit further data
editing and input), you have to perform the RESET operation to clear all data.
Before doing so, you may want to recall important data and write it down (if you
don’t yet have a copy). You can then re-input the data after clearing PV Unit
memory.
Continued problems after performing the RESET operation can indicate a serious
hardware problem. Consult with your nearest CASIO dealer if problems persist.
To reset after viewing data
1. After the Data error message appears, tap Ye s.
2. In response to the message that appears (Data error! Consult your
User’s Guide for correct procedure.), tap OK.
• This displays the pop up tool screen.
3. Now you can enter other modes to recall data and make handwritten
copies if you want.
4. After recalling the data you want, perform the RESET operation under
“Resetting the PV Unit” on page 170.
16
Page 19
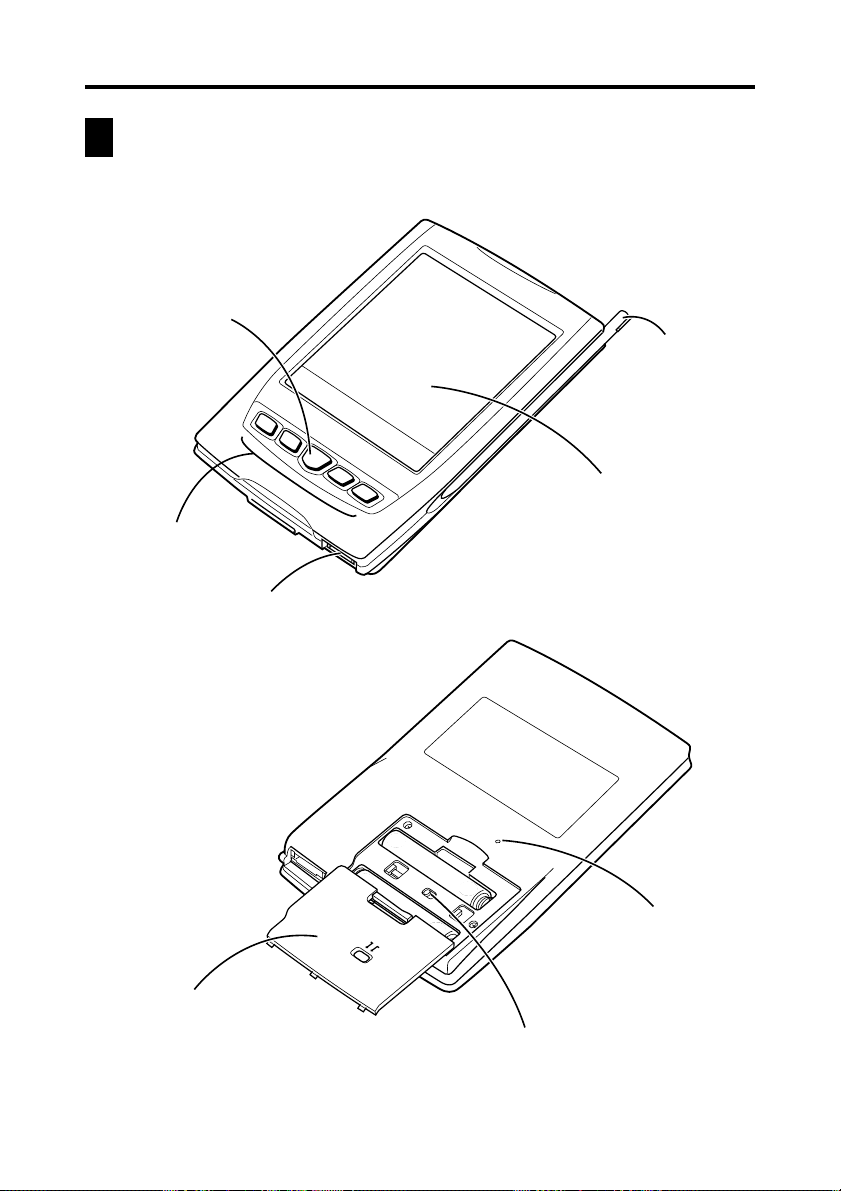
General Guide
Center key
Cursor keys
Cable connector
Chapter 1 Getting Acquainted
Stylus
Touch screen
Battery
compartment cover
REPLACE BATTERIES
NORMAL OPERATION
17
R
E
S
E
T
RESET button
Battery switch
Page 20
Chapter 1 Getting Acquainted
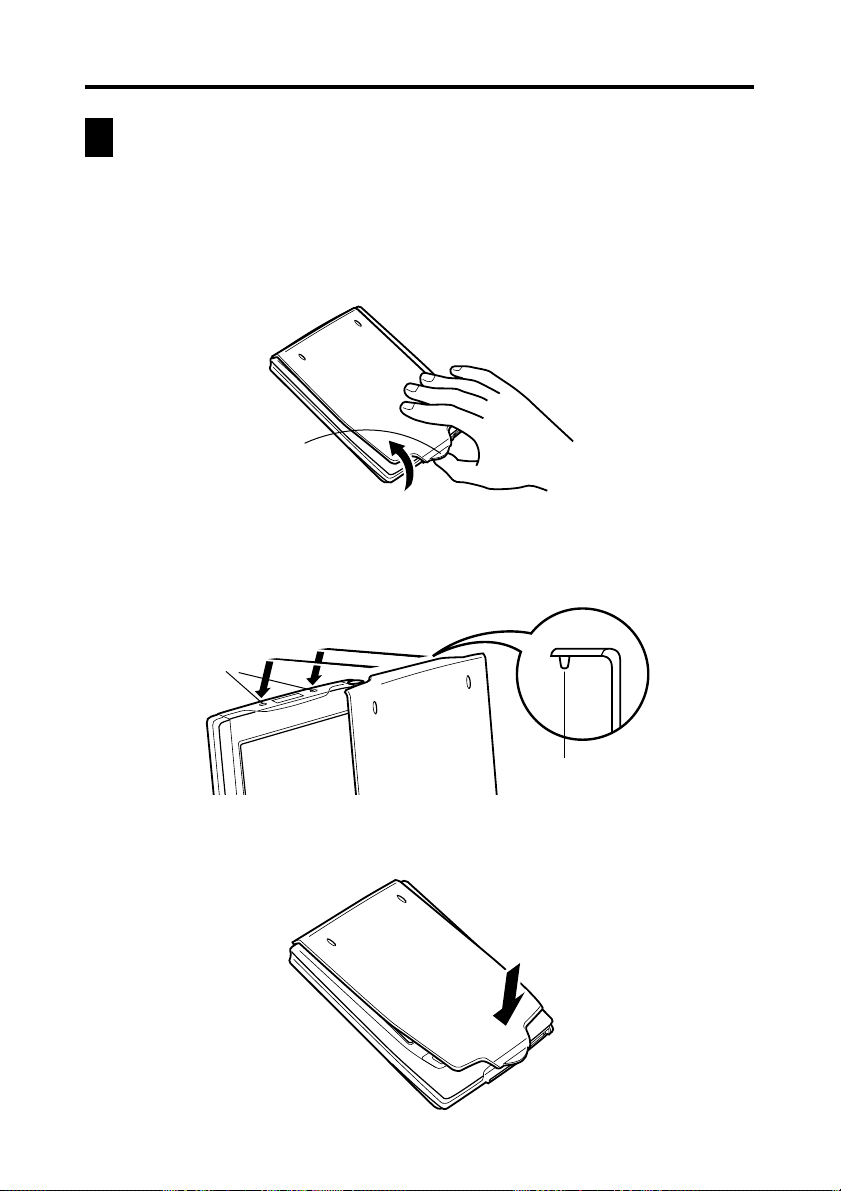
Using the Cover
To remove the cover
Pressing down lightly on the center of the cover, pull upwards on the bottom
of the cover, and then lift up to remove it.
Pull here.
To replace the cover
1. Hook the tabs on the top of the cover into the grooves in the PV Unit.
Grooves
Cover hook
2. Swing the cover down and press the bottom against the PV Unit until it
snaps securely into place.
18
Page 21
Chapter 1 Getting Acquainted
Power Supply
Your PV Unit can be powered by two AAA-size alkaline batteries.
Important!
• Normally the flash memory of the PV Unit retains its data even when power
is turned off and when batteries go dead. Mis-operation or other problems,
however, can cause data to become corrupted or lost. Always keep separate
copies of important data.
Low Battery Warning
The message shown below appears whenever battery power drops below a
certain level. Replace the batteries immediately after this message appears:
Batteries are getting weak! Replace them as instructed in the User’s
Guide.
Important!
• If you continue using the PV Unit after the low battery warning message
appears, power may suddenly turn off or the contrast adjustment screen
may suddenly appear. Should this happen, replace batteries immediately.
• Be sure to use alkaline batteries. Manganese batteries provide very short
battery life.
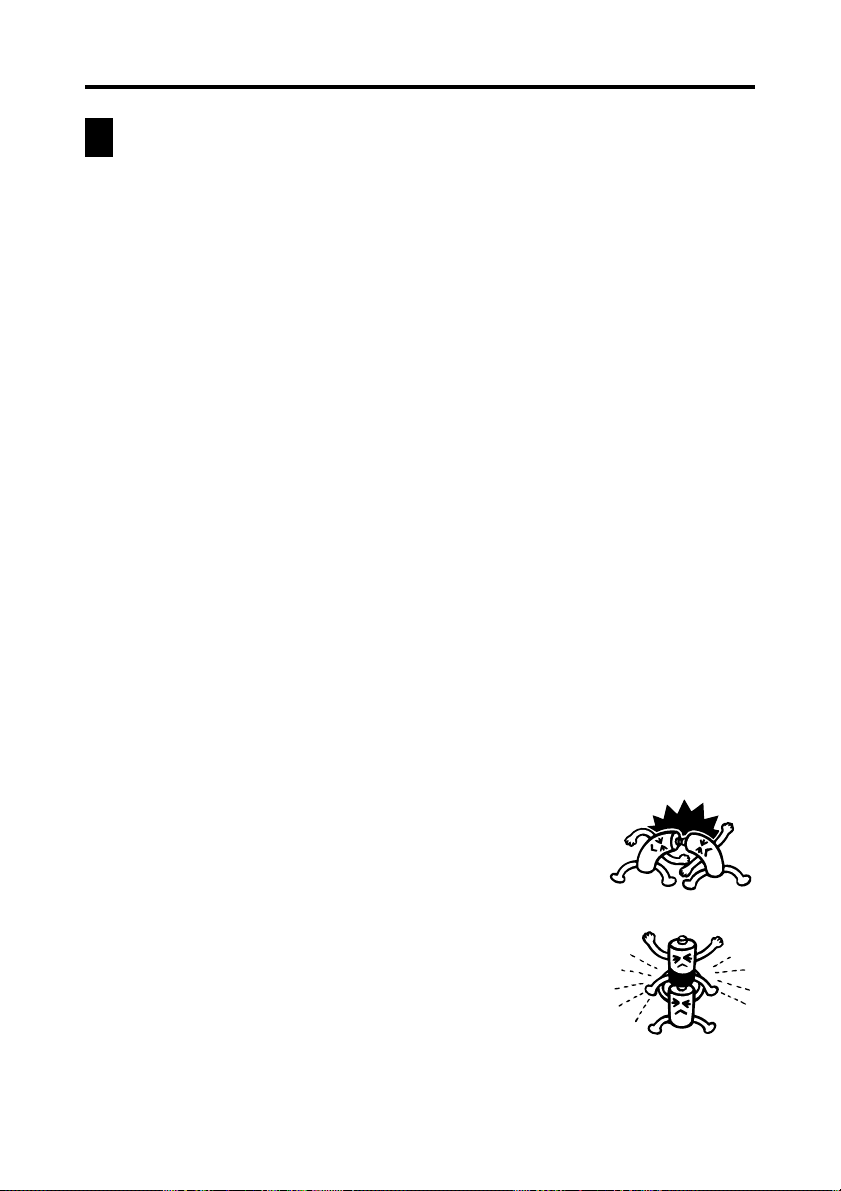
Battery Precautions
Incorrectly using batteries can cause them to burst or leak, possibly damaging
the interior of the PV Unit. Note the following precautions.
• Be sure to use alkaline batteries only to power this PV Unit.
• Be sure that the positive (+) side of each battery is
facing in the correct directions.
• Never mix batteries of different types.
19
Page 22

Chapter 1 Getting Acquainted
• Never mix old batteries and new ones.
• Do not expose batteries to direct heat, let them become shorted, or try to
take them apart.
• Never leave dead batteries in the battery
compartment.
• Remove the batteries if you do not plan to use the PV Unit for a long
time. Batteries will go dead after about six months if you leave them in
the PV Unit while it is not used.
• Replace batteries at least once every year, no matter how much you use
the PV Unit during that period.
• About once a month, turn on the PV Unit and check its battery level. If
the low battery warning appears or if nothing at all appears on the display,
replace batteries as soon as possible.
• Never try to recharge the batteries that come with
the PV Unit.
• Should a battery leak, clean out the battery compartment of the PV Unit
immediately, taking care to avoid letting battery fluid come into direct
contact with your skin.
Keep batteries out of the reach of small children. If swallowed, consult
with a physician immediately.
• Frequent data synchronization using the optional SB-305 serial cable
shortens battery life.
• The batteries that come with this unit discharge slightly during
shipment and storage. Because of this, they may require replacement
sooner than the normal expected battery life.
20
Page 23
Chapter 1 Getting Acquainted
To replace the batteries
Important!
• Always make sure the battery switch is in the NORMAL OPERATION
position at all times, except when replacing batteries.
1. Turn off PV Unit power.
2. Remove both of the old batteries and replace them with new ones,
referring to the procedure on pages 1 through 3.
To turn power on and off
1. Touch anywhere on the PV Unit screen or press the center key to turn on
power.
2. To turn power off, tap Off with the stylus.
• You can disable screen tap power on (so power can be turned on only by
pressing the center key) using the procedure below.
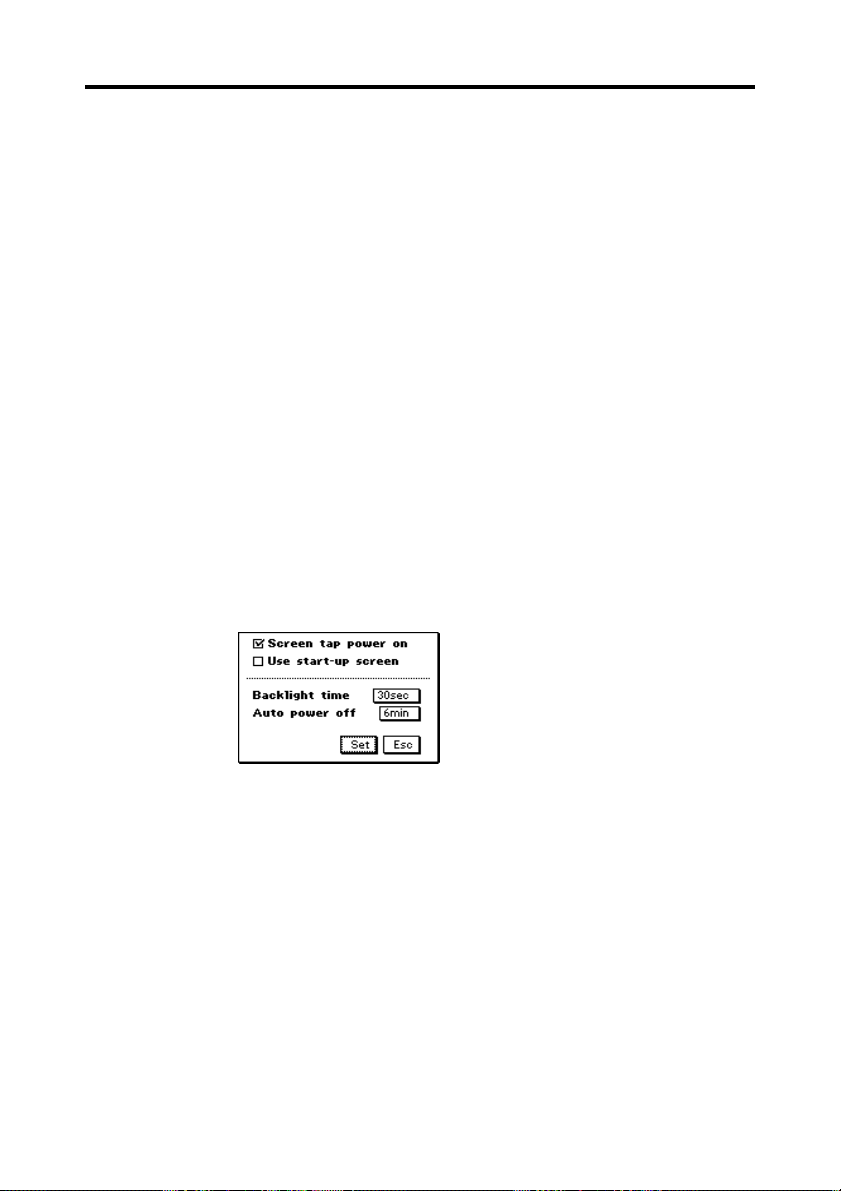
To turn the screen tap power on feature on and off
1. While the Mode Menu or Action Menu is on the display, tap Menu Bar
to display the menu bar, and then tap Option – Screen Options.
2. Tap the check box next to the “Screen tap power on” option to toggle
the option on (checked) and off (unchecked).
• When this feature is on, you can turn on power by touching the PV Unit
screen or by pressing the center key. When off, you can turn on power
only by pressing the center key.
3. Tap Set to register your setting.
• Replacing batteries or resetting the PV Unit turns on the screen tap power
on feature.
21
Page 24

Chapter 1 Getting Acquainted
Auto Power Off
The Auto Power Off function automatically turns off power whenever
you do not perform any operation for a specified period. You can specify
1 minute, 3 minutes, or 6 minutes before Auto Power Off is triggered.
Use the procedure described under “To turn power on and off” above to
turn power back on.
To set the Auto Power Off Interval
1. While the Mode Menu or Action Menu is on the display, tap Menu Bar
to display the menu bar, and then tap Option – Screen Options.
2. Tap the value next to Auto power off.
• Each tap of the value cycles it in the sequence: 1 → 3 → 6 → 1, etc.
• The value you specify controls how many minutes is allowed to pass
without any operation being performed. The PV Unit turns off
automatically after the specified number of minutes passes without any
operation.
3. Tap Set to register your settings.
Configuring the Start-up Screen
You can select a Quick-Memo (page 78) and use its contents as a start-up screen
image. You can even use images from a personal computer, which you transfer to
Quick-Memo using PC sync for Windows.
To select a start-up screen
1. Enter the Quick-Memo Mode.
2. Select the Quick-Memo whose data you want to use as the start-up screen.
• You can select a Quick-Memo by displaying its data screen.
3. Tap Menu Bar to display the menu bar, and then tap Option – Start-
Up Screen.
• This specifies the data of the Quick-Memo you selected as the start-up
screen, and enables start-up screen operation.
22
Page 25
Chapter 1 Getting Acquainted
To enable and disable start-up screen operation
1. While the Mode Menu or Action Menu is on the display, tap Menu Bar
to display the menu bar, and then tap Option – Screen Options.
2. On the configuration screen that appears, tap the check box next to the
“Use start-up screen” option to toggle it on (checked) and off
(unchecked).
3. Tap Set to register your setting.
Using the Backlight
Tapping the icon beneath the PV Unit screen illuminates the display screen
for easy viewing in the dark. You can specify a duration of 15 seconds or 30
seconds for the backlight.
To specify the backlight duration
1. While the Mode Menu or Action Menu is on the display, tap Menu Bar
to display the menu bar, and then tap Option – Screen Options.
2. On the configuration screen that appears, tap the box next to “Backlight
time” to toggle it between 15sec (15 seconds) and 30sec (30 seconds).
3. Tap Set to register your setting.
About the EL backlight
• Tapping the icon while the backlight is on turns it off.
• The backlight may fail to turn on when battery power is low and during
data communication.
• Frequent use of the backlight shortens battery life. The following shows
how backlight use affects battery life under controlled test conditions.*
For comparison with the values below, battery life is normally
approximately 80 hours with 55 minutes of continuous display only and
5 minutes of processing operation per hour in the Contacts Mode when
no backlight operation is performed.
Backlight Operation Battery Life
3 minutes per hour Approximately 60 hours
15 minutes per hour Approximately 30 hours
23
Page 26

Chapter 1 Getting Acquainted
* Test Conditions
•“Battery Life” is the number of hours before battery failure when
the unit is left on (5 minutes of a processing operation and 55 minutes
of continuous display only (no processing operation) per hour in the
Contacts Mode, plus the backlight operation described below). The
above values assume ambient temperature of 20°C, starting with a
fresh set of new batteries.
•“Backlight Operation” is the number of minutes the backlight is
turned on per hour during the display only (no processing operation)
period.
• Be sure to use alkaline batteries. Manganese batteries provide very
short battery life.
Cursor Keys and Stylus
Many of the PV Unit’s operations can be performed using either a stylus or the
cursor keys under the display screen. The following describes the general
operations that can be performed with each.
Stylus
The stylus takes the place of a computer mouse. You can perform all PV
Unit operations with the stylus. In this manual, all data input operations are
described using stylus operations.
You can perform the following basic operations with the stylus.
• Tap
Tap the tip of the stylus on the display to press a button, select an item,
select a data input field, etc.
• Double-tap
Tap the display twice in relatively quick succession.
• Drag
Touch the tip of the stylus to the screen, and drag it across the screen to
select a range of text, draw a line, etc.
24
Page 27
Chapter 1 Getting Acquainted
Cursor Keys
The cursor keys beneath the display screen make it possible to perform
certain PV Unit operations with one hand. In this manual, many data recall
operations are described using the cursor key operations.
You can perform the following basic operations with the cursor keys.
• Click
Pressing the center key is like a “click” with a computer mouse. Pressing
the center key executes the command that is highlighted on the display,
executes the function assigned to the button whose name is enclosed by a
dotted line (such as
• Left/Right Scroll
Pressing the H or J cursor key causes movement in the corresponding
direction. You can use left/right scroll to move the cursor, select a cell, etc.
• Up/Down Scroll
Pressing the K or L cursor key causes movement in the corresponding
direction. You can use up/down scroll to move the cursor between lines,
select a cell, display previous or next items, etc.
), switches between a list and a data screen, etc.
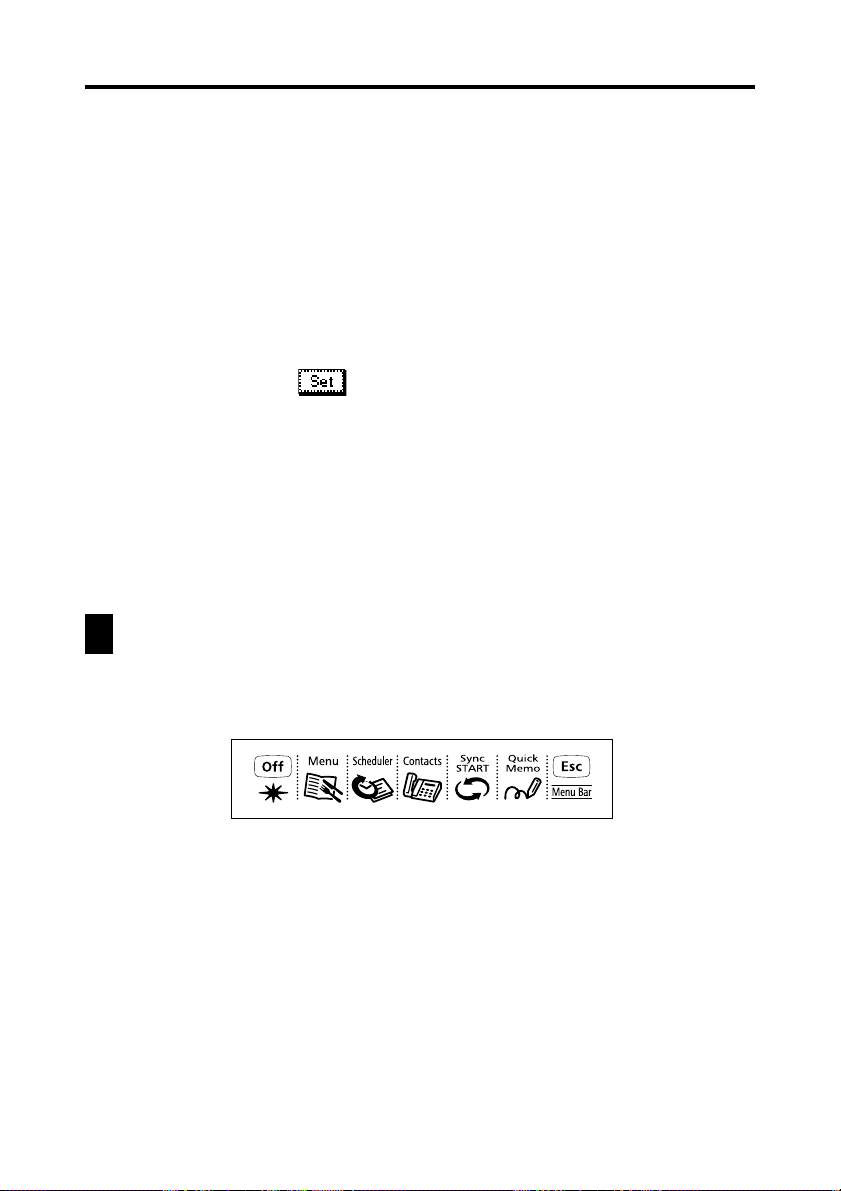
Using the Icon Menu
The PV Unit has an icon menu beneath its display screen. You can tap these icons
to perform various functions no matter what mode you are using.
25
Page 28
Chapter 1 Getting Acquainted
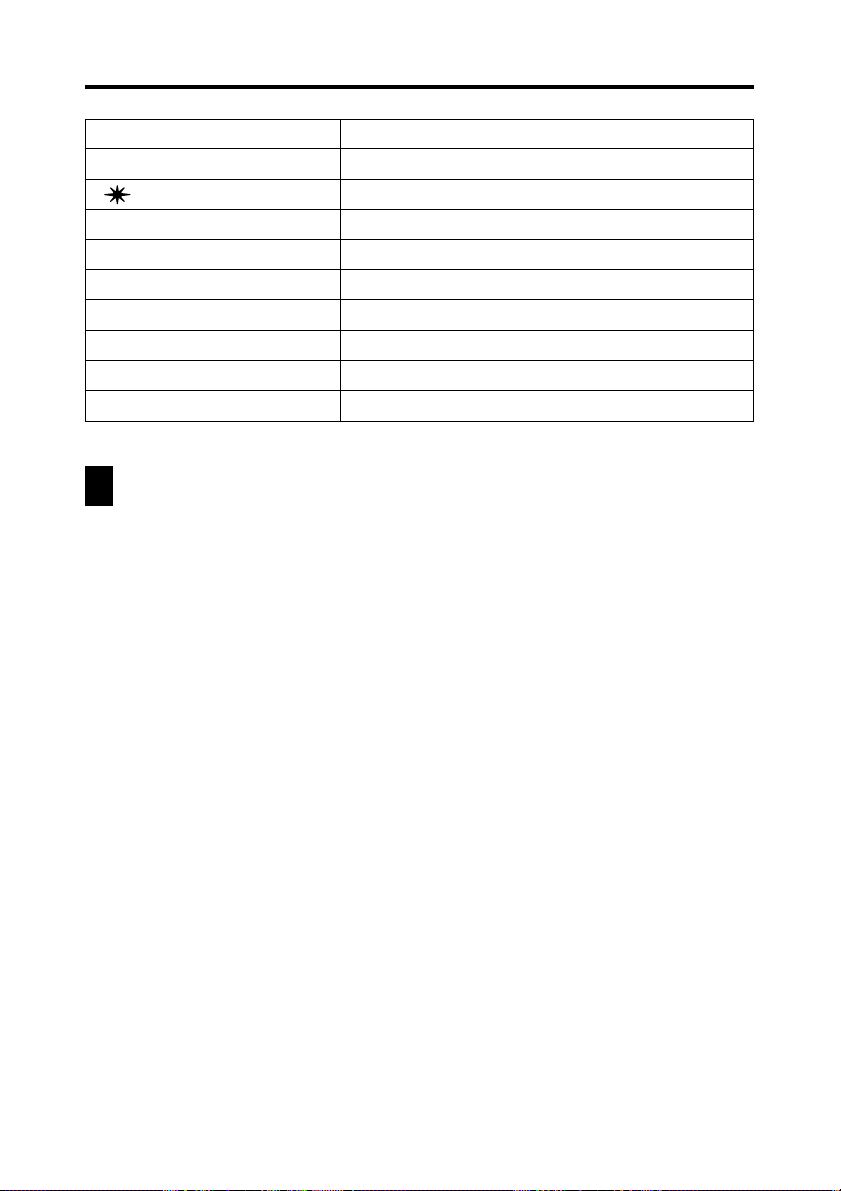
Icon Description
Off Turns off PV Unit power.
Turns on the backlight.
Menu Displays the Mode Menu.
Scheduler Enters the Scheduler Mode.
Contacts Enters the Contacts Mode.
Sync START Starts the data transfer operation.
Quick-Memo Enters the Quick-Memo Mode.
Esc Exits the current operation.
Menu Bar Displays the menu bar.
Modes
With most PV Unit operations, you must first enter a mode before you can input
or view data. You can use any of the following methods to enter a mode.
• Tap an icon in the icon menu beneath the display screen
• Tap an on-screen icon in the Mode Menu
• Select a mode on the Action Menu with the stylus or the cursor keys
Note
• All the procedures in this User’s Guide are performed using the icon menu
whenever possible.
To enter a mode using the icon menu
Use the stylus to tap on the icon for the mode you want to enter.
26
Page 29
Chapter 1 Getting Acquainted
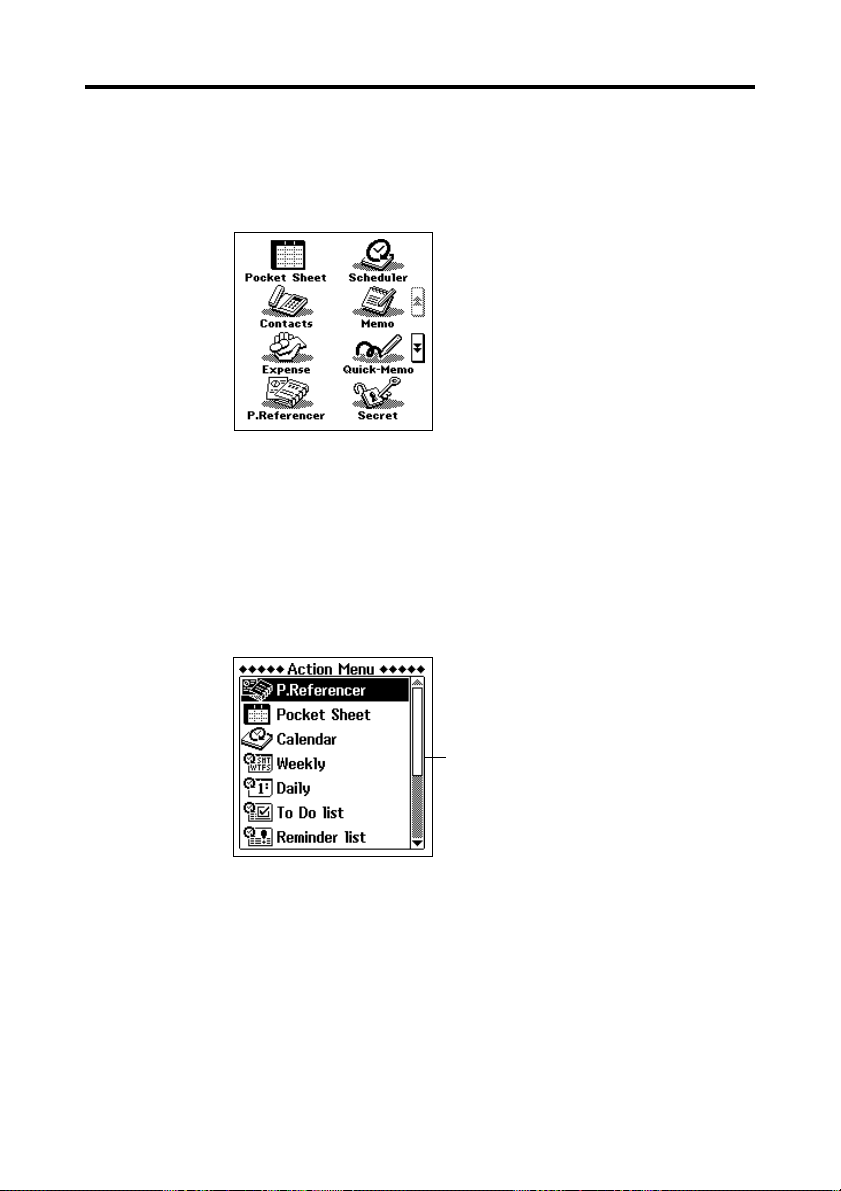
To enter a mode using the on-screen icon menu
1. On the icon menu, use the stylus to tap the Menu icon to display the on-
screen icon menu.
2. Tap the “ and ‘ buttons on the right side of the display to change
menu pages and display the icon of the mode you want. Next, tap the
icon of the mode you want to enter.
To enter a mode using the Action Menu
1. Press the center key to turn on PV Unit power and display the Action
Menu.
Scroll bar
2. If the mode you want is not on the screen, scroll the menu up and down.
• See “Scroll Bars” on page 143 for details on using the scroll bar.
3. Enter the mode you want.
• You can enter a mode using either of the following methods.
• Tap on the mode name in the Action Menu.
• Scroll with the K and L cursor keys to highlight the name of the
mode you want, and then press the center key.
27
Page 30

Chapter 1 Getting Acquainted
Customizing the Appearance of the Mode Menu
You can rearrange Mode Menu so the icons are in any order you want. The
following procedures describe how to swap the positions of two icons and how to
move an icon to a specific location.
Note that you cannot change the positions of icons on the Action Menu.
Swapping Two Icons
Use the following procedure to swap the positions of two icons.
1. On the Mode Menu, tap Menu Bar to display the menu bar, and then
tap Option – Menu edit.
2. On the menu that appears, tap Swap.
3. Tap the first of the two icons whose positions you want to swap to select
it.
4. Tap the second icon to swap it with the first.
Moving an Icon to a Specific Location
Use the following procedure to move an icon to a specific location on the
Mode Menu screen.
1. On the Mode Menu, tap Menu Bar to display the menu bar, and then
tap Option – Menu edit.
2. On the menu that appears, tap Move.
3. Tap the icon you want to move to select it.
4. Tap the icon at the location where you want the icon you tapped in step
3 to be.
28
Page 31

Chapter
2
The Scheduler Mode provides you with a selection of powerful schedule
management tools that help to keep you on time all the time. In addition to
Schedule, Reminder, and To Do tools, you can select from among a variety of
different screens to view your appointments on a monthly, weekly, or daily basis.
You can even set alarms to help make sure you never miss an important
appointment or event.
Scheduler
Entering the Scheduler Mode
On the icon menu beneath the display screen, tap the Scheduler icon. This enters
the Scheduler Mode and displays the 1-month Calendar screen.
Now you can maneuver around the Scheduler Mode to input and recall data.
Inputting New Scheduler Data
This section describes how to input Schedule, To Do, and Reminder data. Note
that a Schedule item can be input as a “single-date” item (an appointment that
starts and ends on the same day) or a “multiple-date” item (an appointment that
spans more than one day). You can input a new multiple-date item with the New
button or with the calendar screen.
29
Page 32

Chapter 2 Scheduler
To input a single-date Schedule item
1. While any Scheduler Mode data screen is on the display, tap New.
2. On the menu that appears, tap Schedule.
1 Data input tool bar
1
2 Date
2
3 Time bar
3
3. If you want to change the date of the appointment, tap the displayed
date and then use the date keyboard that appears to make the changes
you want. Tap NEXT to advance to the appointment time.
4. Use the time keyboard that appears to input the start time and end time
if you want, and then tap NEXT to advance to the alarm time.
5. Use the time keyboard to input the Schedule alarm time if you want,
and then tap NEXT to advance to description text input.
6. Use the text keyboard to type text that describes the item.
7. After the item is the way you want, tap Save to store it.
• In addition to a date, you must input description text or a start time. The
PV Unit will refuse to store the item if it does not contain a date plus
description text or a start time.
To input a multiple-date Schedule item with the New button
1. While any Scheduler Mode data screen is on the display, tap New.
2. On the menu that appears, tap Multi-date item.
• If you drag the stylus across a range of dates on the 1-Month Calendar
screen (page 38), a multiple-date item is created with the corresponding
range of dates.
30
Page 33

Chapter 2 Scheduler
1
3. Tap the date you want to change and then input the year, month, and
day.
4. Tap NEXT to advance to the description text input screen.
5. Input text that describes the item.
6. After the item is the way you want it, tap Save to store it.
• Note that you must input a start date, end date, and description text. The
PV Unit will refuse to store the item if it does not contain a start date,
end date, and description text.
To input a To Do item
1. While any Scheduler Mode data screen is on the display, tap New.
2. On the menu that appears, tap To Do .
2
3
4
5
1 Priority
2 Data input tool bar
3 Category
4 Due date
5 Date keyboard
3. Change the priority if you want.
• A new To Do item is automatically assigned a priority of B. Tap the
priority you want to change to.
4. If you want to change the category, tap on current category setting.
5. On the tab that appears, tap the category you want to assign (Business,
Personal, or Free), and then tap NEXT to advance to the due date.
6. Use the date keyboard that appears to input the due date if you want,
and then tap NEXT to advance to the alarm date.
• The initial due date setting is the date that was selected (flashing) when
you tapped New.
31
Page 34

Chapter 2 Scheduler
7. Use the date keyboard that appears to input an alarm date if you want,
and then tap NEXT to advance to the alarm time.
8. Use the time keyboard that appears to input an alarm time if you want.
• If you input an alarm time, be sure to also input an alarm date. You will
not be able to store the data item if you input an alarm time without an
alarm date.
9. Tap NEXT to advance to description text input.
10. Use the text keyboard to type text that describes the item.
11. After the item is the way you want it, tap Save to store it.
• In addition to a due date, you must input description text. The PV Unit
will refuse to store the item if it does not contain a due date and description
text.
To input a Reminder item
1. While any Scheduler Mode data screen is on the display, tap New.
2. On the menu that appears, tap Reminder.
1 Data input tool bar
1
2 Start date
2
3 End date
3
4 Reminder type
4
5 Date keyboard
5
3. If you want to change the start and/or end date of the reminder, tap the
displayed date and then use the date keyboard that appears to make the
changes you want. Tap NEXT to advance to the reminder time.
4. Use the time keyboard that appears to input the start time and end time
if you want, and then tap NEXT to advance to the alarm time.
32
Page 35

Chapter 2 Scheduler
5. Use the time keyboard to input the Reminder alarm time if you want,
and then tap NEXT to advance to the Reminder type screen.
Reminder type
6. Input the required data for the Reminder type you select, and then tap
NEXT to advance to description text input.
• If you input data incorrectly (with a Reminder date that does not fall
between the start date and end date, for example), the PV Unit will refuse
to store the data item when you tap Save below.
7. Use the text keyboard to type text that describes the item.
8. After the item is the way you want it, tap Save to store it.
• In addition to a start date and end date, you must input description text
or a start time. The PV Unit will refuse to store the item if it does not
contain a start date and end date plus description text or a start time.
Reminder Types and Settings
The following describes each of the Reminder types available and provides details
about the settings required by each.
Daily
Repeated every day. No additional settings are
required.
Weekly
Repeated the same day of the week, each week. Specify
the day of the week by tapping its button.
Buttons Selected day of the week
33
Page 36

Monthly 1
Monthly 2
Yearly 1
Yearly 2
Chapter 2 Scheduler
Repeated the same day of the month, every month.
Specify the day of the month by tapping on it in the
calendar.
Repeated the same day of the week of a specific week
each month. Tap the L arrows next to the Week and
Day boxes to display menus of options, and tap the
ones you want to select.
Repeated the same date every year. Tap the L arrows
next to the Month and Date boxes to display menus
of options, and tap the ones you want to select.
Repeated the same day of the week of a specific week
of a specific month each year. Tap the L arrows next
to the Month, Week, and Day boxes to display menus
of options, and tap the ones you want to select.
Important!
• Be sure to correctly specify all of the settings required for the Reminder type
you specify.
Importing Contacts Data Into a Schedule Item
The following procedure lets you import certain Contacts data entries (fields)
into the Description of a Schedule item, which provides you with handy reference
information about the person you are planning to meet. The entries (fields) that
are imported depend on whether you are importing Business or Personal data.
34
Page 37

Chapter 2 Scheduler
Personal Data Business Data
Name Name
Phone (H) Company
Fax (H) Phone (B)
Mobile Fax (B)
E-mail E-mail
Phone (B) Phone (H)
Fax (B) Fax (H)
Mobile
• Entries (fields) that do not contain any data are skipped (not imported).
To import Contacts data into a Schedule item
1. While any Scheduler Mode data screen is on the display, tap New –
Appointment.
2. On the screen that appears, input the date, time, and alarm time.
• See “To input a single-date Schedule item” on page 30 for details.
• Tapping the NEXT button after inputting the above data displays the
following screen.
Tabs
Contacts
data index
35
Page 38

Chapter 2 Scheduler
3. Tap on a tab to access either Business or Personal Contacts data, and
then use the index to locate the name whose data you want to import.
Highlight the name whose data you want to import by tapping on it, and
then tap the highlighted name again.
4. Input any more text you want for the description, and then tap Save to
store the item.
• The applicable entries (fields) contained in the Contacts item you specify
are imported into the Schedule item. See page 34 for details on which
entries are imported.
• You can move the cursor around the imported data and make any changes
in it that you want.
• Note that Contacts data can be imported as you are creating a new
Schedule item only. You cannot use this procedure to import into an
existing Schedule item.
36
Page 39

Chapter 2 Scheduler
Viewing Scheduler Data
The Scheduler Mode provides a variety of screens that you can use to view
Schedule, To Do, and Reminder data. This section describes the various data
recall screens available in the Scheduler Mode, and provides information about
how to navigate between them.
Screen Organization
The screens used for recall in the Scheduler Mode are arranged as shown in
the following table.
Type
Calendar
Periodic
Schedule
Schedule
Reminder
To D o
Screen Name
• 1-Month Calendar
• 2-Month Calendar
• 3-Month Calendar
• Weekly Scheduler
• Daily Scheduler
• Schedule Data
• Reminder Data
• Reminder List
• To Do Data
• To Do List
Description
• Calendar of a single month
• Calendars for two months
• Calendar for 17 weeks
• Overview of Scheduler data for
a specific week
• Overview of Scheduler data for
a specific day
• Details of an individual
Schedule item
• Details of an individual
Reminder item
• List of all Reminder items
• Details of an individual To Do
item
• List of all To Do items
37
Page 40

Chapter 2 Scheduler
To select a Scheduler Mode screen
1. In the Scheduler Mode, tap the View button to display a list of available
screen types.
• The Vie w list provides the following screen options: 1-Month Calendar,
2-Month Calendar, 3-Month Calendar, Weekly Scheduler, Daily
Scheduler, To Do List, and Reminder List.
2. Tap the screen type you want.
Calendar Screens
Use the calendar screens to quickly locate a specific date and view its
Scheduler data.
1-Month Calendar
The 1-Month Calendar for the month that contains the today’s date (as kept
by the PV Unit’s clock) appears first whenever you enter the Scheduler
Mode.
1
2
3
4
5
678
1 Date jump button (page 49)
2 Weekly Scheduler buttons
3 Highlighted date
4 Selected date (flashing)
5 Data display area
6 Days passed in the year
7 Days remaining in the year
8 Week number for the year
9 Data display tool bar
9
0
q
w
e
r
t
y
0 2-Month Calendar button
q Indicates AM appointment.
w Today’s date (as kept by the PV
Unit’s clock)
e Indicates PM appointment.
r Indicates AM and PM appointment
or appointment without a time.
t Multiple-date item
y Scroll buttons
38
Page 41

Chapter 2 Scheduler
To view a date’s Daily Scheduler screen
1. Tap a date to select it. The selected date flashes in the calendar.
2. Tap the flashing date to change to its Daily Scheduler screen.
3. In the Daily Scheduler screen, tap Esc to return to the 1-Month Calendar
screen.
To view the 2-Month Calendar screen
1. Tap the 2-Month Calendar button to switch to the 2-Month Calendar
screen.
2. In the 2-Month Calendar screen, tap Esc to return to the 1-Month
Calendar screen.
To view a Weekly Scheduler screen
1. Tap the
you want to view.
2. In the Weekly Scheduler screen, tap Esc to return to the 1-Month Calendar
screen.
Using the data display area
• This area shows an outline of data input for up to three Scheduler items
for the currently selected (flashing) date. It shows Schedule, To Do and
Reminder data.
• Use the scroll buttons to scroll the data up and down.
• Tapping the highlighted item displays its data screen.
button to the left of the week whose Weekly Scheduler screen
39
Page 42

2-Month Calendar
Chapter 2 Scheduler
1
2
3
1 Date jump button (page 49)
2 Highlighted date
3 Weekly Scheduler buttons
4 Data display tool bar
5 1-Month Calendar button
6 Indicates AM appointment.
4
5
6
7
8
9
7 Indicates PM appointment.
8 Indicates AM and PM
appointment, appointment without
a time or multiple-date item.
9 Selected date (flashing)
To view a date’s Daily Scheduler screen
1. Tap a date to select it. The selected date flashes in the calendar.
2. Tap the flashing date to change to its Daily Scheduler screen.
To view the 1-Month Calendar screen
Tap the 1-Month Calendar button to switch to the 1-Month Calendar screen.
To view a Weekly Scheduler screen
Tap the
button to the left of the week whose Weekly Scheduler screen
you want to view.
40
Page 43

3-Month Calendar
Chapter 2 Scheduler
1
2
3
1 Date jump button (page 49)
2 Month numbers
3 Highlighted date
4 Data display tool bar
5 Indicates AM appointment.
4
5
6
7
8
6 Indicates PM appointment.
7 Indicates AM and PM
appointment, appointment without
a time or multiple-date item.
8 Selected date (flashing)
To view a date’s Daily Scheduler screen
1. Tap a date to select it. The selected date flashes in the calendar.
2. Tap the flashing date to change to its Daily Scheduler screen.
To view a 1-Month Calendar screen
Tap the month number of a month to view its 1-Month Calendar screen.
Periodic Schedule Screens
The periodic schedule screens give you a quick overview of your scheduled
appointments. You can view all your appointments for a specific day or week.
41
Page 44
Chapter 2 Scheduler
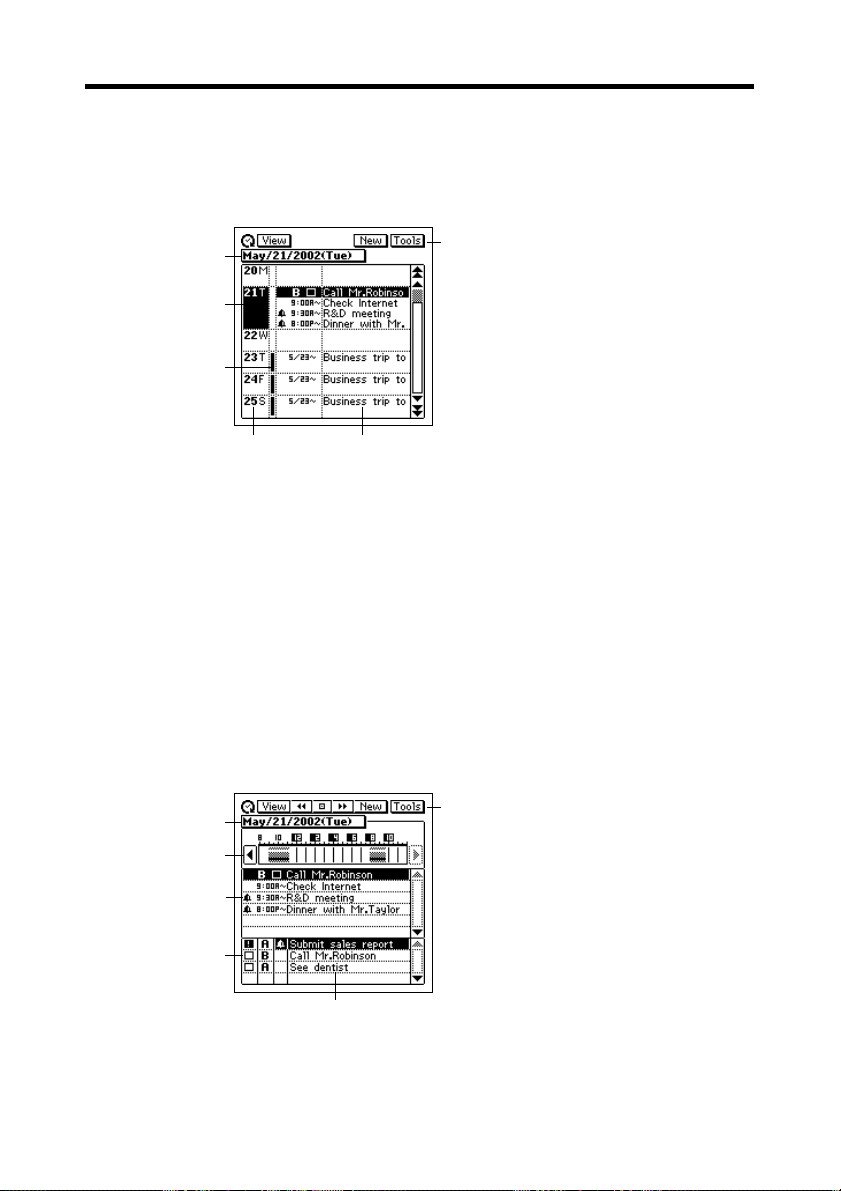
Weekly Scheduler Screen
The Weekly Scheduler screen shows your schedule for an entire week,
including Schedule, To Do, and Reminder items.
1 Date jump button (page 49)
1
2
3
45
To view a date’s Daily Scheduler screen
1. Tap a date in the date column to select (highlight) it.
2. Tap the selected date to display its Daily Scheduler screen.
To view an item’s data screen
1. Tap an item to select (highlight) it.
2. Tap the selected item to display its data screen.
6
2 Highlighted date
3 Multiple-date item
4 Date column
5 Description text
6 Data display tool bar
Daily Scheduler Screen
The Daily Scheduler screen gives you an overview of Scheduler (Schedule,
Reminder, To Do) items for a particular date, along with a list of all currently
unchecked To Do items.
1 Date jump button
42
6
2 Time bar
3 Scheduler area
4 To Do area
5 Description text
6 Data display tool bar
1
2
3
4
5
Page 45

Chapter 2 Scheduler
To shift the time bar
Tap the H and J scroll buttons to shift the time bar left and right.
The shaded portion in the time bar indicates a period during which an
appointment is scheduled. Overlapping time bars (schedules) are black.
Scheduler Area
• This area shows the current date’s six Scheduler (Schedule, Reminder,
To Do) items.
• Changing to a different date causes the data in the Scheduler area to be
replaced with the Scheduler data of the new date.
• You cannot check or change the priority of a To Do data item in the
Scheduler area.
To Do Area
• This area shows the four unchecked To Do items.
• You cannot use this screen to change the checked/unchecked status.
• The data in this area remains the same, even if you change to a different
date.
• You can check a To Do data item in the To Do area by tapping its check
box. As soon as you do, the data item disappears from the To Do area
(though it remains stored in the To Do Mode).
• You can change the priority of a To Do data item in the To Do area by
tapping on its current priority setting to cycle it in the following sequence:
A → B → C → A, etc.
To view an item’s data screen
1. Tap an item to select (highlight) it.
2. Tap the selected item to display its data screen.
43
Page 46

Chapter 2 Scheduler
Schedule Data Screen
The Schedule data screen shows the details of a selected Schedule item.
Schedule Data Screen (Single-Date)
1 Start time (and end time)
2
2 Data display tool bar
3
1
• Tapping Esc goes to the Daily Scheduler screen.
Schedule Data Screen (Multiple-Date)
3 Date
4
4 Alarm time
5
5 Description
1 Data display tool bar
1
2 Start date
3 End date
2
4 Description
3
4
• Tapping Esc goes to the Daily Scheduler screen.
44
Page 47

Chapter 2 Scheduler
Reminder Screens
The two Reminder screens show currently stored Reminder items. The
Reminder data screen shows full details of each item, while the Reminder
list is a collection of one-line summaries of Reminder data items that can be
used for quick location of a specific item.
Reminder List Screen
1 Reminder dates
4
2 Reminder types
3 Descriptions
4 Data display tool bar
2
3
1
To view a Reminder data screen
1. In the Reminder list screen, tap a Reminder item to select (highlight) it.
2. Tap the selected item again to display its data screen.
Reminder Data Screen
1 Data display tool bar
1
2 Reminder date
2
3
3 Start time (and end time)
4
4 Alarm time
5
5 Reminder type
6
6 Description
• Tapping Esc returns to the Reminder list screen.
45
Page 48

Chapter 2 Scheduler
To Do Screens
The two To Do screens show currently stored To Do items. The To Do data
screen shows full details of each item, while the To Do list is a collection of
one-line summaries of To Do items that can be used for quick location of a
specific item.
To Do List Screen
1
1 Display category
6
2 Check boxes
3 Priorities
2
3
4
5
To specify the display category
1. Tap the display category box to open a menu of categories.
2. Tap the category whose data you want to display.
7
4 Alarm indicator
5 Display item buttons
6 Data display tool bar
7 Descriptions
To specify the display item type
Tap the display item button that corresponds to the type of items you want
to display.
Unchecked items only
Checked items only
Priority A items only
Priority B items only
Priority C items only
All items
46
Page 49

Chapter 2 Scheduler
To check and uncheck items
Tap the check box of an item to toggle it between being checked and
unchecked.
• The check boxes of all unchecked data items whose due dates are passed
are replaced by exclamation points (
To change the priority of an item
Tap the current priority of an item to cycle it in the following sequence:
A → B → C → A, etc.
To view a To Do data screen
1. In the To Do list screen, tap a To Do item to select (highlight) it.
2. Tap the selected item again to display its data screen.
To Do Data Screen
1
2
3
).
1 Priority
4
2 Check box
5
3 Description
6
7
4 Data display tool bar
8
5 Date checked
9
6 Category
7 Due date
8 Alarm date
9 Alarm time
• Tapping Esc returns to the To Do list screen.
To check and uncheck the item
Tap the check box to toggle it between being checked and unchecked. The
date checked is added automatically.
• The check boxes of all unchecked data items whose due dates are passed
are replaced by exclamation points (
).
To change the priority
Tap the current priority to cycle it in the following sequence:
A → B → C → A, etc.
47
Page 50

Chapter 2 Scheduler
Date Highlighting
You can highlight dates on the 1-Month or 2-Month Calendar screen to specify
them as holidays or other special events.
To highlight dates
1. While the 1-Month Calendar or 2-Month Calendar is on the display, tap
Menu Bar to display the menu bar, and then tap Option – Highlight.
• You can switch between the 1-Month Calendar and 2-Month Calendar
at any time during the following steps.
2. Tap the individual dates you want to highlight, or drag the stylus across
the range of dates you want to highlight.
• If you make a mistake and highlight the wrong date, simply tap or drag
across it to unhighlight.
3. If you want to highlight dates in other months, tap the tool bar’s
HH
(
H) and (
HH
• You can highlight dates only within the year that contains the month
where the date cursor was located when you started this procedure.
4. After all date highlighting is the way you want it, tap Save to store it.
JJ
J) buttons to change months, and repeat step 2.
JJ
To unhighlight dates
1. While the 1-Month Calendar or 2-Month Calendar is on the display, tap
Menu Bar to display the menu bar, and then tap Option – Unhighlight.
2. Specify the start month and end month of the period whose dates you
want to unhighlight.
• Note that you can unhighlight dates for a range of months only. You
cannot unhighlight individual dates.
3. After the dates are the way you want them, tap Exe.
4. In response to the message that appears, tap Ye s to unhighlight all dates
in the range you specified.
48
Page 51

Chapter 2 Scheduler
Jumping to a Specific Date
You can use the following procedure while the Calendar, Daily Scheduler, or
Weekly Scheduler screen is on the display to select a date and display its data.
1. While the 1-Month Calendar, 2-Month Calendar, 3-Month Calendar,
Weekly Scheduler screen, or Daily Scheduler screen is on the display,
tap the date jump button.
Date jump
button
2. Use the date keyboard that appears to input the date to which you want
to jump, and then tap NEXT.
Renaming To Do Categories
Use the following procedure to change the name of a To Do category.
1. In the To Do Mode, display the list screen or a data screen.
2. Tap Menu Bar to display the menu bar, and then tap Option – Name
edit.
3. Type in the names you want to assign to the categories, and then tap
Save to save them.
• You can input up to 14 characters for each category name.
• Category names revert to their preset defaults whenever the PV Unit is
reset.
49
Page 52

Chapter
3
The Contacts Mode is the easy way to organize, store, and manage all your business
and personal contact data. Fields are provided for name, address, phone number,
fax number, e-mail address, and more. Business data is grouped under company
name, so you have instant at-a-glance access to information on everyone who
works for the same company.
Contacts
Entering the Contacts Mode
You can use any one of the three following methods to enter the Contacts Mode.
The method you use determines what appears on the screen first.
To enter the Contacts Mode from the icon menu
Tap the Contacts icon below the PV Unit screen to enter the Contacts Mode.
This displays the list screen of the data items contained in the category that
was on the display when you last exited the Contacts Mode.
To enter the Contacts Mode from the Action Menu
1. Press the center key to turn on PV Unit power.
2. Scroll with the K and L cursor keys to highlight the name of the
Contacts Mode list you want.
• You can select Latest calls, Business, or Personal.
3. Press the center key.
To enter the Contacts Mode from the Mode Menu using the stylus
1. On the icon menu beneath the PV Unit display screen, tap Menu to
display the on-screen icon menu.
2. Tap Contacts.
• This displays the list screen of the data items contained in the category
that was on the display when you last exited the Contacts Mode.
50
Page 53

Chapter 3 Contacts
Changing the Display Category
1. Display a Contacts list screen.
Category
name box
• Note that you can change the display category only from a Contacts list
screen.
2. Tap the L arrow to the right of the category name box to open a list of
categories, and tap the one you want to select.
Category Name
Latest calls
All
Business
Personal
Untitled 1 - 5
• The above describes the default list screen contents. You can change the
contents of the Personal and Untitled category lists, and of the employee
list that appears when you select a company name from the Business
category list. See “Changing Contacts List Screen Contents” on page
56 for details.
Last 16 Contacts data items whose data
screens you opened. See “Latest Calls List”
below for details.
All Contacts data, regardless of category
Company names of Contacts data stored under
the Business category. Selecting a company
name displays a list of employees and their
business phone numbers.
Personal names and home phone numbers of
Contacts data stored under the Personal
category
Free 1 and Free 2 fields of Contacts data stored
under the applicable Untitled category
List Contents
51
Page 54

Chapter 3 Contacts
Latest Calls List
Selecting an item in the Contacts list screen and then changing to the item’s data
screen causes that item to be added to the Latest calls list. An item is not added to
the Latest calls list if you scroll to its data screen from another data screen.
Note
• The contents of the Latest calls list are cleared whenever you perform a data
synchronization operation with your computer, when you delete all the data
items in a category, or when you delete all data items.
Resizing Contacts List Screen Columns
You can use the stylus to drag the separator line on a list screen left and right to
change the relative sizes of the columns.
Drag
52
Page 55

Chapter 3 Contacts
Inputting New Contacts Data
The following procedure shows how to input new Business category data. Data
input procedures for Personal and Untitled category data are identical.
1. While a Contacts Mode list or data screen is on the display, tap the New
button.
2. On the menu that appears, tap the category where you want to input the
data.
• In this example, tap Business.
1
1 Prompt
3
2 Text keyboard
4
3 Data input toolbar
4 Scroll bar
5
5 Category name
2
3. Input the name of the person. Business and Personal data is sorted
automatically by name, so it is a good idea to input the last name first.
• Note that you must input Name data for a Personal item, Name and
Company data for a Business item, and data for the first entry (field) of
an Untitled item. The PV Unit will refuse to store the item when you tap
Save below if it does not contain the minimum required data.
4. Tap the other fields on the screen and input the data you want.
5. After you finish inputting all the data that you want, tap Save to store it.
53
Page 56

Chapter 3 Contacts
Viewing Contacts Data
Use one of the following procedures to view the Contacts data you want.
To view Business data
1. In a Contacts list screen, tap the L arrow to the right of the category
name box to open a list of categories.
2. Tap Business to change to the Business category.
Company
names
Index
3. Scroll with the H and J cursor keys to move the highlighting in the
index at the bottom of the screen to the letter that starts the name of the
company whose data you want to view.
4. Double-tap the name of a company to display a list screen (name and
business phone number) of all entries whose company entry matches
the company you selected.
1
2
54
1 Company name
2 Names
3 Phone numbers
3
Page 57

Chapter 3 Contacts
5. Scroll with the K and L cursor keys to move the highlighting to the
name of the person whose data you want to view, and then press the
center key to display the data screen for that person.
To view other data
1. In a Contacts list screen, tap the L arrow to the right of the category
name box to open a list of categories.
2. Tap the name of the category (besides Business) whose data you want
to view.
3. Scroll with the H and J cursor keys to move the highlighting in the
index at the bottom of the screen to the letter that starts the data that
appears in the left column of the list screen.
• The data that appears in the left column depends on the category you
selected.
4. Double-tap the data item in the list to display its data screen.
55
Page 58

Chapter 3 Contacts
Changing Contacts List Screen Contents
You can specify one of the entries (fields) that appears in the list screens of the
Personal category and the five Untitled categories, and of the employee list screen
that appears when you select a company name from the Business category list.
The following table shows the entries (fields) in each list screen that are fixed.
All others are selectable.
Category
Business
(Employee List)
Personal
Untitled 1-5
Latest calls
All
Business
(Company List)
• You can make separate settings for each of the five Untitled categories.
Fixed Entries (Fields)
Name
Name
Free 1
All entries are fixed.
All entries are fixed.
All entries are fixed.
To change the contents of a category’s list
1. Display the Contacts list of the category whose contents you want to
change.
2. Tap the button under the Tools button to display a list of entries (fields)
that can be displayed in the list.
3. Tap the entry name that you want to display in the list together with the
fixed entry.
• You can specify only one field per list.
• Tapping an entry name closes the list entry selection screen and displays
the list with the entry you selected.
56
Page 59

Chapter 3 Contacts
Changing Contacts Input Screen Contents
Use the procedure described here to change the contents of the Contacts Mode
data input screen for each category. The following table shows the entries (fields)
in each input screen that are fixed. All others are selectable.
Category
Business
Personal
Untitled 1-5
• You can make separate settings for each of the five Untitled categories.
Fixed Entries (Fields)
Name
Company
Name
Phone (H)
Free 1
Free 2
To change the contents of a category’s input screen
1. Display the Contacts list of the category whose input screen’s contents
you want to change.
2. Tap Menu Bar to display the menu bar, and then tap Option – Prompt
edit to display a list of entries (fields) that can be displayed in category’s
input screen.
Check boxes
• The above is the entry selection screen for the Business category.
57
Page 60

Chapter 3 Contacts
3. Tap the check box next to an entry to toggle it between checked (display
entry) and unchecked (do not display entry).
• You can check or uncheck any of the displayed entries shown on the
screen.
4. After making the settings you want, tap Ye s to save them and close the
entry selection screen.
Managing Untitled Categories and Free Entries
You can use the procedures described here to change the names of each of the
five Untitled categories, and the names of the 13 entries (fields) under each of the
Untitled categories.
Contacts Categories
There are seven categories in the Contacts Mode: the two preset categories
named Business and Personal, and five undefined categories named Untitled
1 through Untitled 5.
The Business and Personal categories contain identical entries (fields). The
difference between them is the sequence the fields appear on the display,
and how data is sorted.
The Untitled categories contain entries that can be configured by you.
58
Page 61

Chapter 3 Contacts
Contacts Field Names
Business Personal Untitled 1 - 5
Name* Name* Free 1*
Company* Phone (H) Free 2
Phone (B) Fax (H) Free 3
Fax (B) Mobile Free 4
Address (B) Address (H) Free 5
E-mail E-mail Free 6
Position Company Free 7
Department Phone (B) Free 8
Phone (H) Fax (B) Free 9
Fax (H) Position Free 10
Mobile Department Free 11
Address (H) Address (B) Free 12
Note Note Free 13
* Indicates entries on which data items are sorted.
• (B): Business
• (H): Home
To edit Contacts Untitled category and Free entry names
1. In the Contacts Mode, display the list screen of the Untitled category
you want to edit.
2. Tap Menu Bar to display the menu bar, and then tap Option – Name
edit.
3. On the screen that appears, tap the category name or one of the entry
names, and make any changes you want. Repeat this step for as many
names as you want to change.
• You can assign category names up to 14 characters long, and entry names
up to 10 characters long.
4. After everything is the way you want, tap Save to store the data.
59
Page 62

Chapter 3 Contacts
Copying Data Items Between the Personal and Business Categories
You can select a Personal data item and copy it to create a Business data item, and
vice versa. You can then make any changes you want in the copy.
1. In the Business or Personal category, select the data item you want to
copy.
• You can select an item by displaying its data screen or by tapping the
item on a list screen.
2. Tap Menu Bar to display the menu bar, and then tap Option – Business
Personal.
• This creates a copy of the data item you selected in step 1.
3. On the screen that appears, make any changes in the data you want.
4. After you are finished, tap Save to save the copied data as a new data
item.
Exporting Contacts Data Into a Schedule Item
The following procedure lets you export Contacts data into the description text of
a Schedule item, which provides you with handy reference information about the
person you are planning to meet.
1. Display the data item (record) you want to export.
2. Tap New – Appointment.
3. On the screen that appears, input the date, time, alarm time, and any
additional description text you want.
4. Tap Save to store the item.
• The applicable entries (fields) of the Contacts item are exported into the
Schedule item. See “Importing Contacts Data Into a Schedule Item” on
page 34 for details on which entries are exported.
• Note that Contacts data can be exported to create a new Schedule item
only. You cannot use this procedure to export into an existing Schedule
item.
60
Page 63

Chapter
4
The Memo Mode works much like a basic word processor. It lets you input and
store text files for later recall when you need them.
Memo
Entering the Memo Mode
Enter the Memo Mode by tapping Menu to display the Mode Menu, and then
selecting Memo.
1 Category name box
1
2
• This is the Memo list screen, which appears first when you enter the Memo
Mode.
• The display category is the one that was selected when you last exited the
Memo Mode.
2 Memo titles
3 Scroll bar
3
Changing the Display Category
1. Display the Memo list screen.
• Note that you can change the display category only from the Memo list
screen.
2. Tap the L arrow to the right of the category name box to open a list of
categories, and tap the one you want to select.
• The Memo Mode list changes to show all memos stored under the
category you select.
• All Memo Mode categories are initially named Untitled (1 through 5).
See “Renaming Memo Categories” on page 65 for details on changing
Memo Mode category names.
61
Page 64

Chapter 4 Memo
Inputting New Memo Data
Data input procedures are the same for all categories.
1. While a Memo Mode list or data screen is on the display, tap the New
button.
2. On the menu that appears, tap the category where you want to input the
data.
• In this example, tap Business.
1
1 Prompt
2
2 Data input tool bar
3 Category name
4 Text keyboard
3
4
3. Input the text of the memo. The first line appears in the Memo list screen,
so it is a good idea to input a descriptive title in the first line for later
reference.
4. After you finish inputting all the data that you want, tap Save to store it.
62
Page 65

Chapter 4 Memo
Viewing Memo Data
The following procedures explain how to recall a memo item (record) for viewing,
and how to expand the data display to fill the entire screen.
To view memo data
1. Display the Memo list screen.
• Note that you can change the display category only from the Memo list
screen.
2. Tap the L arrow to the right of the category name box to open a list of
categories, and tap the one that contains the data you want to view.
Memo titles
3. Scroll with the K and L cursor keys to highlight the title of the memo
you want to view, and then press the center key to display the memo’s
contents.
63
Page 66

Chapter 4 Memo
To display an item in the full-screen view
1. Select the memo whose contents you want to display in the full-screen
view.
• You can select a memo by highlighting it in the list screen or by displaying
its data screen.
2. Tap Menu Bar to display the menu bar, and then tap Option – Full
screen.
• Use the K and L cursor keys to scroll the screen page-by-page.
• Tap Esc to return to the normal view.
64
Page 67
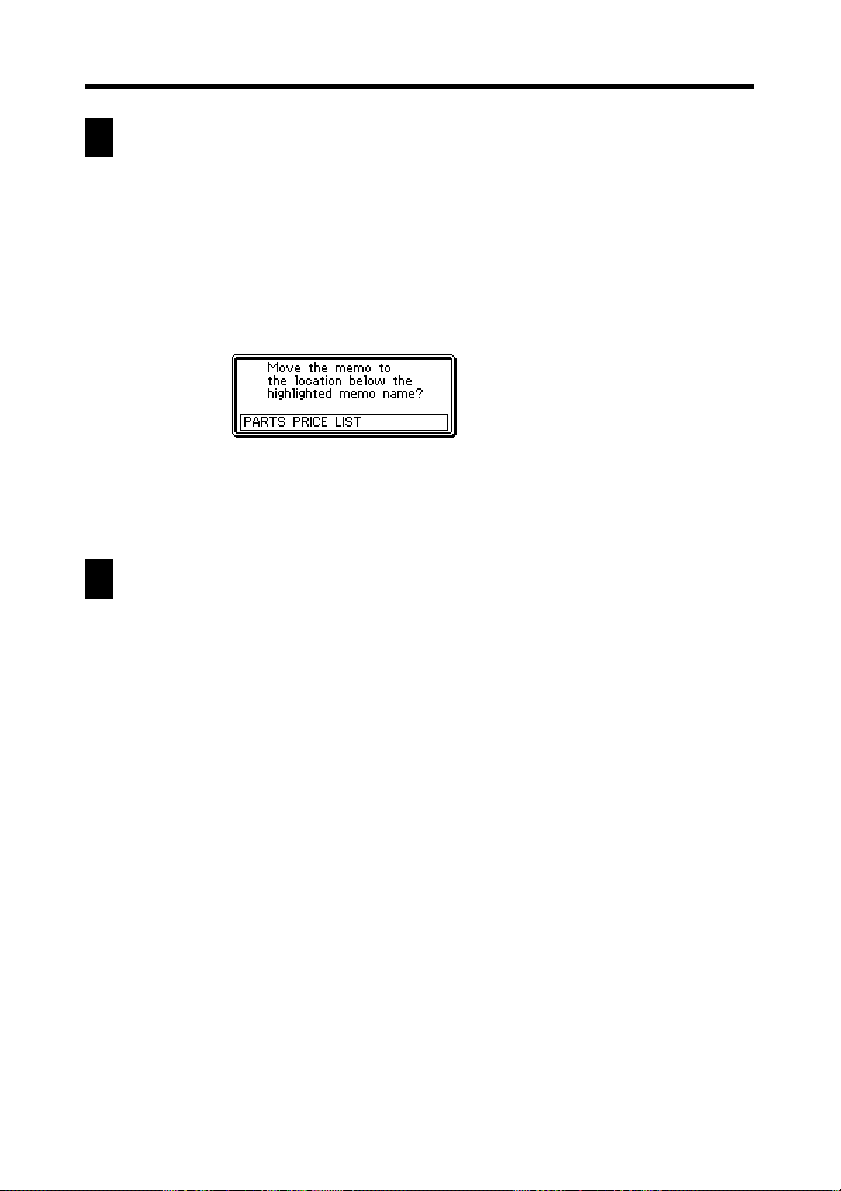
Chapter 4 Memo
Moving a Memo within a List Screen
Use the following procedure when you want to move a memo to different location
within the list screen of the same category.
• You can’t move a memo from one category to another.
1. Display the list screen that contains the memo you want to move, and
tap the memo title to highlight it.
2. Tap Menu Bar to display the menu bar, and then tap Option – Move.
3. Tap the memo above which you want to move the memo you selected in
step 1.
4. Tap Exe to move the memo.
Renaming Memo Categories
Use the following procedure to change the name of a Memo category.
1. In the Memo Mode, display the list screen for the category whose name
you want to change.
2. Tap Menu Bar to display the menu bar, and then tap Option – Name
edit.
3. On the screen that appears, type in the name you want to assign to the
category, and then tap Save to save it.
• You can use up to 14 characters for a category name.
• Category names revert to their preset defaults whenever the PV Unit is
reset.
65
Page 68
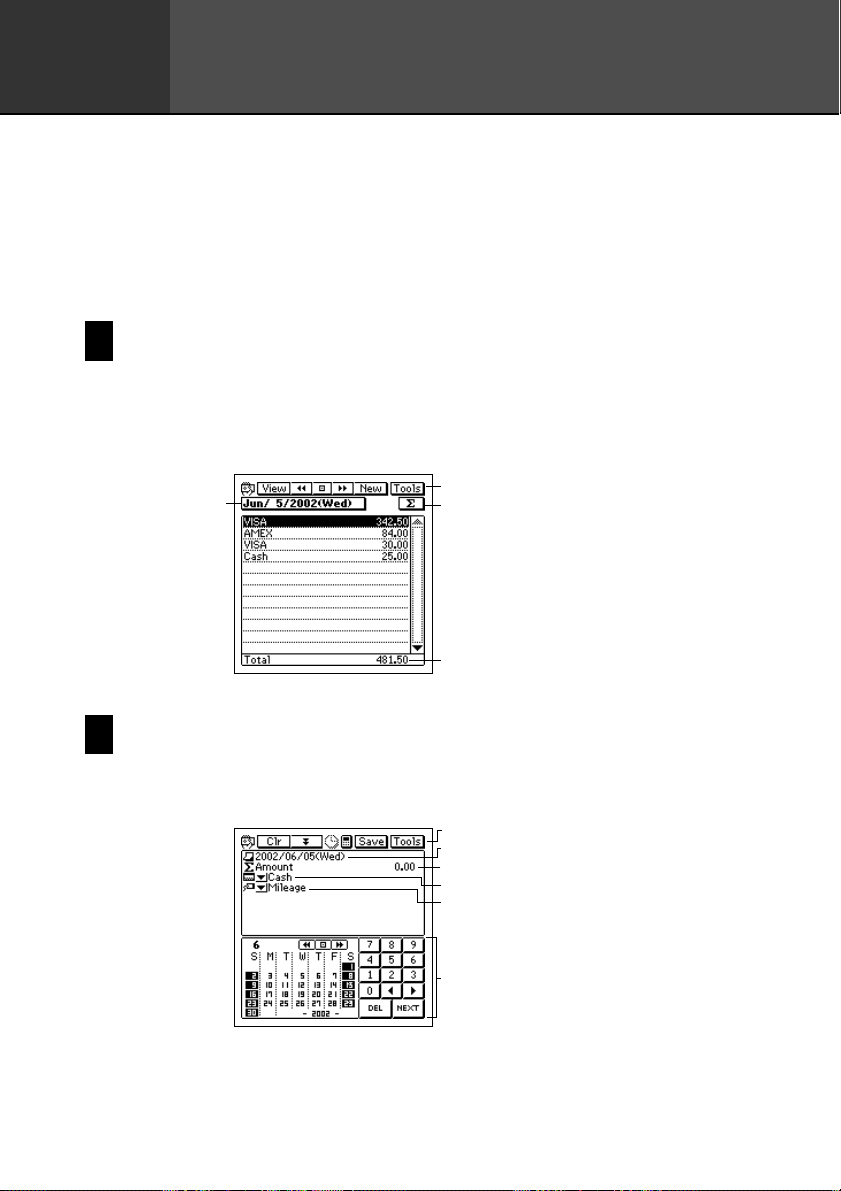
Chapter
5
The Expense Manager is like having your own personal bookkeeper along with
you wherever you go. You input transaction data as it occurs, and later you can
calculate periodic totals. It’s the easy way to keep track of your finances day by
day.
Expense Manager
Entering the Expense Manager Mode
Enter the Expense Manager Mode by tapping Menu to display the Mode Menu
screen, and then selecting Expense. This displays a transaction list for today’s
date, as kept by the PV Unit’s clock.
1 Date jump button
1
2
2 Data display tool bar
3
3 Periodic total button
4 Date total
4
Inputting a New Transaction
1. In any Expense Manager Mode list screen or data screen, tap New to
display a new transaction input screen.
1
1 Data input tool bar
2
2 Transaction date
3
3 Transaction amount
4
5
4 Payment type
5 Expense type
6 Date keyboard
6
66
Page 69

Chapter 5 Expense Manager
2. If you want to change the date of the transaction, tap the displayed date
and then use the date keyboard that appears to make the changes you
want. Tap NEXT to advance to the amount.
3. Input the amount of the transaction, and then tap NEXT.
• An Expense Manager item must have date and amount data. Otherwise,
the PV Unit will refuse to store the data when you tap Save below.
4. Tap the L arrow to the left of the payment type to open a list of available
payment types, and select the one you want to assign to the transaction.
• You could also use the text keyboard to input a payment type or to change
the payment types inside the list. Payment types can be up to 14 characters
long.
5. Tap NEXT.
6. Tap the L arrow to the left of the expense type to open a list of available
expense types, and select the one you want to assign to the transaction.
• You could also use the text keyboard to input a expense type or to change
the expense types inside the list. Expense types can be up to 14 characters
long.
7. After everything on the screen is the way you want, tap
the description input screen.
8. After inputting the description, tap Save to save it.
• If you want to save the transaction without inputting a description, tap
Save to save it without inputting description text.
67
to advance to
Page 70

Chapter 5 Expense Manager
Recalling Expense Manager Data
1. In the Expense Manager Mode list screen, tap the date jump button.
Data jump
button
2. Use the date keyboard that appears to input the date to which you want
to jump, and then tap NEXT.
• You can also scroll forward and back through the dates by tapping
and in the data display toolbar.
• Use the H and J cursor keys to scroll dates in sequence.
3. To select the contents of the list screen, tap the View button in the data
display toolbar to open a menu of data types.
4. On the menu that appears, tap the type of data you want to display in the
list.
5. To display the data screen of a transaction, tap the transaction to highlight
it and then tap it again.
68
Page 71

Chapter 5 Expense Manager
Calculating Periodic Totals
This section describes how to calculate total for a period you specify. You can
calculate a periodic total for a specific payment type or expense type.
1. In the Expense Manager Mode list screen, tap the
Total type
Date keyboard
2. Input the start date and the end date of the period for which you want to
calculate a total.
3. Tap either Expense or Payment to specify the type of total you want to
calculate.
4. When the date and total type are the way you want, tap the Exe button.
• The total of all transactions for which an expense type or payment type
is not defined is shown under the title “Other”.
button.
5. Tap Esc to return to the list screen.
69
Page 72

Chapter 5 Expense Manager
Managing Payment and Expense Types
Your PV Unit comes with the built-in payment and expense types shown below.
You can use these as they are, or you can change the names of the built-in payment
and expense types to suit your own needs.
Built-in Payment and Expense Types
Payment Types Expense Types
Cash Mileage
Checking A Fuel
Checking B Parking & Tolls
Savings Taxi
AMEX Meals
VISA Phone
Master Card Entertainment
DISCOVER Hotel
Diners Club Miscellaneous
Free Free
To change a payment type or expense type name
1. Tap Menu Bar to display the menu bar, and then tap Option – Label
edit.
2. Tap either Payment type or Expense type.
3. Scroll with the K and L cursor keys to highlight the item whose name
you want to edit, and then press the center key.
4. Use the text keyboard to type up to 14 characters for the name that you
want to assign to the payment type or expense type.
5. After the name is the way you want, tap Save to save it.
70
Page 73

Chapter
6
The Currency Converter lets you instantly convert from one currency to two
other currencies. You can even convert between euros and national currencies.
Currency Converter
Entering the Currency Converter Mode
Tap the Menu icon to display the Mode Menu, and then tap Conversion.
1 Tab s
4
1
2
3
• Use the General tab for general currency conversion and the Euro tab
for euro currency conversion.
2 Currency names
3 Calculator keyboard
4 Rate Table button
General Currency Conversion
You can perform general currency conversion calculations using the General tab
of the Currency Converter.
Performing a Conversion
Before actually performing a conversion, you must first set the exchange
rate for each of the currencies and change the currency names, if you want.
See “Changing the Currency Name and Rate” on page 72 for details.
71
Page 74

Chapter 6 Currency Converter
Example: To find out the dollar and yen equivalents of 2 pounds.
1. In the Currency Converter, tap the General tab.
Currency
names
2. Tap the name of the currency from which you want to convert. In this
example you would tap £.
3. Use the calculator keyboard to input an amount into for the selected
currency and then tap = (or NEXT). In this example you would tap 2 =.
4. Tap Exe to perform the conversion.
Changing the Currency Name and Rate
Use the following procedures to change the currency names that appear on
the General tab, and the rates used for performing currency conversion
calculations. Note that you must constantly update conversion rates to keep
them current.
To set a conversion rate
1. While the General tab is displayed on the Currency Converter screen,
tap Menu Bar to display the menu bar, and then tap Option – Rate
edit.
2. On the screen that appears, tap the exchange rate value you want to
change.
3. Use the calculator keyboard to input the rate and then tap = (or NEXT).
4. Now you can tap Set to apply the rate and close the editing screen or
you can tap Name edit and display the name editing tab.
72
Page 75

Chapter 6 Currency Converter
To change a currency name
1. While the General tab is displayed on the Currency Converter screen,
tap Menu Bar to display the menu bar, and then tap Option – Name
edit.
2. On the screen that appears, tap the currency name you want to change.
3. Use the text keyboard to input a name up to four characters long.
4. Now you can tap Set to apply the name and close the editing screen, or
you can tap Rate edit and display the rate editing tab.
Displaying the Current General Rates
While the General tab is displayed on the Currency Converter screen, tap
the Rate button.
To close the rate table, tap anywhere on the screen outside of the rate table.
Euro Conversion
The Euro tab lets you convert between euros and any three of the 12 national
currencies of countries where the euro is used.
Performing a Conversion
The 12 national currencies are preset with the exchange rates and decimal
place specifications shown the “Euro Conversion Rate Presets” table on
page 172. If necessary, you can change exchange rates for each of the
currencies and change the currency names. See “Changing the Currency
Name and Rate” on page 75 for details.
73
Page 76

Chapter 6 Currency Converter
Example: To find out the mark, franc, and lira equivalents of 5 euros.
1. In the Currency Converter, tap the Euro tab.
Currency
names
2. Tap the name of the currency from which you want to convert. In this
example you would tap
3. Use the calculator keyboard to input an amount into for the selected
currency and then tap = (or NEXT). In this example you would tap 5 =.
4. Tap Exe to perform the conversion.
Important!
• The number of significant digits of this product is 11.
Errors may be generated in currency conversion calculations that produce
results greater than the values shown below.
1.00= Euro → National Currency National Currency → Euro
1.95583
DEM
FRF
ITL
ESP
NLG
BEF
PTE
AT S
FIM
IEP
LUF
GRD
6.55957
1936.27
166.386
2.20371
40.3399
200.482
13.7603
5.94573
0.787564
40.3399
340.750
511,291,881.19 → 999,999,999.99
152,449,017.23 → 999,999,999.95
51,645,689.90 → 99,999,999,983
601,012,104.38 → 99,999,999,999
453,780,216.08 → 999,999,999.98
2,478,935,247.71 → 99,999,999,999
498,797,897.06 → 99,999,999,998
72,672,834.16 → 999,999,999.89
168,187,926.46 → 999,999,999.99
1,269,738,078.42 → 999,999,999.99
2,478,935,247.71 → 99,999,999,999
293,470,286.13 → 99,999,999,999
.
1,955,830,000.00 → 1,000,000,000.00
6,559,570,000.00 → 1,000,000,000.00
999,999,999,999 → 516,456,899.09
166,386,000,000 → 1,000,000,000.00
2,203,710,000.00 → 1,000,000,000.00
40,339,900,000 → 1,000,000,000.00
200,482,000,000 → 1,000,000,000.00
13,760,300,000.00 → 1,000,000,000.00
5,945,730,000.00 → 1,000,000,000.00
787,564,000.00 → 1,000,000,000.00
40,339,900,000 → 1,000,000,000.00
340,750,000,000 → 1,000,000,000.00
74
Page 77

Chapter 6 Currency Converter
Changing the Displayed National Currencies
Use the following procedure to select from among the 12 national currencies
and display the ones you want on the Euro tab.
1. On the Currency Converter Euro tab, tap the L button next to the
currency you want to change.
2. On the list that appears, tap the currency you want to use.
Displaying the Current Euro Rates
While the Euro tab is displayed on the Currency Converter screen, tap the
Rate button.
To close the rate table, tap anywhere on the screen outside of the rate table.
Changing the Currency Name and Rate
You can use the following procedures to change the names and rates of the
national currencies. Note that you cannot change the euro symbol or exchange
rate.
To set a conversion rate
1. While the Euro tab is displayed on the Currency Converter screen, tap
Menu Bar to display the menu bar, and then tap Option – Rate edit.
2. On the screen that appears, tap the exchange rate value you want to
change.
3. Use the calculator keyboard to input the rate and then tap = (or NEXT).
4. Now you can tap Set to apply the rate and close the editing screen or
you can tap Name edit and display the name editing tab.
To change a currency name
1. While the Euro tab is displayed on the Currency Converter screen, tap
Menu Bar to display the menu bar, and then tap Option – Name edit.
2. On the screen that appears, tap the currency name you want to change.
75
Page 78

Chapter 6 Currency Converter
3. Use the text keyboard to input a name up to four characters long.
• Tapping the Initial button displays a list of initial default currency names
and rates. Tapping on a currency in this list returns its name and exchange
rate to the settings shown on the list.
4. Now you can tap Set to apply the name and close the editing screen or
you can tap Rate edit and display the rate editing tab.
Specifying the Rounding Method
Normally, you can leave the preset rounding settings the way they are for each
currency. When necessary, however, you can use the following procedure to change
them.
1. Tap the General or Euro tab.
2. Tap Menu Bar to display the menu bar, and then tap Option – Rounding.
3. Specify the number of decimal places for each currency.
• 0 and 2 specify the number of decimal places for the Cut, 5/4, and Up
rounding methods.
• Free specifies a floating decimal point, which displays the value without
rounding.
76
Page 79

Chapter 6 Currency Converter
4. Tap a button at the bottom of the screen to specify the rounding method.
• The rounding method you select is applied for all currency conversion
calculations involving a currency for which you specified 0 or 2 decimal
places in step 3, above.
Cut: Cuts off the decimal part to the specified number of places.
5/4: Rounds off the decimal part to the specified number of places.
Up: Rounds up the decimal part to the specified number of places.
5. After everything is the way you want, tap Set.
77
Page 80

Chapter
7
Quick-Memo is like having a digital memo pad on which you can sketch simple
line drawings or jot down reminders.
Quick-Memo
Entering the Quick-Memo Mode
Tap the Quick-Memo icon below the PV Unit screen to enter the Quick-Memo
Mode.
1 Draw toolbar
2
1
• This is the Quick-Memo input screen, which appears first whenever
you enter the Quick-Memo Mode.
• Tap
Mode and return to the screen from which you originally entered it.
in the upper right corner of the screen to exit the Quick-Memo
2 Input toolbar
3
3 Quick-Memo category
button
Quick-Memo Categories
There are three Quick-Memo categories. As with categories in other modes, QuickMemo categories let you group your memos for easier management.
To select a Quick-Memo category
Tap the Quick-Memo category button to cycle through the Quick-Memo
categories in the following sequence:
etc.
The display shows the Quick-Memos that are stored under the currently
selected category.
78
→ → → ,
Page 81

Chapter 7 Quick-Memo
Using the Quick-Memo Drawing Tools
The following describes the functions of the Quick-Memo Drawing tools when
inputting Quick-Memo data.
Tap a drawing tool with the stylus to select it. The currently selected drawing tool
is highlighted on the toolbar. Tapping some of the drawing tools also cycles through
a number of optional settings.
12 34 5
1 Pencil
6
Important!
A diagonal line may appear jagged on the display, even in the Quick-Memo list
(page 81).
2 Eraser
3 Line
4 Darkness
5 Undo
6 Selected tool
Pencil Tool
• Tap this tool to cycle through line thickness in the sequence:
medium
• Dragging the stylus on the screen while this tool is selected draws a
line.
• Note that you can control the type of line produced by the pencil tool
with the line tool, described below.
→ thick → thin → medium , etc.
Eraser Tool
• Tap this tool to cycle through eraser thickness in the sequence:
medium
• Dragging the stylus on the screen while this tool is selected erases
anything along the line.
• Note that you can control the type of path produced by the eraser tool
with the line tool, described below.
→ thick → thin → medium , etc.
79
Page 82

Chapter 7 Quick-Memo
Line Tool
• Tap this tool to cycle through the type of line or eraser path produced
when dragging the stylus on the display while the line tool or eraser tool
is selected. Each tap of this tool cycles through the line type in the
sequence: freehand
→ rectangle → freehand , etc.
→ straight → vertical/horizontal
Darkness Tool
• Tap this tool to toggle the darkness of the line between the following
settings: black
↔ gray .
Undo Tool
• Tap this tool to undo the last draw operation you just performed.
Creating a New Quick-Memo
Use the procedures in this section to draw the figures you want in a Quick-Memo.
To input a new Quick-Memo
1. Enter the Quick-Memo Mode.
2. Tap the
to save the Quick-Memo.
3. Use the drawing tools to draw the figure you want.
• To clear all Quick-Memo screen contents, tap Clr.
(category) button to select the category where you want
4. After you are finished, tap Save to save the Quick-Memo.
• If you want to input another Quick-Memo, tap New.
To draw a line or rectangle
1. Select the line tool for the type of figure (freehand, straight line, vertical/
horizontal line, rectangle) you want to draw.
2. Drag the stylus on the display to draw the figure.
80
Page 83

Chapter 7 Quick-Memo
Recalling a Quick-Memo
Use the following procedure to scroll through a list of Quick-Memos and find the
one you want. Then you can select a Quick-Memo in the list to view it.
1. While the Quick-Memo input screen is on the display, tap List.
2
1
1 Category button
4
2 Scroll buttons
3
• This is the Quick-Memo list screen.
2. Tap the category button to specify the category whose Quick-Memos
you want to view. Selecting
categories.
3. Use the scroll buttons to scroll through the Quick-Memos in the currently
selected category.
4. When the Quick-Memo you want to recall is on the screen, tap it with
the stylus to select it.
5. Tap the selected Quick-Memo to change to its data display.
1
2
3 Selected Quick-Memo
4 Creation date
displays the Quick-Memos in all
1 Scroll buttons
3
2 Category of displayed
Quick-Memo
3 Creation date
81
Page 84

Chapter 7 Quick-Memo
6. In the Quick-Memo data display, you can use the scroll buttons to scroll
back and forward to the data display of other memos.
7. After viewing the Quick-Memo, tap List to return to the list screen.
Screen Copy
The screen copy feature lets you copy an image of certain screens and store it as
a Quick-Memo screen. The following is a list of screens that you can copy with
the screen copy feature.
Mode
Contacts
Scheduler
Expense Manager
Memo
Currency Converter
Pocket Sheet
Data that can be screen copied
All list and data screens
All calendar screens (1, 2, 3-month)
Weekly Scheduler
Daily Scheduler
To Do List
Reminder List
All data screens
Screens listing periodic totals by expense
types or payment types (page 69)
All list and data screens
All list and data screens
Conversion calculation screens
List screen and sheet screen (without onscreen keyboard displayed)
To record a screen copy
1. Display the data for which you want to record a screen copy.
2. Tap Menu Bar to display the menu bar, and then tap Option – Screen
copy.
• The PV Unit switches to the Quick-Memo Mode, with the new screen
copy on the display. Make any additions or changes if you want, and
then store the image by tapping Save.
82
Page 85

Chapter
8
Pocket Sheet gives you access to basic spreadsheet capabilities while on the go.
You can build your own spreadsheets from scratch, and even synchronize with
Microsoft
Pocket Sheet
®
Excel data on your computer.
Entering the Pocket Sheet Mode
1. Tap the Menu icon to display the Mode Menu, and then tap Pocket
Sheet.
1 Sheet titles
2 Scroll bar
2
1
• This is the Pocket Sheet list screen, which appears first when you enter
the Pocket Sheet Mode.
Pocket Sheet Basics
With Pocket Sheet, you can open up a blank sheet and build the sheet you want
from scratch.
The following sections describe how to open a new sheet, and how to perform
some of the most basic sheet operations.
83
Page 86

Chapter 8 Pocket Sheet
Creating a New Sheet from Scratch
1. Display the Pocket Sheet list screen.
2. Tap the New button.
34
1 Row numbers
2 Keyboard
1
2
• Columns are named using the letters of the alphabet from A to Z, while
rows are numbered sequentially from 1 to 999.
• The maximum capacity for a single sheet is about 32KB (about 1,900
cells when each cell contains one character, without any format settings
or borderlines). The message “Sheet is too big!” appears on the display
whenever the contents of a file exceeds this limit.
If a sheet being received by the unit during a Pocket Sheet Sync operation
exceeds the maximum limit (about 32KB), the excess cell data is
automatically cut off. In this case, the sync operation ends normally,
with no indication that the data was cut off. This means you should
always check sheet contents visually after a sync operation is complete.
• A cell is referred to using its cell reference, which is made up of the
cell’s column name and row number. This means that the cell reference
of the upper left cell in the above sheet is A1, and the cell reference of
the lower right cell is D5.
• The active cell is the one that is currently selected for input. The active
cell is highlighted.
• The numeric keyboard appears first whenever you open a new sheet.
5
3 Input field
6
4 Current cell
5 Column names
6 Cells
84
Page 87

Chapter 8 Pocket Sheet
Making a Cell the Active Cell
You can make a cell active by tapping it with the stylus so it becomes
highlighted. You can also move the highlighting around the display using
the scroll bar.
• Tapping the gray areas of the scroll bar scrolls the entire screen with the
highlighted active cursor in the same relative position in the newly
displayed screen.
Selecting a Range of Cells
While a sheet is open on the display, drag the stylus across the range of cells
you want to select. The cells become highlighted as you drag across them.
Jumping to a Specific Cell in a Sheet
Important!
• You cannot jump to a cell located inside a row or column that is frozen. To
jump to such a cell, you must unfreeze the row or column first (page 98).
1. While a sheet is on the display, tap Menu Bar to display the menu bar,
and then tap Edit – Go To to display the Go To screen.
2. On the screen that appears, use the on-screen keyboard to type in the
cell reference (column and row) of the cell to which you want to jump.
• To jump to cell Z999, for example, type “Z999”.
3. Tap Exe to jump to the cell you specified.
85
Page 88

Chapter 8 Pocket Sheet
Inputting Data Into a Cell
This section explains the rules and procedures for inputting text, values, and
mathematical expressions into sheet cells. It also contains detailed information
on the various cell functions that are available.
General Input Rules
The following are the general rules that you should observe whenever
inputting data.
• Anything you enter on the keyboard is input into the sheet’s active cell.
• You can input up to 256 characters into each cell.
• Mixing text and numbers inside the same cell causes everything in the
cell to be treated as text.
• Do not manually input commas as separators inside values. Doing so
interferes with correct display of calculation results. Use the procedure
under “Changing the Format Settings of a Cell” on page 93 to turn on
automatic comma separators.
Cell References
The term cell reference means calling the contents of one cell into another
cell. Pocket Sheet supports three types of cell references: relative, absolute,
and mixed. Whether a cell references is relative, absolute, or mixed does not
make affect the results it normally produces. The cell reference type matters
only when the contents of the cell are copied and then pasted into another
location. See “Copying a Relative Cell Reference” on page 105 and “Copying
an Absolute or Mixed Cell Reference” on page 105 for full information
about how cell references are affected by cut, copy, and paste operations.
86
Page 89

Chapter 8 Pocket Sheet
Relative Cell References
As its name suggests, a relative cell reference is one that references a cell in
relation to the cell where the reference is made. Note the following examples.
Relative Cell
Reference
A1
A1:A10
A1:E1
Contents of cell A1
Contents of the column of cells from A1
through A10
Contents of the row of cells from A1 to E1
Meaning
Absolute Cell References
An absolute cell reference is one that references a specific cell, no matter
where it is located in relation to the cell where the reference is made. A
reference is made absolute by inserting a dollar sign in front of its column
name and row number. Note the following examples.
Absolute Cell
Reference
$A$1
$A$1:$A$10
$A$1:$E$1
Contents of cell A1. Both the column ($A) and
row ($1) references are absolute.
Contents of the column of cells from A1
through A10. All the column and row
references are absolute.
Contents of the row of cells from A1 to E1. All
the column and row references are absolute.
Meaning
87
Page 90

Chapter 8 Pocket Sheet
Mixed Cell References
A mixed cell reference is one in which one component (column name or
row number) is relative, and the other component is absolute. Note the
following examples.
Mixed Cell
Reference
$A1
A$1
Contents of cell A1. The column reference ($A)
is absolute, and the row reference (1) is
relative.
Contents of cell A1. The column reference (A)
is relative, and the row reference ($1) is
absolute.
Meaning
Using the On-screen Keyboards
Opening a new sheet that does not contain any data or tapping the highlighted
cell within a sheet causes an on-screen keyboard to appear.
• Tapping the
keyboard.
• Tapping the
text keyboard.
• Tapping
button above the text keyboard changes to the numeric
button above the numeric keyboard changes to the
displays a menu of built-in functions.
88
Page 91

Chapter 8 Pocket Sheet
Inputting Mathematical Expressions
You can set up a cell to perform arithmetic operations (addition, subtraction,
multiplication, division), and other useful functions like SUM (sum of a
series of values), MIN (extracts the lowest value), and COUNT (counts the
number of values). You can also use parentheses to ensure that operations
are performed in the sequence you want.
• Inputting a mathematical expression causes its result to be displayed in
the cell. The mathematical expression itself appears in the input field
only.
• The results of mathematical operations are normally displayed flush right
in the cell.
• If the result of a mathematical expression is longer than the cell that
contains it, the contents of the cell are replaced by a string of # marks.
This is to let you know that the cell contains a value, but the value cannot
be displayed. If this happens, try making the cell wider (page 97).
To input a mathematical expression
1. Make the cell where you want to input the expression the active cell.
2. On the on-screen keyboard, tap =.
• Inputting = as the first character tells the PV Unit that what follows is a
mathematical expression.
3. Use the on-screen keyboard to input the mathematical expression you
want.
• Tapping the buttons above the keyboard inputs the corresponding
function. See “Examples” below for details.
4. After the content of the cell is the way you want, tap NEXT to store it.
89
Page 92

Chapter 8 Pocket Sheet
Examples
The following are some examples of mathematical expressions you can
input into sheet cells.
Cell Contents
=1+2-3
=(1+2)*(3+4)
=(A1+B5)*2
=$A$1+B2
=2^3
=ABS(A1)
=AVERAGE(A1:D5)
=COUNT(A1:D5)
=COUNTA(A1:A7)
=EVEN(3)
=INT(8.9)
=MAX(A1:D5)
=MIN(A1:D5)
=MOD(3,2)
=ODD(2)
=ROUND(2.15,1)
=SQRT(A1*5)
=SUM(A1:D5)
Displayed Result
0
21
Result of expression using contents of cells A1
and B5
Contents of cell A1 + Contents of cell B2
8 (Raises left value to power specified by right
value.)
Absolute value of value in A1
Average of values in cells A1 through D5
Number of values in cells A1 through D5
Number of non blank cells in cells A1 through
A7
4 (Rounds up to the nearest even number.)
8 (Rounds down to the nearest integer.)
Greatest value of those in cells A1 through D5
Least value of those in cells A1 through D5
1 (Integer result when left value is divided by
right value.)
3 (Rounds up to the nearest odd number.)
2.2 (Rounds left value to decimal places
specified by right value.)
Square root of value in cell A1 multiplied by 5
Sum of contents of cells A1 through D5
90
Page 93

Chapter 8 Pocket Sheet
Inputting Text
Text (letters and numbers) can be input into the active cell using the onscreen text input keyboard.
• Input make up entirely of numbers (including decimal point) is treated
as a numeric value. Inclusion of even a single non-numeric character
(alpha-character or symbol) causes the input to be treated as text.
• Text is normally aligned in the cell flush left, while numbers are aligned
flush right.
• If a text string is longer than the cell, the extra text is allowed to extend
into the next cell to the right in the sheet display, as long as the
neighboring cell does not contain any data. If it does, the extra characters
are cut off in the sheet display.
• If an input value is longer than the cell that contains it, the contents of
the cell are replaced by a string of # marks. This is to let you know that
the cell contains a value, but the value cannot be displayed. If this
happens, try making the cell wider (page 97).
• If the first character in a cell is an equals sign (=), the text is considered
to be part of a mathematical expression.
91
Page 94

Chapter 8 Pocket Sheet
Input Example
This section contains an example that illustrates a number of Pocket Sheet input
techniques.
Example Data
All of the operations in this section are performed using the data shown
below.
Example: To input the function below into cell C5.
=SUM(A2:B5)*C2
• This calculates the total of the values from cell A2 through cell B5, and
then multiplies it by the value in cell C2 (4).
1. Open a sheet and then tap cell C5.
2. Perform the following keys operations to input characters into the input
field.
SUM
3. Next, use the stylus to drag from cell A2 to cell B5, so all the required
cells become highlighted.
4. Remove the stylus from the screen to input the range of selected cells
into the input field.
5. Tap in the input bar to the right of the close parenthesis to move the
cursor there.
92
Page 95

Chapter 8 Pocket Sheet
6. Type * into the input field.
7. Tap cell C2.
8. Tap any cell or the NEXT button to display the calculation result.
• The value in cell C5 shows the result of the function.
Controlling the Appearance of a Cell
This section explains how to make cell format settings that control the format of
data inside individual cells or a range of cells. The format settings are: numeric
value category (monetary unit, percent), number of decimal places, alignment,
text style (bold or normal), comma separators for values, and cell lock.
Changing the Format Settings of a Cell
1. Make the cell whose format you want to change the active cell (page
85).
• You can select a single cell or a range of cells.
2. Tap Menu Bar to display the menu bar, and then tap Option – Formats
to display the Formats tab.
93
Page 96

Chapter 8 Pocket Sheet
3. Make the format settings you want.
• See the following sections for information about the settings you can
make on the Formats tab.
4. After making the settings you want, tap Set to apply them.
• Tapping Esc exits the Formats tab without applying any changes you
have made in the settings.
Category
• Tap the L arrow next to Category box to display a list of numeric
value categories. The following shows the available settings and their
meanings.
Category Setting
None
%
$
£
¥
• For the monetary units and percent, the applicable symbol is appended
automatically to the value in the cell.
• When percent is selected as the category setting, a value of 0.1 becomes
10%, 1 becomes 100%, 10 becomes 1000%, etc.
• Numeric value (no setting)
• Percent
• Dollar value
• British pound value
• Japanese yen value
• Euro value
Description
94
Page 97

Chapter 8 Pocket Sheet
Edit
• Tap this button to display the euro currency symbol editing screen shown
below.
• Note that you can edit the euro currency symbol only. The symbols for
the other currencies are fixed.
• Use the on-screen keyboard to type up to three letters for the currency to
which you want to change. You could input DEM for German marks,
FRF for French francs, etc. After inputting the letters you want, tap Set
to save them.
• The letters you input above replace the euro symbol in the Category
list.
Decimal Places
• Tap the L arrow next to the Decimal Places box to display a list of
decimal place settings. You can specify anywhere from 0 to four decimal
places. Selecting Free specifies a free-floating decimal place, which
means the decimal point is located wherever you input it.
Alignment
• Tap the L arrow next to the Alignment box to display a list of alignment
settings. You can select from among General, Left, Center, and Right.
Selecting General causes text to be aligned left, and numbers aligned
right.
Bold
• Tap the check box to toggle bold text on (checked) and off (unchecked).
95
Page 98

Chapter 8 Pocket Sheet
Comma
• Tap the check box to toggle comma separators every three digits on
(checked) and off (unchecked).
Lock
• Tap the check box to toggle cell lock on (checked) and off (unchecked).
• Note that the sheet where the locked cell is located must be a protected
sheet (page 107) for the cell’s locked status to be enforced. The content
of a cell can always be edited whenever the sheet where it is located is
unprotected, even if the cell is locked. The following shows the
relationship between the cell lock and sheet protection.
Cell Status
Locked
Locked
Unlocked
Unlocked
Sheet Status
Protected
Unprotected
Protected
Unprotected
Cell Content Editing
Not allowed
Allowed
Allowed
Allowed
Specifying Cell Border Lines
1. Select the range of cells whose borderlines you want to change.
• See “Making a Cell the Active Cell” on page 85.
2. Tap Menu Bar to display the menu bar, and then tap Option – Border.
3. On the screen that appears, tap the borderline option you want to select.
To select this type of border line:
Bold outer lines only
Normal outer lines only
Normal outer lines and inner lines
Borderlines off
4. When the borderlines are the way you want, tap Exe to apply them and
to close the Border screen.
Tap this button:
96
Page 99

Chapter 8 Pocket Sheet
Row and Column Operations
This section contains such information as how to change the width of a column,
how to insert rows and columns, and how to delete rows and columns.
Changing the Width of a Column
You can change the width of a column of cells either by dragging the
boundary to the width you want, or by specifying width value that represents
a number of display dots.
To change the width of a column by dragging its boundary
• In the black bar that shows the column names (A, B, C) at the top of a
sheet, drag either of the white boundary markers of the cell left or right
to change its width.
Drag here
• You can drag a column boundary marker as far as the edge of the display
screen.
97
Page 100

Chapter 8 Pocket Sheet
To change the width of a column by specifying a value
1. Make a cell in the column whose width you want to change the active
cell (page 85).
2. Tap Menu Bar to display the menu bar, and then tap Option – Width to
display the Width dialog box.
Current width
(number of screen dots)
3. Tap K to increase the value or L to decrease it.
• You can set the width value in the range of 3 to 130.
4. When the setting you want is displayed, tap Set to apply it.
Scroll Freezing Rows and Columns
“Scroll freeze” is a technique you can use to stop rows, and columns from
scrolling when you tap the scroll bars on the screen. This is helpful when
you want to leave row and column titles frozen on the screen as you scroll
the data only.
You can freeze rows only or columns, or you can freeze rows and columns
at the same time.
98
 Loading...