


Casio EX-M2 1 Manual
FILE MANAGEMENT
FILE MANAGEMENT
The file management capabilities of the camera make it easy to keep track of images. You can protect files against deletion, and even use its DPOF feature to specify images for printing.
Folders
Your camera automatically creates a directory of folders in its built-in flash memory or on the memory card to store images.
Memory Folders and Files
An image you record is automatically stored in a folder, whose name is a serial number. You can have up to 900 folders in memory at the same time. Folder names are generated as shown below.
Example: Name of the 100th folder.
100CASIO
Serial number (3 digits)
Each folder can hold files numbered up to 9,999.
Trying to store the 10,000th file in a folder causes the next serially numbered folder to be created. Folder names are generated as shown below.
Example: Name of the 26th file
CIMG0026.JPG
Extension
Serial number (4 digits)
•The actual number of files you will be able to store on a memory card depends on the image quality settings, capacity of the card, etc.
•For details about the directory structure, see “Memory Directory Structure” on page 94.
64
FILE MANAGEMENT
Protecting Files
Once you protect a file it cannot be deleted (page 62). You can protect files individually or you can protect all files in memory with a single operation.
To protect a single file
1.In the PLAY mode, press MENU.
2.Select the “PLAY” tab, select “Protect”, and then rock the controller to the right.
3.Rock the controller left or right to scroll through files and display the one you want to protect.
4.Rock the controller up or down to select “On”, and then click.
•A file that is protected is
indicated by the  mark.
mark.
•To unprotect a file, select “Off” in step 4, and then click.
5.Press MENU to exit the menu screen.
65

FILE MANAGEMENT
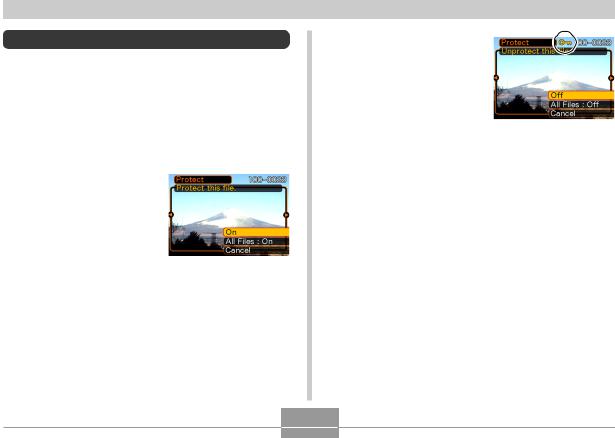
To protect all files in memory
1.In the PLAY mode, press MENU.
2.Select the “PLAY” tab, select “Protect”, and then rock the controller to the right.
3.Rock the controller up or down to select “All Files : On”, and then click.
•To unprotect all files, click the controller in step 3 so the setting shows “All Files : Off.”
4.Press MENU to exit the menu screen.
DPOF
The letters “DPOF” stand for “Digital Print Order Format”, which is a format for recording on
a memory card or other medium which digital camera images should be printed and how many copies of the image should be printed. Then you can print on a DPOF-compatible printer or at a professional print service in accordance with the file name and number of copies settings recorded on the card.
With this camera, you should always select images by viewing them on the monitor screen. Do not specify images by file name without viewing the file contents.
■ DPOF Settings
File Name, number of copies, date
66
FILE MANAGEMENT
To insert the date during printing

 NOTE
NOTE 

•To insert the date during printing, you need to use the following procedure to turn on the date insertion feature before configuring other print settings.
1.In the PLAY mode, rock the controller up (DPOF).
2.Rock the controller up or down to select “Date”, and then rock the controller to the right.
3.Rock the controller up or down to select “On”, and then click.
•If you do not want the date inserted, select “Off”.
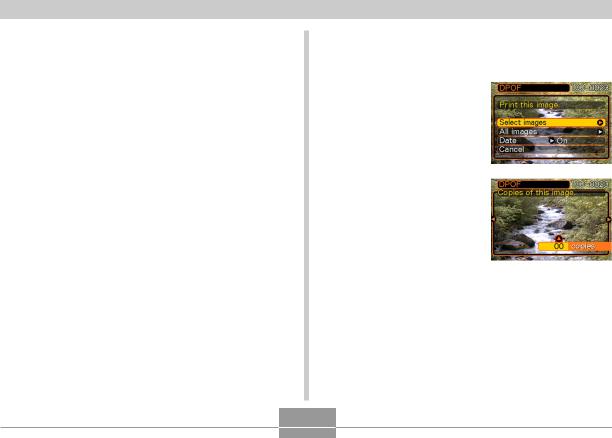
To configure print settings for a single image
1.In the PLAY mode, rock the controller up (DPOF).
2.Rock the controller up or down to select “Select images”, and then rock the controller to the right.
3.Rock the controller left or right to scroll through images and display the one you want to print.
67

FILE MANAGEMENT
4.Rock the controller up or down to specify the number of copies.
•You can specify up to 99 for the number of copies. Specify 00 if you do not want to have the image printed.
•Repeat steps 3 through 4 to configure settings for other images, if you want.
5.Click the controller to complete the procedure.
To configure print settings for all images
1.In the PLAY mode, rock the controller up (DPOF).
2.Rock the controller up or down to select “All images”, and then rock the controller to the right.
3.Rock the controller up or down to specify the number of copies.
•You can specify up to 99 for the number of copies. Specify 00 if you do not want to have the image printed.
4.Click the controller to complete the procedure.
68
FILE MANAGEMENT
PRINT Image Matching II
Images include PRINT Image Matching II data (mode setting and other camera setup information). A printer that supports PRINT Image Matching II reads this data and adjusts the printed image accordingly, so your images come out just the way you intended when you recorded them.
*SEIKO EPSON Corporation holds the copyright for PRINT Image Matching and PRINT Image Matching II.
Exif Print
Exif Print is an internationally supported, open standard file format that makes it possible to capture and display vibrant digital images with accurate colors. With
Exif 2.2, files include a wide range of shooting condition information that can be interpreted by an Exif Print printer to produce betterlooking prints.

 IMPORTANT!

•Information about the availability of Exif Print compatible printer models can be obtained from each printer manufacturer.
69
FILE MANAGEMENT
Using the FAVORITE Folder
You can copy snapshots from a file storage folder (page 94) to the FAVORITE folder in built-in memory (page 94). This makes it easy to keep track of important files.
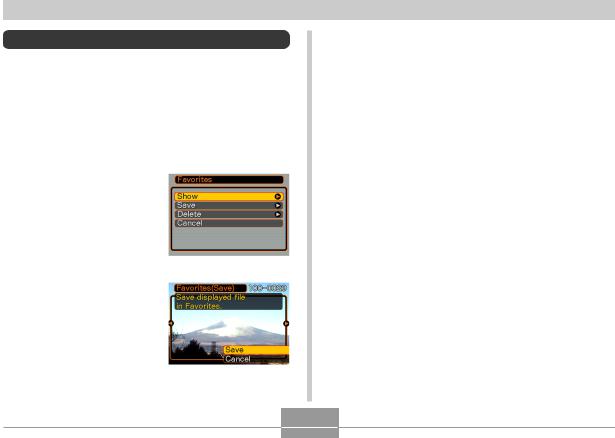
To copy a file to the FAVORITE folder
1.In the PLAY mode, press MENU.
2.Select the “PLAY” tab, select “Favorites”, and then rock the controller to the right.
3.Rock the controller up or down to select “Save”, and then click.
•This displays the names of the files in built-in memory or on the loaded memory card.
4.Rock the controller left or right to select the file you want to copy to the FAVORITE folder.
5.Rock the controller up or down to select “Save”, and then click.
• This copies the displayed file to the FAVORITE folder.

 NOTES
NOTES 

•Copying an image file with the above procedure creates a 320 x 240-pixel QVGA-size image in the FA-
VORITE folder.
•A file copied into the FAVORITE folder is automatically assigned a file name that is a serial number (0001 to 9999).
70
FILE MANAGEMENT
To display a file in the FAVORITE folder
1.In the PLAY mode, press MENU.
2.Select the “PLAY” tab, select “Favorites”, and then rock the controller to the right.
3.Rock the controller up or down to select “Show”, and then click.
•If the FAVORITE folder is empty, the message “No
Favorites file!” appears.
4. Rock the controller |
File Name |
|
right (forward) or left |
|
|
|
|
|
(back) to scroll |
|
|
through the files in |
|
|
the FAVORITE folder. |
|
|

 NOTE
NOTE 

•Holding the controller to the left or right scrolls at high speed.
To delete a file from the FAVORITE folder
1.In the PLAY mode, press MENU.
2.Select the “PLAY” tab, select “Favorites”, and then rock the controller to the right.
3.Rock the controller up or down to select “Delete”, and then click.
4.Rock the controller left or right to select the file you want to delete from the FAVORITE folder.
5.Rock the controller up or down to select “Delete”, and then click.
• This deletes the file from the FAVORITE folder

 IMPORTANT!

•You cannot use the delete operations on page 62 to delete images from the FAVORITE folder. Performing the memory format operation (page 75), however, does delete FAVORITE folder files.
71

OTHER SETTINGS
OTHER SETTINGS
Turning the Key Tone On and Off
Use the following procedure to turn the tone that sounds when you press a key on and off.
1.In the REC mode or PLAY mode, press MENU.
2.Select the “Set Up” tab, select “Beep”, and then rock the controller to the right.
3.Rock the controller up or down to select the setting you want, and then click.
To do this: |
Select this: |
|
|
Turn on the key tone |
On |
|
|
Turn off the key tone |
Off |
|
|
Specifying an Image for the Startup Screen
You can specify an image you recorded with the camera as the startup screen image, which causes it to appear on the monitor screen for about two seconds whenever you turn on the camera.
1.Enter the REC mode or the PLAY mode.
2.Press MENU.
3.Select the “Set Up” tab, select “Startup”, and then rock the controller to the right.
4.Rock the controller left or right to display the image you want to use as the startup image.
5.Rock the controller up or down to select the setting you want, and then click.
To do this:
Use the currently displayed image as the startup screen image
Disable the startup screen
Select this:
On
Off
72
OTHER SETTINGS

 IMPORTANT!

•You can select any one of the following types of image as the startup image.
—The camera’s built-in startup image
—A snapshot you recorded with the camera
—A movie you recorded with the camera two seconds or less in length and 200KB or less in size
•The snapshot image or movie that you select as the startup image is stored in a special memory location called “startup image memory.” Only one image can be stored in startup image memory. Selecting a new startup image overwrites anything that is already stored in startup image memory. Except for the camera’s built-in startup image, if you want to return to a previous startup image, you need to have a separate copy of that image in the camera’s standard image storage memory.
Changing the Date and Time Setting
Use the following procedure to change the date and time setting.
1.In the REC mode or PLAY mode, press MENU.
2.Select the “Set Up” tab, select “Adjust”, and then rock the controller to the right.
3.Set the date and the time.
To do this: |
Do this: |
|
|
Change the setting at the |
Rock the controller up or |
current cursor location |
down. |
|
|
Move the cursor between |
Rock the controller left or |
settings |
right. |
|
|
4.Click to register the settings and exit the setting screen.
73
OTHER SETTINGS
Changing the Date Format
You can select from among three different formats for display of the date.
1.In the REC mode or PLAY mode, press MENU.
2.Select the “Set Up” tab, select “Date Style”, and then rock the controller to the right.
3.Rock the controller up or down to select the setting you want, and then click.
Example: October 23, 2002
To display the date like this: |
Select this format: |
|
|
02/10/23 |
YY/MM/DD |
|
|
23/10/02 |
DD/MM/YY |
|
|
10/23/02 |
MM/DD/YY |
|
|
Changing the Display Language
You can use the following procedure to select one of six languages as the display language.
1.In the REC mode or PLAY mode, press MENU.
2.Select the “Set Up” tab, select “Language”, and then rock the controller to the right.
3.Rock the controller up or down to select the option you want, and then click.
: Japanese
English : English
Français : French
Deutsch : German
Español : Spanish
Italiano : Italian
74
OTHER SETTINGS
Formatting Built-in Memory
Formatting built-in memory deletes any data stored in it.

 IMPORTANT!

•Note that data deleted by a format operation cannot be recovered. Check to make sure you do not need any of the data in memory before you format it.
•Formatting memory deletes all files in memory, even files that are protected (page 65).
1.Check to make sure there is no memory card loaded in the camera.
•If there is a memory card loaded in the camera, remove it (page 77).
2.In the REC mode or PLAY mode, press MENU.
3.Select the “Set Up” tab, select “Format”, and then rock the controller to the right.
4.Rock the controller up or down to select “Format”, and then click.
•To exit the format operation without formatting, select
“Cancel”.
75

USING A MEMORY CARD
USING A MEMORY CARD
You can expand the storage capabilities of your camera by using a commercially available memory card (SD memory card or MultiMedia Card). You can also copy files from builtin flash memory to a memory card and from a memory card to flash memory.
•Normally, files are stored in built-in flash memory. When you insert a memory card, however, the camera automatically stores files to the card.
•Note that you cannot save files to built-in memory while a memory card is installed in the camera.

 IMPORTANT!

•Make sure you turn off the camera before inserting or removing a memory card.
•Be sure to orient the card correctly when inserting it.
Never try to force a memory card into the slot when you feel resistance.
•See the instructions that come with the memory card for information about how to use it.
•Certain types of cards can slow down processing speeds.
•SD memory cards have a write protect switch, which you can use to protect against accidental deletion of image data. Note, however, if you write protect an SD memory card, you must remove write protection whenever you want to record to it, format it, or delete any of its files.
76
USING A MEMORY CARD
Using a Memory Card
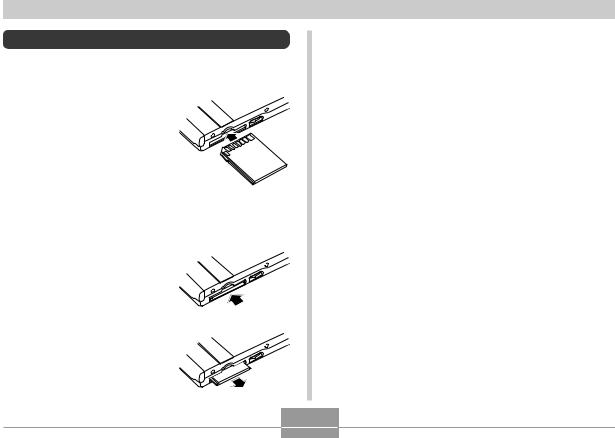
To insert a memory card into the camera
1.Making sure that the contacts of the memory
card are facing towards the top of the camera,
carefully insert the card  into the slot as far as it Contacts
will go.
To remove a memory card from the camera
1.Press the memory card into the camera and then
release it. This will cause the card to come part way out of the camera.
2. Pull the memory card out of the slot.

 IMPORTANT!

•Never insert any other object besides a memory card into the camera’s card slot. Doing so creates the risk of damage to the camera and card.
•If you are not using a memory card, be sure to insert the dummy card into this slot to protect against dust and damage.
•The dummy card is intended for use with this camera only. Never insert it into the card slot of any other type of device.
•Should water or any foreign object ever get into the card slot, immediately turn off the camera, remove the battery, and contact your dealer or nearest CASIO authorized service center.
•Never remove a card from the camera while the operation/flash charge lamp is flashing. Doing so can cause the files save operation to fail, and even damage the memory card.
77
USING A MEMORY CARD
Formatting a Memory Card
Formatting a memory card deletes any data already stored on it.

 IMPORTANT!

•Be sure to use the camera to format a memory card. Formatting a memory card on a computer and then using it in the camera can slow down data processing by the camera. In the case of an SD card, formatting on a computer can result in non-conformity with the
SD format, causing problems with compatibility, operation, etc.
•Note that data deleted by a memory card format operation cannot be recovered. Check to make sure you do not need any of the data on the memory card before you format it.
•Formatting a memory card that contains files deletes all the files, even those that are protected (page 65).
1.Load the memory card into the camera.
2.Turn on the camera. Next, enter the REC mode or PLAY mode and press MENU.
3.Select the “Set Up” tab, select “Format”, and then rock the controller to the right.
4.Rock the controller up or down to select “Format”, and then click.
•To exit the format operation without formatting, select “Cancel”.
78
USING A MEMORY CARD
Memory Card Precautions
•Use only an SD memory card or a MultiMediaCard with this camera. Proper operation is not guaranteed when any other type of card is used.
•Electrostatic charge, electrical noise, and other phenomena can cause data to become corrupted or even lost. Always make sure that you always back up important data on other media (MO disc, computer hard disk, etc.)
•If a memory card starts to behave abnormally, you can restore normal operation by reformatting it. However, we recommend that you always take along more than one memory card whenever using the camera far away from the home or office.
•We recommend that you format a memory card before using it for the first time after purchasing it, or whenever the card you are using seems to be the cause of abnormal images.
•Before starting a format operation, check to make sure that the battery is fully charged. Power interruption during the format operation can result in improper formatting, and even damage the memory card and make it unusable.
Copying Files
Use the procedures below to copy files between built-in memory and a memory card.
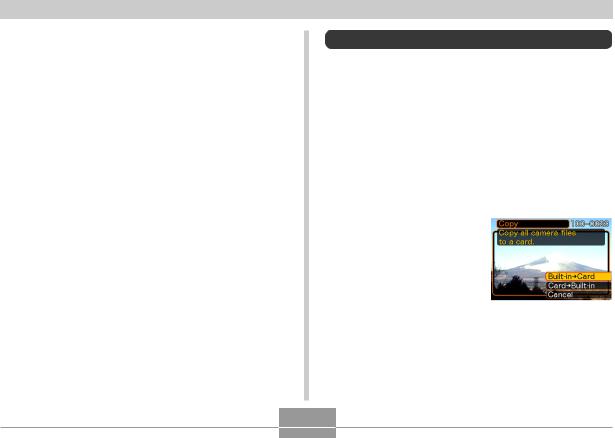
To copy all the files in built-in memory to a memory card
1.Load the memory card into the camera.
2.Turn on the camera. Next, enter the PLAY mode and press MENU.
3.Select the “PLAY” tab, select “Copy”, and then rock the controller to the right.
79

USING A MEMORY CARD
4.Rock the controller up or down to select “Builtin  Card”, and then click.
•This starts the copy operation and displays the message “Busy... Please wait...”
•After the copy operation is complete, the monitor screen shows the last file in the folder.
To copy a file from a memory card to built-in memory
1.Perform steps 1 through 3 of the procedure under “To copy all the files in built-in memory to a memory card.”
2.Rock the controller up or down to select “Card
 Built-in”, and then click.
3.Rock the controller left or right to select the file you want to copy.
4.Rock the controller up or down to select “Copy”, and then click.
•This starts the copy operation and displays the message “Busy... Please wait...”
•The file reappears on the monitor screen after the copy operation is complete.
80
 Loading...