

Page 1
Module No. 1840
GETTING ACQUAINTED
Congratulations upon your selection of this CASIO watch. To get the most out
of your purchase, be sure to carefully read this manual and keep it on hand
for later reference when necessary.
About this manual
• Button operations are indicated using the letters shown in the illustration.
• Each section of this manual provides basic information you need to
perform operations in each mode. Further details and technical information
can also be found in the “REFERENCE” section.
LIGHT
MENU
GPS
Display Indicators
The following describes the indicators that
appear along the bottom of the display.
1840-1
Indicator
GPS
• Watch is in the GPS Mode.
• Flashes when the watch is performing a GPS measurement
AUTO
SAVE
2D
3D
ALM
SIG
BATT
• The measurement functions built into this watch are not intended for
use in taking measurements that require professional or industrial
precision. Values produced by this watch should be considered as
reasonably accurate representations only.
• Though a useful navigational tool, a GPS receiver should never be used as
a replacement for conventional map and compass techniques. Remember
that magnetic compasses can work at temperatures well below zero, have
no batteries, and are mechanically simple. They are easy to operate and
understand, and will operate almost anywhere. For these reasons, the
magnetic compass should still be your main navigation tool.
• CASIO COMPUTER CO., LTD. assumes no responsibility for any loss or
any claims by third parties that may arise through the use of this watch.
operation.
Watch is in the GPS Auto or Continuous Mode.
Watch is in the GPS One-shot or Auto Mode.
Watch is performing a 2-dimensional GPS measurement (using
three satellites). This is the type of measurement normally used
in the Quick, One-Shot, and Auto Mode.
Watch is performing a 3-dimensional GPS measurement (using
four or more satellites), which provides better accuracy than
2D. This is the type of measurement used in the Continuous
Mode when data is obtained from four or more satellites.
Alarm is turned on.
Hourly Time Signal is turned on.
Battery power is low and battery needs to be replaced.
Description
Precautions
GENERAL GUIDE
• Use MENU and GPS to change between modes.
• In the GPS Mode, use L and K to change between screens.
• The watch beeps whenever you press a button to change to another mode
or screen.
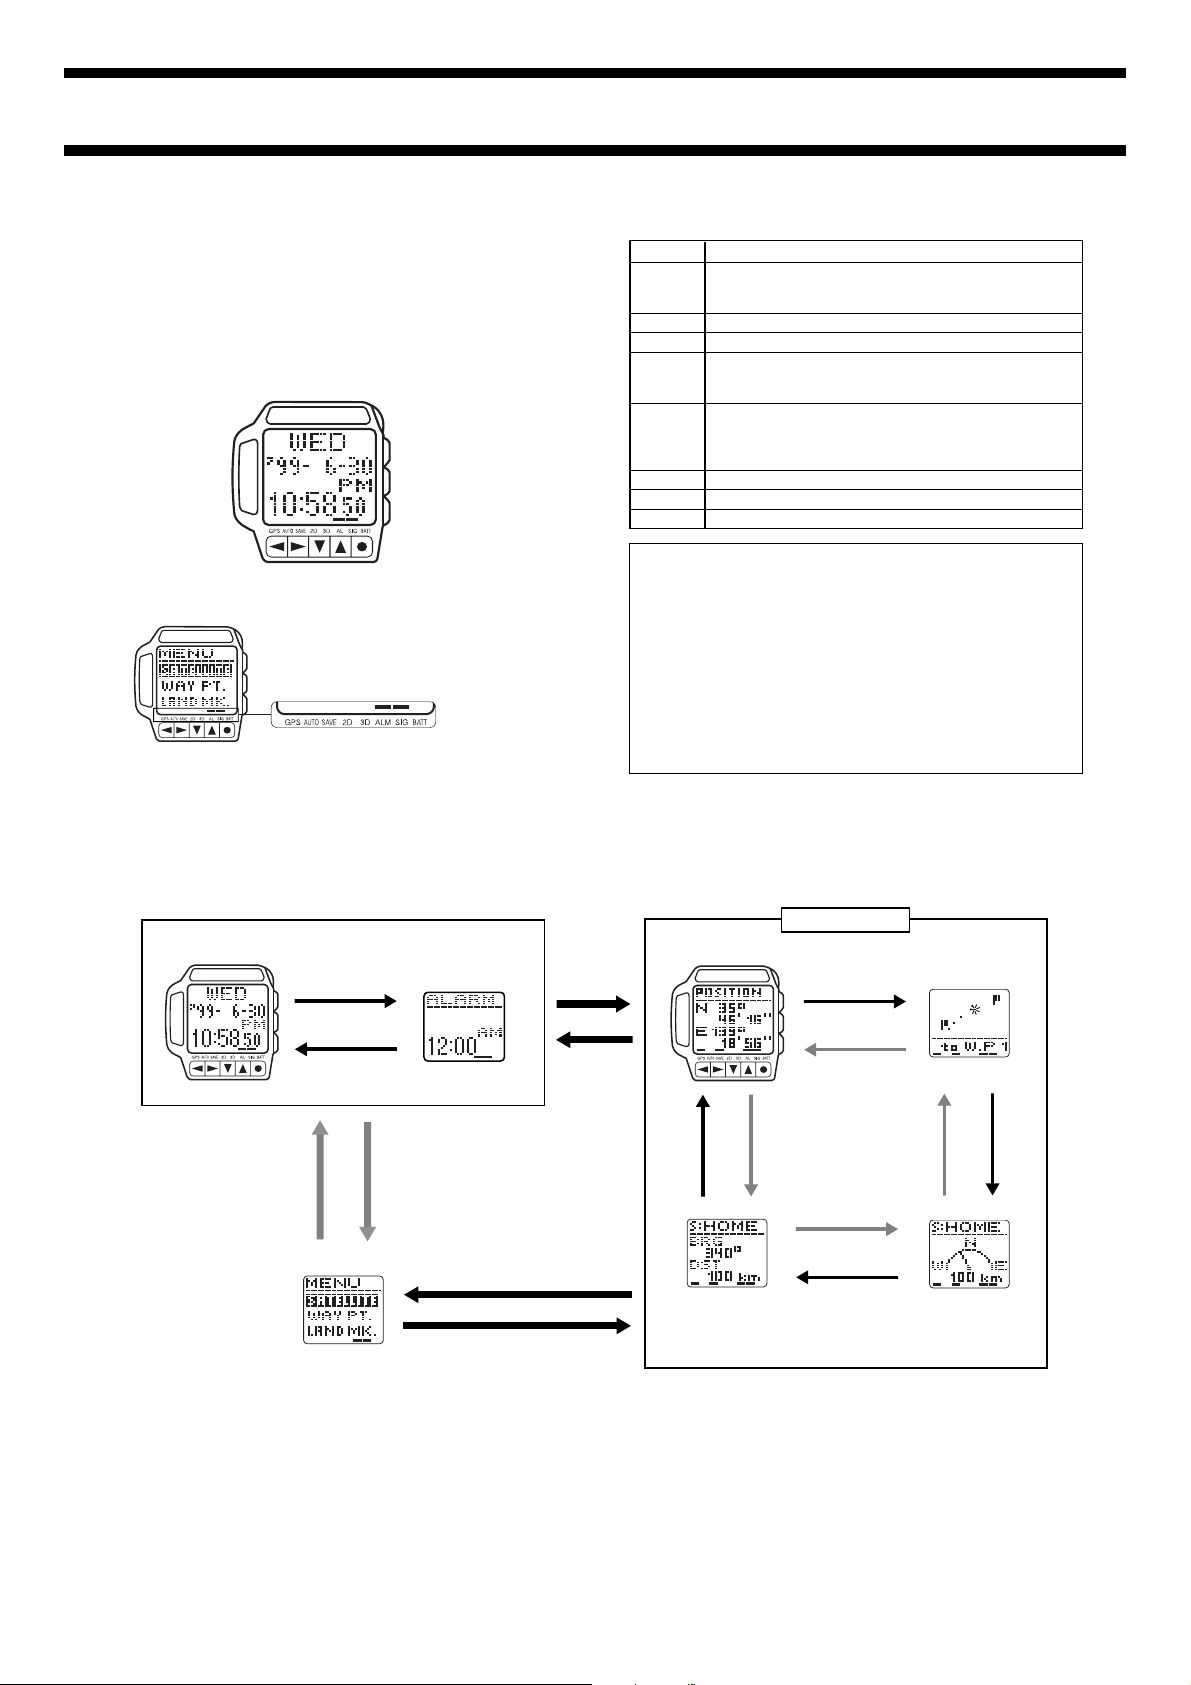
Timekeeping Mode Alarm Mode
Press L or K.
Press GPS. Press MENU.
Menu Screen
Press MENU.
Press GPS.
Press GPS.
Press GPS.
GPS Mode
Position Screen Plot Screen
Press L.
Press K.
K
K
L
Direction and Speed
Screen
• You cannot go from the Menu Screen to the GPS Mode after displaying the
Menu Screen from the Timekeeping Mode or Alarm Mode. To get to the
GPS Mode in this case, you have to press GPS to return to the
Timekeeping Mode (or Alarm Mode) and then press GPS again to enter the
GPS Mode.
K
Graphical Navigation
LL
Screen
Page 2
1840-2
Using the Menu Screens
Many of the operations of this watch are performed using on-screen menus.
The following describes the general procedures for using on-screen menus.
To use the Menu Screens
• In any mode, press the MENU button to
display the Menu Screen.
• The highlighted menu item is the one that
is currently selected.
• Use L and K to move the highlighting.
The menu will scroll automatically if all the
items do not fit on a single screen.
• Press ● to select the highlighted menu item. Selecting a menu item
sometimes displays another menu, and sometimes it displays some sort of
Setting Screen.
• Press the MENU button to back track through menus.
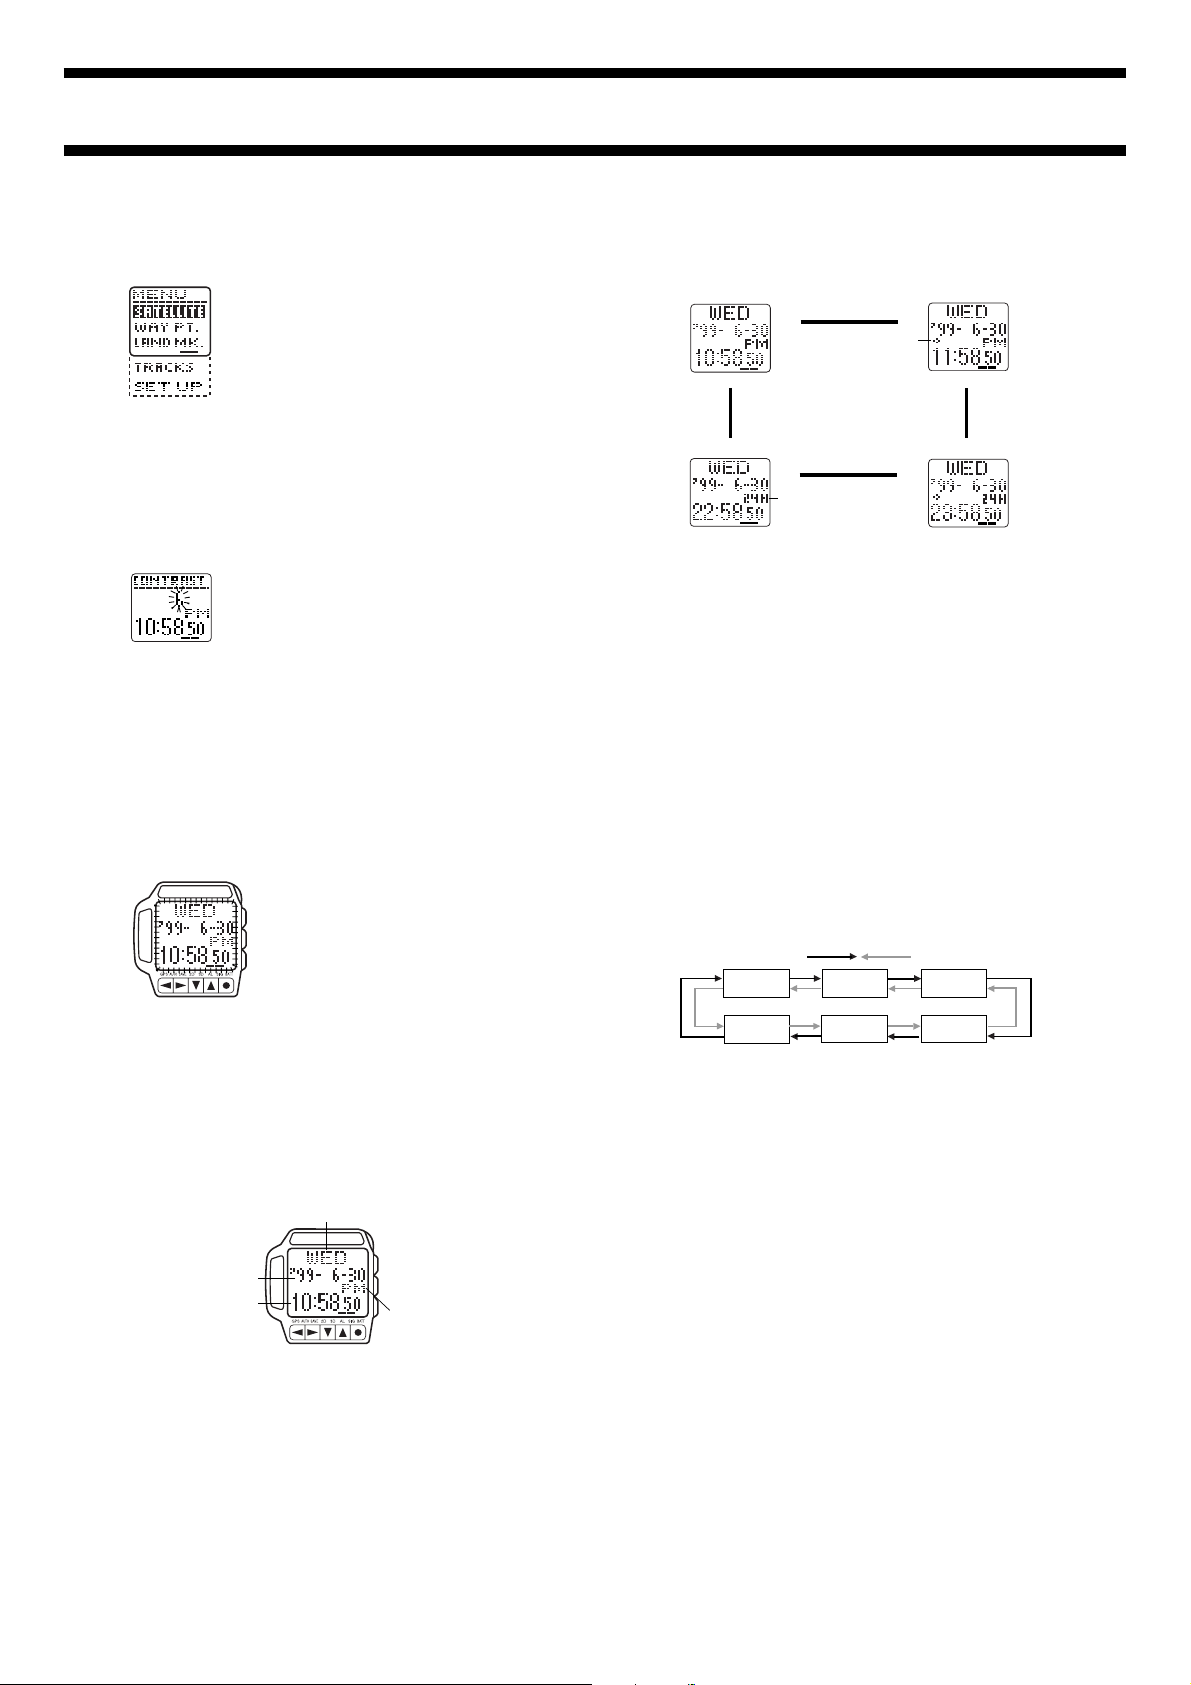
Adjusting Display Contrast
Use the following procedure to adjust the relative darkness of the figures on
the display.
To adjust display contrast
1. In any mode, press the MENU button
and the H button at the same time to
display the Contrast Screen.
2. Use K to increase contrast (making the
screen darker) and L to decrease it.
• You can set contrast to one of 16 levels.
• The current contrast setting is indicated
by a value on the Contrast Screen.
3. After the contrast is the way you want, press MENU or ● to return to the
screen you started from in step 1.
• You can also display the Contrast Screen using the following procedure:
Press MENU, highlight SET UP, press ●, highlight CONTRAST, press ●.
After setting the contrast, press MENU twice to return to the Menu Screen.
BACKLIGHT
Press the LIGHT button to illuminate the
display for about two seconds.
• The backlight is disabled while a GPS
measurement operation is in progress
(indicated when the GPS indicator is
flashing) and while the WAIT message is
on the display following a Set Up Menu
operation.
• The electro-luminescent (EL) panel that
illuminates the display loses illuminating
power after very long use.
• Illumination may be hard to see when
viewed under direct sunlight.
• The watch may emit an audible sound
while the backlight is on. This is normal
and does not indicate malfunction.
TIMEKEEPING MODE
Day of the week
Current date
(year, month, day)
Current time
PM indicator (AM indicator
for morning times)
Use the Timekeeping Mode to view the current time and date. You can select
from among the four different Timekeeping Screen formats shown below.
Standard 12-hour
Timekeeping
K
Press H.
L
Standard 24-hour
Timekeeping
• The summer time or Daylight Saving Time (DST) Screen automatically
advances the current time setting by one hour. This is a practice followed
in certain geographic areas, and may or may not apply in your area.
Hold down ● about
one second.
H
DST indicator
Hold down ● about
one second.
H
24-hour timekeeping
indicator
Summer Time (DST)
12-hour Timekeeping
J
K
Press H.
L
J
Summer Time (DST)
24-hour Timekeeping
Setting the Current Time and Date
Use the Menu Screen to set the current time and date, and to reset the
second’s count to zero.
Important!
The GPS Mode of this watch uses the time and date settings to determine the
current positions of satellites. Make sure that your time and date setting are
always accurate.
To set the current time and date
1. In any mode, press the MENU button to display the Menu Screen.
2. Use L and K to move the highlighting to SET UP.
3. Press ● to display the Set Up Menu.
4. Use L and K to move the highlighting to TIME, and then press ●.
• This displays the current date and time setting, with the seconds digits
flashing.
5. Use H and J to move the flashing around the display to the other digits
in the sequence shown below.
Press
H
Press J.
Seconds
Day
6. While the hour, minutes, year, month, or day digits are selected (flashing),
press K to increase them or L to decrease them.
• Holding down either button changes the flashing digits at high speed.
7. After everything is the way you want it, press GPS to exit the Setting
Screen and return to the screen you started from in step 1.
Hour
Month
To reset the seconds count to zero
1. In any mode, press the MENU button to display the Menu Screen,
highlight SET UP, and then press ● to display the Set Up Menu.
2. Use L and K to move the highlighting to TIME, and then press ●.
3. While the seconds digits are flashing, press K to reset them to zero.
• Pressing K while the seconds count is in the range of 30 to 59 resets it to
00 and adds 1 to the minutes. If the seconds count is in the range of 00 to
29, pressing K resets it without changing the minutes.
4. After everything is the way you want it, press GPS to exit the Setting
Screen and return to the screen you started from in step 1.
Notes
• The year can be set in the range of 1995 to 2039.
• The day of the week is displayed automatically in accordance with the
month and day settings.
• The watch's built-in full automatic calendar makes allowances for different
month lengths and leap years. Once you set the date, there should be no
reason to change it except after replacing the watch’s battery.
.
Minutes
Year
Page 3

1840-3
ALARM MODE
Mode name
Alarm time
Hourly Time Signal
on indicator
Alarm on indicator
To set the alarm
1. In any mode, press the MENU button to display the Menu Screen.
2. Use L and K to move the highlighting to SET UP.
3. Press ● to display the Set Up Menu.
4. Use L and K to move the highlighting to ALARM and then press ●.
• This displays the current alarm time setting, with the hour digits flashing.
5. Use H and J to move the flashing between the hour digits and the
minutes digits.
6. Press K to increase the flashing digits or L to decrease them.
• Holding down either button changes the flashing digits at high speed.
7. After the alarm time is the way you want it, press GPS to exit the Setting
Screen and return to the screen you started from in step 1.
To turn the alarm and Hourly Time Signal on and off
In the Alarm Mode, each press of ● cycles through the alarm and Hourly Time
Signal on/off settings as shown below.
[Alarm On Indicator/Hourly Time Signal On Indicator]
ALM SIG ALM SIG ALM SIG ALM SIG
Both Off Hourly Time
• An indicator appears above ALM at the bottom of the display when the
alarm is turned on, and above SIG when the hourly time signal is turned on.
To test the alarm
In the Alarm Mode, hold down ● to sound the alarm.
You can set an alarm time at which a beeper
sounds for about 20 seconds each day. Press
any button to stop the alarm.
The watch also has an hourly time signal that
beeps twice every hour on the hour when
turned on.
Signal On
Both OnAlarm On
GPS MODE
The GPS Mode provides you with a collection of powerful GPS functions that
allow you to determine your current position and perform other useful
navigation operations. After entering the GPS Mode, use the L and K
buttons to cycle through four GPS Data Screen formats as shown below.
GPS Data Screens
Position Screen
PressL.
PressK.
K
L
• The Position Screen appears first whenever you enter the GPS Mode.
Plot Screen
LKKL
Graphical Navigation ScreenDirection and Speed Screen
Setting Up the GPS Mode
The following are settings you need to make before actually taking any
measurements with the GPS Mode. Most of these need to be made only the
first time you use the watch. See the referenced pages for full information
about each setting.
• Area setting (See “Setting Your Area”)
• Datum setting (See “Setting a Datum”)
• Distance unit setting (See “Setting the Distance Unit”)
• Speed unit setting (See “Setting the Speed Unit”)
Important!
• The Timekeeping Mode time and date settings are also used to determine
the current positions of satellites. Make sure that your time and date setting
are always accurate.
Taking a GPS Measurement
The following are the basic steps for taking a position measurement in the
GPS Mode. See the referenced pages in this manual for further details.
The following procedure uses the One-Shot Mode as an example. See “GPS
Measurement Modes” for information about other measurements.
Important!
• GPS measurements may take a long time to complete or may even be
impossible due to satellite and other conditions.
To take a GPS measurement
1. While a GPS Data Screen is on the
display, press ●.
• This example procedure starts from the
Position Screen.
• This changes to the Satellite Search
Screen.
• The indicator flashes above GPS at the
Antenna
L
2. When the measurement is successful, the watch beeps a number of times
and returns to the GPS Data Screen you started from in step 1.
• See “To add a landmark by registering your current location” for information
about storing GPS measurement data in Landmark Memory.
• See “GPS Measurement Modes” for more information about indicators and
how the watch updates measurement data.
• If the watch is unable to successfully complete the measurement within
about two minutes, it plays a short tune and displays SATELLITE at the top
of the display to let you know. If this happens, press ● twice to return to the
GPS Data Screen, move to a more open area, and try again.
• If you perform the above GPS measurement operation within the area
defined by 20° to 46° north latitude and 122° to 149° east longitude, a
successful measurement causes a map of Japan to appear on the display
for a few seconds, followed by a GPS Data Screen.
bottom of the screen to indicate that the
watch is searching for overhead satellites.
• To interrupt an ongoing GPS
measurement, press ● again.
• Make sure the antenna is pointing up at
the sky while a measurement is taking
place.
GPS Measurement Modes
You can select from among four different GPS measurement modes. The
mode you should select depends on how quickly you want your position data
updated balanced against how important it is for you to conserve remaining
battery power.
Remember, however, that no matter which GPS measurement mode you use,
it can take a considerable amount of time to achieve the first measurement.
One-shot measurement with standby for
subsequent measurements
One-shot measurement with no standby
(power save)
Continuous measurement with standby for
subsequent measurements
Continuous measurement with semi-standby
(power save)
• The standby modes provide faster updating of measurement data following
the first measurement, but they consume more battery power because the
watch’s GPS circuit remains in standby (half power). The indicator flashing
above GPS at the bottom of a GPS Data Screen indicates that GPS
measurement is in standby.
To perform:
Use:
Quick Mode
One-Shot Mode
Continuous Mode
Auto Mode
Page 4
1840-4
• The non-standby modes take longer to produce subsequent
measurements, but shutdown of the watch’s GPS circuit between
measurements conserves battery power. In these modes, the indicator
above GPS at the bottom of a GPS Data Screen does not flash and an
indicator appears above SAVE to indicate power save is enabled.
Quick Mode
The Quick Mode performs a GPS measurement when you press ● and
updates the GPS Data Screen. After the first measurement, the watch’s GPS
circuit remains in standby, which is indicated by the flashing indicator above
GPS at the bottom of the GPS Data Screen. Because of this, subsequent
measurements are produced more quickly. Continuous Quick Mode standby
uses battery power. To exit standby, press J while the Position Screen is on
the display to change to another measurement.
One-Shot Mode
The One-Shot Mode also performs GPS measurement when you press ● and
updates the GPS Data Screen. In this mode, however, the watch’s GPS circuit
is shut down between measurements. Because of this, it takes more time to
perform each measurement.
Continuous Mode
The Continuous Mode performs a GPS measurement every second starting
when you press ● and ending when you press ● again. The GPS Data
Screen is updated with each measurement. In the Continuous Mode, the
watch’s GPS circuit remains in standby, which is indicated by the flashing
indicator above GPS at the bottom of the GPS Data Screen.
Auto Mode
The Auto Mode also performs a GPS measurement every minute starting from
when you press ● and ending when you press ● again. The GPS Data
Screen is updated with each measurement. Though the GPS circuit shuts
down between measurements in this mode, the indicator above GPS
continues to flash until you press ● to stop measurement.
Important!
• The indicator flashing above GPS at the bottom of a GPS Data Screen
indicates that the GPS circuit is activated, which consumes valuable battery
power. To prolong battery life, be sure to use the following operations to
turn off the GPS circuit when you are not using it.
• Press ● to stop position measurement and turn off the GPS circuit. The
indicator above GPS stops flashing at this time.
To select a GPS measurement mode
While the Position Screen is on the display in the GPS Mode, press J to
cycle through the GPS measurement modes in the sequence shown below.
Press J.
Quick Mode
One-Shot Mode
Continuous Mode
Auto Mode
Position Screen
Latitude
Longitude
• The Position Screen shows your current
position in terms of latitude and longitude.
• Latitude is indicated as N (north) or S
(south), and longitude as E (east) or W
(west).
Plot Screens
The Plot Screens show your current location and your progress (tracks) from
one waypoint to another.
• See “Track Memory” for information about tracks and how they are stored
in memory.
• With the Plot Screens, the top (12 o’clock position) of the watch’s display is
always north.
Plot Screen Formats
There are two Plot Screen formats: a Map Screen and a Waypoint Plot Screen.
• Press J to toggle between screen formats.
Press J.
H
Map Screen
• The Map Screen shows tracks and your current position inside the grid cell
where your current position is located.
• The Waypoint Plot Screen normally shows the two waypoints between
which your current position is located. You can also scroll to view other sets
of waypoints along your route.
• When you change to the Map Screen, a Map Scale Screen first appears for
about two seconds, followed by the Map Screen.
Grid cell width
Grid cell height
• When you change to the Waypoint Plot Screen, the virtual width of the
screen first appears for about two seconds, followed by the Waypoint Plot
Screen.
Screen virtual
width
J
Waypoint Plot Screen
J
J
Destination waypoint number
(W.P 1 = Waypoint 1)
Waypoints
Note that you must define waypoints in watch memory before you can use the
Waypoint Plot Screen. See “Using Waypoints” for information about defining
and managing waypoints.
• The message NO W.P (no waypoints) appears on the screen if there are no
waypoints defined in the WAY PT. (waypoint) List.
Using the Map Screen
Once you set up the Map Screen to match the gridlines on your paper map,
you can easily plot your position within a specific grid cell on the map. A
simple operation also lets you quickly determine which grid cell on the map is
currently shown on the Map Screen of the watch.
• See “Maps and Gridlines” for information about the types of maps that are
compatible with the Map Screen.
• See “Map Scale Settings” for other important information about the map
scale.
Important!
• The Map Screen of this watch is designed for use with maps that indicate
latitude and longitude down to minutes. It will not work properly with maps
that indicated latitude and longitude in degrees only.
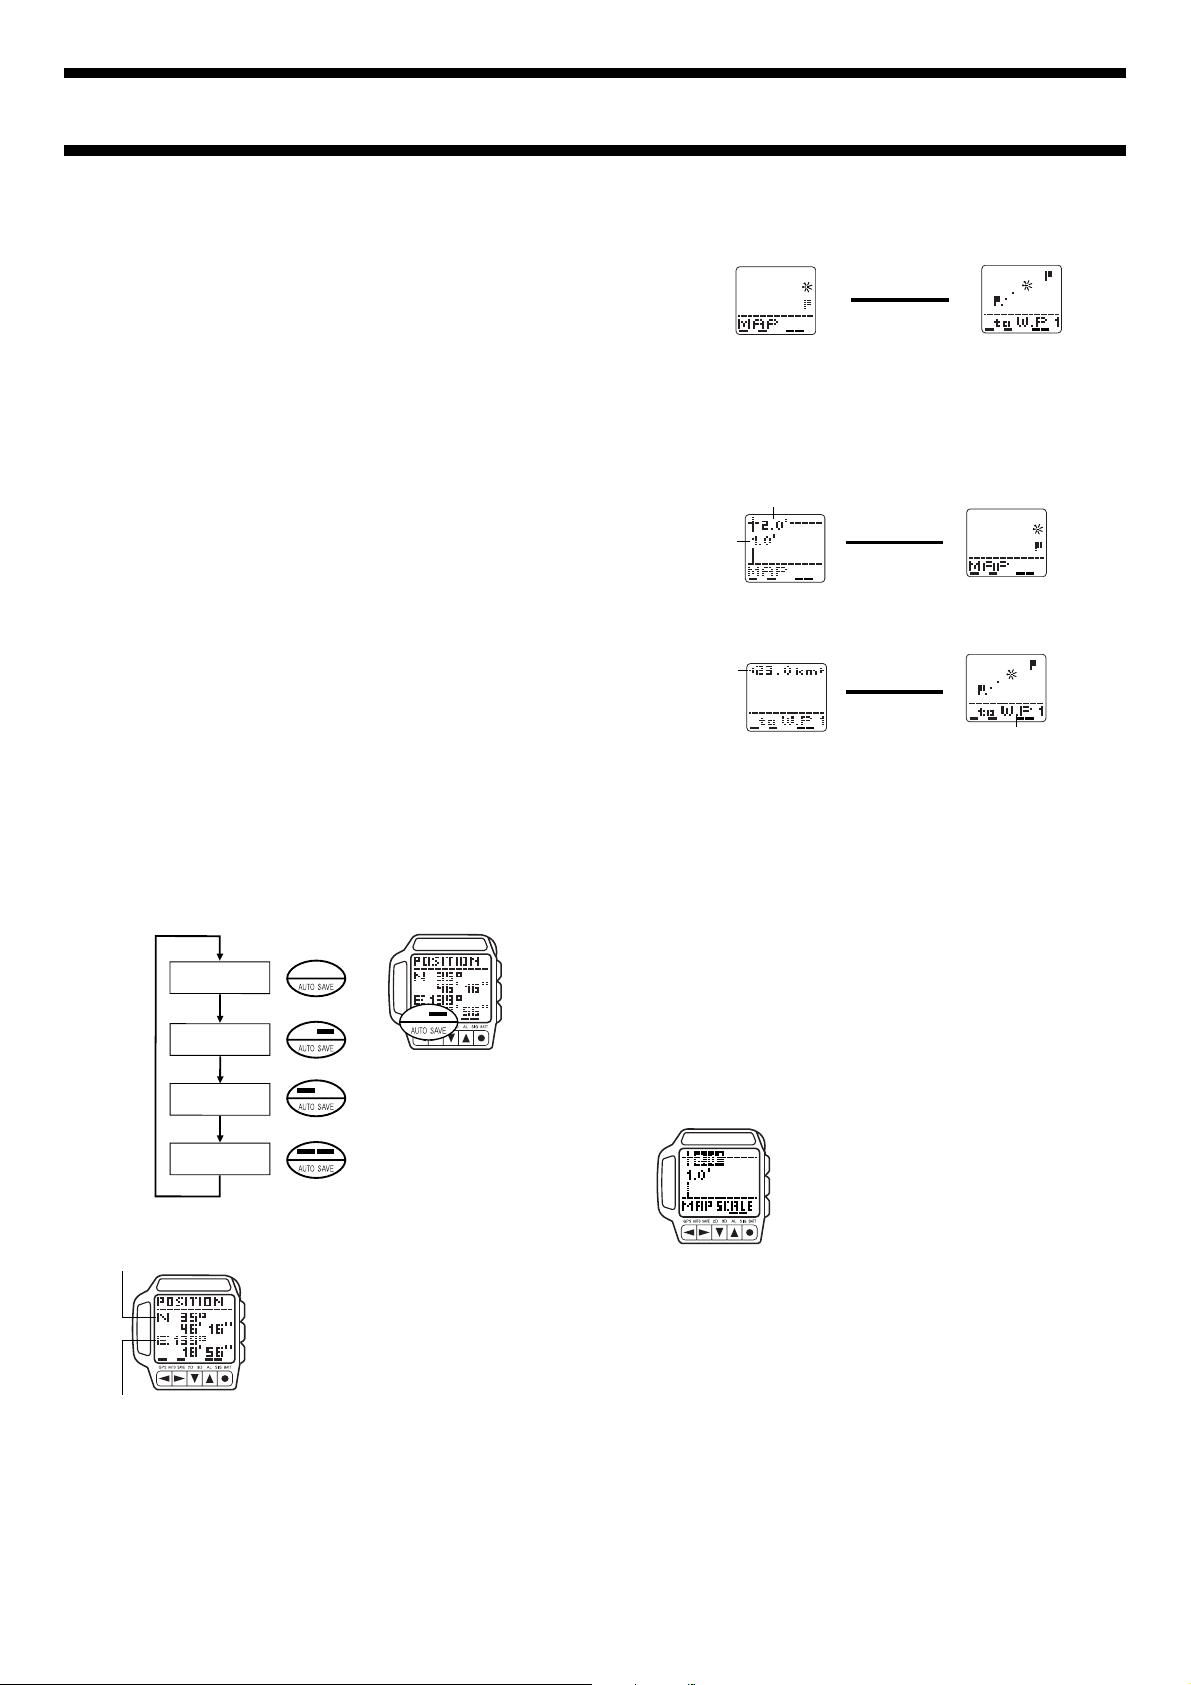
To set up the Map Screen to match the gridlines of your map
1. In any mode, press the MENU button to
display the Menu Screen.
2. Use L and K to move the highlighting
to SET UP and then press ● to display
the Set Up Menu.
3. Use L and K to move the highlighting
to MAP SCALE and then press ● to
display the Map Scale Setting Screen.
• The values on the Map Scale Setting
Screen are for specifying the vertical-tohorizontal ratio (in minutes) of each grid
cell on the map you are using. 1:2, for
example, indicates that grid cells are
twice as wide as they are high.
4. Use H and J to move the highlighting between the vertical and
horizontal ratio values, and L and K to change the highlighted value.
• See “Map Scale Settings” for full details about how your settings affect the
appearance of the screen.
5. After everything is the way you want, press ● to return to the Set Up Menu
with DST UNITS highlighted.
6. Press the MENU button to return to the Menu Screen.
Page 5
1840-5
GPS Measurement with the Map Screen
After successful measurement is achieved, your current position appears on
the Map Screen.
Current position
(flashing)
Waypoint
• See “Taking a GPS Measurement” for full details about GPS
measurements.
• Any waypoints ( ) located in the same grid cell as your current location
also appear on the display.
To determine your current grid cell
1. Set up the Map Screen to match the
gridlines of the map you are using.
• See “To set up the Map Screen to match
the gridlines of your map”.
2. While your position is plotted on the Map
Screen, press H to display the Corner
Screen.
• This screen shows the latitude and
longitude of the upper left corner of the
grid cell on your map where your current
position is located.
• See “Maps and Gridlines” for detailed
information about grid cells.
3. Press H to return to the Map Screen.
• When you press H, the Map Scale Screen appears for about two seconds,
followed by the Map Screen.
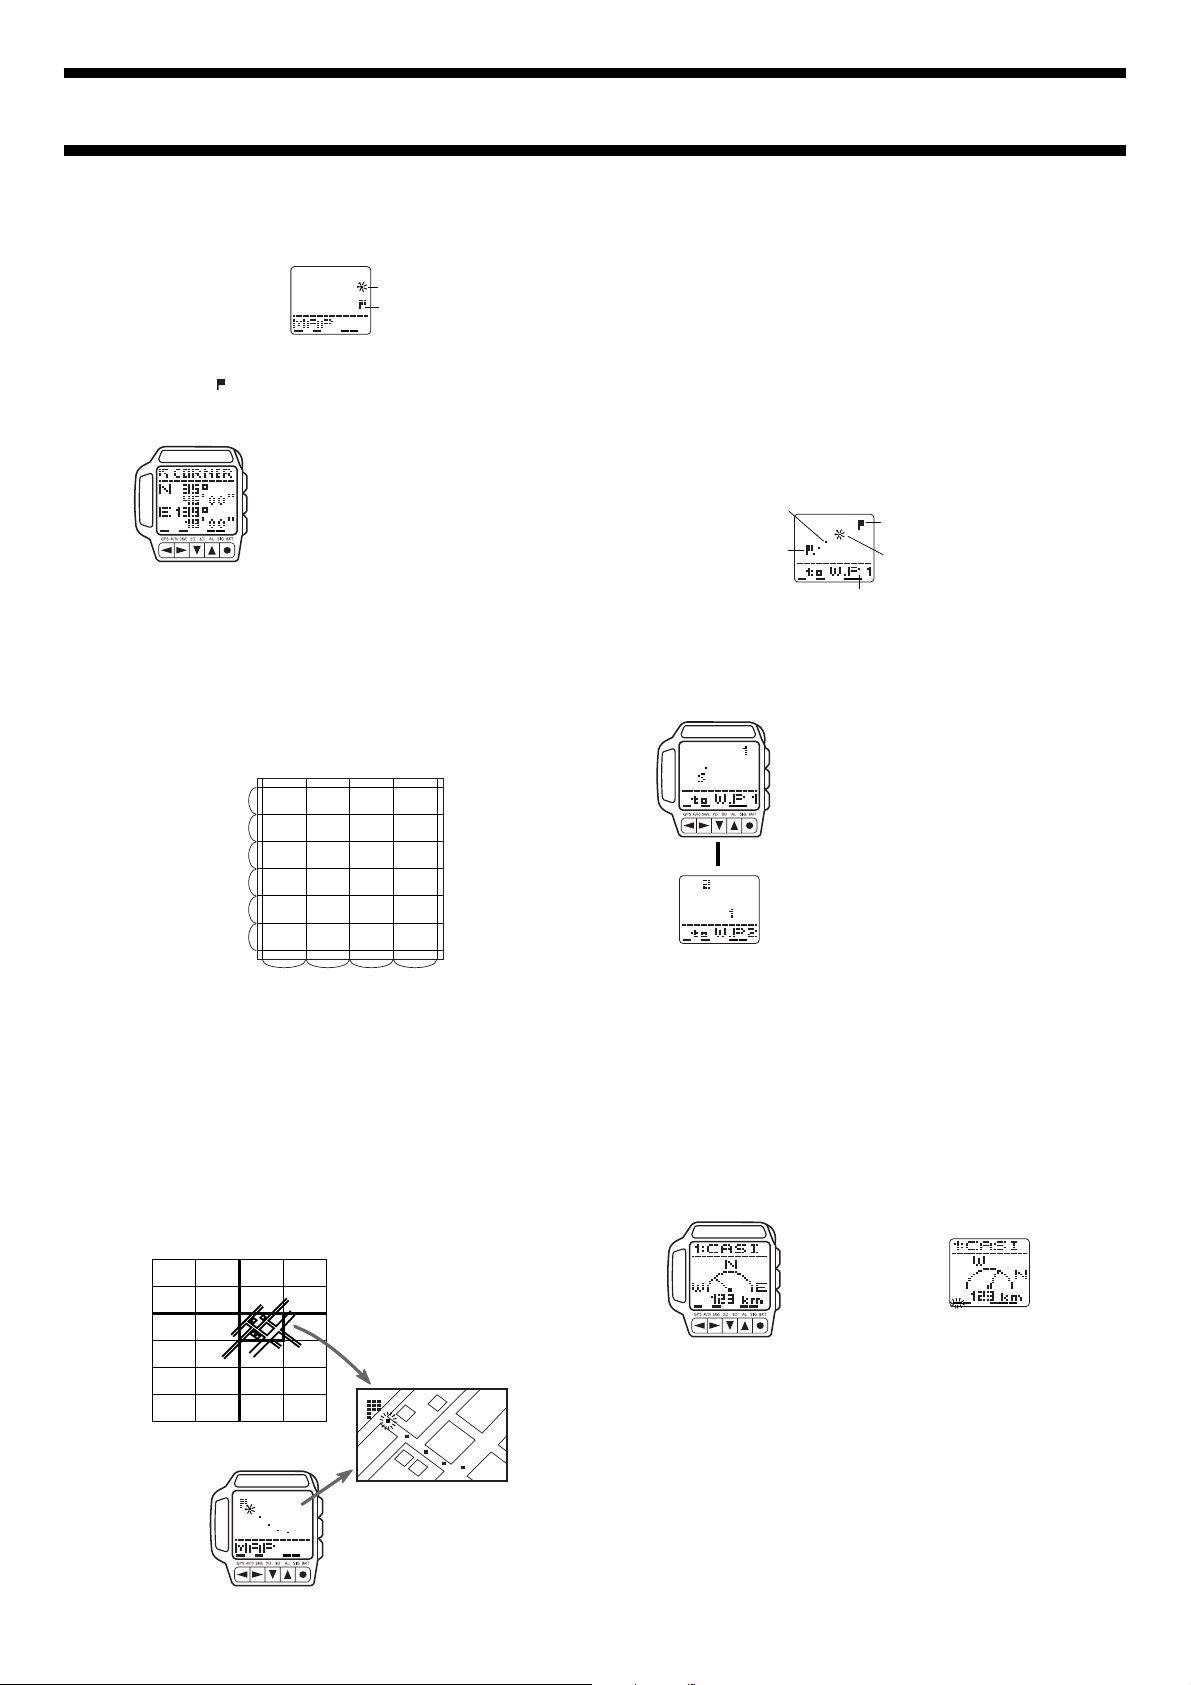
Using the Map Screen for Navigation
Let’s say you want to use the Map Screen to determine your position on a
paper map. Let us assume that your map is marked with lines creating grid
cells that are twice as wide as they are high.
1.0'
1.0'
1.0'
1.0'
1.0'
1.0'
Using the Waypoint Plot Screen
The Waypoint Plot Screen shows preset waypoints in sets of two each, a
waypoint
and a
your progress between the two points. The distance between start and
destination waypoints is scaled in order to allow both of them to fit on the
screen, so the
accordance with the actual distance between the two displayed waypoints.
Text at the bottom of the screen indicates the name of the next destination
waypoint, and you can specify kilometers, miles, or nautical miles as the unit
of measurement for the virtual width. When you reach a destination waypoint,
a simple operation changes it to your new start waypoint and displays the next
destination waypoint, automatically scaling the distance between them so they
both fit on the screen.
destination waypoint
virtual width
, along with
track markers
that indicate
of the screen is adjusted automatically in
GPS measurement with the Waypoint Plot Screen
After successful measurement is achieved, your current position appears on
the Waypoint Plot Screen, along with your current start waypoint and
destination waypoint.
Tracks indicating
your movement
Waypoint
• Each waypoint is indicated on the display by a flag, which flashes
alternately with the applicable waypoint number.
• See “Taking a GPS Measurement” for full details about GPS
measurements.
Waypoint
Current position
(flashing)
Destination waypoint number
(W.P 1 = Waypoint 1)
start
To display the next set of waypoints
1. While the Waypoint Plot Screen is on the
display, press H to display the next set
of waypoints.
2. The virtual width of the screen for the
new start and destination waypoints
appears for about two seconds, followed
by the Waypoint Plot Screen.
• You can use the above procedure to view
upcoming waypoints to determine
L
changes in direction. Remember that the
top of the display is always north.
Use the following procedure to set up the watch to match the map and to plot
your position on the map.
1. Use the procedure under “To set up the Map Screen to match the gridlines
of your map” to set the map scale.
• If you want waypoints to appear on the Map Screen, use the procedure
under “Using Waypoints” to define them.
2. Use the GPS Auto or Continuous mode to measure your position and plot
it on the screen as you travel towards your destination.
3. Use the procedure under “To determine your current grid cell” to locate the
currently displayed grid cell on your map.
4. Find the applicable grid cell on your map and you should be able to determine
your route by tracing the tracks that appear on the display of the watch.
• The example below shows the grid cell whose upper left corner is located
at 35° 46' 00'' North latitude and 139° 18' 00'' East longitude.
139°14'
35°48'
47'
46'
45'
44'
43'
16' 18' 20'
2.0' 2.0' 2.0' 2.0'
Map
Your route on the map
Graphical Navigation Screens
The Graphical Navigation Screen shows the distance and direction from your
current position to a destination waypoint. You can specify kilometers, miles,
or nautical miles as the unit of measurement for the distance.
• See “To set the distance unit” for information about how to set the units of
measurement.
Important!
• The Graphical Navigation Screen will not work properly unless you have
defined waypoints already. See “Using Waypoints” for information about
defining and managing waypoints.
Graphical Navigation Screen Formats
There are two Graphical Navigation Screen formats: a Fixed Direction Screen
and a Current Direction Screen.
Fixed Direction Screen Current Direction Screen
• The Graphical Navigation Screen format is normally the Fixed Direction
Screen. It automatically switches to the Current Direction Screen only while
the watch is in the Continuous Mode and you are moving at a speed of
8kph or faster. The Current Direction Screen is refreshed with each new
successful position measurement.
• Both screens show the name of your destination waypoint, a pointer to the
next destination waypoint, and the distance to the next destination
waypoint.
• With the Fixed Direction Screen, the top (12 o’clock position) of the display
is always north, while with the Current Direction Screen the top of the
display is always your current direction of travel.
Watch display
Page 6

1840-6
GPS Measurement with a Graphical Navigation Screen
After successful measurement is achieved, the display shows a pointer to
your destination waypoint along with the distance to the destination.
Destination
waypoint name
Destination
pointer
Distance to destination
Fixed Direction Screen Current Direction Screen
• See “Taking a GPS Measurement” for full details about GPS
measurements.
• When you plan to use the GPS Continuous Mode while in motion, wait until
the watch is able to obtain its first successful position measurement before
you start moving.
• See “Graphical Navigation Screen” for other important information about
these screens.
waypoint
To change the destination waypoint
1. While the Fixed Direction Screen or Current Direction Screen is on the
display, press H to display the next waypoint.
2. The Graphical Navigation Screen points to the direction of the new
waypoint and displays the distance to it.
• See “Using Waypoints” for information about defining and managing
waypoints.
Direction and Speed Screens
The Direction and Speed Screens provide you with numeric information about
the bearing and distance to your destination waypoint, and your current
heading and speed. You can specify kilometers, miles, or nautical miles as the
unit of measurement for the distance, and kilometers per hour, miles per hour,
or knots for the speed.
• See “To set the distance unit” and “To set the speed unit” for information
about how to set the units of measurement.
Direction and Speed Screen Formats
There are two Direction and Speed Screen formats: a Bearing and Distance
Screen, and a Heading and Speed Screen.
• Press J to toggle between screen formats.
Press J.
H
Bearing and Distance Screen
Important!
• The Bearing and Distance Screen will not work properly unless you have
defined waypoints already. See “Using Waypoints” for information about
defining and managing waypoints.
GPS Measurement with the Bearing and Distance Screen
After successful measurement is achieved, the Bearing and Distance Screen
shows the bearing and distance from your current position to your destination
waypoint.
Destination waypoint name
• See “Taking a GPS Measurement” for full
details about GPS measurements.
• See “Bearing and Direction Values” for
information about how to interpret the
Bearing
Distance
bearing value.
To change the destination waypoint
1. While the Bearing and Distance Screen or Heading and Speed Screen is
on the display, press H to display the next waypoint.
2. The Bearing and Distance Screen shows the bearing of the new waypoint
and the distance to it.
J
Heading and Speed Screen
GPS Measurement with the Heading and Speed Screen
After successful measurement is achieved, the Heading and Speed Screen
shows your current direction of travel (heading) and speed.
Important!
• Heading and speed can be displayed
only when you are using the GPS
Continuous Mode.
Heading
Speed
• When you plan to use the GPS
Continuous Mode while in motion, wait
until the watch is able to obtain its first
successful position measurement before
you start moving.
Using the Landmark List
The LMK (landmark) list is like a data bank of locations from which you can
select your waypoints. You can store up to 200 locations in the LMK list for
instant recall when defining your waypoints.
Preset Data
Your GPS watch comes pre-programmed with landmark list data for the
latitudes and longitudes of the world’s major mountains. See “LANDMARK
LIST”. You can use this data as it is, or you can edit or delete it to suit your
own needs.
• Note that once you edit or delete the preset data it cannot be recovered.
• Use the procedures under “Editing and Deleting Landmarks” to change the
preset data.
• Local names for mountains may differ from those pre-programmed in the
“LANDMARK LIST”.
• As described under “Datums”, latitude and longitude may differ according to
the map datum being employed to produce them. Because of this, the
latitudes and longitudes pre-programmed in the “LANDMARK LIST” may
differ from positions plotted on maps used by you.
To display the LMK list
1. In any mode, press the MENU button to
display the Menu Screen.
2. Use L and K to highlight LAND MK.,
and then press ●.
• A screen showing how many more
landmarks can still be stored in memory
appears for about one second, followed
by the actual LMK list.
• If there are no landmarks currently stored
in memory, the New Landmark Input
Screen appears in place of the list.
3. To exit the LMK list, press MENU to
return to the Menu Screen.
To display the location of a landmark
1. On the LMK list, use L and K to move the highlighting to the landmark
whose location (latitude and longitude) you want to display.
2. Press J to display the Location Screen.
3. Press H to return to the LMK list.
Press Jor H.
J
Landmark List Location
Adding Landmarks to the LMK List
You can store up to 200 landmarks in the LMK list for later recall when you
need them. There are two methods you can use to add a landmark to the
LMK list: registering your current location and manually entering position data.
To add a landmark by registering your current location
While the GPS Mode Position Screen is on the display with the latitude and
longitude of a successful GPS measurement, hold down H for about one
second until the watch beeps and the message SAVE appears at the top of
the screen.
Hold down H.
J
J
Position Screen
The position is saved as a landmark, with the current date (month – day) and
time (hour : minutes) as its name.
• See “Taking a GPS Measurement” for full details about GPS
measurements.
Page 7

1840-7
To add a new landmark by manually entering position data
1. While the LMK list is on the display,
press ● to display the LMK list editing
menu.
• Note that you cannot edit or delete a
landmark what is also defined as a
waypoint in the WAY PT. List. Because of
this, the LMK List Editing Menu does not
appear if you press ● while such a
Landmark
Cursor
Latitude
Longitude
5. Input the latitude of the position and then press ● to move the cursor to
the longitude.
• See “To input the longitude”.
6. Input the longitude and then press ● to save the landmark data.
name area
landmark is highlighted in the LMK List.
2. Use L and K to move the highlighting
to NEW and then press ● to display the
Landmark Input Screen.
3. Input the name you want to assign to the
landmark.
• See “To input text”.
4. After the name is the way you want,
press ● to advance to the Latitude and
Longitude Input Screen.
• See “To input the latitude”.
Editing and Deleting Landmarks
Use the following procedures to edit and delete landmarks.
To edit a landmark
1. On the LMK list, use L and K to
Landmark name area
Cursor
4. Use the procedures under “Inputting Data” to edit the landmark name,
latitude, and longitude.
5. After you are finished editing the landmark, press ● the required number
of times to return to the Location Screen in step 1.
highlight the landmark you want to edit.
2. Press ● to display the LMK list editing
menu.
• Note that you cannot edit or delete a
landmark what is also defined as a
waypoint in the WAY PT. List. Because of
this, the LMK List Editing Menu does not
appear if you press ● while such a
landmark is highlighted in the LMK List.
3. Use L and K to move the highlighting
to EDIT and then press ● to display the
Landmark Editing Input Screen.
To delete a landmark
1. On the LMK list, use L and K to
highlight the landmark you want to
delete.
2. Press ● to display the LMK list editing
menu.
• Note that you cannot edit or delete a
landmark what is also defined as a
waypoint in the WAY PT. List. Because of
this, the LMK List Editing Menu does not
appear if you press ● while such a
landmark is highlighted in the LMK List.
3. Use L and K to move the highlighting to DELETE and then press ●.
4. Use L and K to highlight YES (if you really want to delete the landmark)
or NO (if you want to exit the delete operation without deleting anything),
and then press ●.
Using Waypoints
Waypoints are the points you pass through while travelling. They include your
initial start point, your final destination, and points you pass along the way.
Waypoints are required to produce readings on the Plot Screens, the
Graphical Navigator Screens, and the Direction and Speed Screens. You can
define up to 9 waypoints by selecting them from the LMK (landmark) list.
To define a set of waypoints
1. In any mode, press the MENU button to
display the Menu Screen.
2. Use L and K to highlight WA Y PT ., and
then press ● to display the WAY PT. list.
• This is the list of currently defined
waypoints.
• S: indicates the start point. If there is no
start point currently set, the start point
name appears as S:xxxx.
3. Press ● to display the list of currently
registered landmarks.
• Landmarks are listed in alphabetical
order, according to their names.
4. Use L and K to move the highlighting
to the landmark you want to select as
your start point.
5. Press ● to select the highlighted landmark as your start point, and return
to the WAY PT. list.
6. To define the next waypoint, use L to move the highlighting to 1:
(waypoint number 1).
7. Repeat steps 3 through 6 to define all the waypoints you want.
8. After you are finished defining waypoints, press the MENU button to return
to the Menu Screen.
To add waypoints
1. In any mode, press the MENU button to display the Menu Screen.
2. Use L and K to highlight WAY PT., and then press ● to display the WAY
PT. list.
3. Use L to move the highlighting to the bottom of the list.
4. Press ● to display the list of landmarks.
5. Use L and K to move the highlighting to the landmark you want to add,
and then press ●.
6. Repeat steps 3 and 5 to add more waypoints if you want.
7. After you are finished adding waypoints, press the MENU button to return
to the Menu Screen.
To insert waypoints
1. On the WAY PT. list, use L and K to move the highlighting to waypoint
above which you want to insert a new waypoint.
2. Press ●.
3. On the menu of options that appears, use L and K to move the
highlighting to INSERT, and then press ● to display the list of landmarks.
4. Use L and K to move the highlighting to the landmark you want to
insert, and then press ●.
5. In response to the INSERT? message that appears, use L and K to
highlight YES (if you really want to insert the waypoint) or NO (if you want
to exit the operation without inserting anything), and then press ●.
To change an existing waypoint
1. On the WAY PT. list, use L and K to move the highlighting to waypoint
you want to change.
2. Press ●.
3. On the menu of options that appears, use L and K to move the
highlighting to CHANGE, and then press ● to display the list of landmarks.
4. Use L and K to move the highlighting to the landmark to which you want
to change, and then press ●.
5. In response to the CHANGE? message that appears, use L and K to
highlight YES (if you really want to change the waypoint) or NO (if you
want to exit the operation without changing anything), and then press ●.
To delete a waypoint
1. On the WAY PT. list, use L and K to move the highlighting to waypoint
you want to delete.
2. Press ●.
3. On the menu of options that appears, use L and K to move the
highlighting to DELETE, and then press ●.
4. In response to the DELETE? message that appears, use L and K to
highlight YES (if you really want to delete the waypoint) or NO (if you want
to exit the operation without deleting anything), and then press ●.
Track Memory
Track point data is automatically stored into track memory when you perform
a GPS position measurement. Track memory can hold up to 100 track point
data records, each of which contains a record number, track position (latitude
and longitude), measurement date, and measurement time. Track point data
is used as the basis for the tracks that are plotted on the GPS Mode Plot
Screens. You can also recall track memory records and view the data
contained in each.
• After the track memory becomes full with 100 track point data records, each
new measurement causes the oldest record in memory to be deleted to
make room for the new data.
When track point data is stored
The following describes the timing when track point data is stored into track
memory.
• Quick Mode/One-Shot Mode
Track point data is stored each time a GPS measurement is successful.
• Auto Mode/Continuous Mode
Track point data is stored every 10 minutes.
Page 8

1840-8
0.5'
1.0'
1.5'
2.0'
2.5'
3.0'
1.0' 1.5' 2.0' 2.5' 3.0' 4.0' 5.0' 6.0' 7.5'
24
×
32 16 × 32
24
×
24
24
×
32
20
×
32 16 × 32
24
×
22
24
×
27
24
×
32
18
×
32
24
×
20
24
×
24
24
×
32
20
×
32 16
×
32
24
×
20
24
×
26
24
×
32 20 × 32
24
×
22 24
×
27 24
×
32
16
×
32
20
×
32
Horizontal
Vertical
To recall track memory data
1. In any mode, press the MENU button to display the Menu Screen.
2. Use L and K to highlight TRACKS, and then press ● to display the
Tracks Screen.
3. Use L and K to scroll through the data in track memory.
4. Use H and J to switch between the two Track Memory Data Screens.
Record
number
Measurement
time
Date and Time Screen
To clear track memory
L
GPS Mode Settings
This section describes how to make various settings that affect GPS Mode
data. Most of these settings can be made once when initially setting up the
watch, and should never need changing.
Setting Your Area
The area setting lets the watch know where it is currently located. The watch
uses this information as a reference point for making GPS measurements.
You need to update this setting whenever you move from one geographic
area to another.
There are two ways to specify the area: by selecting a preset area or by
inputting area data.
To specify a preset area
5. Use L and K to scroll through the area names on the screen until the
one you want is highlighted.
• See “AREA LIST” at the back of this manual for a full list of area names
and the area data connected with each name.
6. After highlighting the name of the area you want to specify, press ● to
register it and return to the Set Up Menu.
7. To exit the Set Up Menu, press MENU.
• Selecting an area automatically sets the appropriate latitude, longitude,
GMT differential and datum for that area.
To input area data
5. Input the latitude of the area and then press ● to move the cursor to the
longitude.
• See “To input the latitude”.
6. Input the longitude and then press ● to advance to the GMT Differential
Screen.
• See “To input the longitude”.
Measurement date
Press Jor H.
J
Latitude
J
Longitude
Track Position Screen
1. While the Tracks Screen is on display,
press ●.
• You can perform this step while either the
Date and Time Screen or Track Position
Screen is on the display.
2. Use L and K to highlight YES (if you
really want to clear all data from the track
memory) or NO (if you want to exit the
clear operation without clearing
anything), and then press ●.
1. In any mode, press the MENU button to
display the Menu Screen.
2. Use L and K to move the highlighting
to SET UP and then press ● to display
the Set Up Menu.
3. Use L and K to move the highlighting
to AREA and then press ● to display the
Area Menu.
4. Use L and K to move the highlighting
to SELECT and then press ● to display
the Area Selection Screen.
1. In any mode, press the MENU button to
display the Menu Screen.
2. Use L and K to move the highlighting
to SET UP and then press ● to display
the Set Up Menu.
3. Use L and K to move the highlighting
to AREA and then press ● to display the
Area Menu.
4. Use L and K to move the highlighting
to INPUT and then press ● to display the
Area Data Input Screen.
Record
number
7. Input the GMT differential.
• The GMT differential is the time difference between the area whose data
you are setting and Greenwich Mean Time.
• You can input a GMT differential value in the range from –11.0 to +13.0, in
units of 0.5 hours.
• See “To change a numeric setting”.
8. After inputting the GMT differential, press ● to return to the Set Up Menu.
9. Press ● to display the DATUMS list, and set the datum for the area. Use
the procedure starting from step 4 under “To specify a datum”.
• See “Datums” for information about datums.
• Pressing MENU instead of ● in the above step exits the Set Up Menu.
Setting a Datum
The GPS constellation of satellites generates latitude and longitude positions
on the World Geodetic System 1984 (WGS 84) horizontal datum. Though
WGS 84 is the latest standard for the entire world, higher precision can be
obtained using a datum for a particular local area. Use the following
procedure to select the datum that is appropriate for the area where you are
taking GPS measurements with this watch.
• See “Datums” for more information about datums and how they affect GPS
measurements.
To specify a datum
1. In any mode, press the MENU button to
display the Menu Screen.
2. Use L and K to move the highlighting
to SET UP and then press ● to display
the Set Up Menu.
3. Use L and K to move the highlighting
to DATUMS and then press ● to display
the DATUMS list.
4. Use L and K to scroll through the
datum names on the screen until the one
you want is highlighted.
• See “DATUM LIST” at the back of this manual for a full list of datum names
and the applicable area for each.
5. After highlighting the name of the datum you want to specify, press ● to
register it and return to the Set Up Menu.
6. To exit the Set Up Menu, press MENU.
Map Scale Settings
You can change the map scale settings of
the watch so the screen represents one grid
cell of the map you are using. Because of
the physical size of the screen, its default
vertical-to-horizontal relationship is normally
Ratio: 2:6
Ratio: 2:2.5
The following table shows all of the possible settings that can be made for the
map scale. The values along the top and left side indicate the latitude-tolongitude ratio, while the dimension values inside the table indicate the screen
size in dots. The full screen size is 24 × 32 dots.
1:2, meaning the cell is assumed to be twice
as wide as it is tall. Whenever you use the
procedure under “To set up the Map Screen
to match the gridlines of your map” to
change the longitude value, the watch
automatically adjusts the latitude value to
maintain a ratio of 1-to-2.
If you manually change the latitude value to
a vertical-to-horizontal ratio other than 1:2,
the unused portion of the screen is
automatically blacked out as shown in the
illustration nearby.
Page 9

1840-9
Setting the Distance Unit
Distance data produced by the GPS Mode can be displayed in kilometers
(KM), miles (MILES) or nautical miles (NM). Use the following procedure to
select the unit of measurement you want to use for distance data.
To set the distance unit
1. In any mode, press the MENU button to
display the Menu Screen.
2. Use L and K to move the highlighting
to SET UP and then press ● to display
the Set Up Menu.
3. Use L and K to move the highlighting
to DST UNITS and then press ● to
display the DST Units Menu.
4. Use L and K to move the highlighting
to the unit you want to set and then press
●.
5. Press MENU to return to the Menu
Screen.
Setting the Speed Unit
Speed data produced by the GPS Mode can be displayed in kilometers per
hour (KPH), miles per hour (MPH) or knots (KNOTS). Use the following
procedure to select the unit of measurement you want to use for speed data.
To set the speed unit
1. In any mode, press the MENU button to
display the Menu Screen.
2. Use L and K to move the highlighting
to SET UP and then press ● to display
the Set Up Menu.
3. Use L and K to move the highlighting
to SPD UNITS and then press ● to
display the SPD Units Menu.
4. Use L and K to move the highlighting
to the unit you want to set and then press
●.
5. Press MENU to return to the Menu
Screen.
REFERENCE
This section contains more detailed and technical information about the
features, functions, and operation of this watch. It also contains important
precautions and notes that apply to watch operation.
Power Requirements
This watch is powered by a single CR2 lithium battery. Replace the battery as
soon as possible when figures on the display appear dim, when the backlight
does not turn on, or when the BATT EMPTY message appears on the display.
Important!
• Make sure that any water on the outside of the watch does not get into the
battery compartment! Carefully wipe all moisture from the watch before
opening the battery compartment.
To replace the battery
2
3
Slot
• Never remove the battery from the watch while the message WAIT is on
the display. Wait until the message disappears (which can take as long as
20 seconds) before starting.
2. Insert a coin into the slot in the battery compartment cover and twist so
the K mark 1 on the cover is aligned with the mark 2 on the watch to
open the cover.
• The battery has a spring under it, so the cover and battery will suddenly
spring free. Take care that you do not drop the battery compartment cover
and lose it.
1. In the Timekeeping Mode, check the
1
Battery
Metal Sleeve
display of the watch to make sure that
the WAIT message is not shown and
that there is no GPS measurement
operation being performed.
• Never remove the battery from the watch
while a GPS measurement operation is in
progress.
3. Remove the old battery and its
metal sleeve from the watch, and
then remove the battery from the
sleeve.
4. Insert the new battery into the
sleeve, and slide the battery and
sleeve into the battery
compartment.
• Load the new battery as quickly as
possible after removing the old
battery.
• Make sure that the positive end (the one with the nub in the center) of the
battery is facing toward the cover and the negative end (the flat one) is
facing down when you insert the battery and sleeve into the watch.
5. Screw the battery compartment cover back onto the watch, aligning the
mark 3 on the cover with the mark 2 on the watch.
• Make sure you do not force or over-tighten the battery compartment cover.
Doing so can damage the watch.
6. Press LIGHT to check that the EL Backlight works properly.
7. Check the area, datum, time, and date settings of the watch and correct
them if necessary.
Important!
• We strongly urge use of battery brands specifically recommended in this
manual.
• The battery installed at the factory discharges during shipment and
inventory storage. Because of this, it may not provide the normal battery
life specified for this watch.
• The battery installed at the factory is not rechargeable. Never try to charge it.
• Damage to or dirt, dust, moisture on the inside of the battery compartment
cover or on the surface that comes into contact with the rubber seal can
cause loss of water resistance. Keep such areas clean and free of
moisture.
• We recommend that you replace the battery compartment cover and the
rubber seal once a year in order to ensure that the watch always performs
at the level for which it was designed. Contact your CASIO dealer or
distributor about replacement of these items.
• Should battery fluid ever leak inside the battery compartment, immediately
use a dry rag to wipe it out while taking care not to get any fluid on your
hands.
• Never leave a dead or weak battery in the battery compartment. Doing so
runs the risk of damage and malfunction due to battery fluid leaks.
• Be sure to dispose of old batteries according to the local laws and
regulations in your area.
• Improperly replacing the battery can result in damage to the watch.
Repairing such damage will be charged to you, so take care to replace the
battery correctly.
• Always take along extra batteries when going to isolated areas where they
might not otherwise be available.
• The display of the watch will go blank if you leave it for a long time without
a battery installed.
• If you do not plan to load a battery right away, insert the empty metal
sleeve into the battery compartment and close the battery compartment
cover. When you open the battery compartment cover while there is no
battery loaded, there is no spring force pressing up on the inside of the
cover when you open it. In such a case, use the following procedure to
open the battery compartment cover.
1. Insert a coin into the slot in the battery compartment cover and twist so
K
mark 1 is aligned with the mark 2 on the watch to release the
the
cover.
2. Insert the blade of a screwdriver or other similar object into the slot on
the side of the cover and lift the cover to open it.
• Do not operate any of the watch’s buttons when there is no battery in the
battery compartment.
• If you left the watch without battery power until the screen went blank,
make new time, alarm, map scale, distance unit, and speed unit settings.
• The initial position measurement after you replace the battery may take a
relatively long time to complete.
• Never try to take the battery apart, or expose it to heat or direct flame. Take
care that the positive and negative ends of the battery never become
shorted.
• Carrying or storing batteries together with metal objects or other batteries
can cause them to generate heat, burst, or even emit flame. Take sufficient
care whenever carrying, storing, or disposing of batteries.
• Keep batteries out of the reach of small children. If accidentally
swallowed, immediately contact a physician.
Inputting Data
Use the following procedures to input text and numbers. These procedures
are performed while the input cursor is flashing on an Input or Editing Screen.
To input text
1. Use H and J to move the cursor to the
position where you want to input a
character.
2. Use L and K to cycle through the
available input characters in the
sequence shown below.
• You can input up to 14 characters for the
name.
Press K.
(space)
/
• Holding down L or K cycles through the characters at high speed.
• To delete all the characters currently in the input area on the display, hold
down H or J until the watch beeps.
3. Repeat steps 1 and 2 to input all the characters you want.
A
Press L.
to
Z
. :
0
to
9
Page 10

1840-10
1
2
3
4
5
6
7
8
5
4
2
3
1
6
7
8
Zenith
West East
North
Horizon
South
Current latitude
and longitude
Celestial Sphere
Top-Down View
West
Horizon
North
Azimuth Angle
(Easterly from 0° due
north to 359°)
Zenith
East
South
To input the latitude
1. Use H and J to move the cursor to the position in the latitude you want
to change.
2. Use L and K to cycle through the range of settings at the position where
the cursor is located.
Position
N 00 00' 00"
N 00 00' 00"
N 00 00' 00"
N 00 00' 00"
N 00 00' 00"
N 00 00' 00"
N 00 00' 00"
• Holding down L or K cycles through the settings at high speed.
• Any latitude greater than 90°00'00" is automatically converted to 90°00'00"
when you save it.
3. Repeat steps 1 and 2 to set the latitude you want.
Setting Range
N or S
0 to 9
0 to 9
0 to 5
0 to 9
0 to 5
0 to 9
To input the longitude
1. Use H and J to move the cursor to the position in the longitude you want
to change.
2. Use L and K to cycle through the range of settings at the position where
the cursor is located.
Position
E 100 00' 00"
E 100 00' 00"
E 100 00' 00"
E 100 00' 00"
E 100 00' 00"
E 100 00' 00"
E 100 00' 00"
E 100 00' 00"
Setting Range
E or W
0 or 1
0 to 9
0 to 9
0 to 5
0 to 9
0 to 5
0 to 9
Satellite Information Display
The following shows the meaning of the satellite marks that appear on the
display.
• Holding down L or K cycles through the settings at high speed.
• Any longitude greater than 180°00'00" is automatically converted to
180°00'00" when you save it.
3. Repeat steps 1 and 2 to set the longitude you want.
To change a numeric setting
1. Use H and J to move the cursor to the digit you want to change.
2. Use L and K to cycle through the numbers from 0 to 9.
• Holding down L or K cycles through the numbers at high speed.
3. Repeat steps 1 and 2 to make all the settings you want.
Displaying GPS Satellite Information
You can use the following procedure to display the position and the receive
status of GPS satellites that are currently overhead.
To display GPS satellite information
• In the case of a GPS Continuous Mode measurement operation, the screen
data is refreshed every second. To refresh the display in other GPS
measurement modes, press MENU to return to the Menu Screen and then
press ● again.
Satellite Marks
Searching
This mark indicates a satellite from which the watch
is standing by to receive a signal. The positions of
these satellites are determined using almanac data
for the current latitude, longitude, and time.
Tracking
This mark indicates a satellite that is currently being
tracked by the watch. Signal receipt for these
satellites is enabled.
1. In any mode, press the MENU button to
display the Menu Screen.
2. Use L and K to highlight SATELLITE,
and then press ●.
• Satellite information appears immediately
if a GPS measurement operation is
already in progress.
• If a GPS measurement operation is not in
progress, the message WAIT remains on
the display as data is being collected.
Datums
Since the Earth is neither flat nor a perfect sphere or even an ellipsoid, a wide
variety of spheroid models (mostly ellipses) were developed with different
major and minor axes. An ellipsoid, in addition to the various control points
required to relate how the ellipsoid lies in relation to the Earth constitutes a
map datum.
When various countries mapped their areas, each usually used its own datum
to provide accuracy in a specific area. Though some datums share the same
ellipsoid, they use different control points, which results in differing datums.
The development of air travel between countries created the need for a single
global datum, which is identified according to their World Geodetic System
(WGS) names. The constellation of GPS satellites uses WGS 84 to describe
coordinates. It should be noted that errors of several hundred meters can
occur if coordinates of one datum are referred to in another datum without
converting them first.
Maps and Gridlines
Most maps are marked with horizontal and vertical lines that form a
squares of a map’s grid are called
The gridlines of some maps are spaced a number of inches or millimeters
apart, while others have gridlines spaced a number of minutes of latitude and
longitude. It is this latter type of map with
gridlines
that can be used with the Map Screen of your GPS watch for
positioning.
Busy
This mark indicates a satellite from which ephemeris
data (information about the position of the host
satellite and the satellite clock time) is being
received. It indicates the satellites that the watch is
using for position measurement.
grid
grid cells
or
grid squares
latitude and longitude based
.
. The
Page 11

1840-11
GPS Mode
What is GPS?
The Global Positioning System (GPS) was originally developed and is
currently operated by the United States Department of Defense. The space
segment of the GPS consists of the NAVSTAR satellites that are orbiting
21,000 kilometers above the Earth over six equally spaced orbital planes.
When signals are received from a minimum of three satellites, the principal of
triangulation is used to determine the current location of the GPS Watch
based on the distance between each satellite and the watch, and the orbital
path of each satellite.
Important!
• The signals produced by GPS satellites are controlled by the GPS Master
Control Station at Colorado Springs, Colorado. Signals may be subject to
reduced precision and even interruption without notice.
Almanac and Ephemeris Data
The data message sent from a GPS satellite consists of an
gives the approximate positions of all the other satellites in the system, and
the satellite
the host satellite.
How quickly the watch is able to acquire the data it needs to determine your
position depends on a number of factors. One of the most important factors is
the status of almanac and ephemeris data in watch memory. There are two
possible data conditions from which you can start when performing a GPS
measurement:
Important!
• The above terms and their definitions are based on current standard
Whenever the watch determines that the almanac data it currently has in
memory is no longer valid, it receives new almanac data from one of the
satellites overhead. The message RECEIVING SATELLITE DATA appears on
the display of the watch to indicate when almanac data is being received. Be
sure to leave the watch with its antenna facing the sky whenever this
message is on the display.
ephemeris
Start Type
Hot Start
Warm Start
American English usage. Definitions may differ according to language and
geographic area.
that contains precise information about the position of
hot start, warm start
• GPS receiver circuit shut off for a very short time
• Watch has not been moved to a different location
• Both almanac and emphemeris data from last
• GPS receiver circuit shut off for a long time
• Watch has not been moved to a different location
• Almanac data from last measurement still in
.
Description
(few minutes at most).
since last measurement.
measurement still in memory.
(over night, etc.)
since last measurement.
memory, but no ephemeris data.
Factors that Affect GPS Signal Reception
Signal reception from GPS satellites may be difficult or even impossible under
the following conditions.
• Inside buildings or underground
• Among tall buildings
• In densely wooded areas
• Near high voltage lines
• Inside a motor vehicle
• When the antenna is covered by your sleeve, etc.
Navigation Precautions
• Never perform navigation operations while walking, cycling, or
operating a motor vehicle. Doing so can lead to accidents.
• Do not use this watch as a main navigation device for a boat or
aircraft. Doing so can lead to accidents.
• Though a useful navigational tool, a GPS receiver should never be
used as a replacement for conventional map and compass
techniques. Remember that magnetic compasses can work at
temperatures well below zero, have no batteries, and are
mechanically simple. They are easy to operate and understand, and
will operate almost anywhere. For these reasons, the magnetic
compass should still be your main navigation tool.
Data Reliability
• The global positioning system (GPS) is administered by the United States,
which also takes responsibility for all maintenance, management, and
precision adjustments. Because of this, there may be unforeseen changes
in the system and the signals it generates.
almanac
that
Graphical Navigation Screen
• Though the Current Direction Screen can be used when travelling at
speeds of less than 8 kilometers per hour, measurement accuracy is greatly
reduced.
• The message SEARCH appears on the screen if buildings or other
obstructions interfere with signal receipt while the Current Direction Screen
is on the display during Continuous Mode measurements. The Current
Direction Screen will return as soon as the next successful measurement is
achieved.
• The maximum distance that can be displayed on the Graphical Navigation
Screen is 9999 kilometers.
• The direction pointer may remain on the Current Direction Screen even if
you come to a full stop.
• The appearance of the destination pointer changes automatically
depending on the relative direction of the destination.
Fixed Direction Screen
Destination towards the North Destination towards the South
Current Direction Screen
Destination in front of you Destination in back of you
Bearing and Direction Values
Bearing and direction are indicated on the Direction and Speed Screens as
values that represent degrees. The following illustration shows the meanings
of these values.
315° = Northwest
270°= West
225° = Southwest
0° = North 45° = Northeast
90° = East
180° = South
135° = Southeast
Display Indicators and Messages
The following describes some of the indicators and messages that appear on
the display of the watch. These are normal and do not indicate malfunction.
Wait Message
This message indicates that the watch is
busy performing some procedure. Never
remove the battery from the watch while the
WAIT message is on the display.
Data Receive Message
This message indicates that the watch is
receiving satellite data. A data receive
operation can take about 20 minutes to
complete. Leave the watch with its face
facing towards the sky during this period.
Flashing GPS Indicator
➜
The bar at the top of the screens in the GPS
Mode flashes while the watch is receiving
ephemeris data. Ephemeris data contains
precise information about the position of the
host satellite and the satellite clock time.
Do not perform any button operations while
the bar is flashing.
Page 12

1840-12
Low Battery Warning
Antenna
Antenna
City name GMT Latitude
HONOLULU
ANCHORAGE
LAS VEGAS
LOS ANGELES
SEATTLE
SAN FRANCISCO
VANCOUVER
DENVER
EDMONTON
CHICAGO
DALLAS
GUATEMALA CITY
HOUSTON
MEXICO CITY
SAN JOSE
ATLANTA
BOGOTA
BOSTON
DETROIT
LIMA
MIAMI
NEW YORK
PANAMA CITY
WASHINGTON
MONTREAL
TORONTO
CARACAS
LA PAZ
SANTIAGO
BUENOS AIRES
MONTEVIDEO
RIO DE JANEIRO
SAO PAULO
CASABLANCA
EDINBURGH
LISBON
LONDON
GRAN CANARIA
AMSTERDAM
BARCELONA
BRUSSELS
COPENHAGEN
FRANKFURT
HAMBURG
MADRID
MILAN
MUNICH
OSLO
PARIS
ROME
STOCKHOLM
VIENNA
ZURICH
ATHENS
CAIRO
CAPE TOWN
JERUSALEM
HELSINKI
ISTANBUL
ADDIS ABABA
BAHRAIN
BAGHDAD
DOHA
RIYADH
KUWAIT CITY
JEDDAH
NAIROBI
TEHRAN
Code
HNL
ANC
LAS
LAX
SEA
SFO
YVR
DEN
YEA
CHI
DFW
GUA
HOU
MEX
SJO
ATL
BOG
BOS
DTT
LIM
MIA
NYC
PTY
WAS
YMQ
YTO
CCS
LPB
SCL
BUE
MVD
RIO
SAO
CAS
EDI
LIS
LON
LPA
AMS
BCN
BRU
CPH
FRA
HAM
MAD
MIL
MUC
OSL
PAR
ROM
STO
VIE
ZRH
ATH
CAI
CPT
JRS
HEL
IST
ADD
BAH
BGW
DOH
RUH
KWI
JED
NBO
THR
Differential
– 10.0
– 9.0
– 8.0
– 8.0
– 8.0
– 8.0
– 8.0
– 7.0
– 7.0
– 6.0
– 6.0
– 6.0
– 6.0
– 6.0
– 6.0
– 5.0
– 5.0
– 5.0
– 5.0
– 5.0
– 5.0
– 5.0
– 5.0
– 5.0
– 5.0
– 5.0
– 4.0
– 4.0
– 4.0
– 3.0
– 3.0
– 3.0
– 3.0
0.0
0.0
0.0
0.0
0.0
1.0
1.0
1.0
1.0
1.0
1.0
1.0
1.0
1.0
1.0
1.0
1.0
1.0
1.0
1.0
2.0
2.0
2.0
2.0
2.0
2.0
3.0
3.0
3.0
3.0
3.0
3.0
3.0
3.0
3.5
This message appears when battery power
drops to a level that does not allow proper
operation of the watch’s functions. Replace
the battery as soon as possible after this
message appears.
Note that the low battery warning may
appear under very cold conditions, even
though battery power is not low. In this case,
the message should disappear when the
watch is brought back to normal
temperature.
Never attach any metallic stickers to the
antenna of this watch. Doing so can interfere
with proper signal reception.
AREA LIST
Preset Data
0.01 min unit
Longitude
0.01 min unit
S/N Deg Min
21
N
61
N
36
N
34
N
47
N
37
N
49
N
39
N
53
N
41
N
32
N
14
N
29
N
19
N
09
N
33
N
04
N
42
N
42
N
12
S
25
N
40
N
08
N
38
N
45
N
43
N
10
N
16
S
33
S
34
S
34
S
22
S
23
S
33
N
55
N
38
N
51
N
28
N
52
N
41
N
50
N
55
N
N
50
N
53
N
40
N
45
N
48
N
60
N
48
N
41
N
59
N
48
N
47
N
37
N
30
S
33
N
31
N
60
N
40
N
08
N
26
N
33
N
25
N
24
N
29
N
21
S
01
N
35
21
10
05
03
37
37
11
45
34
47
47
35
46
24
56
39
42
22
20
00
49
46
58
51
28
40
30
31
26
35
52
55
30
34
57
47
09
29
21
25
50
41
07
38
25
28
08
12
58
48
2
15
23
58
08
59
46
19
58
59
00
14
17
43
20
30
19
41
N : + S : –
128100
367000
216500
204300
285700
225700
295100
238500
321400
250700
196700
87500
178600
116400
59600
201900
28200
254200
254000
– 72000
154900
244600
53800
233100
272800
262000
63000
– 99100
– 200600
– 207500
– 209200
– 137500
– 141000
201400
335700
232700
306900
170900
314100
248500
305000
334100
300700
321800
242500
272800
288800
361200
293800
250800
356100
289500
284300
227800
180800
– 203900
190600
361900
245800
53900
156000
199400
151700
148300
176000
129000
– 7900
214100
E/W Deg Min
W
157
W
149
W
115
W
118
W
122
W
122
W
123
W
104
W
113
W
87
W
96
W
90
W
95
W
99
W
84
W
84
W
74
W
71
W
83
W
77
W
80
W
73
W
79
W
77
W
73
W
79
W
66
W
68
W
70
W
58
W
56
W
43
W
46
W
07
W
03
W
09
W
00
W
15
E
04
E
02
E
04
E
12
E
08
E
10
W
03
E
09
E
11
E
11
E
02
E
12
E
17
E
16
E
08
E
23
E
31
E
18
E
35
E
24
E
29
E
38
E
50
E
44
E
51
E
46
E
48
E
39
E
36
E
51
56
55
10
15
19
23
10
52
31
45
48
31
22
12
05
25
08
02
01
07
17
54
31
02
45
38
56
11
41
29
12
10
37
40
13
08
11
11
54
08
20
33
40
00
41
12
42
05
27
14
57
22
34
43
24
36
13
58
05
48
30
14
32
43
01
12
55
21
Datum
E : + W : – No. Name
– 947600
111
– 899500
105
– 691000
107
– 709500
107
– 733900
107
– 734300
107
– 739000
106
– 629200
107
– 681100
106
– 526500
107
– 580800
107
– 543100
108
– 572200
107
– 595200
108
– 504500
108
– 506500
107
– 444800
034
– 426200
107
– 498100
107
– 462700
141
– 481700
107
– 443400
107
– 477100
001
– 462200
107
– 442500
106
– 477800
106
– 401600
141
– 409100
141
– 424100
141
– 350900
035
– 337200
170
– 259000
042
– 279700
042
– 46000
080
– 19300
117
– 54800
057
– 1100
117
– 91100
122
29400
057
12800
057
26000
057
75300
057
057
52000
057
60000
057
– 22100
057
55200
057
70200
057
66500
057
14700
057
73400
057
107700
057
98200
057
51400
057
142300
110
188400
037
111600
001
211300
057
149800
001
174500
007
232800
013
303000
001
265400
135
309200
085
280300
084
288100
085
235200
023
221500
057
308100
Datum
HAWAII
NAD83-1
NAD83-3
NAD83-3
NAD83-3
NAD83-3
NAD83-2
NAD83-3
NAD83-2
NAD83-3
NAD83-3
NAD83-4
NAD83-3
NAD83-4
NAD83-4
NAD83-3
BOGOTA
NAD83-3
NAD83-3
SAM69
NAD83-3
NAD83-3
WGS84
NAD83-3
NAD83-2
NAD83-2
SAM69
SAM69
SAM69
CAMPO
YACARE
CORREGO
CORREGO
MERCHICH
GRB36
EUR79
GRB36
PICO
EUR79
EUR79
EUR79
EUR79
EUR79
EUR79
EUR79
EUR79
EUR79
EUR79
EUR79
EUR79
EUR79
EUR79
EUR79
EUR79
EGYPT30
CAPE
WGS84
EUR79
WGS84
ADIND-1
ABD70
WGS84
QATAR
NAHRWA3
NAHRWA2
NAHRWA3
ARC60
EUR79
Preset Data
0.01 min unit
City name GMT Latitude
DUBAI
MUSCAT
KABUL
KARACHI
BOMBAY
CALCUTTA
DELHI
MADRAS
DHAKA
YANGON
BANGKOK
JAKARTA
HONG KONG
KUALA LUMPUR
MANILA
BEIJING
PERTH
SHANGHAI
SINGAPORE
TAIPEI
FUKUOKA
OSAKA
SEOUL
SAPPORO
TOKYO
ADELAIDE
GUAM
MELBOURNE
SYDNEY
NOUMEA
AUCKLAND
WELLINGTON
Code
DXB
MCT
KBL
KHI
BOM
CCU
DEL
MAA
DAC
RGN
BKK
JKT
HKG
KUL
MNL
BJS
PER
SHA
SIN
TPE
FUK
OSA
SEL
SPK
TYO
ADL
GUM
MEL
SYD
NOU
AKL
WLG
Differential
4.0
4.0
4.5
5.0
5.5
5.5
5.5
5.5
6.0
6.5
7.0
7.0
8.0
8.0
8.0
8.0
8.0
8.0
8.0
8.0
9.0
9.0
9.0
9.0
9.0
9.5
10.0
10.0
10.0
11.0
12.0
12.0
S/N Deg Min
N
25
N
23
N
34
N
24
N
18
N
22
N
28
N
13
N
23
N
16
N
13
S
06
N
22
N
03
N
14
N
39
S
31
N
31
N
01
N
25
N
33
N
34
N
37
N
43
N
35
S
34
N
13
S
37
S
33
S
22
S
37
S
41
18
48
33
54
54
32
37
00
48
46
44
11
18
07
31
56
56
10
22
02
35
41
30
03
41
56
33
49
57
16
01
17
N : + S : –
151800
142800
207300
149400
113400
135200
171700
78000
142800
100600
82400
– 37100
133800
18700
87100
239600
– 191600
187000
8200
150200
201500
208100
225000
258300
214100
– 209600
81300
– 226900
– 203700
– 133600
– 222100
– 247700
Longitude
E/W Deg Min
E
55
E
58
E
69
E
67
E
72
E
88
E
77
E
80
E
90
E
96
E
100
E
106
E
114
E
101
E
121
E
116
E
115
E
121
E
103
E
121
E
130
E
135
E
127
E
141
E
139
E
138
E
144
E
144
E
151
E
166
E
174
E
174
DATUM LIST
Datum Name Display Applicable Area
WGS-84
WGS-72
ASTRO B4 SOR. ATOLL
ASTRO BEACON "E"
ASTRO POS 714
ASTRONOMIC STATION 1952
AIN EL ABD 1970
ADINDAN
AFG
ANNA 1 ASTRO 1965
ARC 1950
ARC 1960
ASCENSION ISLAND 1958
AUSTRALIAN GEODETIC 1966
AUSTRALIAN GEODETIC 1984
BELLEVUE (IGN)
BERMUDA 1957
BOGOTA OBSERVATORY
BUKIT RIMPAH
CAMP AREA ASTRO
CAMPO INCHAUSPE
CANTON ISLAND 1966
CAPE
CAPE CANAVERAL
CARTHAGE
CHATHAM 1971
CHUA ASTRO
CORREGO ALEGRE
DJAKARTA (BATAVIA)
DOS 1968
EASTER ISLANDS 1967
OLD EGYPTIAN 1930
EUROPEAN 1950
EUROPEAN 1979
G. SEGARA
GANDAJIKA BASE
GEODETIC DATUM 1949
ORDNANCE SURVEY OF
GREAT BRITAIN 1936
GUAM 1963
GUX 1 ASTRO
HERAT NORTH
WGS84
WGS72
A . EB4 SOR
A . EBEACON
A . EPOS 714
A . ESTA 52
ABD70
ADIND-1
ADIND-2
ADIND-3
AFG
ANNA 65
ARC 50
ARC 60
ASCEN 58
AUS66
AUS84
BELLEV
BERM 57
BOGOTA
BUKIT
CAMP
CAMPO
CANT 66
CAPE
CAPE CAN
CARTHA
CHAT 71
CHUA
CORREGO
DJAKART
DOS68
EASTER67
EGYPT30
EUR50
EUR79
G SEG
GANDA
GEODE49
GRB36
GUAM63
GUX 1
H-NORTH
Worldwide
Worldwide
Tern Island
Iwo Jima Island
St. Helena Island
Marcus Island
Bahrain Island
Mean Value (Ethiopia & Sudan)
Mali
Senegal
Somalia
Cocos Island
Mean Value (Botswana, Lesotho, Malawi,
Swaziland, Zaire, Zambia, Zimbabwe), etc.
Mean Value (Kenya & Tanzania)
Ascension Island
Australia & Tasmania Island
Australia & Tasmania Island
Efate & Erromango Islands
Bermuda Islands
Colombia
Bangka & Belitung Islands (Indonesia)
Camp Mcmurdo Area, Antarctica
Argentina
Phoenix Islands
South Africa
Mean Value (Florida & Bahama Islands)
Tunisia
Chatham Island (New Zealand)
Paraguay
Brazil
Sumatra Island (Indonesia)
Gizo Island (New Georgia Islands)
Easter Island
Egypt
Mean Value (Western Europe, Cyprus,
Egypt, England, Scotland, Channel &
Shetland Islands, England, Ireland, Scotland
& Shetland Islands, Greece, Iran, Italy Sardinia, Italy - Sicily, Norway & Finland,
Portugal & Spain), etc.
Mean Value
Kalimantan Islands (Indonesia)
Republic of Maldives
New Zealand
Mean Value (England, England, Isle of Man,
& Wales, Scotland & Shetland Island,
Wales), etc.
Guam Island
Guadalcanal Island
Afghanistan
0.01 min unit
Datum
E : + W : – No. Name
331800
18
36
13
08
49
20
12
11
25
10
34
50
10
33
00
17
57
26
55
31
23
31
00
20
46
31
50
58
11
27
48
46
351600
415300
402800
436900
530000
463200
481100
542500
577000
603400
641000
685000
609300
726000
697700
695700
728600
623500
729100
782300
813100
762000
848000
838600
831100
869000
869800
907100
998700
1048800
1048600
084
116
167
001
065
065
065
065
065
001
064
164
063
071
075
001
006
001
153
168
003
003
003
003
003
006
060
006
006
001
059
059
Datum
NAHRWA2
OMAN
H-NORTH
WGS84
INDIAN-2
INDIAN-2
INDIAN-2
INDIAN-2
INDIAN-2
WGS84
INDIAN-1
BUKIT
HONG63
KERTAU48
LUZON-1
WGS84
AUS84
WGS84
S-ASIA
HU-TIZU
TOKYO
TOKYO
TOKYO
TOKYO
TOKYO
AUS84
GUAM63
AUS84
AUS84
WGS84
GEODE49
GEODE49
Page 13

Datum Name Display Applicable Area
OLD HAWAIIAN
HJORSEY 1955
HONG KONG 1963
HU-TZU-SHAN
INDIAN
RELAND 1965
ISTS 073 ASTRO 1969
JOHNSTON ISLAND 1961
KANDAWALA
KERGUELEN ISLAND
KERTAU 1948
L.C.5 ASTRO
LA REUNION
LIBERIA 1964
LUZON
MAHE 1971
MARCO ASTRO
MASSAWA
MERCHICH
MIDWAY ASTRO 1961
MINNA
NORTH AMERICAN 1927
NORTH AMERICAN 1983
NAHRWAN
NAMIBIA
NAPARIMA. BWI
OBSERVATORIO 1966
OMAN
PICO DE LAS NIVIES
PITCAIRN ASTRO 1967
PUERTO RICO
QATAR NATIONAL
QORNOQ
ROME 1940
RT90
SOUTH ASIA
PROVISIONAL SOUH
CHILEAN 1963
SOUTHEAST BASE
SOUTHWEST BASE
PROVISIONAL SOUH
AMERICAN 1956
SOUTH AMERICAN 1969
SANTA BRAZ
SANTO (DOS)
SAPPER HILL 1943
TANANARIVE OBSERVATORY
1925
TIMBALAI 1948
TOKYO
TRISTAN ASTRO 1968
VITI LEVU 1916
WAKE-ENIWETOK 1960
YACARE
ZANDERIJ
HAWAII
HJOR55
HONG63
HU-TZU
INDIAN-1
INDIAN-2
IRE65
ISTS073
JOHNSTO
KANDAWA
KERGUELE
KERTAU48
L.C.5-A
LA REUNIO
LIBERIA64
LUZON-1
LUZON-2
MAHE71
MARCO-A
MASSAWA
MERCHICH
MID61
MINNA
NAD27-1
NAD27-2
NAD27-3
NAD27-4
NAD83-1
NAD83-2
NAD83-3
NAD83-4
NAHRWA-1
NAHRWA-2
NAHRWA-3
NAMIBIA
NAPARIM
OBSERV66
OMAN
PICO
PITC67
PUERTO
QAT AR
QORNOQ
ROME40
RT90
S-ASIA
S-CHILE
S-E-BASE
S-W-BASE
SAM56
SAM69
SANTA BR
SANTO
SAPPER43
TANAN25
TIMBA48
TOKYO
TRIST68
VITI16
WAKE60
YACARE
ZANDERIJ
Mean Value (Hawaii, Kauai, Maui, Oahu),
etc.
Iceland
Hong Kong
Taiwan
Thailand & Vietnam
Bangladesh, India & Nepal
Ireland
Diego Garcia
Johnston Island
Sri Lanka
Kerguelen Island
West Malaysia & Singapore
Cayman Brac Island
Mascarene Island
Liberia
Philippines (Excluding Mindanao Island)
Mindanao Island
Mahe Island
Salvage Islands
Eritrea (Ethiopia)
Morocco
Midway Island
Nigeria
Mean Value (CONUS)
Alaska, Bahamas (Excluding San Salvador
Island),
Bahamas - San Salvador Island
Canada (Including Newfoundland Island),
Alberta & British Columbia, East Canada,
Manitoba & Ontario, Northwest Territories &
Saskatchewan
Yukon, Canal Zone, Caribbean
Central America
Alaska
Canada
CONUS
Mexico, Central America
Masirah Island (Oman)
United Arab Emirates
Saudi Arabia
Namibia
Trinidad & Tobago
Corvo & Flores Island (Azores)
Oman
Canary Island
Pitcairn Island
Puerto Rico & Virgin Islands
Qatar
South Greenland
Sardinia Islands
Sweden
Singapore
South Chile (near 53° S)
Porto Santo & Madeira Islands
Faial. Graciosa, Pico, Sao Jorge & Terceira
Island
Mean Value (Bolivia, Chile - Northern Chile
(near 19° S), Chile - Southern Chile (near
43° S),
Colombia, Ecuador, Guyana, Peru,
Venezuela), etc.
Mean Value (Argentina, Bolivia, Brazil,
Chile, Colombia, Ecuador, Guyana,
Paraguay, Peru, Trinidad & Tobago,
Venezuela), etc.
Sao Maguel, Santa Maria Islands (AzoEes)
Espirito Santo Island
East Falkland Island
Madagascar
Brunei & East Malaysia (Sarawak & Sadah)
Mean Value (Japan, Korea & Okinawa)
Tristan da Cunha
Viti Levu Island (Fiji Islands)
Marshall Islands
Uruguay
Suriname
1840-13
Page 14

1840-14
LANDMARK LIST
The Landmark List comes pre-programmed with the names and locations of the major mountains of the world. You can use these as they are or you can change them
to other landmarks using the procedure under “Editing and Deleting Landmarks”.
• The readings of names shown in this list may differ from those used locally.
• Depending on the map you use, the latitude and longitude values in this list may be a number seconds off.
No Mountain Name Preset Name Deg. Min. Sec.
1
Aconcagua
2
Mount Apo
3
Aragats
4
Mt. Ararat
5
Bagzane
6
Volcan Baru
7
Bazar-Dyuzi
8
Ben Nevis
9
Pic Bette
10
Blue Mountain Peak
11
Pico Bolivar
12
Brandberg
13
Champagne Castle
14
pik Chan-Tengri
15
Chimborazo
16
Mount Cook
17
Pico Cristobal Colon
18
Mount Damavand
19
Daravica
20
Dimlang
21
Doi Inthanon
22
Pico Duarte
23
Emi Koussi
24
Everest
25
Fan si Pan
26
Fuji
27
Galdhopiggen
28
Gerlachovsky
29
Mt. Goverla
30
Grauspitz
31
Grossglockner
32
Gunnbjorn Fjeld
33
Mt. Hermon (Jabal ash-Shaykh)
34
Hkakabo Razi
35
Mount Huascaran
36
Mount Inyangani
37
Jabal ash-Sham
38
Jebel Abha
39
K2
40
Kanchenjunga
41
Volcan Karisimbi
42
Mt.Karonje
43
Mt.Kartala
44
Gebel Katherina (Mount Sinai)
45
Kebnekaise
46
Mt.Kilimanjaro
47
Mount Kinabalu
48
Kinyeti
49
Kommunizm Peak
50
Korab
ACONCAGUA
APO
ARAGATS
ARARAT
BAGZANE
BARU
BAZAR-DYUZI
BEN NEVIS
BETTE
BLUE MOUNTAIN
BOLIVAR
BRANDBERG
CHAMPAGNE
CHAN-TENGRI
CHIMBORAZO
COOK
CRISTOBAL COLO
DAMAVAND
DARAVICA
DIMLANG
DOI INTHANON
DUARTE
EMI KOUSSI
EVEREST
FAN SI PAN
FUJI
GALDHOPIGGEN
GERLACHOVSKY
GOVERLA
GRAUSPITZ
GROSSGLOCKNER
GUNNBJORN
HERMON
HKAKABO RAZI
HUASCARAN
INYANGANI
JABAL ASH-SHAM
JABEL ABHA
K2
KANCHENJUNGA
KARISIMBI
KARONJE
KARTALA
KATHERINA
KEBNEKAISE
KILIMANJARO
KINABALU
KINYETI
KOMMUNIZM
KORAB
Latitude Longitude
S
N
N
N
N
N
N
N
N
N
N
S
S
N
S
S
N
N
N
N
N
N
N
N
N
N
N
N
N
N
N
N
N
N
S
S
N
N
N
N
S
S
S
N
N
S
N
N
N
N
11
39
32
58
00
07
02
32
40
58
41
39
03
40
18
46
48
08
51
12
41
59
47
56
57
01
22
01
11
18
01
33
08
30
09
21
59
04
29
00
12
42
55
27
01
49
40
43
01
50
10
37
57
35
22
32
42
06
24
08
01
35
18
30
01
19
00
50
19
50
58
27
42
18
22
27
21
35
54
37
61
35
09
49
02
10
48
48
03
47
52
04
47
02
55
68
43
24
33
02
20
28
29
07
09
02
18
18
55
09
23
02
16
27
20
53
35
14
45
27
29
30
01
59
10
04
01
45
11
36
30
28
01
53
67
21
03
03
33
04
06
58
56
03
41
56
38
55
46
41
W
E
E
E
E
W
E
W
E
W
W
E
E
E
W
E
W
E
E
E
E
W
E
E
E
E
E
E
E
E
E
W
E
E
W
E
E
E
E
E
E
E
E
E
E
E
E
E
E
E
Deg. Min.
070
125
044
044
008
082
047
005
019
077
071
014
029
080
078
170
073
052
020
011
098
071
018
086
103
138
008
020
024
009
012
029
035
097
077
032
057
040
076
088
029
029
043
033
018
037
116
032
072
020
Sec.
01
14
16
31
11
57
18
40
40
00
33
20
51
43
00
30
12
37
08
02
03
01
34
35
21
02
15
03
48
58
02
25
41
00
05
57
07
46
47
14
29
02
01
01
30
01
55
17
46
17
43
50
15
41
08
22
34
02
35
01
41
26
47
00
51
28
32
02
36
39
51
00
25
39
00
59
30
27
10
46
26
51
40
58
21
59
57
23
10
06
21
53
36
10
54
01
01
21
32
40
Page 15

1840-15
No Mountain Name Preset Name Deg. Min. Sec.
51
Mt.Kosciusko
52
Kula Kangri
53
La Selle
54
Mt. Logan
55
Maglic
56
Mount Makarakomburu
57
Margherita Peak
58
Maromokotra
59
Mt. McKinley
60
Mogoton
61
Mont Blanc
62
Monte Binga
63
Monte Rosa (Dufourspitze)
64
Mount Kenya (Kirinyaga)
65
Moussa Ali
66
Mulhacen
67
Musala
68
Pico da Neblina
69
Negoiu
70
Mt. Nimba
71
Nowshak
72
Ojos de Salado
73
Mount Olympus
74
Pico de Orizaba
75
Mont Orohena
76
Mount Paek-tu
77
Phou Bia
78
Pico de Basile
79
Pico de Cano
80
Pidurutalagala
81
Pik Pobedy
82
Puncak Jaya
83
Ras Dashan
84
Mount Roraima
85
Rysy
86
Sajama
87
Santa Ana
88
Sapitwa(Mt. Mulanje)
89
Serro Moco
90
Mount Shimbiris
91
Gora Shkhara
92
Soira
93
Tahat
94
Volcan Tajumulco
95
Jebel Toubkal
96
Troglav
97
Tavan-Bogdo-Uli
98
Vinson Massif
99
Yu Shan
100
Zugspitze
KOSCIUSKO
KULA KANGRI
LA SELLE
LOGAN
MAGLIC
MAKARAKOMBURU
MARGHERITA
MAROMOKOTRA
MCKINLEY
MOGOTON
MONT BLANC
MONTE BINGA
MONTE ROSA
MOUNT KENYA
MOUSSA ALI
MULHACEN
MUSALA
NEBLINA
NEGOIU
NIMBA
NOWSHAK
OJOS DE SALADO
OLYMPUS
ORIZABA
OROHENA
PAEK-TU
PHOU BIA
PICO DE BASILE
PICO DE CANO
PIDURUTALAGALA
POBEDY
PUNCAK JAYA
RAS DASHAN
RORAIMA
RYSY
SAJAMA
SANTA ANA
SAPITWA
SERRO MOCO
SHIMBIRIS
SHKHARA
SOIRA
TAHAT
TAJUMULCO
TOUBKAL
TROGLAV
TSAST BOGD
VINSON MASSIF
YU SHAN
ZUGSPITZE
Latitude Longitude
S
36
N
N
N
N
S
N
S
N
N
N
S
N
S
N
N
N
N
N
N
N
S
N
N
S
N
N
N
N
N
N
S
N
N
N
S
N
S
S
N
N
N
N
N
N
N
N
S
N
N
27
28
04
18
21
32
18
43
18
09
43
00
22
14
00
63
05
13
45
45
50
11
52
45
56
00
08
12
27
37
03
42
04
00
47
45
36
07
37
36
24
27
05
40
05
19
00
17
37
41
59
19
30
03
35
14
56
06
59
42
03
04
02
13
12
05
13
49
11
18
01
13
50
15
58
12
19
10
43
43
00
14
44
23
16
15
02
31
03
43
56
46
31
77
40
23
29
47
25
24
22
59
34
03
32
56
02
35
21
04
02
40
40
10
07
59
30
03
01
36
24
33
35
12
42
07
26
57
59
00
34
47
55
58
27
58
09
10
30
05
59
56
14
55
44
58
00
23
00
Deg. Min. Sec.
E
148
E
090
W
071
W
064
E
018
E
160
E
029
E
049
W
151
W
086
E
006
E
035
E
007
E
037
E
042
W
003
E
023
W
066
E
024
W
008
E
071
W
068
E
022
W
097
W
149
E
128
E
103
E
008
W
024
E
080
E
080
E
137
E
038
W
060
E
020
W
069
W
089
E
035
E
015
E
047
E
043
E
039
E
005
W
091
W
007
E
016
E
093
W
087
E
121
E
010
15
40
22
37
59
02
45
38
45
11
01
36
51
50
12
01
00
45
23
23
51
28
01
58
51
39
18
32
24
36
18
17
23
57
06
47
34
34
24
40
49
16
32
14
21
36
15
55
28
49
05
13
04
07
45
40
23
02
46
45
11
02
03
18
21
00
44
01
04
05
04
05
38
01
42
49
00
17
14
47
05
40
31
58
31
13
55
17
54
59
35
47
32
58
00
05
02
32
59
18
1840 NOTES
Antenna
GPS Measurement Tips
Check the following points whenever GPS measurements seem to take too
long or when you are unable to achieve successful measurements.
❑ Are the watch’s AREA, DATUM, and TIME settings correct?
❑ Are you in a building with a roof, heavily wooded area, or any other
area where you cannot directly see the sky?
❑ Are you using an old battery?
❑ Is the low battery power message on the display of the watch?
❑ Are you near high-voltage lines, near a person using a mobile phone,
or near any other device or facility that could be interfering with signal
reception?
❑ Is the antenna to the left of the display wet or covered with a sticker?
GPS Measurement Troubleshooting
1. When poor measurement conditions are due to objects blocking you from
the sky or satellite pattern configuration.
➜ Change to another location or try again later.
LIGHT
MENU
GPS
2. When your current measurement point is more than 300km from your last
measurement point.
➜Change the area setting of the watch. If you cannot find a pre-
programmed area that is close to your current position, manually input
your current location.
3. After you have replaced the battery or removed and then reloaded the
battery.
➜If the watch cancels the measurement operation before it can be
completed, try again. If you cannot achieve a successful measurement
after about five minutes, cancel the current measurement and try again.
4. After you have not performed a GPS measurement for a long time.
➜If the watch cancels the measurement operation before it can be
completed, try again.
Getting Back to the Timekeeping Mode Screen
If you find yourself at a screen from which you do not know how to return,
perform the following steps until you get back to the Timekeeping Mode or
Alarm Mode. First try step 1. If that doesn’t work, advance to step 2. If you still
are not in the Timekeeping Mode or Alarm Mode, perform step 3.
Step 1: Press the GPS button.
Step 2: Simultaneously press the LIGHT, MENU, and GPS buttons, and then
press the GPS button again.
Step 3: Press the L button twice, and then press the GPS button.
• After you get to the Timekeeping Mode, press the MENU button and
confirm that the Menu Screen appears.
• From the Menu Screen, press the GPS button to return to the Timekeeping
Mode.
 Loading...