

CAS ECB Series Owner's Manual

2

3
CONTENTS
1. Precautions Before Using The Scale
..................
5
2 . Overall view
.............................................................
8
3. Installation
................................................................
9
4. Explanation Of Display Symbols
.......................
11
5. Keypad Functions
...............................................
13
6. Operations
............................................................
14
A.Switch on / off
....................................................................
14
B.Zero the scale
...................................................................
14
C.Sampling before counting
................................................
14
D.How to use memory cells
.................................................
16
E.Subtract container’s weight
..............................................
18
F. Weight/Quantity accumulation
.........................................
21
G.Preset counting check range
...........................................
22
H.Preset weight check range
..............................................
24
7. User Programming Functions
.............................
26
A.Auto. shut off time setting
.................................................
26
B.Zero Tracking range
.........................................................
27
C.Zero display range
...........................................................
27
D.Stable class range
............................................................
28
E.Stable class rate
...............................................................
28
F. Backlight type
...................................................................
29
G.Change unit of measure from kg to pound .....................30
H.Unit weight recomputing
..................................................
31
I.Check alarm type ...............................................................32
J.Baud rate setting
...............................................................
34
K.Transmit method setting
...................................................
34
L.
Label format setting(available when a label printer is connected.)
35
M.Cancel Tare setting
..........................................................
35

4
8. Calibration(can be done in kg/lb)
.........................
36
9. Power supply & battery operation
.......................
37
10. RS-232 Output
.......................................................
38
11. Error Codes
............................................................
45
12. Technical Data
.......................................................
46

5
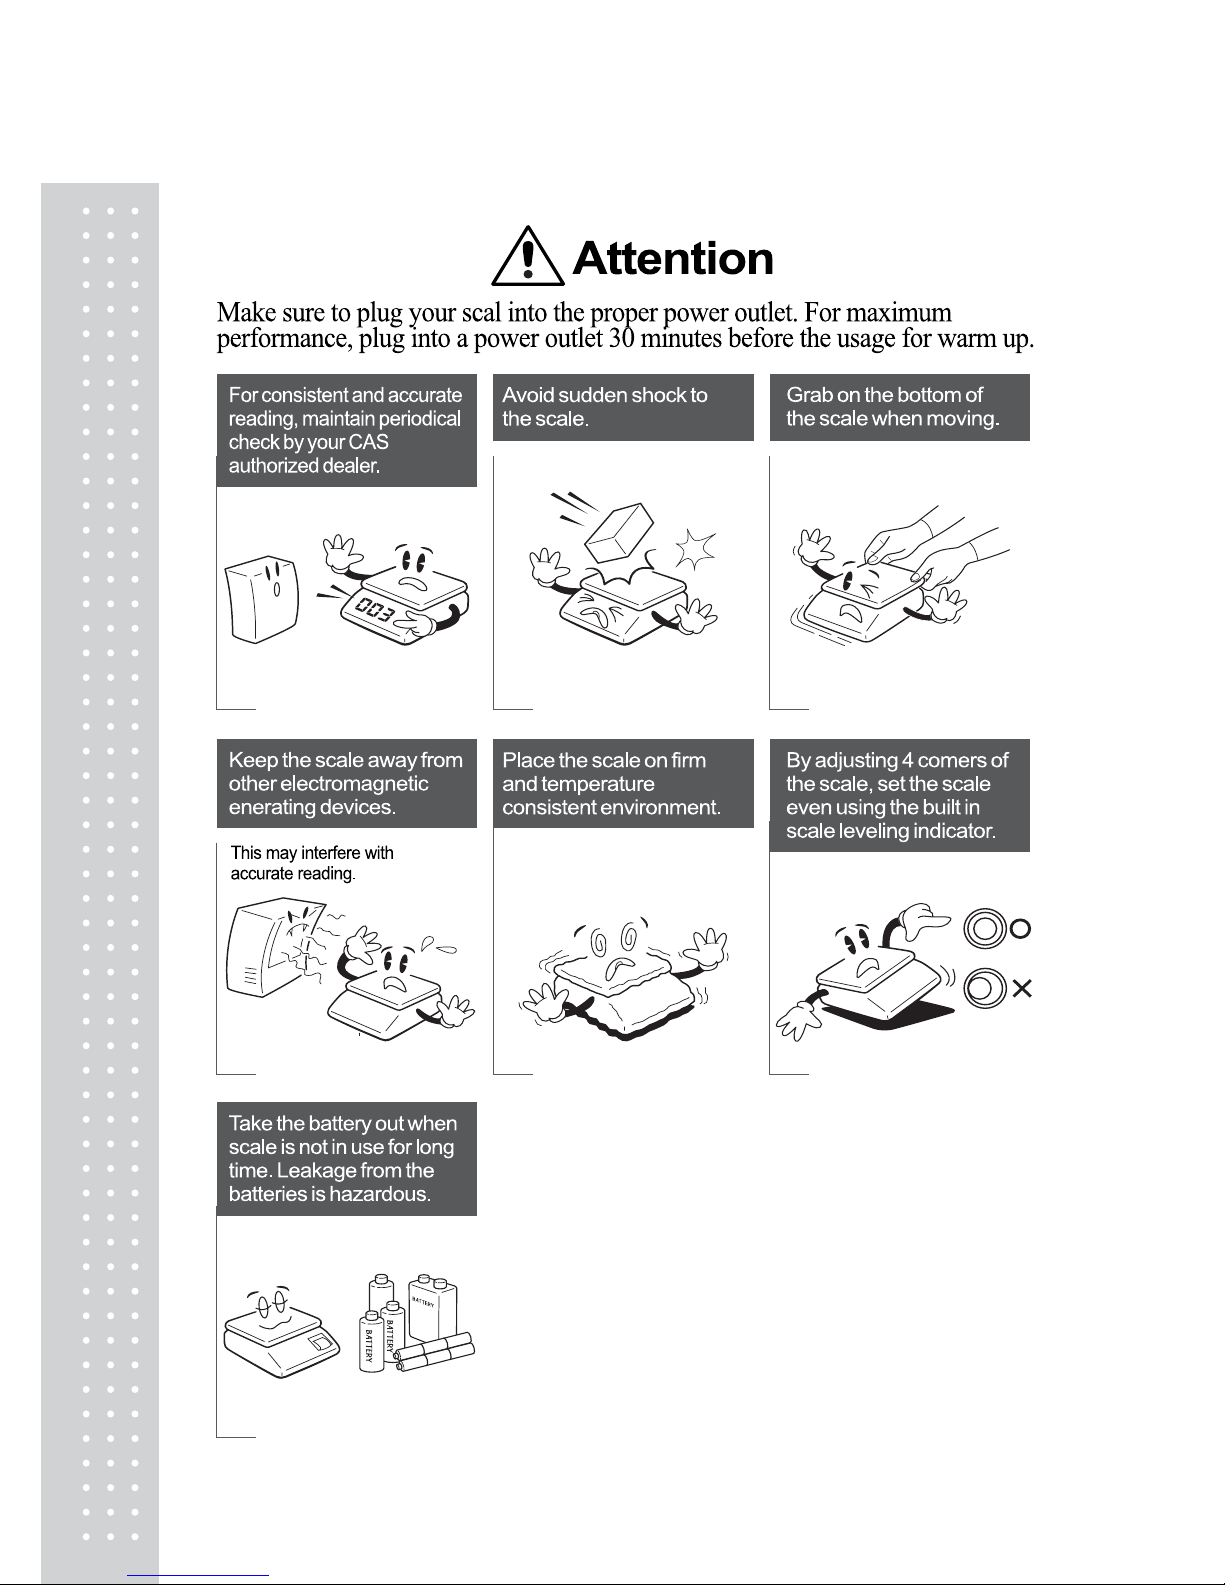
1. Precautions Before Using The Scale
6

7
Environment
The scale should always be used in an environment, which is free form excessive
air currents, corrosives, vibration, and temperature or humidity extremes.
These factors will affect displayed weight reading.
DO NOT install the scale :
● Next to open windows or doors causing drafts or rapid temperature changes.
● Near air conditioning or heating vents.
● Near vibrating, rotating or reciprocating equipment.
● Near magnetic fields or equipment that generates magnetic fields.
● On an unstable work surface
● In a dusty environment
● In direct sunlight.
Leveling the Scale
The scale is equipped with a level indicator on the back side at the middle of platform and
four adjustable leveling feet. Adjust the leveling feet until the bubble appears in the center
of the circle.
Turn on Scale
Do not turn on scale with anything on the platform.
After switch at the bottom of indicator ON, The scale will start to count down from 9 to 0. It
is self checking time to be ready for use the scale.
Besides, should give a warm-up for 15 ~ 30 mimutes before use.
8
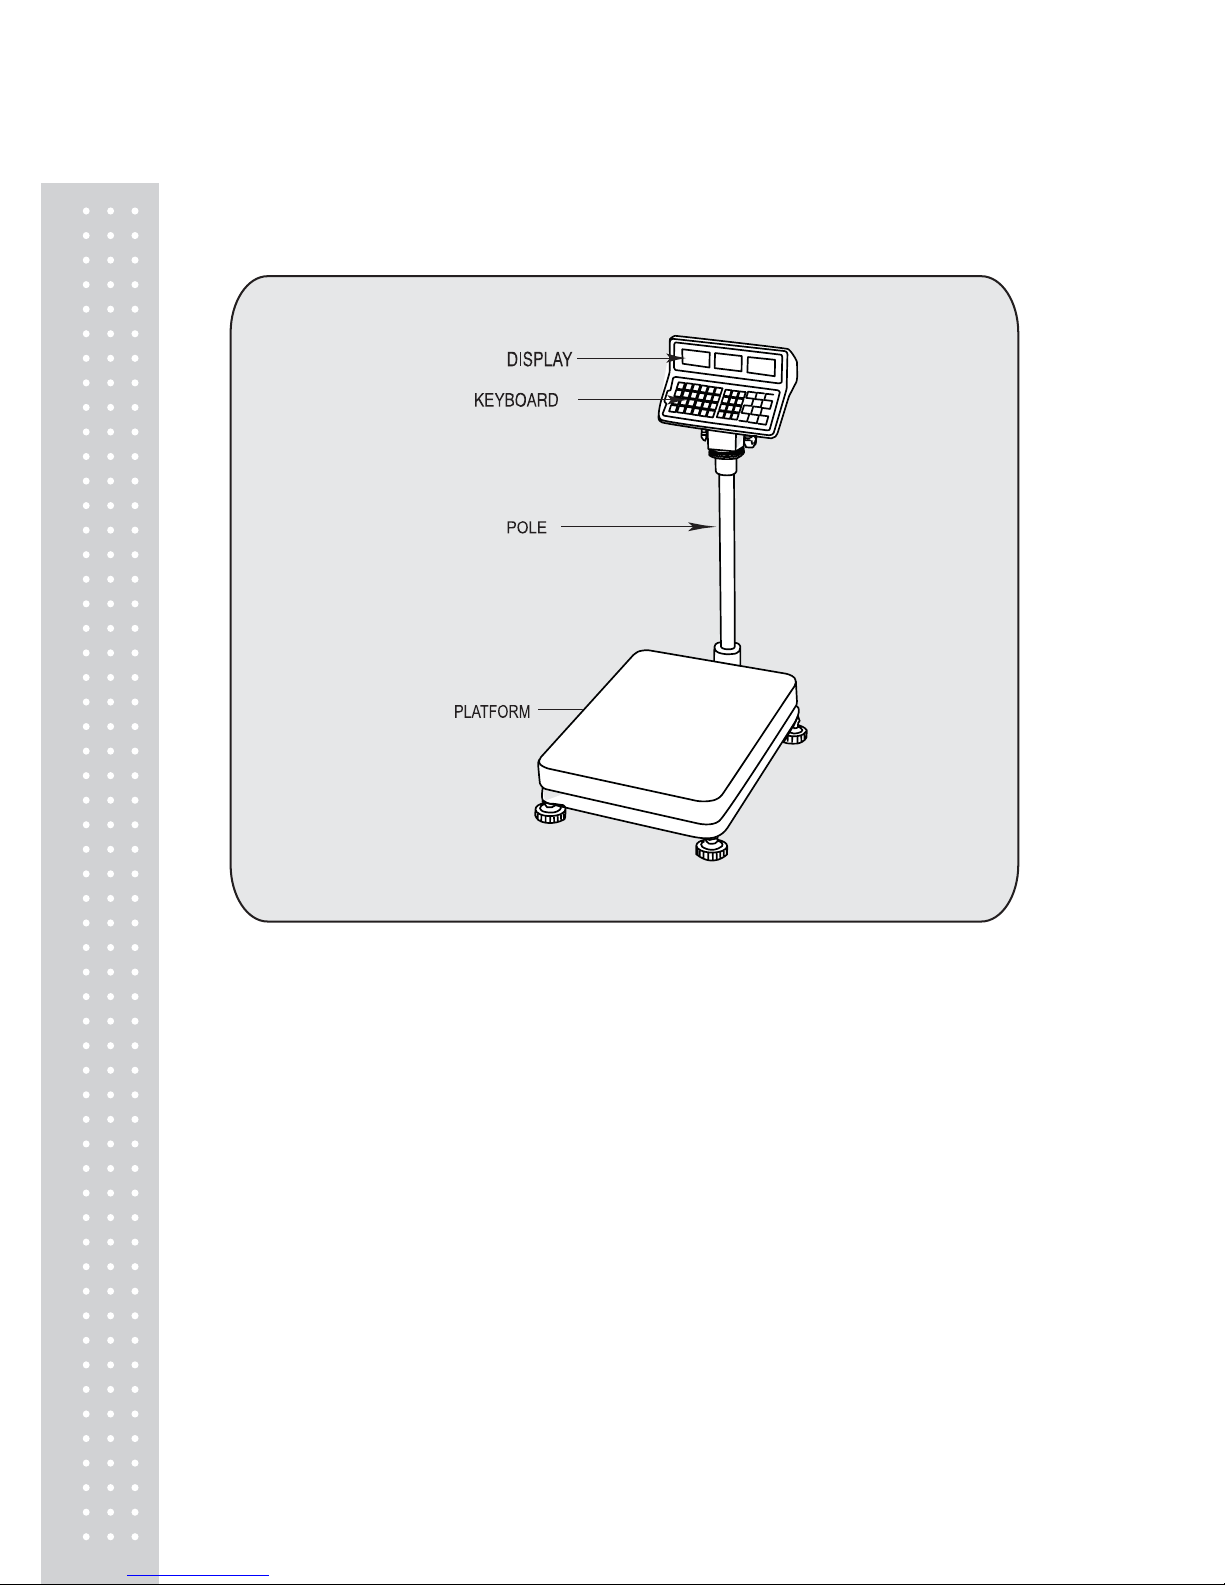
2. Overall view
9
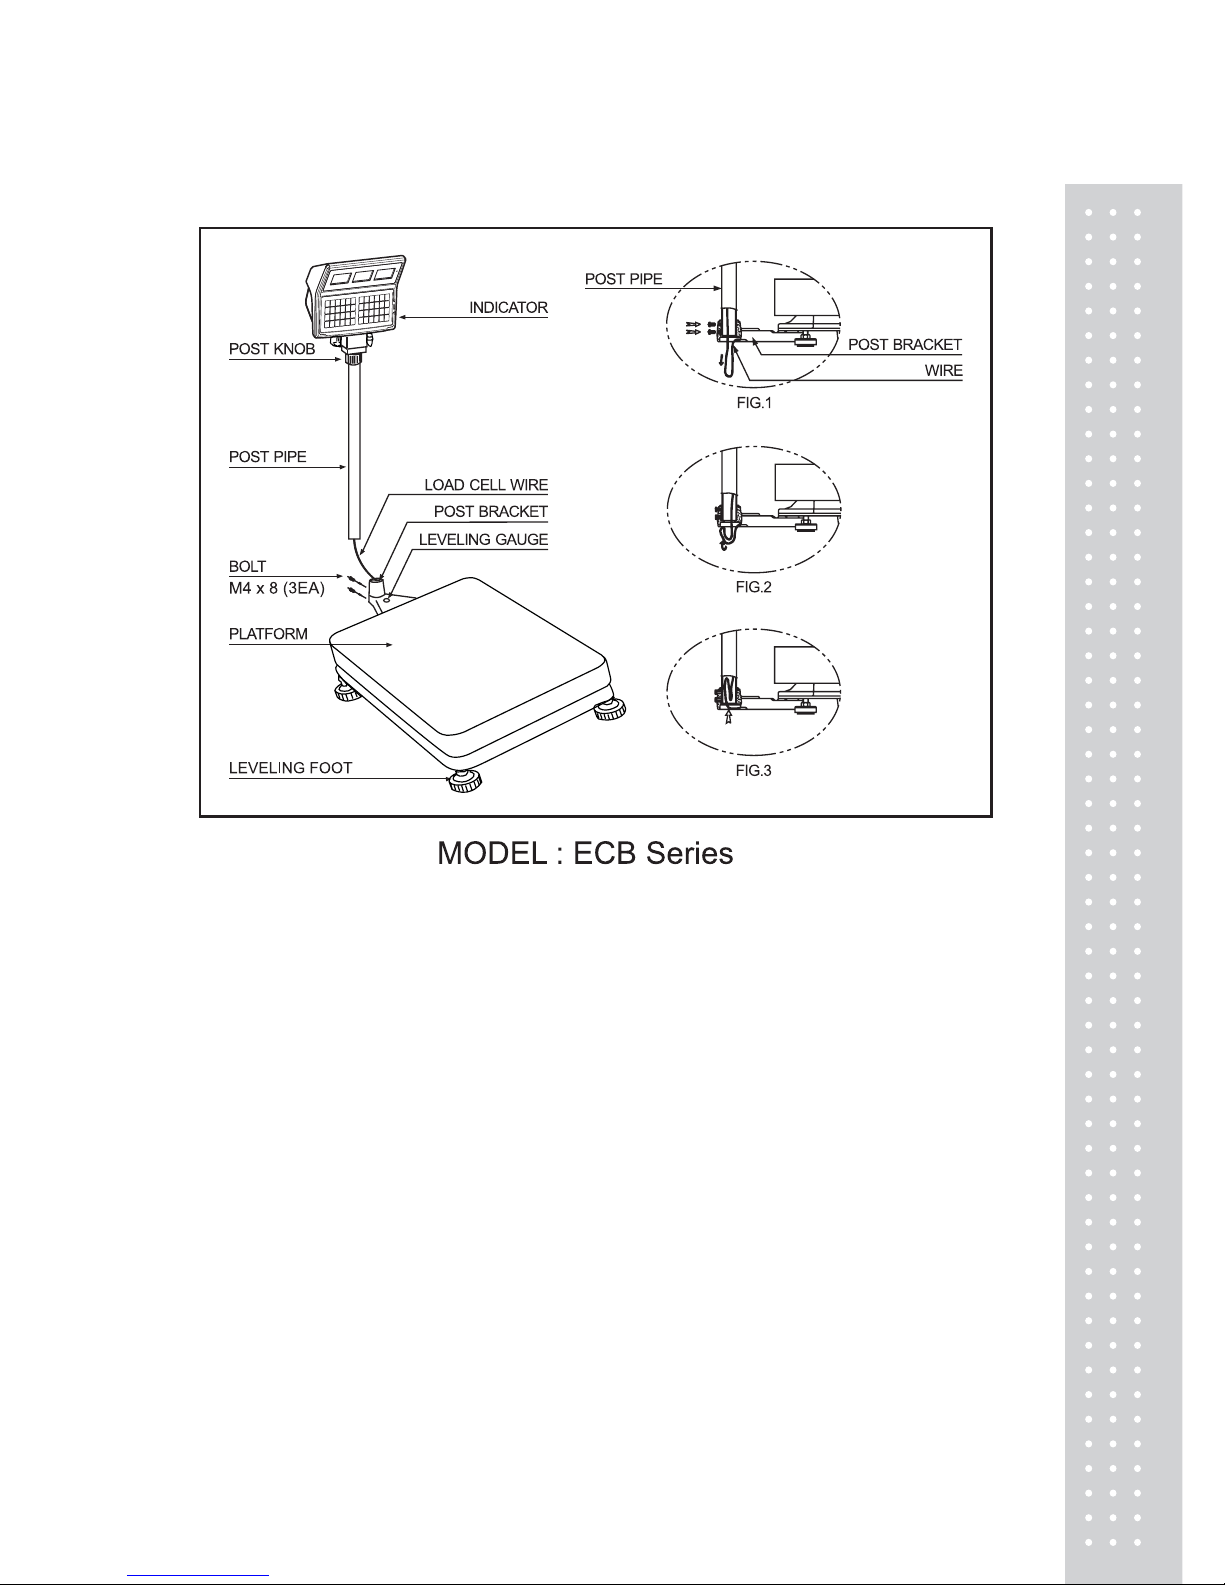
3. Installation
1. Open the box with care because indicator is connected to the scale with
load cell wire.
2. Turn the post knob so as to fix indicator.
3. Pull down the wire out of post pipe and insert the post pipe to the post
bracket. (Refer to fig. 1)
4. Fasten the post pipe with two bolts. (Refer to fig. 1)
5. Insert the wire to the post pipe. (Refer to fig. 2, 3)
6. If the scale is not properly level, please adjust 4 leg(adjusting bolt) at the
bottom of the scale so as to center the bubble of the leveling gauge.
Note : Place the scale on a flat and stable surface.※
Inside the indicated circle.
10
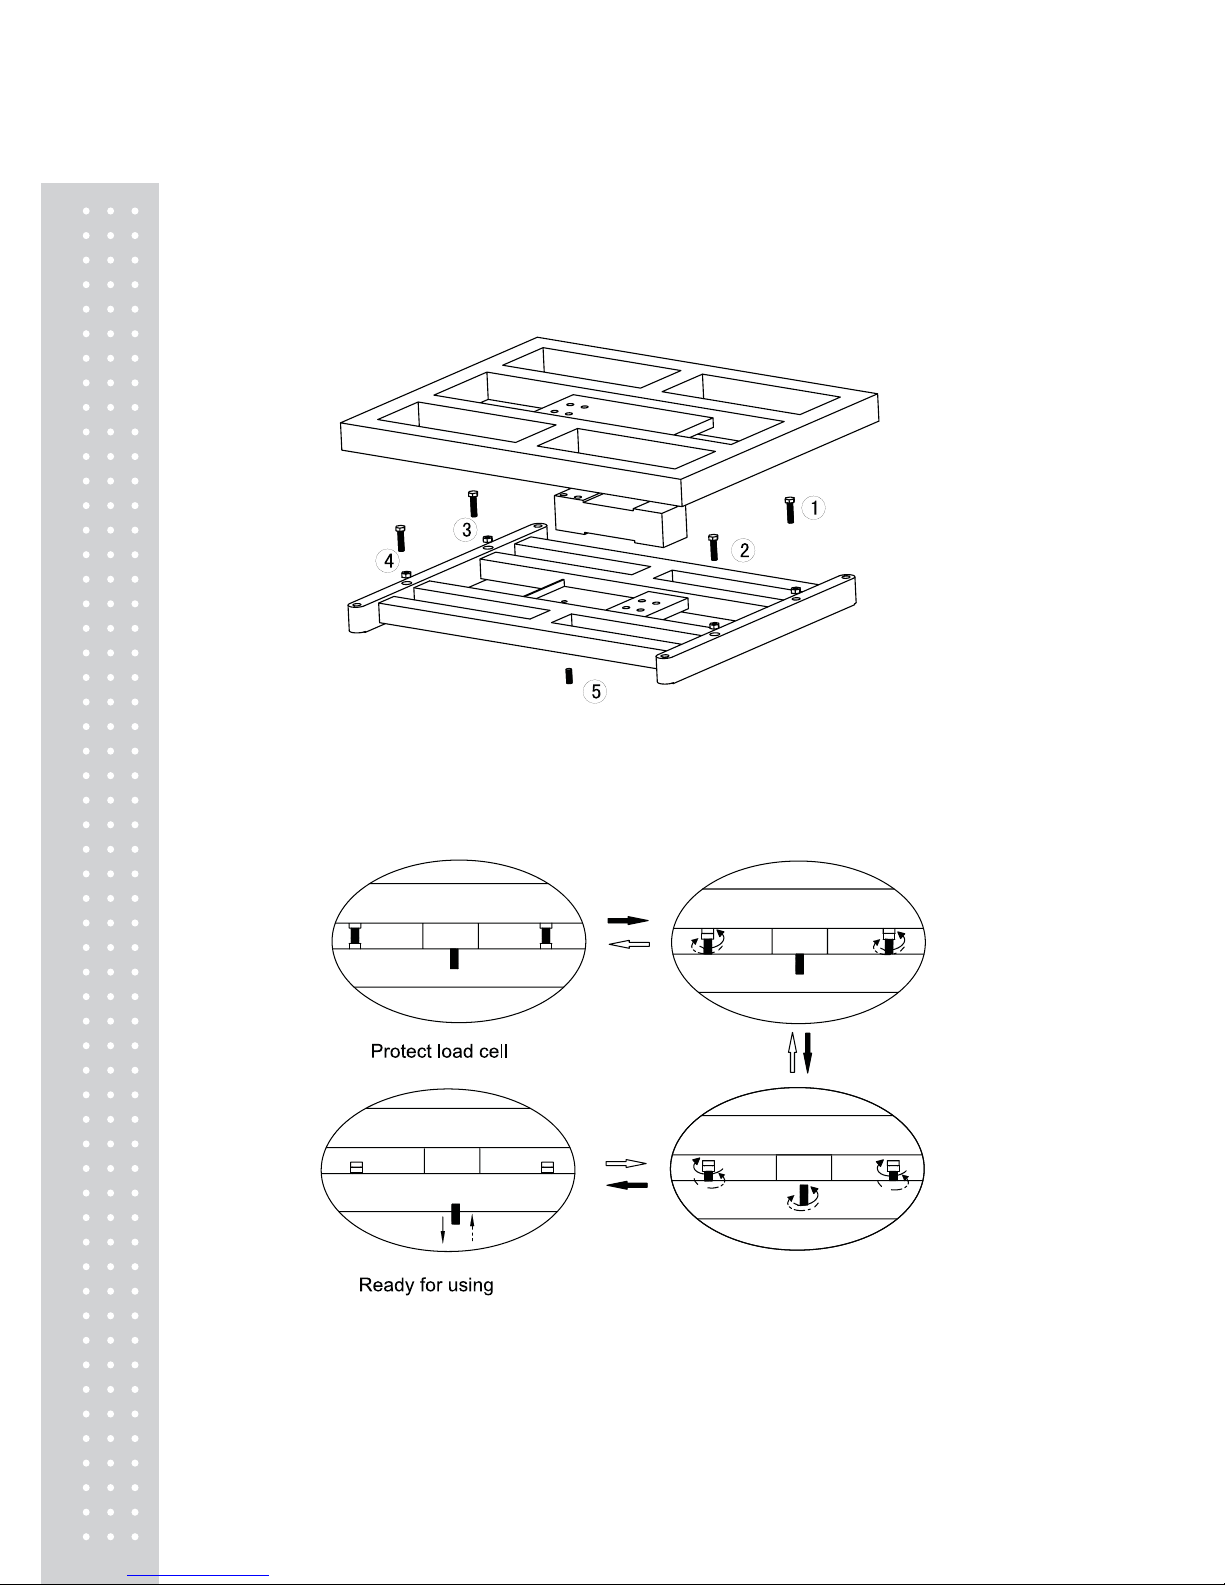
※
Note
: Before using the scale, unscrew the five shipping protection
screws. If not, the weighing operation works wrong.
1) Location of screws
2) Adjusting procedure
11
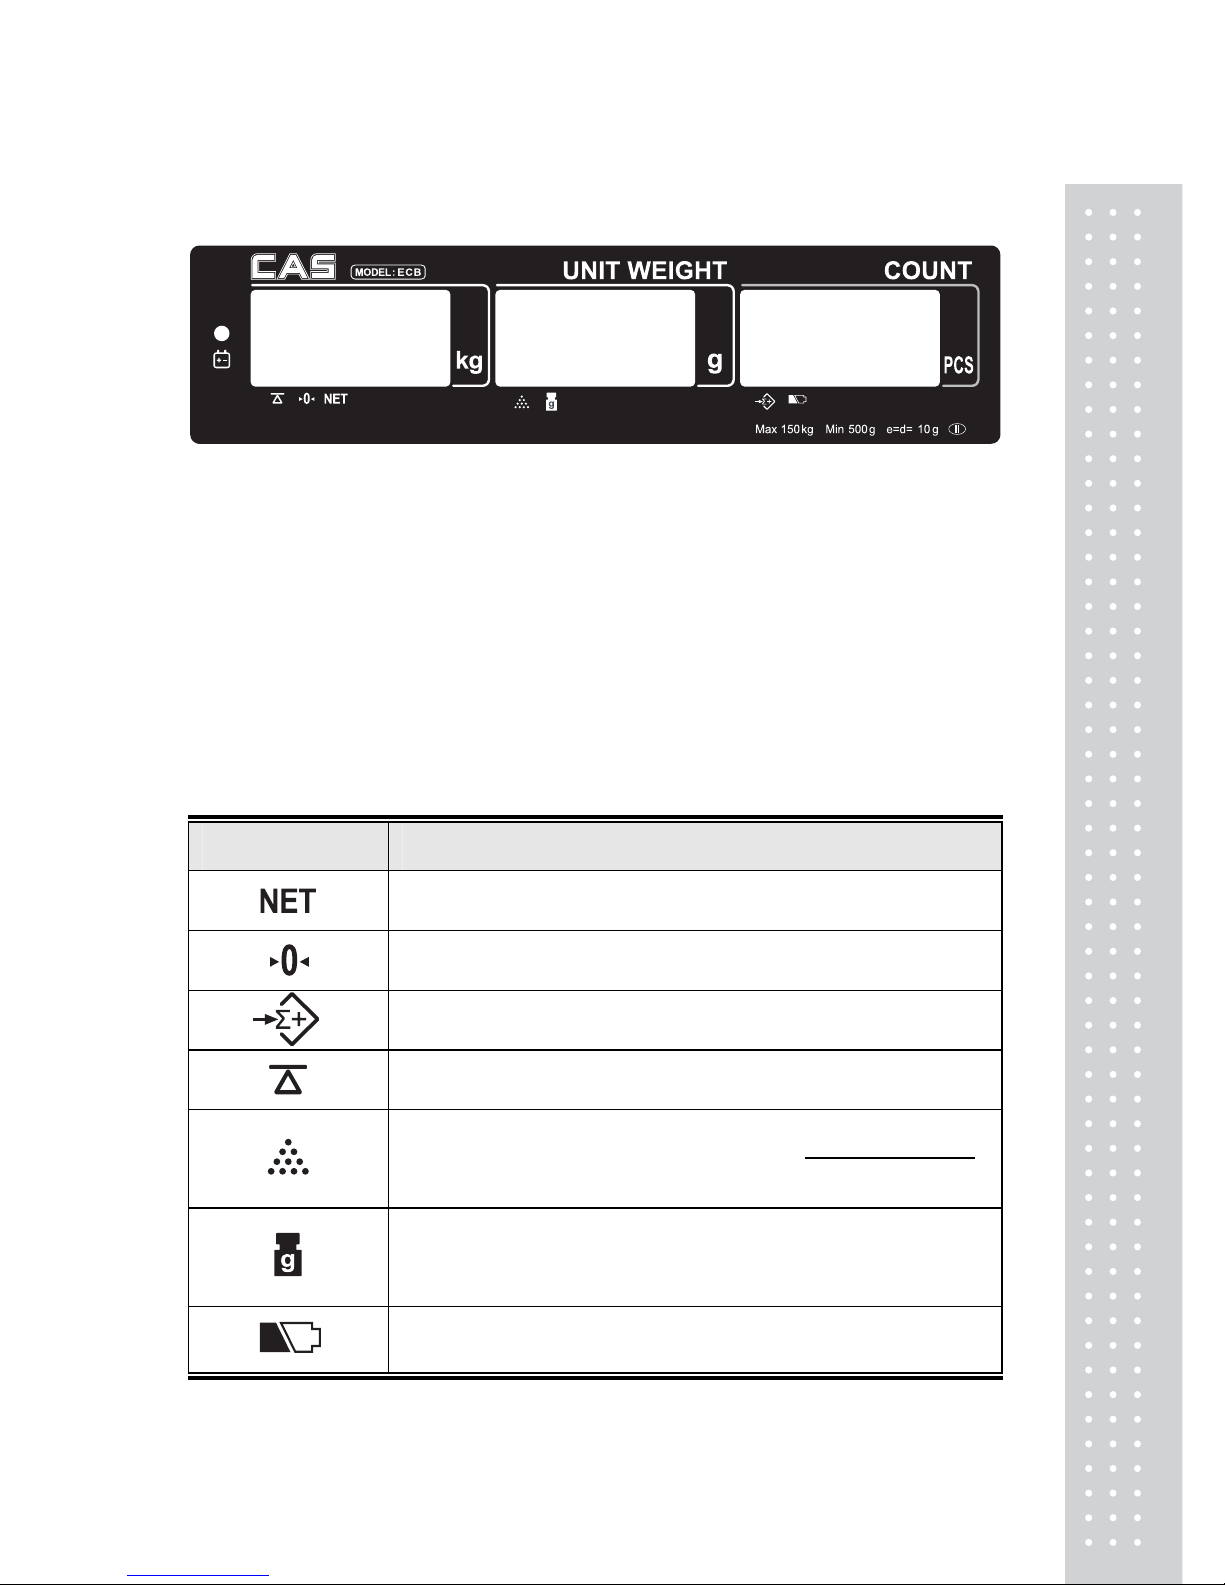
4. Explanation Of Display Symbols
1) Display Windows
z Weight Display: Total 6 digits for weight accumulated or being measured on the
platform.
z Unit Weight Display: Total 6 digits for unit weight or times of weight accumulated.
z Count Display: Total 6 digits for number accumulated or being counted on the
platform.
2) Indicated Symbols
Sysmbols Specification
Scale is in TARE mode.
Scale is in ZERO mode.
Scale is in ACCUMULATION mode.
The display reading is in STABLE condition.
Lack of Sample Weight
If the total sample weight on the platform is less than 10 display divisions,
a triangular indicator will appear to remind the user to add more samples
until the indicator disappears.
Lack of Unit Weight
If the unit weight is less the 1/10 display divisions, a triangular indicator will
appear to remind the user that the displayed unit weight is too small for
getting accurate quantity calculations.
Low Voltage
12
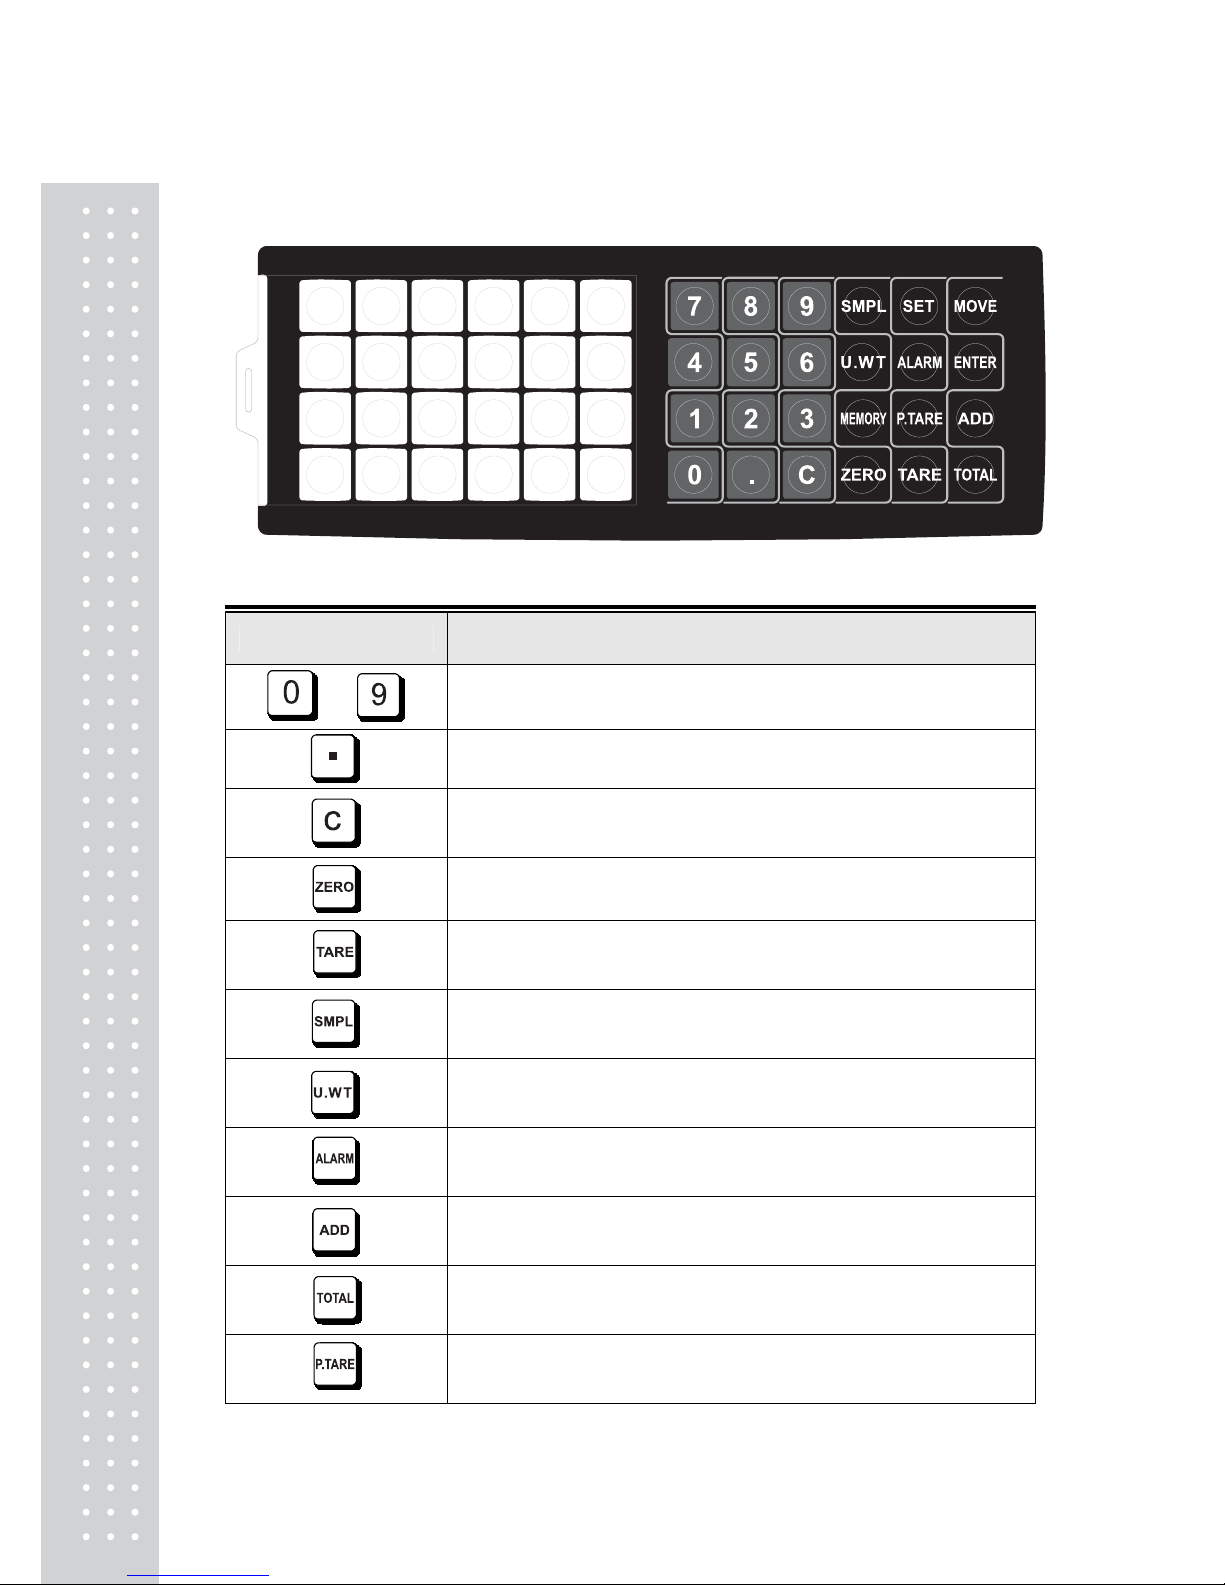
5. Keypad Functions
Keys
내용
~
Numeric keys
Decimal point key
Use this key to clear out the displayed numeric readings.
If there is a minor weight displayed without anything on the platform,
press the zero key to clear the display.
Use this key to subtract the container’s weight, indicates that the current
weight reading is net weight.
Use this key to input sample size.
Use this key to input the known unit weight of item to be counted.
Use this key to input the HIGH & LOW weight/quantity limit for check
function.
Use this key to accumulate weight/quantity measured.
Use this key to recall total weight, count & accumulation on times.
Use this key to preset TARE weight.
13
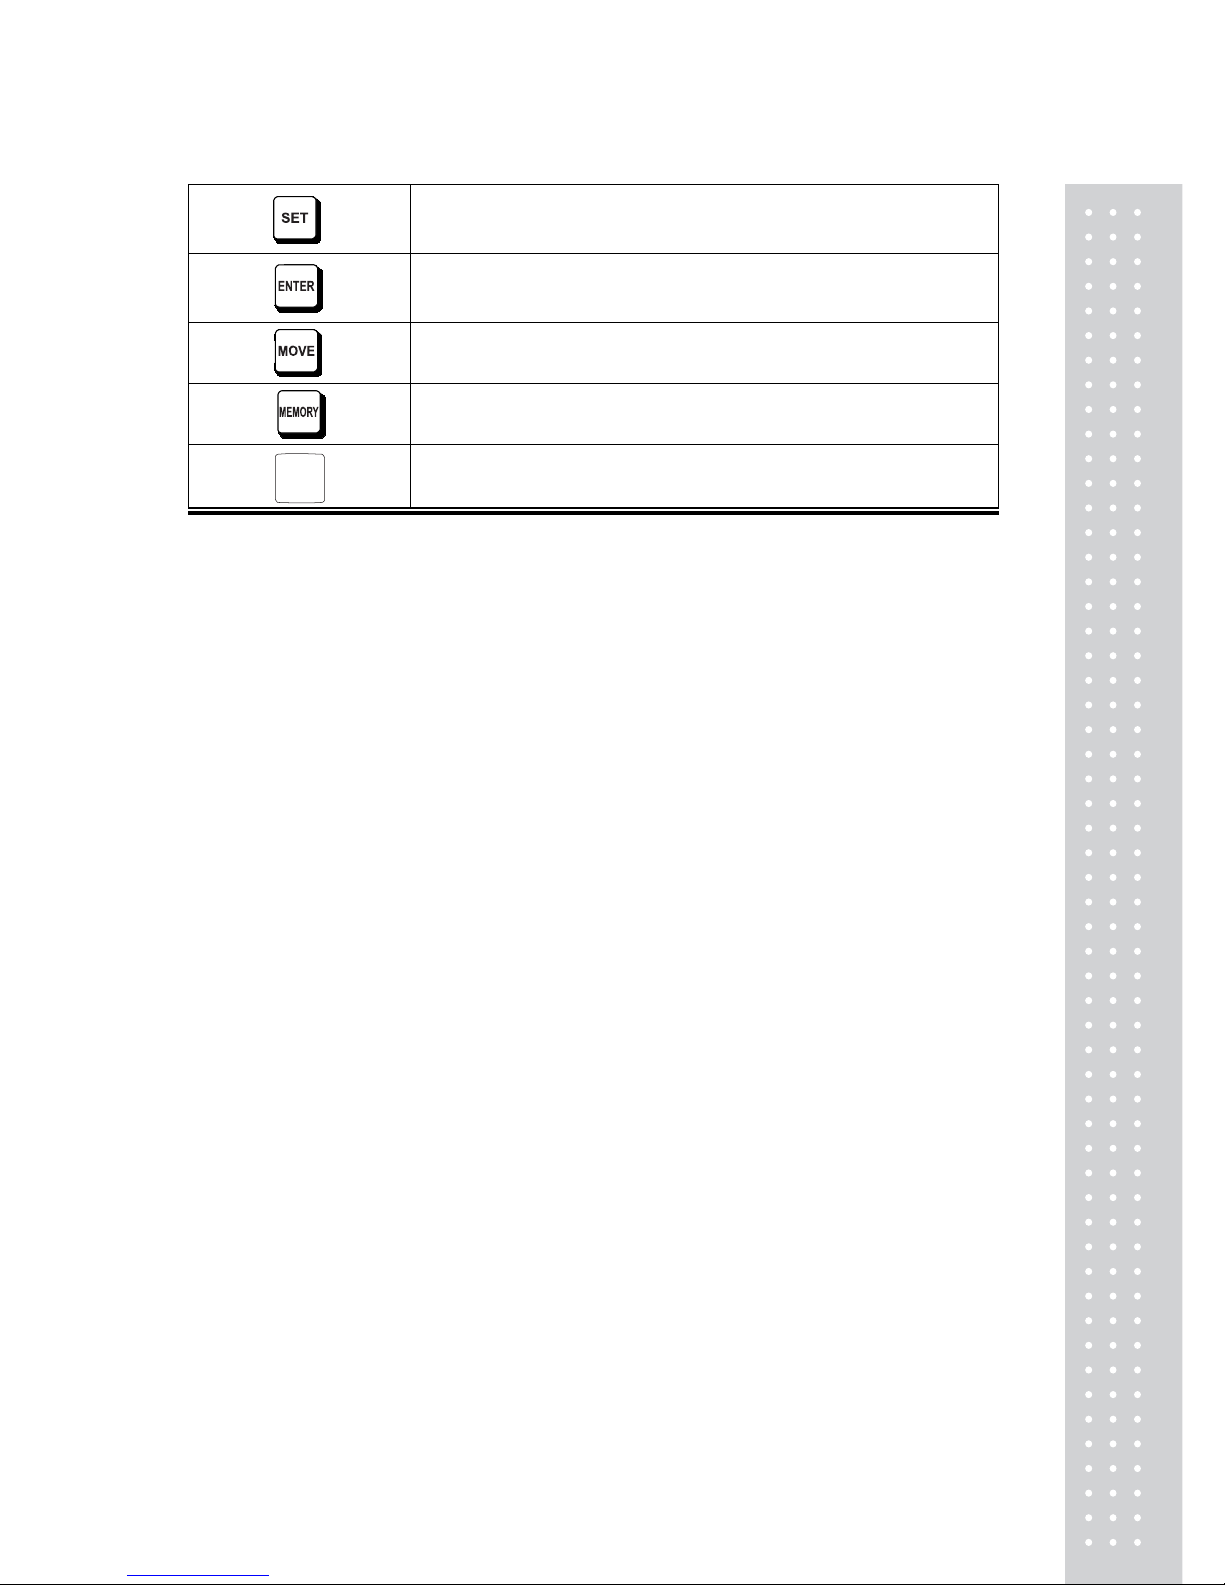
Use this key to enter into User Programming Functions.
Use this key to confirm the parameter setting
Use this key to move the parameter value in Set Mode.
Use this key to memory a value to a location.
Use these 24 blank keys to store values in memory.
1
4
6. Operations
A. Switch ON/OFF
Push the on & off switch at the bottom of indicator to turn on or off the scale.
B. Zero the scale
Press ZERO key to return the display to zero in case there is any zero drifting while unloaded.
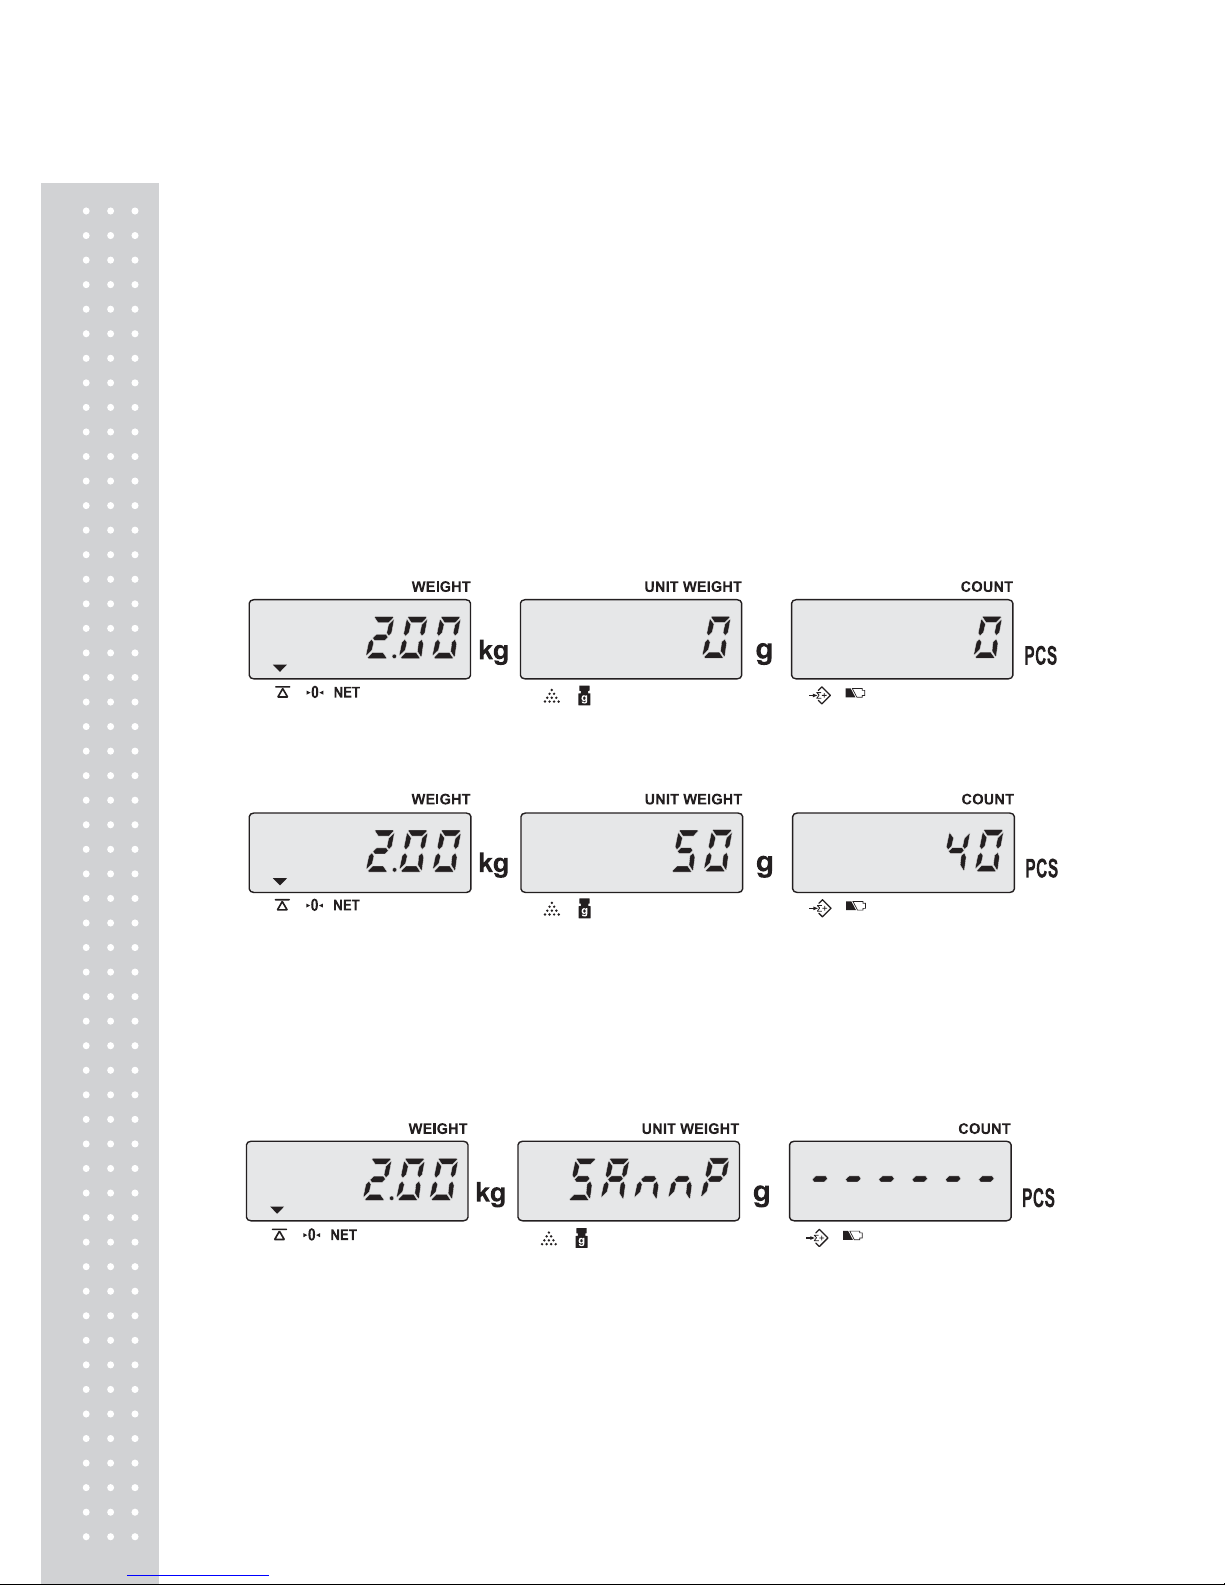
C. Sampling before counting
1) Unknown unit weight
● Place a few pieces of item to be counted on the platform.
● Input the quantity of item on the platform.. (ex. 50pcs)
● Press SMPL key
Note : The system default is “Unit Weight”. If the “SMPL” key is clicked when the value (ex : 40) in
COUNT window is blinking, then the numerical value input will be as “Quantity”.
If the “SMPL” key is not clicked when the value (ex : 40) in COUNT window is blinking,
then the numerical value input will be as “Unit Weight”.
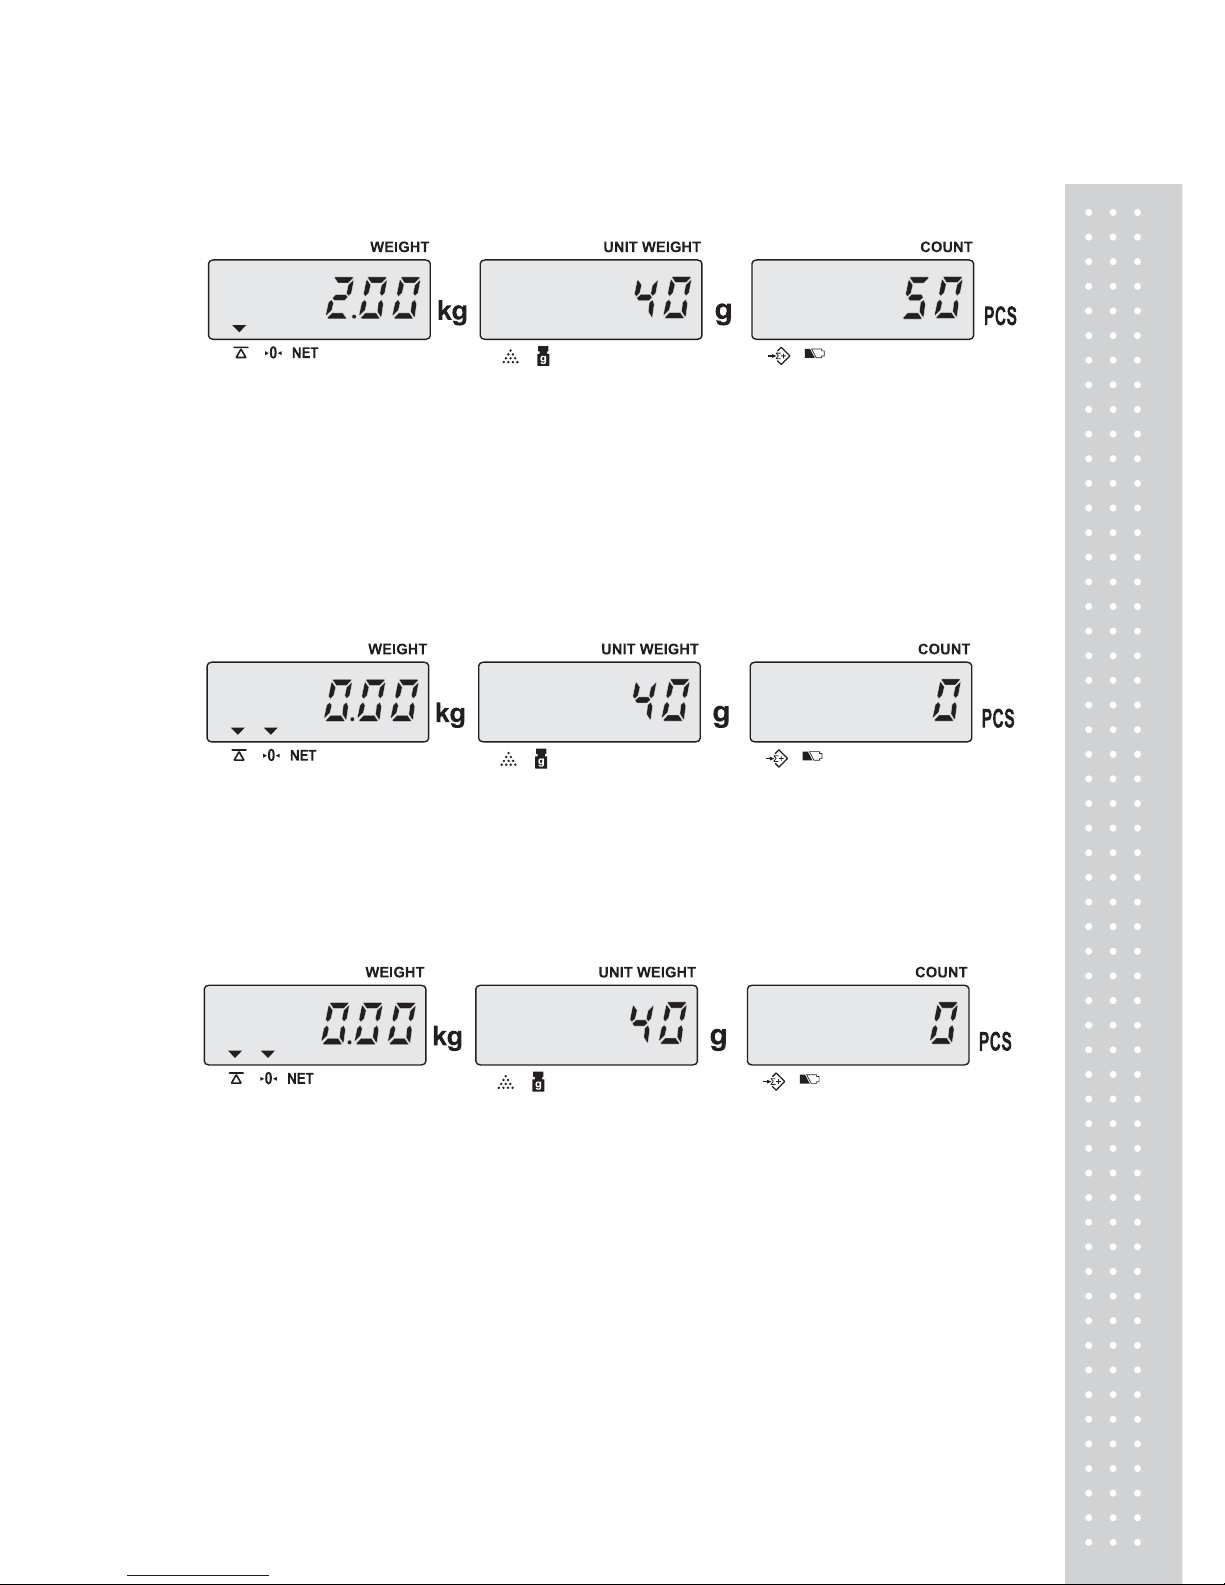
15
● The sampling operation is completed while stable display appears as below :
※
The larger sample size, the more accurate unit weight
※ Press SMPL key to recomputing unit weight during in counting process if the setting of
“Unit Weight Recomputing” set to “on”
2) Known unit weight
● Input the known unit weight. (ex. 40g)
● Press U.Wt key to complete sampling operation & enter into counting mode.
Note : The system default is “Unit Weight”. If the “U.WT” key is clicked when the value (ex : 0) in
COUNT window is blinking, then the numerical value input will be as “Unit Weight”.

16
D. How to use memory cells
1) How to store into direct/indirect memory cells
● Give a long press of MEMORY key. Then the display as below will be shown up.
Input the unit weight values by using numeric key(ex. 35g). After input U/W, press ENTER
key to to Confirm it and move on the next step.
Note : Press the MOVE key to change the value when a wrong value is entered.
● The second step is for storing Tare value. So, Input the tare value (ex. 10kg) and press the
ENTER key to confirm it and move on the next step.
● The third step is for storing item number. So, Input the item number (ex. 800125)and press the
ENTER key to confirm it and move on the next step.
Note : You can enter up to 6 digits
 Loading...