

Page 1

Digital Counting Scale
C Series
Operation Manual
8526-M260-O1 Rev-A PO BOX 151 WEBB CITY, MO 64870
06/14 PH (417) 673-4631 - FAX (417) 673-5001
www.cardinalscale.com
Technical Support: Ph: 866-254-8261 techsupport@cardet.com
8526-M260-O1 C Series Operation
1
Page 2

2
8526-M260-O1 C Series Operation
Page 3

INTRODUCTION
Thank you for purchasing our Cardinal C Series Digital Count ing Sca le. Your sca le is
equipped with a rechargeable battery pa ck th at is able to provide 100 hours continuous
operation (with backlight on) or 200 hours continuous operation (with backlight off).
This manual will guide you through setup and operation of your scale. Please read it
thoroughly before attempting to operate this scale and keep it handy for future reference.
Copyright
All rights reserved. Reproduction or use, without expressed writte n permission, of editorial
or pictorial content, in any manner, is prohibite d. No pate nt lia bility is assumed with respect
to the use of the information containe d he r ein.
Disclaimer
While every precaution has been taken in the preparation of this manual, the Seller
assumes no responsibility for errors or omissions. Neither is any liability assumed for
damages resulting from use of the inform a tion contained herein. All instructions and
diagrams have been checked for accuracy and ease of applica tion; however, success and
safety in working with tools depend to a great ext ent u pon th e in dividu al accur a cy, skill and
caution. For this reason the Seller is not able to gu ar an tee the result of any procedure
contained herein. Nor can they assume responsibility for any damage to property or injury
to persons occasioned from the procedures. Pers on s engag ing th e pr o ced ures do so
entirely at their own risk.
FCC Compliance Statement
This equipment generates uses and can radiate radio frequency and if not ins ta lled and
used in accordance with the instruction manual, may c aus e interference to radio
communications. It has been tested and found to comply with the limits for a Class A
computing device pursuant to Subpart J of Par t 15 o f FCC ru le s, which are designed to
provide reasonable protection aga in st such interference when operated in a commercial
environment. Operation of this equipmen t in a r esiden t ial area may cause interference in
which case the user will be responsible to take whatev er mea s ur e s nece ssa ry to correct
the interference.
You may find the booklet “How to Identify and Resolve Radio TV Interference Problems”
prepared by the Federal Communications Commission helpful. It is available from the U.S.
Government Printing Office, Washington, D.C. 20402. Stock No. 001-000-00315-4.
Proper Disposal
When this device reaches the end of its useful life, it must be pr op er ly disp ose d of . I t mu st
not be disposed of as unsorted municipal waste. Within the Eur o pean Union, this device
should be returned to the distributor from where it was purchased for proper disposal. This
is in accordance with EU Directive 2002/96/ EC. Wit hin North America, the device should be
disposed of in accordance with the local laws regarding the disposa l of waste electrical and
electronic equipment.
It is everyone’s responsibility to help maintain the environment and to reduce
the effects of hazardous substances contained in electr ica l and electronic
equipment on human health. Please do your part by making certain that this
device is properly disposed of. The symbol shown to the right indicates that
this device must not be disposed of in unsorted municipal waste progr ams.
8526-M260-O1 C Series Operation
3
I
Page 4
SPECIFICATIONS
Model:
C6
C15
C30
C65
Capacity and Division Value
6 lb x 0.0005 lb (3 kg x 0.2g)
15 lb x 0.001 lb (7.5 kg x 0.5g)
30 lb x 0.002 lb (15 kg x 1g)
65 lb x 0.005 lb (30 kg x 2g)
Display: WEIGHT = 6 Digits
Avg Piece Weight = 6 Digits
PIECES = 6 Digits
Scale Size: 13.39" W x 13.39" D x 5.00" H
(340 mm x 340 mm x 127 mm)
Platform Size: 12.60" W x 9.06" D
(320 mm x 230 mm)
Power: Built-in rechargeable 6v/4Ah battery or 12VDC /110~240 VAC 50/60Hz
AC adapter
Temperature: 32° ~ 104°F (0° ~ 40°C)
Humidity: 25% ~ 95% RH
Zero: Established on power up routine and maintained by auto-zero circuitry
Tare: 100% of full scale capacity
Serial Number_____________________
Date of Purchase __________________
Purchased Form___________________
_________________________________
RETAIN THIS INFORMATION FOR FUTURE USE
PRECAUTIONS
Before using this scale, read this manual
and pay special attention to all
NOTIFICATION symbols:
IIMPORTANT ELECTRICAL
WARNING
4
II
8526-M260-O1 C Series Operation
Page 5

TABLE OF CONTENTS
INSTALLATION . . . . . . . . . . . . . . . . . . . . . . . . . . . . . . . . . . . . . . . . . . . . . . . . . . . . . 1
Unpacking . . . . . . . . . . . . . . . . . . . . . . . . . . . . . . . . . . . . . . . . . . . . . . . . . . . . . . . 1
Placement . . . . . . . . . . . . . . . . . . . . . . . . . . . . . . . . . . . . . . . . . . . . . . . . . . . . . . . 1
Level Adjustment . . . . . . . . . . . . . . . . . . . . . . . . . . . . . . . . . . . . . . . . . . . . . . . . . . 1
Power Connection . . . . . . . . . . . . . . . . . . . . . . . . . . . . . . . . . . . . . . . . . . . . . . . . . 1
AC Operation . . . . . . . . . . . . . . . . . . . . . . . . . . . . . . . . . . . . . . . . . . . . . . . . . . . . . 1
PRECAUTIONS . . . . . . . . . . . . . . . . . . . . . . . . . . . . . . . . . . . . . . . . . . . . . . . . . . . . . 2
CARE AND CLEANING . . . . . . . . . . . . . . . . . . . . . . . . . . . . . . . . . . . . . . . . . . . . . . . 2
KEY FUNCTIONS . . . . . . . . . . . . . . . . . . . . . . . . . . . . . . . . . . . . . . . . . . . . . . . . . . . 3
ANNUNCIATORS . . . . . . . . . . . . . . . . . . . . . . . . . . . . . . . . . . . . . . . . . . . . . . . . . . . 5
OPERATION . . . . . . . . . . . . . . . . . . . . . . . . . . . . . . . . . . . . . . . . . . . . . . . . . . . . . . . 6
Power Switch . . . . . . . . . . . . . . . . . . . . . . . . . . . . . . . . . . . . . . . . . . . . . . . . . . . . . 6
Metric Conversion . . . . . . . . . . . . . . . . . . . . . . . . . . . . . . . . . . . . . . . . . . . . . . . . . 6
Weight Display . . . . . . . . . . . . . . . . . . . . . . . . . . . . . . . . . . . . . . . . . . . . . . . . . . . . 6
Displaying Weight . . . . . . . . . . . . . . . . . . . . . . . . . . . . . . . . . . . . . . . . . . . . . . . 6
Zero the Weight display . . . . . . . . . . . . . . . . . . . . . . . . . . . . . . . . . . . . . . . . . . . 6
Tare Weight Entry . . . . . . . . . . . . . . . . . . . . . . . . . . . . . . . . . . . . . . . . . . . . . . . . . 7
Push Button Tare . . . . . . . . . . . . . . . . . . . . . . . . . . . . . . . . . . . . . . . . . . . . . . . 7
Pre-set Tare with Known Weight of Container . . . . . . . . . . . . . . . . . . . . . . . . . 7
Pre-set Tare with Container on Scale . . . . . . . . . . . . . . . . . . . . . . . . . . . . . . . . 7
To Clear the Tare . . . . . . . . . . . . . . . . . . . . . . . . . . . . . . . . . . . . . . . . . . . . . . . 7
Quantity Preset Hi Limit . . . . . . . . . . . . . . . . . . . . . . . . . . . . . . . . . . . . . . . . . . . . . 8
Weight Preset Hi Limit . . . . . . . . . . . . . . . . . . . . . . . . . . . . . . . . . . . . . . . . . . . . . . 8
Clear the Quantity and Weight Preset Hi Limits . . . . . . . . . . . . . . . . . . . . . . . . . . 8
Counting . . . . . . . . . . . . . . . . . . . . . . . . . . . . . . . . . . . . . . . . . . . . . . . . . . . . . . . . 9
Weight of Sample Unknown . . . . . . . . . . . . . . . . . . . . . . . . . . . . . . . . . . . . . . . 9
Sample Weight is Known . . . . . . . . . . . . . . . . . . . . . . . . . . . . . . . . . . . . . . . . . . 9
Counting With an Insufficient Sample . . . . . . . . . . . . . . . . . . . . . . . . . . . . . . . . 9
Accumulator . . . . . . . . . . . . . . . . . . . . . . . . . . . . . . . . . . . . . . . . . . . . . . . . . . . . . . 10
Adding to the Weight Accumulator . . . . . . . . . . . . . . . . . . . . . . . . . . . . . . . . . . 10
Displaying the Accumulator . . . . . . . . . . . . . . . . . . . . . . . . . . . . . . . . . . . . . . . . 10
Clearing the Accumulator . . . . . . . . . . . . . . . . . . . . . . . . . . . . . . . . . . . . . . . . . 10
OPERATION USING PLU(S) . . . . . . . . . . . . . . . . . . . . . . . . . . . . . . . . . . . . . . . . . . . 11
Add or Edit PLU . . . . . . . . . . . . . . . . . . . . . . . . . . . . . . . . . . . . . . . . . . . . . . . . . . . 11
PLU Operation Using Numeric Keypad . . . . . . . . . . . . . . . . . . . . . . . . . . . . . . . . . 11
PLU Operation Using Preset P1 through P9 . . . . . . . . . . . . . . . . . . . . . . . . . . . . . 11
SCALE SETTINGS . . . . . . . . . . . . . . . . . . . . . . . . . . . . . . . . . . . . . . . . . . . . . . . . . . 12
Accessing the User Setup Mode . . . . . . . . . . . . . . . . . . . . . . . . . . . . . . . . . . . . . . 12
To Navigate in the User Setup Mode . . . . . . . . . . . . . . . . . . . . . . . . . . . . . . . . . . . 12
RECHARGEABLE LEAD-ACID BATTERY . . . . . . . . . . . . . . . . . . . . . . . . . . . . . . . . 16
Battery Charging . . . . . . . . . . . . . . . . . . . . . . . . . . . . . . . . . . . . . . . . . . . . . . . . . . 16
Low Battery . . . . . . . . . . . . . . . . . . . . . . . . . . . . . . . . . . . . . . . . . . . . . . . . . . . . . . 16
Notice . . . . . . . . . . . . . . . . . . . . . . . . . . . . . . . . . . . . . . . . . . . . . . . . . . . . . . . . . . 16
ERROR AND STATUS MESSAGES . . . . . . . . . . . . . . . . . . . . . . . . . . . . . . . . . . . . . 17
8526-M260-O1 C Series Operation
III
5
Page 6

Page 7

INSTALLATION
Unpacking
Before beginning installation of your C Series Digital Counting Scale, make certain the scale
has been received in good condition. Carefully remove the scale from the shipping carton
and inspect it for any evidence of damage (su c h as exterior dents or scratches) that m ay
have taken place during shipment. Keep the carton and packing material for return
shipment if it should become necessary. It is the responsibility of the purchaser to file all
claims for any damages or loss incurred during transit.
Placement
Place the scale on a stable, vibration-f r ee level sur face away from direct sunlight and from
any rapidly moving air source (heating/cooling ven ts, fans, etc.). Make certain the powe r
cord and peripheral cables are routed out of the way of normal traffic.
CAUTION! DO NOT place the scale on any unstable cart, stand or t able. The
scale may fall causing injury to the operator, a nd seriously damage the unit,
or proper operation of the scale may be inhibited.
Level Adjustment
Check to make certain the scale is level. The level indicator is
located at the front of the scale. If the scale is not level (the bubble
will not be centered), loosen the locking ring on all four ( 4) mo un ting
feet and adjust them as required to cent er the bubble and attain a
level scale. Once a level condition has been obt ain ed , lock the
mounting feet in place by tightening the adjust m en t locking ri ng s
against the bottom of the scale.
Power Connection
The scale contains a power supply that conver ts the 110/120/220/240 VAC 50/60Hz wall
supply to the power required by the scale circuitry. The power supply also contains the
circuitry necessary to monitor and rechar ge the battery and is capable of operating the sca le
and recharging the battery simultaneously.
AC Operation
Plug the power cord into a grounded, polariz ed wall r ecep tacle that supplies 110/120 VAC
50/60Hz power. If it is necessary to use an extension co r d, make cert ain it is a 3-wire, fully
grounded type using a minimum of 18-gauge wire. Be certain the power cord is rout ed out
of the way of normal traffic. If only an ung r ou nde d wall re cep tacle is available, it is the
customer's responsibility to contact a qualifie d electrician to replace the ungrounded
receptacle with a properly grounded polarized wall recep tacle or have a grounding adapter
properly installed.
WARNING! To avoid electrical hazard, DO NOT under any circumstances,
cut, remove, alter, or in any way bypass the power cord-grounding prong.
It is the responsibility of the customer to contact a qualified electrician to install the
proper power cord connector. Plug th e power cord into a grounded, polarized wa ll
receptacle that supplies 220/240 VAC 50/60Hz power. Be certain the power cord is routed
out of the way of normal traffic.
Not Level Level
8526-M260-O1 C Series Operation
1
Page 8

PRECAUTIONS
Most scales are designed for an office type environment. The C Series Digital Counting
Scale is no exception to that rule. The following should be used as a guideline for the
proper environment to operate you r scale:
The environment should be free of excessive dust and moisture.
Provide a comfortable temperature. In general, the scale will perform well over a
temperature range of 32 to 104° F (0 to +40° C).
To keep cooling requirements to a minimum, the scale should be placed out of direct
sunlight and to provide adequate air circulation, keep the area around the scale clear.
Make certain the scale is not directly in front of a heatin g or co oling vent . Such a location
will subject the scale to sudden temperature changes and air currents that may resu lt in
unstable weight readings.
Insure that the scale has good, clean AC power and is properly gro un ded . In areas
subject to lightning strikes, additio na l pr otection to minimize lightning damage, such as
surge suppressors, should be installed.
CARE AND CLEANING
1. DO NOT submerge the scale in water, pour or spray water directly on it.
2. DO NOT use acetone, thinner or other volat ile solvent s for cleaning.
3. DO clean the indicator with a damp soft cloth and mild non-abrasive detergent .
4. DO remove power before cleaning with a damp cloth.
5. DO clean and store the scale in a plastic bag (in a dry environment) if the sca le is not
going to be used for some time. A desiccant packet may be included to pr e ven t moisture
build up.
6. DO recharge the internal battery every three months while in storage.
2
8526-M260-O1 C Series Operation
Page 9

KEY FUNCTIONS
This section describes the use of each of the keys on the C Series Digital Counting Scale.
It will be helpful to refer to the scale keyboard or the figure below when reading this section.
The membrane keyboard is not to be operated with pointed objects (pencils,
pens, fingernails, etc). Damage to keyboard resulting from this practice will
NOT be covered under warranty.
SAMPLE
SIZE
SAMPLE
WEIGHT
COUNT
PRESET
MC
M+
This key is used to weigh a known number of pieces in preparation for a new
counting operation. Sample quantities are entered using the numeric keypad in
any quantity desired.
Pressing this key will display the calculated average p iece we igh t from the
current sampling and counting operation. It will also allow the manual entry of
a known average piece weight (using the numeric keys) to be used in the next
counting operation.
This key is used when setting the Quantity and Weight Pr ese t limits. Duri ng a
counting operation (with the limits set) if the qu an tity or weight exceeds the
limits, the error beeper will sound and an er r or message will flash on the display.
The MC key is used to clear the accumulator. The M+ and ADD annunciators
will turn off to indicate the clearing has taken place.
Pressing the M+ key will cause the scale to display the contents of the
accumulator (the number of pieces accumulated since the last time the
accumulator was cleared).
The M+ key is also used to add the current piece count value to t he
accumulator. The M+ annunciator will be selected to indicate the accumulation
has taken place.
8526-M260-O1 C Series Operation
3
Page 10

KEY FUNCTIONS, CONT.
PGM
P#
P1
to
P9
C /
>0<
ZERO
>T<
TARE
UNITS
0 ~ 9
Enter
The PGM key is used to add or edit produc t lo ok u p ( PLU) number s. Up to 99
PLU numbers can be programmed. Note that the first 9 PLU’s a r e assign ed t o
the P1-9 keys and that all PLU’s can be selected using the numeric keys.
Pressing the P# key will cause the scale to recall the ave r age pie c e weig ht
along with the saved tare weight (if a tare weight was programmed) associated
with the product look up (PLU) number.
Pressing these keys will cause the scale to recall the average piece weight
along with the saved tare weight (if a tare weight was programmed) associated
with the product look up (PLU) number assigned to the key.
The C /
mode of operation:
Data Entry: The C /
Pressing and holding the C /
The ZERO key is used to perform a var iet y of functions depending on the
current mode of operation:
Weight Display Mode (lb or kg annunciator on): Pressing the ZERO key will set
the weight display to zero and turn on the ZERO annunciator if the displayed
weight is within ± 4% of scale capacity.
The TARE key is used to display the current tare weight (or zero if no tare has
been entered) and/or using the num er ic keypad, to enter a new tare weight. It is
also used when entering a tare under a Preset number.
Pressing this key will toggle the weighing units between pounds (lb) and
kilograms (kg). The currently selec t e d we ig hin g un it is indicated by illuminating
either the lb or kg annunciator.
These keys are used to enter numeric data during normal oper a tions as well as
during calibration and operational setup.
This is the decimal point key. It is used to enter a decimal point where required
when entering numeric data.
The Enter/ key is used to signal completion of the ent r y of data and causes the
scale to process the data entered.
key is used to perform different funct ions de pending on the current
key is used to clear an incorrect entry from the
display without processing the data. If an incorrect entry is made, press
the C /
backlight on and off.
key and re-enter the correct data.
key for 3 seconds will toggle the display
4
8526-M260-O1 C Series Operation
Page 11

ANNUNCIATORS
lb
The lb annunciator is illuminated to show that the we ight displayed is in pounds. The UNITS
key may be used to select pounds as the weighing units.
kg
The kg annunciator is illuminated to show that the weight displayed is in kilograms. The
UNITS key may be used to select kilogram as the weighing units.
NET
The NET annunciator is illuminated to show that the weight displa yed is the net weight. Net
weight is determined by subtracting t he st or ed tare weight from the gross or scale weight.
The tare weight, usually the weight of the container, is entered using the tare key. Note that
the NET annunciator is only active when a zero tare weight or tare weight value is stored
and the display is in the weight mode as shown by the illumination of the lb or kg
annunciator.
ZERO (Center-of-Zero)
The Center-of-Zero annunciator is loca te d on t he left of the display and is illuminated to
indicate that the weight is within +/- 1/4 division of the center of zero.
Insuf Sample
The Insuf Sample annunciator is located on the lower left of the display and is illuminated to
show that the sample is too small to calculate an accur at e piece weight. If the counting
function is continued without
though accuracy will be affected.
(Stable)
The (Stable) annunciator is located at the bottom left of the display and is illuminated when
the WEIGHT display is stable.
ADD
The ADD annunciator is located at the bot tom right of the display and is illuminated when
the scale is in the accumulator mode (M+).
M+
The M+ annunciator is located on the lower right of the display and is illuminated to show
that the display is in the Accumulator mode and that th e value displa yed is the cur r e nt
contents of the accumulator. Individual counts ar e adjusted via the ( M+ ) and ( MC ) keys
or optionally, any count may be entered using the numeric keypad. Note that when both the
M+ and ADD annunciators are illuminated, t he current count has been added to the
accumulator.
(Low Battery)
The Low Battery annunciator will illuminate to indicate that the internal battery requires
charging. No change in operation will occur until ju st before the battery voltage dro ps to a
level where operation is affected. At this level, the scale will automatically turn itself off.
NOTE! When the battery needs to be recharged, the CHARGING LED will turn Red. After
the battery has been recharged, the CHARG ING LED will turn Green.
increasing the sample size, the scale will still oper at e eve n
8526-M260-O1 C Series Operation
5
Page 12

OPERATION
Power Switch
The Power Switch is located on the bottom
left side panel towards the front of the scale.
Place the power switch in the on position.
The scale will perform a brief lamp test. This
test consists of illuminating all disp lay
segments and annunciator LED's to allo w the
operator to make a visual verification that the
display is operational. After completion of the
lamp test, the scale will display the model
number and software revision level and then
the WEIGHT display will change to show zero
weight, indicating the scale is ready for use.
Metric Conversion
To change weighing units, press the UNITS key to toggle between pounds and kilograms.
Note that either the LB or KG annunciator will illuminate to indicate which weighing unit is
active.
Before using the scale, it should be “warmed up” (turned on and unloaded
for approximately 15 to 20 minutes).
WEIGHT Display
Displaying Weight
1. With the scale in the Weight mode ()000 will be displayed for WEI G HT an d 0 will be
displayed for the Avg Piece Weight and PI ECES displays), place the item to be
weighed on the scale platform.
2. The display will show the weight on the scale platform. The lb or kg annuncia t o r s will
illuminate to indicate which unit of weight has been selected and that the scale is in the
Weight mode. Note that the Avg Piece Weight and PIECES display will remain at 0
(zero).
Zero the WEIGHT Display
1. With the scale in the Weight mode (0 will be displayed for the Avg Piece Weight and
PIECES displays), press the ZERO key.
2. The WEIGHT display will show )000 and the ZERO and Stable annunciators will
illuminate, indicating a center-of-zero, stable gr o ss weigh t co ndit ion .
6
8526-M260-O1 C Series Operation
Page 13

OPERATION, CONT.
Tare Weight Entry
Push Button Tare
1. With the scale in the Weight mode, place the em pty container on the scale platform.
2. Press the TARE key. The WEIGHT display will change to zero and the NET
annunciator illuminates, indicating net weight is being displaye d. The em pt y con tainer's
weight has been entered as "tare weight".
Pre-set Tare with Known Weight of Container
1. With the scale in the Weight mode, press the TARE key. The display will change to
show PrEtA and the PIECES display will show ------ (six dashes).
2. Using the numeric keypad, enter the desired tare (container) weight.
3. After the desired tare value has been enter e d, press the TARE key. The display will
show the Net weight (Gross minus tare) and the NET annunciator will illuminate.
4. Proceed with the counting or weighing operation.
Pre-set Tare with Container on Scale
1. With the scale in the Weight mode, place the container on the scale.
2. Read the weight of the container.
3. Using the numeric keypad, enter the container weight and press the TARE key.
4. The display will show the Net weight (Gross minus tare) and the NET annun cia to r will
illuminate.
5. Proceed with the counting or weighing operation.
To Clear the Tare
To return to a zero tare, simply remove all material from the scale platform and press the
TARE key. This will reset the tare weight to zero.
8526-M260-O1 C Series Operation
7
Page 14

OPERATION, CONT.
Quantity Preset Hi Limit
The scale can store a Quantity Preset Hi Lim it valu e. The scale will be ep and th e Avg Piece
Weight will display a blinking -)TY- if the quantity is over the Hi limit value set.
1. Press the COUNT PRESET key (items can be on scale or platform can be empty).
2. The WEIGHT display will change to show preset.
3. Using the numeric keypad, enter the Quantity Preset Hi Limit.
4. Press the SAMPLE SIZE key, followed by the COUNT PRESET key.
5. The scale will return to the Weight mode.
Weight Preset Hi Limit
The scale can store a Weight Preset Hi Limit value. The scale will beep and th e Avg Piece
Weight will display a blinking -LJPST- if the weight is over the Hi limit value set.
1. Press the COUNT PRESET key (items can be on scale or platform can be empty).
2. The WEIGHT display will change to show preset.
3. Using the numeric keypad, enter the Weight Preset Hi Limit.
4. Press the SAMPLE WEIGHT key, followed by the COUNT PRESET key.
5. The scale will return to the Weight mode.
Clear the Quantity and Weight Preset Hi Limits
To clear the Quantity and/or Weight Preset Hi Limit, simply enter a “0” for the limit value.
8
8526-M260-O1 C Series Operation
Page 15

OPERATION, CONT.
Counting
Weight of Sample is Unknown
1. With the scale in the Weight mode, place the sample on th e scale plat fo r m .
2. On the numeric keypad, enter the numbe r of p iec es in the s ample.
3. While the display is blinking, press the SAMPLE SIZE key.
4. The display will change to show Sannp and then show the average piece weight and
number of pieces.
5. Add the pieces to be counted and read the total count on the PIECES display.
6. Remove the pieces from the scale.
7. Press the C / key to complete the counting oper ation and return to the Weight
mode.
Sample Weight is Known
1. With the scale in the Weight mode, using the numer ic key pad , enter the piece weight of
the sample.
2. Press the SAMPLE WEIGHT key.
3. Add the pieces to be counted and read the total count on the PIECES display.
4. Remove the pieces from the scale.
5. Press the C / key to complete the counting oper ation and return to the Weight mode.
Insufficient Sample
IMPORTANT! If the sample weight is too small the PIECES display will show
------ (six dashes) for a few seconds and then the Insuf Sample annunciator
will illuminate. Continued use of the scale with the Insuf Sample
annunciator illuminated, will result in an “inaccurate” count. Press the C /
key to cancel the counting operation and retur n to th e Weight mode. Increase
the number of pieces for the sample and r epe at the counting operation to
achieve an “accurate” count.
8526-M260-O1 C Series Operation
9
Page 16

OPERATION, CONT.
Accumulator
Adding to the Weight Accumulator
1. With the scale in the Weight mode and displaying zero weight, place the item on the
scale platform.
2. Press the M+ key to add to the value of the Weight Accumulator.
3. The Avg Piece Weight display will change to show the accumulator values and the ADD
annunciator will be illuminated(to indicate th e ad dition t o t he accumulator has taken
place). After 3 seconds, the scale will return to the weight mode.
4. Remove the item from the scale.
5. The scale is ready for the next counting or weight operation.
NOTE: Additional Weight Accumulator additions can
weighing operation (scale weight returns to zero) has been completed.
Displaying the Accumulator
With the scale in the Weight mode and displaying zero we igh t, press the M+ key to
display the content of the accumulators. The values of the accumulator will be displayed
for 3 seconds, then return to the Weight mode display.
Clearing the Accumulator
With the scale in the Weight mode and displaying zero we igh t , pr ess the MC key. The
accumulator will be reset to zero.
not take place until the current
10
8526-M260-O1 C Series Operation
Page 17

OPERATION USING PLU(S)
Add or Edit PLU
1. With the scale in the Weight mode, press the PGM key. The Weight display will
change to show .
2. Touch the P1 through 9 key or using the numeric keys, en t er th e de sir e d nu mbe r of
PLU 10 through 99 to change and press the ENTER key. The PLU numbe r will be
shown on the Weight display.
3. Using the numeric keypad to enter the aver ag e piece weight an d then press the
ENTER key to accept it. Note that if the PLU currently ha s an ave r ag e piece weight,
you can press the ENTER key to accept it or change it at this time.
4. The PIECES display will change to show .
5. Press the ENTER key to accept it.
6. The next sequential PLU number will be displayed. Repeat steps 2 through 5 to
program the remaining PLU’s.
7. To exit PLU programming, simply press the PGM key and t he scale will ret urn t o the
normal weight mode.
PLU Operation Using Numeric Keypad
1. With the scale in the Weight mode, press the P# key. The Weight display will change
to show .
2. Enter the desired PLU number (1 throug h 99 ) and pr ess the ENTER key.
3. The recalled PLU and average piece weight will display along with the asso cia t e d
tare weight (if a tare weight was programmed).
4. Add the pieces to be counted and read th e total weight on the WEIGHT and the total
count on the PIECES display.
5. Remove the pieces from the scale.
6. Press the C / key to complete the counting op er at ion a nd return to the Weight
mode.
PLU Operation using Preset P1 through P9
1. With the scale in the Weight mode, pre ss th e desired PLU key P1 through P9.
2. The recalled PLU and average piece weight will display along with the asso cia t e d
tare weight (if a tare weight was programmed).
3. Add the pieces to be counted and read th e total weight on the WEIGHT and the total
count on the PIECES display.
4. Remove the pieces from the scale.
5. Press the C / key to complete the counting oper a t ion a nd r e tu r n t o th e W eight
mode.
8526-M260-O1 C Series Operation
11
Page 18

SCALE SETTINGS
Accessing the User Setup Mode
To access the User Setup Mode, with the scale off press and hold t h e UNITS key while
switching the scale on. The Scale will display SETUP.
To Navigate in the User Setup Mode
Use the following keys to navigate the User Setup settings.
UNITS Accept the displayed setting and to proceed to next step
TARE Toggles available settings for the current step
ZERO R eturns to the previous step
C / Exit setup and proceed to SAVE
SETUP
btli Auto Off
AOFF
120S 180S 240S 300S
On
600S OFF
SLEEP 30S 60S OFF
Units <G lb
<G=kg
bUrr On Off
rtAdd On Off
SAuE On Off
12
8526-M260-O1 C Series Operation
Page 19

SCALE SETTINGS, CONT.
btli – Backlight Mode
With SETUP, btli displayed the current settin g for th e Backlig ht Mode parameter will be
shown. If the setting displayed is acceptable, pr e ss th e UNITS key to proceed to the next
parameter.
Otherwise, use the TARE key to toggle between the se lect ions and then press the UNITS
key to save it and proceed to the next paramet er. The available settings are:
=
Auto
Auto Backlight – While weighing, the backlight will be tur ne d O N
automatically when the weight is over 10 divisions or any key is pressed.
The backlight will turn OFF automatically when the scale has not be en
used for 10 minutes.
OFF
On
=
The will be no backlight (always OFF).
=
The backlight will always be ON.
AOFF – Automatic Power-Off
With SETUP, AOFF displayed the current setting for the Automatic Shut-Off function
parameter will be shown. If the setting displ ayed is acceptable, press the UNITS key to
proceed to the next parameter.
Otherwise, use the TARE key to toggle between the se lect ions and then press the UNITS
key to save it and proceed to the next paramet er. The available settings are:
After 120 seconds (2 minutes) of no activity the scale will shut off
120s
180s
240s
300s
600s
OFF
=
and must be turned on using the ON/OFF switch.
After 180 seconds (3 minutes) of no activity the scale will shut off
=
and must be turned on using the ON/OFF switch.
After 240 seconds (4 minutes) of no activity the scale will shut off
=
and must be turned on using the ON/OFF switch.
After 300 seconds (5 minutes) of no activity the scale will shut off
=
and must be turned on using the ON/OFF switch.
After 600 seconds (10 minutes) of no activit y the scale will shut
=
off and must be turned on using the ON/OFF switch.
The Auto Shut-Off function is disabled.
=
8526-M260-O1 C Series Operation
13
Page 20

SCALE SETTINGS, CONT.
SLEEP – Sleep Mode
With SETUP, SLEEP displayed the current setting for th e Sle ep M ode function parameter
will be shown. If the setting displayed is acceptable, press the UNITS key to proceed to
the next parameter.
Otherwise, use the TARE key to toggle between the selections and then press the UNITS
key to save it and proceed to the next paramet er. The available settings are:
=
30s
60s
OFF
Unit – Weighing Units
With SETUP, Unit displayed the current setting fo r the Weighing Units parameter will be
shown. If the setting displayed is acceptable, press the UNITS key to proceed to the next
parameter.
Otherwise, use the TARE key to toggle between the selections and then press the UNITS
key to save it and proceed to the next paramet er. The available settings are:
If no activity occurs on scale for 30 seconds, the scale will enter Sleep
Mode. The display will be blank except for a flashing cursor . To
activate the scale, press any key or add/remove weight from scale.
=
If no activity occurs on scale for 60 seconds, the scale will enter Sleep
Mode. The display will be blank except for a flashing cursor . To
activate the scale, press any key or add/remove weight from scale.
=
The Sleep Mode function is disabled.
<G
Lb
= kg (Kilograms)
= Lb (Pounds)
bUrr – Beeper
With SETUP, bUrr displayed the current setting for the Beeper parameter will be shown.
If the setting displayed is acceptable, press the UNITS key t o pr o c eed to the next
parameter.
Otherwise, use the TARE key to toggle between the selections and then press the UNITS
key to save it and proceed to the next paramet er. The available settings are:
=
On
OFF
Enable Beeper
=
Disable Beeper
rtadd – Return Add
With SETUP, rtadd displayed the current setting for th e Re turn Add parameter will be
shown. If the setting displayed is acceptable, press the UNITS key to proceed to the next
parameter.
Otherwise, use the TARE key to toggle between the selections and then press the UNITS
key to save it and proceed to the next paramet er. The available settings are:
On
OFF
14
= The weight have to return to 0.0 then you can execute the M+
You can execute the M+ even the weight did not ret ur n to 0.0
=
8526-M260-O1 C Series Operation
Page 21

SCALE SETTINGS, CONT.
sauE – Save User Setup
With SETUP, SAuE displayed the current setting fo r th e Save Set ting para meter will be
shown. If the setting displayed is acceptable, pr e ss th e UNITS key to proceed to the next
parameter.
Otherwise, use the TARE key to toggle between the se lect ions and then press the UNITS
key to save it and proceed to the next paramet er. The available settings are:
On
OFF
The scale will reset and perform a lamp test. Next , the display will show the model number;
the software revision level and then the WEIGHT display will show zero weight.
= The changes are saved and the scale is ready for use with the new
settings.
= The changes are NOT saved and the scale will continue to operate with
the previous settings.
8526-M260-O1 C Series Operation
15
Page 22

RECHARGEABLE LEAD-ACID BATTERY
Battery Charging
The scale can charge the battery (lead-acid rechargeable battery, 6v/4Ah). Just connect
the scale to the external power supply to charge it. The battery will be charged regardless
if the scale is on or off. It takes approximately 12 hours to charge the battery to full
capacity depending on the voltage of the battery. If the battery has be en - discharged, a
prolonged charging time is required to bring t he b attery back to full capacity.
Red light: The battery is charging.
Low Battery
When the battery voltage falls below 5.7v, the low battery annunciator will be turned on.
The battery must be recharged. Continued use (approximately 15 minutes later), the
display will show Lo BAt in the weight field. If the batt er y vo ltage drops too low for
accurate weighing, the scale will automatically shut off and you will be unable to turn it
back on. When the low battery indicator is displayed , the operator should plug the power
supply into the scale and then into the proper electrical wall outlet. The scale will begin
charging the battery.
Notice
The battery should be recharged at least every 5 months regardless if it is used or not.
After a long time storage, e.g. over 3 months, it is desired to cycle (charge/discharge) the
battery 3 times to let it restore to full capacity.
When replacing the battery, pay muc h at tention to the poles. The positive (+) termin al
must be connected to the red connector and the negative (-) terminal must be connected to
the black connector. If connected wrongly, the battery will be damaged.
NOTE: The battery cover can be removed by loosening a single capt ive scr ew. This
screw remains attached to the cover which prevents it fr om f allin g ou t o f t he co ver or
being dropped and lost.
The capacity of the batteries will reduce over the ye ar s an d t her e fore also the total
operation time of the scale. This is not an error of the scale, but it is normal behavior or
rechargeable batteries.
Green light: The battery is fully charged.
16
8526-M260-O1 C Series Operation
Page 23

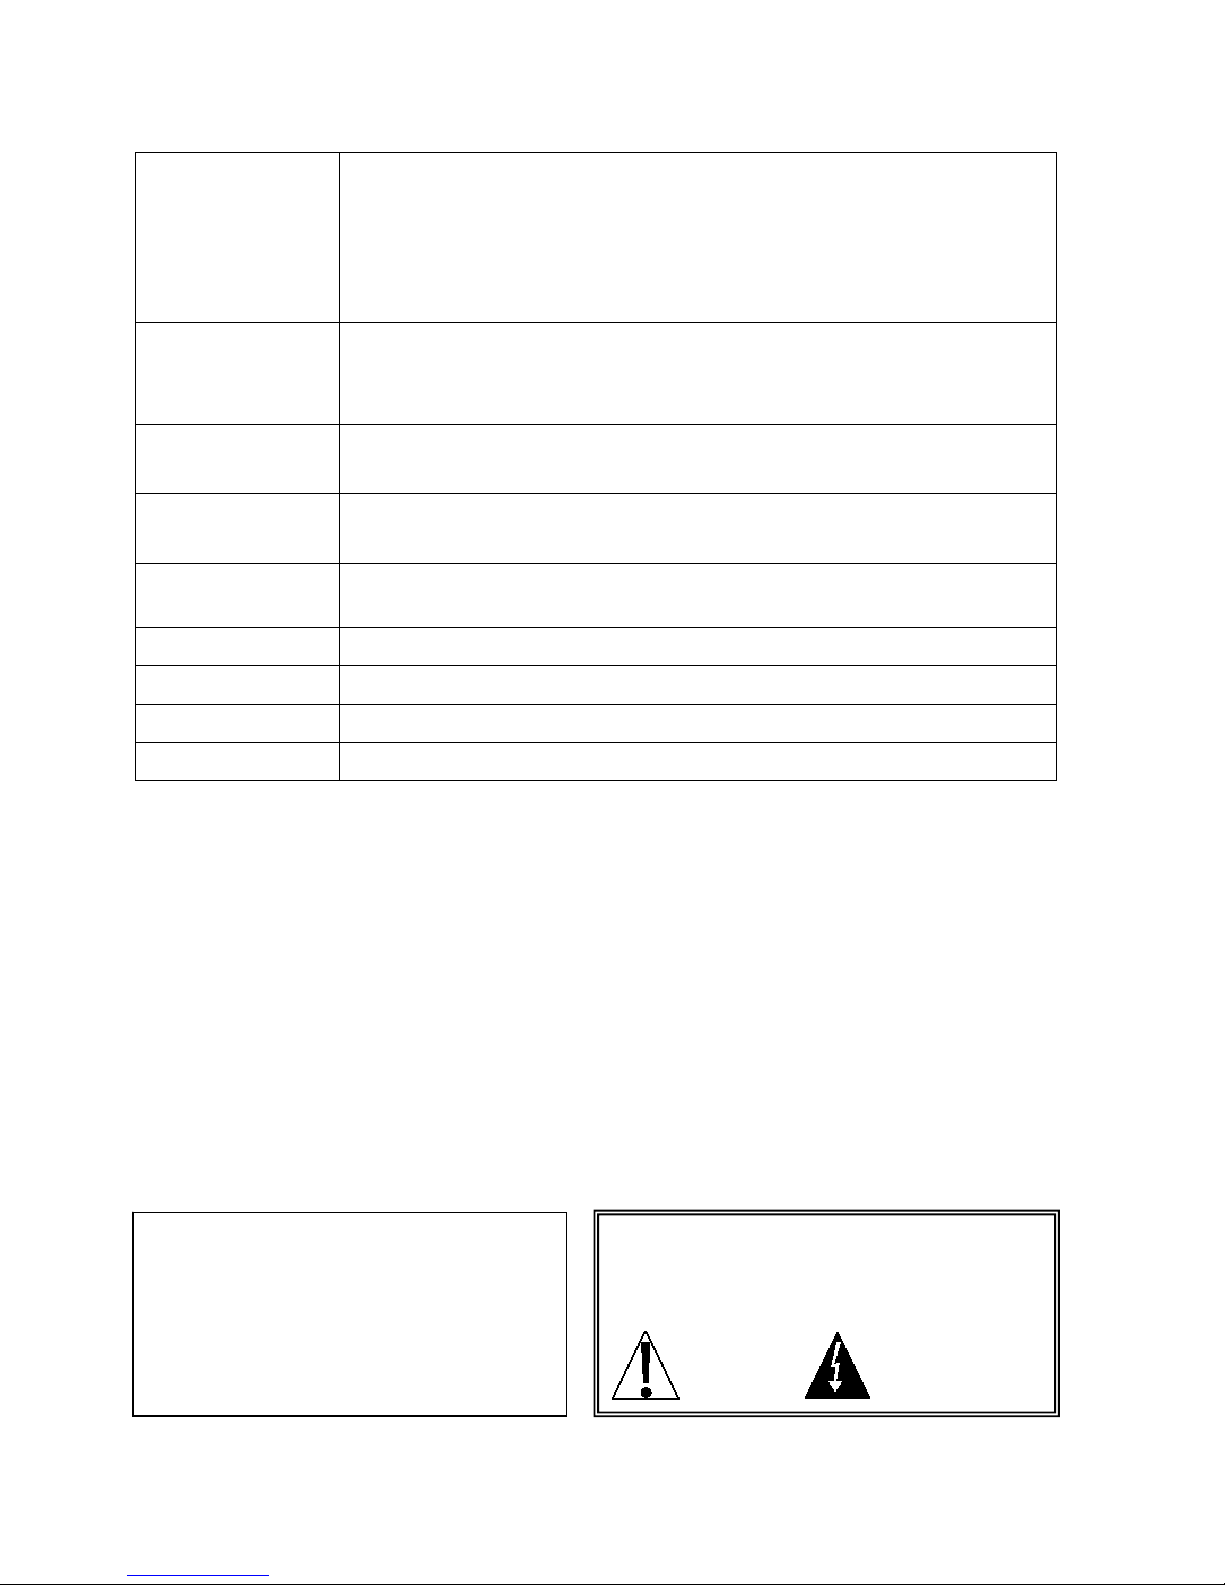
ERROR AND STATUS MESSAGES
The Cardinal C Series Digital Counting Scale is eq uip ped with a diagn ostic software
program that tests various portions of the scale's circuitry and verifies pr op er operation.
Should a problem be detected, an error or sta tus message will be displayed alerting the
operator to that condition. The following lists these er r or messages and their description.
ERROR MESSAGE DESCRIPTION
Err
Lo bat
ooooo
ooooo
ErrH
ErrL
erre
errs
Over capacity
Low battery
Zero value is too low when starting
Zero value is too high when starting
Zero value is too high
Zero value is too low
EEprom Error
Keypad Error
8526-M260-O1 C Series Operation
17
Page 24

18
8526-M260-O1 C Series Operation
 Loading...