

Page 1
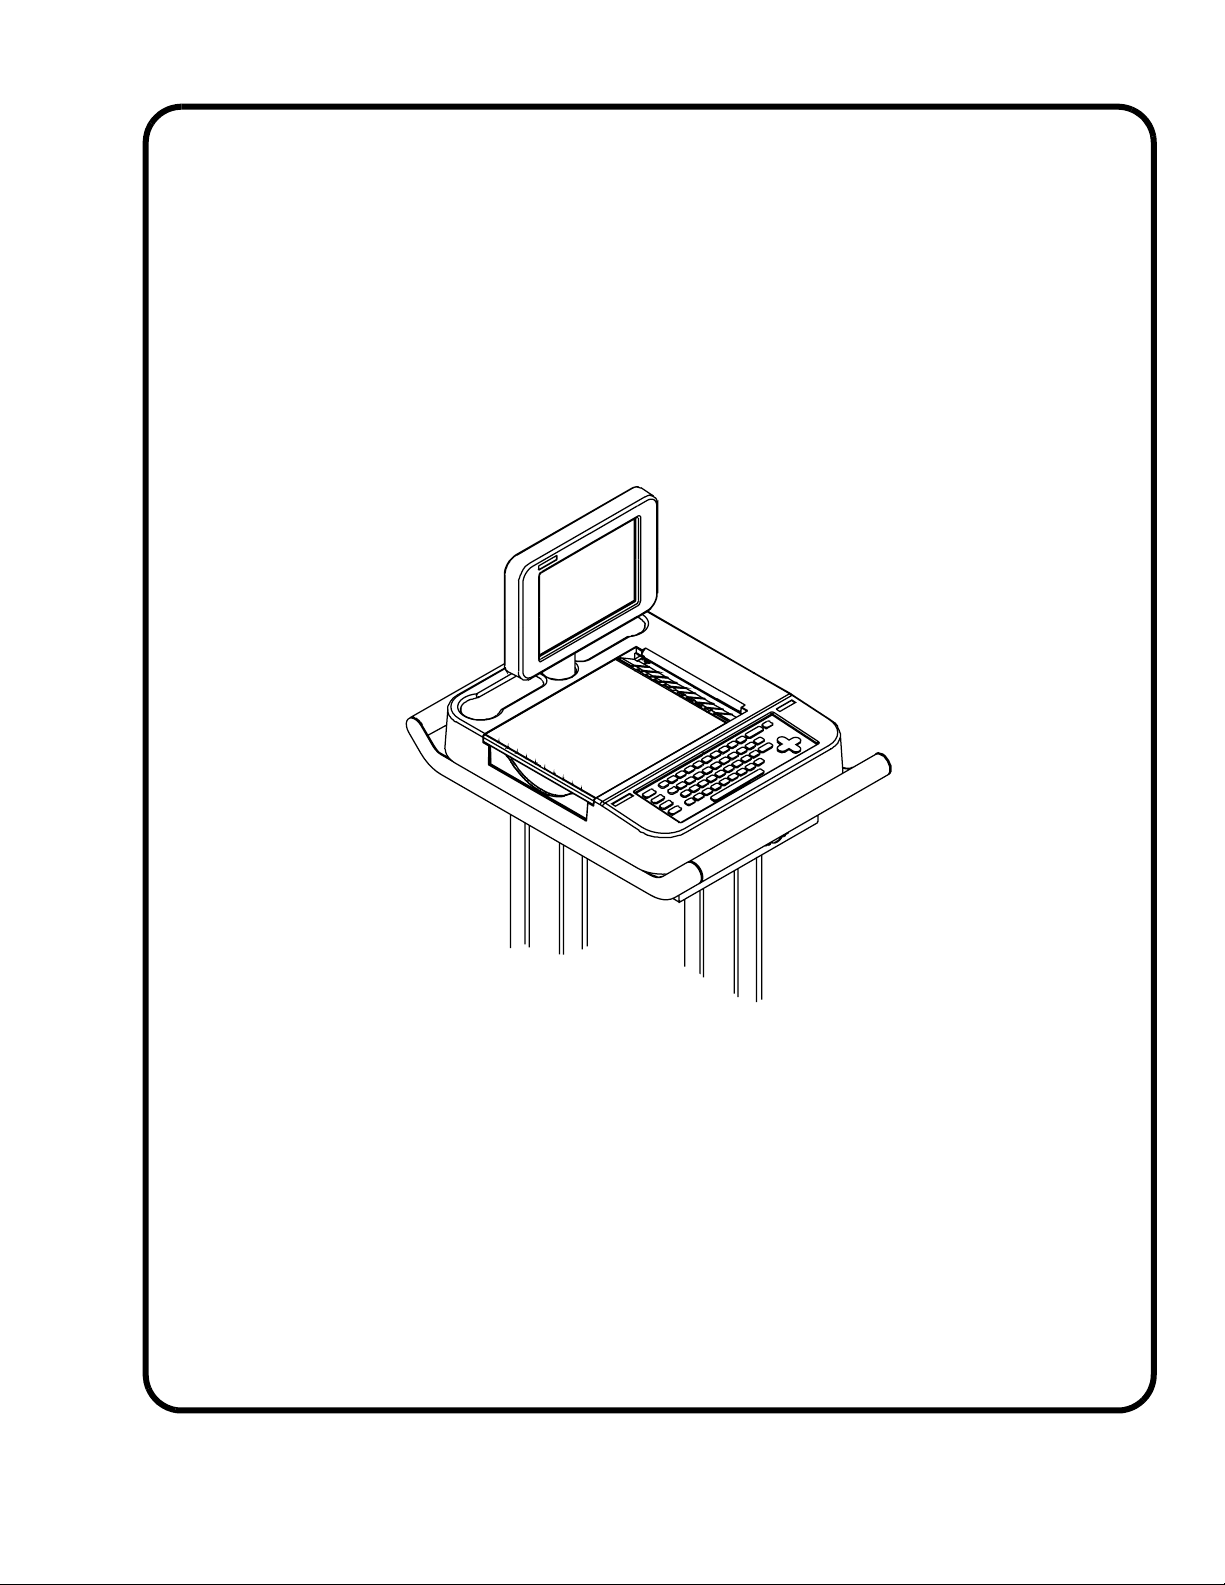
Operating
Instructions
Eclipse™ Premier
Electrocardiograph
Part No. 070-1149-01 Rev. B
Page 2

Copyright © 2007 Cardiac Science Corporation. All rights reserved.
Cardiac Science Corporation
3303 Monte Villa Parkway
(&
5(3
Bothell, WA 98021, USA
MDSS GmbH
Toll Free: +1.800.426.0337
Telephone: +1.425.402.2000
Email: [email protected]
Website: www.cardiacscience.com
Tel: +49 511 62 62 86 30
Schiffgraben 41
D-30175 Hannover
Germany
Fax: +49 511 62 62 86 33
ii 070-1149-01 B
Page 3
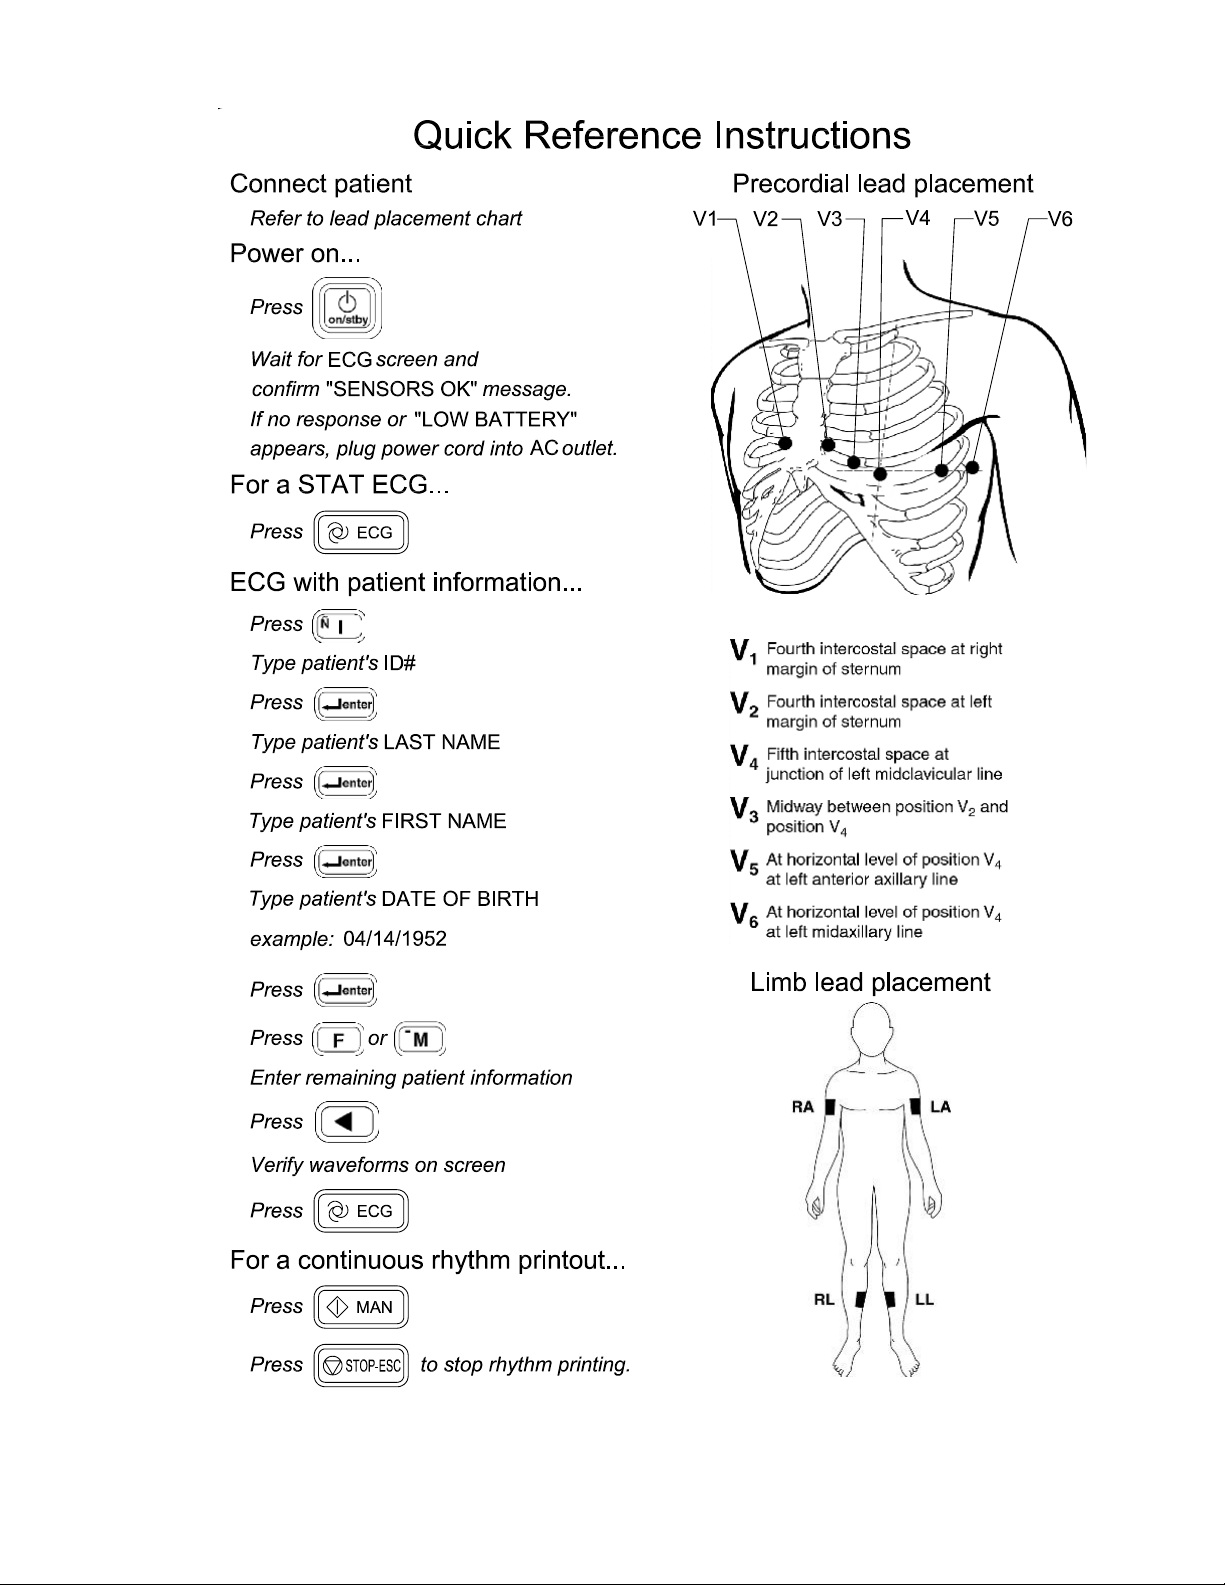
PHOTOCOPY THIS PAGE AS NEEDED
1 070-1149-01 B
Page 4

070-1149-01 B 2
Page 5

Table of Contents
Chapter 1 General Information . . . . . . . . . . . . . . . . . . . . . . . . . 1-1
Chapter 2 Equipment Setup . . . . . . . . . . . . . . . . . . . . . . . . . . . . 2-1
Chapter 3 Keyboard and Displays . . . . . . . . . . . . . . . . . . . . . . . . 3-1
Intended Use . . . . . . . . . . . . . . . . . . . . . . . . . . . . . . . . . . . . . . . . . . . . . . . iii
Warnings, Cautions & Notices . . . . . . . . . . . . . . . . . . . . . . . . . . . . . . . . iv
Definitions of Symbols Used . . . . . . . . . . . . . . . . . . . . . . . . . . . . . . . . . . vii
Inspection Upon Delivery . . . . . . . . . . . . . . . . . . . . . . . . . . . . . . . . . . . . .1-1
General Description . . . . . . . . . . . . . . . . . . . . . . . . . . . . . . . . . . . . . . . . . .1-2
Interpretive Analysis Program . . . . . . . . . . . . . . . . . . . . . . . . . . . . . . . . . .1-3
Safety Features . . . . . . . . . . . . . . . . . . . . . . . . . . . . . . . . . . . . . . . . . . . . .1-4
Using Multiple Electrical Apparatus . . . . . . . . . . . . . . . . . . . . . . . . . . . . .1-4
Patient Cable . . . . . . . . . . . . . . . . . . . . . . . . . . . . . . . . . . . . . . . . . . . . . . .2-2
Grounding . . . . . . . . . . . . . . . . . . . . . . . . . . . . . . . . . . . . . . . . . . . . . . . . .2-2
Loading Recording Paper . . . . . . . . . . . . . . . . . . . . . . . . . . . . . . . . . . . . .2-3
Turning the Unit On . . . . . . . . . . . . . . . . . . . . . . . . . . . . . . . . . . . . . . . . . 2-4
Using the Battery . . . . . . . . . . . . . . . . . . . . . . . . . . . . . . . . . . . . . . . . . . . .2-4
The Keyboard . . . . . . . . . . . . . . . . . . . . . . . . . . . . . . . . . . . . . . . . . . . . . .3-1
The PREVIEW Screen . . . . . . . . . . . . . . . . . . . . . . . . . . . . . . . . . . . . . . . 3-4
A sample menu—the EDIT ID menu . . . . . . . . . . . . . . . . . . . . . . . . . . . .3-6
Using Menus . . . . . . . . . . . . . . . . . . . . . . . . . . . . . . . . . . . . . . . . . . . . . . .3-7
Lists and System Notes . . . . . . . . . . . . . . . . . . . . . . . . . . . . . . . . . . . . . . .3-8
Chapter 4 System Setup and User Setup . . . . . . . . . . . . . . . . . . . 4-1
Configuring SYSTEM SETUP Menu . . . . . . . . . . . . . . . . . . . . . . . . . . . .4-1
Configuring the USER SETUP Menus . . . . . . . . . . . . . . . . . . . . . . . . . . . 4-6
Acquire Printout of Eclipse Premier Program Settings . . . . . . . . . . . . . .4-17
Chapter 5 Patient Preparation . . . . . . . . . . . . . . . . . . . . . . . . . . 5-1
Choosing the environment . . . . . . . . . . . . . . . . . . . . . . . . . . . . . . . . . . . . . 5-1
Preparing Patients for Resting ECGs . . . . . . . . . . . . . . . . . . . . . . . . . . . .5-1
Resting ECG Lead Placement & Coding Chart . . . . . . . . . . . . . . . . . . . . 5-3
Alternative Lead Placements . . . . . . . . . . . . . . . . . . . . . . . . . . . . . . . . . . . 5-7
Chapter 6 Acquiring ECG Reports . . . . . . . . . . . . . . . . . . . . . . . 6-1
Acquiring a Stat ECG . . . . . . . . . . . . . . . . . . . . . . . . . . . . . . . . . . . . . . . .6-1
Acquiring an Auto ECG . . . . . . . . . . . . . . . . . . . . . . . . . . . . . . . . . . . . . .6-2
Printing Reports . . . . . . . . . . . . . . . . . . . . . . . . . . . . . . . . . . . . . . . . . . . . . 6-4
Temporarily Changing Current Settings . . . . . . . . . . . . . . . . . . . . . . . . . . 6-5
Acquiring an Auto Rhythm or a Manual Rhythm . . . . . . . . . . . . . . . . . . .6-6
Acquiring an ECG Using Alternative Lead Placements . . . . . . . . . . . . . . 6-7
Entering Patient Demographics . . . . . . . . . . . . . . . . . . . . . . . . . . . . . . . . .6-9
070-1149-01 B Eclipse Operating Instructions i
Page 6

Chapter 7 Managing Patient Records . . . . . . . . . . . . . . . . . . . . . 7-1
Using the DIRECTORY Menu . . . . . . . . . . . . . . . . . . . . . . . . . . . . . . . . .7-1
Accessing Saved Files . . . . . . . . . . . . . . . . . . . . . . . . . . . . . . . . . . . . . . . .7-3
Additional Functions . . . . . . . . . . . . . . . . . . . . . . . . . . . . . . . . . . . . . . . . .7-6
Chapter 8 Sending and Receiving Records . . . . . . . . . . . . . . . . . 8-1
Equipment Connections . . . . . . . . . . . . . . . . . . . . . . . . . . . . . . . . . . . . . . .8-1
How record status affects the sending operations . . . . . . . . . . . . . . . . . . .8-3
Changing Record Status . . . . . . . . . . . . . . . . . . . . . . . . . . . . . . . . . . . . . . .8-3
Setting Up the Unit to Send and Receive . . . . . . . . . . . . . . . . . . . . . . . . .8-4
Receiving requisitions from PYRAMIS . . . . . . . . . . . . . . . . . . . . . . . . . .8-6
Sending records to PYRAMIS . . . . . . . . . . . . . . . . . . . . . . . . . . . . . . . . . .8-7
Sending and Receiving records from an Eclipse . . . . . . . . . . . . . . . . . . . .8-8
Receiving records from PYRAMIS . . . . . . . . . . . . . . . . . . . . . . . . . . . . . .8-8
Chapter 9 Sample Printouts . . . . . . . . . . . . . . . . . . . . . . . . . . . . . 9-1
Print Directory Report . . . . . . . . . . . . . . . . . . . . . . . . . . . . . . . . . . . . . . . .9-1
Print Setup Report . . . . . . . . . . . . . . . . . . . . . . . . . . . . . . . . . . . . . . . . . . .9-2
Standard 12-Lead, 4-Channel Auto ECG . . . . . . . . . . . . . . . . . . . . . . . . .9-3
Standard 12-Lead, 6-Channel Auto ECG . . . . . . . . . . . . . . . . . . . . . . . . .9-4
Standard 3-Channel Rhythm & Manual ECG . . . . . . . . . . . . . . . . . . . . . .9-5
Measurement Matrix . . . . . . . . . . . . . . . . . . . . . . . . . . . . . . . . . . . . . . . . .9-6
Median Complex . . . . . . . . . . . . . . . . . . . . . . . . . . . . . . . . . . . . . . . . . . . .9-7
Chapter 10 Troubleshooting . . . . . . . . . . . . . . . . . . . . . . . . . . . . 10-1
Troubleshooting Basic Unit Problems . . . . . . . . . . . . . . . . . . . . . . . . . . .10-1
Troubleshooting Trace Problems . . . . . . . . . . . . . . . . . . . . . . . . . . . . . . .10-2
Troubleshooting Printer Problems . . . . . . . . . . . . . . . . . . . . . . . . . . . . . .10-3
Recognizing and Reducing ECG Artifacts . . . . . . . . . . . . . . . . . . . . . . .10-4
Chapter 11 Maintenance and Service . . . . . . . . . . . . . . . . . . . . . 11-1
Calibrating the Battery . . . . . . . . . . . . . . . . . . . . . . . . . . . . . . . . . . . . . . .11-1
Inspecting for Damage . . . . . . . . . . . . . . . . . . . . . . . . . . . . . . . . . . . . . . .11-1
Cleaning and Disinfecting . . . . . . . . . . . . . . . . . . . . . . . . . . . . . . . . . . . .11-1
Testing Equipment . . . . . . . . . . . . . . . . . . . . . . . . . . . . . . . . . . . . . . . . . .11-2
Notice to responsible service personnel . . . . . . . . . . . . . . . . . . . . . . . . . .11-3
Performance Disclosures . . . . . . . . . . . . . . . . . . . . . . . . . . . . . . . . . . . . .11-3
EMC Declaration Tables . . . . . . . . . . . . . . . . . . . . . . . . . . . . . . . . . . . . .11-6
Technical Specifications . . . . . . . . . . . . . . . . . . . . . . . . . . . . . . . . . . . .11-10
Chapter 12 Measurement Matrix . . . . . . . . . . . . . . . . . . . . . . . . 12-1
Index. . . . . . . . . . . . . . . . . . . . . . . . . . . . . . . . . . . . . . . . . . . . . . . . . . . . IN-1
ii Eclipse Operating Instructions 070-1149-01 B
Page 7

Intended Use
WARNING: The Eclipse Premier should not be connected to nonmedical equipment unless the non-medical equipment complies with
IEC 601-1. In addition, the enclosure leakage current of nonmedical equipment connected to the Eclipse Premier should not be
allowed to exceed 500µA in fault condition. To maintain a proper
enclosure leakage current, provide additional protective earth
grounding, use an additional isolating transformer or use a floating
power supply.
WARNING: The Eclipse Premier and any non-medical equipment
that it is connected to should not be allowed within the patient’s
vicinity, which extends 6 feet (1.83 m) beyond the perimeter of the
bed, table or chair, and 7 1/2 feet (2.29 m) above the floor.
WARNING: NEVER create a direct connection between an
Eclipse Premier and a PYRAMIS computer if the Eclipse Premier is
already connected to a patient.
Under the supervision of a qualified physician trained in the subject of ECG
interpretation, the Eclipse Premier can be used to record the electrical activity of the
heart for the purpose of correlating the resultant waveforms with the health of the heart
muscle tissue structures.
This equipment produces a 12 lead (view) electrocardiogram which can be used as a
first step for assessment of patients with cardiac arrythmias, intraventricular
conduction block, pre-excitation syndrome and ischemic heart disease. Records stored
and used during the life of the patient can assist physicians in the diagnosis and natural
history of heart related illnesses (such as coronary artery disease).
This equipment is not designed to produce a definitive interpretation nor an exhaustive
evaluation of the patient’s heart but rather provide an effective beginning for evaluation
of patients with heart abnormalities.
070-1149-01 B Eclipse Operating Instructions iii
Page 8

Warnings, Cautions & Notices
Warnings
WARNING: The Eclipse Premier should not be connected to non-medical
equipment unless the non-medical equipment complies with IEC 601-1. In
addition, the enclosure leakage current of non-medical equipment connected to
the Eclipse Premier should not be allowed to exceed 500µA in fault condition.
To maintain a proper enclosure leakage current, provide additional protective
earth grounding, use an additional isolating transformer or use a floating power
supply.
WARNING: The Eclipse Premier and any non-medical equipment that it is
connected to should not be allowed within the patient’s vicinity, which extends
6 feet (1.83 m) beyond the perimeter of the bed, table or chair, and 7 1/2 feet
(2.29 m) above the floor.
!
WARNING: NEVER create a direct connection between an Eclipse Premier
and a PYRAMIS computer if the Eclipse Premier is already connected to a
patient.
WARNING: This device is NOT intended for unattended or continuous
patient monitoring. It is intended for short-term ECG waveform acquisition.
There are no audible or visible alarms.
WARNING: Never remove the battery pack and attempt to recharge it using
an external battery charger. Fire or explosion may result.
WARNING: Explosion hazard. Do NOT use in the presence of flammable
anesthetics.
WARNING: Electrical shock hazard. Do NOT contact unit or patient during
defibrillation. Otherwise, serious injury or death could result.
WARNING: NEVER position defibrillator paddles very close to or over
ECG sensors. Remove all chest sensors (V-Leads/C-Leads) from a patient
before defibrillation to allow proper paddle placement. Severe burns may
result from improper placement of defibrillator paddles. Before using any
defibrillator, consult the operating instructions for that equipment.
WARNING: Electrical shock hazard. Operate the unit from its battery
supply if the integrity of the protective earth conductor is in doubt. Otherwise,
serious injury or death could result.
iv Eclipse Operating Instructions 070-1149-01 B
Page 9

WARNING: If safety procedures not performed, increased risk to patient
and device can occur.
WARNING: Hazardous voltage. To reduce the risk of electrical shock, do
not attempt to remove the cover under any circumstances. Refer servicing to a
qualified technician.
WARNING: Position the Eclipse Premier away from other equipment. If it
is necessary to use the Eclipse Premier adjacent to or stacked with other
equipment, then observe the Eclipse Premier to verify normal operations.
WARNING: Use of accessories or cables other than those specified, with the
exception of accessories and cables sold by Cardiac Science Corporation as
replacement parts for internal components, may result in increased emissions
or decreased immunity of the Eclipse Premier.
Cautions
CAUTION: Federal law restricts this device to sale by or on the order
of a physician
CAUTION: The unit must be operated only at the line voltage and
frequency specified on the rating plate.
CAUTION: Although the Eclipse Premier is designed to meet IEC 601-1-2
EMC immunity requirements, the presence of strong EMI fields generated by
electronic, surgical or diathermy instruments in close proximity to the unit may
cause trace noise or input overload conditions.
CAUTION: Fire hazard. Use only approved battery packs.
CAUTION: The Eclipse Premier requires special precautions regarding
EMC. Install and use the Eclipse Premier according to the guidelines of the
EMC declaration tables.
CAUTION: Portable and RF communications equipment may affect the
Eclipse Premier. Always observe the recommended separation distances as
defined in the EMC declaration tables.
Notices
NOTICE: Do not place used battery pack in your regular trash. The
incineration, landfilling, or mixing of NiCad batteries with municipal waste is
PROHIBITED BY LAW in most areas. Return this battery pack to a
government-approved battery recycler. Contact your local waste management
officials for more information.
070-1149-01 B Eclipse Operating Instructions v
Page 10

NOTICE: Computer assisted interpretation is a valuable tool when used
properly. However, no automated interpretation is completely reliable and
interpretations should be reviewed by a qualified physician before treatment,
or non-treatment, of any patient.
NOTICE: Because the Eclipse Premier offers different lead configurations,
always ensure that the appropriate lead placement is employed for the lead
configuration selected.
NOTICE: Waveforms displayed on the Eclipse Premier screen are not
intended to be used for diagnostic purposes. Use displayed waveforms to
assess signal quality only.
NOTICE: Damage caused by using unapproved recording paper may void
your warranty. Your Eclipse Premier electrocardiograph is intended for use
with approved ECG supplies; its reliability and performance are directly
affected by the supplies you use.
vi Eclipse Operating Instructions 070-1149-01 B
Page 11
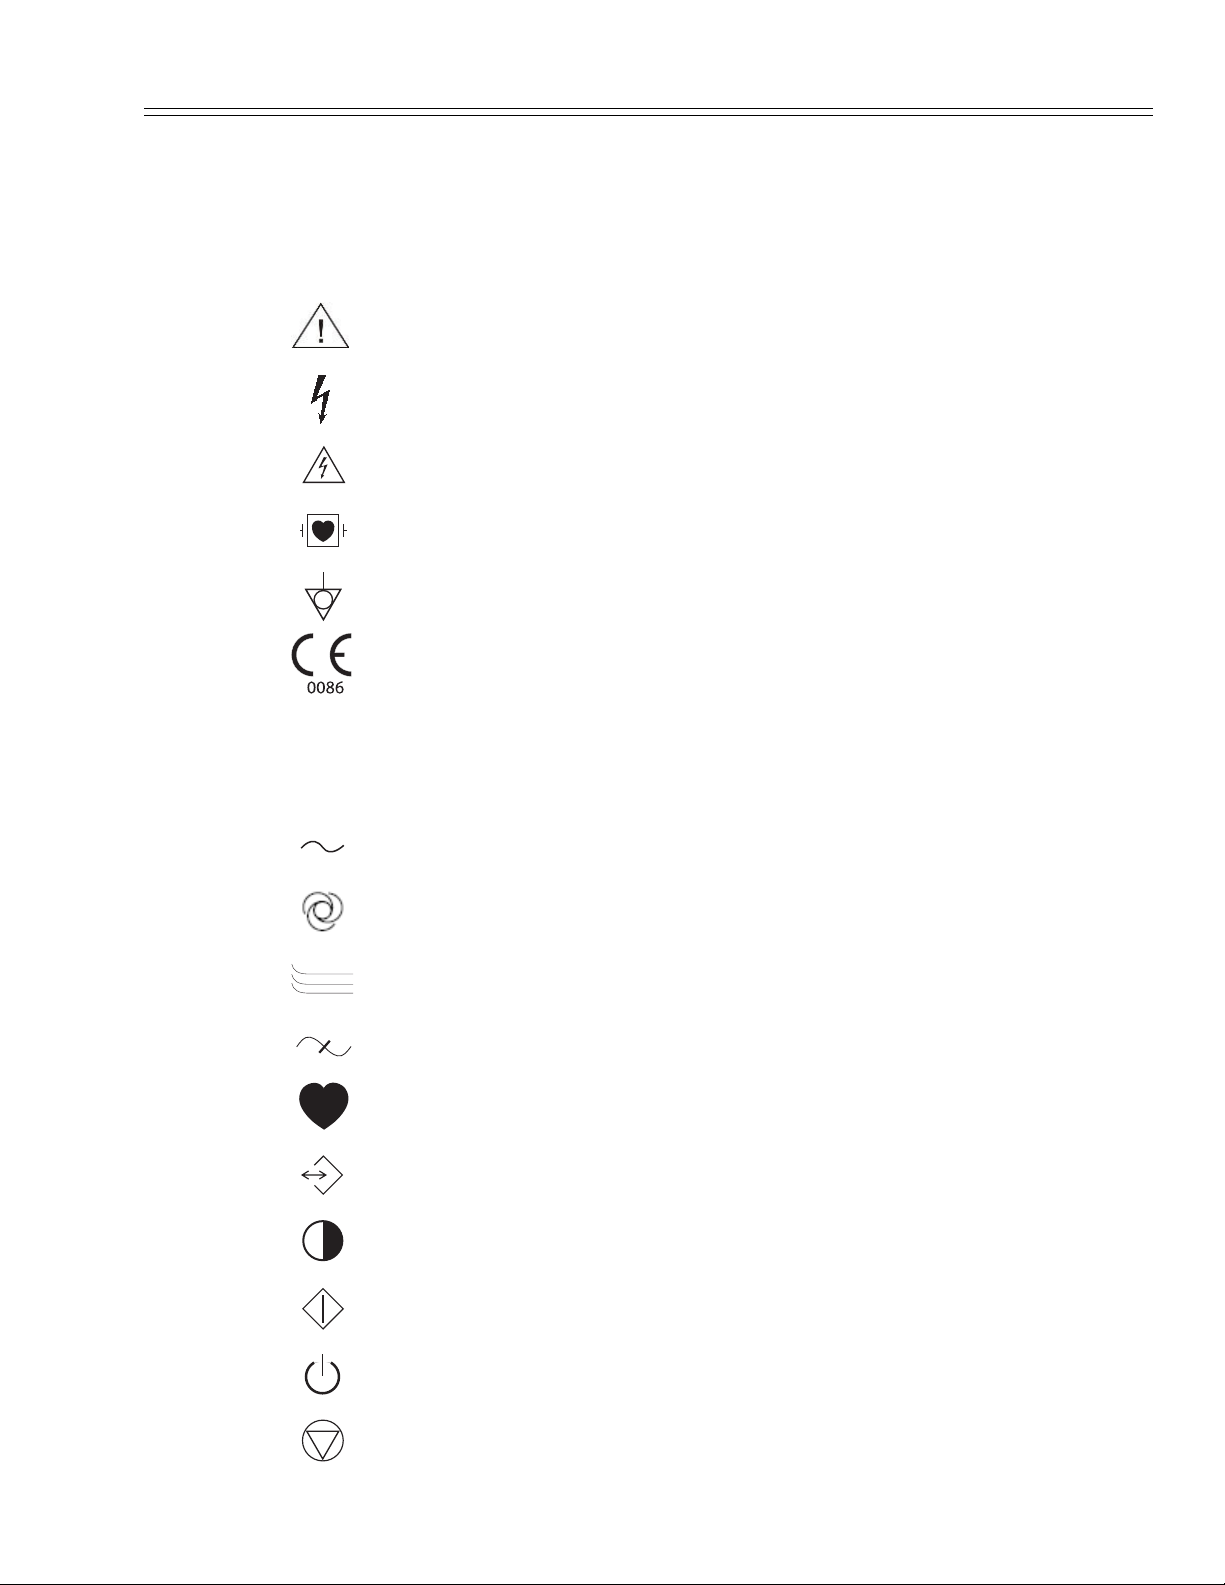
Definitions of Symbols Used
Safety Symbols
Attention. Consult accompanying documents.
Danger! High voltage.
Hazardous voltage.
Defibrillation-Protected Type CF Equipment.
Equipotentiality (used to label the grounding lug).
Meets or exceeds Council Directive 93/42/EEC, MDD, Class IIa.
Labeling Symbols
Alternating Current (AC)
Automatic Operation
Custom Lead Triplet
Frequency Response
Heart Rate
Input/Output Connection
LCD Screen Contrast
Manual Operation
On/Standby
Stop Function
070-1149-01 B Eclipse Operating Instructions
Page 12

Serial port
I0I0
Battery Compartment
Battery Charge Status
Modem
RJ11
Modem
Polarity of DC power connector.
viii Eclipse Operating Instructions 070-1149-01 B
Page 13

Chapter
1 General Information
Congratulations on your purchase of a top quality Eclipse Premier electrocardiograph.
By listening to our customers, we have designed the Eclipse Premier to suit your
specific needs, incorporating features that people like yourself have requested.
Your business is important to us. If you would like more information or if you have any
questions, contact your local representative or Eclipse Technical Support at (800) 4260337 or (425)402-2695.
CAUTION: Federal law restricts this device to sale by or on the
order of a physician.
Inspection Upon Delivery
Your new Eclipse Premier was carefully inspected before shipment. Please inspect your
unit upon delivery for any damage which may have occurred in transit. If you notice
any damage, please contact your shipping agent.
If items are missing, contact your local representative or Eclipse Technical Support at
(800) 426-0337 or (425)402-2695.
NOTE: Your Eclipse Premier electrocardiograph is intended for use
with approved ECG supplies; its reliability and performance are
directly affected by the supplies you use.
070-1149-01 B Eclipse Operating Instructions 1-1
Page 14
Chapter 1 General Information
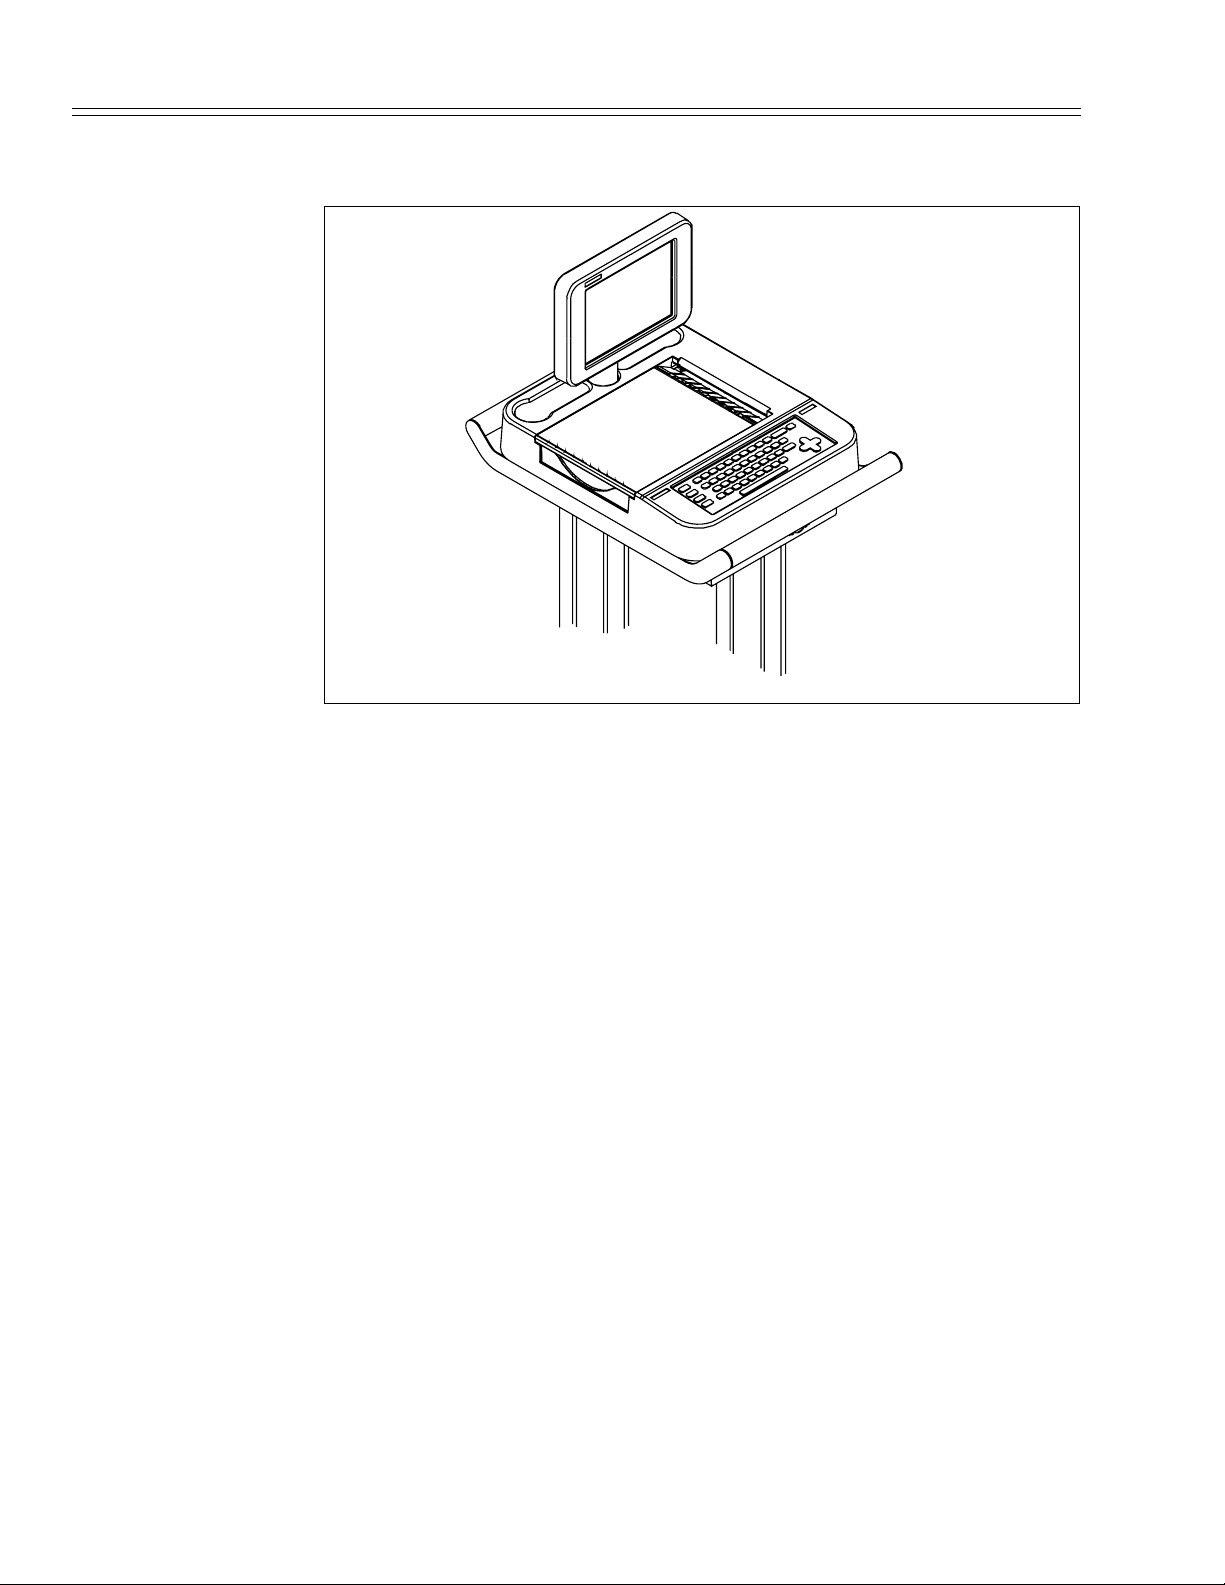
General Description
Figure 1-1
Eclipse Premier
● Portable; may be operated from battery or AC line power.
● Features an active-matrix color LCD.
● Prints using a thermal printer and thermosensitive, Z-fold paper.
● Operates in manual and automatic modes.
● Records in either standard or Cabrera lead formats. Alternative lead selections
include Pediatric (V4R), Alternate Chest Lead, Nehb, and Frank.
● Stores and, with interpretive models, analyzes waveforms acquired in automatic
mode.
● Prints at least 800 pages at 25 mm/s recording speed when the internal battery is
fully charged.
● Continuously recharges the battery whenever the unit is connected to AC line
power.
● Enhanceable. Software enhancements are quickly and easily introduced.
● Allows you to preview waveforms before you print, saving time and supplies.
● Features selectable patient demographic fields that you may use to suit your needs.
1-2 Eclipse Operating Instructions 070-1149-01 B
Page 15

Interpretive Analysis Program
About the program
The Eclipse Premier includes an interpretive analysis program. This analysis program
is widely regarded as one of the most accurate available today. It was developed in the
1980s by Prof. Peter MacFarlane, of the University of Glasgow, who has been involved
in computerized ECG interpretation since its inception in the 1960s. The algorithm has
been continuously enhanced to improve results.
The ECG Interpretation Criteria Physician’s Guide outlines the criteria used by the
analysis program.
Features of the interpretive analysis program
● DEVELOPED IN A HOSPITAL ENVIRONMENT
The interpretive program was developed in the University Department of
Medical Cardiology in the Glasgow Royal Infirmary. Unlike many
products which are developed with the aid of outside consultants, this
program was developed in the environment for which it is intended.
Interpretive Analysis Program
● USES AGE, GENDER AND RACE DATA EXTENSIVELY
More than 500 measurements, plus the patient’s age, gender, race, clinical
classification and medications are factored into each analysis. Several
criteria for abnormalities are age, race and gender dependent. Race, for
example is key in identifying hypertrophy and T-wave abnormalities.
● USES CLINICAL HISTORY
The program is the first to use clinical class as an integral part of analysis
just as a physician would consider clinical class in his or her evaluation.
● PRODUCES CLEAR REASON STATEMENTS
Reasons appending abnormalities are given in conversational language.
For example, wording like, “High voltages in limb leads,” is used rather
than, “R amp > age, sex dependent limit in limb leads.”
● UNDER CONTINUOUS DEVELOPMENT & ENHANCEMENT
The program has been clinically tested against more than 80,000 ECGs and
is continuously under development.
● ACCURATELY DETECTS NORMAL ECGs
Normal ECGs are easily identified and sorted so the physician may quickly
verify results.
● PROVIDES USER-SELECTABLE QTc FORMULAS
Provides four clinically proven methods of calculating QTc, for use in
diagnosis and pharmaceutical studies: Hodges, Bazett, Fridericia, and
Framingham.
070-1149-01 B Eclipse Operating Instructions 1-3
Page 16

Chapter 1 General Information
Safety Features
● PROVIDES INTERPRETATIONS IN TWO FORMATS
Select BRIEF format for short, concise analysis statements with minimal
explanations, presented in mixed case nomenclature (for example,
“Normal ECG”). Select FULL format for lengthier analysis statements—
presented in upper case nomenclature (for example, “NORMAL ECG”)—
and reason statements, which precede the analysis statements.
WARNING: Electrical shock hazard. Do NOT contact unit or
patient during defibrillation. Otherwise, serious injury or death
could result.
WARNING: NEVER position defibrillator paddles very close to or
over ECG sensors. Remove all chest sensors (V-Leads/ C-Leads)
from a patient before defibrillation to allow proper paddle
placement. Severe burns may result from improper placement of
defibrillator paddles. Before using any defibrillator, consult the
operating instructions for that equipment.
Includes a 3-conductor, hospital-grade power cable. Includes an electrically isolated,
DB-15 style patient cable. This conforms to IEC safety, pinout and mechanical
requirements.
This symbol which appears on the rear panel, indicates this equipment meets the
requirements of Council Directive 93/42/EEC, MDD, Class IIa.
This symbol next to the patient cable connector indicates this equipment is classified
as defibrillation-protected, Type CF equipment. The patient cable and input circuits are
designed to prevent damage to the recorder if the unit is connected to a patient during
defibrillation.
Using Multiple Electrical Apparatus
Use caution when monitoring patients who must be protected from very small electrical
currents. Susceptible patients include patients with cardiac catheters or pacemakers.
Consult a qualified technician before using multiple electrical apparatus in this patient
environment.
The Eclipse Premier patient leads are electrically isolated from ground and the device
meets the most stringent IEC and ANSI/AAMI medical standards for leakage currents.
1-4 Eclipse Operating Instructions 070-1149-01 B
Page 17

Using Multiple Electrical Apparatus
However, a potential hazard may occur if the enclosure leakage currents from multiple
pieces of equipment combine and are inadvertently routed directly to a patient’s heart
via a catheter or pacemaker lead. Only equipment which is certified to IEC and
ANSI/AAMI medical standards should be used in this environment. Use of certified
equipment does not, however, completely eliminate this possible hazard.
Another potential hazard may occur if two devices near a patient are powered from
different circuits. If the grounds of the two circuits are at different potentials, which can
occur under certain fault conditions, then a ground loop can exist between the
enclosures of the two devices. If devices must be powered from separate circuits in the
vicinity of a susceptible patient, then the grounding lugs on the devices should be
electrically connected via an equipotential cable. Please also consult Chapter 2,
“Equipment Setup.”
070-1149-01 B Eclipse Operating Instructions 1-5
Page 18

Chapter 1 General Information
1-6 Eclipse Operating Instructions 070-1149-01 B
Page 19
Chapter
2 Equipment Setup
WARNING: Trip hazard. Route all cables away from main work
areas to minimize risk of tripping and injury.
NOTE: For patient safety, all equipment in patient environment
should be EN 60601-1 approved.
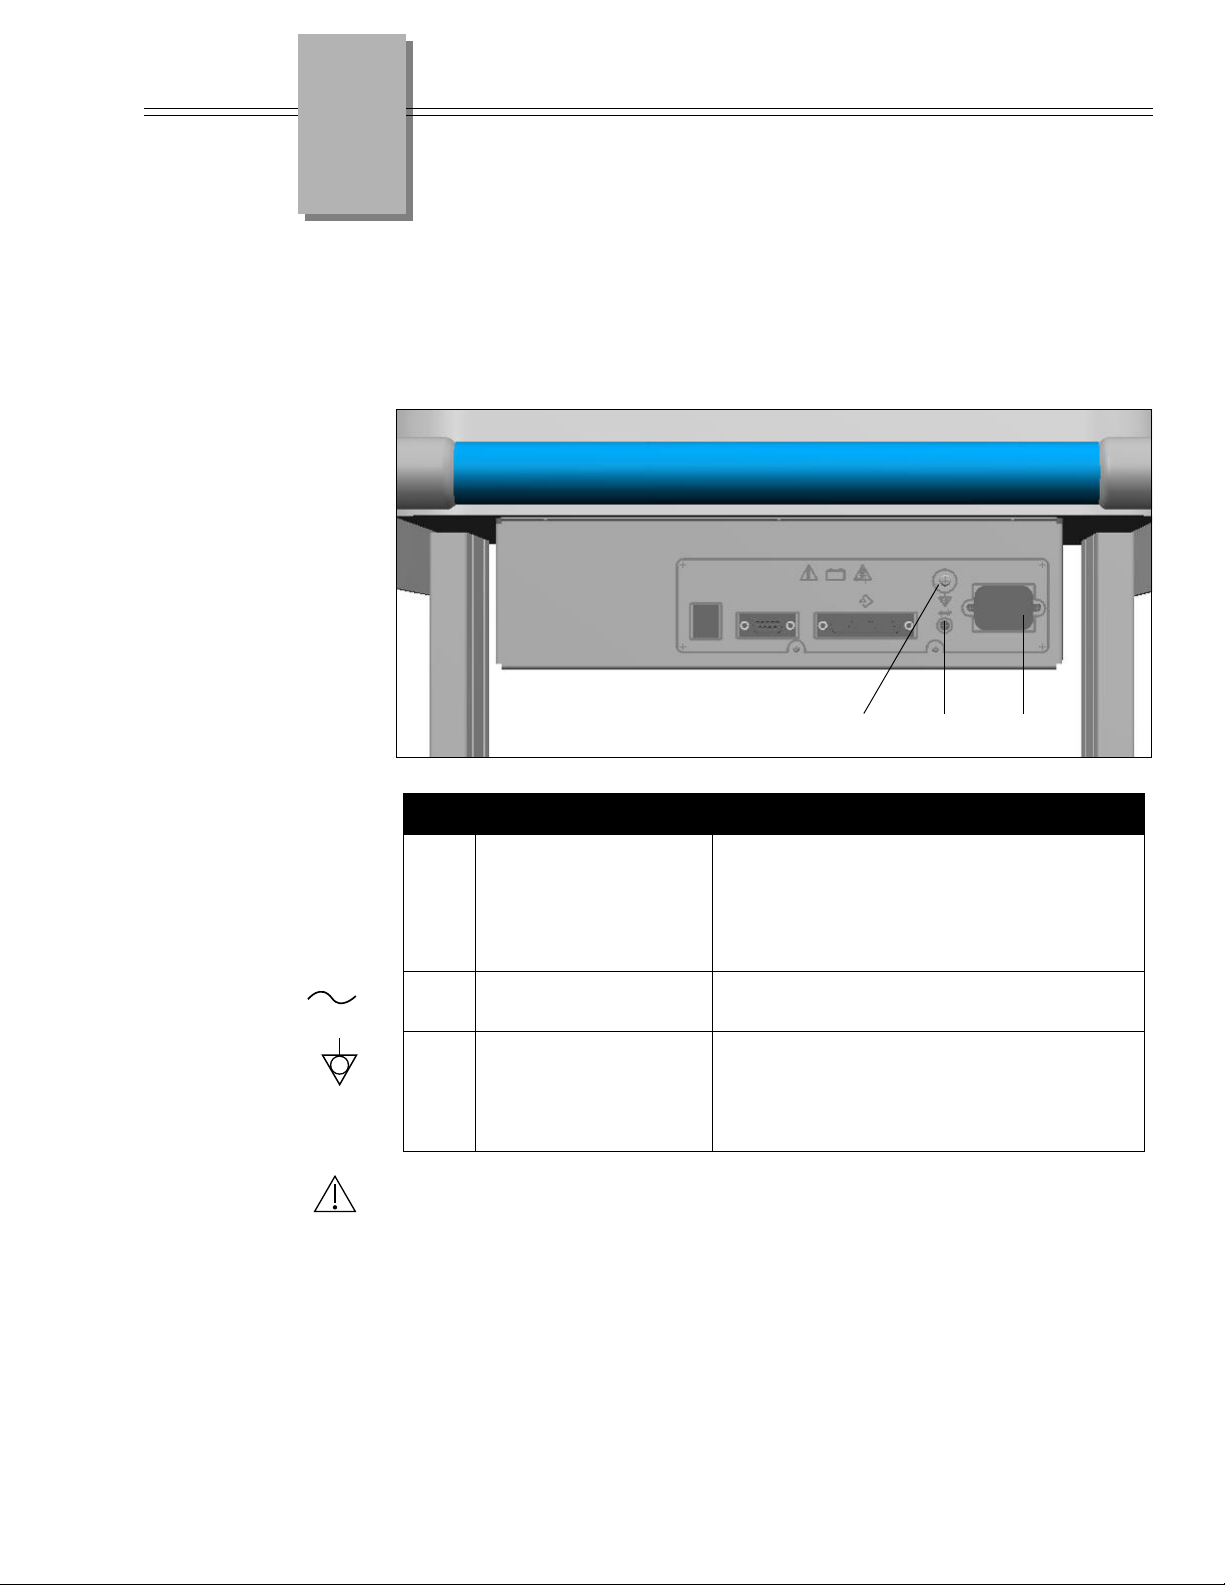
Figure 2-1
Back Panel
BC
Key
A AC power connector
Power indicator
B
C Equipotential
grounding
CAUTION: The unit must be operated only at the line voltage and
frequency specified on the rating plate.
NOTE: The diagram above shows standard connections. Additional
connections may be available if your unit includes communication
options. Refer to “Setting Up the Unit to Send and Receive” on pg. 84 for information and instructions on configuring the unit for
communication options.
Connect the supplied power cord here.
There is no switch to disconnect AC line power.
To do this you must unplug the unit from the AC
outlet. The battery is automatically charged
whenever the unit is connected to AC line power.
When the green light is on the unit is receiving
AC line power.
Connect equipotential ground cable here.
NOTE: Equipotential grounding is only
required if peripheral equipment is attached to
the Eclipse.
A
070-1149-01 B Eclipse Operating Instructions 2-1
Page 20
Chapter 2 Equipment Setup
Patient Cable
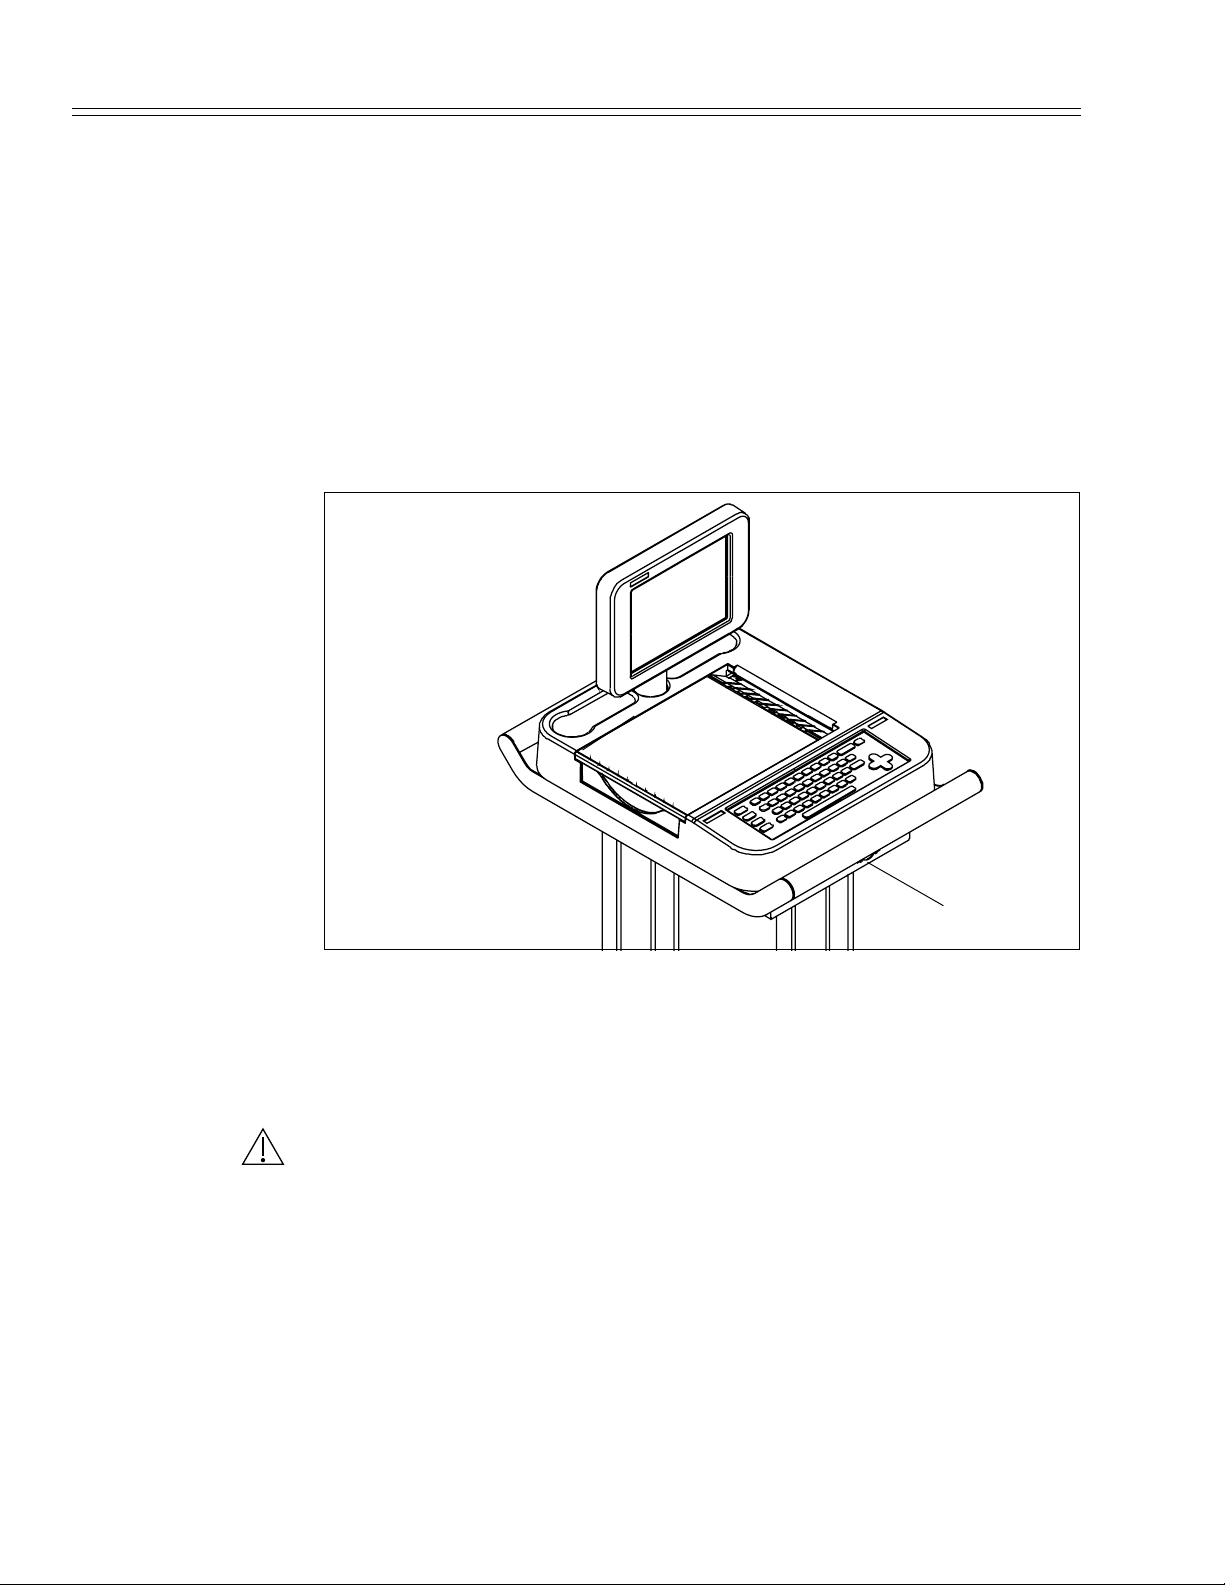
Figure 2-2
Patient Cable Connector
WARNING: Position the Eclipse Premier away from other
equipment. If it is necessary to use the Eclipse Premier adjacent to
or stacked with other equipment, then observe the Eclipse Premier to
verify normal operations.
For patient safety, all equipment in patient environment should be IEC 601-1 approved.
All connected equipment should be IEC 950 approved or equivalent. Consult a
qualified technician to verify equipment compatibility.
Connect the patient cable via the connector on the front of the unit.
Make sure the connector on the cable is arrow-side-up then firmly push the connector
until the arrow point is aligned with the edge of the Eclipse Premier.
Grounding
WARNING: Electrical shock hazard. Operate the unit from its
battery supply if the integrity of the protective earth conductor is in
doubt. Otherwise, serious injury or death could result.
NOTICE: For proper grounding, Cardiac Science Corporation.
recommends the use of medical grade AC outlets.
Maximum patient and operator safety is ensured only when the Eclipse Premier is
properly grounded. To do this, connect the power cable to the AC Power connector (see
Figure 2-1 on pg. 2-1) and connect the other end to a properly grounded, AC line outlet.
Patient Cable
2-2 Eclipse Operating Instructions 070-1149-01 B
Page 21
Loading Recording Paper
NOTE: Damage caused by using unapproved recording
paper may void your warranty.
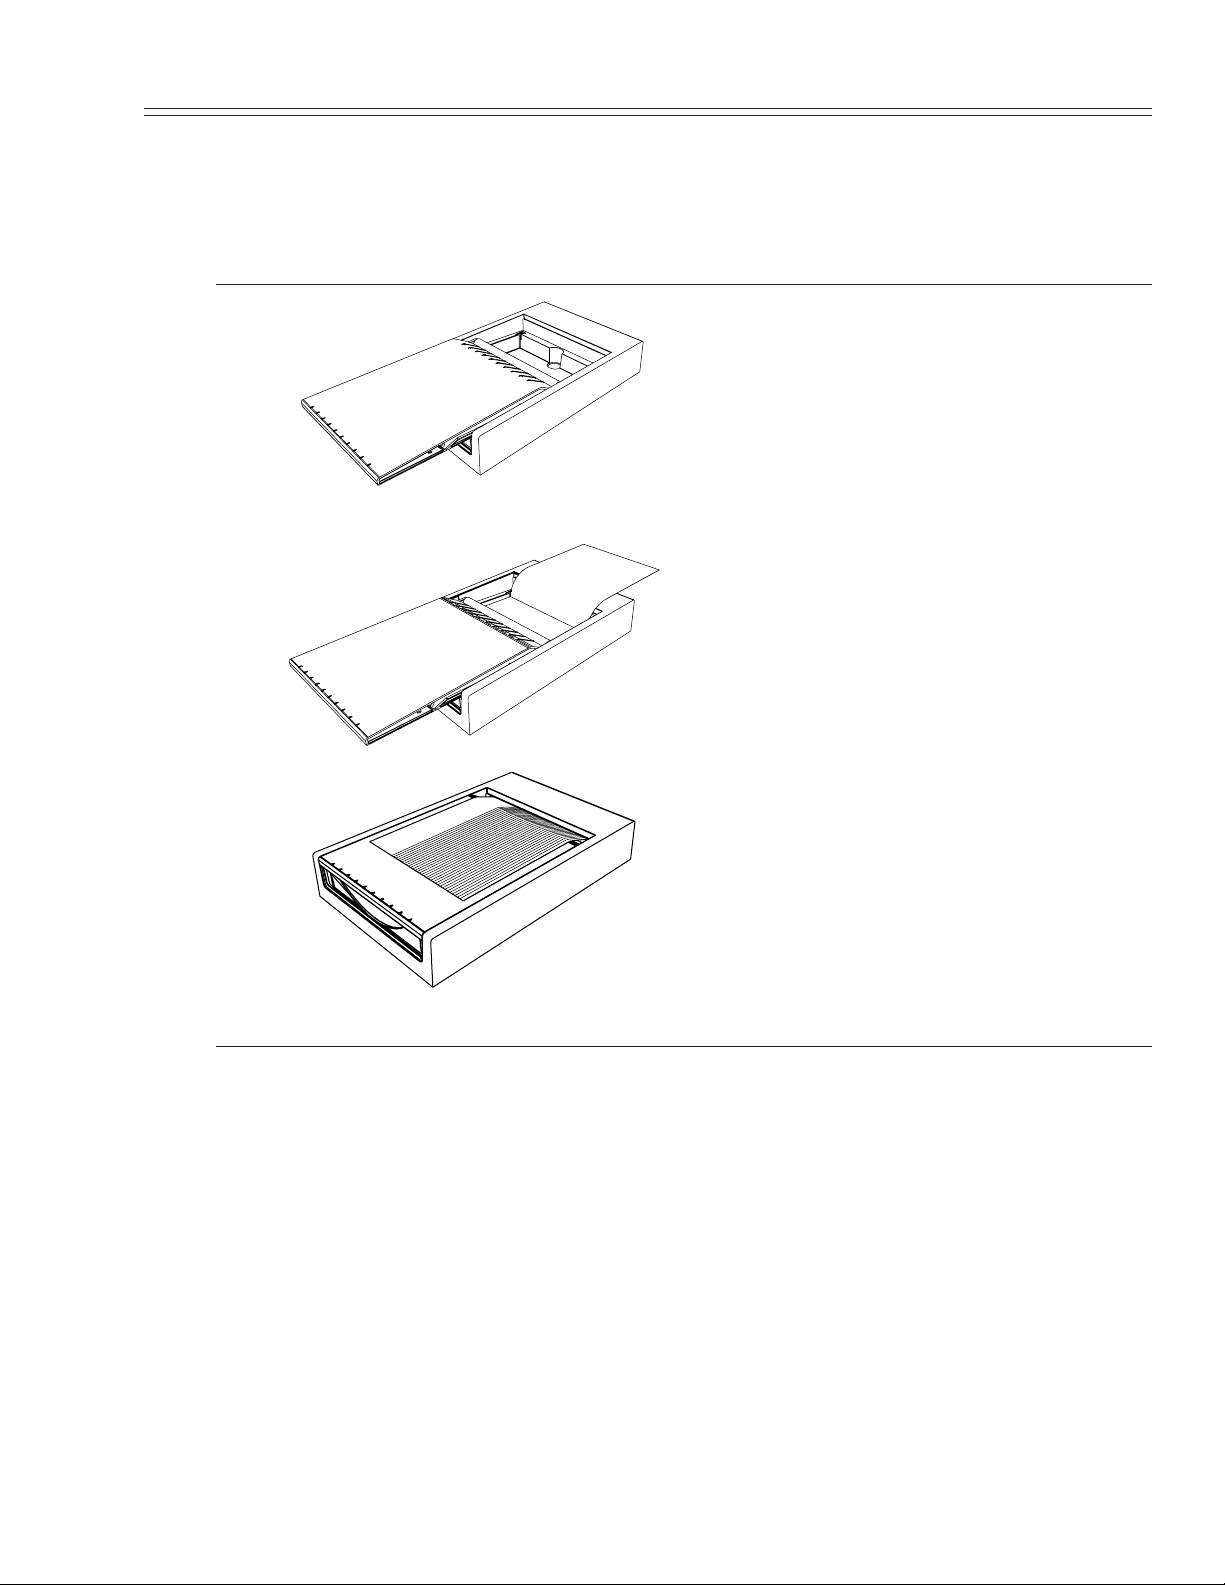
Loading Recording Paper
1. Turn the Eclipse Premier on.
2. Open the paper compartment door by
lifting and sliding it out to the left.
3. Remove any remaining paper from
the paperwell.
4. Lift the top sheet of the new stack of
paper and pull it to the right.
5. Place the paper into the compartment.
6. Slide the compartment cover back into
place until you notice a definite click
as it snaps into the feed rollers.
7. Press the “P” key to advance the paper
to the next sheet.
8. Tear off paper by pulling up and to the
right. Do not pull additional paper out
of the printer.
9. Select the paper type in the System
Setup menu (see “Paper Type” on
pg. 4-4).
Use only approved, thermally responsive ECG paper. The following ECG
papers are recommended:
®
1. Assurance
, permanent trace, Z-fold. Thermal image integrity
guaranteed for 25 years when stored in accordance with
manufacturer’s specifications.
2. Standard trace, Z-fold. Thermal image integrity guaranteed for
5 years when stored in accordance with manufacturer’s
specifications.
The printer is pre-adjusted at the factory. Do not try to make adjustments.
070-1149-01 B
Eclipse Operating Instructions 2-3
Page 22

Chapter 2 Equipment Setup
Turning the Unit On
Press the On/Standby key to turn the Eclipse Premier on. The unit performs self-tests
and displays the current date and time, a message prompting you to check date and time
accuracy, and any error detected during the self-tests.
NOTE: To change the date and time settings, see “Configuring
SYSTEM SETUP Menu” on pg. 4-1.
After completing self-tests, the unit displays the PREVIEW screen.
Standby Mode
NOTE: The Eclipse Premier will automatically power down to
Standby mode after 15 minutes of inactivity.
To power down to Standby mode at any time during operation, press the On/Standby
key (there is no switch to disconnect power).
The unit is not operational in Standby mode; however, the internal battery charges in
Standby mode if connected to AC power.
The Auto Power Down feature may be temporarily turned off by putting the unit in
Battery Calibration Mode.
Power Indicator
This green light on the back of the unit (see Figure 2-1) is on whenever the unit is
receiving AC line power.
Using the Battery
The Eclipse Premier displays battery charge status via the battery status gauge in the
PREVIEW screen (see Figure 3-2 on pg. 3-4) and in Standby mode. When all 8 bars
are lit, the battery is fully charged. When battery power is being used, the message
“BATTERY” is displayed and the minus sign ( - ) is highlighted indicating that charge
is being drained. When the unit is connected to AC line power, the message “AC ON”
is displayed and the plus sign ( + ) is highlighted indicating the battery is charging.
Connect the Eclipse Premier to AC power whenever possible to ensure reliable,
uninterrupted performance. Additionally, you must calibrate the battery prior to initial
use and at regular intervals; refer to “Calibrating the Battery” on pg. 2-5.
Charging the Battery
Connect the unit to AC line power to recharge the battery. The battery fully recharges
in about 4.5 hours. You may operate the Eclipse Premier from AC line power while the
battery is charging. However, this will increase charging time.
2-4 Eclipse Operating Instructions 070-1149-01 B
Page 23

Low Battery Indicators
The following are indicators of low battery, listed in order of occurrence.
1. The Eclipse Premier flashes the message “LOW BATTERY” and
beeps every 30 seconds when fewer than 15 minutes of operating time
remain.
2. The Eclipse Premier displays the message, “POWERING DOWN”
and then shuts off after 5 seconds.
3. The Eclipse Premier beeps 3 times or displays the message, “Battery
Low-Please Charge” when powering up. In this condition, the Eclipse
Premier may not have enough battery charge to power up.
When to Calibrate the Battery
You must calibrate the battery in the following situations:
✔ prior to initial use
✔ when the Eclipse Premier displays the message,
“NOTE: Battery calibration is suggested!” (in Standby mode)
Using the Battery
✔ when the battery drains very quickly but retains a low charge
(single bar as indicated on the battery status gauge) for an
extended period before the “LOW BATTERY” message displays
✔ when the battery will not charge to full capacity, as indicated on
the battery status gauge (in the Preview screen or in Standby
mode)
Calibrating the battery ensures that the battery status gauge is providing accurate
information and the battery is charging to its fullest capacity.
Calibrating the Battery
Battery calibration consists of 2 phases: charging the battery; and completely
discharging a fully charged battery.
Charge the battery:
1. Connect AC power. Power down to Standby mode to fully recharge the
battery (0 to 4.5 hours).
NOTE: You may operate the Eclipse Premier from AC line power
while the battery is charging. However, this will increase charging
time. Additionally, the unit must return to Standby mode to finish
recharging.
2. The unit will power off automatically once the battery is fully charged.
070-1149-01 B Eclipse Operating Instructions 2-5
Page 24

Chapter 2 Equipment Setup
Completely discharge a fully charged battery:
3. Unplug the Eclipse Premier from AC line power.
4. Press ON/STBY to turn the Eclipse Premier on.
5. Press M to go to the Main menu. Press B, then press Enter.
6. Press the left arrow key to return to the PREVIEW screen, and verify
that the battery gauge states “CALIBRATING”.
7. Leave the unit on until it powers off automatically. You may operate
the Eclipse Premier while the battery is discharging.
Battery calibration is complete. Continue with the instructions under “Charging the
Battery” on pg. 2-4.
2-6 Eclipse Operating Instructions 070-1149-01 B
Page 25
Chapter
The Keyboard
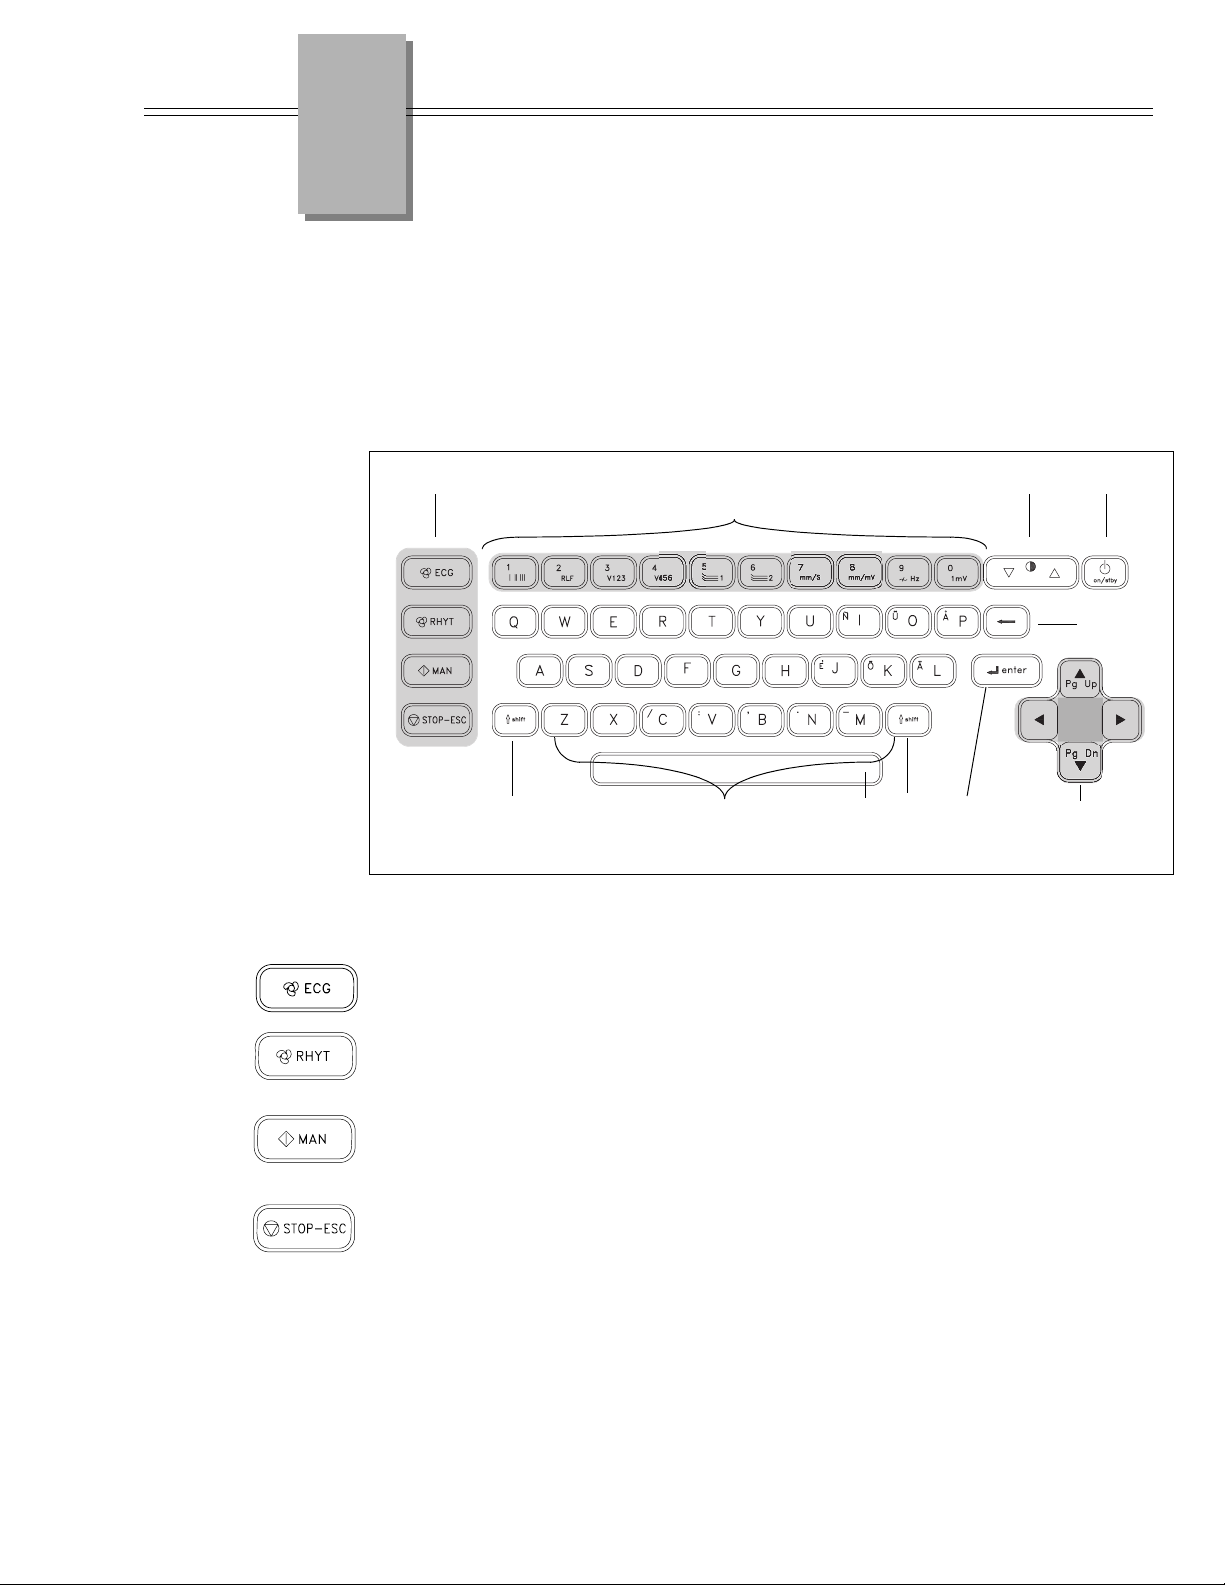
Figure 3-1
The Keyboard and Key Types
3 Keyboard and Displays
Normal operation of the Eclipse Premier occurs through use of the keyboard and LCD
display. Alphabetic and numeric keys are used to enter information and are also used
as hot keys, to make selections in certain screens. Other keys, such as the ECG key and
the arrow keys, provide additional functions, as described in this chapter.
A
B
C
D
E
G
J
(A) FUNCTION KEYS
Use the “ECG” key to acquire and print a 12-lead Auto ECG (a series of reports using
pre-programmed lead sequences and settings.)
Use the “RHYT” key to acquire an Auto Rhythm report (a rhythm strip with a
pre-selected number of pages; uses the leads currently selected in the PREVIEW
screen).
Use the “MAN” key to acquire a Manual Rhythm report (a continuous rhythm strip of
the leads currently selected in the PREVIEW screen). This report will run until the
“STOP” key is pressed.
Use the “STOP” key to terminate any of the above functions and/or return the display
to the PREVIEW screen.
(B) NUMERIC/ MACHINE CONTROL
Use the numeric keys to enter numeric data, when required. These keys may also be
used as hot keys for specific operations (see “Hot Keys” on pg. 3-8).
I
J
H
F
070-1149-01 B Eclipse Operating Instructions 3-1
Page 26
Chapter 3 Keyboard and Displays
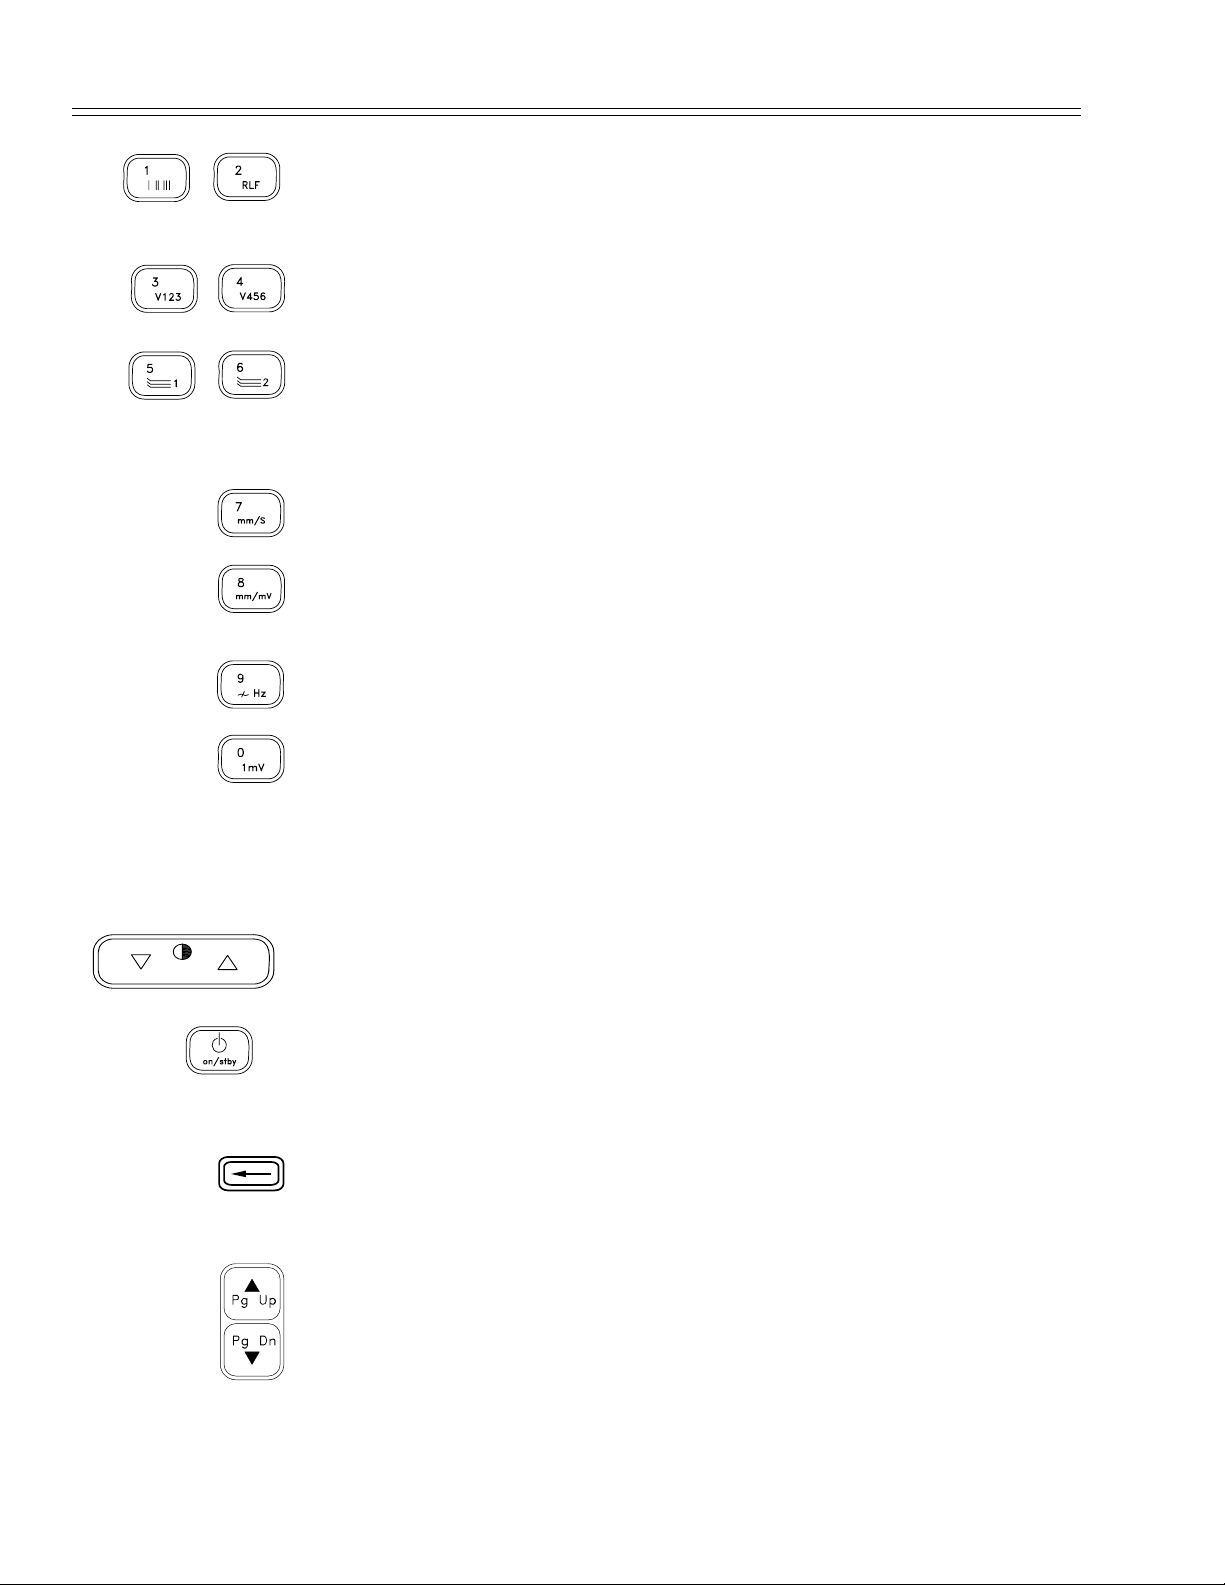
Use the “1” and “2” keys to select pre-programmed lead triplets for the display; the
displayed leads will also be printed on Manual Rhythm and Auto Rhythm reports.
In the PREVIEW screen, use the “1” and “2” keys with the Shift key to select either
User 1 or User 2. See Chapter 4 for user setup information.
Use the “3” and “4” keys to select pre-programmed lead triplets for the display; the
displayed leads will also be printed on Manual Rhythm and Auto Rhythm reports.
Use the “5” and “6” keys to select user-defined leads (Custom Lead 1 and Custom Lead
2) for the display; the displayed leads will also be printed on Manual Rhythm and Auto
Rhythm reports. See “CUSTOM LEAD 1 & CUSTOM LEAD 2” on pg. 4-11 for setup
information.
Use the “7” key to toggle the Paper Speed between 10, 25 and 50 mm/sec.
Use the “8” key to toggle the ECG Gain between 5 mm/mV, 10 mm/mV, 20 mm/mV,
L10,C5 mm/mV and L20, C10 mm/mV.
Use the “9” key to toggle the ECG Filter Frequency between 40 and 150 Hz.
Use the “0” key to produce a 1 mV Calibration Pulse on the display and printouts.
NOTE: When numeric keys are used to change settings, the settings
are in effect for the current ECG only. To change settings for all future
ECGs, modify the settings in the USER SETUP menus or the
SYSTEM SETUP menu.
(C) BRIGHTNESS
Use this key to adjust the brightness of the display.
(D) ON/STANDBY
Use this key to turn the unit on. Pressing the On/Standby key again while the unit is on
will return the unit to standby mode.
(E) BACKSPACE
Use this key to backspace and delete one character behind the cursor, each time the key
is pressed.
(F) ARROW
Use the up and down arrows to move within menus, fields and lists. Hold down the shift
key and press the arrows to page up and down in the directory and in lists.
3-2 Eclipse Operating Instructions 070-1149-01 B
Page 27
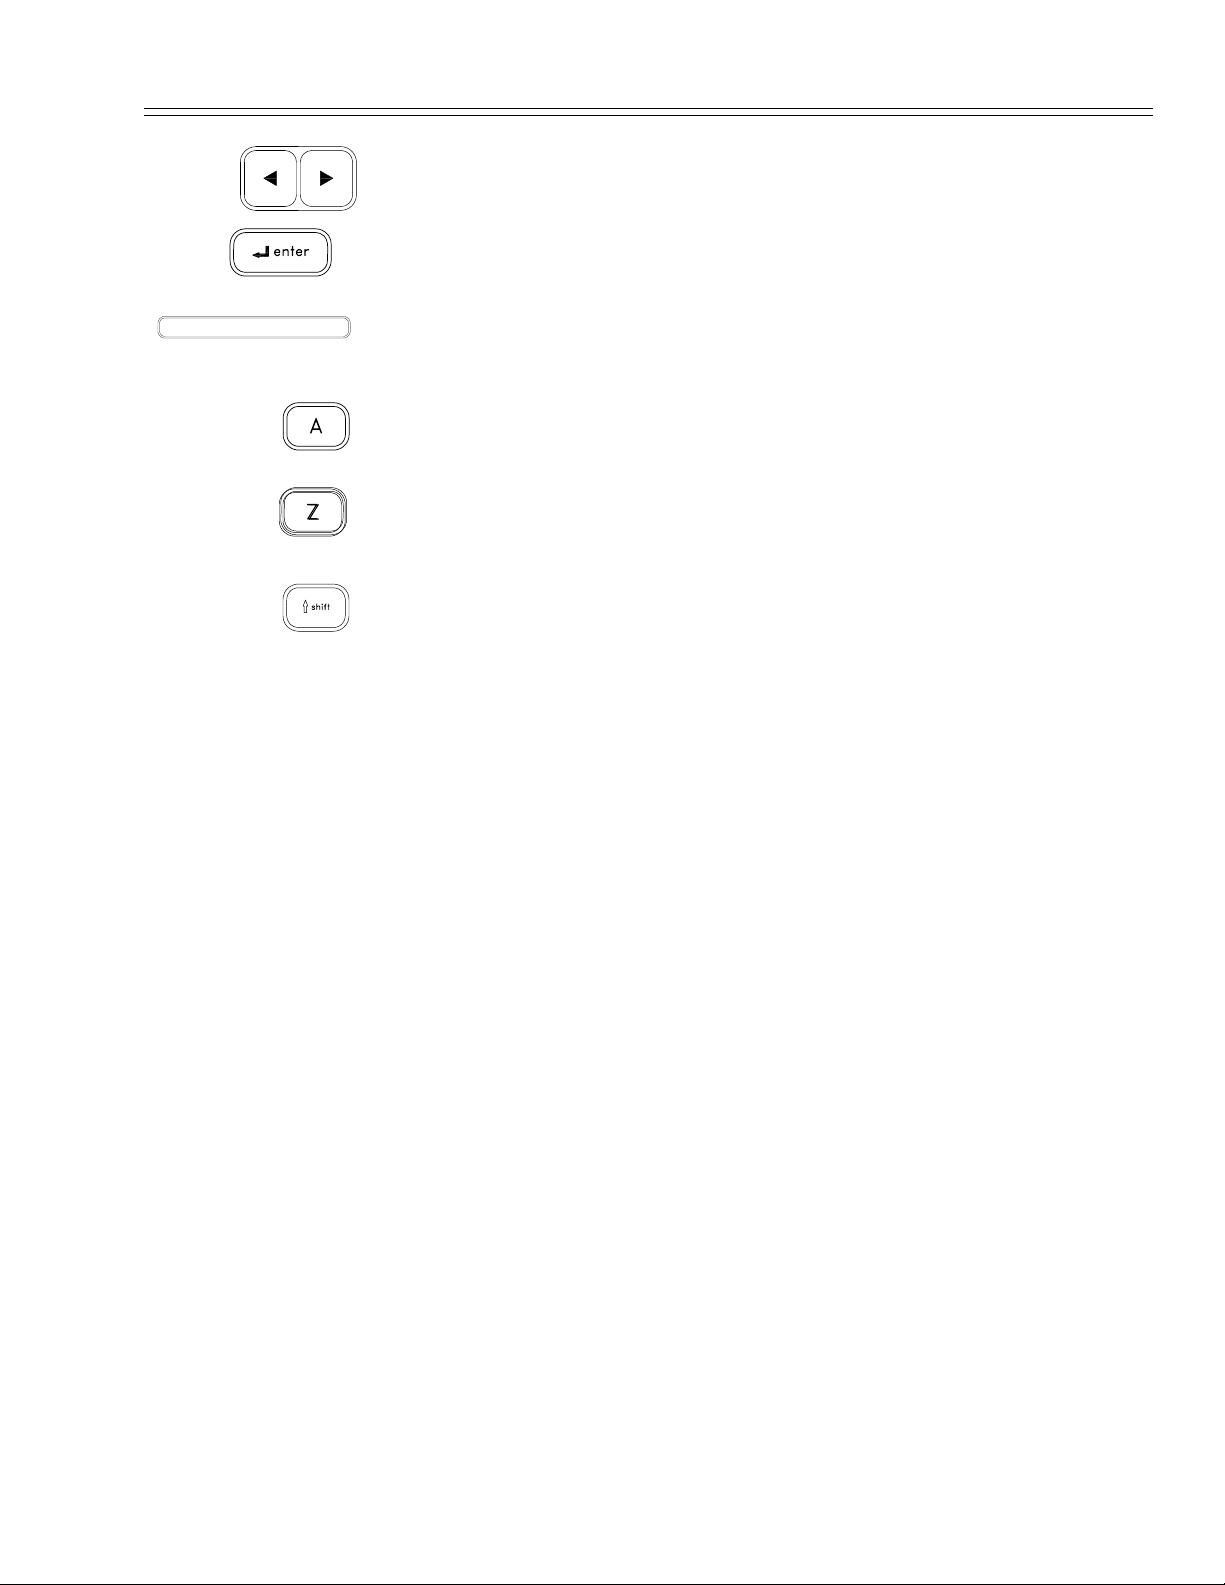
Use the right and left arrows to enter and exit menus and lists.
(G) ENTER
Use the Enter key to accept the current selection.
(H) SPACE
Use this key to insert a space.
(I) ALPHABETIC
The Keyboard
THROUGH
Use the alphabetic keys to enter information, when required. These keys may also be
used as hot keys for specific operations (see “Hot Keys” on pg. 3-8).
To enter punctuation and special characters—such as [
, ], [ . ], [ - ], Ñ, Ü, Ö, Å and
Ä—press the Shift key and the corresponding letter.
(J) SHIFT
Use the Shift key, along with alphabetic keys, to enter punctuation and special
characters. Use the Shift key with the “1” and“2”keys to select either User 1 or User 2.
070-1149-01 B Eclipse Operating Instructions 3-3
Page 28
Chapter 3 Keyboard and Displays
+
65
The PREVIEW Screen
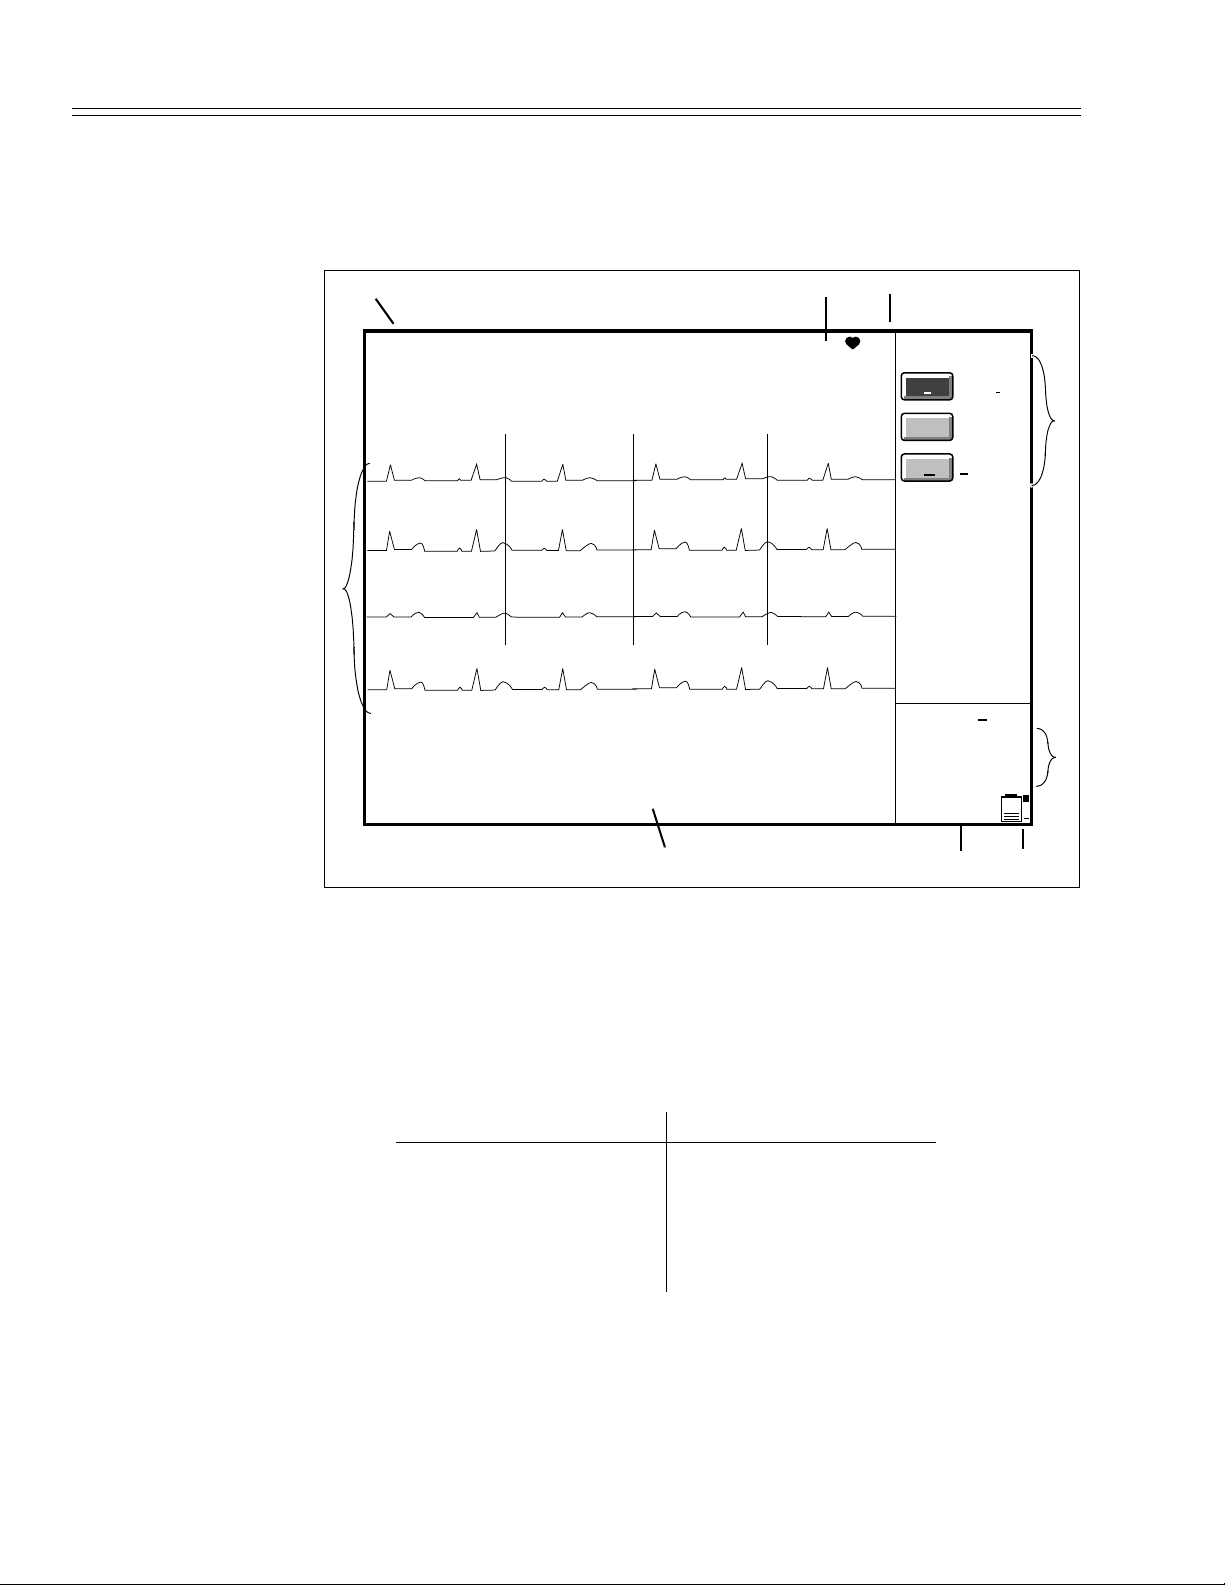
After the Eclipse Premier has been turned on and performs self-tests, the PREVIEW
screen is displayed (see Figure 3-2). General features are described below.
Figure 3-2
The Preview Screen
ABC
ID:0123456789
JONES, THOMAS
I
II
aVR
aVL
V1
V2
V4
V5
L=x2,C=x1
PRESS
I ENTER ID
RECORD
ECG
MAIN MENU
M
Available:60 ECG
D
I
III
II
RA LA LL V1 V2 V3 V4 V5 V6
aVF
V3
SENSORS OK
V6
User: 1
25 mm/s
L20,C10 mm/mV
STABLE 40 Hz
AC ON
E
FGH
(A) PATIENT ID
Identification number of the current patient. On the Eclipse Premier, this field also
displays the patient’s name.
(B) RELATIVE GAIN
Tracks the amplitudes of the displayed waveforms. This corresponds to the Recorder
Gain setting as follows:
Recorder Gain Relative Gain
5 mm/mV x1/2
10 mm/mV x1
20 mm/mV x2
L=10, C=5 mm/mV L=x1, C=x1/2
L=20, C=10 mm/mV L=x2, C=x1
(C) HEART RATE
Displays the patient’s heart rate.
3-4 Eclipse Operating Instructions 070-1149-01 B
Page 29

The PREVIEW Screen
(D) FUNCTIONS LIST
Displays available functions and menus. Displays space available, for example,
“Available: 60 ECG”.
(E) RECORDER SPEED, GAIN AND FREQUENCY RESPONSE
Displays settings for current ECG reports.
(F) BATTERY STATUS GAUGE
Tracks battery charge level.
(G) POWER STATUS
Indicates the power source, AC line power or battery.
(H) SENSOR STATUS
Indicates signal quality.
If all sensors are producing good signals, the display reads:
SENSORS OK
If one or more sensors produce a poor signal, the labels for the affected sensors are
highlighted and the problem is indicated by one of the following messages:
FAIL
DRIFT
NOISE
NOTE: To ensure accurate sensor status indication, the RL electrode
must be connected.
NOTE: Refer to Chapter 10, “Troubleshooting” for information on
correcting signal problems.
(I) ECG WAVEFORMS
NOTICE: Waveforms displayed on the Eclipse Premier screen are not
intended to be used for diagnostic purposes. Use displayed waveforms to
assess signal quality only.
This area of the screen displays waveforms for the selected lead group. Until leads are
properly connected to a patient, only “flatlines” are displayed.
070-1149-01 B Eclipse Operating Instructions 3-5
Page 30
Chapter 3 Keyboard and Displays
A sample menu—the EDIT ID menu
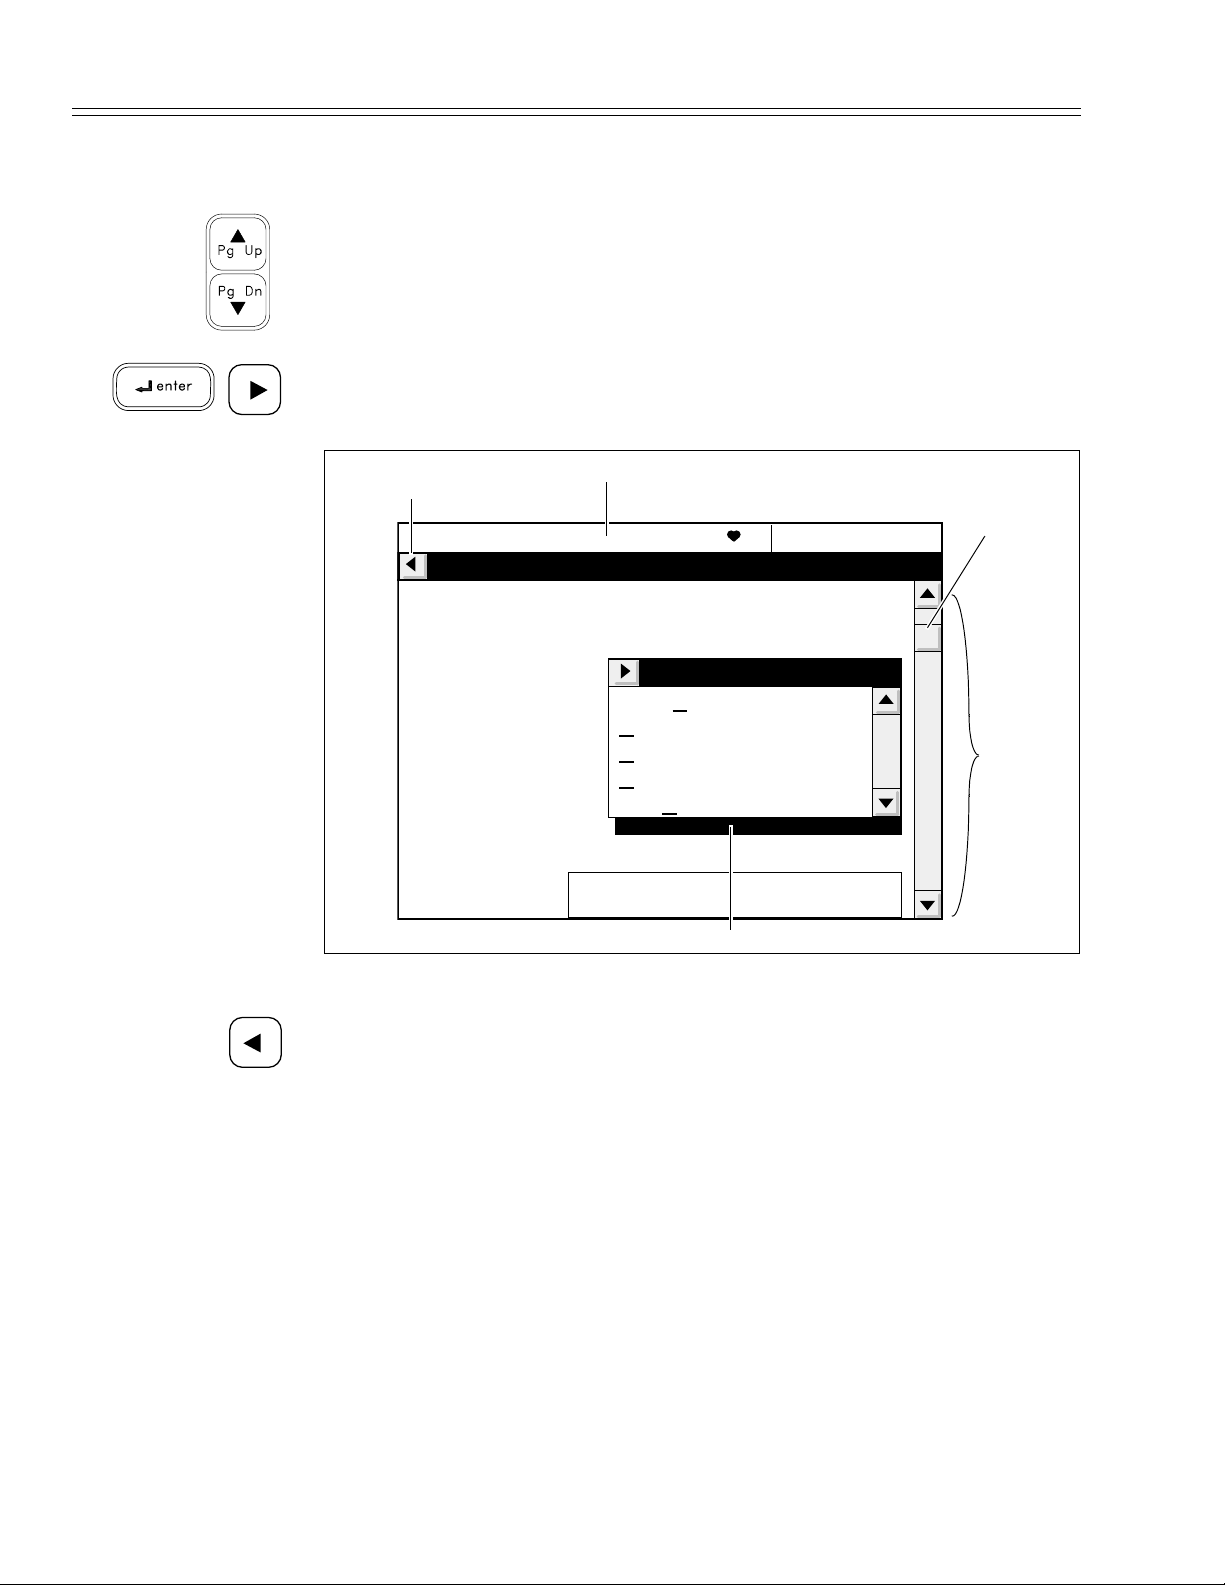
Most of the Eclipse Premier displays consist of menus. For example, the EDIT ID menu
is used to enter patient demographics.
The ENTER ID selection is automatically highlighted when you enter the PREVIEW
screen (see Figure 3-2 on pg. 3-4). You may use the up and down arrow keys to
highlight other choices and move around in the Functions List.
To go to the EDIT ID menu, make sure the ENTER ID selection is highlighted and
either press the Enter key or the right arrow key; pressing the “I” key will also open the
EDIT ID menu. The EDIT ID menu is displayed.
Figure 3-3
A Sample Menu-The
EDIT ID Menu
A
ID:0123456789 PRESS65
(*Items may affect computer analysis)
*V3 Placement : STANDARD
Patient ID :
Last Name :
First Name :
*D.O.B. :
*Age :
*Age Format :
*Sex :
*Medication 1 :
*Class 1 :
Comments :
B
EDIT ID
blank
NO MEDICATION
UNKNOWN
DIGITALIS
DIURETIC
x1
MEDICATION
E
C
D
Once you are in the EDIT ID menu, use the up and down arrow keys to select different
fields. Pressing the right arrow key in certain fields, such as *Age Format, will access
the list of options for that field. Press the left arrow key to exit the list. Press the left
arrow key again to exit the EDIT ID menu.
Following is a description of basic menu features.
(A) RETURN TO PREVIOUS SCREEN
The arrow in the upper left corner reminds you that you may return to the previous
screen by pressing the left arrow key.
(B) PREVIOUS SCREEN
The top of the last screen that was displayed shows above all menus.
(C) SCROLLING BOX
Located in the Scroll bar, this shows you when the menu continues beyond the current
view. The box is at the top when the top field shows. It moves down as you scroll
through the menu until the last field shows.
3-6 Eclipse Operating Instructions 070-1149-01 B
Page 31
(D) SCROLL BAR
Located on the right side of the menu.
(E) ACTIVE FIELD
When a field is highlighted you may edit the contents of that field.
Using Menus
The up and down arrow keys are used to scroll within menus.
Menus are composed of fields. There are three kinds of fields:
1. Alphanumeric
2. Numeric
3. List
ALPHANUMERIC FIELDS
When active, alphanumeric fields may be filled by typing alphabetic or numeric keys.
You may also type spaces, punctuation, and non-English characters. For example, to
type the character “Ñ” in the Last Name field:
Using Menus
1. Scroll to the Last Name field.
2. Hold down the Shift key.
3. Simultaneously press the “I” key.
Press the Enter key after filling fields to accept data and move to the next field.
NUMERIC FIELDS
When active, numeric fields may be filled by typing numeric keys only. The Eclipse
Premier will produce a “beep” sound if you try to type letters or other inappropriate
data into a numeric field.
Press the Enter key after filling fields to accept data and move to the next field.
LIST FIELDS
When active, list fields display a box with a list of choices. These are described in the
next section.
DEFAULTS
Every field has a default setting.
For example, if you skip the *Age Format field it will be filled in with “YEARS.”
Unless you make another choice, the Eclipse Premier always uses defaults. Most often,
fields are left blank.
070-1149-01 B Eclipse Operating Instructions 3-7
Page 32
Chapter 3 Keyboard and Displays
Lists and System Notes
LISTS
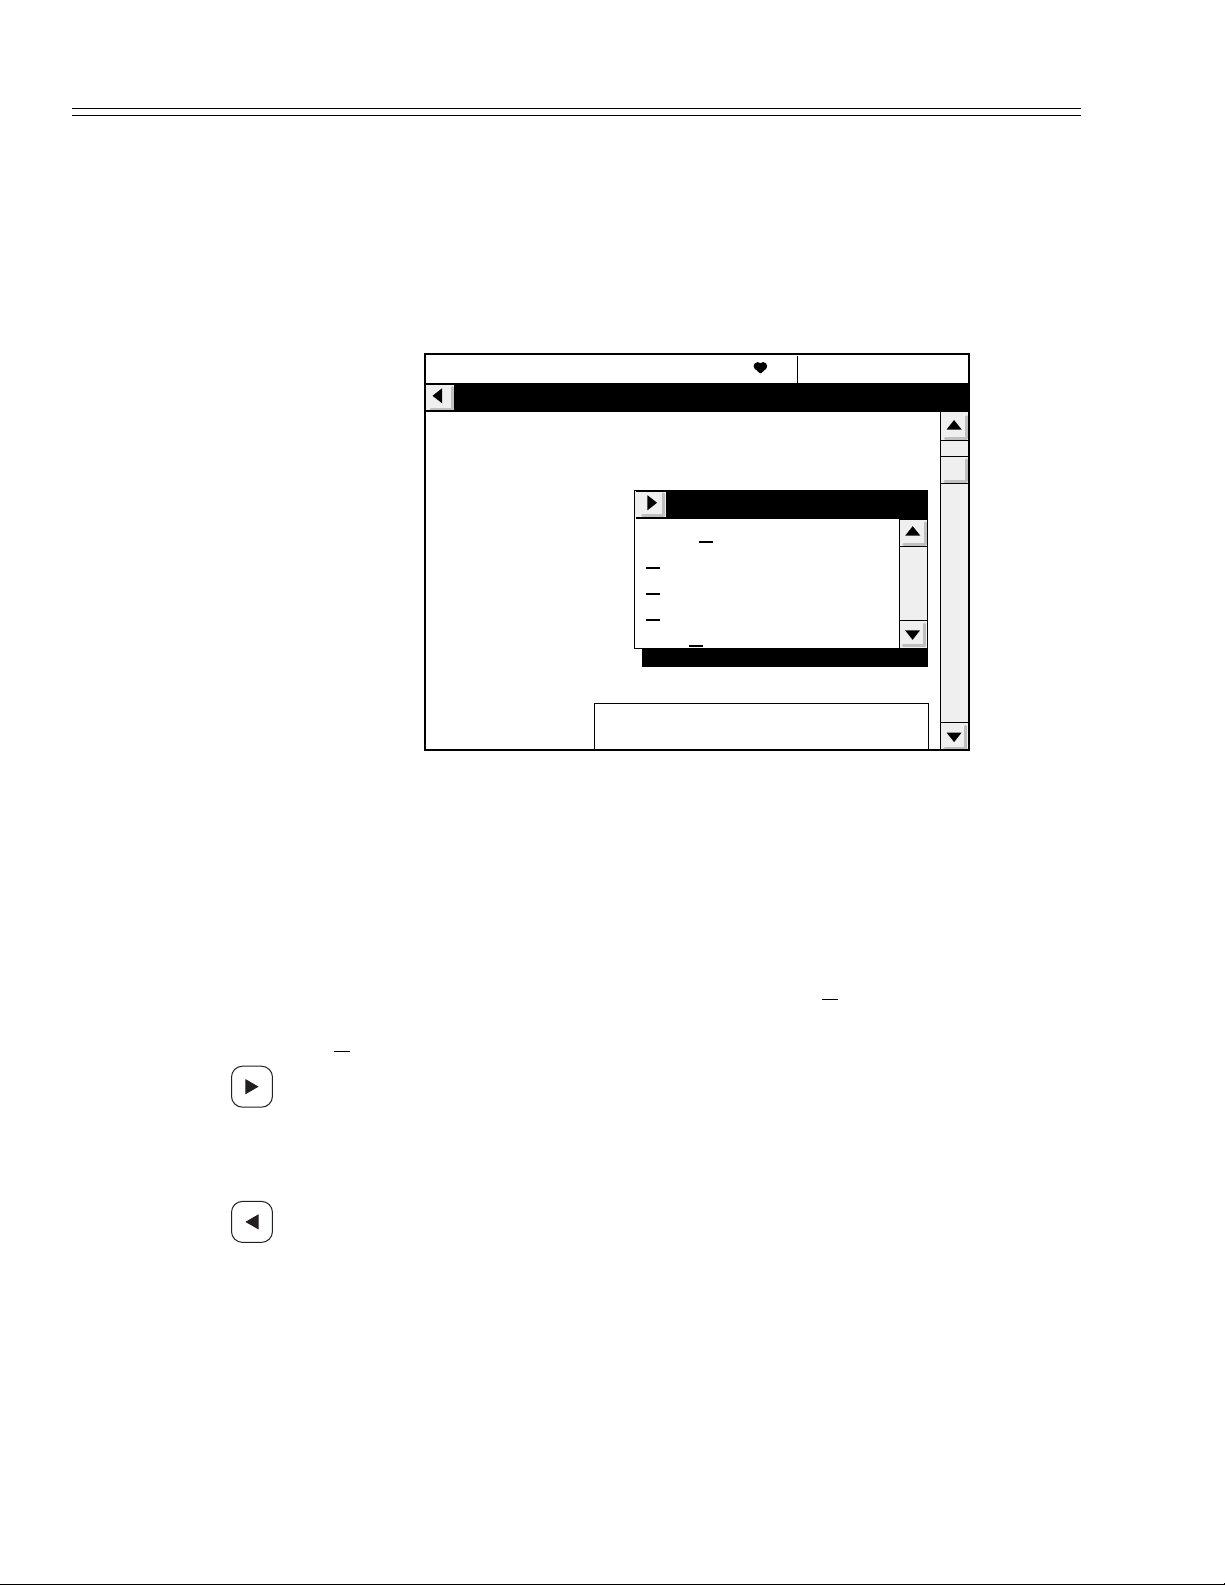
Lists give you all the choices for a particular field. For example, scroll to Medication 1.
A list appears (see Figure 3-4). The field may be filled with any choice from this list.
After you make a selection, the next field becomes active.
Figure 3-4
A Sample List - The
Medication List
HOT KEYS
NOTE: If a custom header has been downloaded to the Eclipse
Premier unit, then hot keys will not appear in certain lists such as the
medication lists.
ID:0123456789 PRESS65
EDIT ID
(*Items may affect computer analysis)
*V3 Placement : STANDARD
Patient ID :
Last Name :
First Name :
*D.O.B. :
*Age :
*Age Format :
*Sex :
*Medication 1 :
*Class 1 :
Comments :
blank
NO MEDICATION
UNKNOWN
DIGITALIS
DIURETIC
x1
MEDICATION
All list items have hot keys to select them.
For example, the letter “D” is underlined in the choice, “D
IGITALIS.” This is a hot
key; it is temporarily specialized to select this choice. Press the “D” key to select
“D
IGITALIS”.
Another way to select items is from within the list. You may gain access to the list by
pressing the right arrow key.
Scroll within the list using the up and down arrow keys. When your choice is
highlighted, choose it by pressing the Enter key.
To exit the list without selecting anything, press the left arrow key.
SYSTEM NOTES
System notes give you additional information as needed. For example, a system note
appears if you enter data that exceeds an allowed range.
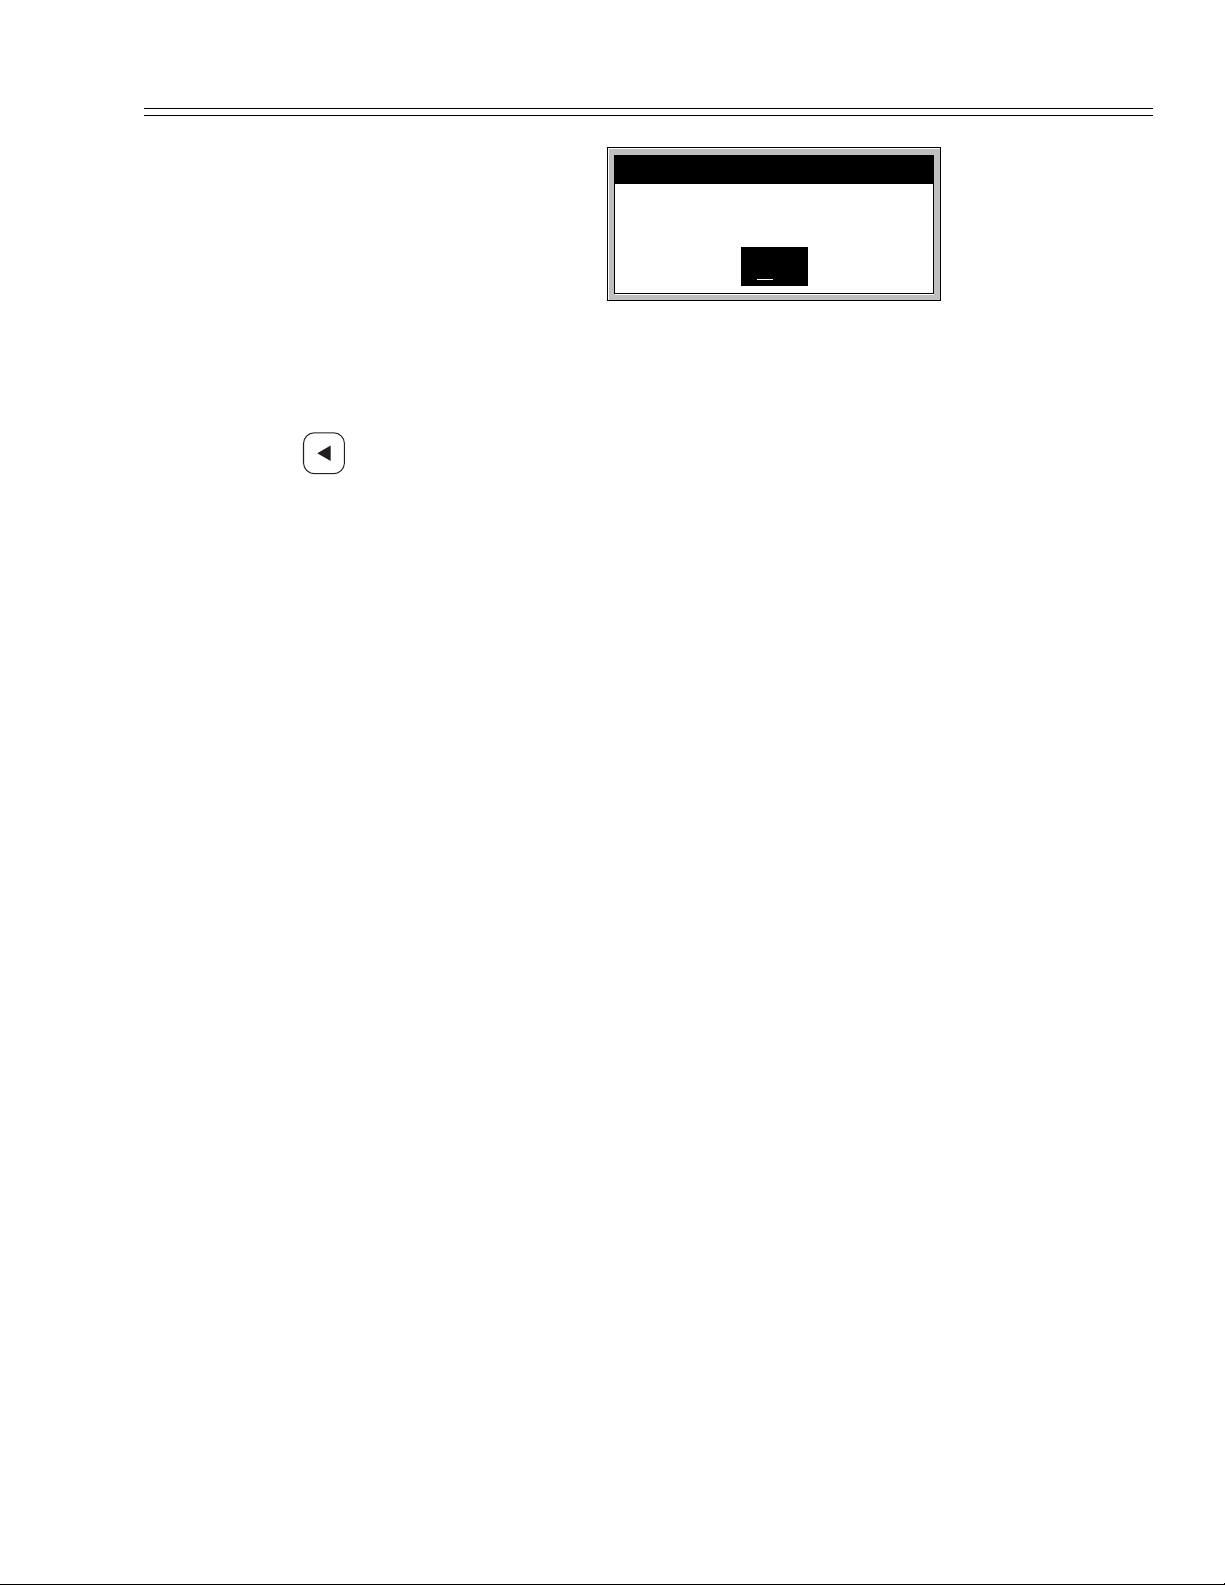
To see a system note, scroll to the *Age field. This is a numeric field that accepts only
data between 0 and 364. Try typing a larger number such as 500. A system note box
appears.
3-8 Eclipse Operating Instructions 070-1149-01 B
Page 33
Lists and System Notes
Not in range: 0 - 364.
OK
Press the Enter key to acknowledge the note and continue.
You have just practiced the basics of using the Eclipse Premier. More information
accompanies sections for specific functions such as acquiring an Auto ECG.
Press the left arrow key to return to the PREVIEW screen and continue working.
070-1149-01 B Eclipse Operating Instructions 3-9
Page 34

Chapter 3 Keyboard and Displays
3-10 Eclipse Operating Instructions 070-1149-01 B
Page 35
Chapter
4 System Setup and User Setup
Configuring SYSTEM SETUP Menu
Within the SYSTEM SETUP menu you can select User 1 or User 2, format Eclipse
Premier general settings, and set the internal calendar & clock. Setting options are
listed in “SYSTEM SETUP Fields” on pg. 4-2.
NOTE: Default settings for Eclipse Premier are given on page 9-2.
Go to SYSTEM SETUP menu
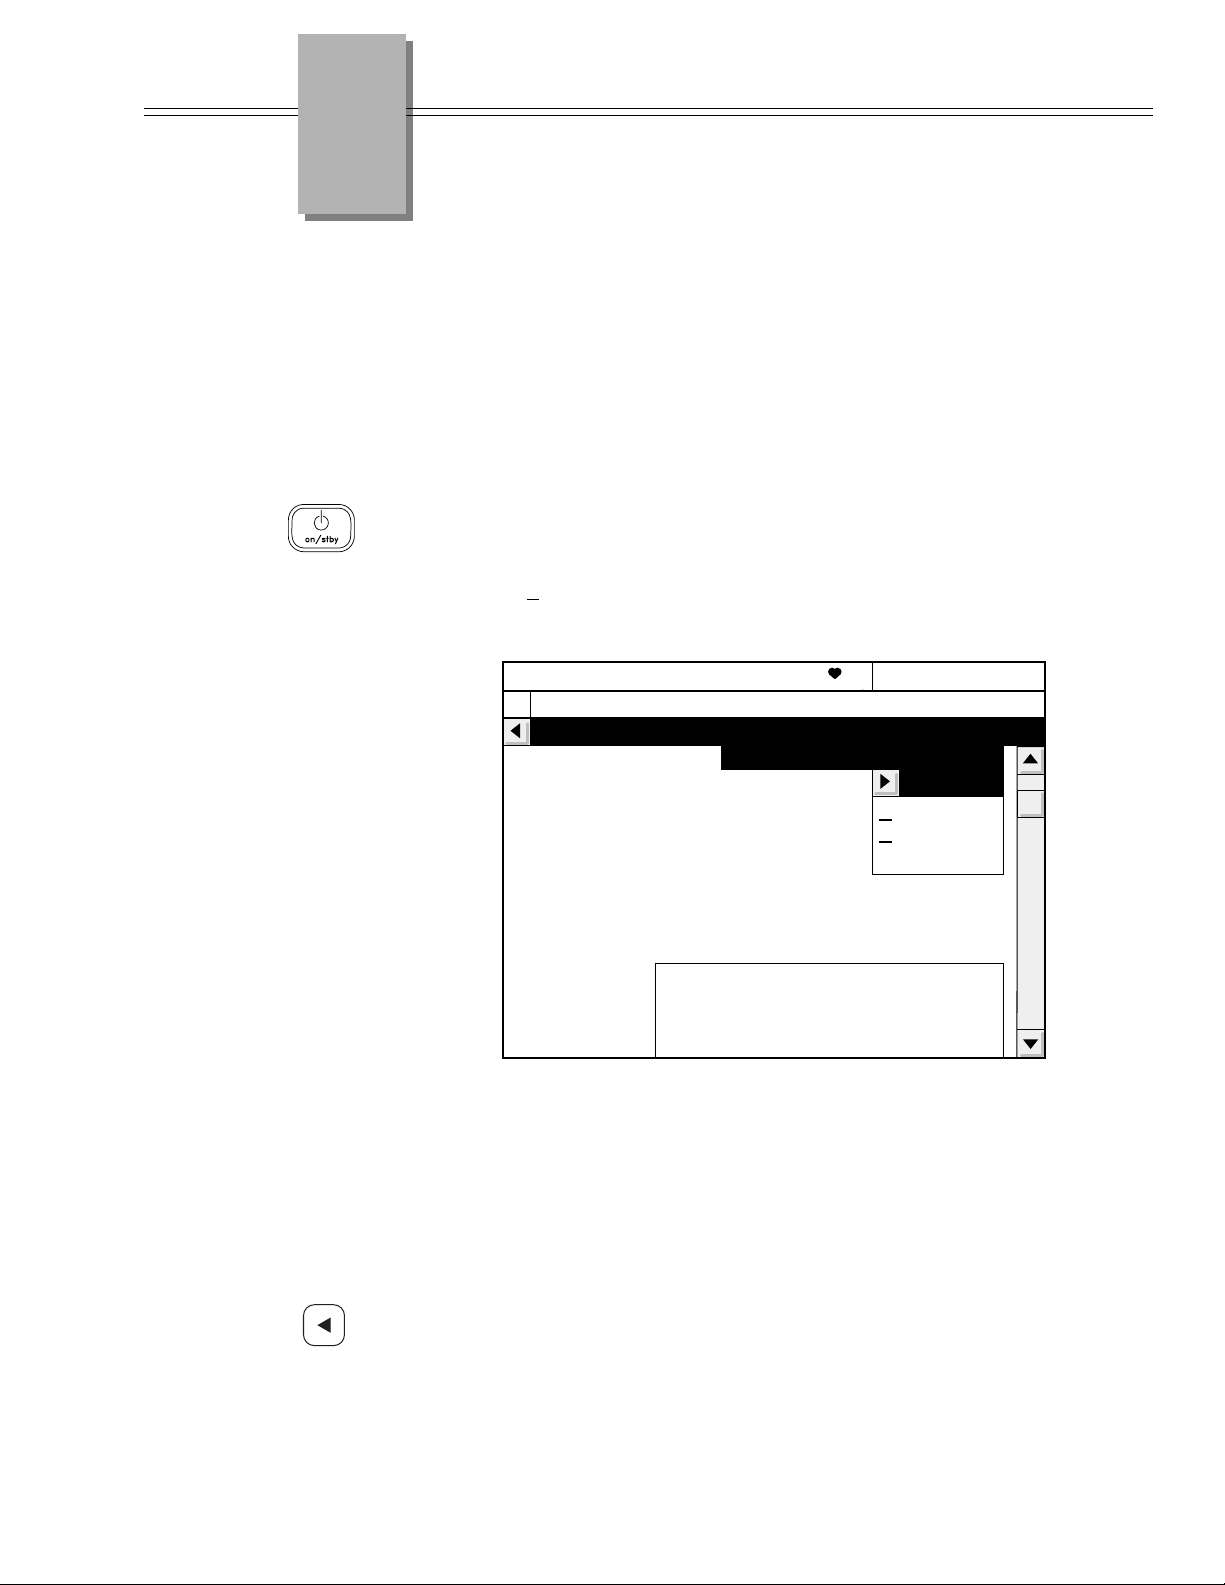
1. Press the On/Standby key to power up to the PREVIEW screen.
2. Press the “M” key to go to the MAIN MENU.
3. Select S
SETUP menu will appear (see Figure 4-1).
YSTEM SETUP by pressing the “S” key. The SYSTEM
Figure 4-1
The SYSTEM SETUP Menu
ID:0123456789 PRESS65
MAIN MENU
SYSTEM SETUP
User 1-2 Select: 1
Line Filter: 60 Hz
Date Format: DD.MM.YY
Date: 12.11.1995
Time: 13:45
Language: ENGLISH
Height Units: IN.
Weight Units: LB.
Inst. Name:
4. Use the up and down arrow keys to scroll through the fields in the
SYSTEM SETUP menu. As you scroll through the fields, the options
available for each field will be displayed when the field is highlighted.
5. Once a field is highlighted, change the current selection by pressing
the hot key associated with the option. For example, to select User 1 in
the User 1-2 Select field, press the “1” key.
6. Use the keyboard to enter information into fields with a blinking
cursor, such as Inst. Name.
x1
USER
1
2
Use the left arrow key to exit the menu.
070-1149-01 B Eclipse Operating Instructions 4-1
Page 36

Chapter 4 System Setup and User Setup
SYSTEM SETUP Fields
Following is a description of the SYSTEM SETUP fields and options. Available
choices are listed to the right of the field name.
Eclipse Premier electrocardiographs can send and receive ECG records. The items
under MANAGEMENT SYSTEM refer primarily to the use of an ECG Management
System, such as the PYRAMIS System or the FAA System. The Phone #, Description,
Connection and Baud Rate fields are also used when sending records between two
Eclipse units. If you are using a management system, be sure to consult your System
Administrator so that you can setup your Eclipse Premier to be compatible with the
management system. For more information on sending and receiving records, see
“Sending and Receiving Records” on pg. 8-1.
Field Name Options, Limitations And Description
User 1-2 Select 1
NOTE: When applicable, the type of information and the number of
characters allowed are listed in brackets to the right of the field name.
2
For each “User,” there is a customized group of formats. For more
information on User 1 and User 2, see “Configuring the USER
SETUP Menus” on pg. 4-6.
NOTE: The unit automatically turns off and on again whenever you
change the User selection. This ensures that all changes take effect.
Line Filter 5
Filters electrical interference from AC line voltage.
Date Format M
Date [Up to 20 alphanumeric characters]
Use spaces, hyphens or periods to separate the day, month and year.
Some acceptable ways to type the date are:
NOTE: Remember that the period character ( . ) is typed by holding
down the Shift key and pressing the “N” key. The hyphen character
( - ) is typed by holding down the Shift key and pressing the “M” key.
Time [Alphanumeric field displayed in 24-hour format]
Enter hour and minutes; use a space to separate the hour from the
minutes. Seconds will fill in automatically when you press Enter.
0 Hz
0 Hz
6
F
OF
M/DD/YY
D.MM.YY
D
Y. M M. D D
Y
1. 10 10 2004
2. 10–10–204
3. 10.10.2004
4-2 Eclipse Operating Instructions 070-1149-01 B
Page 37

Height Units CM.
N.
I
Selects units for expressing patient height.
NOTE: The unit automatically turns off and on again whenever you
change the Units selection. This ensures that all changes take effect.
Configuring SYSTEM SETUP Menu
Weight Units K
G.
B.
L
Selects units for expressing patient weight.
NOTE: The unit automatically turns off and on again whenever you
change the Units selection. This ensures that all changes take effect.
Inst. Name [Up to 30 alphanumeric characters]
Refers to the institution. Information entered here is printed along the
bottom of each printout.
Phone Type T
OUCH TONE
ULSE
P
MANAGEMENT SYSTEM
Institution Number [Up to 5 numeric characters]
Refers to the institution. This is extremely important when two or
more institutions share a PYRAMIS System.
Device Id [Up to 5 numeric characters]
Identifies the Eclipse Premier unit with a unique number. The Device
Id is used by the PYRAMIS system to identify which
electrocardiograph acquired each ECG record.
Phone # [Up to 25 numeric characters. The comma character ( , ) inserts a
pause during dialing]
Provides a phone number to reach the management system or
another Eclipse electrocardiograph with modem. If MODEM is
selected for the Connection field, make sure to include a phone
number to enable the sending and receiving functions on the Eclipse
Premier.
If appropriate, include prefixes for dialing an outside line and/or long
distance numbers.
Include a comma to insert a pause while dialing. A pause may be
used if you need to access an outside line. For example, this is often
used after dialing a “9” prefix before the rest of the phone number.
Description [Up to 20 alphanumeric characters]
Identifies what management system or electrocardiograph is reached
at the phone number in the above field.
070-1149-01 B Eclipse Operating Instructions 4-3
Page 38
Chapter 4 System Setup and User Setup
Connection MODEM
IRECT
D
02.11b/802.3
8
ONE
N
Determines what type of connection is used when sending or
receiving records. Selecting NONE disables any sending or receiving
functions on the Eclipse Premier. This will also allow the Eclipse
Premier to automatically delete records that do not have the St status
(see “Record Status” on pg. 7-2).
Baud Rate 2
Determines the rate at which the modem will send or receive records.
Selecting AUTO allows the modem to send or receive records at the
fastest rate depending on the speed of the modem on the connecting
equipment.
AC Mains
Frequency
Labels ECG records with the frequency of the AC line power which is
connected to the Eclipse Premier unit. This is used by the PYRAMIS
System to identify the line frequency in the area where the records
are acquired.
Paper Type A
Sets print head resistance according to paper type selected.
Analysis
Statements
Selects the format of the ECG analysis statements. Selecting BRIEF
will result in short, concise analysis statements with minimal
explanations, presented in mixed case nomenclature for ease of
reading (for example, “Normal ECG”). Selecting FULL results in
lengthier analysis statements—presented in upper case
nomenclature (for example, “NORMAL ECG”)— and reason
statements, which precede the analysis statements.
400
UTO
A
NSPECIFIED
U
0 Hz
5
0 Hz
6
SSURANCE 50
TANDARD
S
RIEF
B
ULL
F
Barcode Scanner ON
OFF
Enables or disables barcode scanning. When the barcode scanner
has been installed and enabled, patient demographics can be
entered by scanning one or more barcodes.
4-4 Eclipse Operating Instructions 070-1149-01 B
Page 39

Configuring SYSTEM SETUP Menu
Ethernet or 802.11 Wireless Communication
NOTE: The following four fields should be configured as a part of the Eclipse Premier
wireless communication setup for the wireless device that is being installed. The instructions
provided with your wireless device contain additional details and information.
Ethernet/Wireless
Open Timeout (sec)
Ethernet/ Wireless
Retry Timeout (sec)
SCP Max Command
Retries
Ethernet/Wireless
Always Connected
[Up to 2 numeric characters]
Determines the length of the delay, in seconds, from powering on the
wireless/Ethernet device to initiating communications when sending
records to an EMR.
To determine the appropriate setting, refer to the instructions
provided with your wireless device.
[Up to 2 numeric characters]
Determines the length of the delay, in seconds, prior to retrying a
network connection when sending records to an EMR. To determine
the appropriate setting, refer to the instructions provided with your
wireless device. (To mitigate network communication problems, you
may set this to a higher value to ensure adequate time to establish
communications.)
[Up to 2 numeric characters]
Determines the number of times the system will retry when sending
records to an EMR. To determine the appropriate setting, refer to the
instructions provided with your wireless device.
ON
OFF
Set to ON for short startup time. When ON, the wireless/Ethernet
device remains on when the Eclipse Premier is powered on. Set to
OFF to maximize battery life. When OFF, the wireless/Ethernet
device remains off and is powered on only during record transfer.
NOTE: When using a barcode scanner in addition to the
Ethernet/wireless hardware device, note that the device turns off
each time you scan a barcode. For best results, change the
Ethernet/Wireless Always Connected setting to OFF, or be sure to
wait for the device to establish communications after scanning a
barcode and before using the send function.
Password ON
OFF
Determines whether a password is required to access the USER
SETUP menus and the SYSTEM SETUP menu. The password is set
in the MISCELLANEOUS menu (see “Password” on pg. 4-14).
NOTE: If the password is set to OFF in SYSTEM SETUP, the
password field will not appear in the MISCELLANEOUS menu.
070-1149-01 B Eclipse Operating Instructions 4-5
Page 40

Chapter 4 System Setup and User Setup
Directory Password ON
Verify calendar & clock settings
To verify the date and time, press the On/Standby key to put the unit in Standby mode.
Then press the On/Standby key again to turn the unit on.
Check the date and time on the POWER-UP screen.
Configuring the USER SETUP Menus
OFF
Determines whether a password is required to access the directory.
When ON, the user must enter the directory password after every
power up, when accessing the directory. The password is set in the
MISCELLANEOUS menu (see “Directory Password” on pg. 4-14)
NOTE: If the directory password is set to OFF in SYSTEM SETUP,
the directory password field will not appear in the MISCELLANEOUS
menu.
There are 7 USER SETUP menus. Use these to format printouts and reports; customize
lead groups; customize demographic information in the EDIT ID menu and on
printouts; set default values for Recorder Speed, Gain and Frequency Response; get
Custom Header information; and configure miscellaneous settings.
All USER SETUP settings can be customized for both User 1 and User 2 (for more
information, see “User 1-2 Select” on pg. 4-2).
NOTE: Default settings for Eclipse Premier are given on page 9-2.
Go to the USER SETUP menus
1. Press the On/Standby key to power up to the PREVIEW screen.
2. Select the set of formats you want to edit by holding down the Shift
key and simultaneously pressing either the “1” key or “2” key (for
User 1 or User 2, respectively).
NOTE: The unit automatically turns off and on again whenever you
change the User selection.
3. Press the “M” key to go to the MAIN MENU.
4. In the MAIN MENU, select the desired USER SETUP menu by
pressing the appropriate “hot” key; for example, to select POWER-UP
DEFAULTS select the “O” key.
5. The new menu will appear (see Figure 4-2).
4-6 Eclipse Operating Instructions 070-1149-01 B
Page 41

Configuring the USER SETUP Menus
Figure 4-2
A USER SETUP Menu—The
POWER-UP DEFAULTS
Menu
ID:0123456789 PRESS65
MAIN MENU
POWER-UP DEFAULTS
Speed:
Gain: 10 mm/mV
Artifact Filter: 40 Hz
25 mm/s
x1
SPEED
10 mm/s
25 mm/s
50 mm/s
6. Use the up and down arrow keys to scroll through the fields in the
selected menu. As you scroll through the fields, the options available
for each field will be displayed when the field is highlighted.
7. Once a field is highlighted, change the current selection by pressing
the “hot” key associated with the option. For example, to select a speed
of 50 mm/s in the POWER-UP DEFAULTS MENU, press the “5” key.
8. Use the keyboard to enter information into fields with a blinking
cursor.
Use the left arrow key to exit the menu.
USER SETUP Menus, Fields and Options
Following are descriptions of each USER SETUP menu, with information on menu
fields and options. For each field in a menu, the available choices are listed to the right
of the field name. When applicable, the type of information and the number of
characters allowed are listed in brackets to the right of the field name.
070-1149-01 B Eclipse Operating Instructions 4-7
Page 42

Chapter 4 System Setup and User Setup
POWER-UP DEFAULTS
The fields in this menu affect paper speed and waveform printing. The settings in this
menu are in effect whenever the Eclipse Premier is powered on with the On/Standby
key. When changes are made in the POWER-UP DEFAULTS menu, changes go into
effect the next time the Eclipse Premier is powered on.
NOTE: These settings also can be temporarily modified by pressing
the “7,” “8” and “9” machine control keys to change the settings for
Speed, Gain, and Filter, respectively (see “The Keyboard” on pg. 3-1).
Changes remain in effect until the unit powers down.
Speed 1
Refers to chart paper speed.
Gain 5
Determines the amplitude of printed and displayed waveforms.
Artifact Filter 1
Sets the upper frequency response.
Selecting 150 Hz provides the highest fidelity recording and should be used when
little or no noise is present.
The American Heart Association’s 1990 Recommendations (Recommendations for
Standardization and Specifications in Automated Electrocardiography: Bandwidth
and Signal Processing) pertaining to high-frequency response for both adult and
pediatric recordings are met or exceeded when using the 150 Hz setting.
Selecting 40 Hz will reduce the muscle tremor and patient movement artifacts in the
ECG recording. It will result in a smoother looking trace at the expense of losing
some of the fine detail. This filter is applied only to the printed report and displayed
ECG. The data analyzed by the measurement and interpretation software is not
affected when using the 40 Hz setting.
0 mm/s
5 mm/s
2
0 mm/s
5
mm/mV
0 mm/mV
1
0 mm/mV
2
=10 C=5
L
L=20 C
50 Hz
0 Hz
4
=10
4-8 Eclipse Operating Instructions 070-1149-01 B
Page 43
AUTO ECG SETUP
Configuring the USER SETUP Menus
12 Lead Format STANDARD, 4
STANDARD, 3
TANDARD, 3 CH. + 3 (3 channel ECG with 3 rhythm leads)
S
ANDARD, 6 CH 5S/LD (5 seconds per lead, 1 page total)
ST
STAN
ABRERA, 4 CHANNEL
C
BRERA, 3 CHANNEL
CA
RERA, 3 CH. + 3 (3 channel ECG with 3 rhythm leads)
CAB
CABR
CABRE
Sets printout format. For sample printouts, see Chapter 9.
NOTE: If you select a 4-channel or a 3-channel plus 3 rhythm format, select a lead
or leads for the rhythm printout.
Rhythm Leads ch. 1 LEAD I
LEAD II
D III
LEA
aVR
aVL
aVF
V1
V2
V3
V4
V5
V6
-aVR
Selects leads used if an ECG with rhythm lead(s) is selected for 12 Lead Format
above.
CHANNEL (3 channel ECG with 1 rhythm lead)
CHANNEL
DARD, 6 CH 10S/LD (10 seconds per lead, 2 pages total)
ERA, 6 CH 5S/LD (5 seconds per lead, 1 page total)
RA, 6 CH 10S/LD (10 seconds per lead, 2 pages total)
Rhythm Leads ch. 2 Same as Channel 1
Rhythm Leads ch. 3 Same as Channel 1
Rhythm Page CUSTOM LEAD 1 AT 2
CUSTOM LEAD 1 AT 5
F
OF
Enables a separate 10-second rhythm report as part of every Auto ECG report. This
is not available if Custom Lead 1 is set to Frank or Nehb.
Analysis-original ON
OFF
Determines whether analysis statements appear on Auto ECG reports.
Analysis-copies ON
OFF
Determines whether analysis statements appear on copies of Auto ECG reports.
070-1149-01 B Eclipse Operating Instructions 4-9
5 mm/s
0 mm/s
Page 44
Chapter 4 System Setup and User Setup
Number Of Copies [Numeric. Range = 0-5]
Sets the number of complete report copies to print in addition to the automatic
printout.
Median Complex Page ON
OFF
Enables Median Complex printout as part of every Auto ECG report.
Print Mode A
M
O
Determines how ECG reports are printed. If AUTO is selected, then reports
automatically print out prior to saving. If OFF is selected, no report is printed prior to
saving. If MANUAL is selected, then prior to saving the unit will display a message
asking whether to print the record.
Save Mode A
AUTO SAVE AND S
M
Determines how Auto ECG reports are saved. If AUTO is selected, reports will be
automatically saved after printing. If MANUAL save is selected, the PREVIEW
screen is displayed at the end of every Auto ECG sequence. You may save the
report at this time. If AUTO SAVE AND SEND is selected, then the report is
automatically saved; the report is also sent automatically to an ECG Management
System, such as the PYRAMIS System or the FAA System.
Wait for good data ON
OFF
When ON, Auto ECG reports are delayed until ten seconds of low noise waveform
have been collected (all electrodes must be connected). An immediate report can be
forced by pressing ECG a second time. In this case, if data is noisy, the report will
state “Warning: Data quality may affect computer interpretation.”
When OFF, the Auto ECG report starts once at least 10 seconds of ECG waveform
has been collected, regardless of the quality of the collected waveform data. No
warning message is printed in this case.
UTO
ANUAL
FF
UTO
END
ANUAL
NOTE: If any electrodes are disconnected the report will show a flat baseline for
those leads. (“Overload” conditions will also produce a flat baseline.) Leads with
disconnected electrodes will not be used in the ECG analysis.
Annotate R-R Intervals ON
OFF
When ON, R-R intervals are printed at the bottom of the 12-lead report. For
additional information, see “R-R Intervals” on pg. 11-4.
4-10 Eclipse Operating Instructions 070-1149-01 B
Page 45

Configuring the USER SETUP Menus
CUSTOM LEAD 1 & CUSTOM LEAD 2
These two menus each format a group of leads. These groups can later be selected by
pressing the “5” or “6” machine control keys (see “The Keyboard” on pg. 3-1).
Custom Lead Group 1 is also used for the rhythm page of an Auto ECG report. Only
Standard or Cabrera configurations are acceptable for this purpose. Do not select Frank
or Nehb if you want a rhythm page as part of an Auto ECG.
NOTICE: Because the Eclipse Premier offers different lead configurations, always
ensure that the appropriate lead placement is employed for the lead configuration
selected.
Custom Lead 1 STANDARD, 3
STANDARD, 6
STANDARD, 1
TANDARD, 12 CHANNEL (3x4, 1R)
S
ANDARD, 12 CHANNEL (3x4, 3R)
ST
STAND
C
CABR
CABR
CABRE
CABRERA, 12
CABRERA, 12 CHANNEL
A
F
N
Format Custom Lead 1 to suit your needs. The numbers in parentheses indicate how
the selected lead group will be displayed on the screen. If you select a display that
includes rhythm leads, the rhythm leads displayed are the same ones that have
been selected for printing in the Auto ECG Setup menu. (See “AUTO ECG SETUP”
on pg. 4-9.)
If you have selected Alternate Chest Lead or a non-12 lead Standard or Cabrera
format, select leads for the appropriate channels. Lead availability is affected by the
selected lead configuration.
ARD, 12 CHANNEL (6x2)
ABRERA, 3 CHANNEL (3x1)
ERA, 6 CHANNEL (6x1)
ERA, 12 CHANNEL (3x4)
RA, 12 CHANNEL (3x4, 1R)
LTERNATE CHEST LEAD (3X4, 1R)
RANK, 3 CHANNEL (3x1)
EHB, 3 CHANNEL (3x1)
CHANNEL (3x1)
CHANNEL (6x1)
2 CHANNEL (3x4)
CHANNEL (3x4, 3R)
(6x2)
070-1149-01 B Eclipse Operating Instructions 4-11
Page 46

Chapter 4 System Setup and User Setup
Channel 1 through
Channel 6
Channel 7 through
Channel 12
When programming Custom Lead 1, select 1 lead for each channel. The lead
options for each format are listed below.
NOTE: Lead availability is affected by the selected lead configuration.
Standard
LEAD I
LEAD II
D III
LEA
aVR
aVL
aVF
V1
V2
V3
V4
V5
V6
-aVR
When programming Custom Lead 1 or Custom Lead 2 for Alternate Chest Leads,
select one of the following options for each of the channels (Channel 7 through
Channel 12).
V1
V2
V3
V4
V5
V6
V7
V8
V9
V2R
V3R
V4R
V5R
V6R
V7R
V8R
V9R
Cabrera Frank
LEAD I
LEAD II
D III
LEA
aVR
aVL
aVF
V1
V2
V3
V4
V5
V6
aVR
X
Y
Z
Nehb
D
A
J
Custom Lead 2 Custom Lead Group 2 is similar to Custom Lead Group 1. It is set up in the same
manner. It is then accessed by pressing the number “6” on the keyboard.
4-12 Eclipse Operating Instructions 070-1149-01 B
Page 47

MISCELLANEOUS SETTINGS
Configuring the USER SETUP Menus
Baseline Filter 0
Pacer Enhancement ON
Rhythm Mode Pages [Numeric. Range = 1-10]
.05 Hz
TABLE
S
Sets the low frequency response.
Selecting 0.05 Hz provides the greatest low-frequency response with no delay and
should be used when no baseline drift is present.
Selecting STABLE (Baseline Stabilization Filter) will effectively suppress most
baseline wander interference while providing an accurate ECG reproduction (no
distortion of the ST segment.) Use of the Baseline Stabilization Filter will result in an
approximately 1.5 second delay in the displayed ECG. This filter is applied to the
printed report, displayed ECG, and the data analyzed.
NOTE: The American Heart Association’s 1990 Recommendations
(Recommendations for Standardization and Specifications in Automated
Electrocardiography: Bandwidth and Signal Processing) pertaining to low-frequency
response in electrocardiography are met or exceeded by both the 0.05 Hz and
STABLE selections.
F
OF
Enables pacemaker enhancement. This feature makes pacemaker signals show up
as prominent spikes on the display and on printouts. An enhanced pacer is printed
as a spike that is at least 10 mm tall and of positive polarity.
Sets the number of pages printed during an Auto Rhythm.
Bradycardia Limit [Numeric. Range = 41-69]
Reports for adult patients with heart rates below this limit are labeled
“BRADYCARDIA.” For more information on heart rate limits refer to the Physician’s
Guide.
Tachycardia Limit [Numeric. Range = 81-129]
Reports for adult patients with heart rates above this limit are labeled
“TACHYCARDIA.” For more information on heart rate limits refer to the Physician’s
Guide.
QTc Formula HODGES
BAZETT
FRIDERICIA
FRAMINGHAM
Selects QTc formula. Eclipse Premier prints the QTc formula selection on the bottom
of each ECG printout (for example, QTc = Hodges).
For additional information on the QTc formulas, see “QT Interval” on page 4-3 of the
Physician’s Guide.
NOTE: Hodges is the factory default setting.
070-1149-01 B Eclipse Operating Instructions 4-13
Page 48

Chapter 4 System Setup and User Setup
Password [Up to 15 alphanumeric characters]
NOTE: The password field will not appear in the MISCELLANEOUS menu if the
password is set to OFF in SYSTEM SETUP.
NOTE: Write down the password and keep it in a secure place. You will be able to
change or remove the password protection only after you have entered the correct
password.
Determines the password required to access the USER SETUP menus and the
SYSTEM SETUP menu. This field is enabled in the SYSTEM SETUP menu [see
“Password” on pg. 4-5].
Directory Password [Up to 15 alphanumeric characters]
NOTE: The directory password field will not appear in the MISCELLANEOUS
menu if the directory password is set to OFF in SYSTEM SETUP.
NOTE: Write down the password and keep it in a secure place. You will be able to
change or remove the password protection only after you have entered the correct
password.
Determines the password required to access the directory. This field is enabled in
the SYSTEM SETUP menu (see “Directory Password” on pg. 4-6). Once you have
set the password, enable and set the administrator password to prevent users from
viewing the directory password; for more information, see “Password” on pg. 4-5.
ENABLING PATIENT DEMOGRAPHIC FIELDS
NOTE: This menu will not be available if the Eclipse Premier is
configured to use Custom Header in conjunction with an ECG
Management System, such as the PYRAMIS System or the FAA
System.
This final USER SETUP menu determines which patient demographic fields appear in
the EDIT ID menu. An asterisk ( * ) indicates that information in these fields directly
affects ECG waveform analysis.
To ensure that a field does NOT appear in the EDIT ID menu, the field setting should
be “OFF”. Otherwise, select “ON,” “ON, CLEAR” or “ON, HOLD” to make each
demographic field appear in the EDIT ID menu; these fields also appear on printouts.
● Select “ON, HOLD” if you want every patient file to have the same
information in this field. Until the information is typed over, the EDIT ID
menu will keep the information in these fields even if the Eclipse Premier
is turned off. For example, you may want every patient record to be labeled
with the same Department name.
● “ON” and “ON, CLEAR” act the same. Fields with this setting are cleared
for every new patient or when the unit returns to Standby mode.
4-14 Eclipse Operating Instructions 070-1149-01 B
Page 49
*V3 Placement ON, CLEAR
OLD
ON, H
F
OF
Used for pediatric recording of V4R only.
Configuring the USER SETUP Menus
Last Name ON
OF
First Name ON
OF
*D.O.B. ON
OFF
*Age ON
OF
*Age Format ON
OF
*Sex ON
OF
*Race ON
OFF
*Medication 1 ON
OF
*Medication 2 ON
OF
F
F
F
F
F
F
F
OF
F
* Class 1 ON
* Class 2 ON
OFF
Height ON
OFF
Weight ON
OFF
Systolic BP ON
OFF
Diastolic BP ON
OFF
ON, H
F
OF
LEAR
OLD
Department ON, C
070-1149-01 B Eclipse Operating Instructions 4-15
Page 50
Chapter 4 System Setup and User Setup
Room ON, C
Technician ON, C
Physician ON, C
User Field ON, C
User Field Label [Up to 15 alphanumeric characters]
Renames the above field. The new name is displayed in the
EDIT ID menu and printed on patient demographics reports.
The User Field may be used for anything. For example, you
may want to use the field for the referring physician’s name.
Comments ON
ON, H
F
OF
ON, H
F
OF
ON, H
F
OF
ON, H
F
OF
F
OF
LEAR
OLD
LEAR
OLD
LEAR
OLD
LEAR
OLD
GETTING CUSTOM HEADER INFORMATION
The Get Custom Header function is available for Eclipse Premier electrocardiographs
that are used with an ECG Management System, such as the PYRAMIS System or the
FAA System.
Custom Header information is a list of patient demographic items to be used in the
EDIT ID menu and to be printed on ECG reports. This list is maintained on the ECG
data management system. By connecting to the management system, the Eclipse
Premier can be programmed to use the Custom Header.
You can connect to the PYRAMIS ECG Data Management System in three ways: using
a Direct Connection, using a wireless connection with the Cardiac Science Corporation
802.11b transmitter, or using a Remote Connection (this requires an Eclipse Premier
with either an internal or external modem).
NOTE: If you are using a direct connection, begin by connecting the
Interconnect Cable to the connector labeled “DECG-SCP” on the
PYRAMIS back panel. Connect the other end of the cable to the
connector labeled “IOIO” on the Eclipse Premier back panel.
NOTE: The following procedure only affects the User currently
selected (either User 1 or User 2; see “User 1-2 Select” on pg. 4-2).
The procedure must be repeated to get or update the custom header for
the other User.
4-16 Eclipse Operating Instructions 070-1149-01 B
Page 51
Acquire Printout of Eclipse Premier Program Settings
1. Press the On/Standby key to power up to the PREVIEW screen.
2. Press the “M” key to go to the MAIN MENU.
3. Select S
SETUP menu will appear (see Figure 4-1 on pg. 4-1).
4. Press the down arrow key to highlight the Connection field and select
the appropriate choice: either MODEM, DIRECT or 802.11b.
5. If you are using a remote connection (through a modem), verify that
the Phone # and Description fields are correctly filled in.
6. Press the left arrow key to return to the MAIN MENU.
7. Press the “H” key to go to the GET CUSTOM HEADER menu.
8. Receive a list of available Custom Headers by selecting GET
CUSTOM HEADER LIST.
9. Highlight the desired Custom Header and press the Enter key to select
it. The word “SELECT” is displayed.
NOTE: Pressing Enter will also deselect a selection.
10. Press the left arrow key to return to the GET CUSTOM HEADER
menu.
YSTEM SETUP by pressing the “S” key. The SYSTEM
11. Press the “G” key to receive the Custom Header and automatically
configure the Eclipse Premier to use those patient demographic fields.
Acquire Printout of Eclipse Premier Program Settings
Program settings include all settings configured in the SYSTEM SETUP menu and in
the USER SETUP menus.
NOTE: Please see “Print Setup Report” on pg. 9-2 for examples
which were printed using settings configured at the factory (factory
defaults).
1. Press the On/Standby key to power up to the PREVIEW screen.
2. Press the “M” key to go to the MAIN MENU.
3. Press the “P” key to print the list.
Press the left arrow key to return to the PREVIEW screen.
070-1149-01 B Eclipse Operating Instructions 4-17
Page 52

Chapter 4 System Setup and User Setup
4-18 Eclipse Operating Instructions 070-1149-01 B
Page 53
Chapter
5 Patient Preparation
Choosing the environment
WARNING: Explosion hazard. Do NOT use in the presence of
flammable anesthetics.
WARNING: Position the Eclipse Premier away from other
equipment. If it is necessary to use the Eclipse Premier adjacent to
or stacked with other equipment, then observe the Eclipse Premier to
verify normal operations.
CAUTION: Although the Eclipse Premier is designed to meet IEC
601-1-2 EMC immunity requirements, the presence of strong EMI
fields generated by electronic, surgical or diathermy instruments
close to the unit, may cause trace noise or input overload conditions.
The Eclipse Premier is a high fidelity instrument which responds to the minute voltages
of the heart. Since it is such a sensitive instrument, take care to avoid interference
which can be produced by muscle tremor and AC signals. To minimize interference,
locate the electrocardiograph and patient away from power cords and other electrical
devices.
Preparing Patients for Resting ECGs
To minimize muscle artifact, make sure your patient is comfortable and relaxed. Assure
the patient that there is no danger or pain involved, and that his or her cooperation will
assist in producing a valuable diagnostic record.
Make the patient comfortable on a cot or padded table which is large enough to support
arms and legs. The patient’s arms should rest at his or her sides and the legs should lie
flat, not touching one another. Use a pillow to support the patient’s head. Also, try to
avoid factors like cold drafts which could cause discomfort. Leaving the chest and
sensor sites exposed, cover your patient with a blanket to prevent shivering.
Apply sensors and connect lead wires before entering patient information into the
Eclipse Premier. This allows time for the sensors to adhere and improves conductivity.
070-1149-01 B Eclipse Operating Instructions 5-1
Page 54

Chapter 5 Patient Preparation
Preparing the Skin
Refer to the “Resting ECG Lead Placement & Coding Chart” on pg. 5-3 for details on
where sensor sites are located.
NOTE: For information on alternate chest lead and other lead
placements, see “Alternative Lead Placements” on pg. 5-7.
If the patient has oily or sweaty skin, or has recently applied lotion to their skin, clean
the sensor sites with warm, soapy water. Allow the sensor sites to dry completely before
applying sensors.
When applying sensors to sites with a lot of hair, the following techniques may improve
contact:
1. Use the thumb and forefinger to spread the hair before applying the
sensor to the skin.
2. If the sensor does not adhere well, it may be necessary to shave the site.
NOTE: In some cases skin irritation can occur from site preparation
and sensor electrolyte solutions.
Applying Sensors
Apply sensors according to the instructions on the following pages. For information on
using disposable sensors, see “Disposable Resting ECG Sensors” on pg. 5-4. For
information on using reusable sensors, see “Reusable ECG Sensors” on pg. 5-5.
5-2 Eclipse Operating Instructions 070-1149-01 B
Page 55
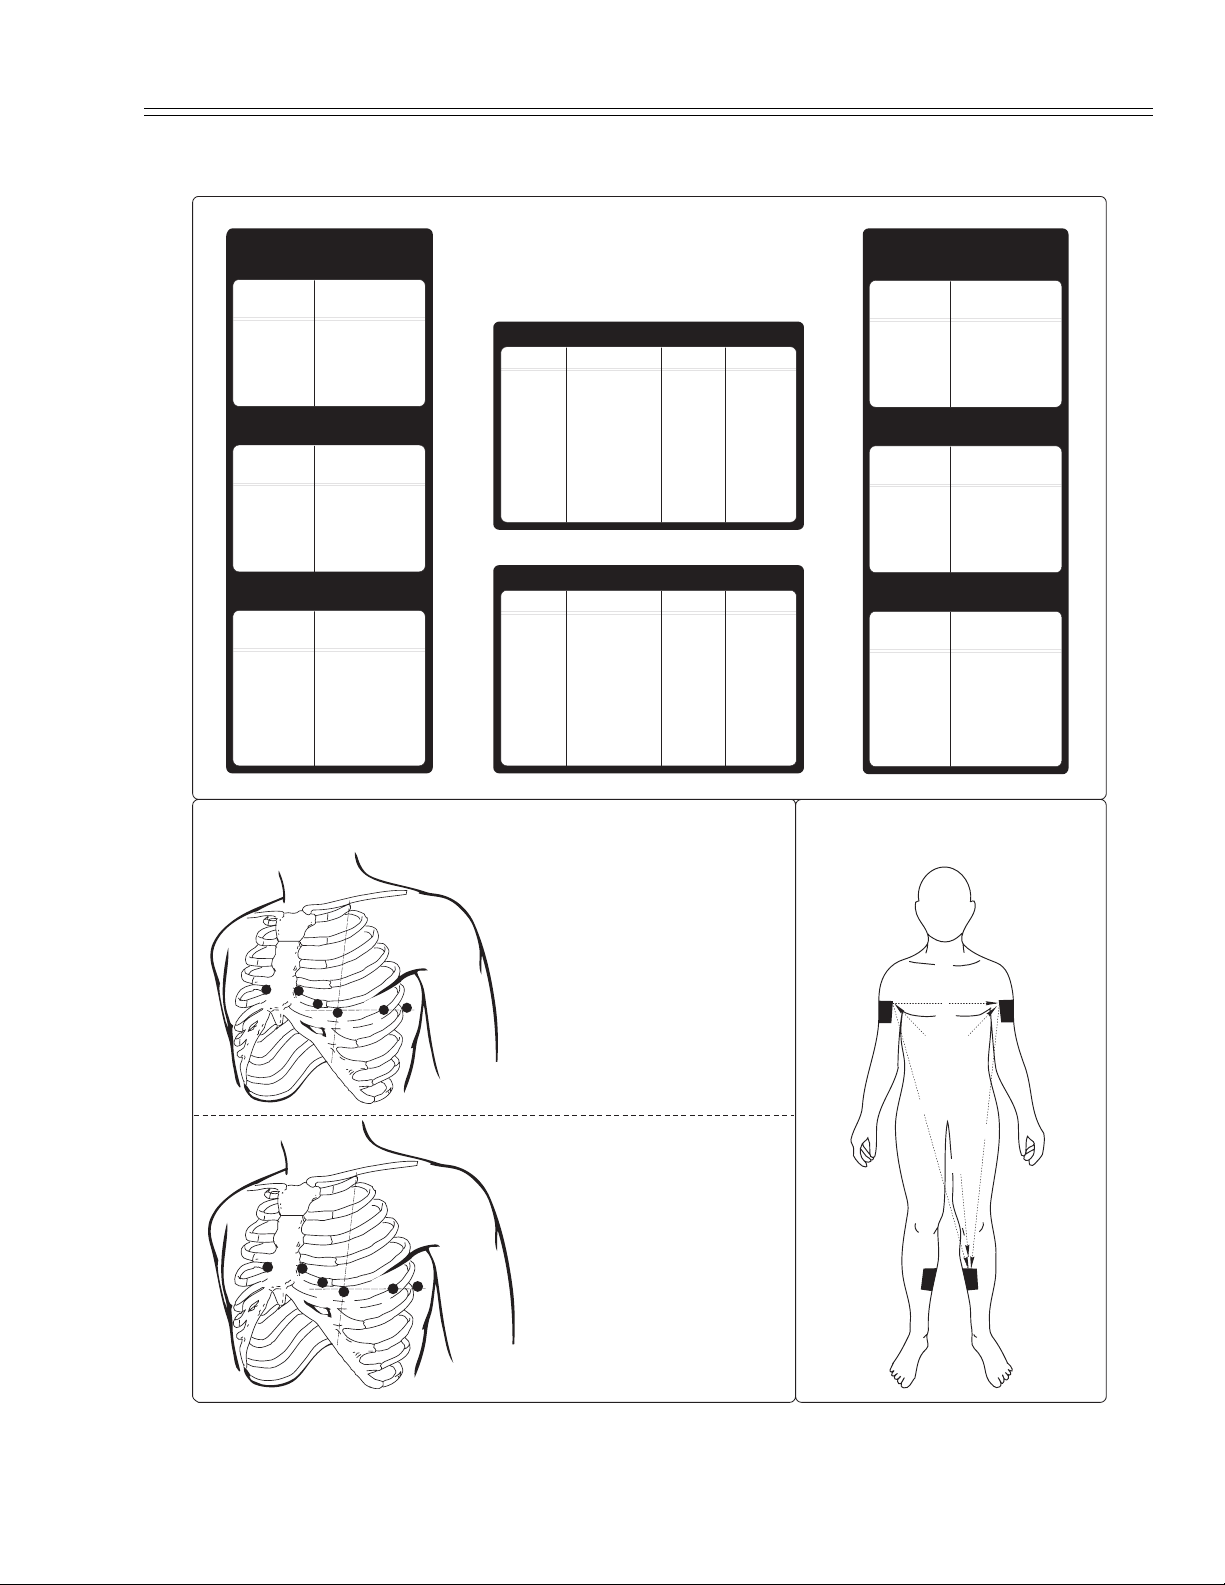
Resting ECG Lead Placement & Coding Chart
Resting ECG Lead Placement & Coding Chart
AHA
STANDARD LIMB LEADS
LEAD
LEAD I
LEAD II
LEAD III
AUGMENTED LIMB LEADS
LEAD
aVR
aVL
aVF
CHEST LEADS
LEAD
V
1
V
2
V
3
V
4
V
5
V
6
SENSORS
CONNECTED /
MEASURED
LA-RA
LL-RA
LL-LA
SENSORS
CONNECTED /
MEASURED
RA and (LA-LL)
LA and (RA-LL)
LL and (RA-LA)
SENSORS
CONNECTED /
MEASURED
V1 and (LA-RA-LL)
and (LA-RA-LL)
V
2
V
and (LA-RA-LL)
3
V
and (LA-RA-LL)
4
and (LA-RA-LL)
V
5
V
and (LA-RA-LL)
6
LEAD CODING AND MEASUREMENTS
AHA COLOR CODE
LEAD
RL
LL
RA
LA
V
V
V
V
V
V
LEAD
N
F
R
L
C
C
C
C
C
C
LOCATION
RIGHT LEG
LEFT LEG
RIGHT ARM
LEFT ARM
1
2
3
4
5
6
CHEST
CHEST
CHEST
CHEST
CHEST
CHEST
IEC COLOR CODE
LOCATION LABEL
RIGHT LEG
LEFT LEG
RIGHT ARM
LEFT ARM
CHEST
1
CHEST
2
CHEST
3
CHEST
4
CHEST
5
CHEST
6
BAND LABEL
GREEN
RED
WHITE
BLACK
BROWN
BROWN
BROWN
BROWN
BROWN
BROWN
BAND
BLACK
GREEN
YELLOW
WHITE
WHITE
WHITE
WHITE
WHITE
WHITE
RED
YELLOW
GREEN
ORANGE
VIOLET
YELLOW
GREEN
BROWN
BLACK
VIOLET
RED
BLUE
RED
STANDARD LIMB LEADS
LEAD
LEAD I
LEAD II
LEAD III
AUGMENTED LIMB LEADS
LEAD
aVR
aVL
aVF
CHEST LEADS
LEAD
C
1
C
2
C
3
C
4
C
5
C
6
SENSORS
CONNECTED /
MEASURED
L-R
F-R
F-L
SENSORS
CONNECTED /
MEASURED
R and (L-F)
L and (R-F)
F and (R-L)
SENSORS
CONNECTED /
MEASURED
C1 and (L-R-F)
and (L-R-F)
C
2
C
and (L-R-F)
3
C
and (L-R-F)
4
and (L-R-F)
C
5
C
and (L-R-F)
6
IEC
PLACEMENT OF THE CHEST SENSORS
AHA
Fourth intercostal space at right
V
1
margin of sternum
Fourth intercostal space at left
V
2
margin of sternum
Fifth intercostal space at junction
V
4
V
1
V
2
V
3
V
V
V
6
5
4
of left midclavicular line
Midway between position V
V
3
position V
4
At horizontal level of position V
V
5
left anterior axillary line
At horizontal level of position V
V
6
left midaxillary line
and
2
at
4
at
4
IEC
Fourth intercostal space at right
C
1
margin of sternum
Fourth intercostal space at left
C
2
margin of sternum
Fifth intercostal space at junction
C
4
C
1
C
2
C
3
C
4
C
C
6
5
of left midclavicular line
Midway between position C
C
3
position C
4
At horizontal level of position C
C
5
left anterior axillary line
At horizontal level of position C
C
6
left midaxillary line
and
2
at
4
at
4
PLACEMENT OF THE
LIMB SENSORS
RA
(R)
I
aVR aVL
II
aVF
RL LL
(N) (F)
LA
(L)
III
070-1149-01 B Eclipse Operating Instructions 5-3
Page 56
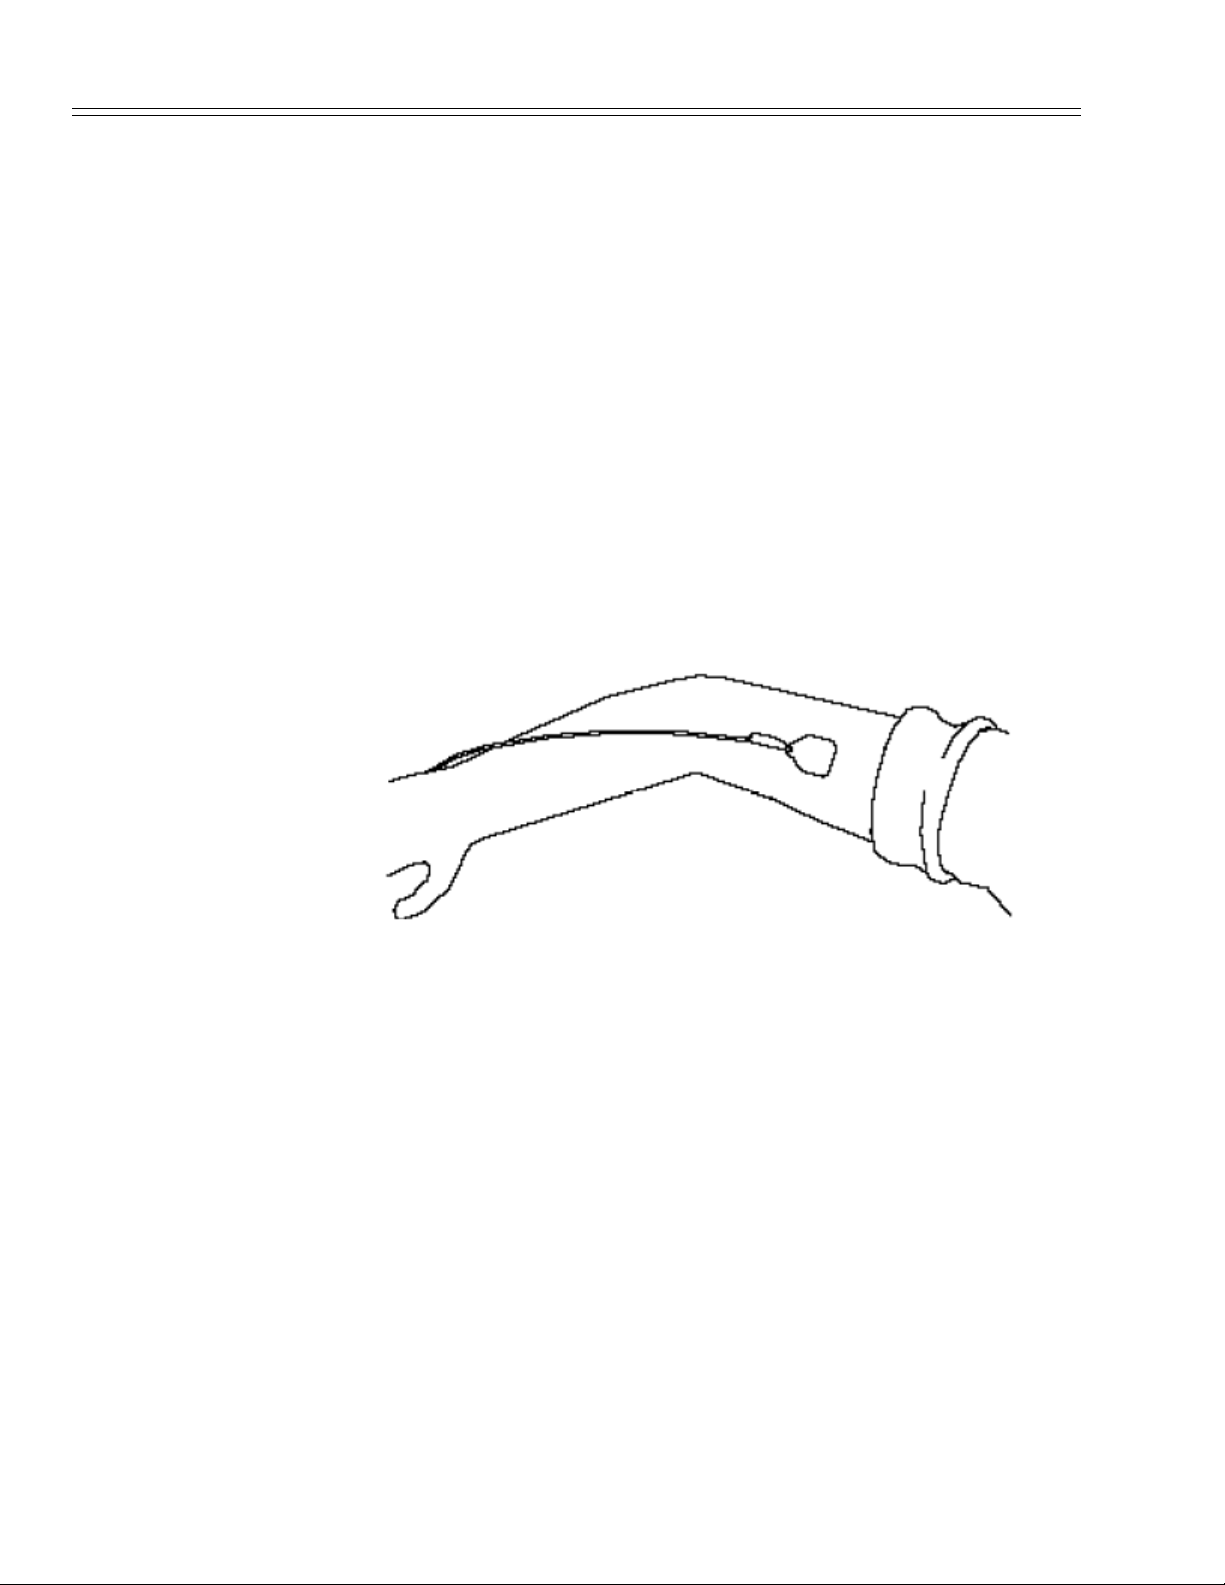
Chapter 5 Patient Preparation
Disposable Resting ECG Sensors
Figure 5-1
Disposable Limb Sensor on
Arm
CardioSens® disposable sensors are a more effective alternative to bulbs, plates, straps,
®
creams, and gels. CardioSens
disposable sensors dramatically reduce cross-
contamination and infection, while helping to improve diagnostic results.
Disposable sensors should be stored according to the guidelines on the packaging and
should not be used after the expiration date. Never mix sensor types or brands.
Incompatibilities can cause baseline drift and can increase trace recovery time after
defibrillation.
APPLYING LIMB SENSORS
1. Expose the arms and legs.
2. Place sensors firmly on the limb sites. Choose fleshy areas, not ankles
or wrists (see Figure 5-1).
3. Clip leads to the sensors. Leads on arm sensors should point
downward toward feet. Leads on legs should point upward toward
chest.
APPLYING CHEST SENSORS
1. Expose the chest.
2. Locate the 6 V-lead (C-lead) positions on the patient’s chest.
3. Apply the sensors.
4. Ensure that the leads conform to body contours and that no strain is
placed on the sensors.
5-4 Eclipse Operating Instructions 070-1149-01 B
Page 57

Resting ECG Lead Placement & Coding Chart
Reusable ECG Sensors
Never mix sensor types or brands. Dissimilar metals or other incompatibilities may
cause considerable baseline drift and may increase trace recovery time after
defibrillation. Do not use corroded sensors, they may give poor results.
ELECTROLYTE
NOTE: Watches and jewelry which could come in contact with
electrolyte should be removed to avoid damage.
®
Cardiac Science Corporation recommends Liqui-cor
Liqui-cor
®
provides excellent conductivity between the skin and sensor. In addition, it
is nonabrasive and water soluble for easy cleanup.
Reusable sensors (Welsh bulbs and limb plates) should be kept clean. They should be
washed after each use and scoured frequently with a light-duty kitchen cleanser. Never
use a metallic pad to clean the sensors. Accumulation of electrolyte may cause drifting
and degrade ECG quality.
for use with reusable sensors.
APPLYING LIMB PLATES
1. Expose the arms and legs.
2. Connect sensor straps to the “ears” of the sensors.
3. Squeeze out a small amount of Liqui-cor® on
sensor as illustrated. Spread it evenly over the
sensor surface. Always apply the same amount of
electrolyte to each sensor.
4. Place sensors firmly on the limb sites. Position them so that the sensor will
not press against the body or table when the patient is relaxed. On arms, the
screws should point downward toward the feet. On legs, the screws should
point upward, toward chest.
5. Without stretching the strap, wrap it around the limb until a hole lines up with
a sensor “ear.” Then stretch the strap and fasten it with the next
hole.
6. Connect the limb leads to the four sensors.
070-1149-01 B Eclipse Operating Instructions 5-5
Page 58
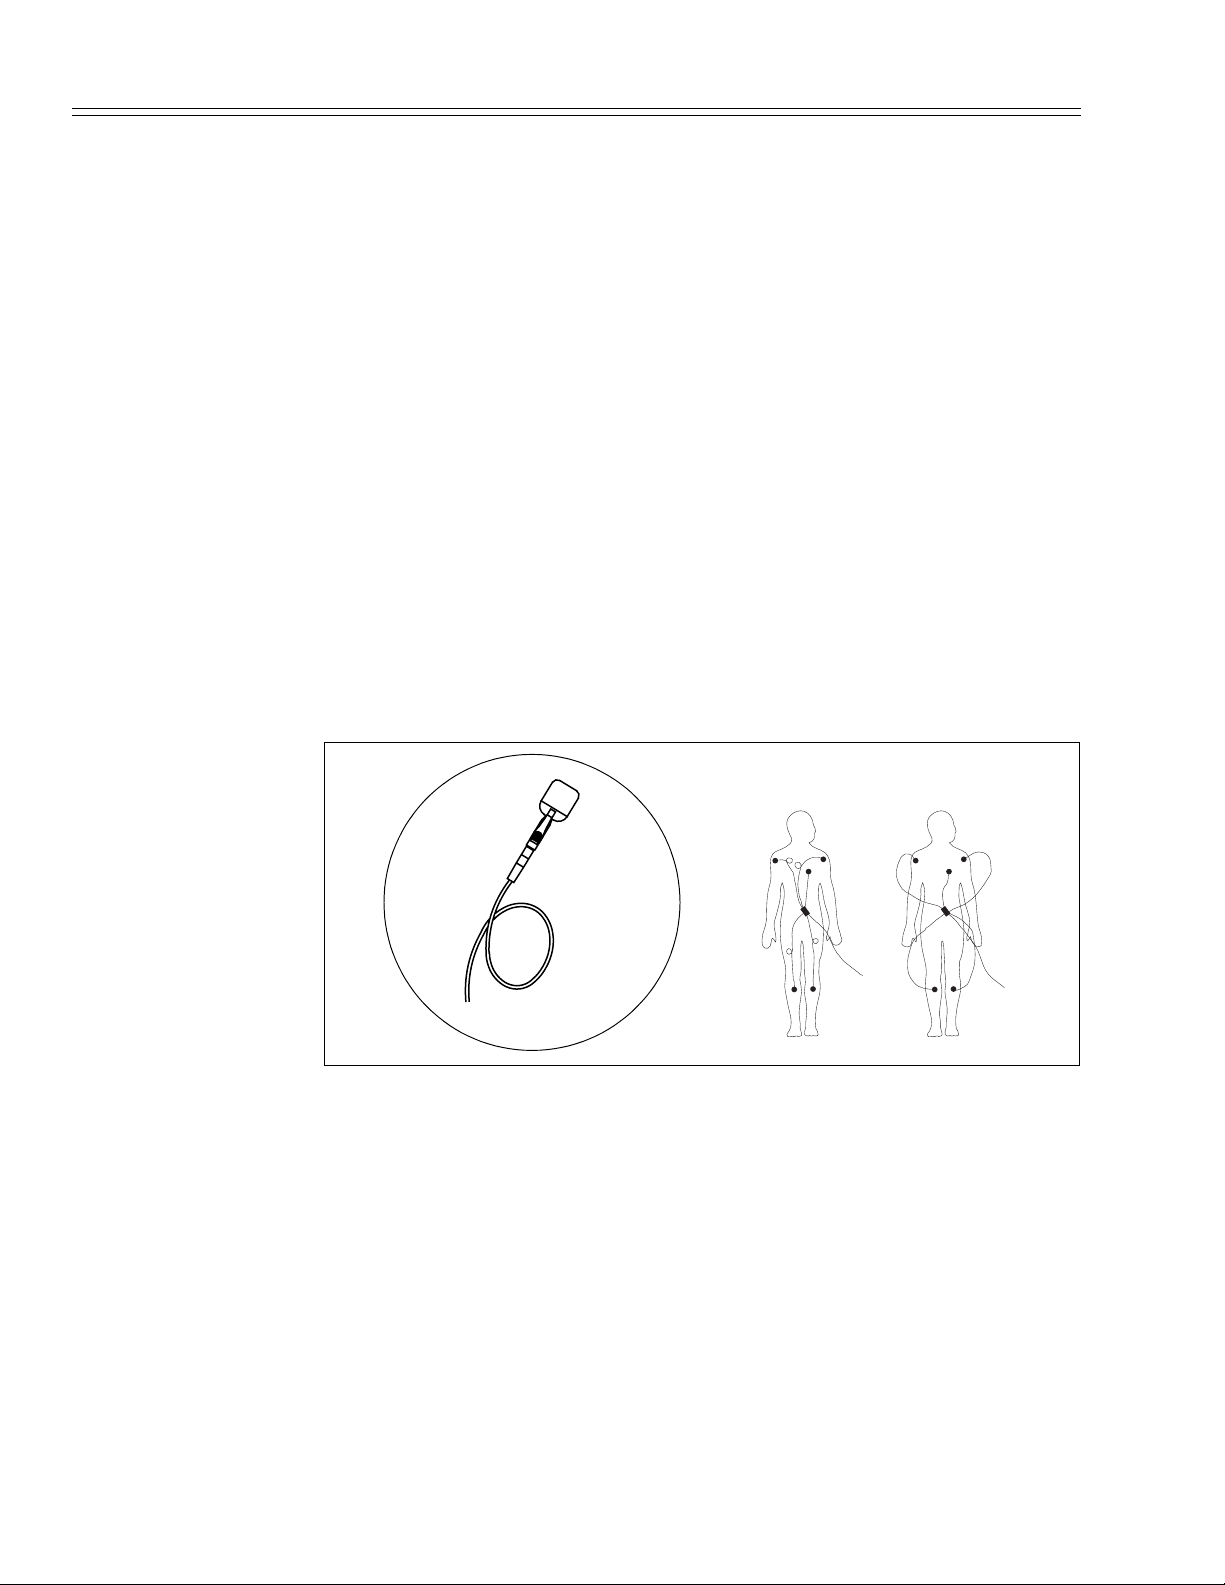
Chapter 5 Patient Preparation
APPLYING WELSH BULB CHEST SENSORS
1. Connect the 6 Welsh bulb sensors to the V-leads (C-leads) on the
patient cable.
2. Locate the 6 V-lead (C-lead) positions on the patient’s chest (see
“Resting ECG Lead Placement & Coding Chart” on pg. 5-3).
3. Squeeze out a drop of Liqui-cor® electrolyte at each sensor site. Use a
tongue depressor to spread the electrolyte taking care that it does not
touch the electrolyte from another site.
4. Apply the sensors by squeezing the rubber bulb and allowing suction
to hold the sensor in place. Only a small dimple should remain on the
bulb when it is released.
5. Ensure that the leads conform to the body contours and that no strain
is placed on the sensors.
Connecting Cables and Lead Wires
After applying sensors, connect the lead wires from the patient cable to the sensors.
Make sure the lead cables follow the contours of the patient’s body and lie flat. If any
lead wire is too long, as with a short patient or child, take up the length by making a
small “stress loop” (see Figure 5-2).
Figure 5-2
Lead Cable Arrangement
CORRECT INCORRECT
Stress Loop
Make sure the patient cable is plugged securely into the connector on the front of the
unit. This is located under the keyboard (see “Patient Cable” on pg. 2-2).
5-6 Eclipse Operating Instructions 070-1149-01 B
Page 59
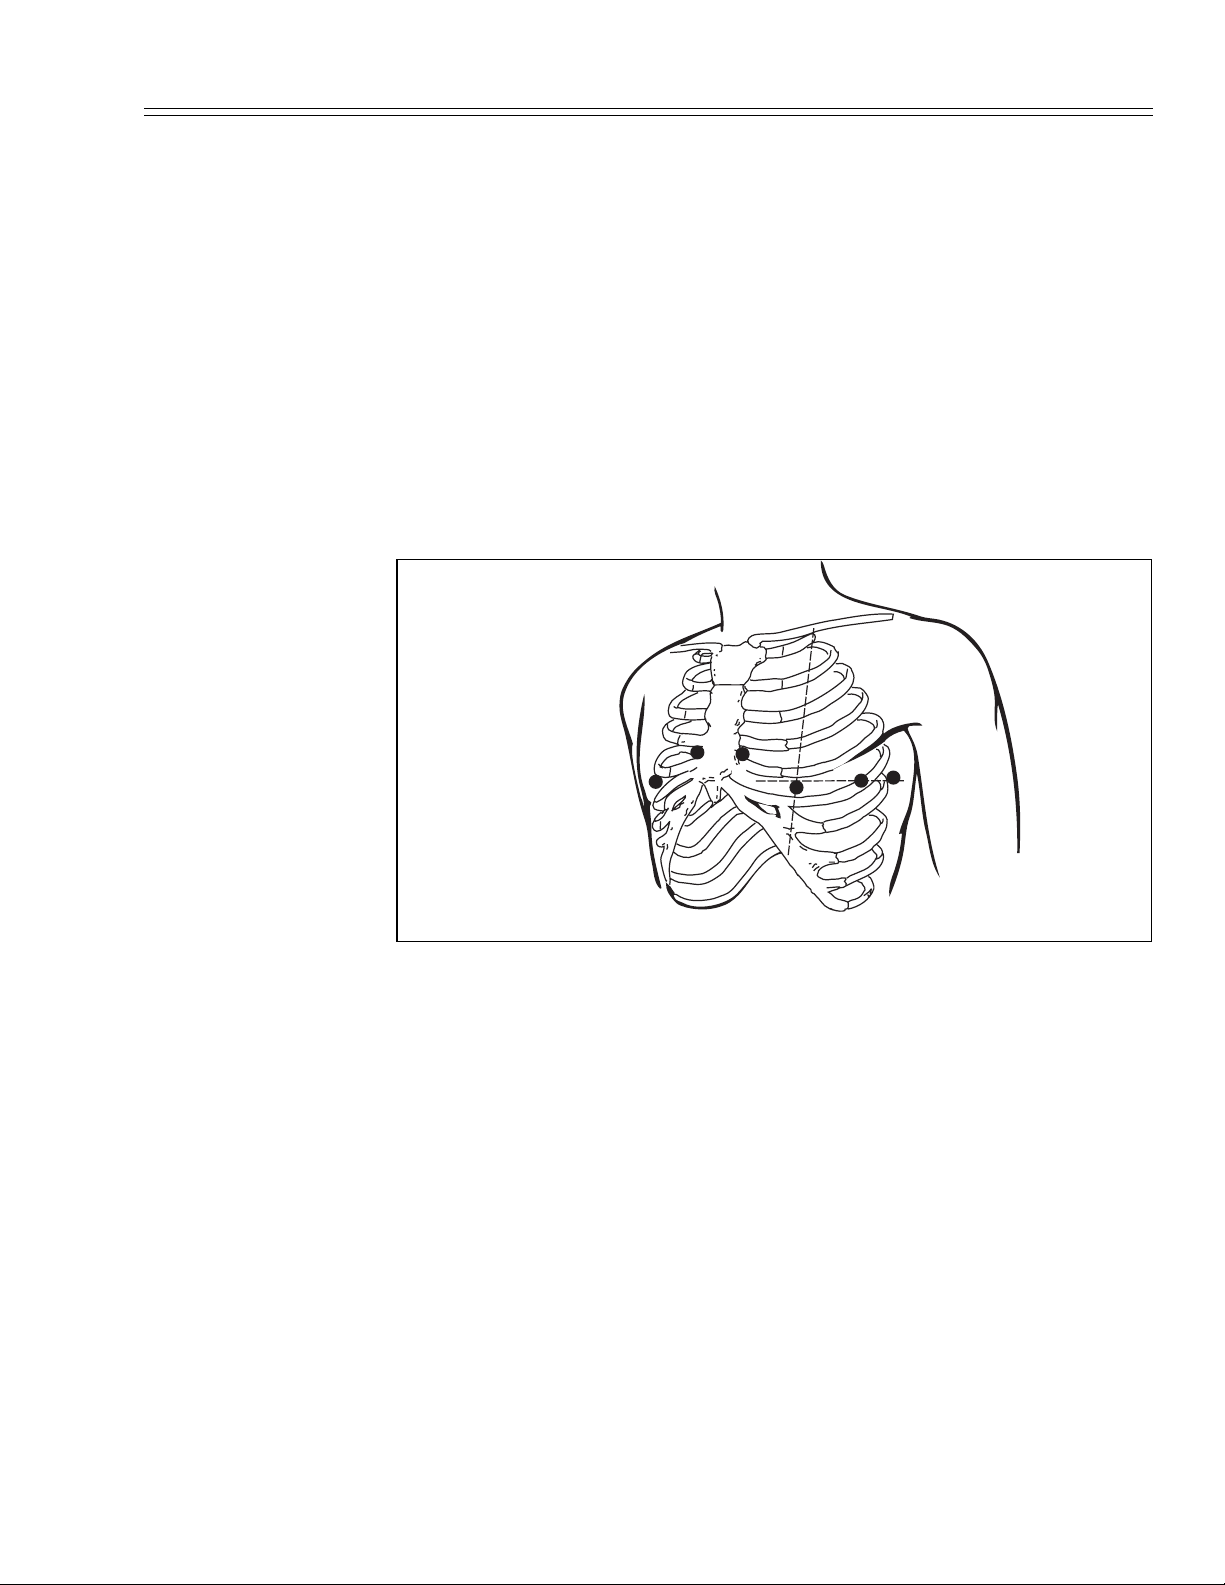
Alternative Lead Placements
Pediatric Lead Placement
When acquiring a pediatric ECG, you may use an alternative to the standard V3(C3)
placement. Place the sensor in the V
). See Figure 5-3 for location. Improper placement will result in inaccurate
V
4 (C4
waveform labeling.
R (C4R) position. This is across the sternum from
4
Alternative Lead Placements
Figure 5-3
Pediatric Chest Lead
Placement
You must select the corrected V
Patient Demographics” on pg. 6-9). If you place V
(C3) placement in the EDIT ID menu (see “Entering
3
) in the V4R (C4R) position,
3(C3
select “V4R” in the *V3 Placement field located in the EDIT ID menu for proper
printout labeling.
V4R (C4R)
Frank: Corrected Orthogonal Leads
Attach all the limb sensors, R, L, F, and N (RA, LA, LL and RL). Please see “Resting
ECG Lead Placement & Coding Chart” on pg. 5-3 for diagram.
Attach the chest sensors according to the following table. I, E, C, M and A should all
be in the same horizontal plane level with the fifth intercostal space (see Figure 5-4).
V1(C1) Chest - right midaxillary line I
V
) Chest - midsternum E
2(C2
V
) Chest - midclavicular line C
3(C3
V4(C4) Chest - left midaxillary line A
V
) Back - spine, opposite E M
5(C5
V
) Throat or back of neck H
6(C6
070-1149-01 B Eclipse Operating Instructions 5-7
Page 60
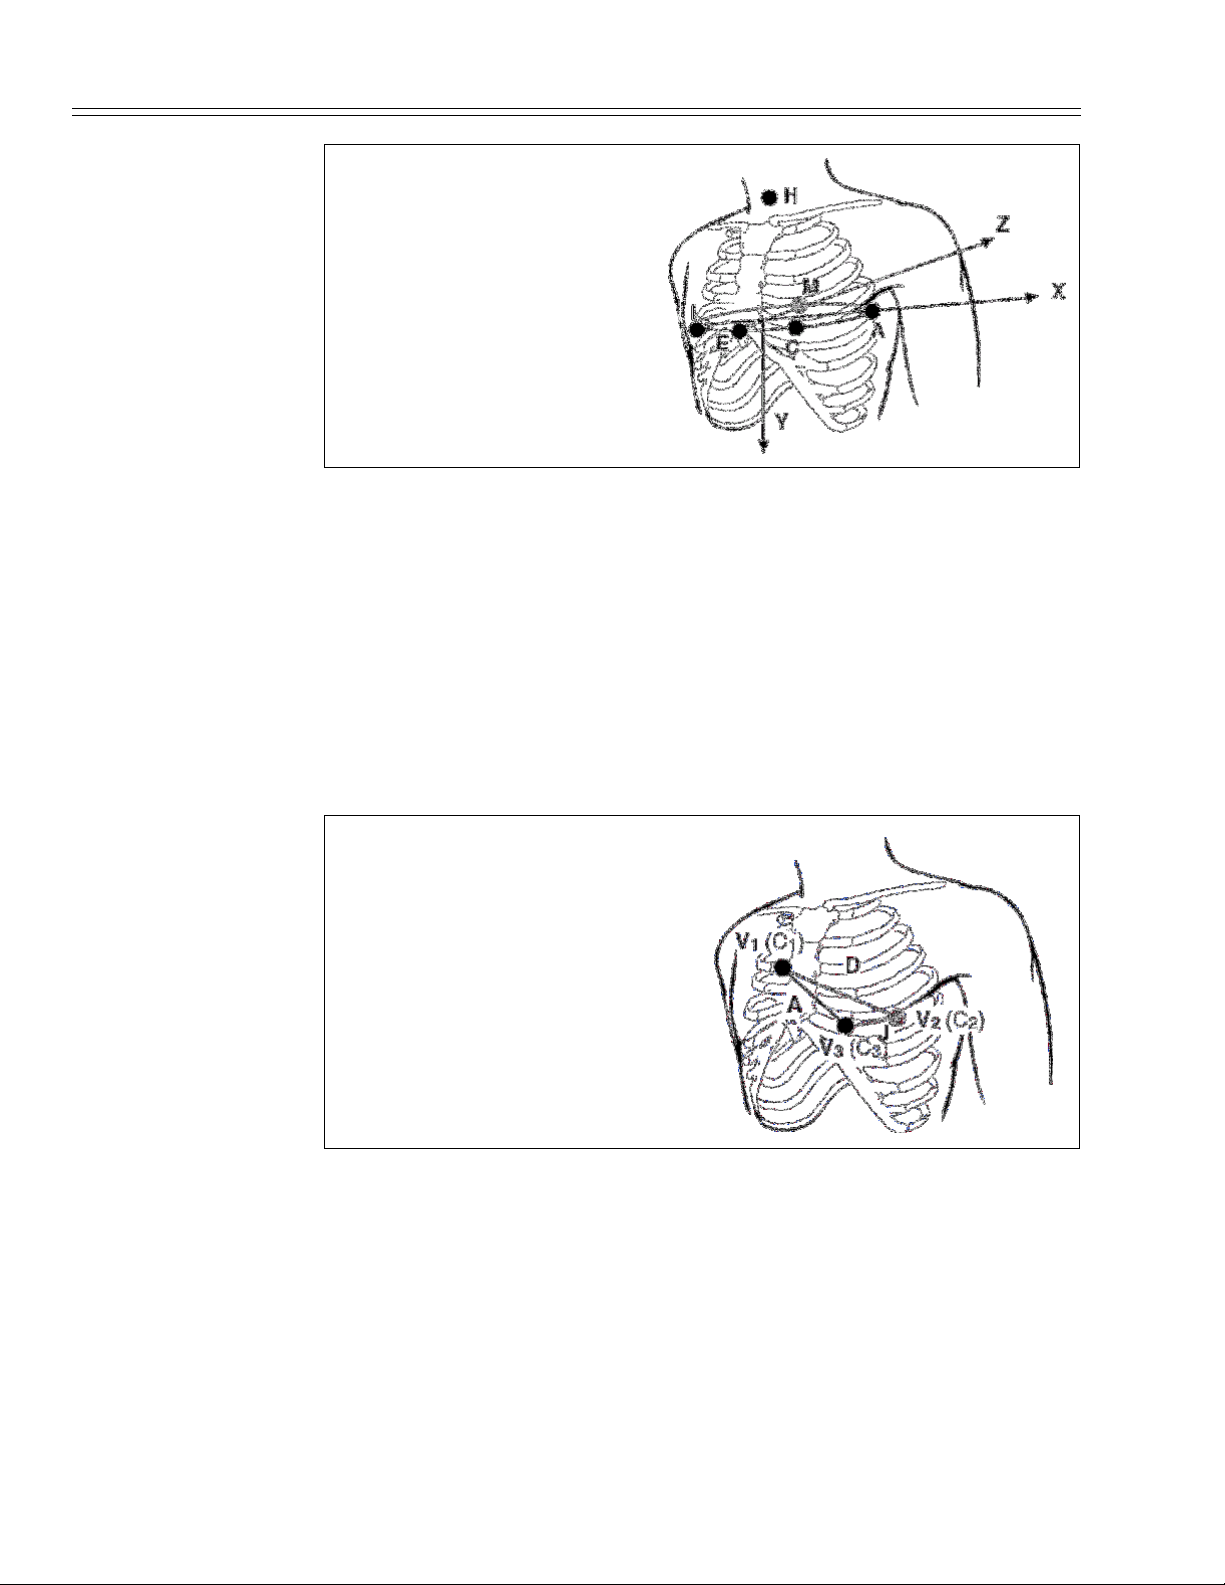
Chapter 5 Patient Preparation
Figure 5-4
Frank Lead Placement
Lead
Measurement
X
Y
Z
Dexter-Sinister
Cranial-Caudal
Ventral-Dorsal
Nehb: Bipolar Leads
Attach all the limb sensors, RA, LA, LL and RL (R, L, N, and F). Please see “Resting
ECG Lead Placement & Coding Chart” on pg. 5-3 for diagram.
Attach the chest sensors according to the following table (see Figure 5-5).
V1(C1) Chest - second rib at right sternal border N
V2(C2) Back - left posterior axillary line on level with the
bottom tip of the scapula.
V3(C3) Chest - opposite the scapular apex at the same level
above.
as V
2
st
N
ax
N
ap
Figure 5-5
Nehb Lead Placement
Lead
D
A
J
Measurement
N
- N
ax
st
N
- N
ap
st
Nap - N
ax
5-8 Eclipse Operating Instructions 070-1149-01 B
Page 61
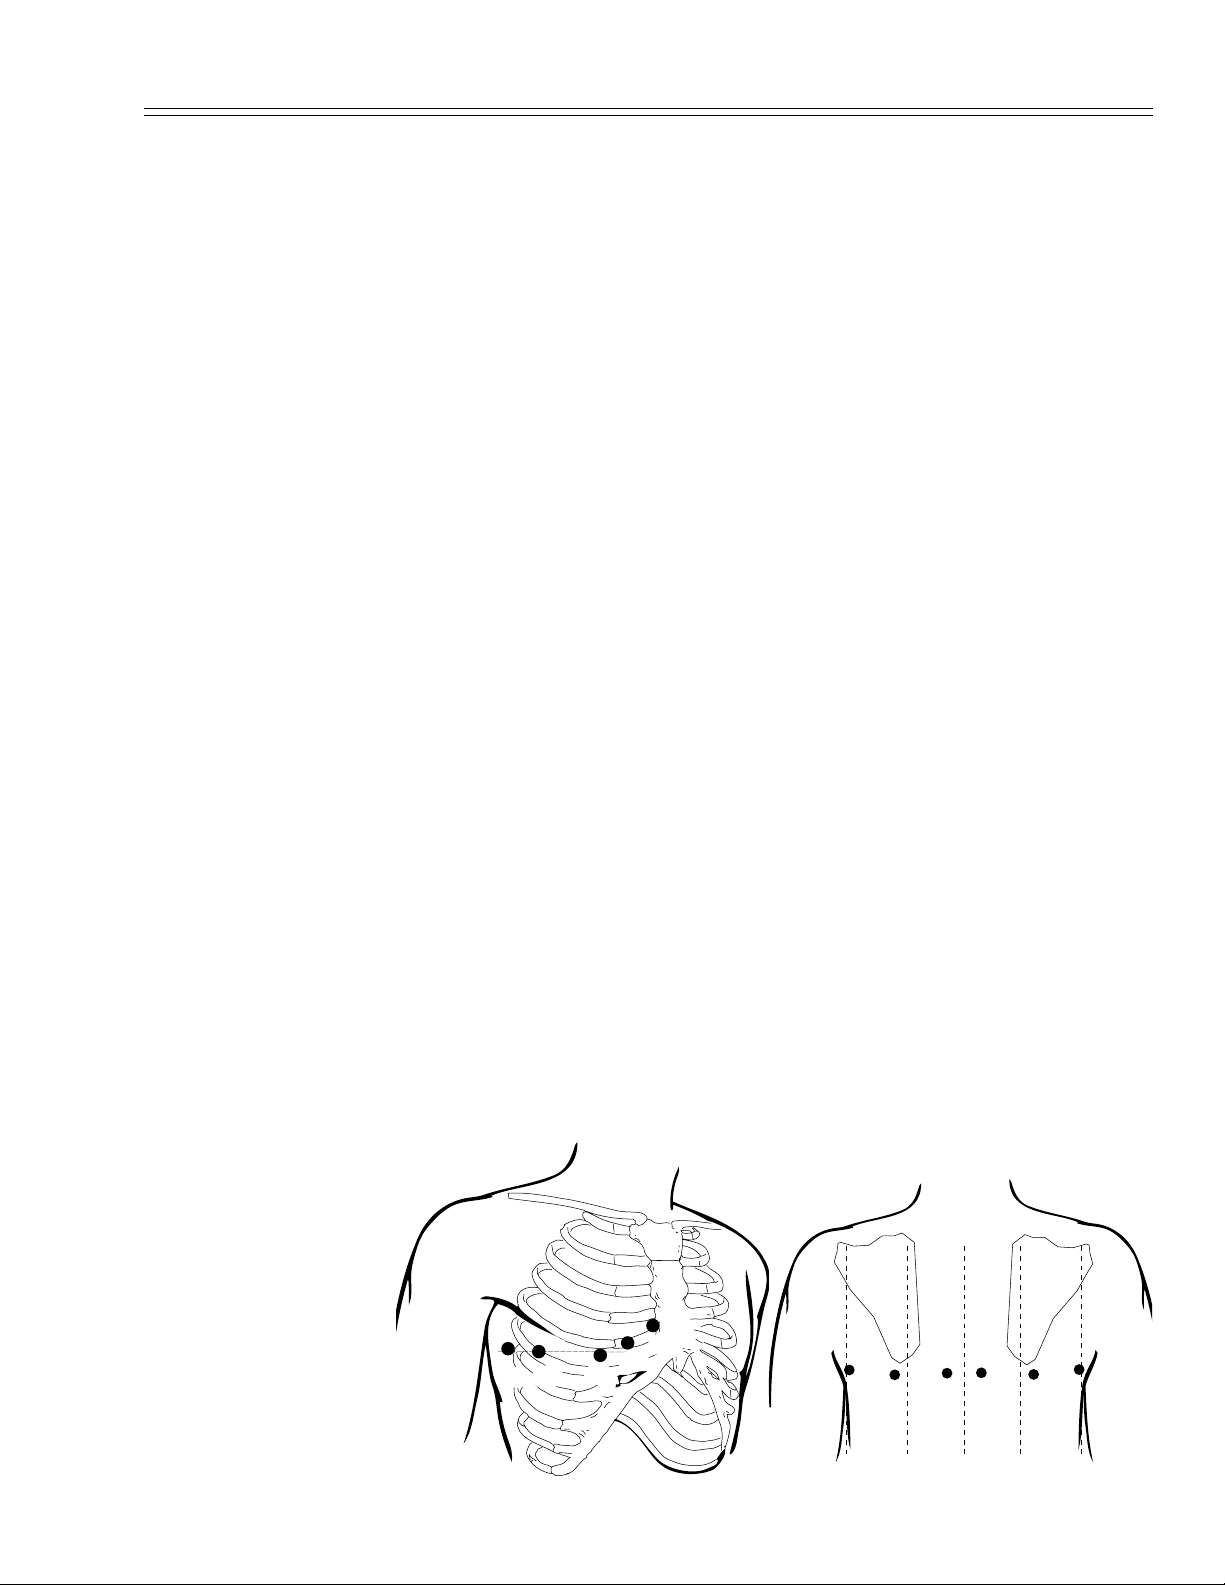
Alternative Lead Placements
Alternate Chest Lead
Acquire a standard 12-lead ECG according to the “Resting ECG Lead Placement &
Coding Chart” on pg. 5-3.
For the Alternate Chest Lead ECG, retain the placement of the limb sensors. Reposition
the chest sensors using 6 of the placements described in the table below. Configure
leads as desired. See the table below for a sample lead configuration.
NOTE: The lead configuration for the Alternate Chest Lead is
completely customizable. The example below is only one of many
possible lead configurations.
NOTE: Lead configuration may also contain any of the standard
chest leads, if desired.
Lead Alternate Placement Description
V
R (C2R) position fourth intercostal space at right margin of sternum
2
V
R (C3R) position midway between position V2R (C2R) and position V4R (C4R)
3
V
)V4R (C4R) position fifth intercostal space at junction of right midclavicular line
1 (C1
V
)V5R (C5R) position on
2 (C2
right
V
)V6R (C6R) position on
3 (C3
right
)V7 (C7) position horizontal level with V6 (C6) at posterior axillary line
V
4 (C4
V
)V8 (C8) position horizontal level with V6 (C6) and V7 (C7) at mid scapular line
5 (C5
V
)V9 (C9) position horizontal level with V7 (C7) and V8 (C8) next to spinal column
6 (C6
V
R (C7R) position horizontal level with V6R (C6R) at posterior axillary line
7
V
R (C8R) position horizontal level with V6R (C6R) and V7R (C7R) at mid scapular
8
horizontal level with V4R (C4R) at right anterior axillary line
horizontal level with V4R (C4R) and V5R (C5R) at right
midaxillary line
line
V
R (C9R) position horizontal level with V7R (C7R) and V8R (C8R) next to spinal
9
column
Figure 5-6
Placement Options
V
R
2
V
R
V
R
6
R
V
5
3
V
R
4
V
7
V
V
8
9
V7R
V
RV9R
8
070-1149-01 B Eclipse Operating Instructions 5-9
Page 62

Chapter 5 Patient Preparation
5-10 Eclipse Operating Instructions 070-1149-01 B
Page 63

Chapter
6 Acquiring ECG Reports
Acquiring and printing ECG reports with an Eclipse Premier is quite simple. Once the
patient is hooked up to the Eclipse Premier, an ECG can be acquired at any time by
pressing the button.
It is a good idea to enter patient demographic information before performing tests.
However, patient demographic information also may be entered after the tests have
been completed.
NOTE: Some patient information directly affects ECG analysis.
Your patient’s physician uses this information when interpreting ECG
reports. Likewise, interpretive Eclipse Premier units provide more
accurate and complete analysis statements when you enter patient
information thoroughly. This information must be entered prior to
acquiring the ECG in order to affect the interpretation.
Acquiring a Stat ECG
Sometimes it will be necessary to take an ECG and there will not be time to enter any
patient demographic information. If no patient ID is entered, Then Eclipse Premier
units with storage will print “#STAT#” in the Patient ID field, followed by the date and
time.
NOTE: Some patient information directly affects ECG analysis.
Your patient’s physician uses this information when interpreting ECG
reports. Likewise, interpretive Eclipse Premier units provide more
accurate and complete analysis statements when you enter patient
information thoroughly. This information must be entered prior to
acquiring the ECG in order to affect the interpretation.
1. Prepare patient according to guidelines in Chapter 5, “Patient
Preparation.”
2. From Standby mode, press to power up to the PREVIEW
screen.
3. Verify that the “Sensors OK” message is displayed on the PREVIEW
screen.
4. Press the “ECG” function key to acquire an Auto ECG
report.
NOTE: This key is active in the PREVIEW screen and most menus,
including the EDIT ID menu.
070-1149-01 B Eclipse Operating Instructions 6-1
Page 64

Chapter 6 Acquiring ECG Reports
Acquiring an Auto ECG
NOTE: Some patient information directly affects ECG analysis.
Your patient’s physician uses this information when interpreting ECG
reports. Likewise, interpretive Eclipse Premier units provide more
accurate and complete analysis statements when you enter patient
information thoroughly. This information must be entered prior to
acquiring the ECG in order to affect the interpretation.
NOTE: Press the “STOP” function key at any time to halt an Auto
ECG.
1. Prepare the patient according to guidelines in Chapter 5, “Patient
Preparation.”
2. From Standby mode, press to power up to the PREVIEW
screen.
3. If a file already exists for the patient (a requisition exists for the patient
or demographic information has been entered previously), go to
“Acquiring an ECG Using an Existing Patient File” on pg. 6-3.
4. Press to go to the EDIT ID menu. Enter the patient’s ID
number, last name, first name, date of birth, gender, and as many other
fields as required or as time will allow (for more information, see
“Patient Demographic Fields” on pg. 6-10).
NOTE: Items indicated with an asterisk (*) may affect computer
analysis.
5. Press the left arrow key to return to the PREVIEW screen. Verify that
the “Sensors OK” message is displayed on the PREVIEW screen.
NOTE: The Recorder Speed, Gain and Frequency Response
settings (displayed in the lower right corner of the PREVIEW screen)
can be temporarily modified if necessary. See “Temporarily Changing
Current Settings” on pg. 6-5.
6. Press to acquire an Auto ECG.
6-2 Eclipse Operating Instructions 070-1149-01 B
Page 65

Acquiring an Auto ECG
NOTE: To obtain a clean trace with very little noise, ensure that
Wait for Good Data is set to ON in the AUTO ECG SETUP menu. If
there is a problem during a recording, the Eclipse Premier will display
a message. You can override the error message and continue recording
by pressing the ECG key again (for more information, see “Wait for
good data” on pg. 4-10).
7. Depending on the current system settings, the Eclipse Premier will
automatically print and save the ECG. (If the unit is equipped with
communication capabilities, the ECG might also be automatically
sent, depending on the settings.) Otherwise, a prompt may be
displayed on the screen, asking if you wish to print or save the ECG.
NOTE: To view or modify the print or save settings, see “Print
Mode”and “Save Mode” on pg. 4-10.
8. If you have saved the ECG, then the Single ECG Functions list is
displayed. At this time you may perform additional functions with the
saved test (see “Accessing Saved Files” on pg. 7-3).
Use the left arrow key to exit.
Acquiring an ECG Using an Existing Patient File
If a requisition has been downloaded for a patient, then a demographics-only file will
already exist for the patient (see “Receiving requisitions from PYRAMIS” on pg. 8-6).
It is also possible to create a demographics-only file for a patient, separately from when
the patient’s ECG is acquired (see “Add New Patient” on pg. 7-6). Once a
demographics-only file exists for a patient, acquiring the ECG is simple.
NOTE: The following procedure also applies if the patient’s ECG
has been acquired in the past and the test still exists in the system.
1. From the PREVIEW screen, press the “M” key to view the MAIN
MENU.
2. Press the “D” key to advance to the DIRECTORY menu.
3. Press the “V” key and select the patient’s file from those listed.
4. Press the “A” key to Acquire ECG. The EDIT ID menu is displayed.
Make changes to patient information if necessary.
5. Press the left arrow key to return to the PREVIEW screen. Verify that
the “Sensors OK” message is displayed on the PREVIEW screen.
NOTE: The Recorder Speed, Gain and Frequency Response
settings (displayed in the lower right corner of the PREVIEW screen)
can be temporarily modified if necessary. See “Temporarily Changing
Current Settings” on pg. 6-5.
070-1149-01 B Eclipse Operating Instructions 6-3
Page 66

Chapter 6 Acquiring ECG Reports
6. Press to acquire an Auto ECG.
NOTE: To obtain a clean trace with very little noise, ensure that
Wait for Good Data is set to ON in the AUTO ECG SETUP menu. If
there is a problem during a recording, the Eclipse Premier will display
a message. You can override the error message and continue recording
by pressing the ECG key again (for more information, see “Wait for
good data” on pg. 4-10).
7. Depending on the current system settings, the Eclipse Premier will
automatically print and save the ECG. (If the unit is equipped with
communication capabilities, the ECG might also be automatically
sent, depending on the settings.) Otherwise, a prompt may be
displayed on the screen, asking if you wish to print or save the ECG.
NOTE: To view or modify the print or save settings, see “Print
Mode”and “Save Mode” on pg. 4-10.
8. If you have saved the ECG, then the Single ECG Functions list is
displayed. At this time you may perform additional functions with the
saved test (see “Accessing Saved Files” on pg. 7-3).
Use the left arrow key to exit.
Printing Reports
NOTE: You can immediately terminate any printout by pressing the
“STOP” key. The Eclipse Premier advances the chart paper to the next
page and returns to the PREVIEW screen.
A formatted, 12-lead report with demographics is automatically included in any ECG
printout. The following reports may also be included with the printout, depending upon
system settings: a rhythm report, a median report, and an analysis report.
For more information on selecting the rhythm report and the median report, see “AUTO
ECG SETUP” on pg. 4-9. Analysis information will be included on the printout, unless
this feature has been disabled (see “Analysis-original” on pg. 4-9).
Printing Problems
If the unit runs out of paper or if the paper jams, you are given the option to reload the
paper and continue printing (see Figure 6-1). If you choose to cancel, you have the
6-4 Eclipse Operating Instructions 070-1149-01 B
Page 67
Figure 6-1
System Note Regarding a
Printing Problem
Temporarily Changing Current Settings
Temporarily Changing Current Settings
option of printing at a later time (see “Print All New ECGs” on pg. 7-6). For paper
loading instructions see “Loading Recording Paper” on pg. 2-3.
Paper OUT:
Reload and continue ?
OK Cancel
Occasionally it may be necessary to modify the system settings for the current patient.
There are several settings that you can customize before acquiring a patient’s ECG. If
you wish to change the below settings permanently, see “POWER-UP DEFAULTS” on
pg. 4-8.
Recorder Speed, Gain, Frequency Response
Use machine control keys “7” through “9” to adjust Recorder Speed, Gain or
Frequency Response.
The “7” key toggles the Paper Speed between 10, 25, and 50 mm/sec.
The “8” key toggles the ECG gain between 5 mm/mV; 10 mm/mV; 20 mm/mV; L10,
C5 mm/mV; and L20, C10 mm/mV.
The “9” key toggles the ECG Filter Frequency between 40 and 150 Hz.
NOTE: Settings are displayed in the lower right corner of the
PREVIEW screen. These settings will stay in effect until you change
them or return the unit to Standby mode.
070-1149-01 B Eclipse Operating Instructions 6-5
Page 68

Chapter 6 Acquiring ECG Reports
Acquiring an Auto Rhythm or a Manual Rhythm
The Eclipse Premier can be set up to automatically print a rhythm page with the 12-lead
ECG. If this feature is not selected, or if an additional rhythm strip is required, you can
obtain a rhythm strip by simply pressing the “RHYT” function key or the “MAN”
function key.
NOTE: REDUCED PERFORMANCE MODE. Printing
performance of an Auto Rhythm or a Manual Rhythm may be reduced
when the current Custom Lead format is Frank and when the printing
speed is set to 50 mm/s.
NOTE: It is not possible to save Auto Rhythm or Manual Rhythm
data.
1. Follow the directions for acquiring a STAT ECG or an AUTO ECG, as
described earlier in this chapter (see page 6-1).
NOTE: The Recorder Speed, Gain and Frequency Response
settings (displayed in the lower right corner of the PREVIEW screen)
can be temporarily modified if necessary. See “Temporarily Changing
Current Settings” on pg. 6-5.
2. The Eclipse Premier prints the rhythm report using the channels
displayed in the PREVIEW screen. Before printing, select the desired
leads using the machine control keys “1” through “6.”
3. To print a rhythm strip for a predefined number of pages, press the
“RHYT” function key .
NOTE: The rhythm strip will print for the number of pages defined
in the MISCELLANEOUS menu (see “Rhythm Mode Pages” on
pg. 4-13).
4. Press the “MAN” function key to acquire a manual rhythm
strip. In the Manual Rhythm mode, the Eclipse Premier will
continue to print the rhythm strip until either the “STOP”
function key or another function key is pressed.
NOTE: While printing, you may place a 1 mV simulated calibration
pulse on the printout and display by pressing the “0” key.
5. To cancel printing at any time for either selection, Press the “STOP”
function key . You may also interrupt printing and begin
another report by pressing any of the other function keys to the left of
the keyboard.
6-6 Eclipse Operating Instructions 070-1149-01 B
Page 69
Acquiring an ECG Using Alternative Lead Placements
Acquiring an ECG Using Alternative Lead Placements
At times it may be necessary to acquire an ECG using an alternative lead placement.
The Alternate Chest Lead ECG allows acquisition of right chest leads and expanded
left chest leads. Other alternative lead placements include Frank and Nehb.
NOTE: The standard ECG is an important part of the Alternate
Chest Lead ECG. If you are acquiring an Alternate Chest Lead ECG,
run a standard resting ECG before continuing (for more information,
see “Acquiring an Auto ECG” on pg. 6-2).
1. Configure either the CUSTOM LEAD 1 or CUSTOM LEAD 2 for the
desired lead placement (see “CUSTOM LEAD 1 & CUSTOM LEAD
2” on pg. 4-11).
2. Follow the directions for acquiring a STAT ECG or an AUTO ECG, as
described earlier in this chapter (see page 6-1).
3. From the Single ECG Functions List, press the left arrow key to return
to the PREVIEW screen.
4. Prepare the patient for the Alternate Chest Lead ECG according to
guidelines in Chapter 5 (see “Alternate Chest Lead” on pg. 5-9).
Attach electrodes according to the specific instructions for each lead
configuration.
5. Verify patient ID on screen. If patient ID is incorrect or absent, follow
steps 1 through 3 of “Acquiring an ECG Using an Existing Patient
File” on pg. 6-3.
6. Select “5” or “6” from the keyboard, depending on whether the
alternative placement was selected for CUSTOM LEAD 1 or
CUSTOM LEAD 2.
NOTE: If ALTERNATE CHEST LEAD was selected, the screen
should display Alternate Chest Lead ECG. In addition, the statement
“Alternate Chest Lead ECG” will appear on the printout in place of the
interpretation.
7. Verify waveforms before taking the ECG.
NOTE: The Recorder Speed, Gain and Frequency Response
settings (displayed in the lower right corner of the PREVIEW screen)
can be temporarily modified if necessary. See “Temporarily Changing
Current Settings” on pg. 6-5.
8. Press the “ECG” function key to record the ECG.
Eclipse Premier automatically prints the ECG.
070-1149-01 B Eclipse Operating Instructions 6-7
Page 70

Chapter 6 Acquiring ECG Reports
Acquiring an ECG Using Pediatric Lead Placements
NOTE: The Eclipse Premier unit can be set up to always acquire
ECGs using pediatric lead placement. Refer to “*V3 Placement”in
“Enabling Patient Demographic Fields” on pg. 4-14.
1. Prepare the patient according to guidelines in Chapter 5, “Patient
Preparation.”Attach electrodes according to the specific instructions
for “Pediatric Lead Placement” on pg. 5-7.
2. Follow steps 2, 3 and 4 of “Acquiring an Auto ECG” on pg. 6-2. At
the top of the EDIT ID screen, for V3 Placement, select V4R.
NOTE: In the EDIT ID menu, change the Age Format to months
and enter the patient’s age in months, if desired.
3. Press the left arrow key to return to the PREVIEW screen. Verify
waveforms before taking the ECG.
NOTE: The Recorder Speed, Gain and Frequency Response
settings (displayed in the lower right corner of the PREVIEW screen)
can be temporarily modified if necessary. See “Temporarily Changing
Current Settings” on pg. 6-5.
4. Press to acquire an Auto ECG.
NOTE: To obtain a clean trace with very little noise, ensure that
Wait for Good Data is set to ON in the AUTO ECG SETUP menu. If
there is a problem during a recording, the Eclipse Premier will display
a message. You can override the error message and continue recording
by pressing the ECG key again (for more information, see “Wait for
good data” on pg. 4-10).
5. Depending on the current system settings, The Eclipse Premier will
automatically print and save the ECG. (If the unit is equipped with
communication capabilities, the ECG might also be automatically
sent, depending on the settings.) Otherwise, a prompt may be
displayed on the screen, asking if you wish to print or save the ECG.
NOTE: To view or modify the print or save settings, see “Print
Mode”and “Save Mode” on pg. 4-10.
6. If you have saved the ECG, then the Single ECG Functions list is
displayed. At this time you may perform additional functions with the
saved test (see “Accessing Saved Files” on pg. 7-3).
Use the left arrow key to exit.
6-8 Eclipse Operating Instructions 070-1149-01 B
Page 71

Entering Patient Demographics
NOTE: Some patient information directly affects ECG analysis.
Your patient’s physician uses this information when interpreting ECG
reports. Likewise, interpretive Eclipse Premier units provide more
accurate and complete analysis statements when you enter patient
information thoroughly. This information must be entered prior to
acquiring the ECG in order to affect the interpretation.
About Patient Demographics
Before acquiring a patient’s ECG, it is a good idea to enter patient information, since
this information affects both physician analysis and computer analysis. Fields which
directly affect computer analysis, such as the *D.O.B. (date of birth) field, are marked
with an asterisk ( * ). In addition, patient information is used to label all ECG reports
until you begin a new patient file or return the unit to Standby mode.
Age/Date of Birth
Entering Patient Demographics
Enter Date of Birth (instead of Age) for the most accurate interpretation.
When date of birth is unknown and the patient is a child, then use the following
guidelines to ensure the most accurate interpretation.
✔ Enter age in months for patients younger than 8 years old.
✔ Enter age in days for patients younger than 1 month old.
NOTE: The Eclipse Premier interpretation criteria uses a default
age of 40 years when an age of 120 years or higher (or the equivalent
date of birth) is entered, or when age is not entered.
Using the EDIT ID Menu
Patient information is entered using the EDIT ID menu. The EDIT ID menu can be
accessed from several different locations. To access the EDIT ID menu from either the
PREVIEW screen or the MAIN MENU, press the “I” key (you may also use the arrow
up and arrow down keys in the MAIN menu to select ENTER ID; press ENTER). The
EDIT ID menu will be displayed.
NOTE: If you want to create a file for this patient in the Directory,
select A
the DIRECTORY Menu” on pg. 7-1).
DD NEW PATIENT in the DIRECTORY menu (see “Using
NOTE: You may exit the EDIT ID menu at any time by pressing the
left arrow key.
070-1149-01 B Eclipse Operating Instructions 6-9
Page 72
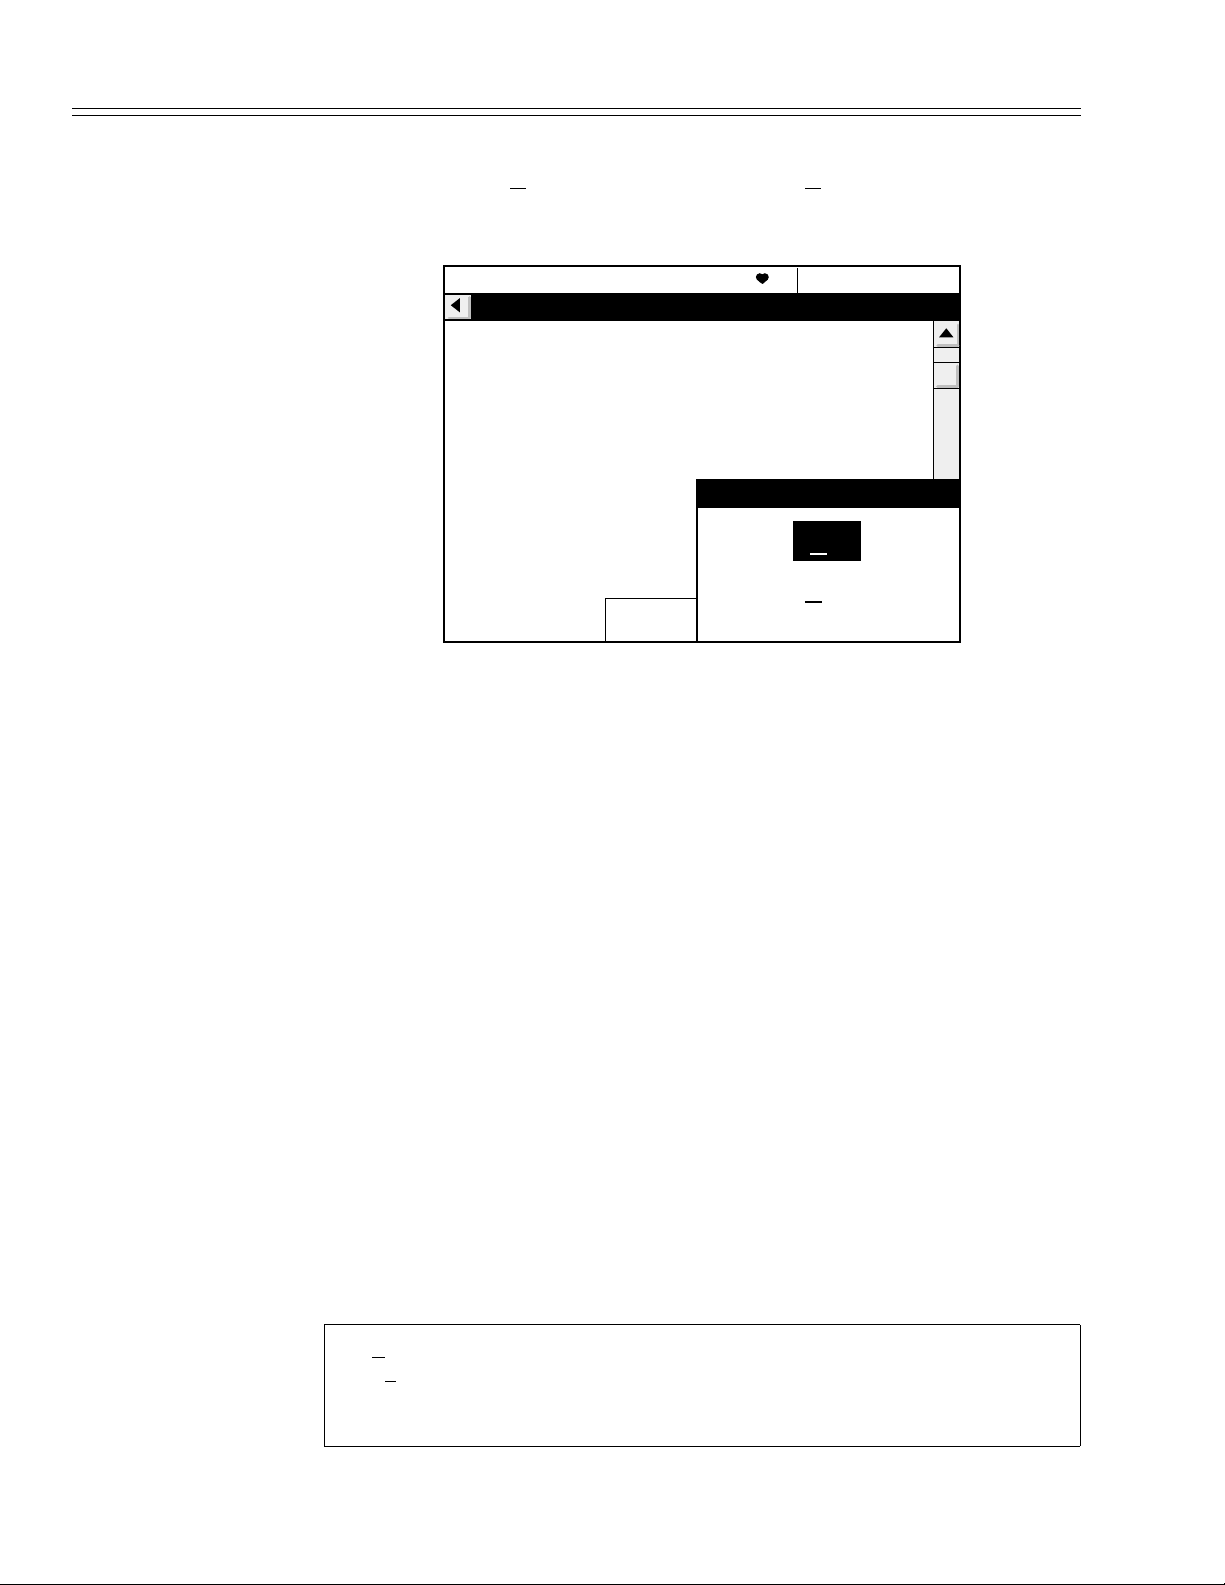
Chapter 6 Acquiring ECG Reports
If demographics have been entered already, a message appears which reads, “NEW
Patient?”. Selecting Y
information.
Figure 6-2
The EDIT ID Menu
ES begins a new file. Selecting NO uses the current patient
ID:0123456789 PRESS65
EDIT ID
(*Items may affect computer analysis)
*V3 Placement : STANDARD
Patient ID : 123456789
Last Name :
First Name :
*D.O.B. :
*Age :
*Age Format : YEA
*Sex :
*Medication 1 :
*Class 1 :
Comments :
x1
NEW Patient?
NO
YES
Patient Demographic Fields
Scroll through the EDIT ID menu fields using the up and down arrows.
In most fields in the EDIT ID menu, the cursor blinks. In these fields, type the
appropriate information from the keyboard. In this chapter, the type of information and
the number of characters allowed are listed in brackets next to the field name. Press the
ENTER key to enter the information.
Other fields in the EDIT ID menu have lists. Select the appropriate item from a list by
pressing the hot key indicated by the underlined letter. Or, press the right arrow key to
access the options, use the up and down arrow keys to select an option, and press the
ENTER key to enter the option. In this chapter, the available choices are listed next to
the field name.
NOTE: Some of the fields described here may not appear because
they have been disabled in the PATIENT FIELDS ENABLE menu (see
“Enabling Patient Demographic Fields” on pg. 4-14) or because the
Eclipse Premier is configured to use a Custom Header (see “Getting
Custom Header Information” on pg. 4-16).
The EDIT ID fields are described below.
NOTE: Fields which directly affect computer analysis are marked
with an asterisk ( * ).
*V3 Placement STANDARD
R
V4
Use only for pediatric reports. For more information on pediatric lead placement, see
“Pediatric Lead Placement” on pg. 5-7.
6-10 Eclipse Operating Instructions 070-1149-01 B
Page 73
Patient ID [Up to 20 alphanumeric characters]
Last Name [Up to 20 alphanumeric characters]
First Name [Up to 20 alphanumeric characters]
Entering Patient Demographics
*D.O.B
(Date Of Birth)
*Age [Up to 3 numeric characters. Range = 0-364]
*Age Format Y
*Sex blank
[Up to 20 alphanumeric characters]
Use spaces, hyphens or periods to separate the day, month and year. Some
acceptable ways to type the date are:
1. 10 10 1950
2. 10–10–1950
3. 10.10.1950
NOTE: Remember that the period character ( . ) is typed by holding down the Shift
key and pressing the “N” key. The hyphen character ( - ) is typed by holding down
the Shift key and pressing the “M” key.
*D.O.B. is used to automatically fill in *Age and *Age Format. For accuracy and
convenience, you may wish to use this field rather than fill in *Age manually.
Not editable if *D.O.B. was entered.
EARS
ONTHS
M
AYS
D
Not editable if *D.O.B. was entered.
ALE
M
EMALE
F
*Race blank
*Medication 1 blank
LACK
B
AUCASIAN
C
SIAN
A
HER RACE
OT
NKNOWN
U
O MEDICATION
N
NKNOWN
U
IGITALIS
D
ETIC
DIUR
ETA BLOCKER
B
UINIDINE
Q
ROCAINAMIDE
P
MIODARONE
A
SOPYRAMIDE
DI
IDOCAINE
L
HER ANTIARRHYTHMIC
OT
HOTROPIC
PSYC
TEROID
S
CALCIUM BLO
NITRATE
ACE INH
CKERS
S
IBITORS
ALPHA BLOCKERS
OTHER M
EDICATION
Select a medication type if you know the category of medication your patient is
taking. For ECG waveform analysis, it is better to select N
NKNOWN than to leave this field blank.
U
070-1149-01 B Eclipse Operating Instructions 6-11
O MEDICATION or
Page 74

Chapter 6 Acquiring ECG Reports
*Medication 2 See *MEDICATION 1, above
NOTE: If you typically use just the *Medication 1 and *Class 1 fields, use the
PATIENT FIELDS ENABLE menu to select the OFF setting for the *Medication 2
and *Class 2 fields (see “Enabling Patient Demographic Fields” on pg. 4-14).
NOTE: Do not use this field if blank
for *Medication 1. These entries for *Medication 1 cause the analysis program in
interpretive Eclipse Premier units to ignore the *Medication 2 field.
*Class 1 blank
*Class 2 See *CLASS 1, above
NOTE: If you typically use just the *Medication 1 and *Class 1 fields, use the
PATIENT FIELDS ENABLE menu to select the OFF setting for the *Medication 2
and *Class 2 fields (see “Enabling Patient Demographic Fields” on pg. 4-14).
NOTE: Do not use this field if blank
*Class 1. These entries for *Class 1 cause the analysis program in interpretive
Eclipse Premier units to ignore the *Class 2 field.
ORMAL
N
NKNOWN
U
YOCARDIAL INFARCTION
M
MYOCARDIAL I
YPERTENSION
H
ONGENITAL HEART DISEASE
C
RHEUMAT
Refers to the patient’s cardiac, lung, or endocrine conditions. Select the
appropriate diagnosis from the list if you know your patient’s condition. For ECG
waveform analysis, it is better to select N
this field blank.
SCHEMIA
IC HEART DISEASE
, NO MEDICATION or UNKNOWN is selected
P
ERICARDITIS
ESPIRATORY DISEASE
R
NTED PACER
IMPLA
NDOCRINE DISEASE
E
MONARY EMBOLISM
PUL
T CARDIAC SURGERY
POS
IOMYOPTHY
CARD
THER
O
ORMAL or UNKNOWN than to leave
, NORMAL or UNKNOWN is selected for
Height [Up to 3 numeric characters. Range = 0-96 in. or 0-244 cm.]
Measured in either inches or centimeters as determined in the SYSTEM SETUP
menu.
Weight [Up to 3 numeric characters. Range = 0- 500 lb. or 0-227 kg.]
Measured in either pounds or kilograms as determined in the SYSTEM SETUP
menu.
Systolic BP
(Blood Pressure)
Diastolic BP
(Blood Pressure)
Department [Up to 5 numeric characters. Range 1 – 32000]
Room [Up to 7 alphanumeric characters]
6-12 Eclipse Operating Instructions 070-1149-01 B
[Up to 3 numeric characters. Range = 0 – 250]
[Up to 3 numeric characters. Range = 0 – 250]
Identifies your department in the facility. A list of the allowable selections is displayed
if it has been downloaded from PYRAMIS. To download ECGs from PYRAMIS, the
department must be entered with the correct number or set to 1 on the Eclipse
Premier.
Identifies your location within the facility.
Page 75

Technician [Up to 20 alphanumeric characters]
Identifies the person acquiring the ECG.
Physician [Up to 20 alphanumeric characters]
Identifies the patient’s physician.
User Field [Up to 15 alphanumeric characters]
Use this field to suit your needs. A possible use might be to identify the referring
physician. You may label this field in the USER SETUP menu (see “Configuring the
USER SETUP Menus” on pg. 4-6).
Comments [Up to 120 alphanumeric characters]
Use this field to input additional patient information as needed.
Entering Patient Demographics
070-1149-01 B Eclipse Operating Instructions 6-13
Page 76

Chapter 6 Acquiring ECG Reports
6-14 Eclipse Operating Instructions 070-1149-01 B
Page 77
Chapter
7 Managing Patient Records
Once a patient’s record has been saved, it is possible to reprint, delete and transmit ECG
records, as well as edit patient information. It is also possible to create files for one or
more patients prior to acquiring any ECGs.
NOTE: Speed, gain and/or artifact filter can be changed prior to
reprinting a record. See “Printing ECG Reports” on pg. 7-4.
Using the DIRECTORY Menu
In order to perform any of the functions described above, it is necessary to access the
DIRECTORY menu.
NOTE: Depending upon your system settings, a password may be
required to access the directory. For more information, see “Directory
Password” on pg. 4-6.
1. Press the On/Standby key to power up to the PREVIEW screen.
2. Press the “M” key to go to the MAIN MENU.
3. Press the “D” key to go to the DIRECTORY menu
4. Press the “V” key to view the directory.
5. A list of all records stored in the directory is displayed.
070-1149-01 B Eclipse Operating Instructions 7-1
Page 78

Chapter 7 Managing Patient Records
Record Status
The status of each record is indicated in the last column of the directory contents.
The status of a record is important, especially when transmitting and receiving records
from another electrocardiograph or ECG management system (for more information,
see “How record status affects the sending operations” on pg. 8-3). Record status also
can affect which records are retained in the event that the directory is full (see
“Automatic deletion when the Directory is full” on pg. 7-3).
Use the table below to understand the record status associated with each code.
Code Record Status Explanation of Status
Pr
Dm
St
No
Rv
Rq
Printed The Auto ECG record has been printed by the
Eclipse Premier electrocardiograph.
Demographics Only The record contains only patient demographic
information. The record does not contain an
ECG report.
Sent The record has been sent to another
electrocardiograph or to an ECG Management
System, such as the PYRAMIS System or the
FAA System.
Do Not Send The record was manually marked so that the
record will not be sent the next time that
BATCH SEND ECGS is selected in the
DIRECTORY menu.
Received The record was received from another
electrocardiograph or from an ECG
Management System, such as the PYRAMIS
System or the FAA System.
Requisition The record contains only patient demographic
information. An ECG report is being requested
for this patient by the ECG data management
system.
ECG
RtE
12-Lead The record contains a 12-lead ECG.
Alternate Chest Lead The record contains an Alternate Chest Lead
(non-standard) ECG.
On Eclipse Premier units, it is possible to change the status of certain records. With this
feature, users can ensure that certain records are sent and other records are not sent
when BATCH SEND ECGS is selected in the DIRECTORY menu (for more
information, see “Changing Record Status” on pg. 8-3).
7-2 Eclipse Operating Instructions 070-1149-01 B
Page 79

Accessing Saved Files
Automatic deletion when the Directory is full
If you create a new record when the Directory is full, the Eclipse Premier deletes an
older record to make room for the new record. There are rules based on record status
which determine which records are automatically deleted. The oldest record with the
proper status is deleted.
● Records with status Dm or Rq are never deleted. However, a record with
both Rq and St will be deleted.
● If, in the SYSTEM SETUP menu, the Connection field is set to MODEM
or DIRECT, a record with status Pr and St may be deleted.
● If, in the SYSTEM SETUP menu, the Connection field is set to MODEM
or DIRECT, a record with status Rv and Pr may be deleted.
● If, in the SYSTEM SETUP menu, the Connection field is set to NONE,
any record with status Pr may be deleted.
If the Directory is full of records that don’t meet any of the automatic deletion criteria,
you will not be able to create new records unless you manually delete records from the
Directory (the Directory Full message is displayed). You may, however, obtain Auto
ECG printouts. These will not be stored in the Directory unless storage space is made
available.
Accessing Saved Files
Editing Patient Demographics
1. Locate the desired patient file, highlight it and press the Enter key. The
Single ECG Functions list is displayed.
2. Press the “E” key to access the EDIT ID menu.
3. Edit patient demographics as desired. These changes are saved when
you press the left arrow key to exit this menu.
NOTE: Patient ID, date of birth, age, and age format cannot be
changed.
070-1149-01 B Eclipse Operating Instructions 7-3
Page 80

Chapter 7 Managing Patient Records
Printing ECG Reports
1. Locate the desired patient file, highlight it and press the Enter key. The
Single ECG Functions list is displayed.
2. If you wish to edit patient information, press the “E” key to access the
EDIT ID menu. Make changes as desired. Press the left arrow to return
to the Single ECG Functions list.
3. If you wish to modify the settings for Recorder Speed, Gain or
Frequency Response, press the “C” key to access the CHANGE
SPEED, GAIN, FILTER menu. Use the arrows to make different
selections. Press the left arrow to return to the Single ECG Functions
list.
4. Press the “P” key to print a copy of the report.
NOTE: Depending upon system settings, the ECG report will
include a rhythm report and a median complex report. Analysis
information may also be included on the printout, unless this feature
has been disabled. To verify or change the print settings, see “Rhythm
Page”, “Median Complex Page”, and “Analysis-original” on pg. 4-9.
5. Manually print a copy of the median complex report for the record by
pressing the “R” key.
NOTE: Chart speed is fixed at 50 mm/s.
6. Print a copy of the measurement matrix for the record by pressing the
“N” key.
Use the left arrow key to exit.
7-4 Eclipse Operating Instructions 070-1149-01 B
Page 81

Accessing Saved Files
Deleting Patient Files
NOTE: This procedure permanently removes the selected record.
1. Locate the desired patient file, highlight it and press the Enter key. The
Single ECG Functions list is displayed.
4501
2. Select DELETE ECG by
the file.
3. A message box will appear. Press the “O” key to confirm deletion.
NOTE: Proceed with caution; choosing Ok will permanently erase
the record. To cancel the request, select Cancel.
Use the left arrow key to exit.
pressing the “D” key to permanently delete
Faxing Saved Files
NOTE: To use the Fax function, your Eclipse Premier must be
equipped with either an internal or an external modem.
1. Locate the desired patient file, highlight it and press the Enter key. The
Single ECG Functions list is displayed.
2. Press the “F” key to access the FAX ECG menu.
3. Select the destination for the fax by pressing the corresponding hot
key: “1,” “2,” “3” or “4.” Eclipse Premier faxes the report.
NOTE: See “Configuring the FAX Menu” on pg. 7-7 to edit fax
numbers and information.
Use the left arrow key to exit.
070-1149-01 B Eclipse Operating Instructions 7-5
Page 82

Chapter 7 Managing Patient Records
Additional Functions
Add New Patient
If you wish to create one or more patient files prior to recording any ECGs, use the
A
DD NEW PATIENT selection in the DIRECTORY. This feature allows you to input
demographics into the Directory in advance of taking an ECG, which later reduces the
time required to acquire the report.
1. In the DIRECTORY menu, select the A
pressing the “A” key.
2. The EDIT ID menu is displayed. Enter the patient’s ID number, last
name, first name, date of birth, gender, and as many other fields as
required or as time will allow (for more information, see “Patient
Demographic Fields” on pg. 6-10).
3. A file is automatically created for the patient. Patient information is
saved when you press the left arrow key to exit the EDIT ID menu.
DD NEW PATIENT field by
Print All New ECGs
If you wish to print all ECGs in the directory which have not been printed previously
(i.e., Record Status is not PR), select the PRINT ALL NEW E
DIRECTORY.
1. In the DIRECTORY menu, select the PRINT ALL NEW E
by pressing the “E” key.
2. All ECGs which have not been printed previously will print out on the
electrocardiograph.
CGS item in the
CGS field
Use the left arrow key to exit.
Print median complex
If you wish to review the averaged beats for a record, select the PRINT MEDIAN
COMPLEX item in the DIRECTORY. On interpretive units, the median complex is
used as the basis for all computerized analyses.
1. Locate the desired patient file, highlight it and press the Enter key. The
Single ECG Functions list is displayed.
2. Press the “R” key to print the median complex for the selected record.
NOTE: Chart speed is fixed at 50 mm/s.
Use the left arrow key to exit.
7-6 Eclipse Operating Instructions 070-1149-01 B
Page 83

Additional Functions
Print Measurement Matrix
If you wish to review the numerical data for a record, select the PRINT
MEASUREMENT MATRIX item in the DIRECTORY. The measurement matrix
contains numerical data, such as P wave duration (“PDUR”), which is derived from the
median complex for the record.
1. Locate the desired patient file, highlight it and press the Enter key. The
Single ECG Functions list is displayed.
2. Press the “N” key to print the measurement matrix for the selected
record.
Use the left arrow key to exit.
Configuring the FAX Menu
Eclipse Premier stores up to 4 phone numbers which are listed by their descriptions.
Fax numbers and descriptions can be entered or modified from the FAX ECG menu.
1. Locate the desired patient file, highlight it and press the Enter key. The
Single ECG Functions list is displayed.
2. From the Single ECG Functions list, press the “F” key to access the
FAX ECG menu.
3. Press “E” to enter new phone numbers or correct existing numbers in
the EDIT PHONE NUMBER menu.
4. To enter a new number for Phone #1, type in a phone number. To
modify an existing phone number, arrow down to the phone number
and enter the new number as desired.
NOTE: Enter up to 20 numeric characters. The comma character
( , ) inserts a pause during dialing. For example, this is often used after
dialing a “9” prefix before the rest of the phone number.
5. Arrow down to the Description field. Using the keyboard, type in a
description for the phone number.
NOTE: Enter up to 15 alphanumeric characters.
6. To add or change additional phone numbers, arrow up or down to the
appropriate fields and enter information as desired.
Use the left arrow key to exit.
070-1149-01 B Eclipse Operating Instructions 7-7
Page 84

Chapter 7 Managing Patient Records
Print Directory
If you wish to print a list of all patient records currently stored in the directory, select
the PRINT DIRECTORY item in the DIRECTORY.
Use the left arrow key to exit.
Delete All Records
1. In the DIRECTORY menu, select the PRINT DIRECTORY field.
2. A complete list of the DIRECTORY contents is printed (see sample
printout in Chapter 9).
NOTE: The below information is for use by IT personnel or
network administrators only.
NOTE: Depending upon your system settings, a password may be
required to delete all records. For more information, see “Password”
on pg. 4-5.
4501
With Eclipse Premier, it is possible to delete all contents in the directory.
NOTE: It is not possible to recover erased records.
1. In the DIRECTORY menu, scroll to and select the DELETE ALL
RECORDS field by pressing the “D” key.
2. A message box will appear. Press the “O” key twice to confirm
deletion. To cancel the request, select Cancel.
NOTE: Proceed with caution. Answering Ok to these questions
will permanently erase every record in the Directory.
Use the left arrow key to exit.
7-8 Eclipse Operating Instructions 070-1149-01 B
Page 85
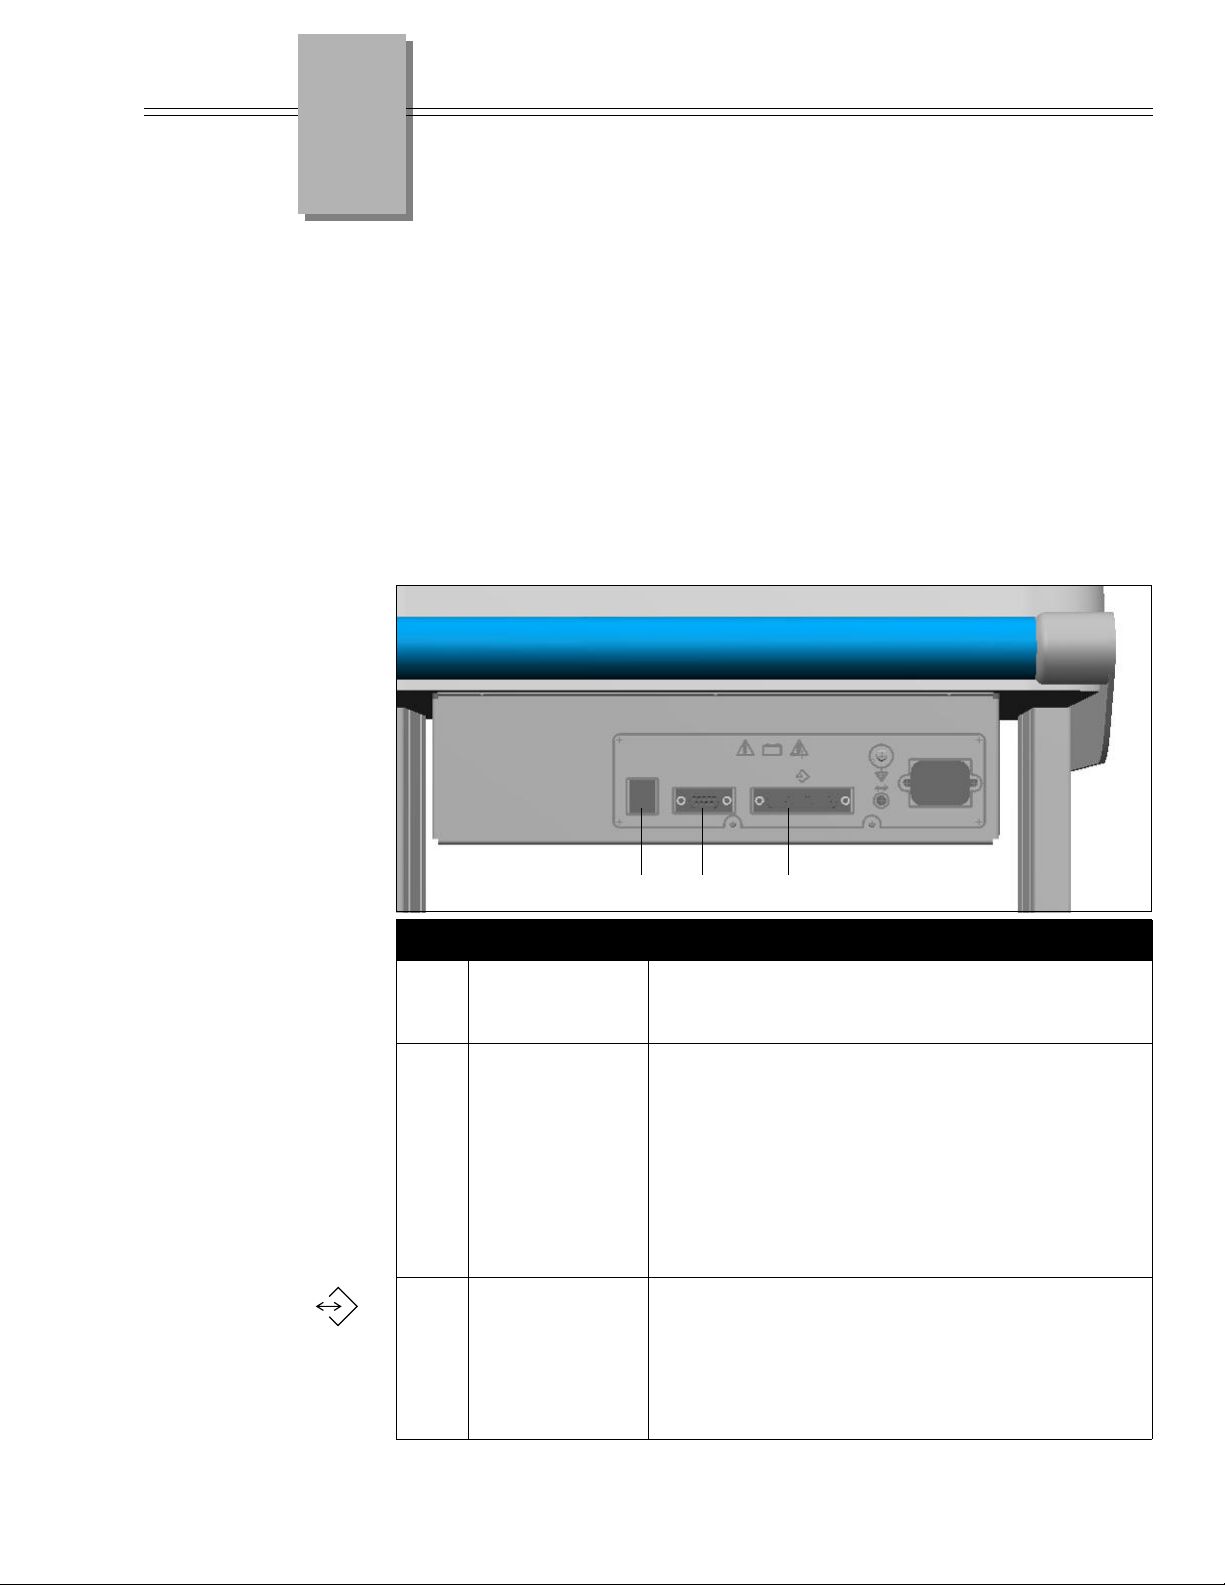
Chapter
8 Sending and Receiving Records
NOTE: You may use your Eclipse Premier for a variety of sending
and receiving. You may use a remote connection with either an internal
or an external modem, a wireless connection with a wireless device, or
a direct connection with another Eclipse or a compatible ECG
management system.
Eclipse Premier units with communication capabilities can receive requisitions, as well
as transmit ECGs to and receive ECGs from other Eclipse electrocardiographs or the
PYRAMIS ECG management system.
Equipment Connections
Figure 8-1
Back Panel
RJ11
IOIO
A
Internal Modem
Serial Port
B
Analog output
C
A BC
Key
Connect phone line cable, p/n 007079, to this RJ11
connector if your unit is equipped with an internal
fax/modem.
Connect compatible fax/modems to this serial connector
using an approved modem cable. Most Hayescompatible modems supporting Fax Service Class 2
commands will work with the Eclipse Premier.
Also use this connector for direct connection to a
compatible management system. The part numbers for
direct connect cables are 012-0710-00 for the adapter
cable; 882029 for the workstation cable; and 863347 for
the server cable.
The analog output provides one channel waveform,
typically the first channel which is currently displayed on
the PREVIEW screen, unless the PREVIEW screen is
displaying all 12 leads. In this case, channel II is output.
For wireless connection, connect adapter module into
this DB-25 connector (see Figure 8-2 on pg. 8-2).
070-1149-01 B Eclipse Operating Instructions 8-1
Page 86
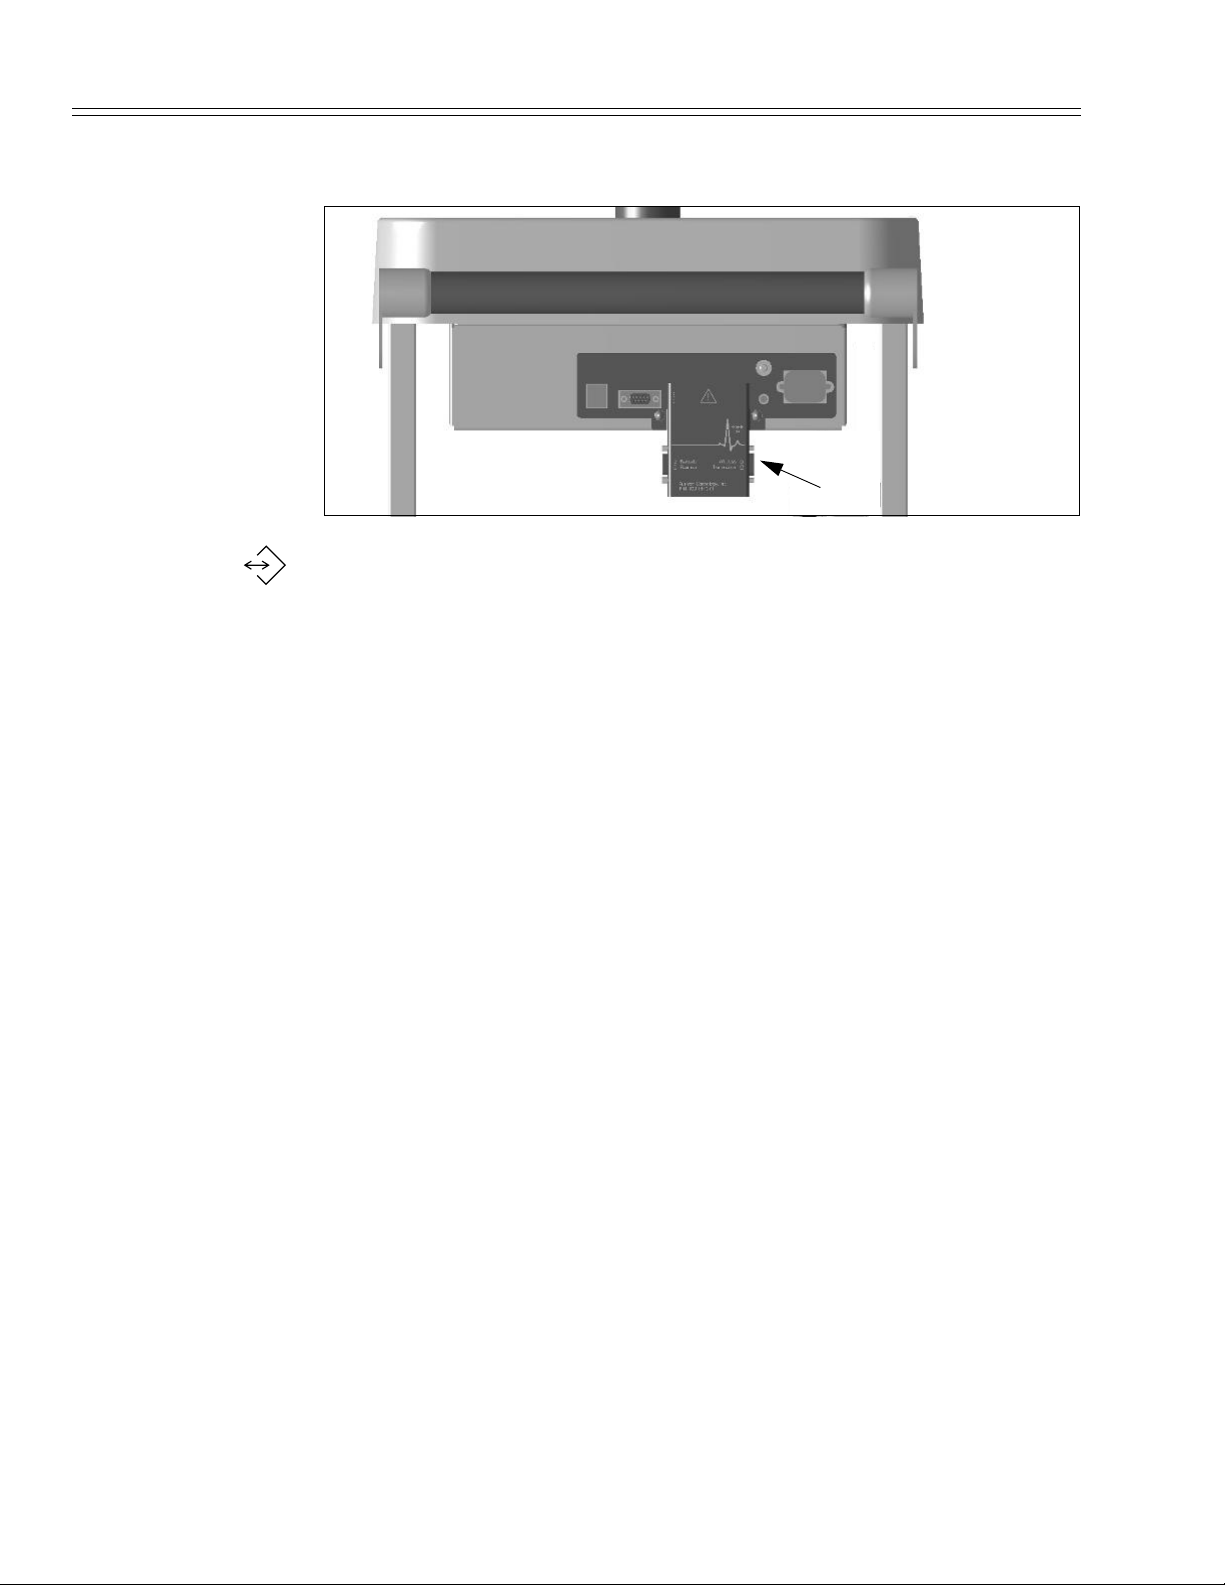
Chapter 8 Sending and Receiving Records
Wireless Connection via Adapter Module (Optional)
Figure 8-2
Back Panel with
Adapter Module
To connect the adaptor module and the wireless adapter, see the instructions provided
with the wireless device.
WARNING: The Eclipse Premier should not be connected to nonmedical equipment unless the non-medical equipment complies with
IEC 601-1. In addition, the enclosure leakage current of nonmedical equipment connected to the Eclipse Premier should not be
allowed to exceed 500µA in fault condition. To maintain a proper
enclosure leakage current, provide additional protective earth
grounding, use an additional isolating transformer or use a floating
power supply.
WARNING: The Eclipse Premier and any non-medical equipment
that it is connected to should not be allowed within the patient’s
vicinity, which extends 6 feet (1.83 m) beyond the perimeter of the
bed, table or chair, and 7 1/2 feet (2.29 m) above the floor.
WARNING: NEVER create a direct connection between an
Eclipse Premier and a PYRAMIS computer if the Eclipse Premier is
already connected to a patient.
8-2 Eclipse Operating Instructions 070-1149-01 B
Page 87

How record status affects the sending operations
How record status affects the sending operations
NOTE: For the list of status codes, see “Record Status” on pg. 7-2.
Record status affects whether records can be sent from the Eclipse Premier. The
following rules apply:
● Records with status Dm can not be sent.
● Records with status Rv can not be sent.
In general, the following records will automatically be sent when BATCH SEND
ECGS is selected in the DIRECTORY menu: records with the status ECG; records
with the status ECG and Pr; records with the status RtE; and records with the status
RtE and Pr. The following rules also apply:
● Records with status St or Rq will not be sent when BATCH SEND ECGS
is selected in the DIRECTORY menu. These records may be sent
individually from the Single ECG Functions list.
● Records with status, No, will not be sent when BATCH SEND ECGS is
selected in the DIRECTORY menu. These records may be sent
individually from the Single ECG Functions list.
Changing Record Status
Patient records can be marked so that they are automatically sent when BATCH SEND
ECGS is selected in the DIRECTORY menu. Similarly, patient record status can be
changed to ensure that a record is not sent.
Mark Record as “SEND”
To ensure that a record is sent the next time BATCH SEND ECGS is selected, select
the MARK RECORD AS “SEND” from the Single ECG Functions list.
1. Follow the instructions for accessing the list of patient files (see
“Using the DIRECTORY Menu” on pg. 7-1).
2. Locate the desired patient file, highlight it and press the Enter key. The
Single ECG Functions list is displayed.
3. Select MARK RECORD AS “SEND” from the Single ECG Functions
list
4. If the record has been sent previously, then the status of St is removed
from that record. The file will be sent the next time BATCH SEND
ECGS is selected.
070-1149-01 B Eclipse Operating Instructions 8-3
Page 88

Chapter 8 Sending and Receiving Records
Mark Record As “DO NOT SEND”
To ensure that a record is not sent the next time BATCH SEND ECGS is selected, select
the MARK RECORD AS “DO NOT SEND” from the Single ECG Functions list.
1. Follow the instructions for accessing the list of patient files (see
2. Locate the desired patient file, highlight it and press the Enter key. The
3. Select MARK RECORD AS “DO NOT SEND” from the Single ECG
4. The record is marked with the No status. The file will not be sent the
Setting Up the Unit to Send and Receive
The Eclipse Premier can transmit and receive records in three ways:
“Using the DIRECTORY Menu” on pg. 7-1).
Single ECG Functions list is displayed.
Functions list
next time BATCH SEND ECGS is selected.
● Direct Connection
● Wireless Connection (optional)
● Remote Connection
A direct connection is achieved through the use of a cable, which connects the Eclipse
Premier unit to either PYRAMIS or another Eclipse unit. A wireless connection is
achieved through a wireless transmitter attached to the Eclipse Premier, a wireless
access port, and receiver software. A remote connection requires either an internal or
external modem connected to a phone line.
Using a Direct Connection
1. If you are connecting to PYRAMIS, connect the Interconnect Cable to
the connector labeled “DECG-SCP” on the PYRAMIS back panel and
to the connector labeled “IOIO” on the Eclipse Premier back panel.
2. If you are connecting to another electrocardiograph, connect the
Eclipse Direct Connect Cable #007796 to the connectors labeled
“IOIO” on the back panel of each Eclipse.
NOTE: Follow steps 3 through 8 on both Eclipse units.
3. Press the On/Standby key to power up to the PREVIEW screen.
4. Press the “M” key to go to the MAIN MENU.
8-4 Eclipse Operating Instructions 070-1149-01 B
Page 89
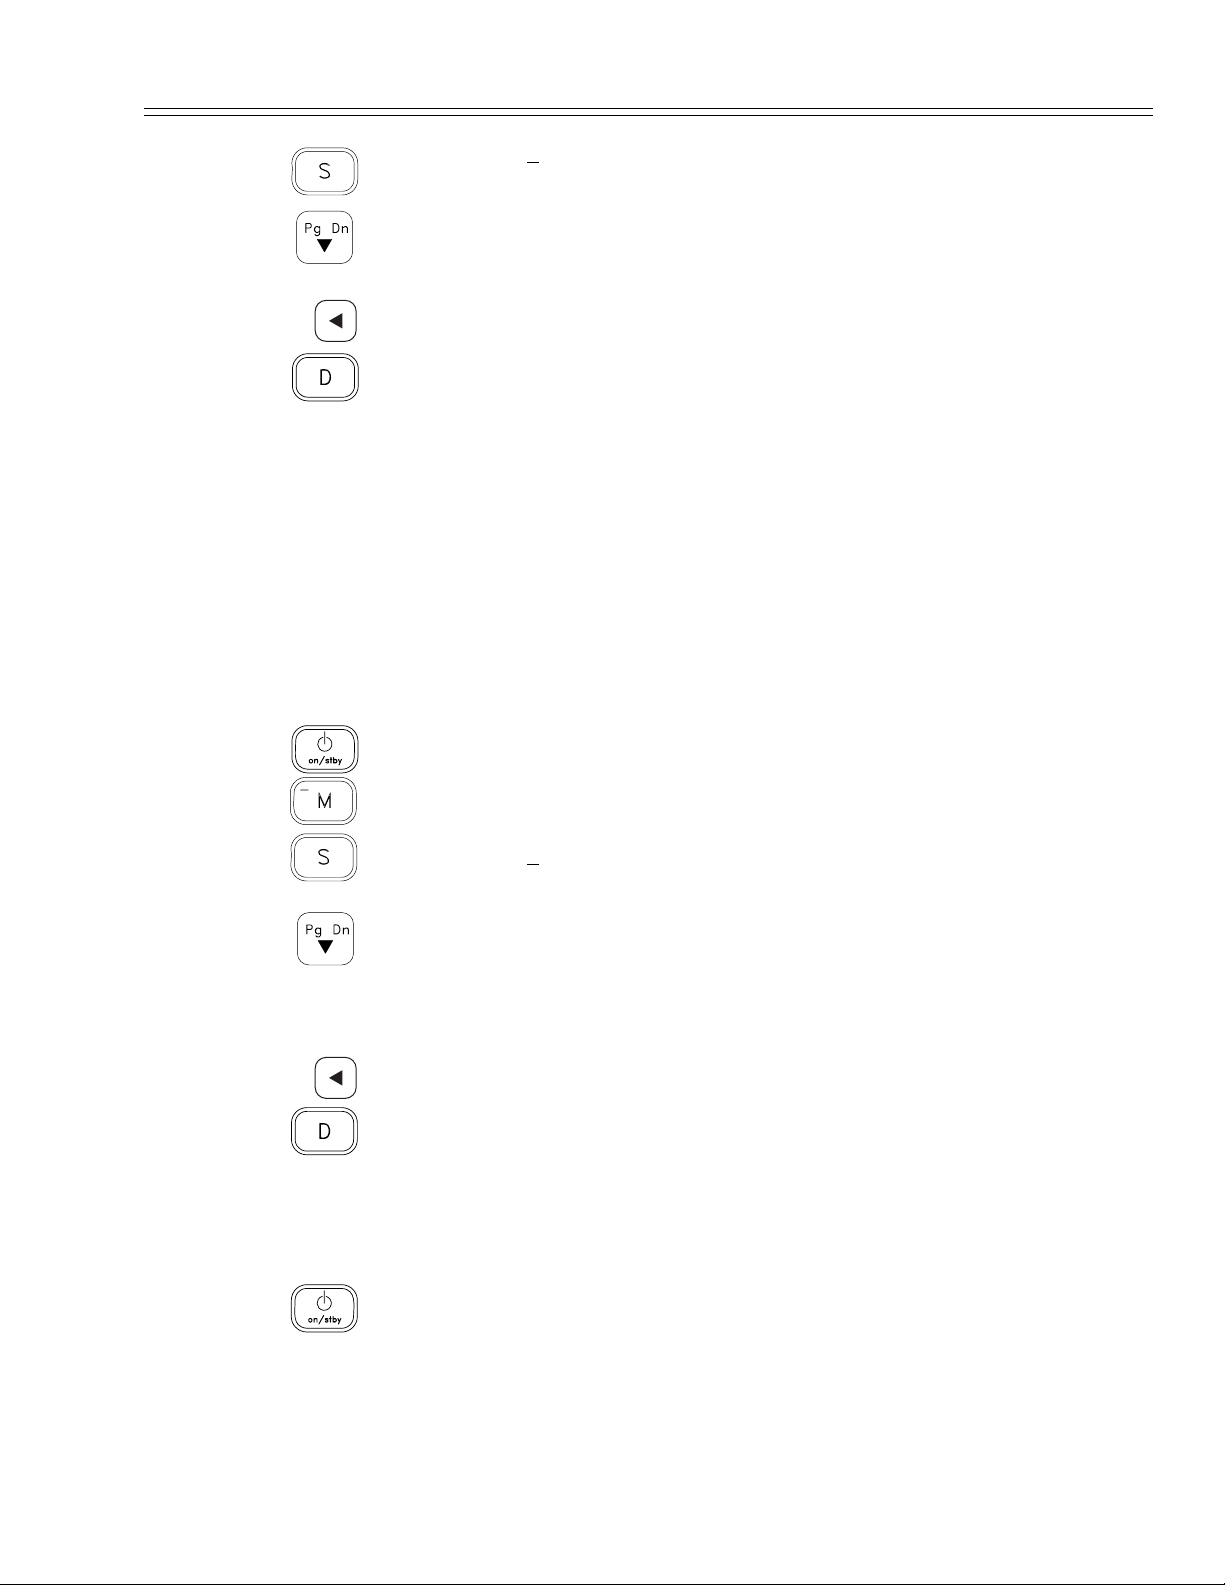
Setting Up the Unit to Send and Receive
5. Select SYSTEM SETUP by pressing the “S” key. The SYSTEM
SETUP menu will appear (see Figure 4-1 on pg. 4-1).
6. Press the down arrow key to highlight the Connection field and select
DIRECT.
7. Press the left arrow key to return to the MAIN MENU.
8. Press the “D” key to go to the DIRECTORY menu.
Using a Wireless Connection
Refer to the instructions that accompanied the Wireless Connection option for
instructions on installing and configuring the transmitter and receiver.
Using a Remote Connection
CONNECTING TO PYRAMIS
To send records to PYRAMIS, or to receive requisitions and records from PYRAMIS,
the Eclipse Premier must be equipped with either an internal or external modem
connected to a phone line.
1. Press the On/Standby key to power up to the PREVIEW screen.
2. Press the “M” key to go to the MAIN MENU.
3. Select S
SETUP menu will appear (see Figure 4-1 on pg. 4-1).
4. Press the down arrow key to highlight the Connection field and select
MODEM.
5. Verify that the Phone # and Description fields are correctly filled in.
6. Press the left arrow key to return to the MAIN MENU.
7. Press the “D” key to go to the DIRECTORY menu.
CONNECTING TO ANOTHER ECLIPSE
NOTE: This requires two Eclipse units with either an internal or
external modem connected to separate phone lines.
YSTEM SETUP by pressing the “S” key. The SYSTEM
1. Both Eclipse units: Press the On/Standby key to power up to the
PREVIEW screen.
070-1149-01 B Eclipse Operating Instructions 8-5
Page 90
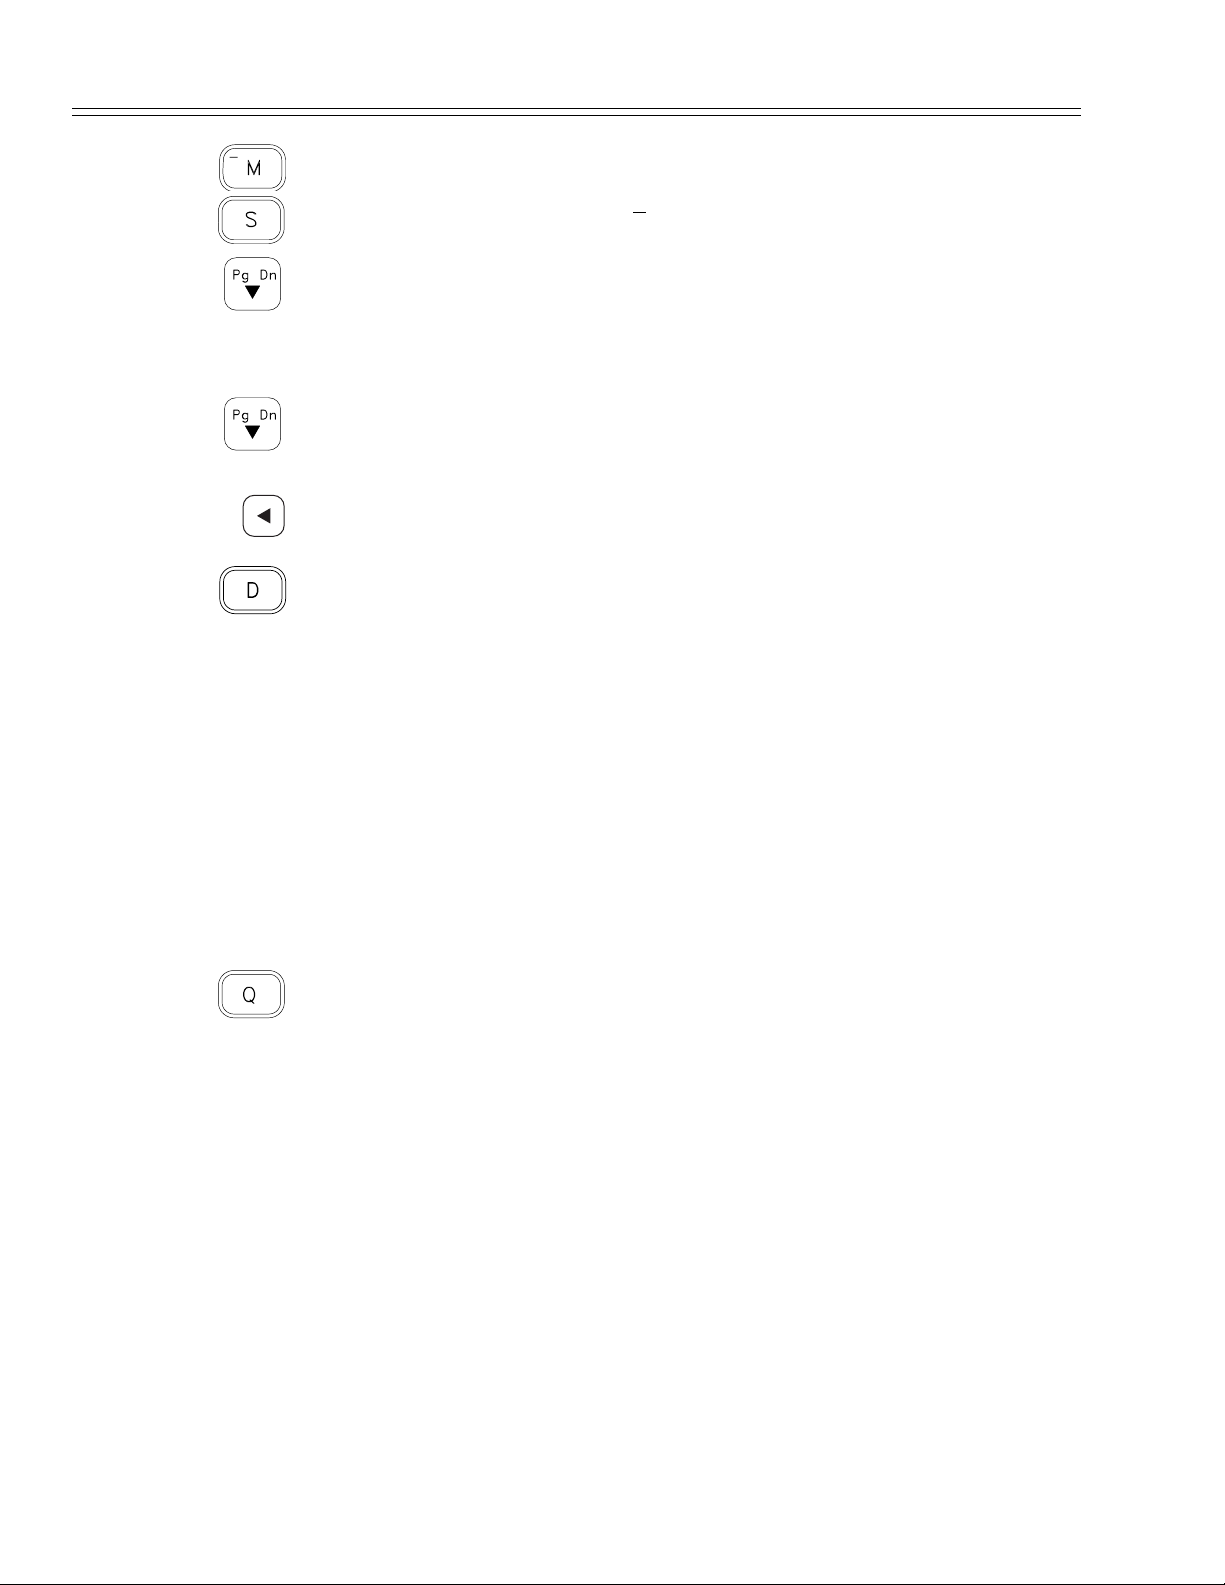
Chapter 8 Sending and Receiving Records
2. Both Eclipse units: Press the “M” key to go to the MAIN MENU.
3. Both Eclipse units: Select S
The SYSTEM SETUP menu will appear (see Figure 4-1 on pg. 4-1).
4. On the Eclipse that will be sending records, press the down arrow key
to highlight the Description field and verify that the description and
phone number are correct for the electrocardiograph that will be
receiving records.
5. Both Eclipse units: Press the down arrow key to highlight the
Connection field and select MODEM.
6. Both Eclipse units: Press the left arrow key to return to the MAIN
MENU.
7. Both Eclipse units: Press the “D” key to go to the DIRECTORY
menu.
YSTEM SETUP by pressing the “S” key.
Receiving requisitions from PYRAMIS
A requisition is a request for an ECG report that consists of demographic information
only. Requisitions are used to organize the schedule of the person acquiring ECG
records. An ECG management system such as PYRAMIS sends a requisition to the
electrocardiograph, indicating that an ECG needs to be acquired on a specific patient.
Requisitions are received using the GET REQUISITIONS selection in the
DIRECTORY menu.
1. Follow the instructions for setting up the unit to receive records (see
“Setting Up the Unit to Send and Receive” on pg. 8-4).
2. From the DIRECTORY menu, press the “Q” key to go to the GET
REQUISITIONS menu.
3. Select ENTER CRITERIA. The Get Requisitions menu is displayed.
4. The Department field will display the default Department number as
set in the PATIENT FIELDS ENABLE menu. This will limit the
search to requisitions targeted at the selected department. You may
change this to receive requisitions for a different department. You can
also delete this to receive all requisitions currently on the PYRAMIS
system.
5. To limit the request to requisitions targeted at you or your area, type
your code into the Group Code field.
The Group Code is maintained on the PYRAMIS system. Contact your
System Administrator to verify your Group Code.
8-6 Eclipse Operating Instructions 070-1149-01 B
Page 91

6. If you want to receive a specific requisition and you know the number,
type this number into the Req. Number (Requisition Number) field.
7. Press the left arrow key to return to the GET REQUISITIONS menu.
8. Select GET REQUISITIONS to receive all requisitions that match
the criteria you have entered.
Sending records to PYRAMIS
1. Follow the instructions for setting up the unit to send records (see
“Setting Up the Unit to Send and Receive” on pg. 8-4).
2. To send more than one ECG, select BATCH SEND ECGS from the
DIRECTORY menu. The Eclipse Premier unit will automatically send
all of the ECGs that have the appropriate status (see “How record
status affects the sending operations” on pg. 8-3). A message will be
displayed indicating the total number of ECGs sent. Select OK.
Sending records to PYRAMIS
3. To send a single ECG, in the DIRECTORY menu, select VIEW
DIRECTORY. Select a single record and select SEND ECG from the
Single ECG Functions list. A message will be displayed indicating the
status of the operation. Select OK.
4. The list of tests is displayed.
070-1149-01 B Eclipse Operating Instructions 8-7
Page 92

Chapter 8 Sending and Receiving Records
Sending and Receiving records from an Eclipse
1. Follow the instructions for setting up the unit to send and receive
1. Ensure that both electrocardiographs display the DIRECTORY menu.
2. On the Eclipse that will be receiving the records, press the “R” key
3. To send more than one ECG, select BATCH SEND ECGS from the
4. To send a single ECG, in the DIRECTORY menu, select VIEW
records (see “Setting Up the Unit to Send and Receive” on pg. 8-4).
(
eceive ECGS) to put the electrocardiograph into waiting mode.
R
DIRECTORY menu. The Eclipse Premier unit will automatically send
all of the ECGs that have the appropriate status (see “How record
status affects the sending operations” on pg. 8-3). A message will be
displayed indicating the total number of ECGs sent. Select OK.
DIRECTORY. Select a single record and select SEND ECG from the
Single ECG Functions list. A message will be displayed indicating the
status of the operation. Select OK.
5. The list of tests is displayed.
Receiving records from PYRAMIS
1. Follow the instructions for setting up the unit to receive records (see
“Setting Up the Unit to Send and Receive” on pg. 8-4).
2. To receive all confirmed records, select GET ALL CONFIRMED
ECGS from the DIRECTORY menu. A message will be displayed
indicating the total number of ECGs received. Select OK.
NOTE: The Institution Number and Department on the Eclipse
Premier must match the settings on PYRAMIS in order for this
selection to function properly (see “Institution Number” on pg. 4-3
and “Department” on pg. 6-12).
3. To receive records for a particular patient, select GET ECG VIA ID
from the DIRECTORY menu. See “Using GET ECG VIA ID” on
pg. 8-9).
8-8 Eclipse Operating Instructions 070-1149-01 B
Page 93

Receiving records from PYRAMIS
Using GET ECG VIA ID
When you select GET ECG VIA ID you can search the PYRAMIS database for all the
records for a particular patient. You can search the database using:
● The patient’s ID
● The patient’s name
USING THE PATIENT’S ID
1. From the DIRECTORY menu, select GET ECG VIA ID. The GET
ECG VIA ID menu is displayed.
2. The only option available at first is ENTER ID. Select this option. The
GET VIA ID menu is displayed.
3. Type the patient’s ID into the ID field.
4. Press the left arrow key to return to GET ECG VIA ID.
5. Select GET ECG LIST to view a list of all the records stored on
PYRAMIS with that ID.
6. When the list has downloaded, highlight each record that you want to
receive and press enter to select the record. The word, “SELECT”
appears on the right side of the display.
7. Press the left arrow key to return to GET ECG VIA ID.
8. Select GET ECG(S) to begin receiving all the selected records.
USING THE PATIENT’S NAME
1. From the DIRECTORY menu, select GET ECG VIA ID. The GET
ECG VIA ID menu is displayed.
2. The only option available at first is ENTER ID. Select this option. The
GET VIA ID menu is displayed.
3. Type at least the first letter of the patient’s last name (see “How
PYRAMIS Searches Using the Patient’s Name”).
4. Press the left arrow key to return to GET ECG VIA ID.
5. Select GET ECG LIST to view a list of all the records stored on
PYRAMIS with that ID.
6. When the list has downloaded, highlight each record that you want to
receive and press enter to select the record. The word, “SELECT”
appears on the right side of the display.
070-1149-01 B Eclipse Operating Instructions 8-9
Page 94

Chapter 8 Sending and Receiving Records
7. Press the left arrow key to return to GET ECG VIA ID.
8. Select GET ECG(S) to begin receiving all the selected records.
HOW PYRAMIS SEARCHES USING THE PATIENT’S NAME
PYRAMIS can search using just the Last Name field. All the files with the entered last
name are retrieved. If there are no files with exactly the same last name, then
PYRAMIS locates all the files with last names that are similar to the one entered.
When you search using First Name in addition to the Last Name field, PYRAMIS
searches for files with a first name that matches exactly. First, PYRAMIS searches for
an exactly matching last name. If no exact matches are found, PYRAMIS searches for
similar last names. Once a last name is found, either matching or similar, PYRAMIS
displays only the records in which the first name matches exactly.
For example:
The database has 4 records:
Stork, Blanche
Smythe, John
Smythe, Blanche
Smith, Blanche
Search for:
Last Name:Smi
First Name: Blanche
PYRAMIS displays 2 records in the List of Patients window:
Smythe, Blanche
Smith, Blanche
No exact match was found for the last name so all names similar to “Smi” were located.
Of these, only files with an exactly matching first name were displayed.
8-10 Eclipse Operating Instructions 070-1149-01 B
Page 95
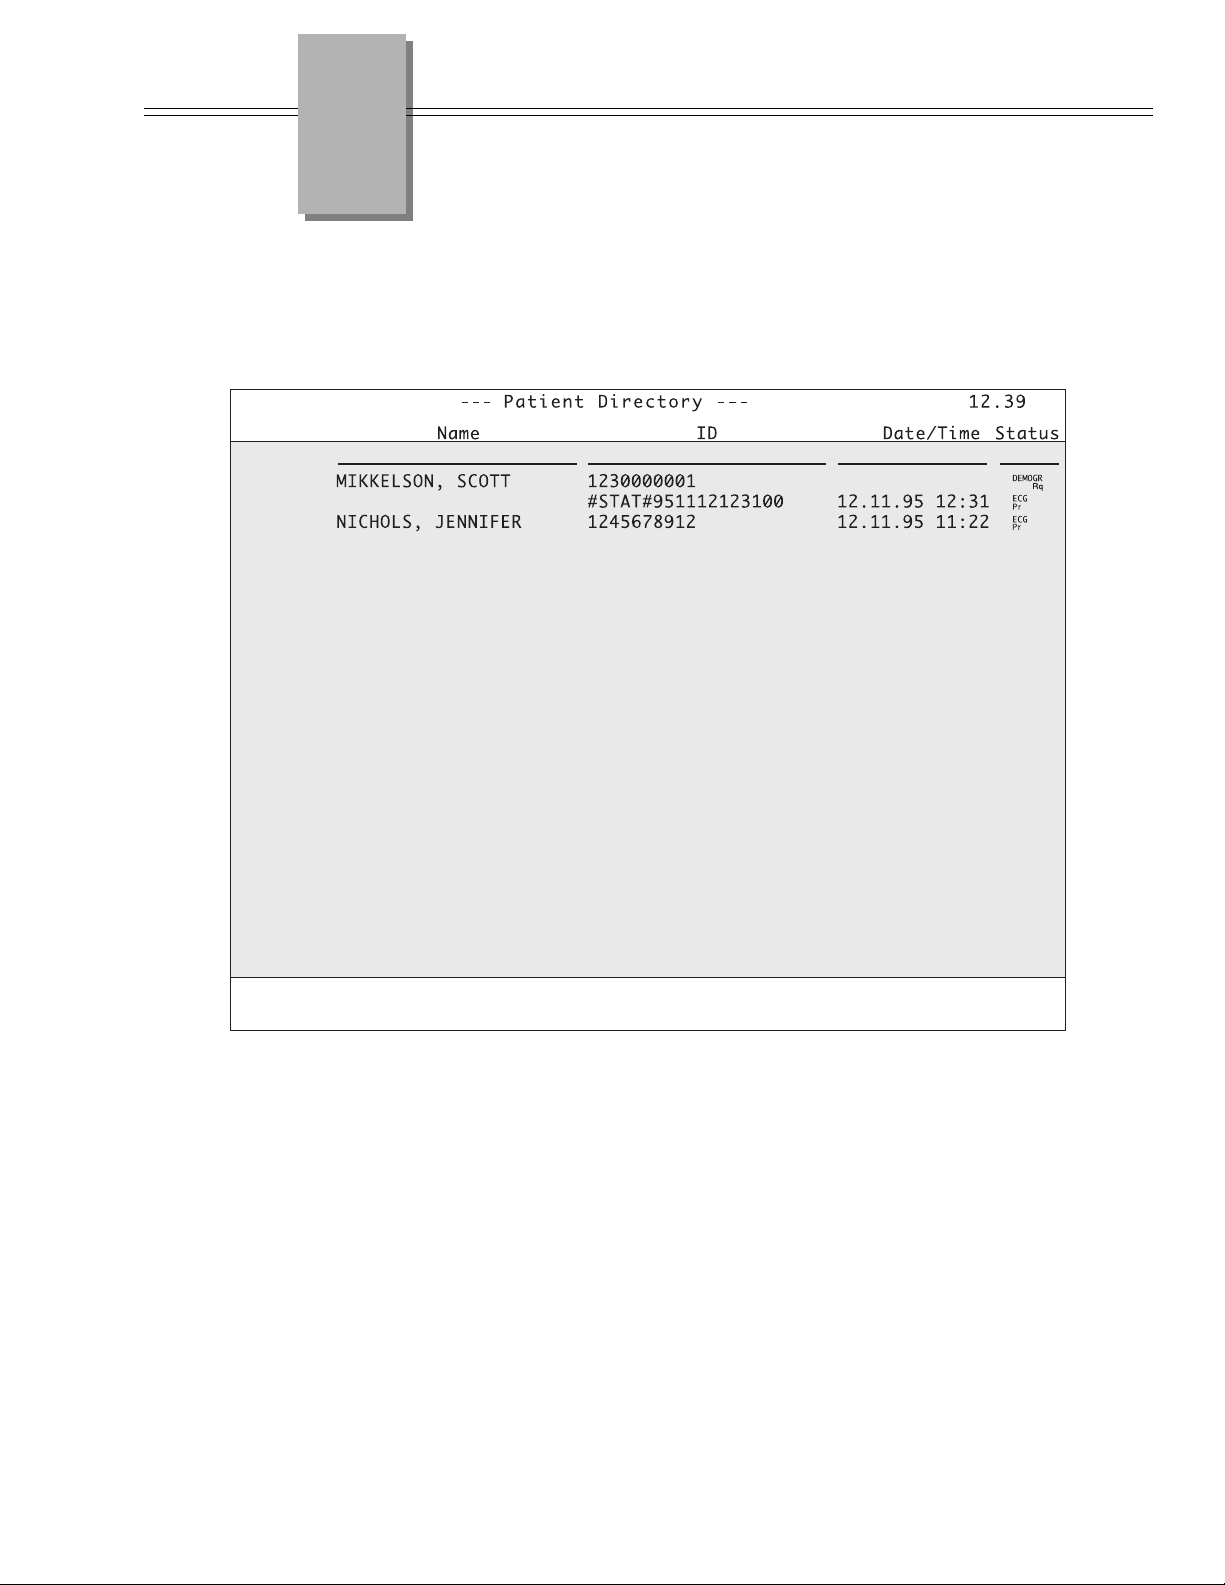
Chapter
Print Directory Report
9 Sample Printouts
12.11.2004
070-1149-01 B Eclipse Operating Instructions 9-1
Page 96
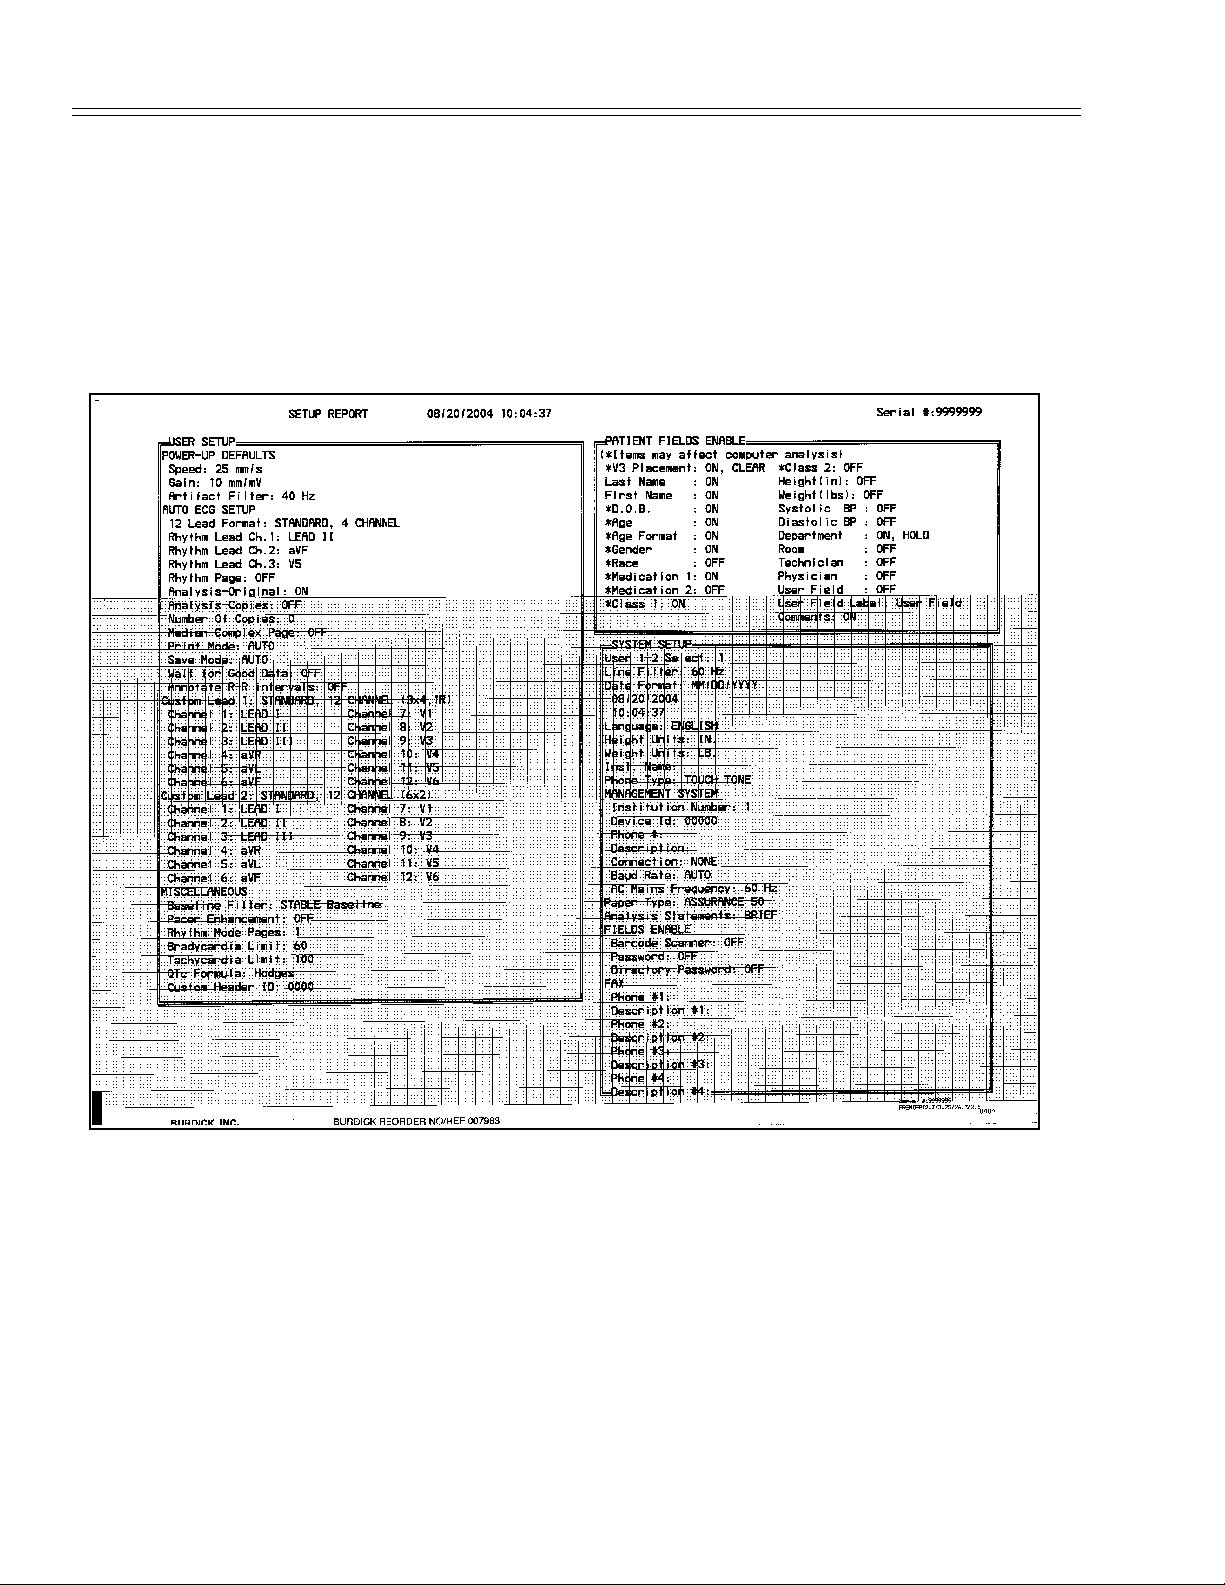
Chapter 9 Sample Printouts
Print Setup Report
The Print Setup Report is a list of all current settings (see “Acquire Printout of Eclipse
Premier Program Settings” on pg. 4-17).
The example Print Setup Report printout below lists the settings as they are set at the
factory.
9-2 Eclipse Operating Instructions 070-1149-01 B
Page 97
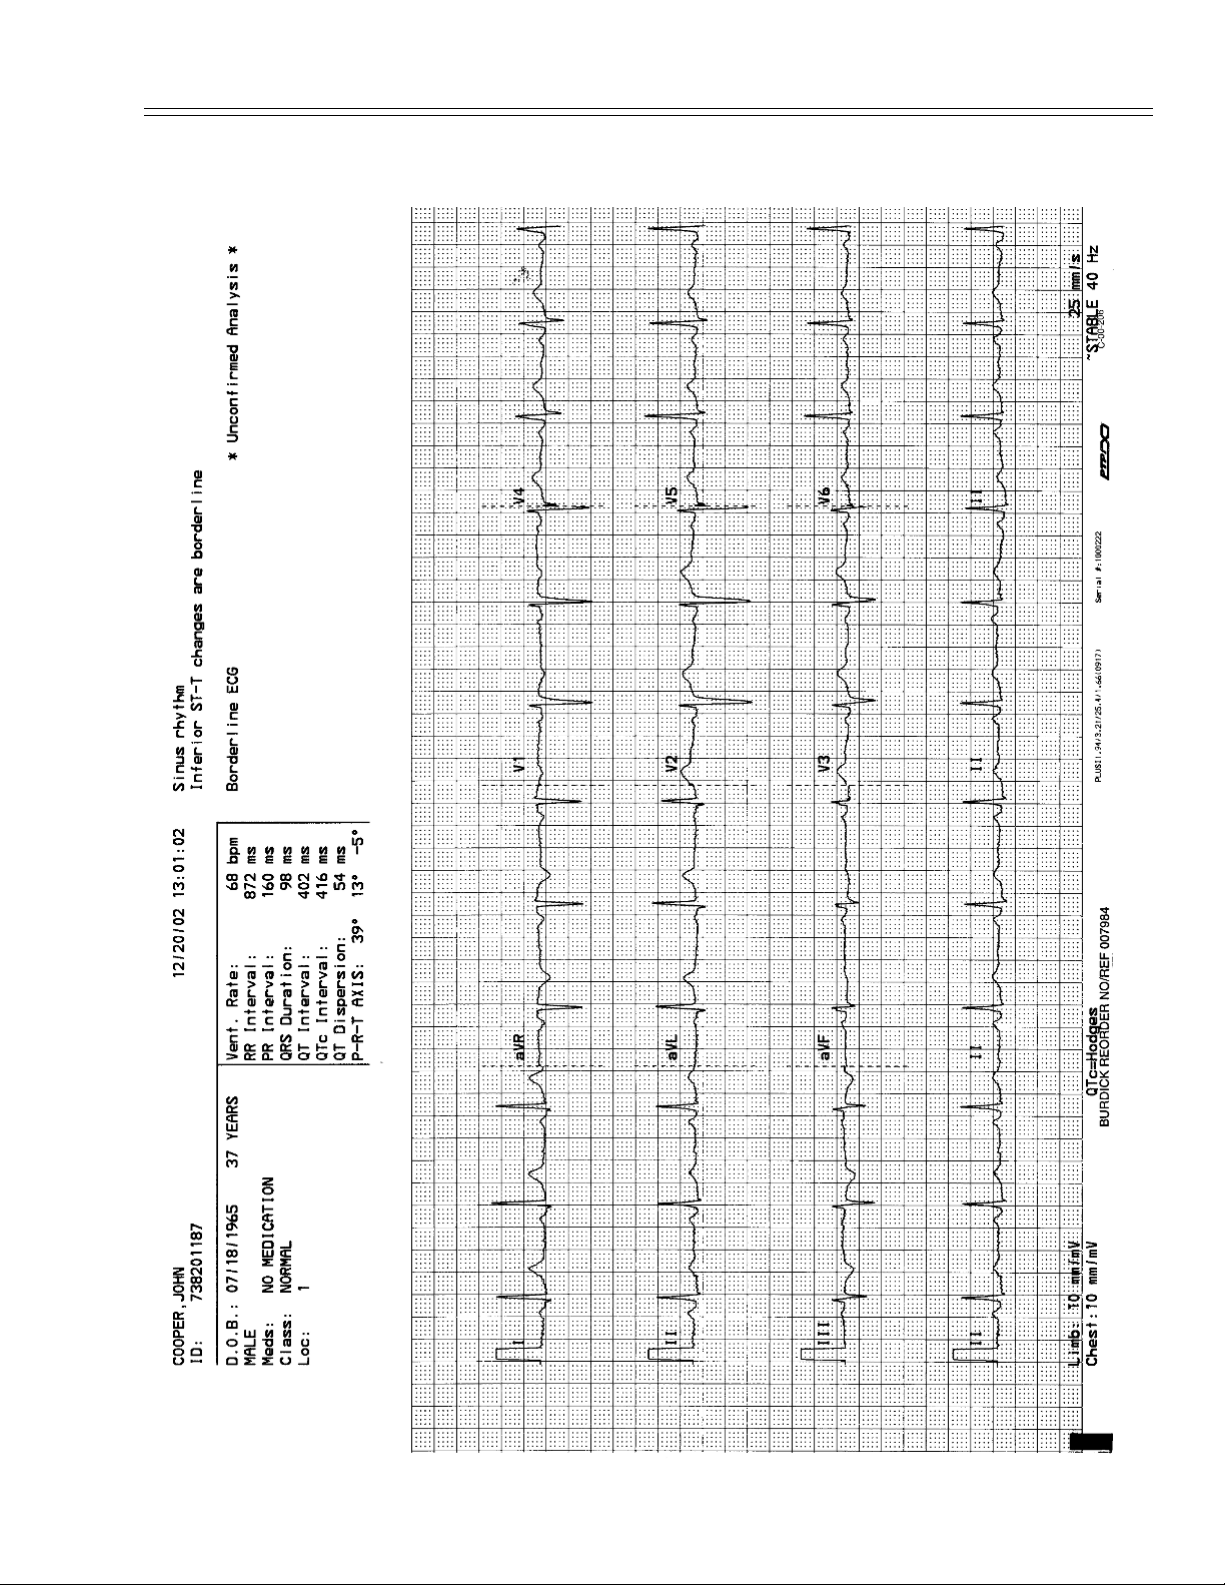
Standard 12-Lead, 4-Channel Auto ECG
Standard 12-Lead, 4-Channel Auto ECG
070-1149-01 B Eclipse Operating Instructions 9-3
Page 98
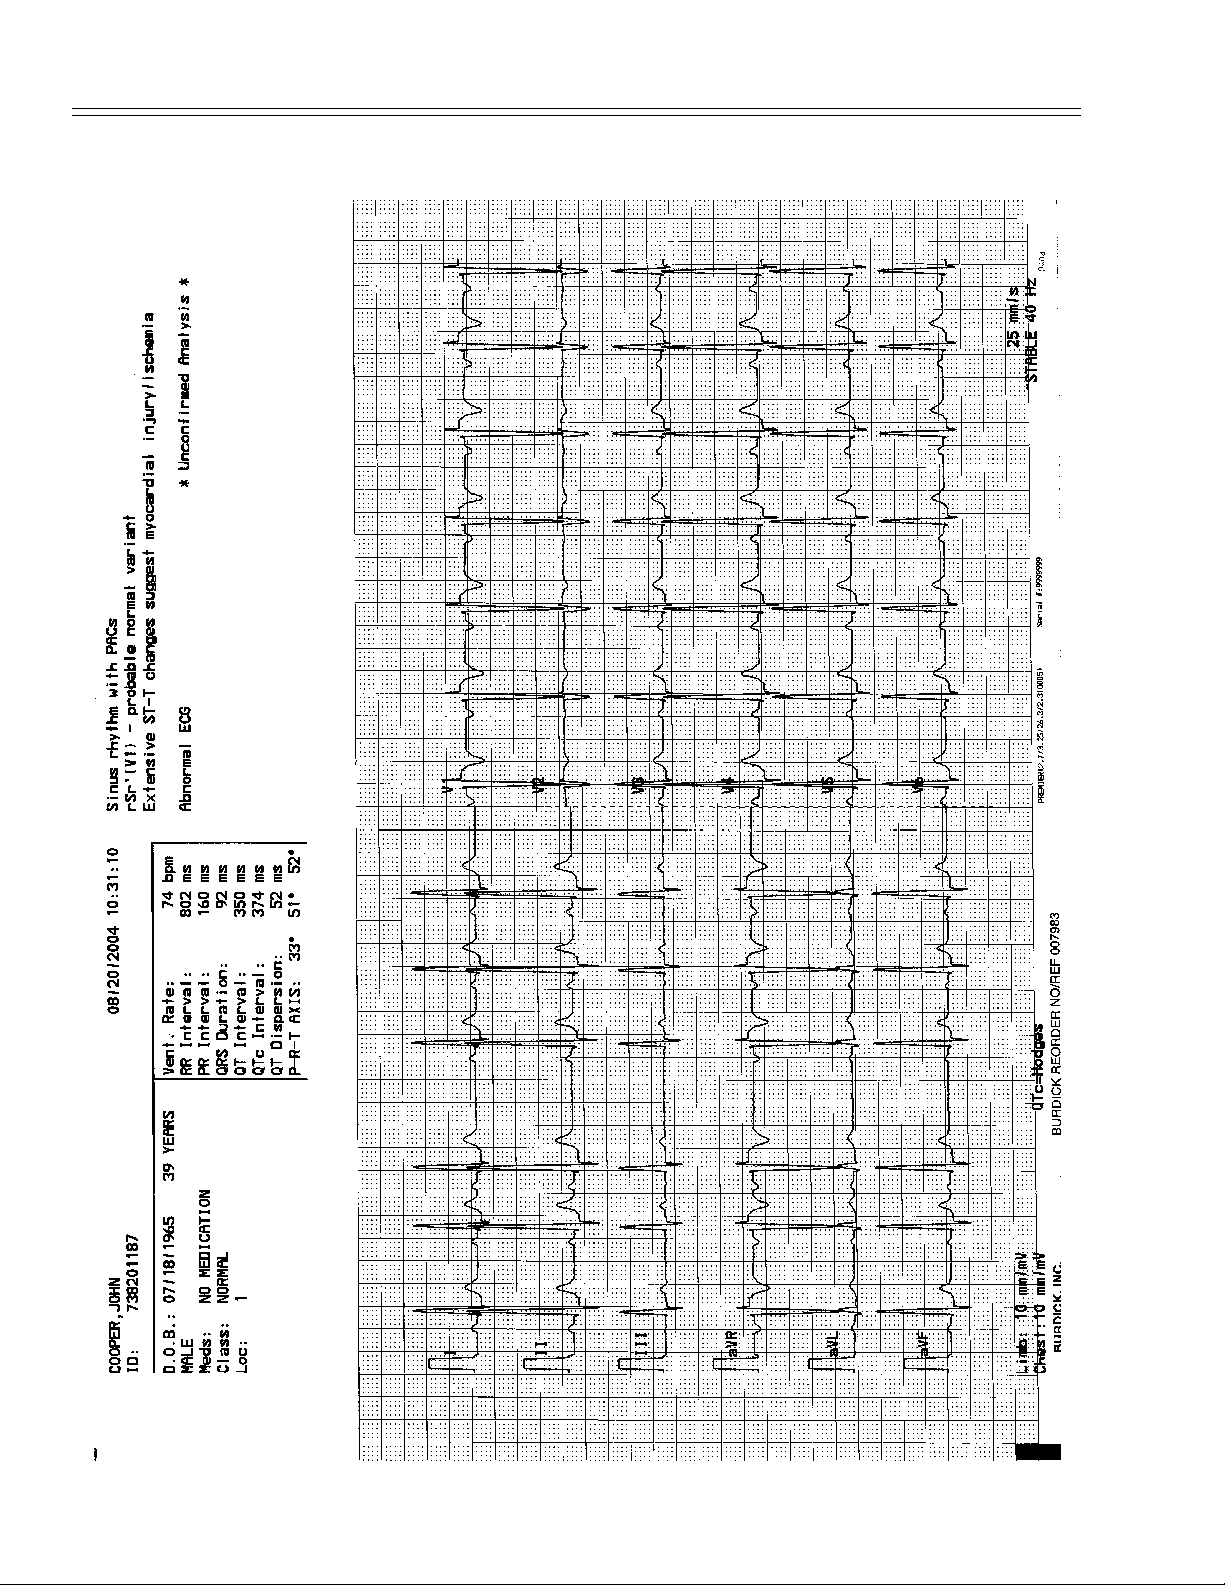
Chapter 9 Sample Printouts
Standard 12-Lead, 6-Channel Auto ECG
9-4 Eclipse Operating Instructions 070-1149-01 B
Page 99
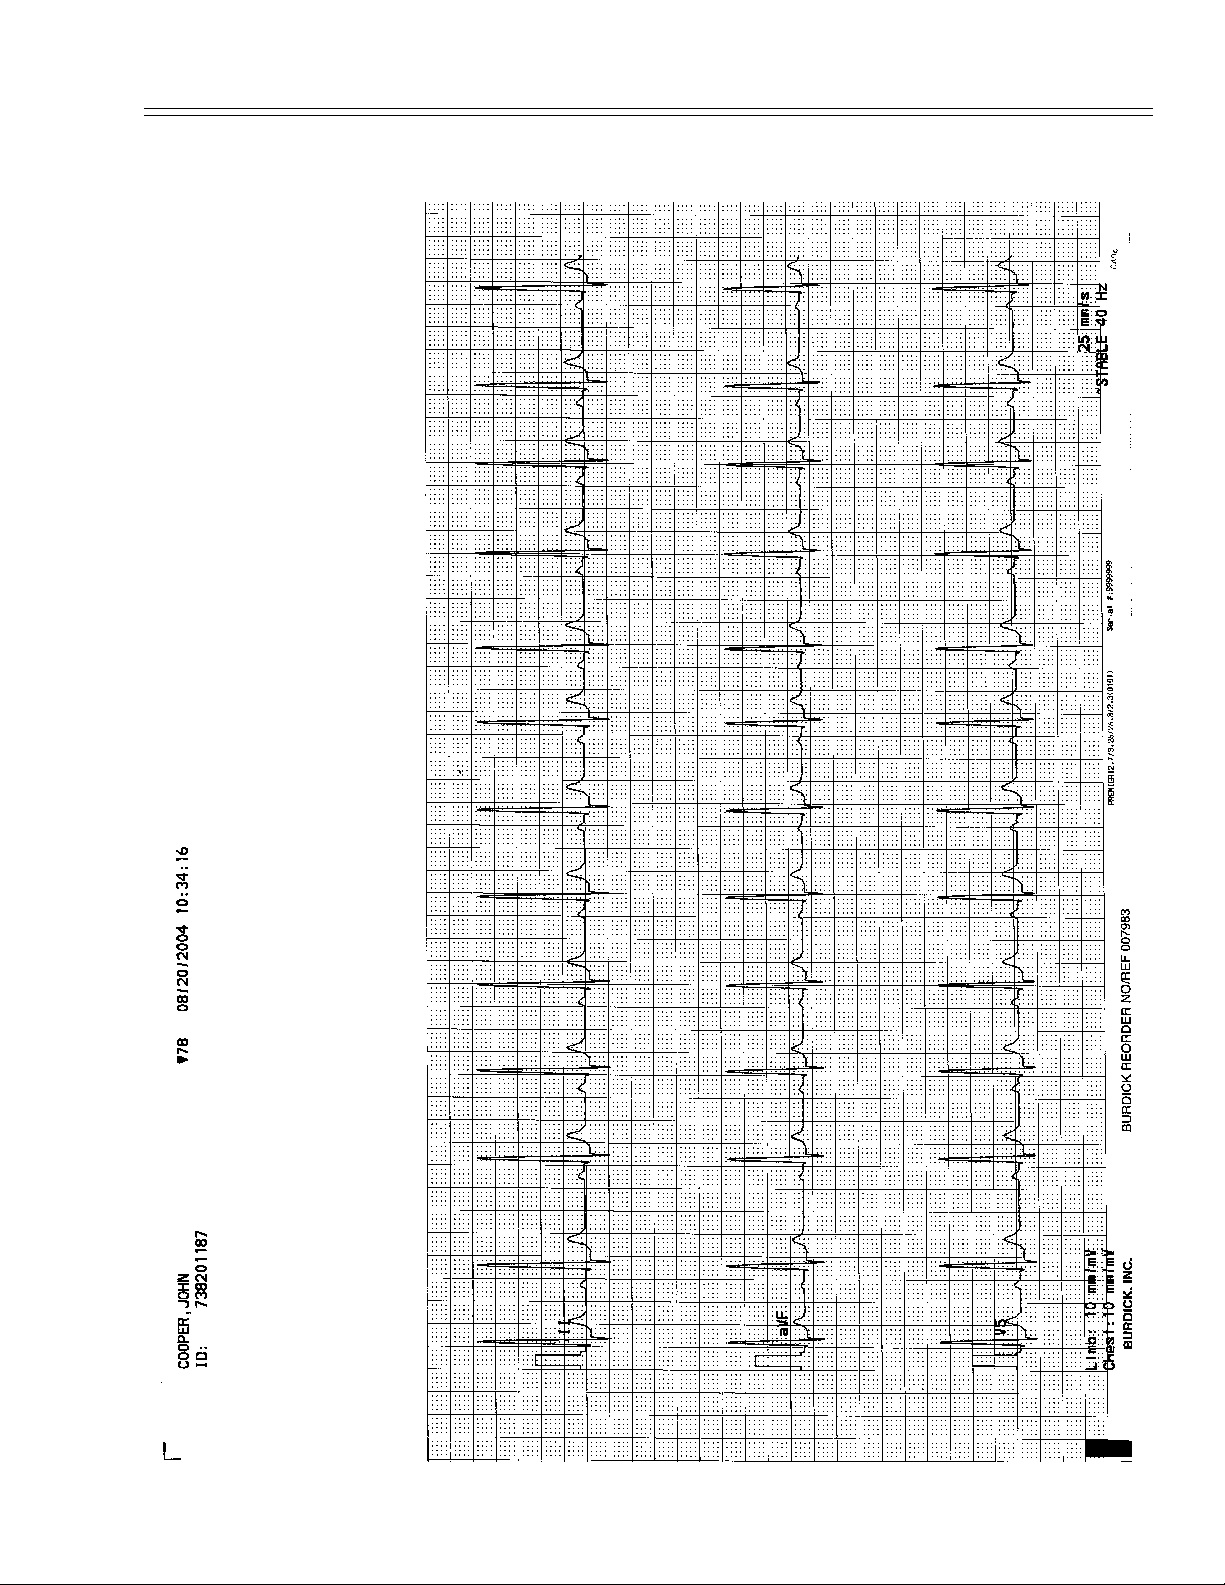
Standard 3-Channel Rhythm & Manual ECG
Standard 3-Channel Rhythm & Manual ECG
070-1149-01 B Eclipse Operating Instructions 9-5
Page 100
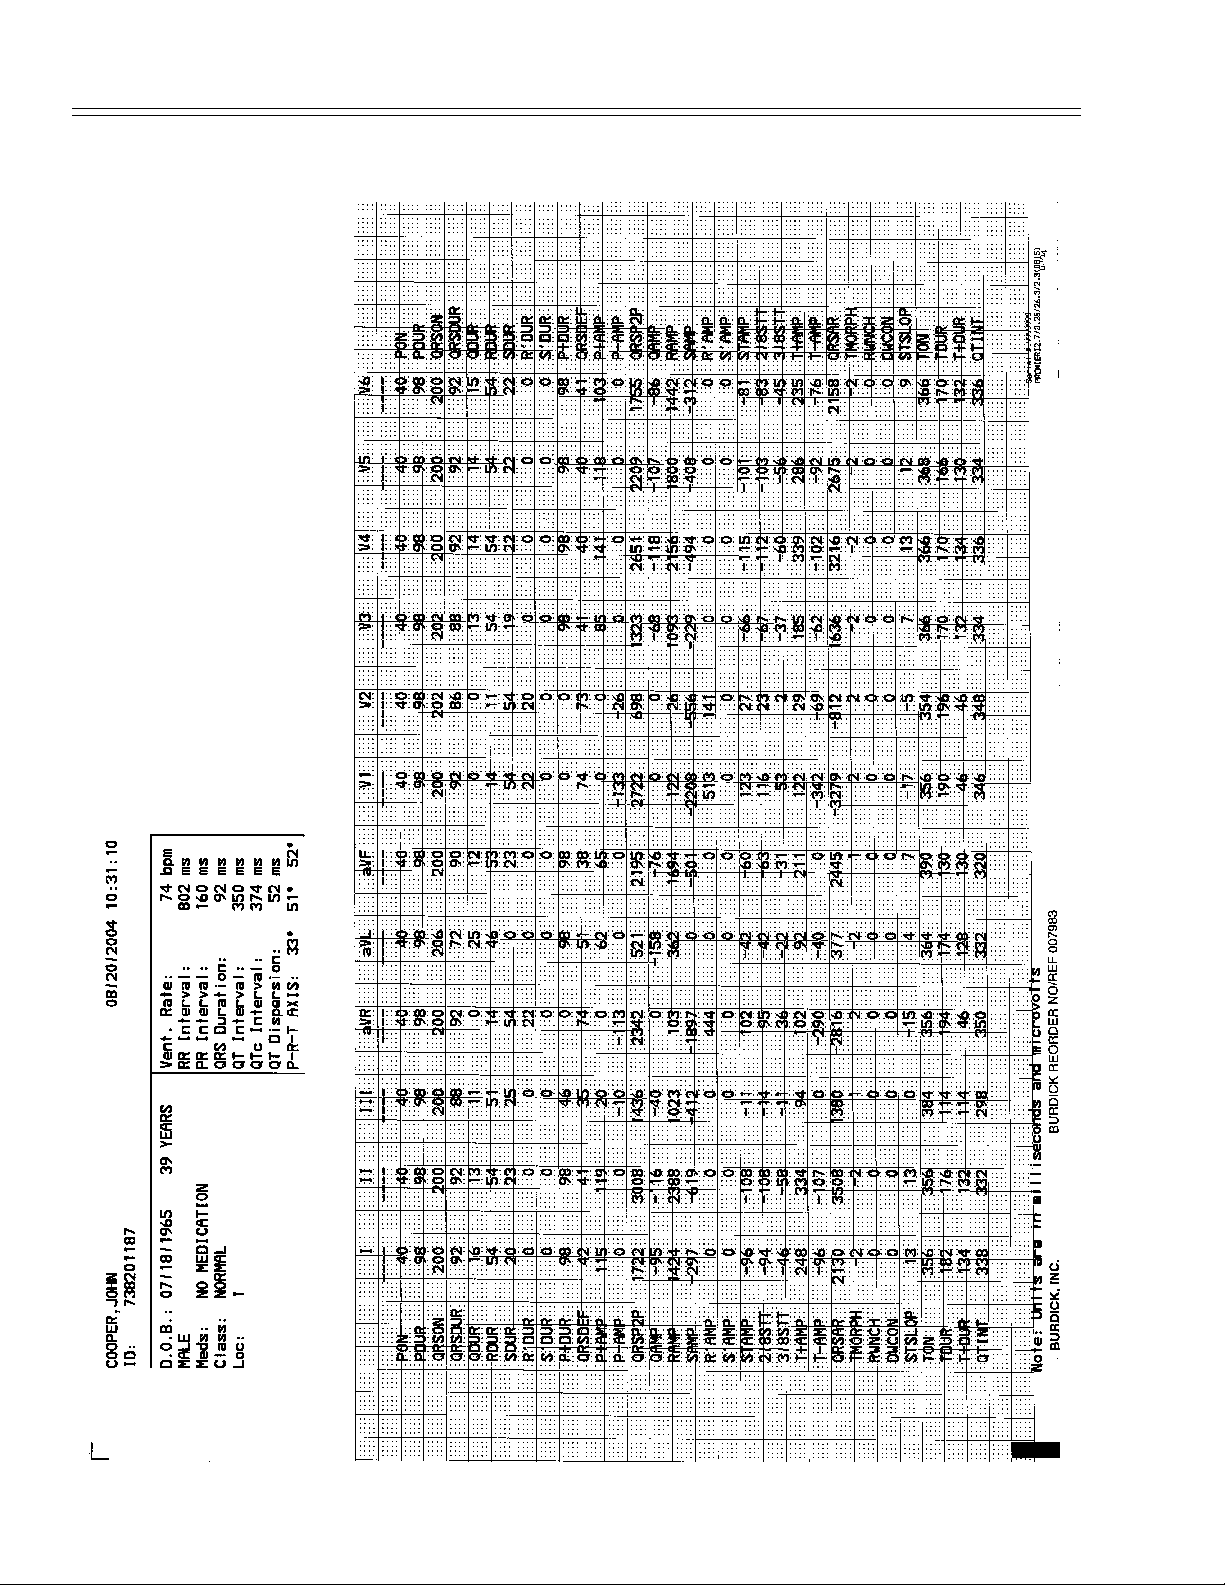
Chapter 9 Sample Printouts
Measurement Matrix
9-6 Eclipse Operating Instructions 070-1149-01 B
 Loading...