

Captiva Pad 10.1 User Manual [ml]


Introduction
Thank you for your choosing this tablet.
The tablet brings you much convenience for your business (supports Word, Excel, send & receive e-mails) and entertainment.
Running on Microsoft Windows 8.1 operating system, Intel Atom Quad-Core processor and highly responsive capacitive
multi-touch screen, it brings you wonderful user experience. This guide serves to enable users to get to know and familiar with
the product as soon as possible. Here we have made a brief introduction to the key layout and definitions in figures and words.
Before beginning, please refer to this user manual carefully.
Contents
Important Notes:....................................................................................................1
Ⅰ. Precautions before Use....................................................................................2
Ⅱ. Key Layout and Definitions ............................................................................3
Ⅲ. Keyboard.........................................................................................................4
IV. Introduction to Desktop...................................................................................5
1. Windows 8.1 start image:..................................................................................5
2. Image slide applications....................................................................................5
3. Introduction to App Interface............................................................................6
4. Charms menu bar...............................................................................................7
5. Dual-Screen Application ...................................................................................8
Ⅴ. Basic Operations..............................................................................................9
1. Dormancy, restart and power off.......................................................................9
2. Security Management........................................................................................9
3. Wi-Fi , Bluetooth, Flight mode..........................................................................9
4. 3G Network.......................................................................................................9
4.1 Installing the SIM Card.................................................................................10
VI. Battery charging............................................................................................13
VII. Specifications...............................................................................................13
VIII. R&TTE Directive.......................................................................................13
IX. Manufacturer.................................................................................................14
X.Information for energy saving.........................................................................14
XI.Package content..............................................................................................14
XII. BIOS – Setting & Bootmanager ................................................................14
XIII. Troubleshooting..........................................................................................14
Important Notes:
1. Charge the battery for at least 12 hours before initial start-up.
2. The display has 2 protective films, one transportation film and one screen protector film. The transportation
film protect the display during the transportation. Please remove this film, when the tablet is used.
The screen protector film protect the screen against scratches during touch operation. Please keep this film
on the display.
Ⅰ. Precautions before Use
1. This product is suitable for use in non-tropic areas below 2,000 meters
2. Prevent this product from falling to the ground it could be strongly damaged.
3. Keep the tablet away from rain, moisture, direct sunlight and heat source.
4. Avoid using it in the strong magnetic and strong static environment as much as possible.
5. Once any water or other liquid splashes onto this product, close it immediately and do not use it until it dries out.
6. Do not clean this product with any detergent containing chemical element or other liquid to avoid causing damage due to
corrosion and becoming damp. If cleaning is really necessary, clean it with dry soft cloth tissue paper.
7. Handle the screen gently. To clear fingerprints or dust on the screen, use soft cloth dedicated for camera lens instead of
gauze.
8. Please back up your important files at any time to avoid loss.
9. Please do not disassemble this product by yourself; otherwise you will lose the right to warranty.
10. Do not disconnect the tablet from power suddenly, when formatting or uploading and downloading, which can lead to
program errors.
11. The tablet does not support USB charge. If you want to charge the tablet, please use the provided AC adapter .
12. Please use the original AC adapter for charging. Nonconforming chargers may cause harms.
13. Protect the power cord. When connect the power cord, do not step onto it or place any object on it, which may cause
extrusion. Protect the connector of the power cord connected devices specially.
14. This product supports the overwhelming majority of mainstream brands of 3G DONGLE network cards. The cases for 3G
Dongle may be different. It is suggested that you test it to make sure it is OK before buying it.
15. Batteries
The batteries in this product cannot be easily replaced by users themselves.
Replacement with incorrect type batteries may cause explosion.
16. While using the earphone, if the volume is excessively high it may cause hearing damage. So please
adjust the volume of the player to a moderate level and balance the time of using.
17. Pictures in this manual are for demonstration purpose only and may differ from the real product.
18. Caution!
This unit contains battery. If the battery is defective, it should not be disposed of with household waste. Batteries can
possibly contain harmful substances that can harm the environment and peoples`s health. Please dispose of the battery
commercially or at a municipal recycling plants. Return is free of charge and is prescribed by law. Please only dispose
of empty batteries in the containers provided and tape the terminals.
Used Logo
All brand marks, trademark and products are registered by their respective company.
Intended Use
This product offers many opportunities for the use. For example surf internet, read e-books, look movies, play games and
communication with the whole world.
This product is intended for home and office use and not for industrial application.
2
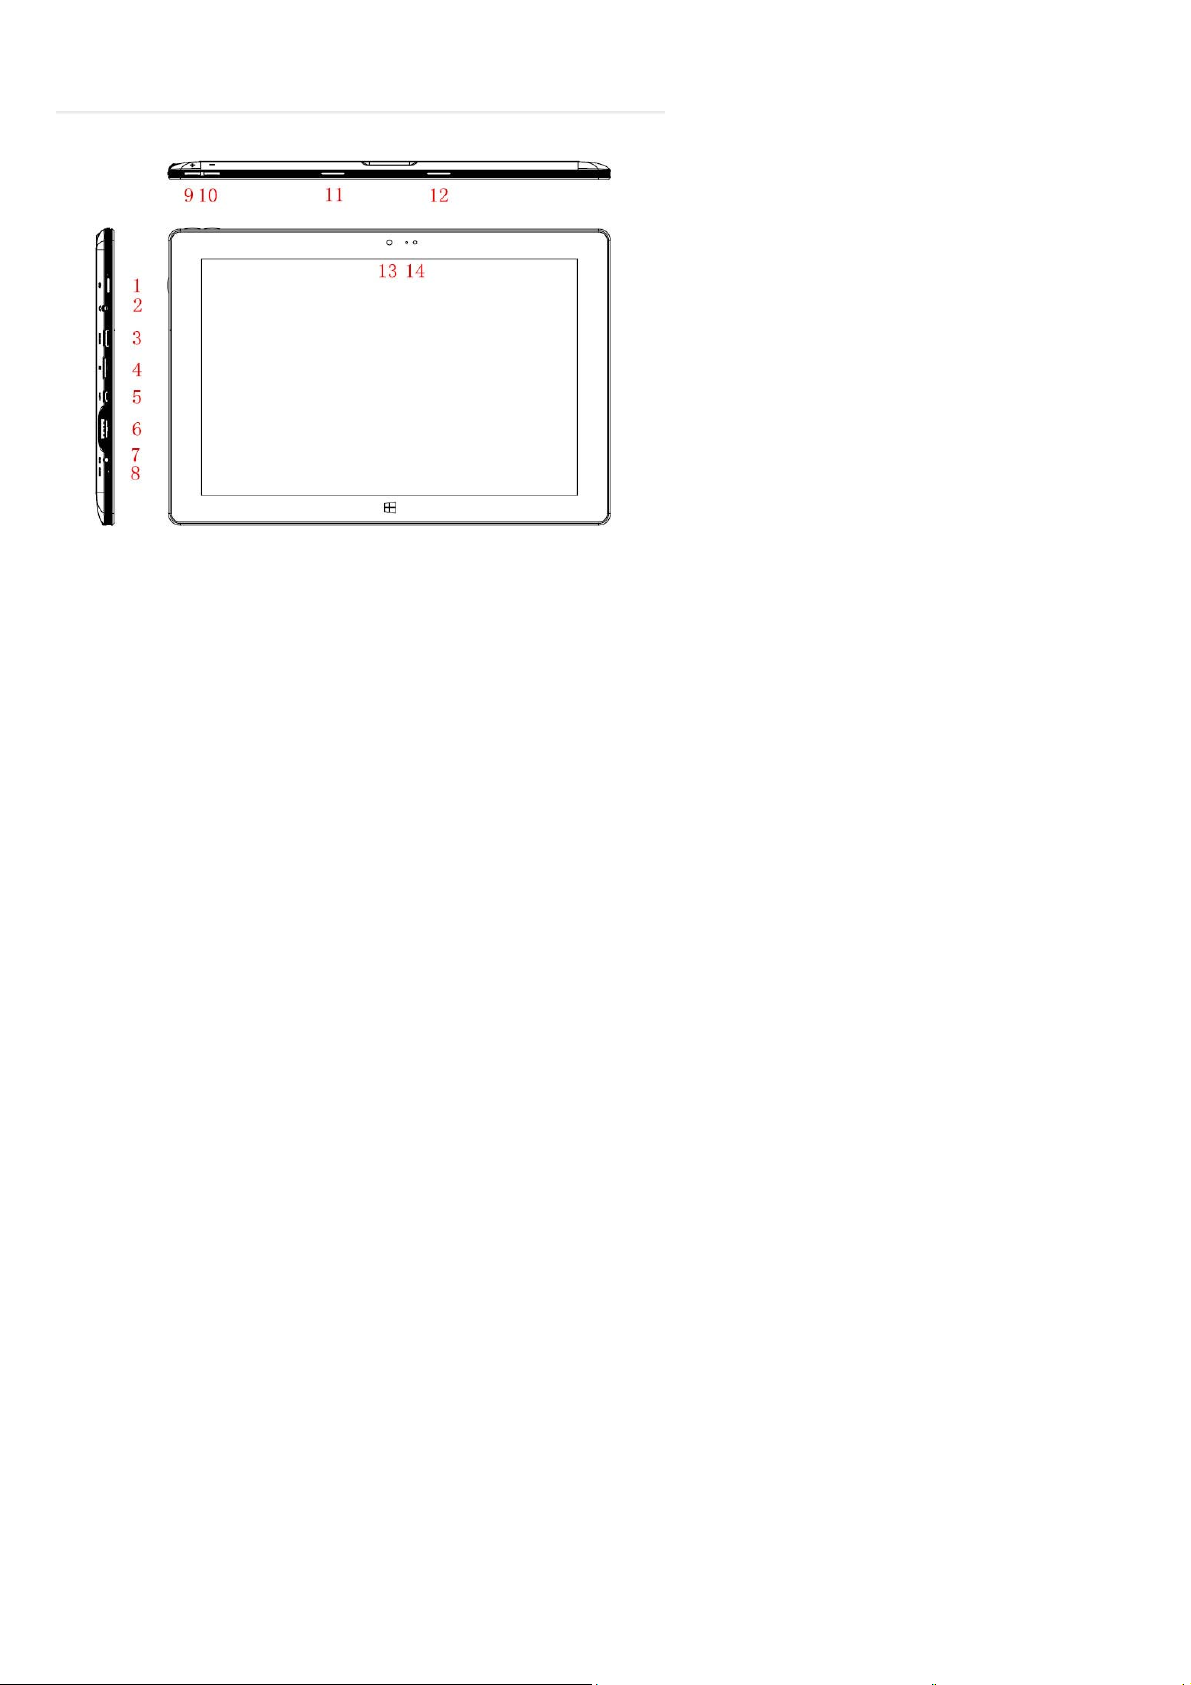
Ⅱ.Key Layout and Definitions
○1 Power button: Press to Switch On the tablet
Long Press to switch Off the tablet (=Reset)
If the tablet is switched ON: Short press to start or close the touch screen panel. You can also let the computer to enter
dormancy through this button or wake from the dormancy mode.
Note:Please wait 1-2 sec. till the touch screen will appear after return from closed touch screen panel.
○2 Headphone connector outlet, Socket for earphone. This socket can transmit the audio signals of Tablet PC to loudspeaker or
earphone.
○3 Mini HDMI Interface: High-Definition Multimedia Interface
○4 Micro SD Micro SDHC Micro SD card slot: The built-in storage card reader slot supports Micro SD and Micro SDHC
format.
○5 Micro USB Port
○6 USB 2.0
○7 Power DC Interface: Charge the battery
○8 MIC: Microphone outlet.
○9 ○10Sound-/sound+: Lower/raise volume
○11 ○12 Speakers
○13 Front camera
○14 Back camera
3
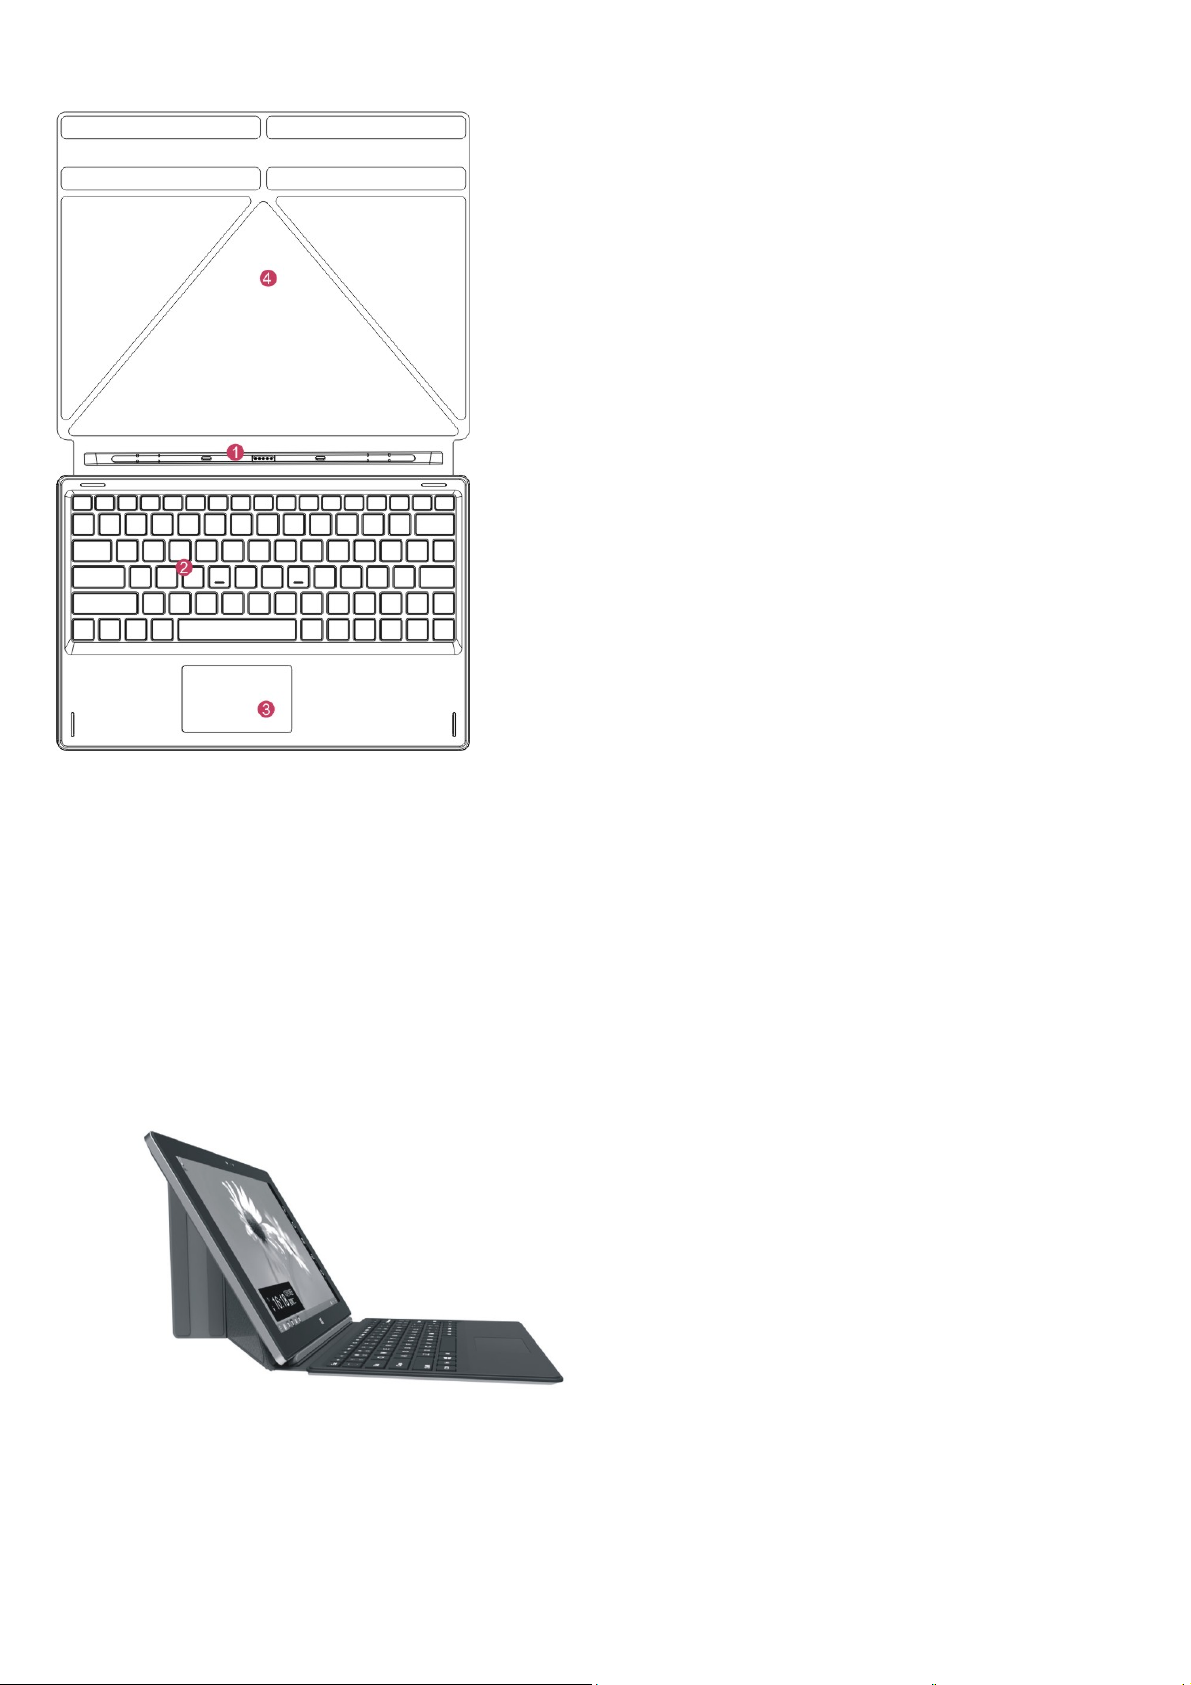
Ⅲ. Keyboard
.
1
○
Movable base keyboard interface: This interface is magnetic, which is convenient for alignment and firmly linking the Table
PC and the keyboard.
2
○
Keyboard group: The keyboard group provides full size QWERTZ (German layout) keys and best typewriting comfort
ability.
3
○
Touchpad: Used to control the cursor on the Tablet PC, with the same function as a mouse.
4
○
Base: Folding base of Tablet PC.
Use of tablet and keyboard
4
IV. Introduction to Desktop
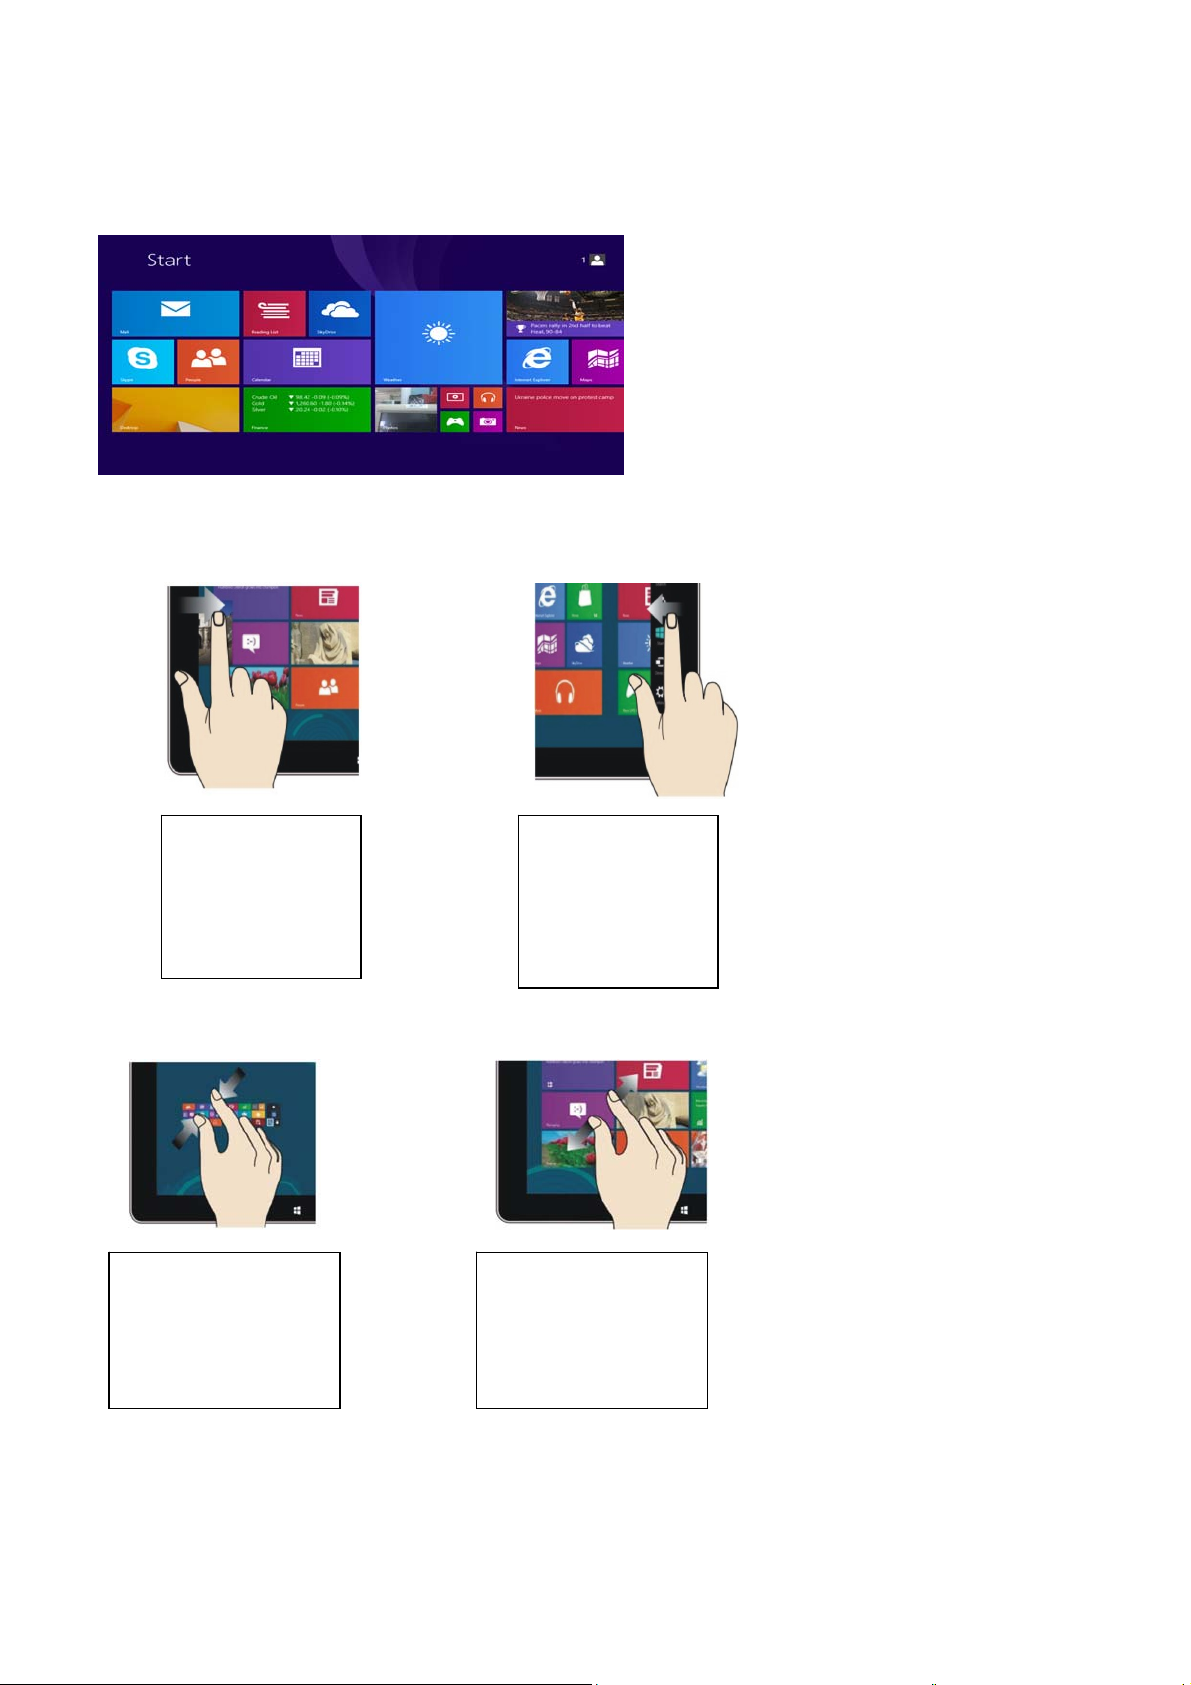
1. Windows 8.1 start image:
On the start screen, you can see many programs fixed in the image. These application programs are displayed in the form
of “magnet”. As long as you click them, you can easily visit them. You need to log on your Microsoft account before the
application program completely runs.
2. Image slide applications
Slide to right Slide to left
Slide to the right
from the left side of
the screen to start
the application
Slide to the left
from the right side
of the screen to
start Charm menu
column.
Zoom In Zoom Out
On the touch screen,
narrow two fingers to
reduce the image.
On the touch screen,
widen two fingers
to enlarge the image.
5
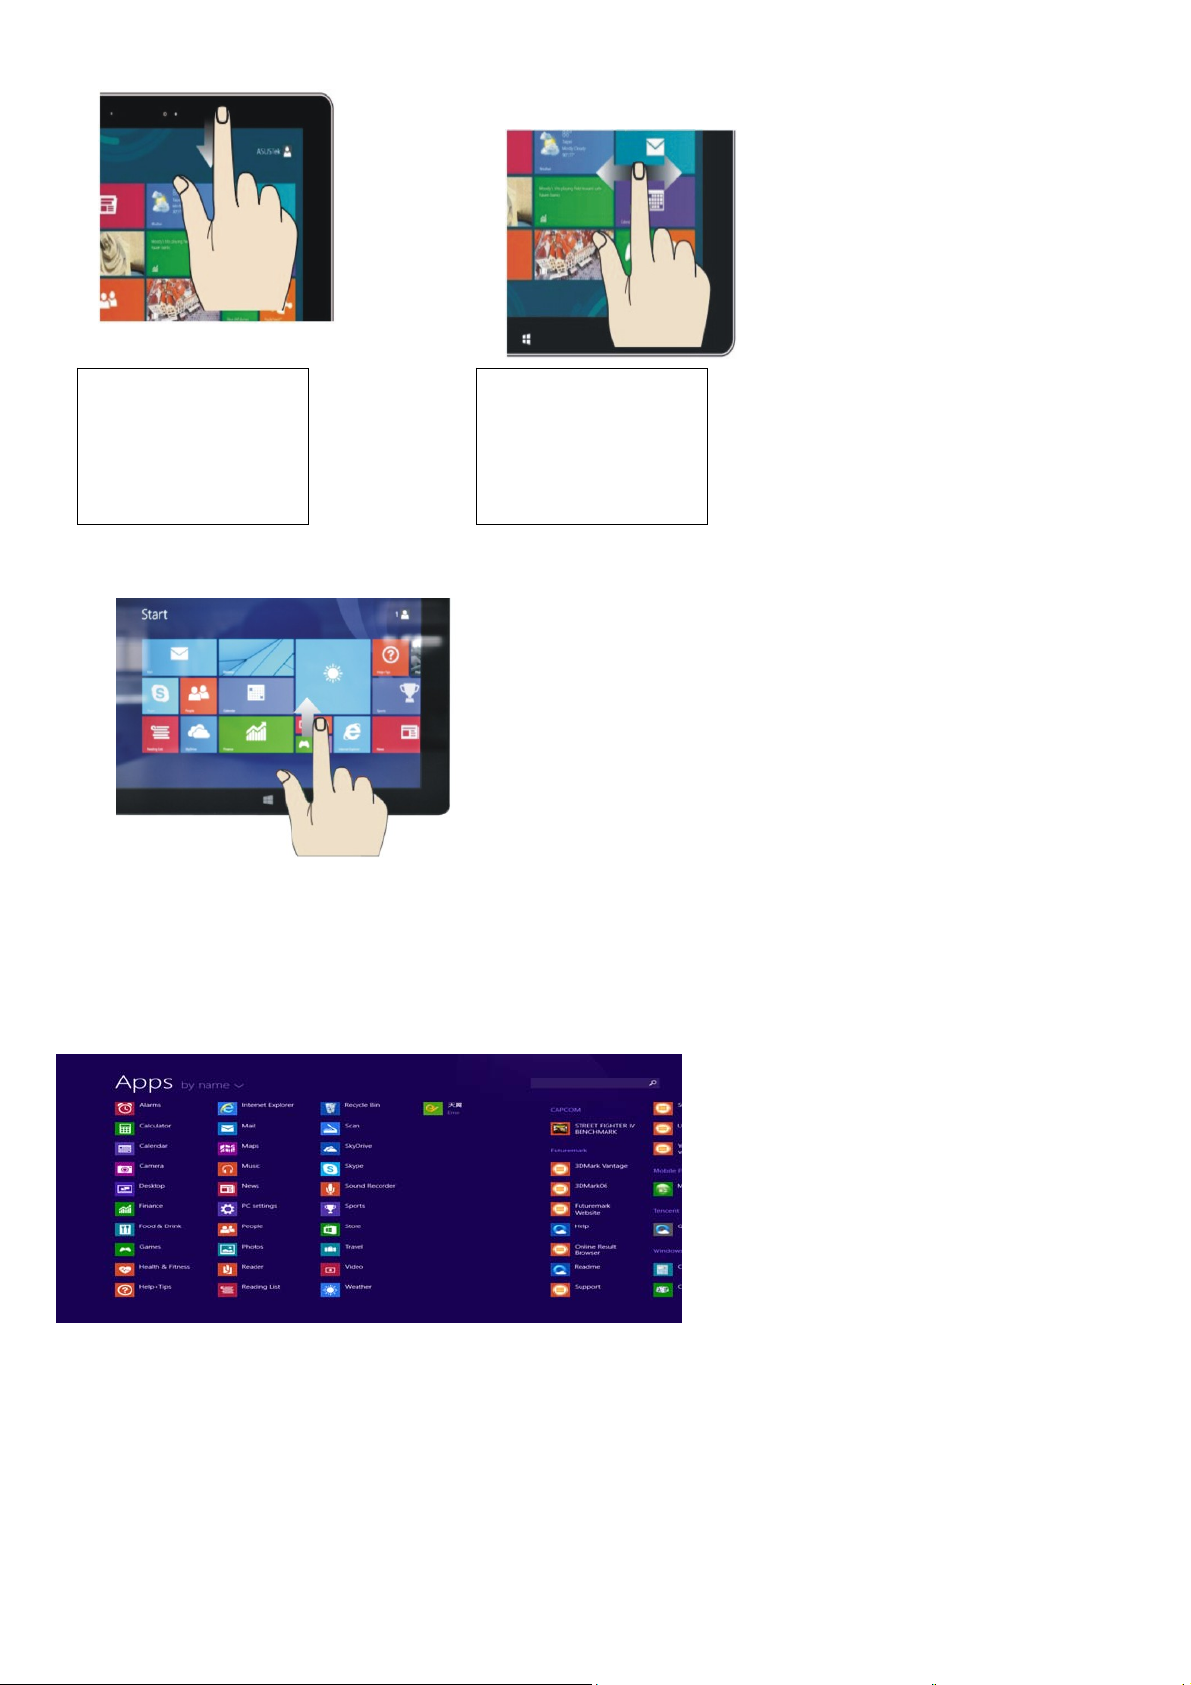
Slide downward Slide with finger
In start screen, slide
from the top of the
screen to view all
application programs
In start screen, slide
finger right and left to
move the images &
programs
Slide upward
In the start screen, slide upward from the bottom of the screen to visit all application program (APPS) interfaces.
3. Introduction to App Interface
Besides the application programs already fixed on the start screen, you can also start other application programs in all
application programs, such as other software application programs attached to the Tablet PC.
If you want to fix more application programs on the start interface, see the operation in the figure below, (1) lightly touch, press
and hold the application program magnet for about one second and then let go, and select (2) to fix to the start screen.
6

Conversely, if you want to cancel or delete a certain application in the start screen, (1) lightly touch, press and hold the
application program magnet for about one second and then let it go and run, and select (2) attribute column to cancel the
programs such as fixation and deletion and then it can be completed.
4. Charms menu bar
Slide it to the left from the right side of the screen to start Charm menu column, including: Start, Device, Setup, Share, and
Search Program.
.
Will enable you to search the files and Apps programs in the Tablet PC.
Will enable you share the program through e-mail or Onedrive.
Tap to return to the start screen. From the start screen, you can also use this function to return the application program
that is opened in the latest.
You can send files via a device which is connected to the Tablet PC.
Set up the Tablet PC.
7
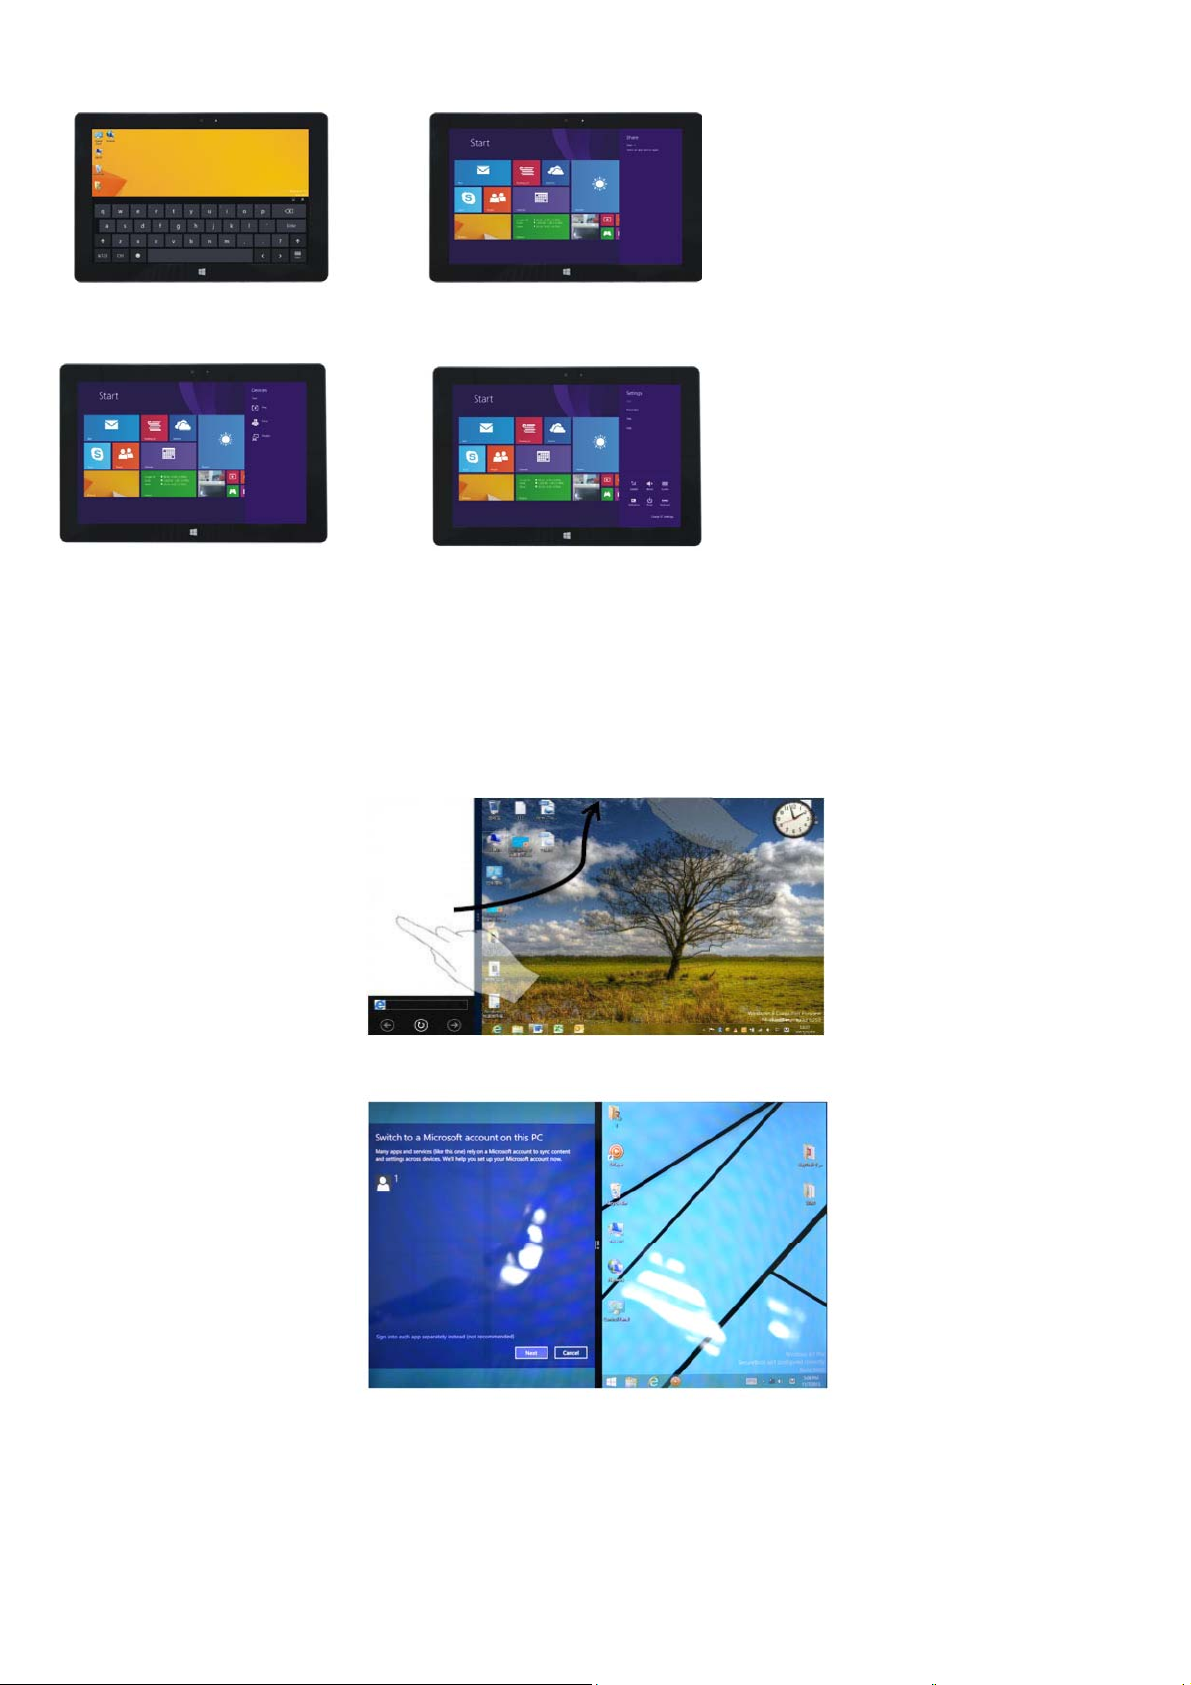
Search menu Share menu
Device Menu Set up Menu
5. Dual-Screen Application
On my computer in (Figure 1), slide it inward from the left side of the screen, drag it and hold. Let go when seeing double
interfaces appear.
In (Figure 2), press the partition button on the middle partition line and drag right and left to partition the display proportion of
the double screens.
(Figure 1)
(Figure 2)
8
 Loading...