

Page 1
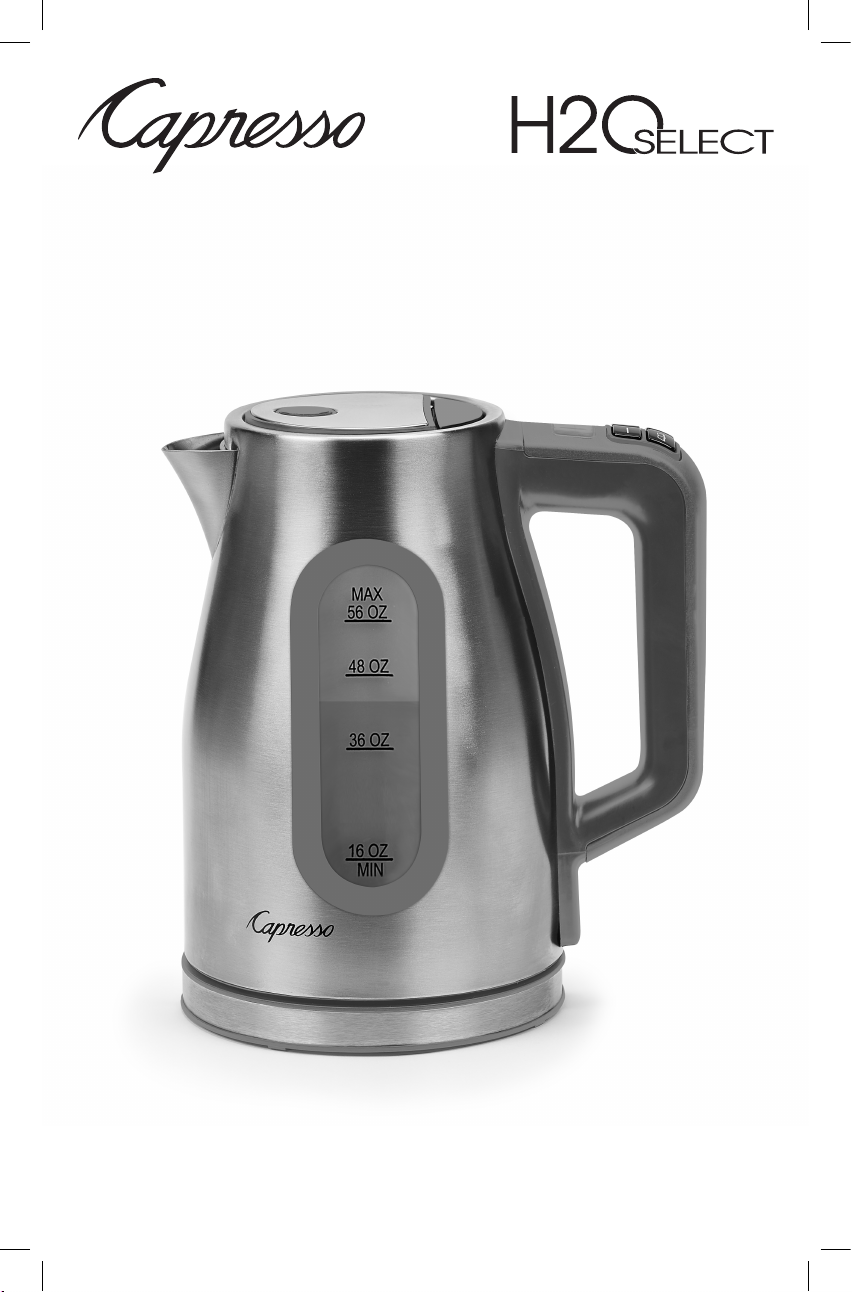
Programmable Water Kettle with
Variable Temperature Control
Model
#274.05
1500W / 120V~ / 60 Hz
• Operating Instructions
• Warranty
Page 2
IMPORTANT SAFEGUARDS
SELECT
When using electrical appliances, basic safety precautions should always be taken, including
the following:
1. READ ALL INSTRUCTIONS.
2. Do not touch hot surfaces. Use handles or knobs.
3. To protect against re, electric shock and injury to persons, DO NOT IMMERSE CORD,
PLUG, OR POWER BASE UNIT in water or other liquids.
4. Close supervision is necessary when any appliance is used by or near children. This
appliance is not intended for use by persons (including children) with reduced physical,
sensory or mental capabilities, or lack of experience and knowledge, unless they have
been given supervision or instruction concerning use of the appliances by a person
responsible for their safety.
5. Unplug from outlet when not in use and before cleaning. Allow to cool before
putting on or taking o parts, and before cleaning the appliance.
6. Do not use harsh abrasives, caustic cleaners or oven cleaners when cleaning
this appliance.
7. Always use the appliance on a dry level surface.
8. Do not leave the appliance unattended when in use.
9. Never insert a nger, or anything else in the spout of the kettle during operation as scalding
or other serious injury may occur.
10. Do not leave water standing in the kettle for prolonged periods of time. When nished using
the kettle always discard any remaining water.
11. The use of accessory attachments not recommended by Capresso may result in re, electric
shock, or injury to persons.
12. Do not use outdoors.
13. Do not let the cord hang over the edge of a table or counter, or touch hot surfaces.
14. Do not place on or near a hot gas or electric burner, or in a heated oven.
15. Always ll the kettle rst, then set the appliance onto the power base, and nally plug cord
into outlet. To disconnect, remove kettle from power base, then remove plug from wall outlet.
16. Do not use this appliance for other than intended use.
17. Always make sure that lid is closed during operation. Scalding may occur when lid is open
during operation.
18. To avoid scalding, never ll pot above the “MAX” line marking on the kettle.
19. Do not operate any appliance with a damaged cord or plug, or after the appliance
malfunctions, or has been damaged in any manner. Return appliance to the nearest
authorized service facility for examination, repair, or adjustment.
20. Extreme caution must be used when moving the kettle containing hot water.
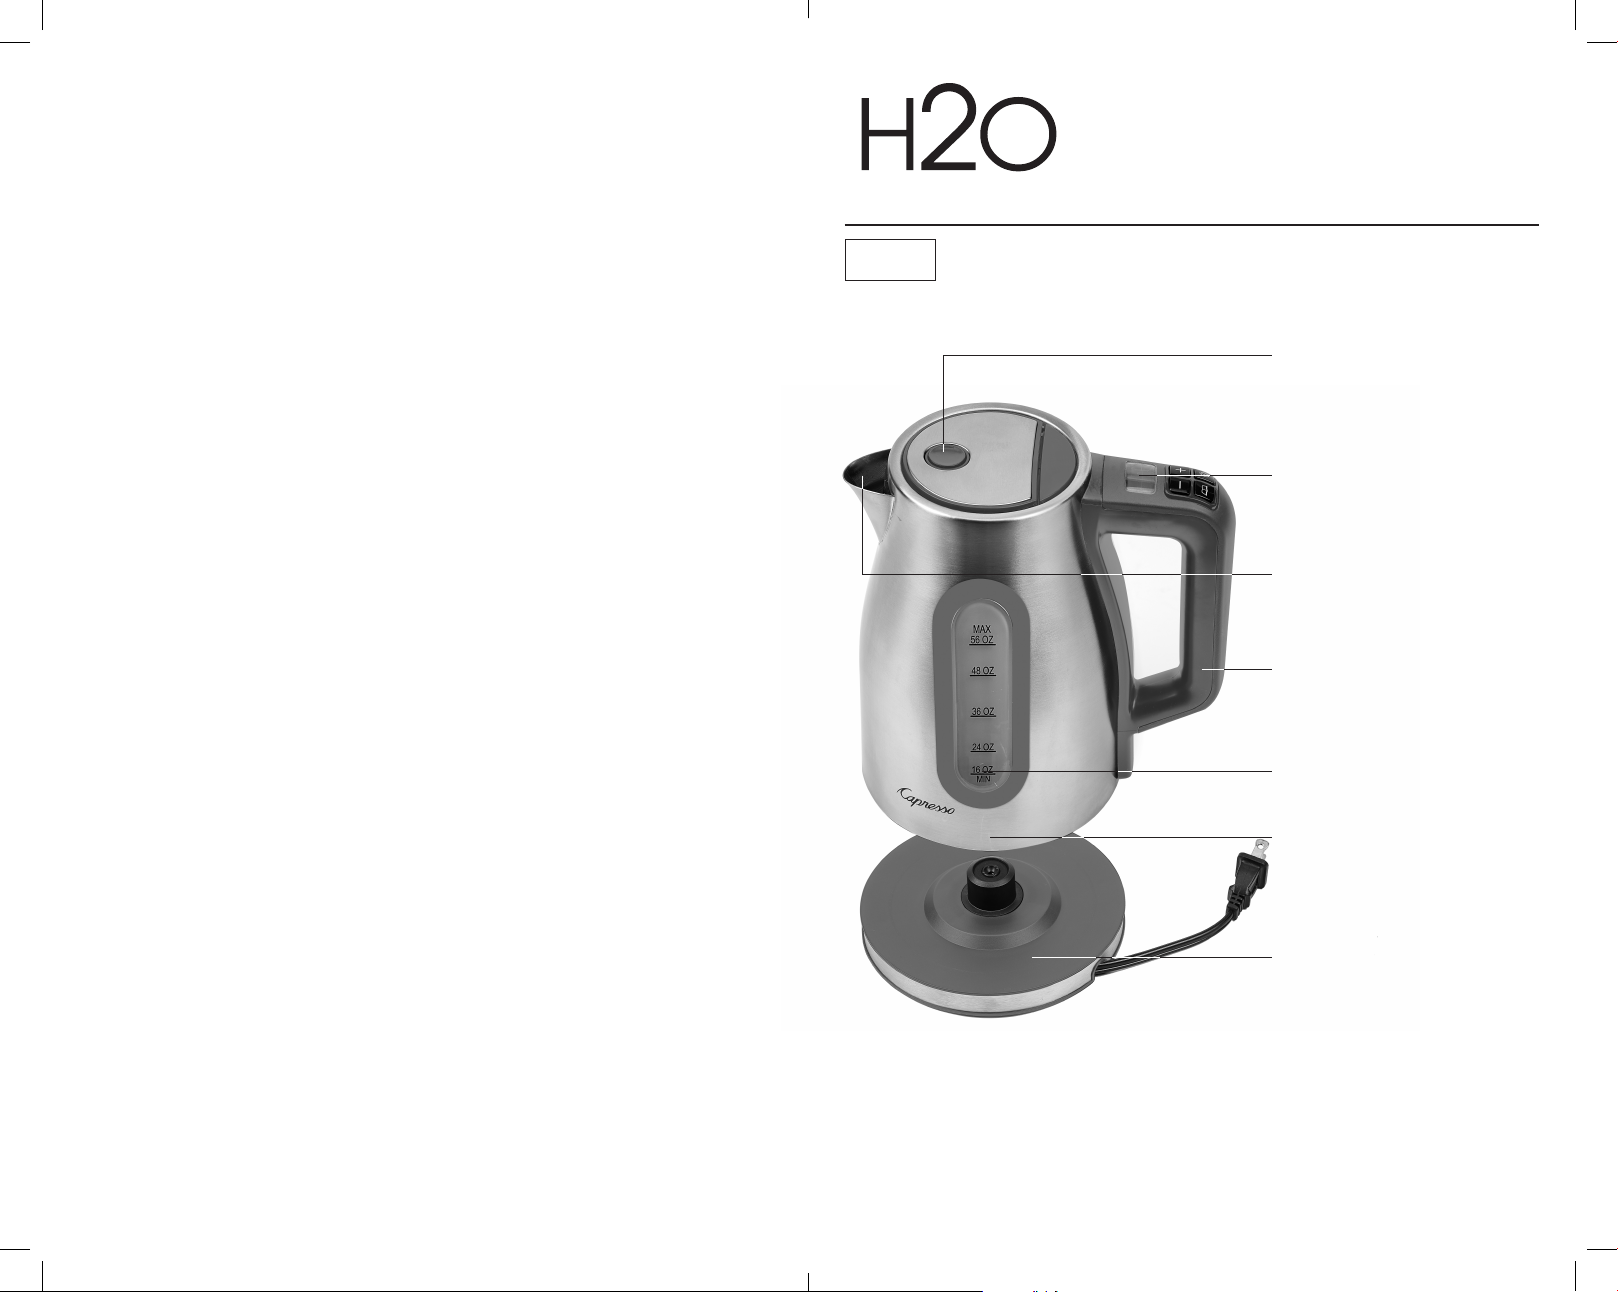
Programmable Water
Kettle with Variable
Temperature Control
Fig. 1
Lid with push button release;
lid is not removable
LCD display with four
operating buttons
(see Fig. 2)
Spout with removable
scale lter
Stay cool handle
Water level window with
MIN/MAX markings
FOR HOUSEHOLD USE ONLY
SAVE THESE INSTRUCTIONS
SPECIAL CORD SET INSTRUCTIONS
This appliance has a polarized plug (one blade is wider than the other). As a safety feature, this
plug will t in a polarized outlet only one way. If the plug does not t fully
in the outlet, reverse the plug. If it still does not t, contact a qualied electrician.
Do not attempt to defeat this safety feature.
1. A short power supply cord is provided to reduce the risk of becoming entangled in or
tripping over a long cord.
2. Longer extension cords are available and may be used if care is exercised in their use.
3. If an extension cord is used:
a. The marked electrical rating of the extension cord should be at least as great
as the electrical rating of the appliance.
b. The longer cord should be arranged so that it will not drape over the countertop or
tabletop where it can be pulled on by children or tripped over.
c. If the appliance is of the grounded type, the extension cord should be a
grounding type 3-wire cord.
2. 3.
Concealed heating element
Power base with plug and
cord storage
CAUTION: Handle kettle carefully,
the metal housing will become hot during and after heating!
Page 3

a. Illuminated display
b. -/+ buttons to select
temperature and timer
Chlorine setting (default)
Timer symbol with 3 second
boil setting (default)
timer
symbol
c. Program button
d. On/O button
Fig. 2
Default setting Keep warm setting (default)
kettle
symbol
keep
warm
symbol
Fig. 3a Fig. 3b
Fig. 3c Fig. 3d
CAUTION!
• Never boil water while the lid is open. Hot steam may cause injuries and
may damage wooden panels in your kitchen.
• Never try to remove the lid.
• Before opening the lid make sure the water is not boiling.
• Never ll kettle with anything but water.
• Do not add instant soups or any other soluble liquids to the kettle.
• Do not use the kettle to thaw food of any kind.
• Do not use the kettle to make sauces or to melt cheese,
butter or any other items.
• Never immerse the kettle in any liquid. Never put kettle or base in
the dishwasher.
4. 5.
Page 4

BEFORE USING FOR THE FIRST TIME
Read all Important Safeguards and Operating Instructions before using
this kettle. Discard the rst lling of boiling water to remove any dust
and residues from the manufacturing process.
1. TO BOIL WATER (default setting)
• Remove kettle from base.
• Push the button on the lid (Fig. 1). The lid opens itself.
• Fill with the desired amount of fresh cold water. The kettle has
minimum and maximum markings. Never underll or overll the kettle.
CAUTION / DANGEROUS: Never ll above the MAX line. If you ll
above the max line, boiling water will push out of the pouring spout.
This can cause severe injuries and burns.
• Close lid.
• Place kettle on power base (Fig. 1).
• Plug cord into outlet. The display illuminates and shows the kettle symbol
and 212ºF (Fig. 3a).
• Push the On/O button (Fig. 2d). The kettle symbol will blink, indicating that
the kettle is heating the water. The warmer the water becomes the more
you will hear the noise of the water heating up.
• When the water comes to a boil the display will switch from the kettle
symbol to the timer symbol (Fig. 3d). The timer symbol will blink for three
seconds (default). Then the display changes back to the kettle symbol
(not blinking) and the heater shuts o.
• Lift kettle from base and pour water out slowly. For dierent settings
see chapters 4, 5 and 6.
2. DRY BOIL SHUT-OFF PROTECTION
If you turn the kettle on without water in the kettle, the heater will shut
o after a few seconds. The display will go blank. Once the kettle has
cooled down, the display will come back on again. This can take several
minutes. To speed up this process you can ll some cold water into the
kettle. You will hear a clicking noise. This indicates that the thermostat
has reset itself. If you place the kettle back on the power base, the
display will show the default setting again (Fig. 3a).
3. TURNING THE KETTLE OFF
There are two ways to turn o the kettle:
1) During operation, push the On/O button. This will not erase any
programmed settings as long as the kettle sits on the base.
2) During operation, lift the kettle o the base. This will turn o the kettle
and erase any personal setting. You will need to select your personal
setting again.
4. VARIABLE TEMPERATURE CONTROL
According to tea experts certain teas should not be steeped with
boiling water (i.e. Green Tea should be steeped between 170ºF and
185ºF, most Oolong teas should be steeped between 190ºF and 200ºF,
water for French Press coee should not be hotter than 200ºF.)
• Fill your kettle with the desired amount of cold fresh water. Place on
power base. The display shows the default setting (Fig. 3a).
• Use the -/+ buttons (Fig. 2b) to select any temperature between 110ºF and
200ºF in 10ºF increments (110ºF, 120ºF and so forth) or 212ºF.
• Push the On/O button (Fig. 2d). The kettle will heat the water to the
desired temperature and then shut o. The display will show the selected
temperature and the kettle symbol will stop blinking.
When you remove the kettle from the base and replace it, the default
setting 212ºF will be displayed.
5. KEEP WARM
The keep warm feature can be set in two ways:
1) To keep water at a certain temperature after it has reached the
desired temperature.
2) To rst boil the water and then bring it down to the desired
temperature.
• The display shows the default setting (Fig. 3a).
• Push the program button once (Fig. 2c). The display will show the warm
keeping symbol and 000ºF.
• Push the -/+ buttons (Fig. 2b) to select the keep warm
temperature between 110ºF and 190ºF.
• Push the On/O button.
Please note: AUTO-OFF. The kettle will always shut-o after the selected
temperature has been reached.
6. 7.
Page 5

Please note: The keep warm temperature cannot be set higher than the
selected heating temperature, i.e. if the selected heating temperature is
set to 160ºF, the keep warm temperature can be set between 110ºF
and 160ºF.
Please note: If the selected heating temperature is set to 212ºF or
200ºF degrees the keep warm temperature cannot be set higher
than 190ºF.
After the selected heating temperature is reached, the display will now
change to the preselected keep warm temperature. The keep warm
symbol and the keep warm temperature are displayed. Once the
water cools to approx. 10ºF below the pre-set keep warm temperature,
the heater will automatically start re-warming the water to the pre-set
temperature. During this time the keep warm symbol will be blinking.
The kettle will keep the selected temperature for up to 40 minutes.
After 40 minutes the keep warm symbol stops blinking indicating
that the heating element has shut o.
Please note: Once you remove the kettle from the power base, all
pre-sets are cancelled.
Tip: If you want to pour water immediately after brewing and then keep
the rest at a certain temperature, proceed as follows:
• Follow the instructions under chapter 1 or 4.
• Pour the desired amount of water.
• Replace the kettle.
• Select the brewing temperature by pushing the -/+ buttons.
• Push the program button once to show the keep warm display.
• 000ºF. Use the -/+ buttons to select the desired keep warm
temperature.
• Push the On/O button.
The kettle is now on. Depending on the temperature of the water it will
either re-heat the water immediately or later.
6. CHLORINE REDUCING SETTING / EXTENDED BOIL SETTING
If you boil the water in the default setting, the kettle will shut o 3 seconds
after the sensor registered the boiling temperature. You can prolong the
actual boiling action as follows:
• Set the Chlorine symbol to “CL”, this will add three extra seconds to
the boiling of the water.
• Change the Timer Setting from 003 (seconds) to any duration up to
20 seconds (020).
• Prepare the kettle as explained in chapter 1.
• Before you push the On/O button, push the program button twice,
the Chlorine symbol appears (Fig. 3c).
• Push either -/+ button once, the display shows “CL”.
• Push the program button again. The display shows the timer symbol and
003 (Fig. 3d).
• Push the -/+ button to select up to 20 seconds.
• Now push the On/O button. Once the boiling temperature is reached the
kettle will keep boiling the extra three seconds from the CL setting plus the
seconds set with the timer.
Please note: Once you remove the kettle from the base all settings will return
to the default (see Fig. 3a).
7. CLEANING
• Always unplug cord of power base before cleaning.
• Make sure kettle is cold.
• Clean the exterior surface with a clean, damp, soft cloth.
• Never use abrasive cleaners or scouring agents.
• Rinse out kettle.
Attention:
• Over time the stainless steel inside of the kettle may change color slightly.
This is caused by the intense heat of the heating element, especially if the
kettle was turned on repeatedly without water. This will not diminish the
performance of the kettle in any way.
• If your water has a high calcium content, calcium deposits might dull the
inside. Follow the instruction below for decalcication.
8. 9.
Page 6

8. DECALCIFICATION
Hard water can leave calcium spots inside the kettle that can slow down
boiling time. Use a commercial descaling agent, like Capresso Cleaning
Solution and follow the instructions that come with the agent.
NOTE: Make sure kettle is cold.
Other limitations and exclusions: Any implied warranties including
tness for use and merchantability are limited in duration to the period
of the express warranty set forth above and no person is authorized to
assume for JURA any other liability in connection with the sale of the
machine.
Use of Capresso Cleaning Solution
Dissolve 1 oz (28 g) of Capresso Cleaning Solution with 32 oz (1 L) of water
and pour mixture into kettle. Allow mixture to sit inside the kettle for 20-30
minutes. Pour water and Cleaning Solution out and rinse the kettle 2-3 times
with fresh, clean water. DO NOT heat the kettle while descaling with Capresso
Cleaning Solution.
Use of Vinegar
You can also use white vinegar to descale the inside.
• Fill the kettle up to the desired level with water.
• For each 2 cups of water (16 oz) add 6 tablespoons of white vinegar.
• Bring to a boil.
• Discard the solution and repeat if necessary. Let the kettle cool down
and rinse the kettle once or twice with fresh cold water.
LIMITED ONE-YEAR WARRANTY
This warranty covers your CAPRESSO water kettle, model #274.05. The
model # can be found on the bottom of the kettle or the bottom of the power
base. This warranty is in eect for one year from the date of the rst
consumer purchase. This warranty covers all defects in materials or
workmanship (parts and labor).
This warranty does not cover:
• Any machine not purchased from an Authorized CAPRESSO Dealer.
• Commercial use of the kettle.
• Damage caused by accident, abuse, negligence, misuse, improper
operation or failure to follow instructions contained in this manual.
• Any service or alteration performed by an unauthorized person,
company, or association.
• Damage caused by neglecting and omitting maintenance,
cleaning and decalcifying.
JURA expressly disclaims liability for incidental and consequential
damages caused by the machine. The term “incidental damages” refers
to the loss of the original purchasers time, loss of the use of the
machine or other costs relating to the care and custody of the machine.
The term “consequential damages” refers to the cost of repairing or
replacing other property which is damaged when this machine does not
work properly. The remedies provided under this warranty are exclusive
and in lieu of all others.
This warranty gives you specic legal rights, and you may also have
other rights which vary from state to state.
Capresso H2O Select Product Registration
Please go to our website www.capresso.com to register your product.
Your information will help us to better serve you.
Capresso Customer Service:
20 Craig Road, Montvale, NJ 07645
Help Line: 1-800-767-3554
Mon-Thu 8AM – 9PM • Fri 8AM – 8PM • Sat 9AM – 5PM
Eastern Time Zone
If you call at any other time, please leave a message with your
telephone number and when we can call you back.
Fax: 201-767-9684
Email: contact@capresso.com
Website: www.capresso.com
10. 11.
Page 7

Customer Service
1-800-767-3554
Mon-Thu 8AM – 9PM • Fri 8AM – 8PM • Sat 9AM – 5PM
Eastern Time Zone
contact@capresso.com
JURA Inc.
20 Craig Road, Montvale, NJ 07645
201-767-3999 • Fax: 201-767-9684
Website: www.capresso.com
 Loading...