

Canyon CN-BR1 Quick Install Guide

Internet
And power on computers.
4 Port 10/100M Internet
Broadband Router
with USB Printer server
Quick Installation Guide
1. Hardware Installation
A. System Requirement
Before you getting started, make sure that you meet the
following requirements.
1. An Internet connection via cable or DSL modem
2. A computer with an Ethernet network card installed
3. Your Windows CD, if your computer is running
Windows 95, 98, or ME
4. UTP network cable with RJ -45 connector
5.Either Microsoft Internet Explorer 4.0 (or above version)
or Netscape Navigator 4.0 (or above version)
B. Setting Hardware Connection
Step 1. Power all devices down. This should include your
PCs, Cable or DSL modem and the Router.
Step 2. Connect the Router to your PCs. Connecting
Computers: Connect computers directly to the Router on
ports 1~4 on the rear panel. If you have more than 4
computers need to be connected, connect a hub or a switch
(using its uplink port) and connect additional computers to
that device.
Notebook
PC
PC
Router
Switch/Hub
Cable/DSL
Modem
USB Printer
2. Configure your computer
•Windows 95/98/ME
Step 1. TCP/IP Configuration
Step 3. Connecting a Cable Modem or DSL Modem:
#4734904AX0FL
© 2003 All rights reserved.
3A-1 Version: 01.15.00.01-1.0
Connect your Cable or DSL modem to the WAN port on
the rear panel.
Step 4. Connecting a Printer: If you have a printer that you
want to share between computers, connect it to the Printer
port using a standard USB Cable.
Step. 5 Power: Plug the power cord into the power jack.
From the Windows desktop, click the “Start” button and
Step. 2 Disable HTTP Proxy
choose “Settings”, then click “Control Panel.”
From “Control Panel”, double-click the “Network” icon.
In the “Network” window, under the “Configuration” tab,
double-click the“TCP/IP” entry that is listed with your
network card.
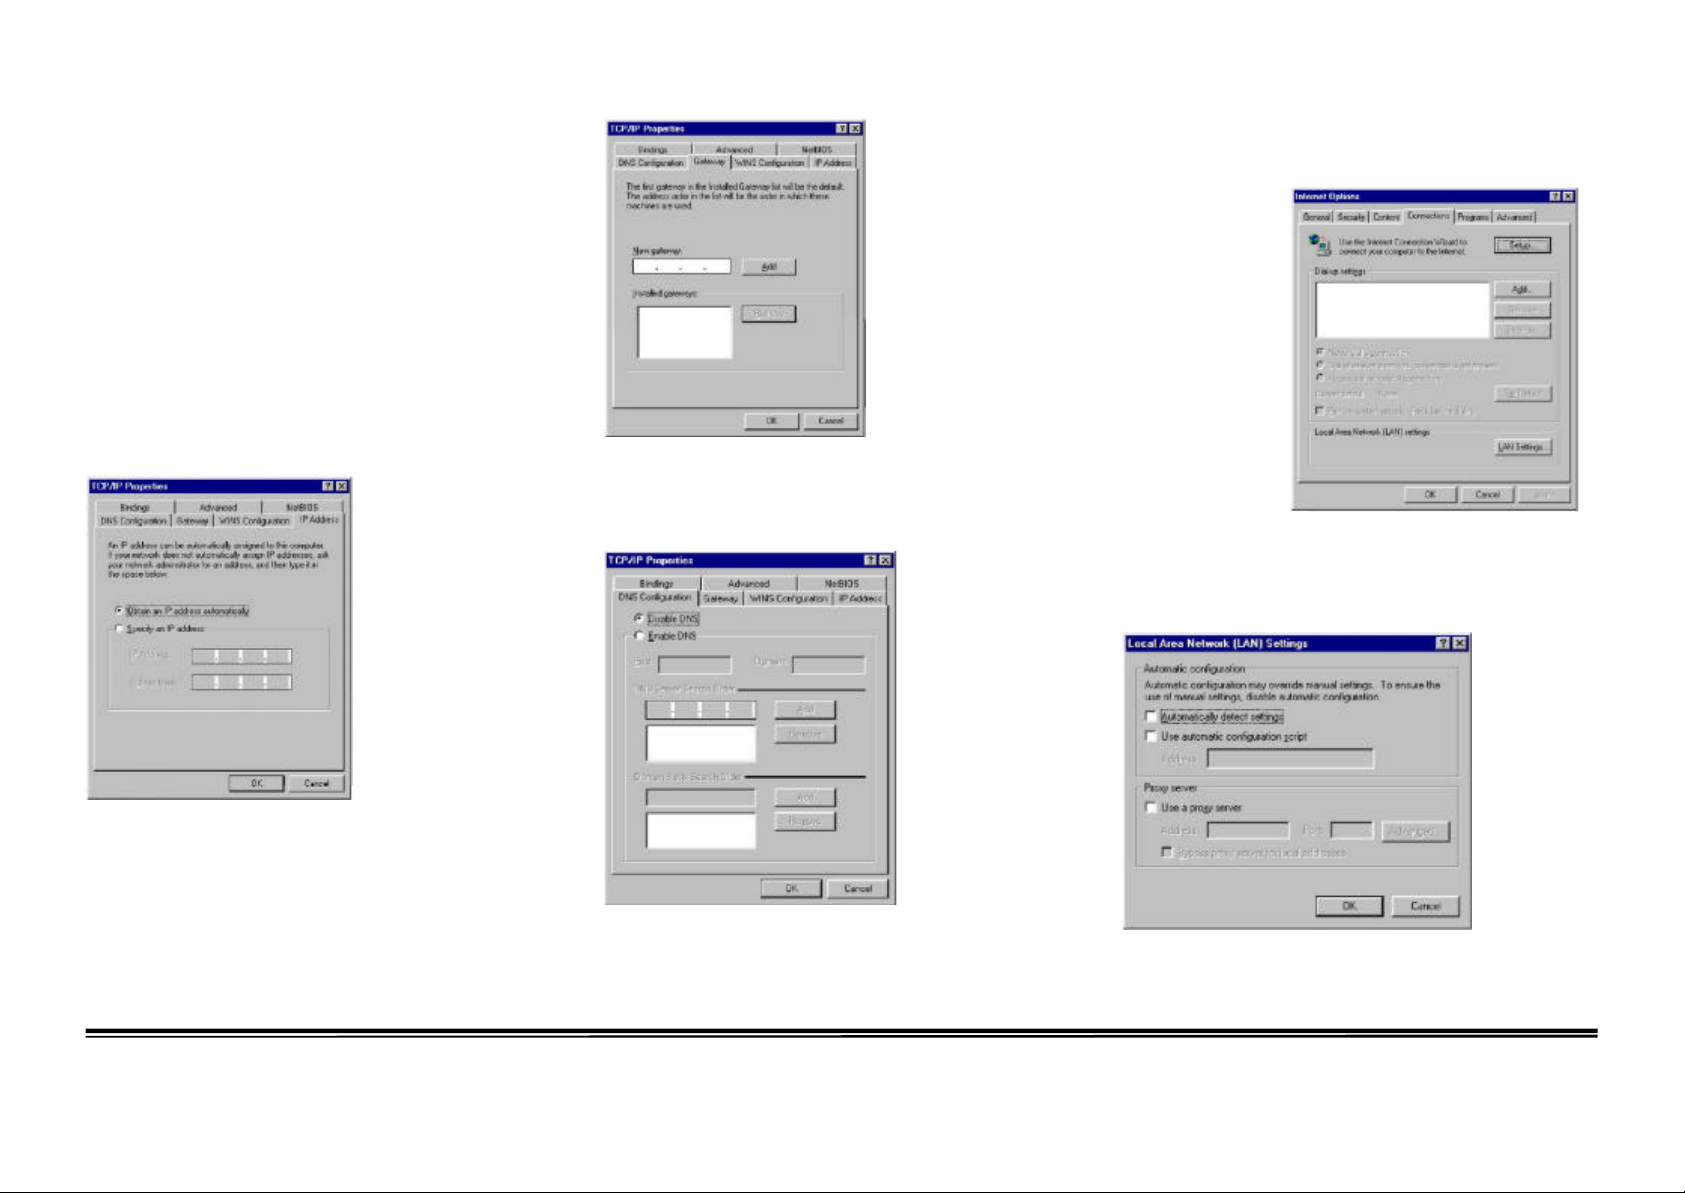
On the “Internet Protocol (TCP/IP) Properties” dialog box,
make sure “Obtain an IP address automatically” and
“Obtain DNS server address automatically” are \selected.
If not, se lect them and click “OK” and close window.
Click the “DNS Configuration” tab. Locate the DNS
servers listed under “DNS Server Search Order”. And
Click “OK”
•Internet Explorer
Open Internet
Explorer and click
the stop button.
Click “Tools”
then “Internet
Options”
In the “Internet
Options” window
click the
“Connections” tab. Then click the “LAN Settings” button.
Clear all the checkboxes.
Locate your IP address and Subnet Mask.
Click the “Gateway” tab and record the numbers listed
under “Installed gateways.”
System may need your Windows 95/98/ME CD to copy
some files. After it fi nishes copying, please restart your
system.
© 2003 All rights reserved.
3A-1 Version: 01.15.00.01-1.0
Click “OK,” and then click “OK” again to close the
“Internet Options” window.
 Loading...