

Canyon 150N, CNP-WF514N1 Quick Manual
150N Wireless AP Router
Article: CNP-WF514N1 Quick Guide v1.0
Package Contents
1. CNP-WF514N1 Main Unit
2. Power Adapter
3. Documentation CD
Hardware Overview
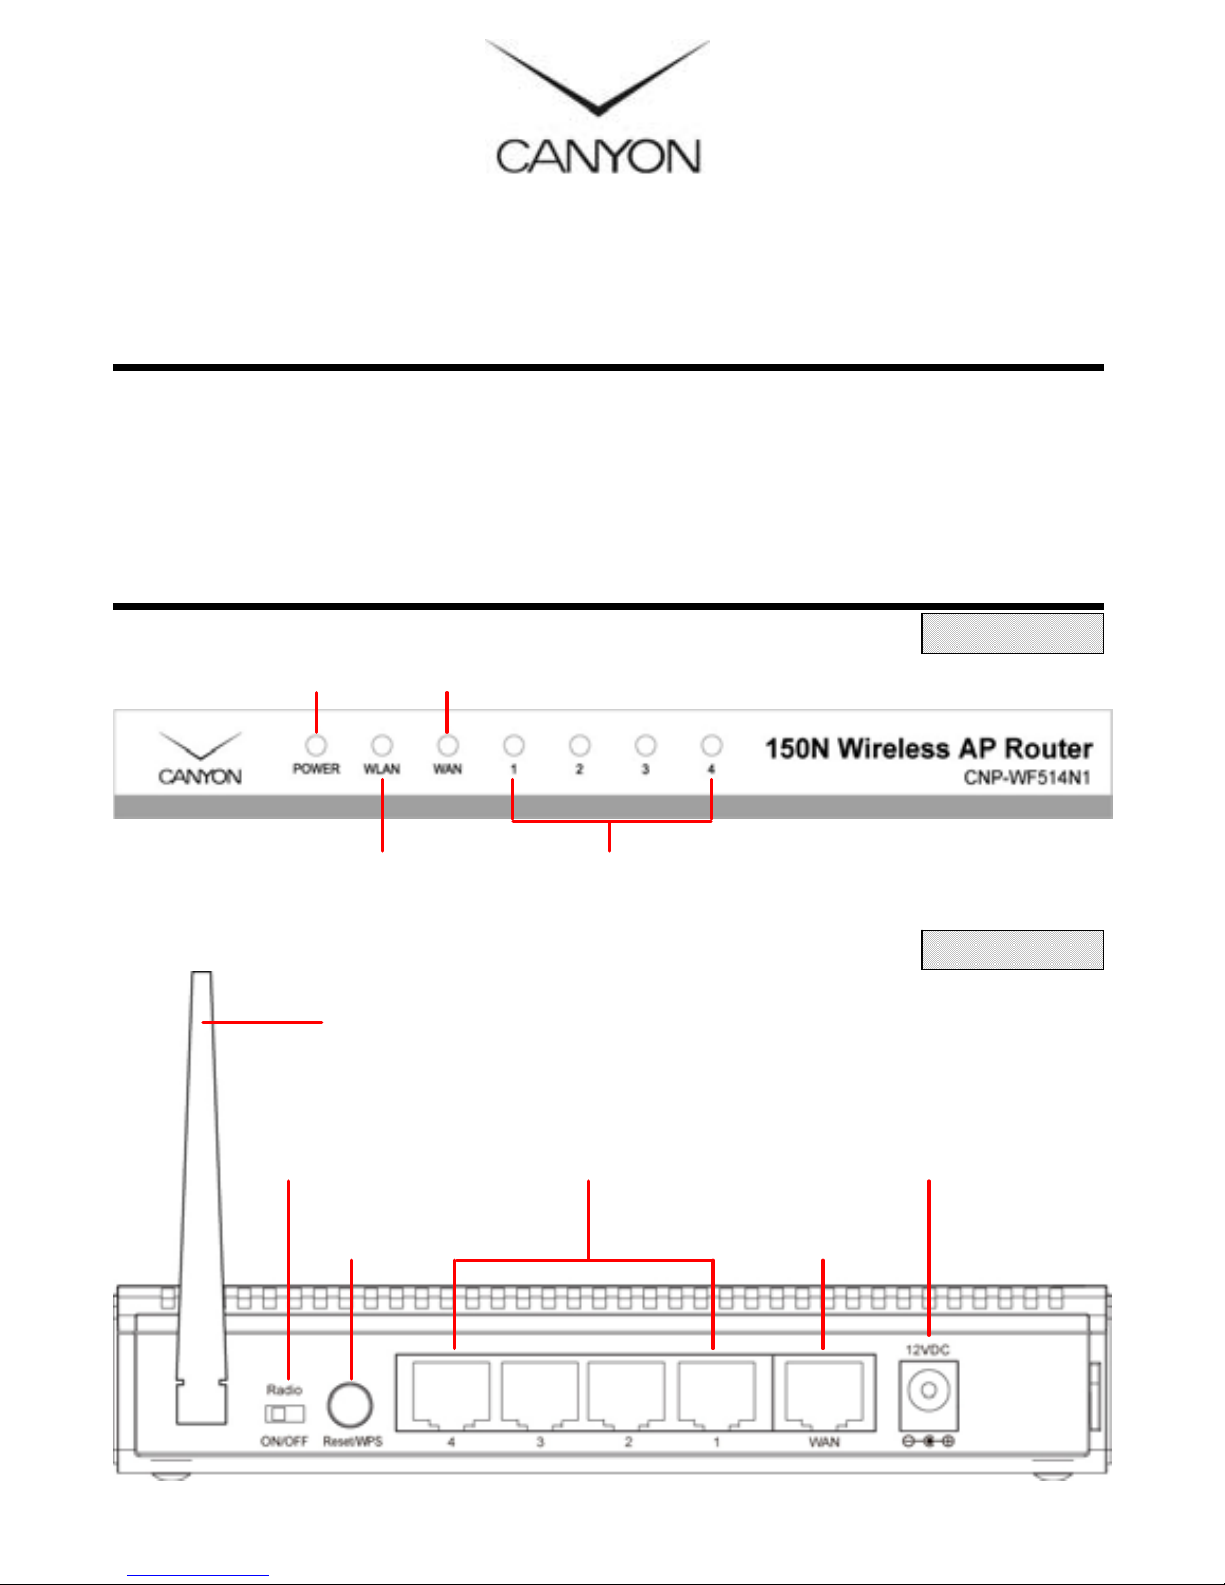
Power Status
Wireless LAN
Activity Status
WAN Activity
Status
4. Standing Base
5. Quick Guide
6. Wa rranty Card
Front View
LAN Port Status
Rear View
Antenna
Radio ON/OFF
Reset/WPS
Function
LAN Ports
ENG - 1
Power Jack
WAN Port
Getting Started
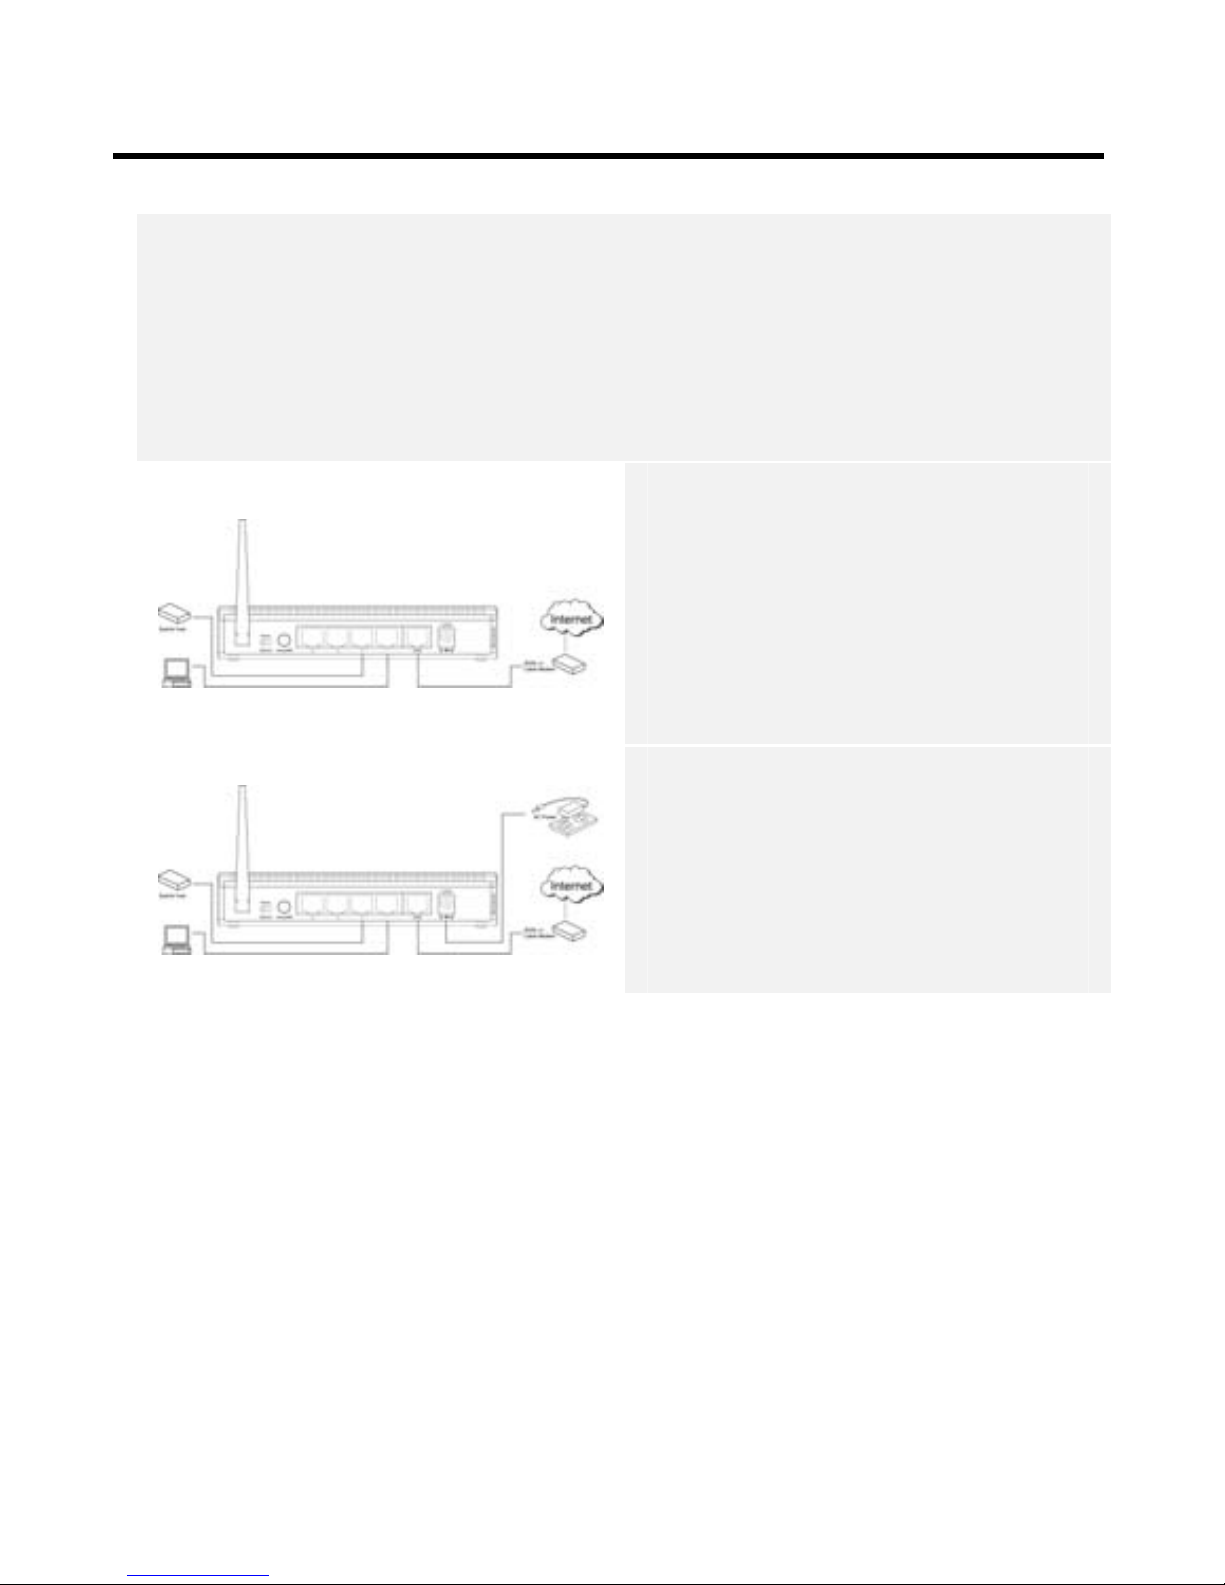
Connecting to Device
1. Begin by searching for an appropriate location to setup device. Please
keep in min d to keep device in the center of worki ng area as the signal
strength and data transfer rate diminishes with distance.
2. It is also recommended to place device at a higher position to ensure
minimum obstacle interference.
3. Make sure that all network devices are powered off, including the
device itself, PCs, switches, cable or DSL modem, and others.
4. Connect the modem to WAN
port of the device by one CAT
5 Ethernet cable.
5. Connect PC(s) or other
network enabled device(s)
with LAN ports (1/2/3/4) of
the device by CAT 5 Eth ernet
cables.
6. Connect power adapter to
wall socket and device to
power on the cable or DSL
modem.
7. POWER and WAN indicator
should light up steadily if
connected properly.
Internet Configuration Wizard
The default network address of the device i s set as 192.168.2.1. Please
configure IP ad dress of host PC at 192.168.2.X XX where XXX is a number
between 002 and 254. Th e subnet mask should be 255.255.255.0. Please
follow below steps to enter web browser management mode.
1. Start Internet QuickS etup Configuration
ENG - 2
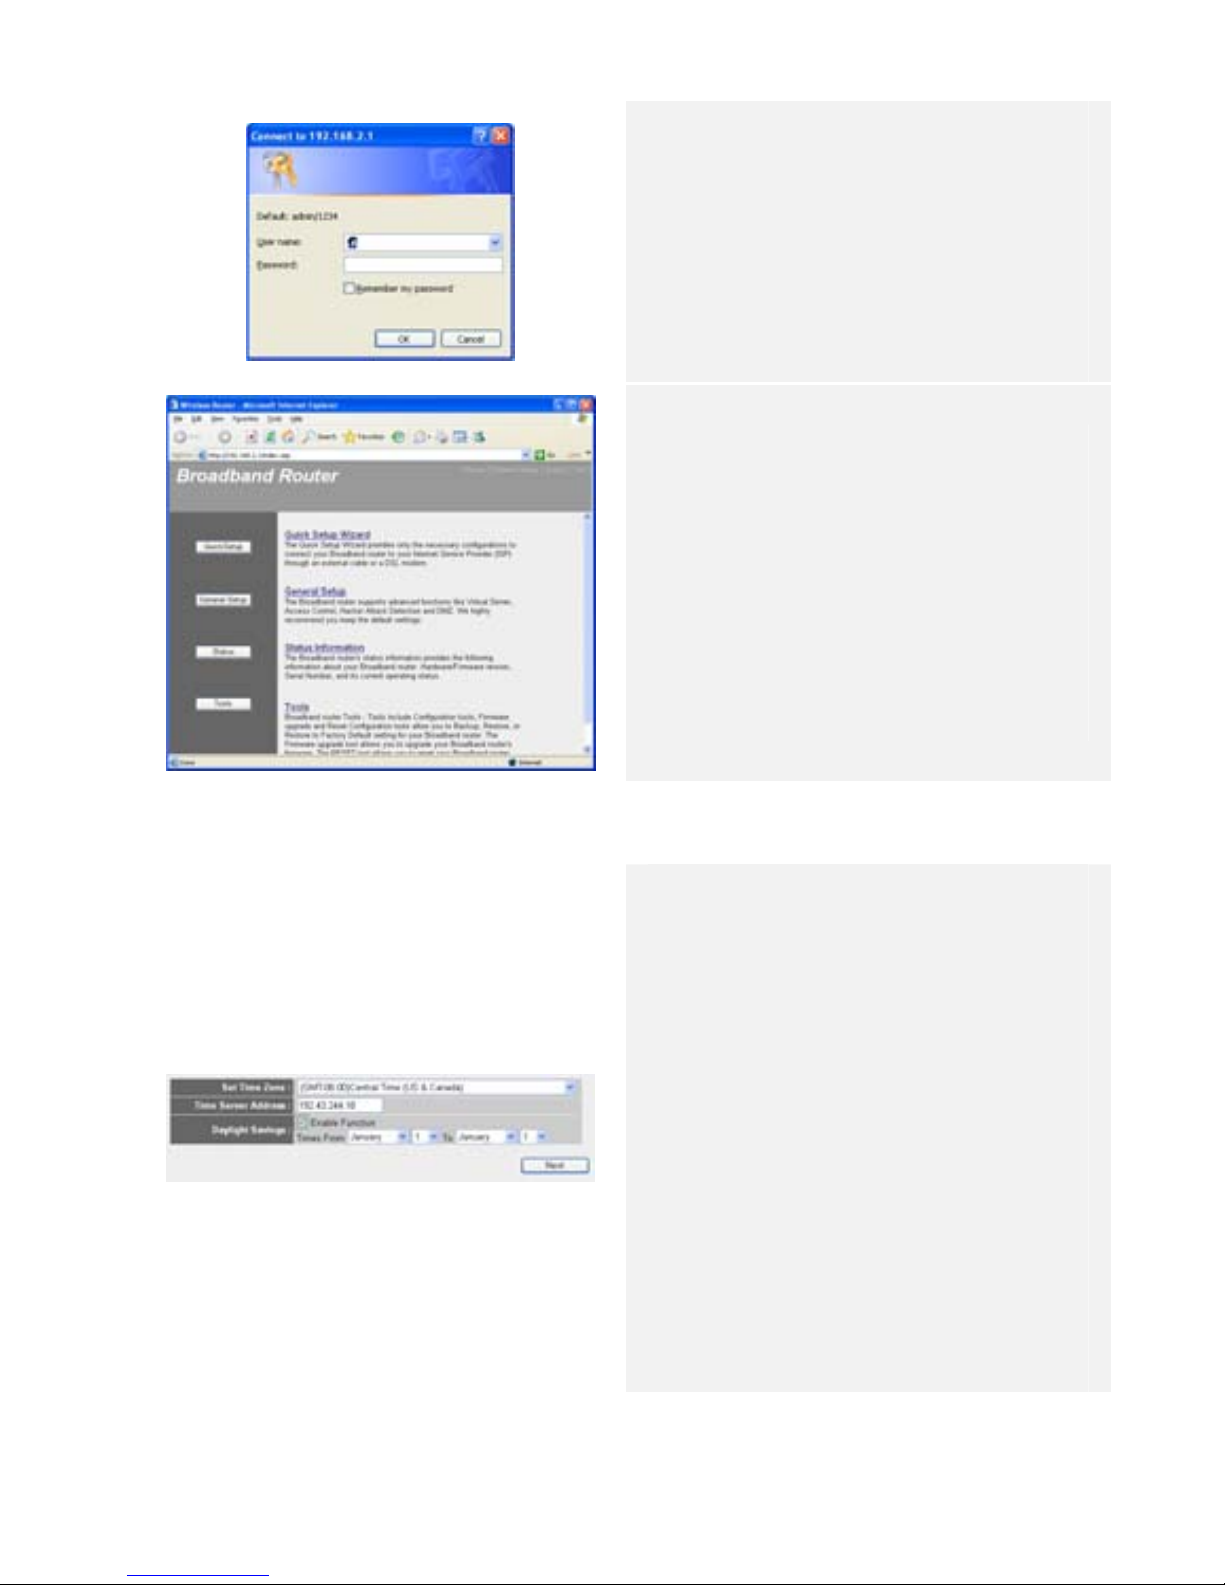
1. Open a browser (Internet
Explorer browser only)
and type in “192.168.2.1” at
the address bar and press
Enter.
2. Type in “admin” at the User
2. Time Zone Setup
Name text box and “1234” at
the Password text box.
3. The web management home
page will be displayed.
4. Click on QuickSetup Button
to start Internet connection
setup.
5. Click on Home option on top
of the page to return to this
page at any time during
setup operation.
1. Upon entering QuickSetup
3. WAN Type Setup
option, please select an
appropriate time zone.
2. Type in Time Server IP
Address if available.
3. Enable Daylight Savings
function if necessary and
input required date
parameters.
4. Click on ? mark next to Time
Zone to display more
information.
5. Click on Next button to
continue Internet
configuration setup.
ENG - 3
 Loading...