


 Loading...
ProCoder 3
Installation and User Guide

ProCoder 3
 Cautions
(1)It is prohibited to copy a part or all of this product without prior permission.
(2)The contents or specifications of this product may be changed without prior notice.
(3)We have prepared the contents of this product to the best of our ability; however if you have any questions about the contents, or if there are any errors or missing items, please contact Grass Valley.
(4)However we do not take any responsibility for malfunctions arising from use, irrespective of the points outlined in (3).
(5)Irrespective of whether it was due to a usage error, Canopus takes no responsibility for extraordinary, incidental or derivative claims, including those for lost earnings generated by the application of this product.
(6)It is prohibited to analyze, reverse engineer, decompile, or disassemble any of the items included with this product, including the software, hardware, and manuals.
(7)HDV is the trademark of Sony Corporation and Victor Company of Japan, Limited (JVC).
(8)Microsoft and Windows are registered trademarks of Microsoft Corporation, USA.
(9)Intel, Pentium and Xeon are the trademarks or registered trademarks of Intel Corporation or its subsidiaries in the United States of America and other countries.
(10)QuickTime is the registered trademark of Apple Computer, Inc., USA.
(11)iPod and Final Cut Pro are the trademarks of Apple Computer, Inc.
(12)Macromedia and Flash are the trademarks of Macromedia, Inc.
(13)Adobe, Adobe logo, Adobe Reader and Adobe Premiere are registered trademarks of Adobe Systems Incorporated.
(14)Dolby, Dolby and the Double D symbol are registered trademarks of Dolby Laboratories.
They are manufactured based on their own license.
(15)Other product names or related brand names are trademarks or registered trademarks of their respective companies.
 Manual Explanation
Information not described in this manual may be displayed in some cases. Make sure to read the text file attached to the disc.
If there are any variations between the explanation in this manual and the actual application method, priority is given to the actual application method.
This manual is written for people who have a basic knowledge of how to use a computer. If there are no special instruction, perform the same operation as a normal computer operation.
Windows XP (collective term of Home Edition, Professional and Professional x64 Edition) in this book means Microsoft® Windows® XP operating system.
In this manual, ProCoder 3 is called 'ProCoder'.

 DANGER
Health Precautions
In rare cases, flashing lights or stimulation from the bright light of a computer display or TV monitor may trigger temporary epileptic seizures or loss of consciousness. It is believed that even individuals whom have never experienced such symptoms may be susceptible. If you or close relatives have experienced any of
these symptoms, consult a doctor before using this product.
Copyright
Do not use captured image/sound data created by other ones without authorization of the right holder regardless of whether it is moving or still image, except for personal fun. Also, duplication of such data is sometimes limited even for personal hobby. Please notice that we are exempted from responsibility for the use of captured data.
ProCoder 3
Installation and User Guide
March, 2007
Copyright © 2007 Grass Valley.
All rights reserved.

Contents
Contents |
|
|
Chapter 1 Introduction |
|
|
1 |
Before Installing ProCoder......................................... |
8 |
|
Before Using ProCoder.......................................................... |
8 |
|
Support............................................................................... |
9 |
2 |
Key Features.......................................................... |
10 |
3 |
Navigating this Manual............................................. |
12 |
|
Minimum System Requirements.............................................. |
12 |
Chapter 2 Installation |
|
|
1 |
Installing ProCoder.................................................. |
14 |
2 |
Uninstalling ProCoder.............................................. |
20 |
Chapter 3 ProCoder 3 Wizard |
|
|
1 |
Using ProCoder 3 Wizard......................................... |
24 |
|
Convert a Source................................................................. |
25 |
|
Choose Conversion Settings.................................................. |
28 |
|
Choosing Output Location...................................................... |
31 |
|
Confiming Your Settings......................................................... |
32 |
|
Converting Files.................................................................... |
34 |
|
Conversion Finished.............................................................. |
35 |
|
Create a Watch Folder.......................................................... |
36 |
|
Other Watch Folder Options................................................... |
38 |
Chapter 4 Using ProCoder |
|
|
1 |
QuickStart............................................................. |
40 |
|
Assigning a Target format...................................................... |
42 |
|
Converting the file................................................................. |
44 |
2 |
Source Tab............................................................ |
45 |
|
Source Properties................................................................ |
45 |
|
Advanced window.................................................................. |
50 |
|
Video Filter tab..................................................................... |
52 |
|
Audio Filter tab..................................................................... |
58 |
3 |
Target Tab.............................................................. |
62 |
|
Assigning Targets................................................................. |
62 |
|
Modifying Targets.................................................................. |
64 |
|
Customizing Advanced Settings.............................................. |
66 |
Contents |
|
|
|
|
|
Introduction |
1 CHAPTER |
|
|
|
|
ationlInsta |
2 CHAPTER |
|
|
|
|
Wizard |
3 ProCoder |
3 CHAPTER |
|
|
|
ProCoder Using |
4 CHAPTER |
|
|
|
|
Hints Helpful |
5 CHAPTER |
|
|
|
|
Reference |
ProCoder |
CHAPTER |
|
|
6 |
|
|
|
Glossary |
CHAPTER |
|
|
|
7 |
|
|
|
Index |
|
|
|
|
|

ProCoder 3 |
|
|
|
Advanced window.................................................................. |
66 |
|
Video Filter tab..................................................................... |
68 |
|
Audio Filter Tab..................................................................... |
73 |
4 |
Convert Tab........................................................... |
77 |
|
Playing converted files........................................................... |
78 |
5 |
Presets and Profiles................................................ |
79 |
|
Loading and Saving Custom Settings....................................... |
79 |
|
Loading and Saving Target profiles........................................... |
79 |
6 |
Queue Manager...................................................... |
80 |
|
Cancelling and managing jobs.................................................. |
81 |
|
Managing Jobs..................................................................... |
82 |
|
Clearing the Queue............................................................... |
83 |
7 |
Watch Folders........................................................ |
84 |
|
Creating Permanent Watch Folders......................................... |
85 |
|
Removing Permanent Watch Folders........................................ |
88 |
|
Creating Temporary Watch Folders.......................................... |
88 |
8 |
Transcoding Settings............................................... |
89 |
|
Processing Options tab......................................................... |
89 |
|
Conversion Options tab......................................................... |
93 |
|
Default Target Folder Tab....................................................... |
95 |
9 |
Application Settings................................................. |
96 |
|
Settings.............................................................................. |
96 |
|
Confirmation........................................................................ |
96 |
10 Advanced Features............................................... |
97 |
|
|
Droplets.............................................................................. |
97 |
|
Command-line Automation...................................................... |
99 |
|
Premiere Plug-in.................................................................. |
101 |
|
EDIUS Plug-in...................................................................... |
104 |
Chapter 5 Helpful Hints |
|
|
1 |
Maximizing ProCoder performance................................................ |
108 |
2 |
Using Filters ......................................................... |
109 |
|
When to apply filters............................................................ |
109 |
|
Why filters are necessary..................................................... |
109 |
3 |
Improving your Video.............................................. |
110 |
|
Video is blocky or appears to break up.................................... |
110 |
|
Video appears fuzzy or blurry................................................. |
111 |
|
Video has halos or blocks near objects.................................... |
113 |
|
Video appears to jitter.......................................................... |
113 |
|
Video movement appears jumpy............................................. |
114 |

Contents
Audio and video are out of sync............................................. |
115 |
Video shows strange patterns or blocks................................. |
116 |
Video appears stretched or squashed.................................... |
117 |
Cannot load encoded MPEG files into DVD authoring software... |
118 |
Chapter 6 ProCoder Reference |
|
1 Source Options..................................................... |
120 |
Common Source Options...................................................... |
120 |
AC3 Audio Source............................................................... |
122 |
AVI Source......................................................................... |
123 |
DV Source.......................................................................... |
123 |
DVD (VIDEO TS.IFO) Source.................................................. |
124 |
Flash Source....................................................................... |
125 |
H.264 Source..................................................................... |
126 |
HDV(m2t) Source................................................................ |
127 |
MP3 Audio Source............................................................... |
129 |
MPEG Source..................................................................... |
129 |
PCM (WAVE) Audio Source.................................................... |
131 |
QuickTime Source................................................................ |
131 |
RawDV Source.................................................................... |
132 |
Still Image Source................................................................ |
132 |
Windows Media Source......................................................... |
134 |
2 Target Options....................................................... |
135 |
Common Target Options....................................................... |
135 |
AC3 Audio Target................................................................ |
139 |
AVI Target.......................................................................... |
140 |
DV Target........................................................................... |
143 |
Flash Target........................................................................ |
145 |
H.264 Target...................................................................... |
147 |
HDV Target......................................................................... |
149 |
MP3 Audio Target................................................................ |
150 |
MPEG Target...................................................................... |
151 |
PCM Audio Target................................................................ |
156 |
Poster Frame (Still Image) Target........................................... |
157 |
Preview DVD Target............................................................. |
158 |
QuickTime Export Target....................................................... |
160 |
QuickTime Target................................................................. |
161 |
Raw DV Target.................................................................... |
165 |
RealMedia Target................................................................. |
166 |
Windows Media Target.......................................................... |
170 |
Contents |
|
|
|
|
|
Introduction |
1 CHAPTER |
|
|
|
|
ationlInsta |
2 CHAPTER |
|
|
|
|
Wizard |
3 ProCoder |
3 CHAPTER |
|
|
|
ProCoder Using |
4 CHAPTER |
|
|
|
|
Hints Helpful |
5 CHAPTER |
|
|
|
|
Reference |
ProCoder |
CHAPTER |
|
|
6 |
|
|
|
Glossary |
CHAPTER |
|
|
|
7 |
|
|
|
Index |
|
|
|
|
|

ProCoder 3 |
|
3 Video Filters.......................................................... |
177 |
601 Correction - Expand Color Space Filter............................ |
177 |
601 Correction - Shrink Color Space Filter.............................. |
177 |
601 to 709 Color Correction Filter........................................ |
178 |
709 to 601 Color Correction Filter........................................ |
178 |
Adaptive De-Interlace .......................................................... |
179 |
Bitmap Keying Filter............................................................. |
179 |
Black/White Correction Filter................................................. |
181 |
Blur Filter........................................................................... |
182 |
Broadcast Color Safe Filter................................................... |
182 |
Circular Blur Filter............................................................... |
183 |
Color Correction Filter.......................................................... |
183 |
Fade In/Out Filter................................................................. |
184 |
Gamma Correction Filter...................................................... |
184 |
Gaussian Blur Filter.............................................................. |
185 |
Median Filter....................................................................... |
185 |
Pulldown Filter..................................................................... |
186 |
Relative Crop Filter.............................................................. |
187 |
Rotate Filter....................................................................... |
189 |
Sharpen Filter..................................................................... |
190 |
Temporal Noise Reducer....................................................... |
191 |
Video Inverse Telecine Filter................................................... |
192 |
4 Audio Filters.......................................................... |
193 |
Channel Mixer Filter............................................................. |
193 |
Fade In/Out Filter................................................................. |
193 |
Lowpass Filter..................................................................... |
194 |
Normalize Filter................................................................... |
194 |
Volume Filter....................................................................... |
195 |
5 ProCoder Preset Categories........................................ |
196 |
Chapter 7 Glossary
Index
Index....................................................................... |
206 |

Chapter 1
Introduction

ProCoder 3
1 |
Before Installing ProCoder |
Before Using ProCoder
Precautions
IN NO EVENT SHALL GRASS VALLEY BE LIABLE TO USER OR ANY OTHER PARTY FOR INCIDENTIAL, CONSEQUENTIAL OR SPECIAL DAMAGES ARISING UNDER THE USE OF THIS PRODUCT WHETHER UNDER THEORY OF CONTRACT, TORT, INDEMNITY, PRODUCT LIABILITY OR OTHERWISE.
EXCEPT AS OTHERWISE EXPRESSLY PROVIDED HEREIN, GRASS VALLEY MAKES NO REPRESENTATIONS, EXTENDS NO WARRANTIES OF ANY KIND, EXPRESS OR IMPLIED, INCLUDING THE WARRANTIES OF MARCHANTABILITY, NON-INFRINGEMENT OR FITNESS FOR A PARTICULAR PURPOSE, AND ASSUMES NO RESPONSIBILITY WITH RESPECT TO THE USE OF THIS PRODUCT HEREUNDER. FURTHER, GRASS VALLEY MAKES NO WARRANTIES OF PROPER OPERATION
OF THIS PRODUCT UNDER OTHER USAGE ENVIRONMENT THAN THAT RECOMMENDED BY GRASS VALLEY FOR THIS PRODUCT.
Unauthorized recording of copyrighted television programmes, compact discs, digital versatile discs, video tapes and other materials may infringe the right of copyright owners and be contrary to copyrights laws.
IN NO EVENT SHALL GRASS VALLEY BE LIABLE TO USER OR ANY OTHER PARTY FOR WORKS AND/OR THEIR REPRODUCTIONS THAT PRODUCED, REPRODUCED, OR EDITTED BY USE OF THIS PRODUCT.
IT IS SPECIFICALLY RECOMMENDED THAT USER SHALL CONSULT WITH ITS LEGAL ADVISOR, FOR THE RISK OF INFRINGEMENT MAY DEPEND ON THE USAGE ENVIRONMENTS.

Before Installing ProCoder
Support
Customer Support
For questions regarding hardware setup and usage, please contact your local Grass Valley office, distributor or the store where you have purchased this product.
Web-site
Including ProCoder, the latest company information is announced at our web-site: http://www.canopus.com/
The latest drivers utilities, product manuals, FAQs, etc. are also available at our website.
Online User Registration
You can register your ProCoder here. http://www.canopus.com/support/
Contents |
|
|
|
|
|
Introduction |
1 CHAPTER |
|
|
|
|
ationlInsta |
2 CHAPTER |
|
|
|
|
Wizard |
3 ProCoder |
3 CHAPTER |
|
|
|
ProCoder Using |
4 CHAPTER |
|
|
|
|
Hints Helpful |
5 CHAPTER |
|
|
|
|
Reference |
ProCoder |
CHAPTER |
|
|
6 |
|
|
|
Glossary |
CHAPTER |
|
|
|
7 |
|
|
|
Index |
|
|
|
|
|

ProCoder 3
2 Key Features
Whether you’re encoding MPEG for DVD production or a Windows Media Video for Web streaming, ProCoder makes conversion from one video format to another quick and easy. Featuring Grass Valley’s highly optimized DV and MPEG codec technologies, ProCoder provides high-quality output without the long wait and guesswork of similar tools.
Supports the loading/exporting of Dolby Digital audio (.ac3)
Dolby Digital audio (.ac3) and MPEG files that contain Dolby Digital audio, such as a video recorded with a DVD recorder, can be used as audio sources, as can AVCHD files.
Dolby Digital audio can also be exported and you can map audio channels with an audio filter, channel mixer.
Audio channel mixer
You can load a source file with multiple audio channels and allocate audio channels before exporting the file.
You can allocate the audio tracks of an EDIUS project to specified channels and export these as an audio file.
High-speed HDV encoder (Speed Encoder)
On a PC with multiple CPU cores, ProCoder 3 can export HDV MPEG-TS files at high speed. By utilizing original GRID encoding technology, the encoding time can be reduced, depending on the number of CPU cores.
*RAM larger than [number of the CPU cores] x [512MB] is required.
Supports Flash encoding
You can generate a file in the Flash7 format, which is suitable for Web Video contents.
Supports H.264 encoding
You can generate an H.264 file that can be played on mobile terminals, including cellular phones.
Convenient features for loading DVD files
When you load a DVD (VOB) onto the ProCoder, the chapter information can be retained for use. You can also load files and split these, based on the chapters.
Improved progressive video quality
The noise reduction filter has been improved, which reduces the combing noise that ordinarily occurs when converting an interlaced video to a progressive format. Another filter that specializes in Inverse Telecine has been added.
10
Key Features
Improved scaling quality
Video quality when changing the video size (scaling) has been improved. ProCoder 3 excels at converting SD video to HD video and/or NTSC to PAL.
Marker function
When you create a new file by joining multiple source files, markers can be added at the joining points.
Supports Drop/Non-Drop timecodes
Drop/Non-drop timecodes can be used during file seek operations.
Supports conversion of files with VBI data
When you convert files that have their original size data (720x512, 720x608, etc.) stored in a VBI (vertical blanking interval) format, scaling and cropping can done properly.
Supports retention of the original timecode
When a file is being converted, the original timecode can be retained and when a file is exported from EDIUS version 4, the EDIUS project timecode will be retained.
Contents |
|
|
|
|
|
Introduction |
1 CHAPTER |
|
|
|
|
ationlInsta |
2 CHAPTER |
|
|
|
|
Wizard |
3 ProCoder |
3 CHAPTER |
|
|
|
ProCoder Using |
4 CHAPTER |
|
|
|
|
Hints Helpful |
5 CHAPTER |
|
|
|
|
Reference |
ProCoder |
CHAPTER |
|
|
6 |
|
|
|
Glossary |
CHAPTER |
|
|
|
7 |
|
|
|
Index |
|
|
|
|
|
11

ProCoder 3
3 Navigating this Manual
To install ProCoder 3 on your system, go to
Chapter 2: Installation.
To learn about the easy-to-use ProCoder 3 Wizard, go to
Chapter 3: ProCoder 3 Wizard.
For an overview on ProCoder 3 and its major features, go to
Chapter 4: Using ProCoder.
For some helpful hints and tips on how to improve video quality, go to
Chapter 5: Helpful Hints.
For a complete ProCoder Reference guide, go to
Chapter 6: ProCoder Reference.
For definitons of common video and compression terminology, go to
Chapter 7: Glossary.
Minimum System Requirements
Intel® Celeron® / Intel Pentium® III 800MHz +, or AMD Athlon™ 800MHz +.
Multiple processors and Hyper-Threading support included
(If multiple CPU's are installed on a PC (including multi-core), the Speed Encoder feature of ProCoder 3 will improves the HDV/MPEG2 conversion speed.)
256MB RAM (512MB RAM for HD encoding, [Number of CPU Cores] x 512MB RAM for Speed Encoder feature)
800MB free hard disk space
DirectX 9.0 or later
Windows® XP Home, Windows® XP Professional + SP2
USB 1.1 port for USB Hardware Key (also compatible with USB hubs)
12

Chapter 2
Installation
ProCoder 3
1 |
Installing ProCoder |
To install ProCoder:
Before installing, make sure the USB hardware key that comes with your software is NOT plugged in.
In order to install, you must log in as a user with administrator privileges.
If QuickTime has not been installed on your system, go to My Computer, open CDROM drive, QuickTime folder, and run QuickTimeInstaller_7.1.exe to install it.
1 |
Insert the ProCoder CD-ROM in your CD drive. The CD launches automatically if |
|
Window’s Autorun feature is enabled. If Autorun is not enabled, then go to My |
|
Computer, double-click on the CD-ROM drive and run Setup.exe. |
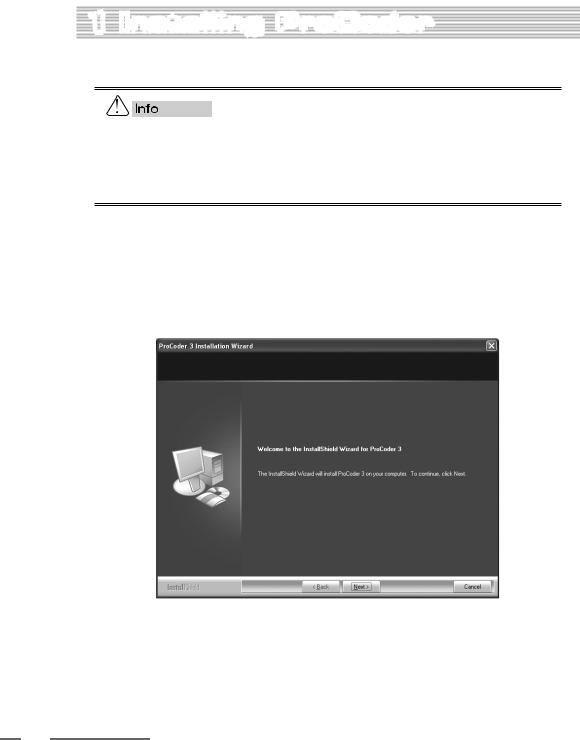
2 |
The Welcome screen appears. Click the Next button to go to the next installation |
|
screen. |
14

Installing ProCoder
3 The License Agreement appears. Select I accept the terms of the license agreement to accept the terms of the license and click the Next button.
4 The Customer Information window appears. Enter your name and company name and click the Next button.
Contents |
|
|
|
|
|
Introduction |
1 CHAPTER |
|
|
|
|
ationlInsta |
2 CHAPTER |
|
|
|
|
Wizard |
3 ProCoder |
3 CHAPTER |
|
|
|
ProCoder Using |
4 CHAPTER |
|
|
|
|
Hints Helpful |
5 CHAPTER |
|
|
|
|
Reference |
ProCoder |
CHAPTER |
|
|
6 |
|
|
|
Glossary |
CHAPTER |
|
|
|
7 |
|
|
|
Index |
|
|
|
|
|
15
ProCoder 3
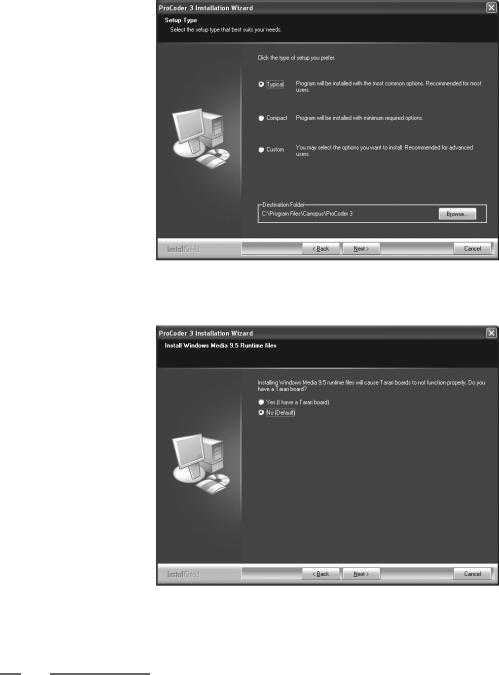
5 Choose Typical, specify a destination location for ProCoder, and click the Next button. To change the destination location, click the Browse button and select a new destination folder.
6 Select No and click the Next button.
If you are going to use a Tarari board, select Yes.
16
7
8
9
Installing ProCoder
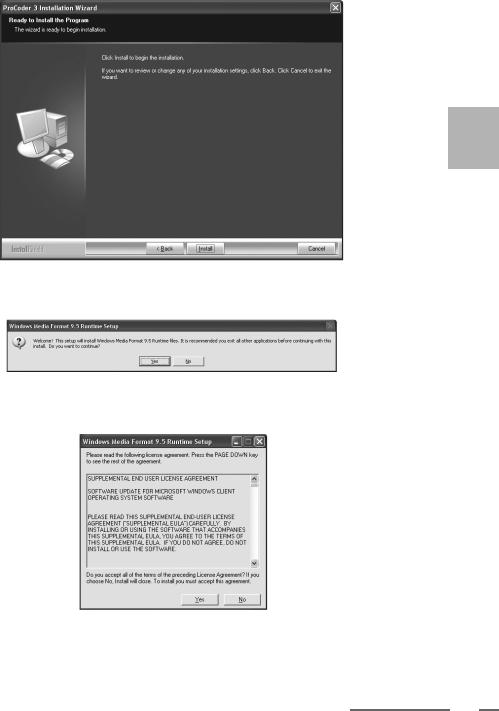
Click the Install button. |
|
|
|
|
Contents |
|
|
|
|
|
|
|
Introduction |
1 CHAPTER |
|
|
|
|
|
|
ationlInsta |
2 CHAPTER |
|
|
|
|
|
|
3 ProCoder Wizard |
3 CHAPTER |
|
|
|
|
|
Install Windows Media Format 9.5 runtime files. |
ProCoder Using |
4 CHAPTER |
|
|
|
||
HintsHelpful |
CHAPTER5 |
||
Click the Yes button. |
|||
|
|
||
|
|
|
|
The License Agreement appears. Click the Yes button to accept the terms of the |
ProCoder Reference |
CHAPTER |
|
|
6 |
||
license. |
|
|
|
Glossary |
CHAPTER |
||
|
|||
|
|
7 |
|
|
|
|
|
|
Index |
|
|
|
|
|
17
ProCoder 3
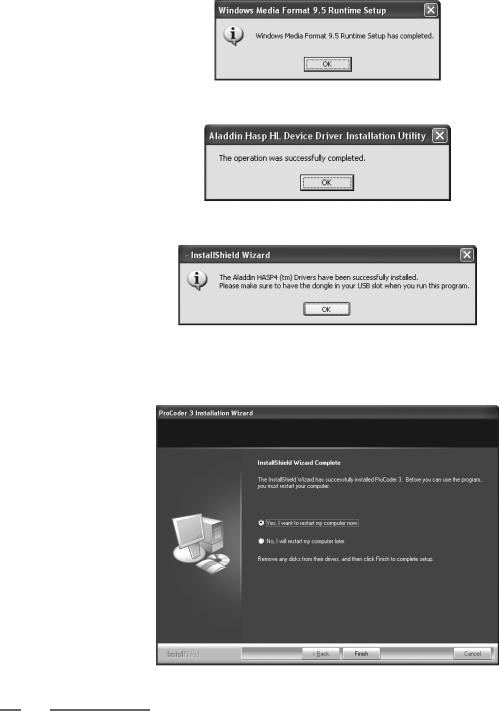
10 Click the OK button.
11 Click the OK button.
12 Click the OK button.
13 When the installation is finished, you must restart your computer to complete the installation. Choose “Yes, I want to restart my computer now.” and click the Finish button to restart your computer.
18

Installing ProCoder
14 When the computer finishes restarting, plug-in the USB Hardware Key that comes with your software. You can use the computer's on-board USB ports, a USB PCI card or a USB hub connected to either of these ports. The USB Hardware Key MUST be connected before starting ProCoder.
Contents |
|
|
|
|
|
Introduction |
1 CHAPTER |
|
|
|
|
ationlInsta |
2 CHAPTER |
|
|
|
|
Wizard |
3 ProCoder |
3 CHAPTER |
|
|
|
ProCoder Using |
4 CHAPTER |
|
|
|
|
Hints Helpful |
5 CHAPTER |
|
|
|
|
Reference |
ProCoder |
CHAPTER |
|
|
6 |
|
|
|
Glossary |
CHAPTER |
|
|
|
7 |
|
|
|
Index |
|
|
|
|
|
19
ProCoder 3
2 |
Uninstalling ProCoder |
Before starting uninstallation, close all the other applications that may be running in the task tray.
In order to uninstall, you must log in as a user with administrator privileges.
To uninstall ProCoder:
1
2
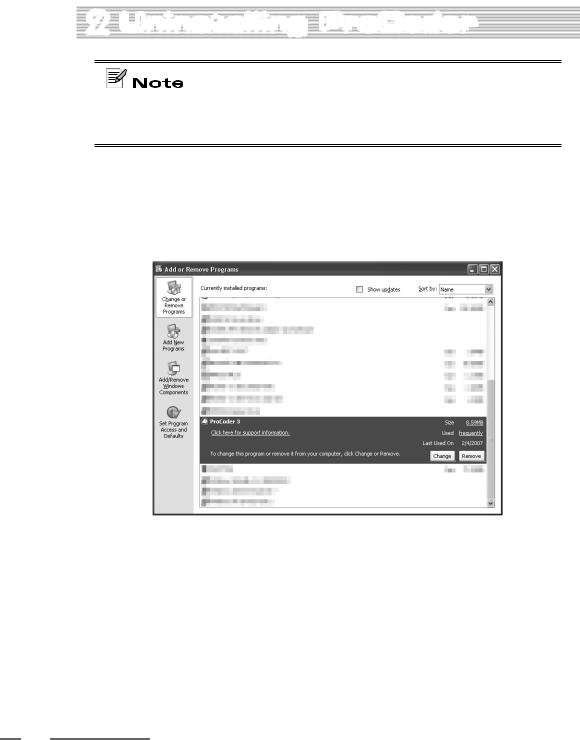
From the Start menu, select Control Panel, and choose Add or Remove Programs.
Select ProCoder 3 and click the Remove button.
20
3
4
Uninstalling ProCoder
Select Remove and click the Next button. |
|
|
|
Contents |
|
|
|
|
|
Introduction |
1 CHAPTER |
|
|
|
|
ationlInsta |
2 CHAPTER |
|
|
|
|
3 ProCoder Wizard |
3 CHAPTER |
|
|
|
Select “Yes, I want to restart my computer now.” and click the Finish button. |
ProCoder Using |
4 CHAPTER |
|
Hints Helpful |
5 CHAPTER |
|
|
|
|
ProCoder Reference |
CHAPTER |
|
|
6 |
|
|
|
|
Glossary |
CHAPTER |
|
|
7 |
|
|
|
|
Index |
|
|
|
|
The computer will reboot. Uninstallation is completed.
21

ProCoder 3
22

Chapter 3
ProCoder 3 Wizard
ProCoder 3
1 Using ProCoder 3 Wizard
The ProCoder 3 Wizard is very easy-to-use. Its Wizard interface makes converting your videos as straightforward as answering a few simple questions. Simply launch the ProCoder 3 Wizard by going to the Start menu and choosing All Programs > ProCoder 3 > ProCoder 3 Wizard.
The ProCoder 3 Wizard lets you configure a conversion by simply answering the questions displayed in the dialog. ProCoder’s online help has more detailed information regarding the questions you will be asked. Press the F1 key on your keyboard to access the online help at any time.
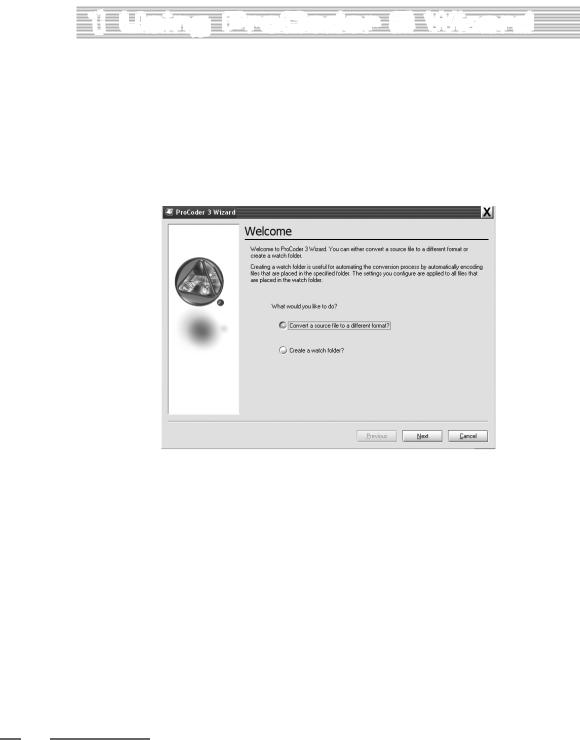
The Welcome screen appears when you launch the application and gives you two choices
– Convert a source file to a different format or Create a watch folder. Make a selection and click the Next button.
24
Using ProCoder 3 Wizard
Convert a Source
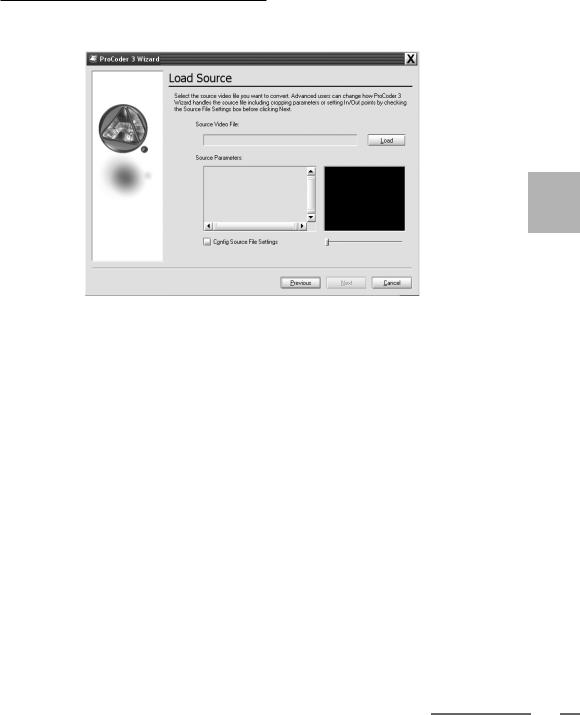
If you choose to convert a source file, the Load Source screen appears. Click the Load button to choose the video file you want to convert.
The ProCoder 3 Wizard can load a variety of different video file formats for conversion. If you cannot see the file you want to load but you know it exists, the file may not be a supported source type. For example, some file types, such as RealMedia files, cannot be loaded due to licensing restrictions.
If the ProCoder 3 Wizard has problems loading the selected file, please make sure the file has the proper file extension for its format. For example, an MPEG-1 file that should have the .mpg file extension may be mislabelled with the .wmv file extension. Windows Media Player may play the file properly but also display an error message about the file extension not matching the file type.
Checking the Source
The Source Parameters section of the window shows the selected source’s file information. You can see a preview of the video and scrub through it on the right side of the screen.
Contents |
|
|
|
|
|
Introduction |
1 CHAPTER |
|
|
|
|
ationlInsta |
2 CHAPTER |
|
|
|
|
Wizard |
3 ProCoder |
3 CHAPTER |
|
|
|
ProCoder Using |
4 CHAPTER |
|
|
|
|
Hints Helpful |
5 CHAPTER |
|
|
|
|
Reference |
ProCoder |
CHAPTER |
|
|
6 |
|
|
|
Glossary |
CHAPTER |
|
|
|
7 |
|
|
|
Index |
|
|
|
|
|
Changing Source Parameters
If you want to modify the In/Out points or change the cropping parameters, click the Config Source File Settings option in the bottom left-hand corner and click the Next button.
25
ProCoder 3
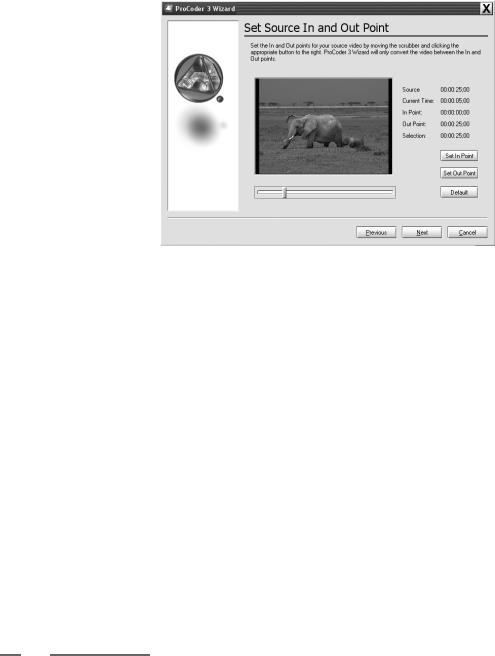
Setting In/Out points
Setting In and Out points on your video clip allows the ProCoder 3 Wizard to ignore portions of video at the start and end. For example, you may have a few seconds of blank video at the beginning or end that you don’t need to encode.
Click and drag the scrubber below the Preview window to choose where you want the final encoded video to start and click the Set In Point button.
The timeline to the left of the scrubber turns gray, which means any footage that appears before the scrubber will not be included in your final converted video. Click and drag the scrubber to set the video’s out point and click the Set Out Point button. The timeline to the right of the scrubber turns gray, which means any footage after this point will not be included in your final converted video.
The Default button restores the in and out points to their original settings.
26
Using ProCoder 3 Wizard
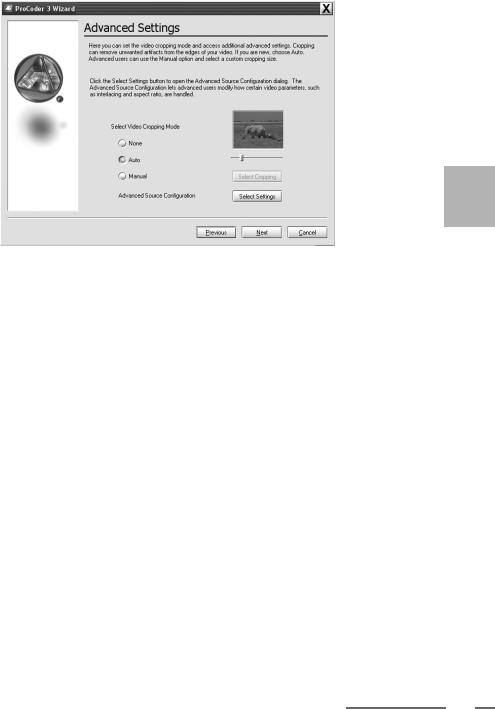
Advanced Settings
Advanced Settings let you set the video cropping mode for your source video. Choose a cropping mode and click the Next button. If you choose the Manual option, then click the Select Cropping button to open the Crop dialog.
To modify more advanced source settings, click the Select Settings button to open the Config dialog. The Config dialog lets you modify additional parameters that affect your source video. This is only recommended for advanced users and should be used with caution.
Contents |
|
|
|
|
|
Introduction |
1 CHAPTER |
|
|
|
|
ationlInsta |
2 CHAPTER |
|
|
|
|
Wizard |
3 ProCoder |
3 CHAPTER |
|
|
|
ProCoder Using |
4 CHAPTER |
|
|
|
|
Hints Helpful |
5 CHAPTER |
|
|
|
|
Reference |
ProCoder |
CHAPTER |
|
|
6 |
|
|
|
Glossary |
CHAPTER |
|
|
|
7 |
|
|
|
Index |
|
|
|
|
|
27
ProCoder 3
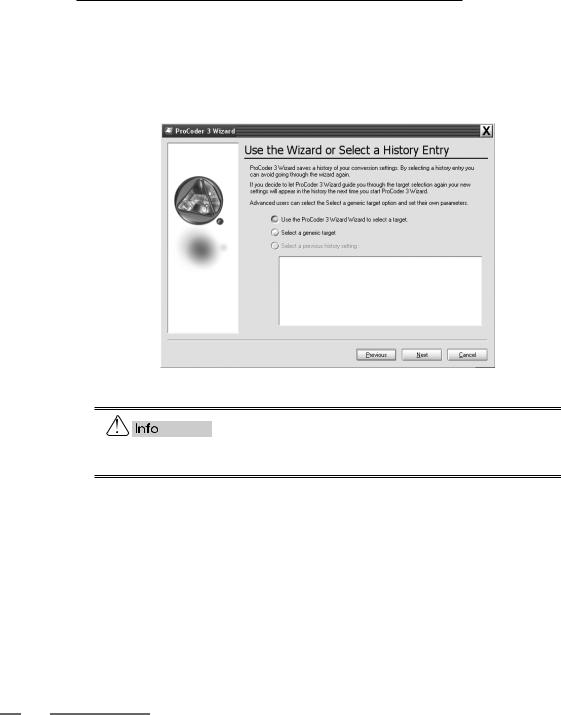
Choose Conversion Settings
Next, the Use the Wizard or Select a History Entry screen appears. This screen gives you three options – you can use the Wizard to help you select a target; select a generic target format and modify the parameters yourself if you are an advanced user; or you can choose the settings from a previous encoding job from the history list. The last option is not available if you have not performed any previous encoding jobs. Click the Next button to proceed to the next screen.
The ProCoder 3 Wizard must be running in order for watch folder monitoring and file conversion to occur.
28
Using ProCoder 3 Wizard
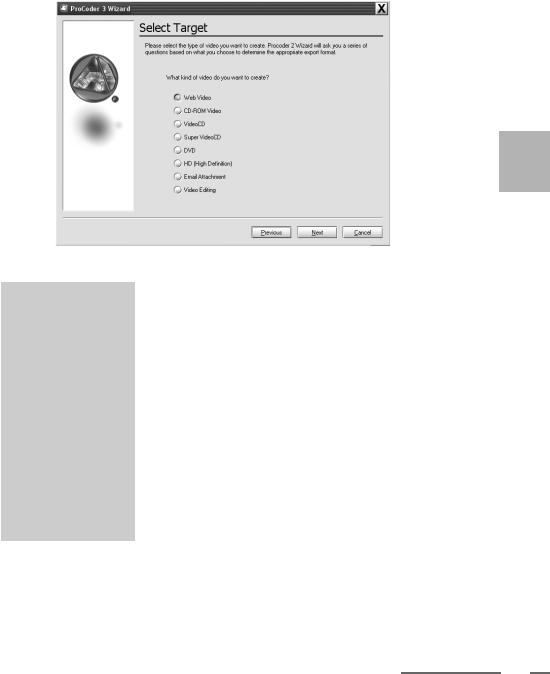
Selecting a Target format
The Select Target screen appears and lets you choose the conversion settings for your source video.
You can choose from any of the following formats.
Web Video |
Create a QuickTime, RealMedia or Windows Media for viewing on a |
|
Web page. |
|
|
CD-ROM Video |
Create video files in AVI, MPEG-1, QuickTime or Windows Media |
|
format for delivery on CD-ROM. |
|
|
VideoCD |
Create MPEG-1 files that are ready to be used in VideoCD authoring |
|
software. |
|
|
Super VideoCD |
Create MPEG-2 files that are ready to be used in Super VideoCD |
|
authoring software. |
|
|
DVD |
Create high-quality MPEG-2 files that are ready to be used in DVD |
|
authoring software. |
|
|
HD (High Definition) |
Create HD-compliant video streams that can be viewed on an |
|
HDTV. |
|
|
Email Attachment |
Create a Windows Media file that is small enough to send via email. |
|
|
Video Editing |
Convert your source video to a format that is compatible with your |
|
video editing software. |
|
|
After selecting your desired target format and clicking the Next button, the Wizard begins asking you a series of questions so that it can choose the appropriate settings for your final encoded video. Proceed through the Wizard’s questions until you get to the Saving Your File screen.
Contents |
|
|
|
|
|
Introduction |
1 CHAPTER |
|
|
|
|
ationlInsta |
2 CHAPTER |
|
|
|
|
Wizard |
3 ProCoder |
3 CHAPTER |
|
|
|
ProCoder Using |
4 CHAPTER |
|
|
|
|
Hints Helpful |
5 CHAPTER |
|
|
|
|
Reference |
ProCoder |
CHAPTER |
|
|
6 |
|
|
|
Glossary |
CHAPTER |
|
|
|
7 |
|
|
|
Index |
|
|
|
|
|
29
ProCoder 3
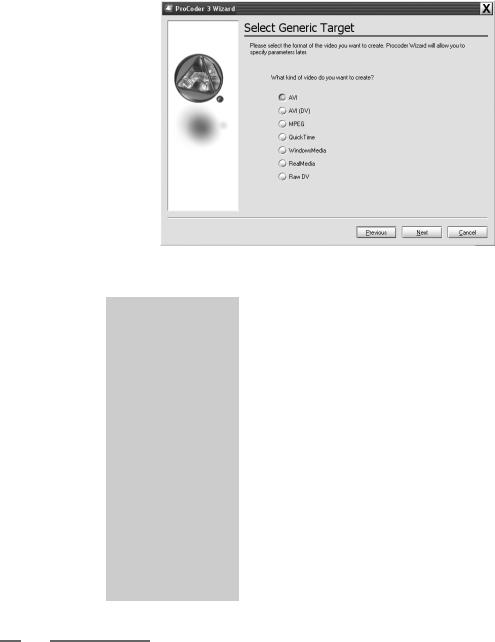
Selecting Generic Targets
Advanced users that know what output settings they want to use can select a generic target type and bypass the Wizard questions. The settings of the target can be specified later in the Job Summary screen by clicking the Advanced Output Settings button.
Choose one of the output types and click the Next button.
About the Formats
AVI |
AVI is used for a variety of applications ranging from CD-ROM |
|
video to video editing and archiving. It is really a file type, versus a |
|
compression type. AVI files can contain many types of compressed |
|
video data depending on the codecs installed on the system. Any |
|
available DirectShow codec on the system can be used as the |
|
compressor. |
|
|
AVI (DV) |
DV AVIs are usually used by DV video editing software. |
|
|
MPEG |
MPEG is commonly used as a delivery and distribution format |
|
because it provides small files sizes. VideoCD, Super VideoCD |
|
and DVD all use MPEG compression. Both MPEG-1 and MPEG-2 |
|
streams can be created. |
|
|
QuickTime |
QuickTime is also more of a file type versus a format. QuickTime |
|
files can contain many types of data depending on the codecs |
|
available on the system. |
|
|
WindowsMedia |
Windows Media files are often used for web video and more |
|
recently, high definition video. |
|
|
RealMedia |
RealMedia files are normally used for streaming video. |
|
|
Raw DV |
Raw DV files are used by some DV video editing systems. |
|
|
30
Loading...