

Page 1

Installation
and
User Guide
Canopus Corporation
711 Charcot Ave.
San Jose, CA 95131
Copyright ©2004 Canopus Corporation. All Rights Reserved.
Page 2

Notice to Reader
This document contains proprietary information, which is protected by copyright. All rights are
reserved. No part of this document may be photocopied, reproduced or translated into another
Limited Warranty
for purchases made through an authorized Canopus dealer or through the Canopus Web site.
This limited warranty extends only to the Customer, who is the
for SOFTWARE
This limited warranty does not apply if the PRODUCT MEDIA (a) has been altered,
Notices & Warranties
ii
Notices & Warranties
iii
Page 3

General Terms Applicable to the Limited Warranty
Statement and Software License
IN NO EVENT WILL CANOPUS OR ITS DISTRIBUTORS BE LIABLE
foregoing limitations shall apply even if the above-stated warranty fails of its essential purpose.
Notices & Warranties
iii
Page 4

Notices & Warranties
iv
Page 5

Page 6

Table of Contents
vi
Table of Contents
vii
Page 7

Application Settings
Advanced Features
Table of Contents
vii
Page 8

Table of Contents
viii
Table of Contents
ix
Page 9

Table of Contents
ix
Page 10

Table of Contents
x
Page 11

Page 12

1: Introduction
1: Introduction
Welcome
Questions
on the Support
Speed without Limits
2
3
Page 13

1: Introduction
Produce, Perfect, Process
Multiple Outputs from Single Source
High-quality Codec technologies
3
Page 14

1: Introduction
4
Page 15
Page 16
2: Installation
for registration of your
for customer support, and if
6
7
2: Installation
Page 17
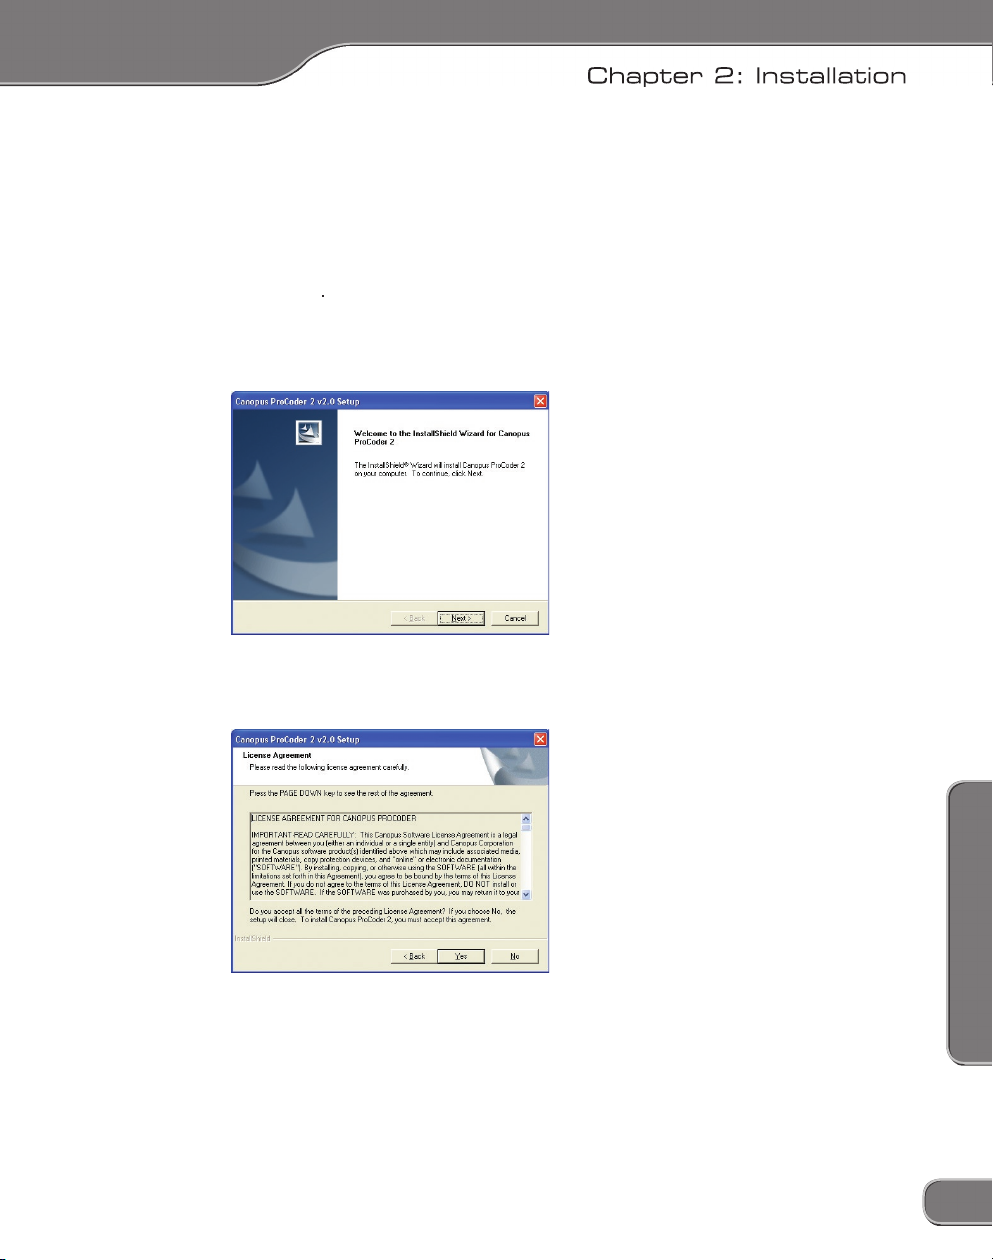
7
2: Installation
Page 18
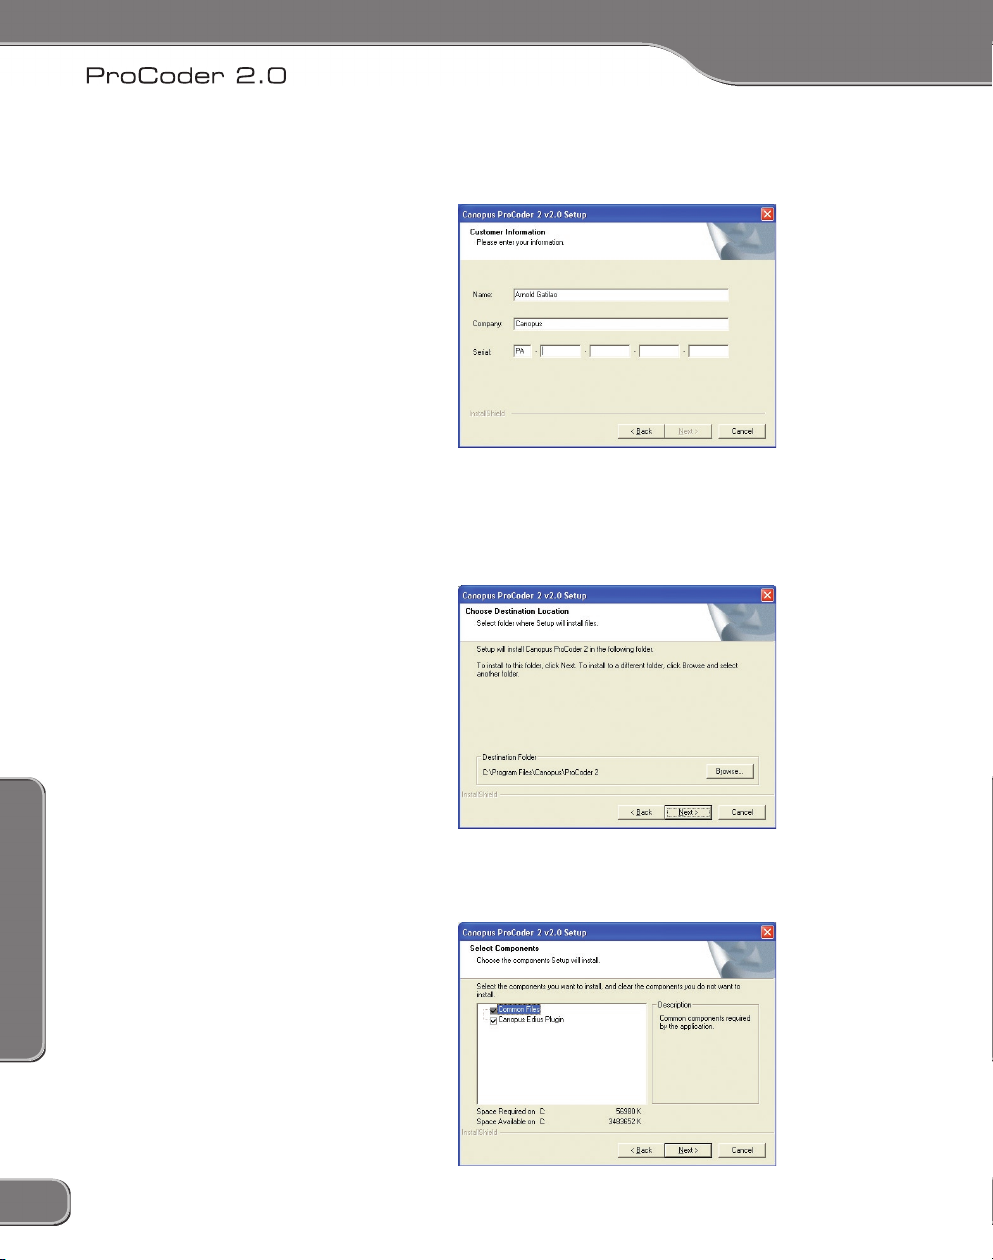
2: Installation
folder. Click the
8
9
2: Installation
Page 19
9
2: Installation
Page 20

2: Installation
10
Page 21
Page 22

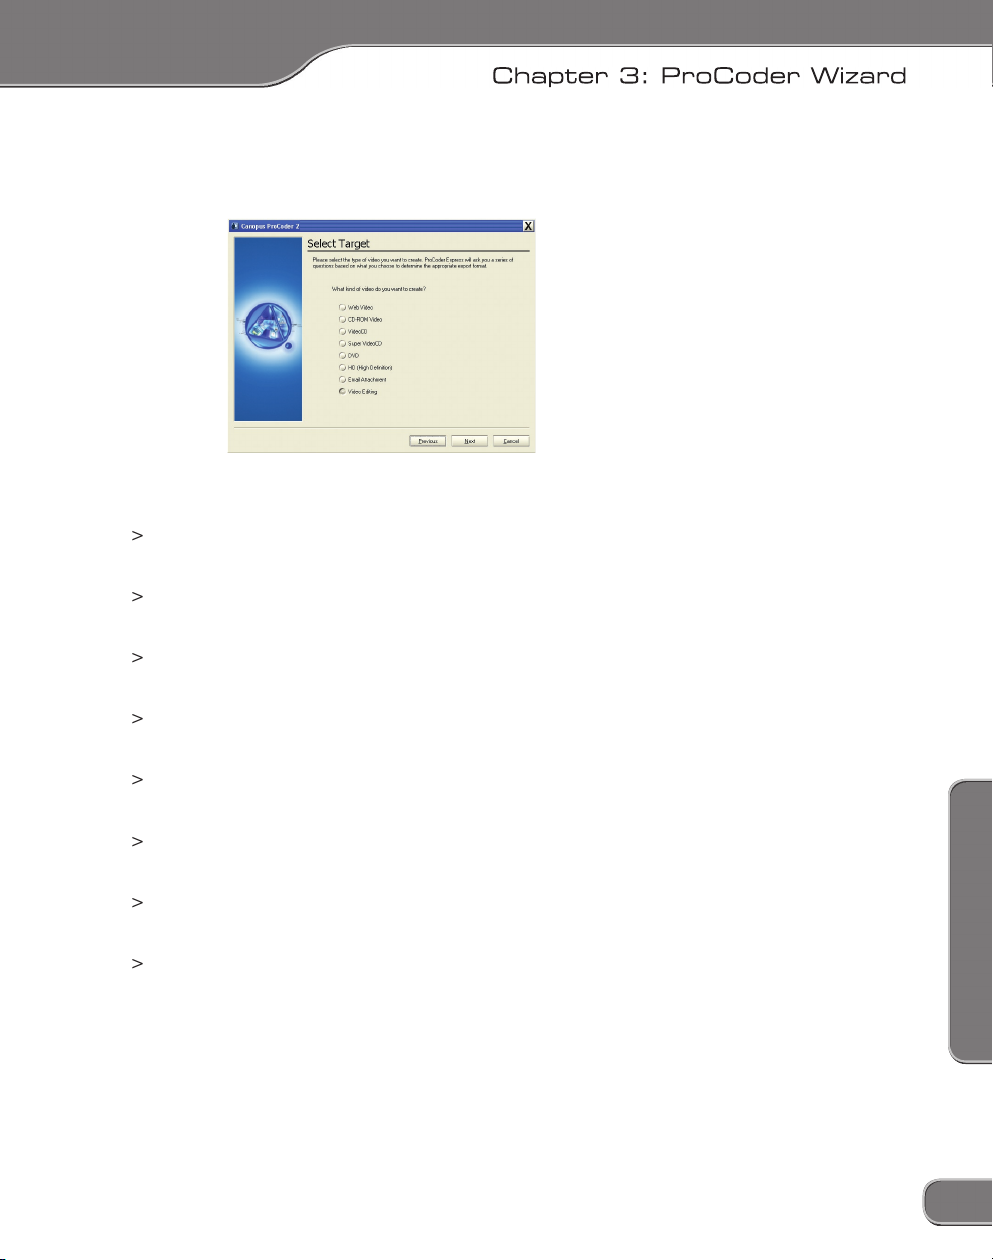
3: ProCoder Wizard
3: ProCoder Wizard
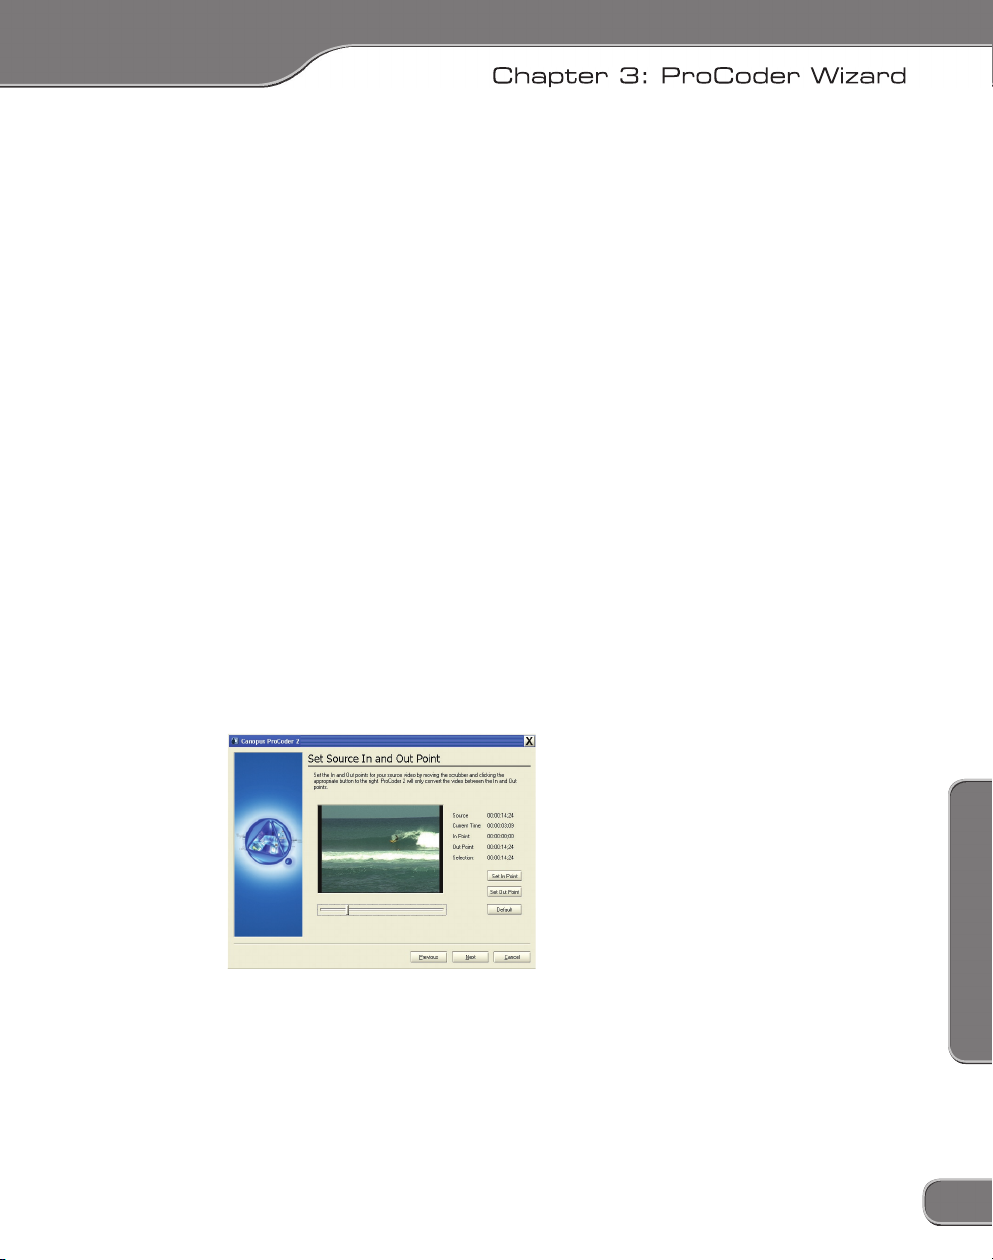
Convert a Source
for conversion. If you cannot see the file you want to load but you know
12
13
Page 23
3: ProCoder Wizard
file extension may
file extension. Windows Media Player
file extension not matching the file type.
If you want to modify the In/Out points or change the cropping
footage that appears before the scrubber will not be included in your
final converted video. Click and drag the scrubber to set the video’s out
13
Page 24
3: ProCoder Wizard
3: ProCoder Wizard
Advanced Settings
Choose Conversion Settings
file conversion to occur.
14
15
Page 25
3: ProCoder Wizard
15
Page 26

3: ProCoder Wizard
3: ProCoder Wizard
Advanced Output Settings
button.
About the Formats
AVI (DV) –
DivX is a popular format that is very versatile. It is commonly
QuickTime is also more of a file type versus a format.
Windows Media files are often used or web video
16
17
Page 27
3: ProCoder Wizard
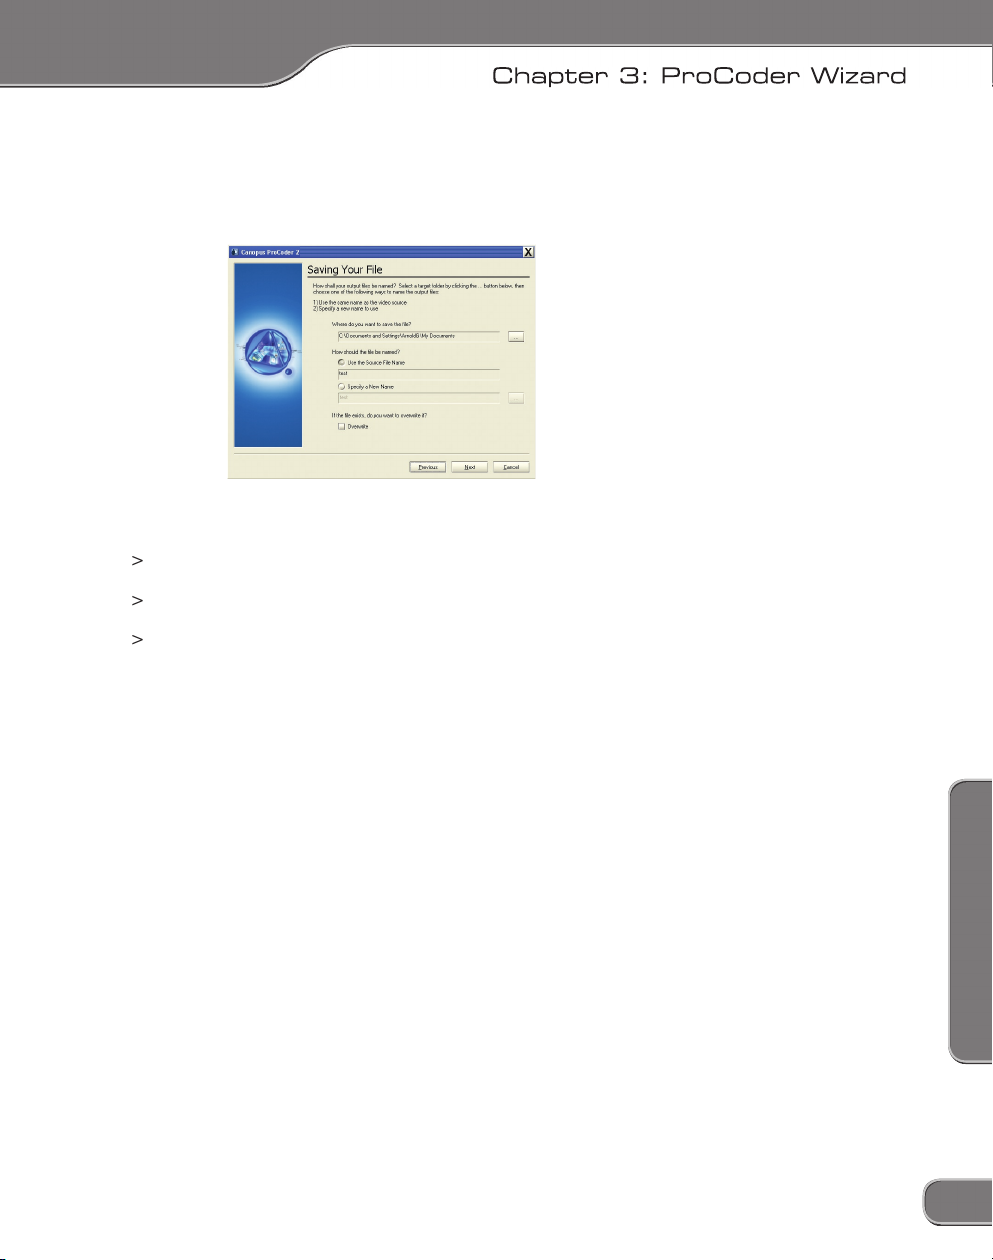
Choosing Output Location
button to choose the folder where you want your
file you’re currently encoding. Leaving this option disabled simply adds
17
Page 28
3: ProCoder Wizard
3: ProCoder Wizard
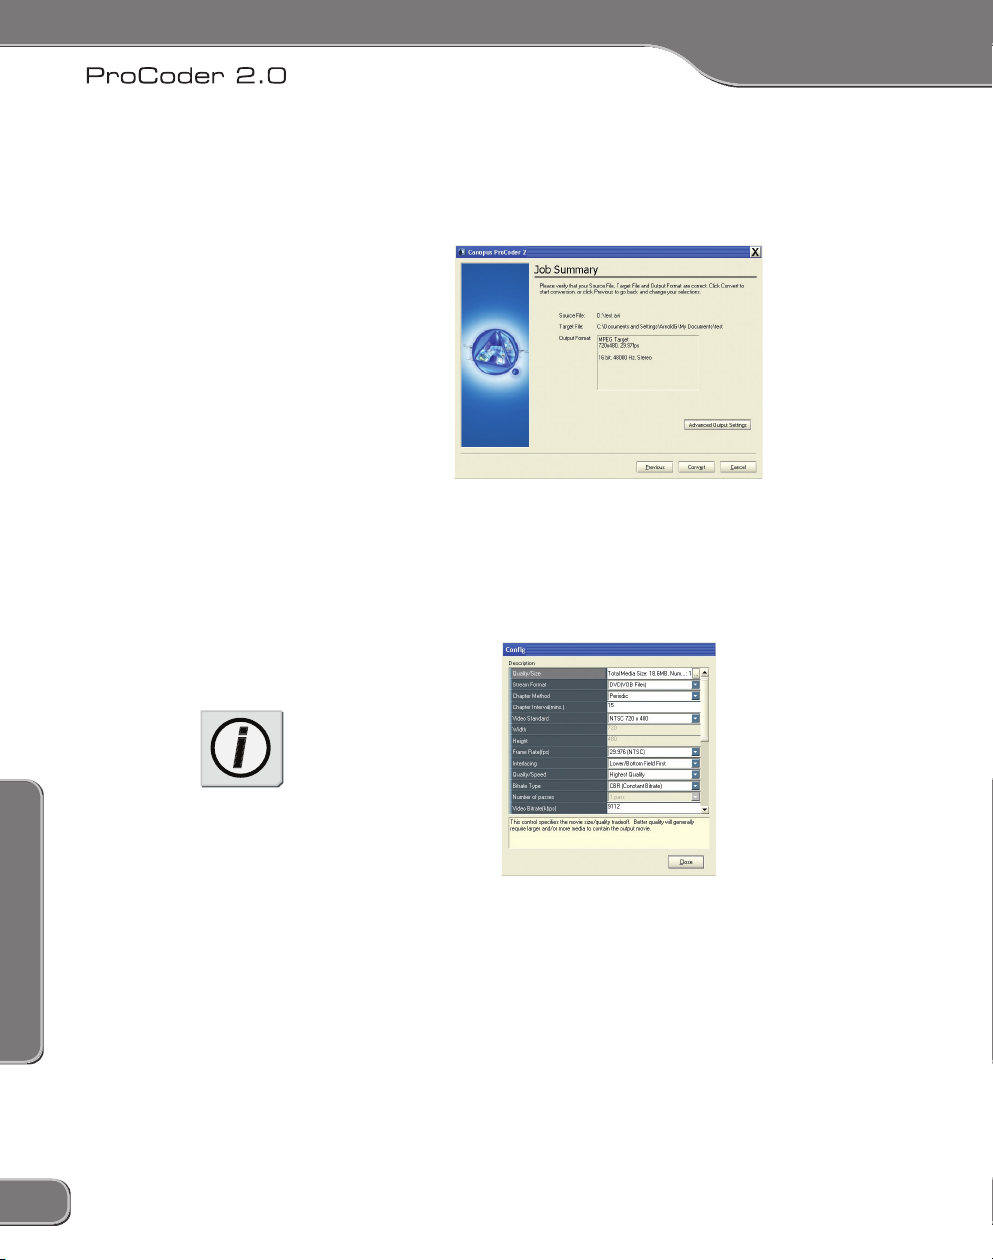
Confiming Your Settings
file, the target file and the output format. Verify that this information is
Advanced Output Settings
Advanced Output Settings
18
19
Page 29
3: ProCoder Wizard
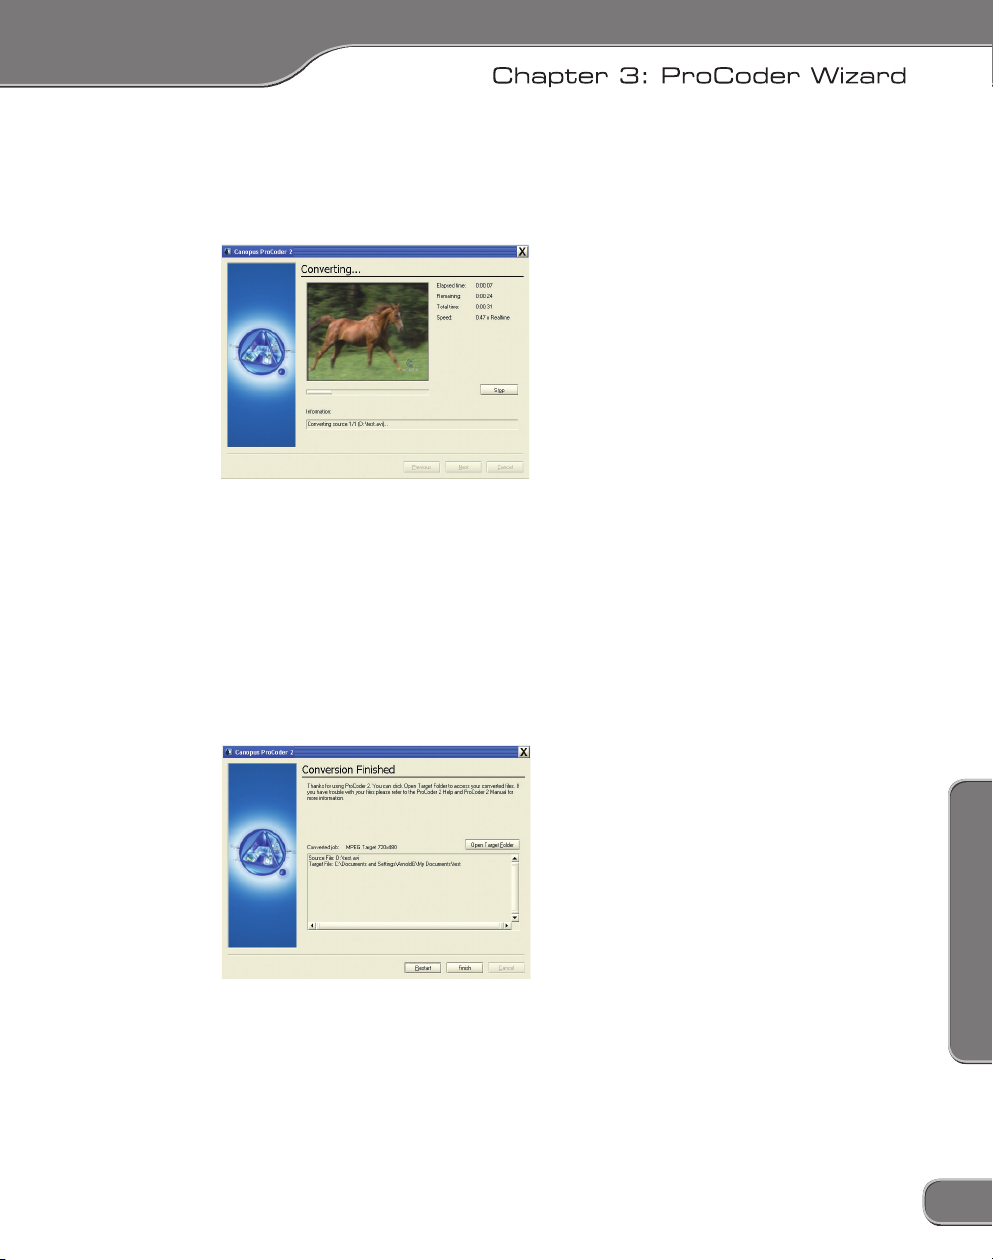
Converting Files
Conversion Finished
19
Page 30
3: ProCoder Wizard
3: ProCoder Wizard
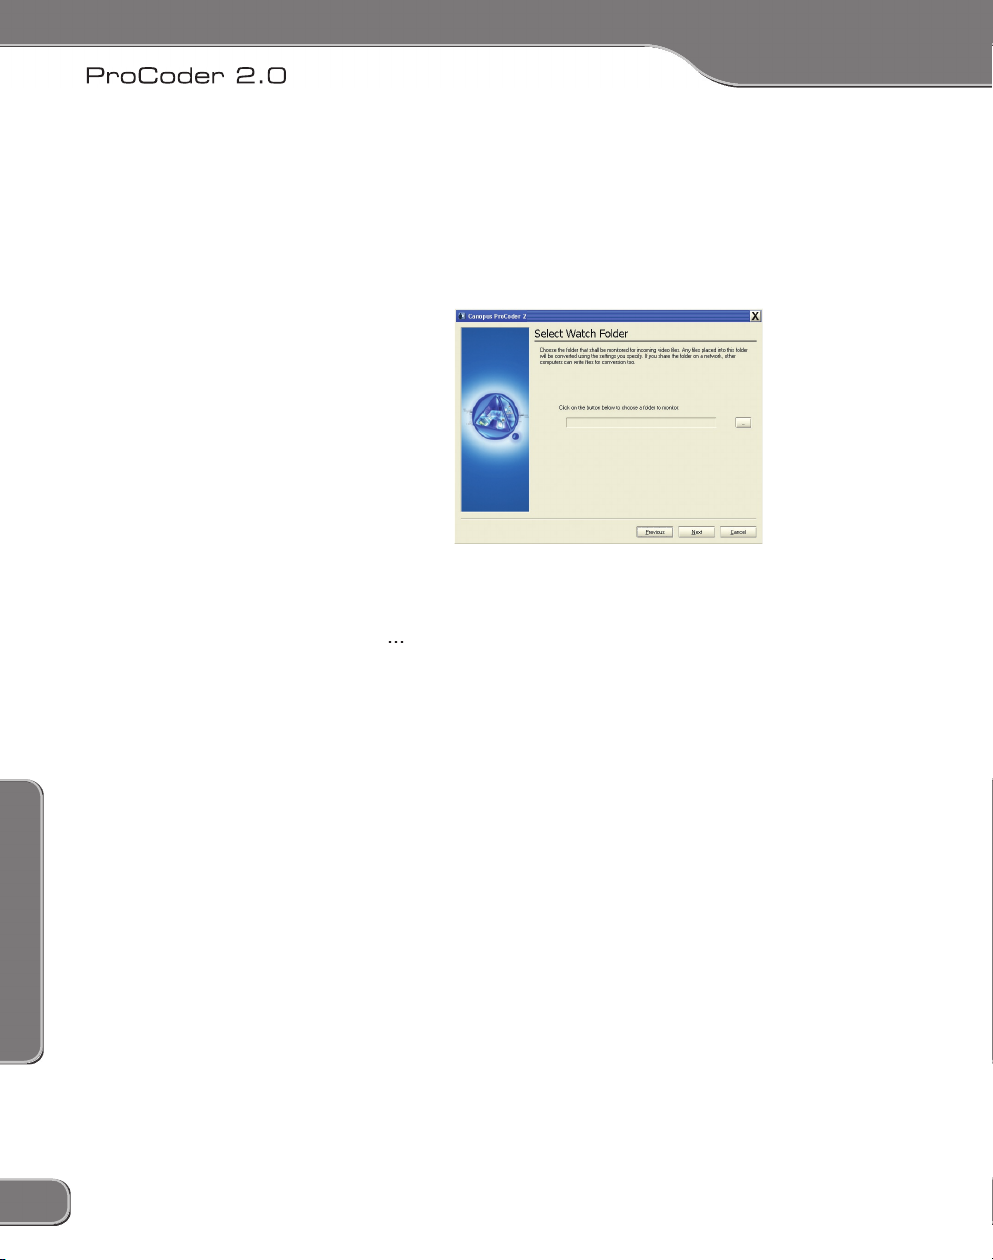
Create a Watch Folder
button to specify a Watch folder. Click the
20
21
Page 31

3: ProCoder Wizard
files that arrive in the watch folder will not be added to the list of files to
Watch Folder
Other Watch Folder Options
folder will also start the encoding process.
21
Page 32

3: ProCoder Wizard
22
Page 33

Page 34
4: Using ProCoder
4: Using ProCoder
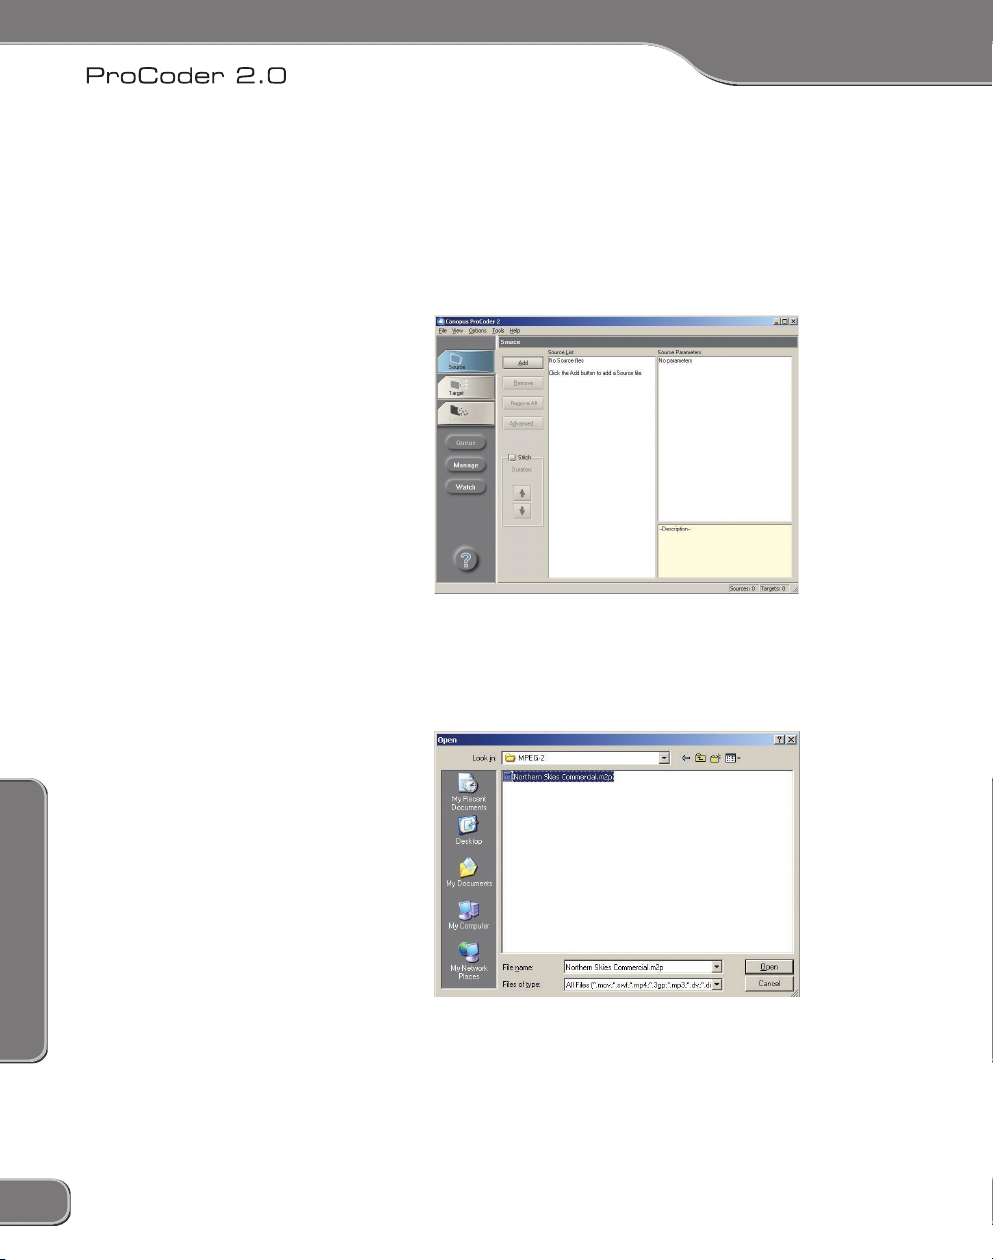
To use ProCoder 2.0:
Add
24
25
Page 35

4: Using ProCoder
filters, click the
Advanced
Advanced
Advanced window
25
Page 36
4: Using ProCoder
4: Using ProCoder
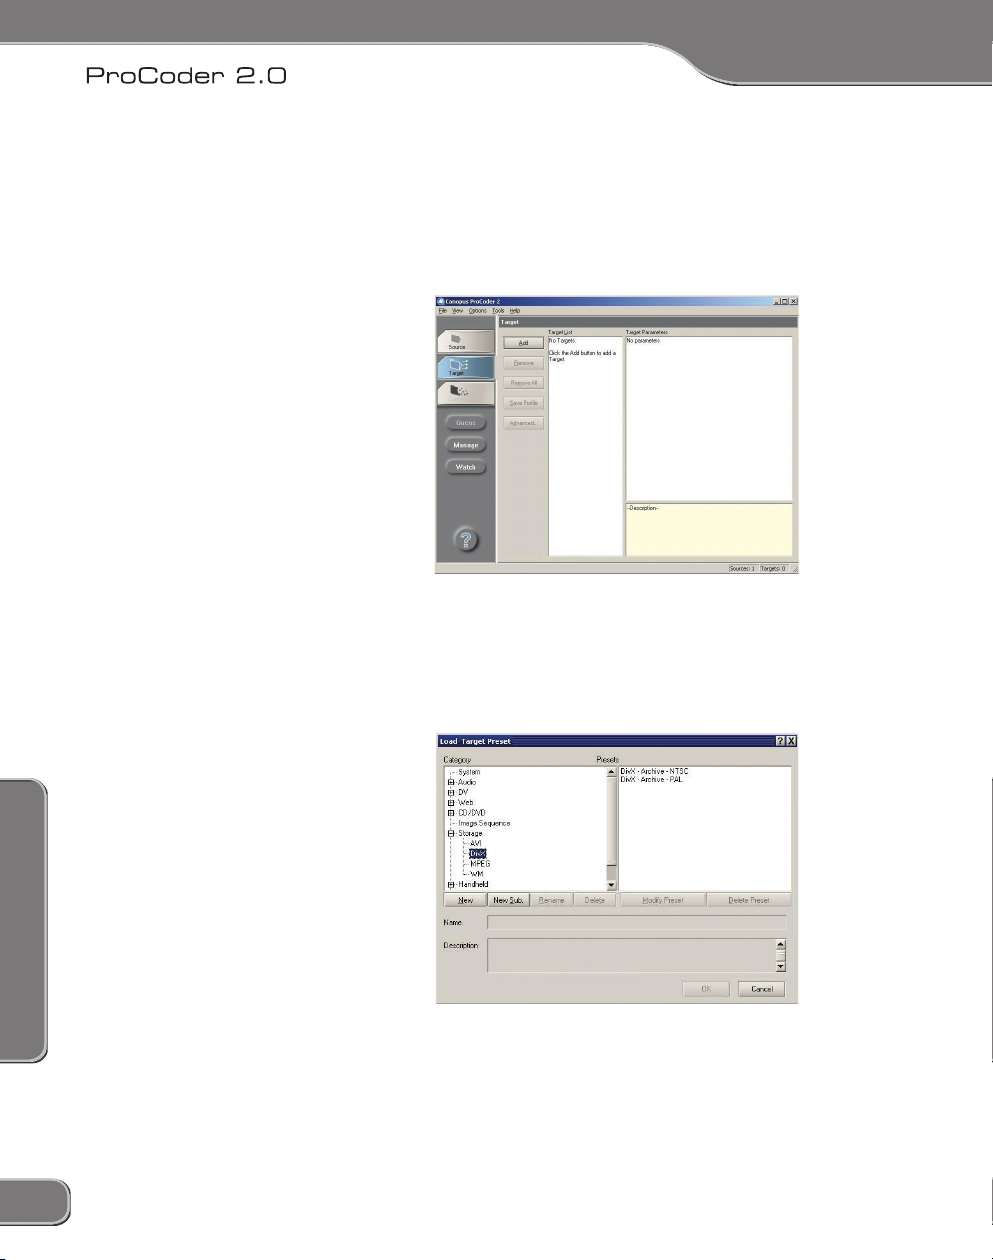
Assigning a Target format
Add
26
27
Page 37

4: Using ProCoder
Advanced
files in the Source List in the Source tab. For example, if you have
five DV files in the Source List and you modify the parameters for
Converting the file
27
Page 38

4: Using ProCoder
4: Using ProCoder
Source Properties
Add –
28
29
Page 39

4: Using ProCoder
from the list.
Advanced –
Advanced
Advanced Window
field. While ProCoder does its best to
29
Page 40

4: Using ProCoder
4: Using ProCoder
Adaptive
filter to your source video and modifying its parameters in
format-specific parameters. For more information on the Advanced
Advanced window
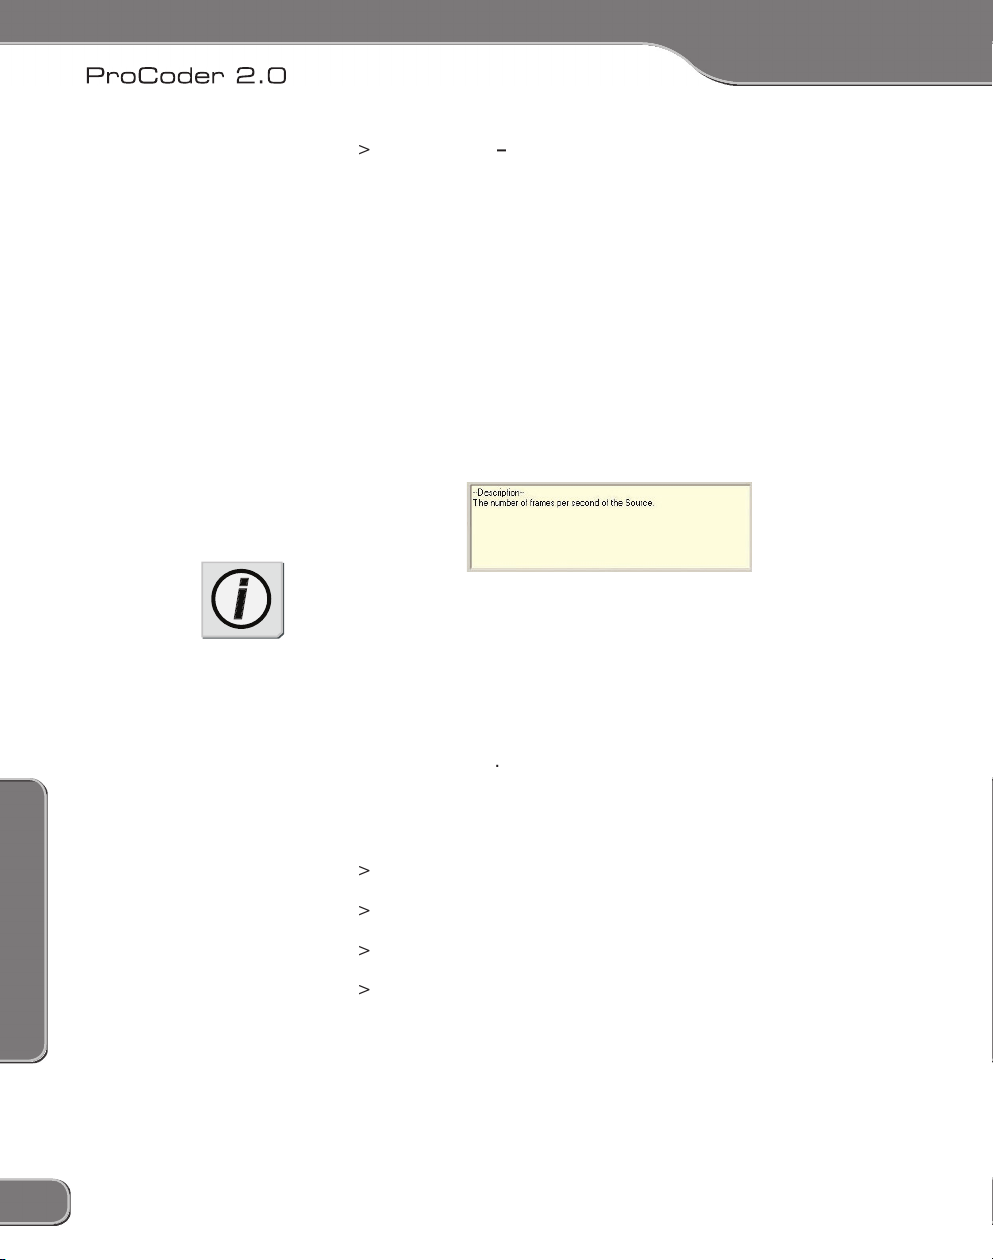
frames per second. The higher the frame rate, the more frames
file’s video. In order to play the video, your system needs to
format. However, you can usually find the codec you’re looking
for on the Internet and then download and install it, making it
frames at one time. Interlaced mode splits each frame into
field is the Lower field,
30
31
Page 41

4: Using ProCoder
field is the Upper field. Specifying the incorrect
field order will result in a vertical jitter or ghosting during
Aspect Ratio –
Audio
Displays the number of audio samples per
Displays the size of each source file’s audio
31
Page 42
4: Using ProCoder
4: Using ProCoder
Audio Codec
file’s audio. In order to play the audio in a file, the system
Advanced window
Audio Filter
Advanced
Advanced
32
33
Page 43

4: Using ProCoder
Sets the
In Point
field.
Displays the frame number at which the scrubber is stopped.
Displays the source file’s total duration after the In and Out
33
Page 44

4: Using ProCoder
4: Using ProCoder
Video Filter tab
filters can be previewed in this tab, but are applied when the video is
Video filters
This video filter expands the
This video filter shrinks the RGB
full 0-255 range.
Adaptive De-interlace –
This filter blurs the video in a rectangular pattern.
This filter allows you to adjust the brightness,
34
35
Page 45

4: Using ProCoder
Some colors that can be displayed on a computer cannot
This filter applies a fade in and/or out to your video in
This filter applies a Gaussian blur to the video.
This filter is designed to improve picture quality by removing
for progressive-to-interlaced (i.e. film-to-video) file conversion. This
footage is encoded to a DVD and played on a TV.
This filter provides 90-degree rotation and axis-flipping
for the video.
This filter sharpens the video using the “unshapen
This filter removes noise by using
35
Page 46

4: Using ProCoder
4: Using ProCoder
Adding a Filter
Add
Add Filter
36
37
Page 47

4: Using ProCoder
Add
button.
filtering. The
37
Page 48

4: Using ProCoder
4: Using ProCoder
button displays the video at 1-to-1 pixel size. (1 monitor pixel =
38
39
Page 49

4: Using ProCoder
Audio Filter tab
Audio Filter
Audio Filters
Audio Fade In/Out –
file’s overall conversion time.
39
Page 50

4: Using ProCoder
4: Using ProCoder
Adding a Filter
Add
40
41
Page 51

4: Using ProCoder
Add
filtering.
41
Page 52

4: Using ProCoder
4: Using ProCoder
Assigning Targets
Add
42
43
Page 53

4: Using ProCoder
Audio –
formats. These settings are good for exporting audio for use in
files that are compatible with handheld devices, such as PDAs
Application Specific –
43
Page 54

4: Using ProCoder
4: Using ProCoder
Modifying Targets
Add
files and custom target
44
45
Page 55

4: Using ProCoder
Advanced
Advanced
Audio
Advanced window
Save
Add Target
Customizing Advanced Settings
Advanced
45
Page 56

4: Using ProCoder
4: Using ProCoder
Advanced window
Advanced window
for enhancing and optimizing the final output files created using the
filter on only the QuickTime Target preset
Audio Filter
Advanced
Advanced
46
47
Page 57

4: Using ProCoder
field. You can also press the
button at the end of the row and choose the path in the dialog box
47
Page 58

4: Using ProCoder
4: Using ProCoder
Video Filter tab
filters can be previewed in this tab, but are applied when the video is
Video filters
This video filter expands the
This video filter shrinks the RGB
full 0-255 range.
Adaptive Deinterlace –
This filter blurs the video in a rectangular pattern.
This filter allows you to adjust the brightness,
48
49
Page 59

4: Using ProCoder
Some colors that can be displayed on a computer cannot
This filter applies a fade in and/or out to your video in
This filter applies a Gaussian blur to the video.
This filter is designed to improve picture quality by removing
for progressive-to-interlaced (i.e. film-to-video) file conversion. This
footage is encoded to a DVD and played on a TV.
This filter provides 90-degree rotation and axis-flipping
for the video.
This filter sharpens the video using the “unshapen
This filter removes noise by using
49
Page 60

4: Using ProCoder
4: Using ProCoder
Adding a Filter
Add
Add Filter
filter is listed in the yellow
50
51
Page 61

4: Using ProCoder
Add
Add
filtering. The
51
Page 62

4: Using ProCoder
4: Using ProCoder
button displays the video at 1-to-1 pixel size. (1 monitor pixel =
52
53
Page 63

4: Using ProCoder
Audio Filter Tab
Audio Filters
Audio Fade In/Out –
file’s overall conversion time.
53
Page 64

4: Using ProCoder
4: Using ProCoder
Adding a Filter
Add
filter is highlighted, a brief description of each filter is listed in the
54
55
Page 65

4: Using ProCoder
Add
Add
filtering.
55
Page 66

4: Using ProCoder
4: Using ProCoder
Playing converted files
56
57
Page 67

4: Using ProCoder
Loading and Saving Custom Settings
Loading and Saving Target profiles
Add Target
Add
57
Page 68

4: Using ProCoder
4: Using ProCoder
job queuing capabilities. Instead of waiting for the ProCoder application
field, enter a name for the job. The job’s name will
field. The job’s
from the drop-down box. The higher the job
58
59
Page 69

4: Using ProCoder
from the
Cancelling and managing jobs
59
Page 70

4: Using ProCoder
4: Using ProCoder
Managing Jobs
Viewing Jobs
job was set to split for multiple CPUs.
jobs with higher priority values will be processed before jobs
60
61
Page 71

4: Using ProCoder
Non-segmented and Segmented Jobs
Change Priority
61
Page 72

4: Using ProCoder
4: Using ProCoder
62
63
Page 73

4: Using ProCoder
Clearing the Queue
Automatically Remove on Completion –
Watch Folders
Watch
folders are converted using the associated target profile and
63
Page 74

4: Using ProCoder
4: Using ProCoder
Creating Permanent Watch Folders
from the
folders appear in the
Active Watch Folders
64
65
Page 75

4: Using ProCoder
button next to
to select the output folder.
dialog appears.
Append Sub Source
option. If it is not enabled, files in subfolders of the
renames the output file, appending a
overwrites any existing output file in the
button to add the watch folder to the
Active
list.
65
Page 76

4: Using ProCoder
4: Using ProCoder
Removing Permanent Watch Folders
from the Start menu in
folders appear in the Active Watch Folders area.
folders, click the
Creating Temporary Watch Folders
66
67
Page 77

4: Using ProCoder
Processing Options tab
frame rate.
Always Pick Nearest Frame –
frame by picking the nearest temporal frame from the source
Always Interpolate –
Automatic Selection
–
frame instead of interpolating in order to avoid ghosting.
67
Page 78

4: Using ProCoder
4: Using ProCoder
Check this box to allow
box.
68
69
Page 79

4: Using ProCoder
Add Letterbox/Scale & Crop slider
fits within the target frame, which can result in unused areas
frame is completely filled, resulting in no letterbox bars, but the
69
Page 80

4: Using ProCoder
4: Using ProCoder
from the bottom of the source frame during conversion. This results in
faster processing and higher quality since scaling is not performed.
Conversion Options tab
Always Scale/Shrink To Aspect Ratio Correct Full Screen Display –
70
71
Page 81

4: Using ProCoder
Enable this option to use video overlay
for preview. Video overlay is faster than standard video writes and
Enable this option to use the
Enable this option to use the Canopus
Apply modified Source options to similar Sources –
Enable this option
Apply modified Source options to similar Sources
is enabled, the
71
Page 82

4: Using ProCoder
4: Using ProCoder
Some conversions need to save temporary files. Click the
ProCoder retains some information in order to speed
Default Target Folder Tab
This option sets the output location for
Always use the Global Default Folder for all Targets
72
73
Page 83

4: Using ProCoder
Always use the Global Default Folder for all Targets
for the selected Target option.
Apply
Application Settings
Settings
foreground conversion.
73
Page 84

4: Using ProCoder
4: Using ProCoder
Confirmation
from targets or sources.
file(s) from the Source List.
from the Target List.
Advanced Features
Droplets
Add
Advanced
74
75
Page 85

4: Using ProCoder
Action
files as sources and the droplet’s target settings applied. The
75
Page 86

4: Using ProCoder
4: Using ProCoder
Command-line Automation
file or multiple files through Droplets, and entire projects through the
– Closes ProCoder after conversion finishes
– Shuts down the PC after conversion finishes
– Queue to job manager instead of converting within the
– creates a log file that details the conversion and
– writes target files to the specified folder
– the complete name and path of your ProCoder project
file. If the filename contains a space, you should enclose the entire path
\Windows\Desktop\My project.PCP”).
76
77
Page 87

4: Using ProCoder
C:\MyProjects\Job1.pcp
will also be used as a source.
– The name of the saved droplet executable file
– Closes ProCoder after conversion finishes
– Shuts down the PC after conversion finishes
– Queue to job manager instead of converting within the
– creates a log file that details the conversion and
– writes target files to the specified folder
and
and output will be
77
Page 88

4: Using ProCoder
4: Using ProCoder
Premiere Plug-in
for a quick preview and export it directly into ProCoder so it can be
78
79
Page 89

4: Using ProCoder
EDIUS Plug-in
function in the Monitor
from the export
function in the Monitor
from the export list.
79
Page 90

4: Using ProCoder
Let’s EDIT 1.03 Plug-in
for a quick preview and drop it into the ProCoder Wizard so it can be
2. The ProCoder Wizard launches and the Use the Wizard or Select
a History Setting screen appears. Simply go through the Wizard
interview and convert your file.
80
Page 91

Page 92

5: Helpful Hints
5: Helpful Hints
Close other tasks
Optimize drive speed
Disable automatic scanning applications
Use separate source and target drives
Disable preview
82
83
Page 93

5: Helpful Hints
When to apply filters
Why filters are necessary
83
Page 94

5: Helpful Hints
5: Helpful Hints
just don’t seem quite right. This section illustrates some common video
Video is blocky or appears to break up
> Original image
format and player, the video may take until the next keyframe to start
84
85
Page 95

5: Helpful Hints
Video appears fuzzy or blurry
> Original image
found by clicking the
Advanced
85
Page 96

5: Helpful Hints
5: Helpful Hints
Video has halos or blocks near objects
> Original image
Video appears to jitter
86
87
Page 97

5: Helpful Hints
Advanced
Video movement appears jumpy
> Original image
frame rate below 15fps will result in unsatisfactory playback.
faster connection to the streaming server, a progressive download file
87
Page 98

5: Helpful Hints
5: Helpful Hints
Audio and video are out of sync
format and player, audio/video synchronization cannot be guaranteed
from start to end without interrupting it to verify. If synchronization is
files playing audio from the PC but using a connected DV camera or
If you’re seeing the problem using a set-top DVD player for playback,
88
89
Page 99

5: Helpful Hints
Video shows strange patterns or blocks
> Original image
Video appears stretched or squashed
> Original image
89
Page 100

5: Helpful Hints
5: Helpful Hints
Cannot load encoded MPEG files into DVD
authoring software
file extension for MPEG-2 program streams. Instead, they want files
90
91
 Loading...